-
Why Is My Cricut Mini Press Beeping Red Light? (Tutorial Steps)
12/30/2025 at 07:02 • 0 commentsYou are working on a small project, maybe pressing a design onto a tote bag or a baby onesie, and everything seems normal. Suddenly, the Cricut EasyPress Mini starts beeping, and the light turns red. It catches you off guard, and most people stop right away. Many users talk about this moment online, saying they paused their work because they worried the machine was getting too hot or might stop working completely.
If this has happened to you, then take a breath. A red light and beeping mean the machine is trying to tell you something important, not that it is broken. In this post, you are going to learn why the Cricut heat press is flashing a red light, what that signal means, and what to do next. The steps are simple and clear, so you can return to your iron-on project without worry or confusion.
Common Reasons Cricut EasyPress Mini Is Beeping Red
When your Cricut EasyPress Mini starts beeping and shows a red light, it’s a sign that the press needs your attention. Most of the time, this happens because of a power problem, too much heat, or a safety feature kicking in. The heat press does this to protect itself and to keep your iron-on project safe before you move forward.
Here are some reasons the red light and beeping may appear:
- Power Problems: Using a power strip or extension cord can cause uneven power. When that happens, the heat press may start flashing a red light. Plugging it into a wall socket works better.
- Overheating or Sensor Issues: If the machine overheats or the temperature sensor fails to read, then it may flash a red light as a safety warning. This helps stop damage before it gets worse.
- Firmware Glitch: Sometimes the internal software can freeze or act up, causing the light to turn red and beep.
- Debris or Blockage: Although less common, dirt or material residue on the heat plate can interfere with normal operation.
How to Fix the Cricut EasyPress Mini Red Beeping Issue
If your ‘heat press is beeping red‘, then it means there is an overheating issue, a sensor problem, or an unstable power supply. The best thing is that you resolved it with some simple steps. Always start by turning the machine off and letting it cool down completely before trying anything else.
Basic Solutions
- Unplug and Let It Cool: Unplug the machine and give it a short break. Wait about 30 to 60 seconds so it can cool down and reset. This simple step can fix the issue.
- Check the Power Source: Connect the machine straight to an electric outlet instead of using a power strip or extension cord. Those can interrupt the power and cause the red light and beeping.
- Check for Obstructions: Look closely at the heat plate and surrounding areas for lint, debris, or stuck material, and clean it if needed.
- Restart the Heat App: If you are using the Cricut Heat app, then close it completely and sign back in to refresh the connection.
Advanced Solutions
- Try a Power Cycle Reset: Plug the machine back in, press the Power button, then unplug and re-plug it a few times until it starts normally. This can help reset internal errors.
- Update the Firmware: Open the Cricut Heat app on your device and check for any available firmware updates. Installing the latest update can fix software-related issues.
- Watch for Temperature Changes: If the temperature keeps jumping up and down before the red beeping starts, the internal sensor or thermal part may be failing.
Frequently Asked Questions (FAQs)
How Do I Reset My Cricut EasyPress Mini?
To reset your EasyPress Mini, unplug it from the power outlet and wait about one to 2 to 3 minutes. This allows the internal power to fully clear. After that, plug it back in and turn it on. This simple power reset usually fixes minor issues.
Why Does My Cricut EasyPress Mini Shut off...
Read more » -
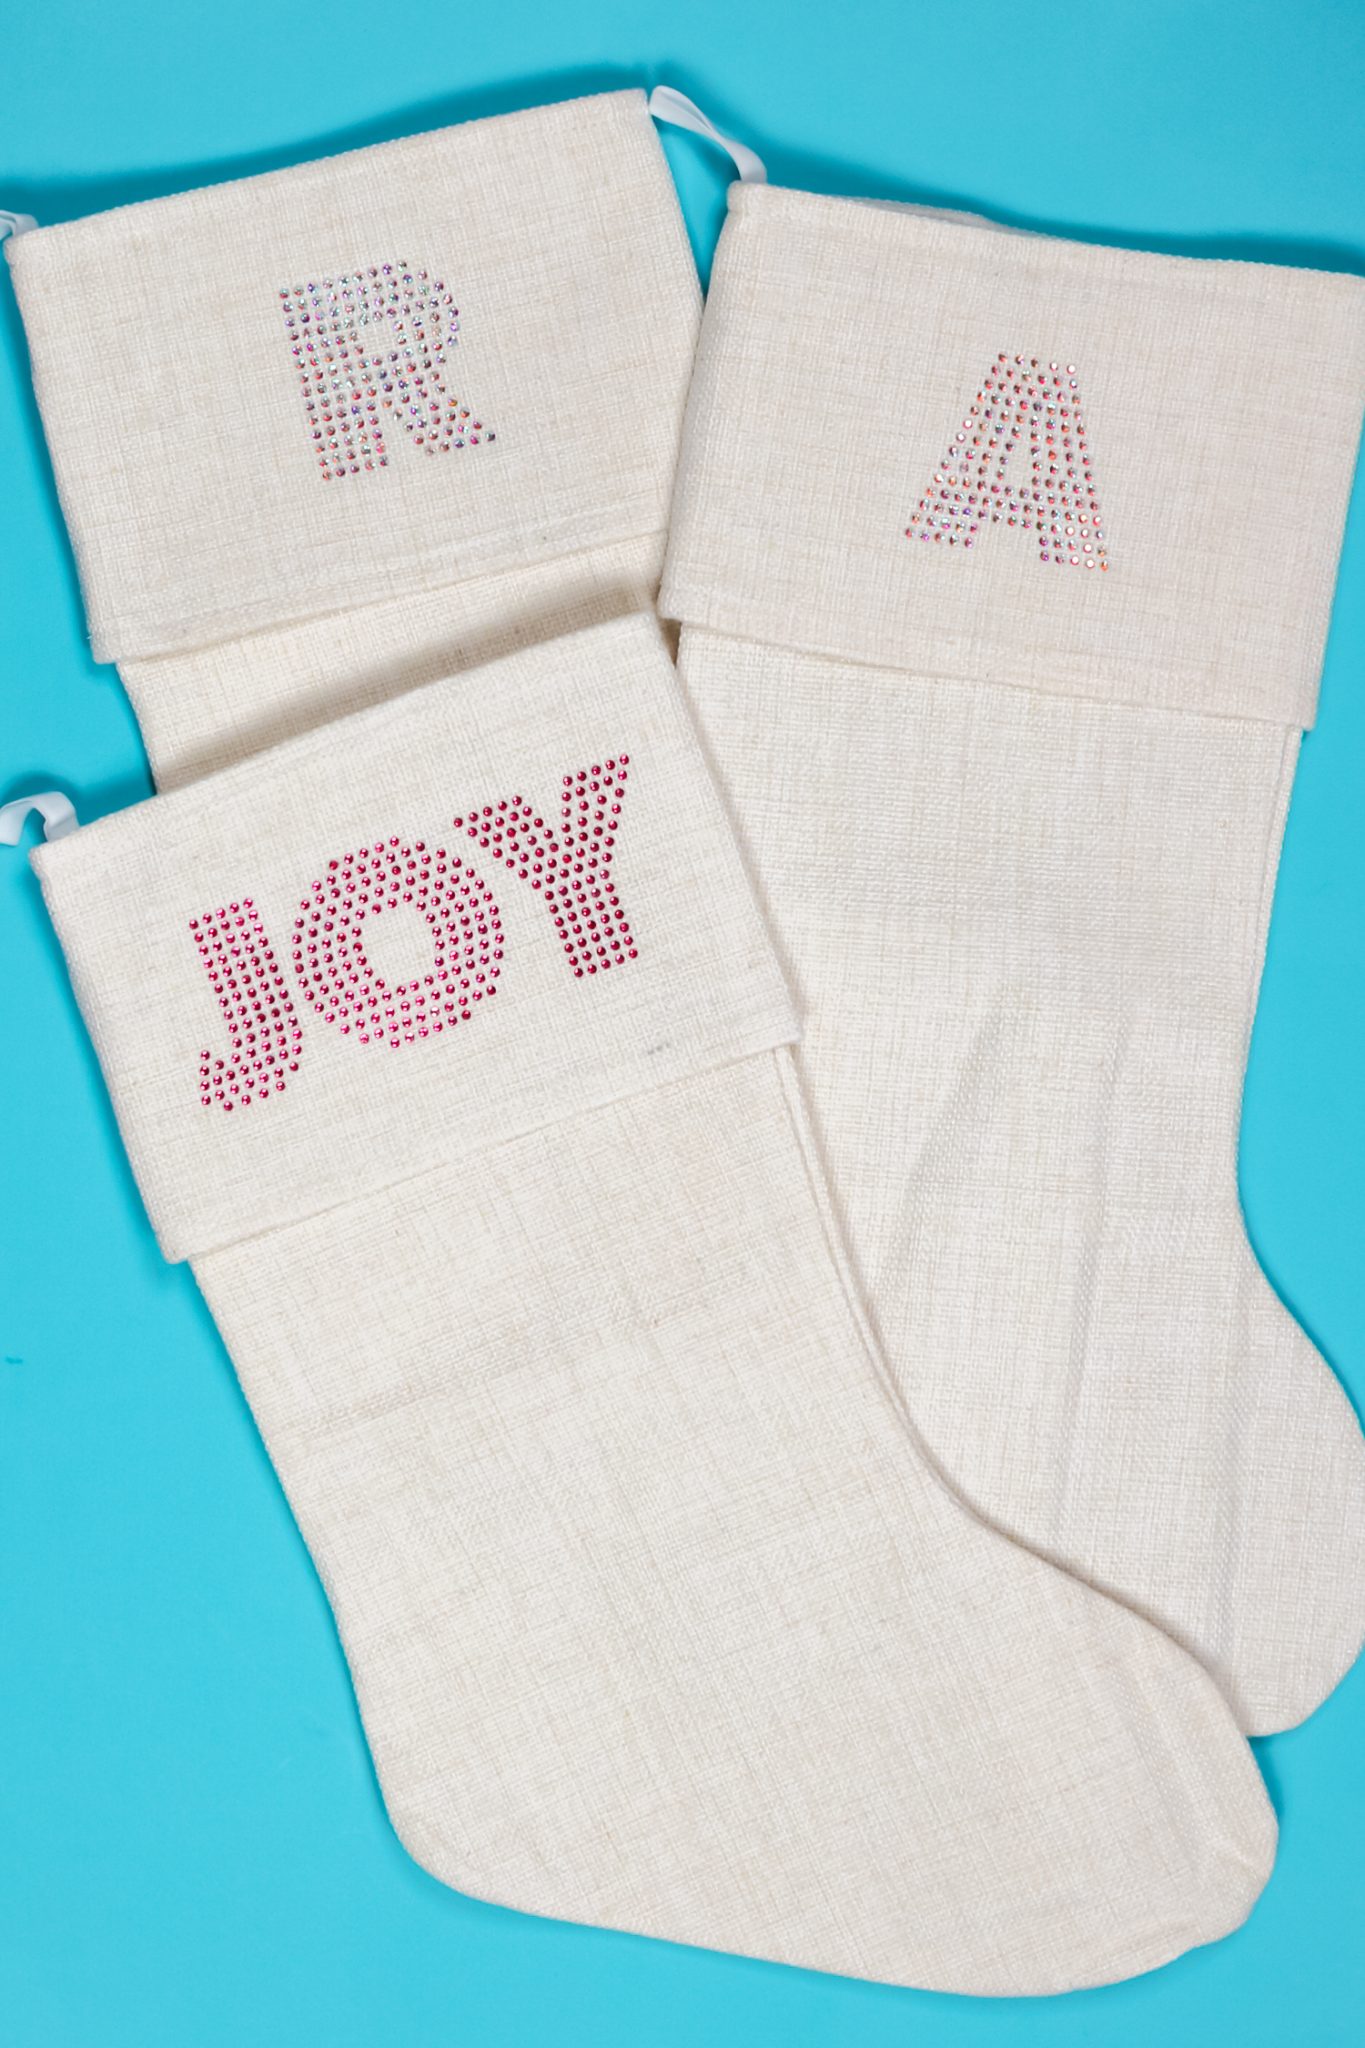
How to Create Rhinestone Template With Cricut: Full Guide
11/21/2025 at 12:09 • 0 commentsMany crafters use Cricut Maker and Cricut Explore series machines to create rhinestone templates, a lesser-known but powerful feature. Magic Flock is a specialized ‘rhinestone template material‘ that allows you to transfer and adhere rhinestones easily. This material is known as flock or hotfix, and it is pressed onto your garment or fabric with a heat press.
![how to create rhinestone template with Cricut]()
Get ready with your Cricut machine that can cut the rhinestone template material, especially in the Maker and Explore series. Whether you’re preparing for a custom project or looking forward to expanding your crafting skills, this guide will teach you ‘How to Create Rhinestone template with Cricut‘, with full step-by-step instructions.
Supplies Needed for Your Rhinestone Project
You will need the following supplies and tools for making rhinestone projects:
- Rhinestone font
- Cricut Maker or Explore series machine
- Weeding tool
- Heat press or household iron
- StandardGrip cutting mat
- Rhinestones
- Rhinestone template flock
- Brush or rhinestone applicator tool
- Transfer tape
- Garments or items to apply the rhinestones
Important Note: Cricut Joy is not designed to create rhinestone projects.
How to Create a Rhinestone Template With Cricut
If you’re planning to create a rhinestone template with your Cricut machine, you must follow a structured approach. Follow this step-by-step guide to get optimal results at every stage.
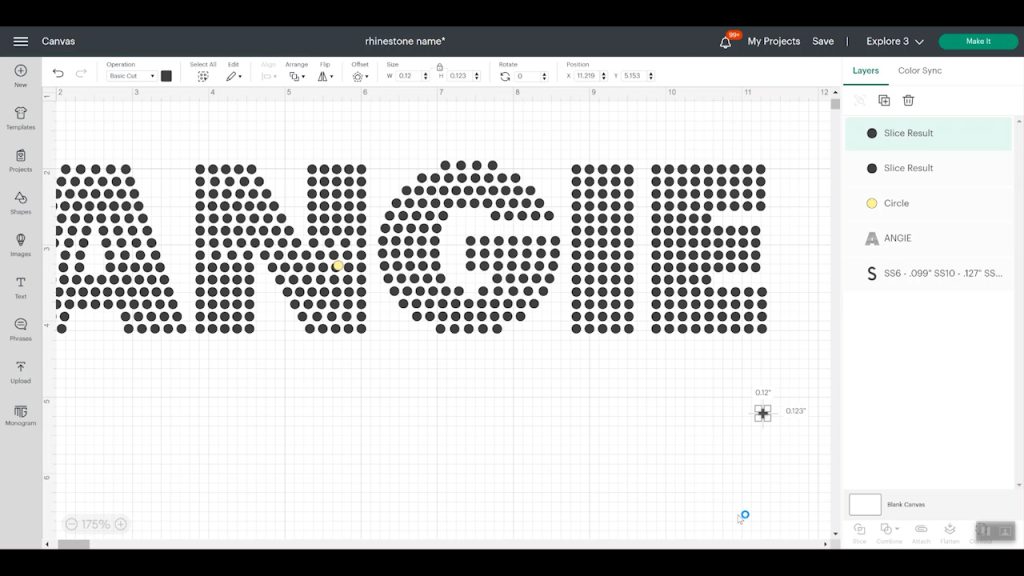
Step 1: Choose or Design Rhinestone Pattern
The Cricut Design Space software doesn’t currently support rhinestone fills. You have two options:
Option A: Use a Pre-made Design
- Open Cricut Design Space and upload your pre-made design image or SVG file.
- Choose the Upload Image option and then Browse.
- Select your SVG file from your system and click Open.
- Insert the design onto the canvas.
Option B: Create Your Own
- Use the Shapes tool to create individual shapes and arrange these shapes in the desired pattern on the design.
- Add a rhinestone grid to your design.
- Adjust the spacing and size of the grid to match the size of your rhinestones.
- Place the design on the top of the grid.
Step 2: Resize Your Design
- Resize the font design so each circle has a diameter of 0.127 inches. Once this is achieved, you’re ready to proceed.
- Verify that each circle is correctly sized.
- Ensure all circle layers are set to Cut.
- Use Attach to keep everything in place during cutting.
- If you want the design to act as a template, you can use the Slice feature to cut the design from the rhinestone grid. You can use the Weld feature for the individual rhinestone shapes to create a single shape for cutting.
![How to Install Rhinestone https://www.dafont.com/ app on windows]()
Note: Remember to mirror your design, especially when it contains text, to ensure proper orientation after pressing.
Step 3: Set Material Settings
- Tap on Browse All Materials and go to Material Settings.
- Click “Add New Material” and locate the green tab at the bottom of the screen.
- Name it as Rhinestone Flock, and then click Save.
- Select “More Pressure” and select the box to apply to all mats.
- Return to the cut screen.
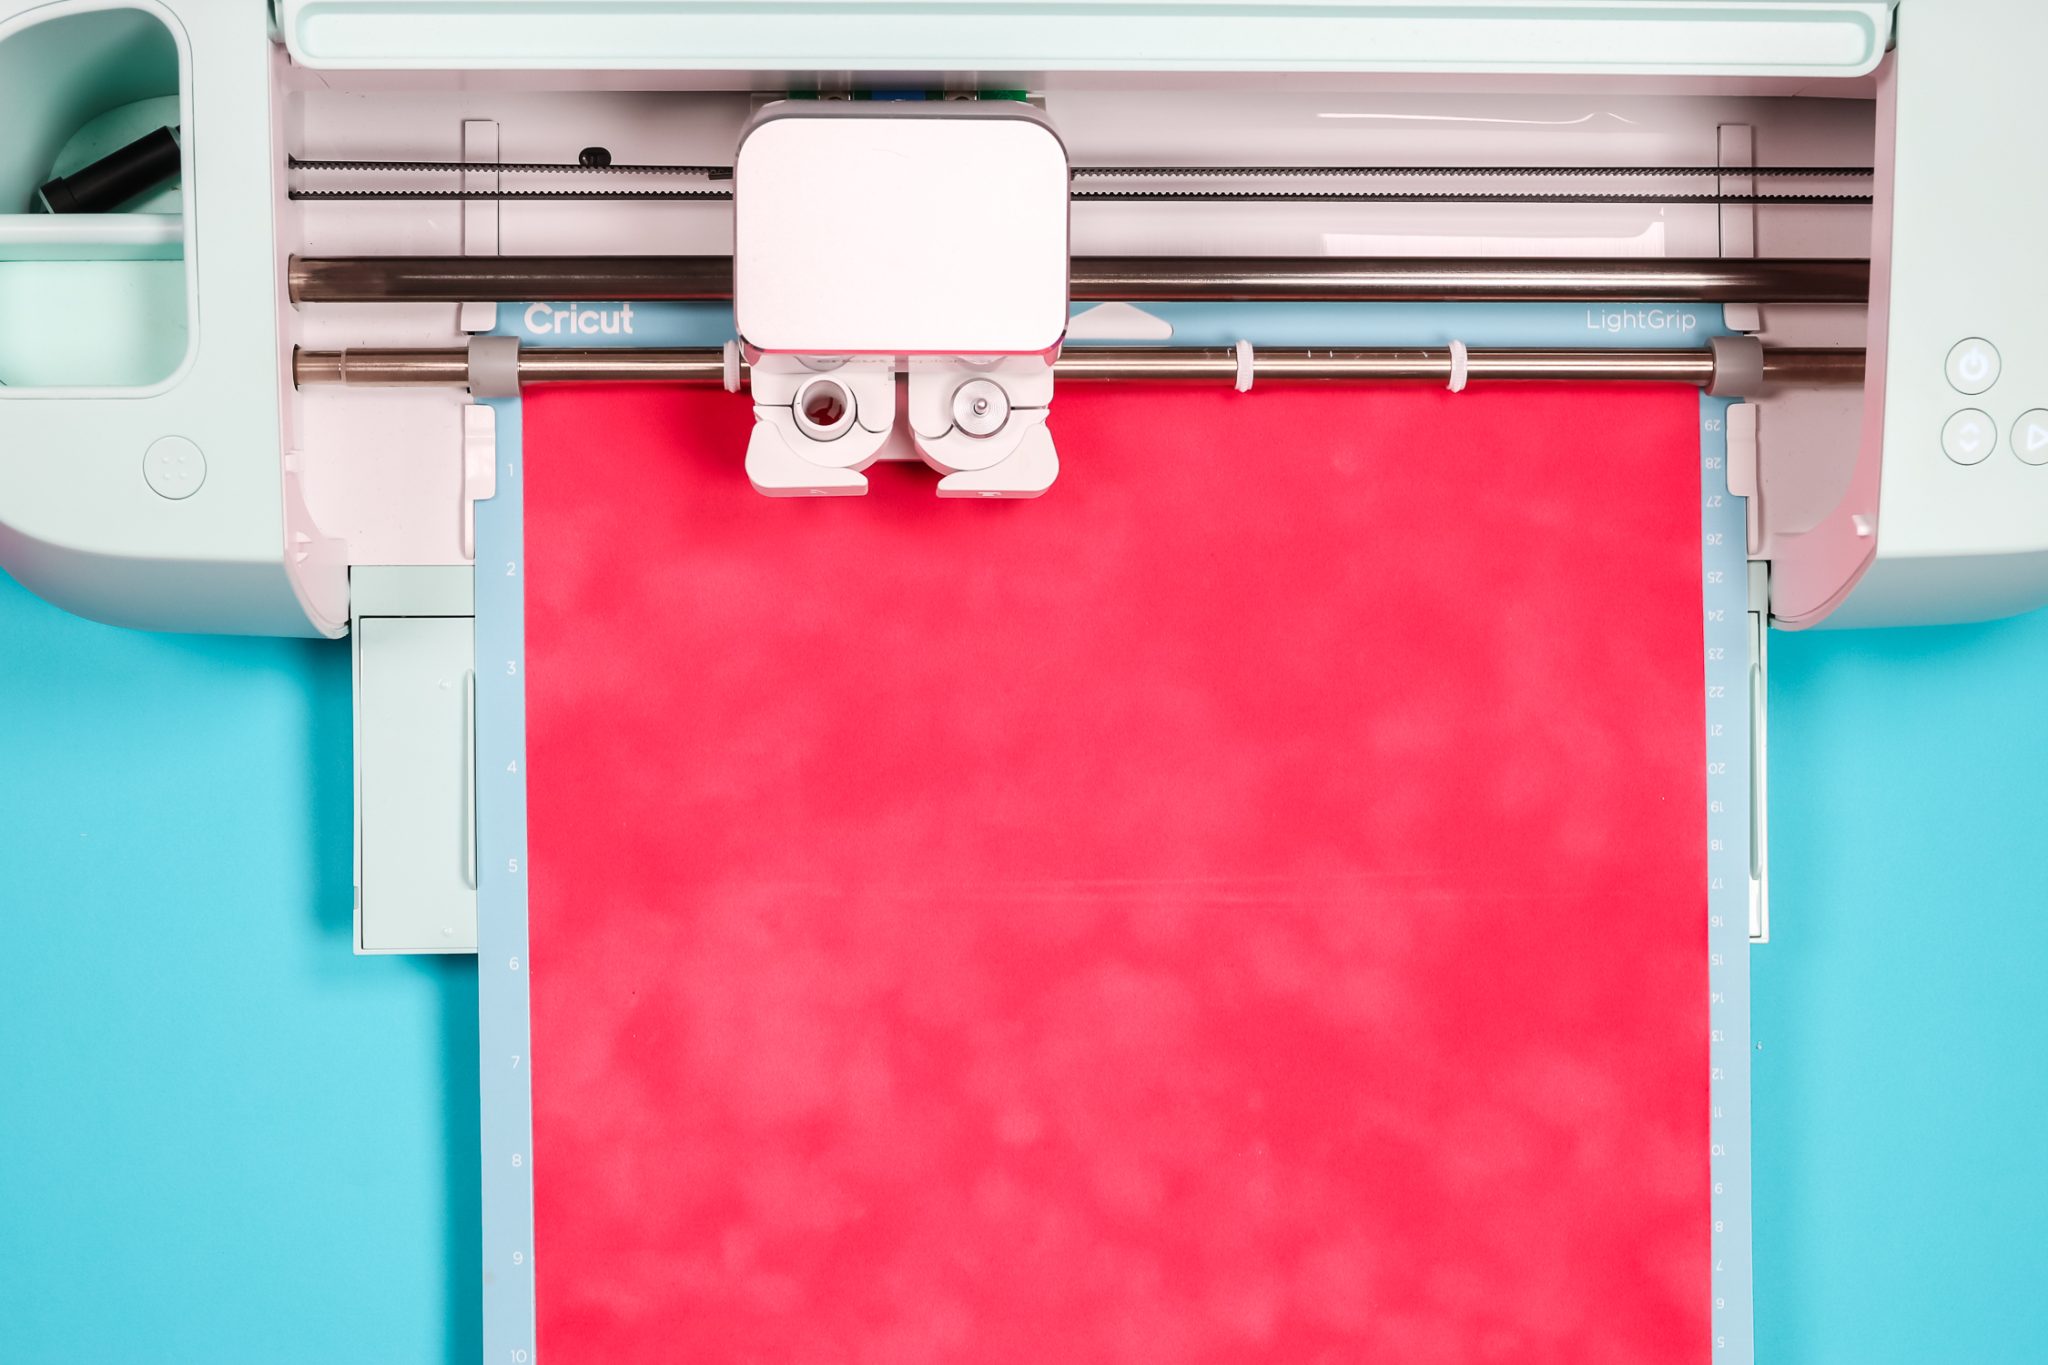
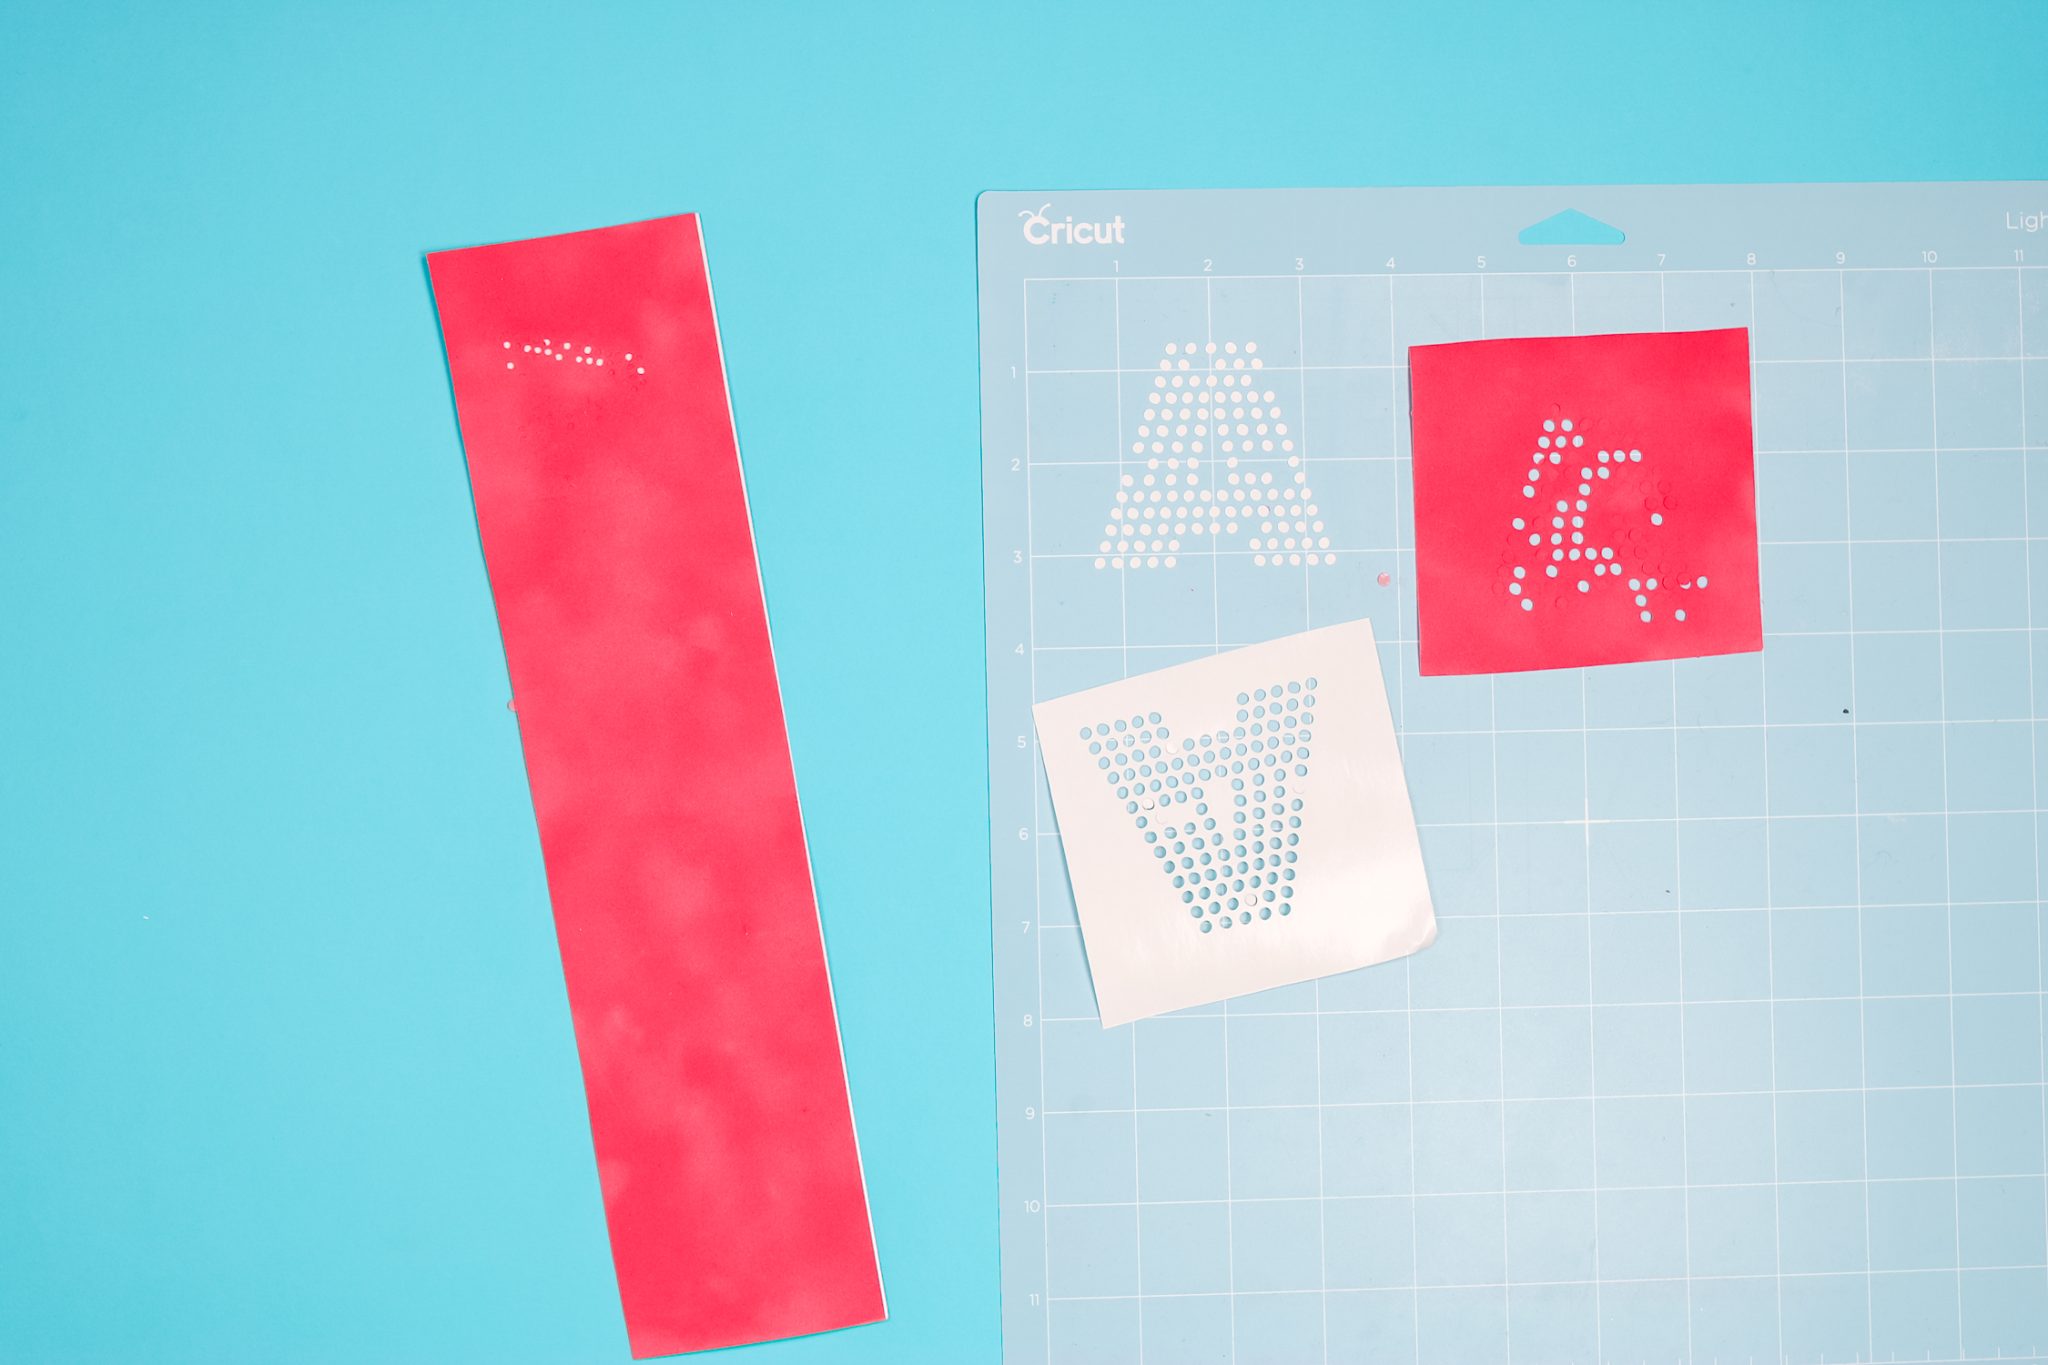
Step 4: Cut the Rhinestone Template
- Now, place the flocked template material on a StandardGrip mat (sticky side down).
- Use a brayer tool to press the material onto the mat.
![Cricut Standard Grip mat]()
- After that, ‘Click Go‘ to begin cutting.
- If you select “Felt” as your material setting in ‘Cricut Design Space‘, the mat may become cluttered with debris, as shown in the image.
![Cricut Design Space Download]()
- Try selecting the flocked paper setting with less pressure. This will allow you to move the mat easily without making a mess.
- Consider using a double-cut setting to ensure a complete cut, especially for detailed designs....
-
install cricut Design Space app
11/08/2025 at 08:52 • 0 commentsGetting started with Cricut is simple, even if you are new to crafting. You can make gifts, wall art, and many other designs using your crafting machine. Before you begin, go to the cricut.com/setup website to download and install cricut Design Space app. Once you connect your machine, you can start creating your own designs or use ready-made ones from the app’s collection.
![Cricut.com Setup (2)]()

 Lutetium
 Víctor Mayoral Vilches
 matteo
 Wassim
 JP Gleyzes
 Reginald Sourn
 Zak Fitzgerald