-
How to Recover Data from an External Drive on Mac?
09/30/2026 at 11:20 • 0 commentsStorage device do not last forever, and external drives connected to your Mac are no exception. However, many drive-related issues are logical rather than physical. In most cases, the hardware is still functioning, but macOS can no longer access the stored data due to file system corruption, accidental formatting, improper ejection, partition damage, or mounting problems.
These are just some of the situations that can make files inaccessible, and in many cases, the data can still be recovered. With the right approach and recovery tools, you may be able to retrieve your lost or deleted files. This guide walks you through several ways to recover data from an external drive on Mac, covering both macOS’s built-in utilities and dedicated data recovery software.
How to Not Make It Worse Than It Already Is?
Data recovery is about prompt action. Files usually become unrecoverable not because of the original issue, but because of what you do after you notice that the data is missing. Before attempting any recovery method, keep these precautions in mind:
- Stop using the affected drive immediately. Avoid saving, copying, or modifying any data on it.
- Do not install recovery software on the affected drive. Install it on your Mac’s internal drive or another healthy storage device instead.
- Hold off on running Disk Utility’s First Aid. It can modify the file system, which may complicate recovery in some situations.
- Do not reformat or initialize the drive. These operations can overwrite file system information and make recovery more difficult.
Ways to Recover Files Lost from an External Drive on Mac
The methods below are arranged from the simplest and safest options to more advanced recovery techniques. Begin with the first method and move to the next only if necessary. For each approach, you’ll find guidance on when it’s appropriate, when it’s better to avoid it, and the exact steps to follow.
1. Check the Trash
When you delete a file on your Mac, the OS doesn’t immediately erase it and moves it to the Trash folder. This is different from Windows, which sends files from external hard drives to the Recycle Bin, but permanently deleted files from the USB flash drives and SD cards straight away. Your files may simply be sitting in the Trash waiting to be restored.
- Make sure the external drive is connected to your Mac.
- Click the Trash icon in your Dock.
- Look for the files you want to recover.
- Right-click any selected file and choose Put Back. The file will go back to where it was on the drive.
2. Restore from a Time Machine Backup
Time Machine is a native utility on macOS which is designed to create incremental snapshots of your system. Time Machine stores hourly backups for last 24 hours, daily backups for the previous month, and weekly backups for older data. It automatically deletes the oldest backup first when the backup drive fills up.
While it is one of the quickest recovery methods available, it requires prior setup and does not include external drives by default. To make sure that your external drive is backed up, you need to manually add it. Open System Settings > General > Time Machine and click Options. If your external drive appears in the "Exclude from backups" list, it isn’t being backed up, if not, your data is safely backed up.
- Click the Time Machine icon in the menu bar.
- Select Browse Time Machine Backups.
- Select the backup files/folders you want and click Restore.
3. Use Mac Data Recovery Software
When you don’t have a Time Machine backup and the Trash is also emptied, the best way forward is to use a free Mac data recovery software. It deep scans the drive’s storage sectors and rebuilds missing files directly from their internal data signatures. The files are recoverable as long as the drive is detectable in Disk Utility and the existing data is not overwritten.
- Download, install, and run the software on your Mac....
-
How to Fix Flashing Question Mark Folder Issue on Mac?
08/26/2026 at 11:26 • 0 commentsIssues on macOS can range from minor glitches to problems that prevent your Mac from booting altogether. A folder with a flashing question mark is one such case that appears on the screen during startup. It usually means that either the Mac is unable to locate its startup disk or it can’t detect a working macOS installation. As a result, the system is unable to complete the boot process.
Many factors, including startup disk issues like bad sectors, formatting errors, or directory corruption, can trigger this problem. Additionally, an incompatible or incorrectly installed macOS version can also cause the Mac to fail to start. Regardless of the reason, the error can interrupt your work and prevent you from accessing your files and apps. This guide will help you quickly fix the flashing folder with a question mark issue and get your system back on track.
Quick Ways to Fix the Flashing Question Mark Issue on Your Mac
Make sure you have a backup of your Mac before proceeding. In case there’s no backup, use a Mac data recovery software to recover all your important data, as some troubleshooting methods like running Disk Utility on a damaged directory may result in data loss. Before applying more technical fixes, try some basic workarounds like restarting your Mac.
If the error was caused by some minor software glitch, a simple restart can often resolve it. Next, check the peripheral devices like printers, scanners, or USB drives connected to your computer. Sometimes, they can interfere with the startup process and cause the flashing question mark folder issue on your Mac. Disconnect all external devices and check whether the error message disappears.
1. Check Startup Disk Settings
Make sure you are using the correct startup disk (usually named, Macintosh HD).
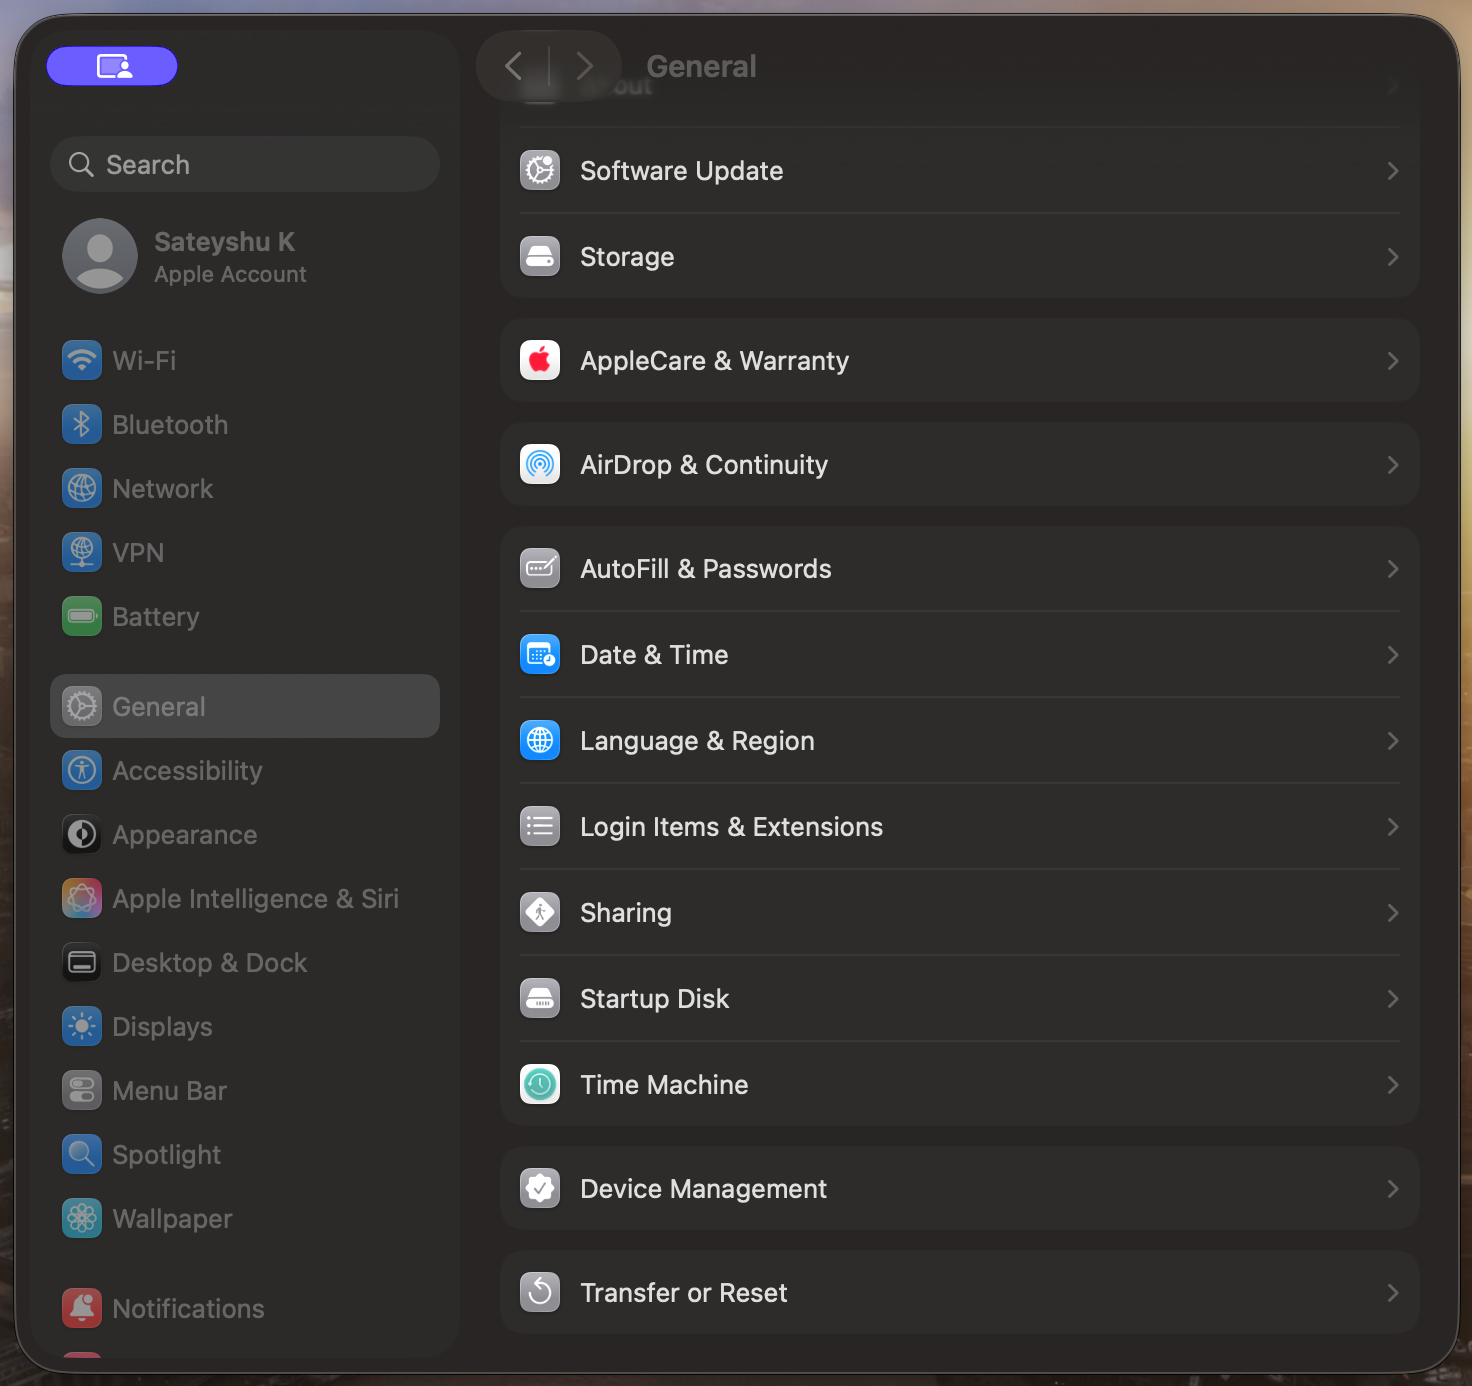
- Click on the Apple menu and open System Settings.
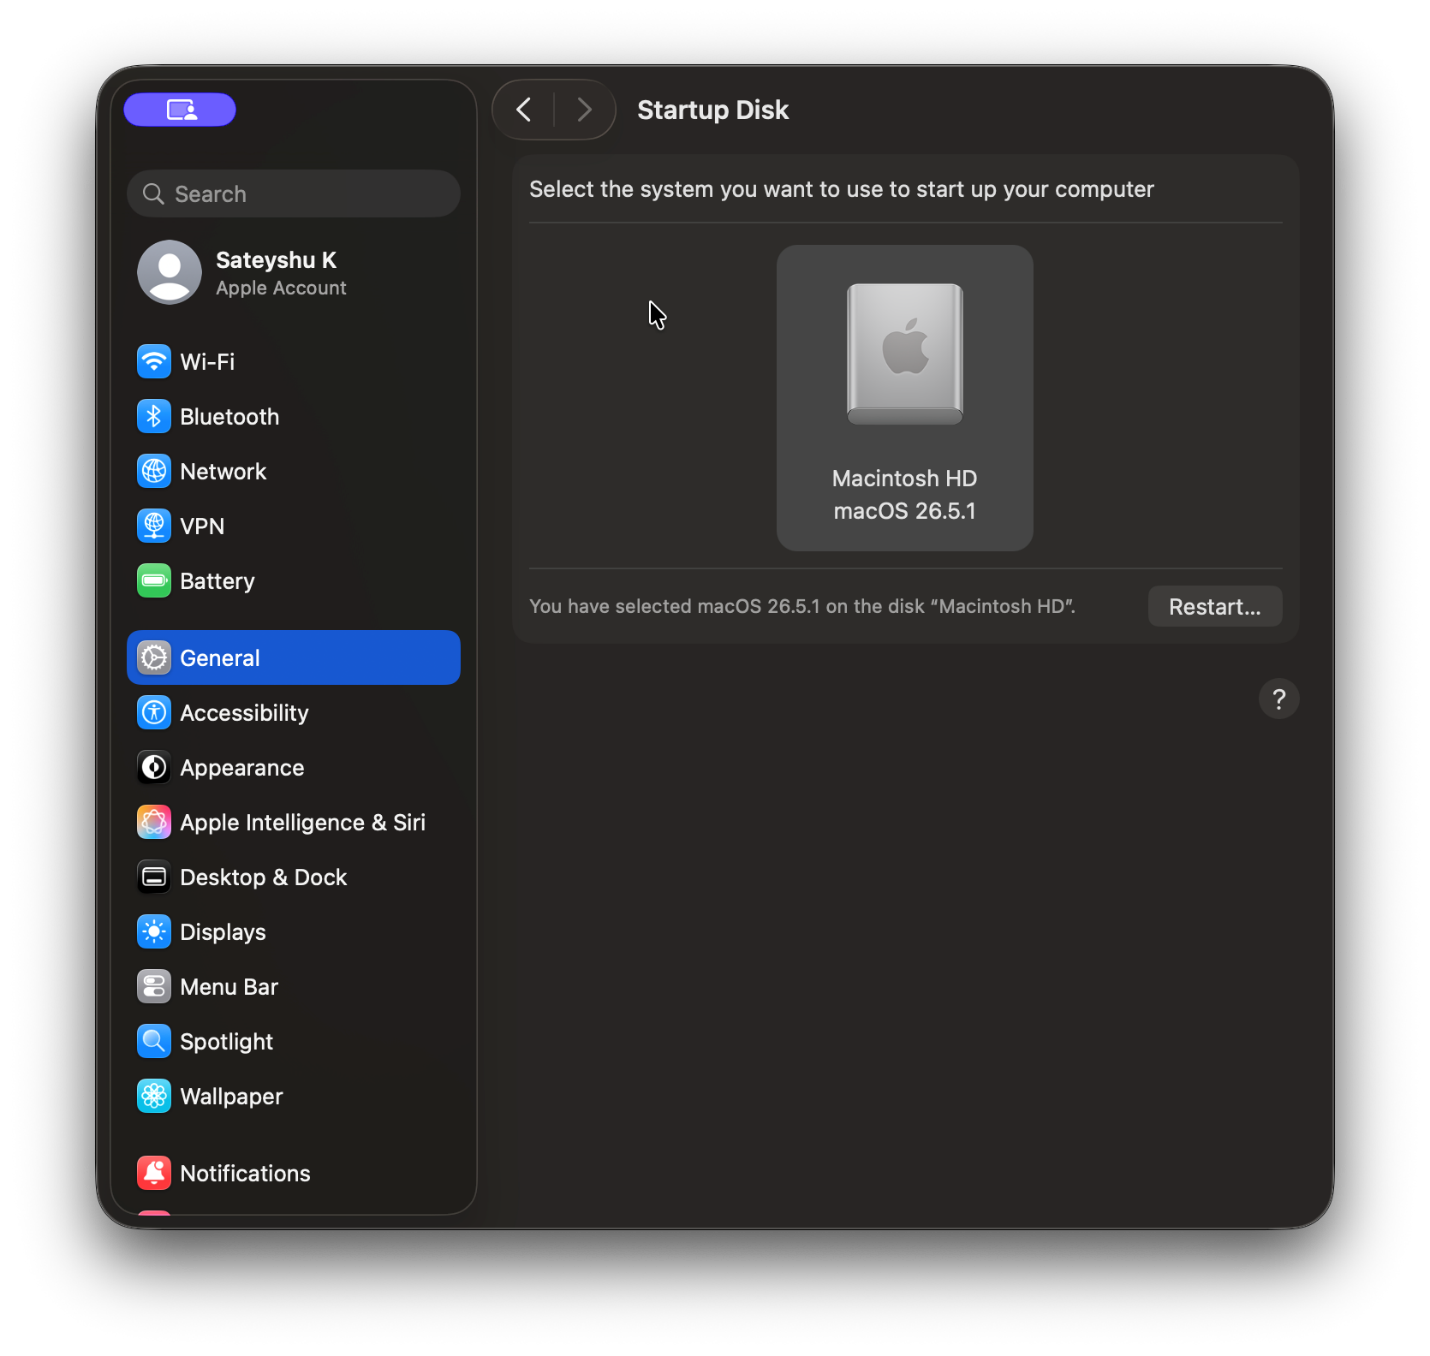
- Go to General > Startup Disk.
![]()
- Select the startup disk that has your OS installed on it.
- Restart your Mac and see if the issue is resolved.
![]()
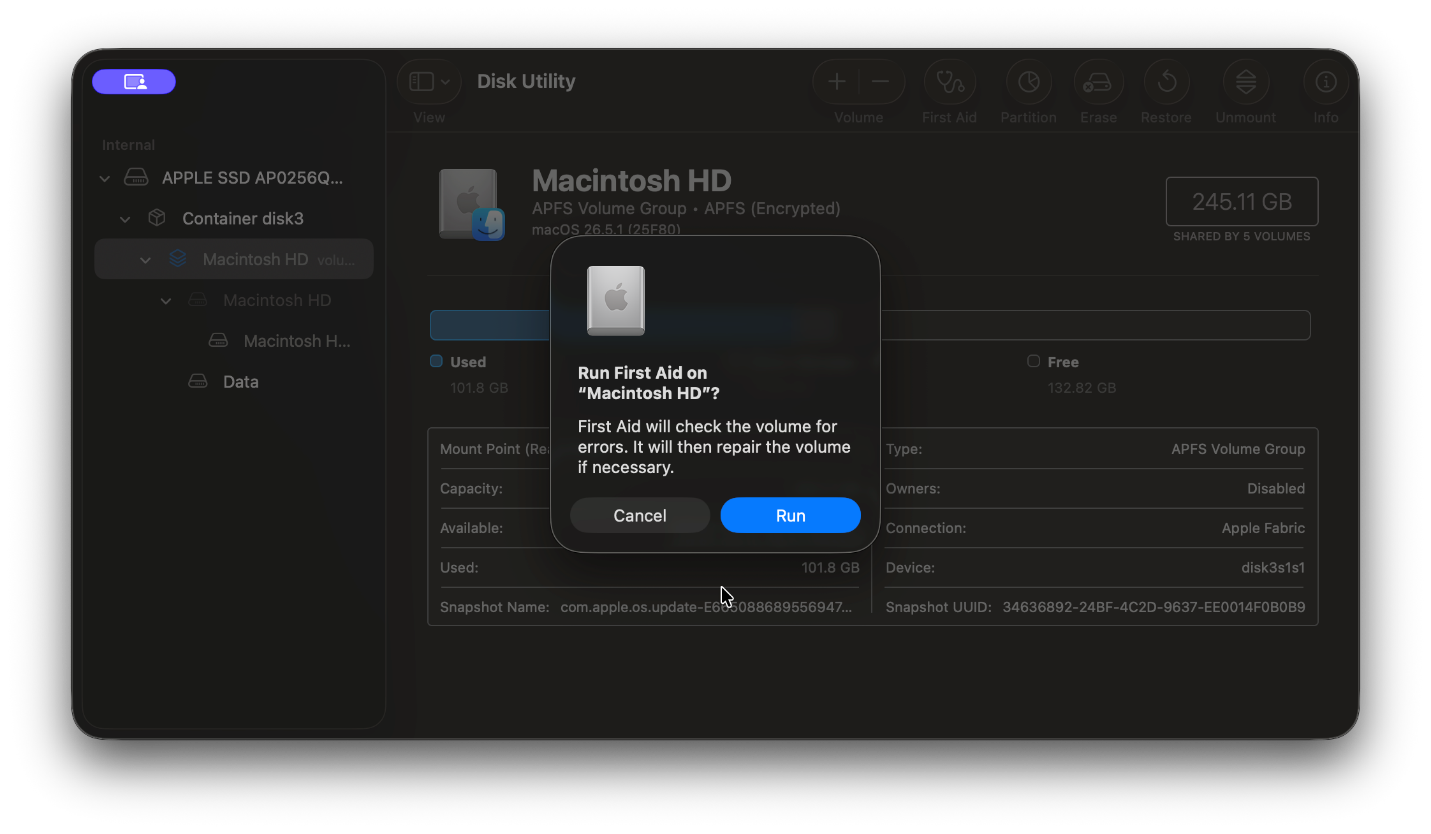
- Select your startup disk (Macintosh HD) from the left sidebar and click First Aid.
- Click Run and wait for the process to complete.
If the issue still persists, move on to the next method.
2. Repair the Disk in Recovery Mode
A flashing folder with question mark issue can occur if your startup disk has run into errors or has become corrupted. Use the First Aid feature in Disk Utility to checks the drive for file-system errors. It repairs common issues like damaged directory structures, invalid volume headers, and minor metadata corruption on both APFS and HFS+ volumes. The best part is that this feature can also be accessed via Recovery Mode, useful when the Mac is unable to boot up.
Here’s how to boot into macOS Recovery:
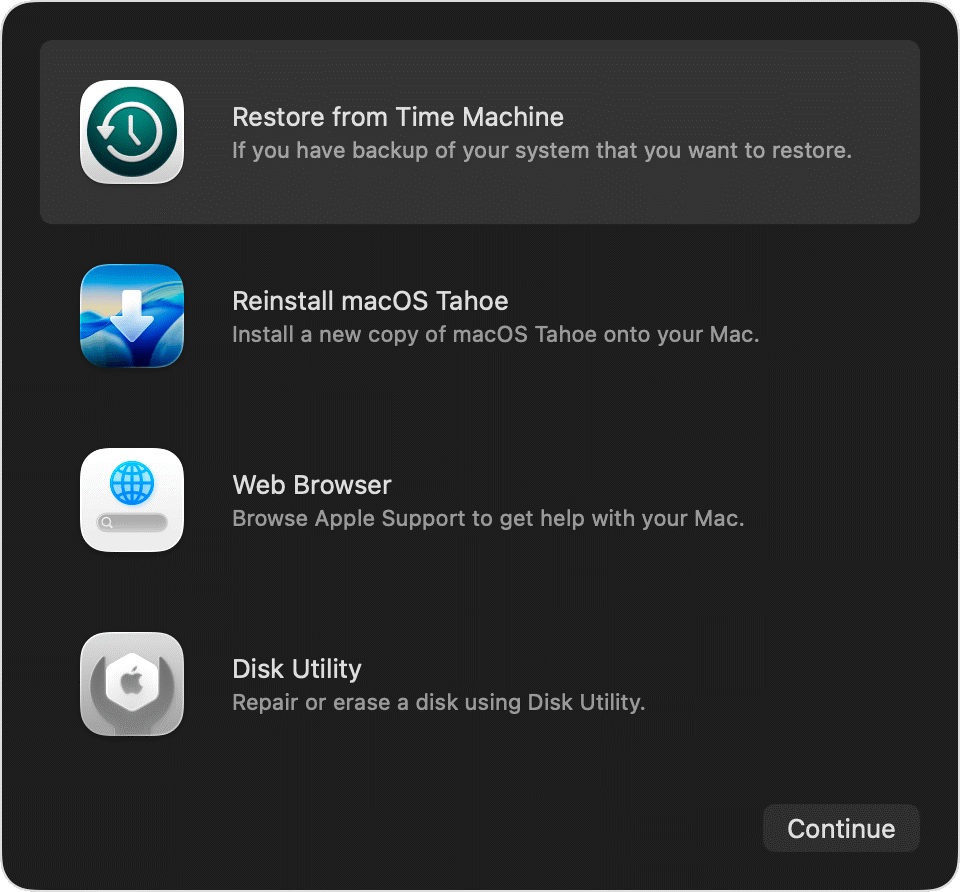
For Apple Silicon Macs: Shut the Mac down completely. Press and hold the power button until you see “Loading startup options”. Click Options > Continue. Next, select Disk Utility and click Continue.
![]()
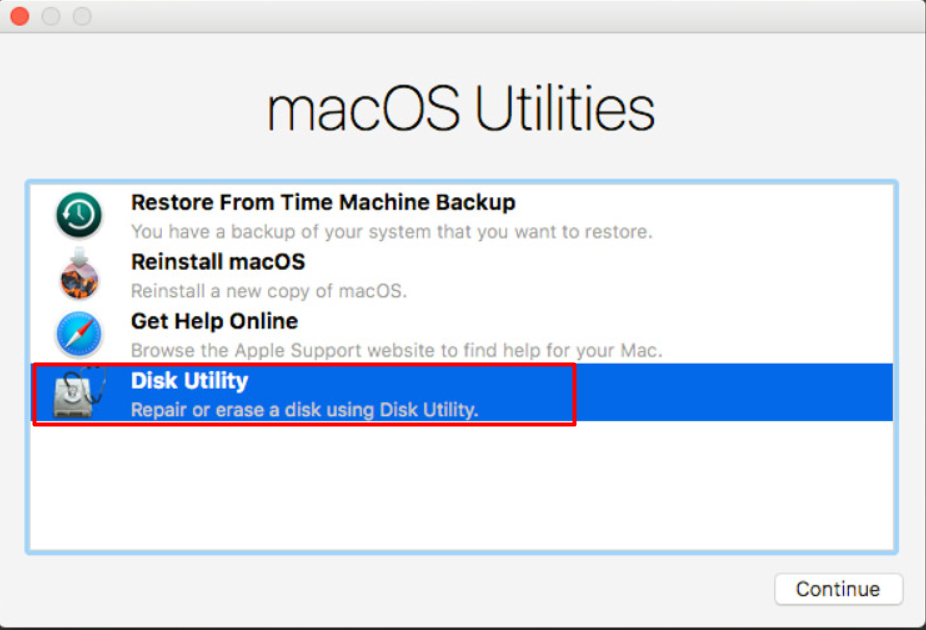
For Intel Macs: Restart while holding Command + R until the Apple logo appears. Your Mac will now boot into Recovery Mode. Select Disk Utility from the macOS Utilities window.
![]()
Once you have successfully accessed Disk Utility from Recovery Mode, the next step is to repair your disk using First Aid.
![]()
3. Reset NVRAM and SMC (Intel Macs Only)
Resetting NVRAM and SMC can help fix the flashing question mark folder by clearing corrupted system parameters which control how your Mac finds and powers its hardware components while booting up. Note that this method applies only to Intel Macs and it’s not possible to manually reset NVRAM and SMC on Apple Silicon Macs.
To reset NVRAM
- Shut down your Mac.
- Press the power button and immediately press and hold the following keys: Option + Command + P + R
- Hold the keys for about 20 seconds and then release.
- Reconnect the drive after macOS has fully loaded.
To Reset the SMC (Intel laptops...
Read more -
How to Fix Flashing Question Mark Folder Issue on Mac?
08/26/2026 at 11:26 • 0 commentsIf the flashing question mark folder continues to appear even after trying all the troubleshooting methods above, the issue may be related to a hardware failure. In such cases, it’s best to seek professional help rather than trying to attempt further repairs yourself. You can contact Apple Support or visit and Apple authorized service provider to get your Mac properly diagnosed and repaired.1. Repair the Disk in Recovery Mode
Make sure you have a backup of your Mac before proceeding. In case there’s no backup, use a Mac data recovery software to recover all your important data, as some troubleshooting methods like running Disk Utility on a damaged directory may result in data loss. Before applying more technical fixes, try some basic workarounds like restarting your Mac.
If the error was caused by some minor software glitch, a simple restart can often resolve it. Next, check the peripheral devices like printers, scanners, or USB drives connected to your computer. Sometimes, they can interfere with the startup process and cause the flashing question mark folder issue on your Mac. Disconnect all external devices and check whether the error message disappears.Issues on macOS can range from minor glitches to problems that prevent your Mac from booting altogether. A folder with a flashing question mark is one such case that appears on the screen during startup. It usually means that either the Mac is unable to locate its startup disk or it can’t detect a working macOS installation. As a result, the system is unable to complete the boot process.
Many factors, including startup disk issues like bad sectors, formatting errors, or directory corruption, can trigger this problem. Additionally, an incompatible or incorrectly installed macOS version can also cause the Mac to fail to start. Regardless of the reason, the error can interrupt your work and prevent you from accessing your files and apps. This guide will help you quickly fix the flashing folder with a question mark issue and get your system back on track.
Quick Ways to Fix the Flashing Question Mark Issue on Your Mac
Make sure you have a backup of your Mac before proceeding. In case there’s no backup, use a Mac data recovery software to recover all your important data, as some troubleshooting methods like running Disk Utility on a damaged directory may result in data loss. Before applying more technical fixes, try some basic workarounds like restarting your Mac.
If the error was caused by some minor software glitch, a simple restart can often resolve it. Next, check the peripheral devices like printers, scanners, or USB drives connected to your computer. Sometimes, they can interfere with the startup process and cause the flashing question mark folder issue on your Mac. Disconnect all external devices and check whether the error message disappears.1. Check Startup Disk Settings
Make sure you are using the correct startup disk (usually named, Macintosh HD).
- Click on the Apple menu and open System Settings.
- Go to General > Startup Disk.
- Select the startup disk that has your OS installed on it.
- Restart your Mac and see if the issue is resolved.
If the issue still persists, move on to the next method.
2. Repair the Disk in Recovery Mode
A flashing folder with question mark issue can occur if your startup disk has run into errors or has become corrupted. Use the First Aid feature in Disk Utility to checks the drive for file-system errors. It repairs common issues like damaged directory structures, invalid volume headers, and minor metadata corruption on both APFS and HFS+ volumes. The best part is that this feature can also be accessed via Recovery Mode, useful when the Mac is unable to boot up.
Here’s how to boot into macOS Recovery:
For Apple Silicon Macs: Shut the Mac down completely. Press and hold the power button until you see “Loading startup options”....
Read more -
5 Best NAS Data Recovery Software in 2026, I Tested Them All Across Real Failure Scenarios
06/12/2026 at 05:12 • 0 commentsSynology dead. QNAP volume corrupt. RAID degraded. I ran five tools through every scenario that actually matters. Here's exactly what happened.
Quick Answer: The best NAS data recovery software in 2026 is Stellar Data Recovery Technician, and it's not particularly close. It's the only tool on this list that handles both online (network-connected) and offline (drives-removed) NAS recovery while simultaneously supporting RAID reconstruction, BTRFS, EXT4, Time Machine, and virtual machine disk recovery, all in a single application that runs natively on both Windows and Mac.
If you want the full breakdown of how each tool performed and which one is actually worth your money based on your specific situation, keep reading.
Why Most NAS Recovery Articles Get This Wrong
Most "best NAS data recovery software" lists are written by people who've never pulled drives from a dead Synology at midnight. They compare feature bullet points from vendor websites, rank tools that have the most checkboxes, and treat "supports NAS" as a meaningful specification without asking what that actually means in practice.
Here's what I did differently. I spent three weeks running five tools across four real NAS failure scenarios: an accidentally deleted share folder on a live Synology NAS, a QNAP unit that wouldn't boot after a firmware update, a four-drive RAID 5 array with two failed disks, and an EXT4 drive with a corrupted partition table connected directly to a Mac. Same hardware, same data loss conditions, five tools, documented results.
The differences were significant. In some scenarios the gap between the best and worst tool was the difference between full recovery and zero recovery. Here's what I found.
The 4 Test Scenarios I Used to Rank These Tools
Before the rankings, a quick breakdown of the failure scenarios I used, because the right tool depends entirely on what kind of NAS failure you're dealing with:
- Scenario A: Accidentally deleted share folder on a live Synology DS920+ (BTRFS, RAID 5, accessible over network)
- Scenario B: QNAP TS-453Be that stopped booting after firmware update (drives pulled, connected via USB adapters)
- Scenario C: Four-drive RAID 5 array with two failed disks, beyond the RAID's fault tolerance
- Scenario D: Single EXT4-formatted drive with corrupted partition table, connected directly to a Mac
Not every tool was tested on every scenario, some simply couldn't attempt certain scenarios due to OS limitations or feature gaps. Where a tool couldn't be tested, I've noted why.
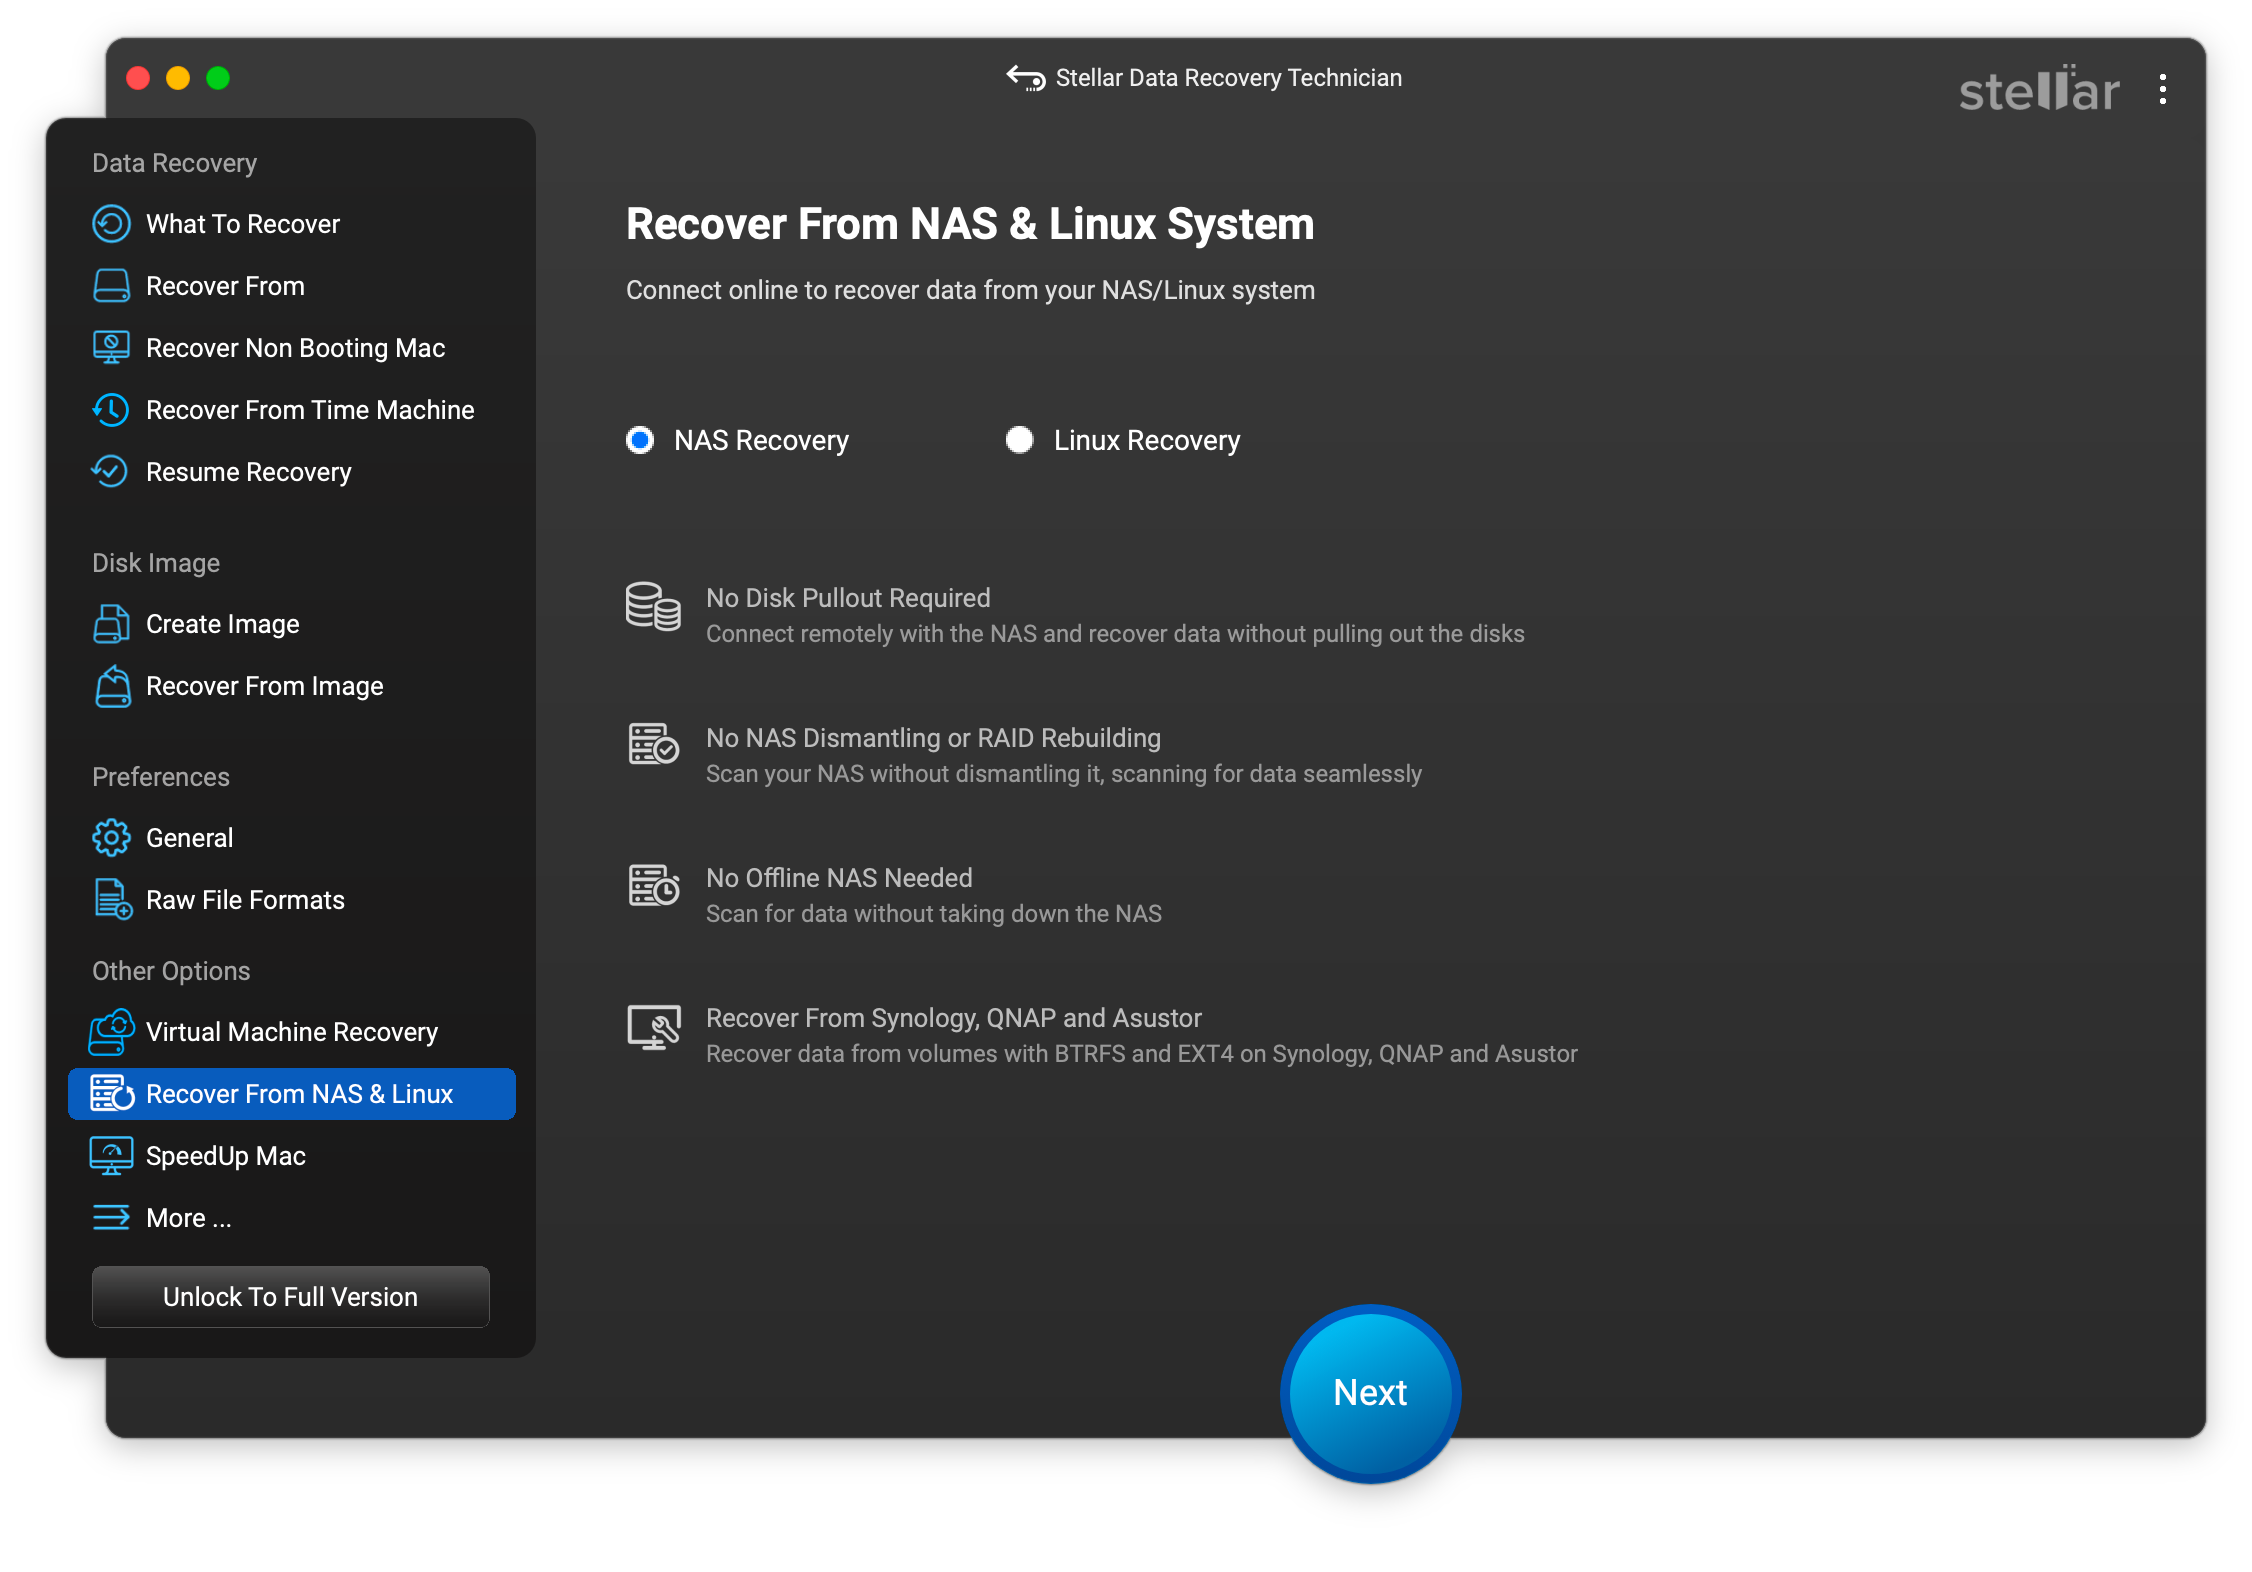
1. Stellar Data Recovery Technician, Best Overall NAS Data Recovery Software
Platforms: Windows and Mac | Price: $199/year (Technician) | Free Trial: Yes, scan and preview before buying
![]()
After running all five tools through these scenarios, Stellar Data Recovery Technician finished first by a wider margin than I expected going in. What makes it stand out isn't any single feature, it's the combination of things it can do that no other tool on this list handles simultaneously.
Scenario A (Live Synology, deleted share folder): Passed
Stellar connected to the Synology via IP address, detected the BTRFS volume structure correctly on the first attempt, and completed a full scan in about 52 minutes. The deleted share folder surfaced with its complete directory structure intact and files fully previewed before any recovery action. Recovery was clean, filenames, folder structure, and file integrity all preserved. This is Stellar's strongest scenario, and it shows.
Scenario B (Dead QNAP, drives pulled): Passed with caveats
With the four QNAP drives connected via SATA-to-USB adapters, Stellar attempted automatic RAID detection. It got the RAID level right (RAID 5) but proposed an incorrect disk order initially. Manual correction of the disk sequence took about ten minutes, and from there the deep scan ran for four-plus hours. Recovery rate: approximately 78% of total data. Larger video files showed partial corruption....
Read more -
Is it Possible to Recover Files from a Formatted Mac Hard Drive?
01/19/2026 at 08:31 • 0 commentsIf it was a slip-up, something done by someone else, or a format you carried out yourself before realizing the files still mattered, the thought of losing important data can hit hard. Still the situation isn’t always as hopeless as it seems. It’s still possible to recover files from a formatted Mac hard drive.
Whether recovery works is matter of how the drive was formatted, the type of storage (HDD or SSD), and whether the underlying data has been overwritten.
What is Hard Drive Formatting?
Creating or modifying the file system of a hard drive is what we call formatting. Every storage drive has a file system structure that governs how data is arranged and tracked on the disk. Without a file system, the macOS is unable to read or write the data stored on the drive.
Modern Apple Silicon or T2 Macs support the following file systems – APFS, HFS+, and FAT, or exFAT, which are also commonly used on Windows systems. macOS can also read data from NTFS-formatted drives out of the box, but it doesn’t allow writing to NTFS disks unless additional software is used.
On a Mac, drives are formatted using Disk Utility, but the recovery outcome depends heavily on how the erase is performed and what type of storage is involved.
Standard Erase (Default in Disk Utility)
The most common formatting method – when you erase a drive using Disk Utility with no advanced options, macOS recreates the file system metadata (usually APFS) without actively overwriting existing data. The files become invisible to the operating system, but the underlying data blocks may still exist until overwritten. Recovery is often possible.
Secure Erase (Legacy HDDs only)
On older Macs with traditional hard drives, Disk Utility used to offer secure erase options that overwrote data multiple times. These options are no longer available for SSDs because modern flash storage manages data internally. When secure overwrite is used on an HDD, software recovery is effectively impossible.
Erase Assistant / Encrypted Erase (Apple silicon & T2 Macs)
On modern Macs, internal drives are encrypted by default using APFS and FileVault. When you erase a Mac using Erase Assistant or erase an encrypted APFS volume, macOS destroys the encryption keys instead of overwriting data. This renders the data permanently inaccessible, even if the physical data blocks still exist. Recovery is not possible in this scenario.
Note: Remember that recovery is usually possible after a standard erase, but not after performing an encrypted erase on modern Macs.
Is Recovery Possible Even After Formatting?
Yes, it’s possible because formatting a hard drive is just setting it up to use a specific file system – by recreating file system metadata and partition maps. Formatting makes files inaccessible by removing file system references & metadata, but does not immediately overwrite all data.
While it may seem like everything on the drive is wiped clean, in reality the data may still be there as long as the following conditions are met:
• You performed a quick format (default on Mac unless you use the Erase Assistant option).
• The drive you formatted is an HDD and not an SSD.Drive Type
Typical recoverability after format
Main limiting factor
HDD (spinning)
Often recoverable if not overwritten; many files can be restored with recovery tools
Overwrites, secure‑erase passes, physical damage
SSD (flash)
Often not recoverable after TRIM or secure erase; possible only if TRIM was disabled and blocks untouched
TRIM, wear‑leveling, controller remapping, encryption
How to Recover Files from a Formatted Hard Drive? (Without Backup)
There are several ways to recover deleted files on a Mac but when you’re dealing with a formatted hard drive, it’s best to use a Mac data recovery software. But first, stop using the formatted drive immediately to prevent the existing data from being overwritten.
Stellar Data Recovery Professional for Mac is a reliable tool to recover lost...
Read more -
How to Recover Accidentally Deleted Files on Mac? (Free Methods)
12/26/2025 at 06:51 • 0 commentsFor years, I carried around the same quiet assumption most Mac users do. If a file is saved, it would still be there when I need it. I had holiday photos tucked into folders I never opened twice, half-edited documents stayed open for days, and old videos sat untouched in folders I hadn’t opened in years. I never paused to wonder where anything actually lived, only that it always seemed to.
Then one lazy afternoon, that comfort bubble popped.
I was checking up on my system, doing the kind of routine cleaning you put off until storage warnings start appearing. A few folders looked safe to remove. A quick sweep of the Trash followed. Nothing felt off. It was the sort of thing I had done dozens of times before without consequence.
But only after emptying the Trash did I realize what actually went wrong. I had accidentally deleted an entire deck of presentation that I had prepared for a client meeting which was supposed to happen the next day! At first, I assumed it was a mistake I could undo.
Then the realization settled in. The file wasn’t misplaced or hidden, it was gone, or at least, that’s what it seemed. That moment changed how I think about deleting a file on Mac, even to this day, and how much faith I place in that small “Are you sure?” dialog box.
Fortunately, that wasn’t the end. Read till the end and I’ll show you what I did to salvage the unsalvageable.
1. Undo the Deletion
If you mistakenly delete a file on your Mac and catch it right away, there’s still a way to recover it. Use the Undo command which relies on temporary event manager to track recent changes and roll back the deletion before something else replaces it. It works best right after deleting a file and before performing any other actions.
- Click the Edit option in the menu bar and select Undo Move of [File Name].
- If the deletion was your last action, the file will reappear immediately.
- You can also use Command + Z for the same purpose.
2. Recover from Trash
Most files aren’t deleted right away on Macs, instead they’re sent to a special folder called Trash. They sit there, waiting for you to change your mind. While a file is still in Trash you can easily recover it with a couple of simple clicks. It works best before the Trash is emptied.
- Click the Trash icon in the Dock.
- Look for the deleted file.
- Right-click the file and select Put Back.
- The file returns to its original location.
3. Recover from Backups
Time Machine is a built-in feature designed to backup and restore files on your Mac. It can incrementally back up your data to an external storage drive, or a network-attached storage (NAS) device. If you had Time Machine enabled on your Mac before the deletion, recovery feels almost too easy.
- Open the folder where the file originally existed.
- Click the Browse Time Machine icon in the menu bar.
- Scroll back through snapshots to find the file.
- Select it and click Restore.
- I downloaded, installed, and launched the software on your Mac.
- On the What to Recover screen, I chose the file type I wanted to recover and clicked Next.
iCloud, Dropbox, and Google Drive are popular cloud-based options for their ease of access. But these backup tools are only of use if you’ve already backed up your data (before deleting it). Without it, you’d have to try alternate recovery methods.
4. Use Free Data Recovery Software
If you were unlucky enough to delete your files from the Trash folder without even backing them up then the only effective way to get them back is by using a free Mac data recovery software. These tools can restore your files even after they are permanently deleted.
It can be difficult to recover files on Macs running SSDs with active TRIM because of its fast cleanup process. So keep your expectations accordingly. But you may succeed if you quickly attempt recovery before...
Read more -
Data Recovery from an External Hard Disk: A Guide
06/24/2025 at 11:25 • 0 commentsLosing data from an external hard disk can be frustrating. Whether it’s photos, documents, or work files, data loss often feels serious. However, recovery is often possible if you follow the right steps. This guide explains common causes of data loss, ways to recover data, and how to prevent it from happening again.
Causes of Data Loss
Data loss can happen for several reasons:
- Accidental Deletion: Files deleted or drives formatted by mistake.
- File System Corruption: Happens when a drive is unplugged improperly or due to crashes.
- Physical Damage: Mechanical failure or damage from drops, heat, or moisture.
- Malware: Viruses that delete, corrupt, or encrypt files.
- Power Problems: Power surges or outages damaging the drive.
Knowing the cause helps decide the best recovery method. Logical issues can often be fixed with software, while physical damage usually requires professional help.
Pre-Recovery Steps
Before attempting to recover data, take these precautions:
- Stop Using the Drive: Continued use risks overwriting lost files.
- Assess the Issue: Listen for unusual noises like clicking, which could mean physical damage.
- Check Connections: Try different cables and USB ports.
- Verify Detection: Make sure the drive shows up in your operating system’s file manager.
- Backup What You Can Access: If some files are visible, copy them immediately to a safe location.
Data Recovery Methods
Method 1: Check Hidden Files
Sometimes files are hidden by system settings or malware.
- Windows:
- Connect the drive.
- Open File Explorer, go to View > Options.
- Under the View tab, select Show hidden files, folders, and drives and uncheck Hide protected operating system files.
- Look for your files.
- macOS:
- Connect the drive and open Finder.
- Select the external drive.
- Press Command + Shift + . (period) to show hidden files.
If files are still missing, try the next method.
Method 2: Use Recovery Software
Recovery software, such as Stellar data recovery professional for windows helps restore files deleted or lost due to corruption.
How to use:
- Download and install the software on your computer’s internal drive or a different external device (not the affected drive).
2. Connect the external hard disk.
3. Run the software, select the drive, and start a scan. Use a deep scan if the drive was formatted or heavily corrupted.
4. Preview found files and recover those you need. Save recovered files to a different drive.
Free versions may have limits; paid versions offer full recovery options.
Method 3: Restore from Backup
If you have a backup, restoring data is simple:
- Connect your backup device or log into your cloud backup service.
- Use Time Machine on macOS or Windows Backup to restore files.
- Download files from cloud services like Google Drive or Dropbox.
- Confirm that the restored files are complete.
If you don’t have a backup, set one up after recovery.
Method 4: Professional Data Recovery Services
If the drive has physical damage or software recovery fails, professional recovery may be necessary.
- Choose a reputable company (DriveSavers, Ontrack, etc.).
- Request a free diagnostic quote.
- Send the drive following the company’s packaging instructions.
- Review the recovery report and approve the files you want.
- Receive recovered data on a new device.
Cost depends on damage and can range from a few hundred to thousands of dollars.
Use professional services when:
- The drive makes clicking or grinding noises.
- The drive is not detected by any computer.
- The data is critical and other methods have failed.
Tips to Improve Recovery Success
- Act quickly to reduce the risk of overwriting lost files.
- Do not save new data or install software on the affected drive.
- Use read-only recovery tools when possible.
- Avoid attempting physical repairs yourself.
- Try multiple recovery tools if one doesn’t work.
- Recover files to a different drive or storage device.
Preventing Future Data...
Read more