Roman
Roman-
Working on a mobile website for the CC3200 board
11/26/2016 at 21:02 • 0 commentsI am currently working on a mobile web page for the CC3200 interface. You can find all the updated files on my Github. One of the web pages I am currently working on is demos-sprinkler.html. You will find it in my updated files on the Github. The page will adjust to the screen size.
![]()
-
UART via WiFi, send messages to a webpage
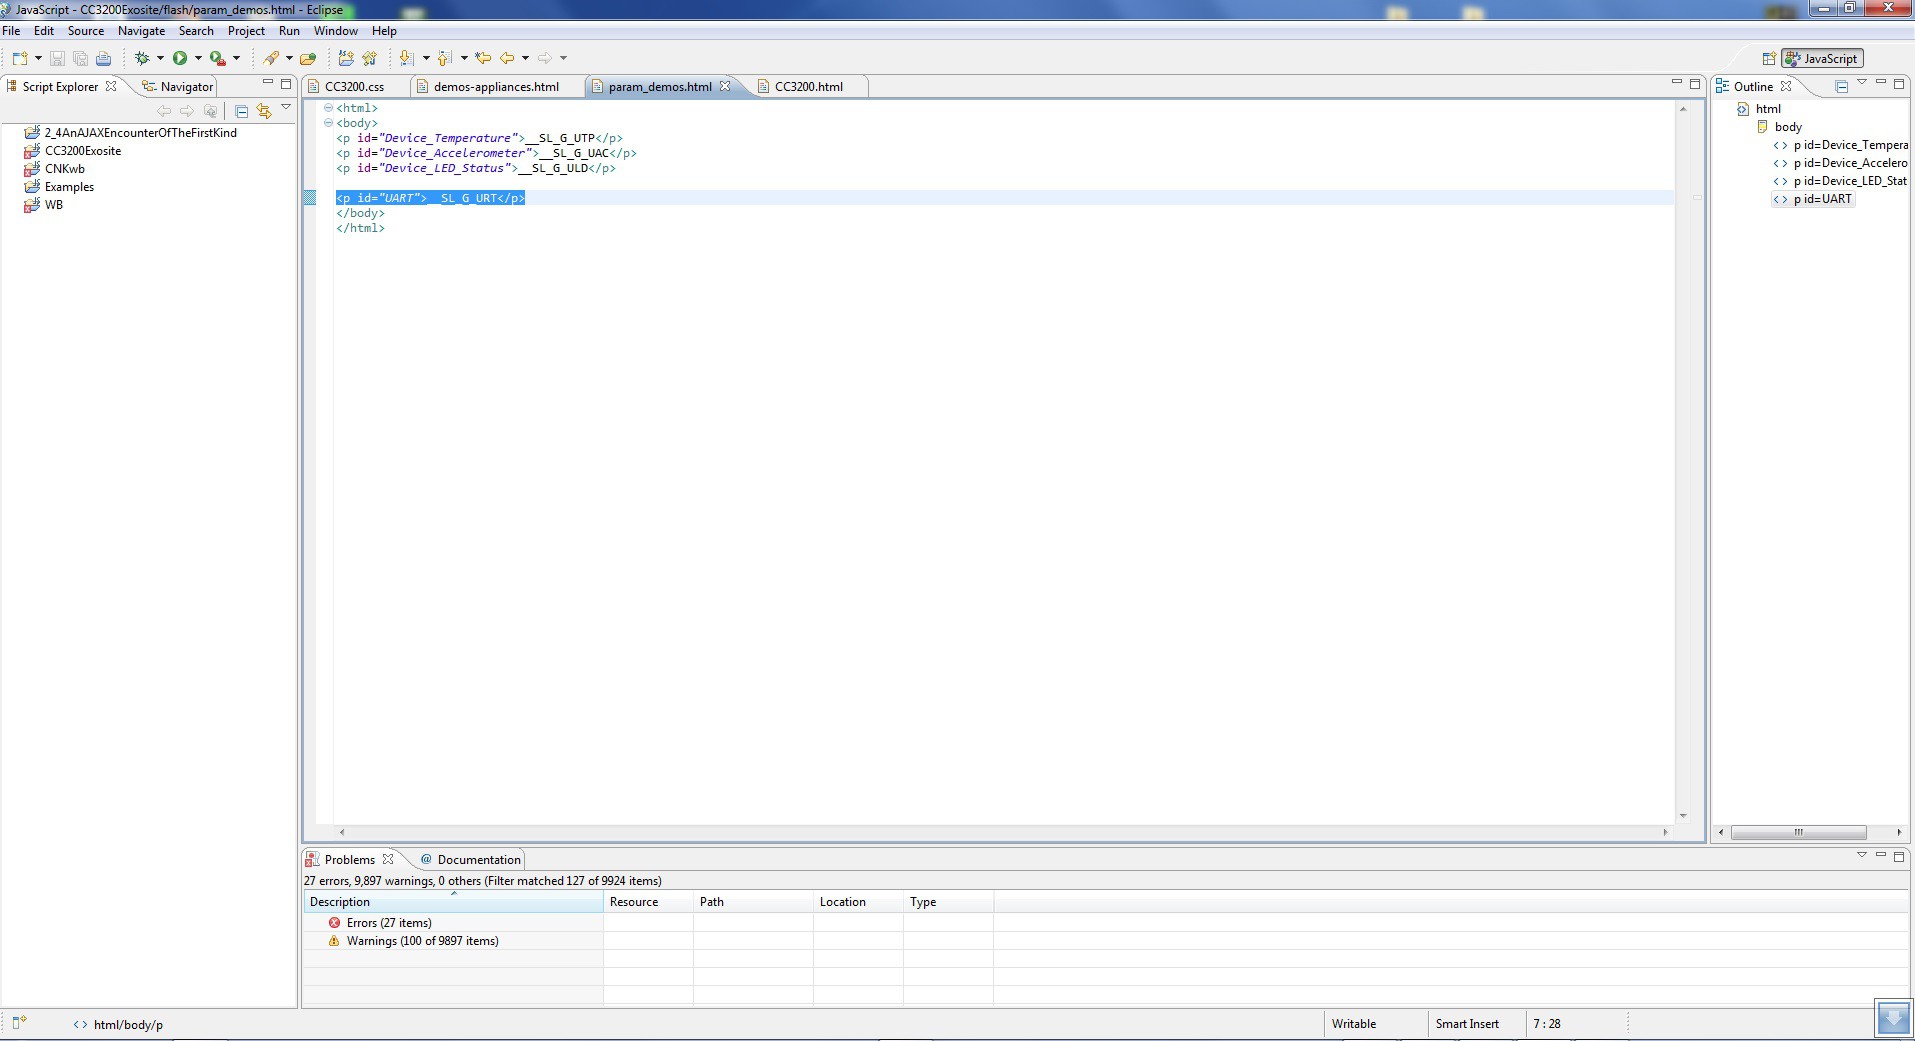
06/19/2016 at 14:27 • 0 commentsCurrently there are tree tockens defined in param_demos.html:
=__SL_G_UTP
=__SL_G_UAC
=__SL_G_ULD
The tockens are defined in the main.c function:
//*****************************************************************************
//                 GLOBAL VARIABLES -- Start
//*****************************************************************************
static const char pcDigits[] = "0123456789";
static unsigned char POST_token[] = "__SL_P_ULD";
static unsigned char GET_token_TEMP[]  = "__SL_G_UTP";
static unsigned char GET_token_ACC[]  = "__SL_G_UAC";
static unsigned char GET_token_UIC[]  = "__SL_G_UIC";
static unsigned char GET_token_URT[]  = "__SL_G_URT";
I have added __SL_G_URT token to the definition list above. I will be using it for
UART communications.
![]()
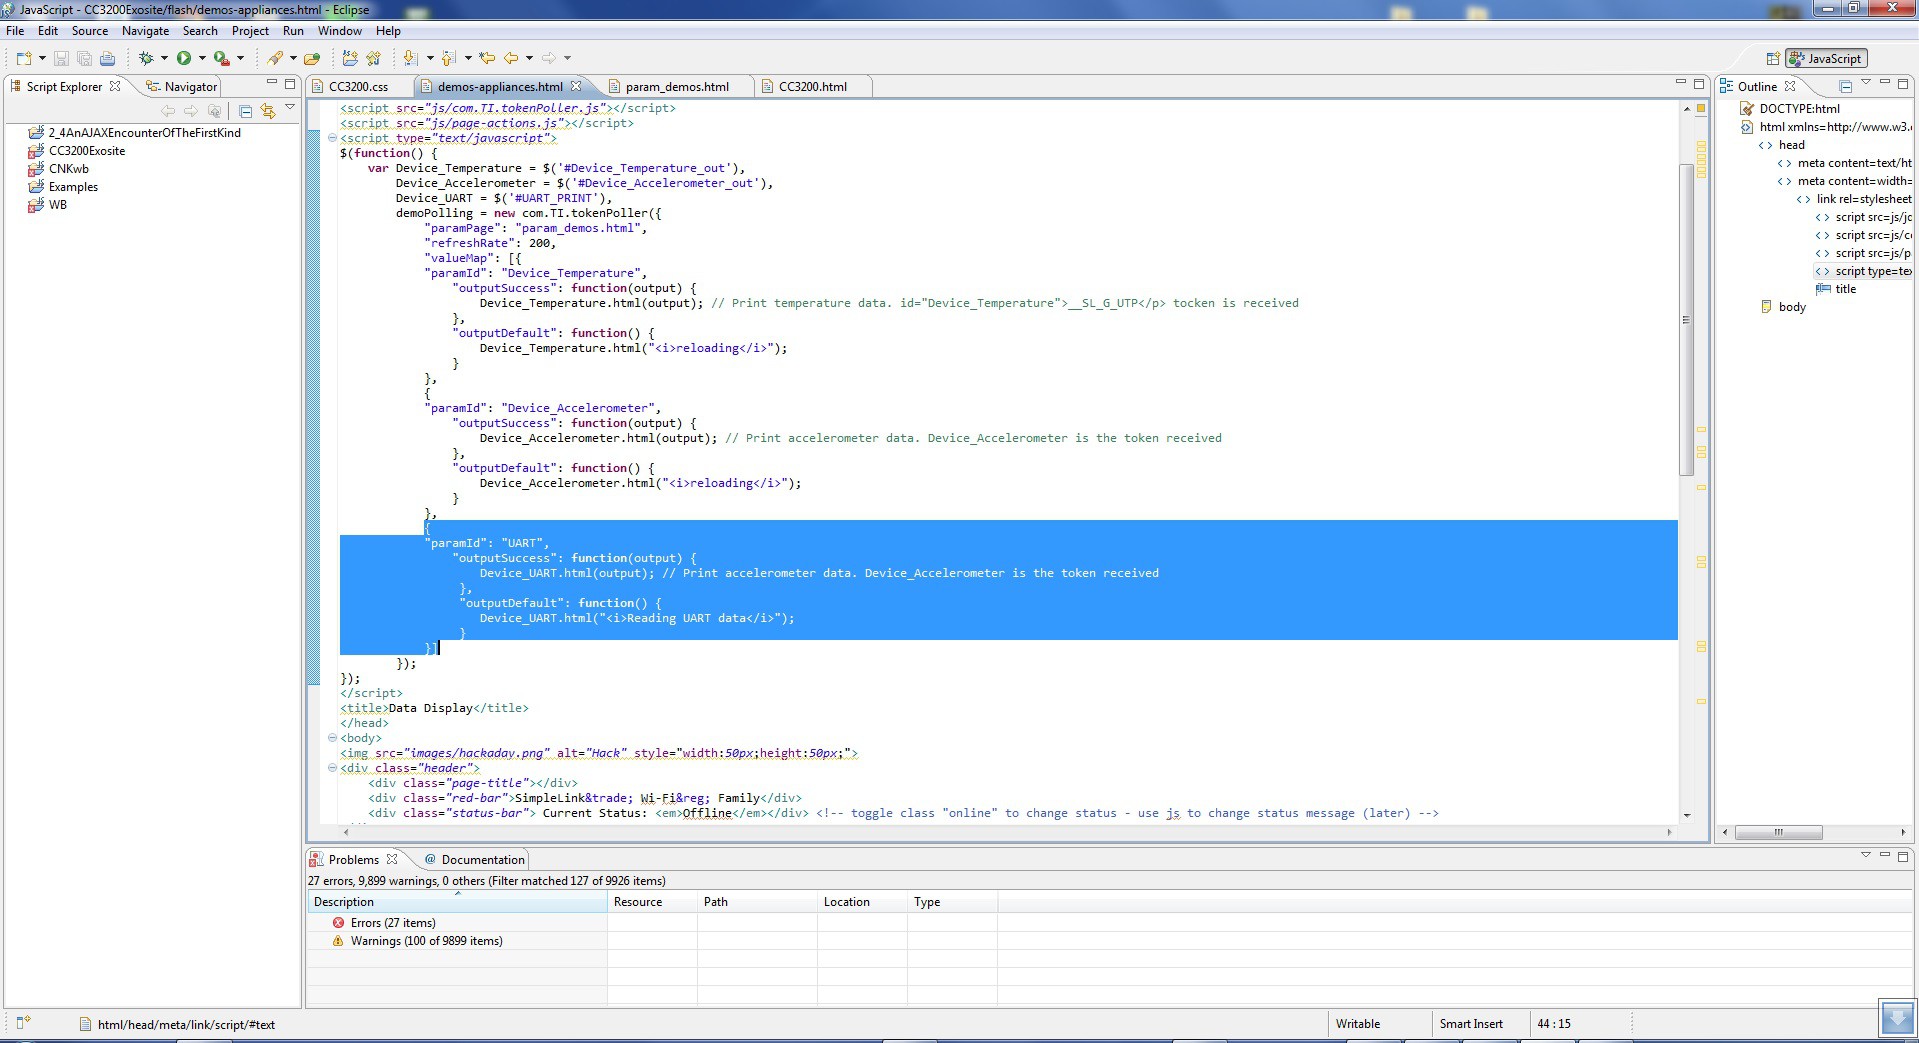
$(function() {
    var Device_Temperature = $('#Device_Temperature_out'),
        Device_Accelerometer = $('#Device_Accelerometer_out'),
        demoPolling = new com.TI.tokenPoller({
            "paramPage": <a href="#param"><font size="3" color="blue">"param_demos.html",</a></font>
            "refreshRate": 200,
            "valueMap": [{
            "paramId": "Device_Temperature",
                "outputSuccess": function(output) {
		// Print temperature data. id="Device_Temperature" __SL_G_UTP tocken is received
                    Device_Temperature.html(output);
                },
                "outputDefault": function() {
                    Device_Temperature.html("<i>reloading</i>");
                }
            },
            {
            "paramId": "Device_Accelerometer",
                "outputSuccess": function(output) {
                	// Print accelerometer data. Device_Accelerometer is the token received
                    Device_Accelerometer.html(output);
                },
                "outputDefault": function() {
                    Device_Accelerometer.html("<i>reloading</i>");
                }
            }]
        });
});
I have added the new GET_token_URT token to the definition list:
static unsigned char GET_token_URT[] = "__SL_G_URT";
Below is shown new token reader I am using for UART communications.
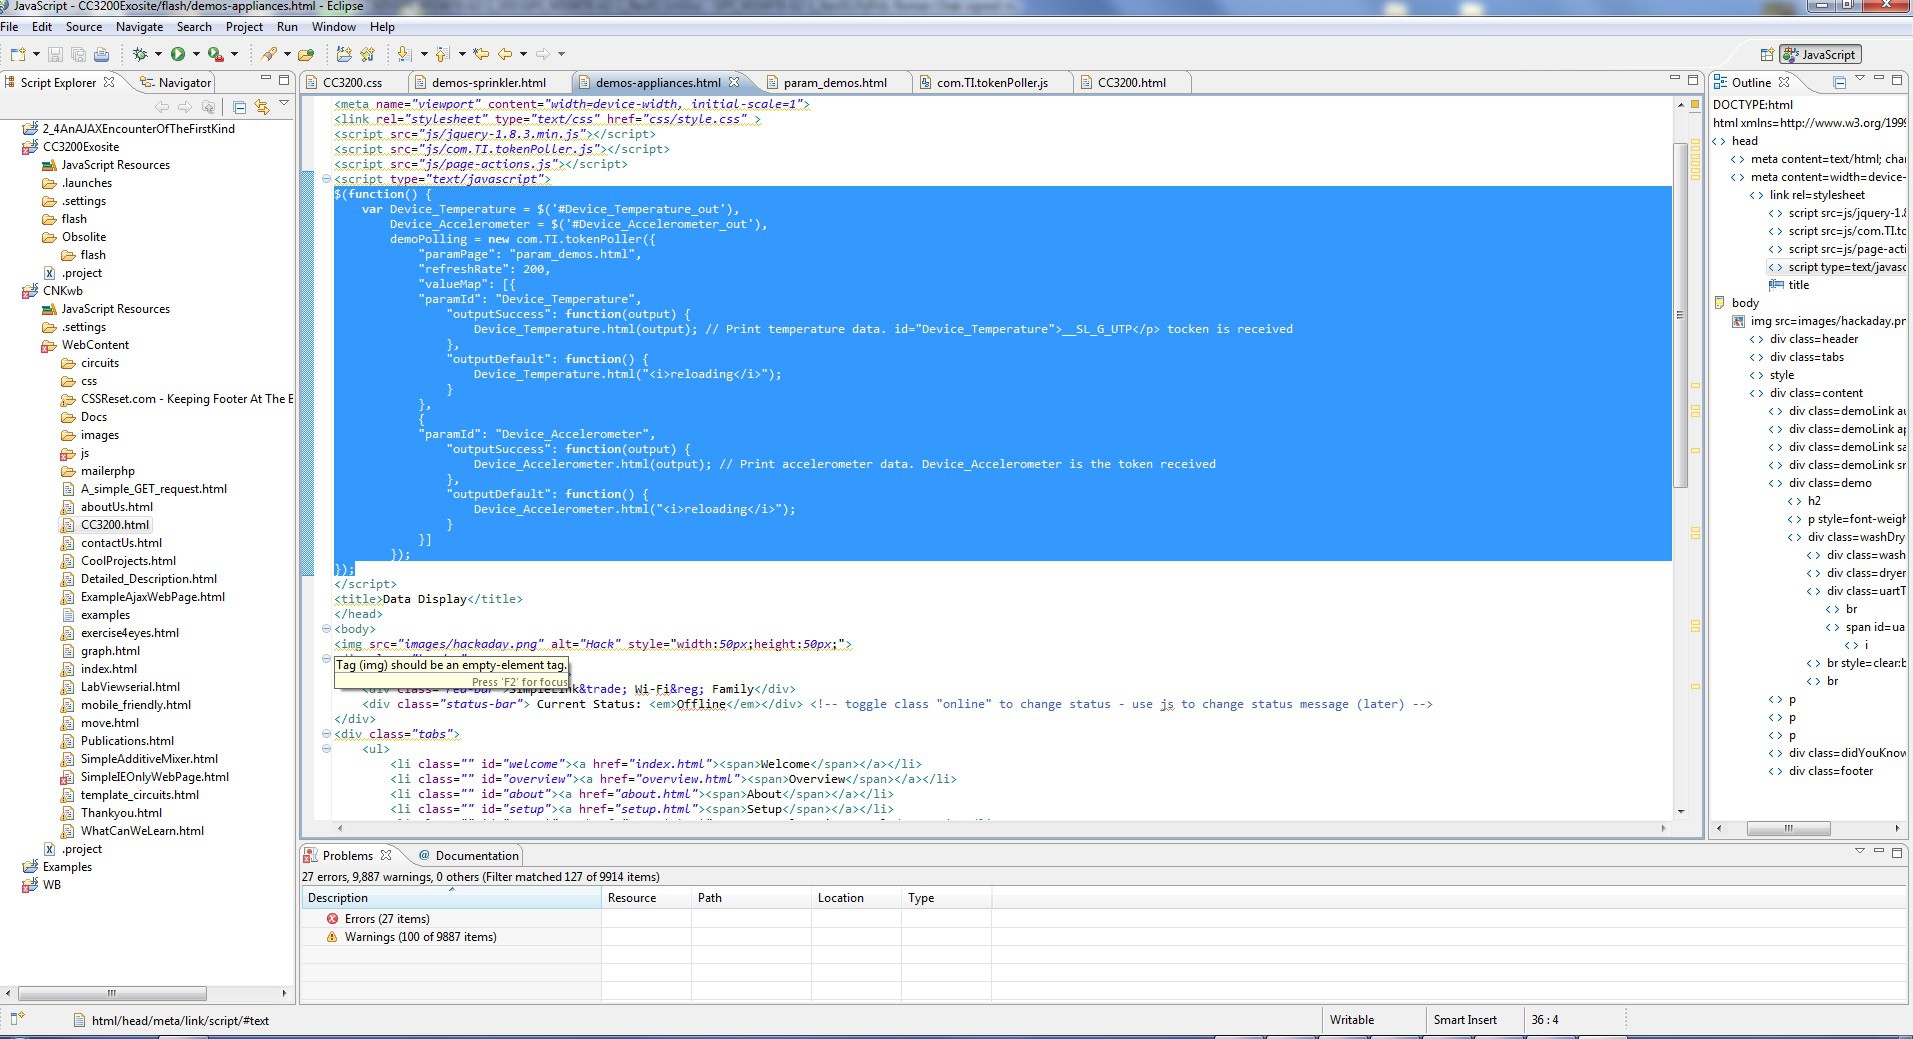
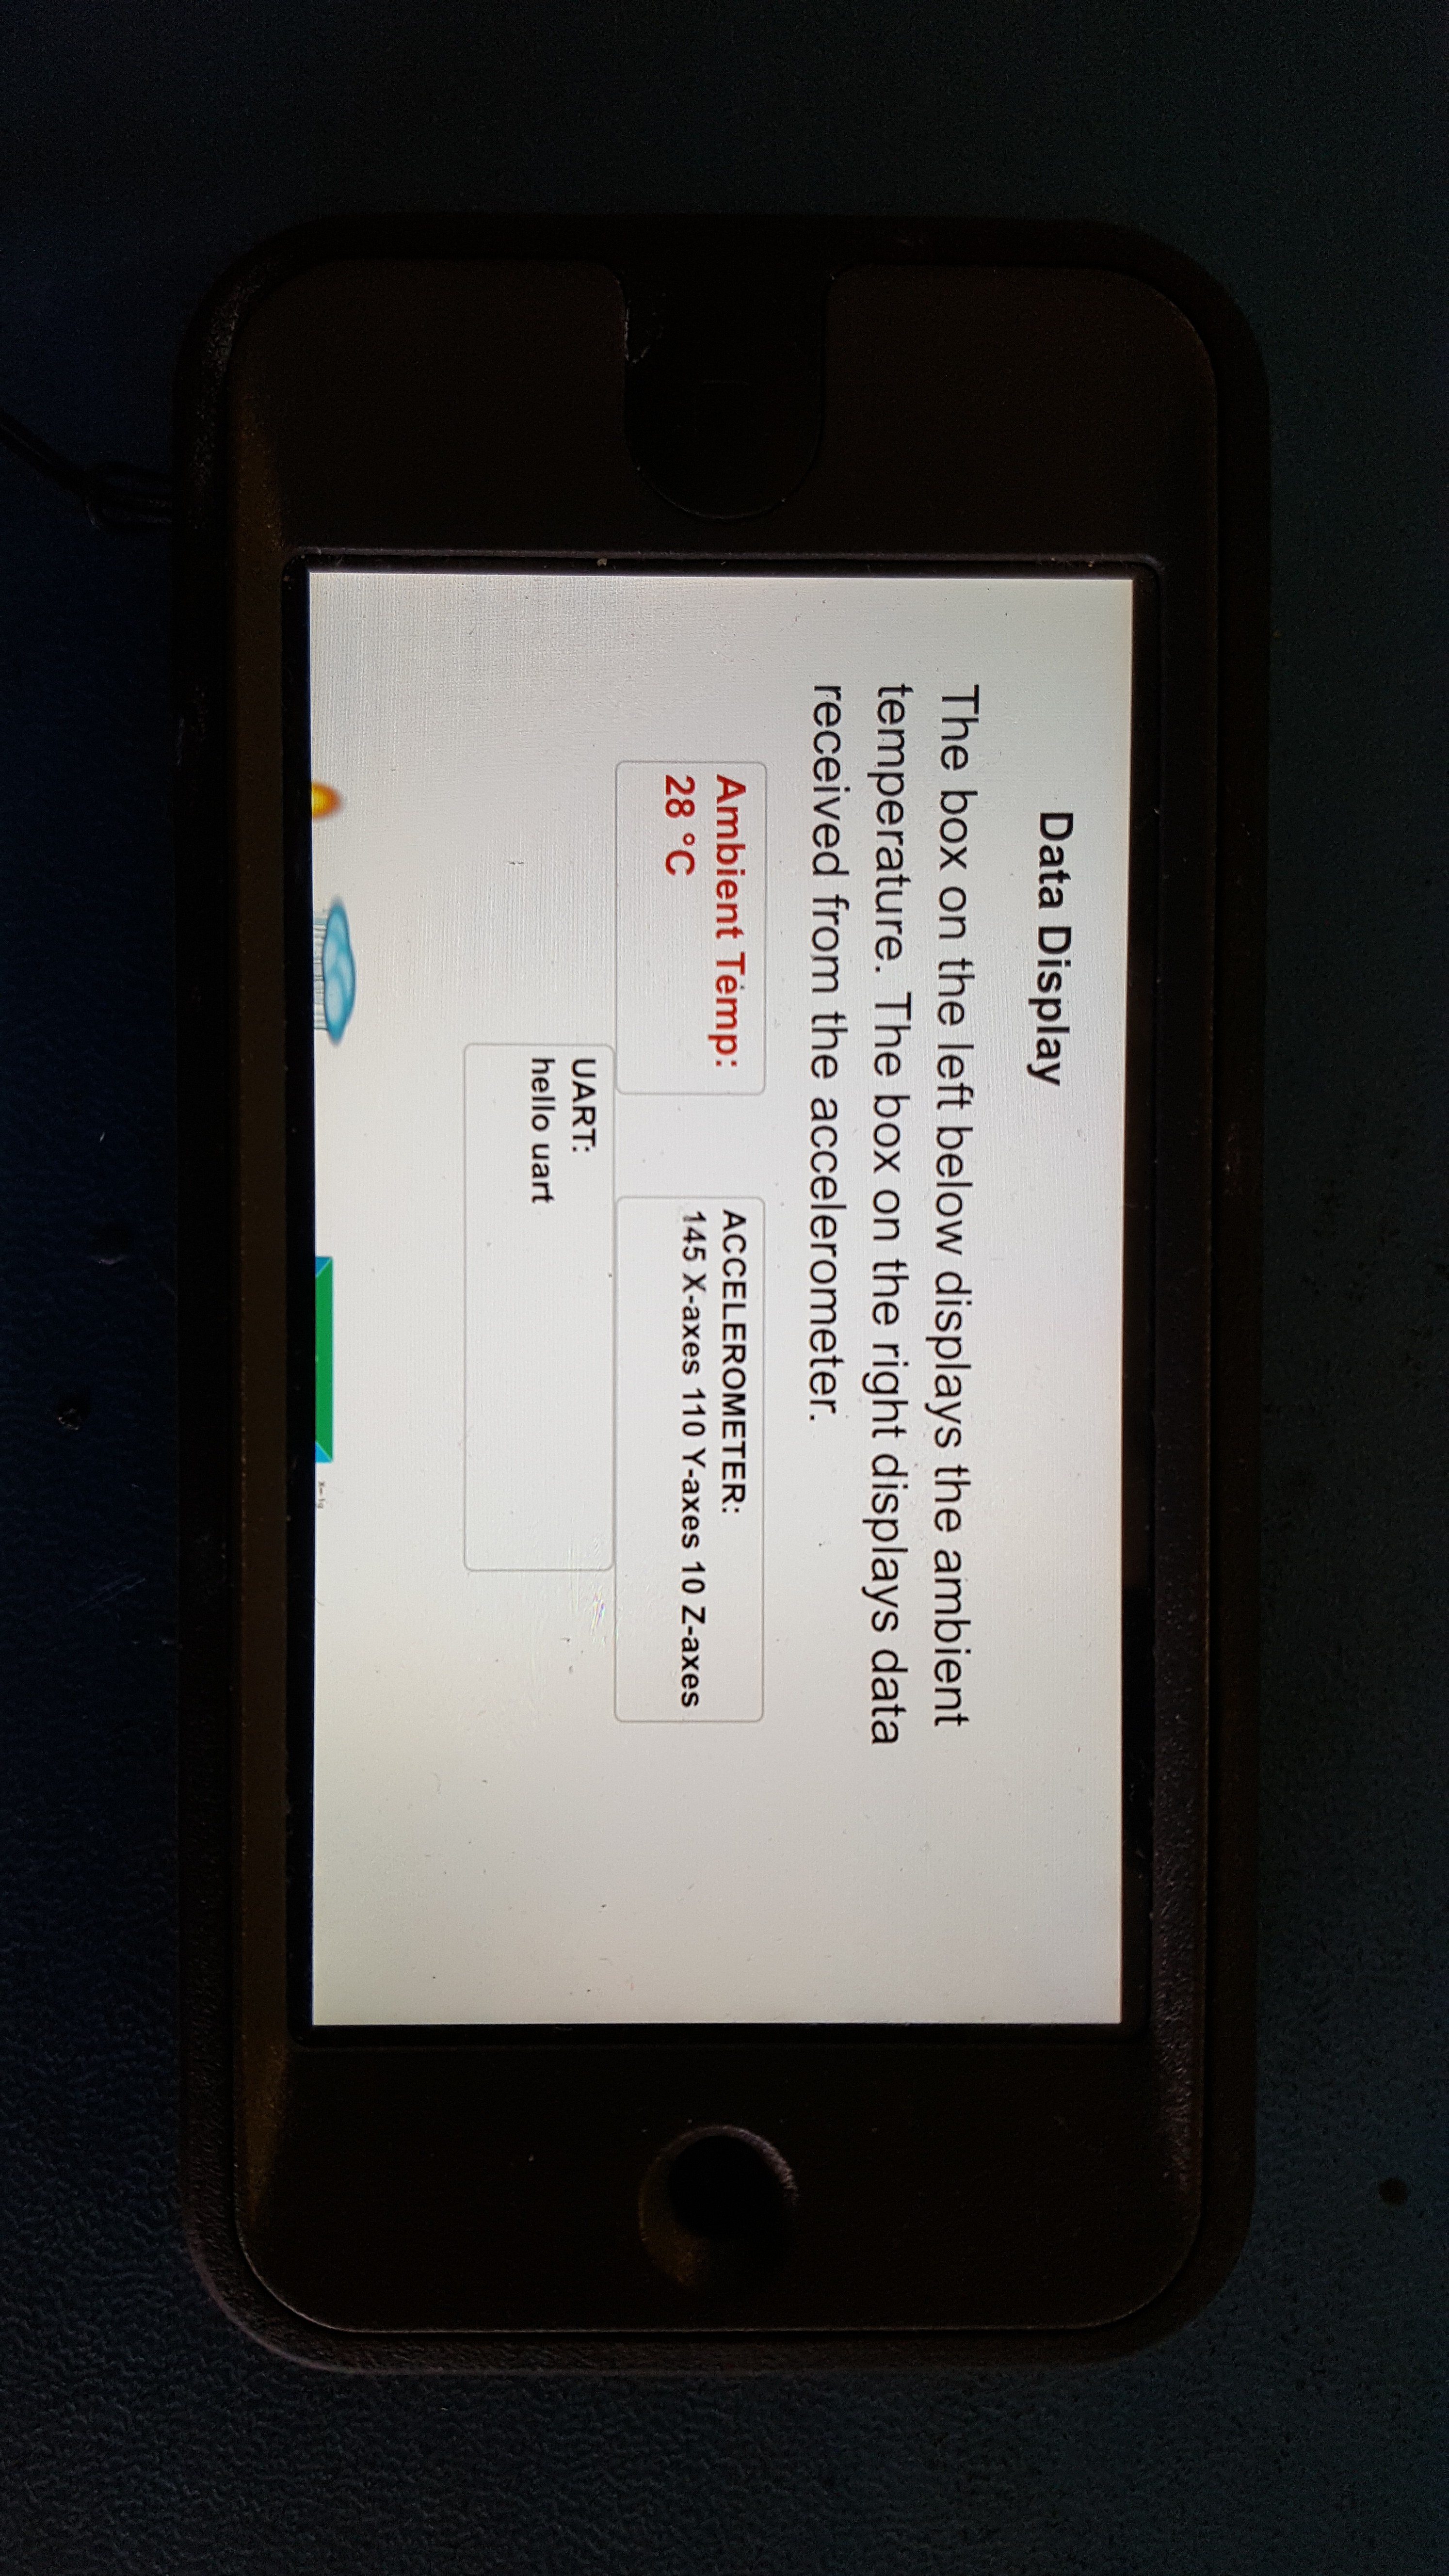
/*
* New UART token *************************************************************************
*/
if(memcmp(pSlHttpServerEvent->EventData.httpTokenName.data,
	GET_token_URT, strlen((const char *)GET_token_URT)) == 0)
	{

		UART_PRINT("\n\r\rExecuting UptimeTask Enter a string and press enter\n\r\r");

		//g_UartHaveCmd=GETChar(&g_ucUARTRecvBuffer[0]);
		//g_ucUARTRecvBuffer[0] = 'H';
		//uart = g_ucUARTRecvBuffer;
		//uart = "hello uart";
		//short sLenuart = itoa(g_accXIntervalSum,(char*)uart);

		//Get length of the sring stored in g_ucUARTRecvBuffer
		strcpy((char*)pSlHttpServerResponse->ResponseData.token_value.data,"hello uart");
		pSlHttpServerResponse->ResponseData.token_value.len += strlen("hello uart");
		//Pointer to the entered string
		//pSlHttpServerResponse->ResponseData.token_value.data = uart;
		//pSlHttpServerResponse->ResponseData.token_value.len += sLenuart;
	}
}
The updated list of tockes in param_demos.html looks as follows now:![]()
demos-appliances.html has a new "paramId" for reading data from UART tocken: { "paramId": "UART", "outputSuccess": function(output) { // Print accelerometer data. Device_Accelerometer is the token received Device_UART.html(output); }, "outputDefault": function() { Device_UART.html("<i>Reading UART data</i>"); } }]![]()
![]()
To get ready to send strings of variable lengths I have done a couple of changes to the GET_token_URT. First I have declared unsigned char *uart in the SL_NETAPP_HTTPGE TTOKENVALUE_EVENT
switch (pSlHttpServerEvent->Event)
    {
        case SL_NETAPP_HTTPGETTOKENVALUE_EVENT:     // Get data from the server
        {
            unsigned char *ptr;
            unsigned char *ptraccX;
            unsigned char *ptraccY;
            unsigned char *ptraccZ;
            unsigned char *uart;
            ...
        }
        ...
    }
And the new UART tocken looks like this now:
/*
* New UART token ****************************New UART token*********************************** New UART token
*/
if(memcmp(pSlHttpServerEvent->EventData.httpTokenName.data,
GET_token_URT, strlen((const char *)GET_token_URT)) == 0)
{
	uart = "Sending srings of data";
	strcpy((char*)pSlHttpServerResponse->ResponseData.token_value.data, (const char *) uart);
	pSlHttpServerResponse->ResponseData.token_value.len += strlen((const char *) uart);
}
I have declared unsigned char g_ucUARTRecvBuffer1[80] a Global 80 character long array. The array will be used to store entered strings.
....
unsigned char printflag = 0;
unsigned char g_ucUARTRecvBuffer1[80];
typedef enum
{
  LED_OFF = 0,
  LED_ON,
  LED_BLINK
}eLEDStatus;
.....
The Uptime Task in the main function with the new g_ucUARTRecvBuffer1[80] array now looks as follows:
static void UptimeTask( void *pvParameters )
{
    while(1)
    {
        //GPIO_IF_LedOff(MCU_ORANGE_LED_GPIO);
        g_uptimeSec++;
        UART_PRINT("\n\r\rExecuting UptimeTask Enter a string and press enter\n\r\r");
        // Returns UART line read from the console. Parameter is unsigned char array
        g_UartHaveCmd = GETChar(&g_ucUARTRecvBuffer1[0]);	// Load buffer from the serial terminal
        osi_Sleep(1000);
    }
}
The only change to the UART tocken is that *uart now points to the beginning address of the g_ucUARTRecvBuffer1 buffer.
/*
 * New UART token ****************************New UART token*****************************
 */
if(memcmp(pSlHttpServerEvent->EventData.httpTokenName.data,
GET_token_URT, strlen((const char *)GET_token_URT)) == 0)
{
	uart = g_ucUARTRecvBuffer1; //g_ucUARTRecvBuffer
	strcpy((char*)pSlHttpServerResponse->ResponseData.token_value.data, (const char *) uart);	//Works
	pSlHttpServerResponse->ResponseData.token_value.len += strlen((const char *) uart);				//Works
}
This code allows me to send varios messages to the demos-appliences.html webpage, the only issue is that I cannot clear old messages off the screen. I also change #define HIGH_TASK_PRIORITY to 4.
Download all the updated files from the GITHUB.
Visit my webpage for daily updates: CC3200.
-
Reading Serial Data in UptimeTask
06/10/2016 at 15:46 • 0 commentsFunction main has a couple of main threads:
- ExositeTask
- UptimeTask
- AccSampleTask
I have changed task priorities for UptimeTask and AccSampleTask. UptimeTask has now a higher priority. I decided to use UptimeTask to read my UART port:
static void UptimeTask( void *pvParameters )
{
	char c = 0;
	while(1)
	{
		//GPIO_IF_LedOff(MCU_ORANGE_LED_GPIO);
		//GPIO_IF_LedOff(MCU_GREEN_LED_GPIO);
		g_uptimeSec++;
		c = MAP_UARTCharGetNonBlocking(CONSOLE);        // Get a single character
		if (c != 0){
			UART_PRINT("\n\r\rExecuting UptimeTask Enter a string and press enter\n\r\r");
			g_UartHaveCmd=GETChar(&g_ucUARTRecvBuffer[0]);
		}
//....A bunch of commented out junk
osi_Sleep(1000);
}
See updated files on the Github. What I am hoping to achieve is to connect serial port of the CC3200 to my #Multimeter + Multimeter+ serial expansion port and start transmitting data through the WiFi. It might take some time though.
-
Blinky LEDs with CC3200 Exosite
04/09/2016 at 13:30 • 0 commentsI just updated my source code to drive two additional LEDs.
![]()
![]()
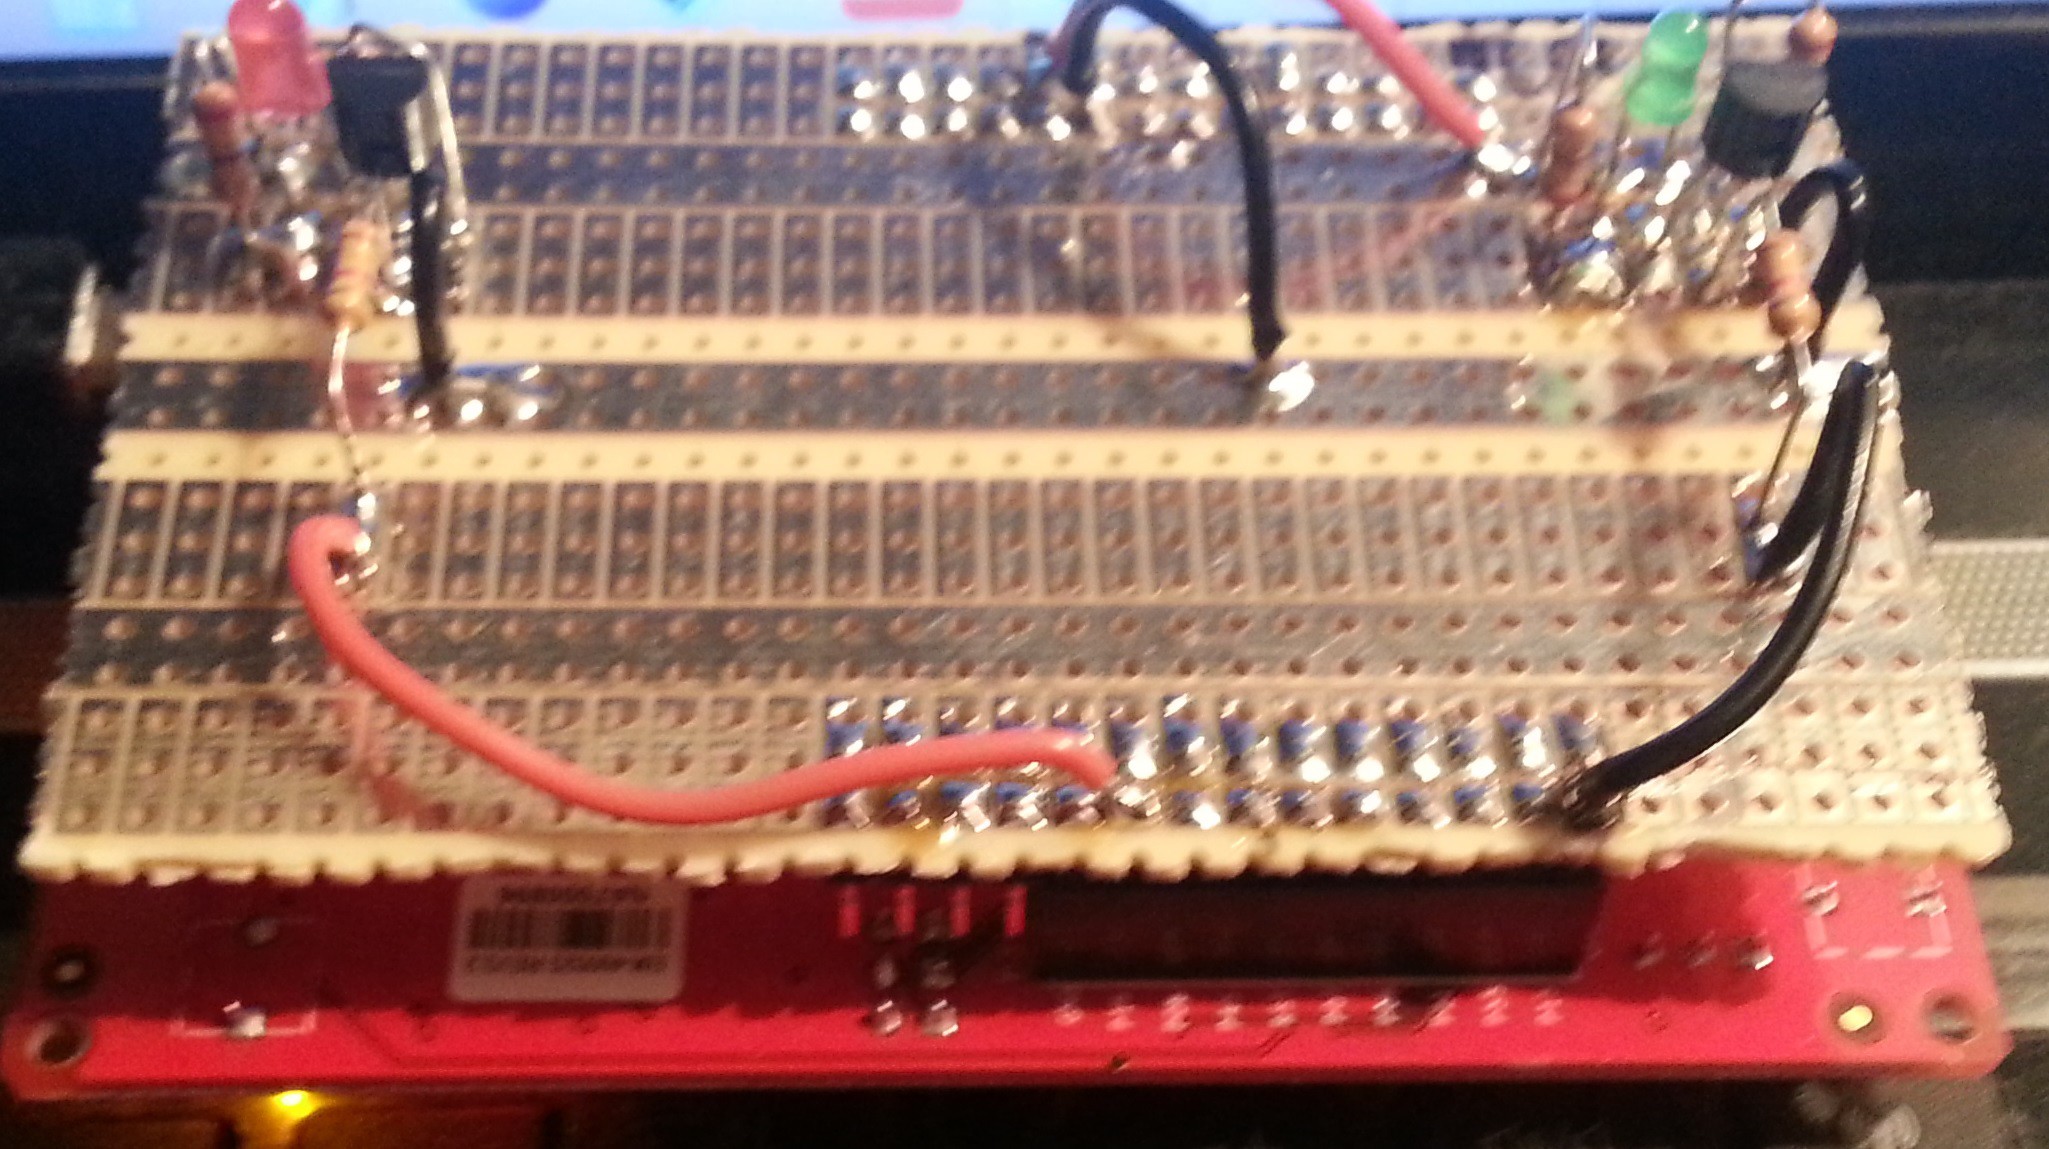
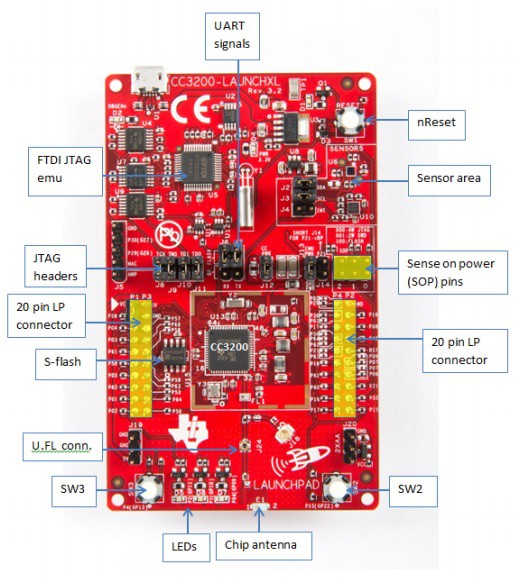
LEDs are connected to PIN 18 and PIN 15 as shown on the diagram above.
Below is the code exerpt to blink LEDs 50 times.
if(led == '1')
{
    if(memcmp(ptr, "ON", 2) == 0)
    {
         GPIO_IF_LedOn(MCU_RED_LED_GPIO);
         g_ucLEDStatus = LED_ON;

    }
    else if(memcmp(ptr, "Blink", 5) == 0)
    {
        for (i = 0; i < 50; i++){
        GPIO_IF_LedOn(MCU_RED_LED_GPIO);// Turn On LED
        MAP_UtilsDelay(delay);
        GPIO_IF_LedOff(MCU_RED_LED_GPIO);// Turn Off LED
        MAP_GPIOPinWrite(GPIOA3_BASE,0x10,0x10);
        MAP_UtilsDelay(delay);
        MAP_GPIOPinWrite(GPIOA2_BASE,0x40,0x40);
        MAP_UtilsDelay(delay);
        MAP_GPIOPinWrite(GPIOA3_BASE,0x10,0);
        MAP_UtilsDelay(delay);
        MAP_GPIOPinWrite(GPIOA2_BASE,0x40,0);
        MAP_UtilsDelay(delay);
     }
     GPIO_IF_LedOn(MCU_RED_LED_GPIO);// Turn On LED
     MAP_GPIOPinWrite(GPIOA2_BASE,0x40,0x40);
     MAP_GPIOPinWrite(GPIOA3_BASE,0x10,0);
     g_ucLEDStatus = LED_BLINK;

     }
     else
     {
      GPIO_IF_LedOff(MCU_RED_LED_GPIO);
      MAP_GPIOPinWrite(GPIOA3_BASE,0x10,0);
      MAP_GPIOPinWrite(GPIOA2_BASE,0x40,0);
      g_ucLEDStatus = LED_OFF;
      }
}
Blinking LEDs are fun :).
-
Analog Front for CC3200 ADC
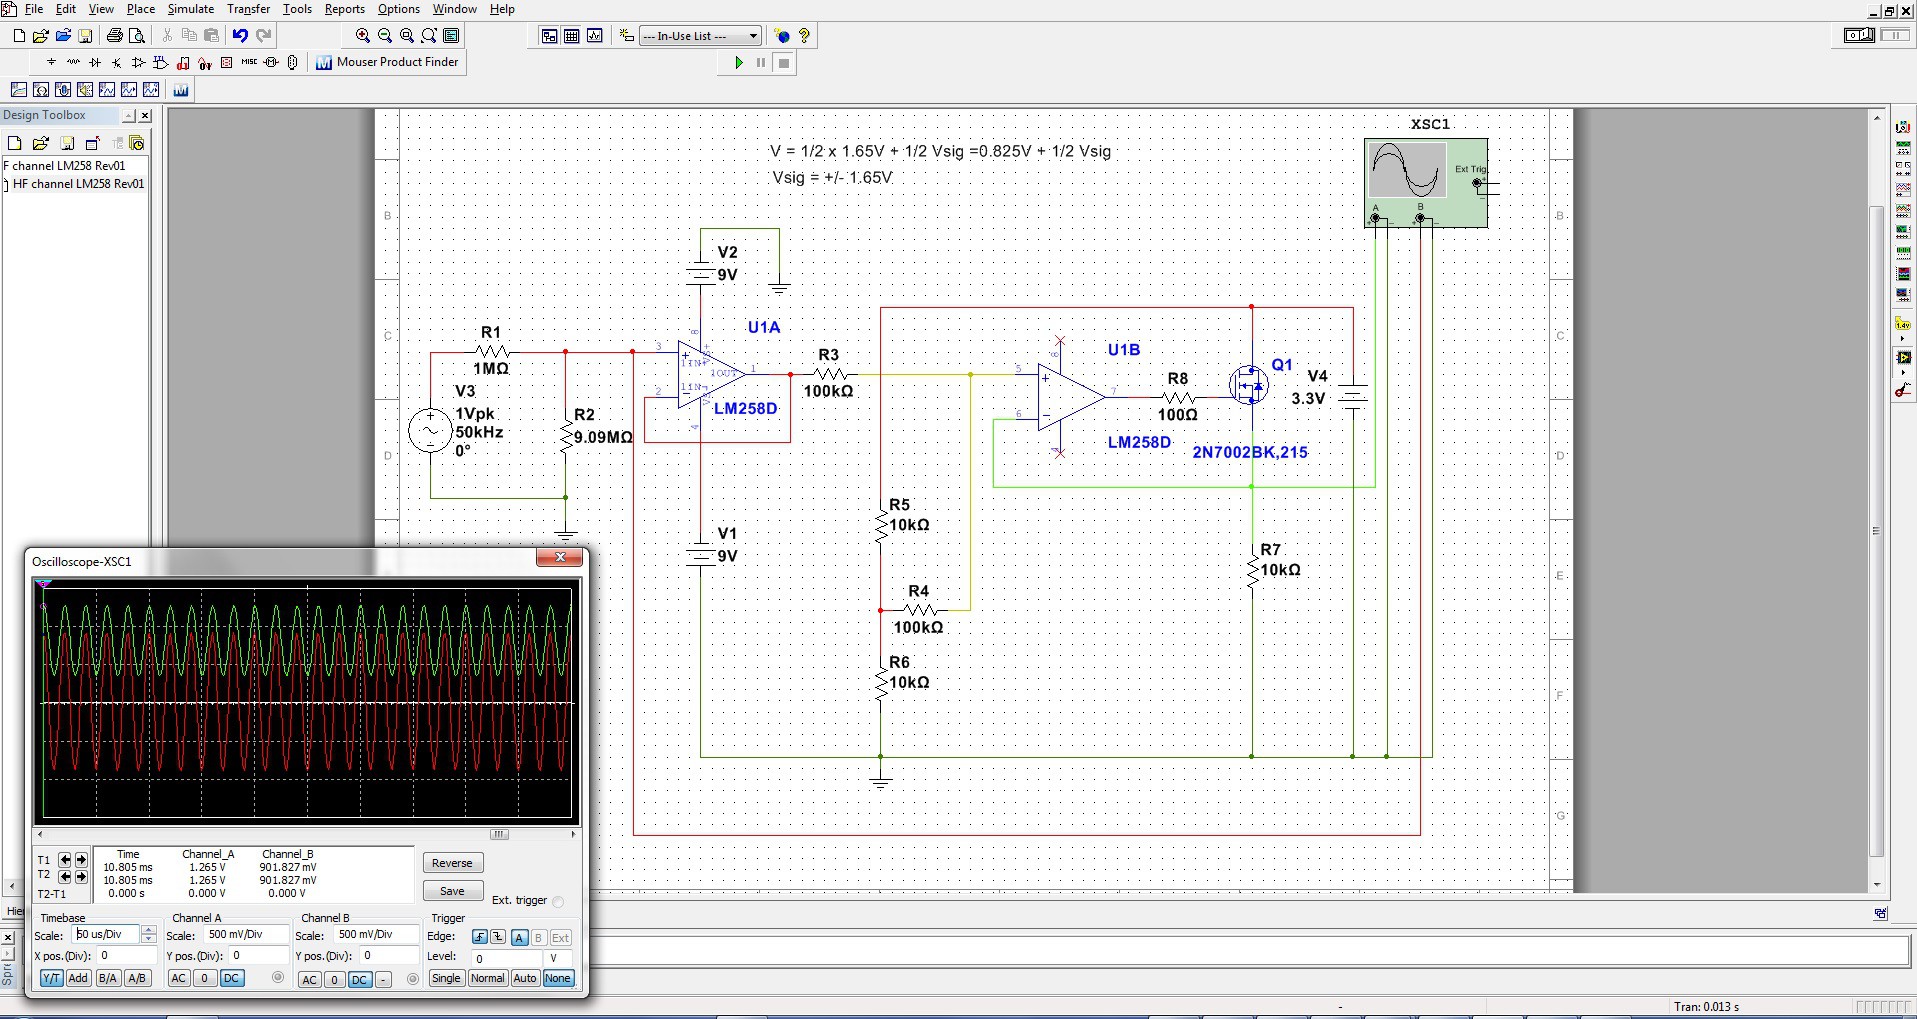
03/29/2016 at 20:00 • 0 comments![]()
I am planning on adding analog front circuit to CC3200 ADC pin 59. Shown above is my preliminary circuit diagram. The design file can be downloaded here. I will be posting updates to the schematics.
-
Updates on Exosite and source code
03/28/2016 at 20:41 • 0 comments![]()
I made a couple of changes to the Exosite and the source code. All updates can be downloaded from CC3200 Site and Source code link. My goal is to get numerical data from the accelerometer and display it on the website. So, I have added couple lines of code to the HTTP server callback function. Now the function sends numeric values x-axis to the Exosite.
void SimpleLinkHttpServerCallback(SlHttpServerEvent_t *pSlHttpServerEvent,
                                SlHttpServerResponse_t *pSlHttpServerResponse){
unsigned char *ptraccX;
…
    ReadAccSensor(); //float *pfCurrTemp
    ptraccX = pSlHttpServerResponse->ResponseData.token_value.data;
    //ptraccY = pSlHttpServerResponse->ResponseData.token_value.data;
    //signed char cAccXT2;
    //signed char cAccYT2;
    //signed char cAccZT2;
    //BMA222ReadNew(&cAccXT2, &cAccYT2, &cAccZT2);
    //volatile static float g_accXIntervalSum = 0;
    //volatile static float g_accYIntervalSum = 0;
    //volatile static float g_accZIntervalSum = 0;
    //char AccX = (char)cAccXT2;
    //char AccY = (char)cAccYT2;
    short sTempLenAccX = itoa(g_accXIntervalSum,(char*)ptraccX);// Convert integer to ASCII in decimal base. Convert x-axis value to a decimal string.
    ptraccX[sTempLenAccX++] 	= ' ';
    ptraccX[sTempLenAccX] 	= ' ';


    //short sTempLenAccY = itoa(g_accYIntervalSum,(char*)ptraccY);// Convert integer to ASCII in decimal base. Convert x-axis value to a decimal string.
    //ptracc[sTempLenAccY++] 	= ' ';
    //ptracc[sTempLenAccY] 	= ' ';

    if(g_ucDryerRunning)	    // g_ucDryerRunning is set in void ReadAccSensor()
     {
       //strcpy((char*)pSlHttpServerResponse->ResponseData.token_value.data,"Running");
       //pSlHttpServerResponse->ResponseData.token_value.len += strlen("Running");
       pSlHttpServerResponse->ResponseData.token_value.data = ptraccX;
       pSlHttpServerResponse->ResponseData.token_value.len += sTempLenAccX;
       //pSlHttpServerResponse->ResponseData.token_value.data = ptraccY;
       //pSlHttpServerResponse->ResponseData.token_value.len += sTempLenAccY;
      }
}
Now I can read x-axis value of the accelerometer. Next step is to get data from Y and Z axis.
After a few hours of hard work and I have managed to send and display data from the other two axis (Y and Z).
![]()
BMA222ReadNew function returns the accelerometer readings. The return values are signed char types. I cast them as unsigned char type, I think that is the reason why I get weird readings sometimes.
BMA222ReadNew(&cAccXT1, &cAccYT1, &cAccZT1);
After that I convert HEX data to character string using the itoa () function.
Using brute force I send data and labels from SimpleLinkHttpServerCallback function:
ReadAccSensor(); //float *pfCurrTemp
            	ptraccX = pSlHttpServerResponse->ResponseData.token_value.data;
signed char cAccXT1, cAccYT1, cAccZT1;
            	//unsigned char cAccXTu, cAccYTu, cAccZTu;
            	unsigned char cAccYTu, cAccZTu;
            	//_u8   *cAccXT2;	//_u8     *data;
            	_u8     *cAccYT2;
            	_u8     *cAccZT2;	//_u8     *data;

            	BMA222ReadNew(&cAccXT1, &cAccYT1, &cAccZT1);

            	//cAccXTu = (unsigned char) cAccXT1;
            	cAccYTu = (unsigned char) cAccYT1;
            	cAccZTu = (unsigned char) cAccZT1;

            	//cAccXT2 = &cAccXTu;
            	cAccYT2 = &cAccYTu;
            	cAccZT2 = &cAccZTu;

            	//ptraccX = cAccXT2;
            	ptraccY = cAccYT2;
            	ptraccZ = cAccZT2;

short sLenAccX = itoa(g_accXIntervalSum,(char*)ptraccX);// Convert integer to ASCII in decimal base. Convert x-axis value to a decimal string.
short sLenAccY = itoa(g_accYIntervalSum,(char*)ptraccY);// String that contains Y-axis data
                ptraccY[sLenAccY++] = ' ';
short sLenAccZ = itoa(g_accZIntervalSum,(char*)ptraccZ);// String that contains Z-axis data
                ptraccY[sLenAccZ++] = ' ';

                ptraccX[sLenAccX++] = ' ';
                ptraccX[sLenAccX++] = ' ';
                ptraccX[sLenAccX++] = 'X';
                ptraccX[sLenAccX++] = '-';
                ptraccX[sLenAccX++] = 'a';
                ptraccX[sLenAccX++] = 'x';
                ptraccX[sLenAccX++] = 'e';
                ptraccX[sLenAccX++] = 's';
                ptraccX[sLenAccX++] = ' ';
                ptraccX[sLenAccX++] = ' ';
                ptraccX[sLenAccX++] = ' ';


                ptraccX[sLenAccX++] = ptraccY[0];
                ptraccX[sLenAccX++] = ptraccY[1];
                ptraccX[sLenAccX++] = ptraccY[2];

                ptraccX[sLenAccX++] = ' ';
                ptraccX[sLenAccX++] = ' ';
                ptraccX[sLenAccX++] = 'Y';
                ptraccX[sLenAccX++] = '-';
                ptraccX[sLenAccX++] = 'a';
                ptraccX[sLenAccX++] = 'x';
                ptraccX[sLenAccX++] = 'e';
                ptraccX[sLenAccX++] = 's';
                ptraccX[sLenAccX++] = ' ';
                ptraccX[sLenAccX++] = ' ';
                ptraccX[sLenAccX++] = ' ';

                ptraccX[sLenAccX++] = ptraccZ[0];
                ptraccX[sLenAccX++] = ptraccZ[1];
                ptraccX[sLenAccX++] = ptraccX[2]; // typo has to be ptraccY

                ptraccX[sLenAccX++] = ' ';
                ptraccX[sLenAccX++] = ' ';
                ptraccX[sLenAccX++] = 'Z';
                ptraccX[sLenAccX++] = '-';
                ptraccX[sLenAccX++] = 'a';
                ptraccX[sLenAccX++] = 'x';
                ptraccX[sLenAccX++] = 'e';
                ptraccX[sLenAccX++] = 's';
                ptraccX[sLenAccX++] = ' ';
                ptraccX[sLenAccX++] = ' ';
                ptraccX[sLenAccX++] = ' ';
I have updated files in my source code link: CC3200 Site and Source code. -
A note on CCS UniFlash
03/26/2016 at 01:32 • 0 commentsFor your custom site you need to add all images and html files to the UniFlash configuration. Once all files are added flash the image.
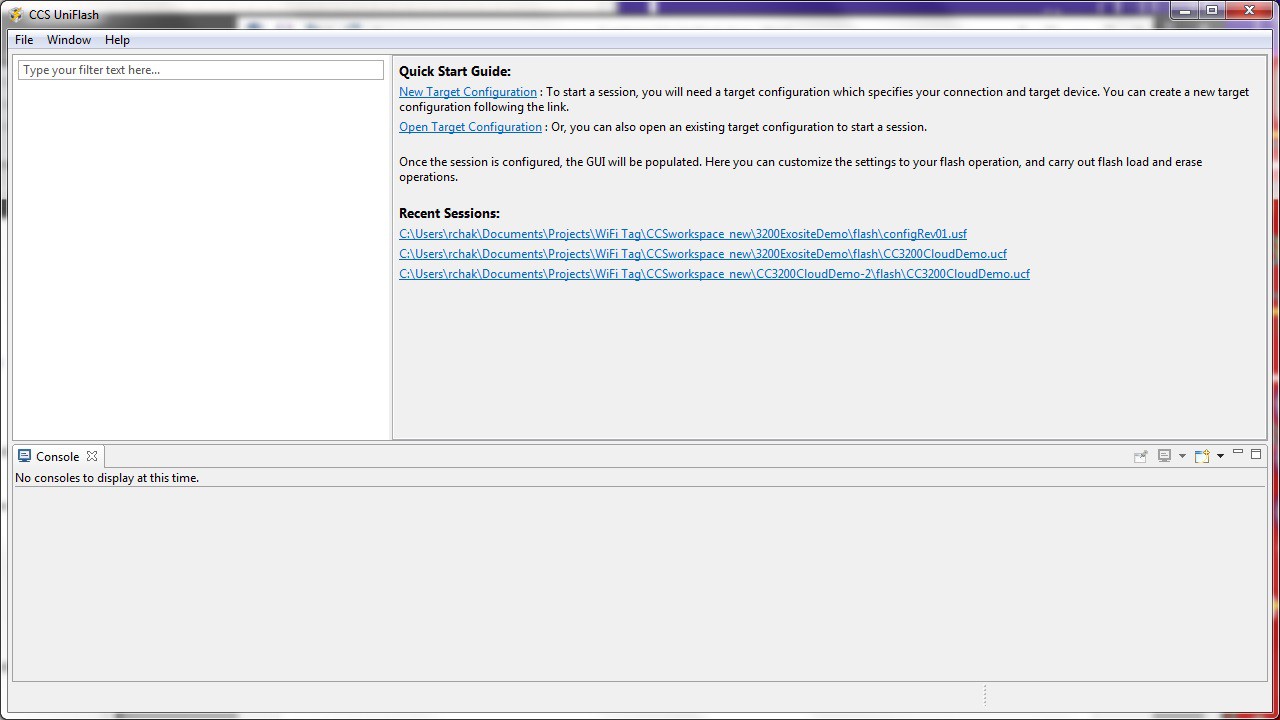
- Open UniFlash
![]()
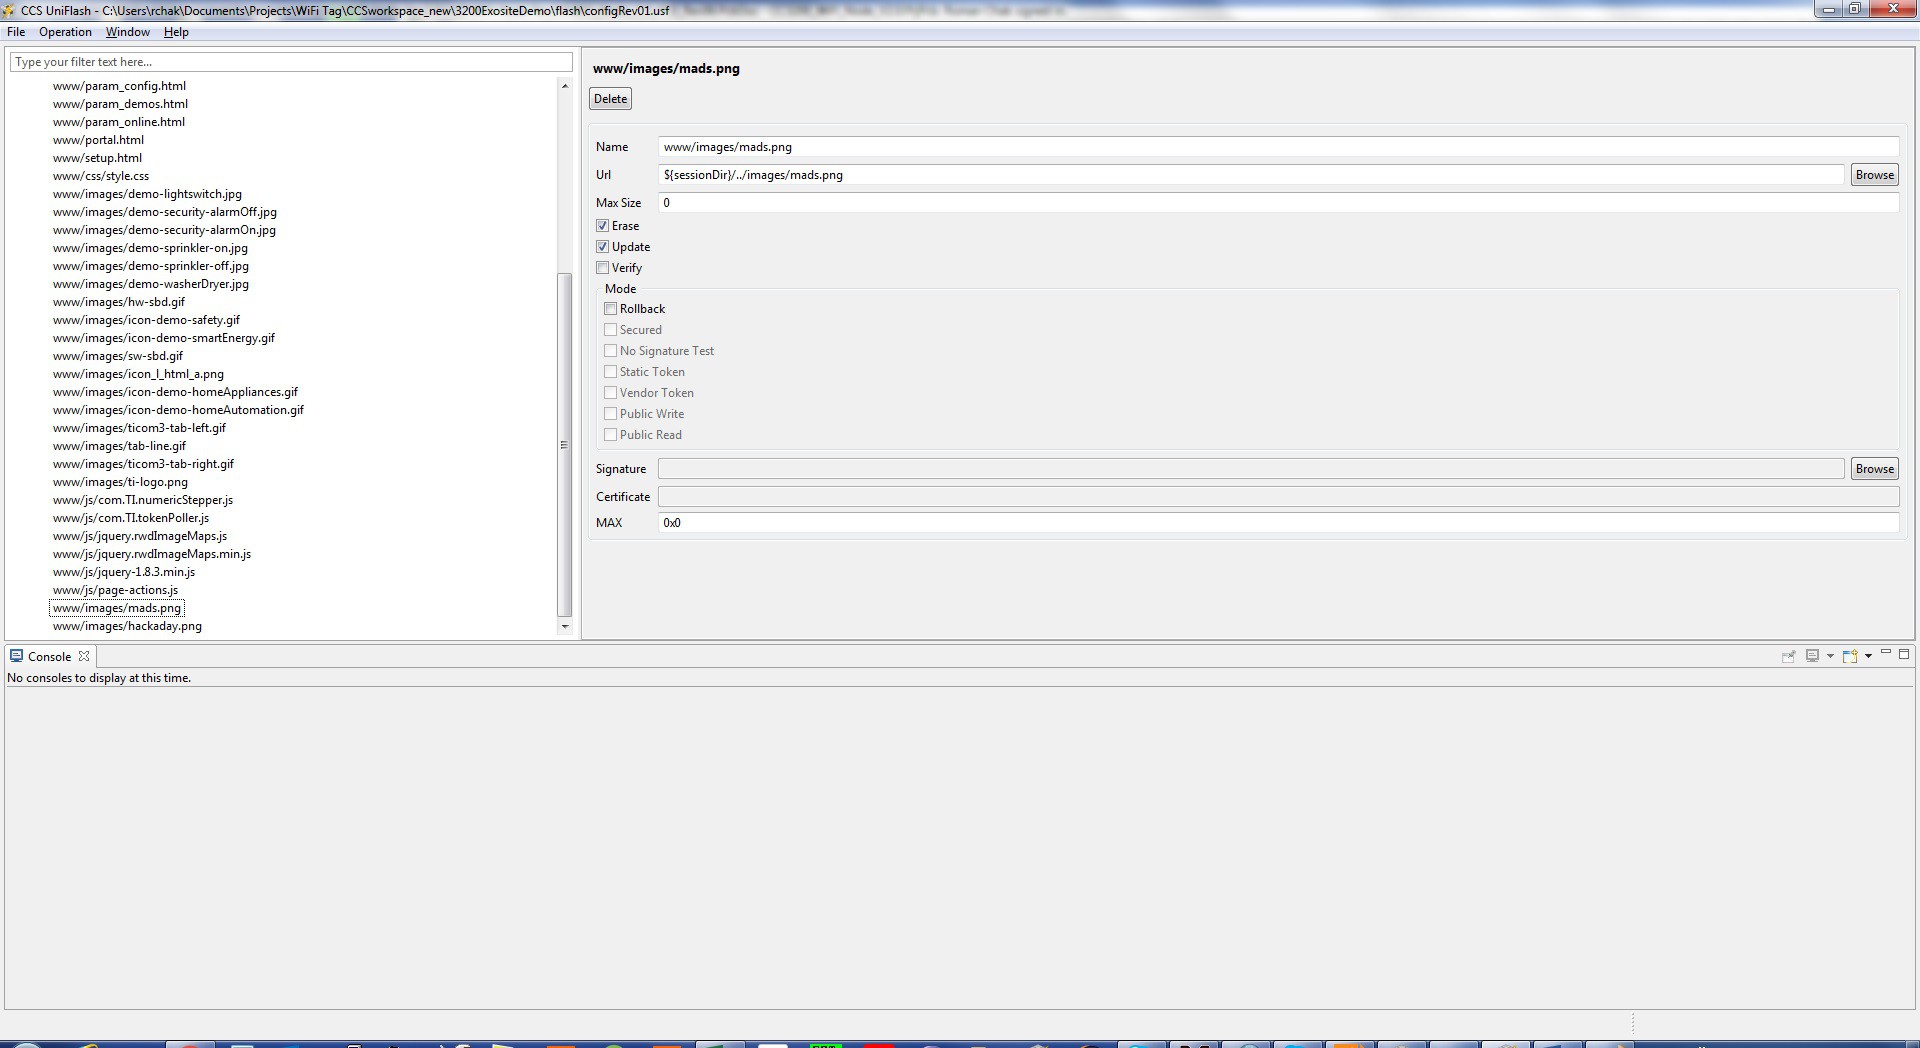
2. File -> Open -> Target Configuration.
![]() The configuration file name for my Exosite is configRev01.usf.
It has additional images I placed on the site, for example mad.png.
The configuration file name for my Exosite is configRev01.usf.
It has additional images I placed on the site, for example mad.png.
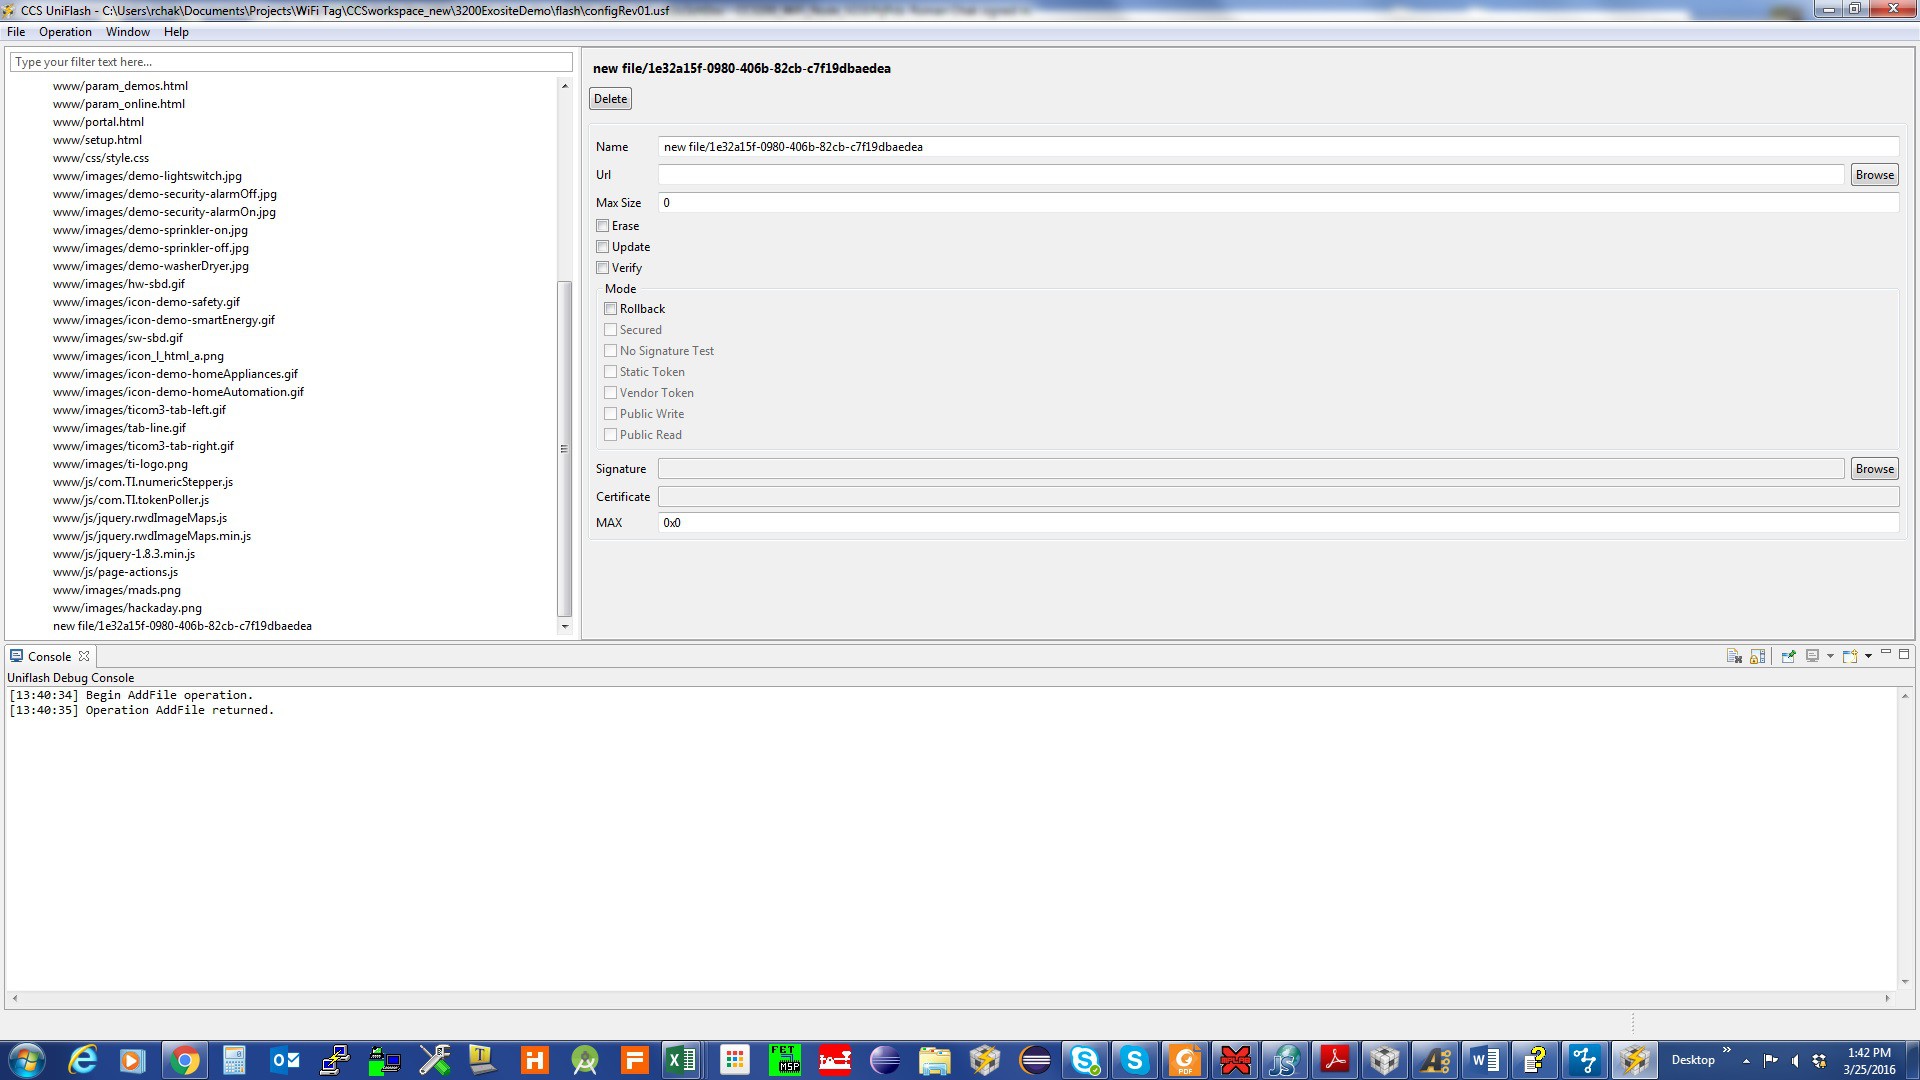
![]() Once configuration is opened click on Operation -> Add
File. You will get a generic file which you will have to replace with your own.
Once configuration is opened click on Operation -> Add
File. You will get a generic file which you will have to replace with your own.
![]() Rename the file and point to a file location.
Rename the file and point to a file location.![]()
That is it, build your custom site on CC3200.
-
CC3200 MCU LaunchPad Hardware.
03/22/2016 at 21:25 • 0 commentsCC3200 Development Board has a lot of useful hardware.
The easiest way to start is to work with the two on-board sensors![]()
accelerometer and temperature and then expand to new
sensors and other hardware.
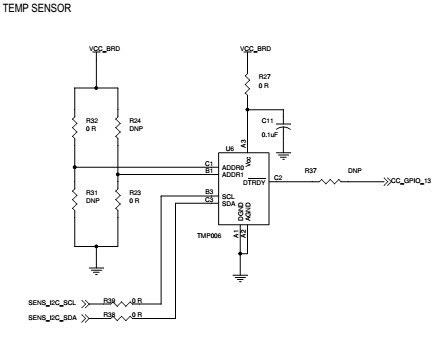
TMP006 Infrared![]()
Thermopile Sensor in Chip-Scale Package.
![]()
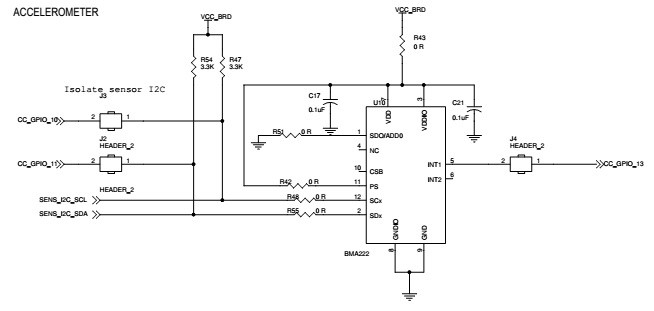
BMA222 3-AXIS ACCELEROMETER DIGITAL SMD
The following function deals with HTTP events. The source code can be downloaded from here. File name is ExositeCC3200CloudDemo-BETA-20140708.zip.
void SimpleLinkHttpServerCallback(SlHttpServerEvent_t *pSlHttpServerEvent,
                                SlHttpServerResponse_t *pSlHttpServerResponse){
....
}
Two events are of a particular interest at this point.
Temperature read:
ptr = pSlHttpServerResponse->ResponseData.token_value.data; pSlHttpServerResponse->ResponseData.token_value.len = 0; if(memcmp(pSlHttpServerEvent->EventData.httpTokenName.data, GET_token_TEMP, strlen((const char *)GET_token_TEMP)) == 0) { float fCurrentTemp; TMP006DrvGetTemp(&fCurrentTemp); char cTemp = (char)fCurrentTemp; short sTempLen = itoa(cTemp,(char*)ptr); ptr[sTempLen++] = ' '; ptr[sTempLen] = 'F'; pSlHttpServerResponse->ResponseData.token_value.len += sTempLen; }Accelerometerread:
if(memcmp(pSlHttpServerEvent->EventData.httpTokenName.data,
GET_token_ACC, strlen((const char *)GET_token_ACC)) == 0)
{

ReadAccSensor();
if(g_ucDryerRunning)
{
    strcpy((char*)pSlHttpServerResponse->ResponseData.token_value.data,"Running");
    pSlHttpServerResponse->ResponseData.token_value.len += strlen("Running");
        }
else
{
    strcpy((char*)pSlHttpServerResponse->ResponseData.token_value.data,"Stopped");
    pSlHttpServerResponse->ResponseData.token_value.len += strlen("Stopped");
}
}
Both sensors share I2C bus for command and data communications.
-
Making Changes to CC3200 Web Page
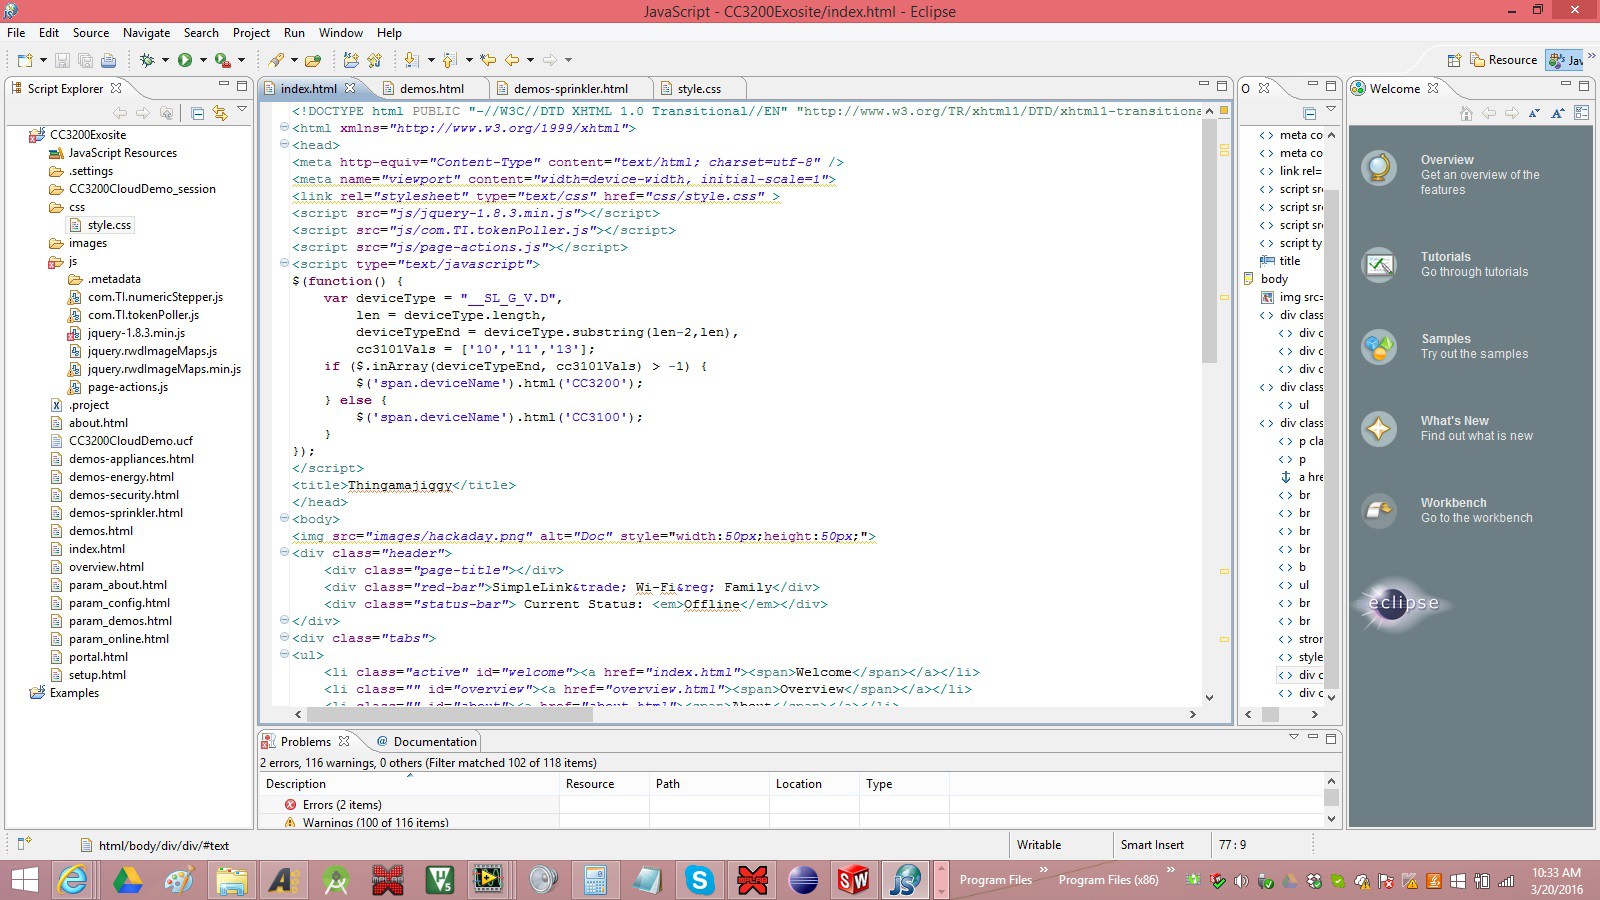
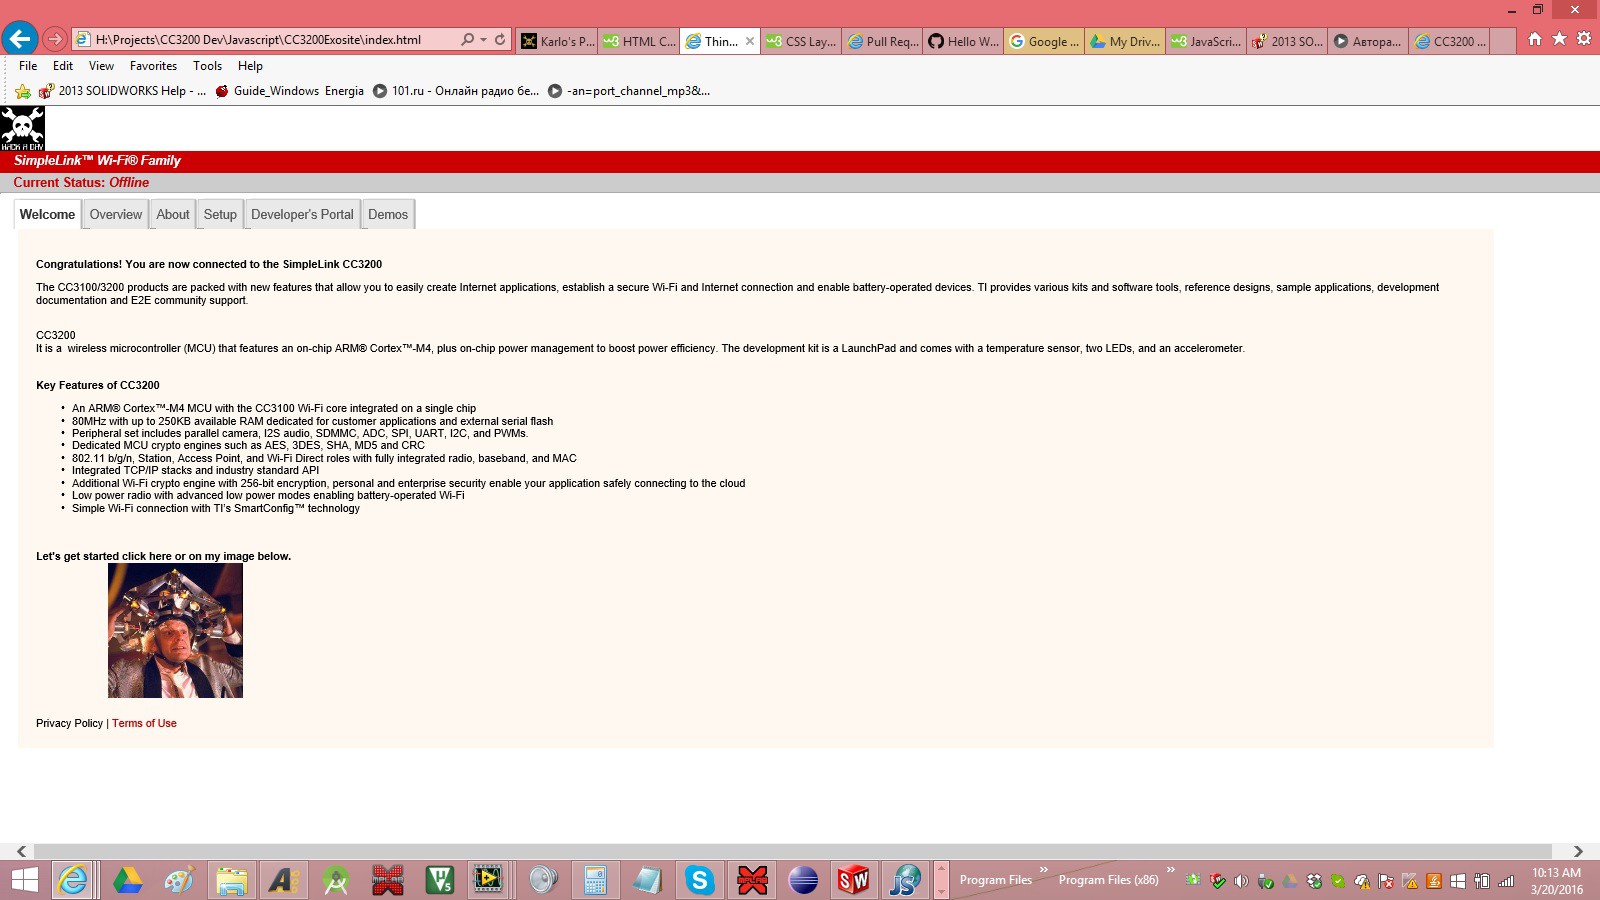
03/20/2016 at 17:35 • 1 commentI am learning HTML, CSS, and JavaScript as I go with the project. I have made a couple of simple changes to the original front page :).
![]() The site is still working, I haven't broken it yet. You can find the site code in zip format here.
The site is still working, I haven't broken it yet. You can find the site code in zip format here.I have changed the title, and inserted two images.
<title>Thingamajiggy</title>
</head>
<body>
<img src="images/hackaday.png" alt="Doc" style="width:50px;height:50px;">
Thingamajiggy is the new title, there is a hackaday image at the top and I placed my image with a link to the demos page at the bottom of the page
<style>
.center {
    margin: auto;
    width: 90%;
    border: 0px solid #73AD21;
    padding: 1px;
}
</style>
<div class="center">
<a href="demos.html">
	<img src="images/mads.png" alt="Doc" style="width:150px;height:150px;">
</a>
I use Eclipse for JavaScript to work on the changes to the site.
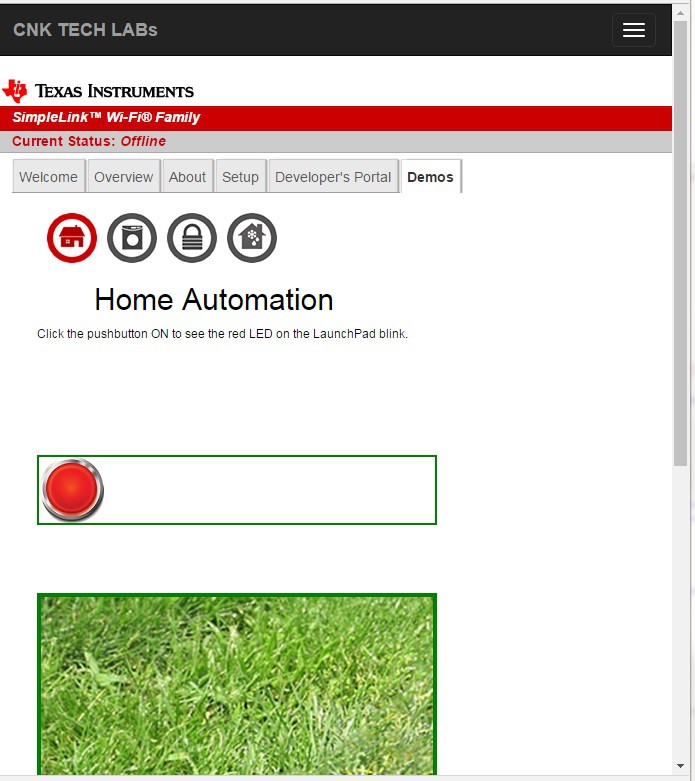
![]()
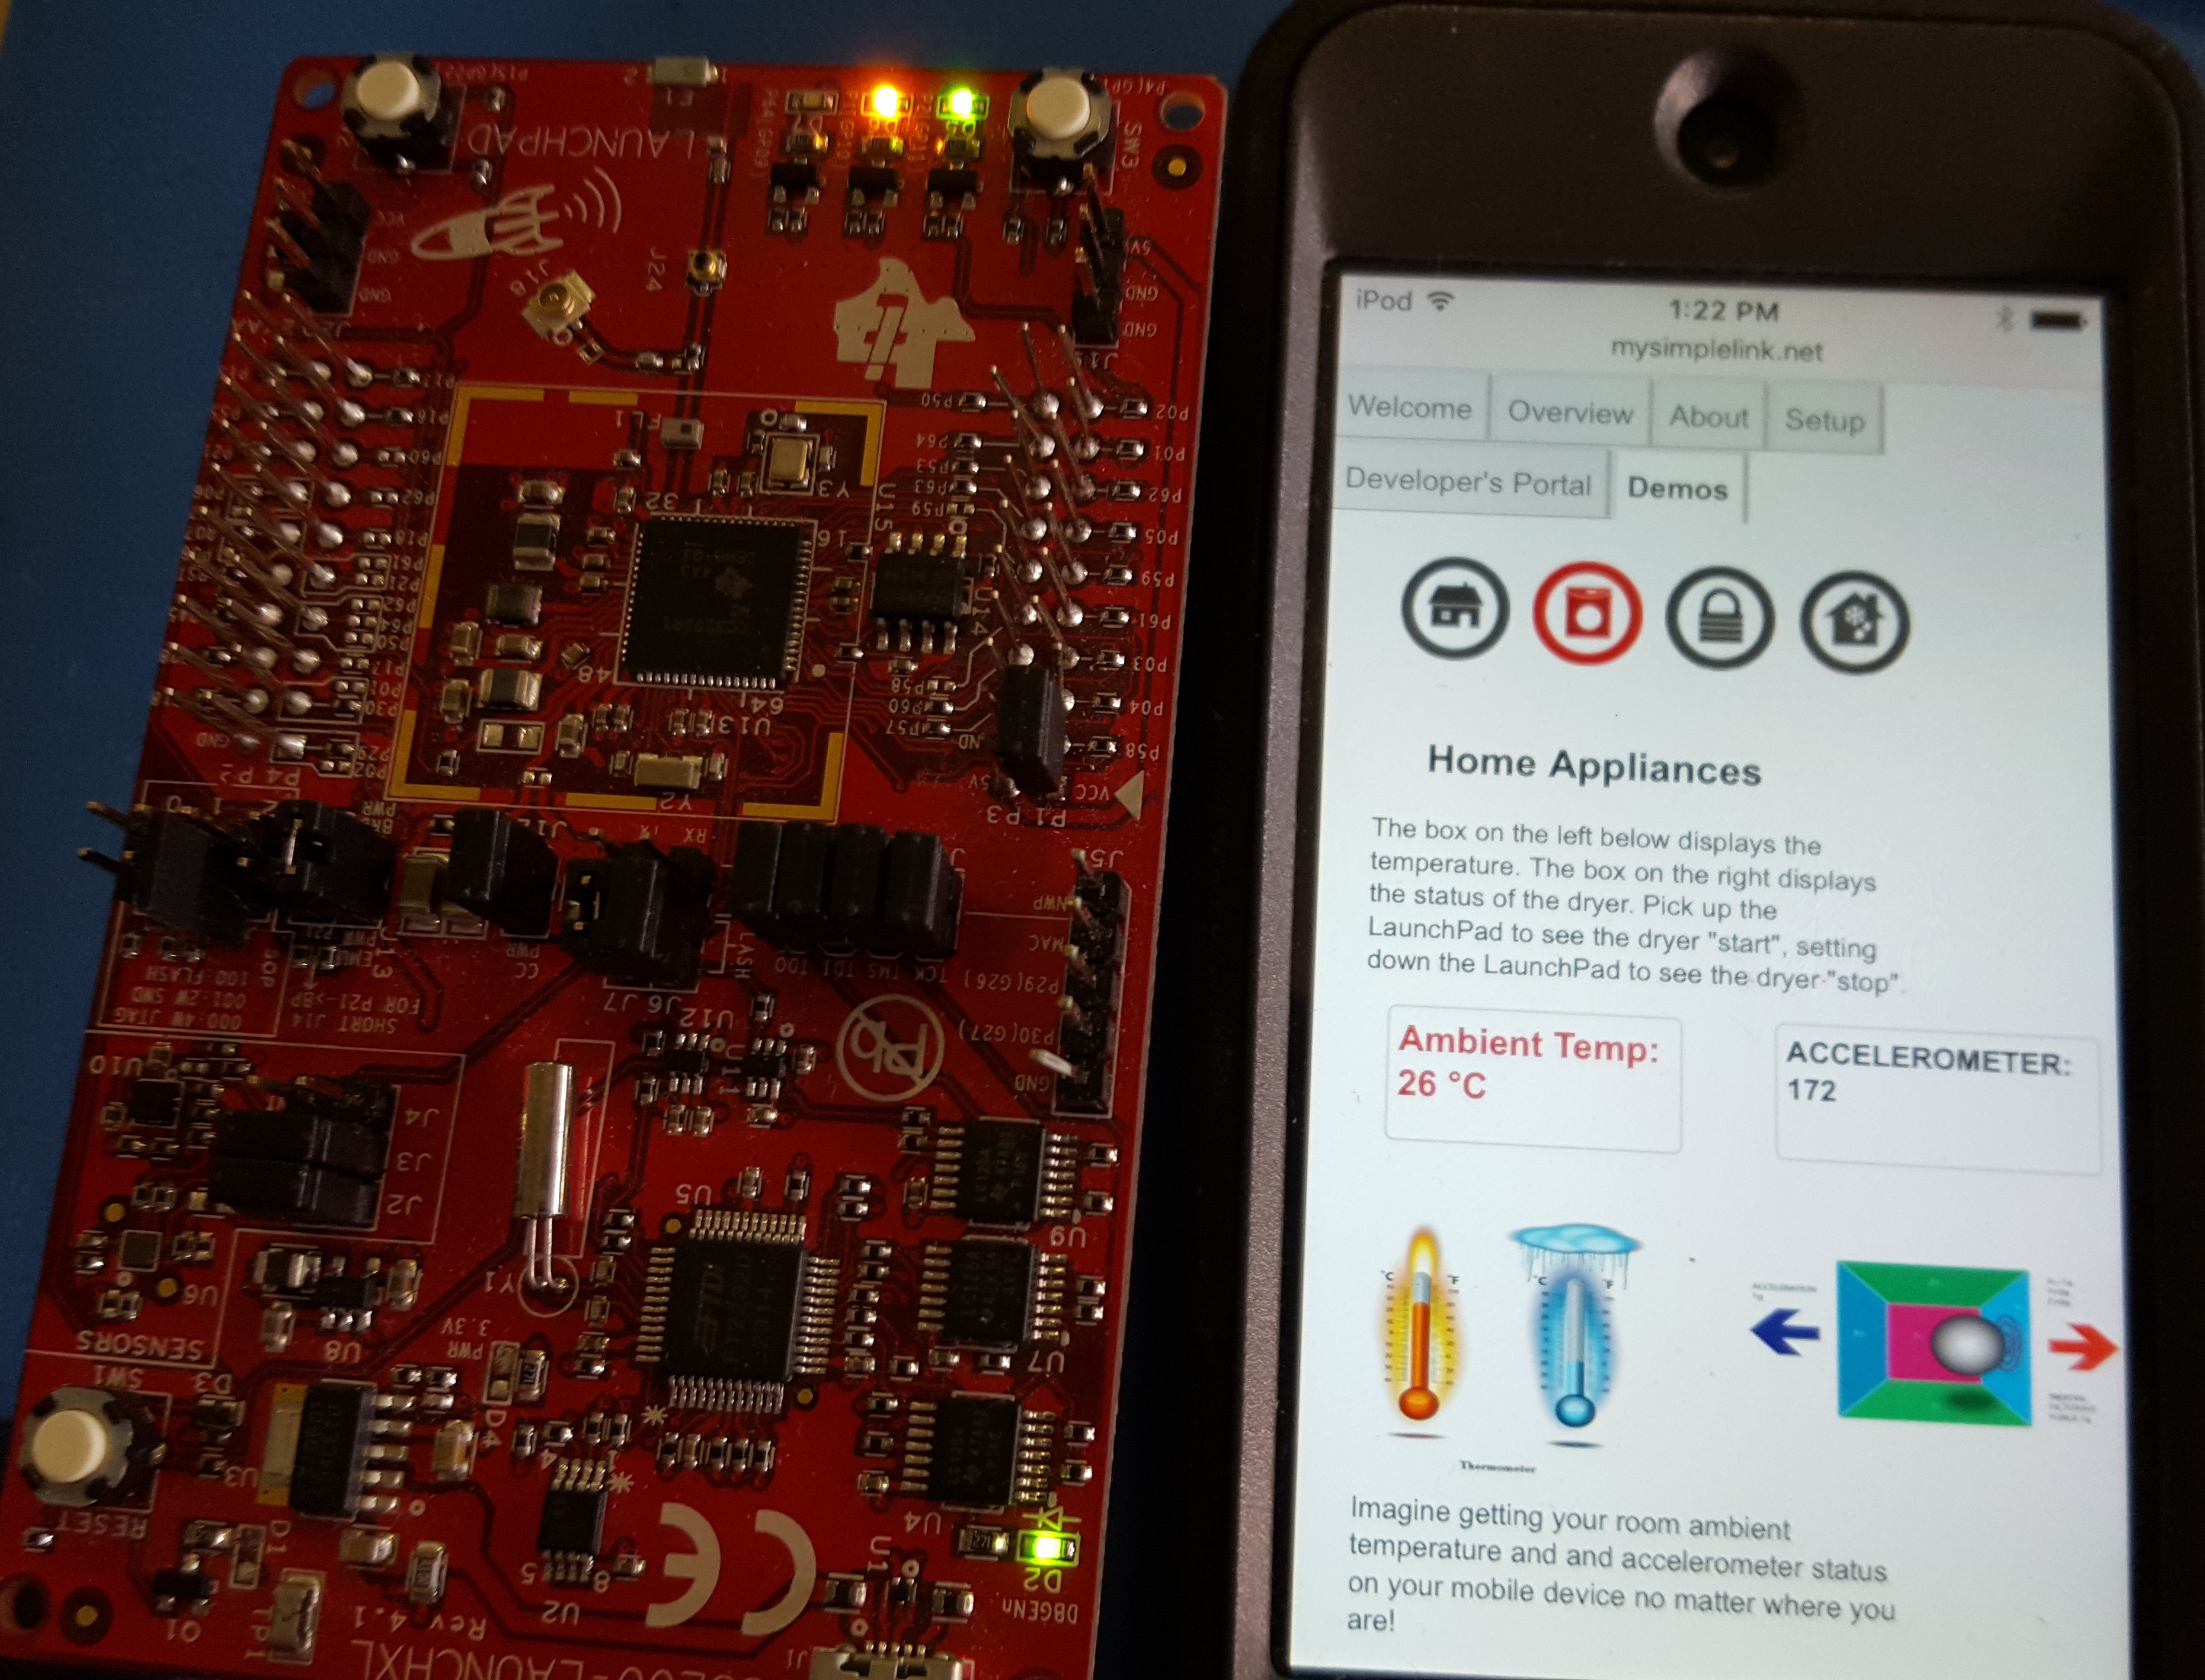
Internet-of-things with CC3200 Dev Board
Internet-of-things with CC3200 development board or my new wireless Thingamajiggy.


 The configuration file name for my Exosite is configRev01.usf.
It has additional images I placed on the site, for example mad.png.
The configuration file name for my Exosite is configRev01.usf.
It has additional images I placed on the site, for example mad.png.
 Once configuration is opened click on Operation -> Add
File. You will get a generic file which you will have to replace with your own.
Once configuration is opened click on Operation -> Add
File. You will get a generic file which you will have to replace with your own.
 Rename the file and point to a file location.
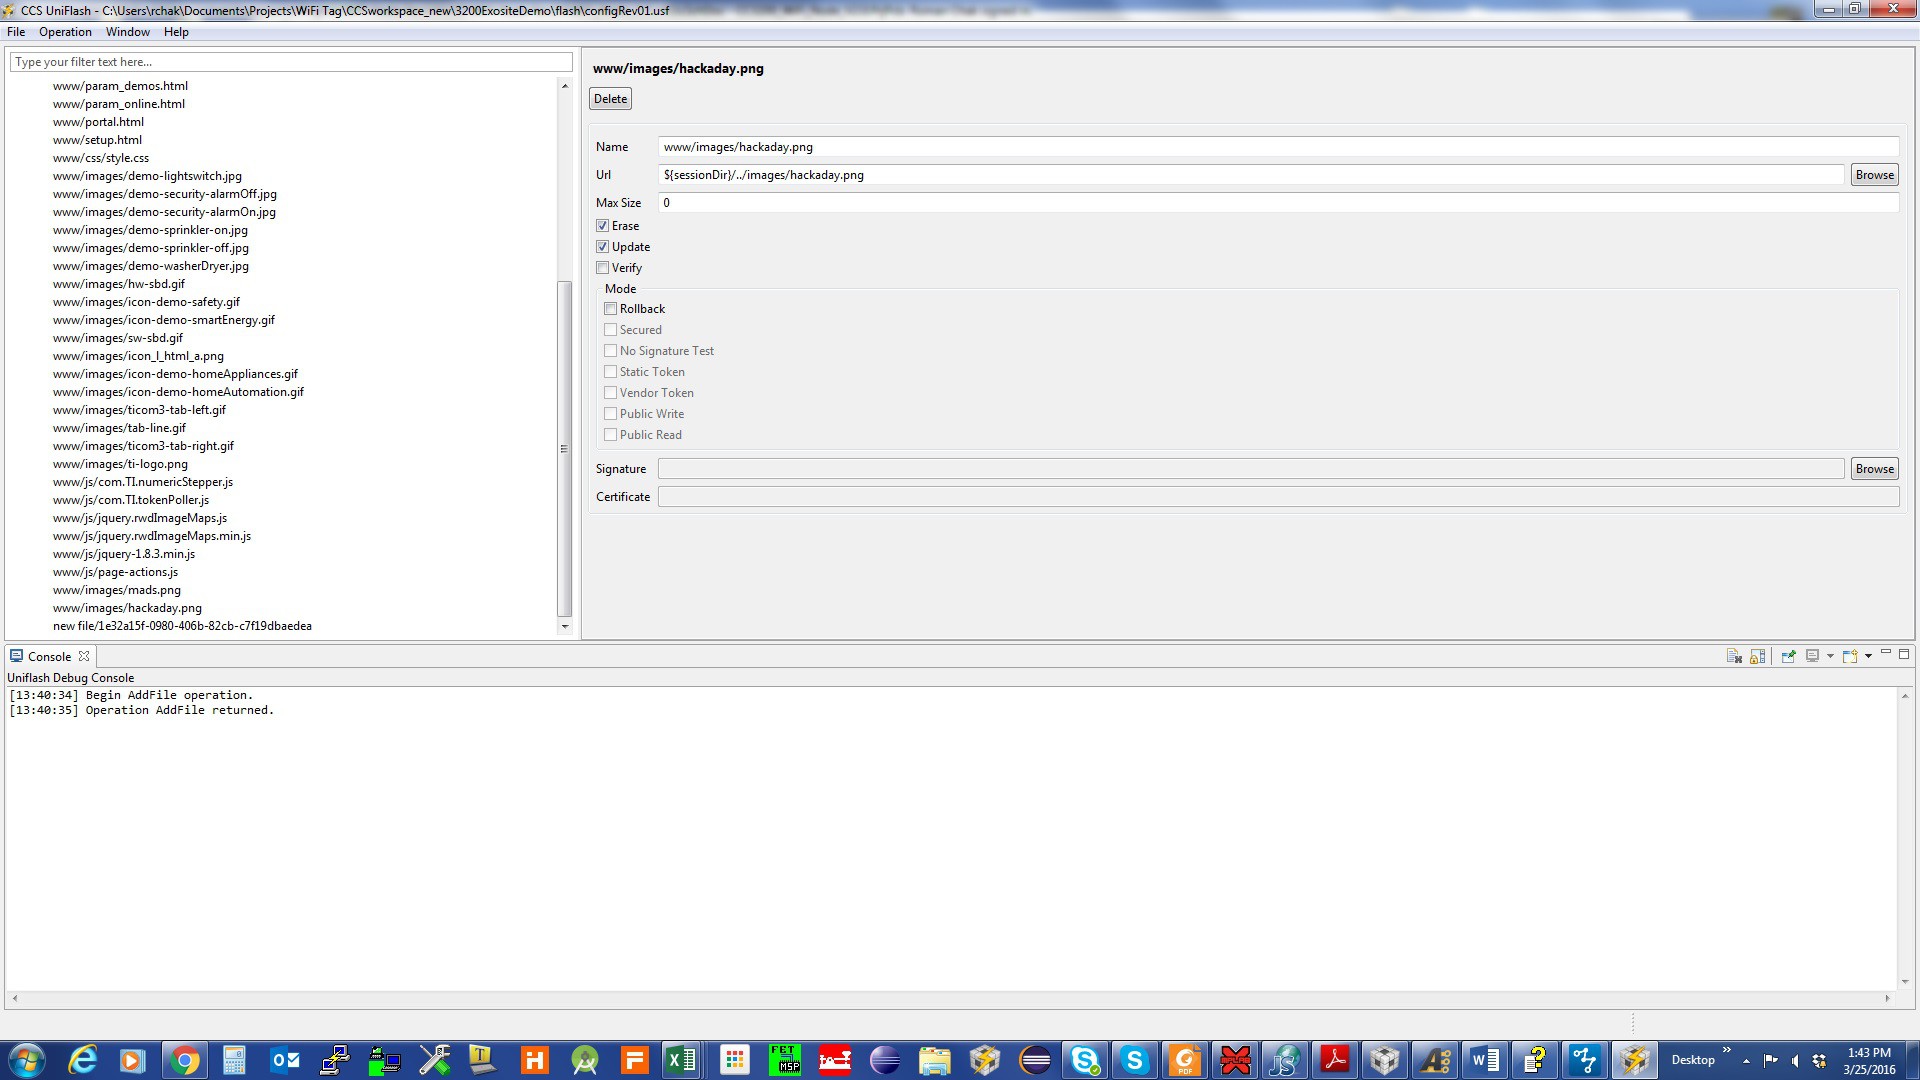
 The site is still working, I haven't broken it yet. You can find the site code in zip format