Close
0%
0%

Suspension 3D Printing

A unique approach to 3D printing that injects curing resin into a gel. The rig is designed to be added to most hackable 3D printers.

Similar projects worth following
A suspension printer is essentially a vat of inert gel and an injection needle on a 3-axis, servo-controlled arm. The needle is moved through the vat as it injects a self-curing resin, silicone, or even plaster. This allows for the deposition of material in pretty much any configuration. The setup can be a modification of an existing fused deposition 3D printer, which is how I intend to prototype the idea.

What I love about this approach is that the possibilities for experimentation seem to be endless. For instance, I imagine that this system could quickly produce some beautiful, alien-looking sculptures through simple conjoined spheres, slow helical motions of the needle, or even just increasing and decreasing the flow rate while moving the needle in a straight line. While I think it will take some time to make a system like this produce prints with good accuracy, I'm excited to try it out and see what it can make.

Problem

By far the most popular 3D printer technology for hackers on the market today is fused deposition modeling (FDM): it's cheap, it's customizable, and the materials are easy to acquire and generally safe to work with. There are several limitations to the design, two of which stick in my mind the most: they only work with thermoplastics, and the deposition of many small layers limits the types of shapes that the printer can make.

The printer technologies that enable a wide range of materials end up being quite expensive and not very hacker-friendly. And technologies that can handle more diverse shapes like STL or SLA require highly specialized materials to work. I think this holds back the 3D printing community. As such I've been searching for a new 3D printer technology that meets all the criteria for the maker/hacker community:

  • Inexpensive
  • Open Source
  • Easy to understand & modify
  • Supports a wide range of materials

Solution

Many formable materials are self-hardening: two-part resins and epoxies, cement, plaster, silicone, etc. However, getting them to keep their shape requires a mold. My idea is to take advantage of shape-retaining nature of many gels to act as a mold as a part is printed, injecting a hardening material into the gel where it will retain its shape until hardened.

This design requires a 3-axis, precision motion arm, common with any FDM 3D printer, enabling the reuse of an already popular and open source technology. The only additional needs are a vat for the gel and a pump/needle mechanism. In the future, the design can include a material-mixing system.

From a software perspective, the majority of tooling created for FDM can also be reused, although it may very well prove to be different enough to warrant new slicing techniques, etc.

Proof of Concept

To prove out the idea, I intend to take a standard fused deposition 3D printer, replace the extruder with a needle head, and place a vat of inert gel on the build plate. Material will be pumped through the needle using a peristaltic pump to provide fine-grained flow control. I've found a great 3D printed implementation of a pump that works with a stepper motor. By rewiring the pump motor to the control board, the 3D printer can drive the pump like it would the extruder head, minimizing/eliminating any major firmware/controller modifications. I've accomplished this before in an attempt to make a 3D printer for clay.

Materials

Materials suitable for injection must have the following properties:

  • Chemical curing process, e.g. thermoset resins
  • Capable of curing in an airless environment
  • Curing times of at least 2-3 minutes

In selecting a material, it's also important to select an appropriate gel medium that won't negatively impact the curing process of the material. For instance, some resins react poorly to moisture and may need an oil-based medium. Other resins are the exact opposite, and would need something water-based or an exotic solution.

So far I've identified four off-the-shelf materials that I think will work nicely for experimentation:

  1. Plaster is cheap and should be relatively versatile. This will probably be the first material I'll try. My major concern is grit blocking the needle. So I'll need to filter the powder with a pretty fine mesh with hole size of a fraction of the needle inner diameter. Since it cures when wet, my initial concern was using a water-based medium, however I think that the plaster will remain cohesive and not leak out into the medium too much.
  2. Portland Cement is also cheap and relatively versatile, but would be even more susceptible to grit issues and will need to be filtered.
  3. Silicone Caulk cures using moisture and would create flexible prints. The down side is that it's pretty thick, so I'll need to investigate ways to thin it. I've heard of mixing water to accelerate hardening - unsure how much water can be added before it negatively impacts the material properties.
  4. Two-part epoxy could provide really solid prints. There's such a wide variety of options...
Read more »

  • 1 × Fused Filament 3D Printer Ideally a very hackable one
  • 1 × Stainless syringe needle approximately .5mm diameter (25G gauge), as long as possible
  • 4 × ft 3/16" OD silicone tubing
  • 1 × 3D printed peristaltic pump http://www.thingiverse.com/thing:454702
  • 1 × Resin reservoir For prototype I won't be implementing a resin mixing system which will limit my working time

View all 7 components

  • On the Kindness of Strangers

    Michael05/26/2016 at 16:02 0 comments

    Hi all,

    Sorry for the delay in updates - for the past month, I've been in the process of selling my home which has significantly hindered my ability to hack.

    I've decided to move to a delta printer for the prototype, but I have a problem: I don't own a delta printer, and considering all my moving about I'm not in a place to buy a bunch of equipment yet. In the next few weeks I'll be settled into my new place with plenty of garage space, but how do I keep moving on my project when I have to keep my current place looking like a showroom? Enter the awesome @Ryan Shill.

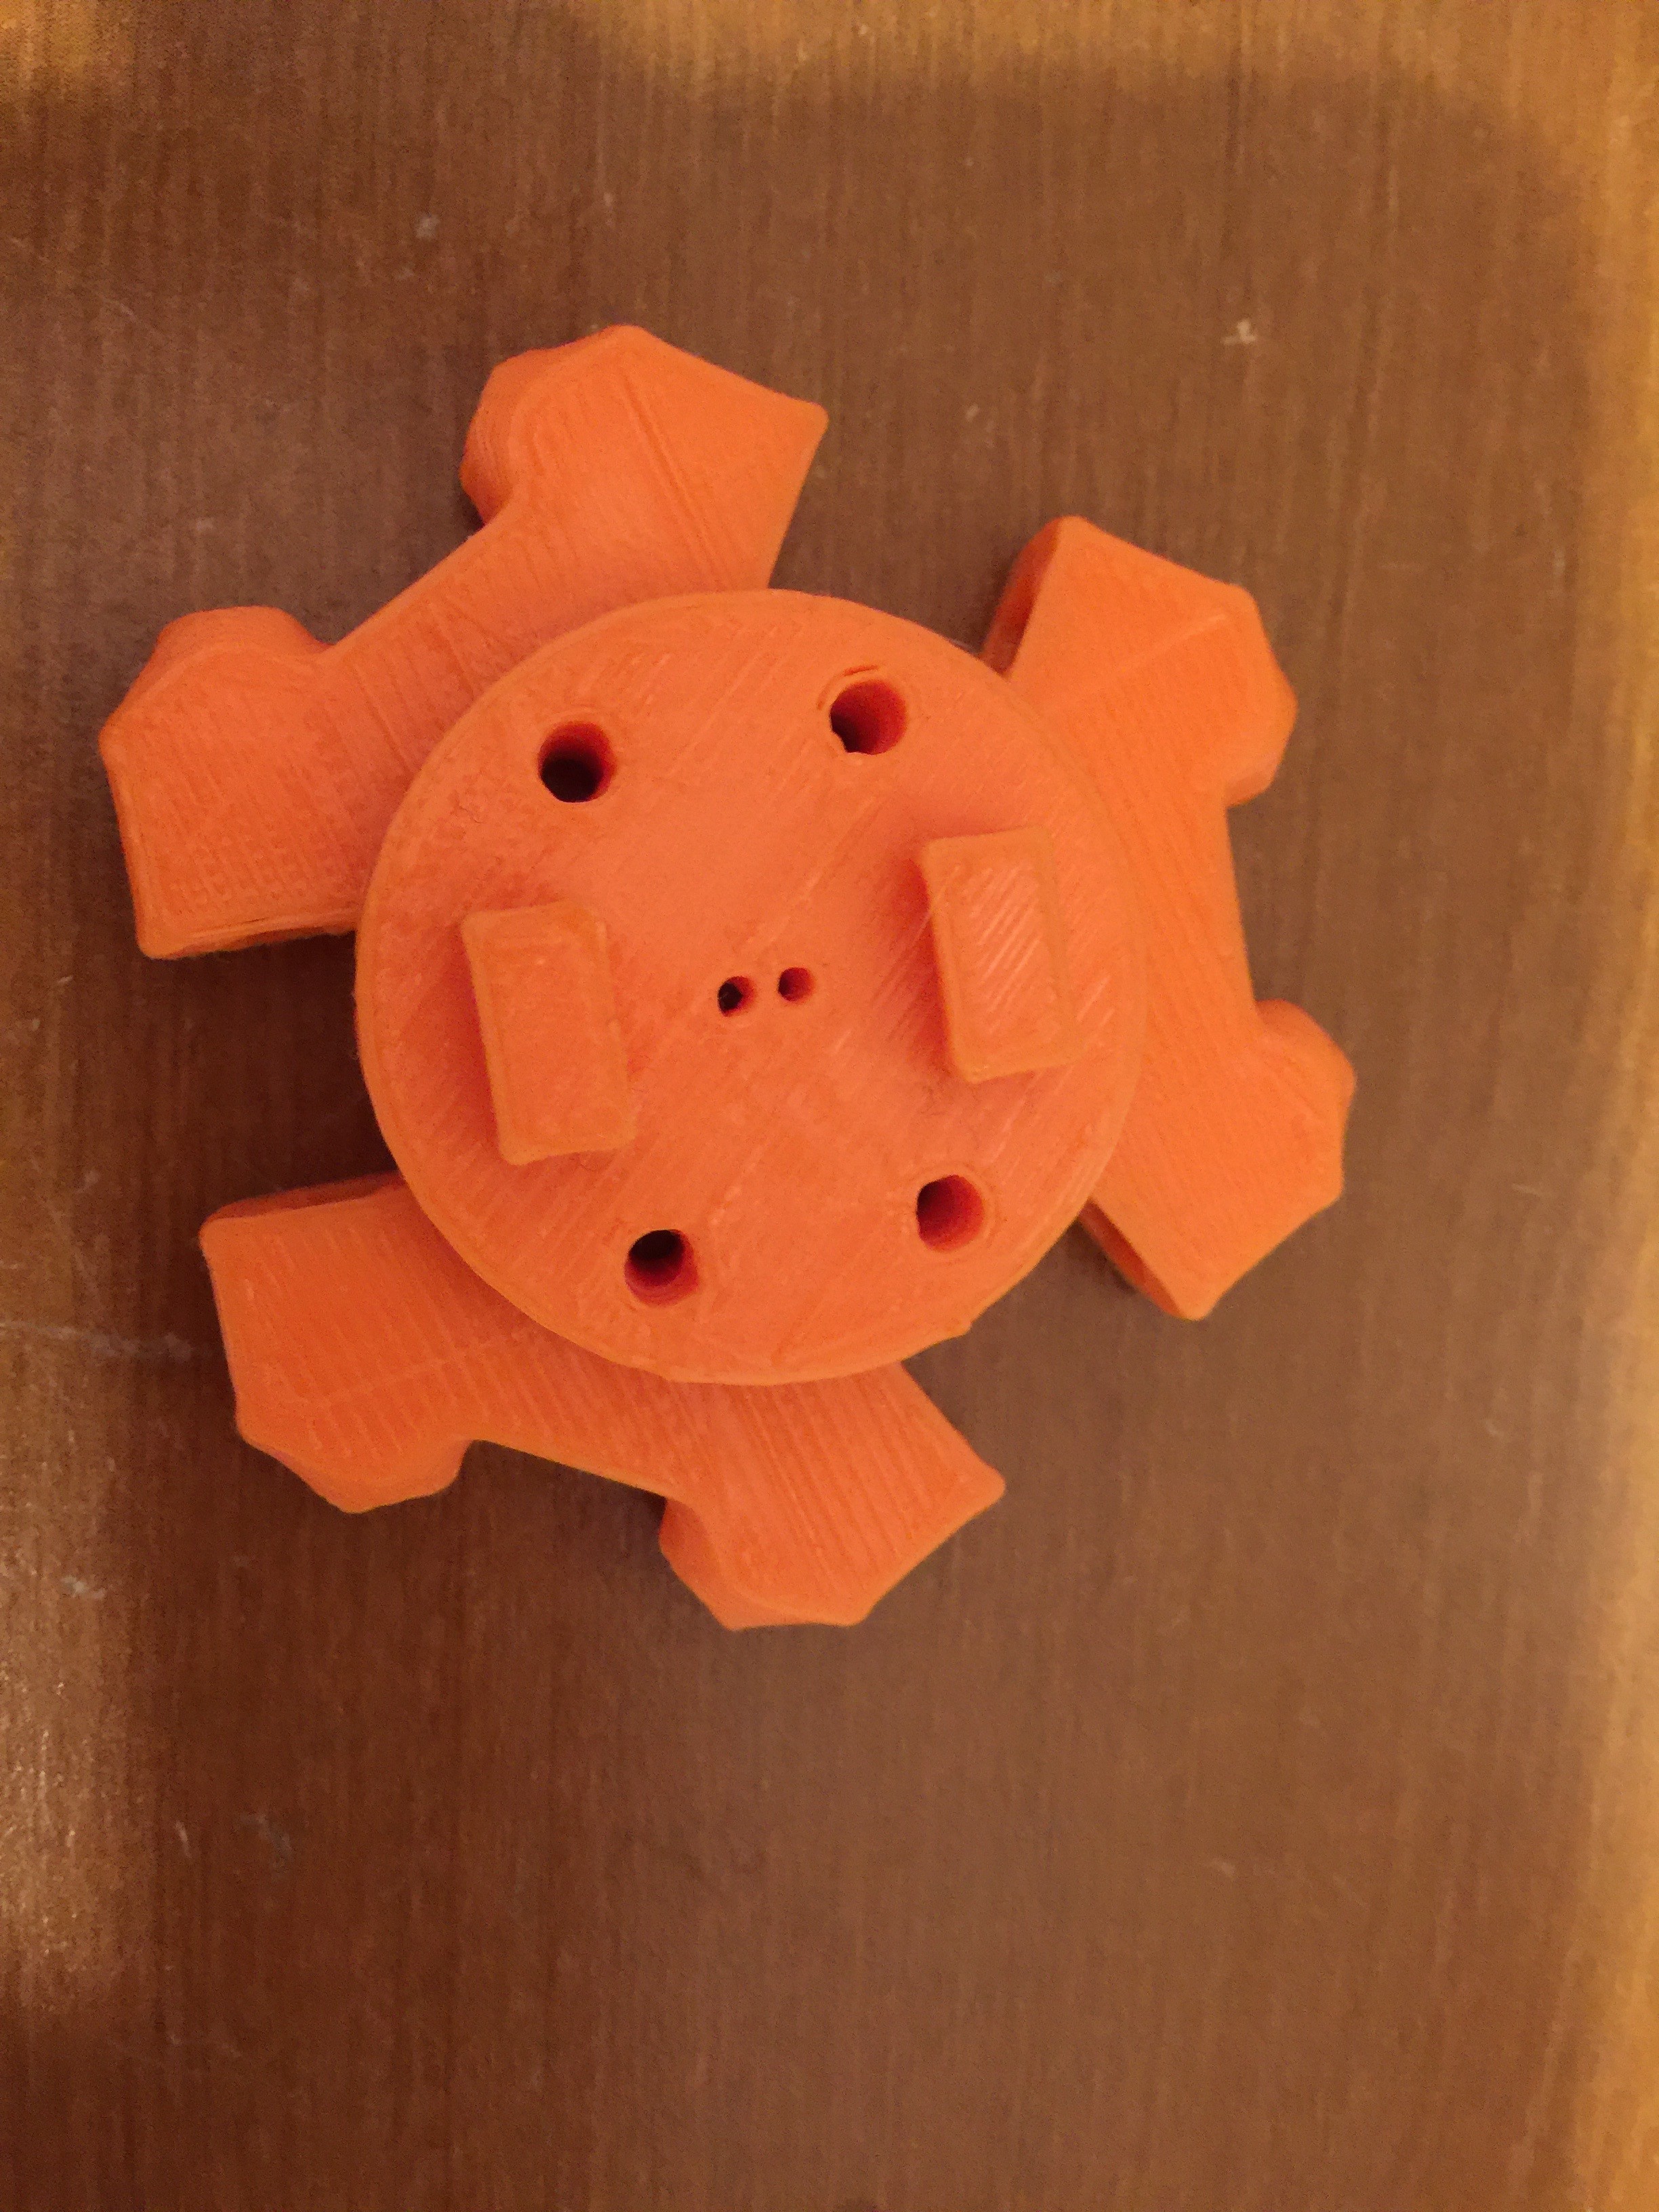
    Ryan generously offered to print my adapter part so I could validate that my design would fit all the correct parts - in particular the silicone tubing and static mixer. Here's the printed part, sitting on top of a printed effector plate he also printed for me to check sizing:

    In trying out the dimensions I've found a number of issues, the biggest being that the hole through the standard effector plate just doesn't give me enough space to fit the silicone tubes I needed. Furthermore, I chose too small of silicone tubing.

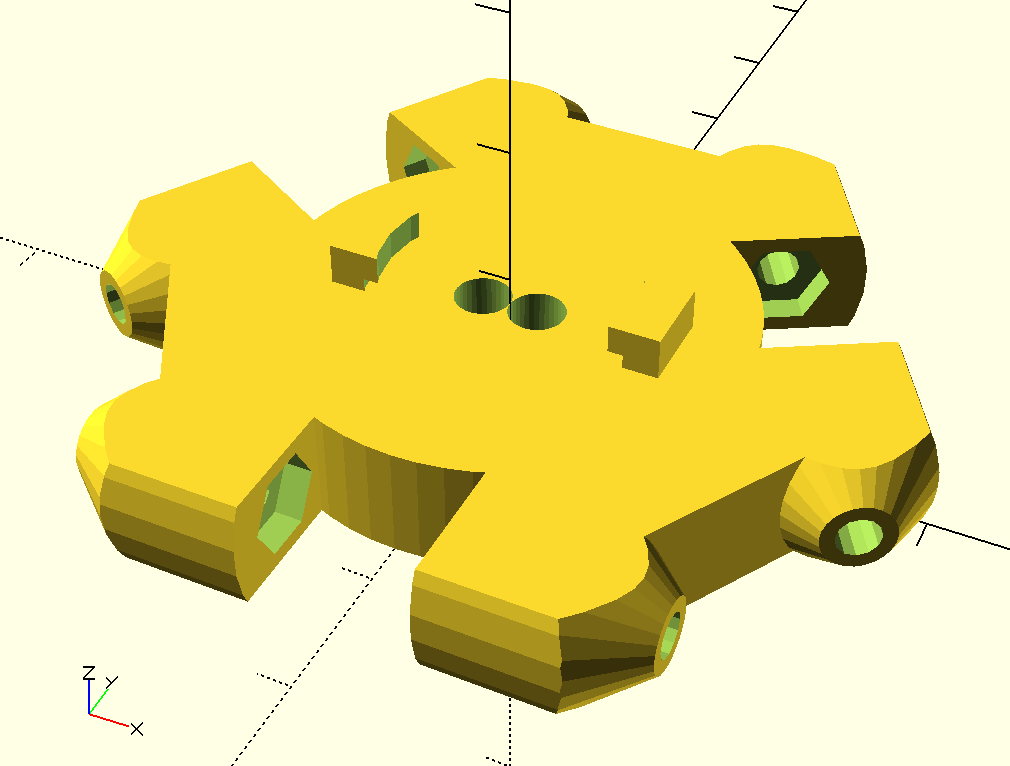
    So I've pulled the original OpenSCAD for the effector plate, and modified it to match the right dimensions for everything, in the effector plate itself. This way to make the printer work as a suspension printer, you need to replace the whole effector plate. This has the advantage that you don't need to disassemble your extruder to modify the printer, so that's a big plus!

    Here's the new part:

    You'll find the modified OpenSCAD file attached to the project.

    Next steps, I will be trying to actually get a printer to modify. I have a clever idea for how to get my hands on one very, very quickly...stay tuned to find out my plan!

  • Mixing & Matching

    Michael04/13/2016 at 04:13 2 comments

    After the experiments with resin, I recognized that the pot time was way to short to mix the material before starting a print. As such, I need an easy setup that will mix the two part resin just before injection.

    Thankfully this is a problem that's been solved multiple times. My favorite solution is the disposable static mixer - particularly these from Loctite as they are cheap and have technical specification diagrams on their website. Thank you Loctite.

    The end of the mixer is a luer slip adapter, so the needles I've been using will slip right on. So then the next challenge is how to get this mixer attached to the 3D printer where the hotend would normally be.

    Thanks to advice from @ear0wax, I recognized that most 3D printers that move the build plate would probably burn out a motor moving around a big vat of gel. As such I've decided the best printer type is a delta printer, particularly the Kossel.

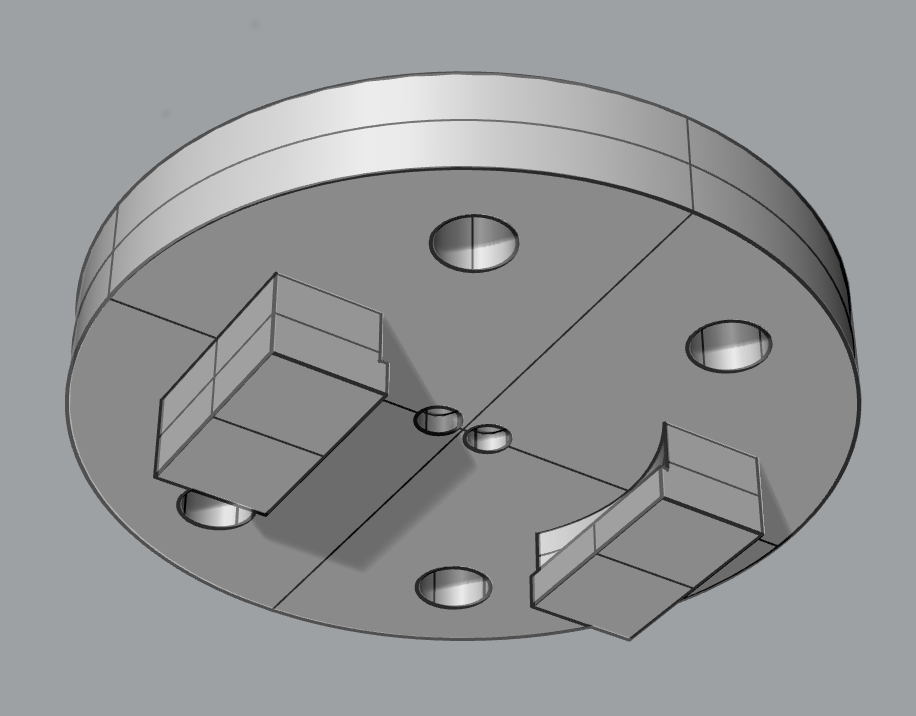
    I've designed an adapter plate that I can easily attach a static mixer to and insert the tubing for the resin parts. Here's the part, which I've included in the files section of the project:

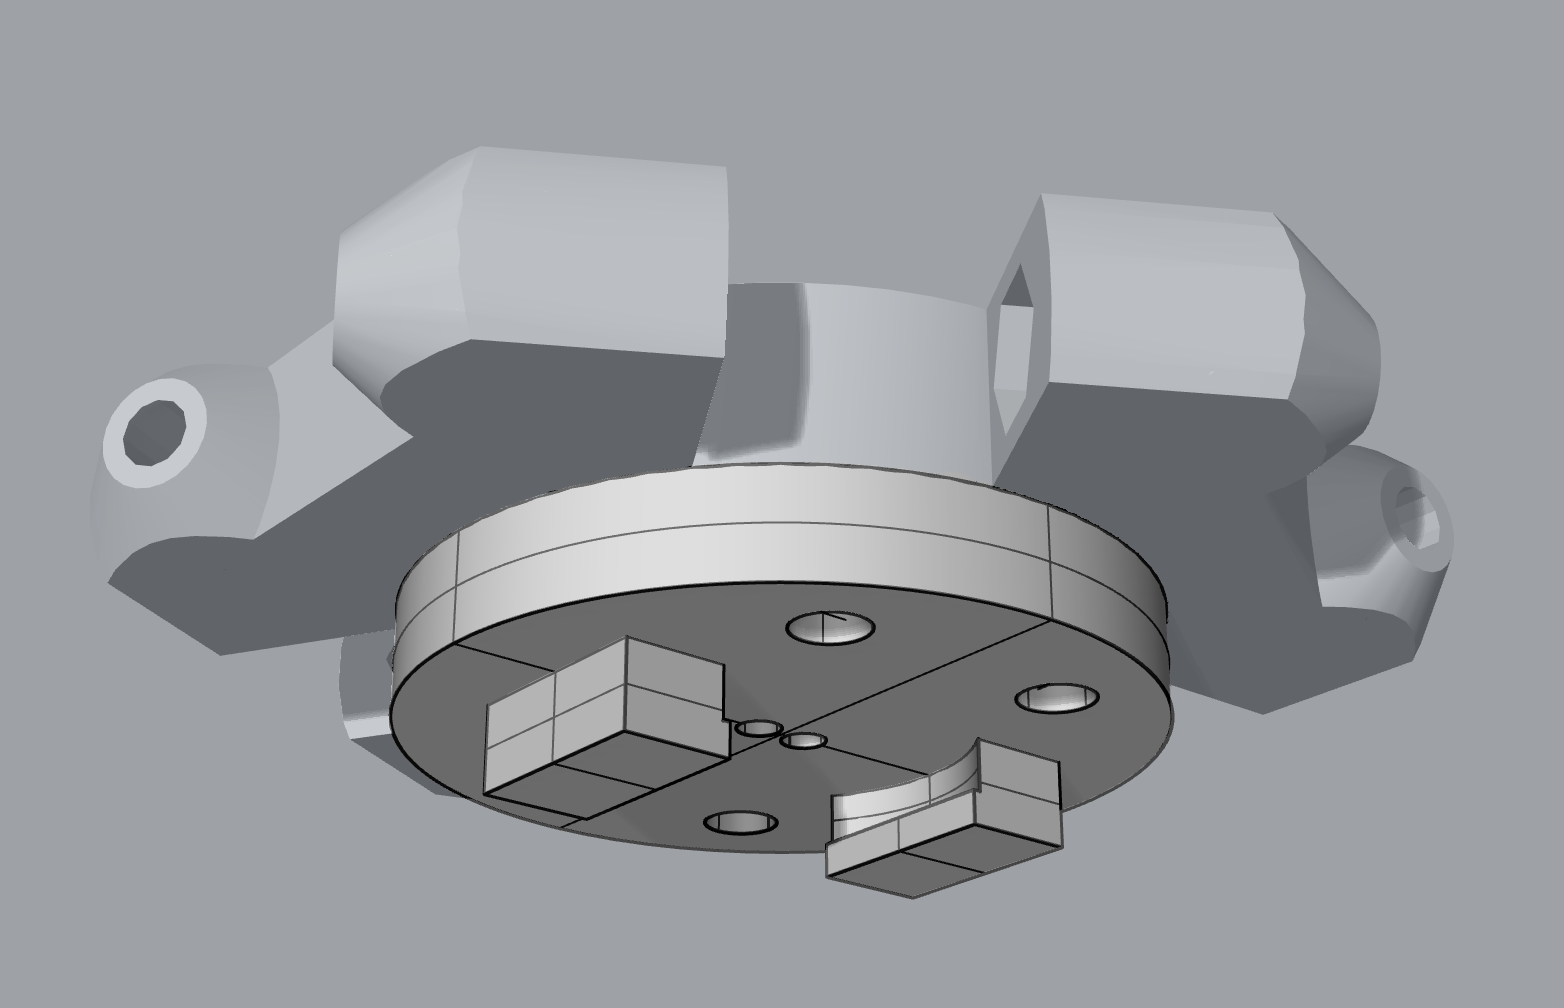
    Here's what it looks like attached to the "effector" - the plate that floats at the vertex of the delta arms:

    Of course I'll need to tweak this thing a bunch to account for 3D print tolerances, etc. That will require getting a Kossel printer, both to make the part and fit the part to the printer. If I'm chosen for any of the early rounds for the Hackaday prize this year, I intend to use the prize money to buy the printer for this stage. Otherwise, I'll need to beg/borrow one. Wish me luck!

  • Weird Science

    Michael03/30/2016 at 15:50 0 comments

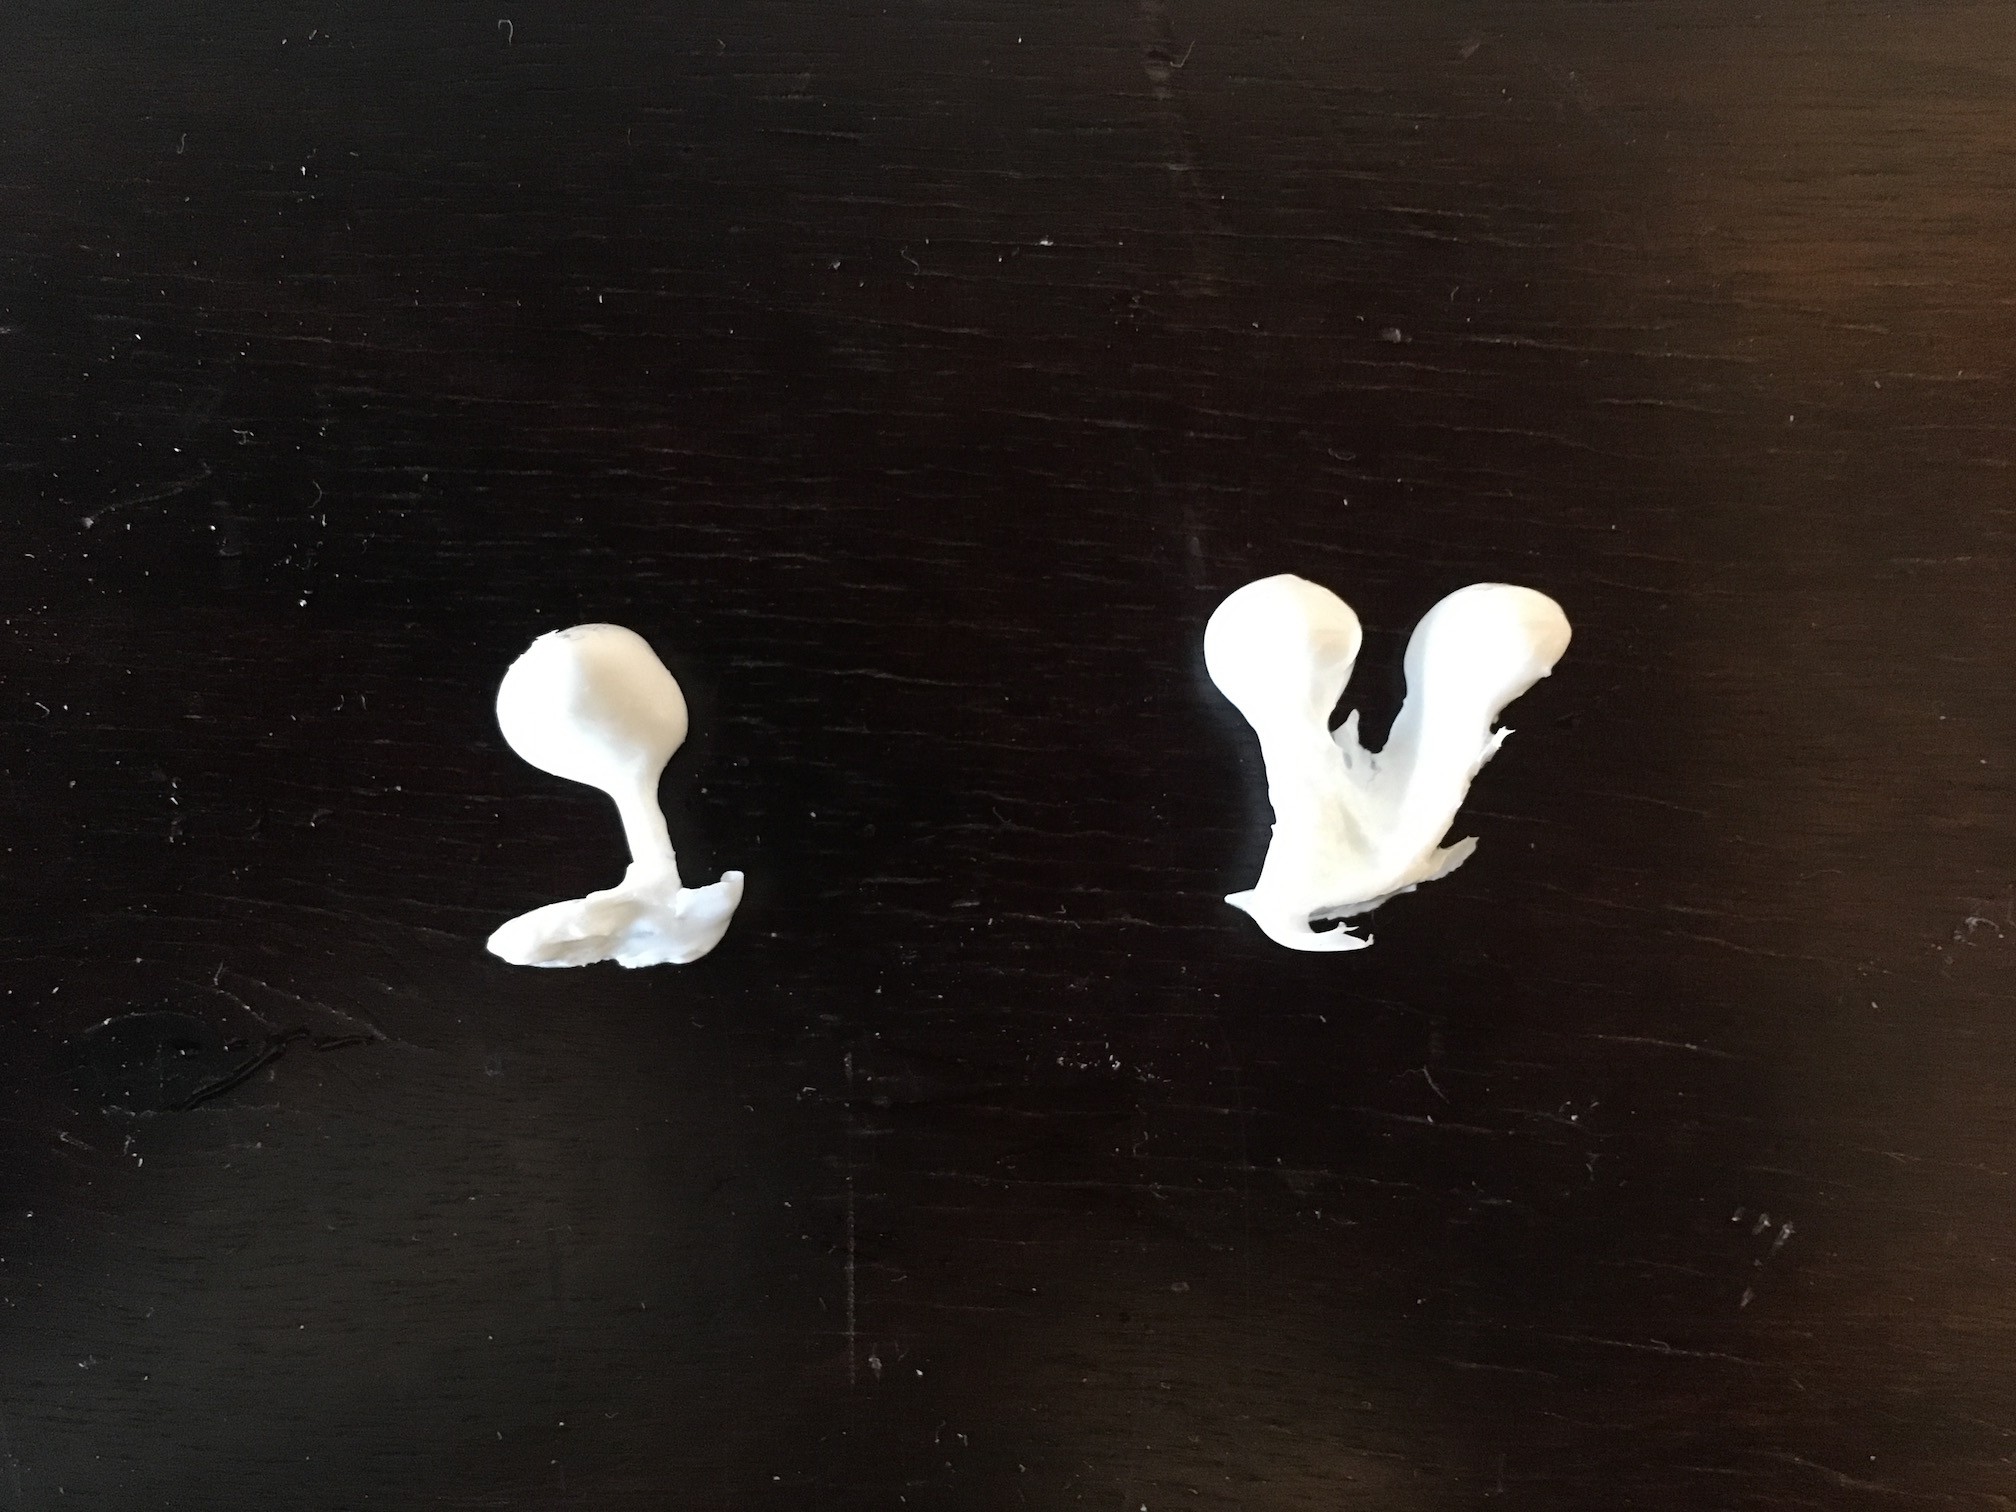
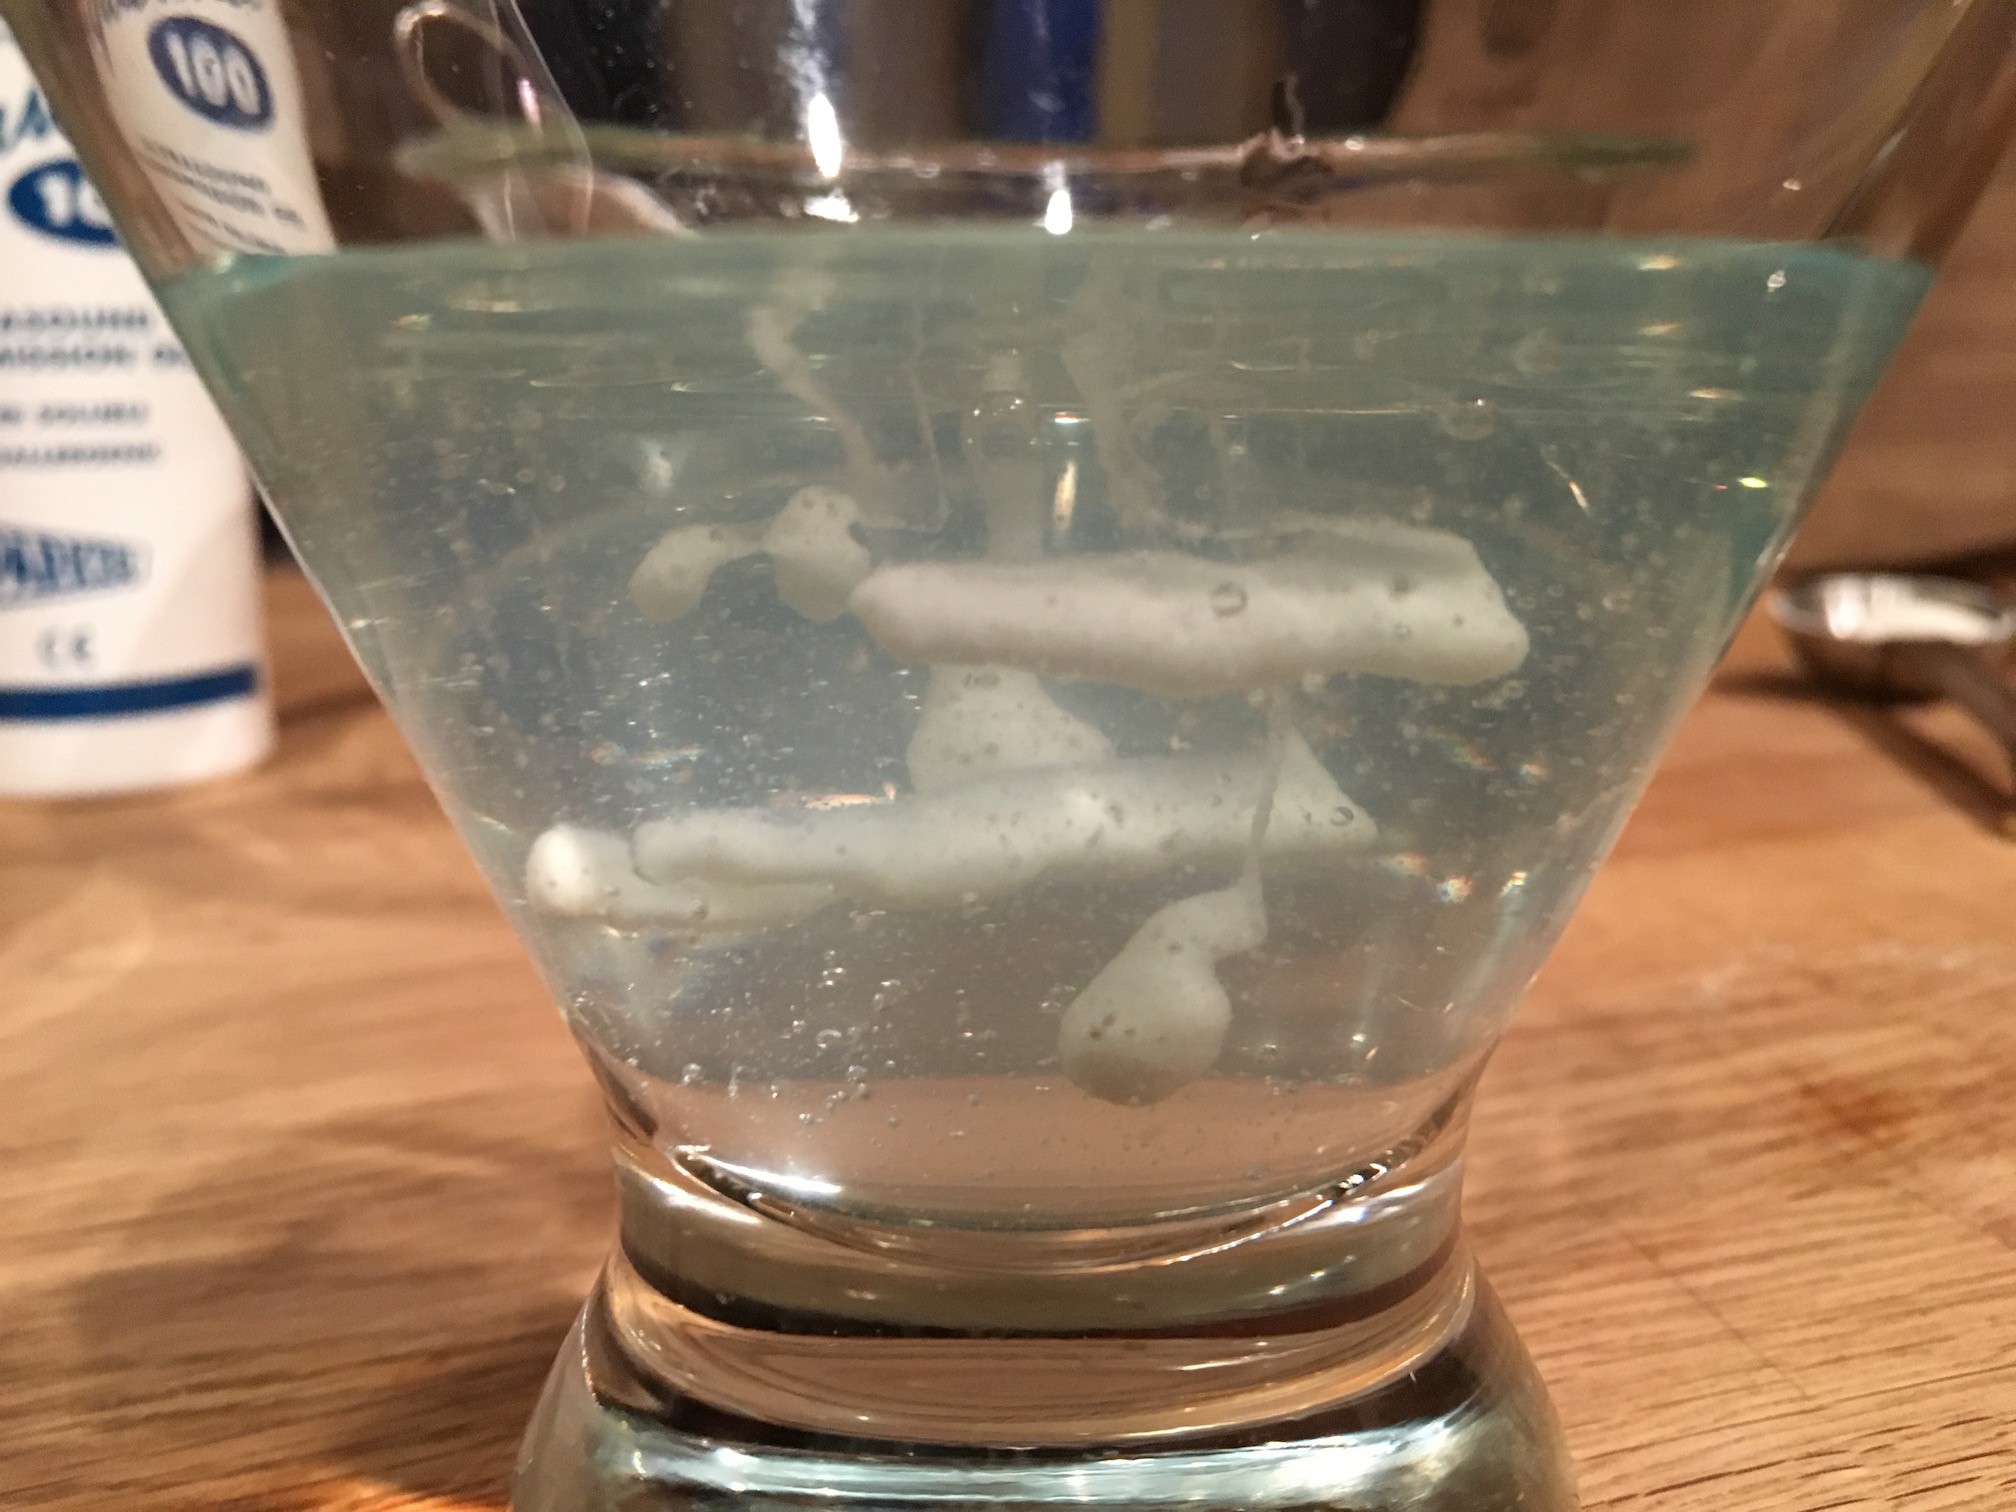
    I just got in the Smooth-on resin and supplies. I tried a few tests to see what kind of issues I'd run into using a resin like this in a water-based gel. I injected mixed resin into a shallow container of gel, mostly to make sure that the combination didn't cause major issues in curing, etc. The results were promising, if a little primitive. Here are some examples of what came out from simple injections:

    The resin cured fine in a water-based gel, considering all the issues I've heard you can have with curing urethane resins in high moisture environments. So that's one issue I don't need to worry about.

    I also found that, for the most part, injecting resin into a gel will allow some extrusion of shapes. That being said, I encountered two big issues I wasn't too thrilled about:

    1. Resin Leaks occurred when I first tried to inject into the gel - the resin would travel up through the hole made by the needle and create a small pool at the surface of the gel.
    2. The Resin Hardened Too Quickly as its pot time is only a few minutes. Those minutes go by fast. I think for future tests I'm going to need a resin with a longer pot time, and for the final proof of concept, I'll need to build something that mixes the resin just as it's going into the gel.

    The resin leak issue was bugging me. The major issue was that the resin was too fluid, and the gel was too viscous. The gel held its shape too well, keeping holes open when it should have filled them in. The resin wanted to flow everywhere.

    So I thought I'd try to test some different materials that I could tweak the viscosity of, to see if there was a balance of material to gel that worked well. The solution was to mix flour and water to act as the material, and whisk the gel with water to make it less viscous. And it worked great.

    Now I could easily inject bubbles, lines, etc. into the gel. It was so much fun to extrude into the gel that I made some GIFs :)

    Next steps are to get some more gel, some materials for thickening the resin, and some plaster. Wish me luck!

  • First Steps

    Michael03/26/2016 at 00:30 1 comment

    Okay Hackaday community, I'm starting some first steps towards the proof of concept. I've ordered a bunch of syringes, a bunch of water-based gel (the kind used for ) and per the recommendation of @Jarrett, some Smooth-on 300 two part resin. The first test will be to hand-inject some mixed resin into the gel to see how the two interact and experiment with shape, movement, flow rate, etc.

    I'm also going to pick up some plaster for testing as well, as I realized that if I can use plaster to print, it could be a great way to make low-temp metal casting molds.

    While I wait for supplies to arrive, I'm doing research into a good 3D printer for this project. So far the best candidate seems to be the Prusa i3 or some variant, and I've mocked that up in the header image. I considered a few other models including delta printers, would love any thoughts you might have on the subject

View all 4 project logs

Enjoy this project?

Share

Discussions

amaury thomas wrote 01/30/2017 at 16:02 point

Great project. I am currently to devellop exaltly the same project with an extruder attach to a robot arm. Would you have any suggestion to get thicker resine and cheap gel ?

  Are you sure? yes | no

willemstaal wrote 05/17/2016 at 11:29 point

Hi Michael how is it doin with your project?  I was thinking about  your setup and suddenly something popped into my head! ;  A independed floating printer!

As you use a gel based system it is possible to make a small computer controlled "boat" that deposits drops into the gel and moves along with a  screw like in a real boat or with a wire.  With this system you dont need a expensive setup,  just a tank and a boat.  The needle must be adjustable in height so enable you to make 3d prints.  

see this very crude illustration: 


  Are you sure? yes | no

Michael wrote 05/27/2016 at 05:28 point

Interesting idea, how would you make sure the boat moved in a calibrated manner?

  Are you sure? yes | no

willemstaal wrote 05/30/2016 at 11:18 point

you could think of a magnetic grid that "parks" the boat steady on regular intervals (smaller  x-y movement will be made from withing the boat untill the grid sector is "filled") 

  Are you sure? yes | no

willemstaal wrote 04/25/2016 at 12:22 point

How thick is that needle? Does it bend when it moving trough the gel?  There could be a precision issue if you use a too flexible needle.  By the way, you could use a modified emulsifying syringe  or similar as mixer.  

  Are you sure? yes | no

Michael wrote 04/25/2016 at 16:59 point

Pretty thick - something like 2mm. It doesn't flex at all in the gel, although I do want to use a smaller needle eventually. As I found in my previous tests, the gel needs to be pretty low in viscosity, something like the consistency of ketchup, so my hope is moving to a thinner needle won't cause issues. Only way to know is to test it!

Thanks for the lead on emulsifying needles, I'm looking into them right now. They look like they're designed for mixing fixed amounts of liquid, not continuous flow...am I missing something about the design?

  Are you sure? yes | no

willemstaal wrote 04/26/2016 at 10:15 point

As you can see these syringes uses a occilating pumping motion to mix the compounds. You are not bound to the design, they can be parralel to each other, you only need a small emulsion chamber to mix. The movement can be achieved with a sort of crankshaft . The amount of mixed compund there is in the chamber will achieve  enoegh pressure to push it out into the gel needle. 

  Are you sure? yes | no

cr0sh wrote 04/19/2016 at 17:47 point

What I like most about this project, regardless of whether or not it works in the end, is the "thinking outside the box" (or maybe, "inside a box of gel"). 

You seem to have identified many or most of the major challenges you'll face, you're using mostly off-the-shelf tech that many 3D printer users already have (the printer, the software, etc), and you seem to have a handle on your experimental approach. 

I look forward to seeing where this project leads. If nothing else, you've perhaps have inspired others to experiment as well, which can also lead to a solution.

  Are you sure? yes | no

Michael wrote 04/20/2016 at 18:23 point

I surely hope that it works! Stay tuned to see if this ends up a terrible success or a fantastic failure...either way, a huge part of this project will be to get some knowledge for others to build on.

  Are you sure? yes | no

willemstaal wrote 04/19/2016 at 08:16 point

As 3D printing is setteling into the mainstream, its obvious that
people try to make a business with it. There is a major catch that
prevents starting companies to ear some decent cash with this
technology: Its way too slow and cumbersome to produce a fair amount of
products for a low price (there are fast printers but they re designed
as "Ferraris" and they have a similar pricetag attached to it).Theres
also the cost of the consumables and logistic.

 
So i designed a new type of printer that might solve both issues.
A mass produce printer that can be build with simple ready available
parts that enables companies to print hundreds of objects in the same
time as a conventional printer.
 
This printer is also designed to make use of a plastic granulate
hopper system  in stead of pre-made filaments. (granulates are 50 times
more cheaper in use than extruded wires, and they can be mixed with
recycled material)
A new development i designed for it, is a software routinei baptised bunnyhop! 

This enables 3D printers to print huge objects with the same configuration.

The system is in fact designed to use recycled print waste material
so you can refeed misprints and print waste into the machine as well,
theres is also a build in polisher.
 
This machine can be quickly converted into a food printer and can be
used mobile as well. (and be able to print at the spot in a medium size
van, close to a building site perhaps, so no logistic or wrapping
issues)
Its a swiss army type of machine that can be used as mass produce
machine or as single print machine that can be used for printing objects
the size of a fridge.
 
So in general im designing a truck rather than a "Ferrari"!

 Your approach is compatible with my system too, so i look forward to the development  of your system. 

  Are you sure? yes | no

Michael wrote 04/21/2016 at 04:03 point

Love the idea of a mass producing printer. I don't know if my design would work if you're setup uses thermoplastics. Suspension printing, at least as I've conceived of it here, only works with materials that undergo a chemical curing process. You should make a Hackaday prize entry!

  Are you sure? yes | no

willemstaal wrote 04/25/2016 at 11:45 point

The setup is designed to be flexible. That includes food, metal, plastics, and suspension printing.  The overall design of my system is not depending on the presentation of any material. In fact, your system is easy adaptable!

I would love to make a entry for the Hackaday Prize, but that might compromise patents, and that prize wil be a lot bigger in the end.  My prototype at the moment is a candy machine, it need a few more tweaks, but it works! (need to visit my dentist now,  im afraid)

Now i need a few BIG investers so i can build a sellable product.

  Are you sure? yes | no

DeepSOIC wrote 04/11/2016 at 19:33 point

And one more thing. The first thing I thought of when exploring your project, that you are injecting hardener into a bath of epoxy with a needle =)

  Are you sure? yes | no

Michael wrote 04/11/2016 at 22:03 point

I tried to use the term "inert" in a bunch of places to make this clearer - was there somewhere in particular it seemed like the gel was hardener?

  Are you sure? yes | no

willemstaal wrote 04/27/2016 at 09:45 point

maybe its the gel that needs to be tackled first. Why not mix it with a solution that hardens the droplets of resin?

  Are you sure? yes | no

Michael wrote 04/11/2016 at 22:04 point

Oh, and thanks for the like!!

  Are you sure? yes | no

DeepSOIC wrote 04/11/2016 at 19:31 point

Cool idea.

Hm, what if I try FDM underwater? except... it will boil....

  Are you sure? yes | no

Michael wrote 04/11/2016 at 22:02 point

As a way to cool the plastic faster? I think yes, the water would warm up/boil around the hot end and keep it from getting up to temp...

  Are you sure? yes | no

DIGI wrote 03/30/2016 at 02:08 point

where is the research? how about you go to google and research UV 3D printer.
they come in many forms and they all use UV sensitive light to harden a resin and prints upside down with almost infinite quality resolution, something your product would never achieve with its limited CnC design. even if somehow your resin idea works, which it won't. mixing epoxy is not the same as boiling an egg.

  Are you sure? yes | no

Jarrett wrote 03/30/2016 at 03:12 point

Wtf. That's a totally different technology, with totally different drawbacks. There's no such thing as "infinite quality"

  Are you sure? yes | no

DIGI wrote 03/30/2016 at 03:18 point

and you realize the drawbacks of your own design? and how your product is a waste of space/resources.
not to mention the lack of any control over the fluid which would result in a noodle mess.

what I linked is your concept in a working practical design, and executed in a superior functionality.
and infinite quality because its only limitation is light waves.
your limitation in quality is the thickness of the paste being extruded into a pool.

  Are you sure? yes | no

Jarrett wrote 03/30/2016 at 03:45 point

Pretty angry about something you don't understand lol

  Are you sure? yes | no

MECHANICUS wrote 03/30/2016 at 10:41 point

He is mad no-one likes his projects quick skull him and leave a nice comment so he stops trolling.

  Are you sure? yes | no

zakqwy wrote 03/30/2016 at 12:59 point

INFINITE QUALITYYYYYY

  Are you sure? yes | no

Michael wrote 03/30/2016 at 05:05 point

Hi Dean,

I'm quite interested in UV-based 3D printers, and I'm really excited that there's recently been a huge number of printers that use this technology in the market that make it affordable for the 3D printing enthusiast. They're great! That's one solution of several in the world of 3D printing. I want to see if there's another one! That's going to take a lot of research and exploration, mistakes, etc. and I'm really excited to be the researcher/explorer/mistake-maker. 

My research started today as I just completed some initial tests using polyurethane resin, which I plan to post shortly. The process was a mess, but it confirmed that some amount of shape can be held by the resin as it cures. Nothing I build is going to get the resolution of a UV-based 3D printer, but the idea could lead, eventually, to somebody building one that does better than a UV printer in some other way.

  Are you sure? yes | no

ear0wax wrote 03/26/2016 at 02:05 point

I would use a CoreXY/Hbot/Ultimaker style printer, moving a huge vat around on a Prusa bed is not viable.

  Are you sure? yes | no

Michael wrote 03/26/2016 at 15:36 point

Good call. Have any experience with Rostock/delta printers in general? Any reason you would think to go with these other styles over delta configurations?

  Are you sure? yes | no

Jarrett wrote 03/22/2016 at 20:42 point

I'm excited about this, I think it's a great idea.

I'm not you, so feel free to ignore me, but I would try resin first. They can come in really watery consistencies and 1L or larger tins, which seems ideal for initial tests. And you can use the clear compound in the tank, with some dye mixed with the second part in the needle, so you can tune in your extrusion easily.

More expensive than plaster for sure, though.

  Are you sure? yes | no

Michael wrote 03/22/2016 at 20:56 point

Thanks Jarrett! I didn't write this up in my notes but one concern around resins was degassing. However now I'm looking at Smooth-Cast 300 which claims no degassing is necessary! Have you used it? Would there be other resins you'd recommend?

  Are you sure? yes | no

Jarrett wrote 03/22/2016 at 22:05 point

Dude at my hackspace uses Smoothcast 300. Given the low viscosity, and assuming there will always be _some_ offgassing, would it make a difference? Bubbles would (may) quickly rise to the top without interfering. Maybe. I have no idea what I'm talking about!

  Are you sure? yes | no

Jarrett wrote 03/22/2016 at 22:36 point

> [3:33] you've got to mix it, just squirting some part b in a isn't going to mix it very well

> [3:33] plus it's really picky about moisture, having a vat of part A is going to spoil within a day

> [3:34] I left a bottle open overnight and it was  full of chunkies

FYI with the resin

  Are you sure? yes | no

Michael wrote 03/22/2016 at 22:52 point

Awesome info, thanks! I'll grab a small amount and run some tests with the rest of the materials on my list.

  Are you sure? yes | no

Similar Projects

Does this project spark your interest?

Become a member to follow this project and never miss any updates