-
1Step 1
Important note: There s a full build instruction document which is updated often is stored in the GitHub Repository HERE. Always refer to it if you are looking to assemble your own EduCase. Instructions here will not be maintained as often.
![]()
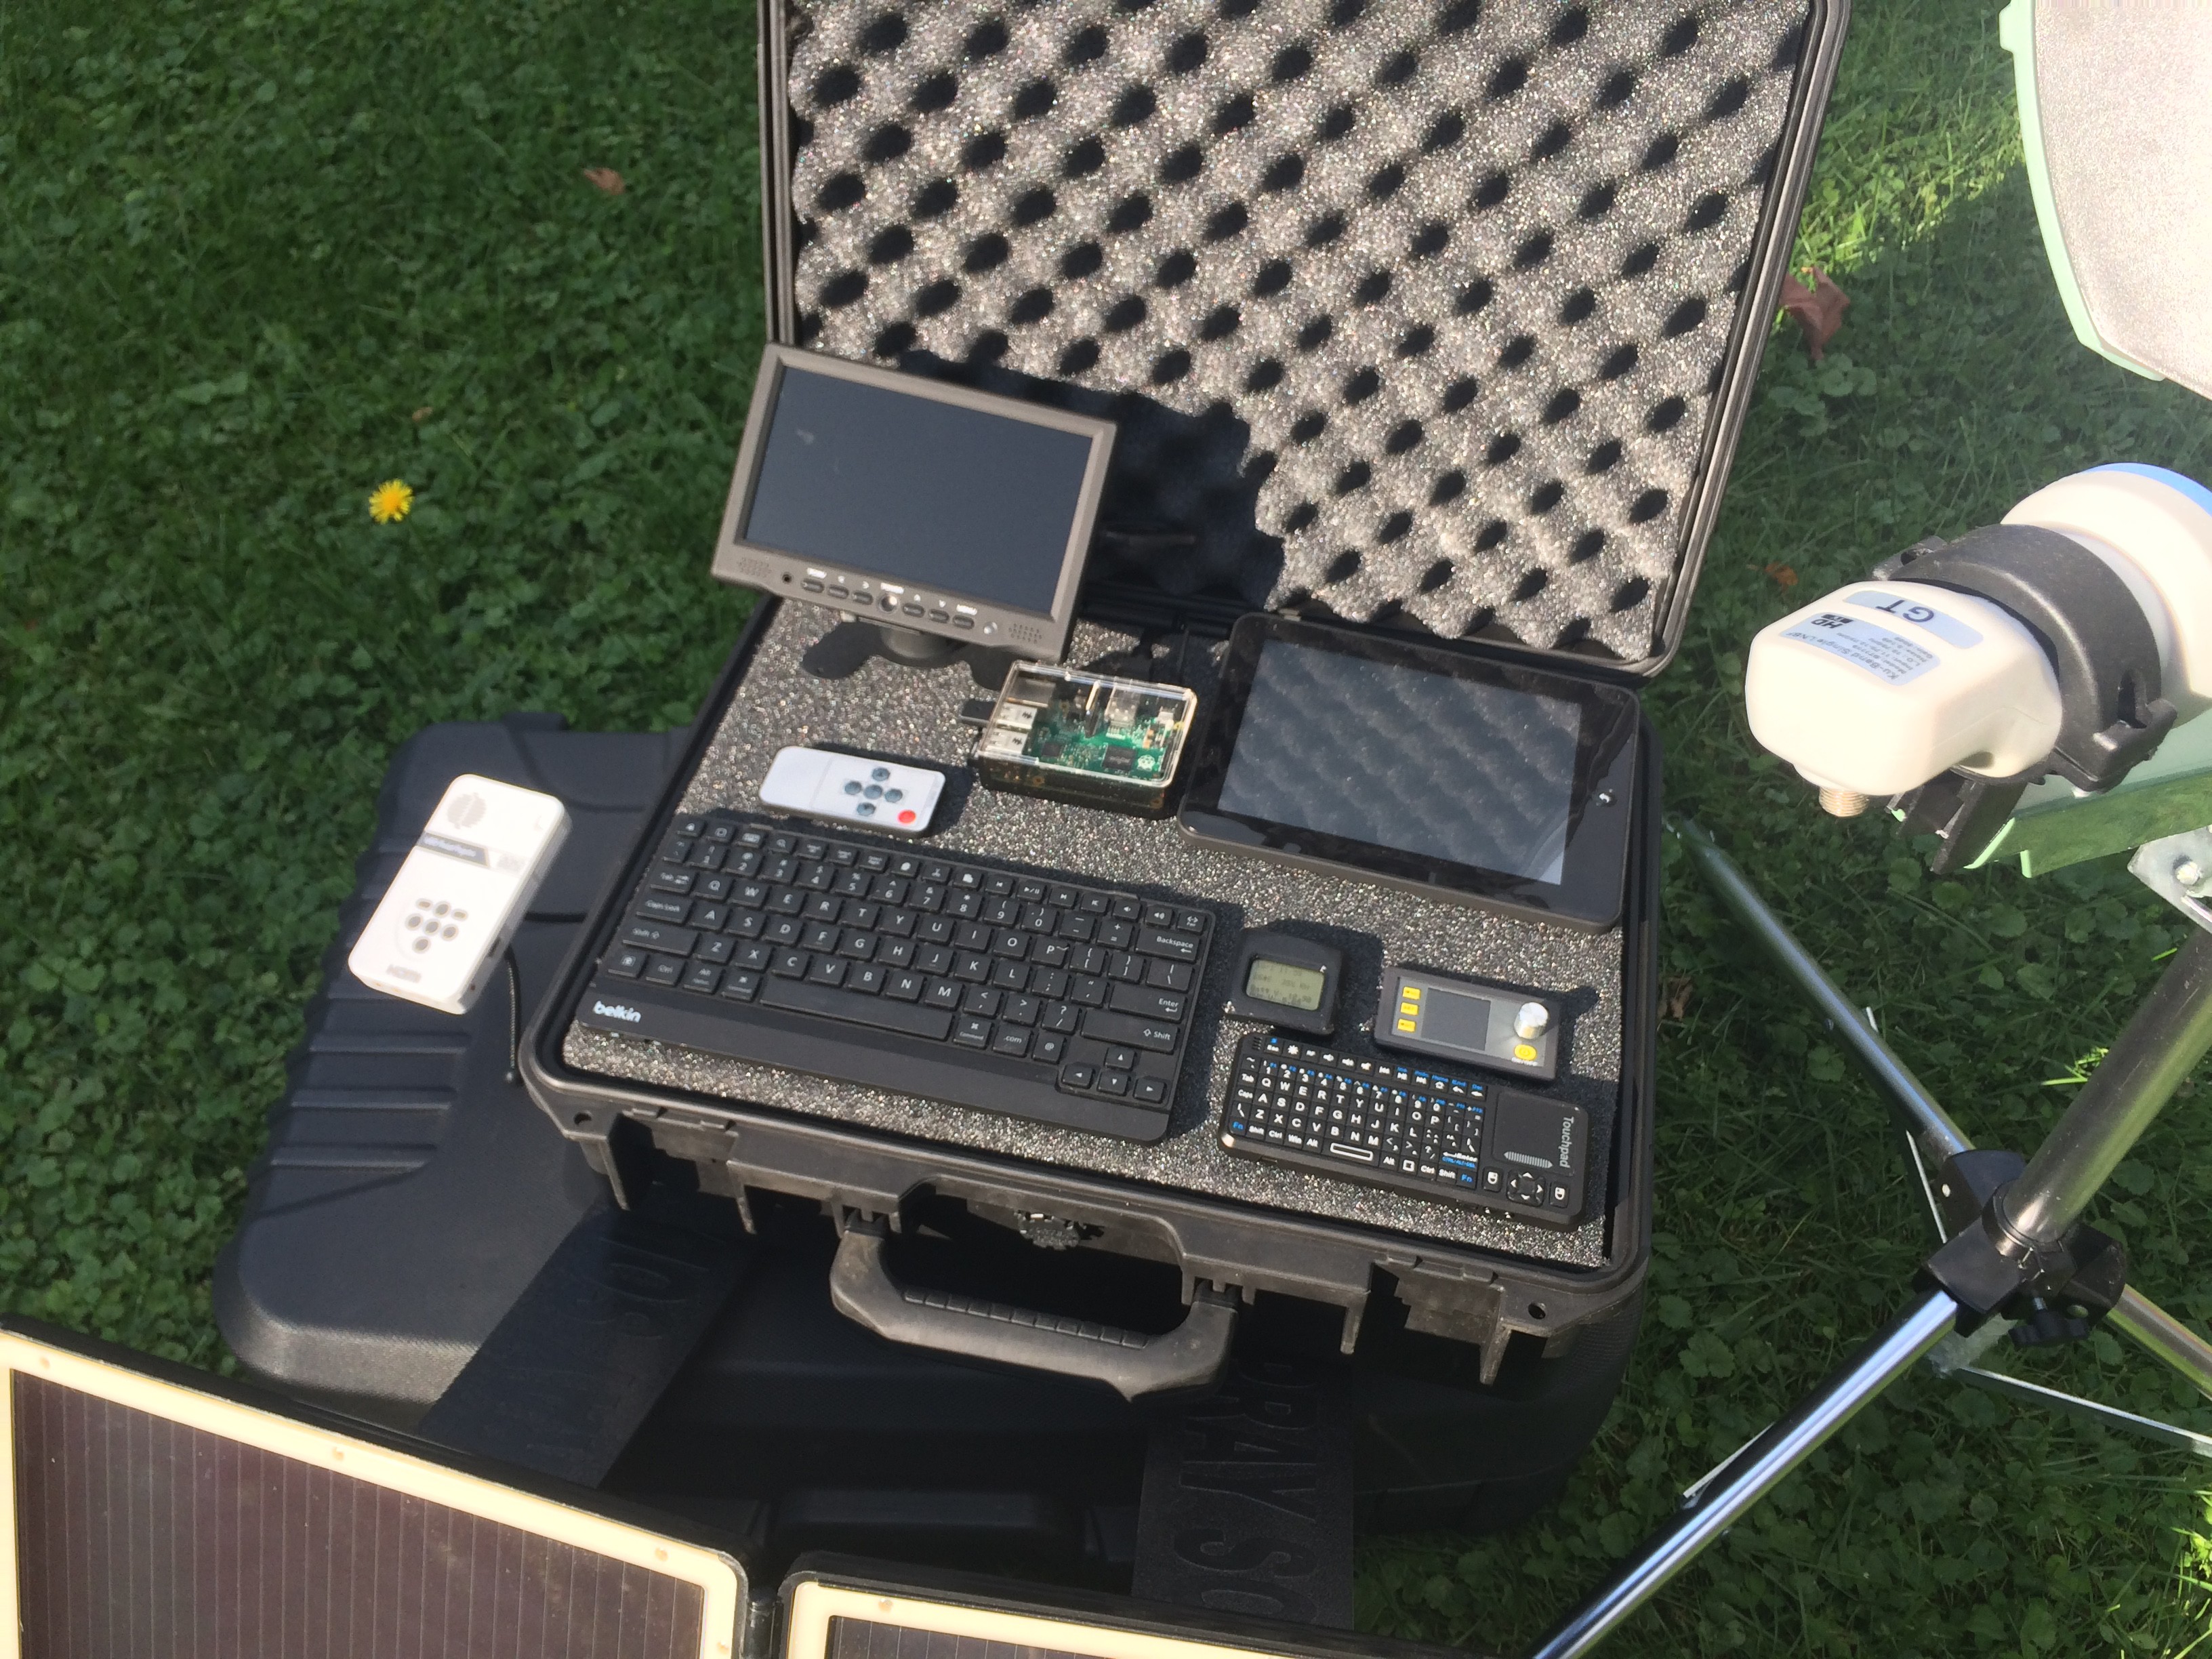
Okay lets get building. Gather all the components for your case as well as the case itself. Here is a quick overview of the parts when I started my build:
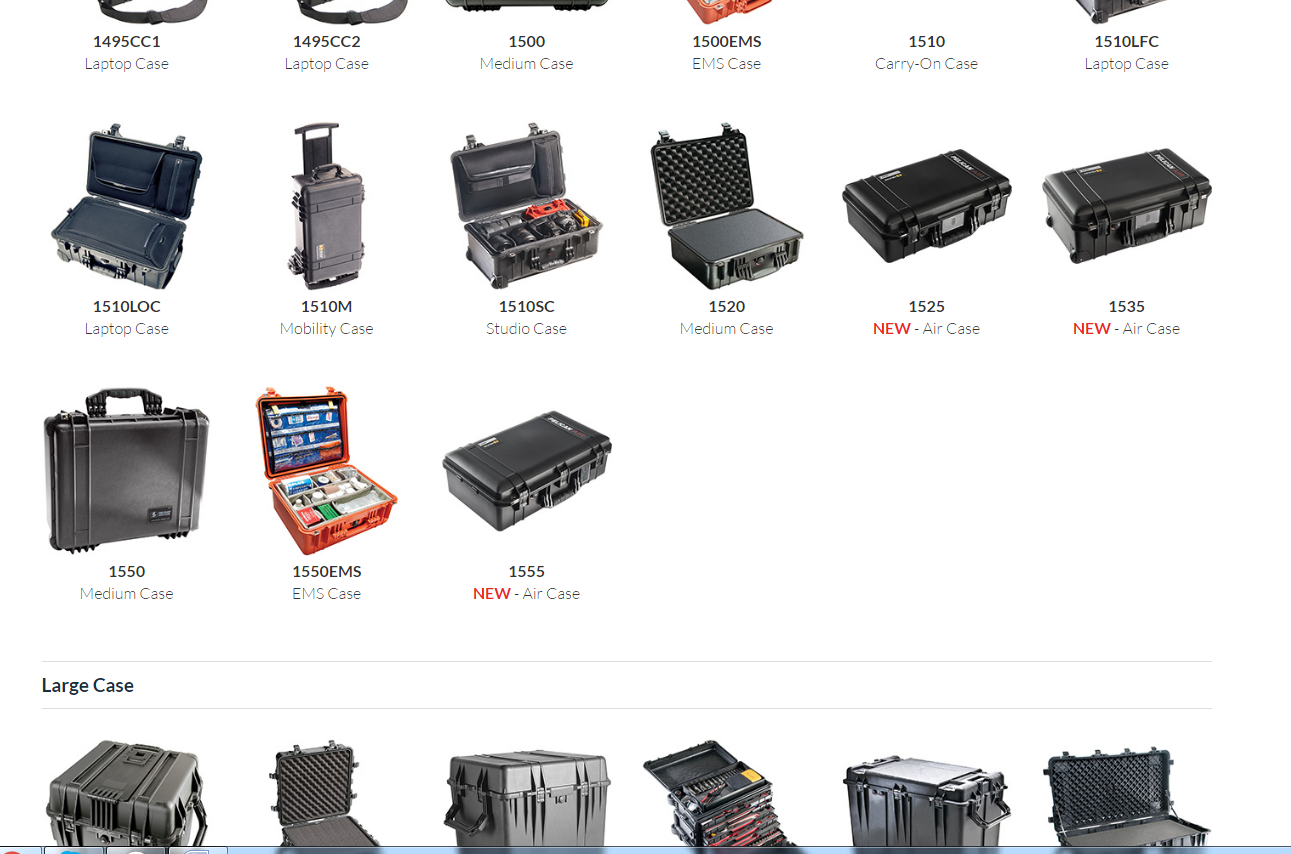
For your enclosure, Pelican style cases are extremely well suited for the project and can be found here
-
2Step 2
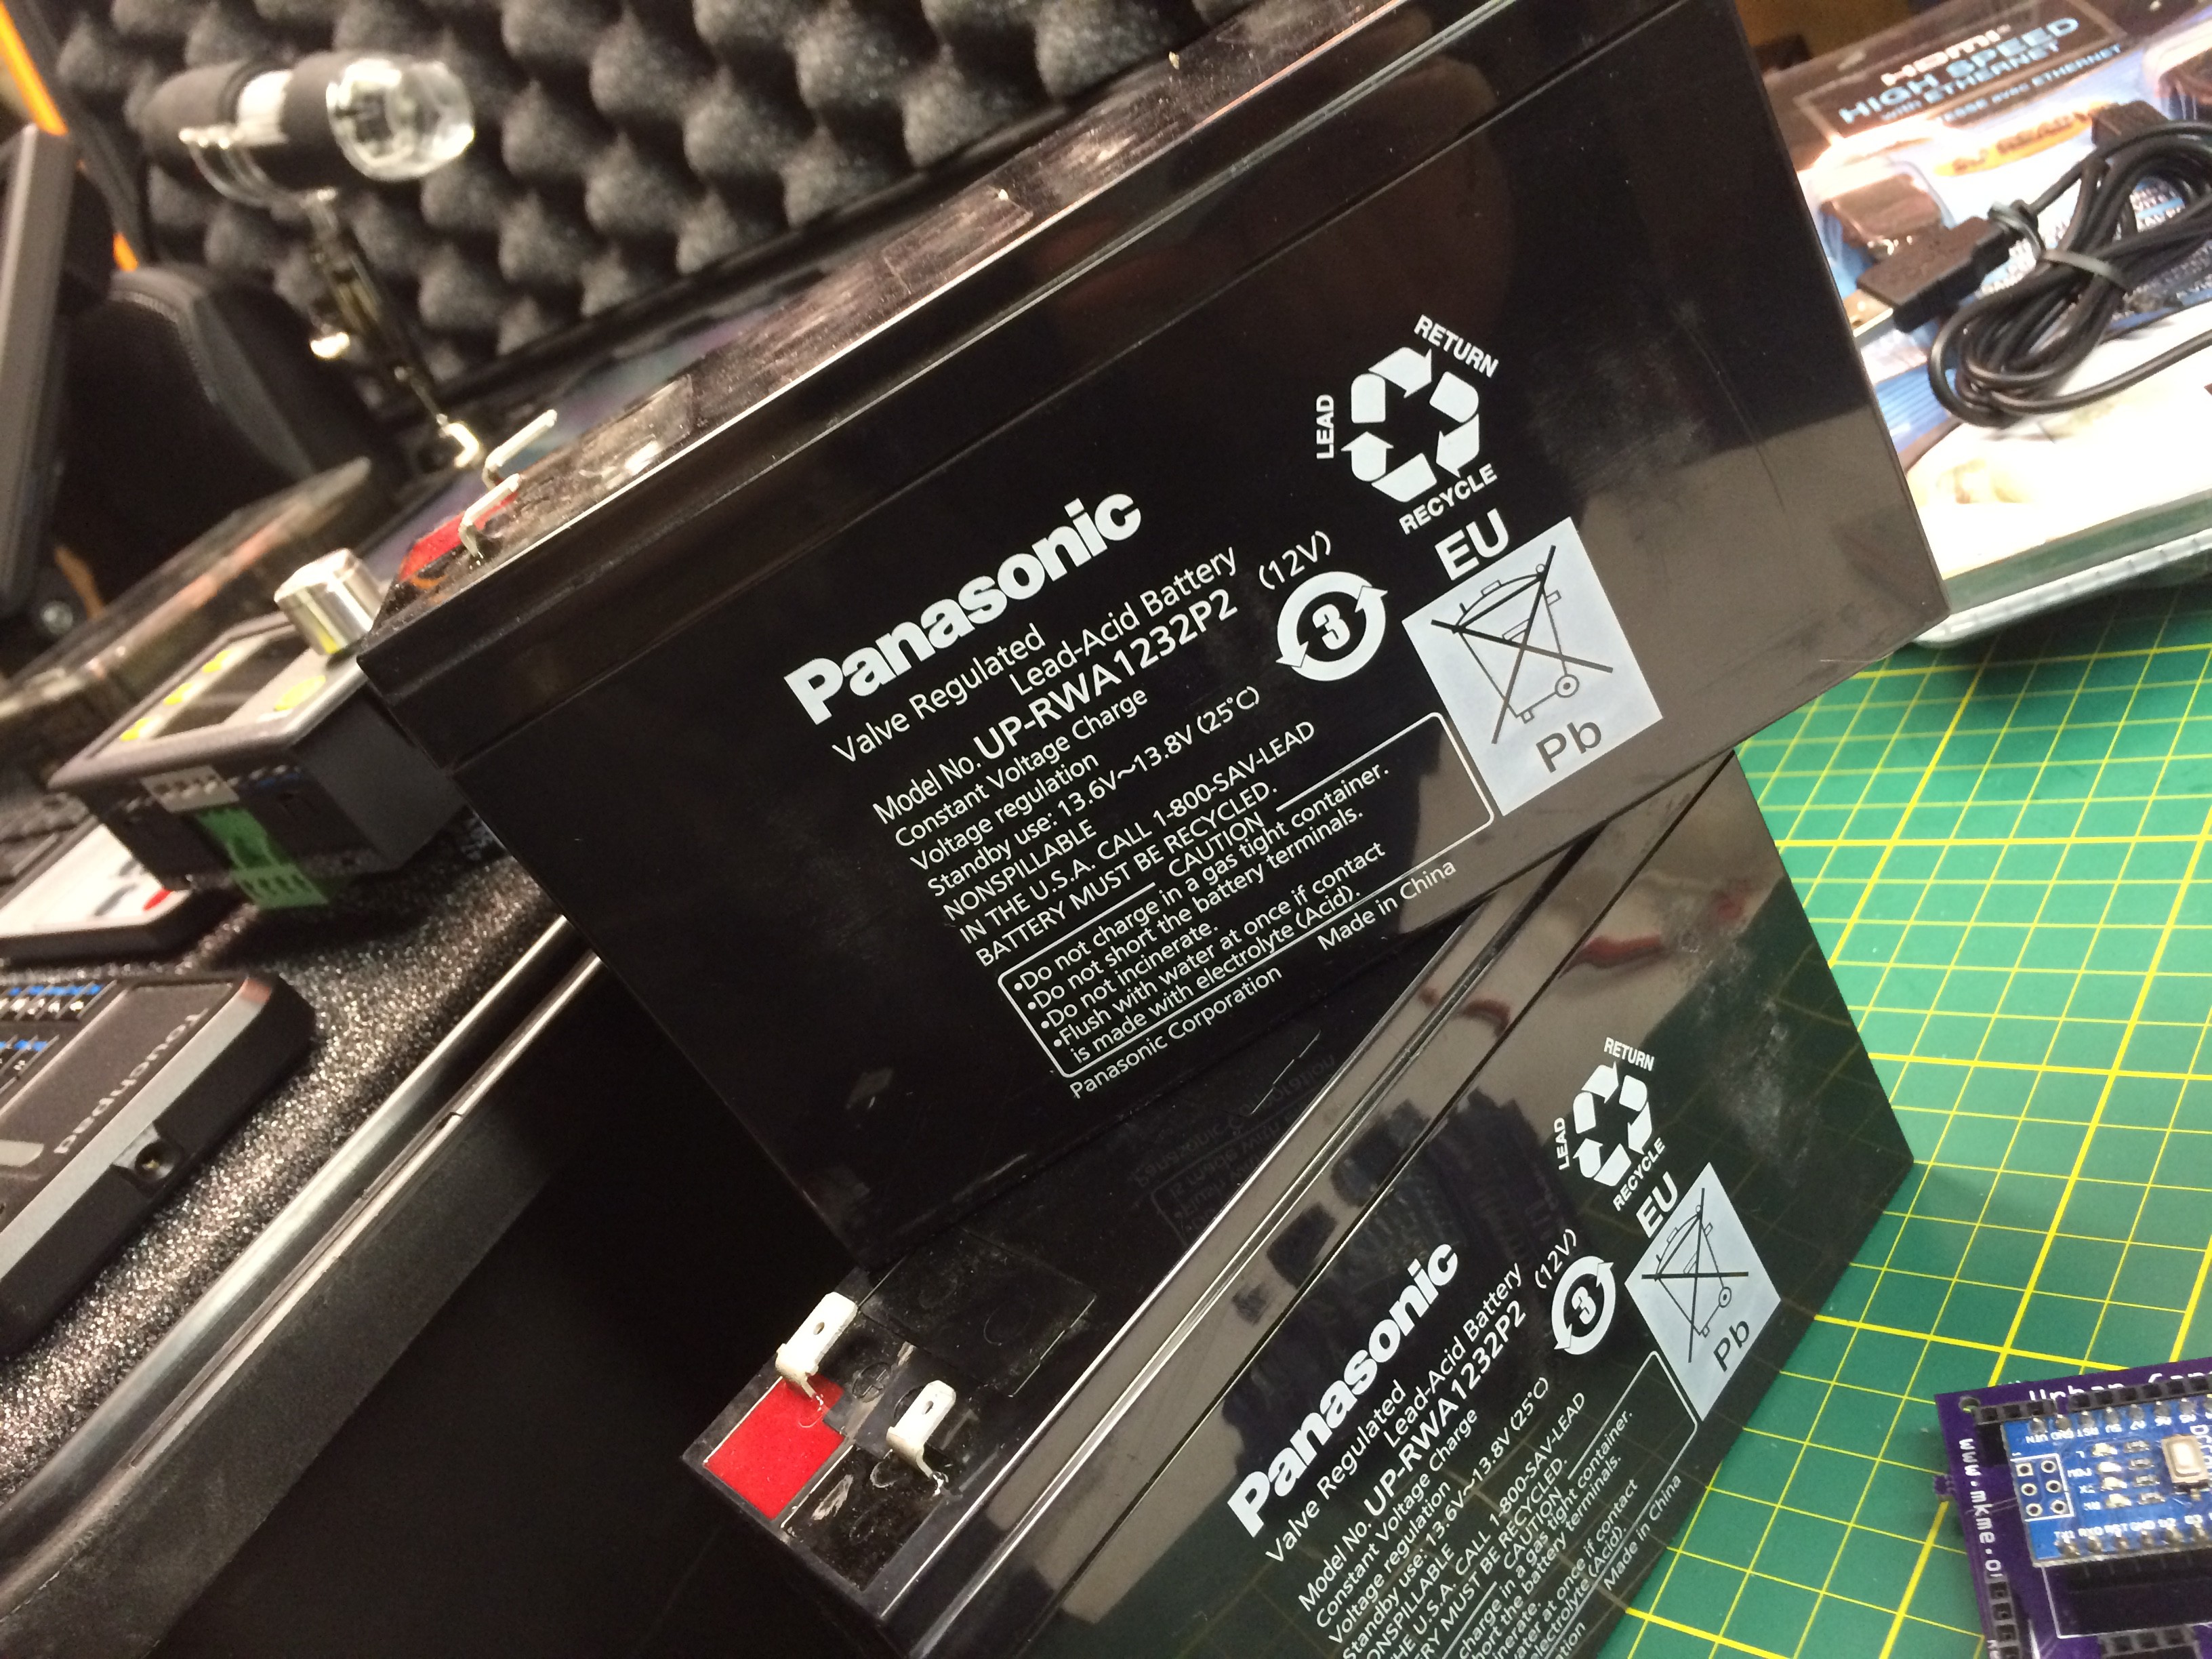
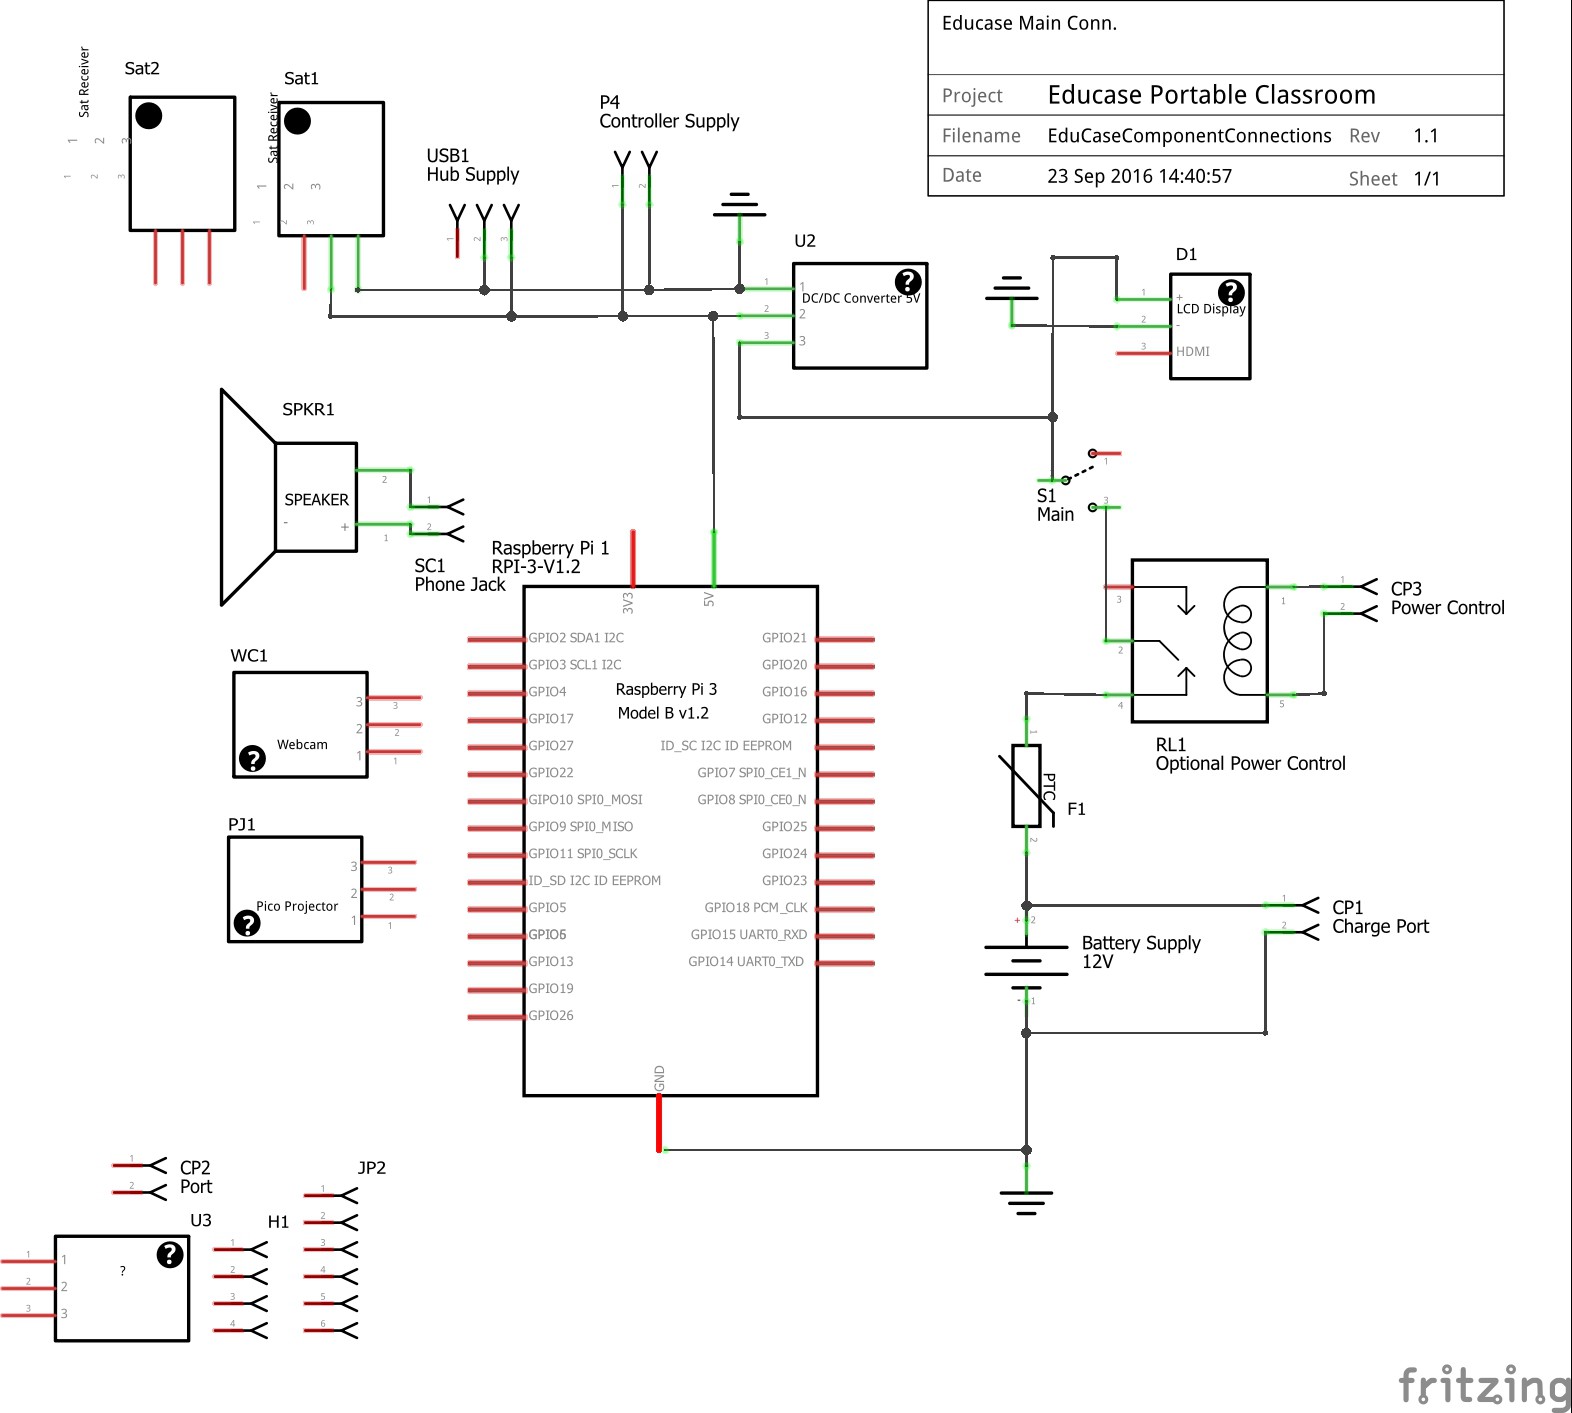
Assemble the batteries into the case as per the electrical schematic. You can use any time of battery you wish but it is preferable to use lead acid batteries which lend themselves better to these discharge cycles better than LiPo etc. My Panasonic batteries:
![]()
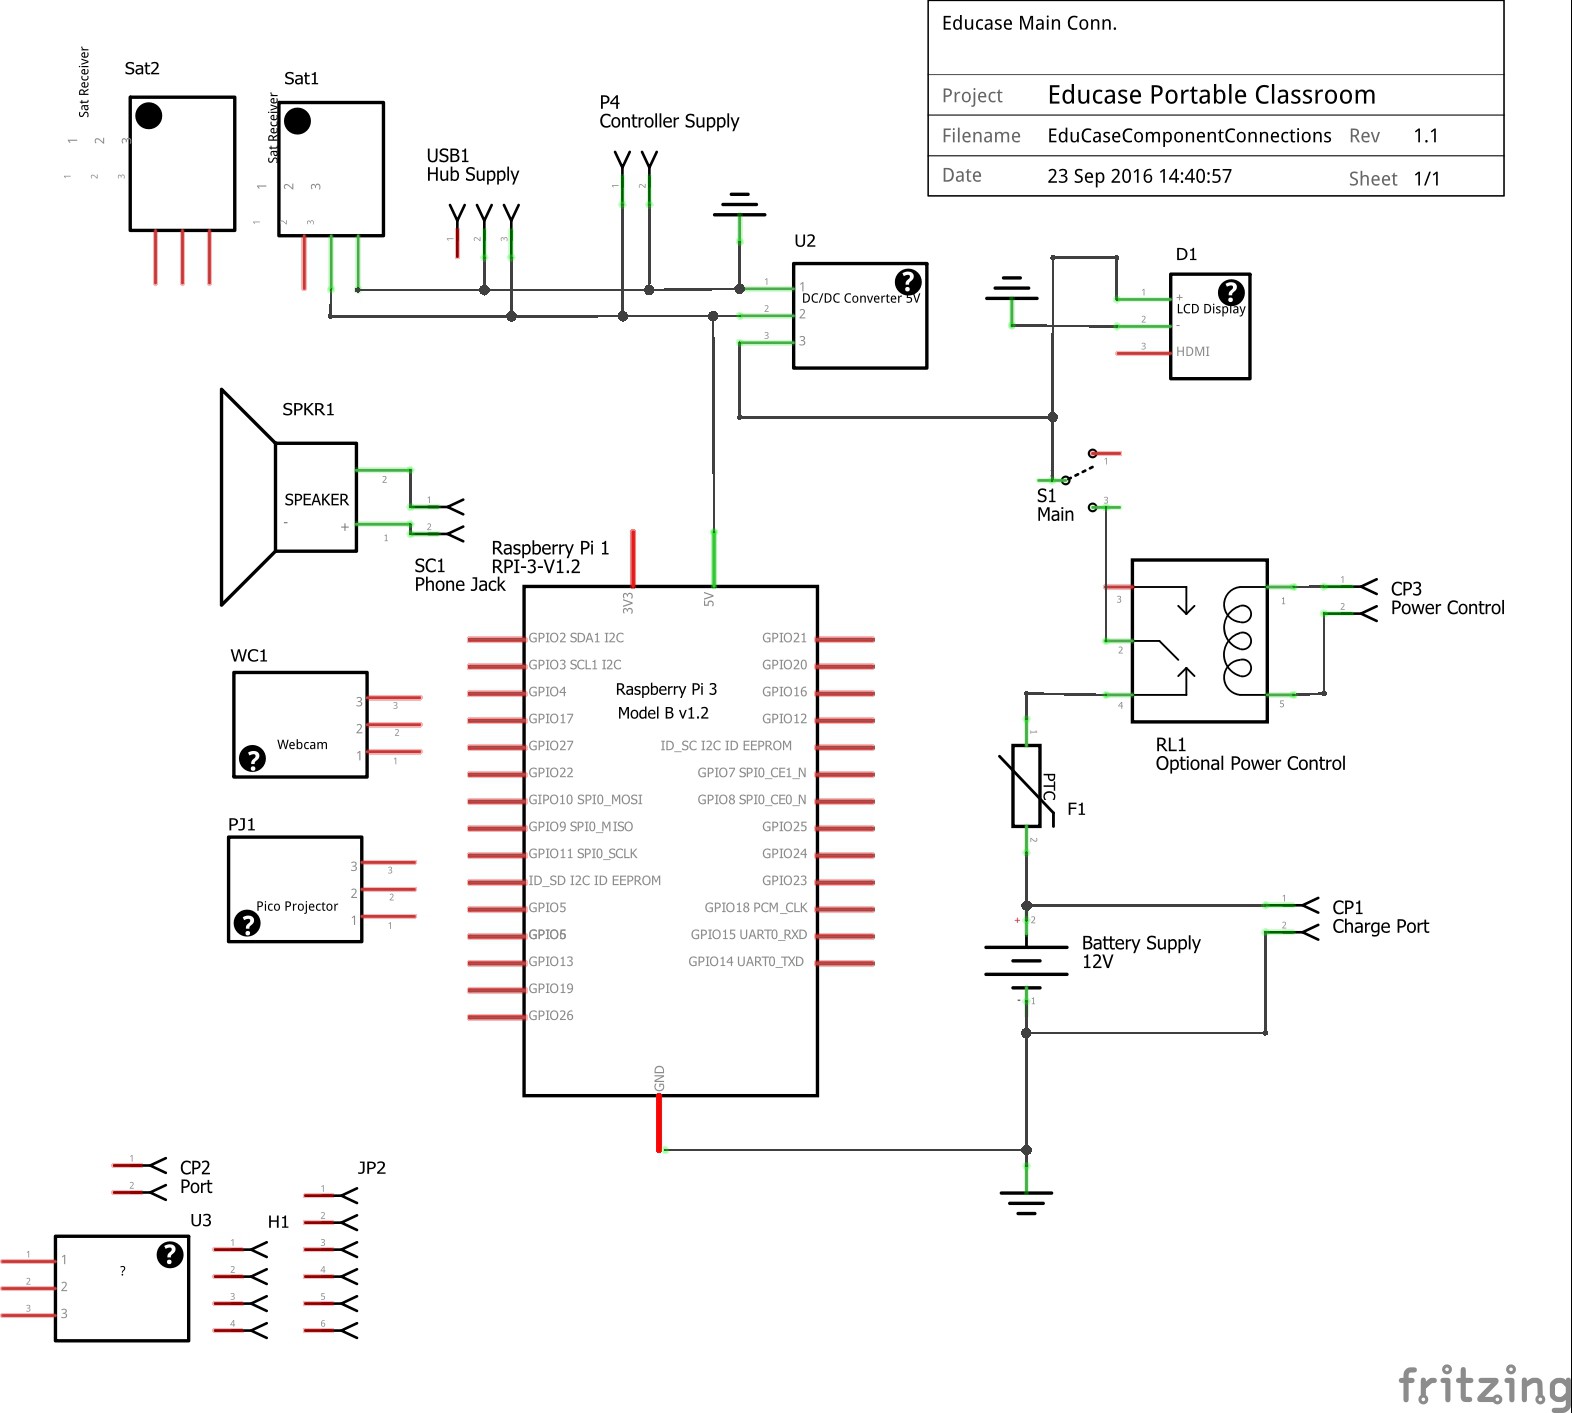
Ensure you fuse the battery output as per the schematic (found on Github HERE) using protection of your choice. A PTC is preferable but and automotive spade-style fuse can also be used and are easily available from many sources
![]()
Charging is done via the charge port and can utilize an automotive "cigarette lighter" style plug, an external 12VDC mains supplied charger, portable solar panel and many more. The portable panel I use here is a briefcase style rigid folding unit I sourced from eBay some time ago.
![]()
-
3Step 3
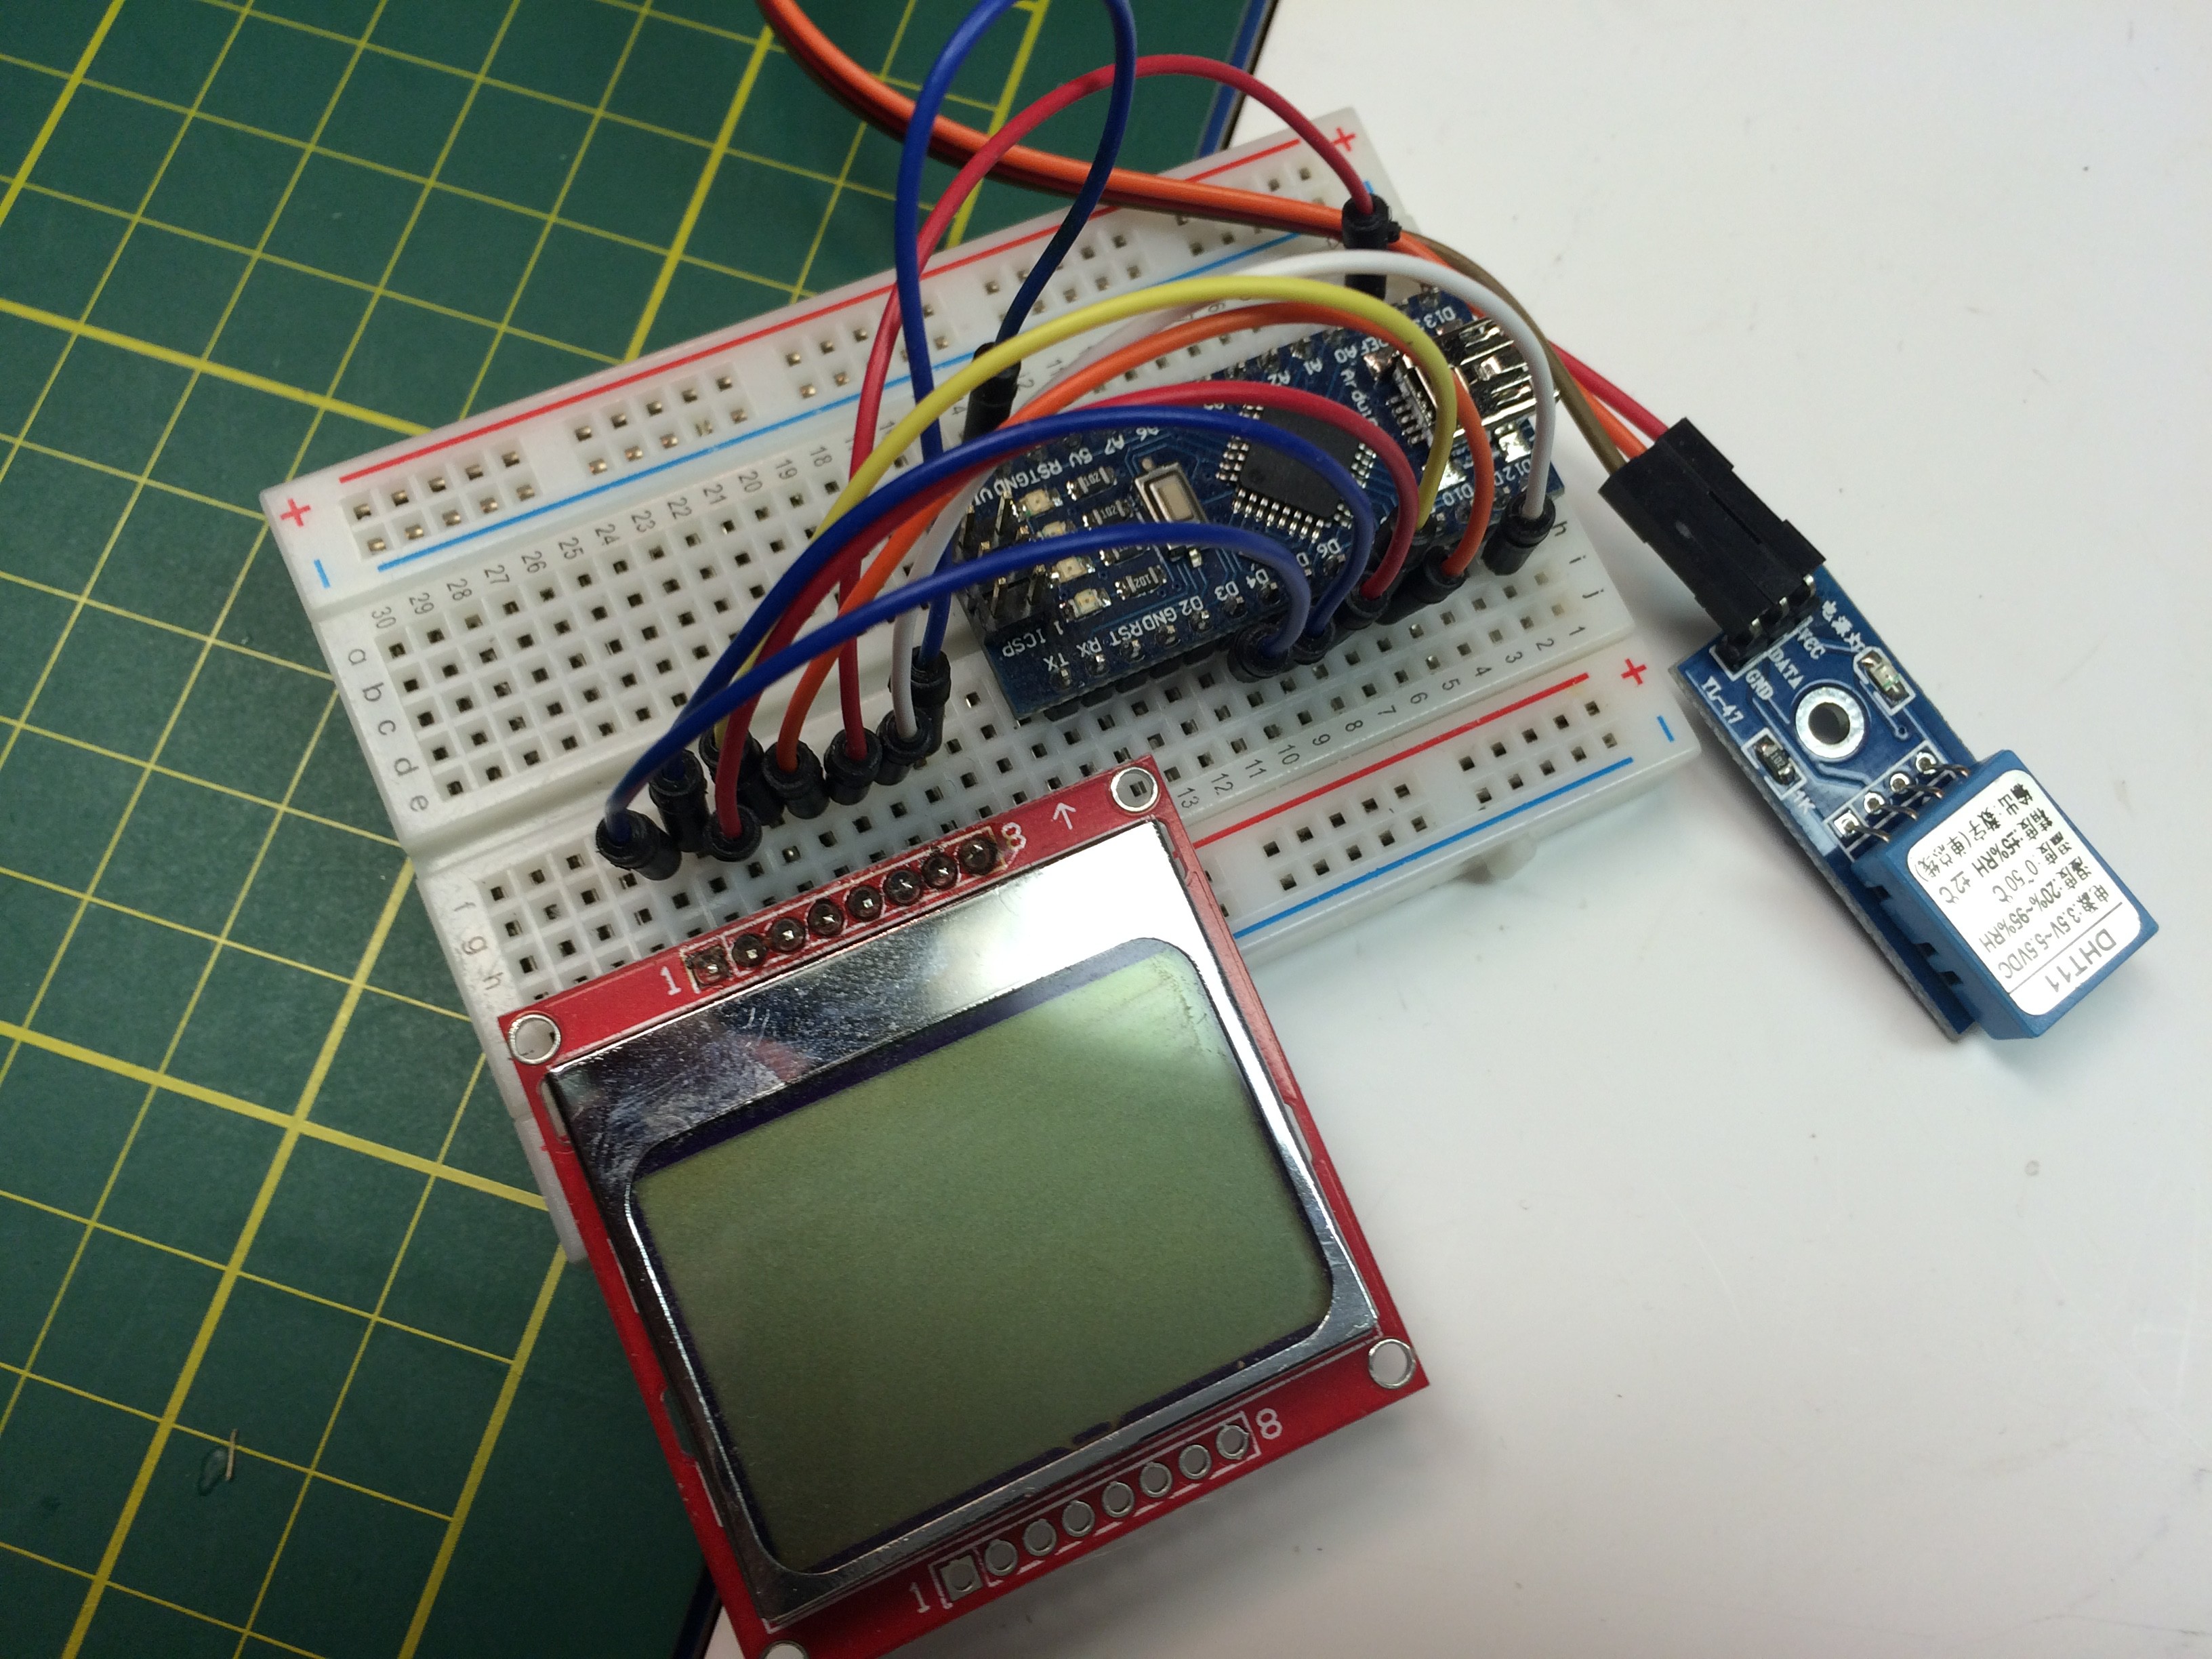
At this time it is best to decide if you will incorporate the Arduino controller into the case. It will be easier to wire the relay power control and temperature sensor now before you finalize the component locations inside the case.
![]()
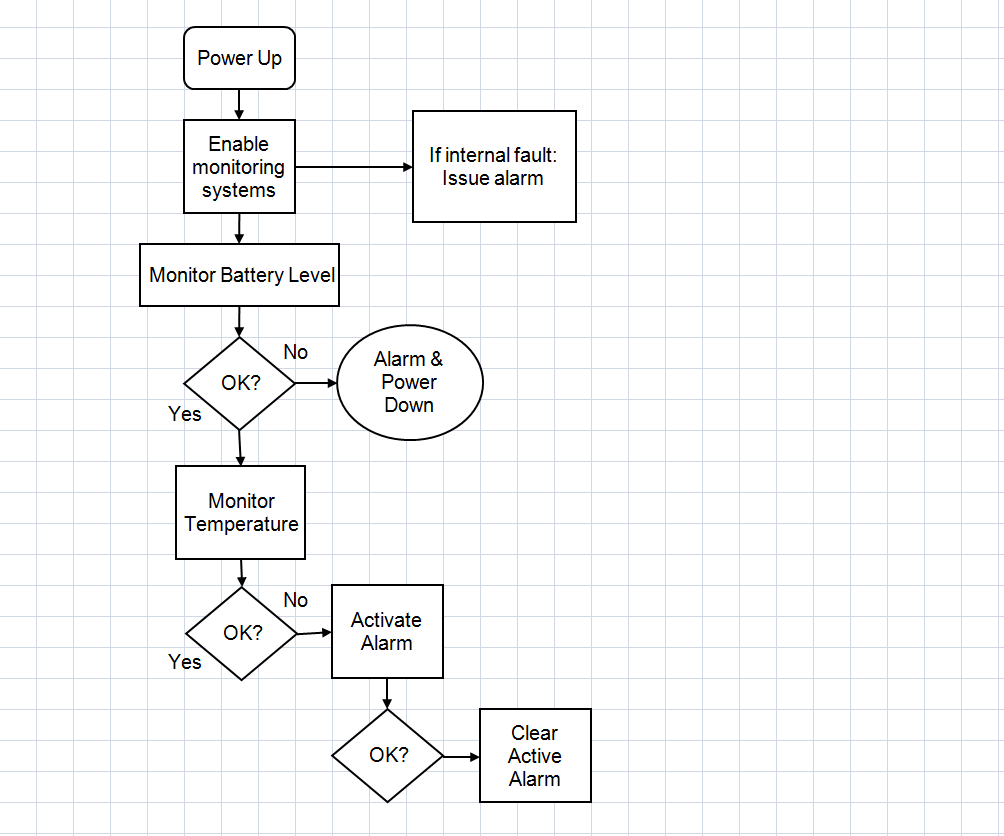
The Arduino and LCD make it much easier to monitor the case and are pivotal to prevent unnecessary damage to the batteries by over discharge. You can also set up control, reminders, alarms on any temperature, voltage level or time based parameters.
![]()
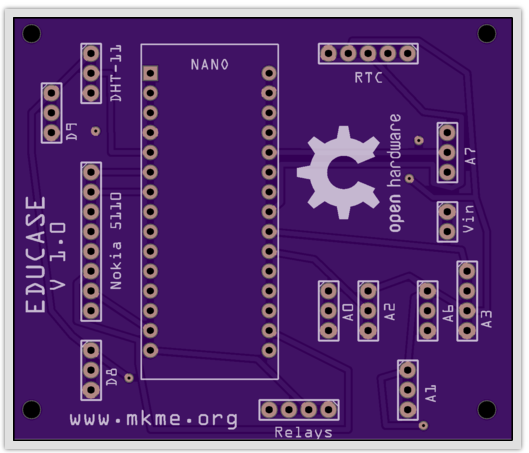
If you choose to use the control you can order the printed circuit board using the files I have provided on GitHub.
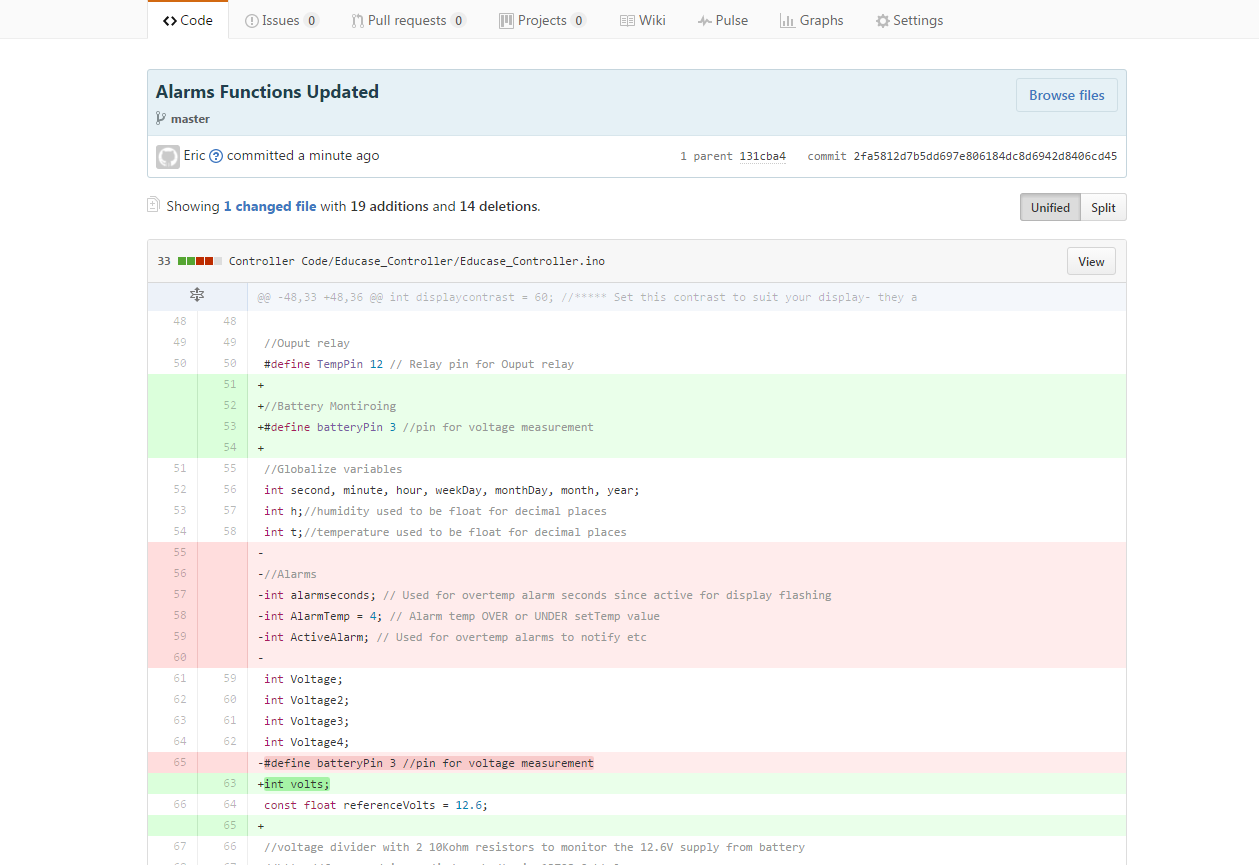
Wire the components as per the layout in the code and schematics and flash the Arduino with the code provided. Download the Aurora firmware from Github HERE
![]()
Flash it using the Arduino IDE from https://www.arduino.cc/en/Main/Software
-
4Step 4
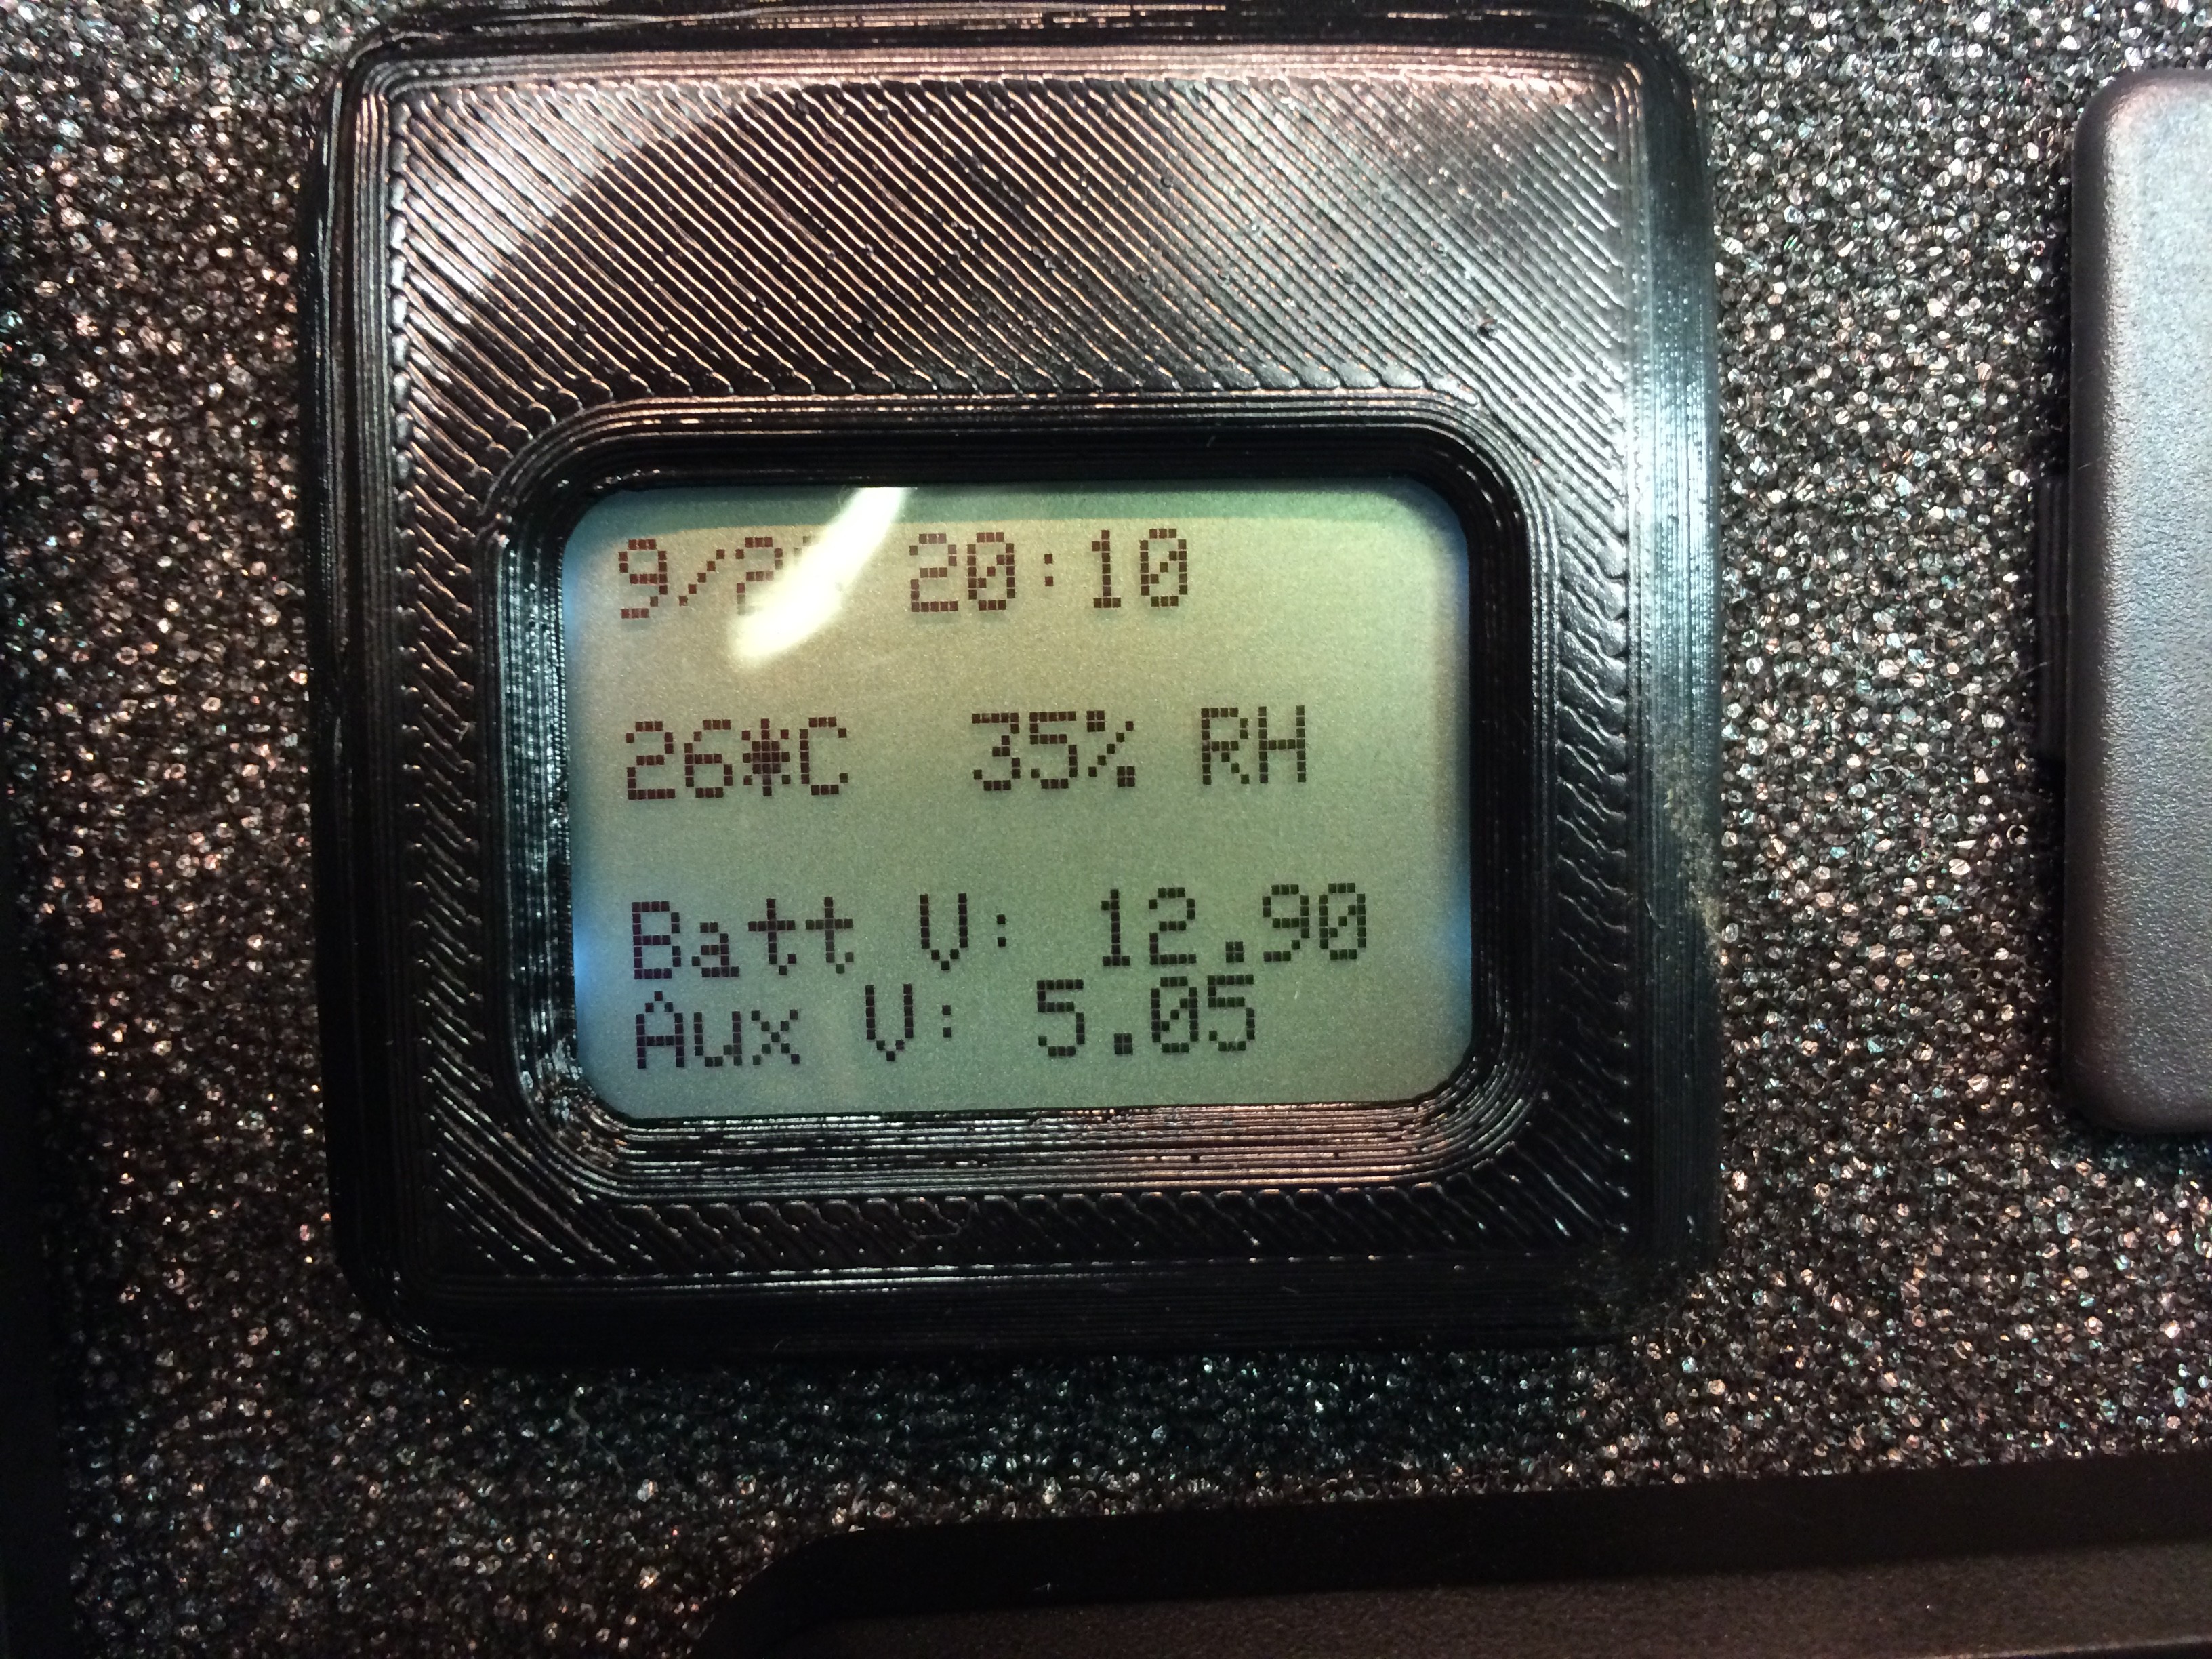
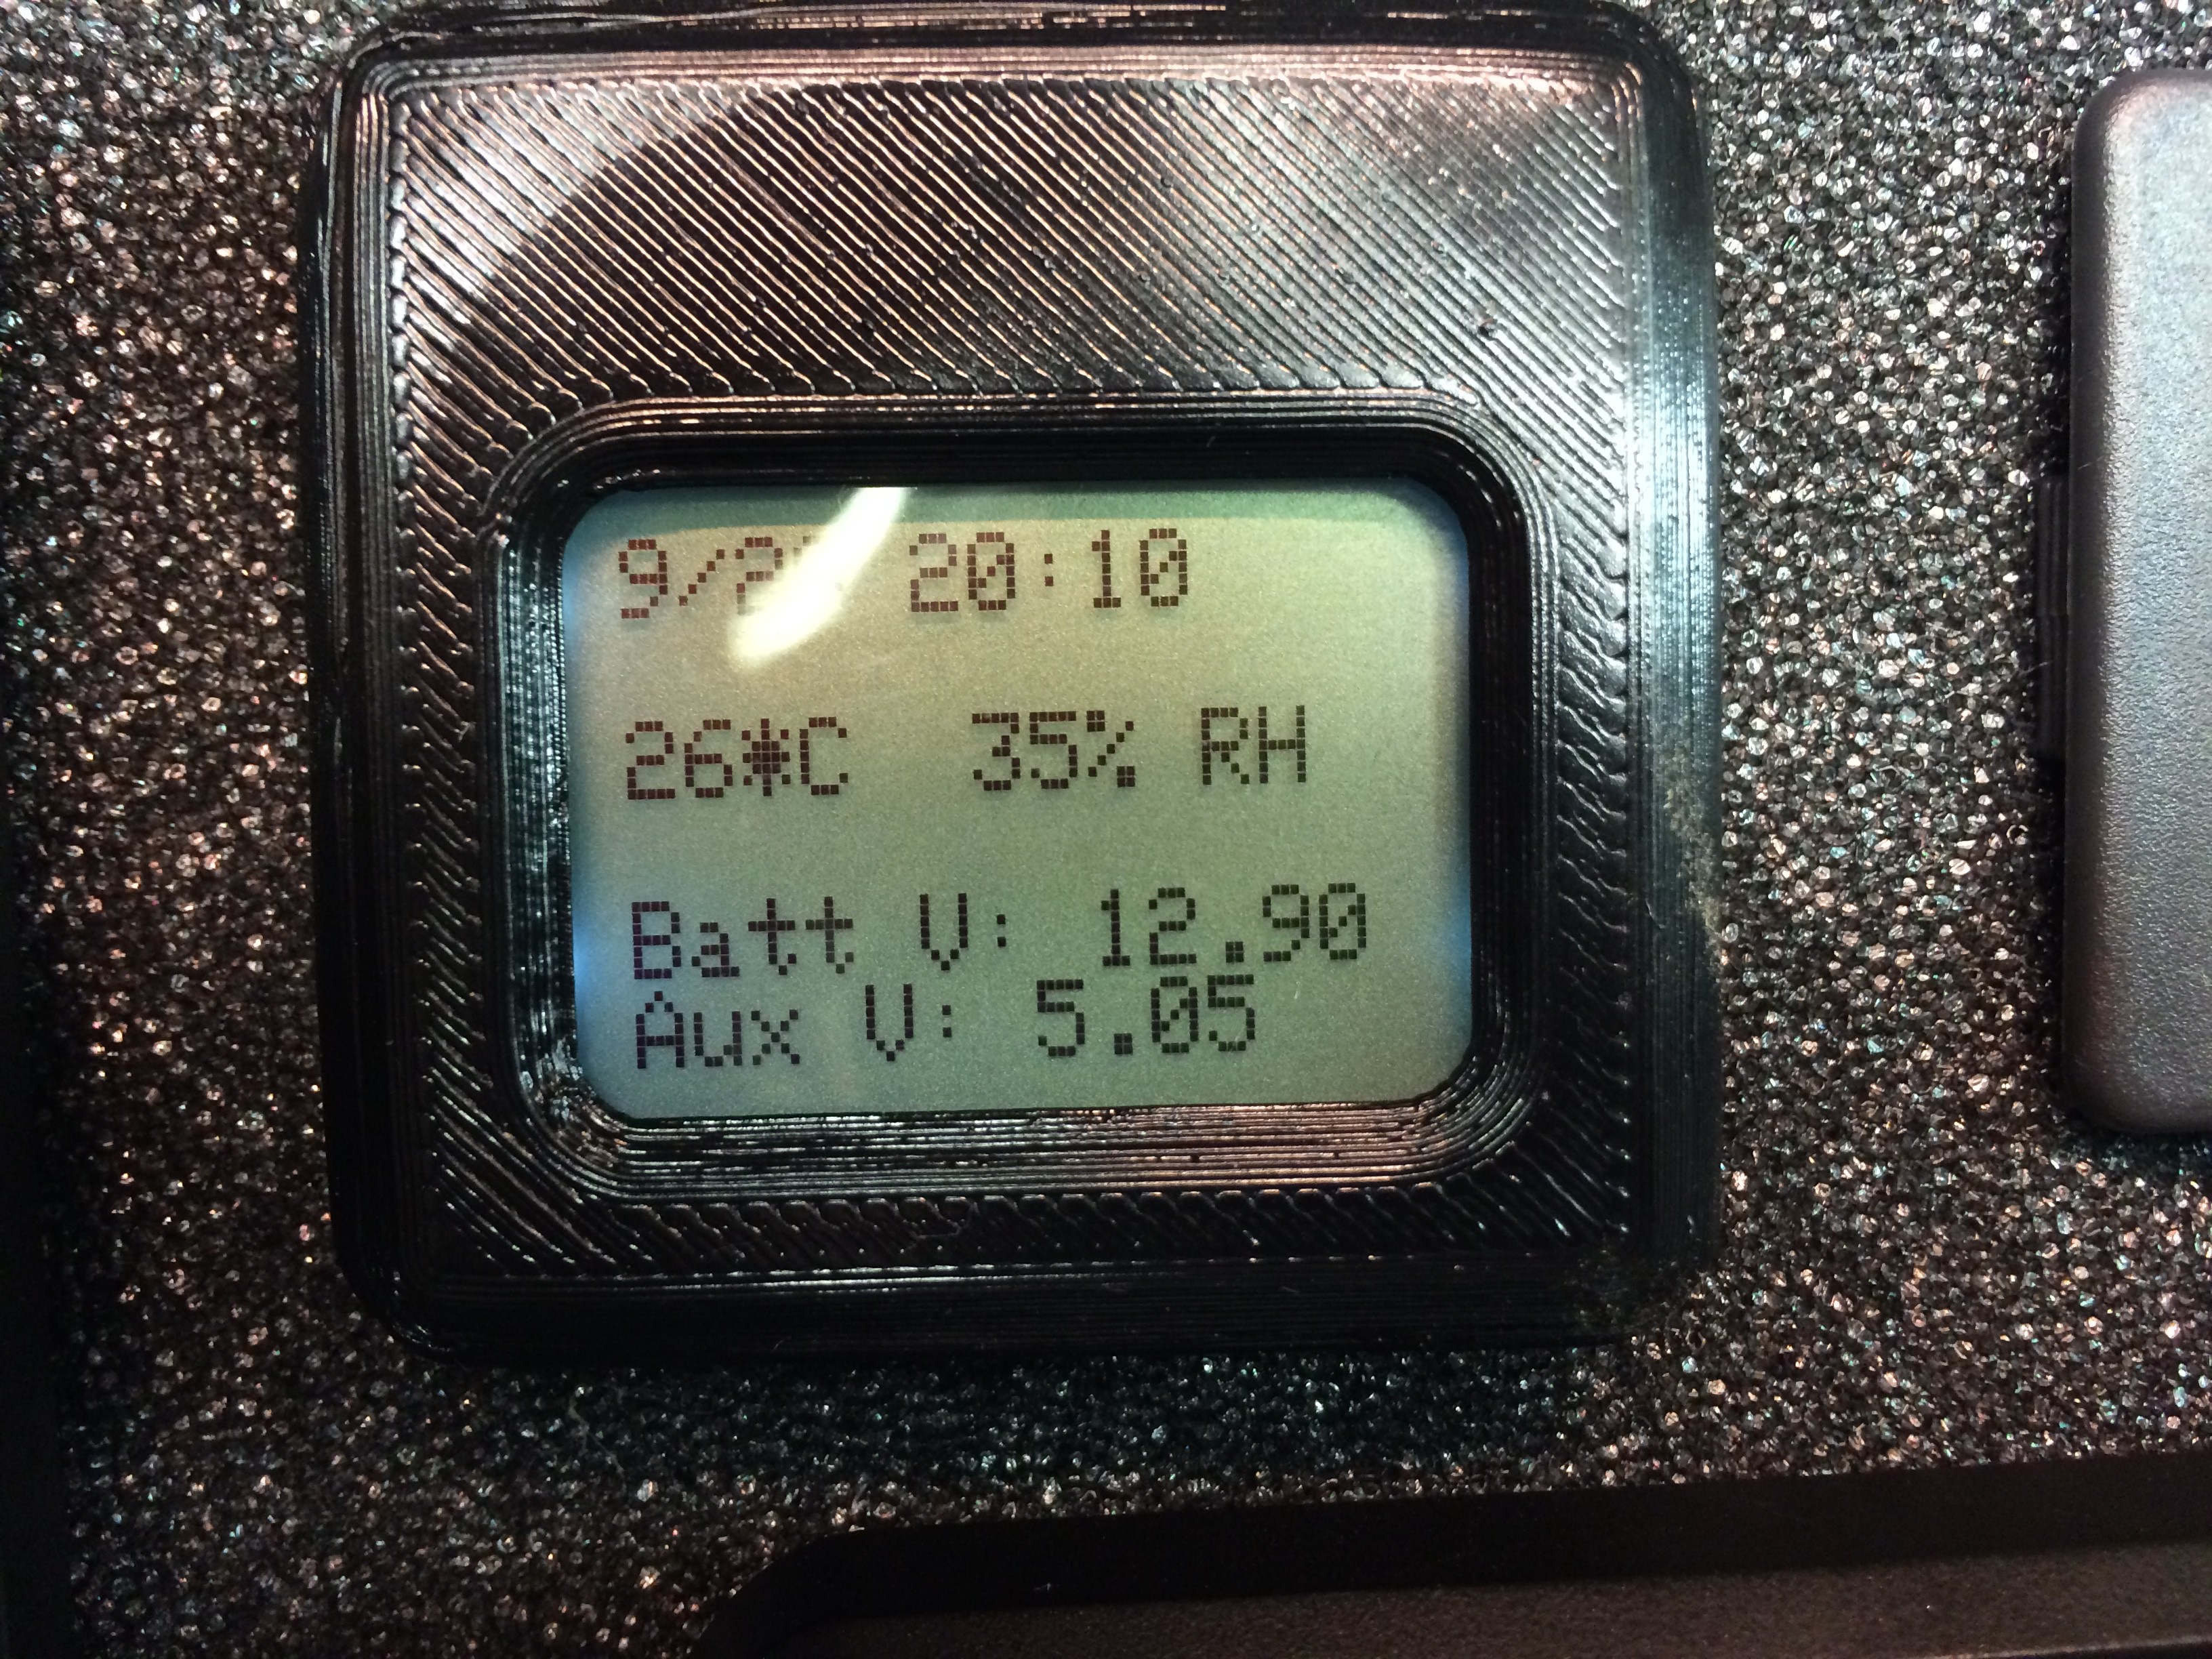
If you implement the controller you may wish to mount your Nokia 5110 LCD permanently in the case. Within the files on Github there is a folder for CAD files and documents.
![]()
Within it you will find a stylish bezel for the LCD. You can 3D print this yourself or use and online source such as Shapeways. Your end result in the EduCase will look like this:
![]()
-
5Step 5
Customize the code as you wish to include time, temperature and voltage alarms and control. If you make changes please consider sharing them back with the world open-source.
Functional Description can be found on GitHub:
Code:
-
6Step 6
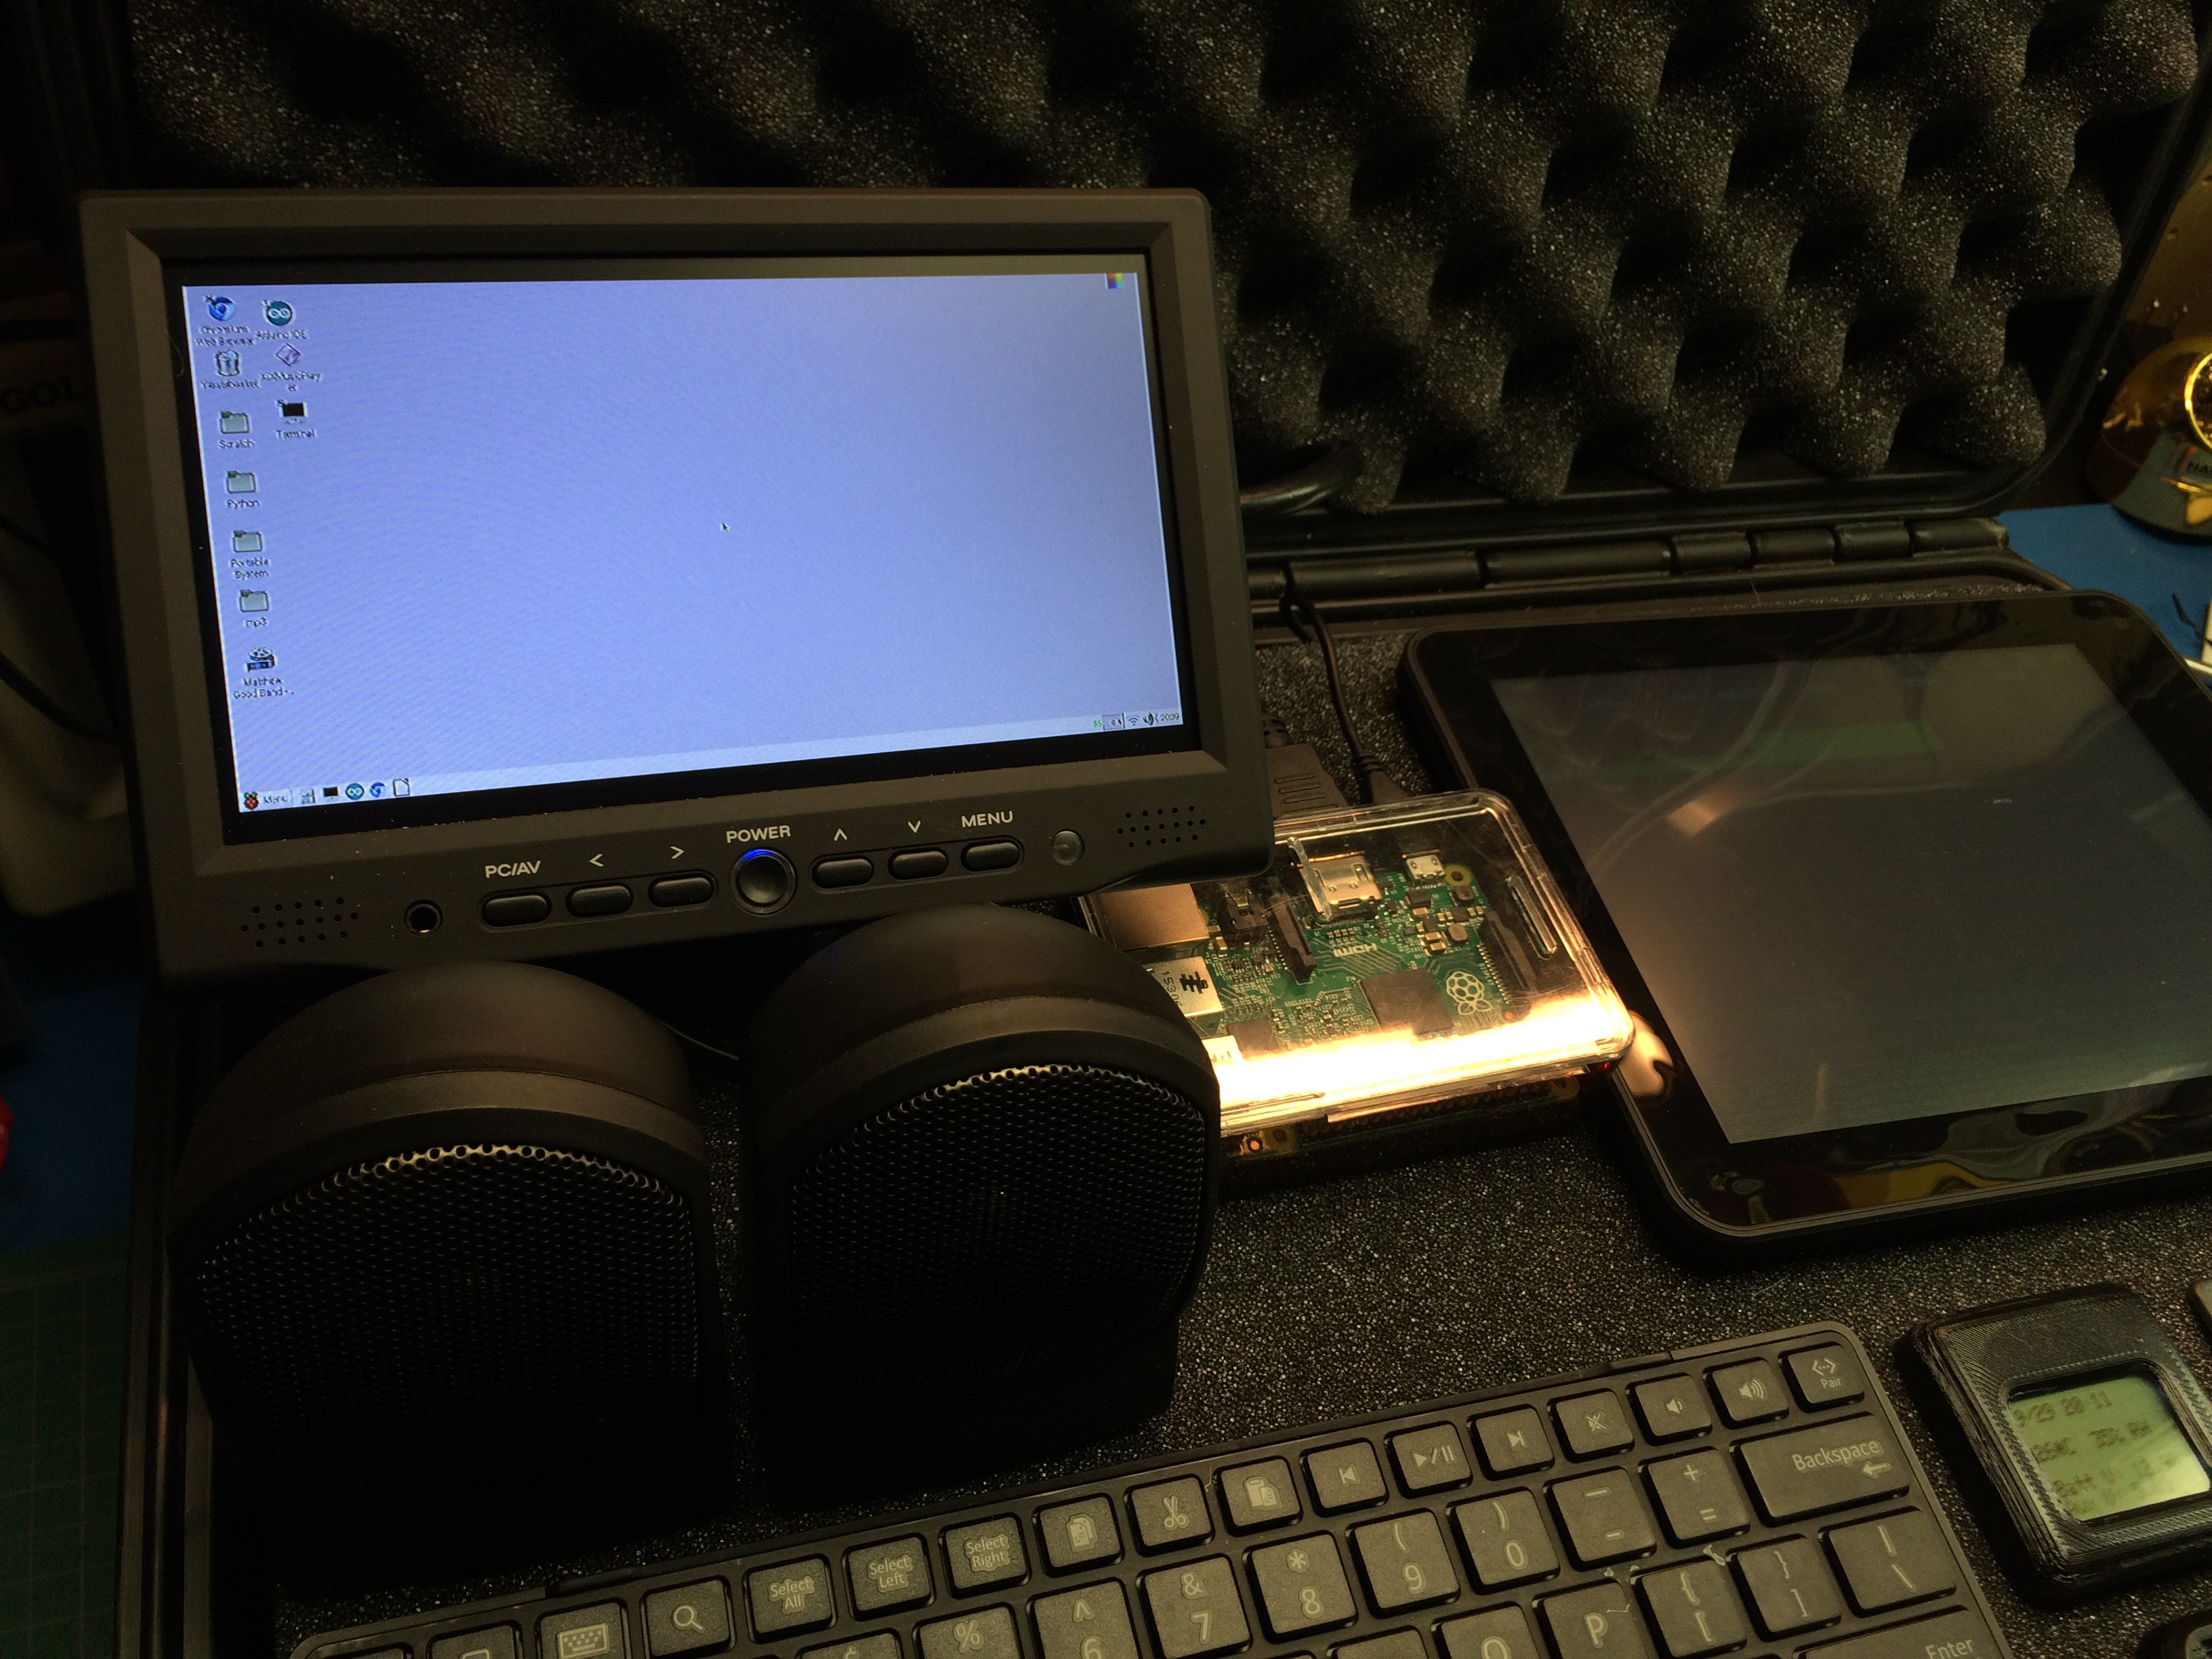
Lay out the components inside your case as per your hardware. You can use the foam inserts and carve them out to snugly fit your monitor, Raspberry Pi and still leave room for storage of components and equipment such as webcams, remotes etc
![]()
Route the USB wiring, video and audio cables to suit your installation. I suggest leaving extra HDMI cable easily accessible so the projector and monitor can be used outside the case. This makes presenting to a classroom environment much easier as you can place the case away from your work/presentation area.
![]()
-
7Step 7
Add a powered USB hub with the number of ports needed for your particular project. I suggest at least 10. The power for the hub is supplied via the DC/DC converter as per the schematic.
![]()
These units can be found as “buck converters” from any electronics source. Some suggested versions are given in the parts list in this project.
Mount the hub so it is convenient to access at least a few ports during normal use for plugging in items for charging, webcams etc.
-
8Step 8
1.Install the Raspbian operating system on your Raspberry Pi. I have made a video detailing this here:
-
9Step 9
You will want to be installing many files and learning content on the Pi so installing a remote VNC connection will make this much easier. Install remote desktop connection as per the video I made here:
-
10Step 10
Copy all the files and content over to your Raspberry Pi. I also place some of the media files on the Android phone. It hooked up to the projector does a much better job at media file playback such as video/movies. I cannot provide the files I am using due to copyright etc so please don’t ask for them. Sorry.
Here is a live stream I did covering a few items:
EduCase Portable Classroom
A self contained classroom suite in a portable case for use anywhere in the world regardless of infrastructure
 Eric Wiiliam





Discussions
Become a Hackaday.io Member
Create an account to leave a comment. Already have an account? Log In.