Ferrite Core Memory Module
A sub-project of the ED-64 Computer to document the development of a 64-byte ferrite core memory module
A sub-project of the ED-64 Computer to document the development of a 64-byte ferrite core memory module
To make the experience fit your profile, pick a username and tell us what interests you.
We found and based on your interests.

Inhibit Driver Rev B.zipCAD files (KiCAD format) for Inhibit Driver module Rev BZip Archive - 61.10 kB - 04/15/2017 at 23:59 |
|
|
Core Driver Rev A.zipCAD files (KiCAD format) for Core Driver module Rev AZip Archive - 137.42 kB - 04/15/2017 at 23:44 |
|
|
Core Select Rev B.zipCAD files (KiCAD format) for Core Selection module Rev BZip Archive - 51.92 kB - 04/15/2017 at 23:23 |
|
|
64-bit Core Memory Plane.zipCAD files (KiCAD format) for bit plane PCB (need 8 for complete stack)Zip Archive - 17.20 kB - 04/15/2017 at 23:15 |
|
|
Quad 2-input AND gate Rev A.zipCAD files (KiCAD format) and PDF schematic for the Quad 2-input AND gateZip Archive - 129.41 kB - 04/10/2017 at 09:33 |
|
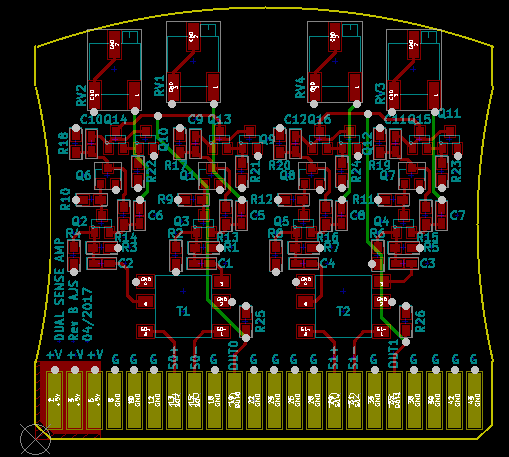
I wasn't able to find a ganged trimpot, unfortunately, so I'll need to adjust the positive- and negative-pulse amplifiers separately.
I have a new sense amplifier design:
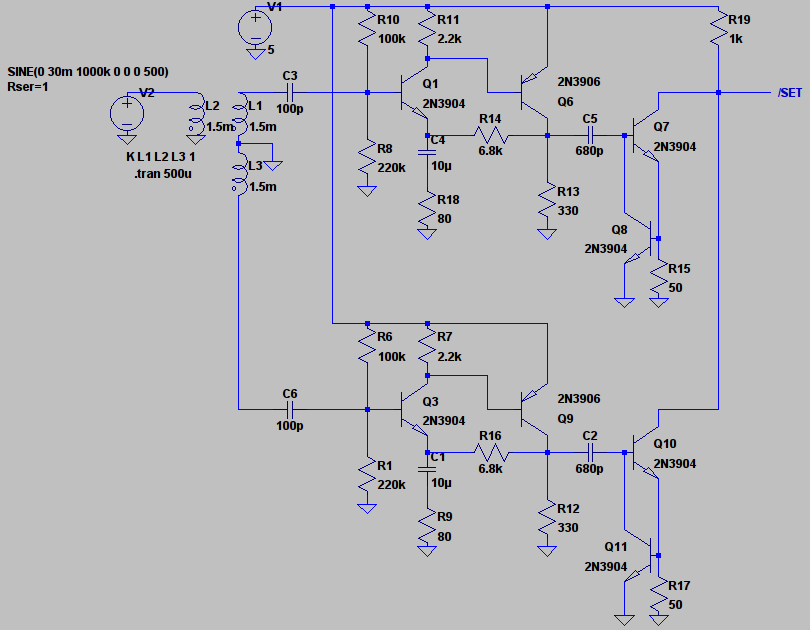
It consists of 3 sections: a pulse transformer front end, a complementary pair amplifier, and a constant current sink output. The amplifier section has some negative feedback that should help stabilise the gain vs temperature, and the input and output of this section is AC-coupled, which should further help prevent the issues experienced with the previous (crappy) design.
In common with the last design, this amp is dual-channel to catch both positive- and negative-going pulses, and the current sinks are wire-ORed together.
Gain is adjustable via R18/R9. I will use a ganged trimpot, if such a thing exists.
I have some more boards for the ED-64 being fabricated at the board house, so while I'm waiting for them to turn up, I have turned my attention back to the temperature issue. As the computer warms up, the data flip-flops have a tendency to stick 'on'. This can occur whether or not memory accesses are occurring, and I believe I know why.
The current sense amplifier design is a cheap and cheerful affair, the core of which is an NPN and PNP transistor connected as a Sziklai pair. This configuration has a huge amount of gain (the gains of the individual transistors are multiplied together), so allows easy detection of the core switch signal. I was originally going to go with a common base amplifier, but they are tricky beasts to design, and when I found that the Sziklai pair worked ok, I went with it.
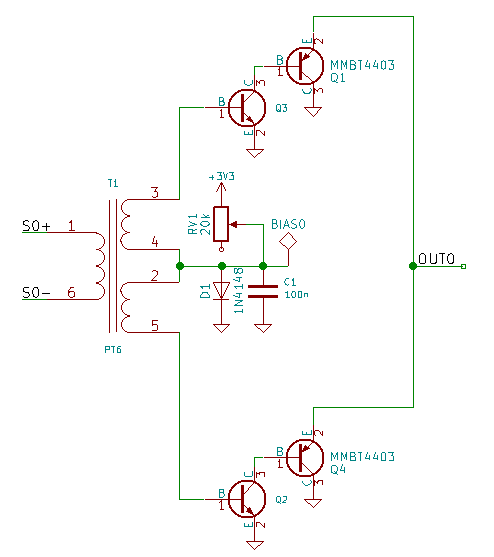
There are 2 amplifiers per channel, to catch both positive- and negative-going core switch signals. The centre of the pulse transformer secondary is has a forward-biased diode to bias the NPN transistors almost to the point of switching. The PNP transistors are wire-ORed together, and go to the active-low SET input of the flip-flop. When a core switch pulse comes in, one or the other of the PNP transistors turn on, pulling down the SET input, setting the flip-flop. The sensitivity of the amplifier is tweakable with the 20k pot.
I think the temperature issue is caused by heat increasing the gains of the transistors (exacerbated by the fact they are multiplied together), to the point where the existing diode bias is enough to pull down the SET input enough to hold the flip-flop 'set'. The pot then has to be adjusted to reduce the bias and fix this condition.
I believe the solution is to replace this design with a high-gain AC-coupled amplifier. I have a design in mind, more on this later.
A while ago I wrote an assembler, and an emulator for the arduino that allows it to emulate the ED-64 instruction set (such as it is). Now that the FC memory is functional, I have modified the emulator to use it as the program and data store (instead of the arduino internal memories).
The output of the assembler is a header file which contains the assembled ED-64 program as an array of constant unsigned chars. When the emulator is loaded into the arduino, it includes the header file. During the setup phase of the emulator, it loads the program array into the FC memory. The program can then be inspected, single-stepped, or executed.
Here's a very short test program:
         JCC start
add1:
         db 0x27
add2:
         db 0x43
sum:
         db 0x00
start:
         SAC sum   ; clear accumulator
         ADD add1  ; add 0x27 into accumulator
         ADD add2 ; add 0x43 into accumulator
         SAC sum   ; store result into sum
loop:
         JCC loop   ; now loop forever
Here is the assembly output:static union
{
unsigned char data;
struct
{
unsigned char operand : 6;
unsigned char opcode : 2;
} instr;
} mem[64] =
{
0xC4,
0x27,
0x43,
0x00,
0x83,
0x41,
0x42,
0x83,
0xC8,
};Inspecting the program via the emulator (before execution):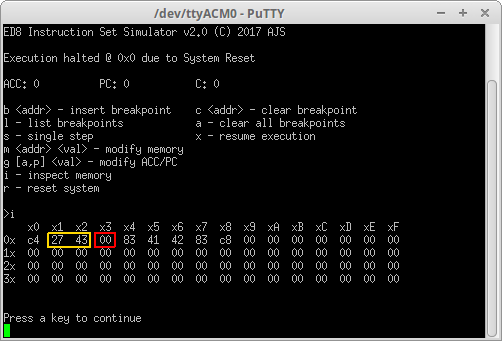
The yellow box indicated the numbers to be added at locations 0x01 and 0x02. The red box is the destination memory location 0x03.
After starting execution (and interrupting the endless loop to inspect the memory):
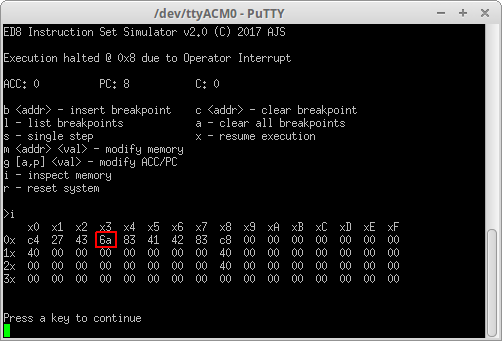
Location 0x03 now holds the result of our calculation, 0x6a.
Temperature is still an issue. I found I needed to occasionally tweak the biases on the sense amps as the room warmed up in the late morning/early afternoon. I may eventually do something about this, or I might not. My priority now is the rest of the computer.
The components for the Inhibit driver arrived yesterday. I populated the module, plugged it in, connected the inhibit lines, and loaded the arduino with a checkerboard memory test I wrote a couple of weeks ago.
And....it works!
No memory errors after 100,000+ iterations, each iteration consisting of writing a pattern byte (0x55 or 0xaa) to all memory locations, then reading all memory locations, checking the data read against the pattern.
This project is now complete, and I can move on with the rest of the ED-64 build. Yay!
As I think I mentioned previously, I was using a X/Y line driver module to drive the inhibit lines - forgetting that since only one H-bridge could be active at a time, at most only a single '0' could be present when writing a byte to memory. Some hasty adaption of the X/Y line driver, and we have the Inhibit Line Driver, Rev A. The PCB arrived today:
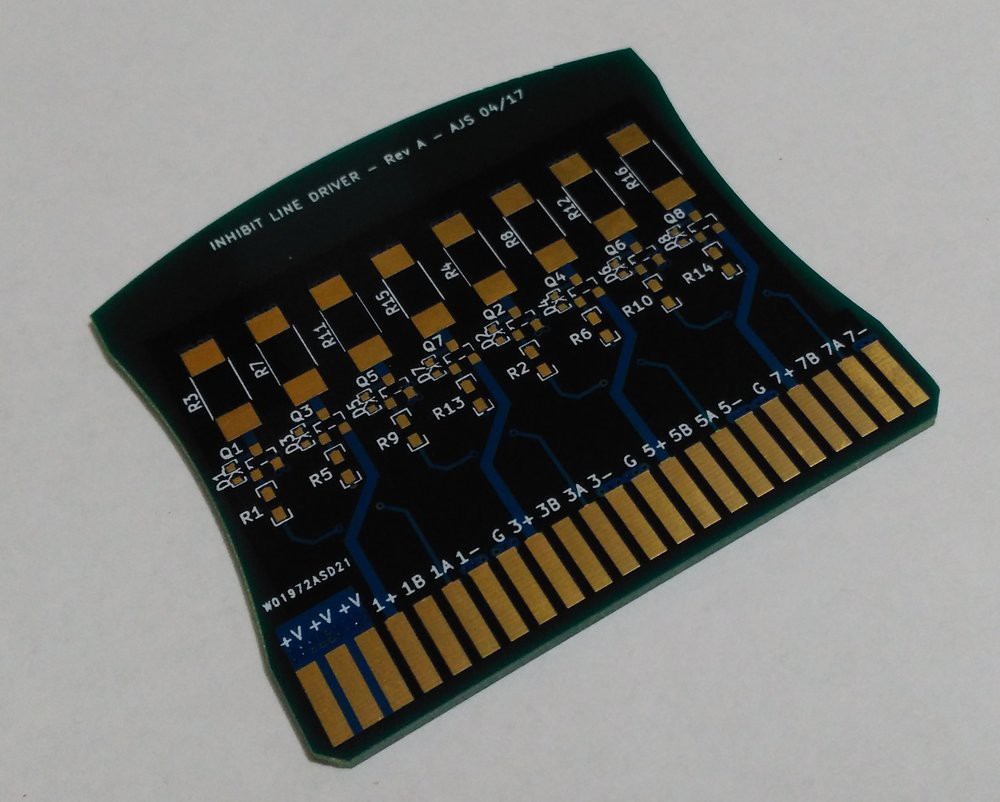
Now I'm just waiting on some 2512 SMD resistors...
Having thought it over, I realised the bias diodes couldn't be the problem - as temperature increases, the forward voltage would actually decrease, making the sense amps _less_ sensitive, not more. They're not really very close to possible heat sources (e.g. H-bridge modules) anyway. So this probably rules out heat effects on the current gains of the sense amp transistors also.
All other transistors are limited by base-collector Schottky diodes, so I don't think self-heating is going to have much effect in, for example, the H-bridge drivers. I might be wrong.
How about the cores themselves? I found a paper published in 1959 describing temperature compensation measures adopted by the designers of a mobile battlefield computer (MOBIDIC) that was rated for operation between -30 to +55 deg C. In the paper the authors make the point that the warmer a core is, the faster it will switch, and the larger the resulting sense pulse amplitude will be. The converse of this is, the warmer a core is, the more careful you need to be with half-select currents, to prevent data corruption.
So I'm wondering if by running a continuous memory test, the cores are warming up, generating larger sense pulses, with the weaker cores eventually producing signals of sufficient magnitude to reliably set the output flip-flops. If this is the case, then some small heating pads attached to the rear of the bit planes might solve this problem.
Some more experimentation should tease this out. Watch this space.
Reading, writing, and repairing.
The last few weeks have seen significant progress, to the point where I can read and write data to the the cores, with the following limitations:
1. I screwed up the design of the Inhibit module, so I can only write 1 zero in a byte. I have corrected the module design, and I expect the corrected boards to arrive any day now.
2. The system currently takes about 30 mins to warm up. If I run a continuous memory test on the cores (writing 0xFFs/0xEFs), a serial printout of erroneous memory locations gradually gets shorter and shorter, until they're all ok. I'm not sure what the issue is, but I suspect the bias diodes (1N4148s) in the sense amplifiers. The sense amplifiers are a bit kludgey, so I'm reluctant to disturb them too much until I have corrected boards for them - the next job, after the inhibit module. Then I can investigate properly, without worrying about breaking shitty soldering joints or shorting kludge wires.
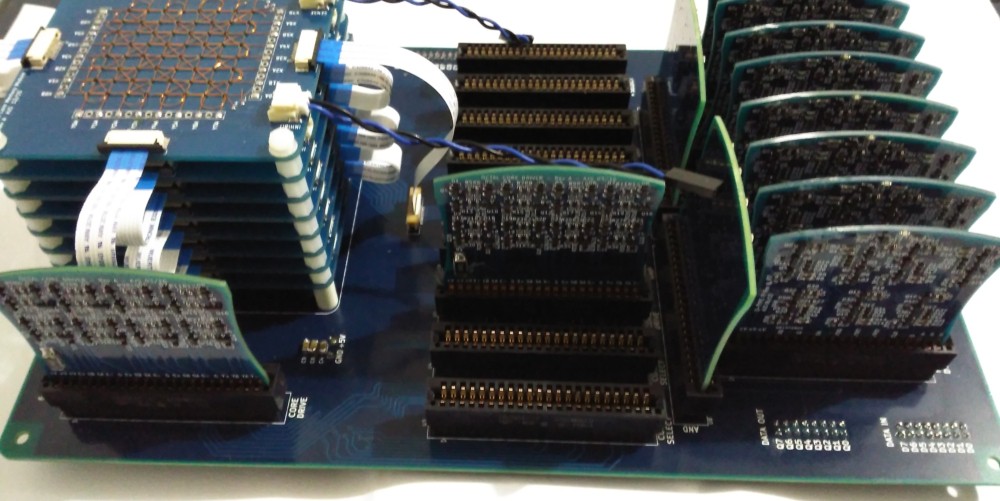
Anyway, here's a few pics of the current setup:
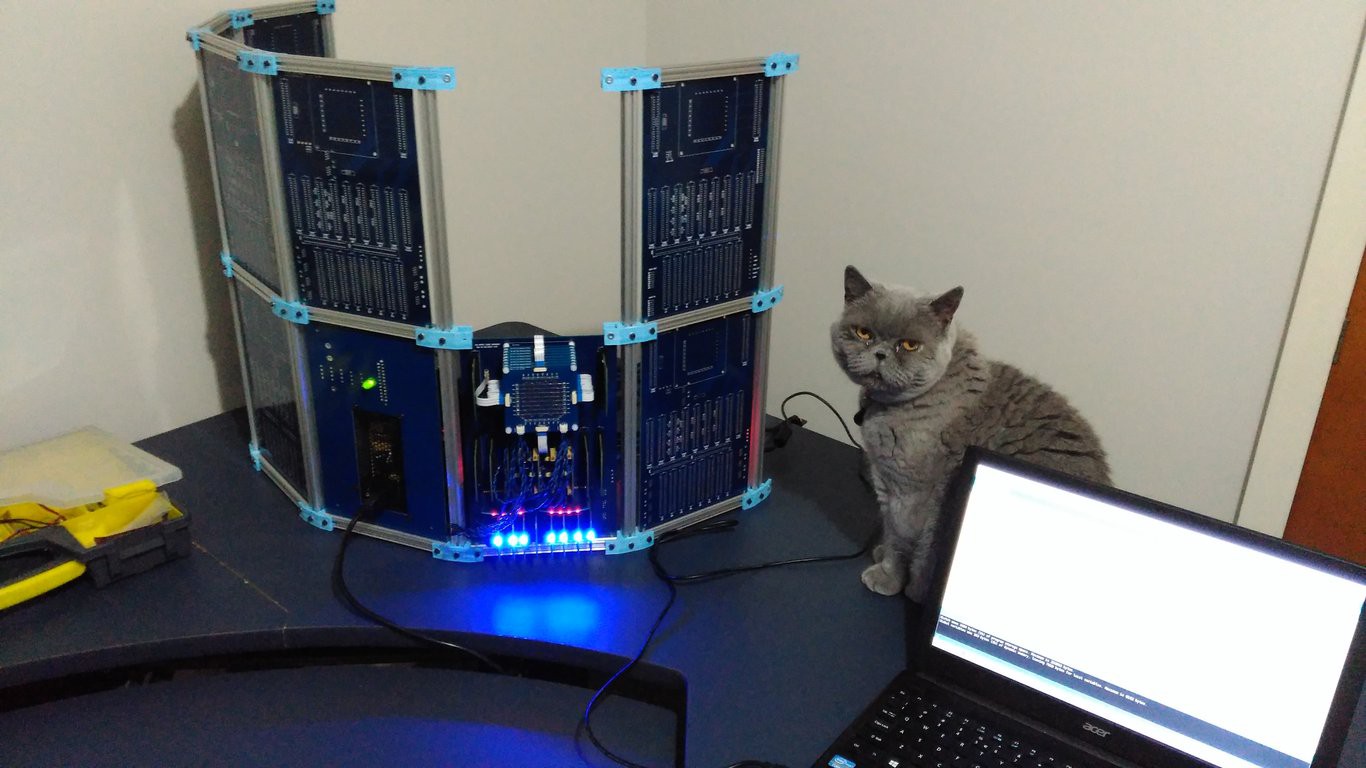
In the picture above you can see my Quality Assurance Technician (QAT) hard at work.
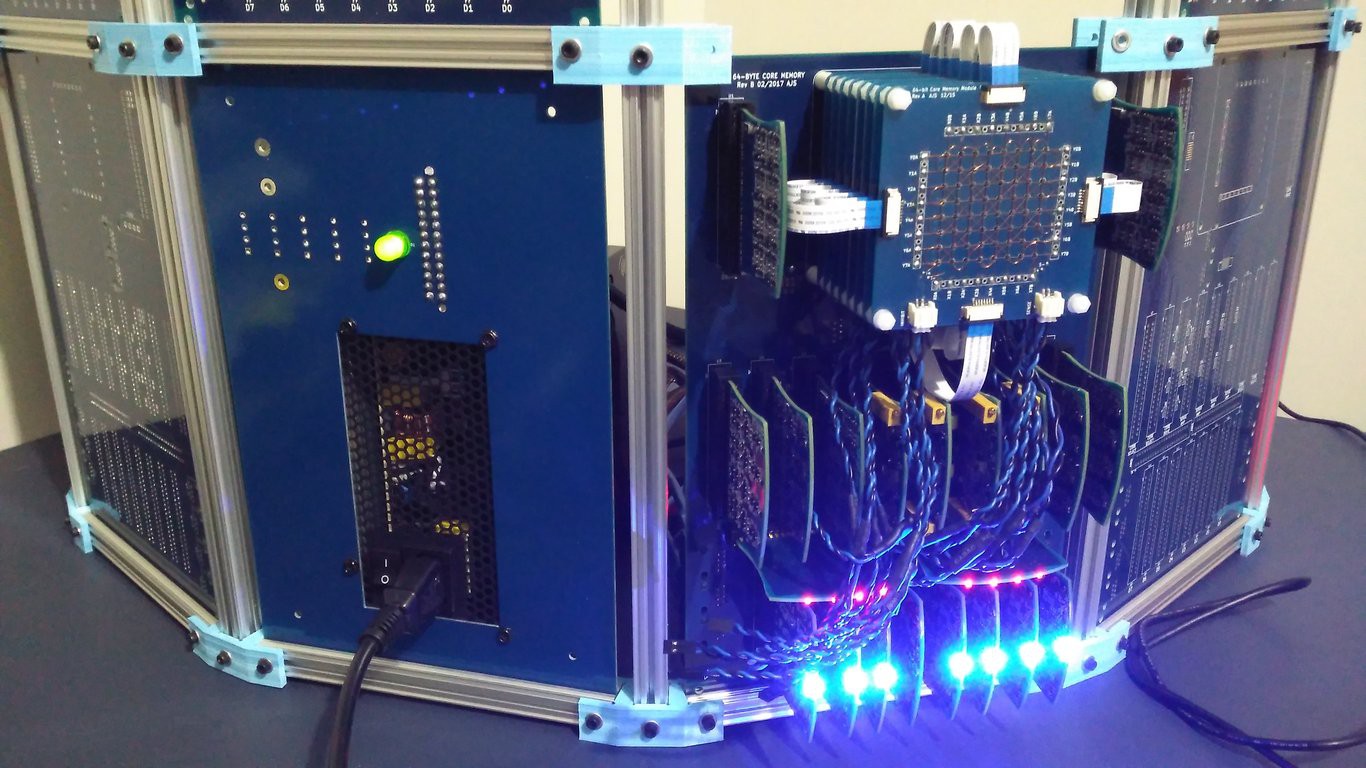
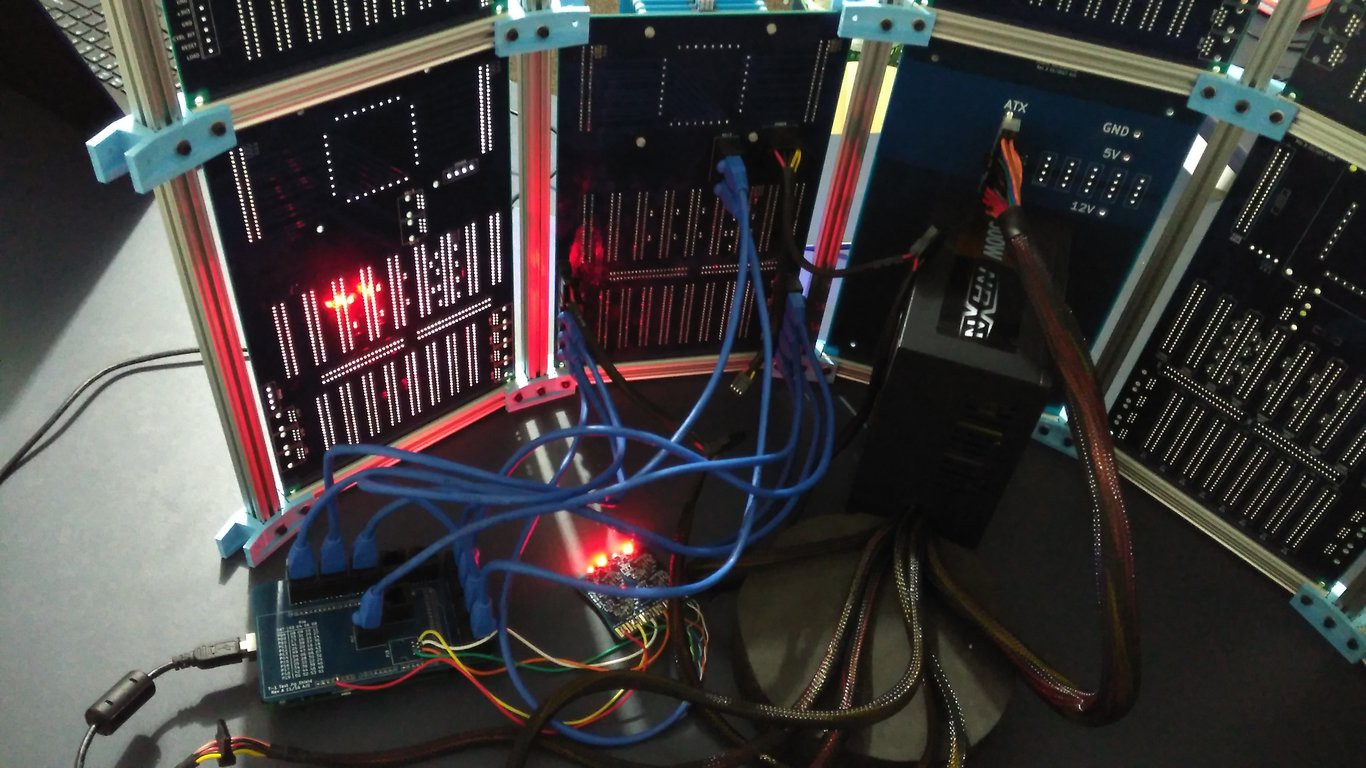
The rear of the memory system, currently controlled with a Arduino Mega 2560, and the power supply. Note the cat-5e cables - this is how the various computer subsystems will be interconnected.
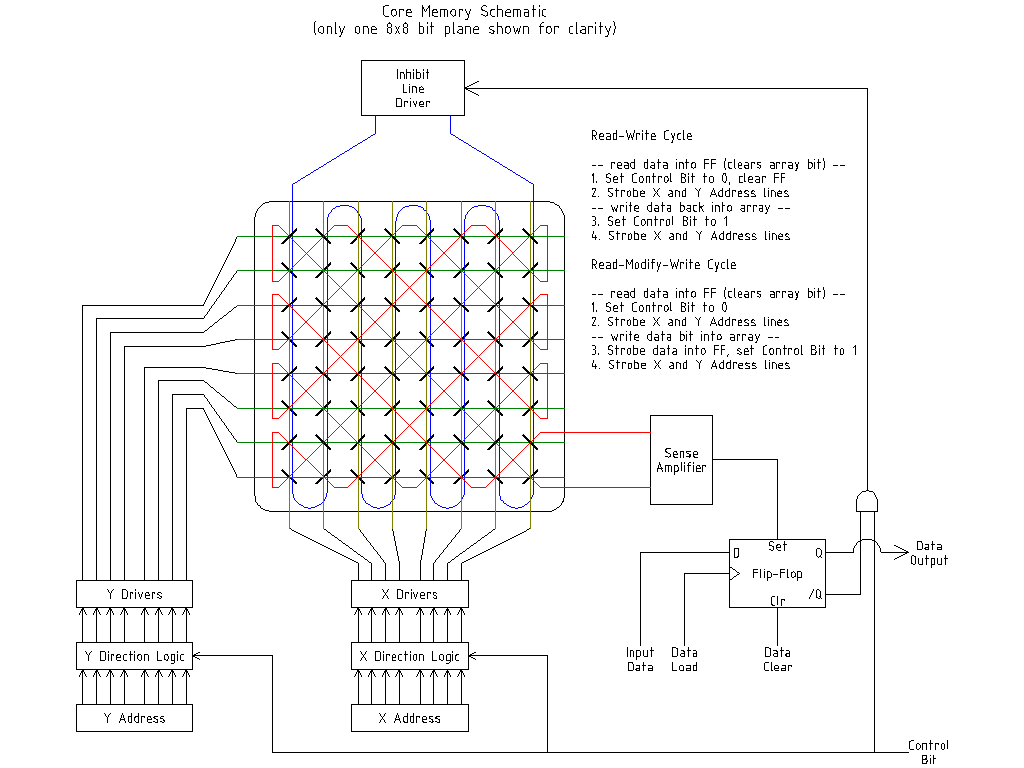
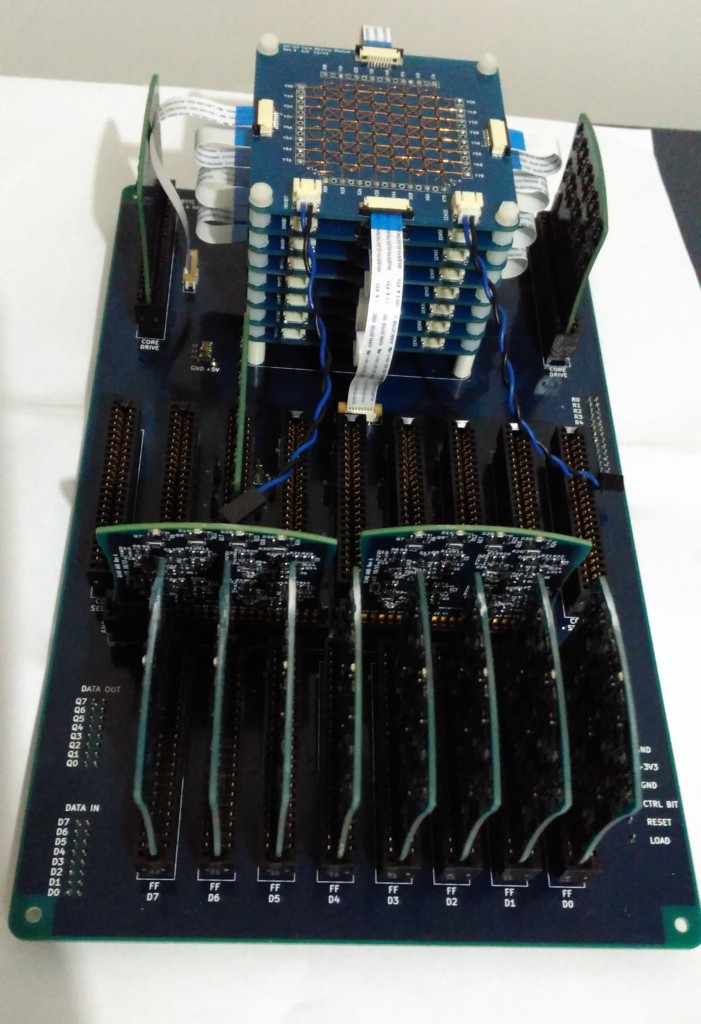
The 4 x core selection modules have been tested and installed. The core selection modules control the activation and direction of current through the H-bridges, depending on control and selection bits, which in turn come from the control logic of the computer.
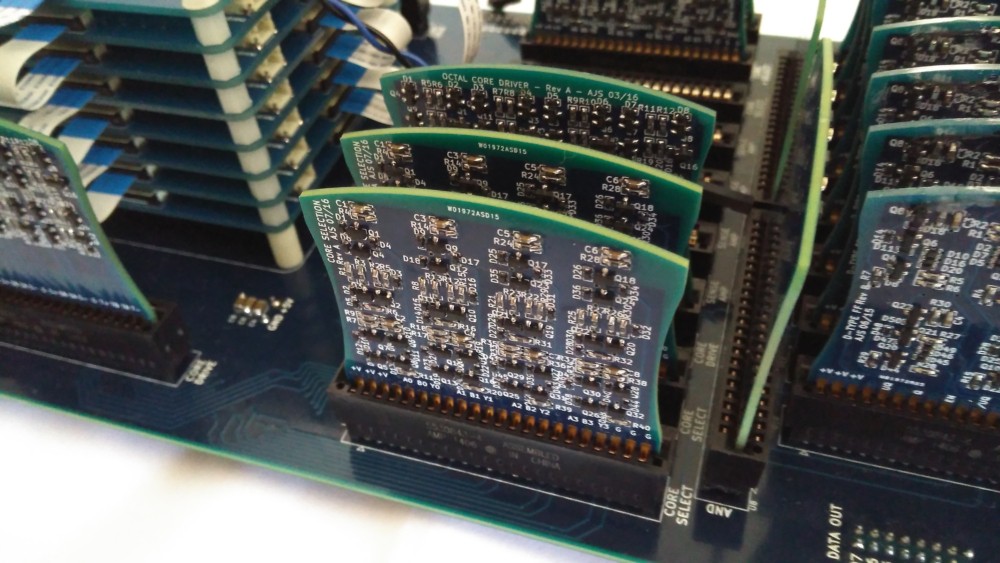
So that leaves 4 remaining vacant slots, waiting for sense amp modules:
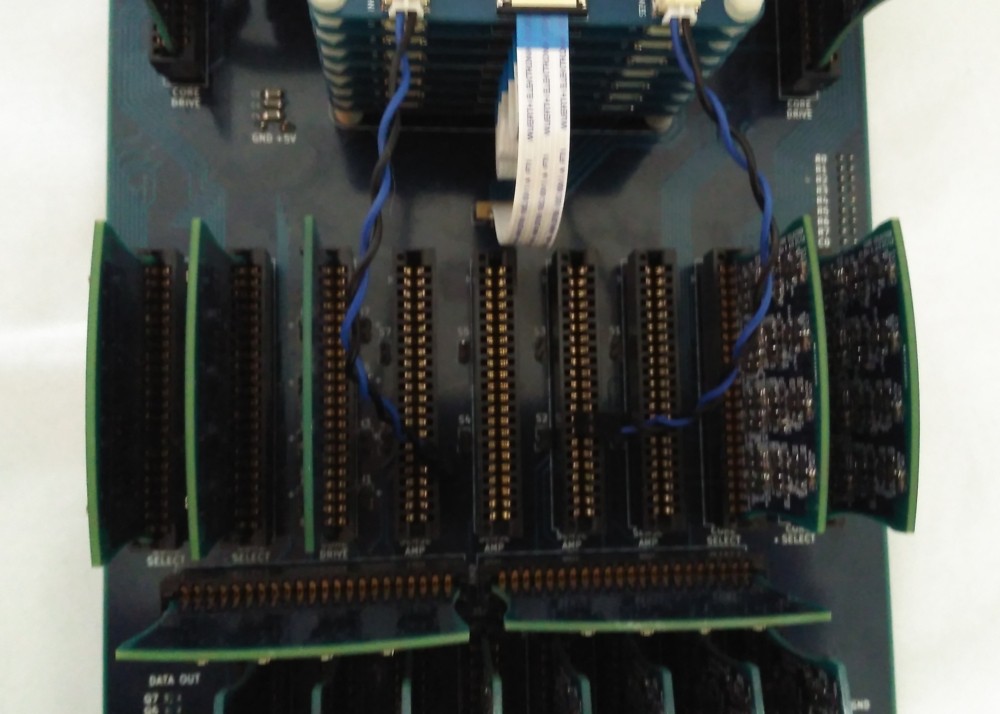
These have been designed, but not made (yet!)
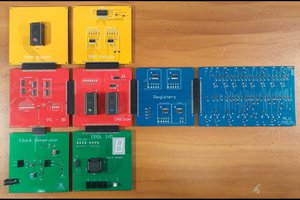
Input/output flip-flops, X/Y H-bridge drivers and some glue logic have been assembled, tested and installed. Remaining to do: 4 x core select modules, and 4 x dual sense amplifier modules:
Create an account to leave a comment. Already have an account? Log In.
I’ve been looking to make a controller for my UNIVAC 64x64 bit plane but I’m more of a digital guy than analog. This project is exactly what I’m looking for, thanks so much for posting!
Hi could you tell me the size of the ferrite cores you use.
Regards
Peter
Hi Peter, the cores have an outer diameter of about 1 mm. They are readily available on Ebay from a Bulgarian seller (search for ferrite memory cores)
Hi thanks I've just email one of them to find out size and cost although they seem to be quite cheapRegards
Peter
Become a member to follow this project and never miss any updates
 Stefano
 Andrew Starr
 Dave's Dev Lab
 Rainer Glaschick
Great project! I like the nod to industrial design with some simple curves. Nice touch.