Alexander Fuentes
-
Protection
08/27/2018 at 21:51 • 0 comments![]()
![]()
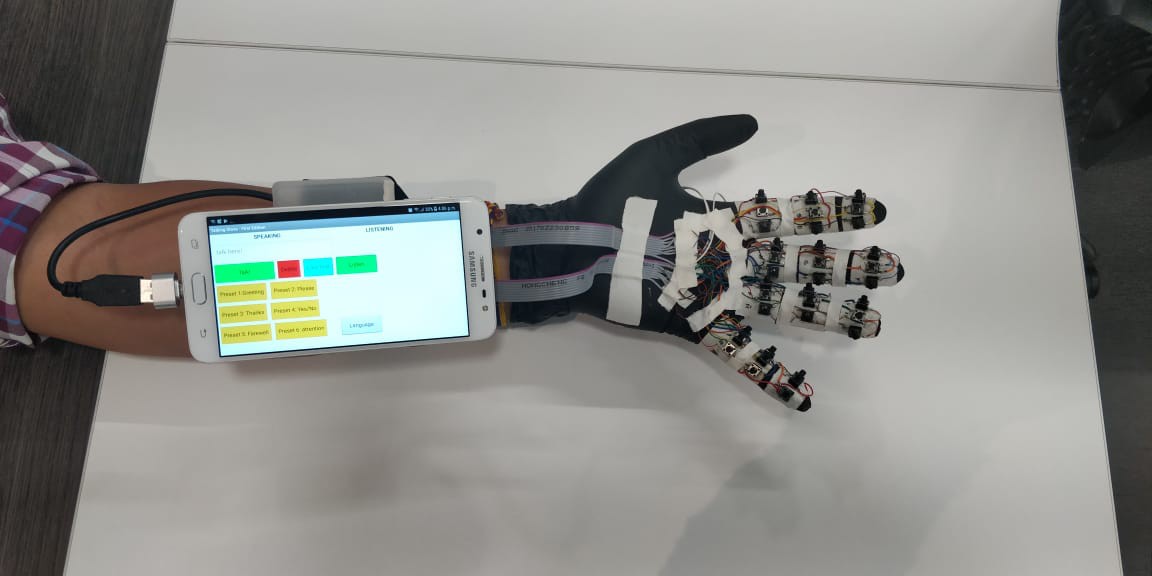
The keyboard PCB should be protected from accidental movements as most times it’s a cheap piece and will break easily and the soldered contacts will be easily detached, so I protected it on a small box.
This box should be tied to a wristband, to fix it in the arm, and it should have a way to secure the cell phone above it. I used a popsocket which is easily detachable and will hold the phone secure.
If the keyboard PCB is wired or not, then an OTG connector should be used to connect the cable to the cell phone’s micro USB port. If wireless, the keyboard will bring a little dongle which should be connected to the OTG.
-
Glove buttons positioning
08/27/2018 at 21:49 • 0 comments![]()
![]()
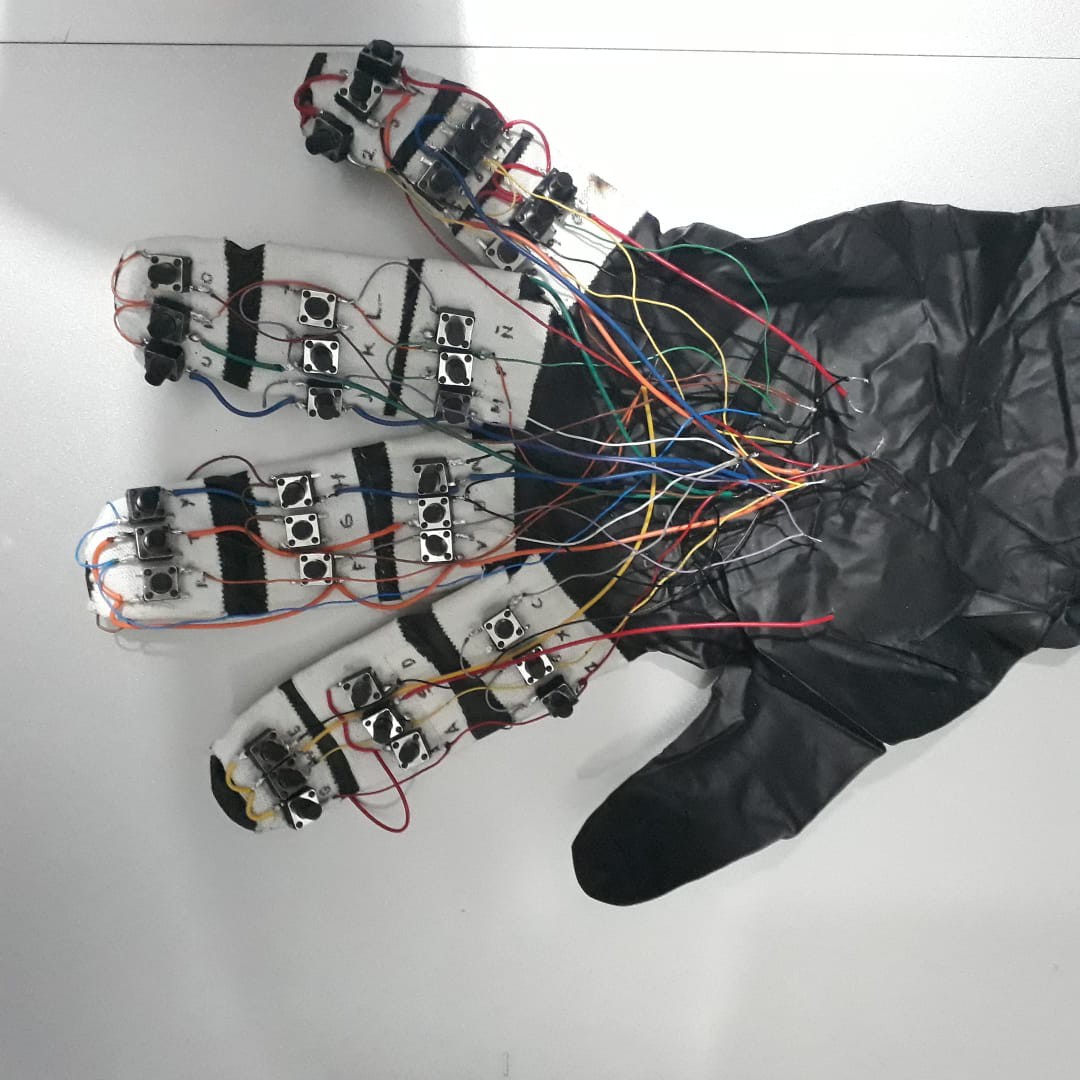
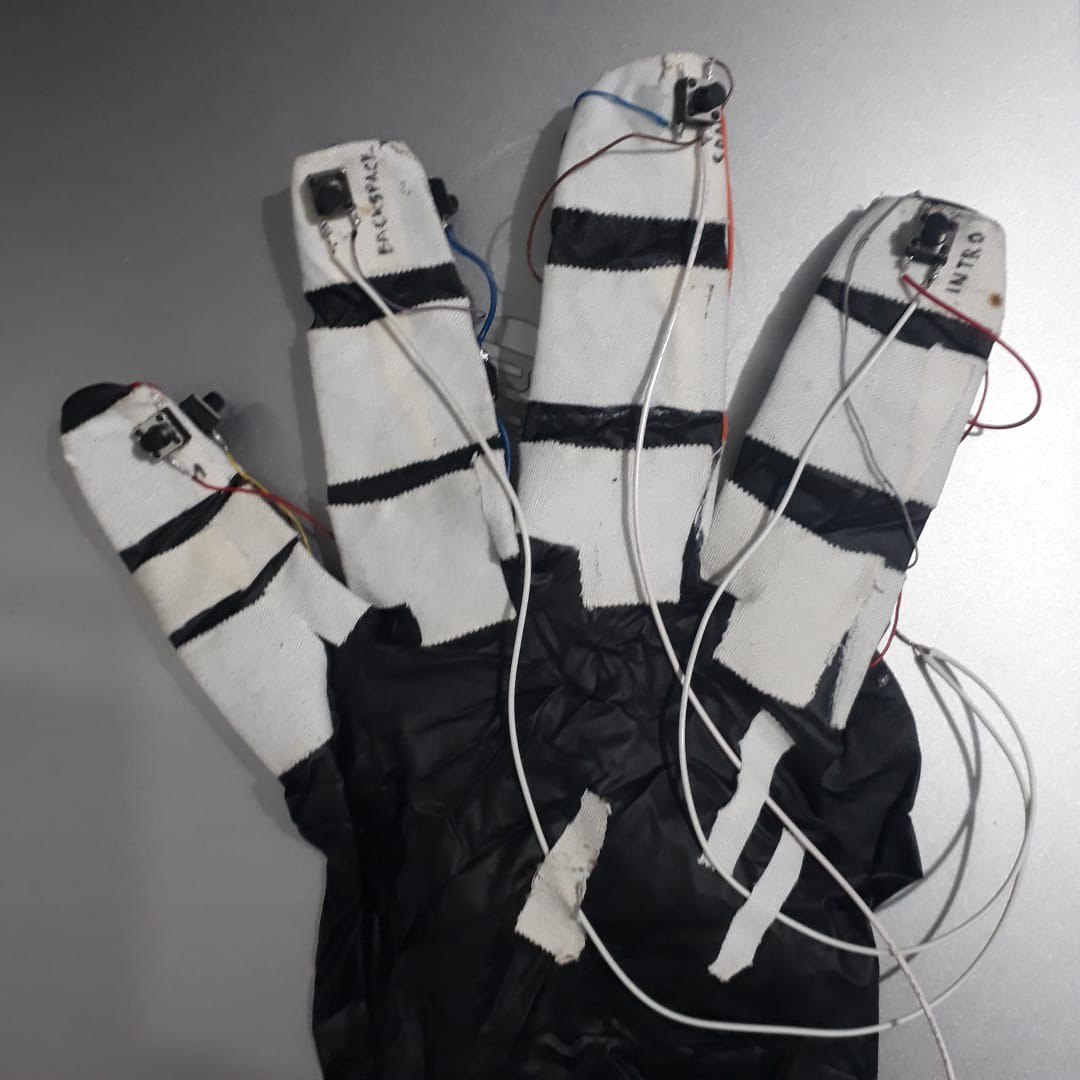
Glove buttons positioning: The button positioning on the working prototype was according the size and shape of it and how much I’ll have to move my thumb to press them. A standard can be set for final models hoping that smaller buttons can be used.
Buttons were not glued directly to the glove, to avoid damages when soldering, also because I used instant glue which can crystalize the glove and make it breakable easily.
The length of the wires coming from the buttons should be set at a point close to the wrist, then soldered to the cables coming from the keyboard PCB.
-
Keyboard Character Distribution
08/27/2018 at 21:47 • 0 commentsKeyboard Character Distribution: In looking for a comfortable way to distribute the buttons in the glove, I set the quantity of 9 buttons per finger in the palm side (excluding the thumb) and 1 per nail in the fore palm side. The thumb will be the actioning finger. For comfort, I set the quantity of resulting wires as a common factor for the key order distribution decision.
I tested distributing from A to Z in the first three fingers and the numbers in the last one, then I tried with the COMAC and DVORAK distributions but the one that uses the less wires is QWERTY, for obvious reasons, it was like reducing the keyboard’s foil matrix to the size of the palm.
-
Mapping and wiring the keyboard key matrix
08/27/2018 at 21:43 • 0 comments![]()
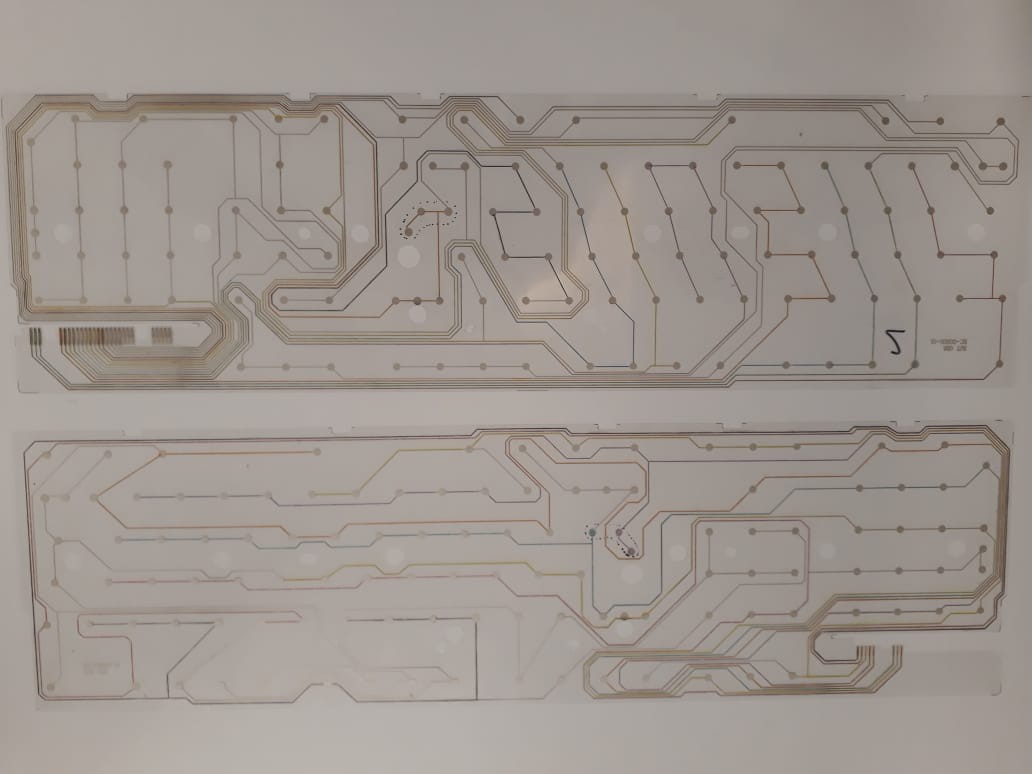
Mapping and wiring the keyboard key matrix: A cheap keyboard have two pieces of transparent plastic foils with the wirings and contacts printed. In order to get the correct contacts in the PCB, I had to paint the printed wires with different colors and then did a list with the corresponding contacts per character. I noticed that there is a main set of contacts and a secondary set. The foil with less contacts is the main.
In order to check functionality, I connected the PCB to the computer and some wires to a breadboard according to the aforementioned distribution, then checked two characters sharing one single secondary line and a different main line (1 and Q) and it worked. Then I checked two characters sharing one single main line and two different secondary lines (1 and 2). It worked too! So, the thickness of the cables I was using won’t affect the result (obviously I would use the thinnest ones possible).
-
Application
08/27/2018 at 21:42 • 0 commentsMobile App: I choose to use MIT App Inventor, due to the ease of use, and because it’s easily customizable. Android phones have also the particularity to be easier to program than other models and have some functionalities that can be well exploited from a single app.
The app visual has the following:
Speaking section:
- Textbox1: Where the user will type with the Talking Glove
- Action Buttons: “talk” to reproduce what has been typed, “delete” to delete text and “last text” to repeat the last text typed
- Preset buttons: Divided in 6 categories, they store common phrases, so they are not typed with the glove.
- Listen: Button to be pressed when the user will “hear” what other people are saying. It starts the Google’s voice functionality found in all Android phones.
- Textbox2: non-editable field which will display the text taken from the voice functionality.
- Language: Button to select voice output and buttons text language.
Listening section:
The app has the following core non-visible components:
Text to speech: Used to convert what is typed with the glove to sounds
Speech Recognizer: To convert voice to text
Other components are used to give useful functionalities:
Clock: used to calculate the time of the day so when the user touches the greeting button, it will create the phrase with the right moment and reproduce it
Notifier and TinyDB: Used to store user name and help on the selection of output language
MIT App Inventor apps are made in blocks, which is like doing a code puzzle instead of typing it. I divided the blocks in 3 parts:
Initialization: Blocks that will start the following functions:
- User name entering: Needed to store the desired user name, this will be used for the greeting button, by concatenating the pieces of code with text and day time calculation.
Buttons: Pieces of code which will activate the non-visible components functions.
- Language: Blocks that will process the language change. Since is not a common functionality, I made use of lists in which the pieces of text are stored.
Language set blocks, which will operate the change by calling the items in the lists. In order to be organized, I divided the function in “language”, “listName” and “String”.
- Language: a number which identifies the language to be chosen. I assigned 1 for Spanish and 2 for English
- ListName: Global variable containing a list of strings. There should be variables for language, buttons, and titles.
- String: corresponding number of the string to be used. The strings are stored in a list inside a list. The main list defines the listname and the inside lists are created with independent pieces of text according to the languages available. In this case, for example, I have a global list called “buttons”. This list contains 2 other lists, one for English and other for Spanish, and inside each list, there are 10 words which will determine the text on the app buttons.
Talking Glove
Human-computer interface to help non speaking people to actually talk!