Alastair Young
-
Nozzle success. Z-Axis stuff and legs
10/06/2018 at 04:28 • 0 commentsI fashioned a collet to hold the delrin rod better in the lathe and bored out the holes with my new cheap metric reamers. The runout on the second attempt at the toolholder is barely visible, so I'm calling it good. See video below.
The z-axis linear slide arrived without the carriage, and I've opened a support call with Banggood. At best it will be weeks before a replacement comes in. I may mock up a carriage in the mean time so I can get on making the other parts.
The springy 4mm - 8mm coupler came with the 4mm hole slanted by about ten degrees. Rather than complain on a $2 part with a 3 week lead time, I just drilled it out, reamed it and sleeved it back to 4mm. It is nice to have a lathe! And reamers.
With the z-axis screw assembled the little Nema 8 happily lifts its own weight and the screw (upside down) so I think it will be fine. I was worried it would not have the torque for the job.
I added legs to the frame lifting it up about 75mm from the base. The plan is to have all the electrical and pneumatic gubbins underneath the work surface as I have very little worktop space here. The work surface will be removable for access. It needs to be raised up anyway to give space for the camera.
Other stuff that came in: the cheapo solenoids, the nano shields, nanos, 2-pin jumpers, stop switches, power plug.
-
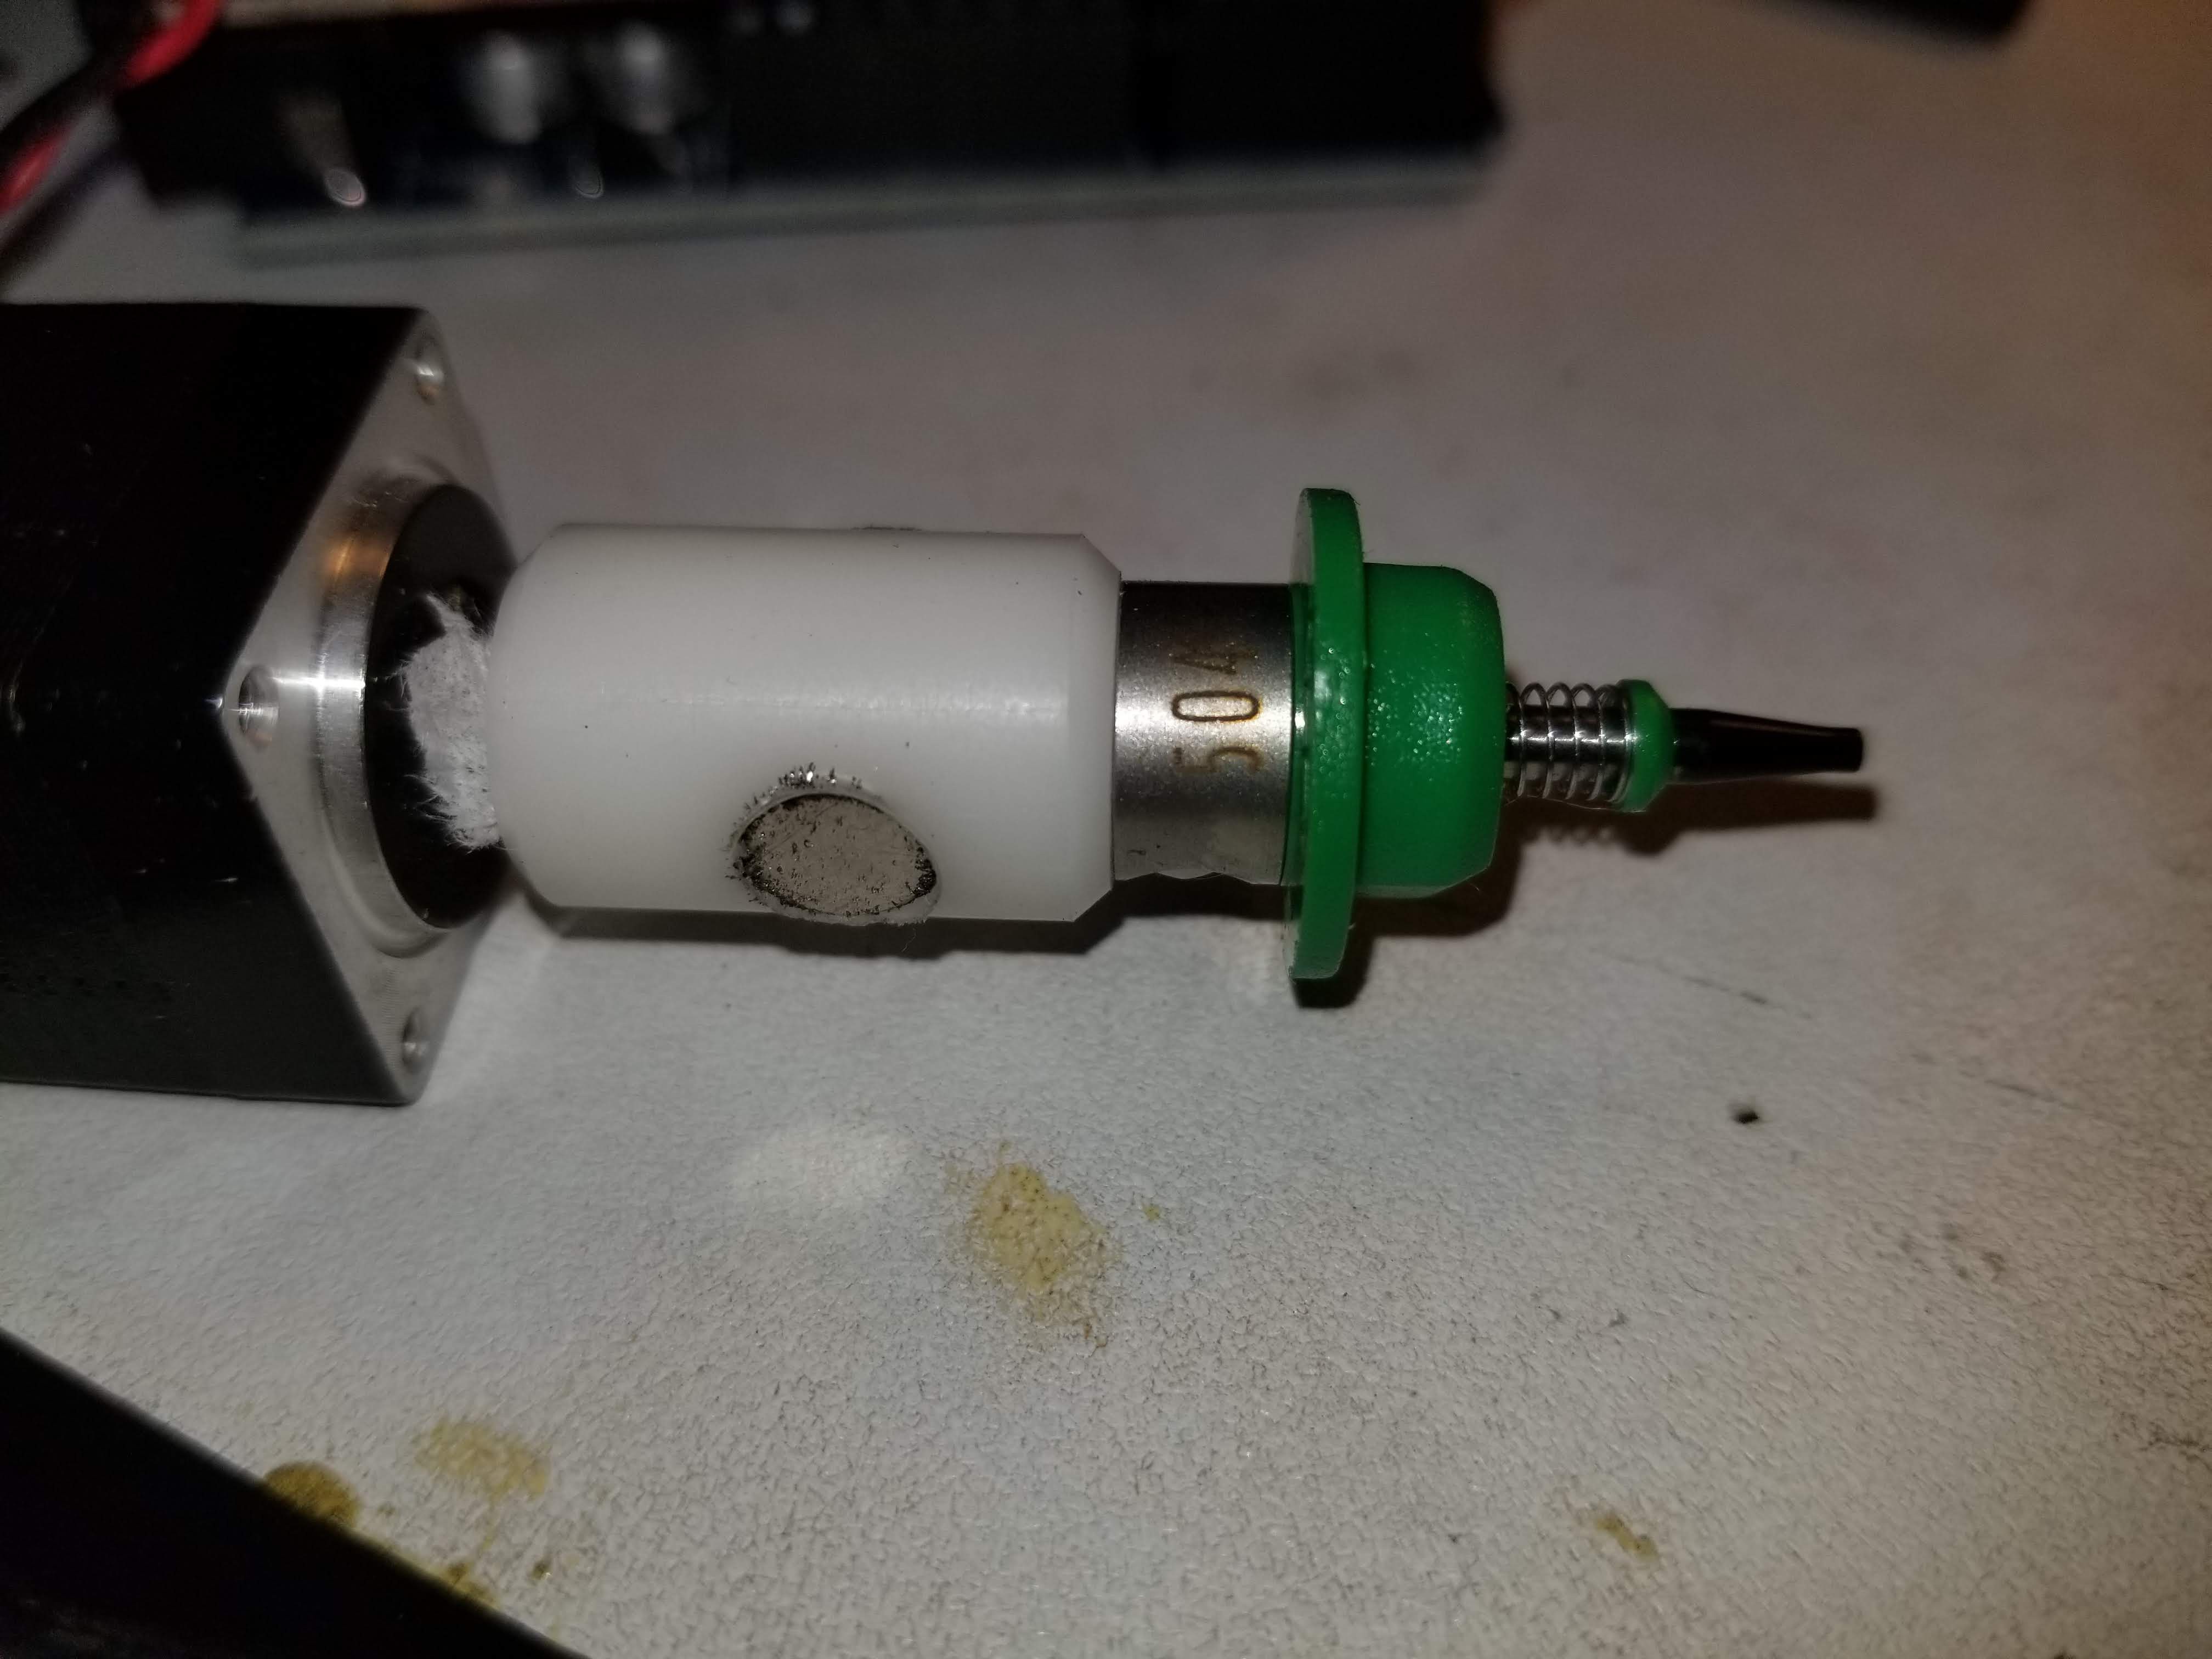
First semi serious attempt at nozzle holder
10/03/2018 at 06:05 • 0 commentsI picked up a foot of 1/2" Delrin rod at Tap plastics today and had a semi proper stab at making the magnetic holder work.
It works! It picks up the nozzle with a satisfying click and the release force is not excessive, but much more than any component I'll be picking up.
I do need to refine the machining process as the run-out is terrible and all at the stepper side as far as I can tell. However I only used 1" of material at 21c per inch, so I can have a few more tries. A cheap set of metric reamers are on order, and I'll be making up a collet to hold the piece out of Fortal alloy I have lying around. Holding a hollow piece of 1/2" Delrin in a 5" 3-jaw chuck tightly enough it doesn't slip distorts the heck out of it I think.
Final drills used were #11 on the stepper side and K on the nozzle side. This gave a close sliding fit on both ends. Friction on the stepper side provide by jamming it over a Kimwipe. Oddly the local stores do not sell metric drills. Or reamers.
A quick manual test-suck reveals functional vacuum seal and pick-up capability.
Pic:
![]()
video
-
More bits came in
10/02/2018 at 05:01 • 0 comments12V 15A PSU. I panicked after ordering that I had ordered a 220V unit, but it turned out to be switchable to 110V. It gives out 12V and did not show any immediate intention to spontaneously combust.
z-axis lead screw
CNC shield and Arduino clone. The "Geekreit" CNC shield is a copy (not a clone) of the Protoneer 3.00 shield. A copy down to the silkscreen, which is really bad form. It comes assembled and with 4 A4988 drivers and an Arduino clone for $12. As one of the objects of this project is to keep the costs down, I'll use it, but a shout out to the folks at Protoneer for designing it. I think this board is pre grbl 0.9 I.e I need to swap pins 11&12 between the shield and the board.
This stuff all seems to work, after I figured out I needed to jumper the ENA pin on the shield to GND.
The little Nema8 motors get mighty warm, so I read up on current adjustment and cranked the Z way down. These are apparently easily melted, so some care is needed there.
-
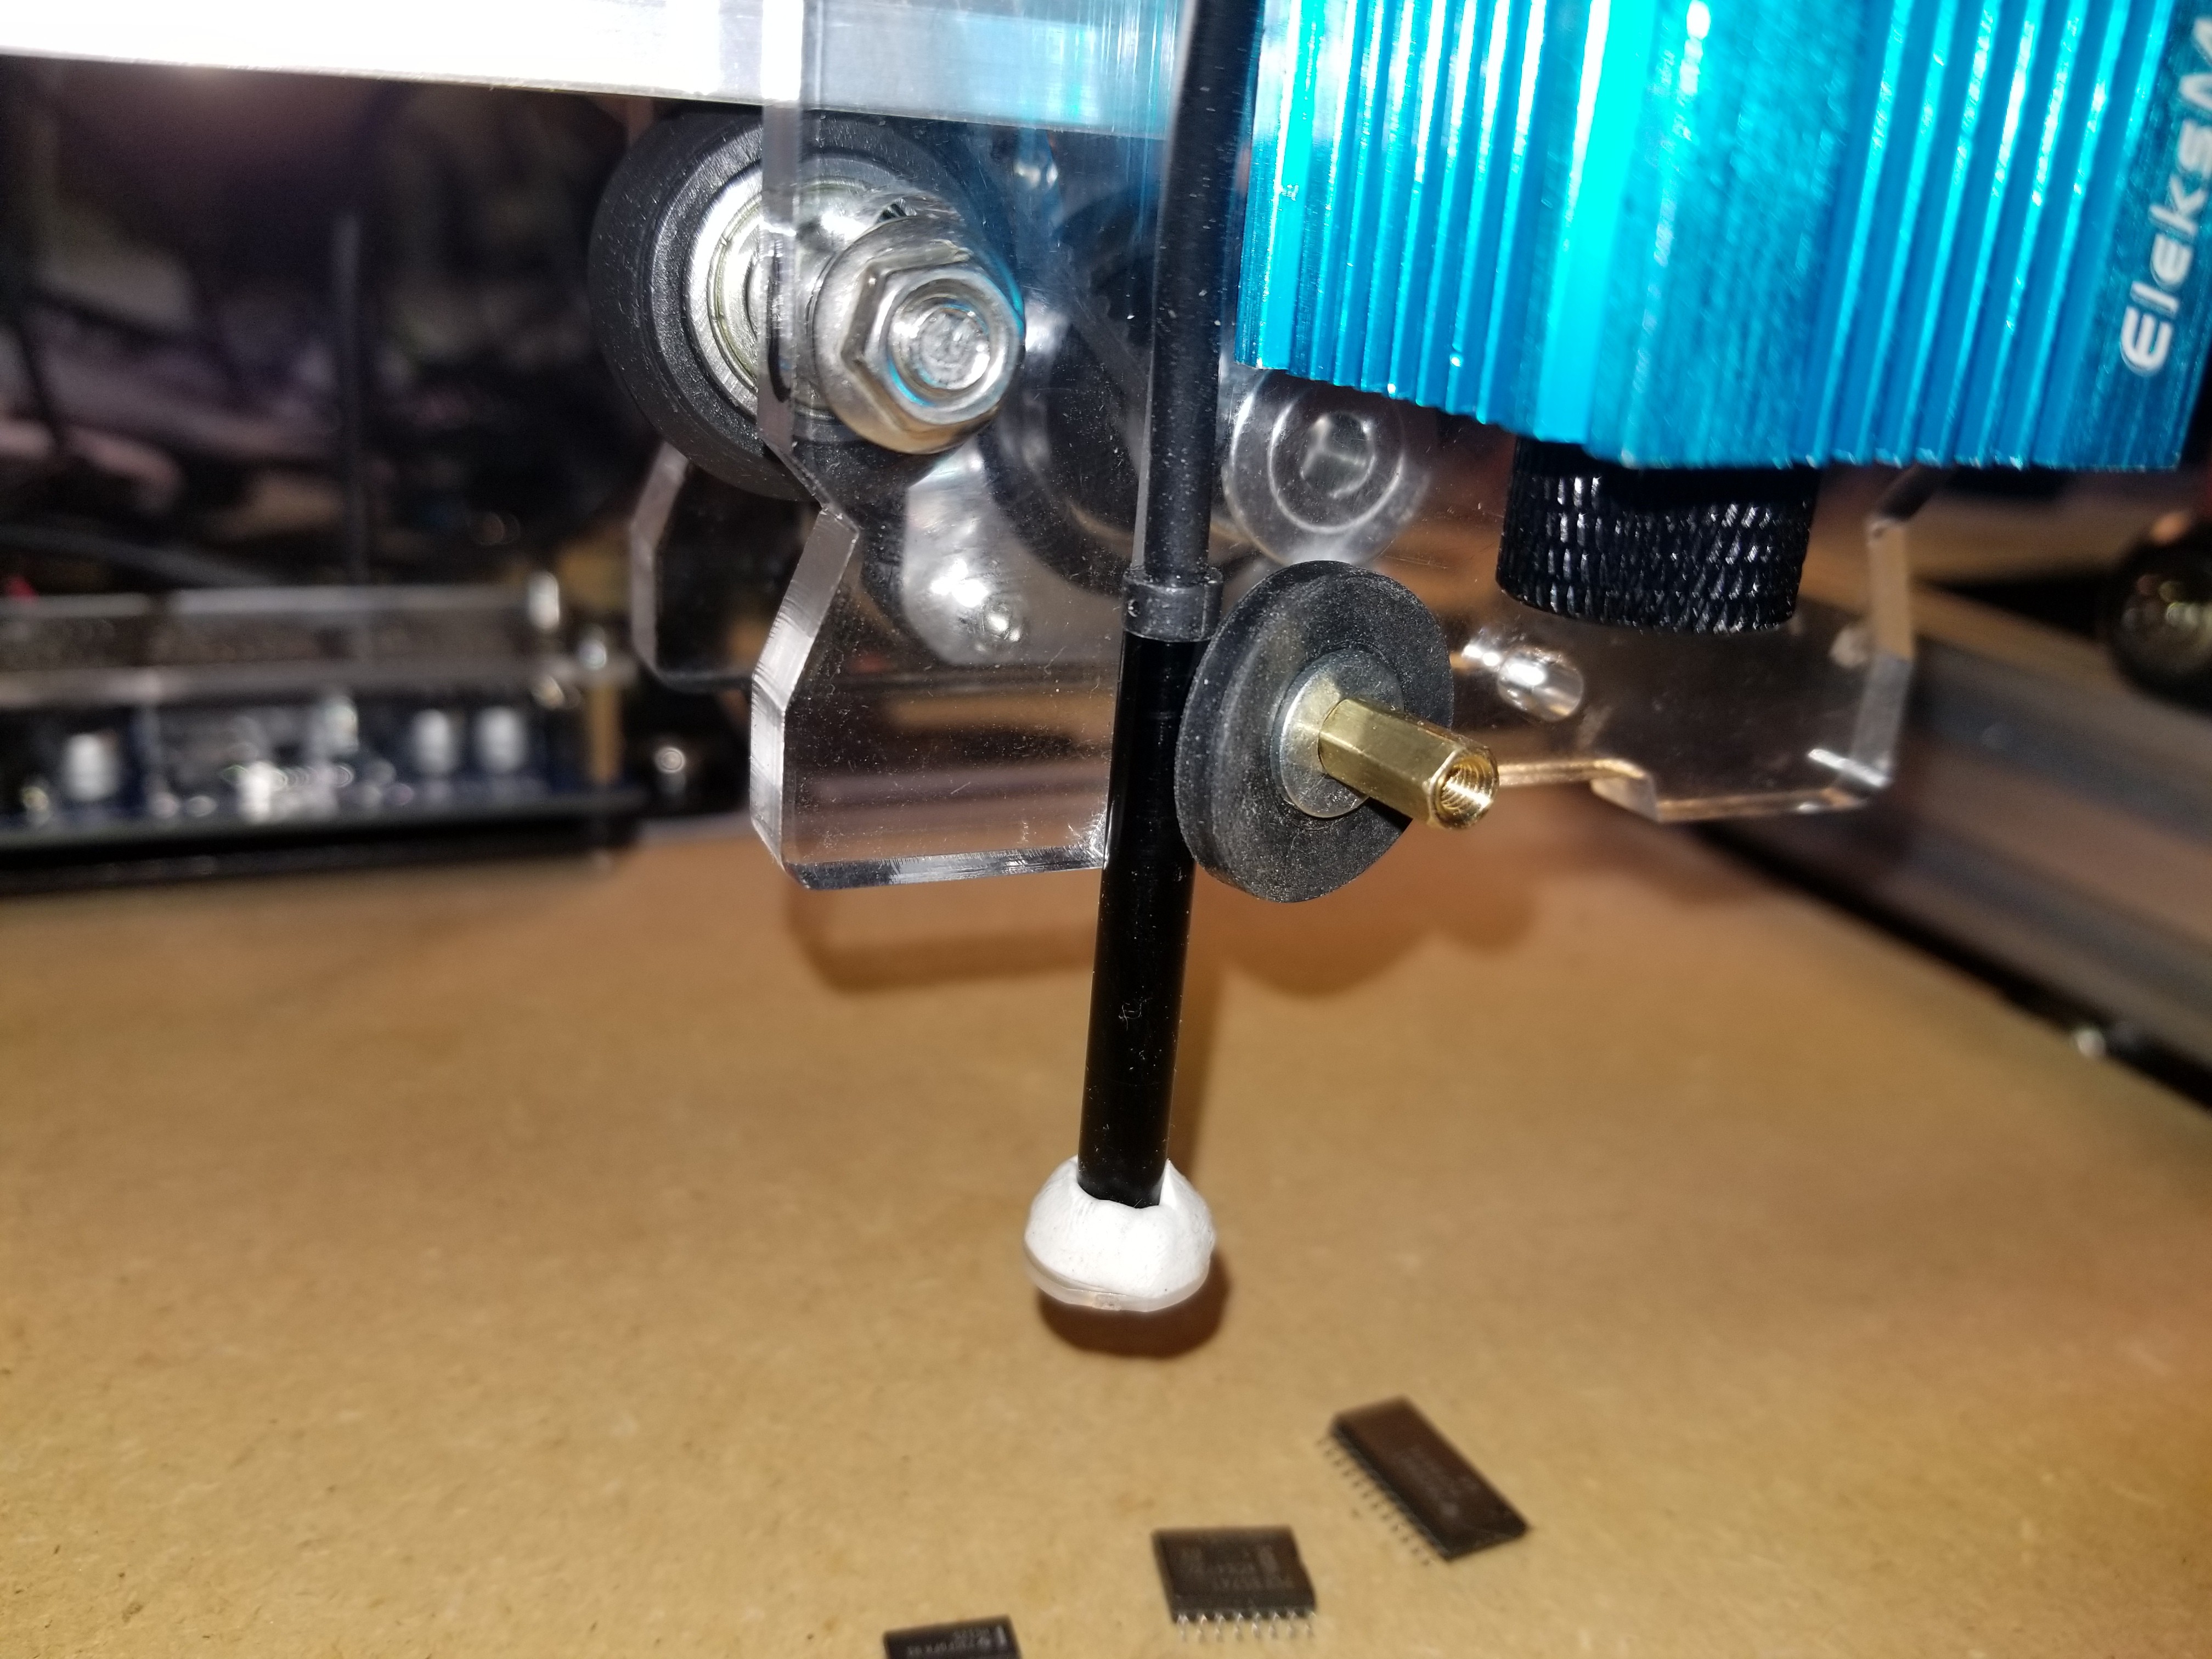
Down camera mount
09/30/2018 at 04:18 • 0 commentsMachined a 45 degree groove in the carriage to align the camera. Interim clamping with bolt and rubber washer.
I also upgraded the GRBL to 1.1 and played around with the speed and acceleration. Much faster!
I traced the pins on the Mana SE 3.2 controller board. Many of the pins it does not use are not broken out at all, e.g. Z-Axis stuff. In particular the stepper enable/disable is not connected at all. The laser is driven off D11, and so is the motor port via a Mosfet to 12V, and the servo. Power for the servo is driven from the 5V on the nano via a hidden on/off switch under the nano. Steppers are nailed up to 16X microsteps. Presumably one can run a fan off the motor port, more laser = more fan. So I think I can use this to drive the C axis and maybe some lights.
Picked up some 1/2" MDF for the base etc.
![]()
-
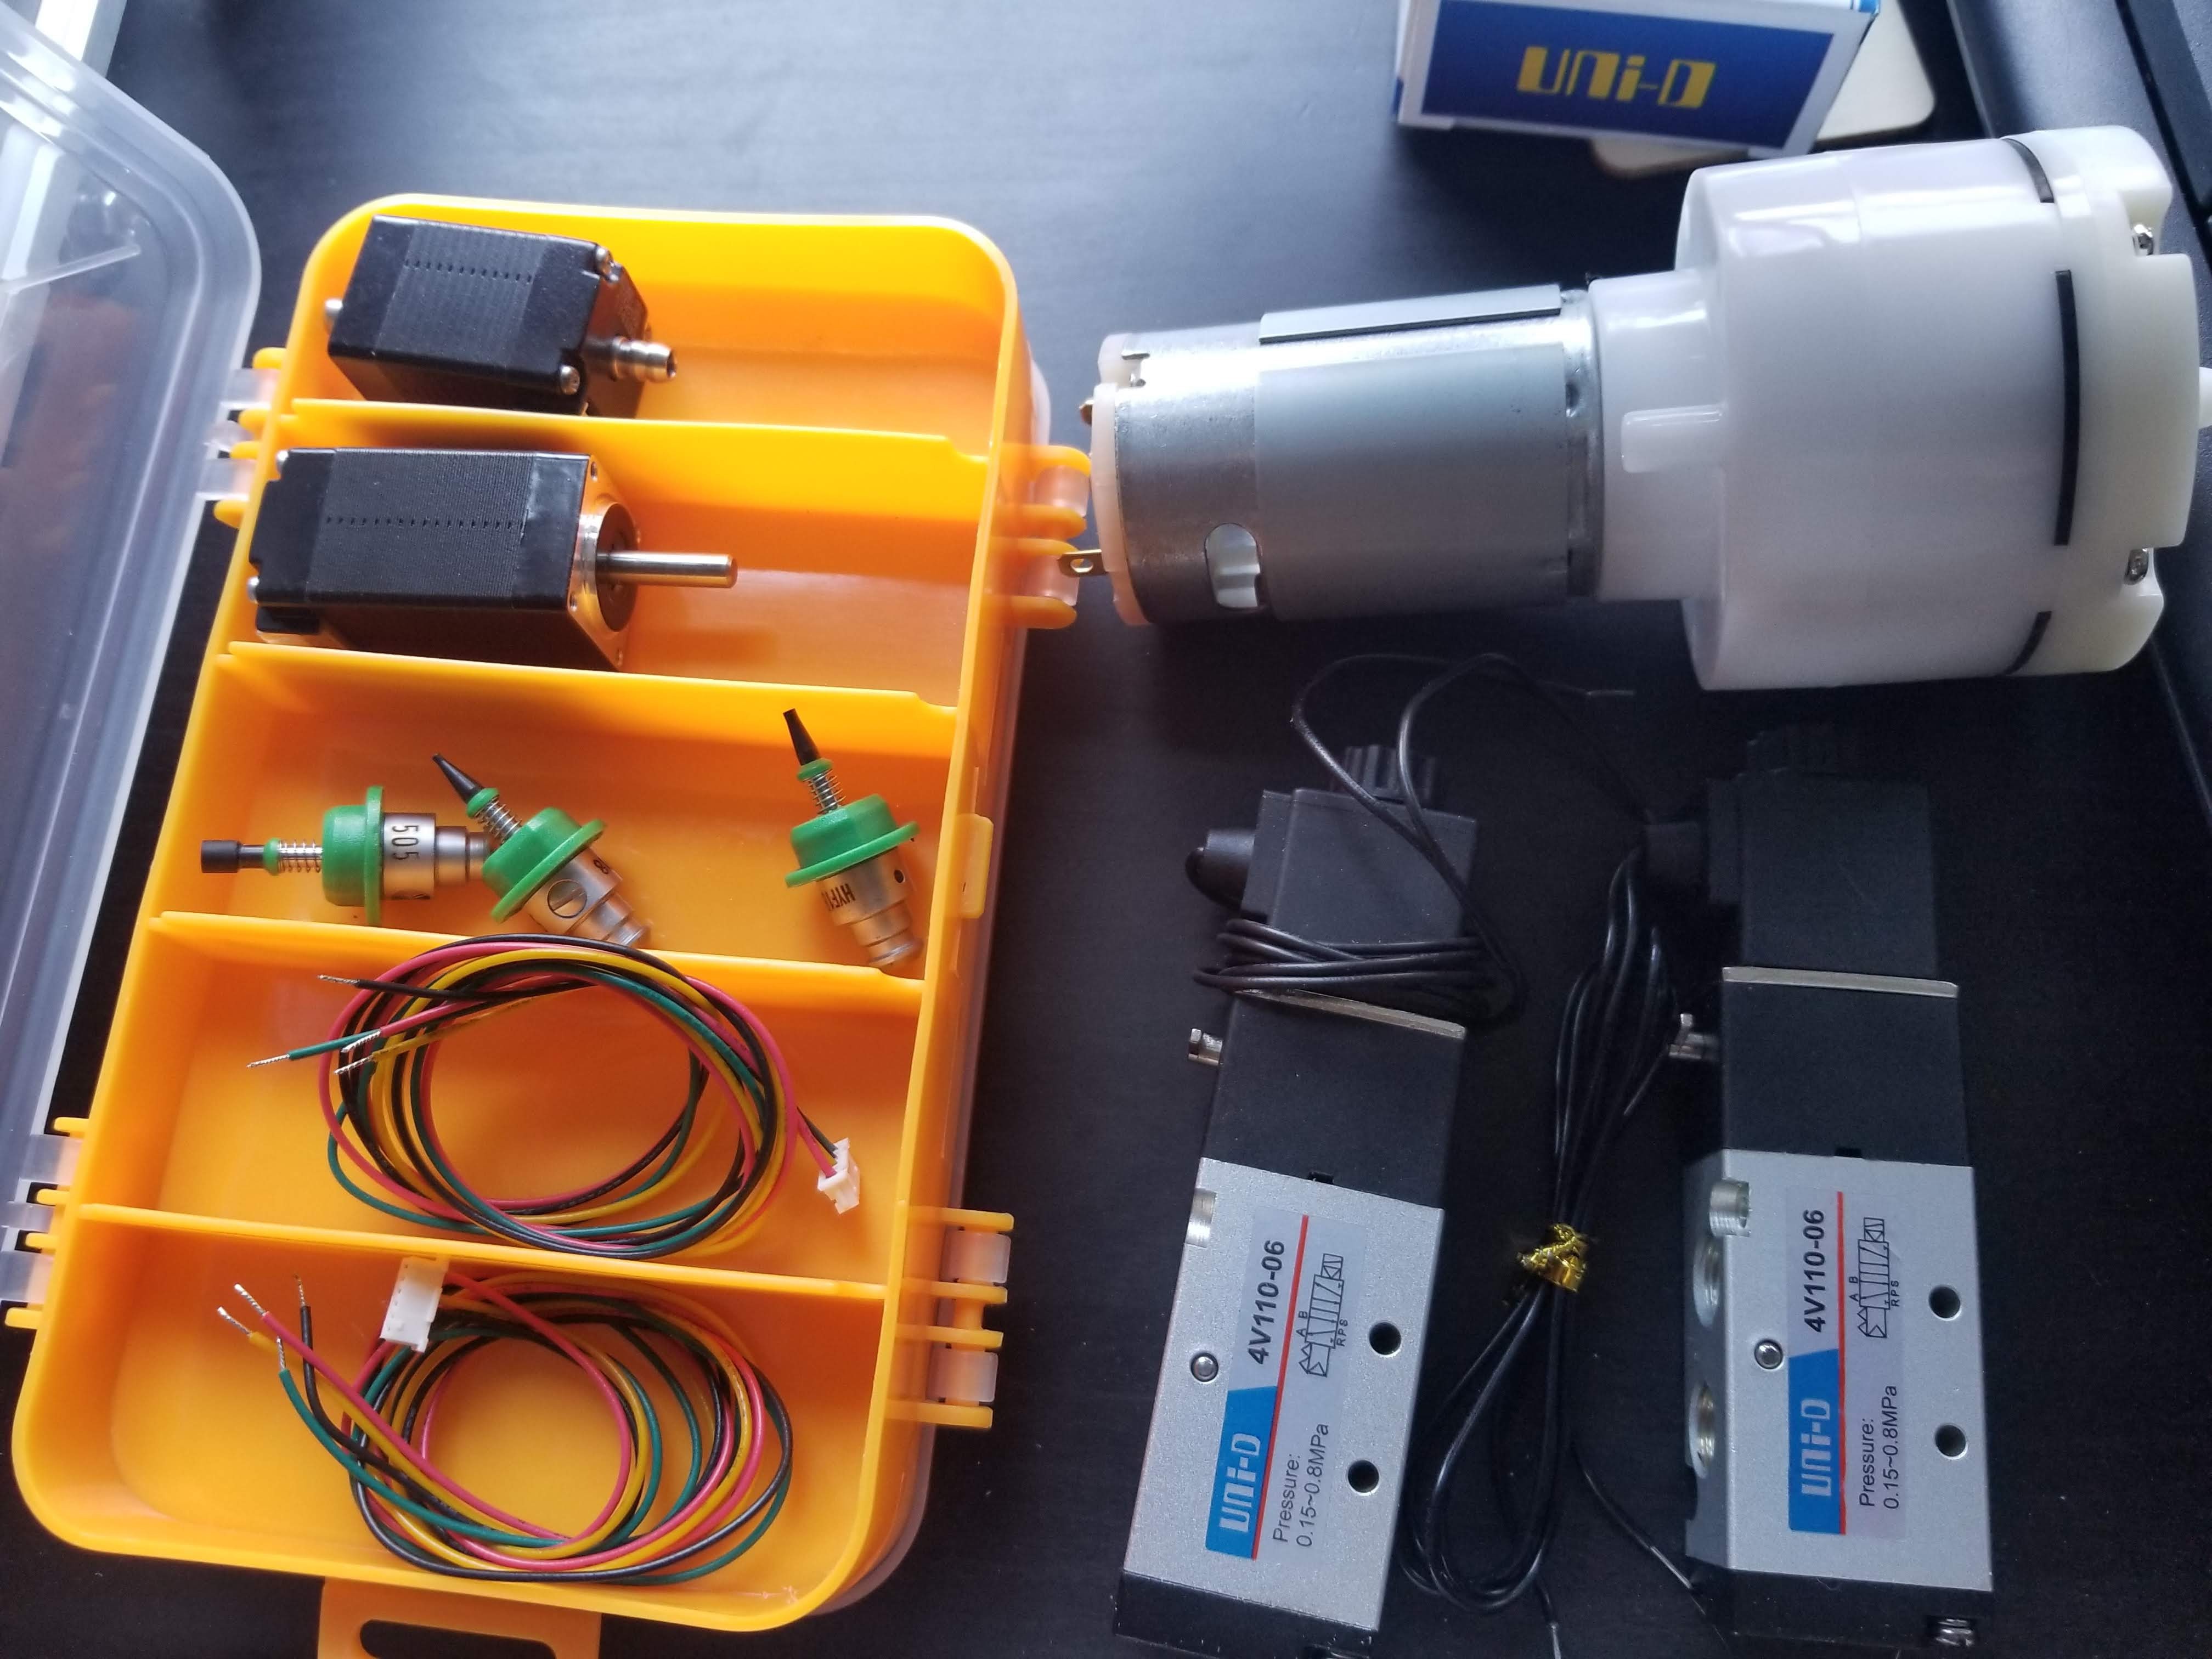
RobotDigg parts arrive.
09/28/2018 at 00:23 • 0 commentsBoxes have started to come in, this batch from robotdigg.
Two Nema8 stepper motors. One with a hollow shaft and nipple for the C axis and a somewhat longer solid shaft one for the Z-axis. I'm thinking a Nema-8 with a screw drive should have ample torque for Z, no need to load the X carriage up with another nema-17. These came with wires.
3 juki nozzles size 503, 504, 505. I really like the spring action on these. I should be able to measure them accurately for machining the holder concept.
12 vacuum pump.
two 4V110-6 2 way 5 port solenoids - which, after dismantling them and figuring out how they work, I understand are completely useless for this project. Which is annoying because they were not cheap.
I have, however, ordered a 10 pack for $10 of these from American Science and Surplus: http://a.co/d/5EGJJMB
![]()
-
Elekslaser A3 Pro Arrives
09/26/2018 at 06:01 • 0 commentsThe framework for the project finally turned up in the mail, trade war notwithstanding. I'm not going to do a full unboxing/review on this as there are dozens already on the web. However I will make some comments based on my unit and how it differs or confirms some of the commonly listed issues.
- Overall component quality and packaging quality is high.
- No component list or instructions included. Most reviewers at least received a parts list, I did not.
- The parts list on the banggood web appears to be for an older unit.
- corner brackets appear sturdier than earlier models. Simple thick acrylic - lots of surface area. Overall rigidity is pretty good.
- While all screws are long enough, some are only just enough. Especially the motor screws. I think they should be 12 mm and are only 9mm - only about 2 threads into the motor.
- Screw heads on the M3 are really too small for the bigger than M3 holes in the acrylic. Rick of crackage there if over-tightened.
- The holes in the motor mounts are oversize for the locating circle on the motor face, so location is set by the 3mm screws with their tiny heads, loose fitting holes and minimal threads. This will come loose, I'm sure.
- No problems with the laser mount thumb screws - long enough.
- Instructions on the wiki match my unit (apart from fictitious M3 screw lengths)
- Includes cable management for the Y cables - feeds them through the slots.
- Extra screws and spacers included. I really hate it when kit makers include the exact amount and then I drop one under a skirting board. (You know who you are IKEA!)
- Plugged it in and it fired right up, responding to basic G code commands. The laser zaps. I only ran it for a second and it made stinky right away. Hood and air extraction will be needed for laser mode. Need that for the SMD toaster anyway....
- Claims to be running grbl 0.9i
- The belt tensioning setup is just as badly designed as expected.
Too dark to take pictures.
-
Cameras Arrive
09/15/2018 at 06:42 • 0 commentsThe cameras arrived today - the only parts that are not coming from China. They are, however, made in China. These 5mm "endoscopes" come with a fairly short USB micro A connector and an adapter to convert to standard USB A. This allows them to plug to many phones as well as PCs.
On the windows laptop they both seemed to work but did not have good focus under 40mm (as advertised) with one of them being a bit less good than the other. At 40mm 0603 components are really small - and resolution is only 640x480.
I had read that disposable cameras have usable lenses for this kind of stuff and a quick rummage turned up an unused Fuki Quiksnap with an expiry date of 2009. The battery had leaked inside it but it rendered 3 lenses, to of which - the main lens and the rear viewfinder lens - improved the eyesight of the cameras no-end.
They are now mounted with Sugru moldable glue which will take a day to cure.
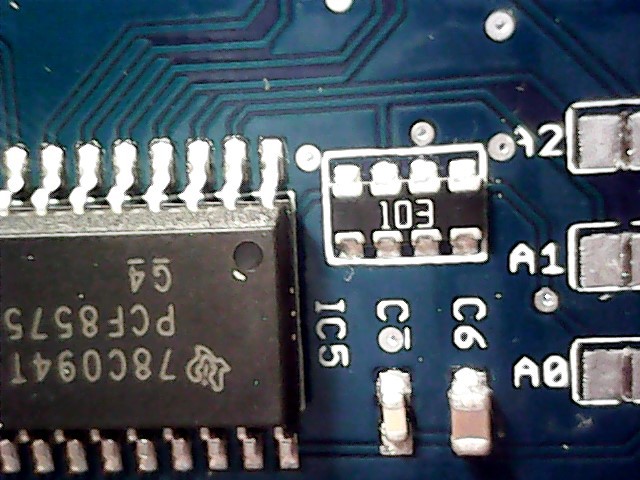
They focus great at 28mm at which size 0603 are clearly defined and the biggest component I use - the SOIC-24 PCF8575 - fills the screen in landscape mode.
The downer is on the interface side. The two cameras need to be plugged into opposite sides of the laptop to get different usb host. According to https://github.com/openpnp/openpnp/wiki/USB-Camera-Troubleshooting-FAQ and https://github.com/openpnp/openpnp/wiki/OpenPnpCaptureCamera if you use OpenPnpCaptureCamera and set the camera to use a compressed format like mpeg, you can put two cameras on one host. These cameras only do YUV uncompressed video. This is a minor bummer as I was planning to combine all the USB on a multiport 3.0/2.0 hub and have only one wire to worry about.
![]()
![]()
-
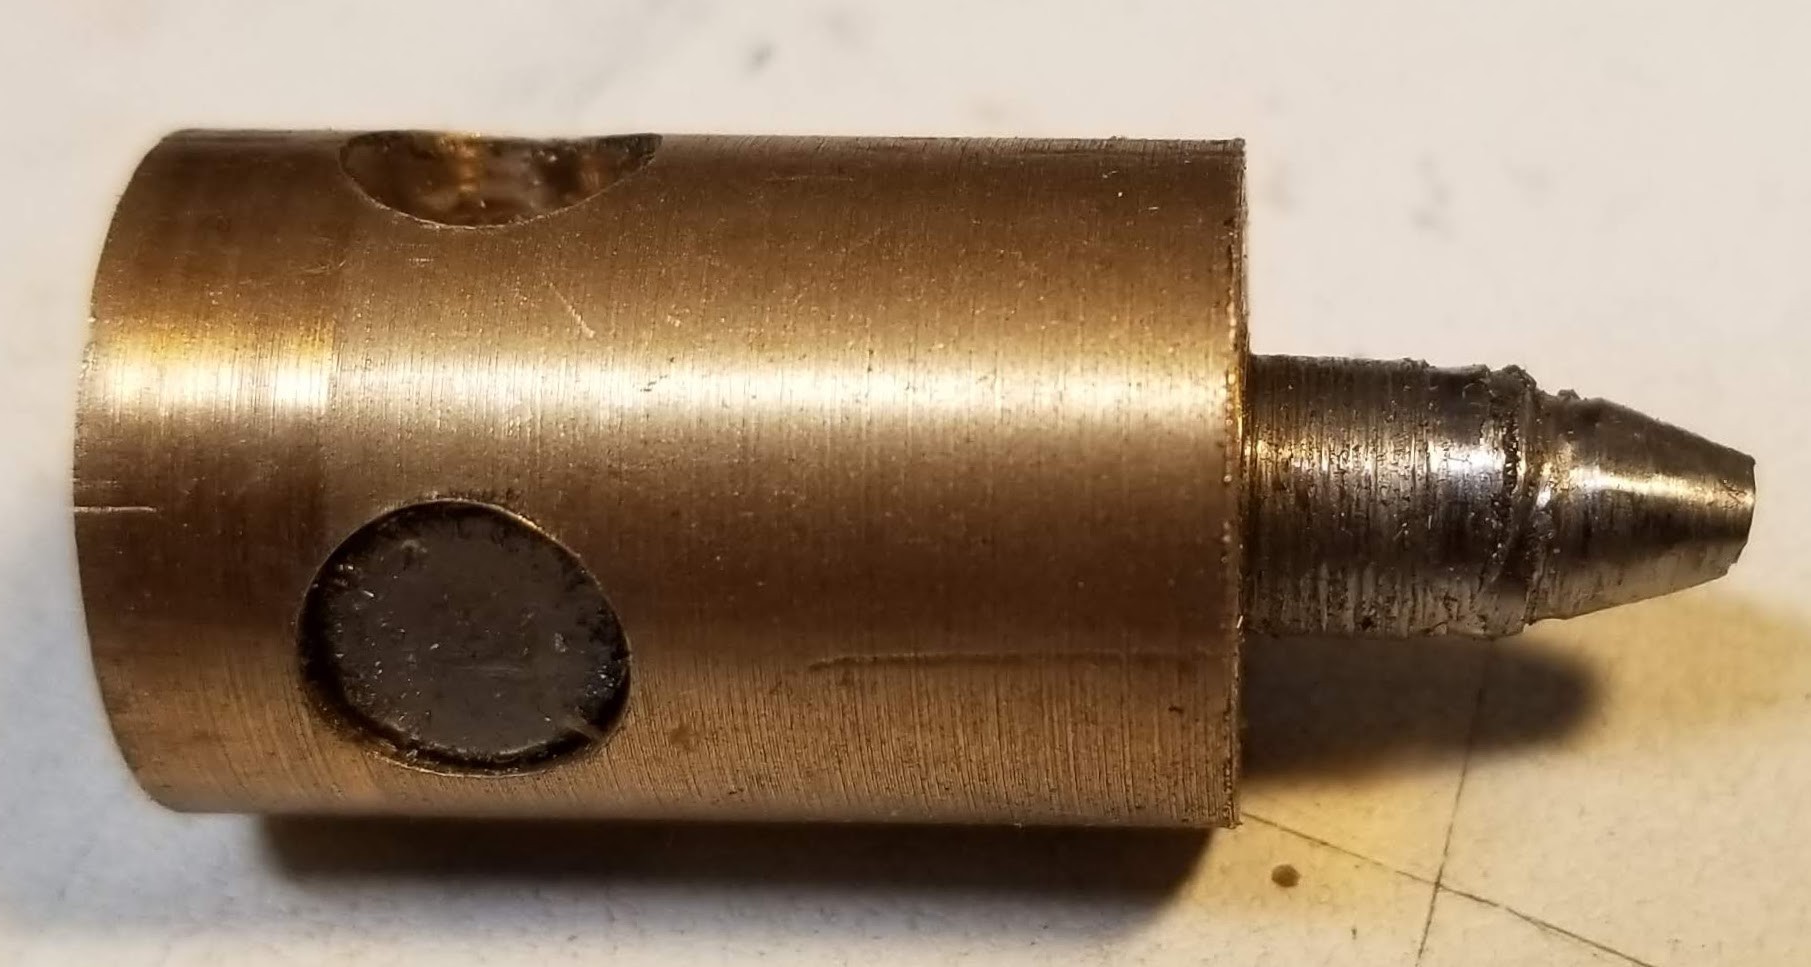
Proof of Concept Quick Change Nozzle Holder
09/10/2018 at 04:21 • 0 commentsRan up a very rough proof of concept for the Juki quick change nozzle holder.
Material is phosphor bronze (from scrap bin - valve guide stock), wee magnets from the fridge and a dummy juki nozzle roughly turned from steel.
The magnets hold and grab the "nozzle" gently but firmly, but removal force is just a few grams. Most importantly with the magnets installed the right way round, the tip is not noticeably magnetized.
Positioning of the magnets is critical - looke like they should be a little above the bulge in the nozzle shank. There is a strong centering force right there, so we'd want to use that to pull up and make the nozzle face pull against the face of the part.
Presumably when a component is being held the vaccum will strengthen the bond, but we don't want the thing to re-center and drop when vacuum is released.
So hole depth is critical, as is magnet placement, as is nozzle seat diameter. I see some jigs and a reamer in my future.
Thinking black Delrin for the material for the real thing.
Credit where credit is due, this idea came from "alex" https://groups.google.com/d/msg/openpnp/IG9cEUypjtM/bqkRM8PEHwAJ
with the lightbulb moment at:
https://groups.google.com/d/msg/openpnp/IG9cEUypjtM/1sfj1XyzKAAJ
![]()
Thrifty Pick and Place
Building a Pick and Place machine on the cheap, in a repeatable way.