David Troetschel
-
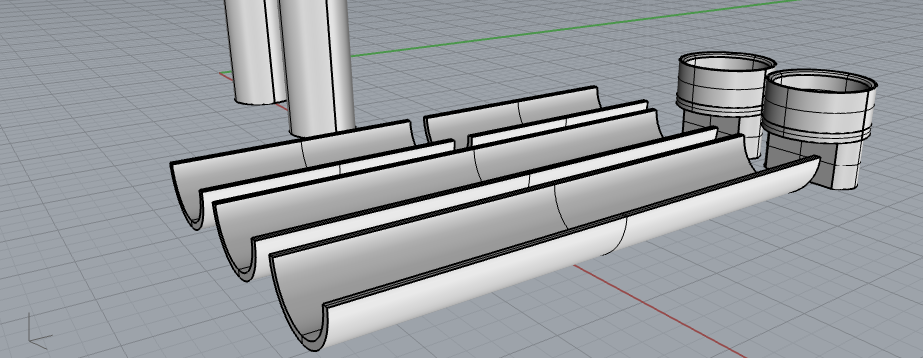
Molding and mold
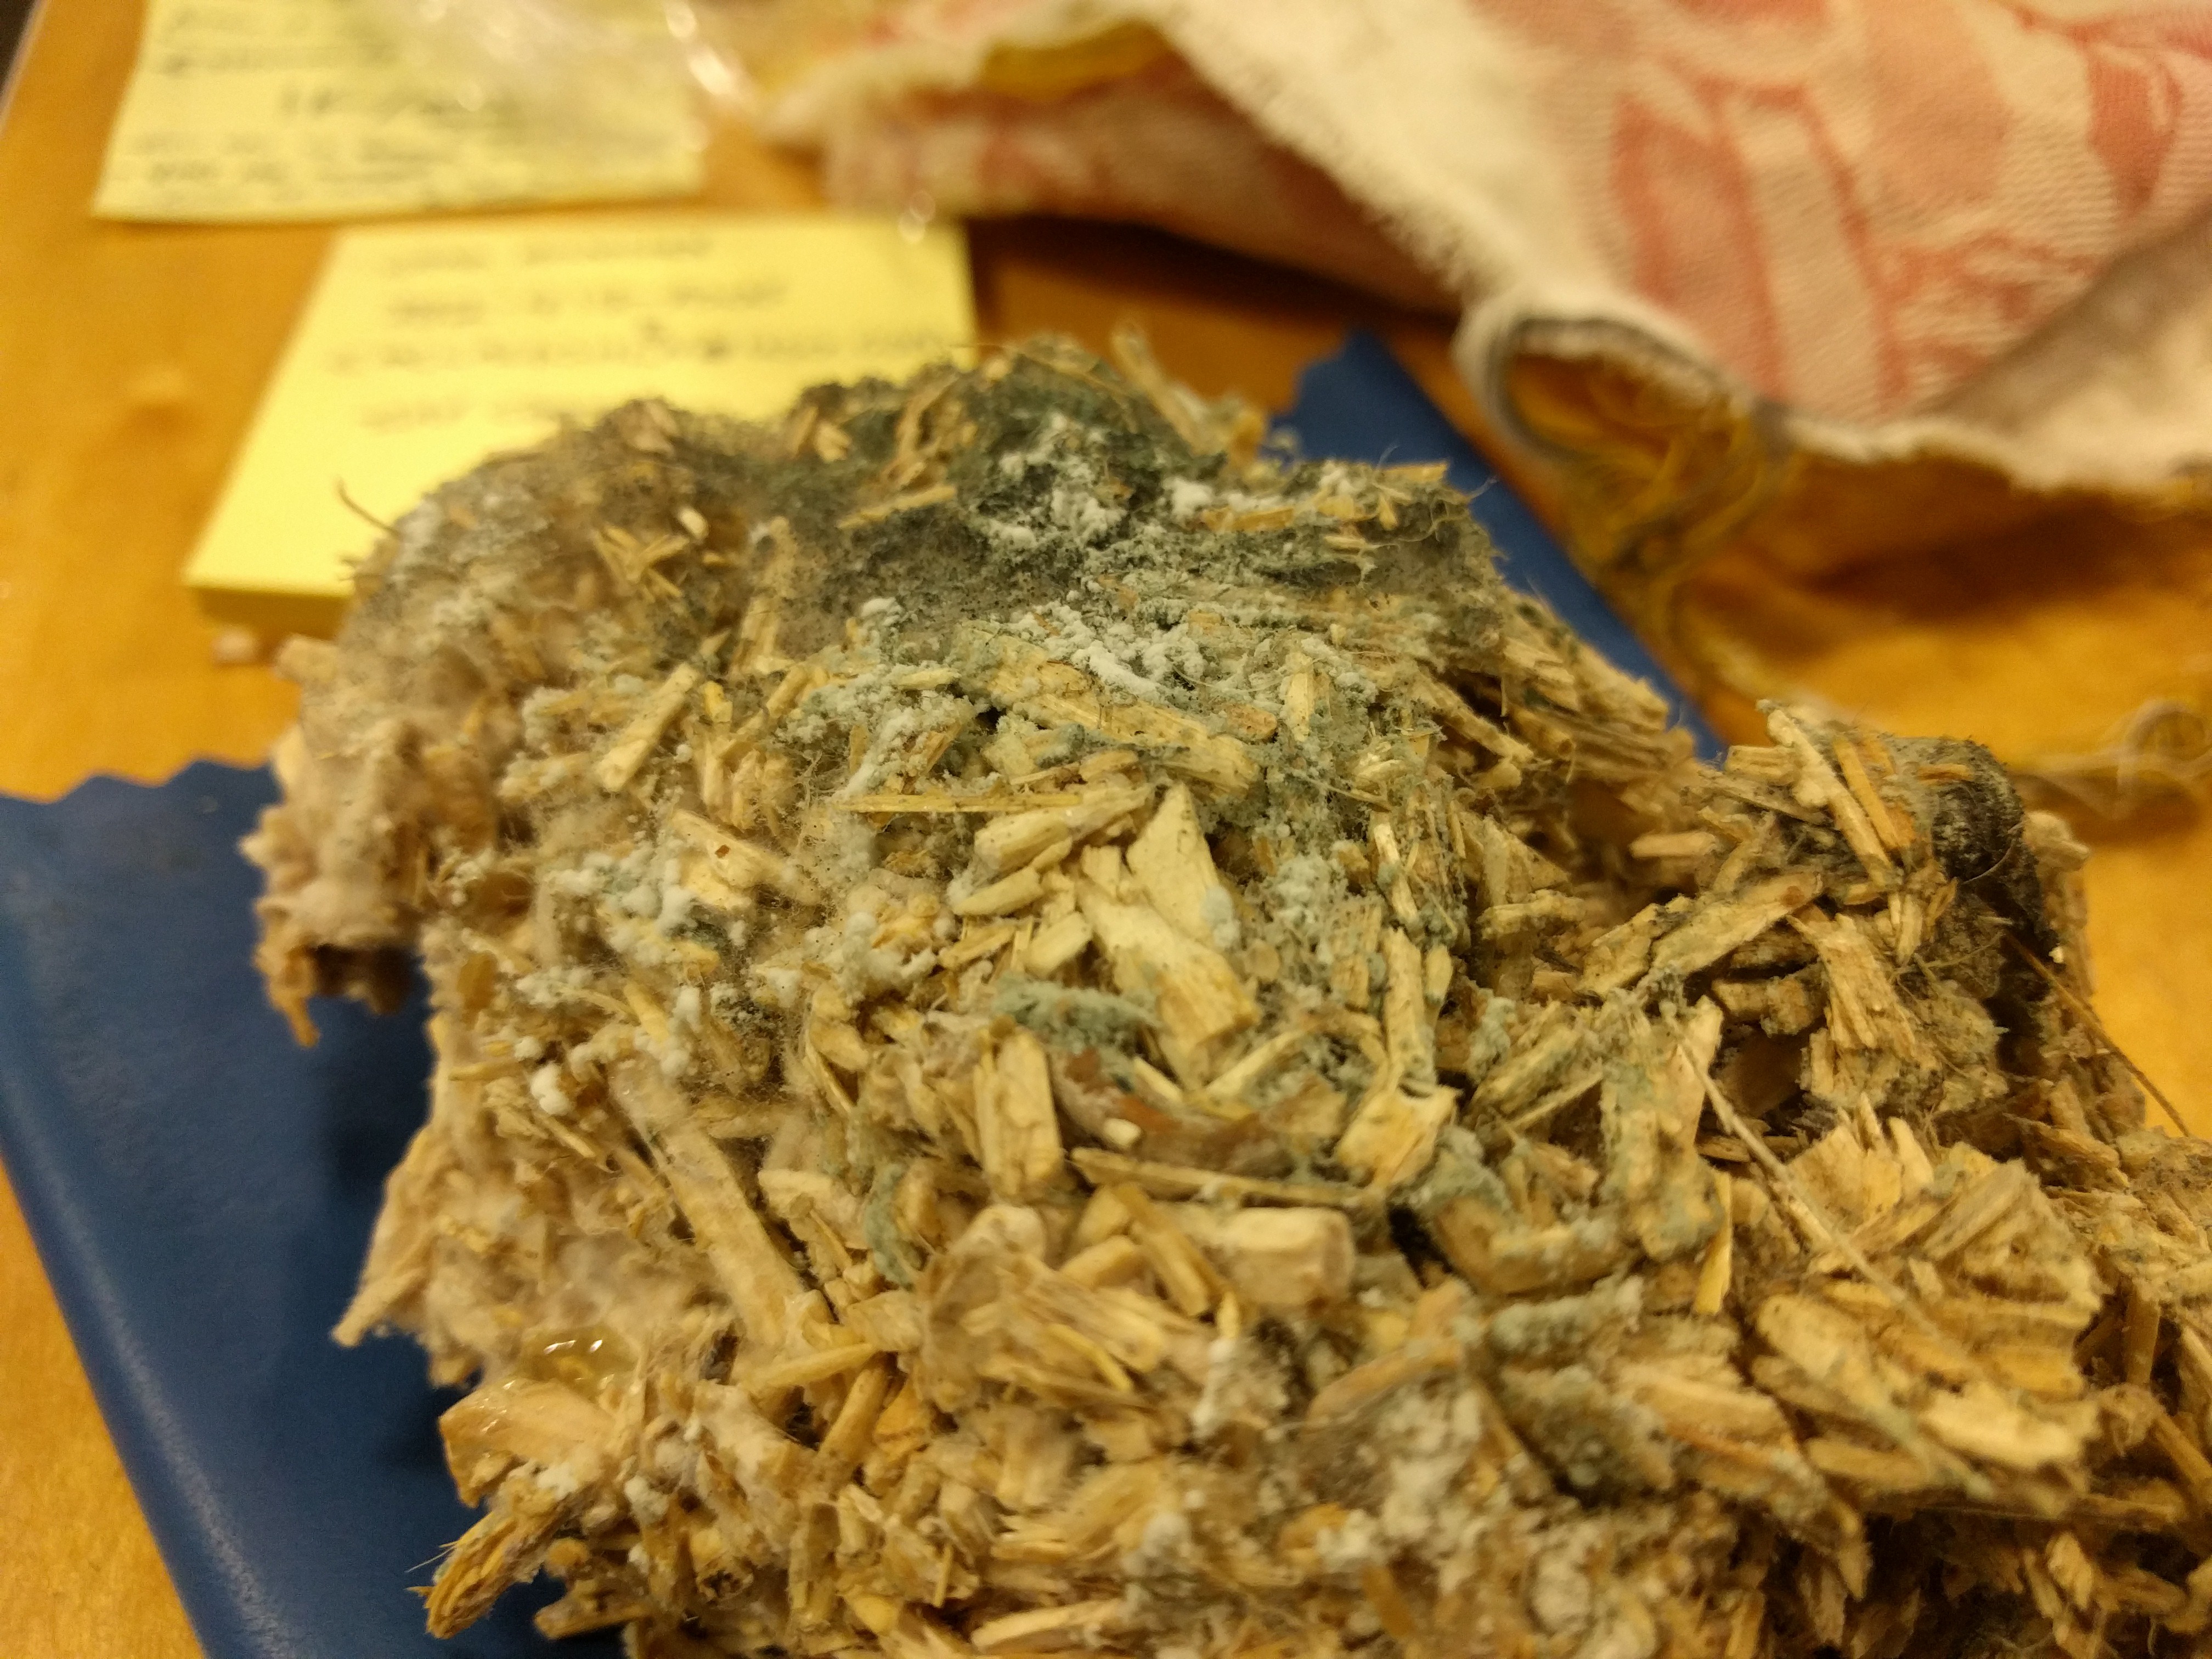
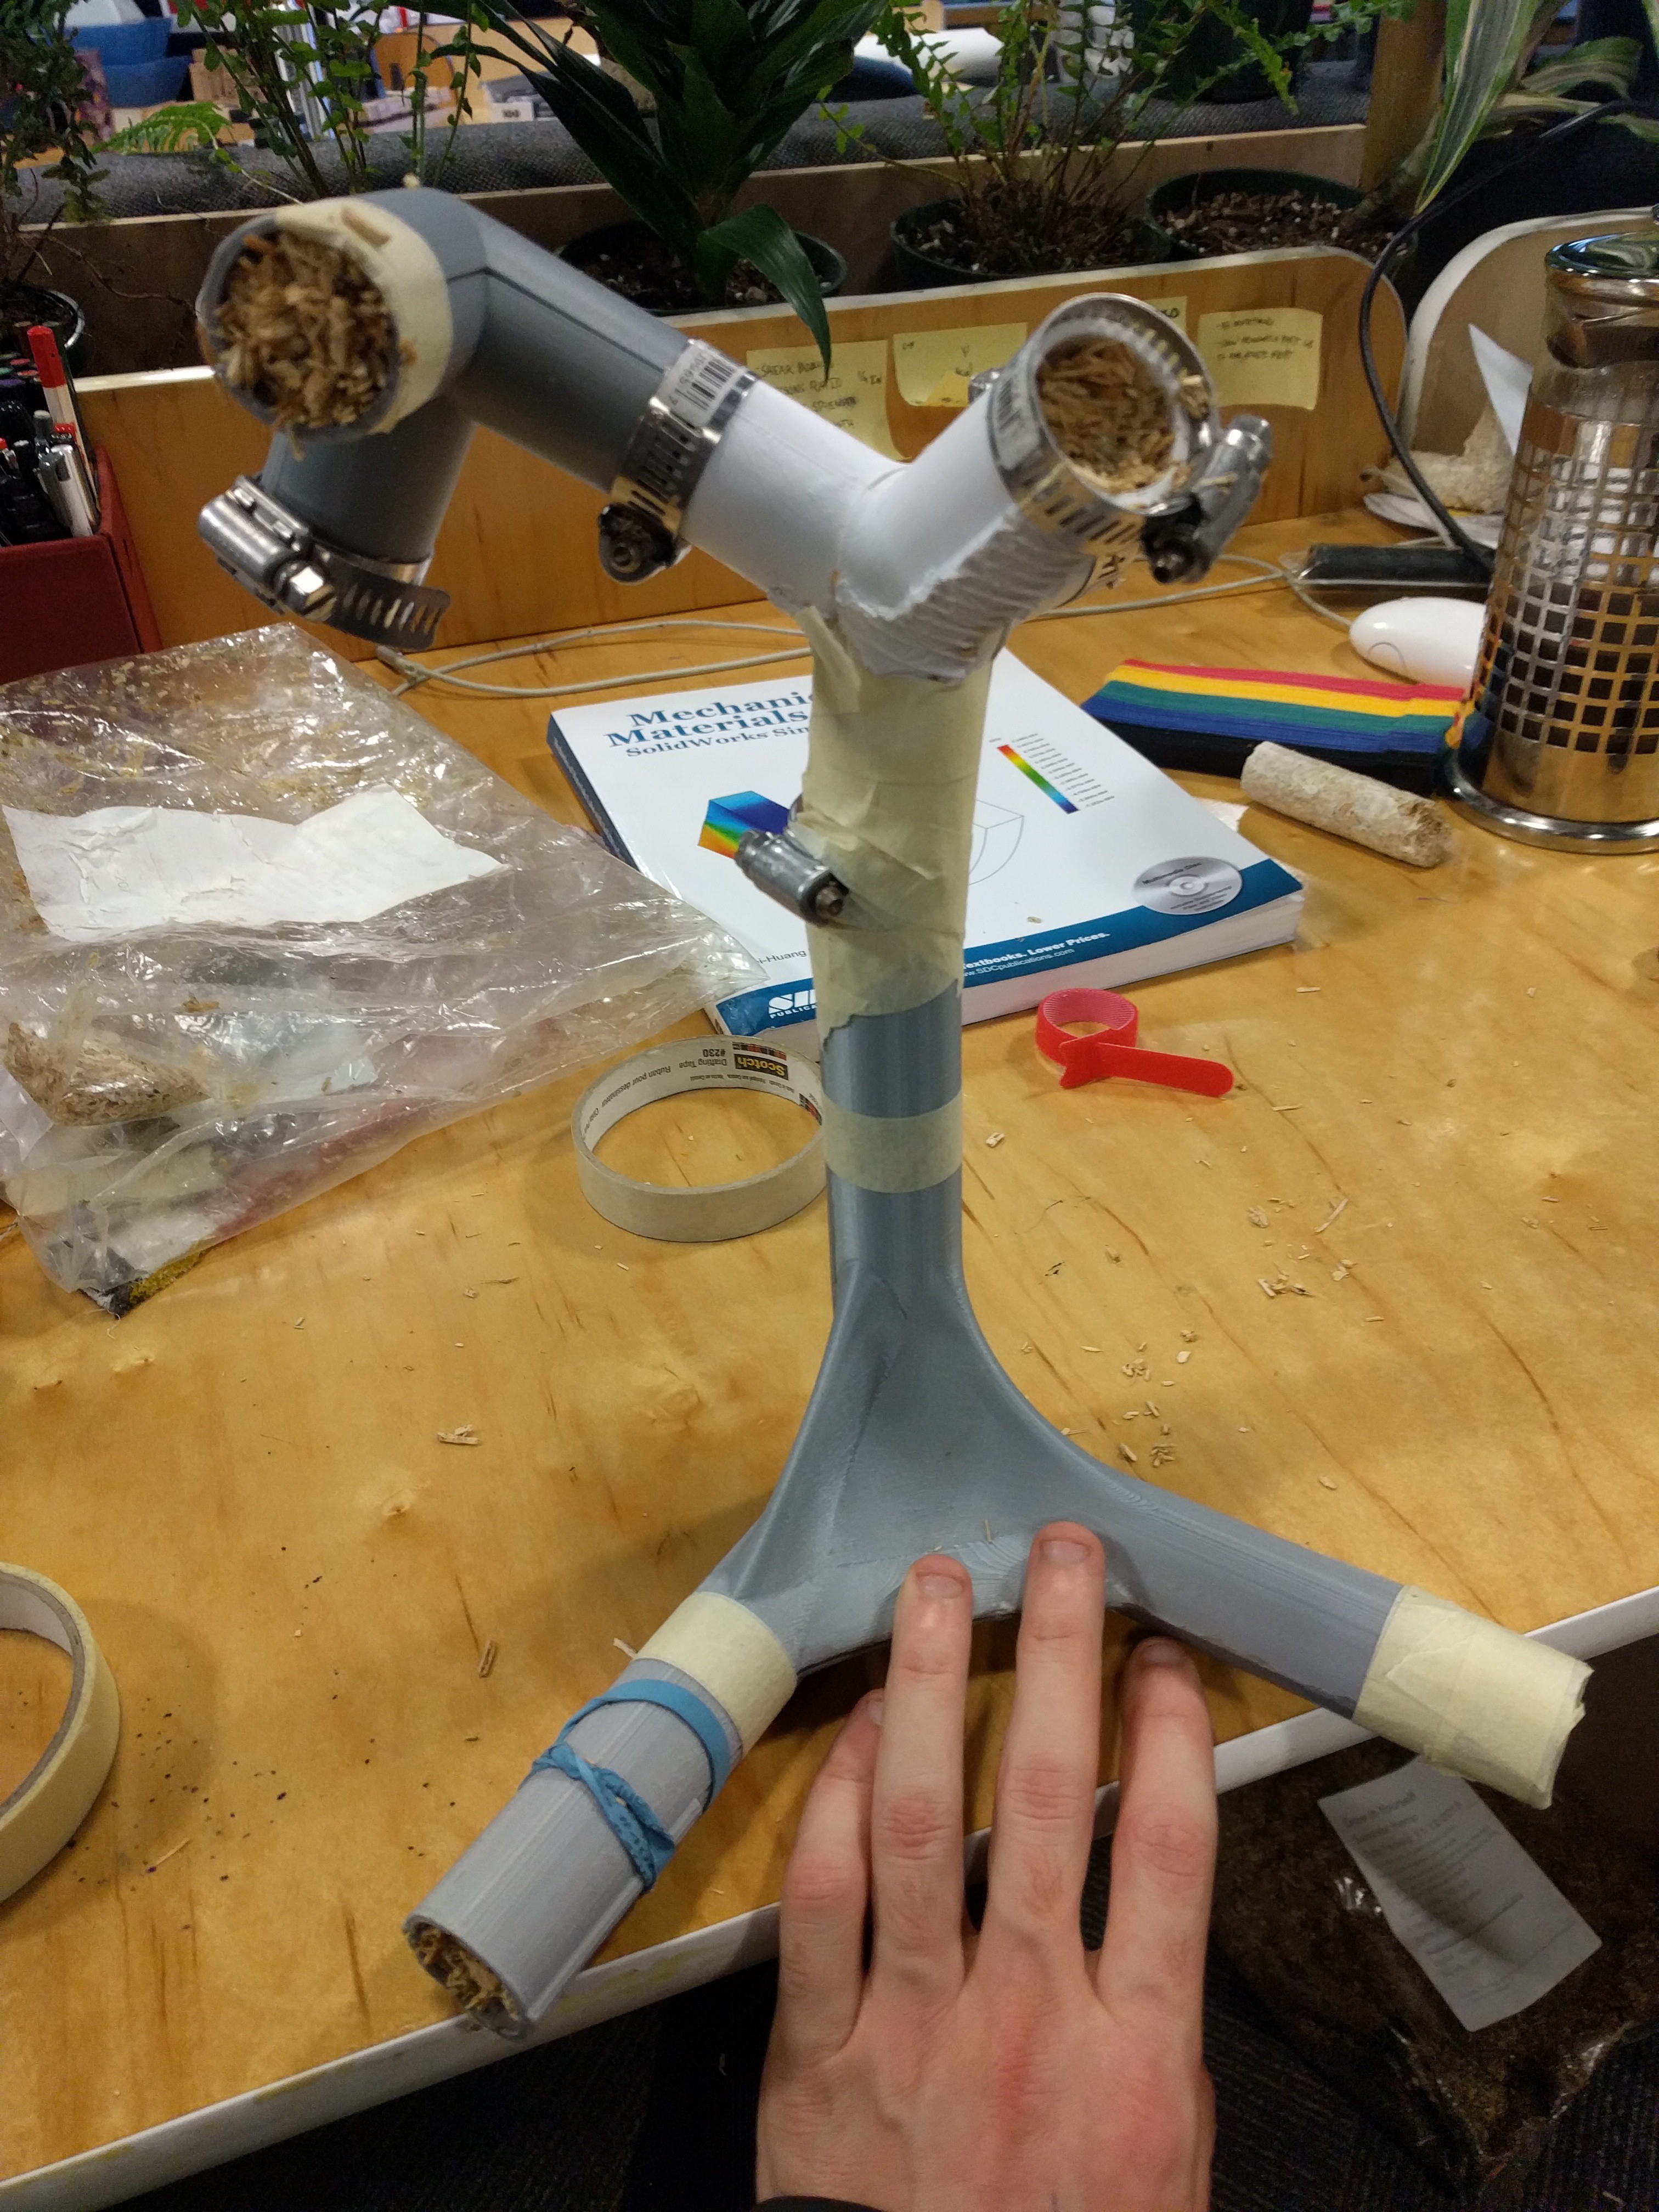
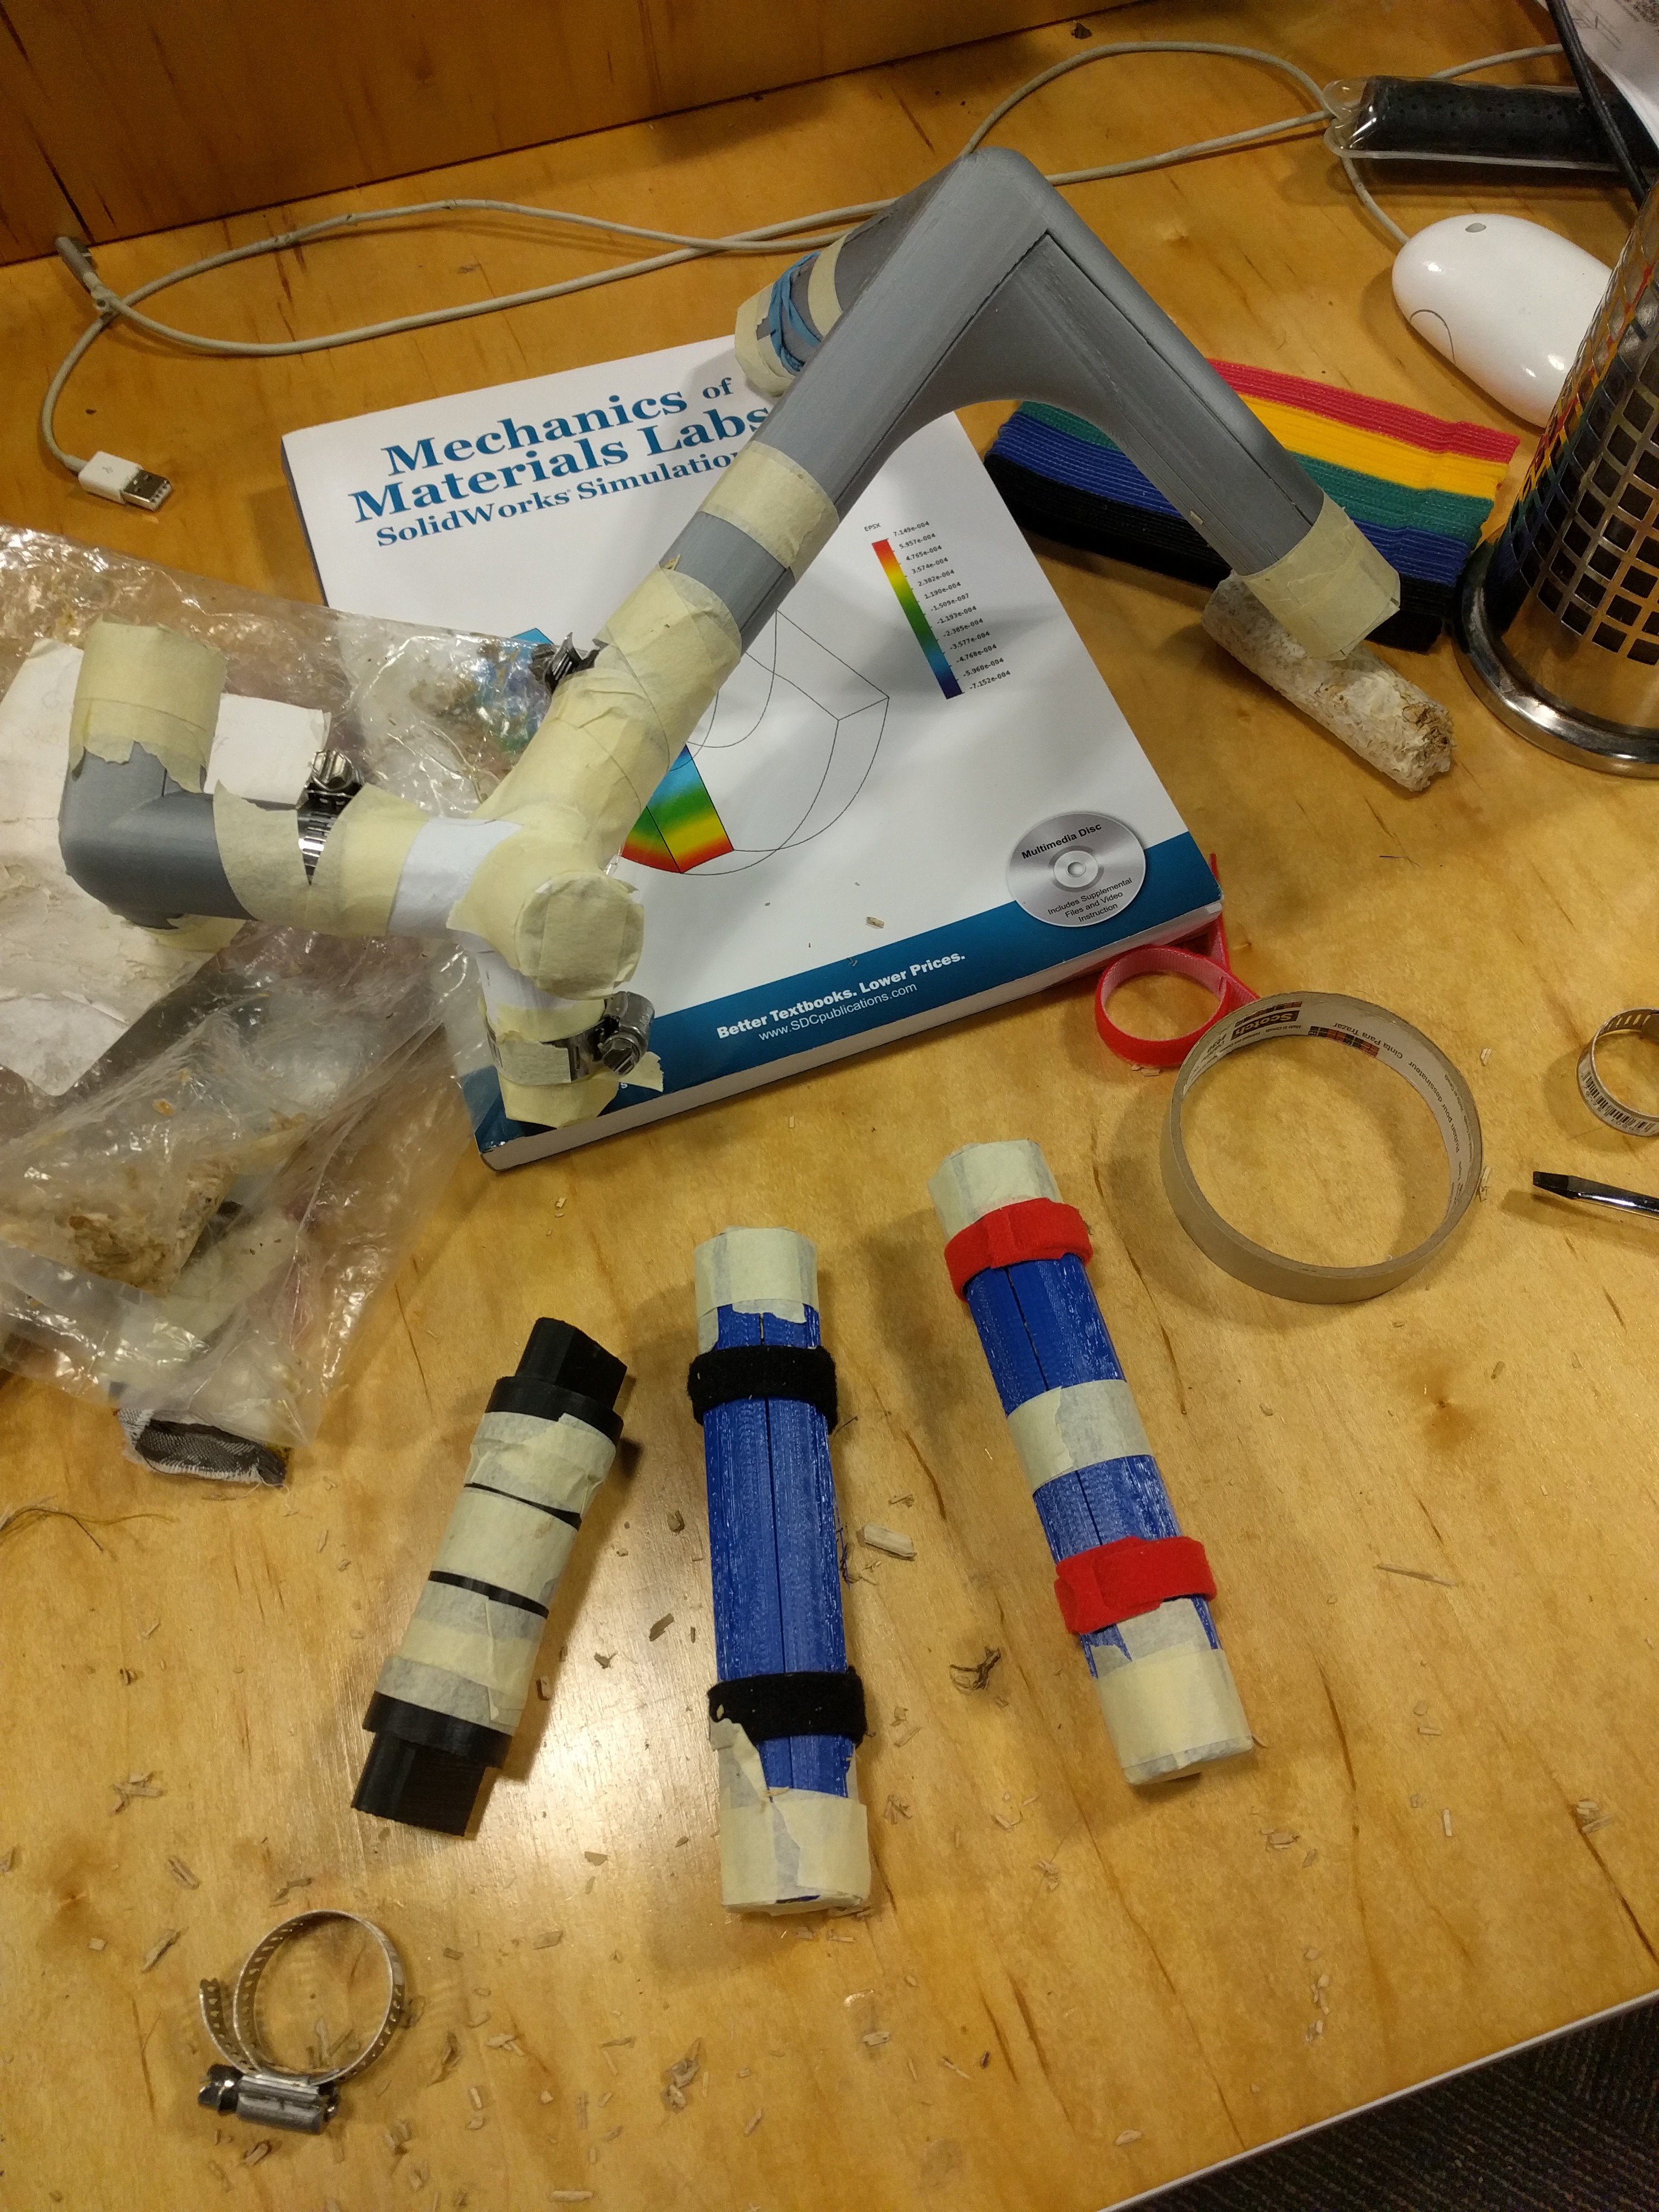
03/06/2019 at 15:30 • 0 commentsWe have been growing a batch of mycelium to make test pieces and to experiment with growing assemblies.
Unfortunately some of our material actually got moldy.
![]()
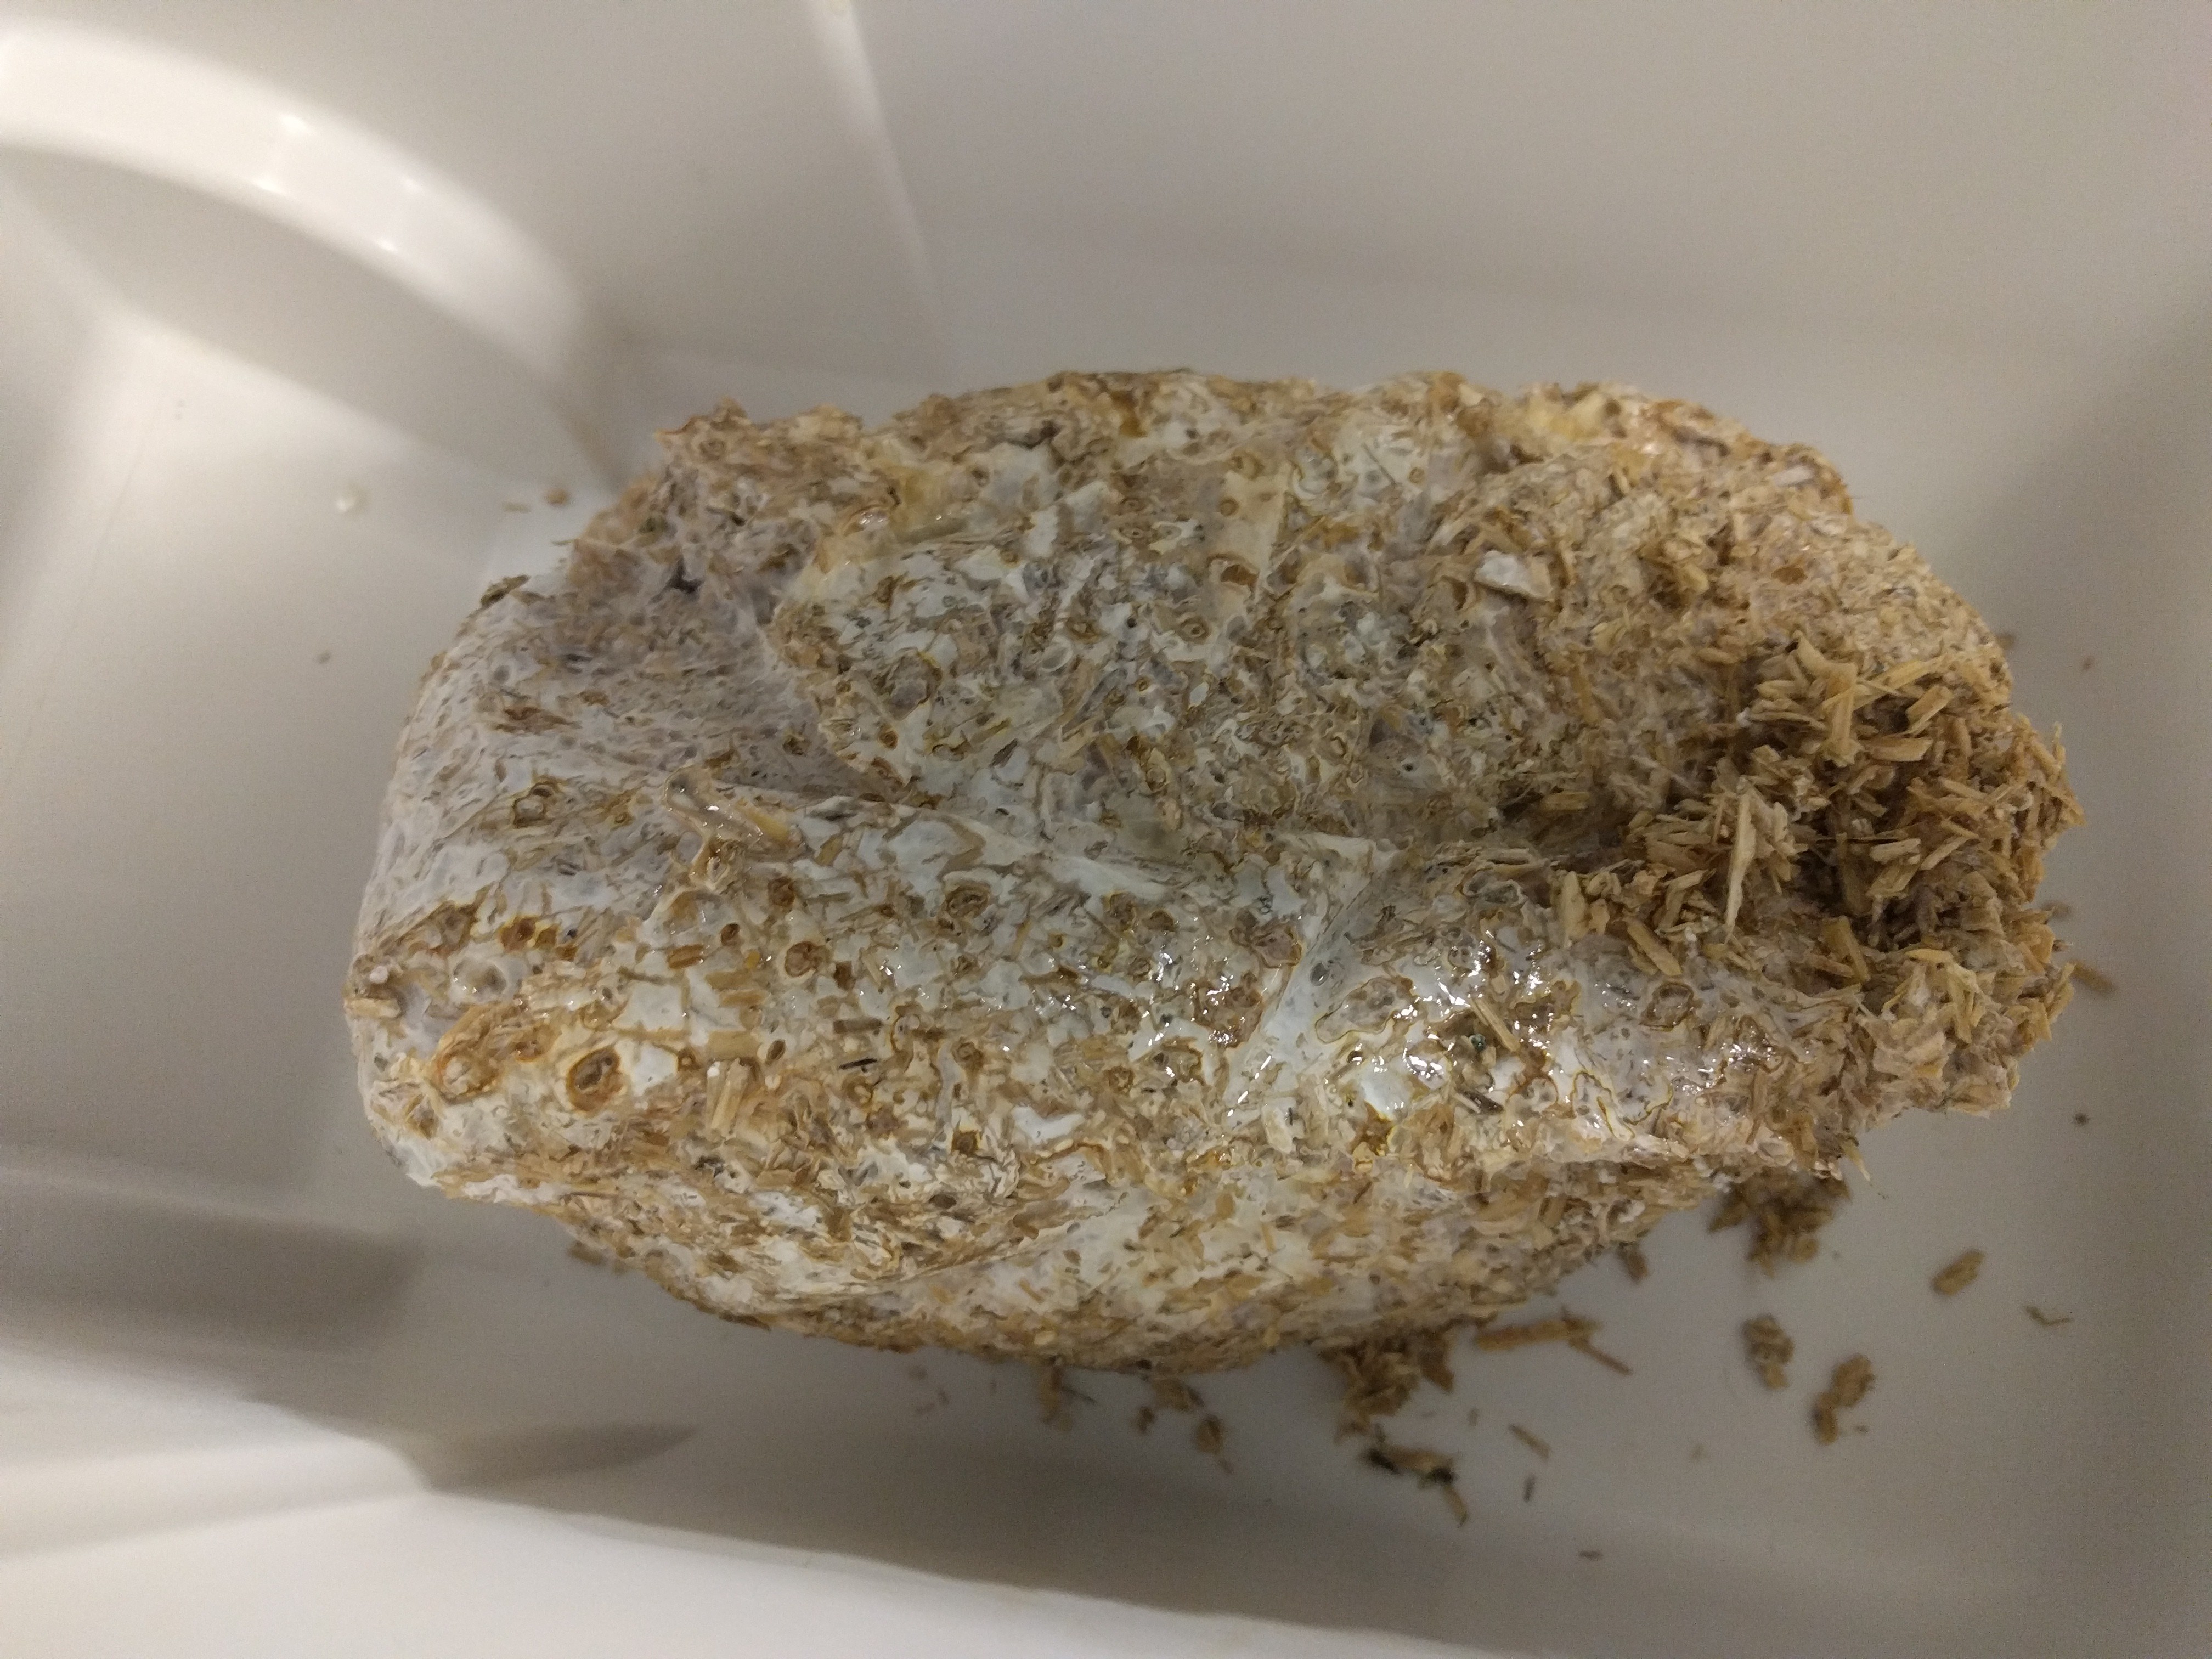
but after removing the surface mold I packed the molds anyways to see how lucky we could get.
![]()
![]()
![]()
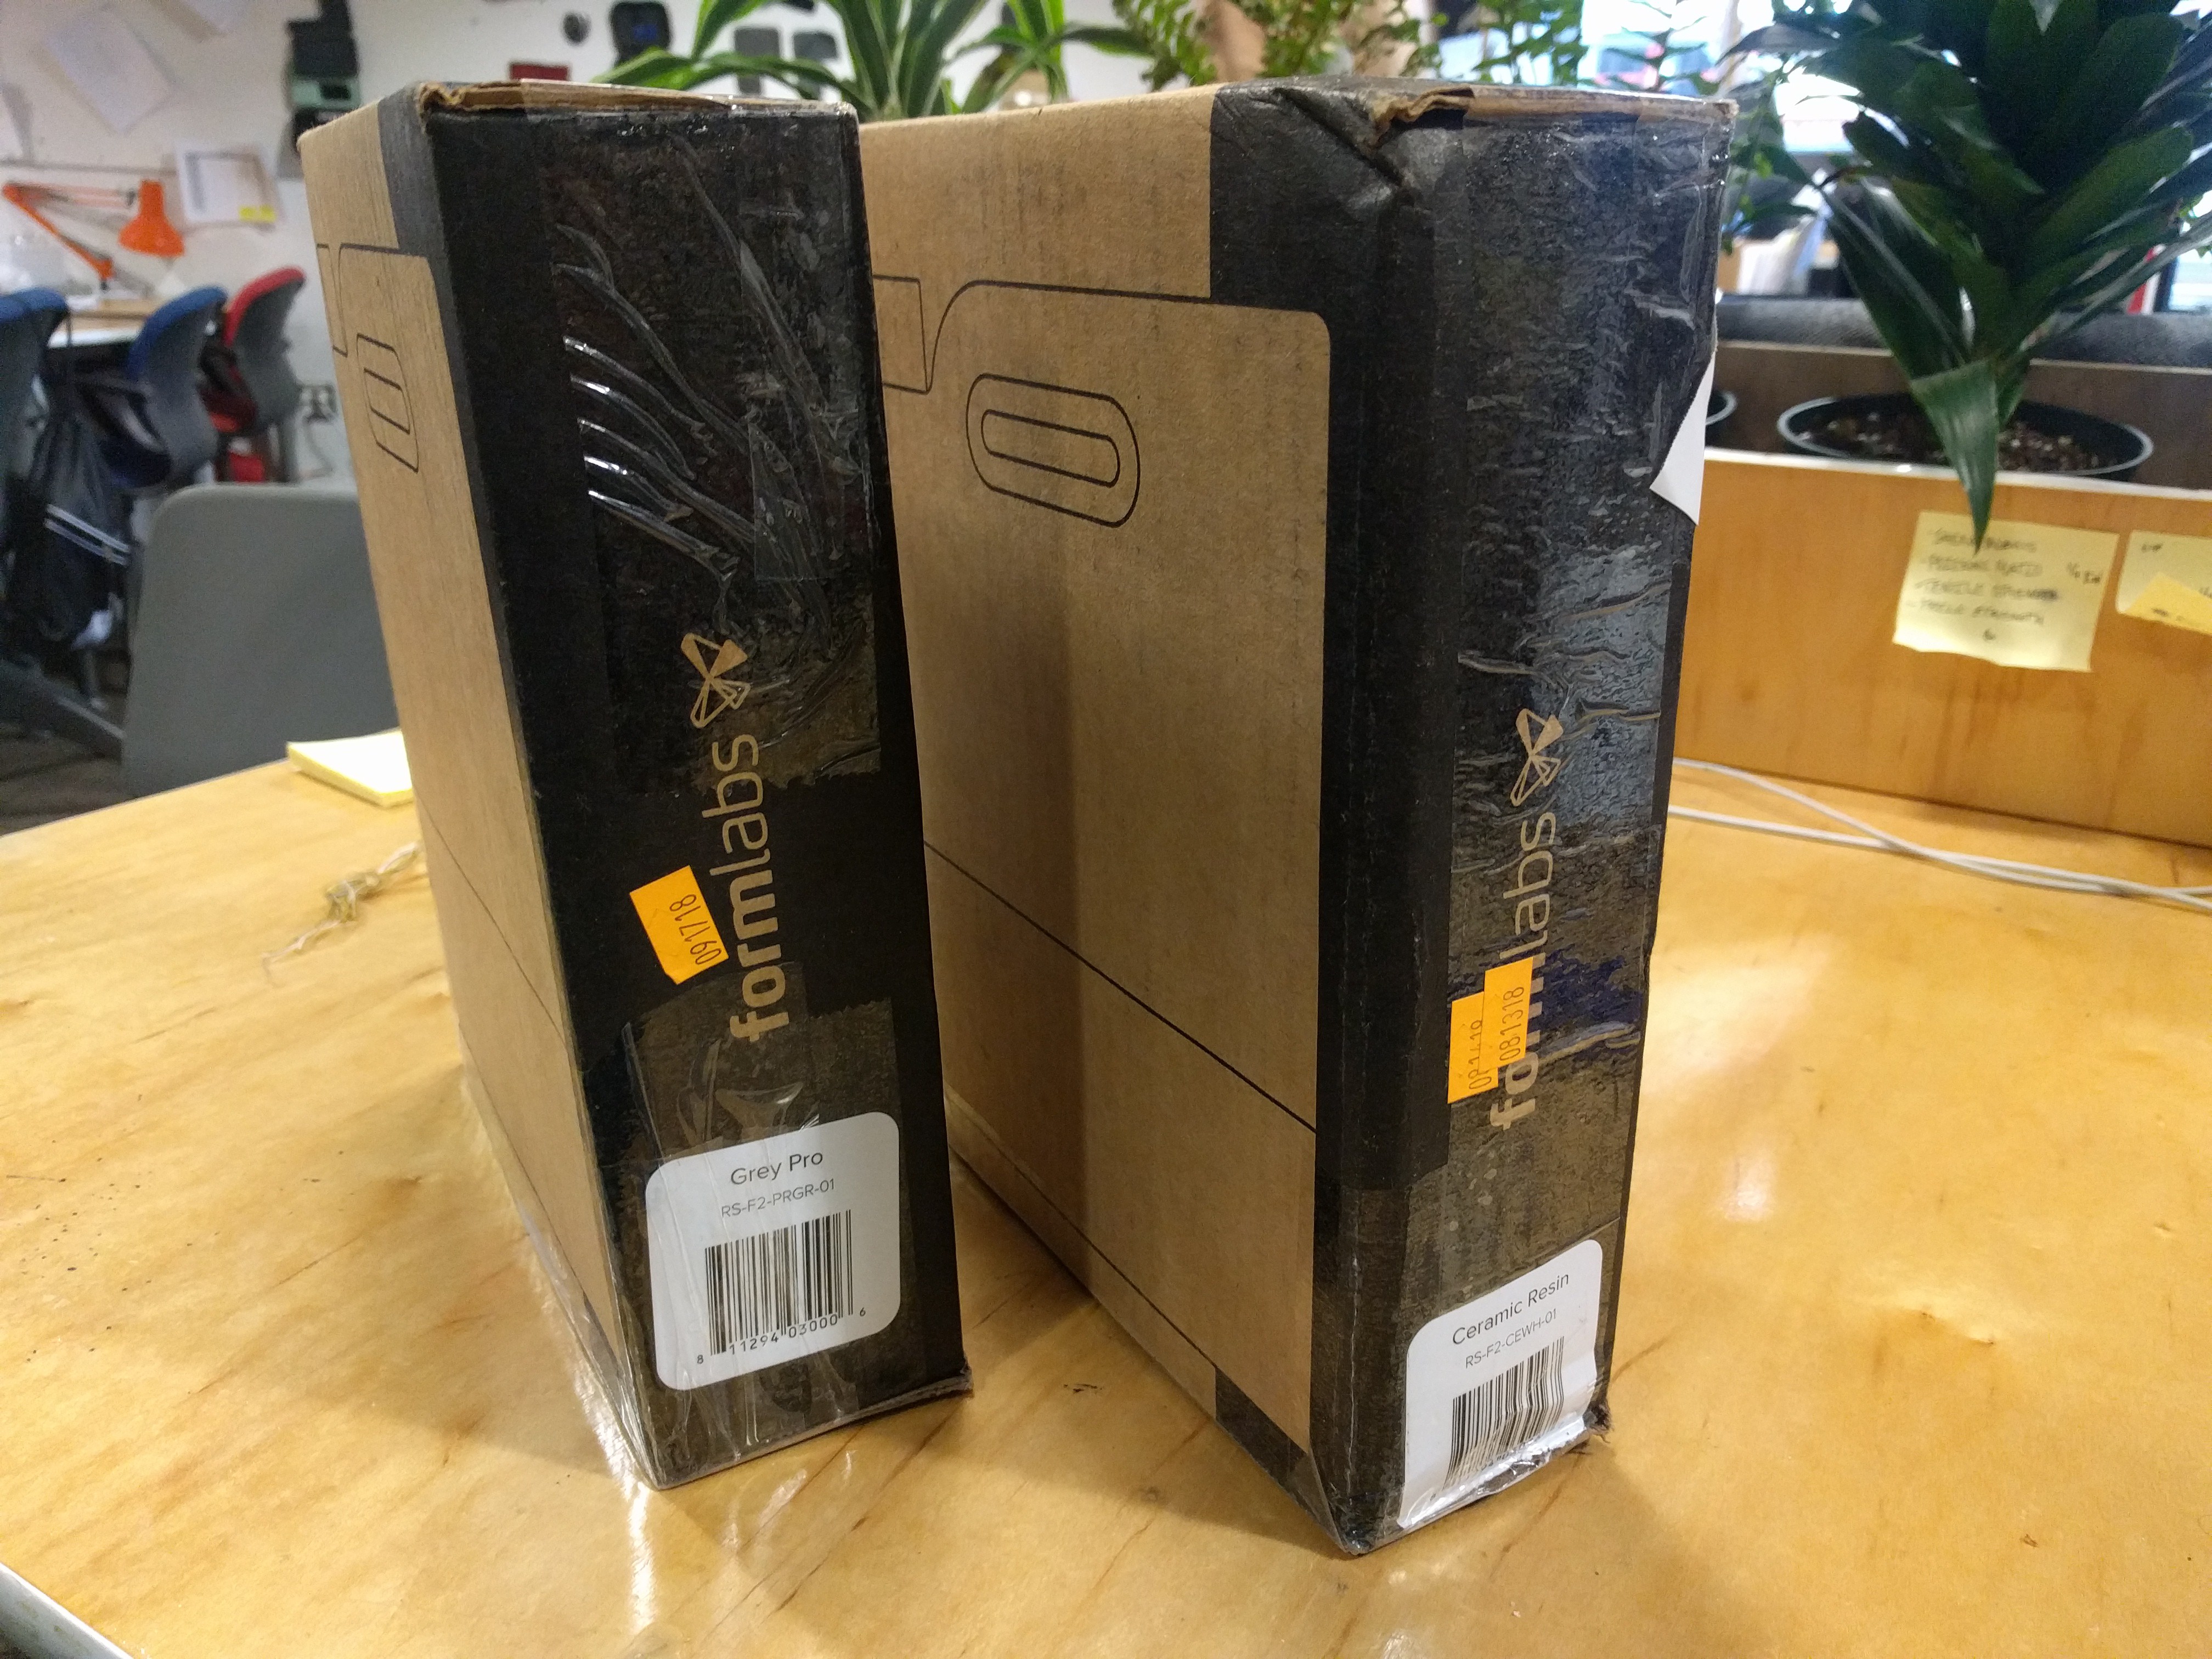
We also got some more resin in for producing test molds.
![]()
-
Module Set 6 different thinkness
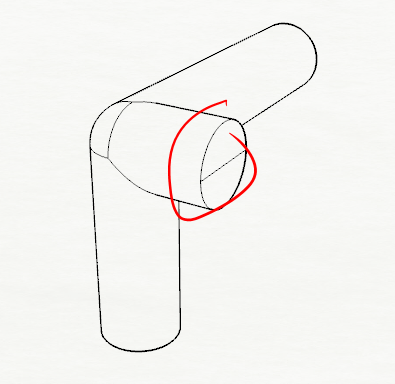
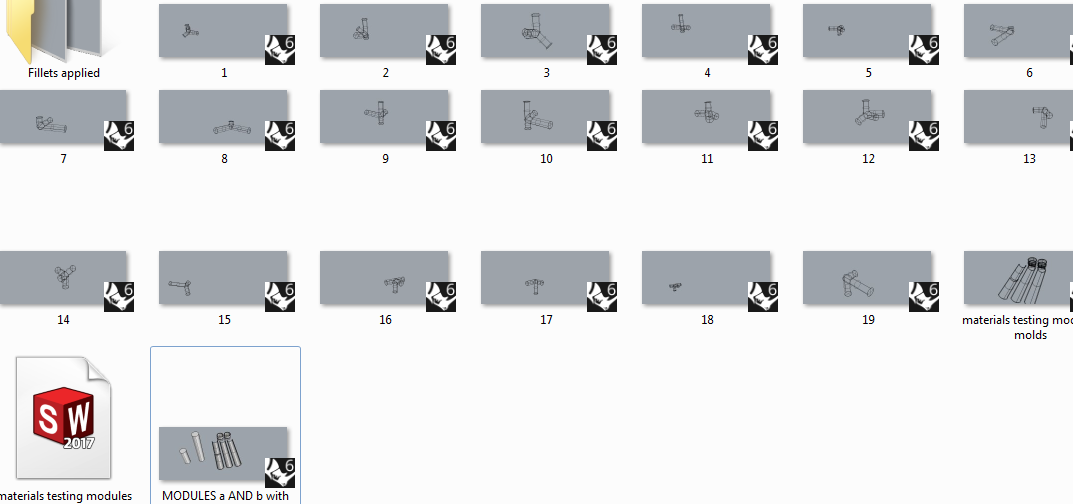
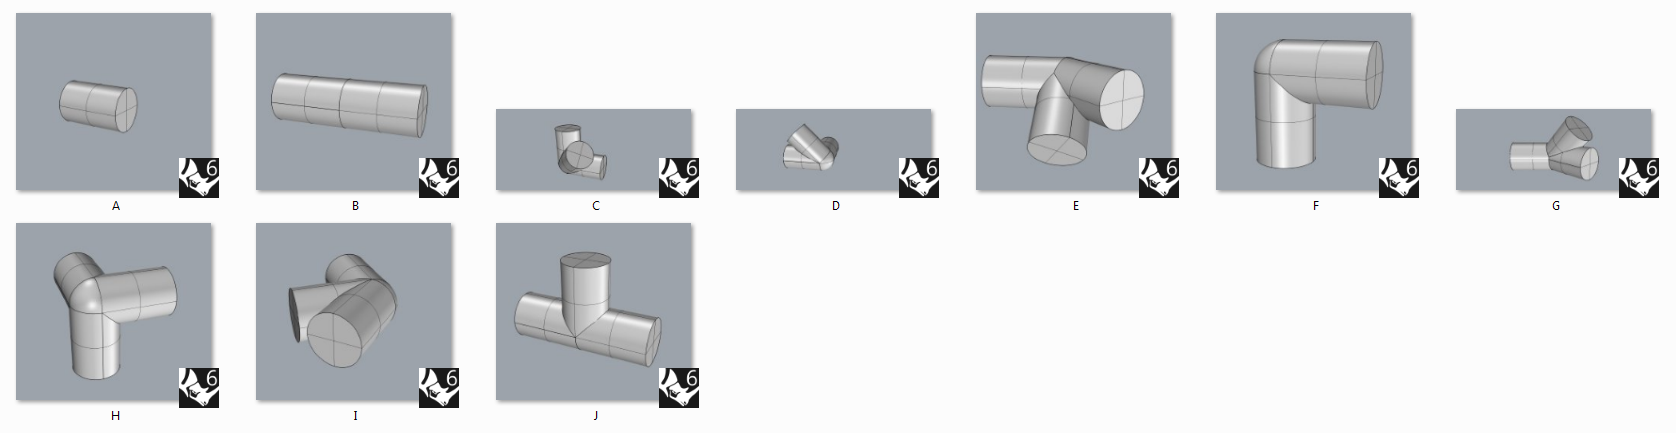
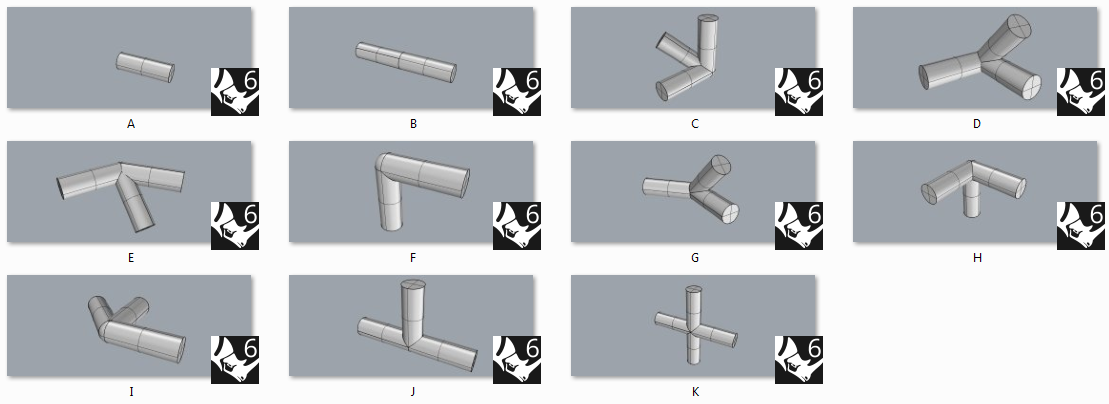
03/06/2019 at 15:08 • 0 commentsWe generated a module set, but incorrectly made the arm thickness two inches rather than one.
![]() Although not directly compatible it will be interesting to compare designs with these thicker modules compared to the normal one inch modules.
Although not directly compatible it will be interesting to compare designs with these thicker modules compared to the normal one inch modules.We just had to change the grasshopper script and then regenerate the modules using the endpoint table.
![]()
This gives us our one inch output using the grasshopper script.
![]() Now we are adding fillets and making molds. OBJ models will also be made for use in VR.
Now we are adding fillets and making molds. OBJ models will also be made for use in VR.Since we are really only using modules A-K right now this is going pretty quickly. We are hoping to go into Mindesk soon to test these modules.
-
Module Set Six Generator
02/27/2019 at 01:55 • 0 commentsUsing Grasshopper to generate module set six took some setup time, and it's still a work in progress.
![]()
This yields a result of:
![]()
We'll walk through the code, noting what is still under construction.
The Back end:
![]()
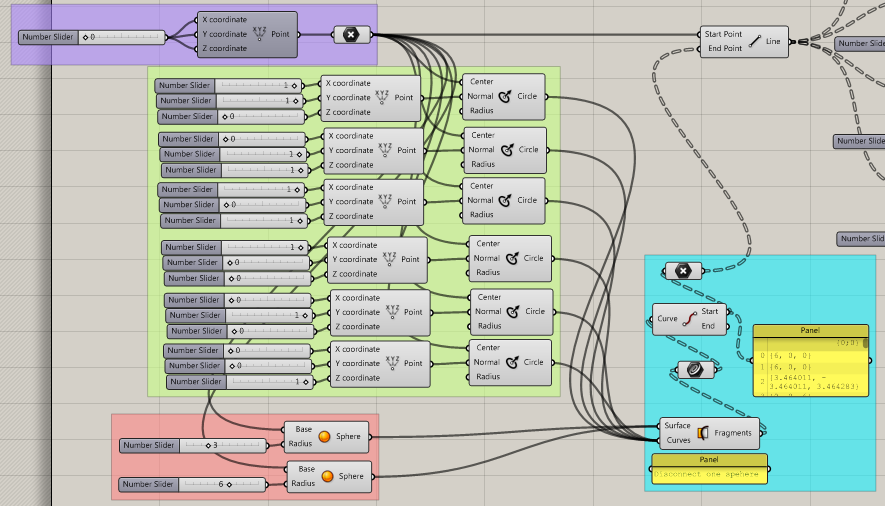
The purple group determines our origin point.
The salmon group generates two spheres, one for modules which will have three inch arms, another which will have six inch arms. For the output to work cleanly only one should be input into the blue group at a time.
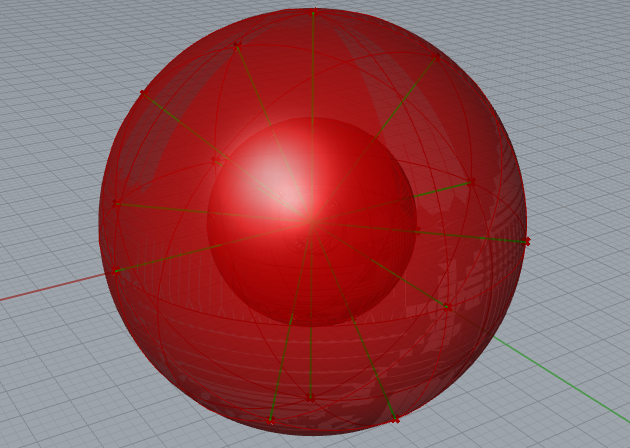
The green group creates a network of circles at various angles and tilts, these will determine our arm angles and are currently under review.
The blue group divides the surface by referencing circles as defined by the green group. This creates a network of overlapping curves with intersecting points at angles relative to the origin determined by the green inputs.
By taking the intersection points of blue group and drawing a line from the origin to each of these points we create a list of lines. As shown, it is a total of fifty-four lines.
---
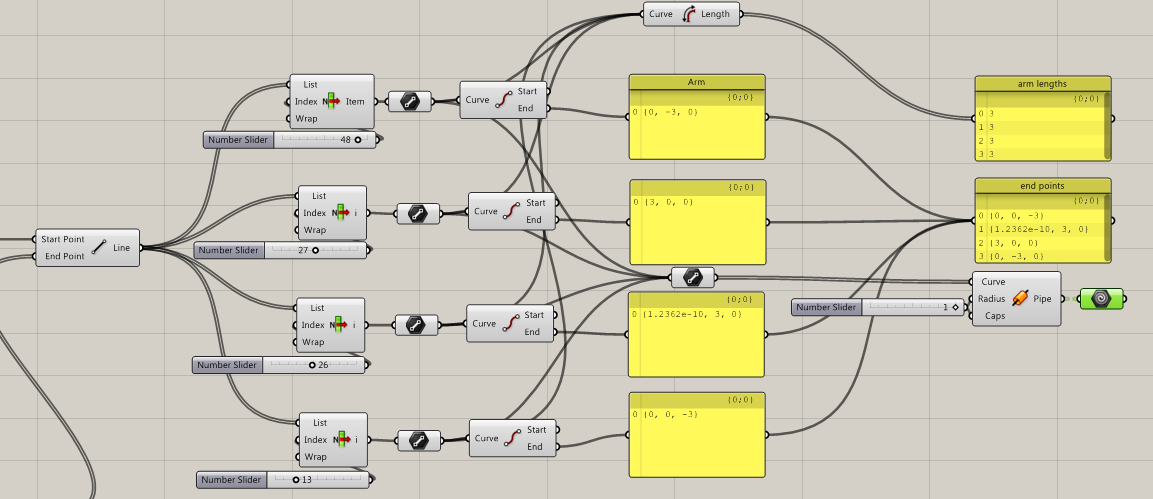
The Front end:
![]()
From left to right; we take our list of lines and create four sorters.
These four sorters pick a single line each from the list and hand off to a measuring utility and a sub-list of the four selected lines. Less than four lines can be selected to create one armed modules (modules "A" and "B"), two armed and three armed modules respectively.
Another utility finds the selected lines end point, the origin is always 0,0,0 (x,y,z) <fight me.>
Those end points are put into a list for convenient export to an excel document and serve to define the module.
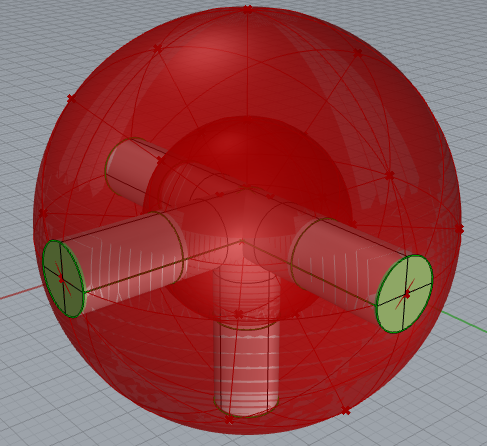
The list of selected lines are then run through a tool to create a pipe around them of uniform diameter (this could be changed if really desired.)
The green output highlighted above can then be used to export the final module.
![]()
From here, some additional parametric steps are required... or some manual steps to create the final module. The output will then be boolean unioned, filleted, saved as its designation determined by the end point diagram, then negative shelled to create the open ended mold.
Whew!
Hopefully this will ease the production of set six and yield a more rational group of modules. If anyone has any feedback feel free to holler at us, this is a much more plastic system than before and conducive for experimentation.
-
Module set 6
02/27/2019 at 01:16 • 0 commentsAfter logging some more time in Mindesk we came to the conclusion that module set five is still extremely difficult to use.
This is definitely a setback, but each module set seems to get us deeper insights into how to approach such a system. Comparatively, set five had serious benefits over previous iterations. The resulting forms were definitely exotic, unfortunately despite complex branching systems resulting they were all single chain. That is, we had long strings of modules but not interdependent connections required for strength. This is easier to show than tell but our screen capture software was paywalled (Arghhh!!!)
Either way, this lack of interconnections seems to really just stem from non uniform arm lengths, of which there were many in set five. The spreadsheet was far from pretty.
---
So we took a step back and determined that the next set should consist of only two arm lengths; three and six inches and that these should probably not be mixed. Instead, the assumption will be that any three inch arm based module can be converted into a full blown, all six inch armed module using module "A" (3" straight) as an adapter or to make a hybrid. This will probably make more sense visually when the module are actually produced.
Second, we want to limit the angles arms can go in. The exact angles we will use are undecided at this time, but should be resolved after our next review.
Considering the above factors its easy to realize that we might be drifting from a more organic form language to something more grid based more similar to our early sets. Only the actual production of this module set will reveal this aspect.
The last goal of set six is to automate the initial production more, in theory it would be nice if it was possible to run it though an iterative solver to find every possible solution set (all possible modules within constraints.) So this set will be built in Grasshopper with manual controls and ease of export at the forefront.
Sorry for this post being mostly words, the next will have a lot more pretty pictures.
-
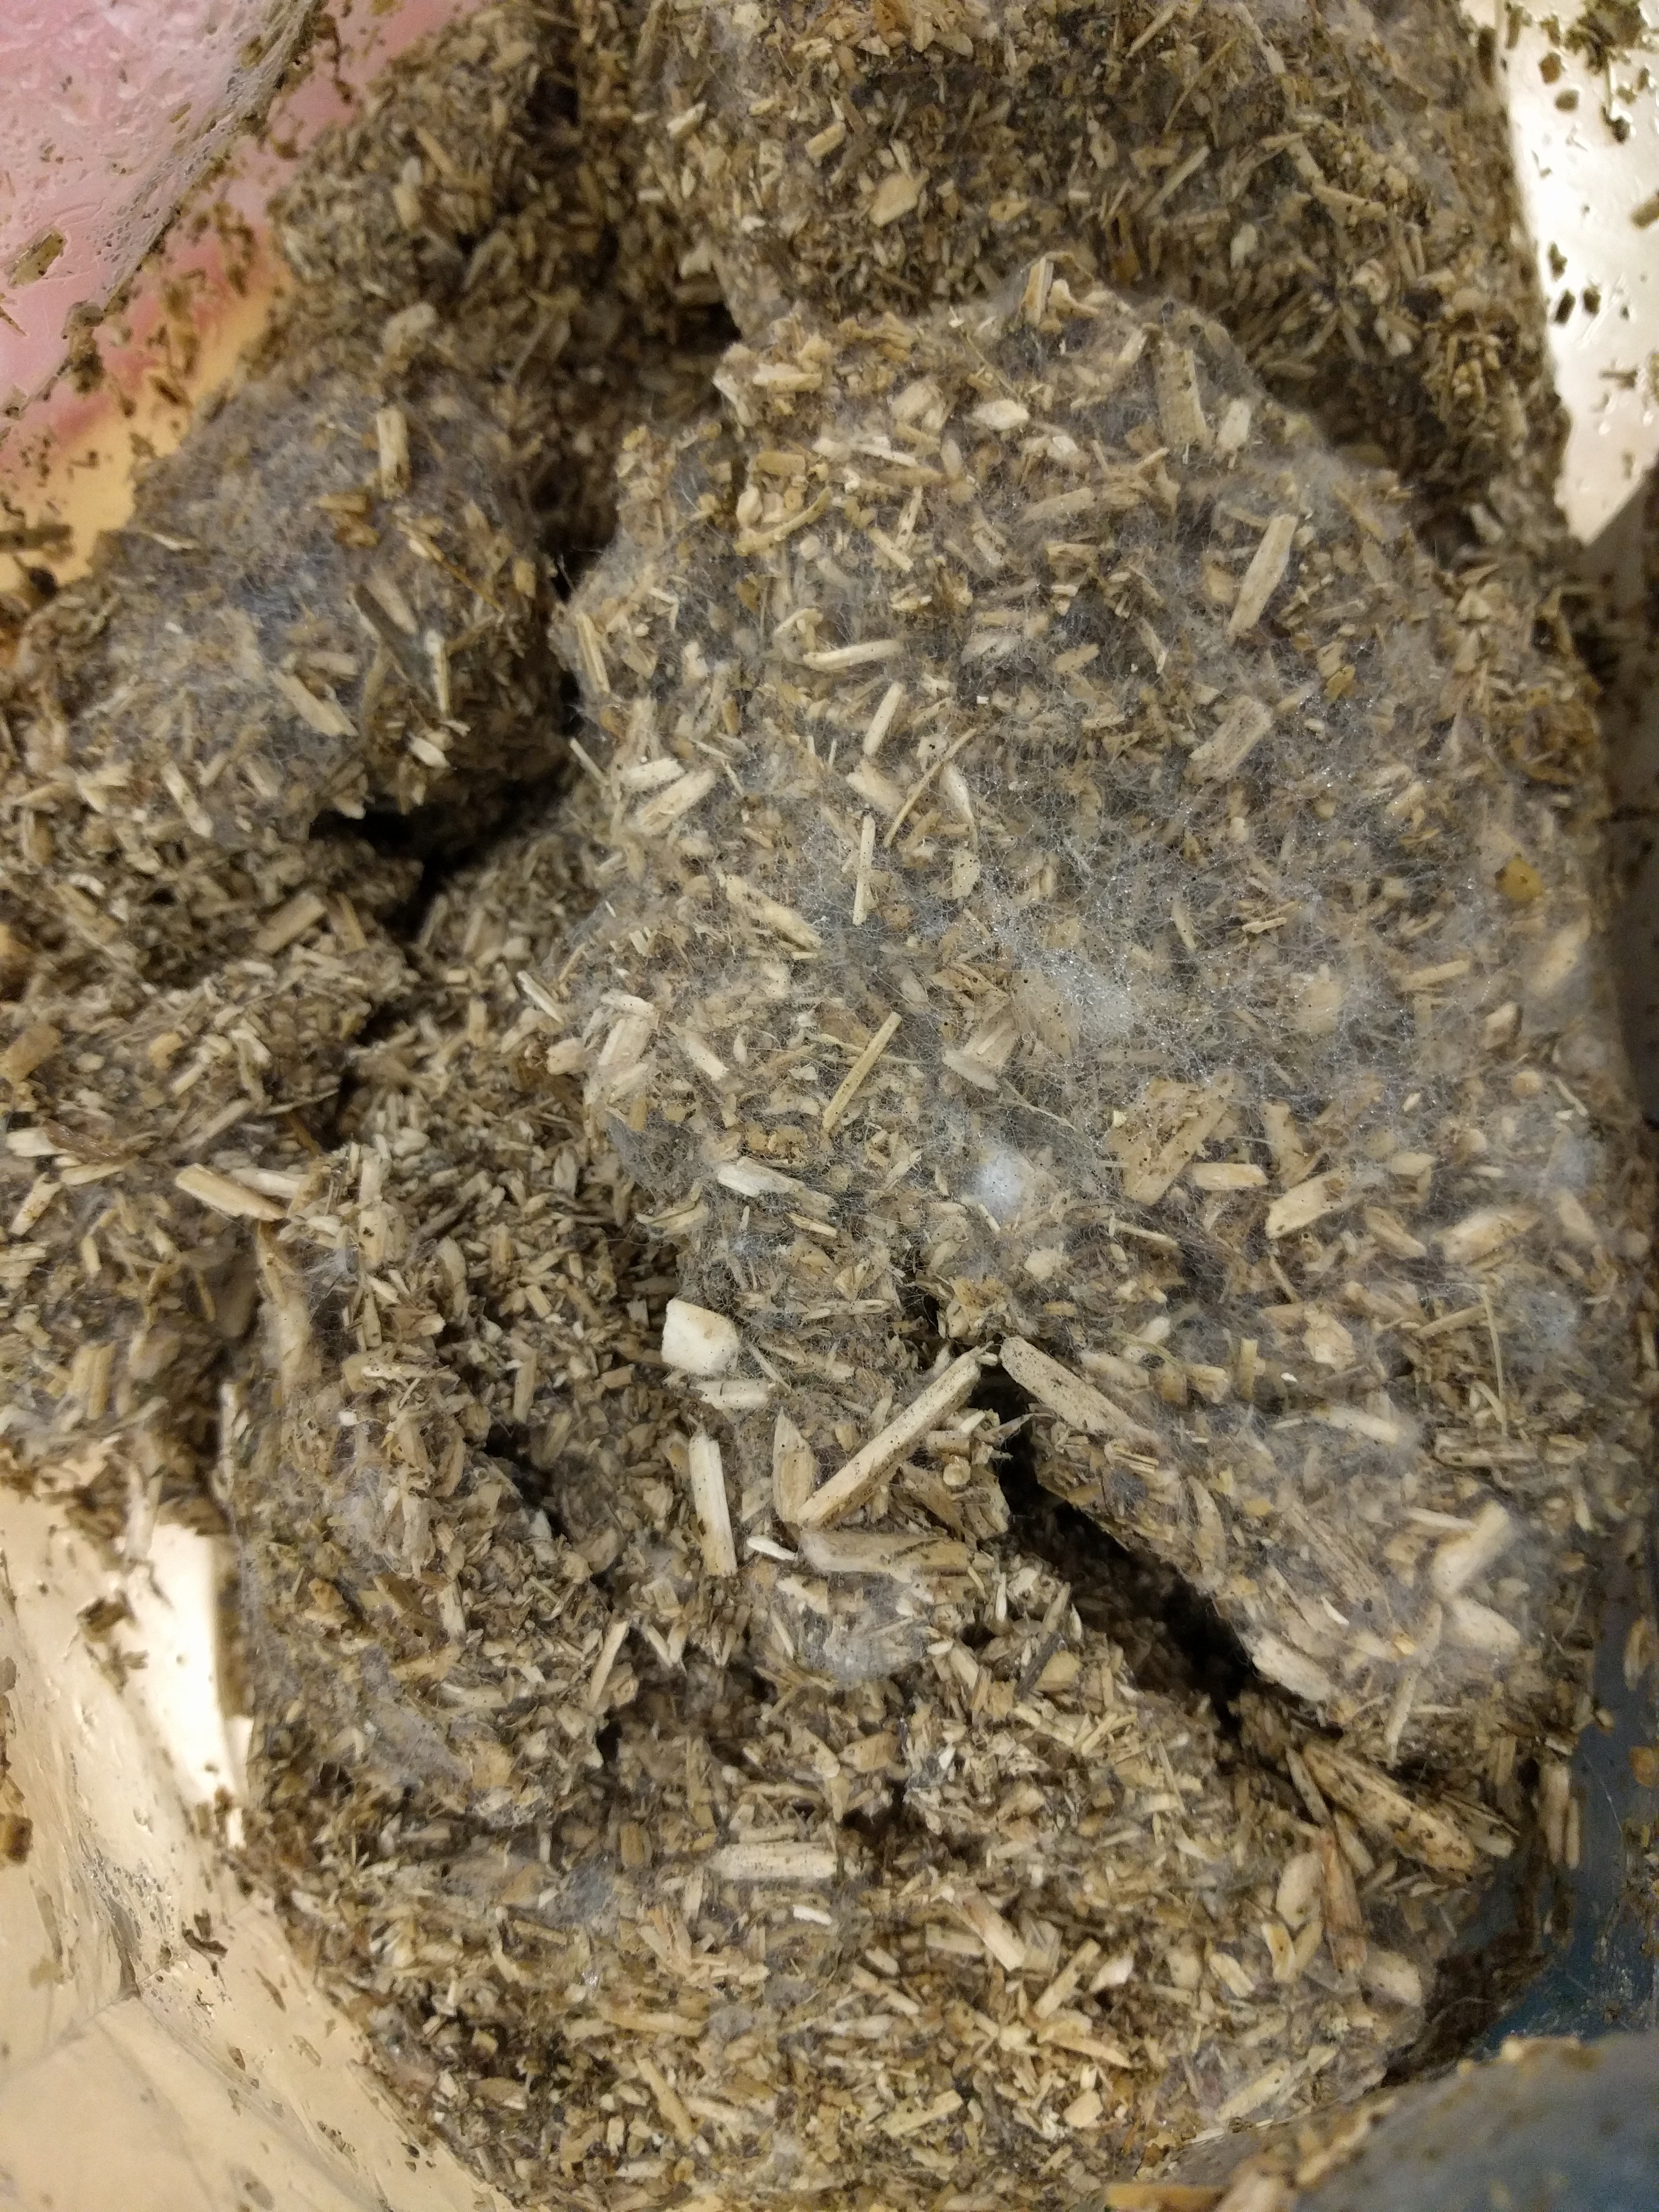
Fine mycelium
02/27/2019 at 00:51 • 0 comments![]() Our batch of fine mycelium looked like this a couple days ago, pretty minimal fuzz.
Our batch of fine mycelium looked like this a couple days ago, pretty minimal fuzz.I added more nutrients and spread the material out more, resting it on its side as well as started a batch of the standard density material.
Timing wise things could be better. We have few molds at the moment but need to perform testing as soon as possible, this is mostly a logistical error. Unfortunately it also has to do with Jason being under the weather, a resin shortage and some unexpected issues with set five... That's right, there's going to be a set six!
Tomorrow we will assess what to do next concerning this, likely we will scramble to make a bunch of basic molds representing modules A and B. These will just be three and six inch lengths.
-
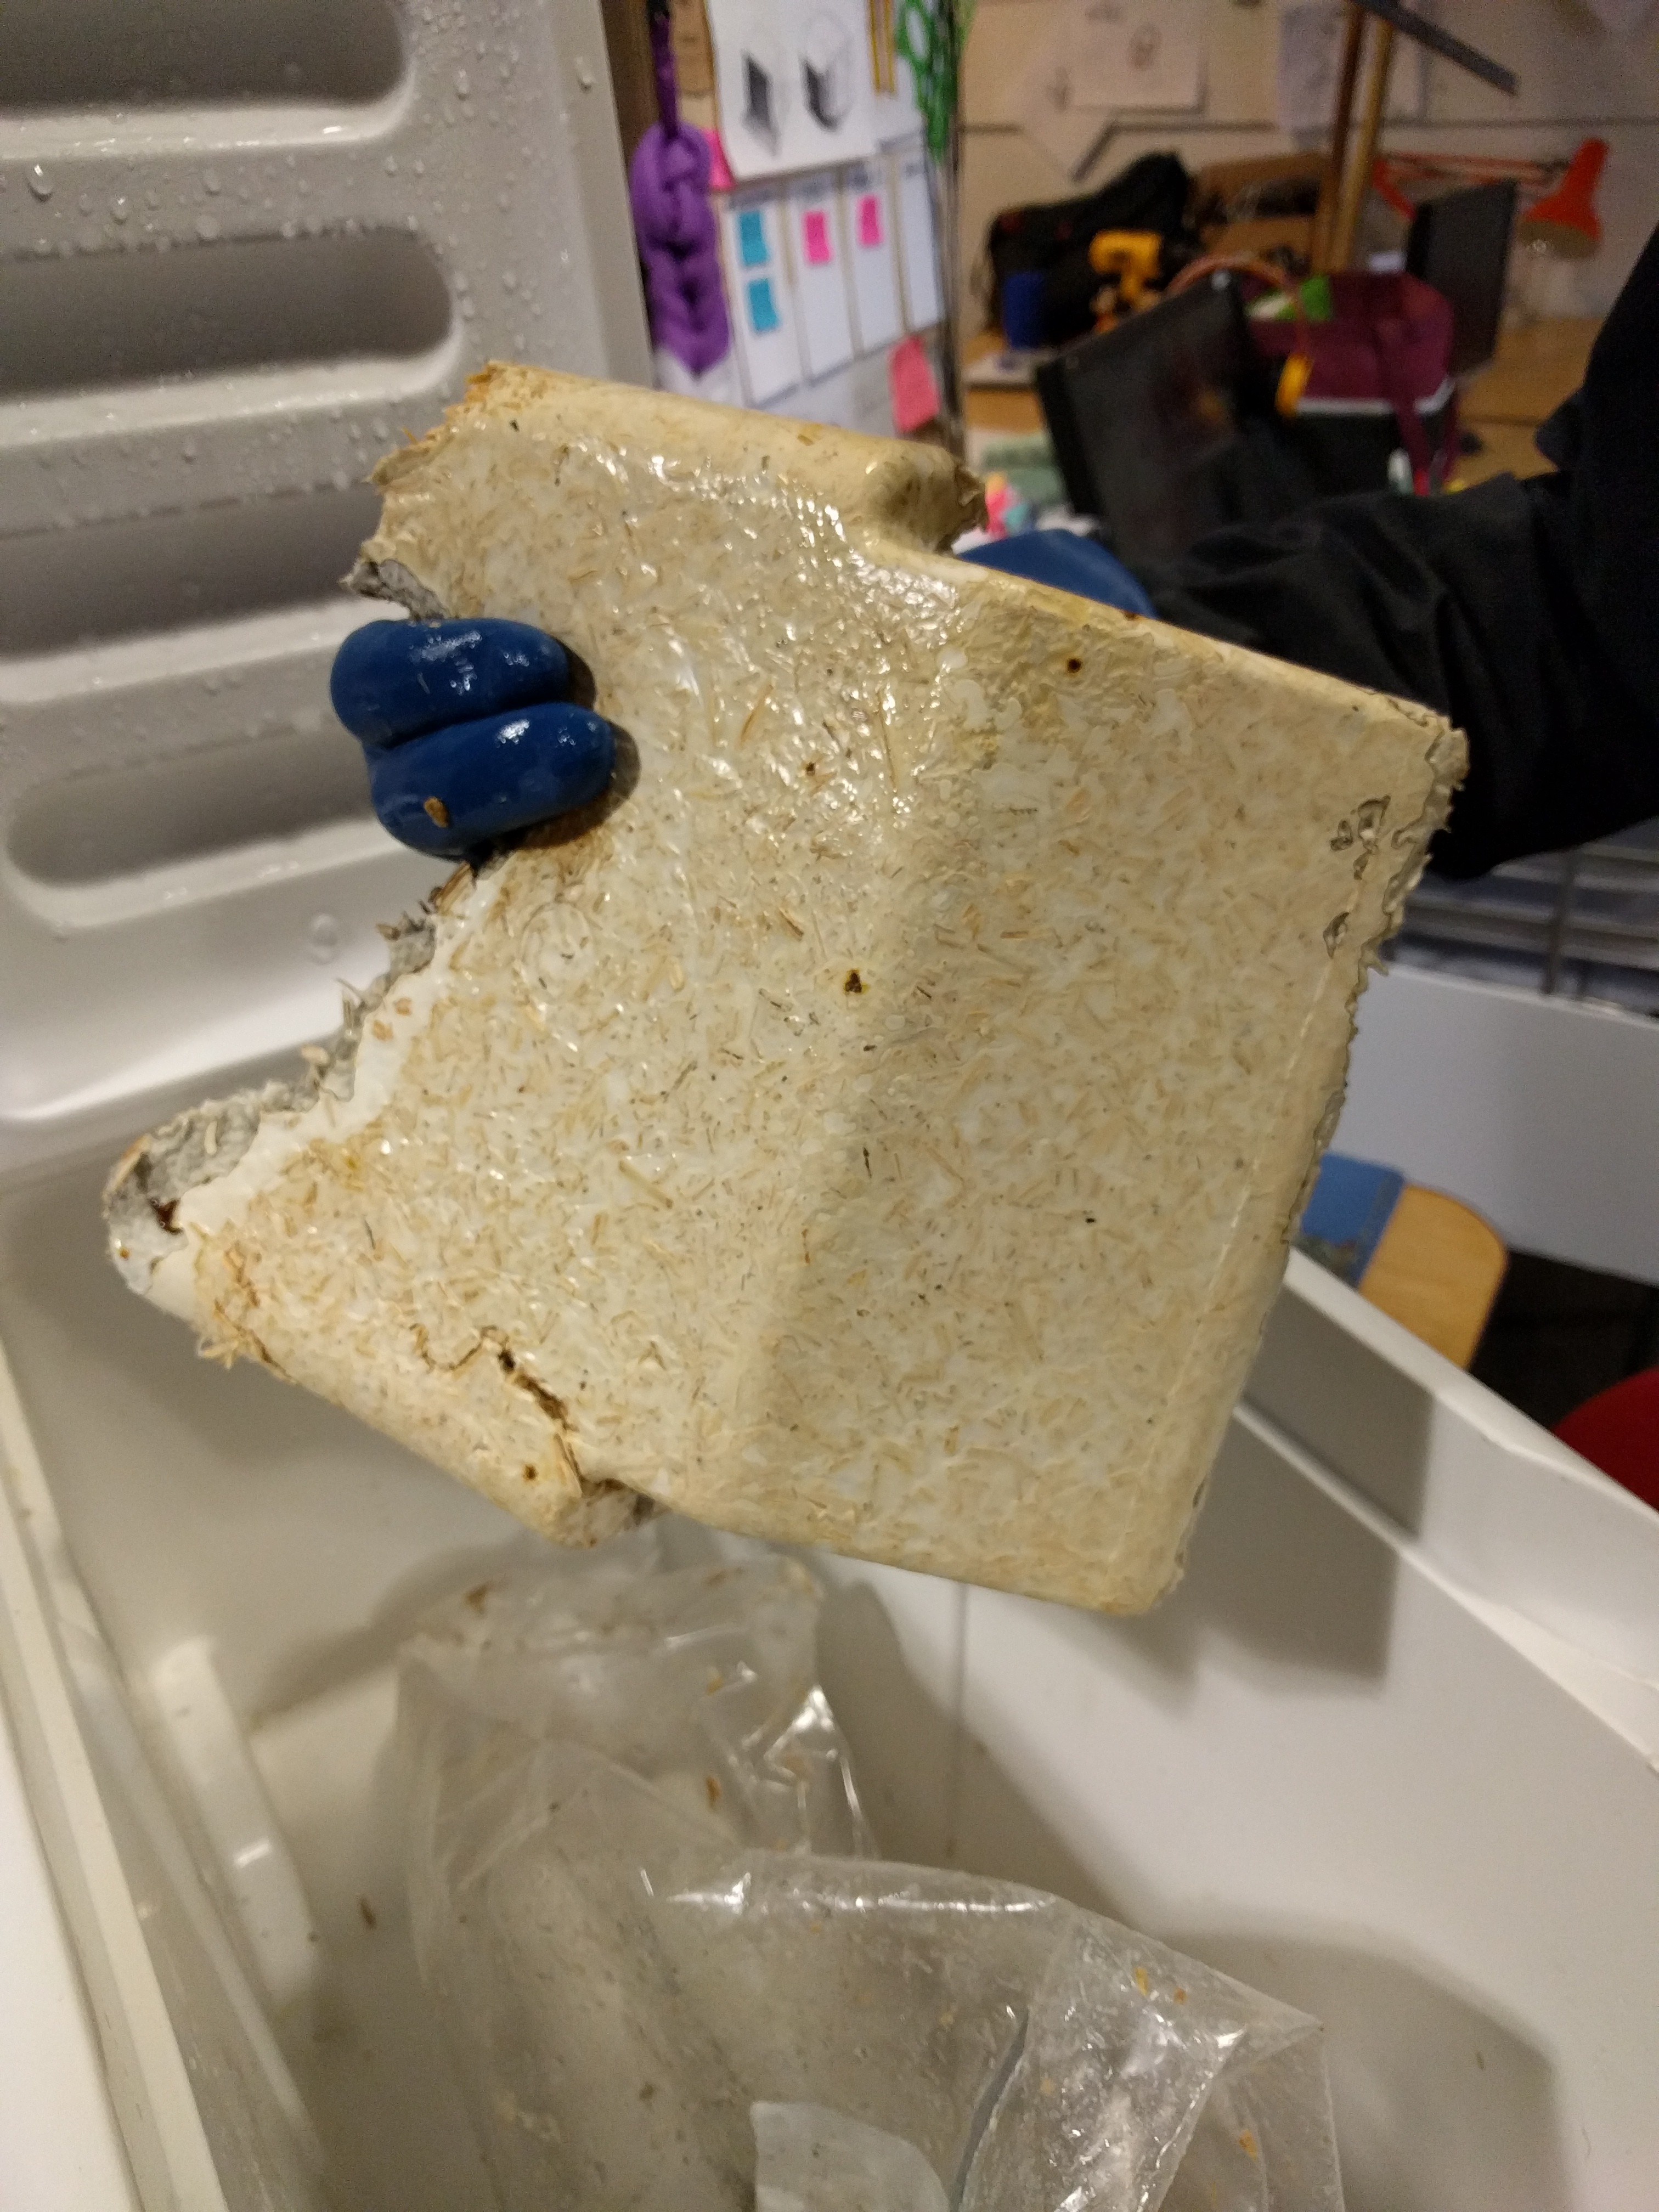
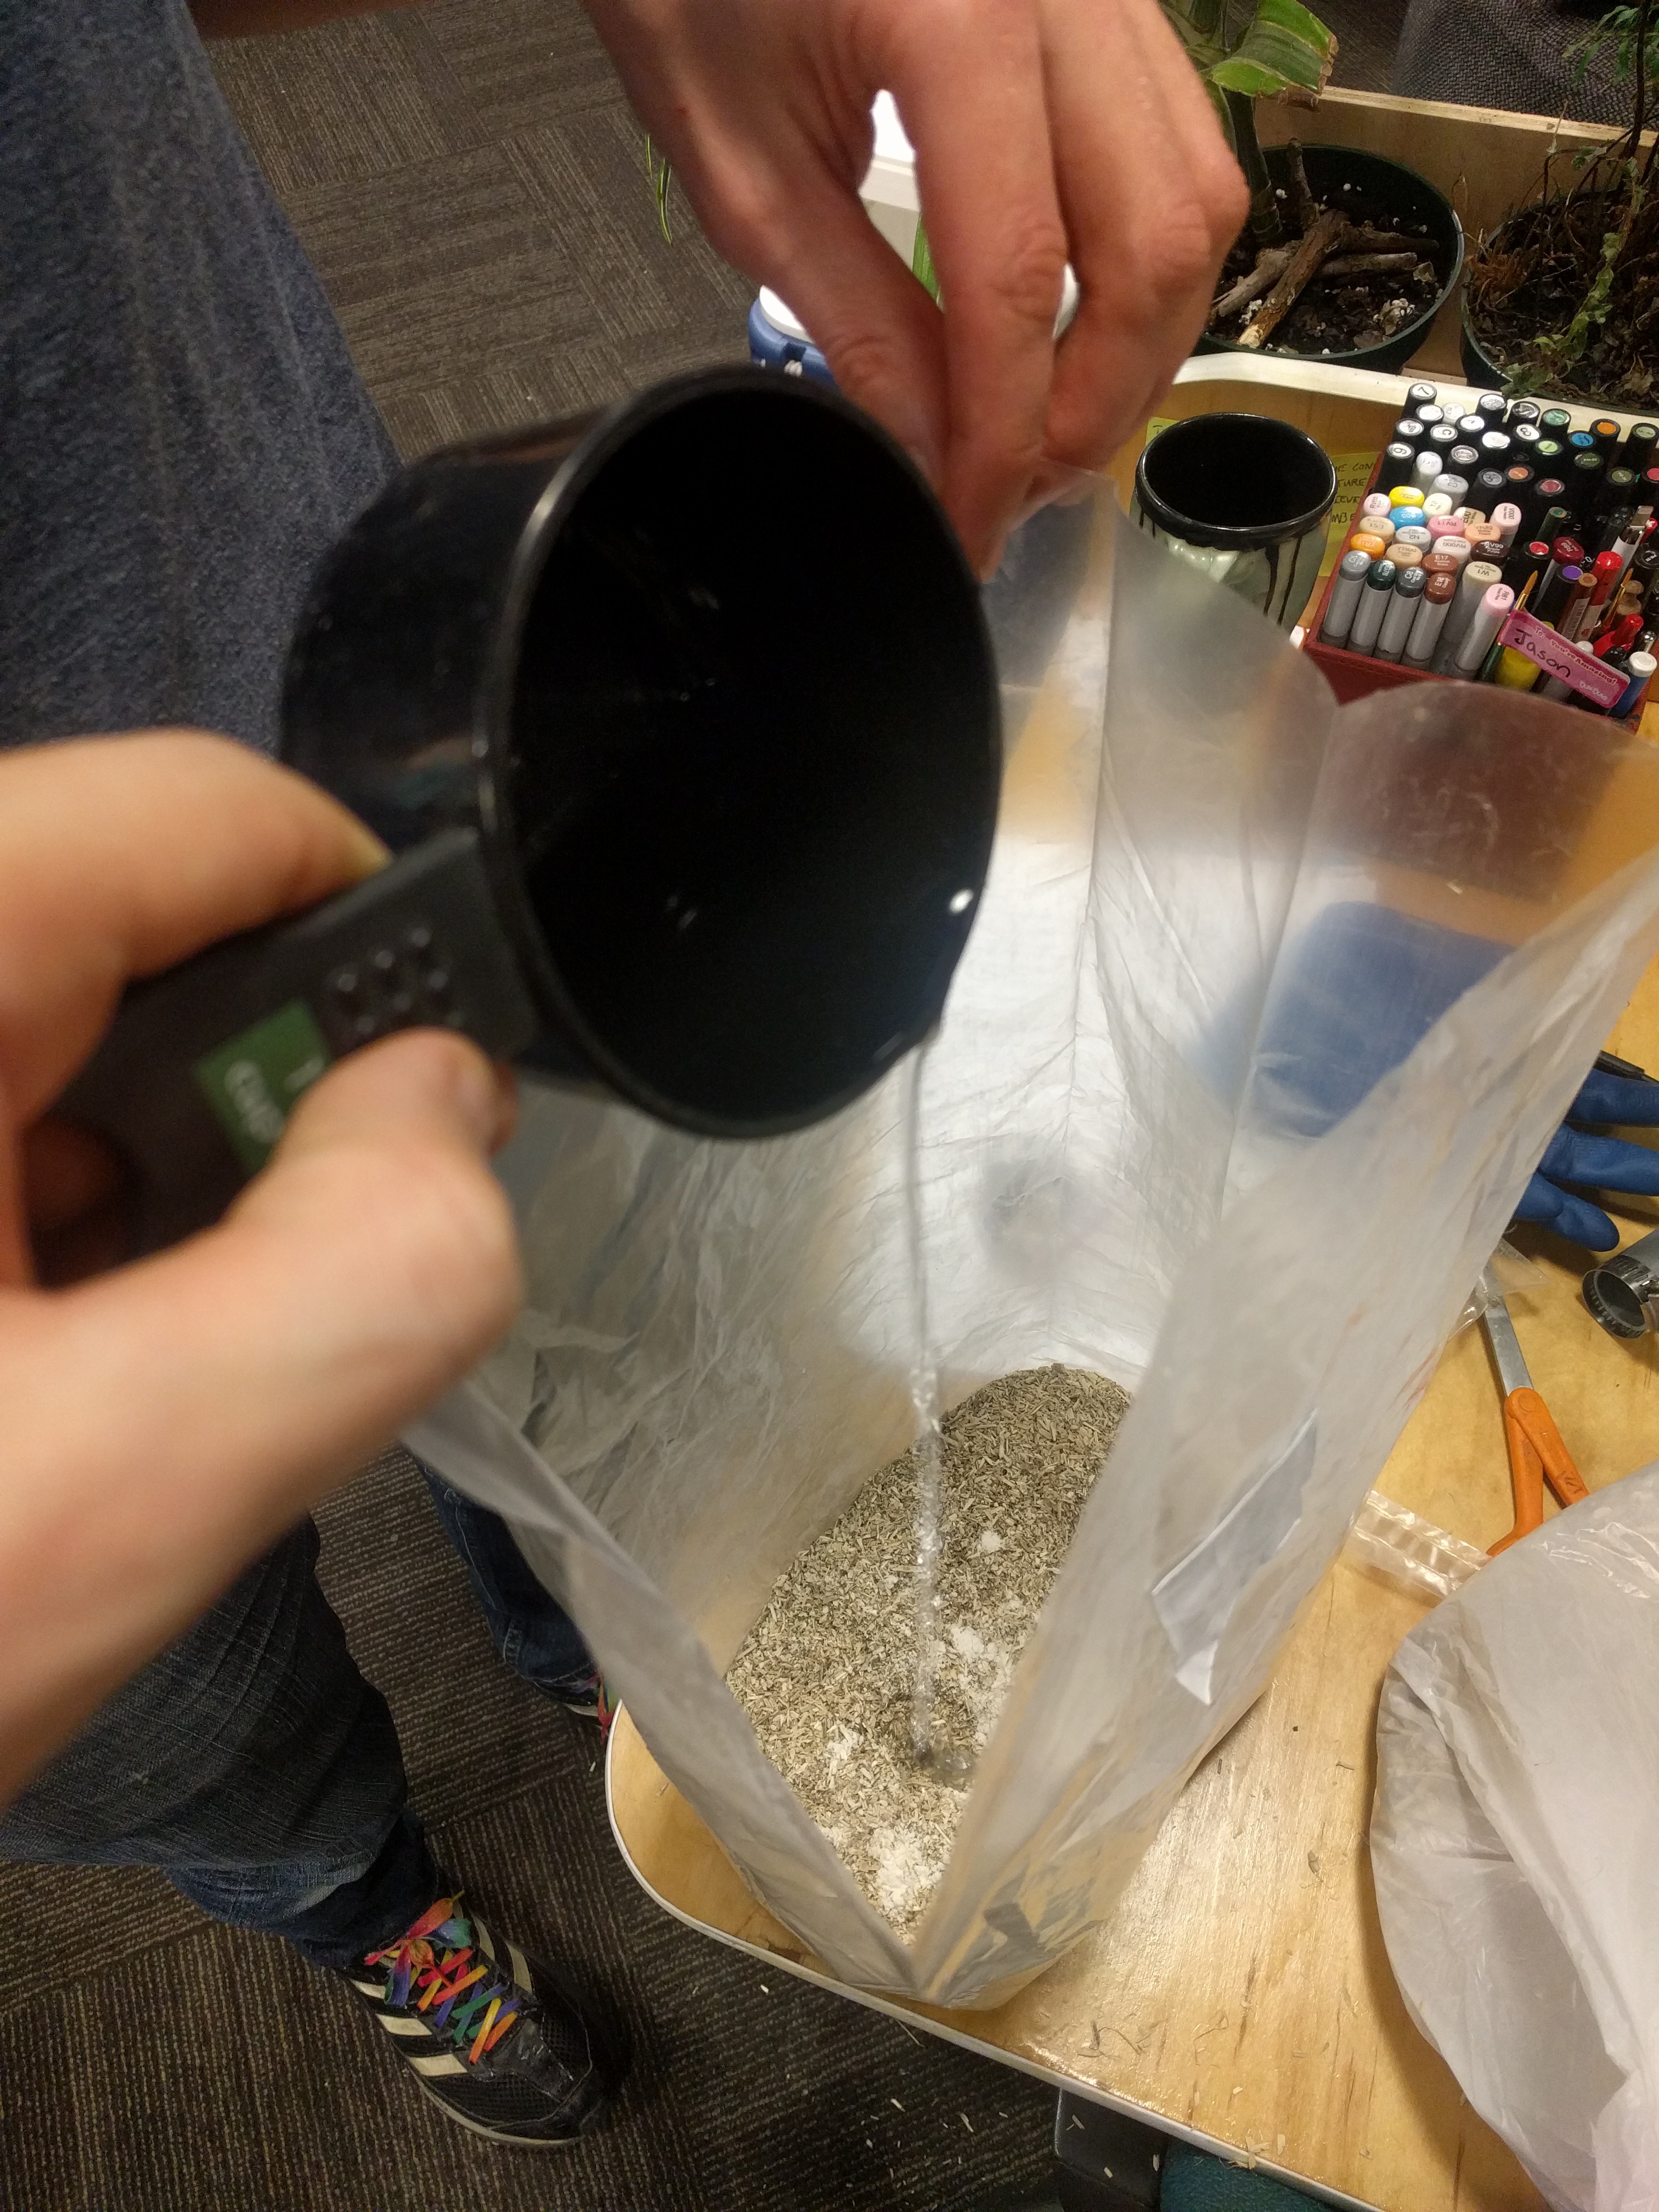
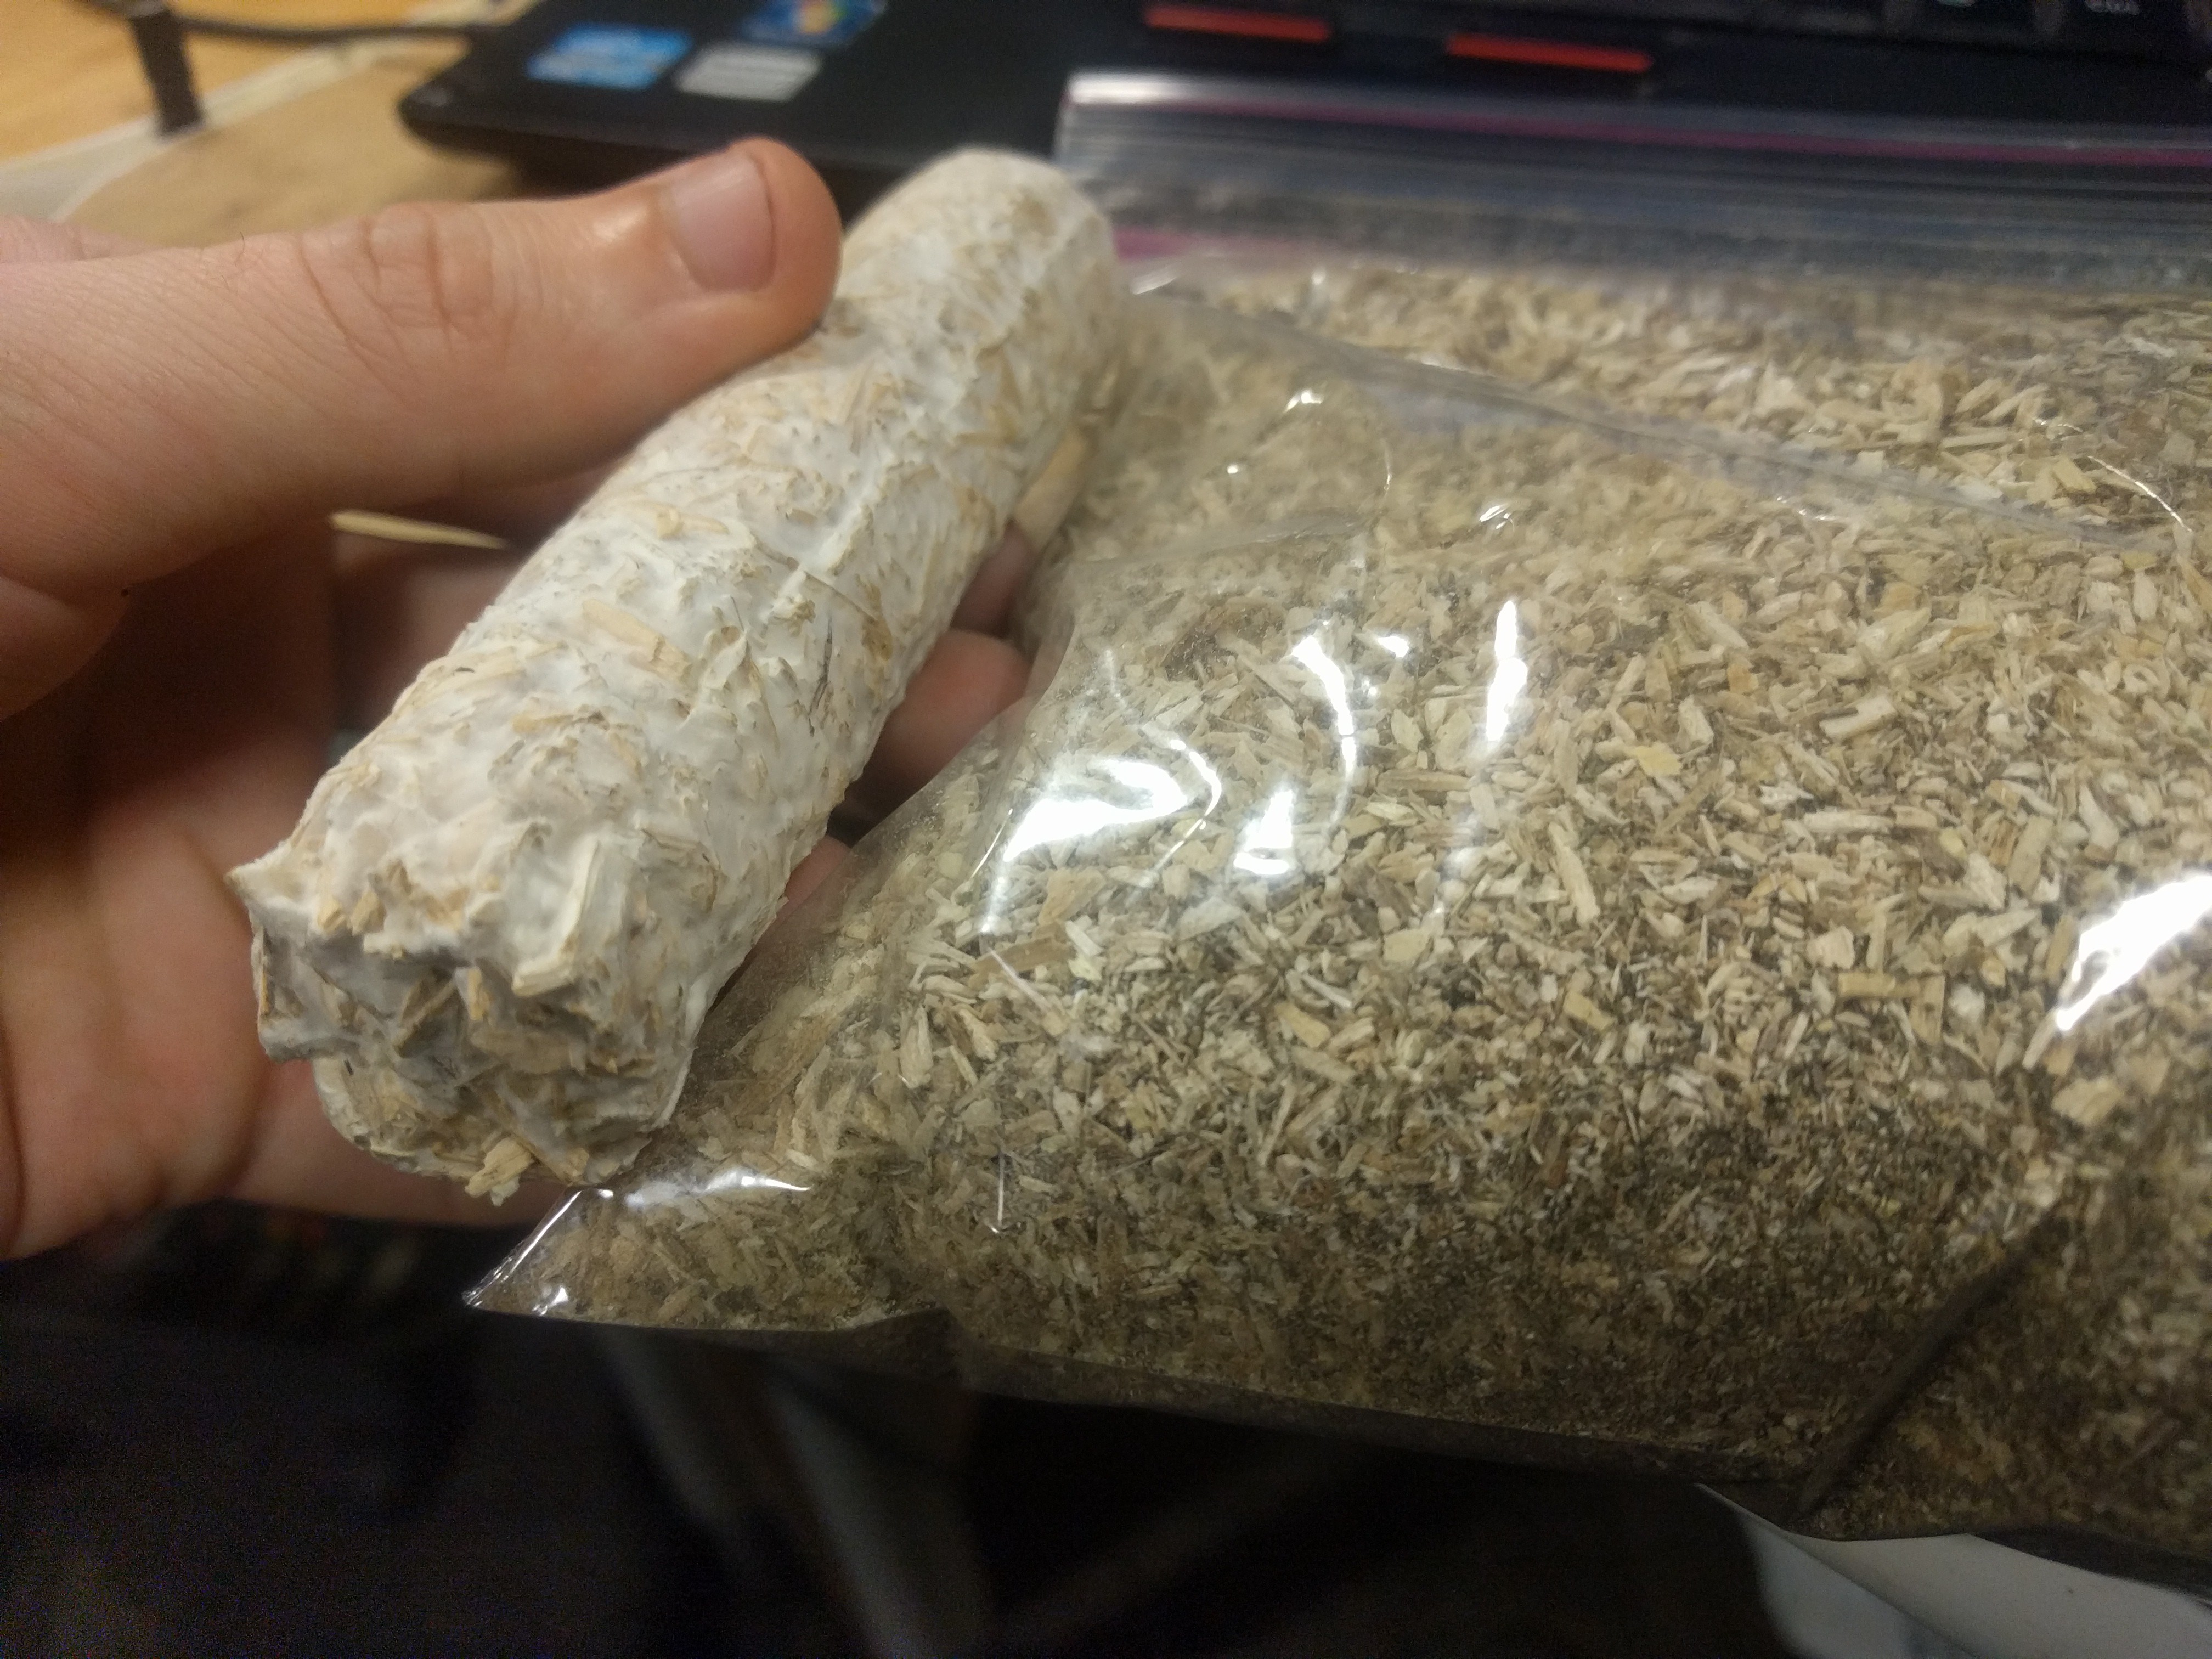
Increasing Density
02/18/2019 at 15:04 • 0 commentsOur last experiments with mycelium showed that we need to greatly increase strength, one potential way of doing this is by increasing the density of our parts. This relies on the strength of the actual mycelium through the matrix so may not work as expected. Since we will be using an Instron machine anyways to validate our found and estimated values for compression and tension we decided to grow a high density test batch in addition to the standard.
First we removed the OLD (OLD) stock
![]()
This hunk was rock solid.
![]()
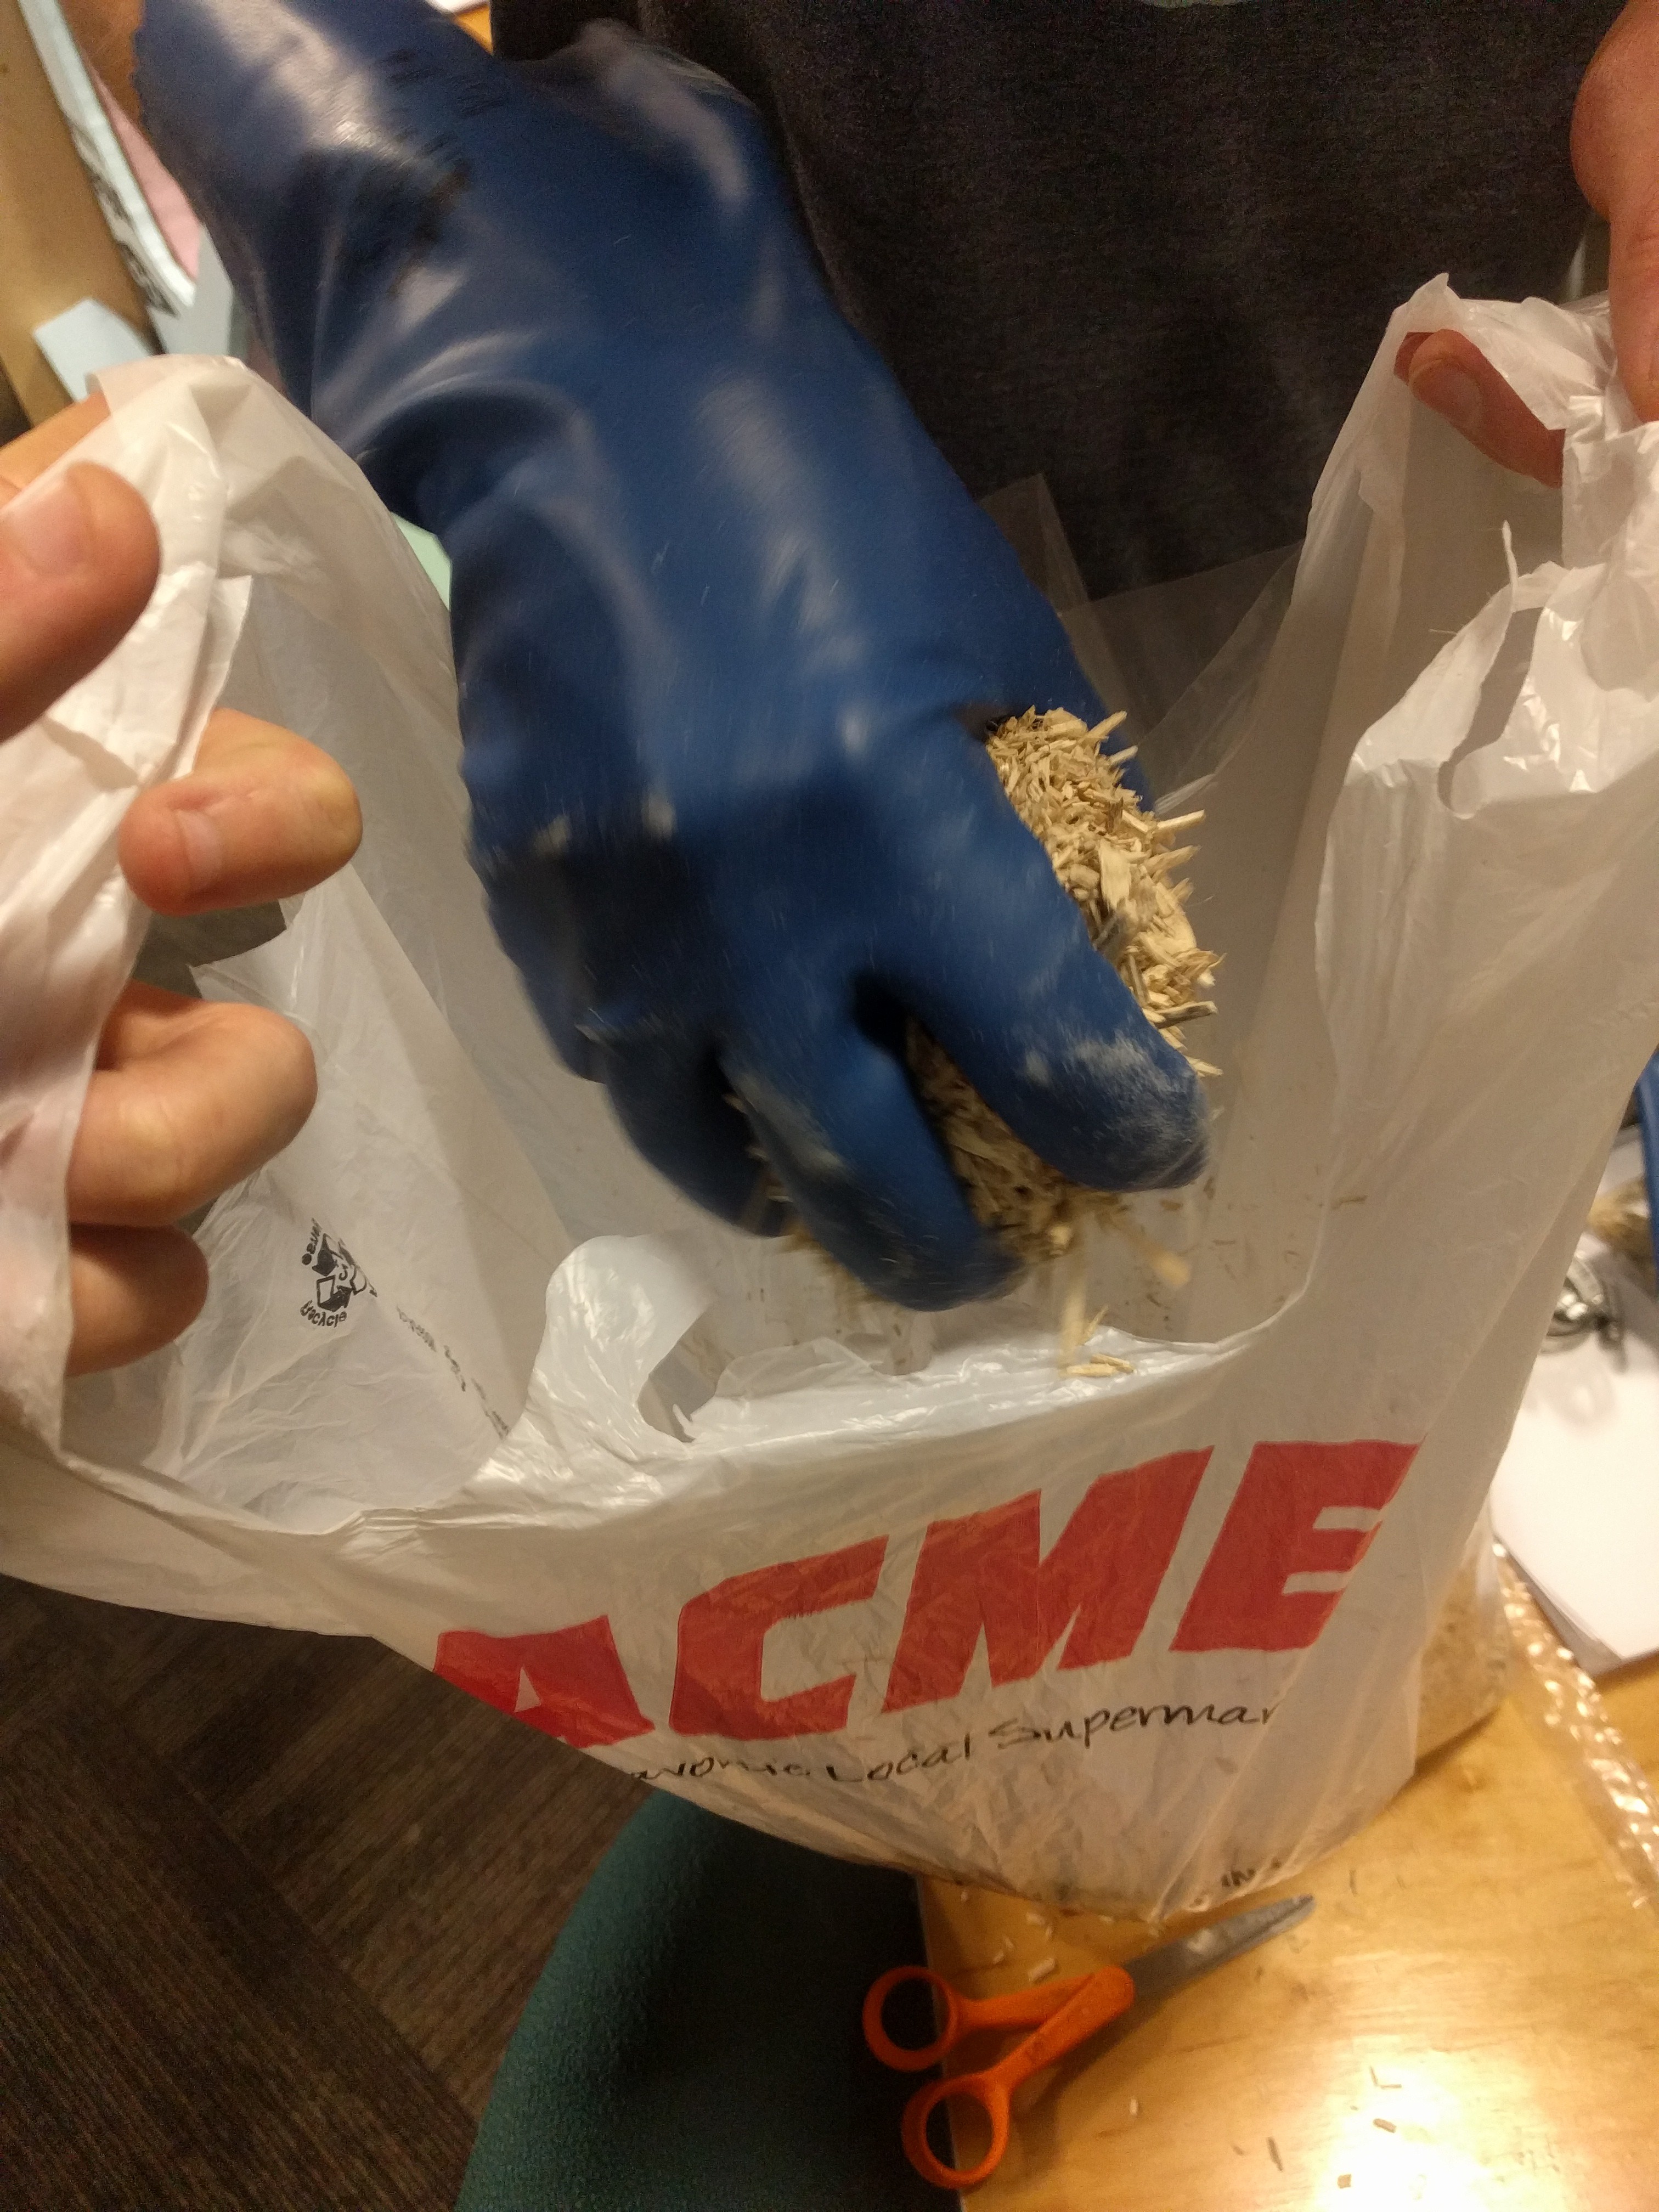
We transferred out the standard density mycelium to be grown separately since we needed to inoculate our fine mixture.
![]()
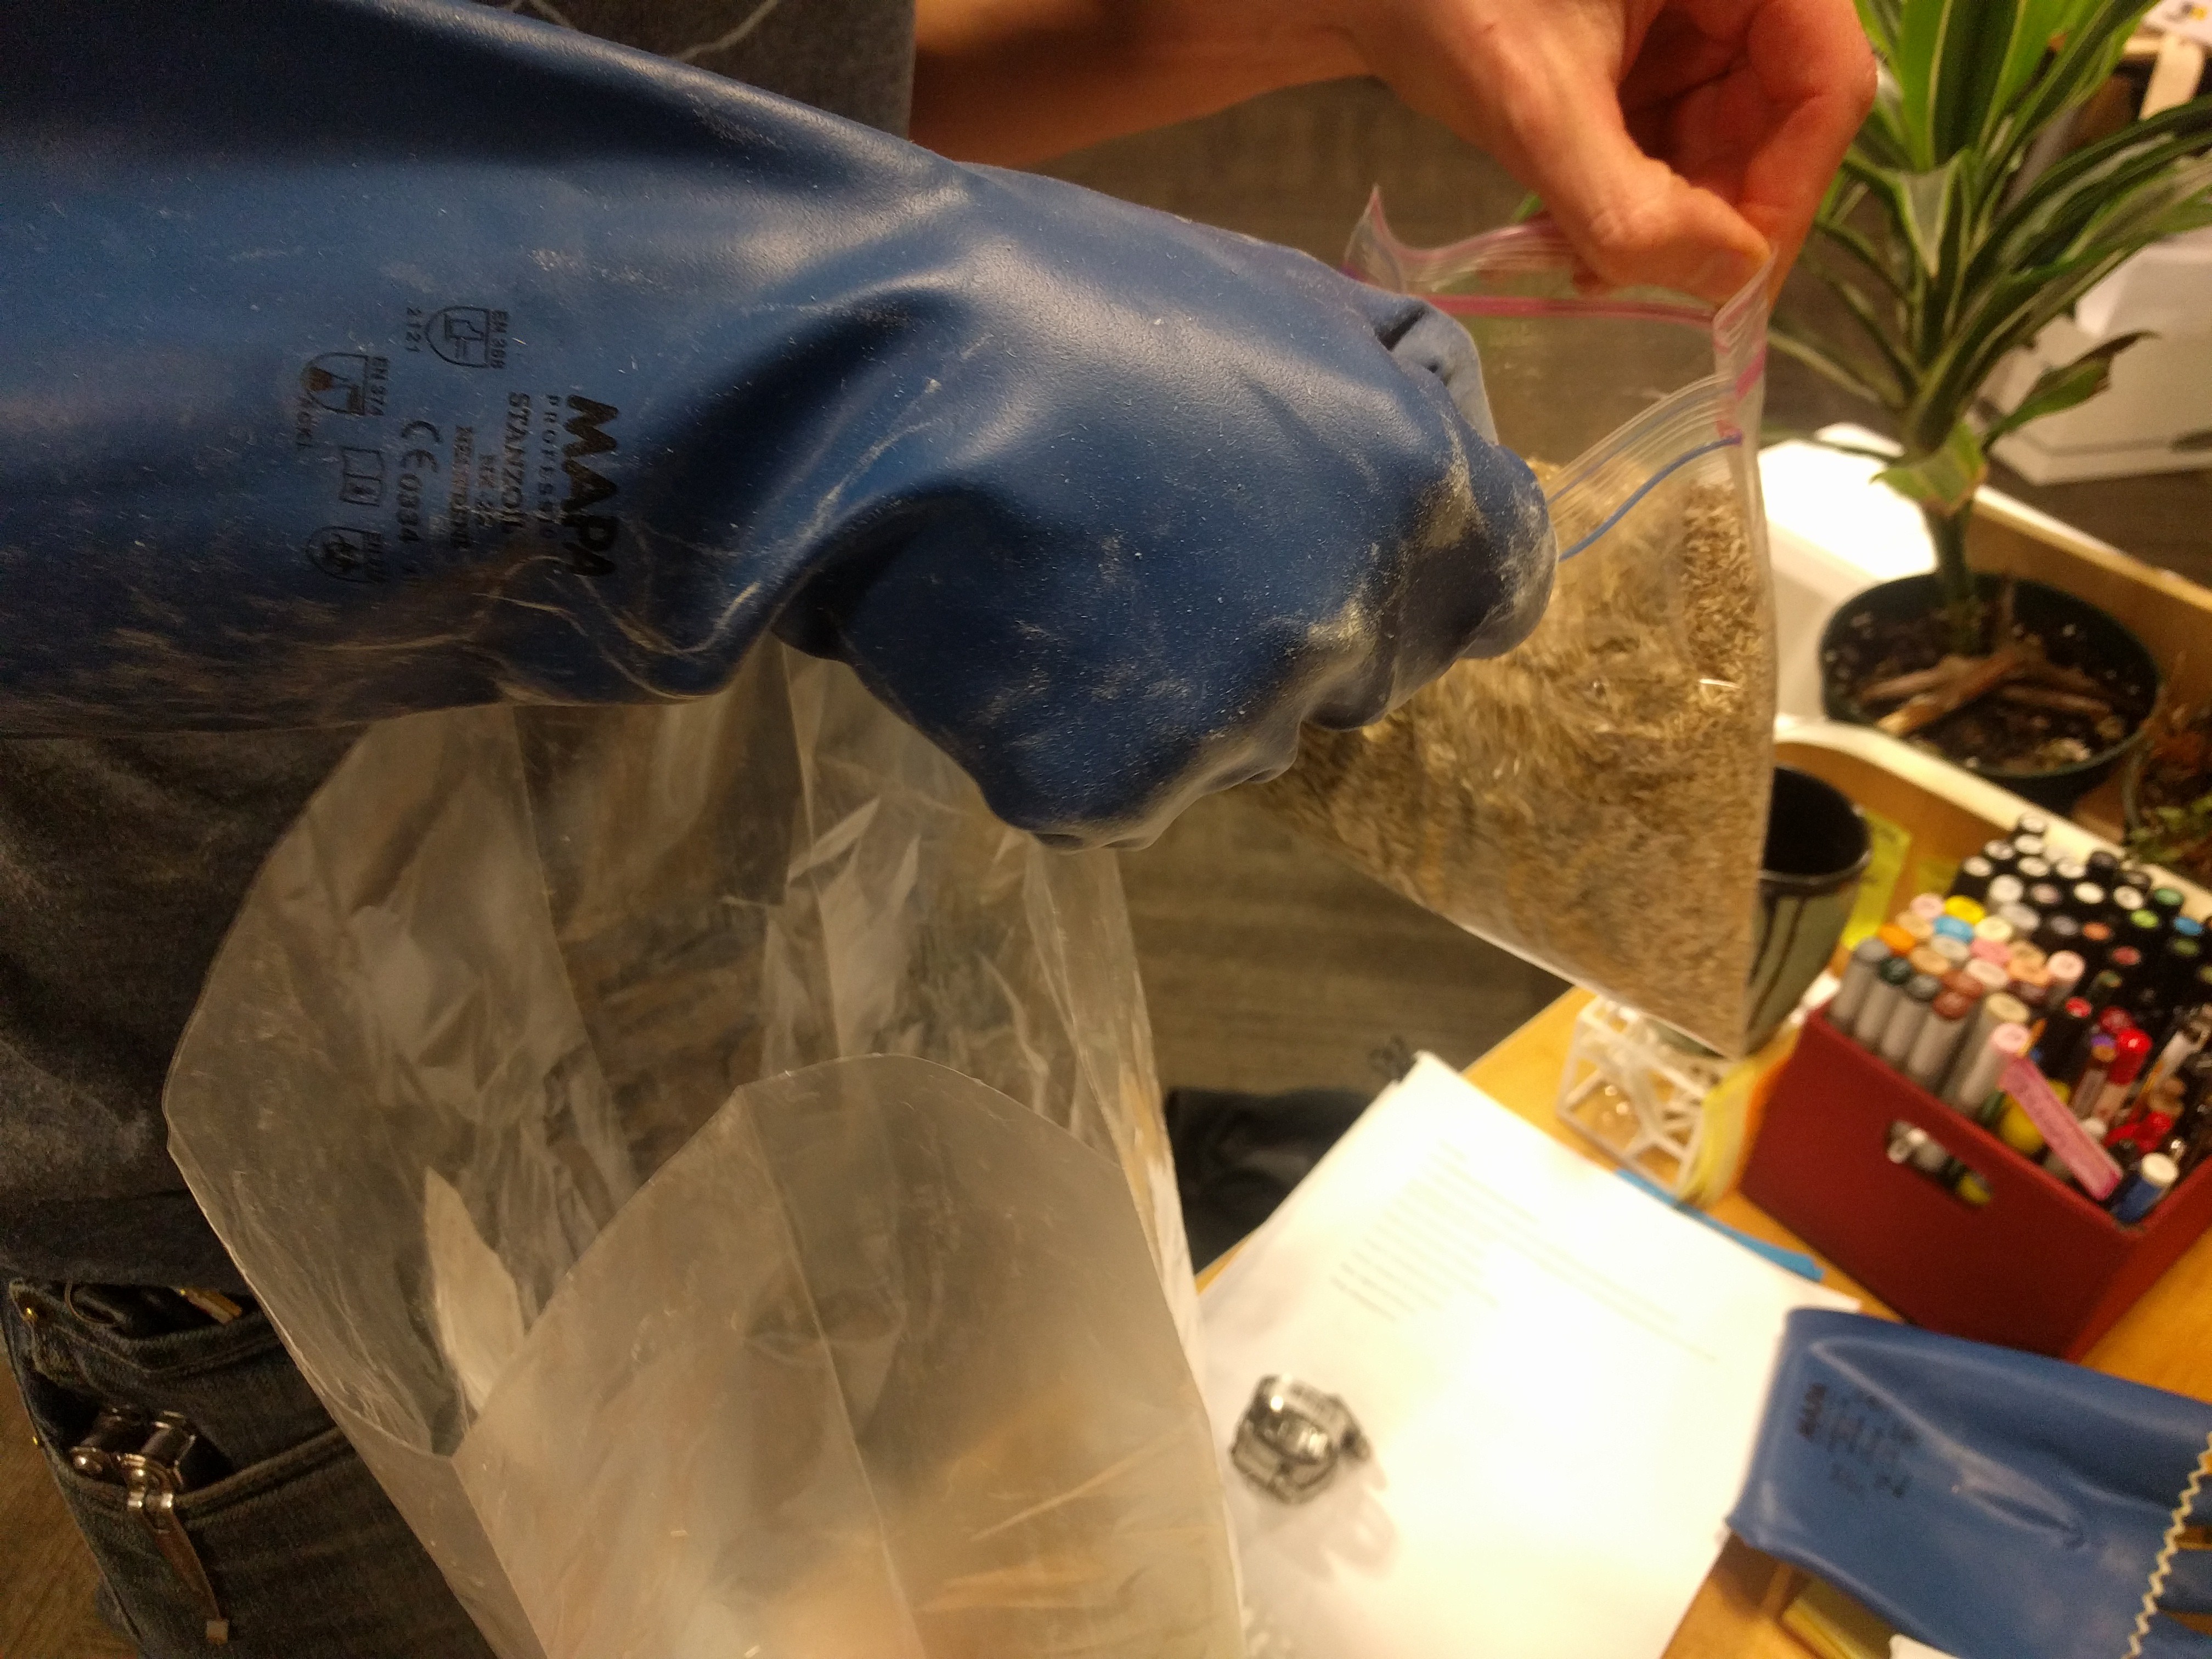
Then we added back in the fine mix (about twice the density.)
![]()
Added a proportional amount of the required additives.
![]()
And then set it aside to grow initially; first for five days after which we add more ingredients then another five days in our molds.
![]()
This material will be cast into modules A and B with end adapters for use in the Instron machine.
-
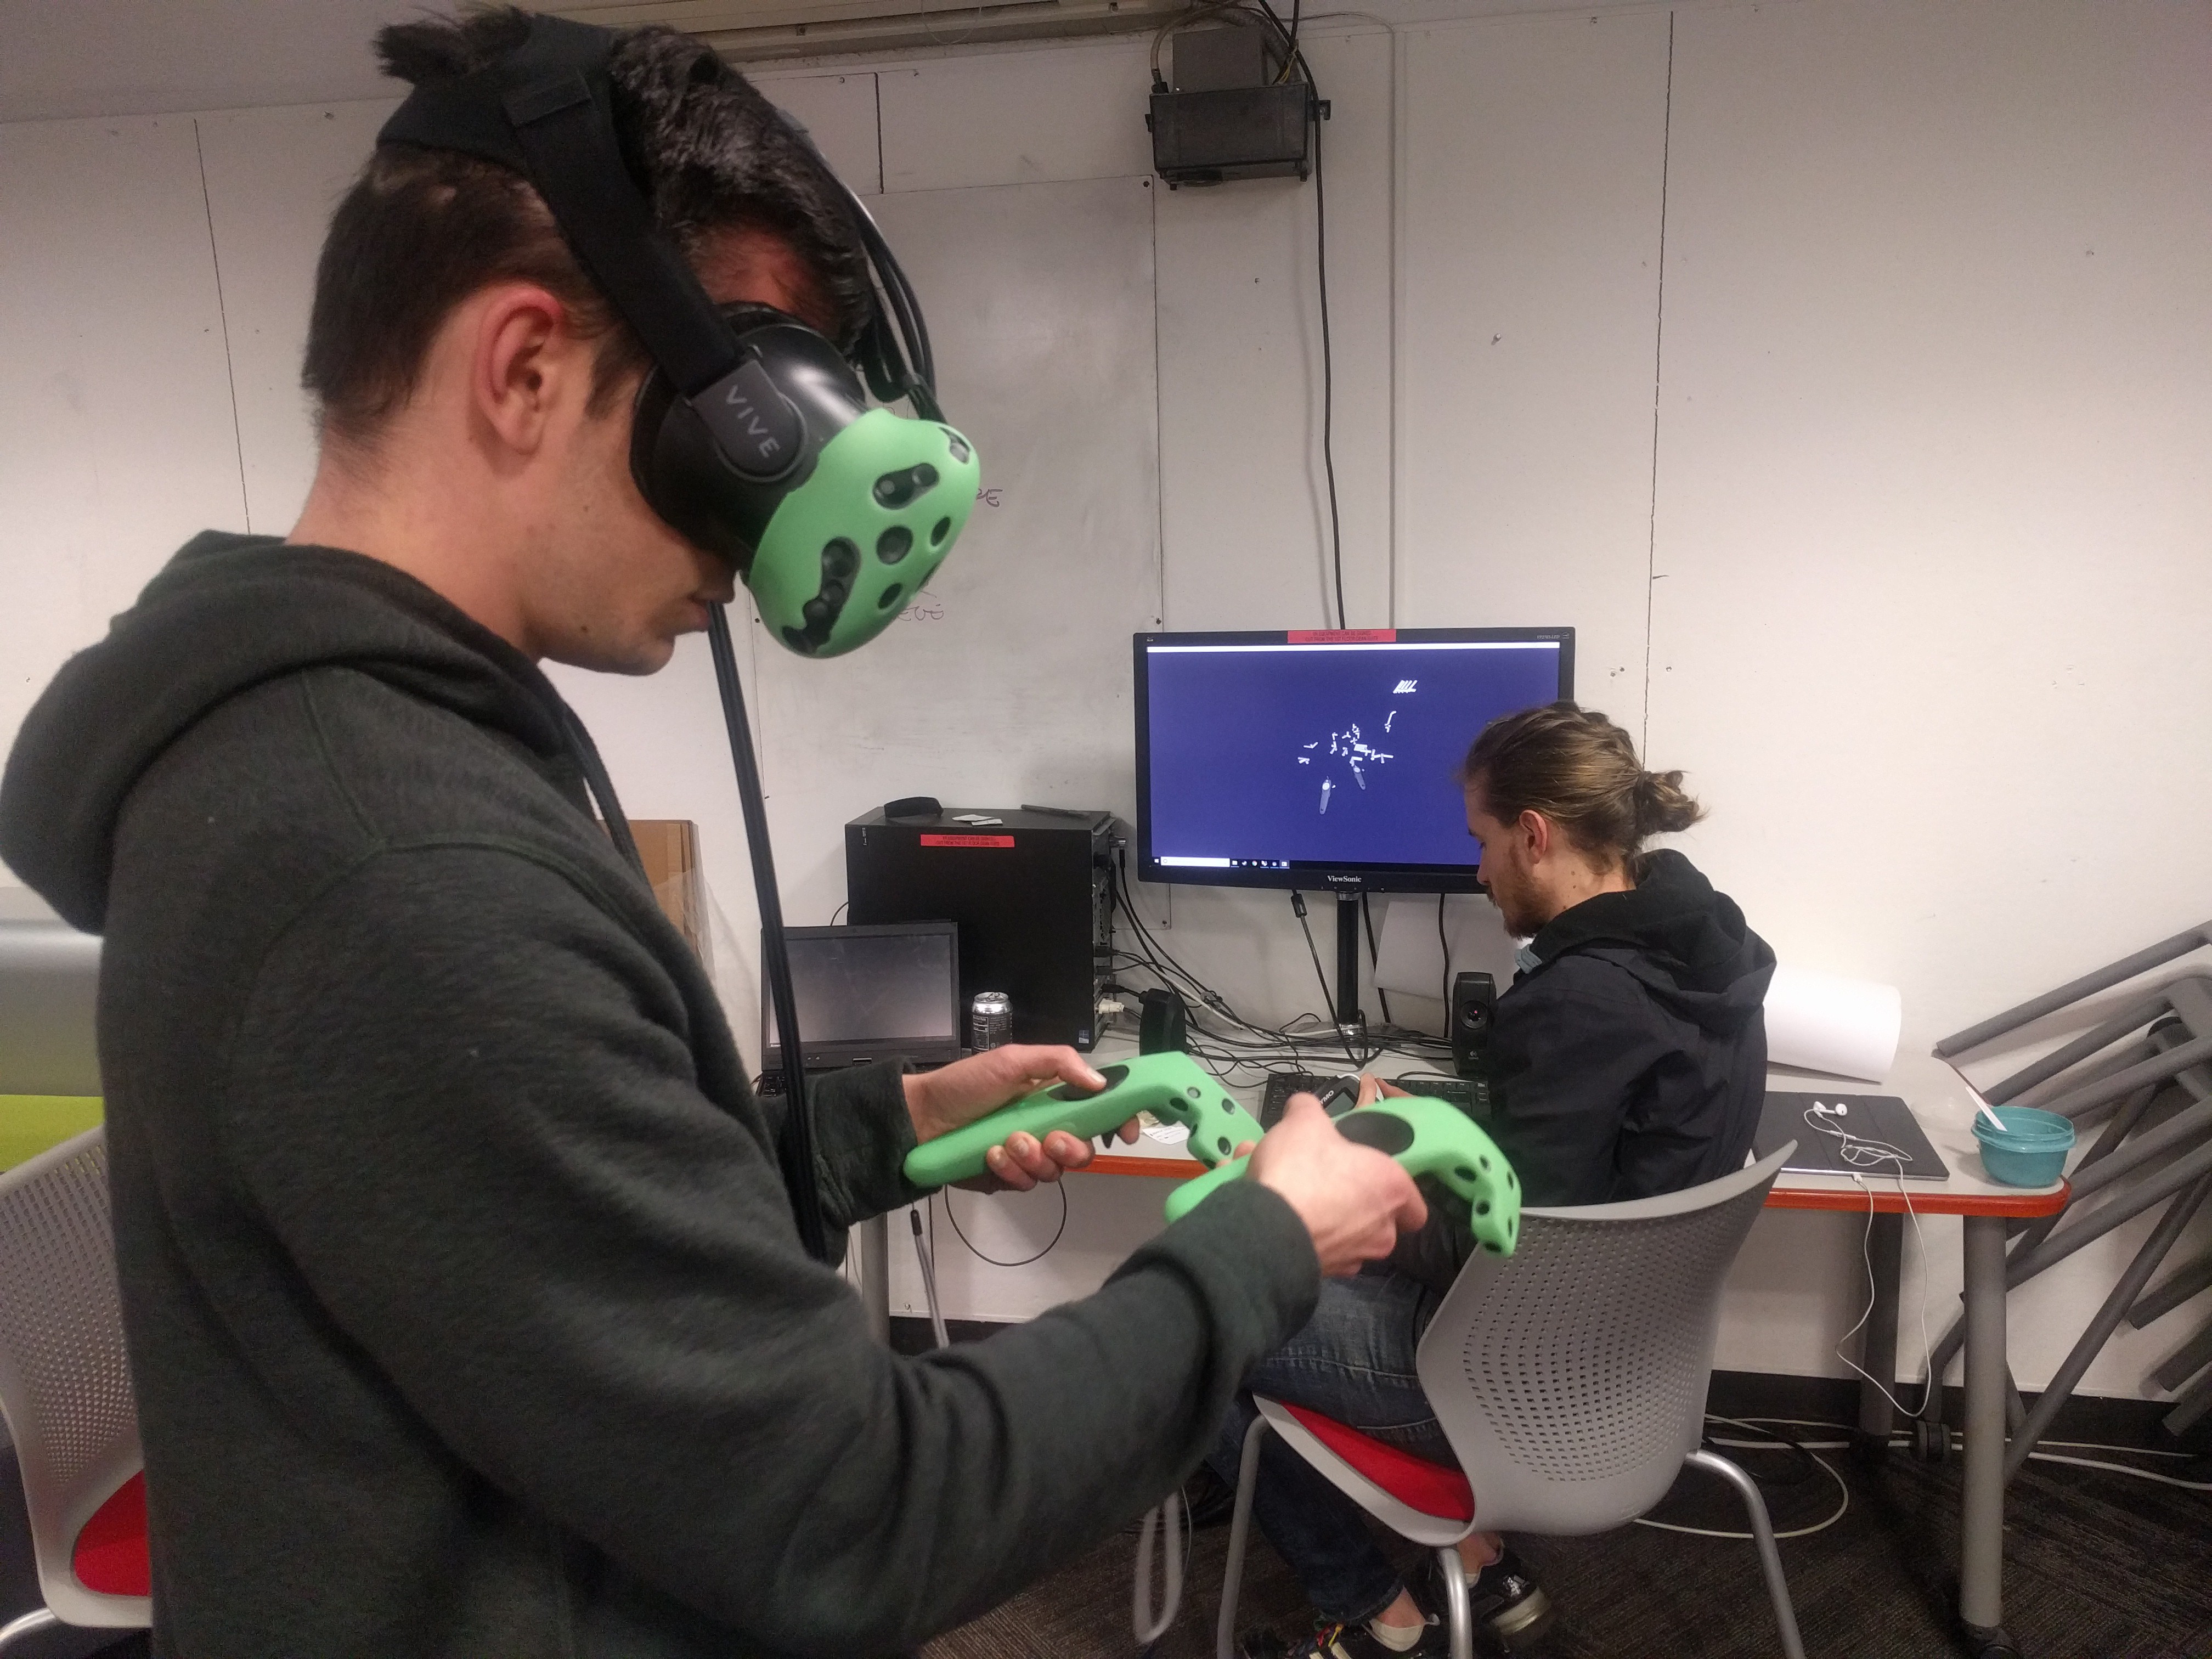
Mindesk VR
02/18/2019 at 14:51 • 0 commentsWe installed and started using Mindesk VR for Rhino3d with Geometer. It seems to work great for our purposes, fixed dimensions and ease of module movement, alignment and general workflow.
Things like moving assemblies in Gravity Sketch were difficult or impossible and we ran into scaling and alignment issues. Mindesk is planning on releasing a Solidworks variant soon so we will look into that as well.
![]()
This is a first time user with minimal guidance.
The results are promising and we will continue to use Mindesk for form exploration. That it updates an active Rhino file is an invaluable feature. Moving forward we need to ensure that we can easily communicate a final design in multiple formats as well.
-
On lowering initial module count
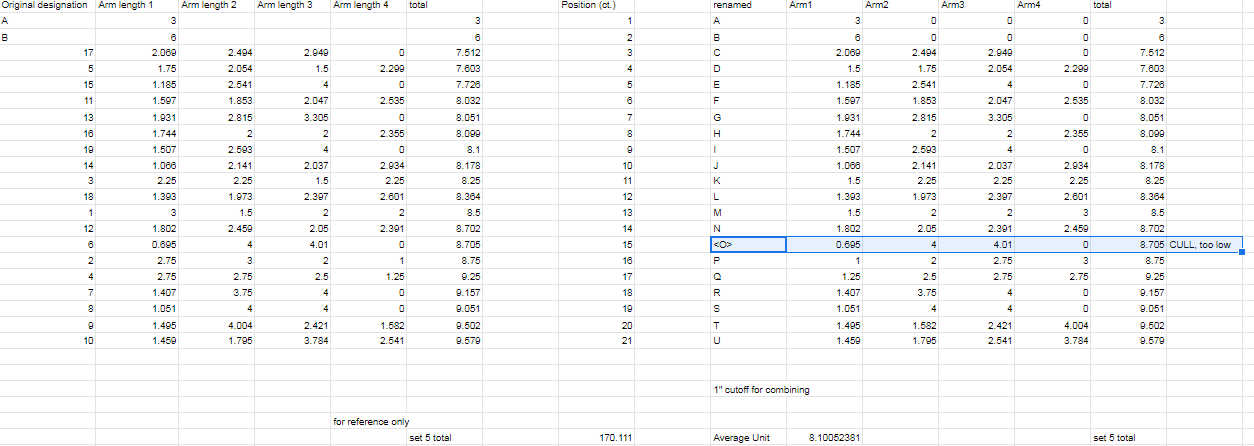
02/12/2019 at 23:02 • 0 commentsRight now module set 5 is made up of A-T (21)
The order of designation is lowest to highest of individual module mass with the least material being "A" and the most material being "Z."
Then for each module, each arm is given a name; with 1, being the shortest followed by "2" the second shortest and so on.
In this way modules are sorted and organized by both overall and component size, hopefully aiding in distinguishing and remembering each of their unique properties.
![]()
We are actively working to decrease the number of modules in order to facilitate a more intuitive introduction, then tailoring the set over time to maximize utility.
For practical reasons we eliminated a redundant module, an artifact from being made up of a cube as well as a module with one arm too short in length to allow for filleting and bonding to its neighbor in an assembly, formerly known as "O" seen highlighted in blue.
![]()
Looking at arm lengths it is quickly apparent that their are seemingly similar modules, but this is not the case since no angle is shown.
An additional part of the spreadsheet is the end point representation table, the definitive definition of each model. Modules are described as a connection of distinct points through a shared origin, making up a line. End point representation is always in relation to the origin or 0,0,0 of the module and X,Y,Z representation for each point based on the shared static module reference
Through more exercises we hope to understand which modules do not demonstrate any practical use and reduce the module list further. With this in mind, we should consider set 5 under construction.
To avoid producing molds for modules which might be eliminated from the set we must act quickly and complete more designs to understand individual module behavior.
-
Molds, Materials and Fillets
02/09/2019 at 21:57 • 0 commentsWe are finalizing set five, we are going with a chord length based fillet operation.
As this is finished we will be converting to OBJ for use in VR.
We are installing Mindesk https://www.food4rhino.com/app/mindesk-vr to hopefully enable easier design workflows.
I am starting to compile the spreadsheet with proper naming conventions for each module, once that and all files are in usable formats they will be uploaded. Molds will follow shortly, they take a little more planning and intentional input when it come to three and four legged modules.
![]()
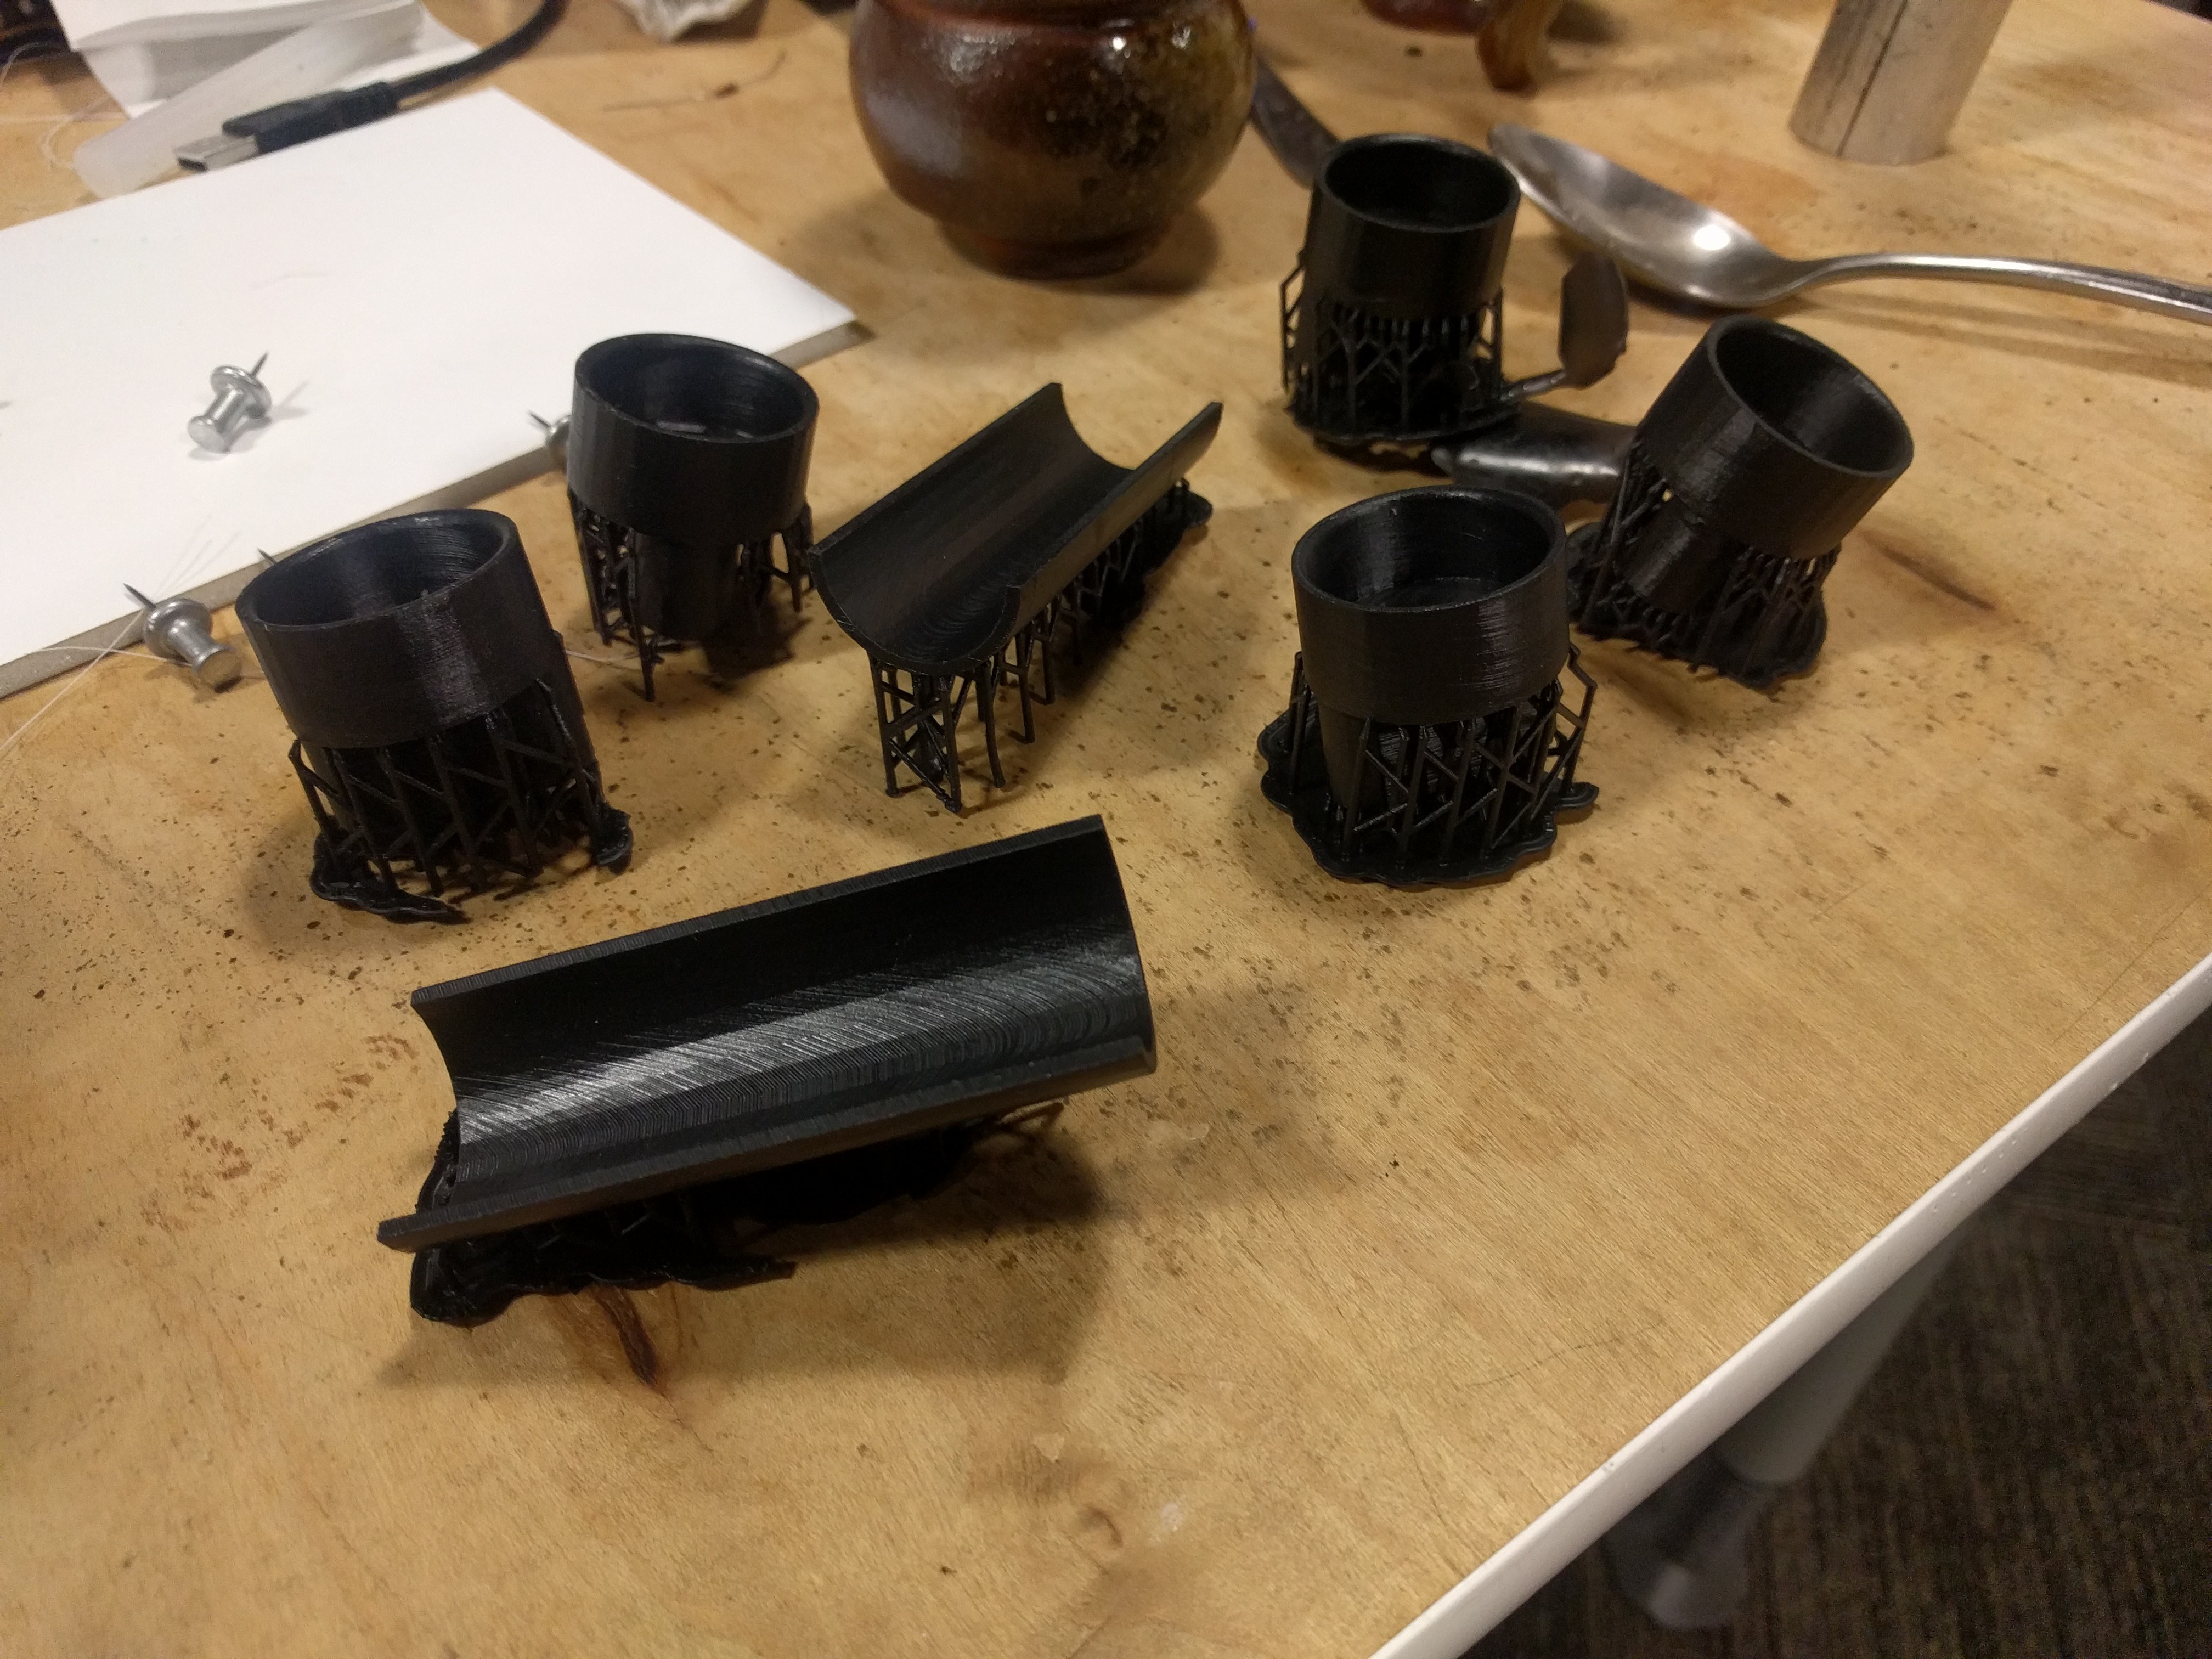
Module A mold and end caps for use with Instron Machine.
![]()
Two parts of one of our most complex modules, it needs to be four parts to guarantee removal after casting of an assembly. This was done quickly on a Dremel 3D printer by DIVE Design.
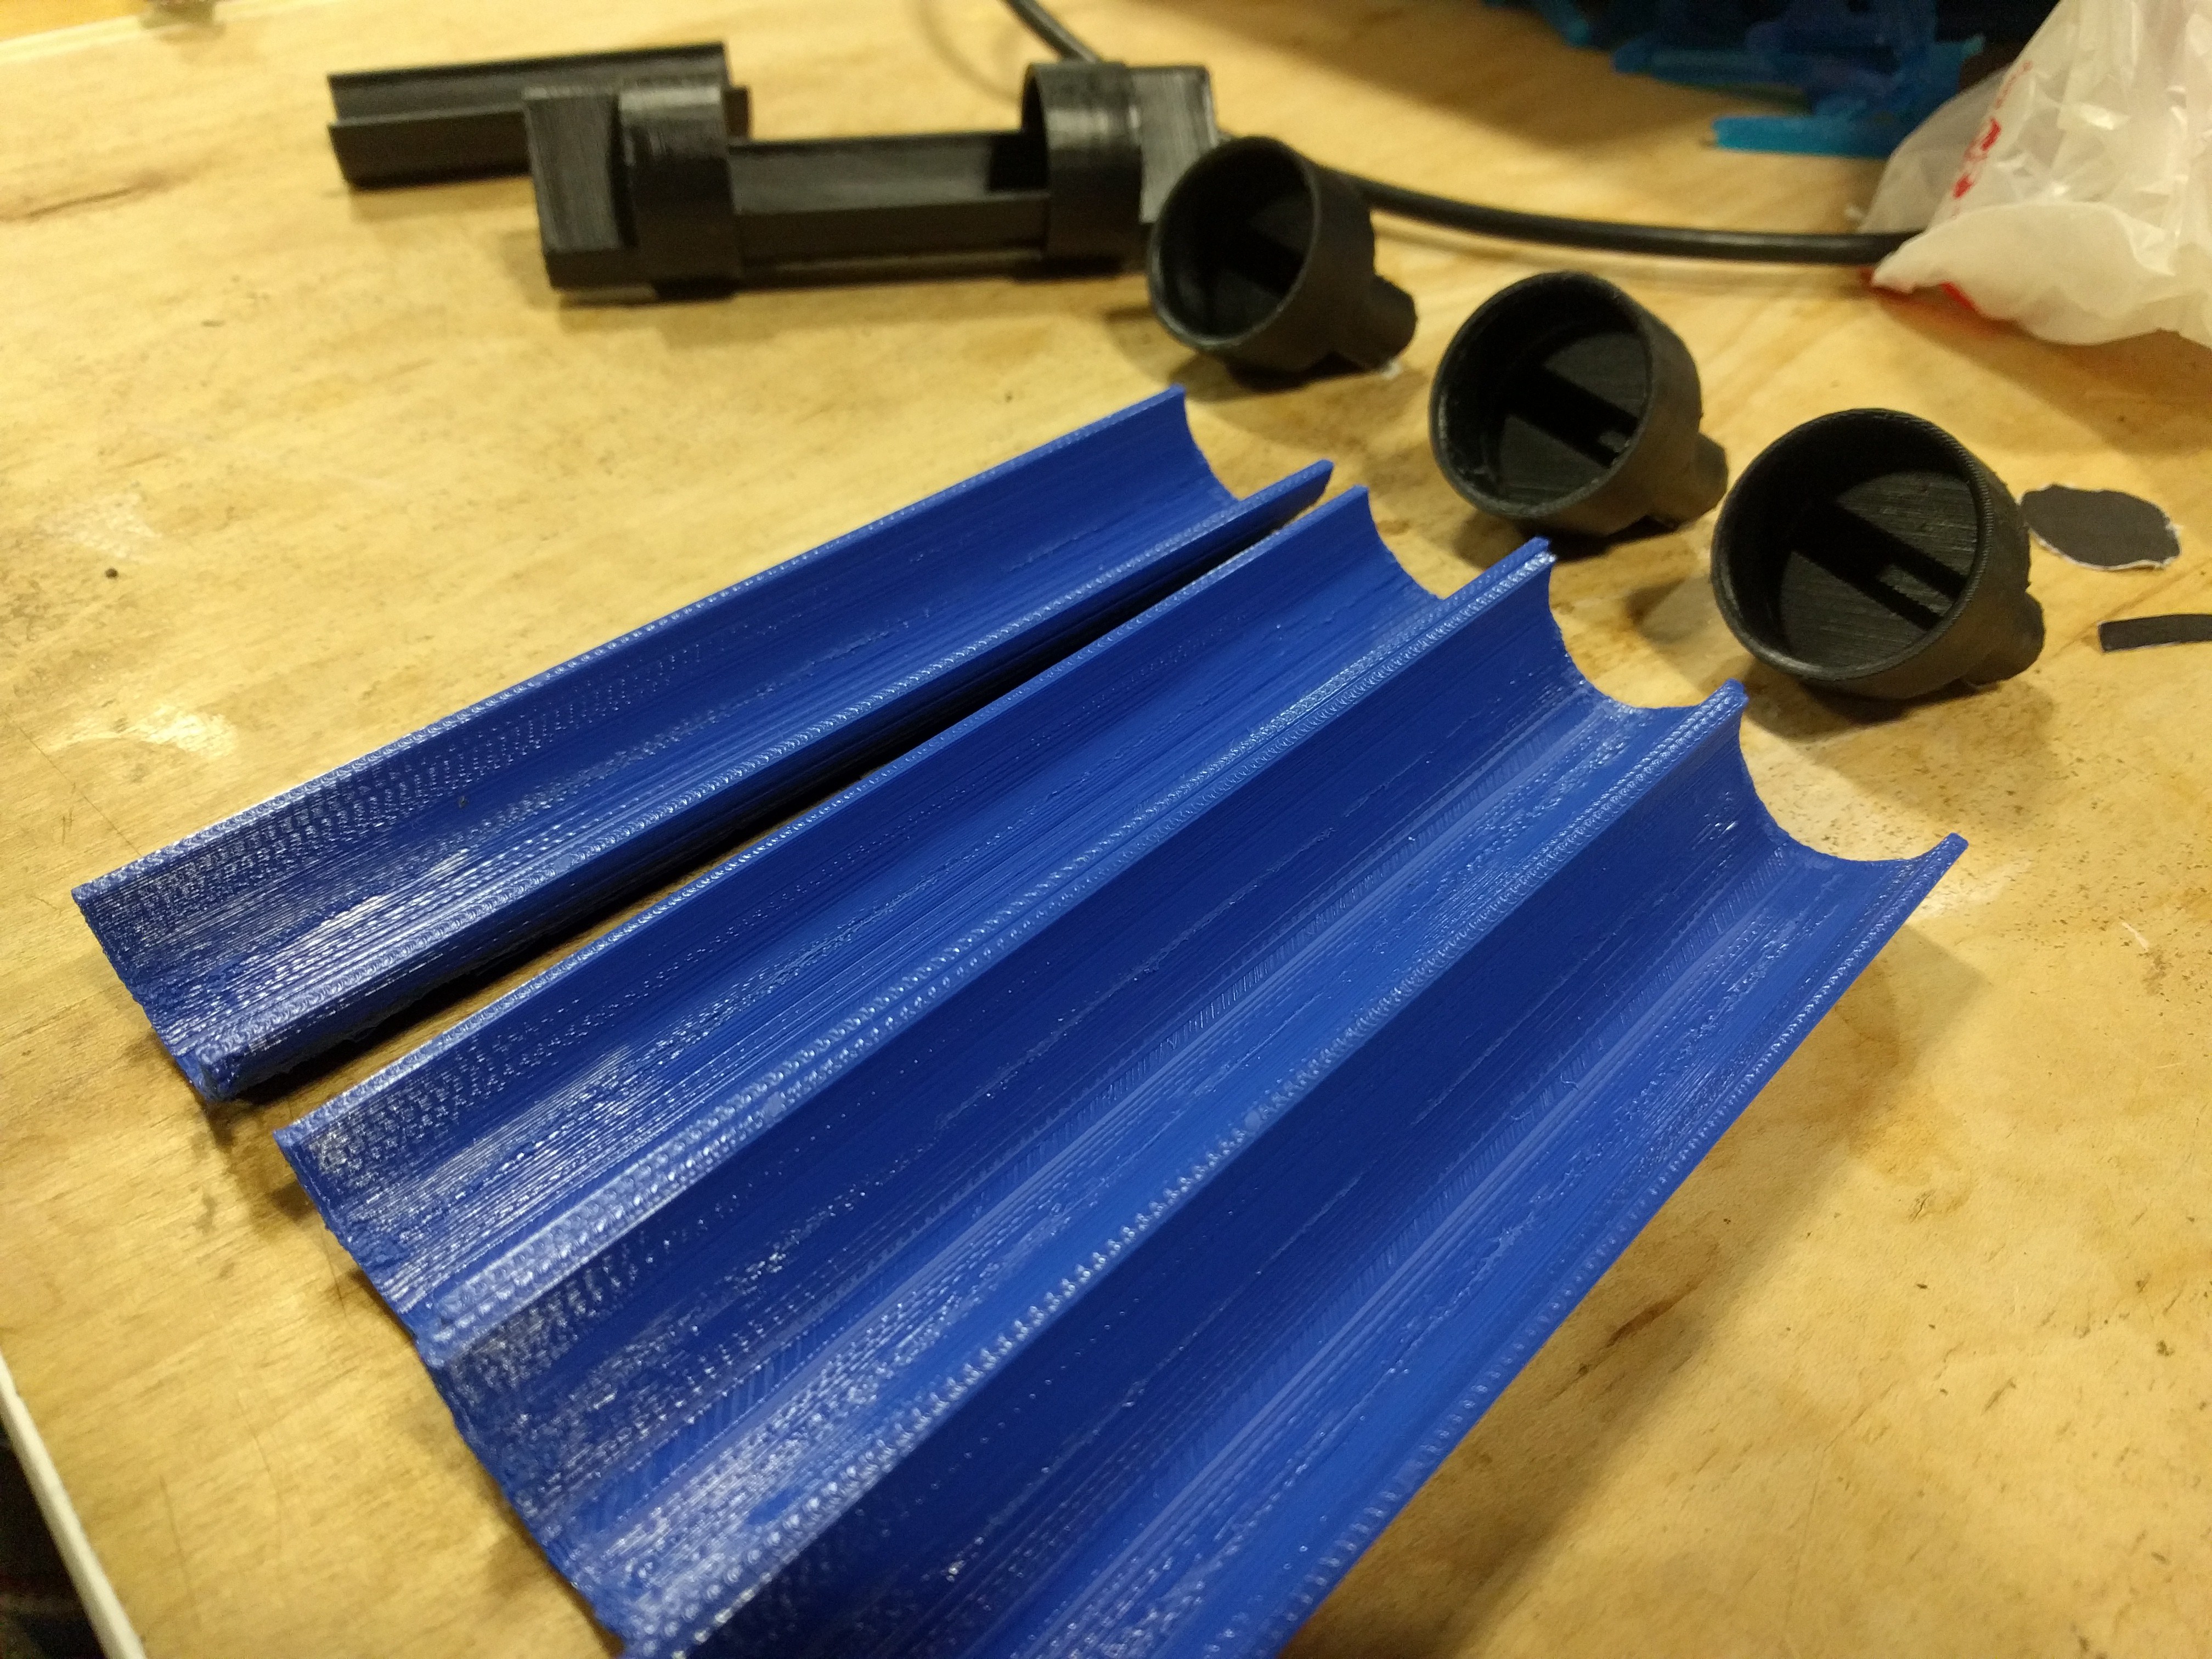
![]()
Module B and A in the background with adapters for Instron Machine.
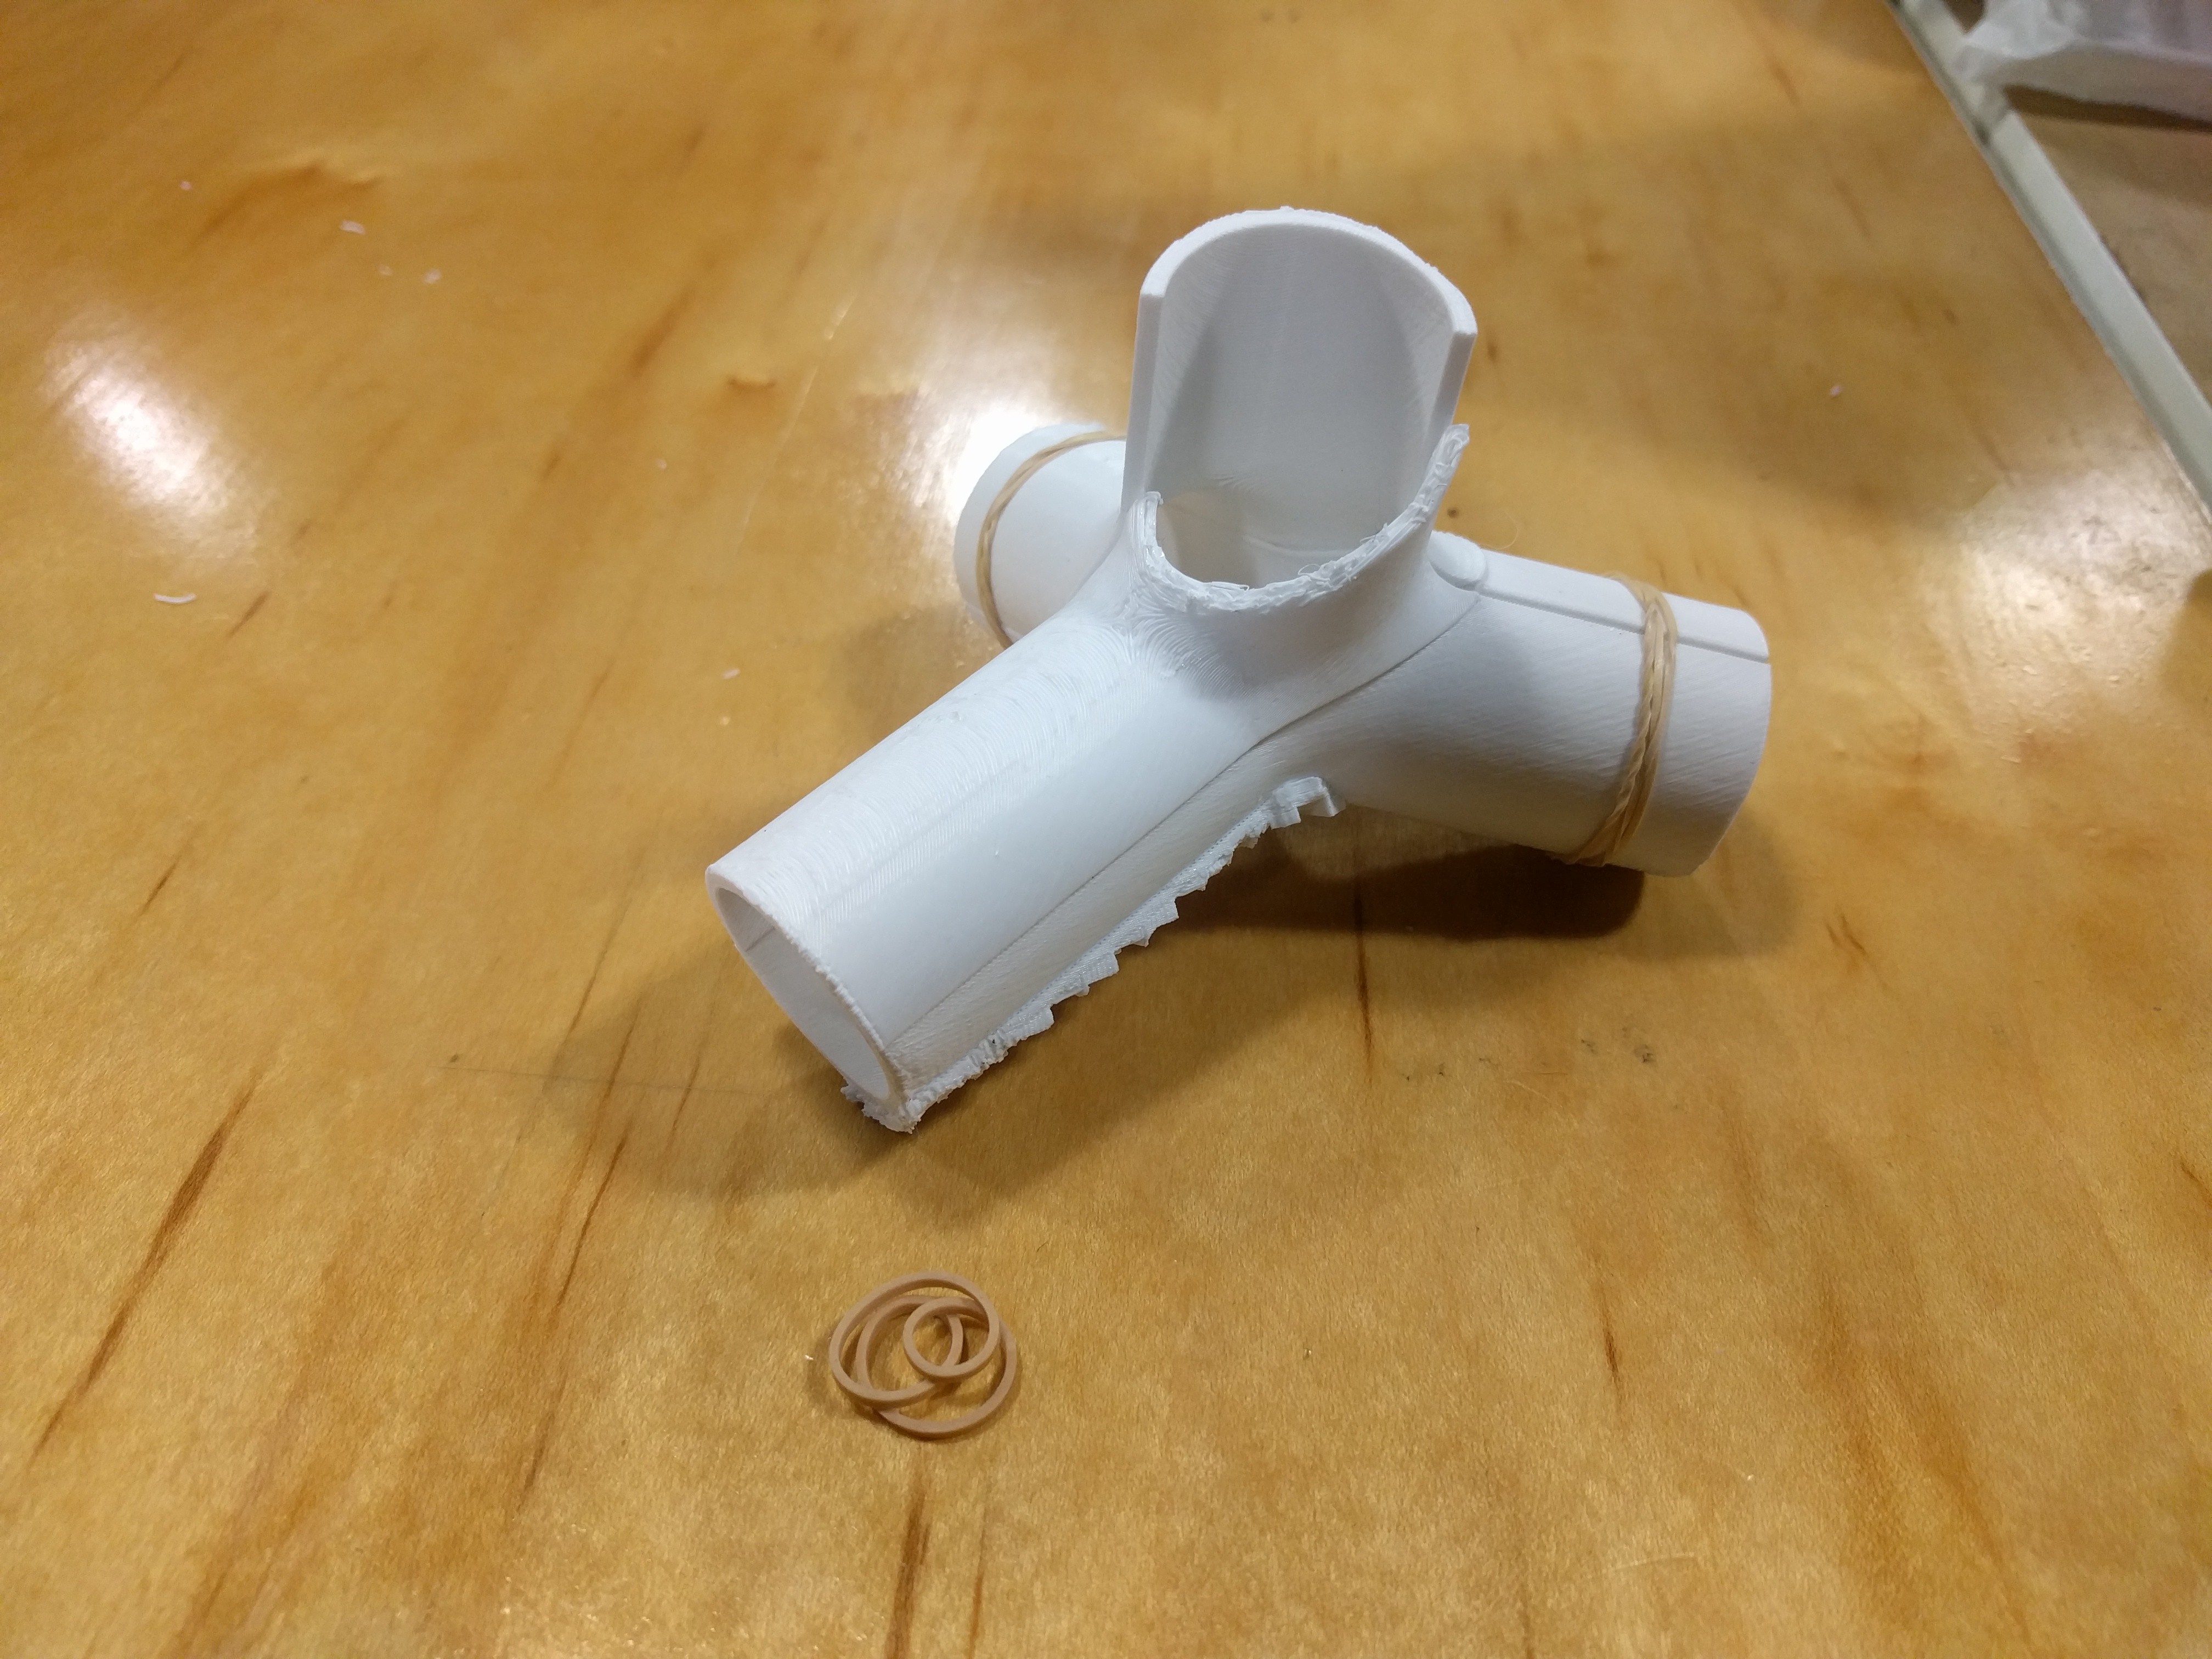
![]()
Rubber bands are used here to test fit, but if we were to assemble more than one module together we would be unable to remove them easily. so we are investigating using something like velcro or silicone cinch straps.
![]()
We are also considering using worm drive metal bands.
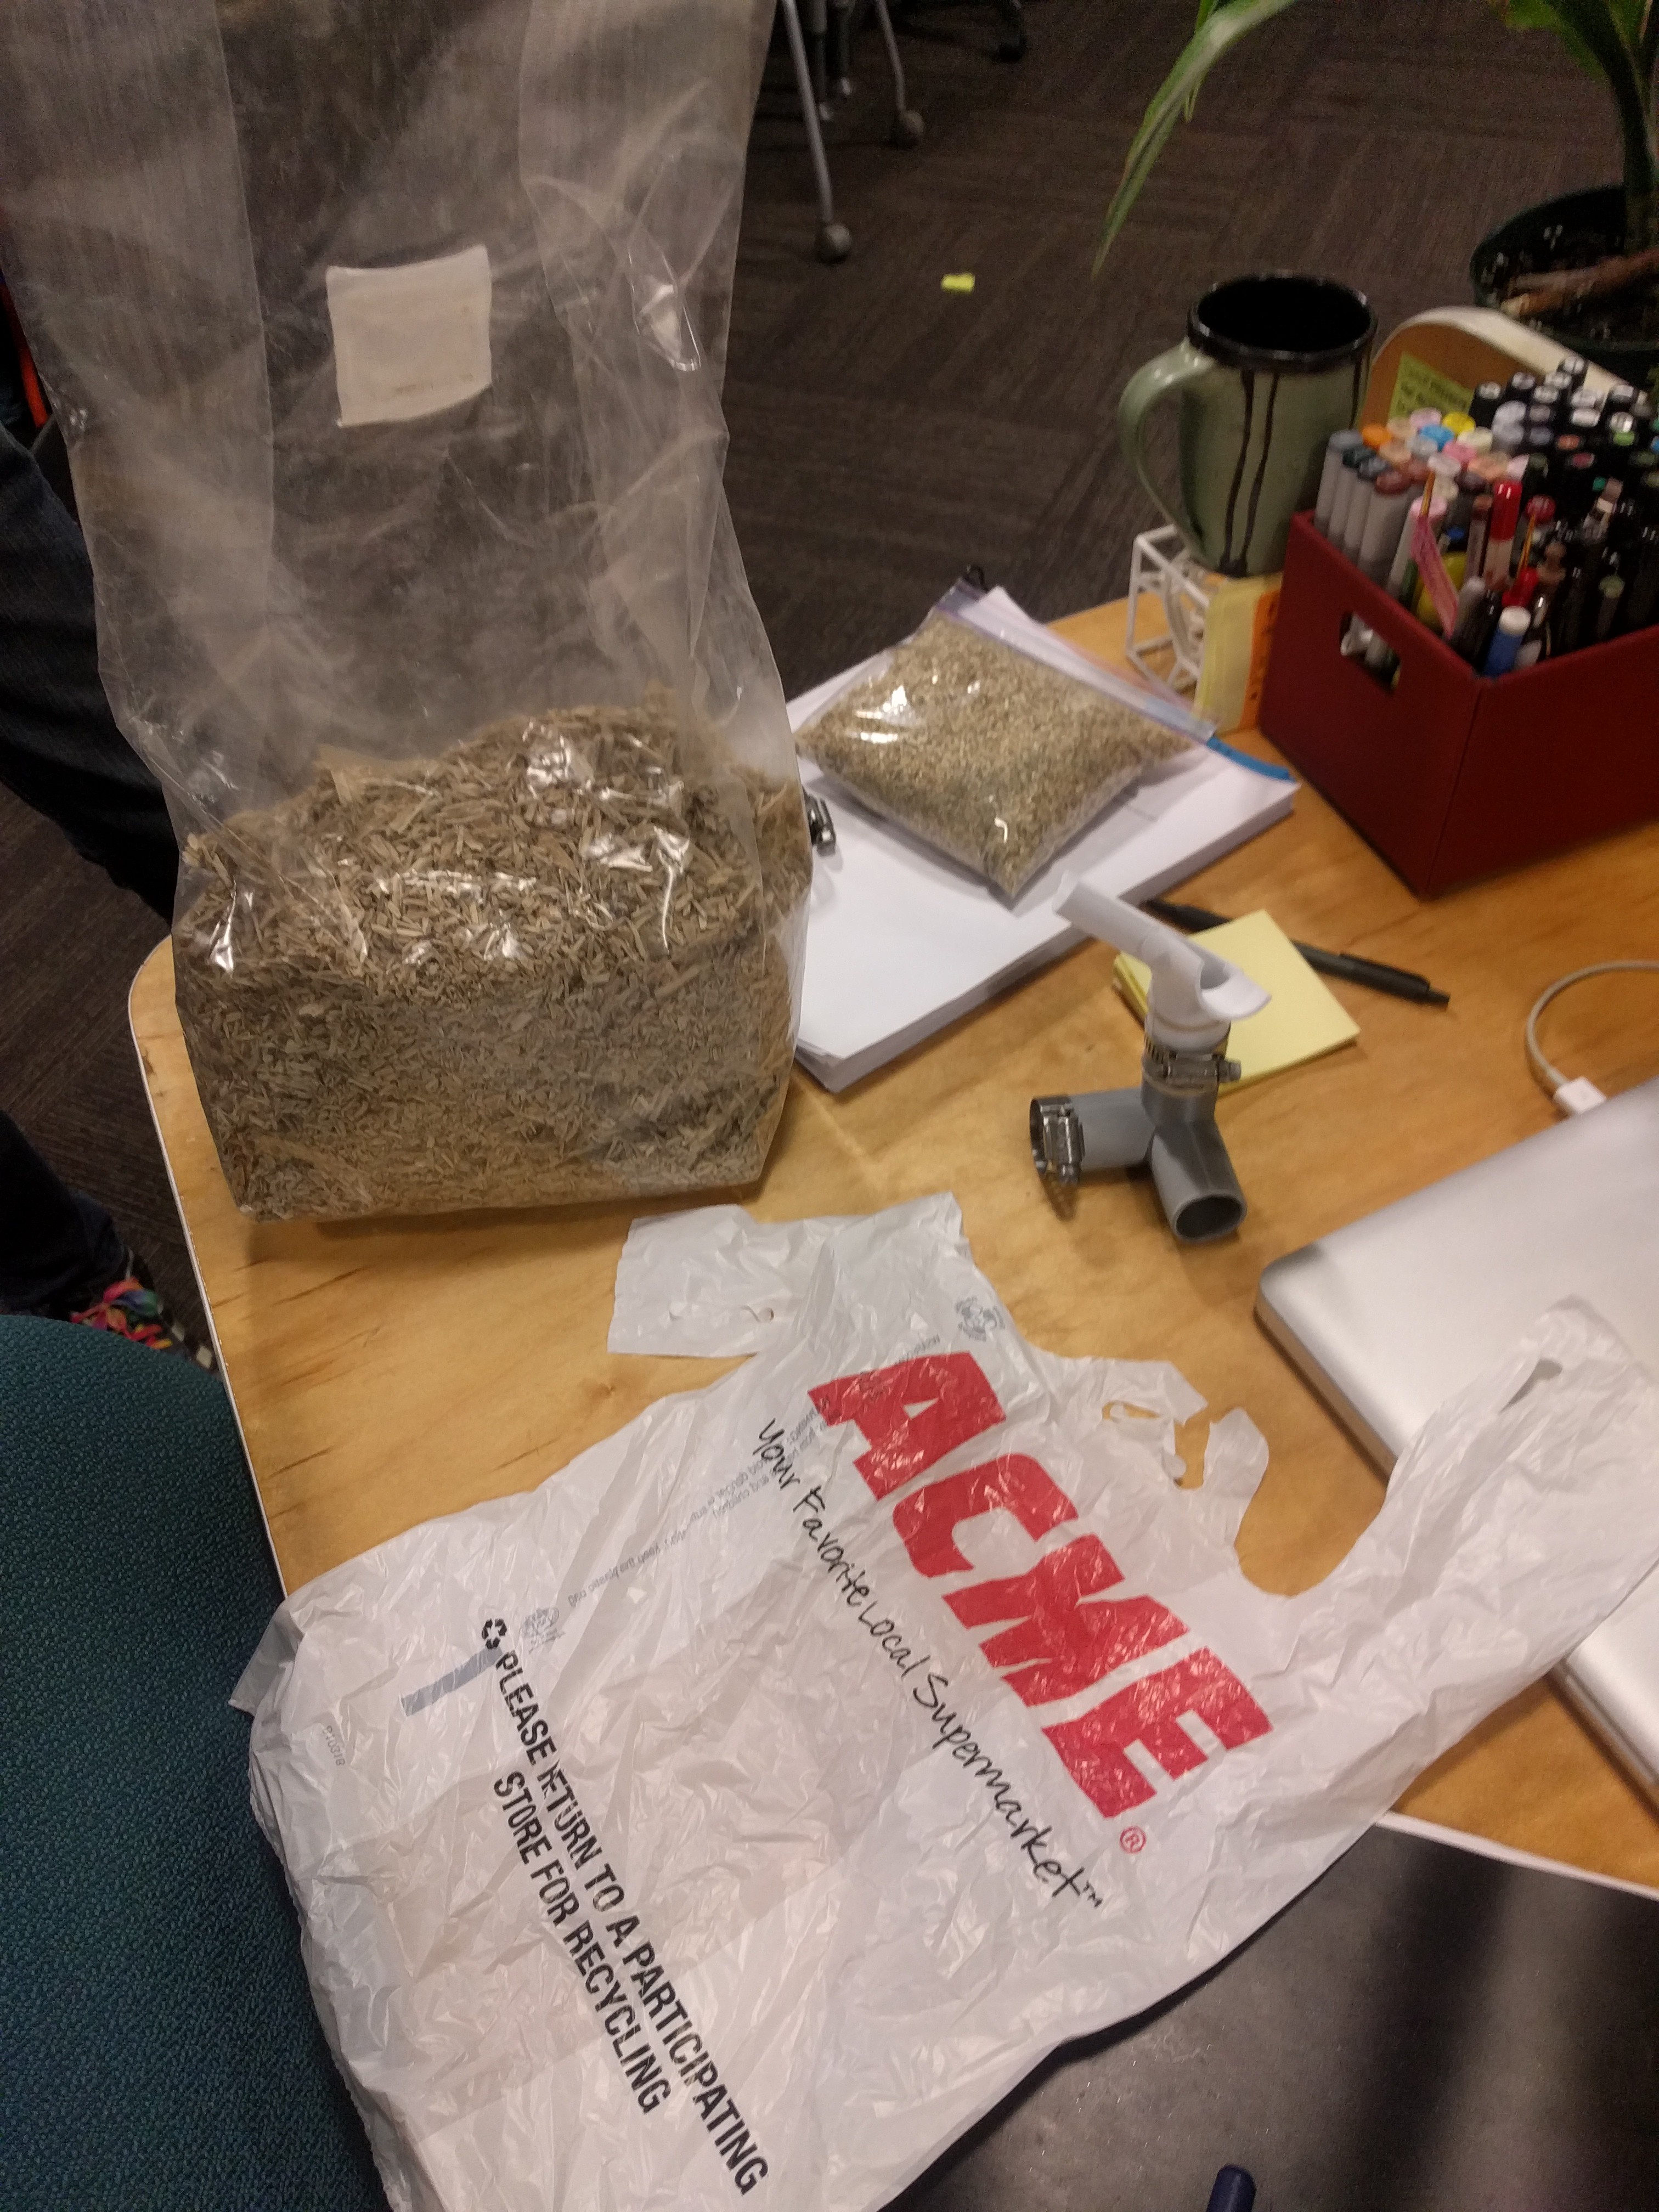
![]()
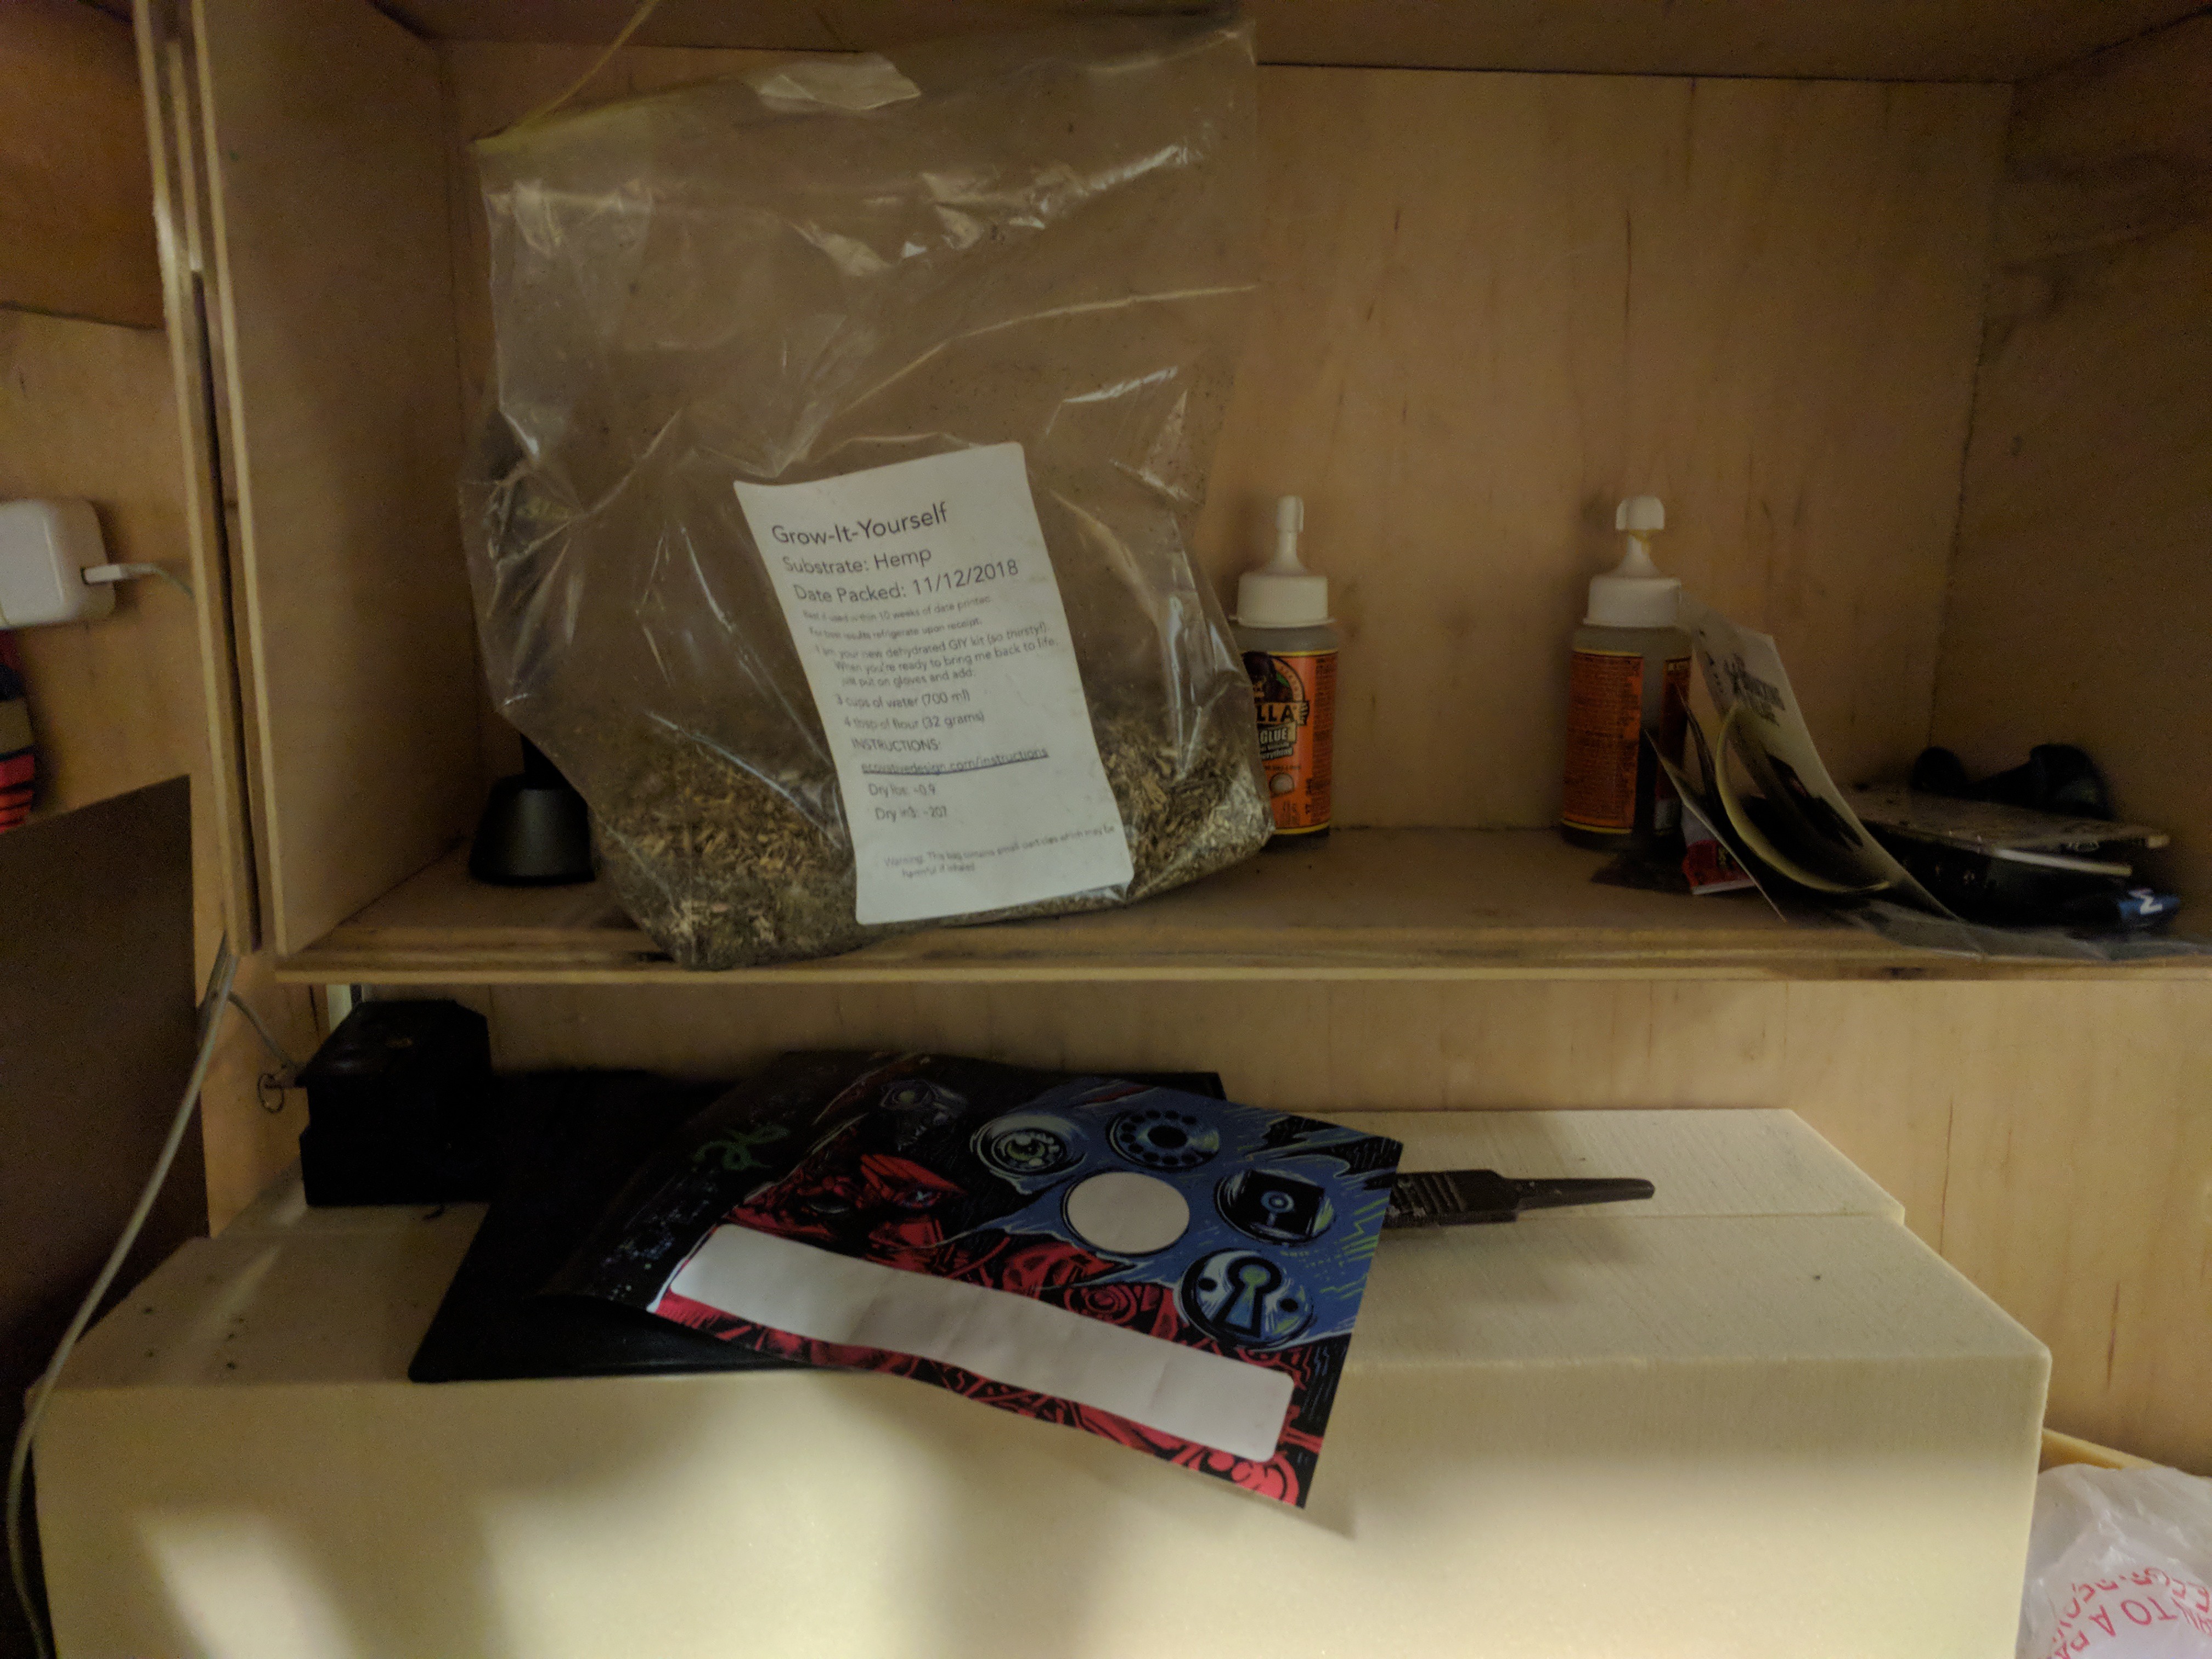
Our efforts to try and find a more dense version of our substrate (Hemp Hurd) have come to fruition. Our original material on the left has much larger particles, which should theoretically give more strength... if it wasn't a problem having more to do with delamination of the mycelium. Either way, we have something now about twice as dense (to be measured.) Our hope is that it will prove stronger. If this happens to be the case we will try to reproduce results using a food processor or related, the main concern is that you don't want to potentially contaminate everything with mycelium spores.
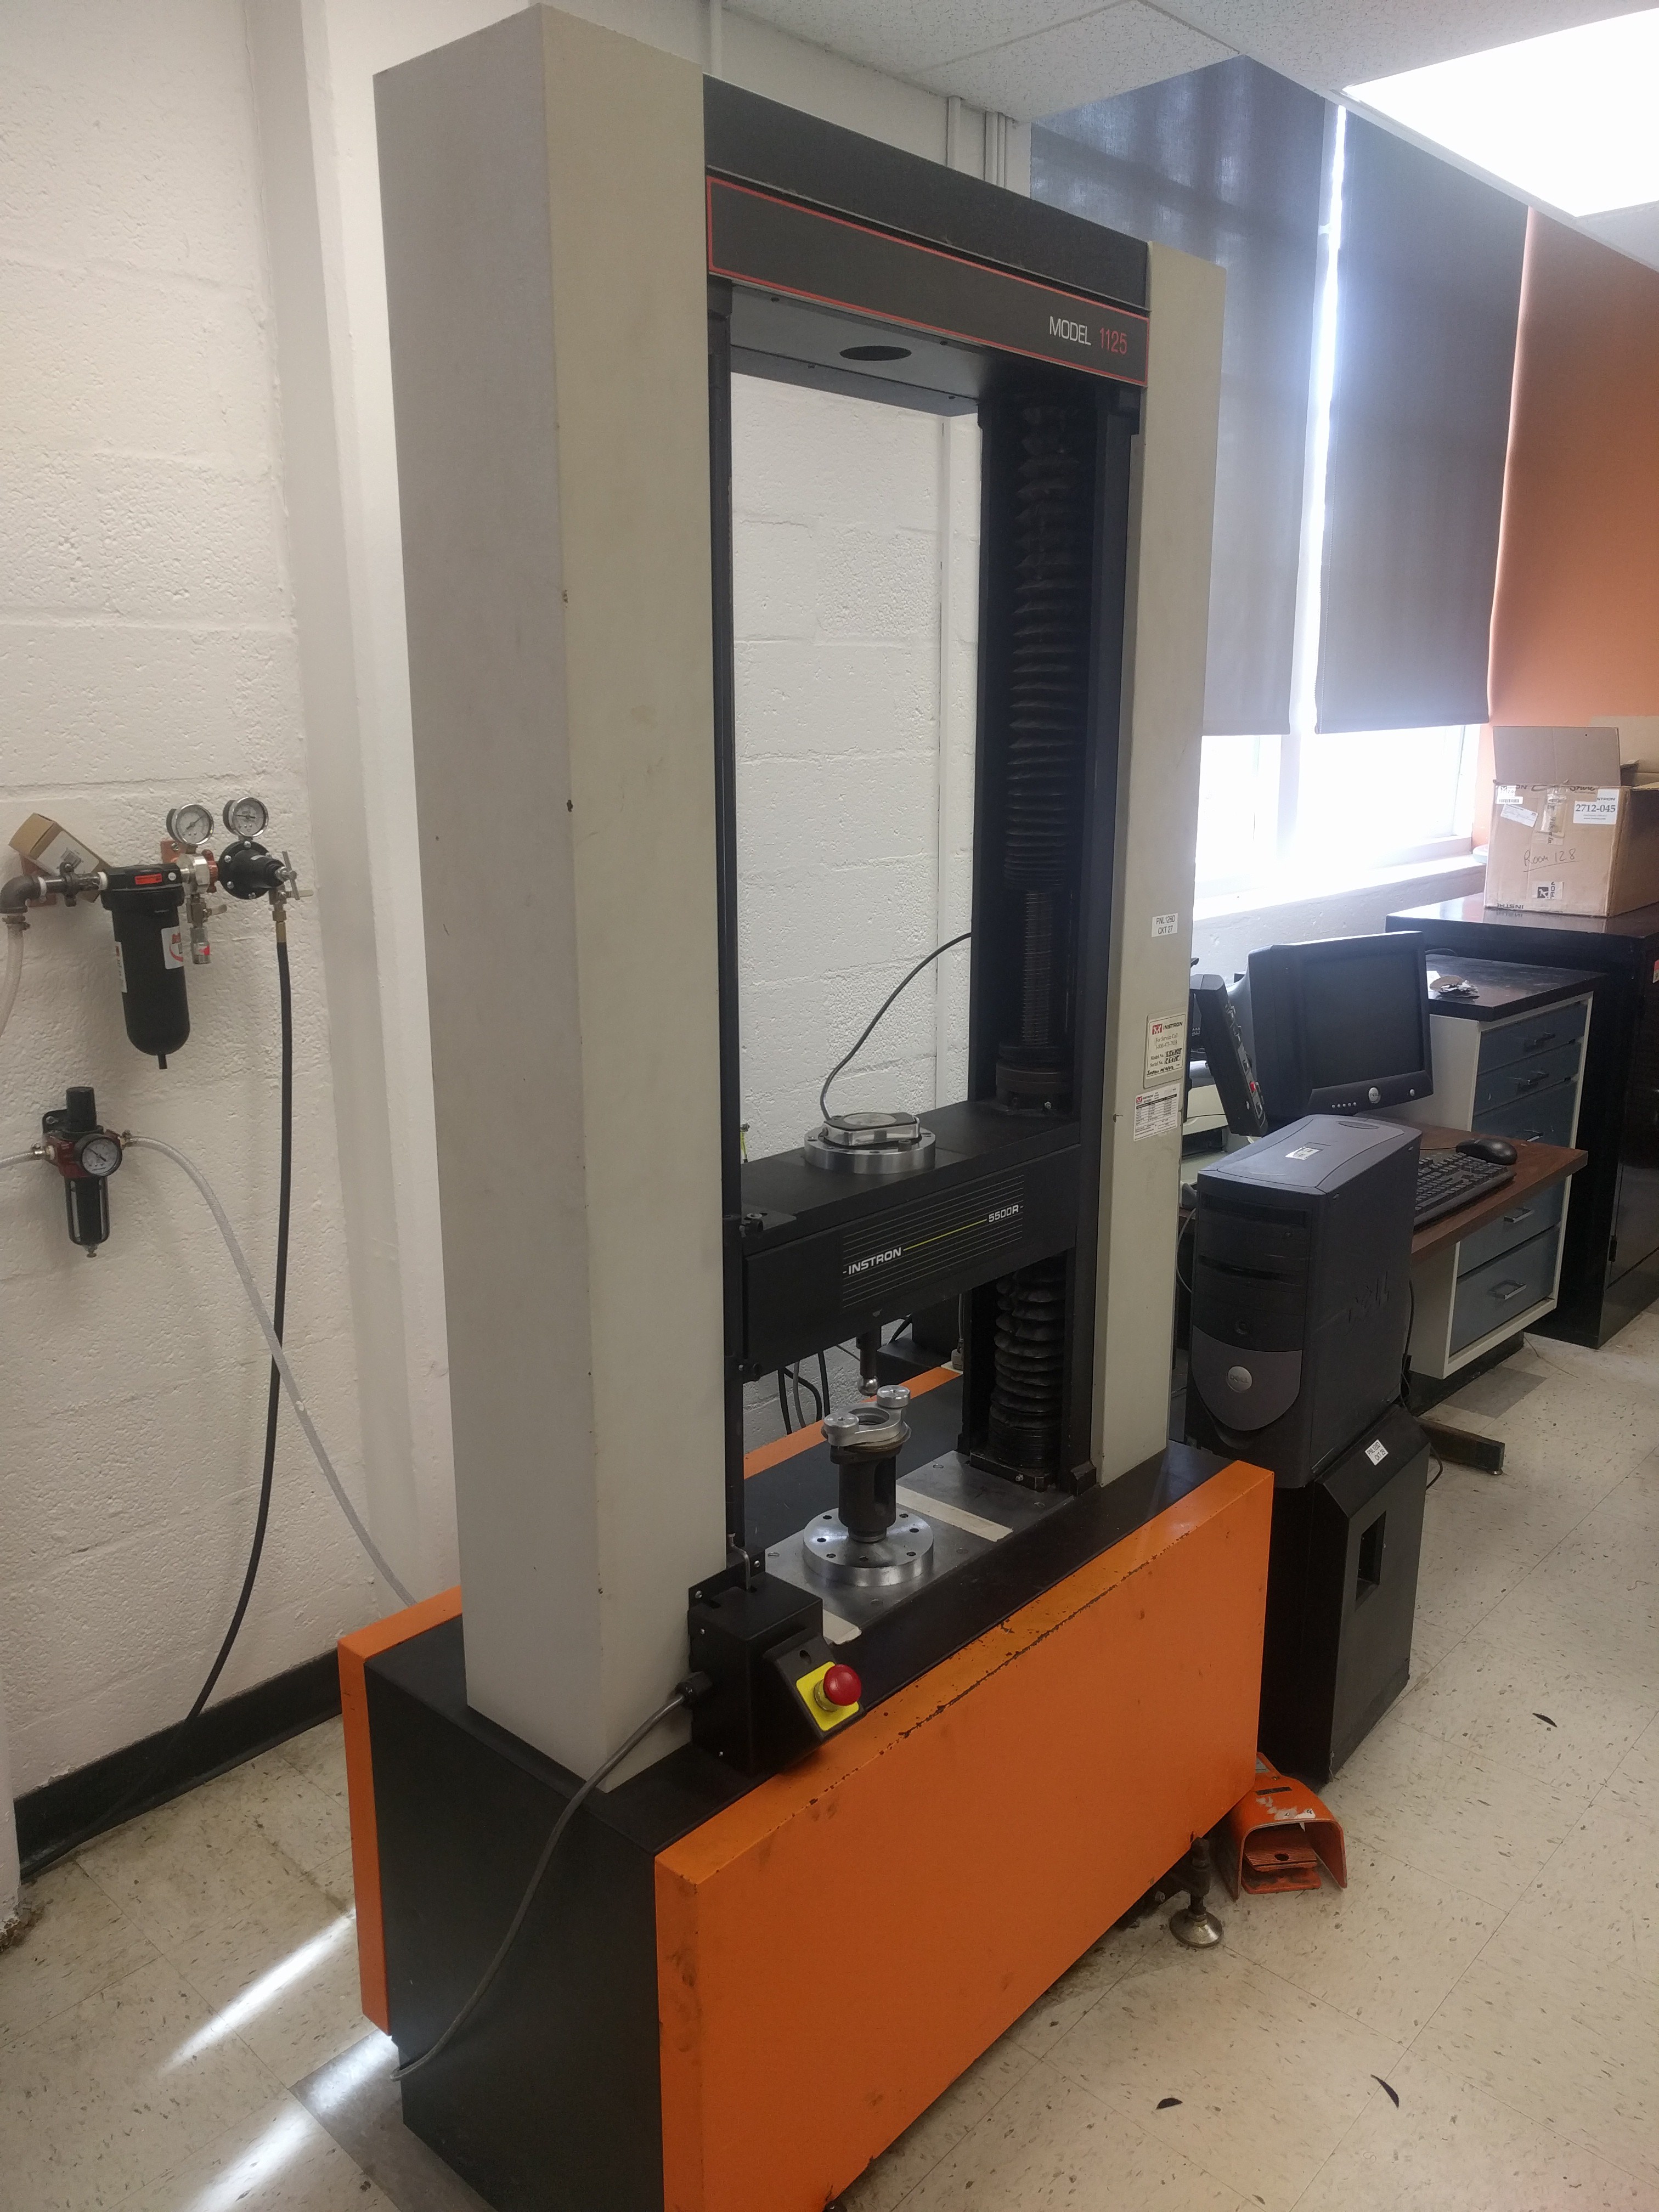
![]()
We will be conducting testing on the above Instron machine, looking principally for tension and compression ratings. Unfortunately the jaws of the machine only open to ~.25" where our nominal thickness is 1" for modules. Thus, an adapter is needed and will affect our test results if not considered. As time allows we will do comparative studies of other materials using the same molds, this will hopefully help us tune our theoretical model with better understood materials.
The bulk of our Hackaday page is slowly getting updated as we have expanded our ambitions for this project and clarified other goals, hopefully the new descriptions will be more straight forward. Please let us know any feedback related to our technical communications.
-
Set 5 Progress
02/04/2019 at 16:45 • 0 commentsJason is continuing to refine our fillet application technique and mold production;
The upcoming set is name Module Set 5, it contains two straight sections, two specialty elements (in development) and 19 derived units.
It will be a little while before we do a public release since we want to get naming conventions and organization squared away so there are no missing elements for people to start fully utilizing this system.
Deciding on the formatting template for communicating a design will be a work in progress (essentially, we need to decide on an excel sheet layout.)
![]()
We are going to start printing modules A and B with an end adapter for materials testing. I changed the wall thickness to 2mm for the print so that it is compatible with the rest of module set 5.
![]()
We are getting in touch with Brian, to work on materials processing this week.
Geometer
A Holistic Design Tool for Creating, Communicating and Manufacturing Advanced Human-Scale Forms for Design Pioneers and Producers
 Although not directly compatible it will be interesting to compare designs with these thicker modules compared to the normal one inch modules.
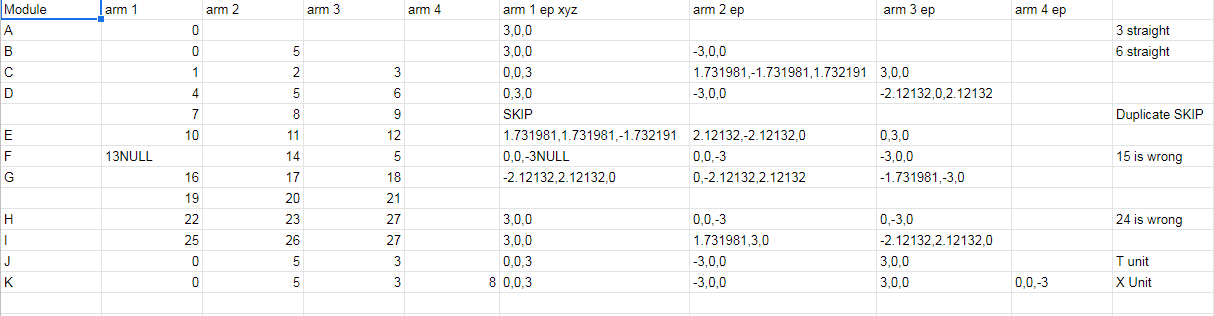
 Now we are adding fillets and making molds. OBJ models will also be made for use in VR.
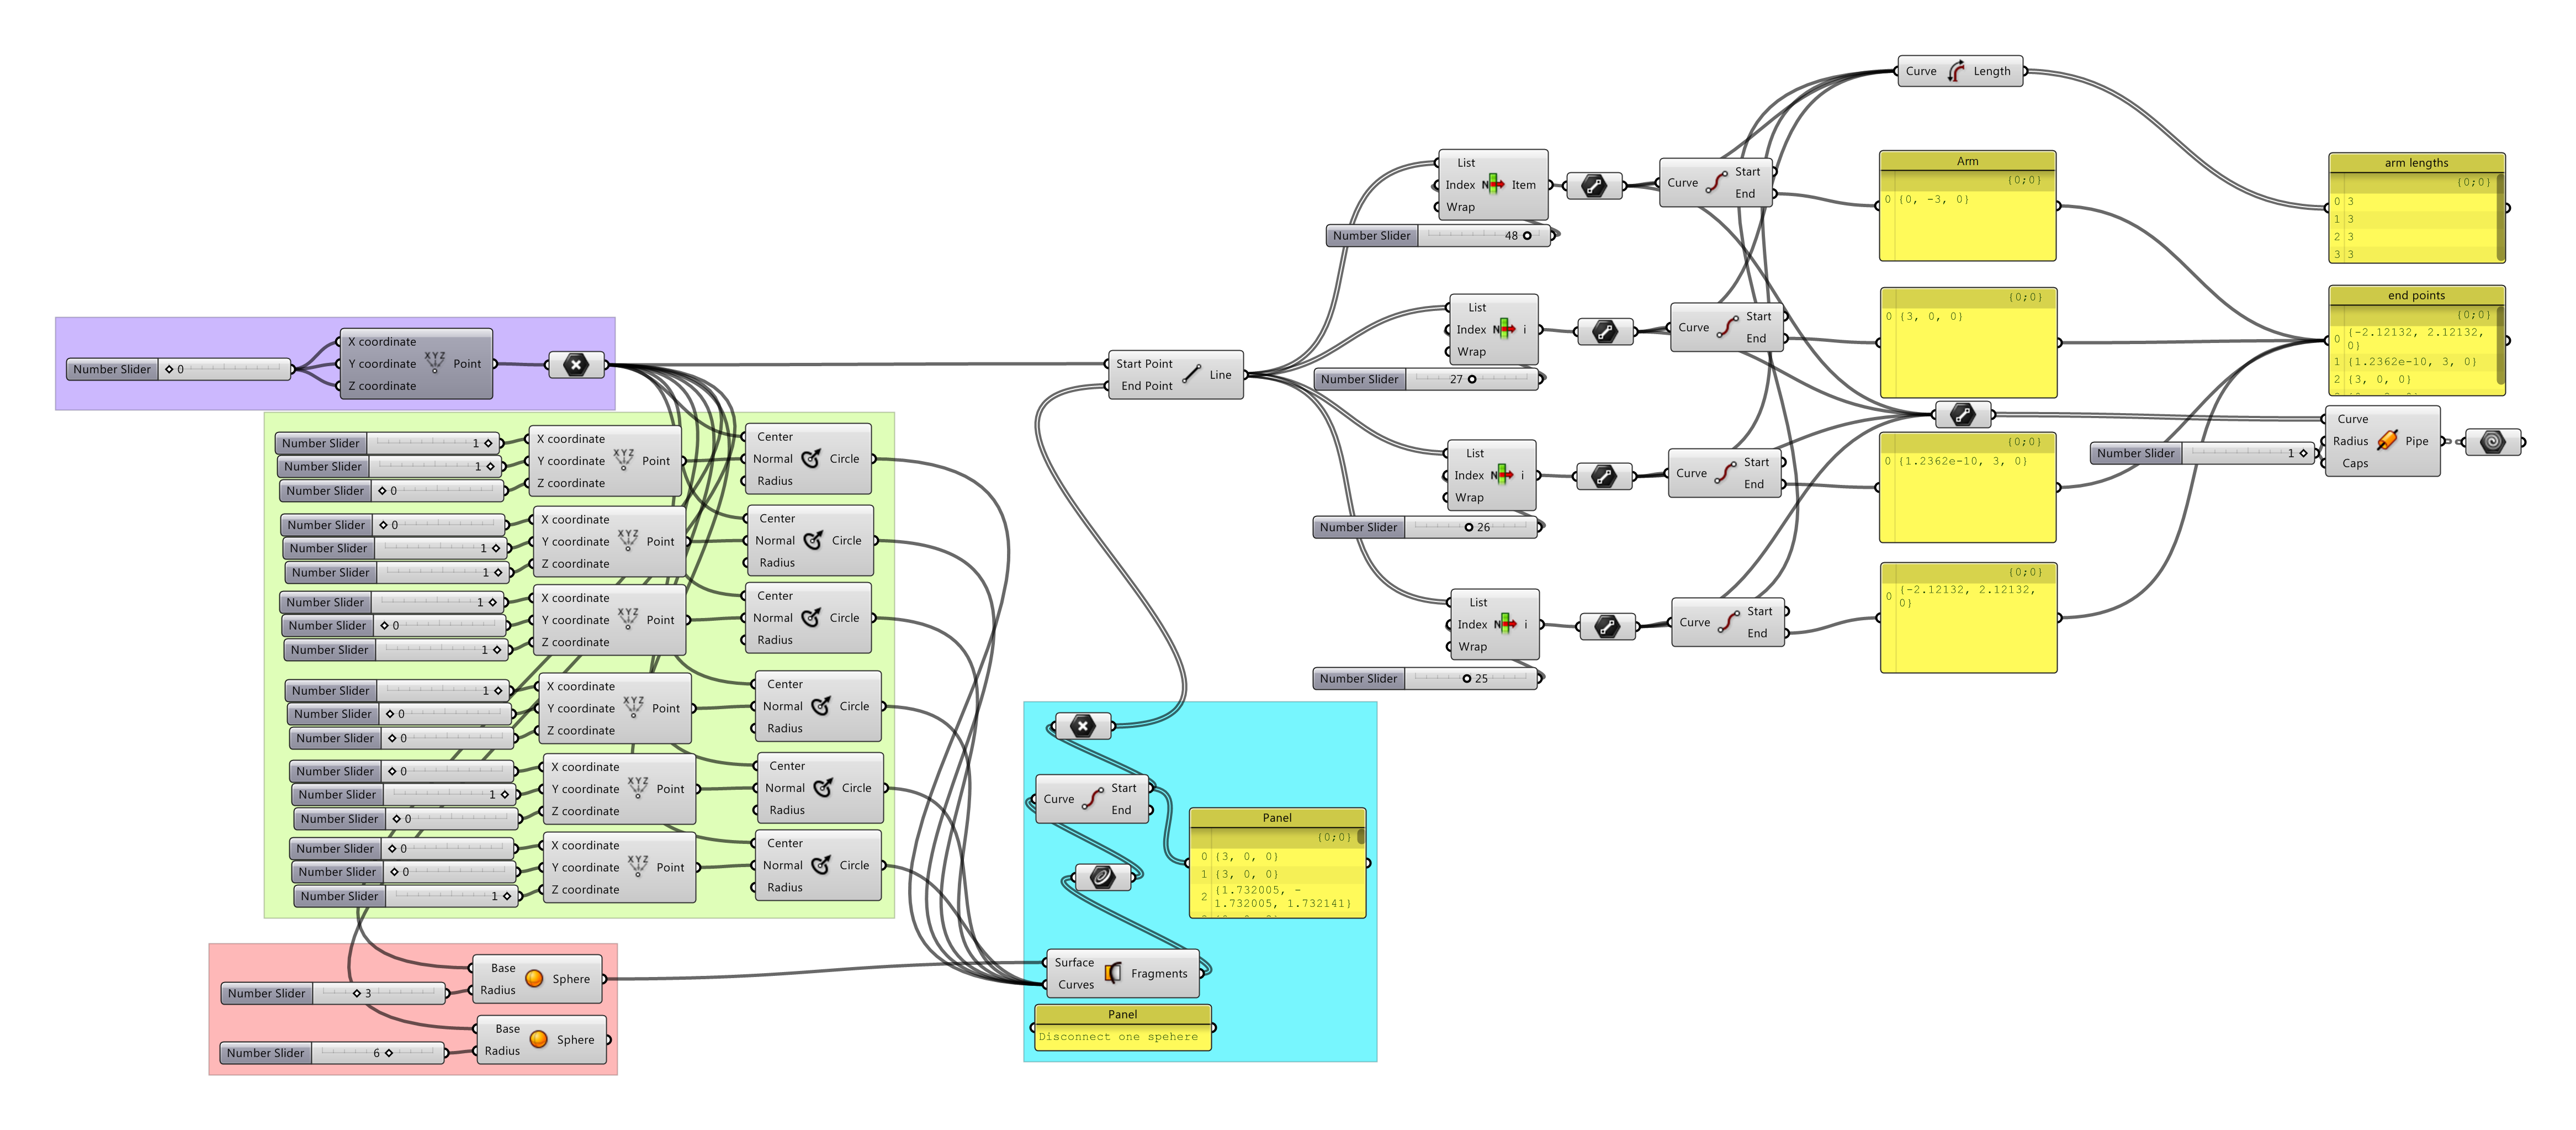
 Our batch of fine mycelium looked like this a couple days ago, pretty minimal fuzz.