Finally, I marked this project as COMPLETE!!
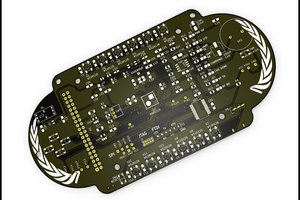
I've finished and verified the latest 3.5 board is working, and the wifi add-on works, jumpers and header work for flashing, etc. At this point there will be NO more hardware updates, the PCB design is complete.
From this point moving forward, all updates will be SOFTWARE ONLY :)
I hope to have a v1.1.0 release within the next month or so, which will have initial wifi setup included, NO actual wifi usage with the oven, only the setup GUI that will allow you to configure and connect to your wifi, display the connection info, etc..
Also in the coming weeks I will enhance and finalize the build instructions, installation instructions, etc (adding the info for the 7.0" resistor changes for the backlight power), and also start working on a USER'S GUIDE, which will have photos and explanations of all the menus, sub-menus, etc.
*** FYI ***
This board is only $30 or so to make from JLCPCB, I highly suggest ordering from there or somewhere similar..
I had my last two version done from them, and they were awesome, zero issues.
(I only have the link to oshpark because you can share projects from there, but I do NOT recommend using them, as this board is $200 from them)
** All documents, source code, files, etc are all in one location, in the GITHUB repo linked from this project page **
PCB gerbers, etc are in the github repo, as well as you can download them from the oshpark link.


 Piotr Esden-Tempski
 Ross Bamford
 FloppidyDingo
 John Adams
FYI: For anyone that would like to build this board, but is not comfortable hand-soldering themselves, you can also consider these options:
1) check out JLCPCB.com, they do board assembly as well as fab
(but maybe not reasonable cost if only doing a single board?)
2) USE your own oven! it still works quite well with the original OEM controller board to do what you need!
You can use 'OshStencil' to make solder-paste stencils for this board, I'd recommend just making individual stencils for the 'STM32' processor and the two LCD connectors, not the entire board.
I've done a 388-pin BGA with a stencil and solder paste, with this oven! It's as simple as lining up the stencil on the empty board with the copper footprint, and rubbing the solder paste over the stencil until a uniform layer of paste is down, then gently lift up the stencil..
If it deposited cleanly, carefully drop your chip onto the paste as it should be aligned..
Run the board in the oven with a decent profile, and the chip should come out soldered up... of course with this small profile chip, solder bridges can quite easily happen... you can always clean it up with some good wick and extra flux!
Best recommendation I can give is watch youtube videos of doing solder paste and stencils! and they are super cheap from OshStencil.