lion mclionhead
-
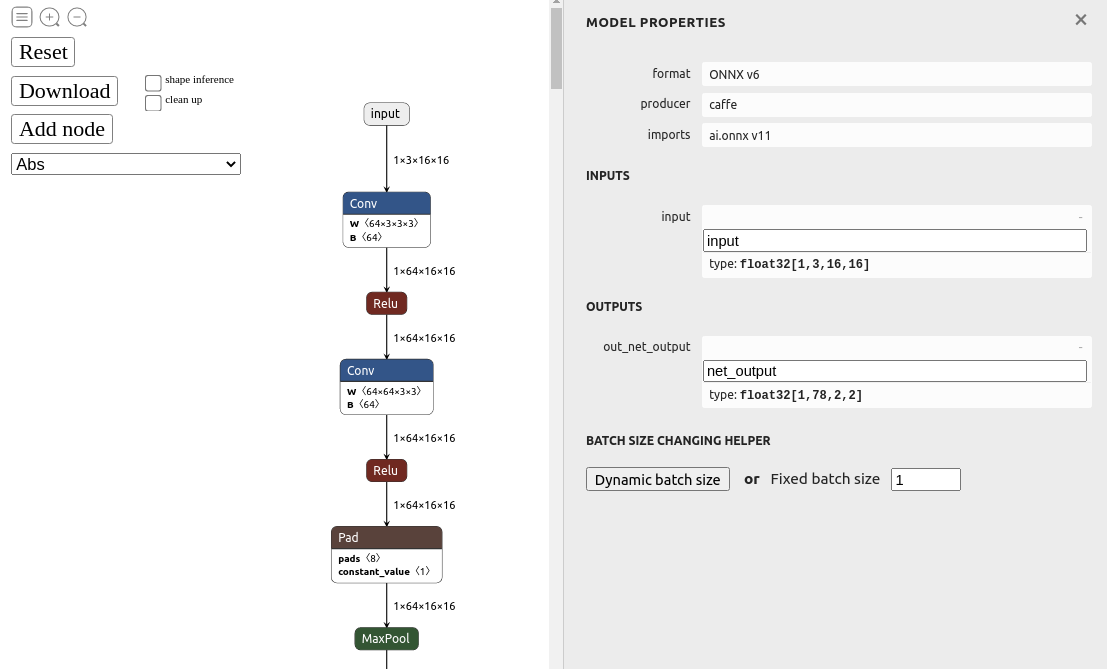
ONNX graphsurgeon
02/28/2023 at 06:20 • 0 commentsThe famous trtexec program was in /usr/src/tensorrt/bin. It supposedly can convert directly from caffe to a tensorrt engine.
./trtexec --deploy=/root/openpose/models/pose/body_25/pose_deploy.prototxt --model=/root/openpose/models/pose/body_25/pose_iter_584000.caffemodel --fp16 --output=body25.engineThat just ends in a crash.
Error[3]: (Unnamed Layer* 22) [Constant]:constant weights has count 512 but 2 was expected
trtexec: ./parserHelper.h:74: nvinfer1::Dims3 parserhelper::getCHW(const Dims&): Assertion `d.nbDims >= 3' failed.Aborted (core dumped)
NvCaffeParser.h says tensorrt is dropping support for caffe & the converter doesn't support dynamic input sizes.
The command for conversion from ONNX to tensorrt is:
/usr/src/tensorrt/bin/trtexec --onnx=body25_fixed.onnx --fp16 --saveEngine=body25.engine
Next, the goog popped out this thing designed for amending ONNX files without retraining.
https://github.com/NVIDIA/TensorRT/tree/main/tools/onnx-graphsurgeon
You have to use it inside a python program.
# from https://github.com/NVIDIA/TensorRT/issues/1677

import onnx
import onnx_graphsurgeon as gs
import numpy as np

print("loading model")
graph = gs.import_onnx(onnx.load("body25.onnx"))

tensors = graph.tensors()
tensors["input"].shape[0] = gs.Tensor.DYNAMIC

for node in graph.nodes:
    print("name=%s op=%s inputs=%s outputs=%s" % (node.name, node.op, str(node.inputs), str(node.outputs)))
    if node.op == "PRelu":
        # Make the slope tensor broadcastable
        print("Fixing")
        slope_tensor = node.inputs[1]
        slope_tensor.values = np.expand_dims(slope_tensor.values, axis=(0, 2, 3))

onnx.save(gs.export_onnx(graph), "body25_fixed.onnx")
time python3 fixonnx.py
This takes 9 minutes.
The onnx library can dump the original offending operator
name=prelu4_2 op=PRelu
    inputs=[
        Variable (conv4_2): (shape=[1, 512, 2, 2], dtype=float32),
        Constant (prelu4_2_slope): (shape=[512], dtype=<class 'numpy.float32'>)
        LazyValues (shape=[512], dtype=float32)]
    outputs=[Variable (prelu4_2): (shape=[1, 512, 2, 2], dtype=float32)]
Then it dumped the fixed operator
name=prelu4_2 op=PRelu
    inputs=[
        Variable (conv4_2): (shape=[1, 512, 2, 2], dtype=float32),
        Constant (prelu4_2_slope): (shape=[1, 512, 1, 1], dtype=<class 'numpy.float32'>)
        LazyValues (shape=[1, 512, 1, 1], dtype=float32)]
    outputs=[Variable (prelu4_2): (shape=[1, 512, 2, 2], dtype=float32)]
This allowed trtexec to successfully convert it to a tensorrt model.
Inputs for body_25 are different than resnet18. We have a 16x16 input image. The 16x16 propagates many layers in.
name=conv1_1 op=Conv
    inputs=[
        Variable (input): (shape=[-1, 3, 16, 16], dtype=float32),
        Constant (conv1_1_W): (shape=[64, 3, 3, 3], dtype=<class 'numpy.float32'>)
        LazyValues (shape=[64, 3, 3, 3], dtype=float32),
        Constant (conv1_1_b): (shape=[64], dtype=<class 'numpy.float32'>)
        LazyValues (shape=[64], dtype=float32)]
    outputs=[Variable (conv1_1): (shape=[1, 64, 16, 16], dtype=float32)]
The resnet18 had a 224x224 input image.
name=Conv_0 op=Conv
    inputs=[
        Variable (input_0): (shape=[1, 3, 224, 224], dtype=float32),
        Constant (266): (shape=[64, 3, 7, 7], dtype=<class 'numpy.float32'>)
        LazyValues (shape=[64, 3, 7, 7], dtype=float32),
        Constant (267): (shape=[64], dtype=<class 'numpy.float32'>)
        LazyValues (shape=[64], dtype=float32)]
    outputs=[Variable (265): (shape=None, dtype=None)]
A note says the input dimensions have to be overridden at runtime. Caffe had a reshape function for doing this. The closest function in tensorrt is nvinfer1::IExecutionContext::setBindingDimensions
Calling nvinfer1::IExecutionContext::setBindingDimensions causes
[executionContext.cpp::setBindingDimensions::944] Error Code 3: API Usage Error (Parameter check failed at: runtime/api/executionContext.cpp::setBindingDimensions::944, condition: profileMaxDims.d[i] >= dimensions.d[i]. Supplied binding dimension [1,3,256,256] for bindings[0] exceed min ~ max range at index 2, maximum dimension in profile is 16, minimum dimension in profile is 16, but supplied dimension is 256.
1 hit was a browser based ONNX editor.
https://github.com/ZhangGe6/onnx-modifier
![]()
This doesn't show any min/max field or allow changing the dimensions. It only allows renaming layers.
Min/opt/max options appeared in a usage of buildSerializedNetwork. This one mentions adding an input & resize layer. It's believed that body_25 is supposed act as a kernel operating on a larger input, rather than operating on a scaled down frame.
https://github.com/NVIDIA/TensorRT/blob/main/samples/sampleDynamicReshape/README.md
Min/opt/max options appeared again in a usage of trtexec
https://github.com/NVIDIA/TensorRT/issues/1581
These options merely end in
[03/01/2023-11:19:21] [W] [TRT] DLA requests all profiles have same min, max, and opt value. All dla layers are falling back to GPU
[03/01/2023-11:19:21] [E] Error[4]: [network.cpp::validate::2959] Error Code 4: Internal Error (input: for dimension number 2 in profile 0 does not match network definition (got min=16, opt=256, max=256), expected min=opt=max=16).)No tool has been found which can set min/max dimensions. Dynamic input size seems to be another caffe feature which was abandoned as usage of neural networks evolved.
-
Failed body_25 with tensorrt
02/25/2023 at 21:00 • 1 commentMany internet commenters have dreamed of running body_25 using tensorrt but failed.
The journey began with this program for converting a caffe model to pytorch.
https://github.com/vadimkantorov/caffemodel2pytorch/blob/master/caffemodel2pytorch.py
python3 caffemodel2pytorch.py openpose/models/pose/body_25/pose_iter_584000.caffemodel -o body_25.ptThen came the previously used program for converting pytorch to onnyx.
python3 convert2onnx.py -i body_25.pt -o body_25.onnx
Which quickly died with an exception. Convert2onnx.py requires a lot of python code specific to the model & is hard coded for resnet18.
The next hit was direct conversion from caffe to onnx.
https://github.com/asiryan/caffe2onnx
After python3 setup.py install do
python3 -m caffe2onnx.convert --prototxt openpose/models/pose/body_25/pose_deploy.prototxt --caffemodel openpose/models/pose/body_25/pose_iter_584000.caffemodel --onnx body25.onnxThis reported a successful conversion, several minutes later.
Then convert the onnx to a tensorrt engine.
./trt_engine body25.onnx body25_fp16.engine
This failed with a parser error. "broadcast dimensions must be conformable" in the logger.
The explanation of this error is buried in:
https://www.photoroom.com/tech/stable-diffusion-25-percent-faster-and-save-seconds
They recommend replacing the broadcast operator with the expand operator. 2 hits recommend using onnx-simplify for doing this which sadly has many compile errors.
You have to run
git clone https://github.com/daquexian/onnx-simplifier.git
git submodule update --init --recursive
This has to be a done from the confuser with your github private key since they don't provide https repositories. This too fails with many "reference is not a tree" errors. The submodules have to be manually checked out with git clone then recursively calling git submodule update.
python3 setup.py installA few more std::filesystem instances had to be converted to std::experimental::filesystem & it built. Helas, it still died.
ModuleNotFoundError: No module named 'onnxruntime'
The setup script didn't install onnxruntime. Compiling onnxruntime requires creating a cmake/build directory & running cmake .. -DPYTHON_EXECUTABLE=$(which python3) in there. Unfortunately, it had an unknown error during the linking process & further challenges accessing std::experimental::filesystem. It seems to require adding libstdc++fs to a bunch of CMake files. It was time to move on from building.
They provide a command for installing it from a python repository.
pip3 install onnxsim
Helas, this bricks python3 with an illegal instruction. GDB showed it auto updated numpy to broken version 1.19.5. It's not compatible with the jetson nano derivative of aarch64. It had to be downgraded with
pip3 install --force-reinstall numpy==1.19.4The canned distribution still failed with missing std::filesystem calls.
Finally, there's a web app which advertises ONNX simplification.
https://convertmodel.com/#input=onnx&output=onnx
& the simplified model still reported "broadcast dimensions must be conformable". The simplifier didn't do anything but add 2 bytes. It has a few more conversion options.
onnx -> tengine failed "ReferenceError: SharedArrayBuffer is not defined"
Tengine is not the same as a tensorrt engine.
caffe -> onnx failed "TypeError: func is not a function"
That's a bug in their javascript.
Porting body_25 to tensorrt might require training a new model which doesn't use the broadcast operator. The lion kingdom doesn't have enough GPU memory to train even the 1st model. There might be other possible changes in caffe2onnx which could avoid the broadcast operator.
There were other openpose models based on body_25, but they all stuck to caffe. Work with the original body_25 model stopped many years ago, as GAN's & then transformers became the big thing.
At this point, body_25 may either have been too complex to port or it may not have gained enough speed for anyone to bother. Lions have noticed the industry wants new models but it doesn't want existing models to be perfected. Efficientdet might be worth another try for the tracking applications.
-
TensorRT in C
02/22/2023 at 04:42 • 0 comments![]()
![]()
![]()
At attempt to use the densenet121 model was equally as bad as resnet18. Meanwhile, the decision was made to keep experimenting with resnet18. A marathon python session got resnet18 displaying results from the webcam without a browser. It was only going at 7fps & sucking all 4GB. With extreme memory constraints, even the small 4MB image buffers seem to be stalled by the swap space. Jetcam also only runs at 1280x960 which slows it way down.
The next step was trying the C front end.
https://github.com/spacewalk01/tensorrt-openpose
It seems to be intended for windows only.
The 1st step is converting the model from pytorch to onnx format.
python3 convert2onnx.py -i ../trt_pose/tasks/human_pose/resnet18_baseline_att_224x224_A_epoch_249.pth -o trt_pose.onnxThe wheels fall off when he continues with converting the onnx model to a TensorRT engine. The conversion to an engine is where the use of 16 bit float starts.
<tensorrt_path>/bin/trtexec.exe --onnx=trt_pose.onnx --explicitBatch --saveEngine=trt_pose_fp16.engine --fp16It's a bit vague on where to get trtexec.exe for the jetson. Then, trying to compile anything with TensorrtPoseNet.h falls over with too many errors.
Fortunately, there are enough bread crumbs in the tensorrt-openpose code to directly call into tensorrt's C API. The general idea is to convert an ONNX model to a TensorRT "engine", then connect the inputs & outputs, then call IExecutionContext::enqueue to process frames.
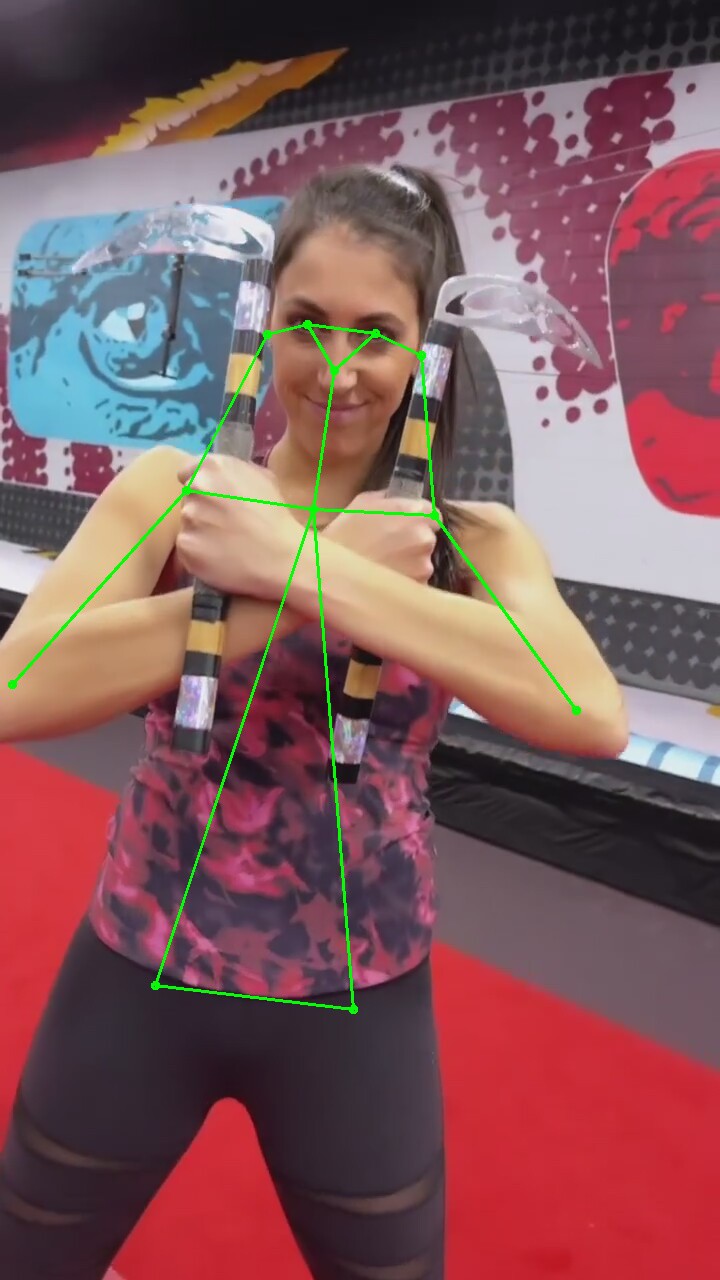
The C version ran at 12fps at the same resolution as the python version, used half the memory, but was equally short of the original openpose in robustness. There are ways to convert the openpose caffe model to a pytorch model, to a onnx model, to a TensorRT engine. The trick is converting all the inputs & outputs.
-
Tensorrt on a jetson nano
02/19/2023 at 06:09 • 0 commentsThe journey begins by reading through
https://github.com/NVIDIA-AI-IOT/trt_pose
Your biggest challenge is going to be installing the pytorch dependencies as described on
https://docs.nvidia.com/deeplearning/frameworks/install-pytorch-jetson-platform/index.html
Some missing dependencies:
apt install python3-pip libopenblas-dev
pip3 install packaging
python3 -m pip install --no-cache $TORCH_INSTALL failed.
The TORCH_INSTALL variable has to be set to the right wheel file for your python version. There's a list of wheel files for the various jetson images on
https://forums.developer.nvidia.com/t/pytorch-for-jetson/72048
The lion image was jetpack 4.6 which has python 3.6, so the wheel file for that version was
torch-1.9.0-cp36-cp36m-linux_aarch64.whlThe lion kingdom cut & pasted bits from the live_demo.ipynb file to create an executable. The live_demo requires many more dependencies
python3 -m pip install Pillow      # PIL errors
python3 -m pip install torchvision
pip3 install traitlets
pip3 install ipywidgets
You have to install the jetcam module with git
https://github.com/NVIDIA-AI-IOT/jetcam
The live_demo program only works inside a web app. The best it can do without bringing up a lot more bits is process JPG images.
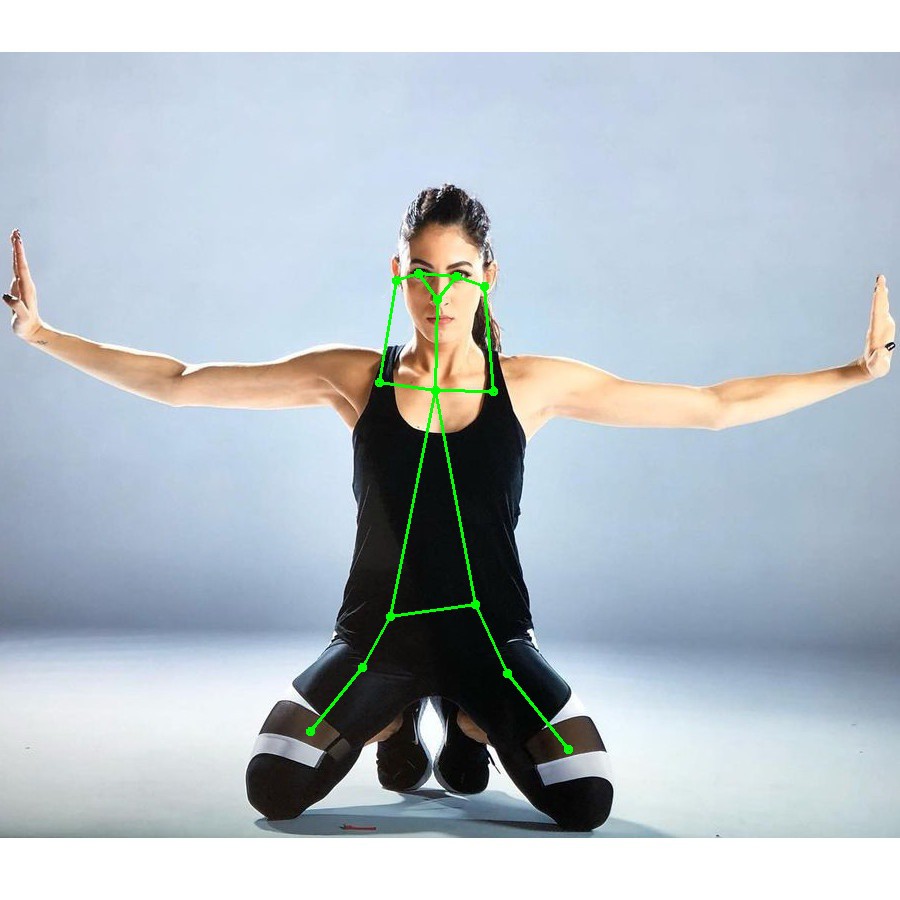
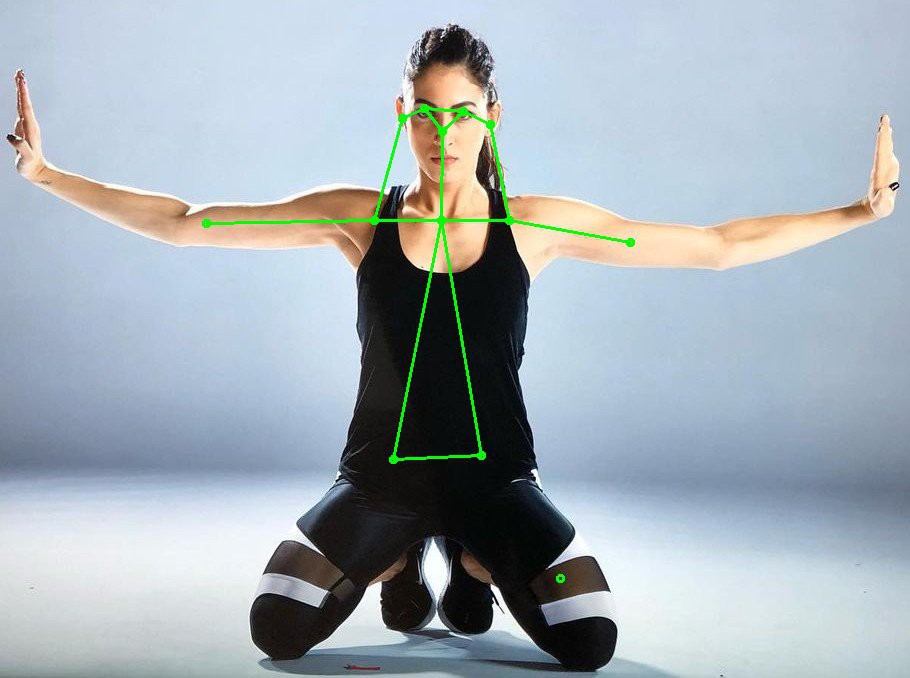
![]()
![]()
![]()
![]()
![]()
![]()
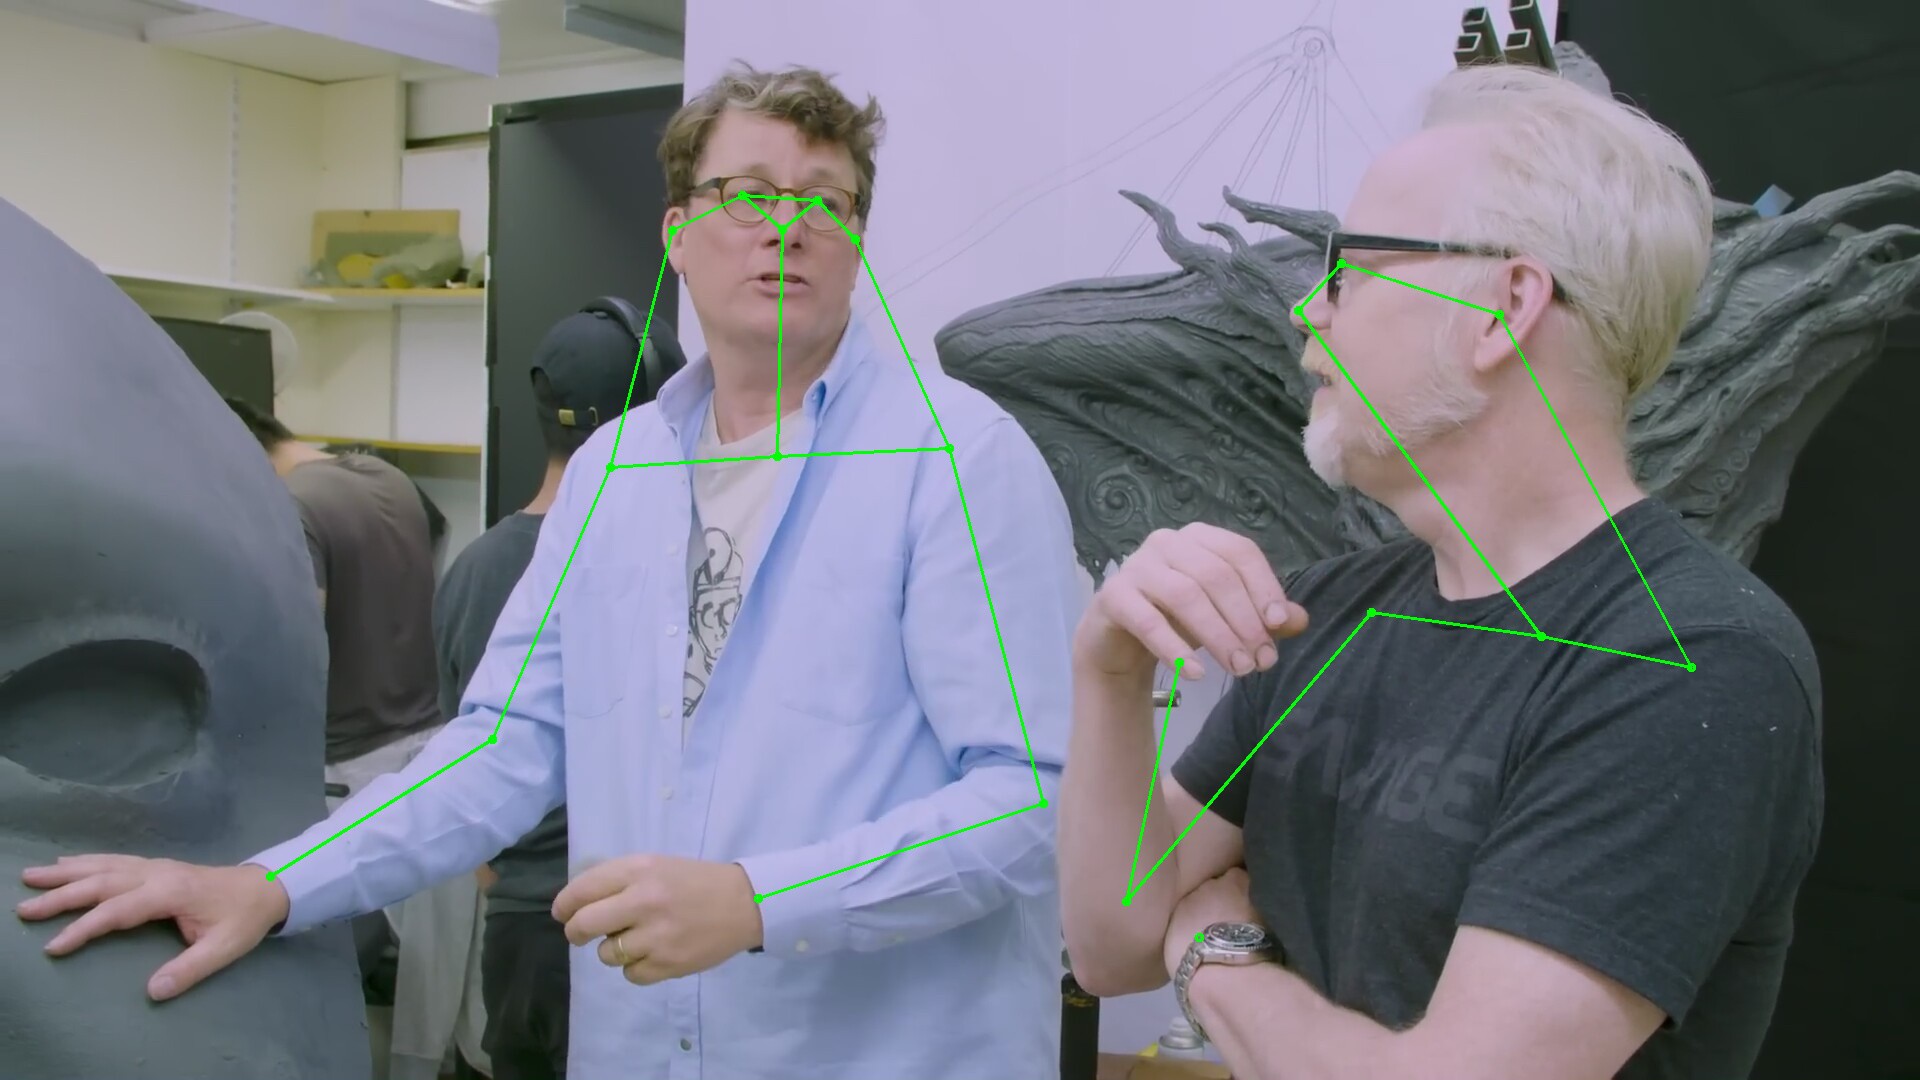
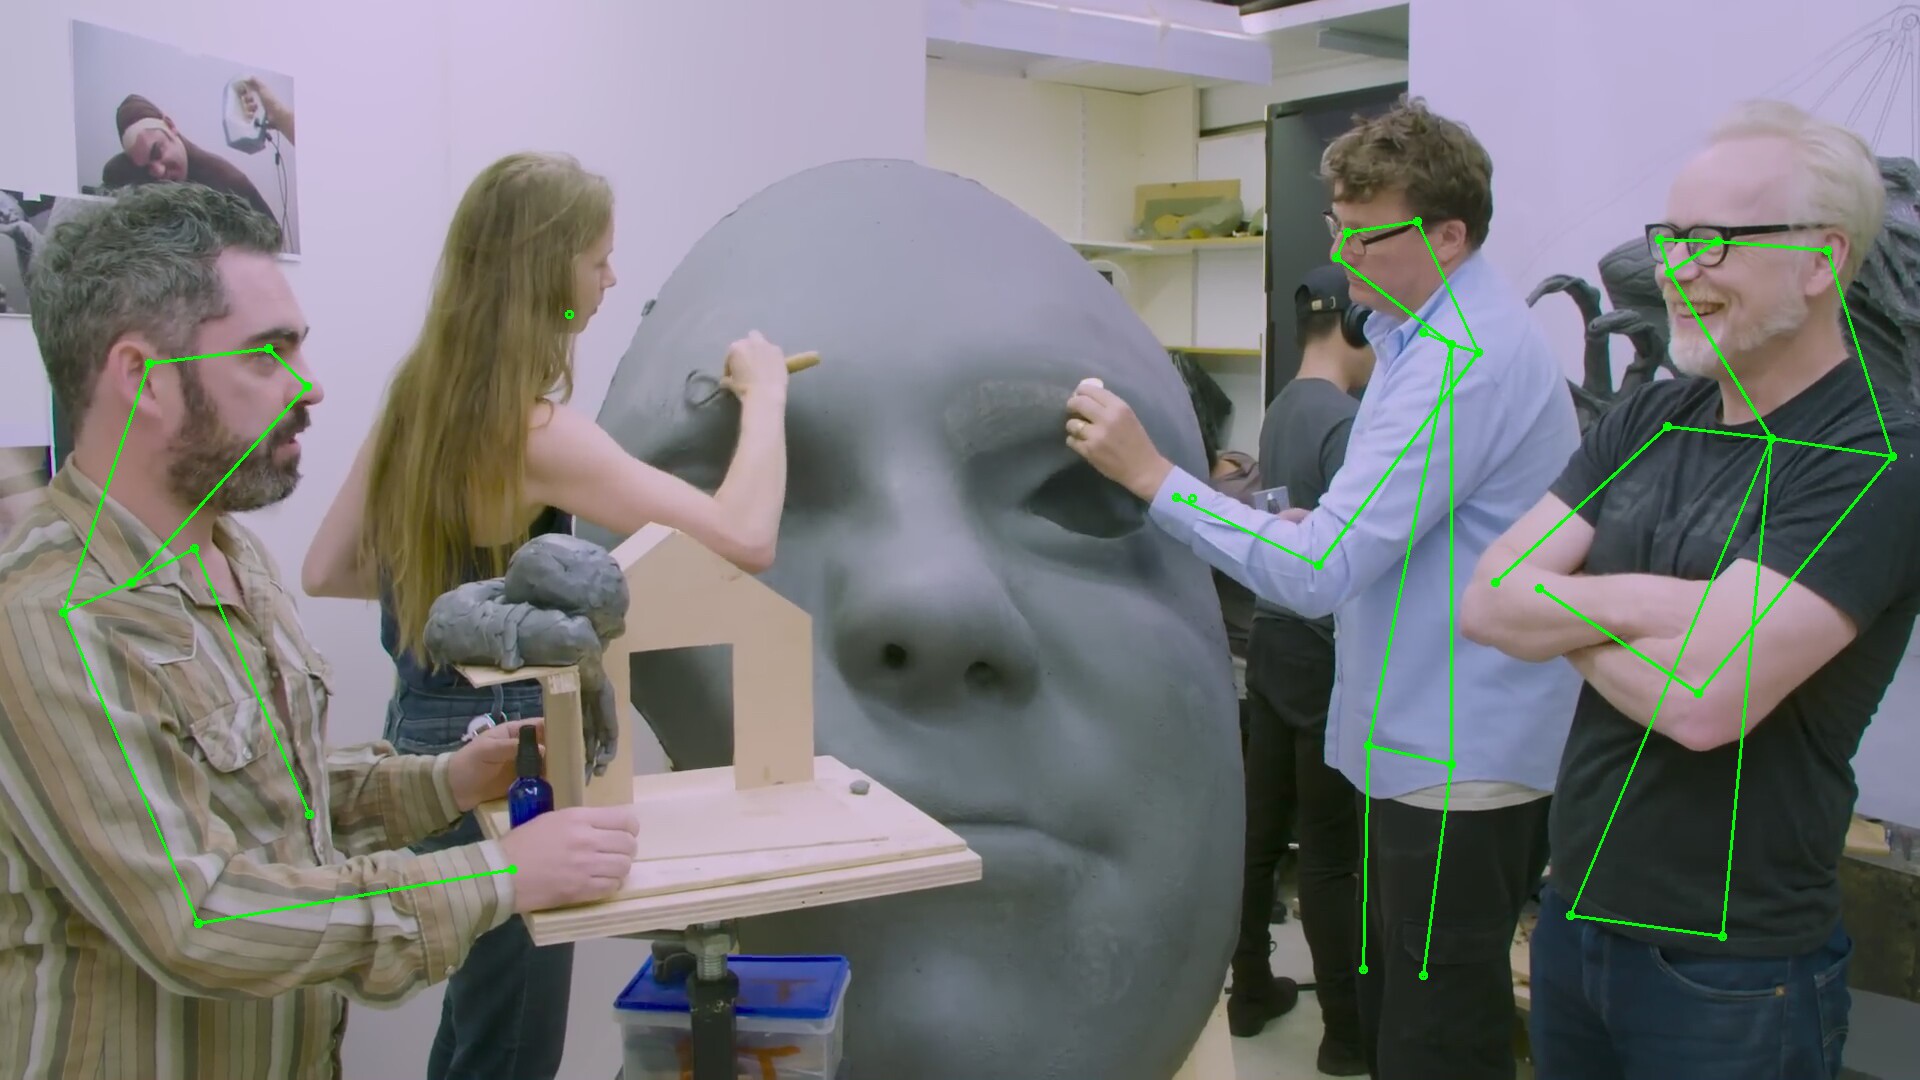
It supports multiple animals, but it's trash at detecting body parts. Changing the aspect ratio gives different but equally worthless results.
The demo without a browser can give a rough idea of the framerate. The frame rate seemed to be in the 12-15fps range.
There is another program which exposes somewhat of a C++ API for trt_pose, but with the same model.
https://github.com/spacewalk01/tensorrt-openpose
Acceptable quality seems to require the original openpose at 5fps. The jetson might be good enough to run efficientdet & face recognition on the truckcam. It's not good enough for rep counting & camera tracking. The most cost effective solution is going to be a gaming laptop more than any embedded confuser.
-
Open pose on Jetson nano
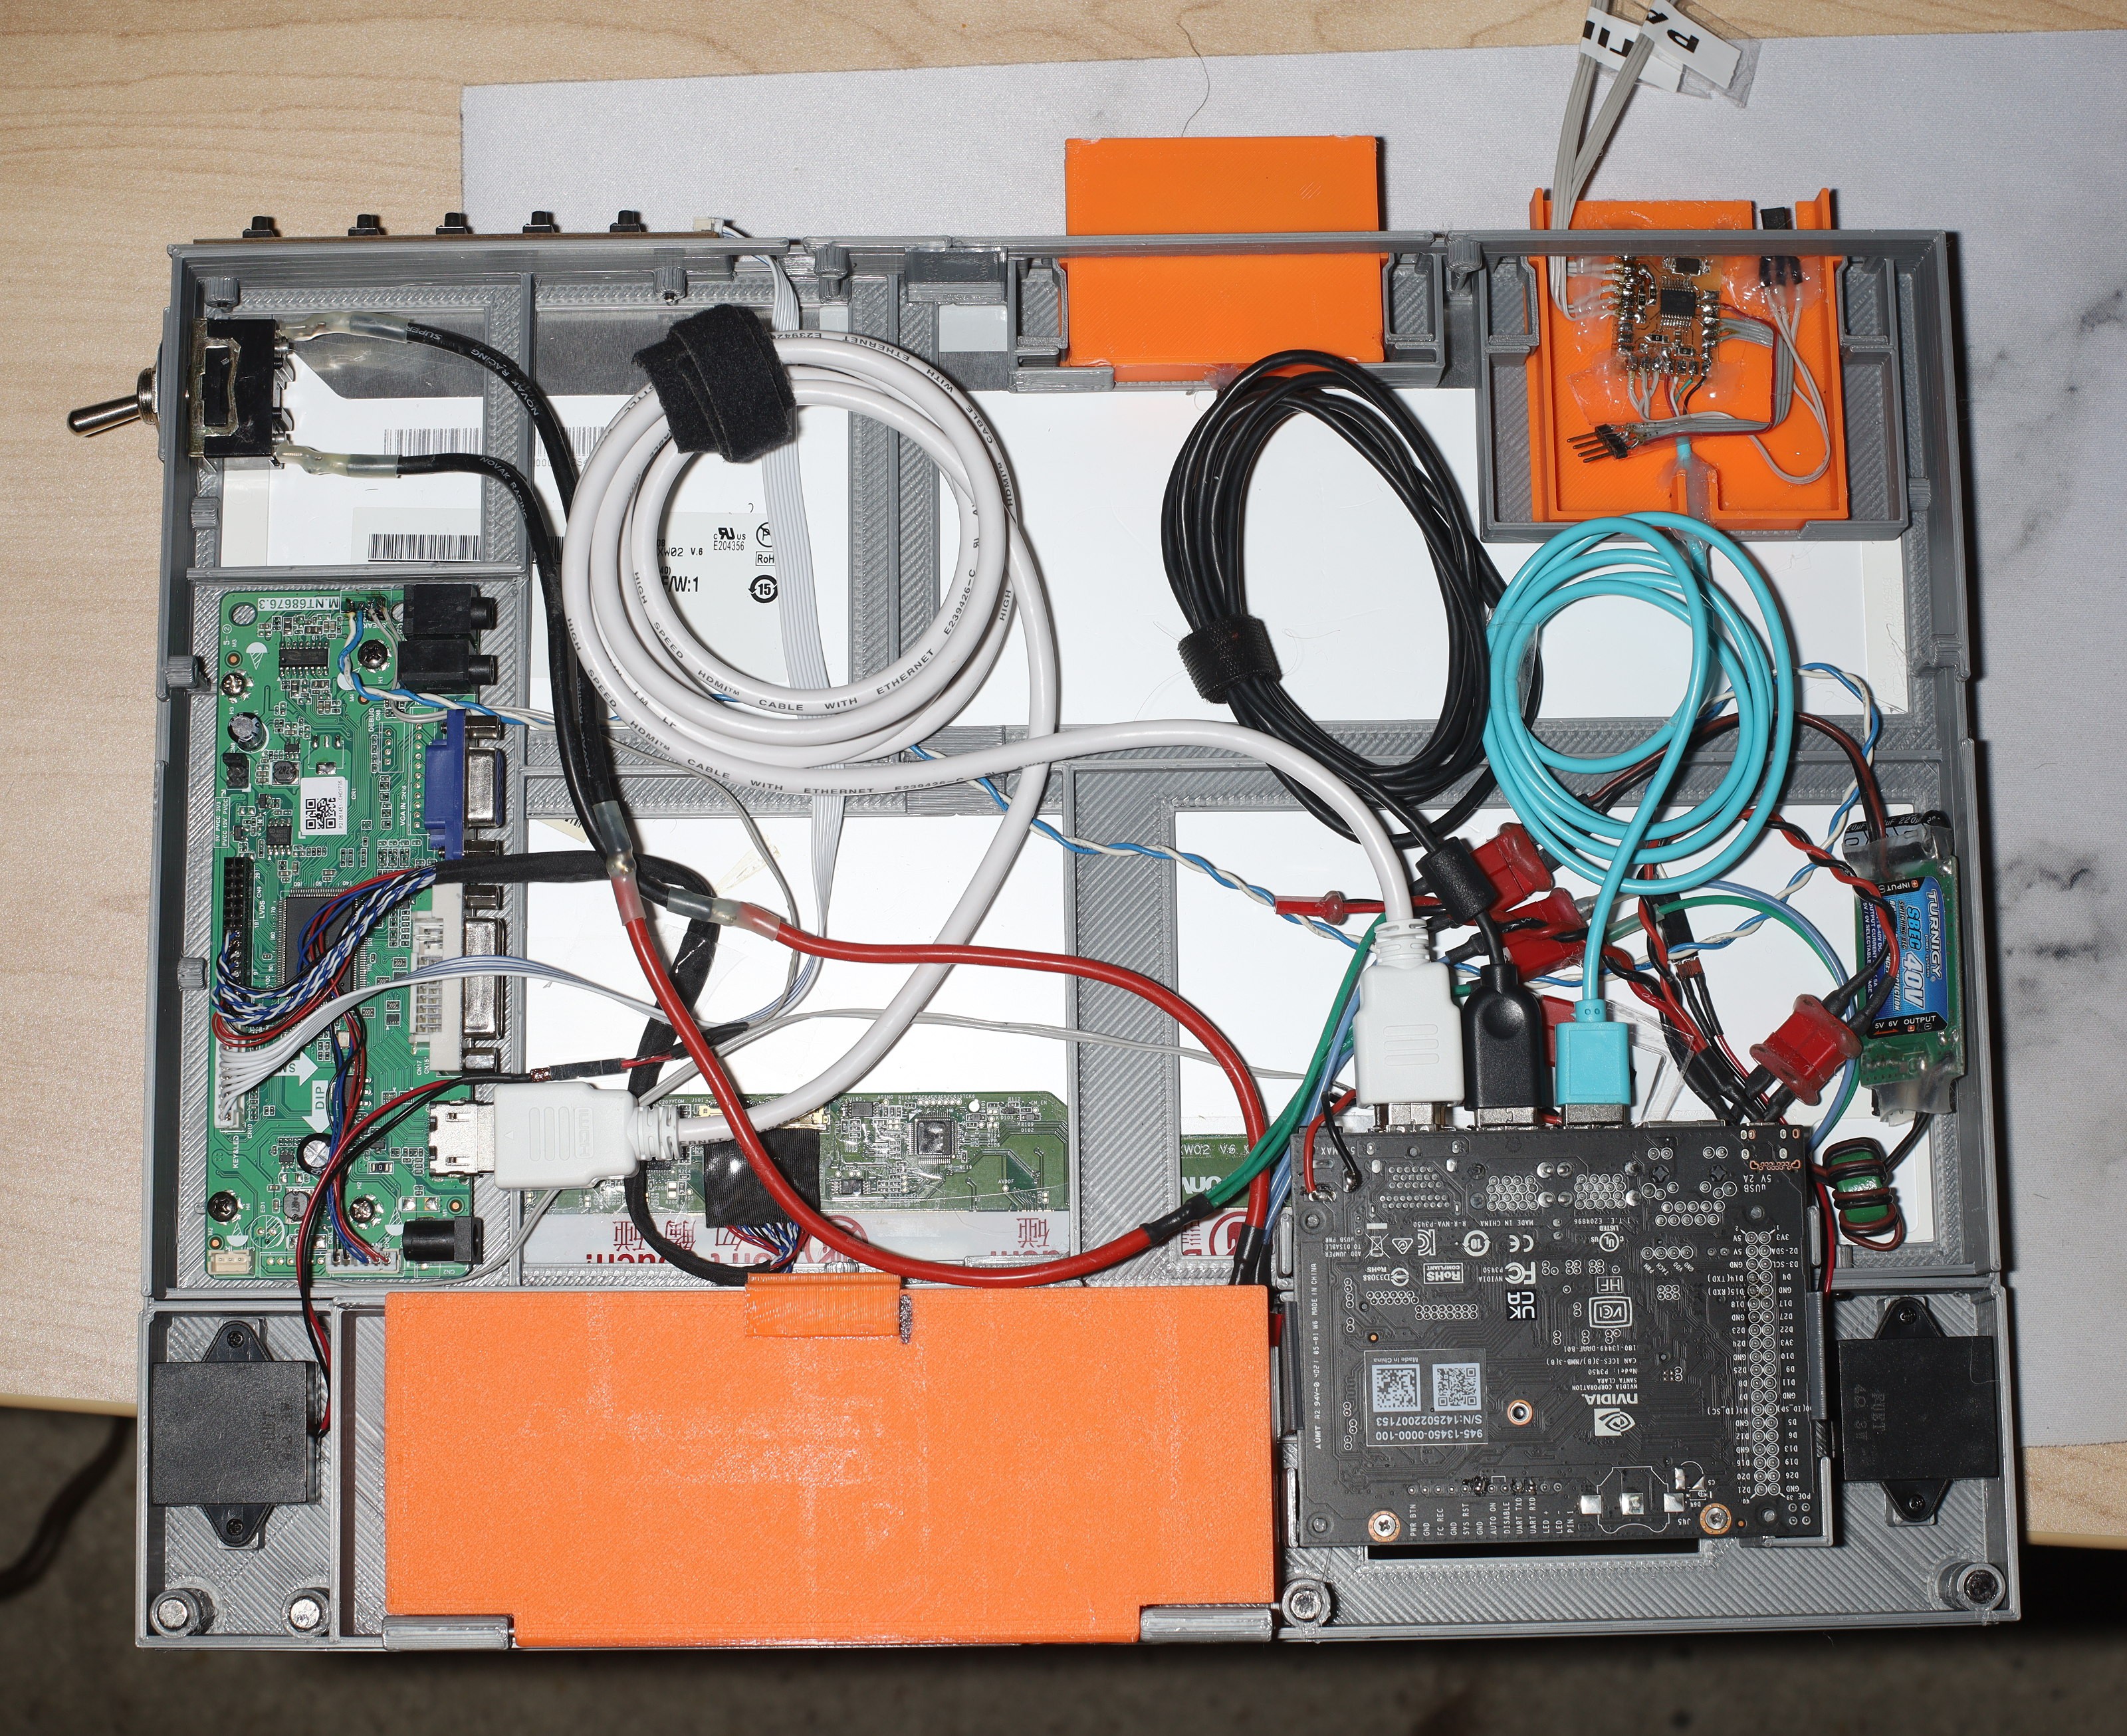
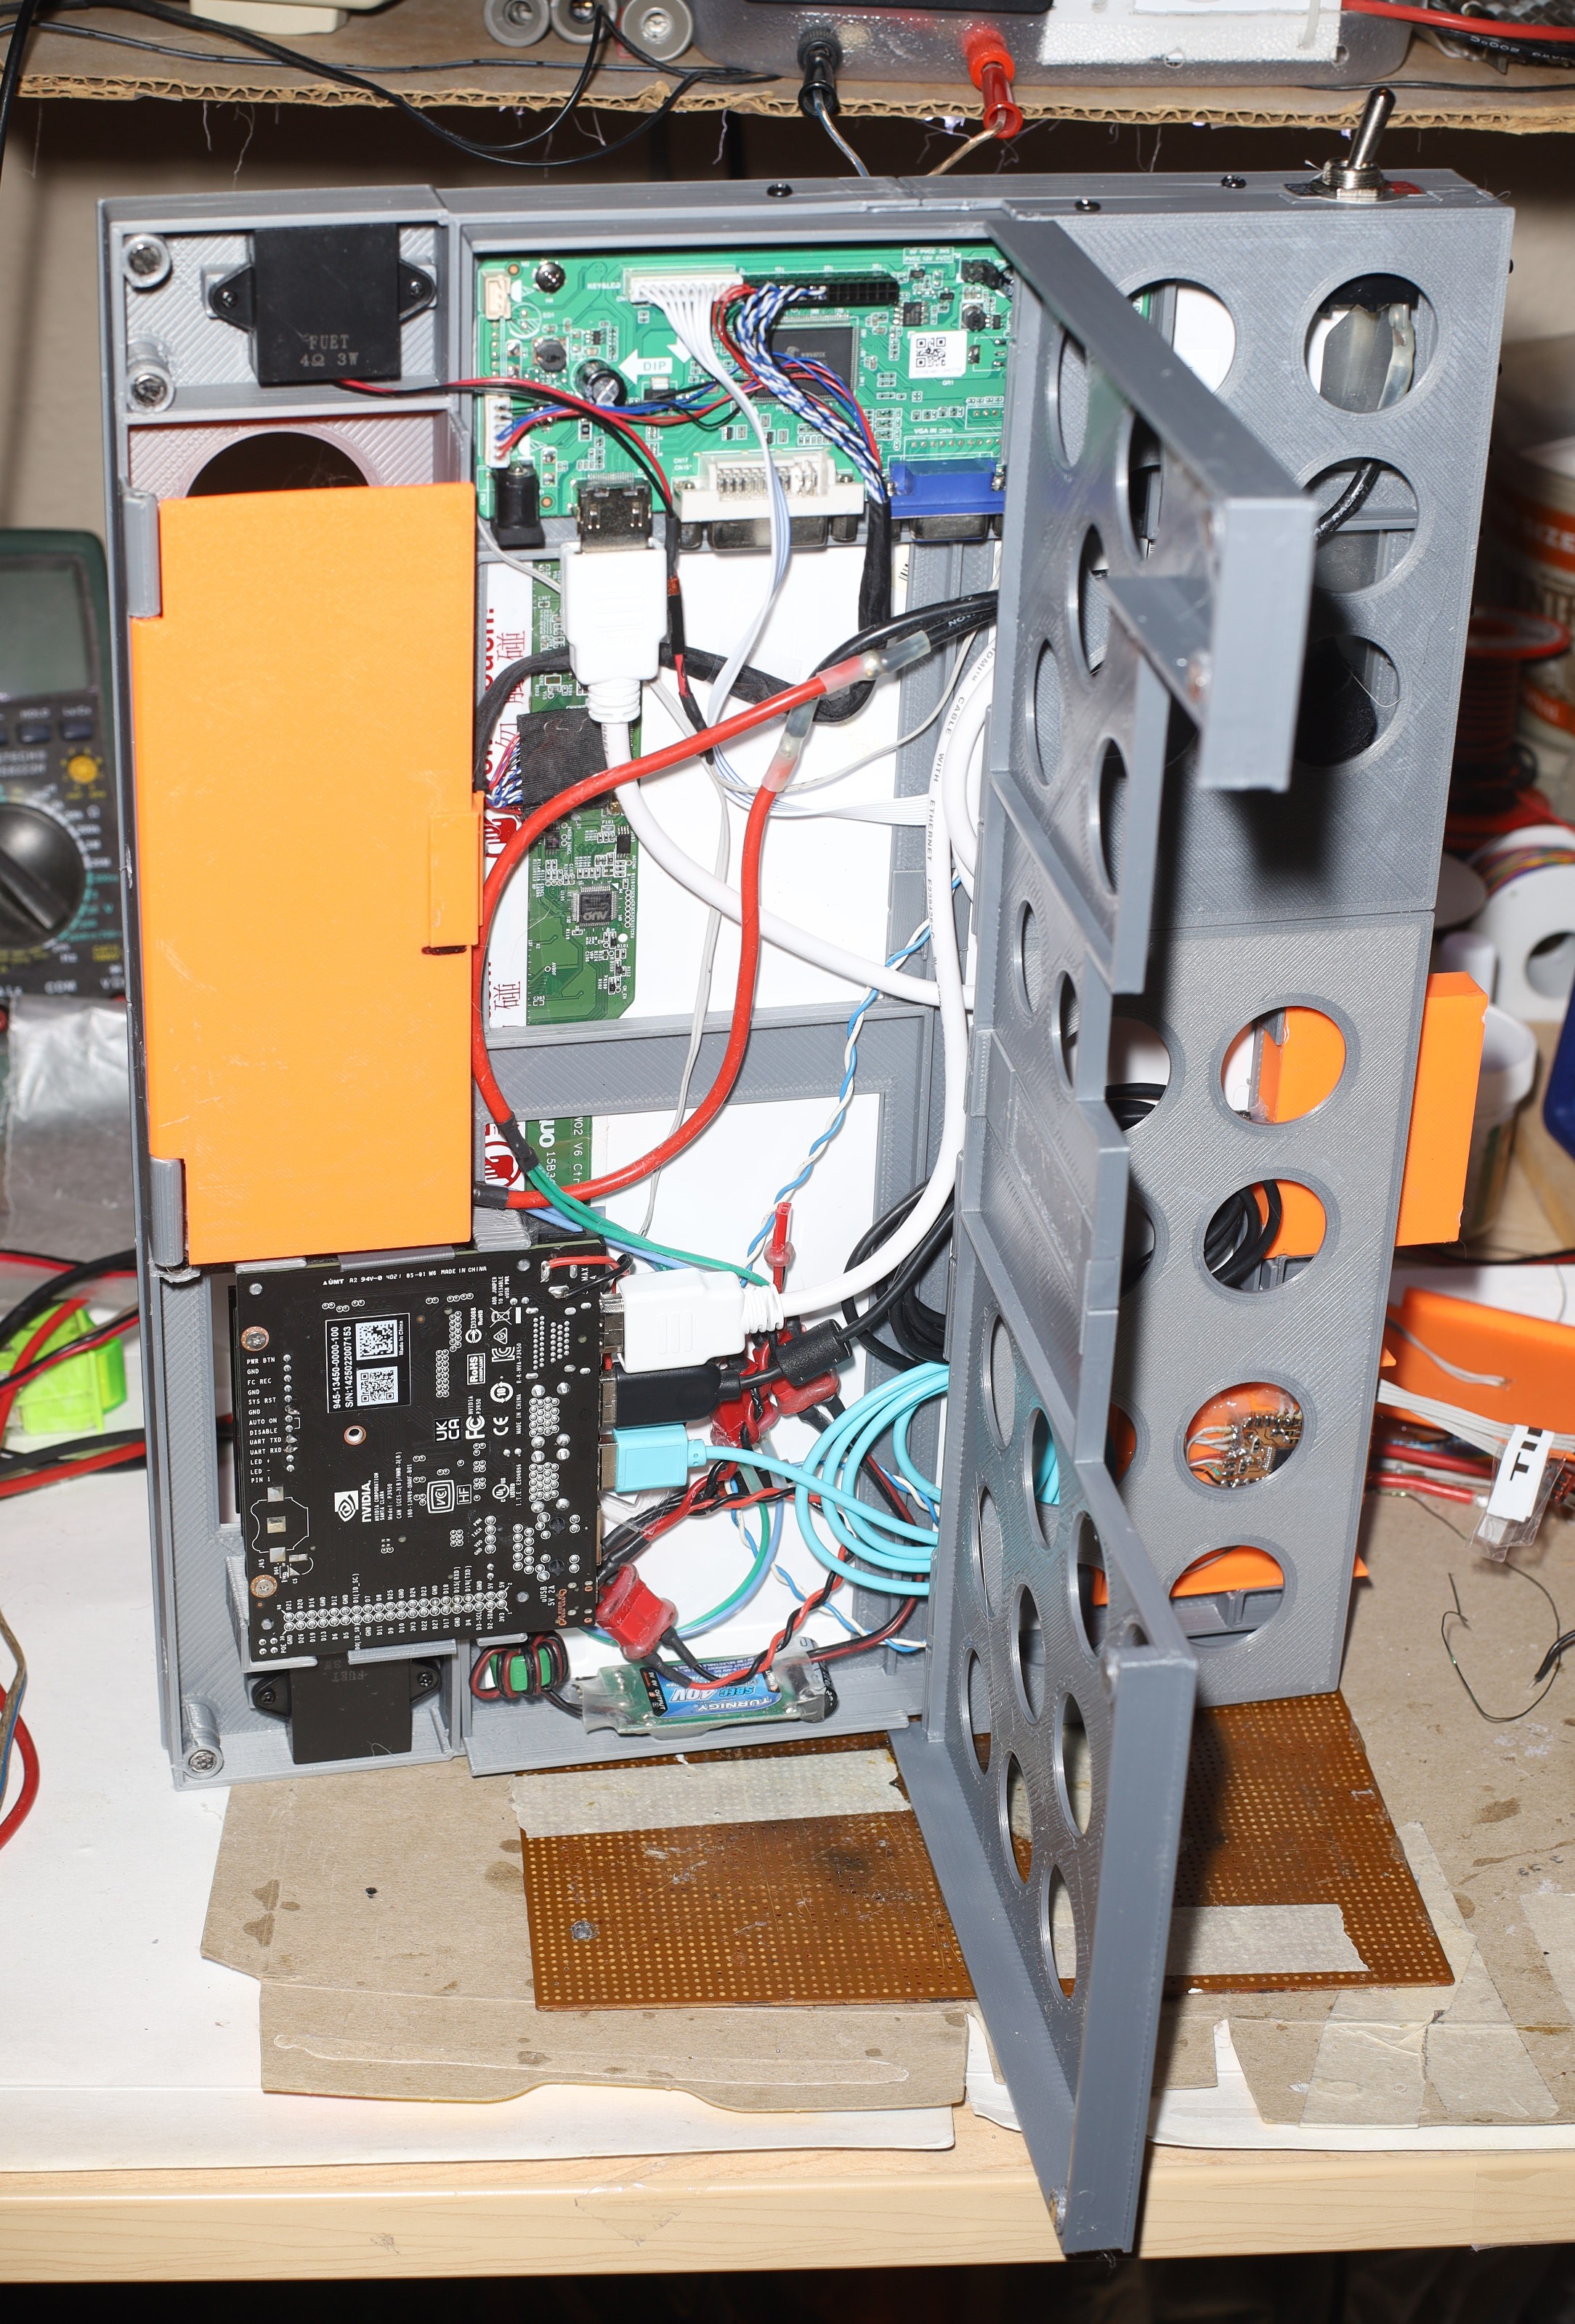
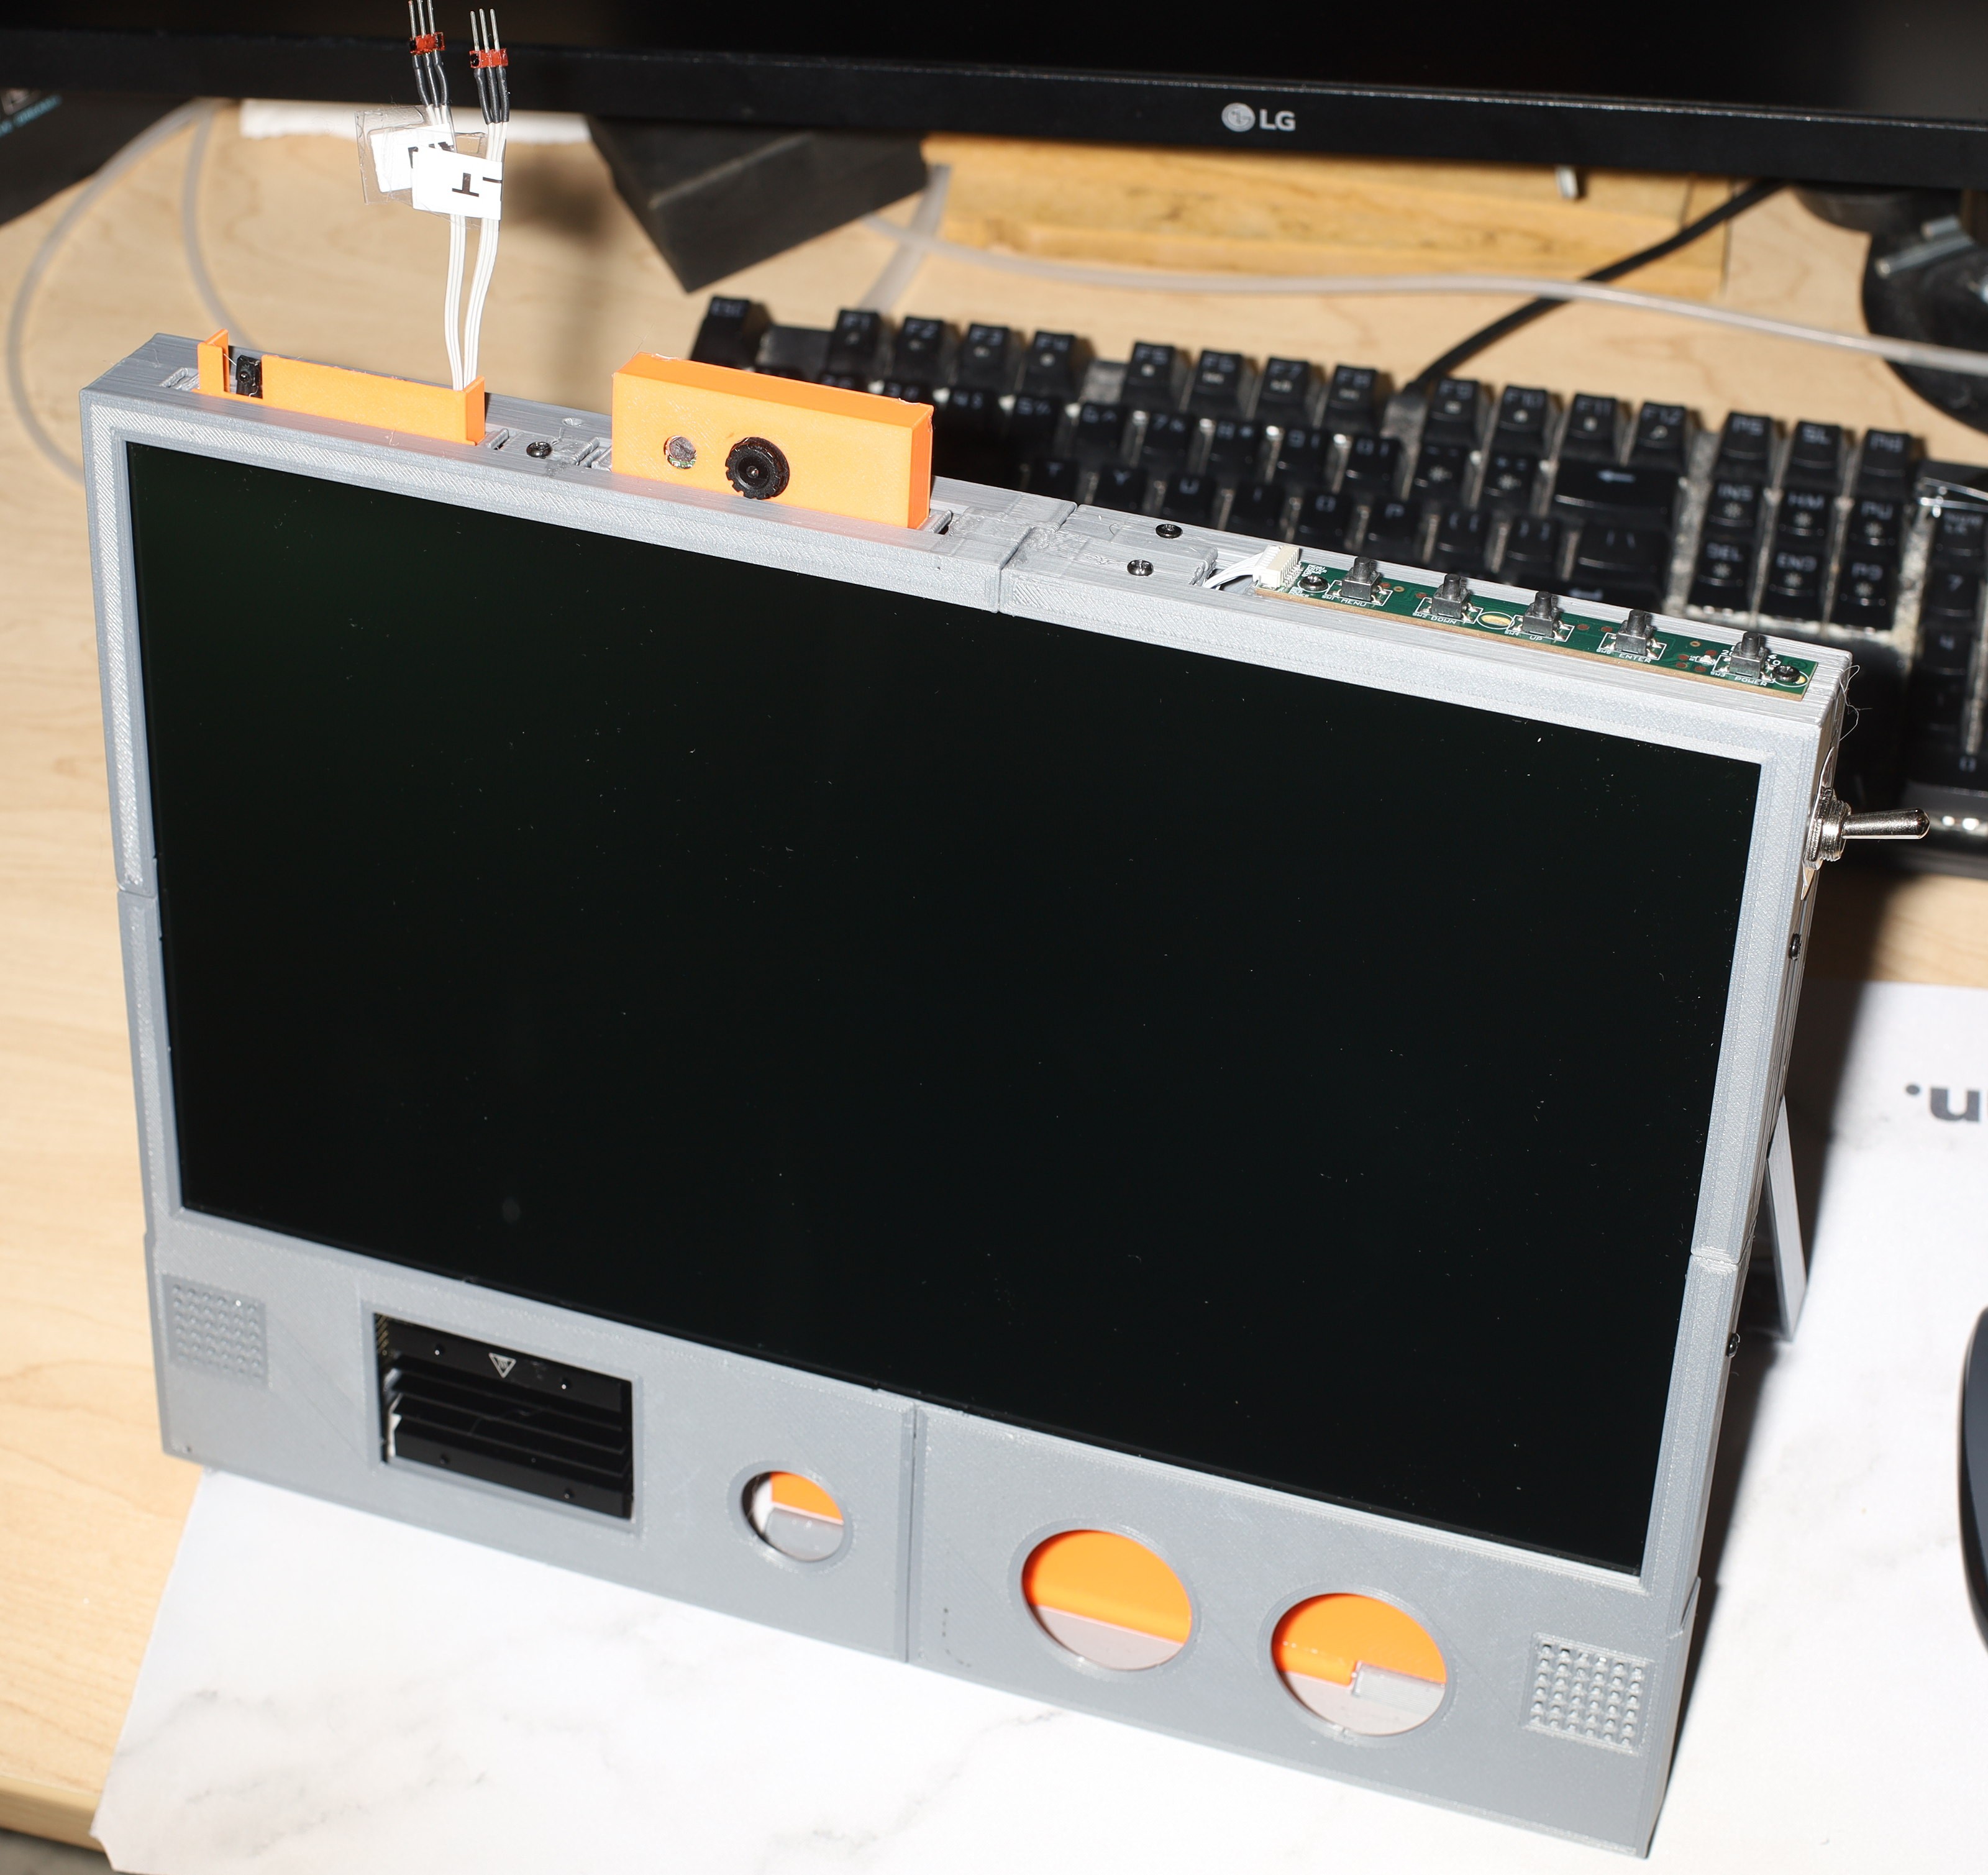
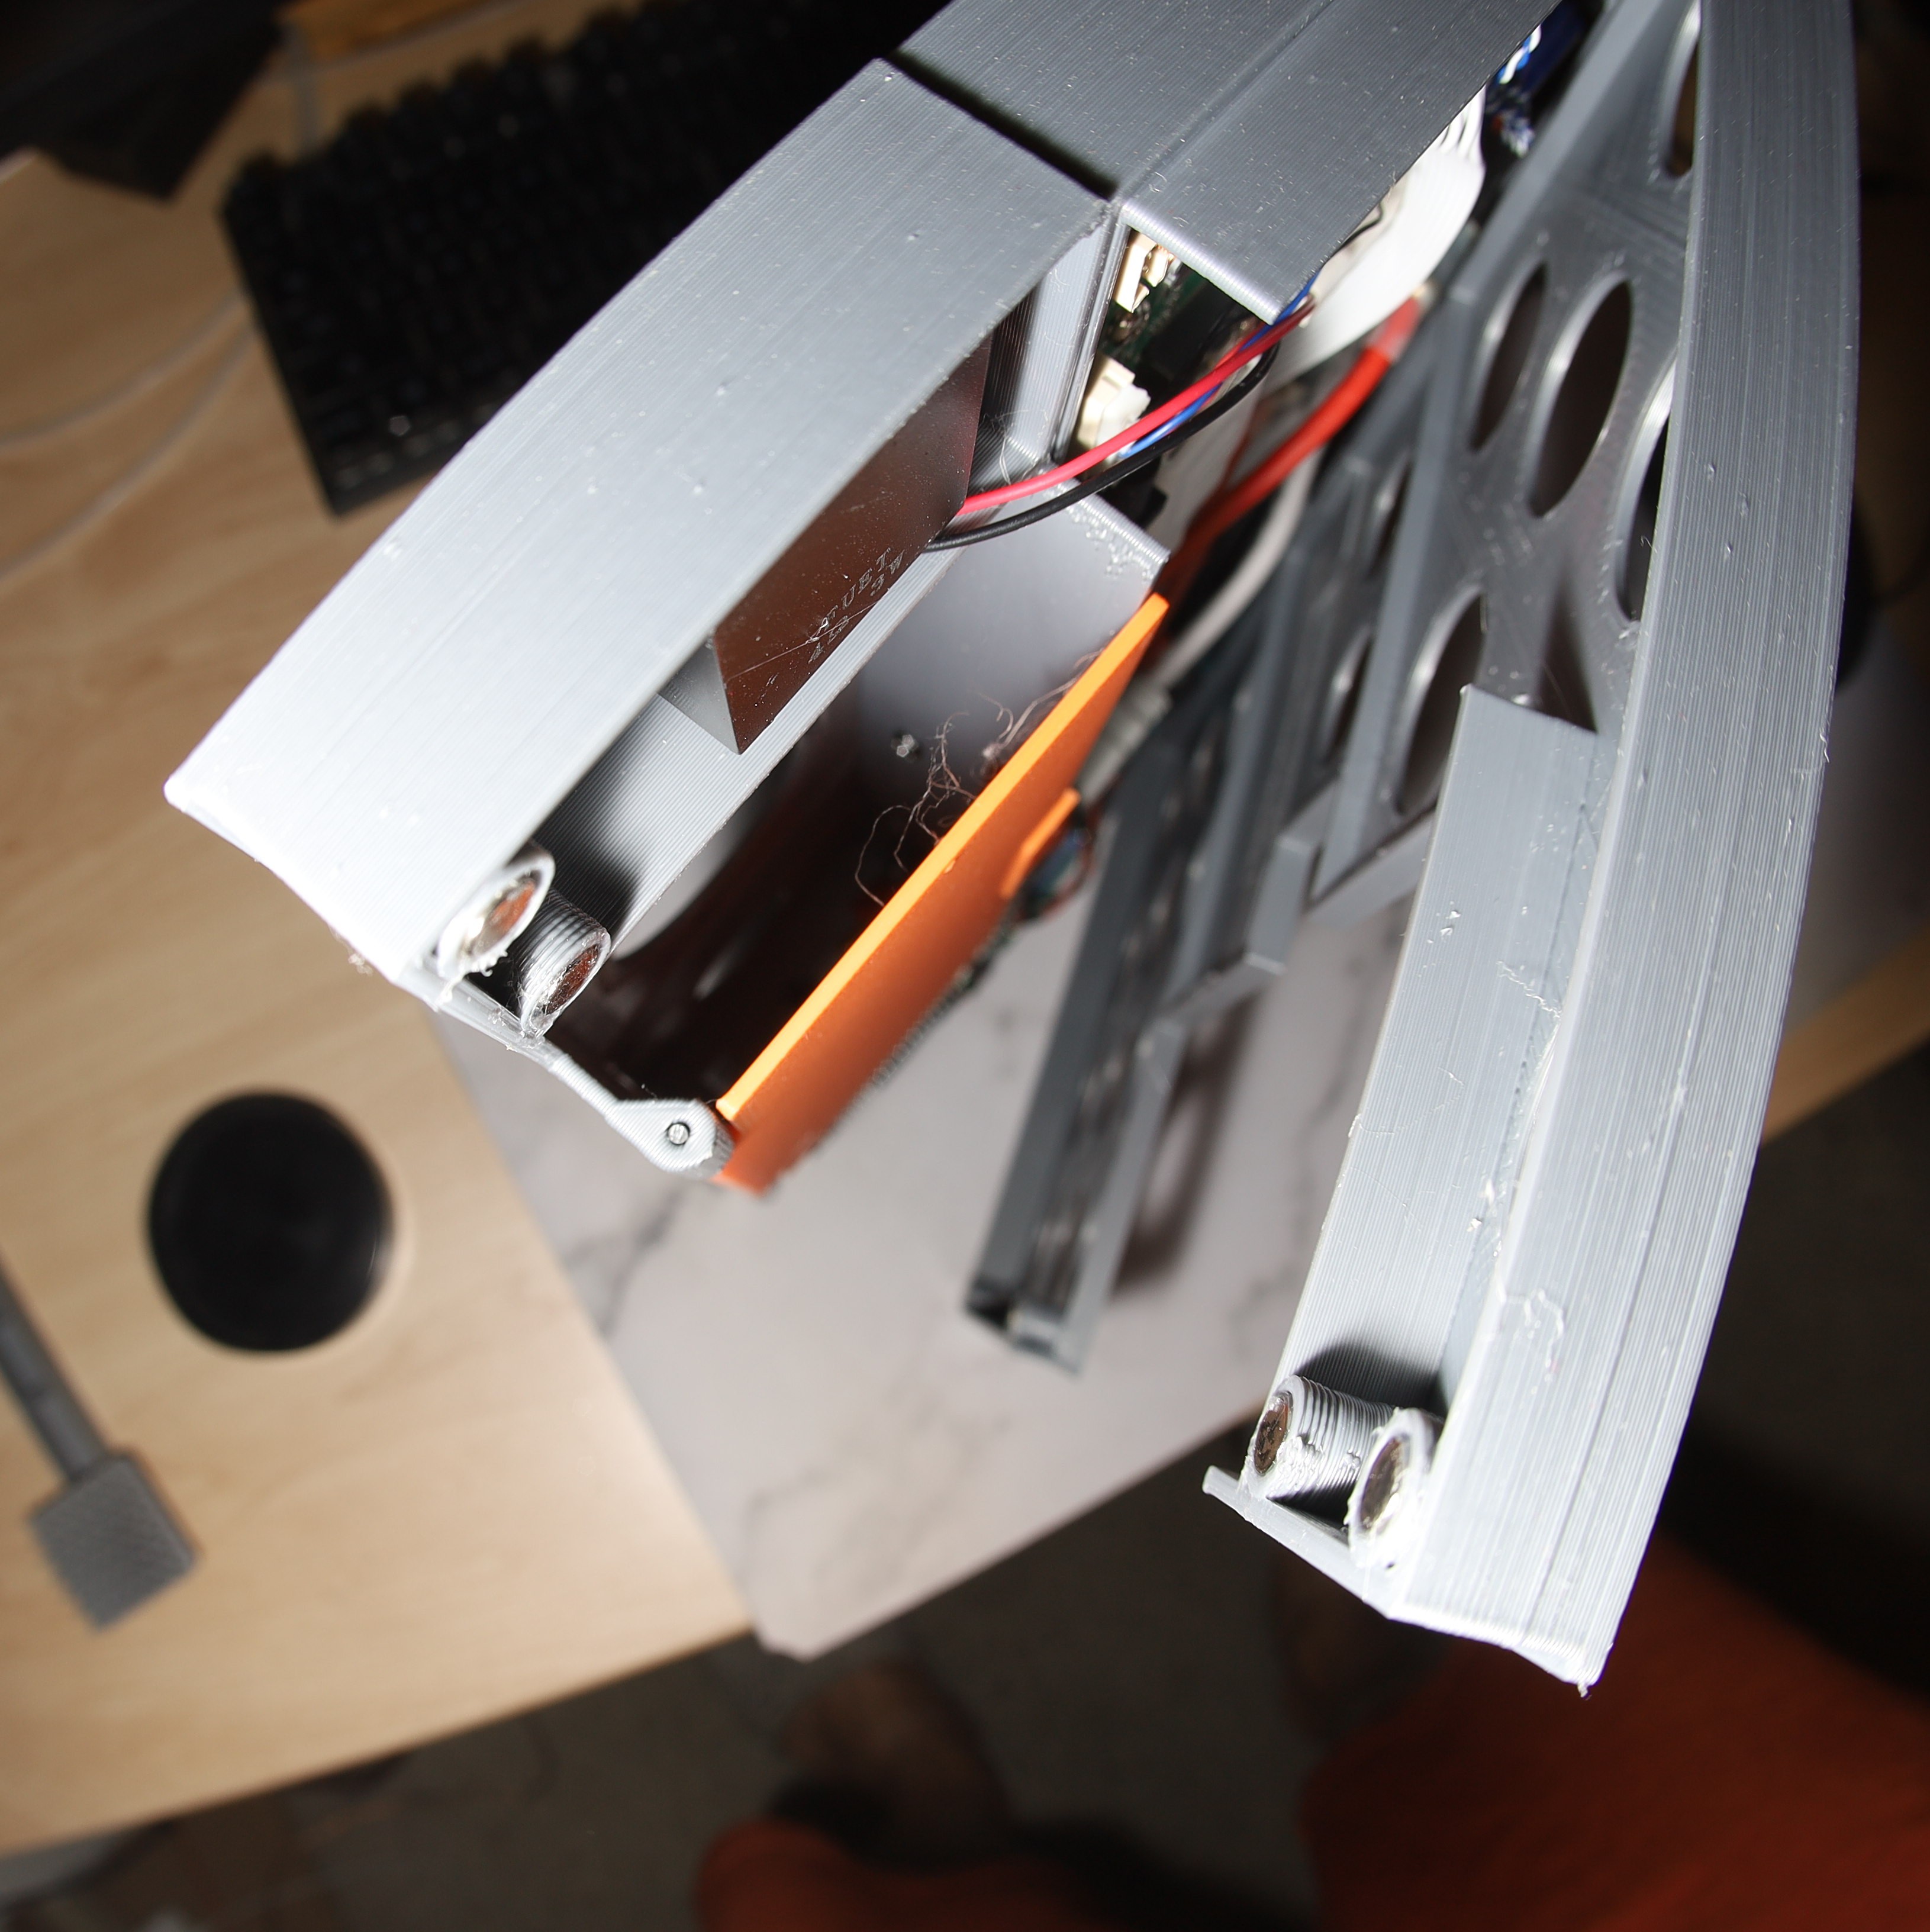
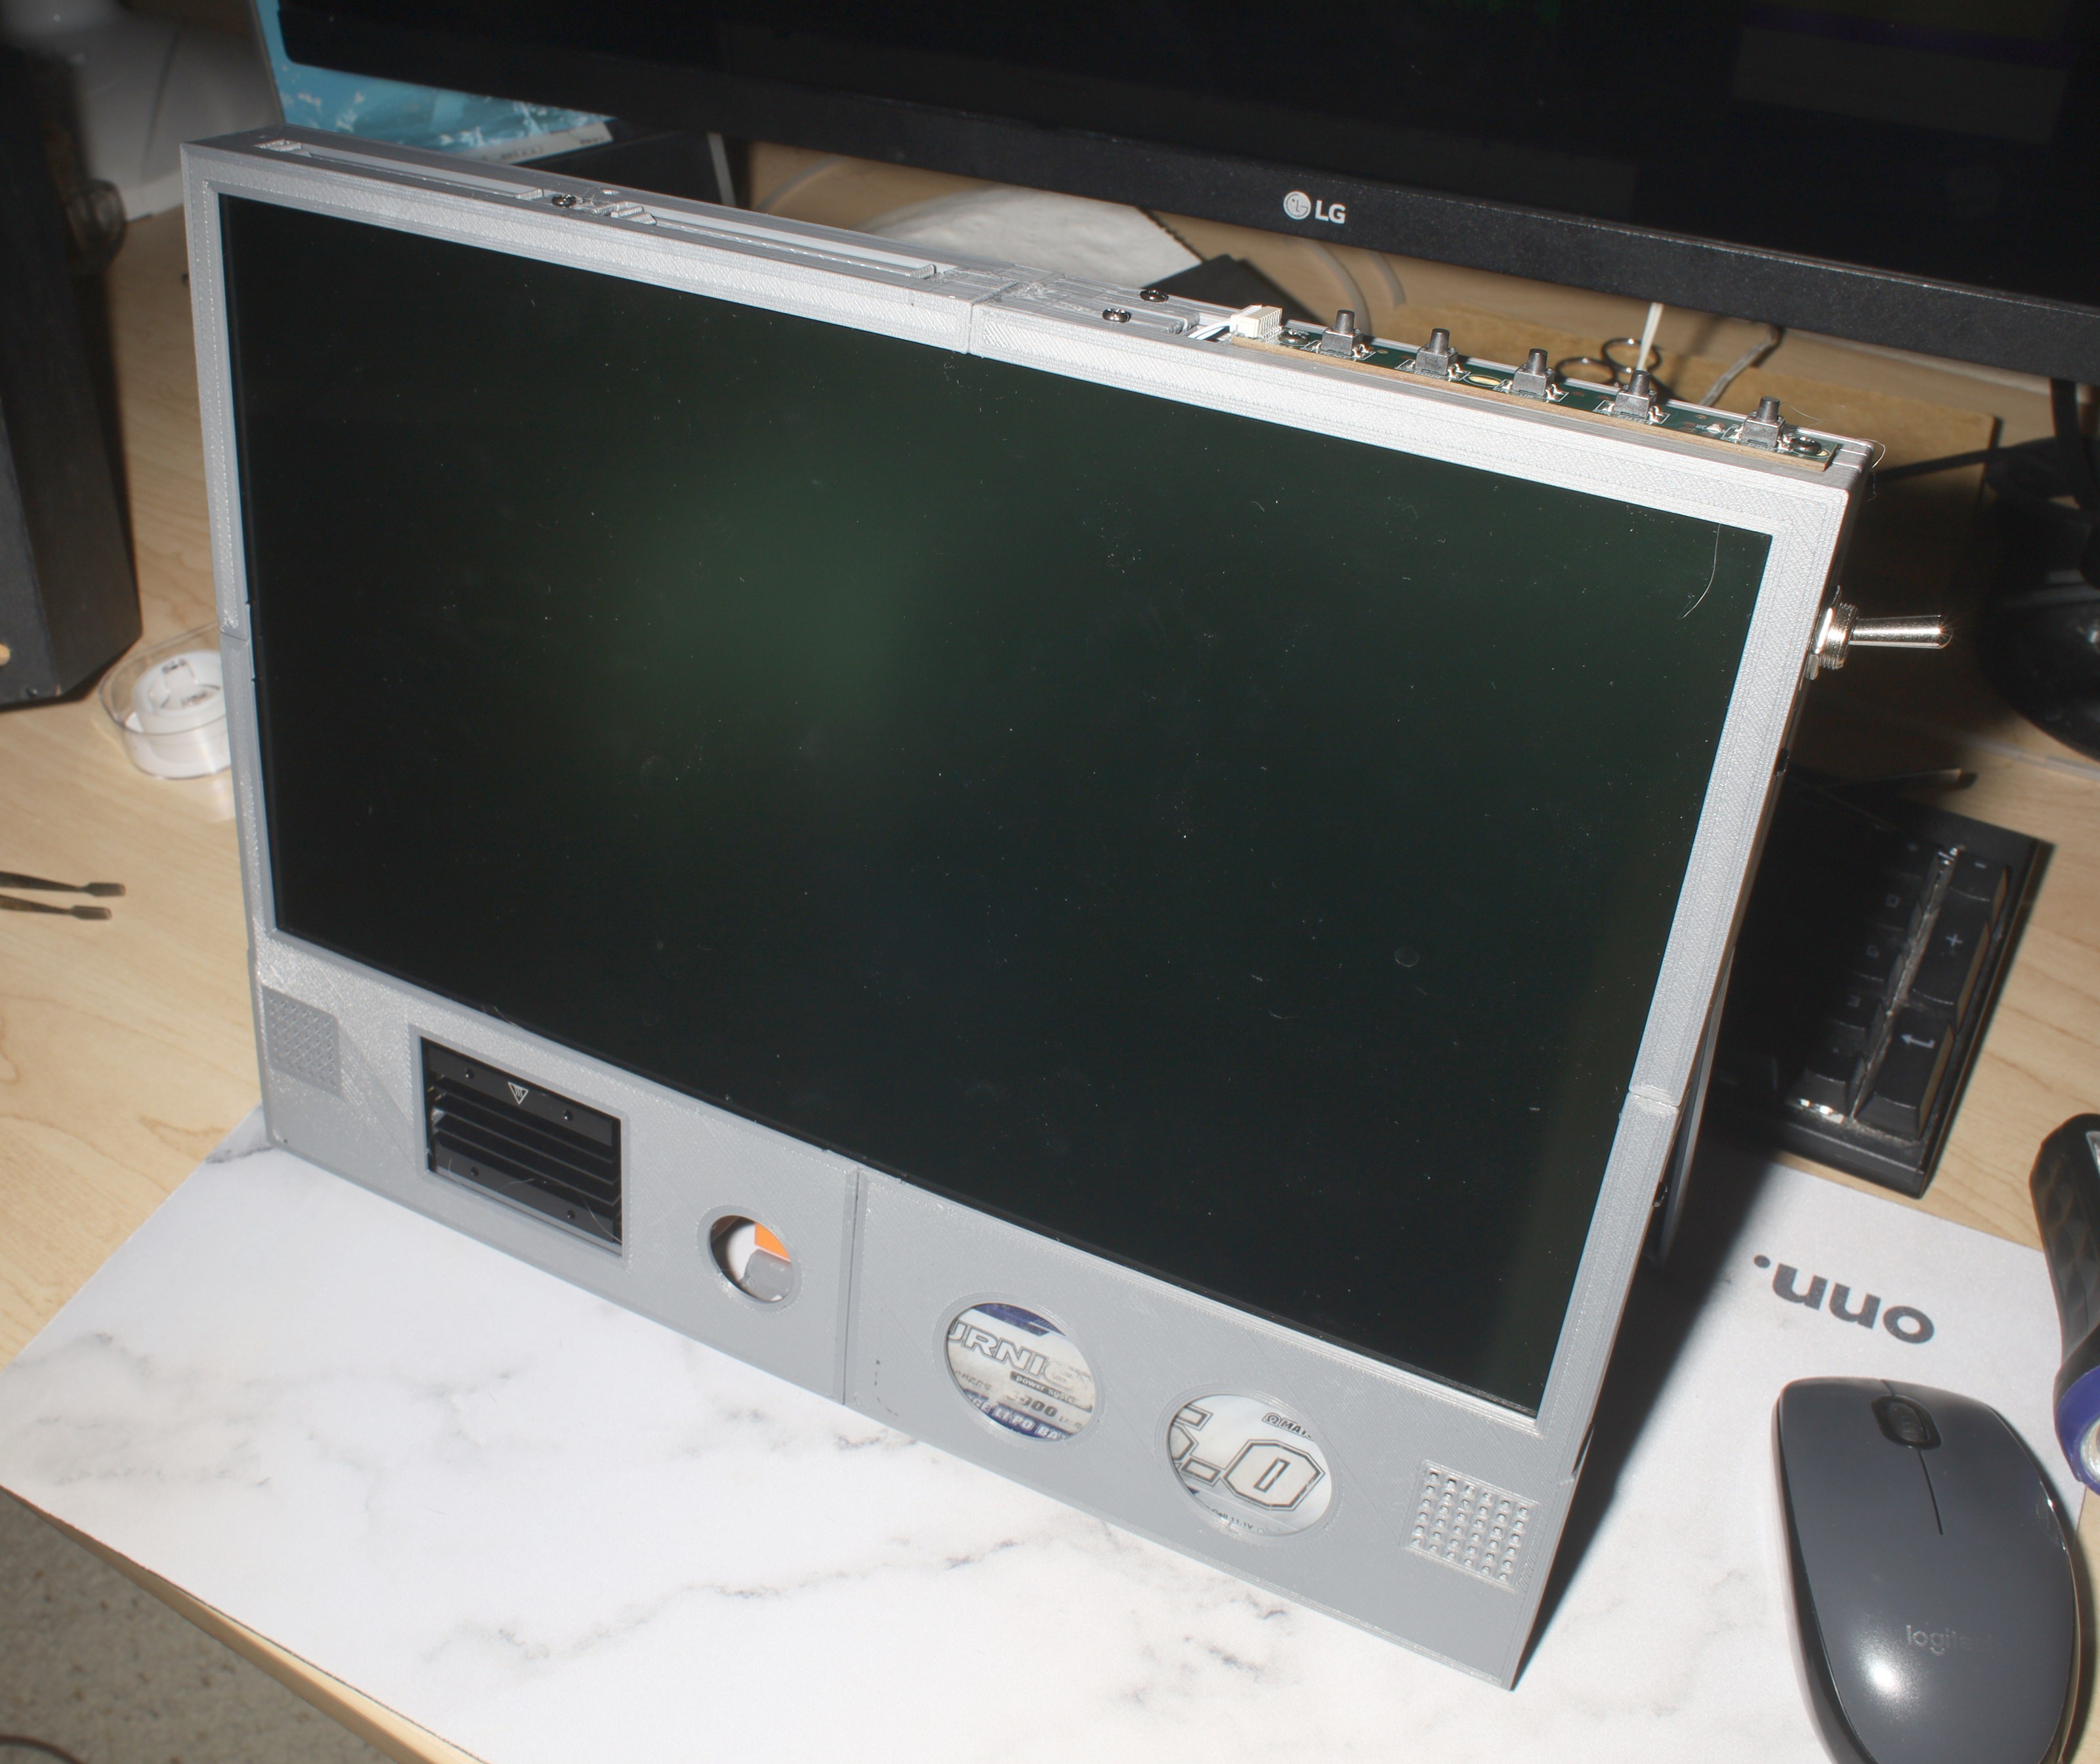
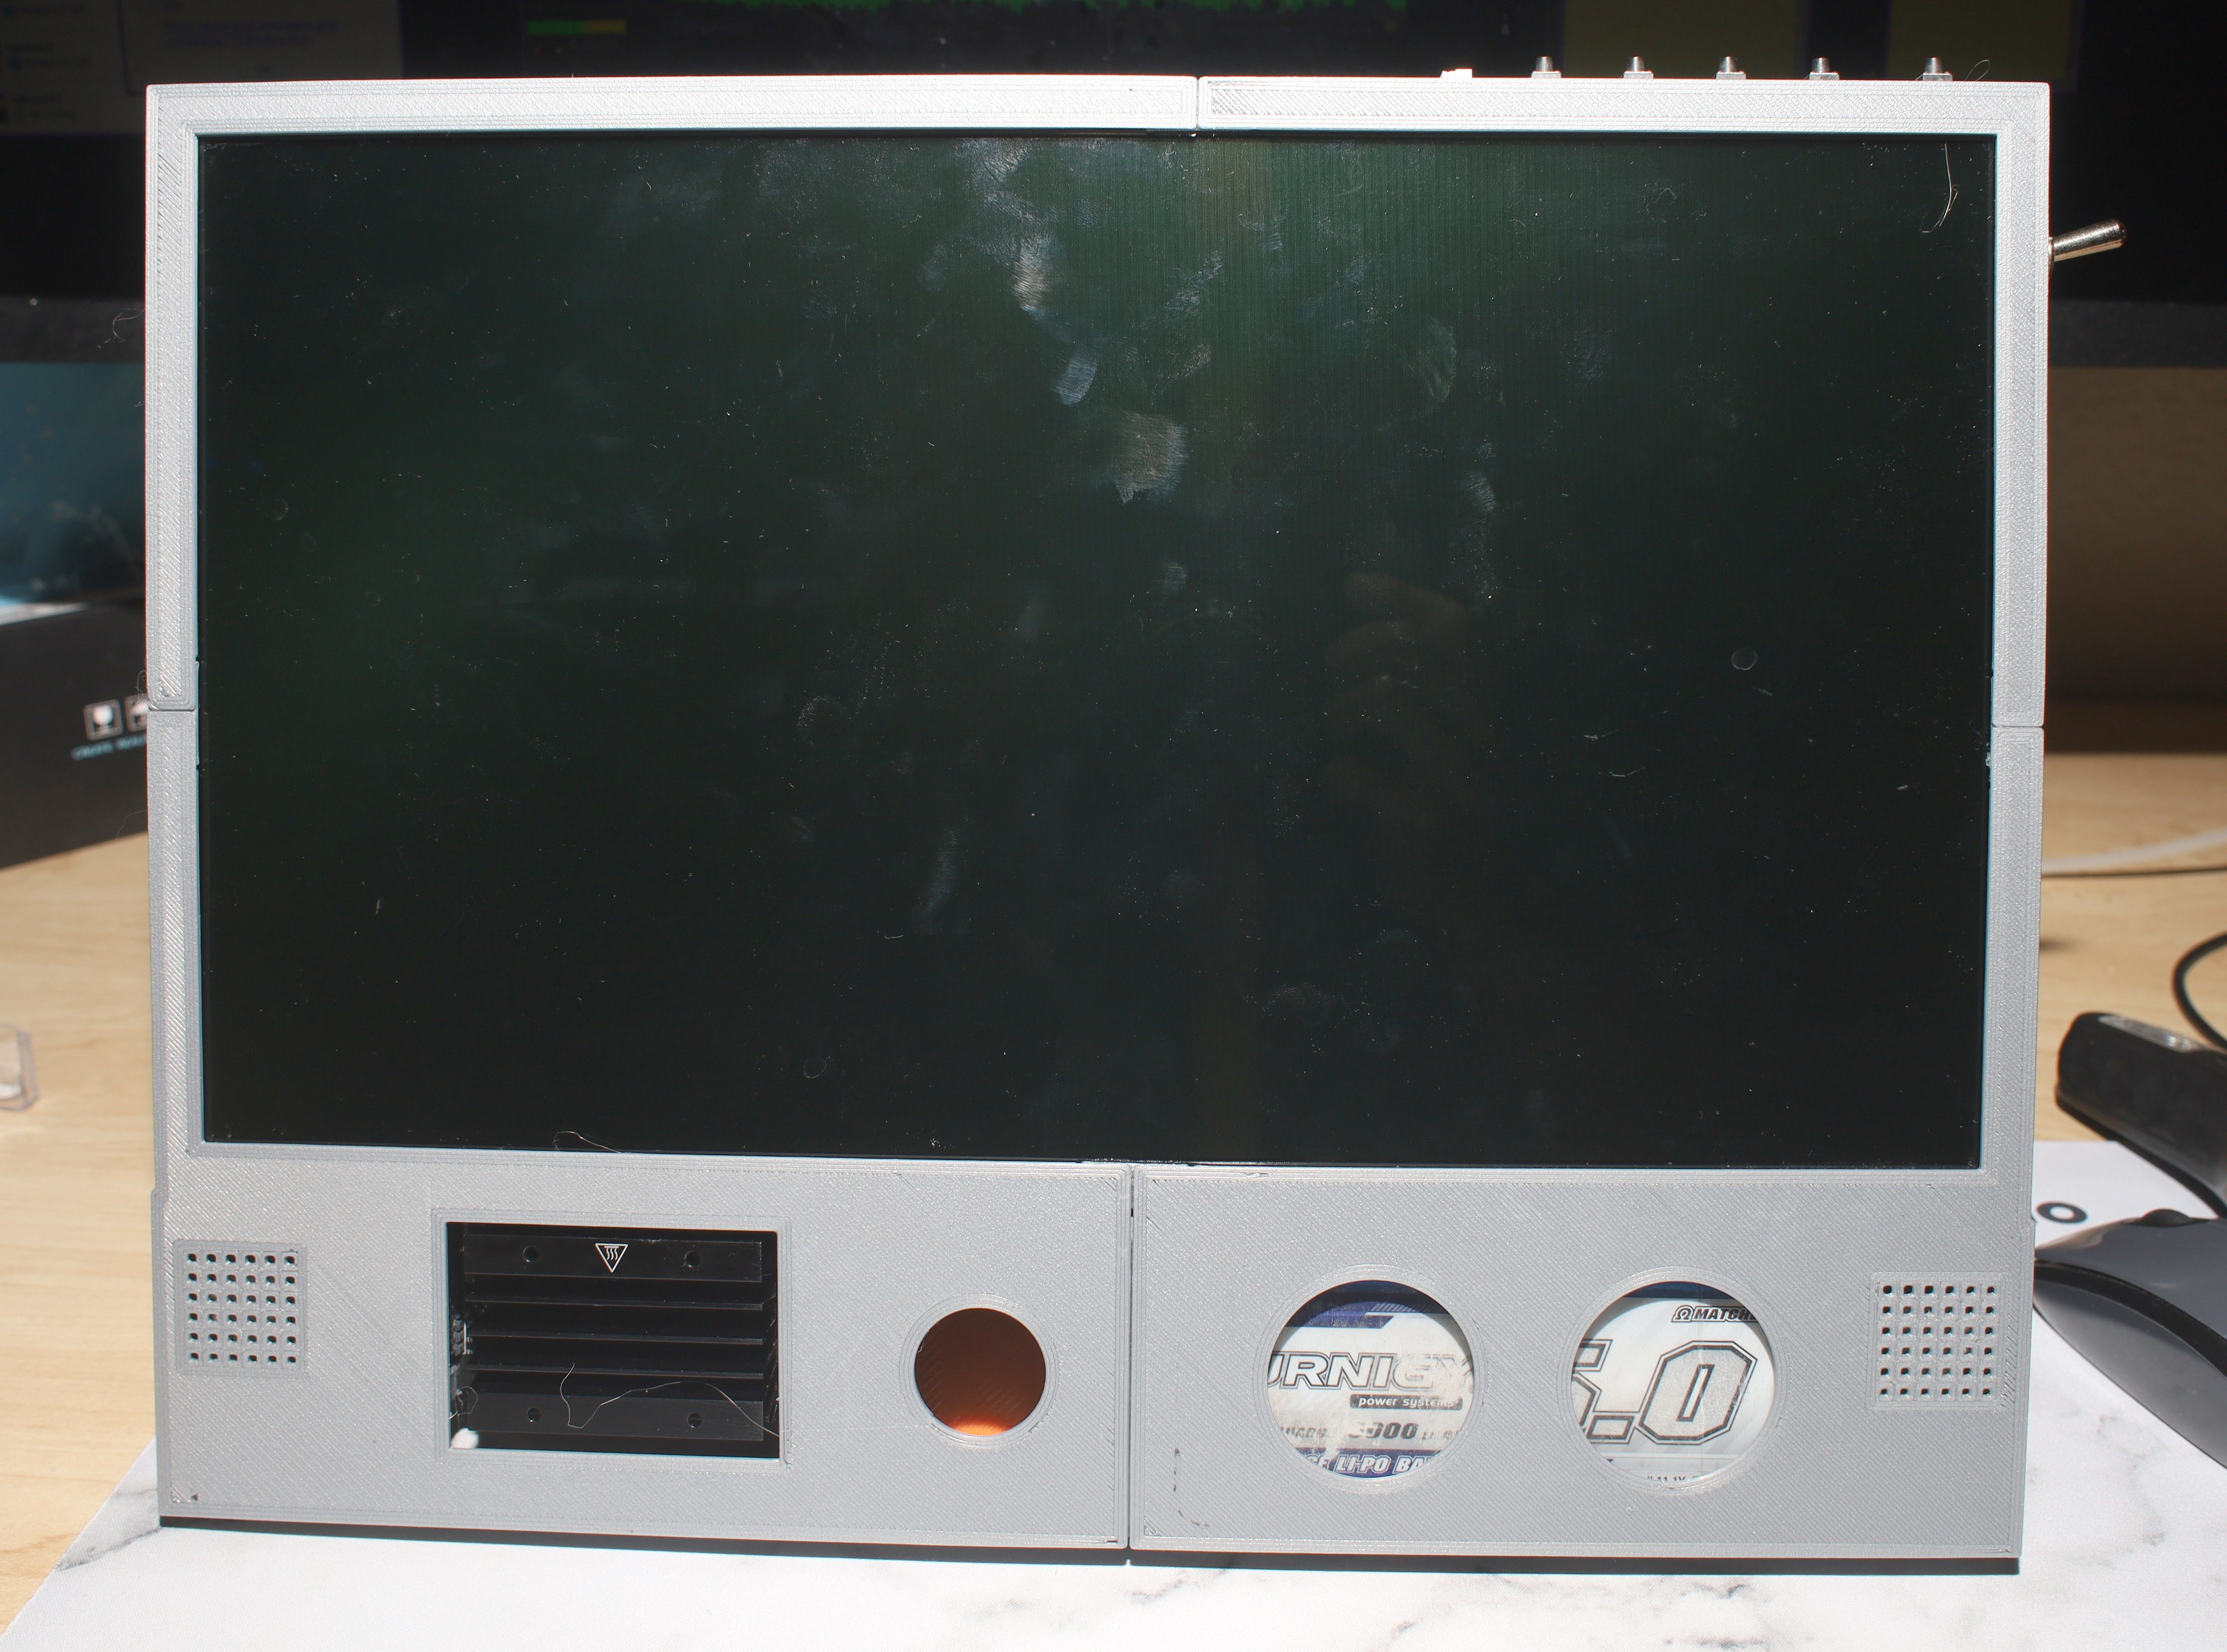
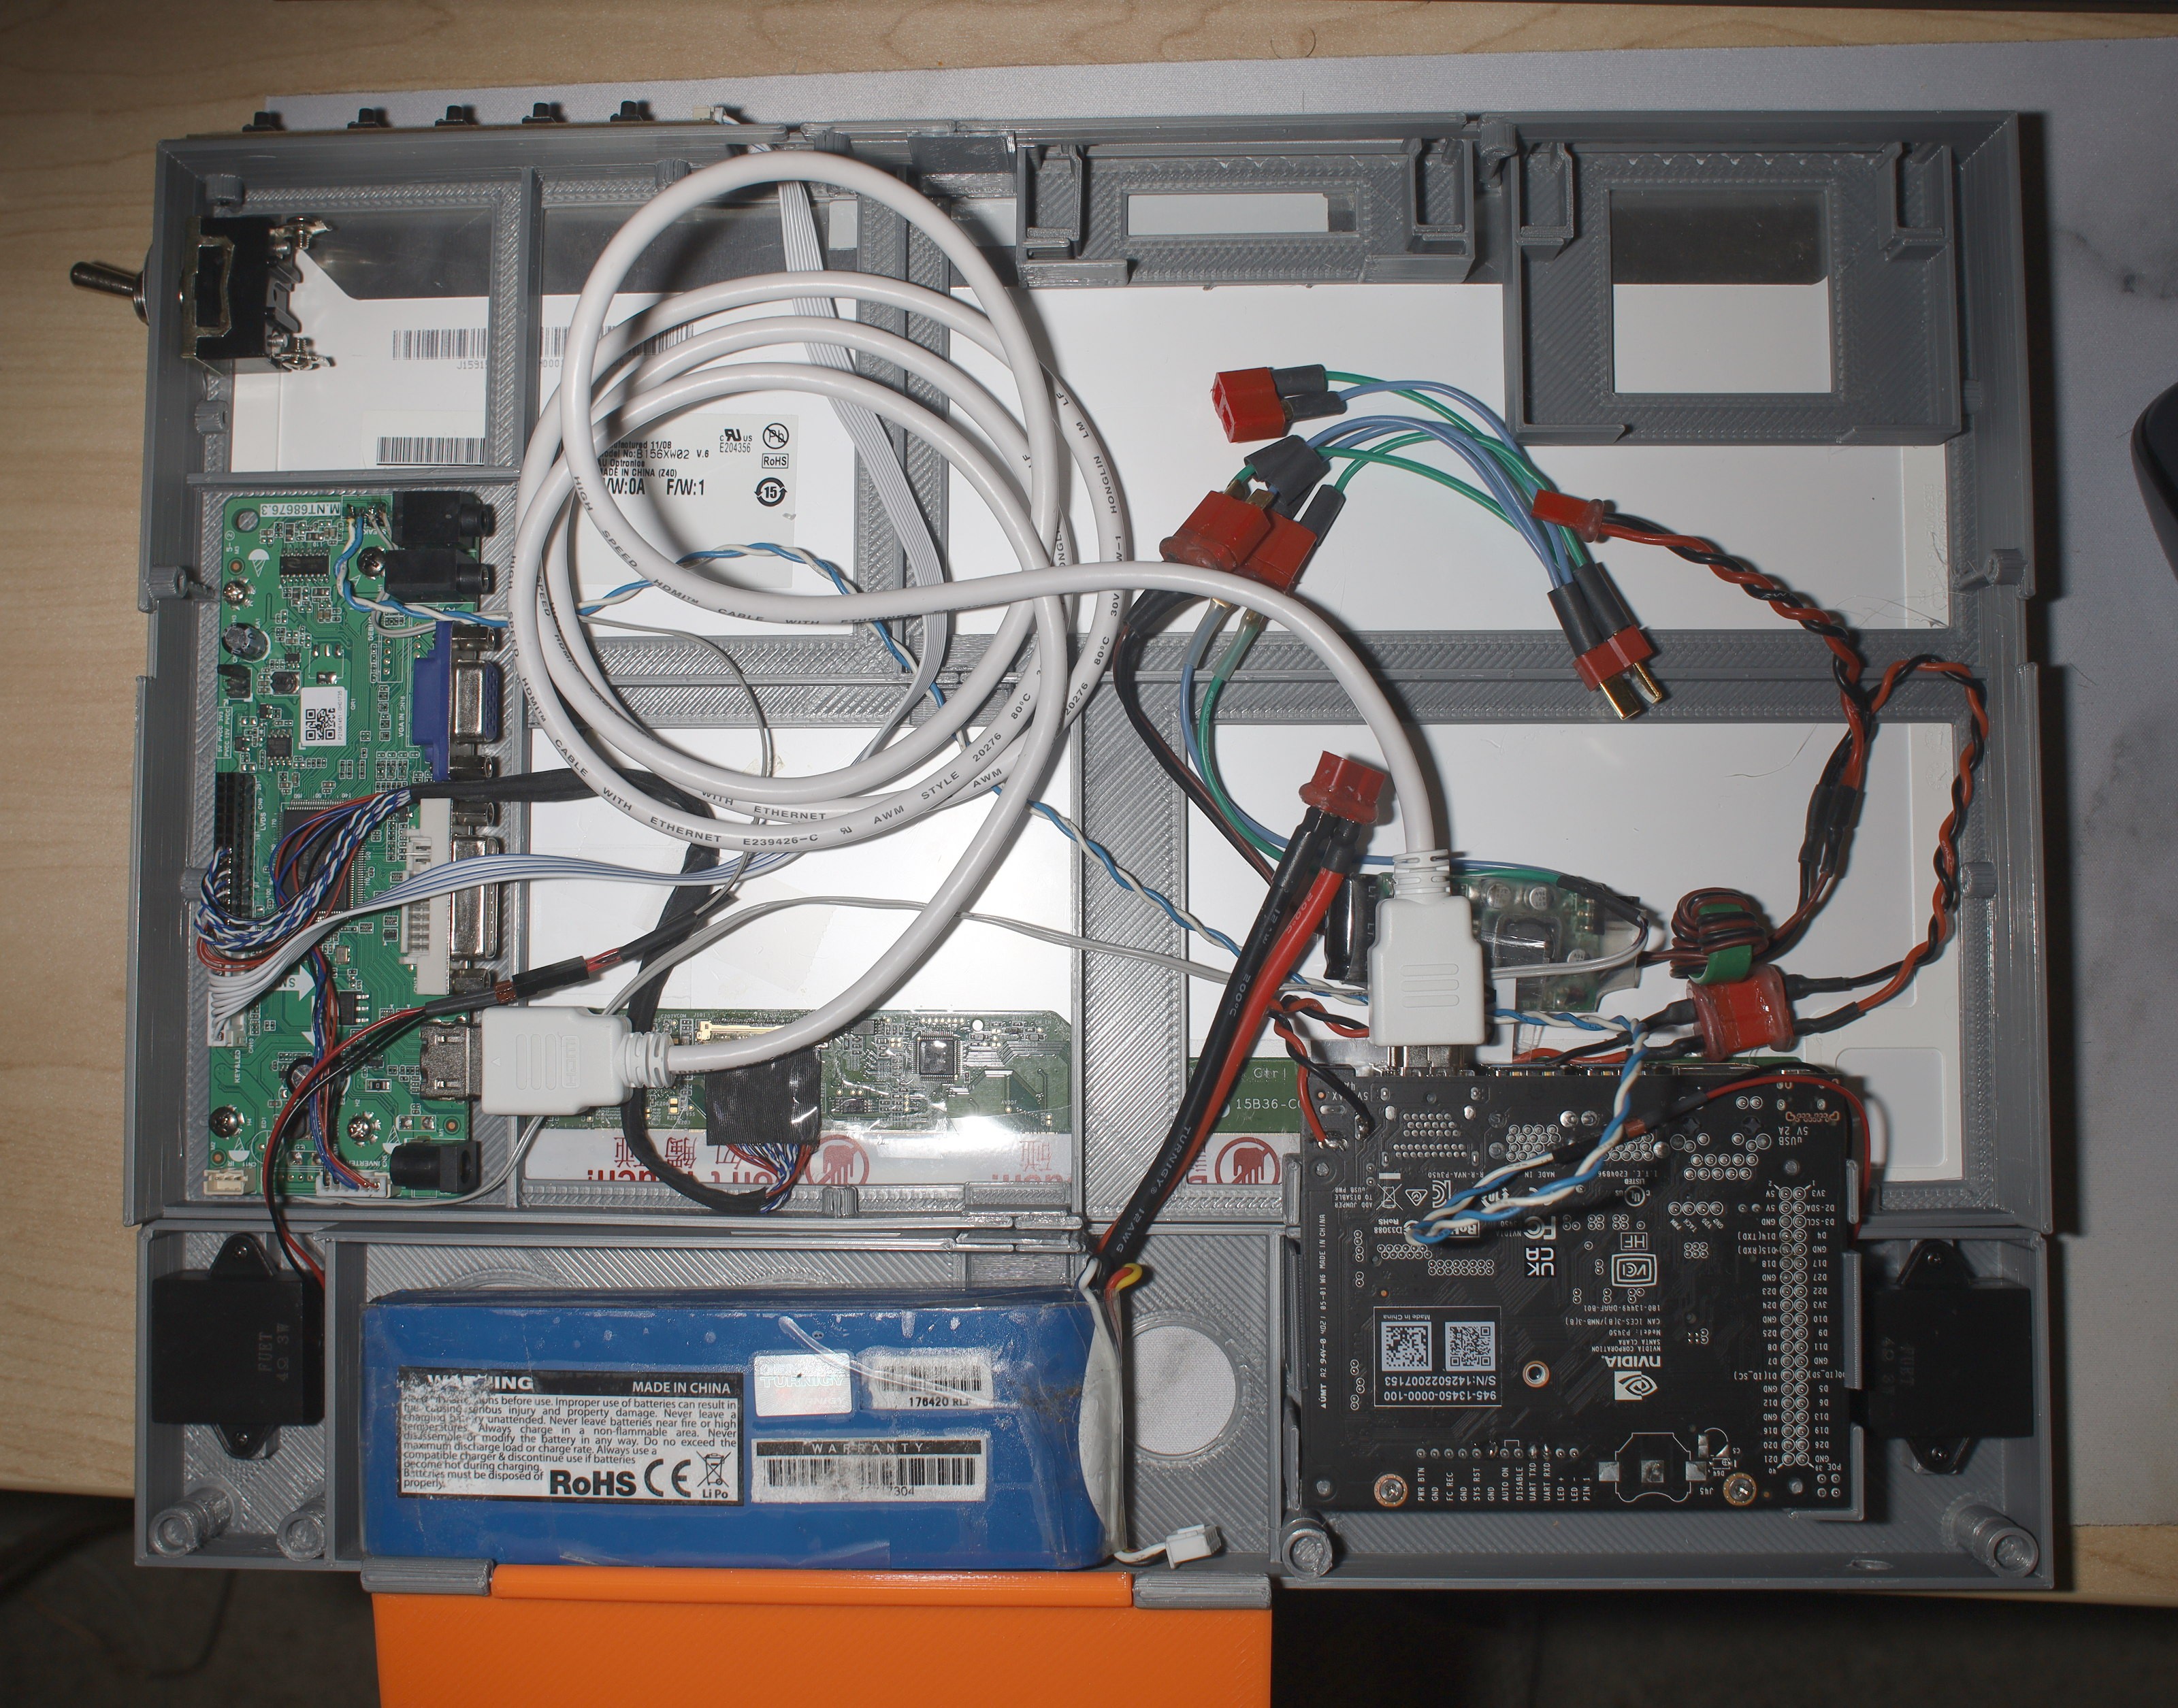
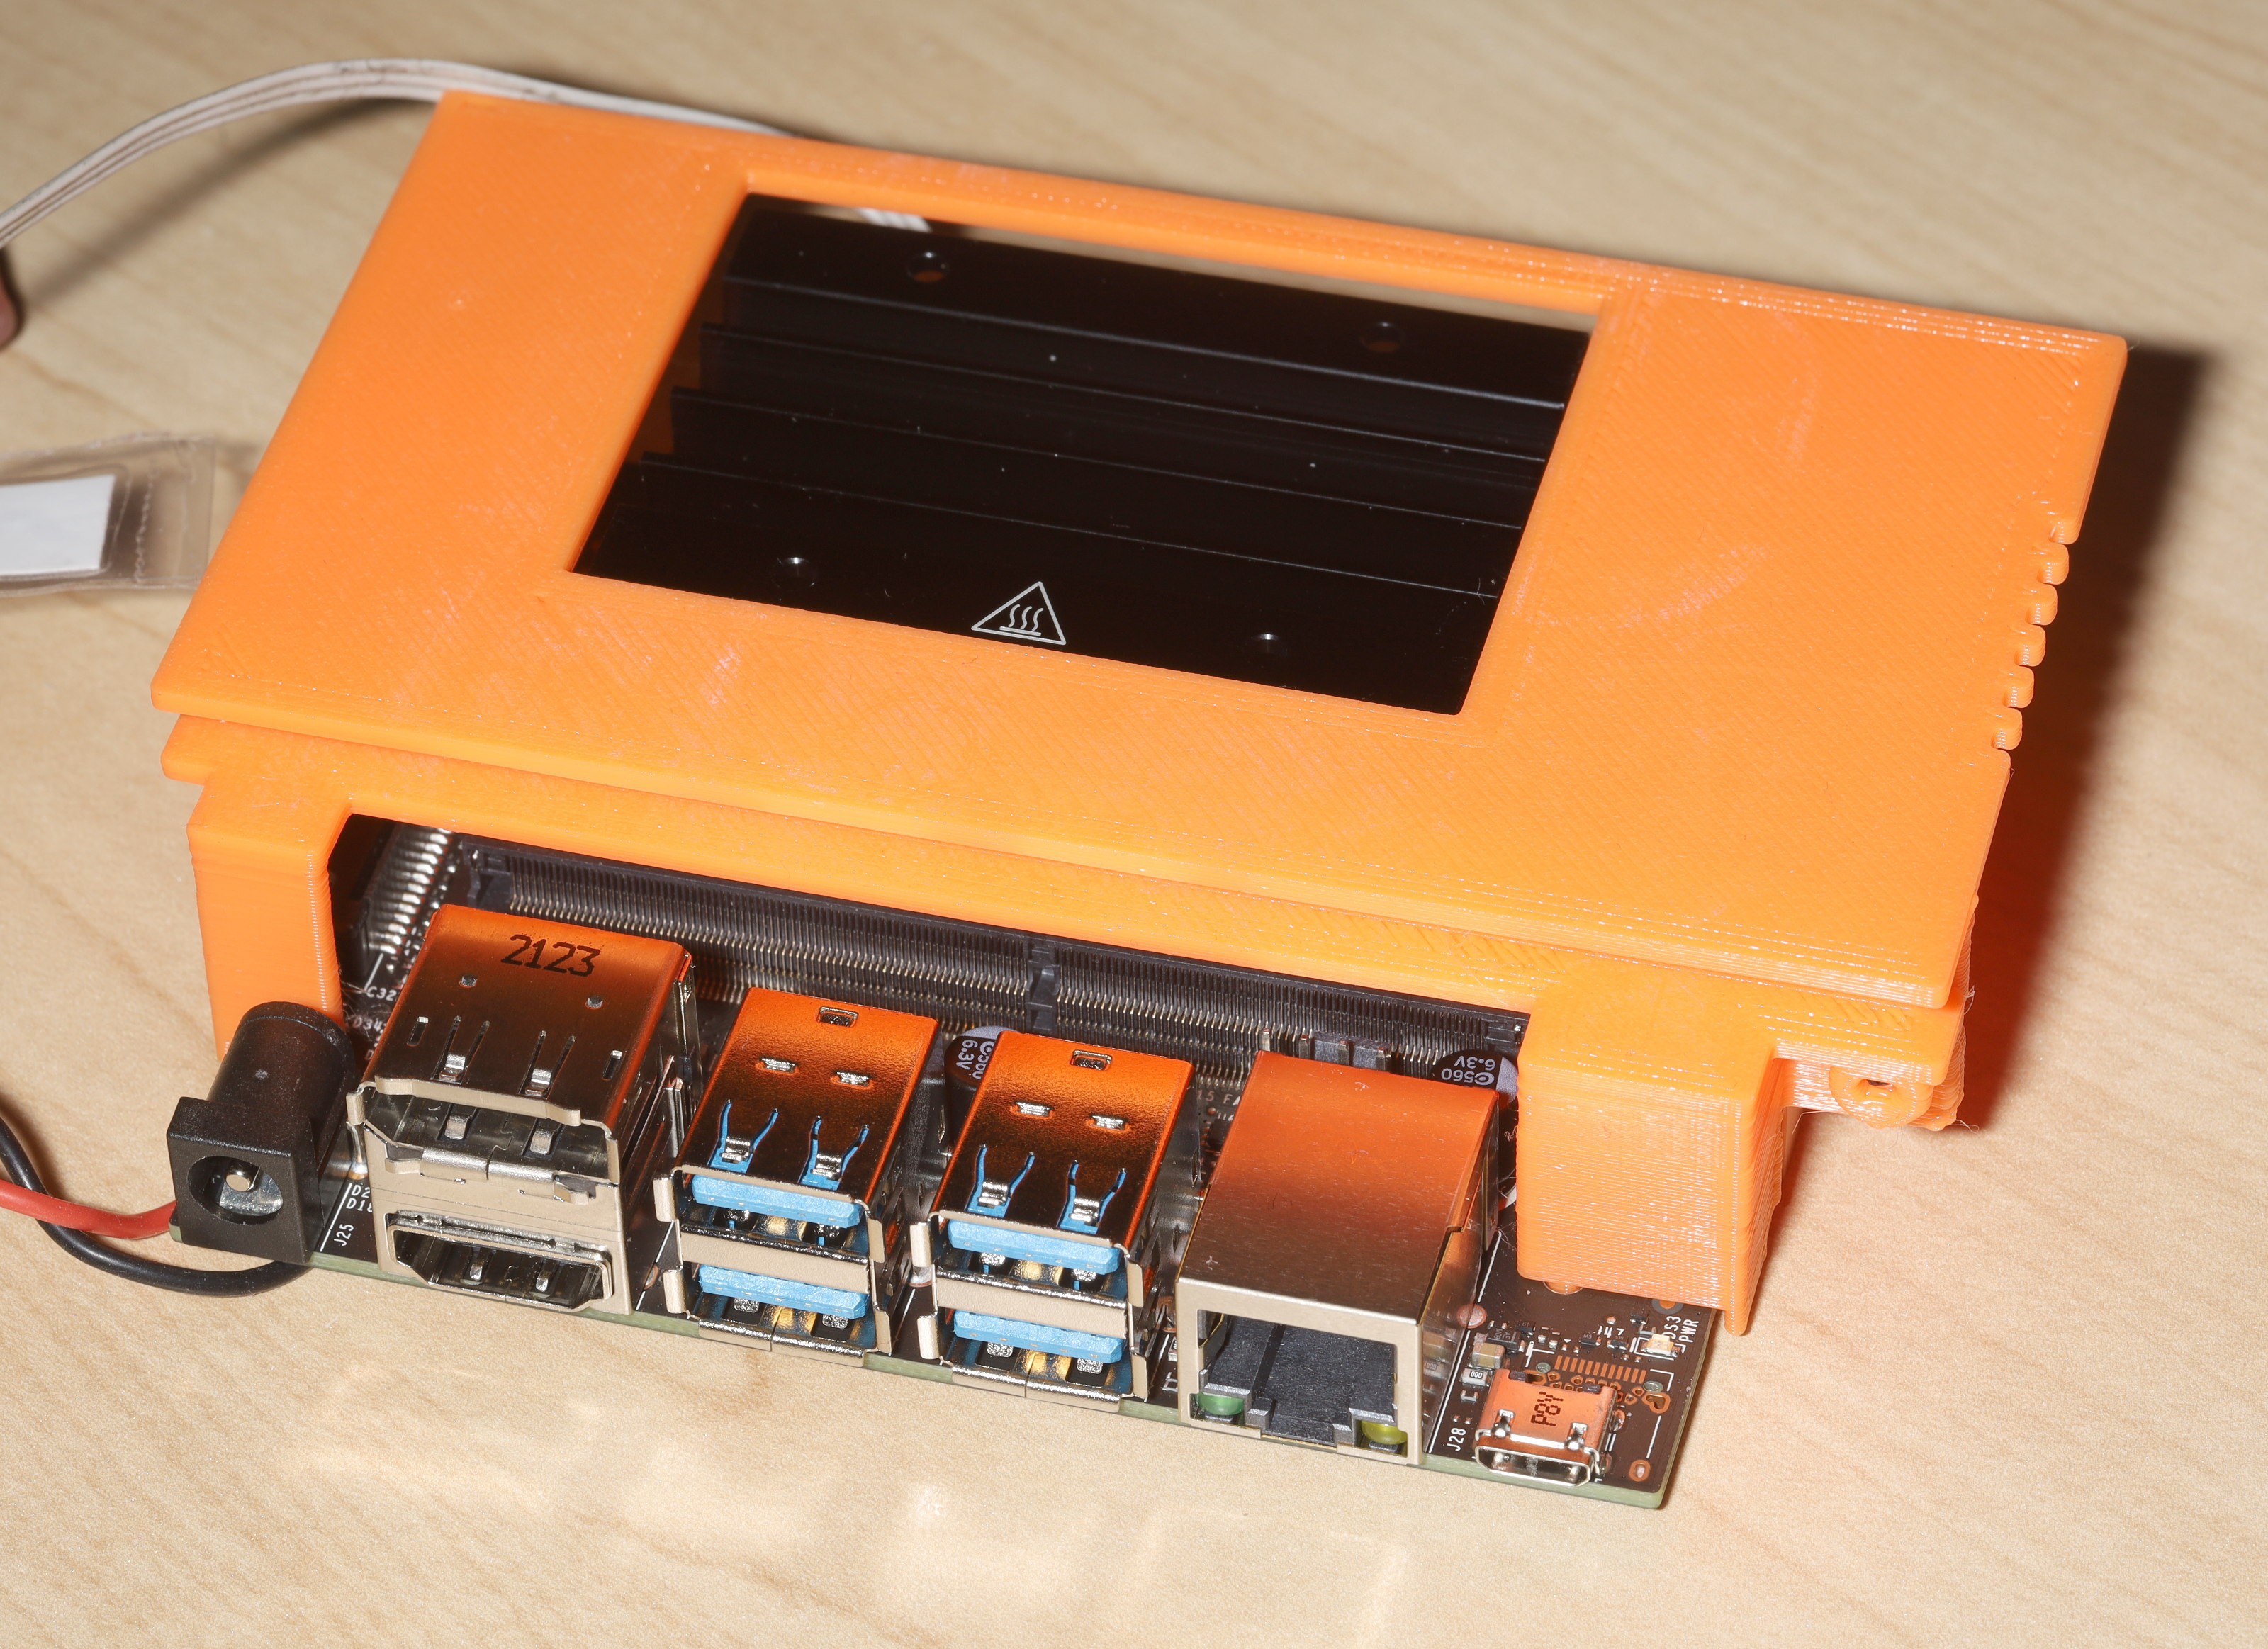
02/17/2023 at 06:54 • 0 commentsThe enclosure continued to be a disaster. The wiring all falls out when it's standing up. The jetson is real hard to install & might be easier with farsteners. Scotch is not enough to stop the LCD cable from glitching. Need to swap it with another cable before ordering a new one. Viewing angle on the LCD isn't wide enough to see it up close. Left & right are covered by the enclosure.
1 option is making the stand a permanent back panel & making new lighter legs to stand it on. Another option is gluing hooks on the existing case. It's not obvious what kind of cable clamps would work. The buck converter, switch cable & battery cable are the mane problems.
Finally, the webcam needs to be angled down for the rep counter.
The predicted hell of compiling openpose on a jetson did not disappoint. The build notes were added to the countreps README. Opencv's webcam support didn't work, so in went a new V4L2 driver. The mane problem even on the 4 gig jetson proved to be RAM. It requires a swap space on a USB flash to do anything at all. An
M.2 flash would be better but the jetson supports the M.2 key E derivative of M2. The M.2 key E derivative is used for laptop wifi so there are no SSDs for it.
A 192x192 network size runs at 2.5fps & appears to swap every frame to the USB flash.
A 128x128 network size & below runs at 5fps.
Power consumption seems to be 30W. The heatsink gets flaming hot. It seems to throttle the GPU based on temperature so the hottest thermal zone stays at 89C.
Temperature can be monitored with:
watch cat ./class/thermal/thermal_zone*/tempA direct framebuffer GUI would only buy a few megabytes. The X server only burns 20MB. Lions still remember when that was a huge amount of memory & what it was like to be 1 of the few animals with enough RAM to run XFree86.
There is a hit saying openpose should be performed using tensorrt instead of caffe. There are 2 models using tensorrt but only 1 says it's based on the openpose model.
https://github.com/NVIDIA-AI-IOT/trt_pose
https://github.com/spacewalk01/tensorrt-openpose
Part of the game is the TRT models only detect 18 body parts while the caffe model detects 25 body parts. The caffe model detects 3 more points in the feet & 1 more in the pelvis, which probably don't matter.
-
Wiring mockup #2
02/15/2023 at 06:05 • 0 comments![]()
![]()
![]()
![]()
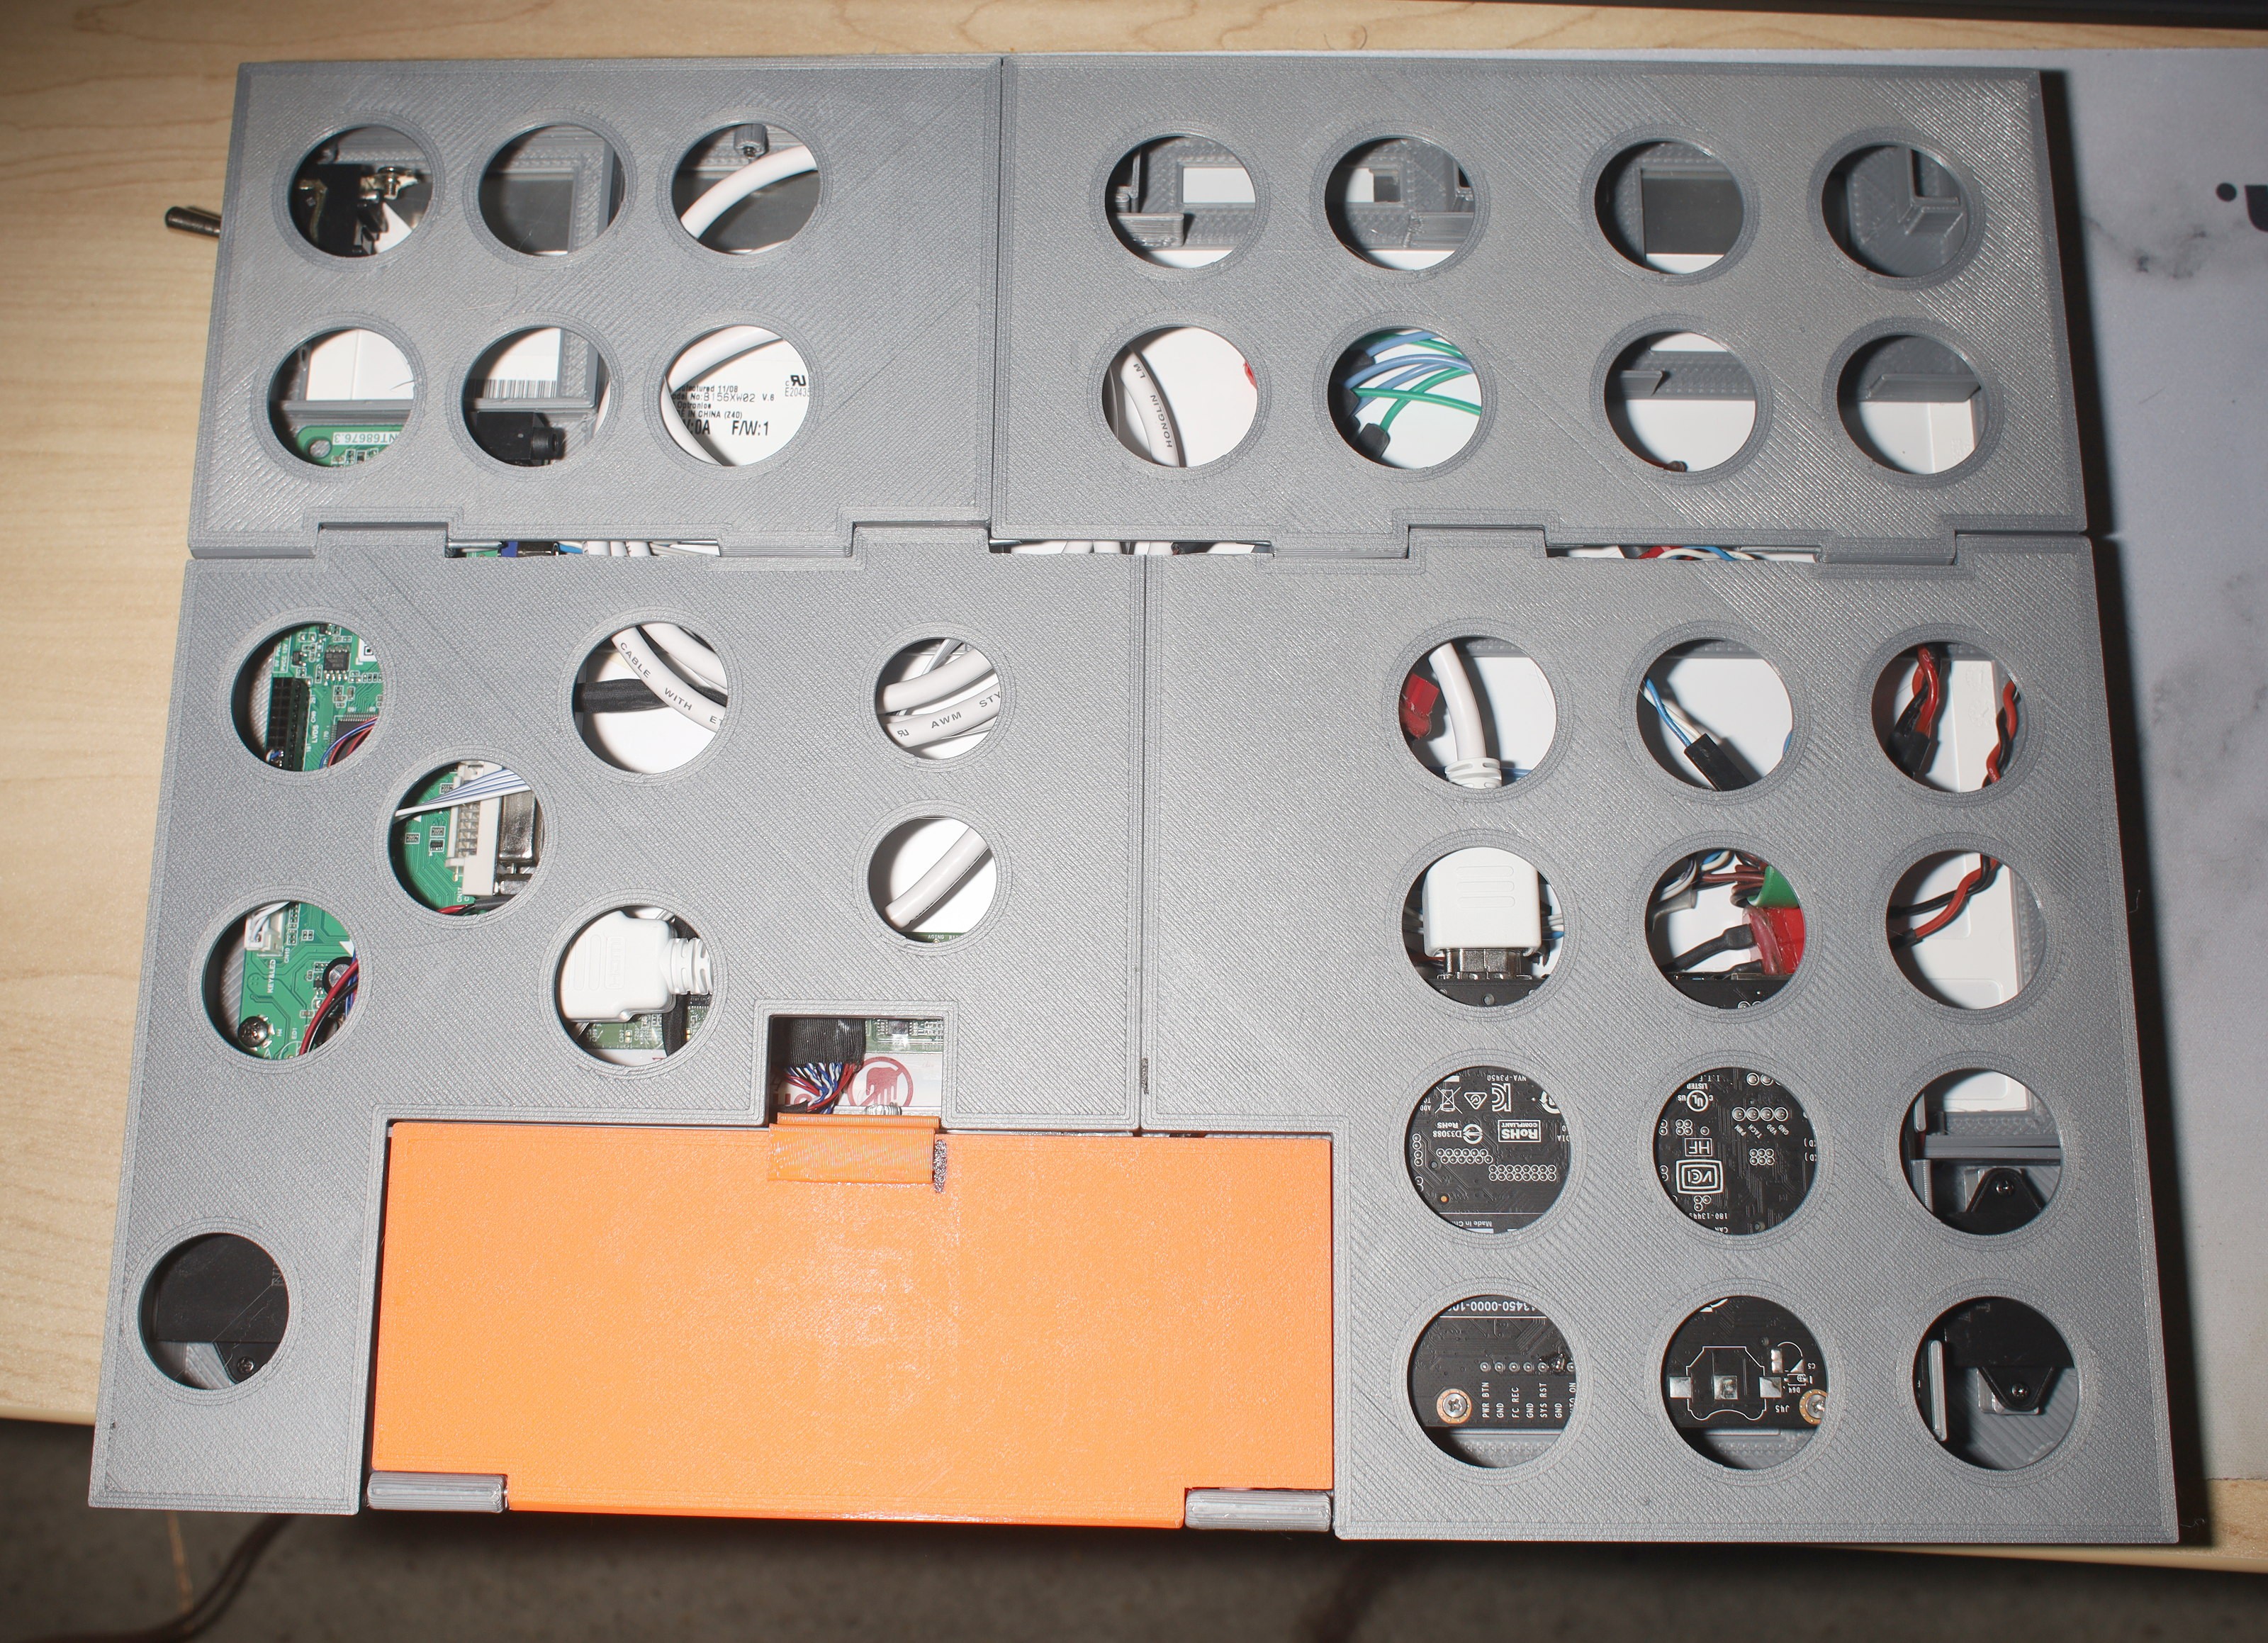
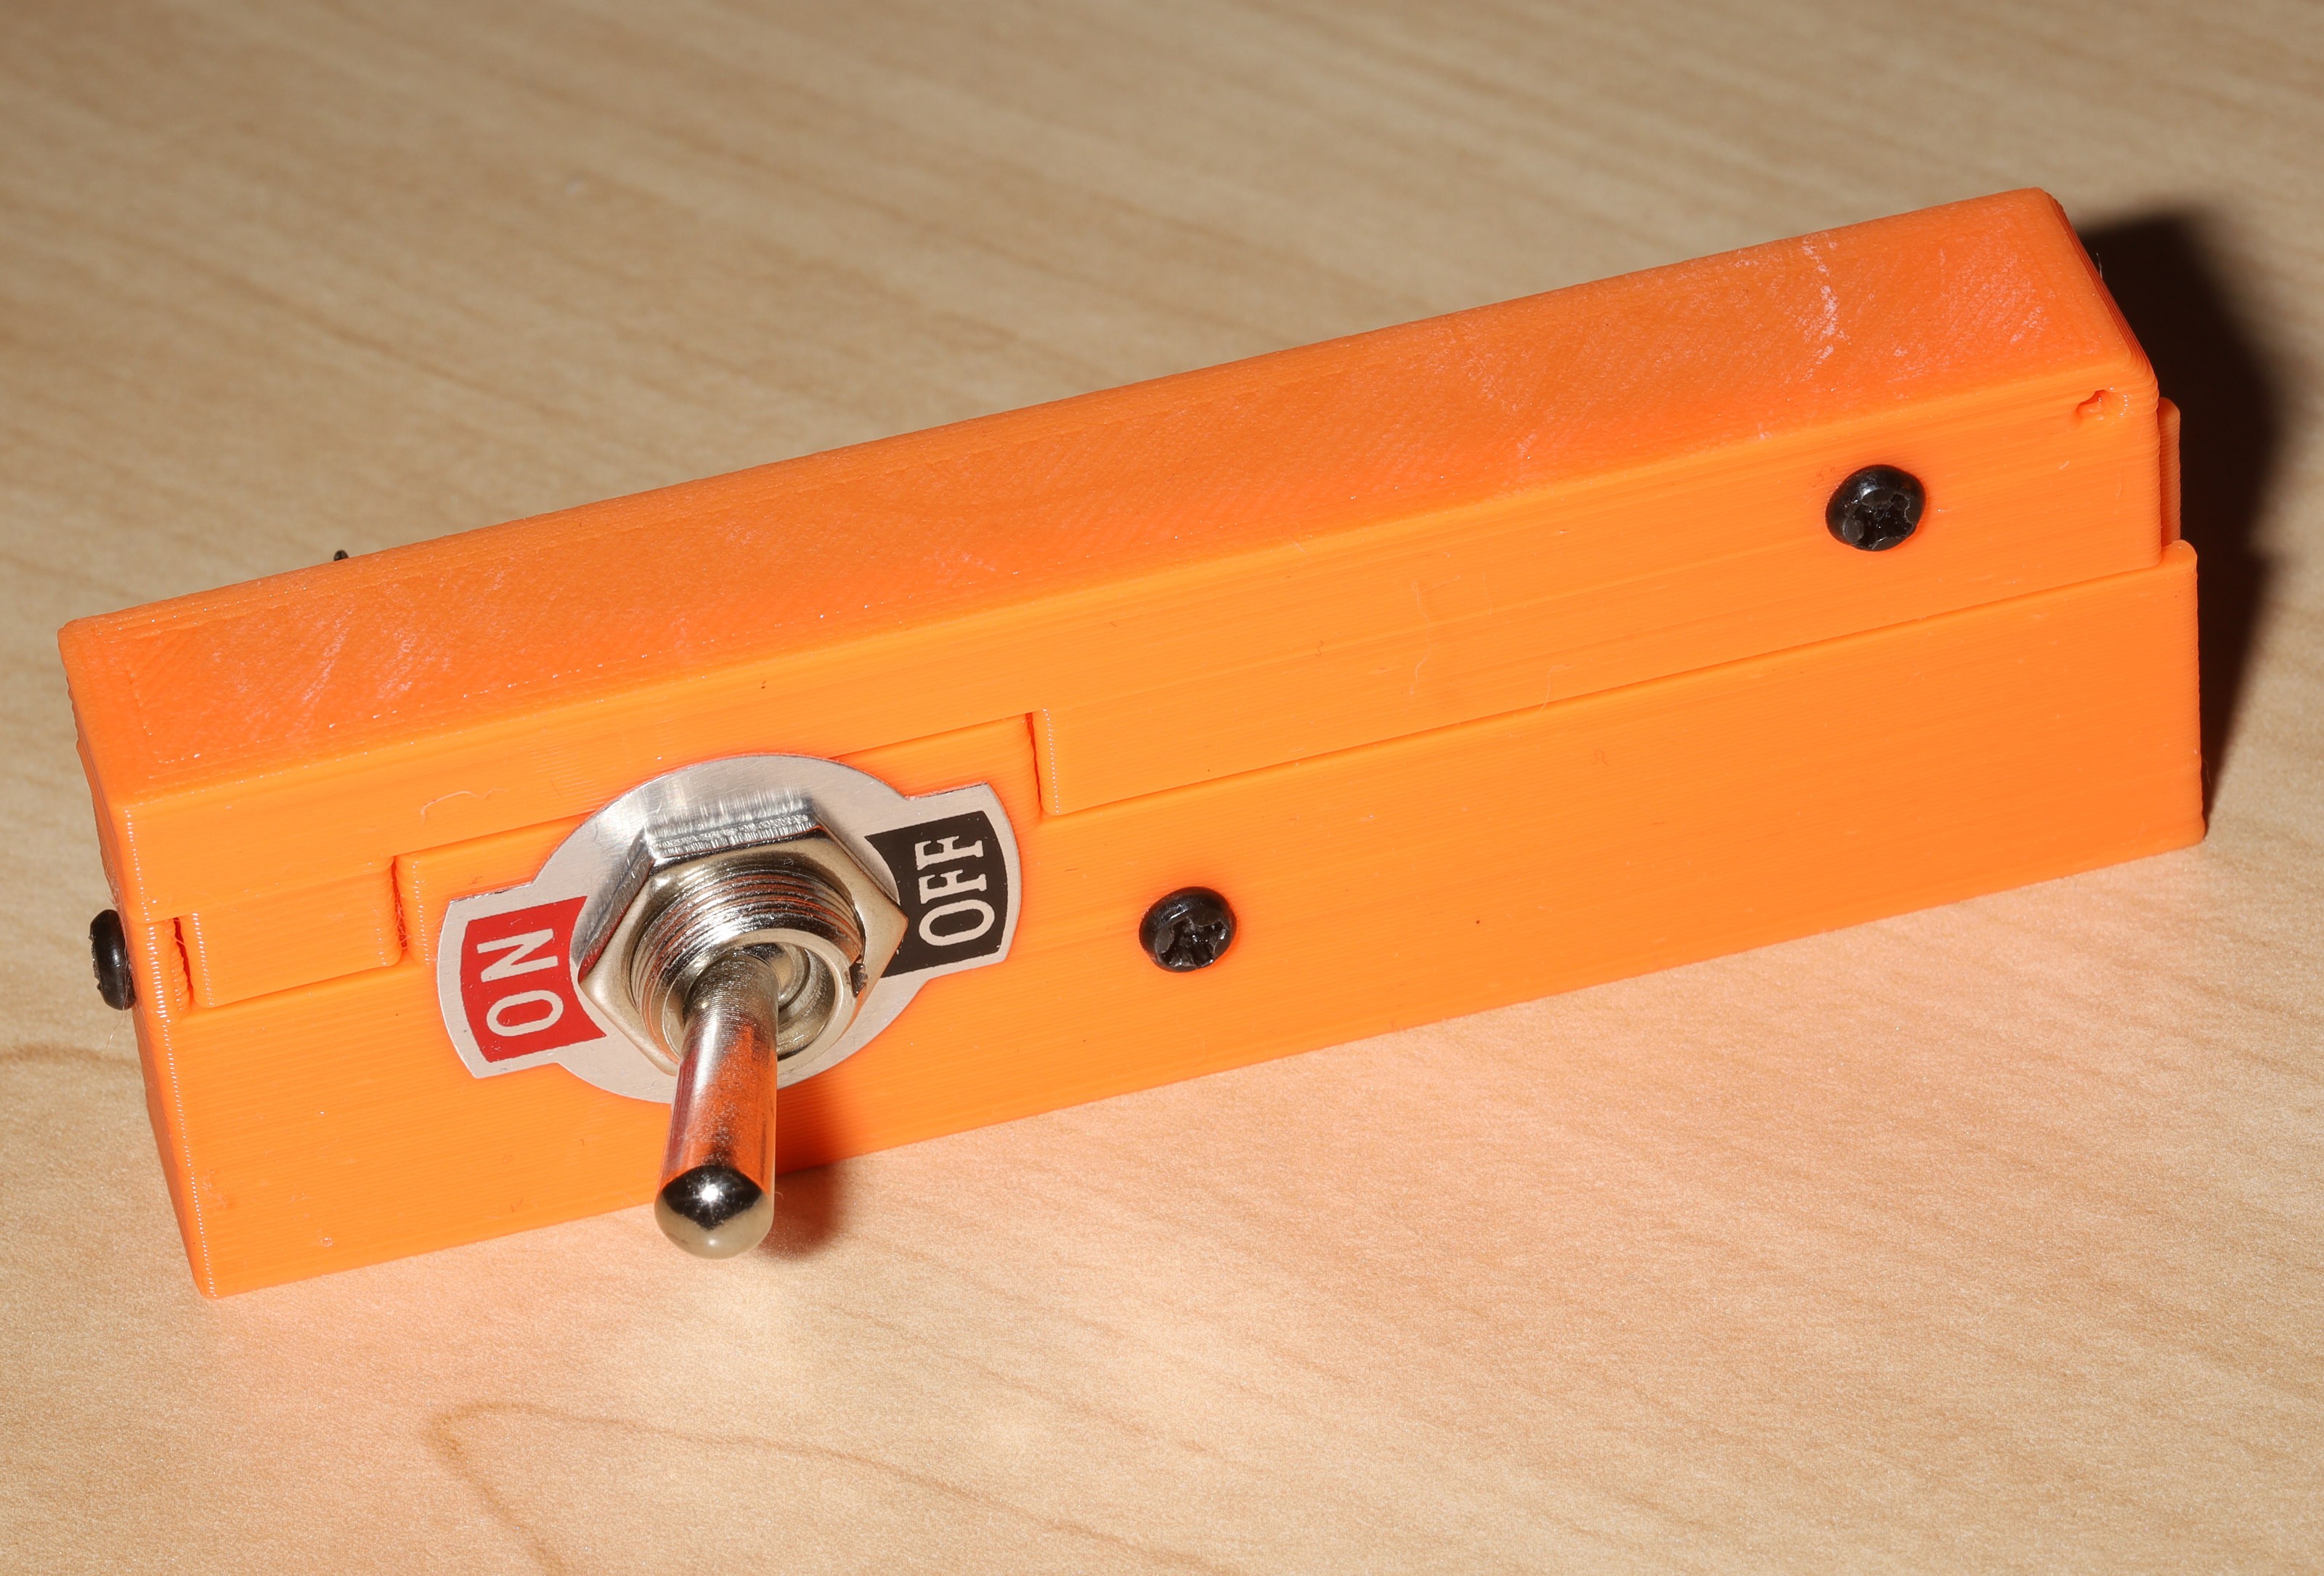
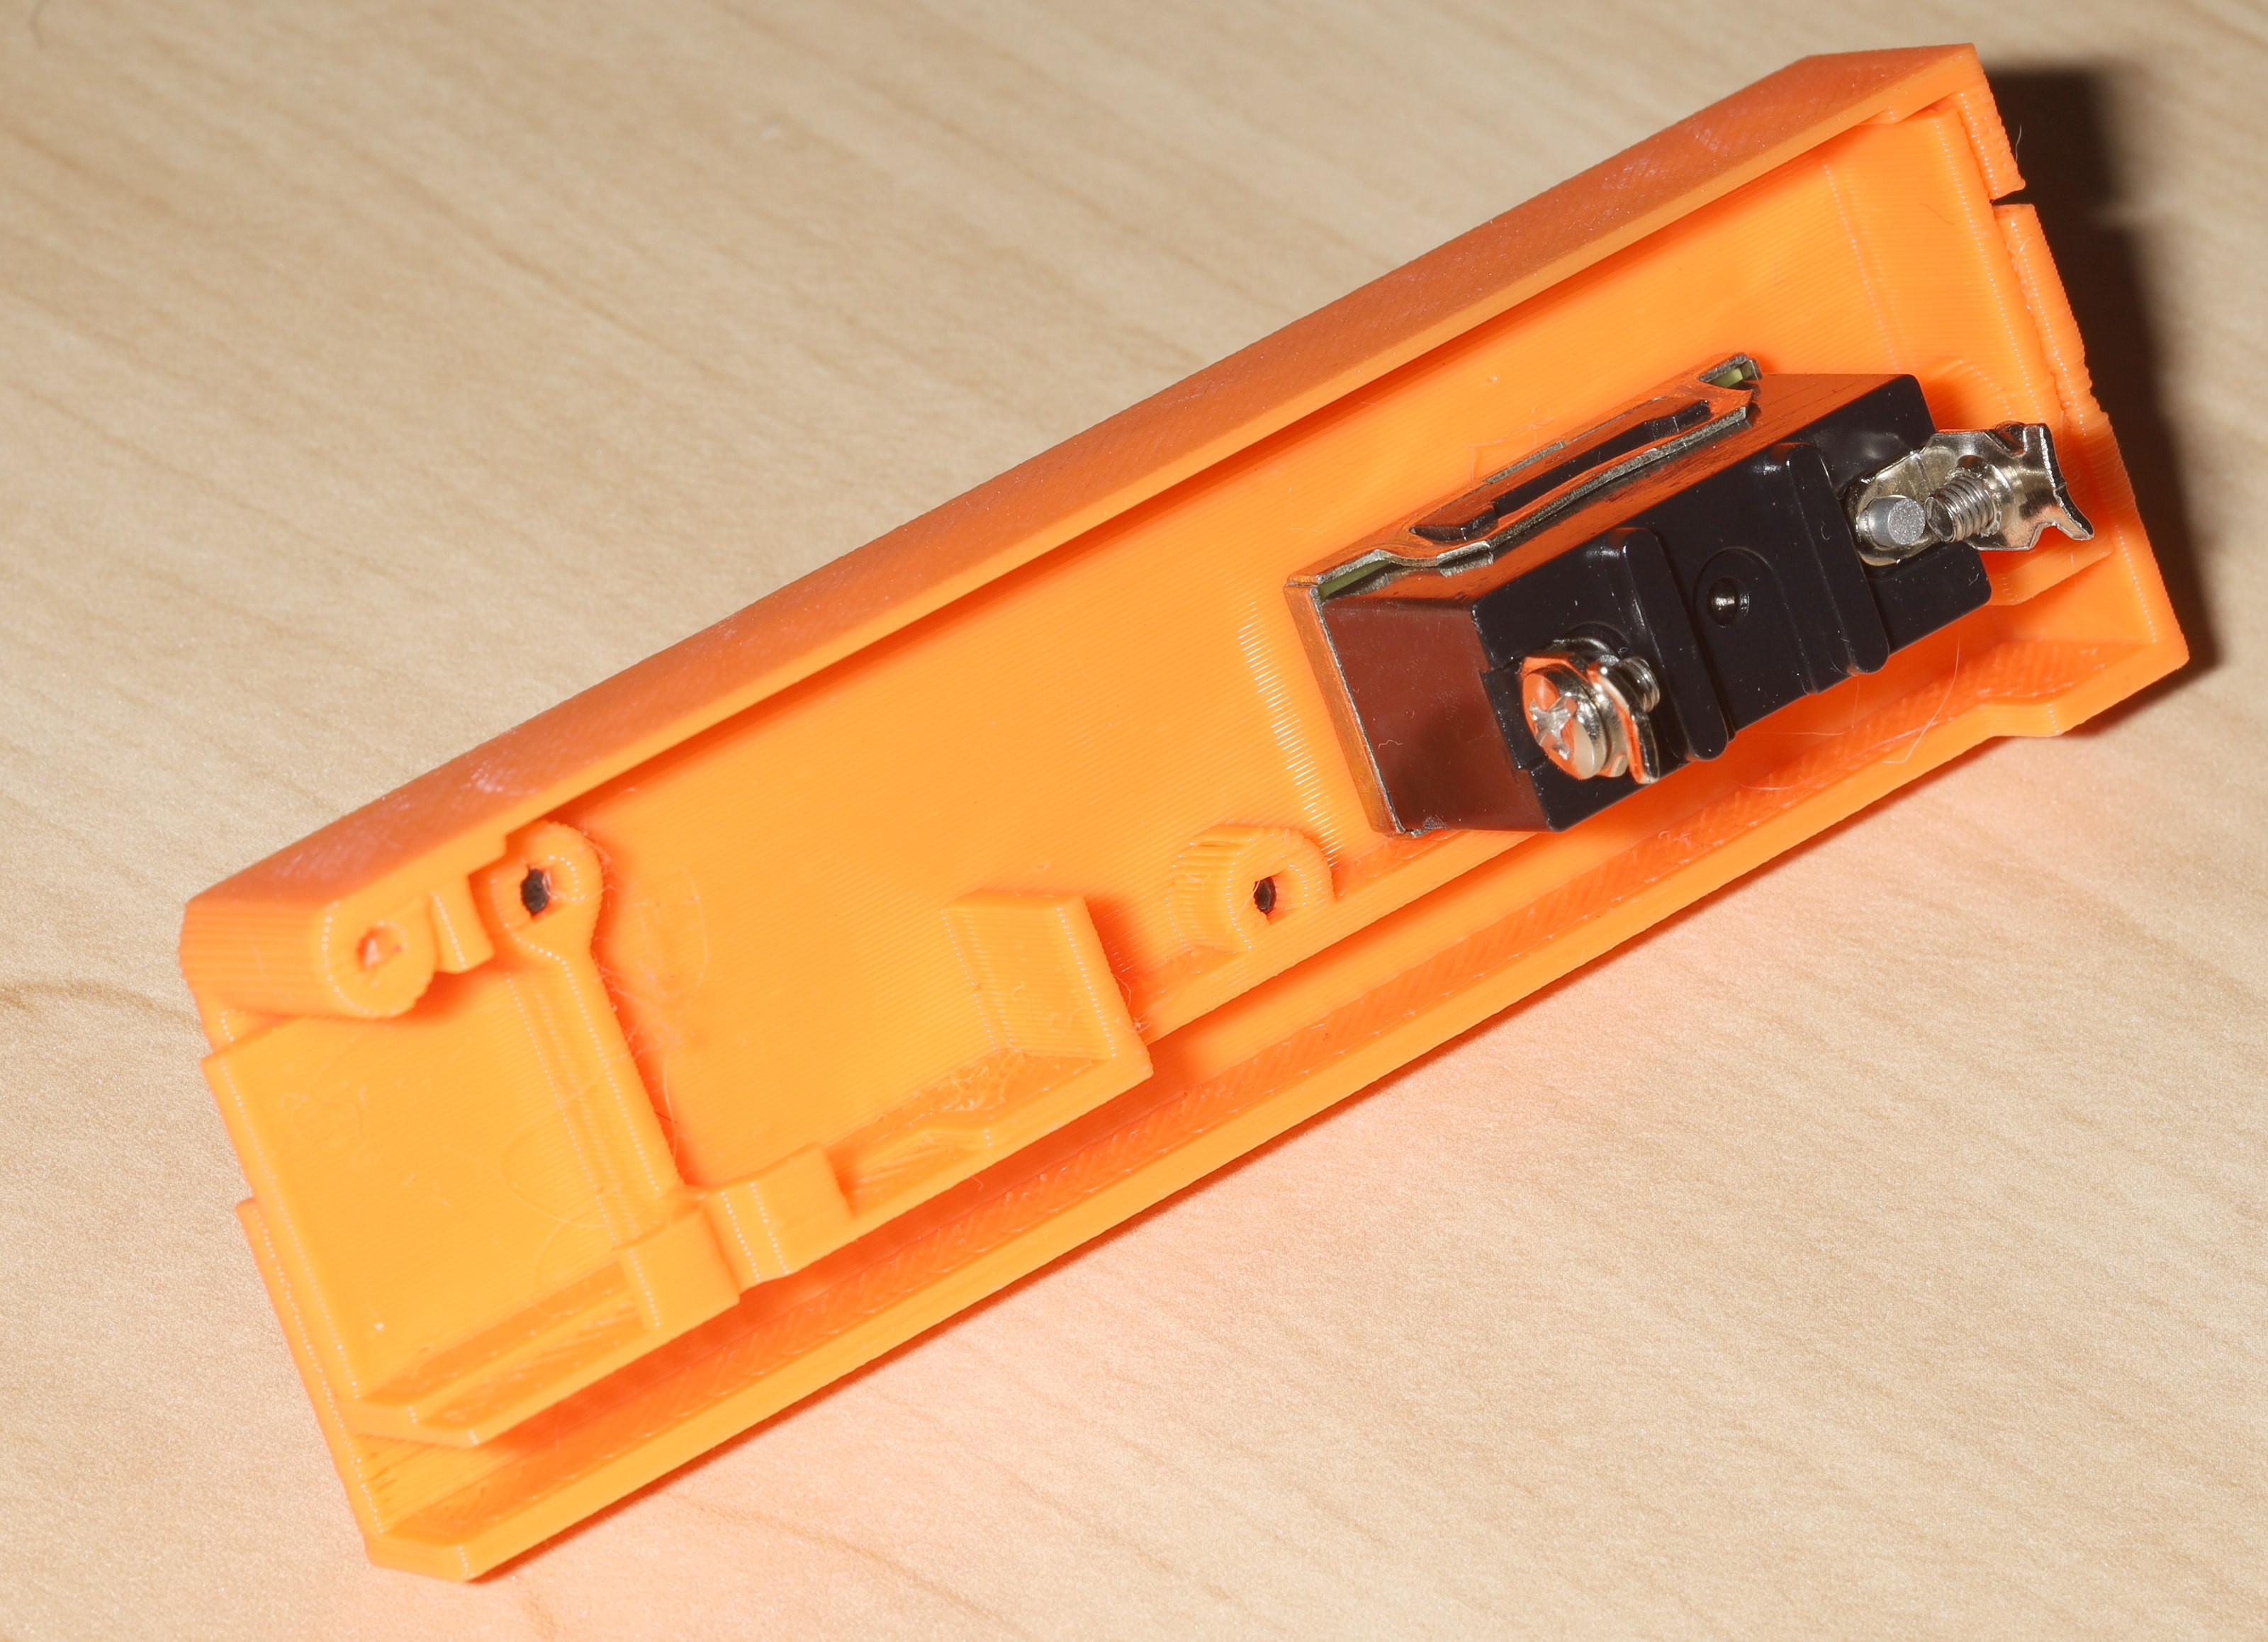
Got the power switch connected. The jetson clamps are too short. There is a desire to make a pure IR board so the rep counter doesn't need servo wires flopping around. That entails a risk of forgetting to change boards.
-
Wiring mockup
02/14/2023 at 05:16 • 0 comments![]()
![]()
![]()
![]()
The wiring managed to fit. The power switch still needs to interrupt the battery connector. The LVD cable is right where a high traffic area is for the battery door. The jetson has a 12V connector even though it's supposed to get 5V. The big HDMI cable managed to fit despite some discomfort. That needs a 1ft flex cable. The back panel manages to contain everything if it flops around. Ideally, the LCD panel wouldn't be supporting anything. A few things needed to be taped to the LCD panel anyway.
-
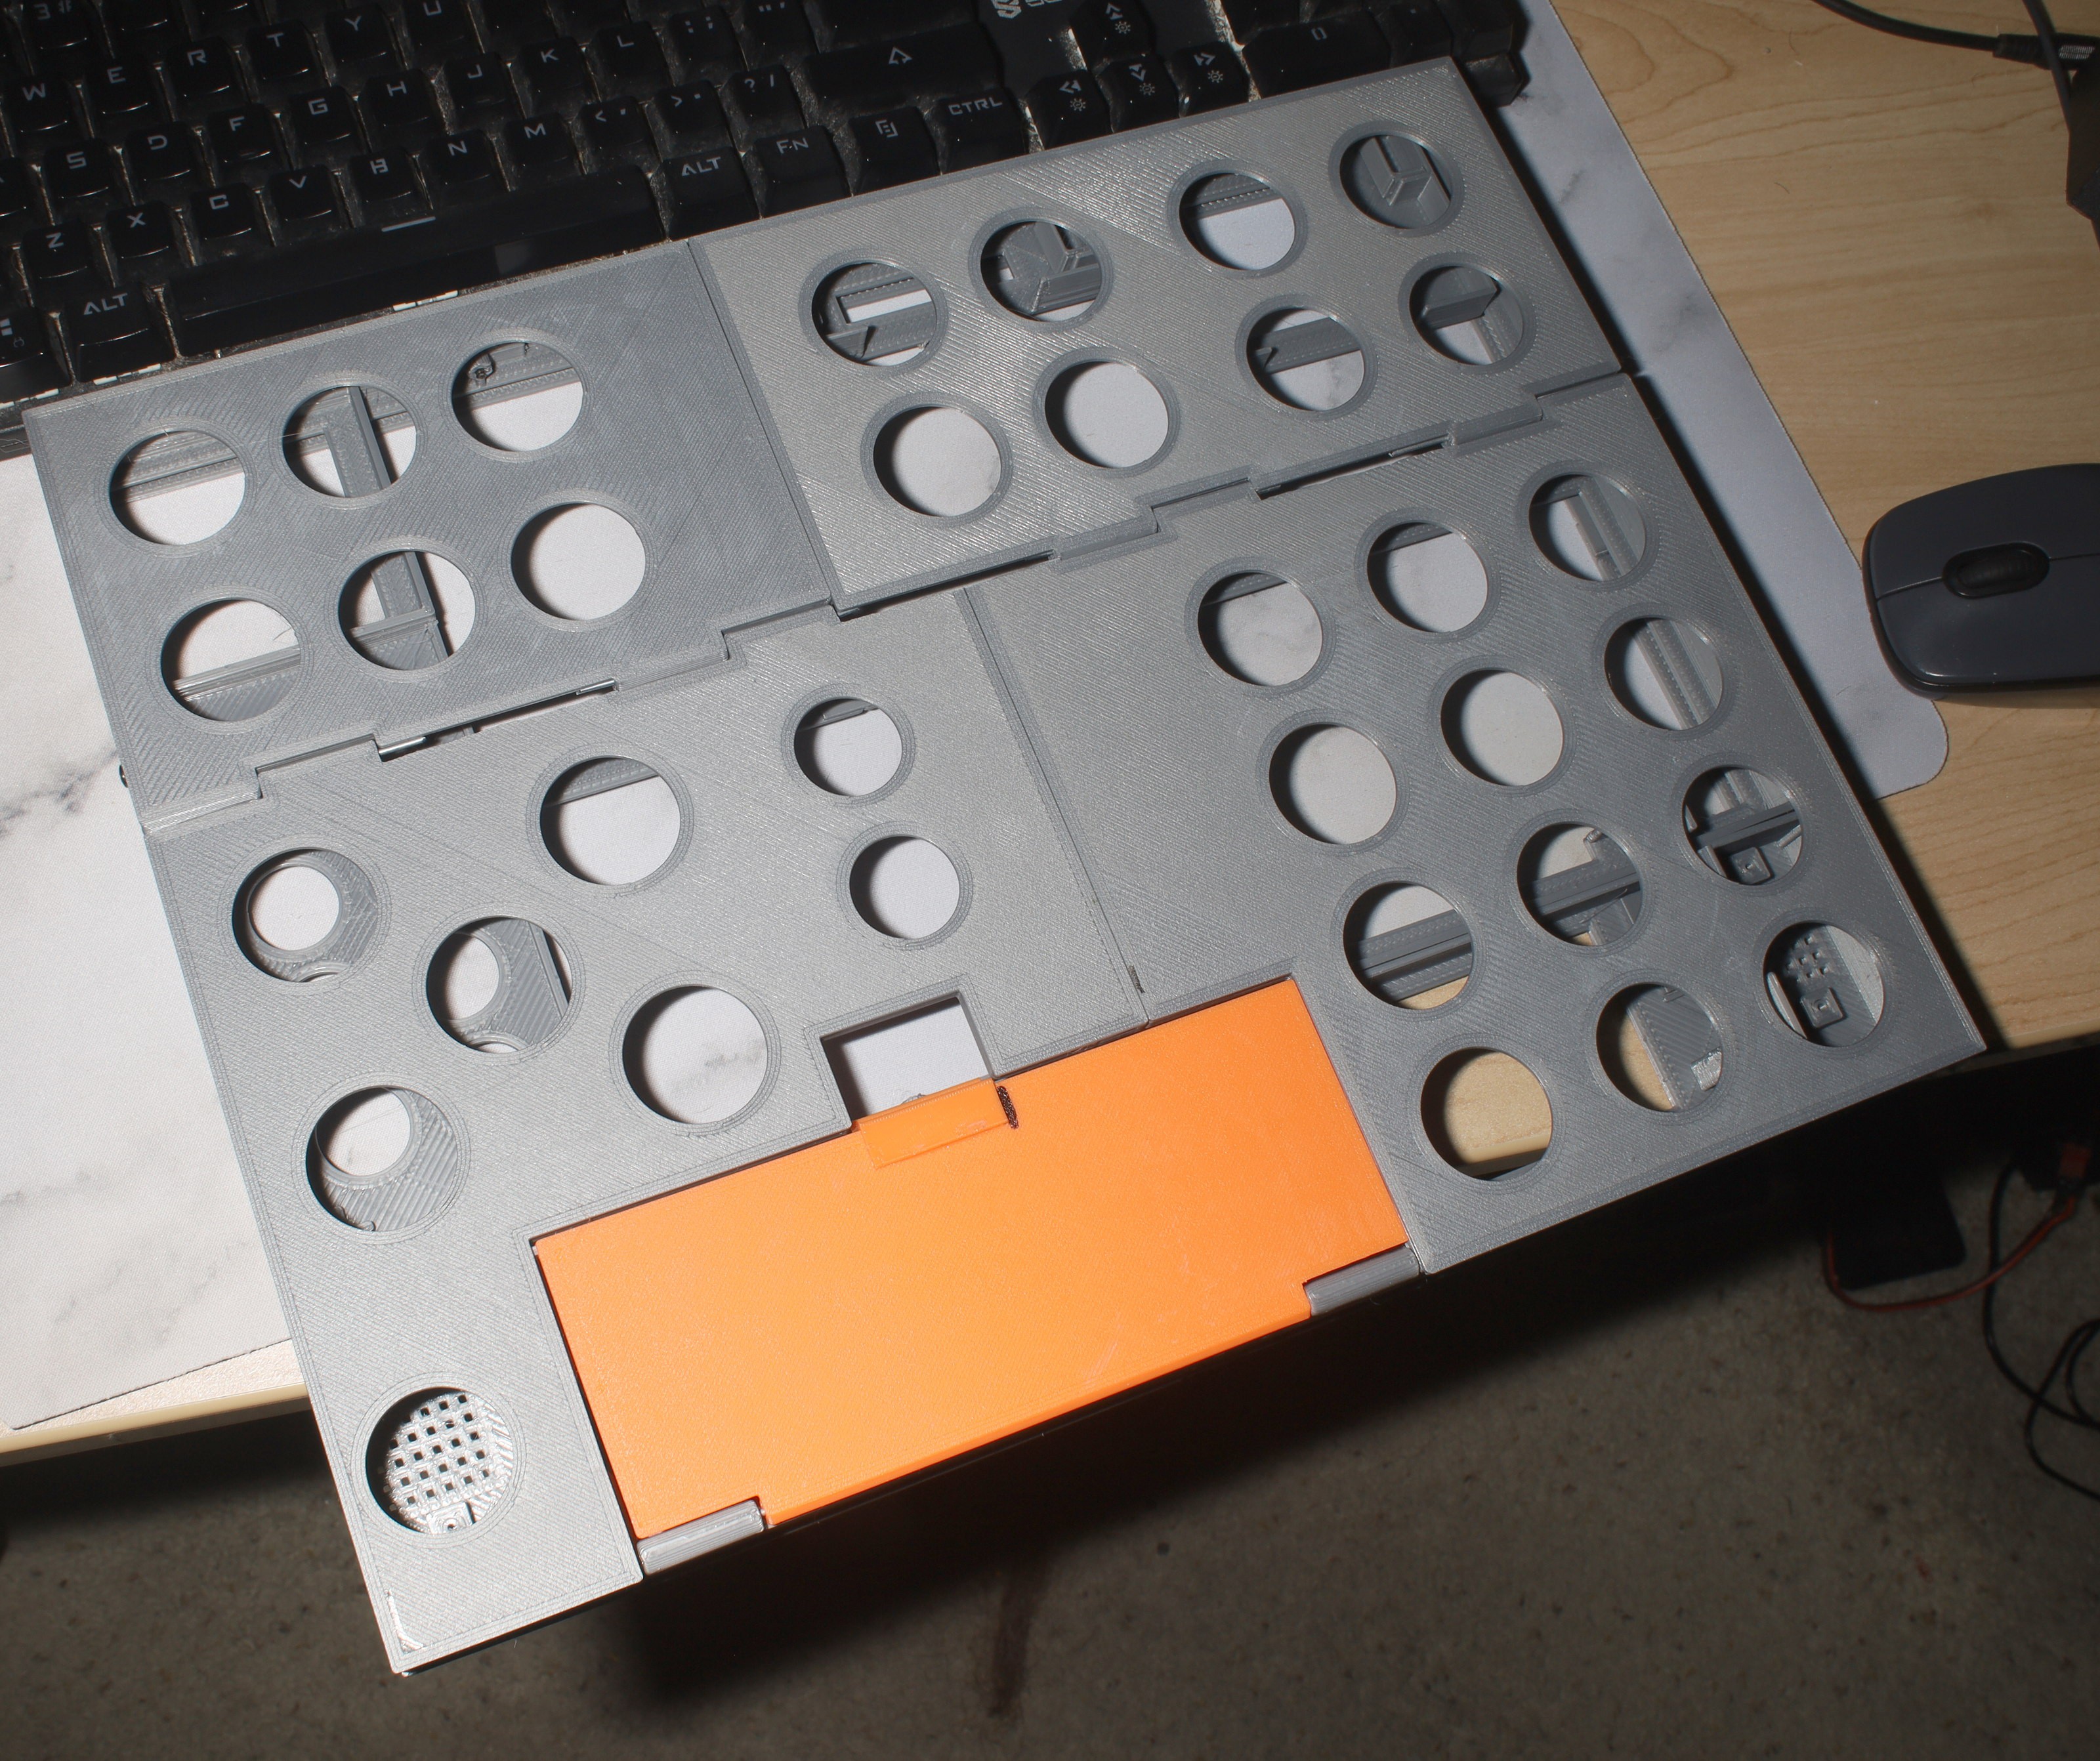
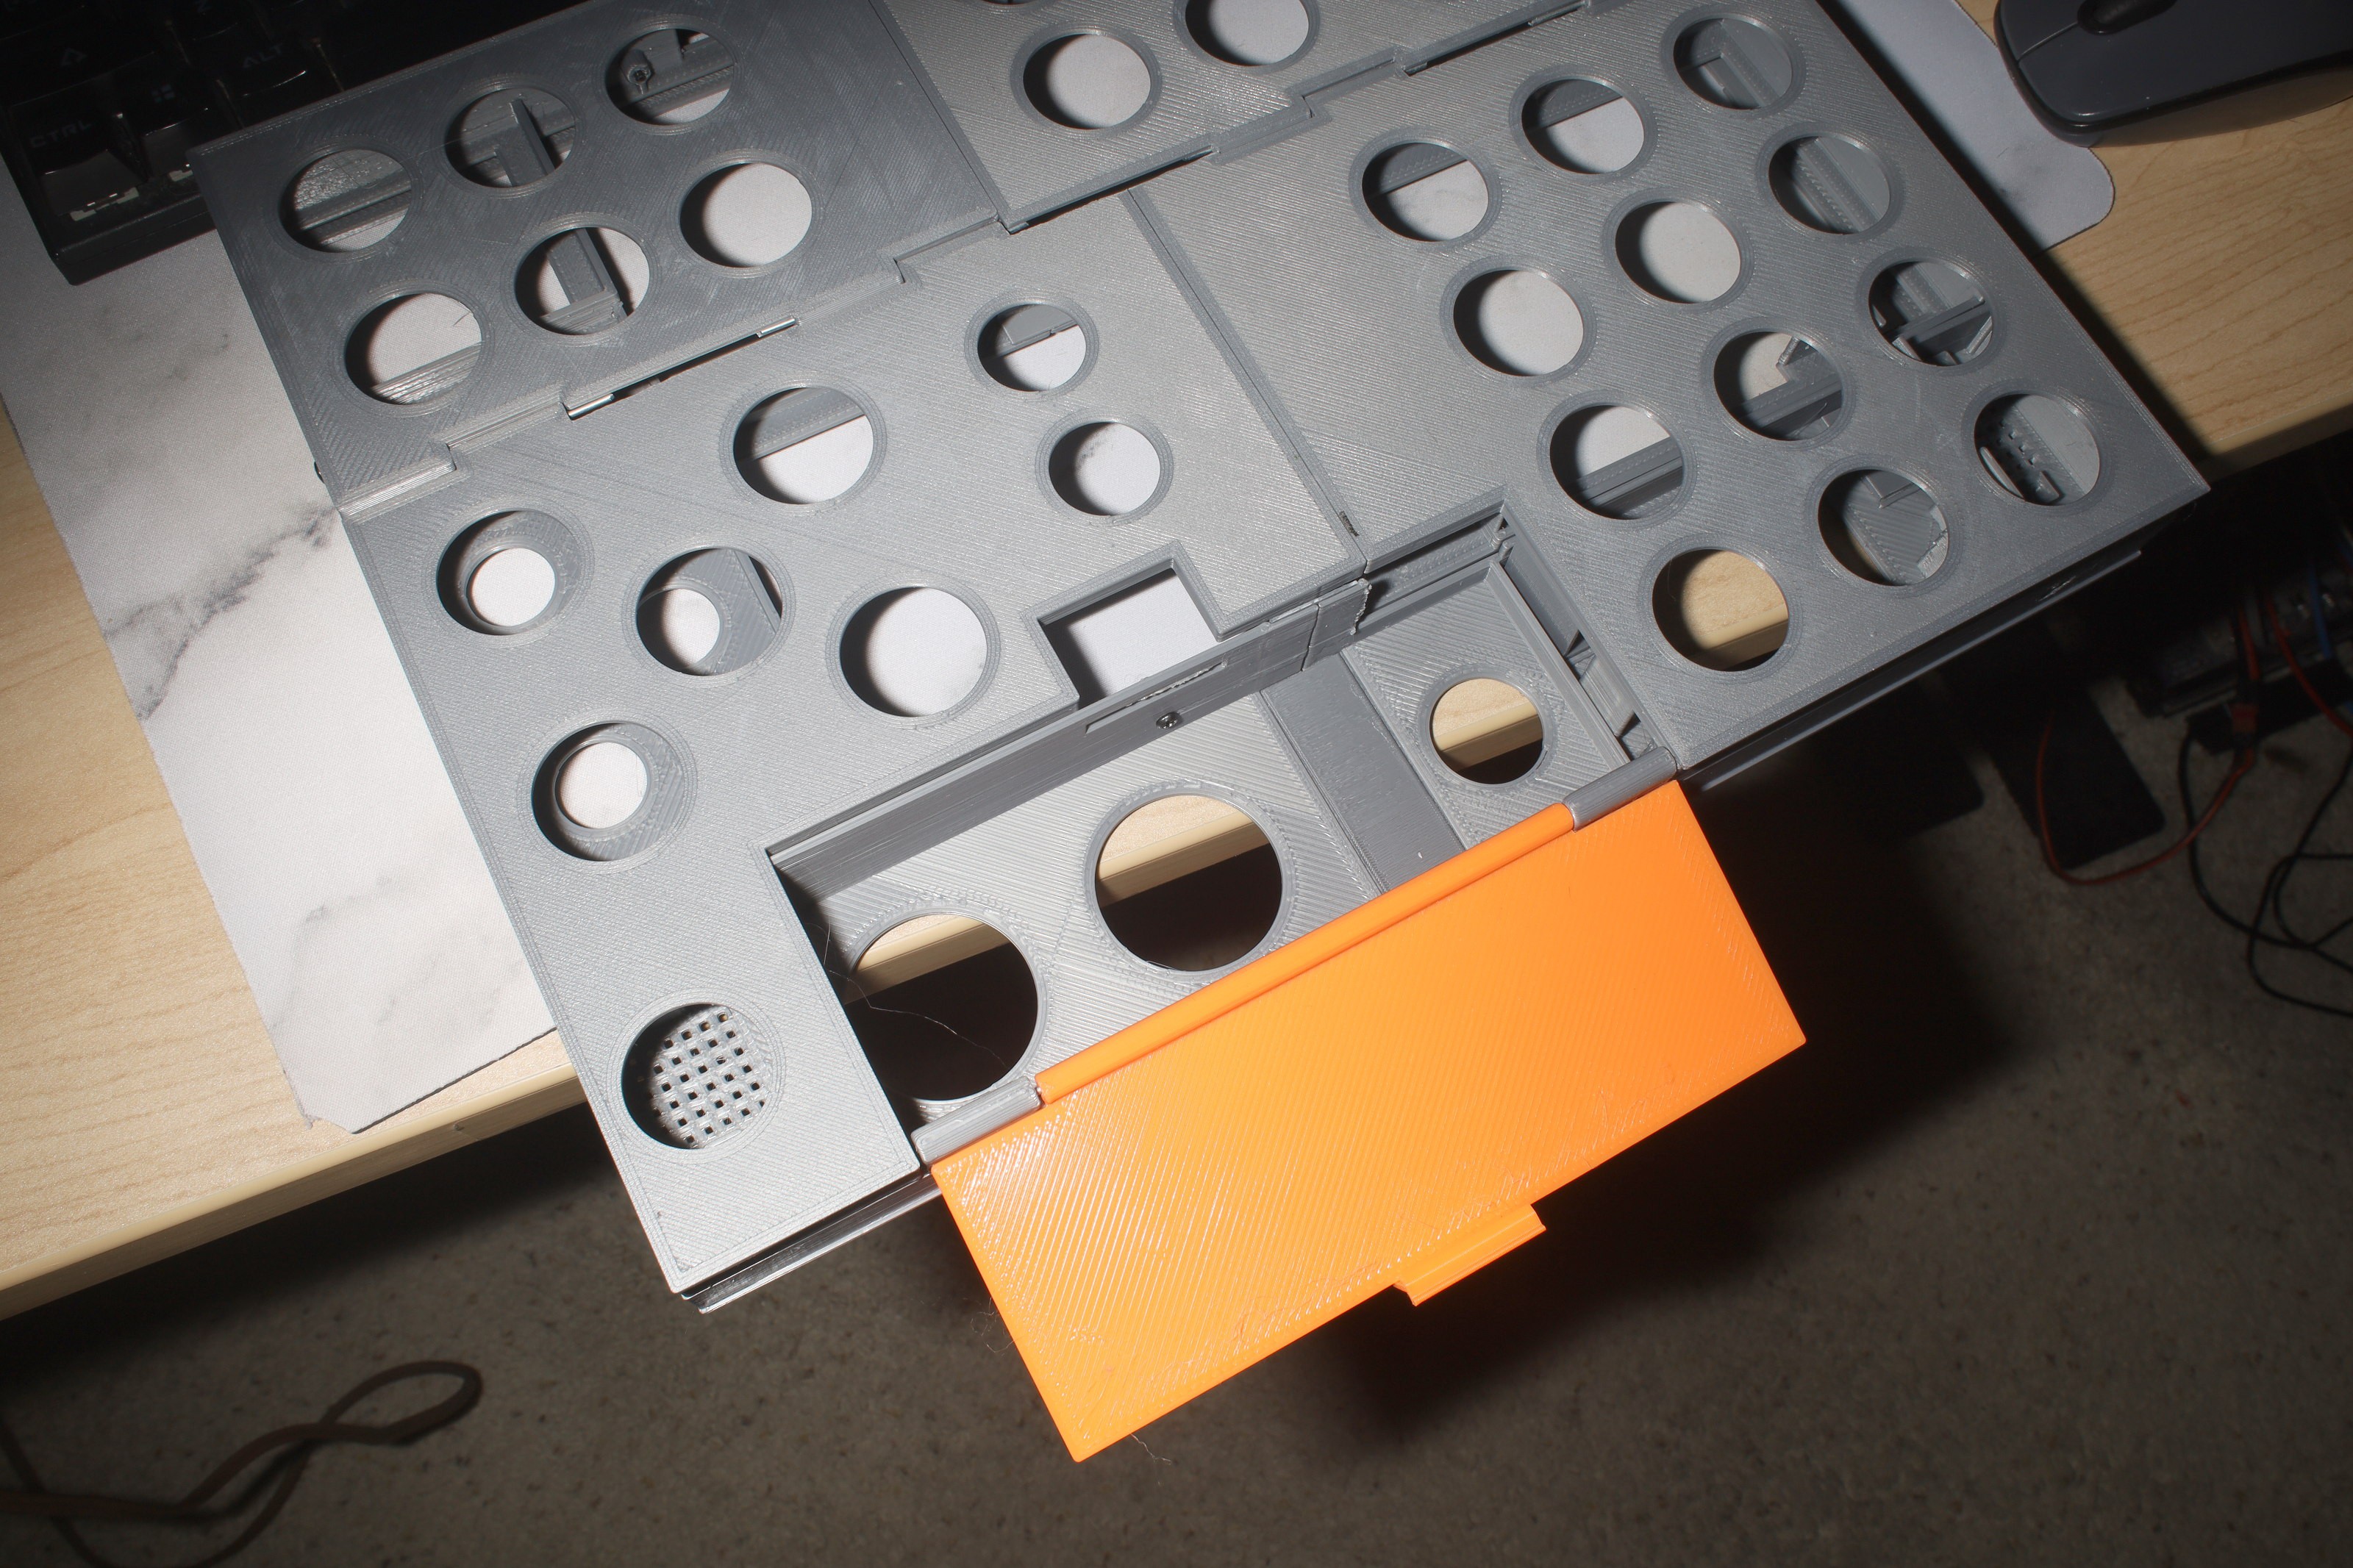
Terminal enclosure
02/12/2023 at 05:17 • 0 comments![]()
![]()
![]()
![]()
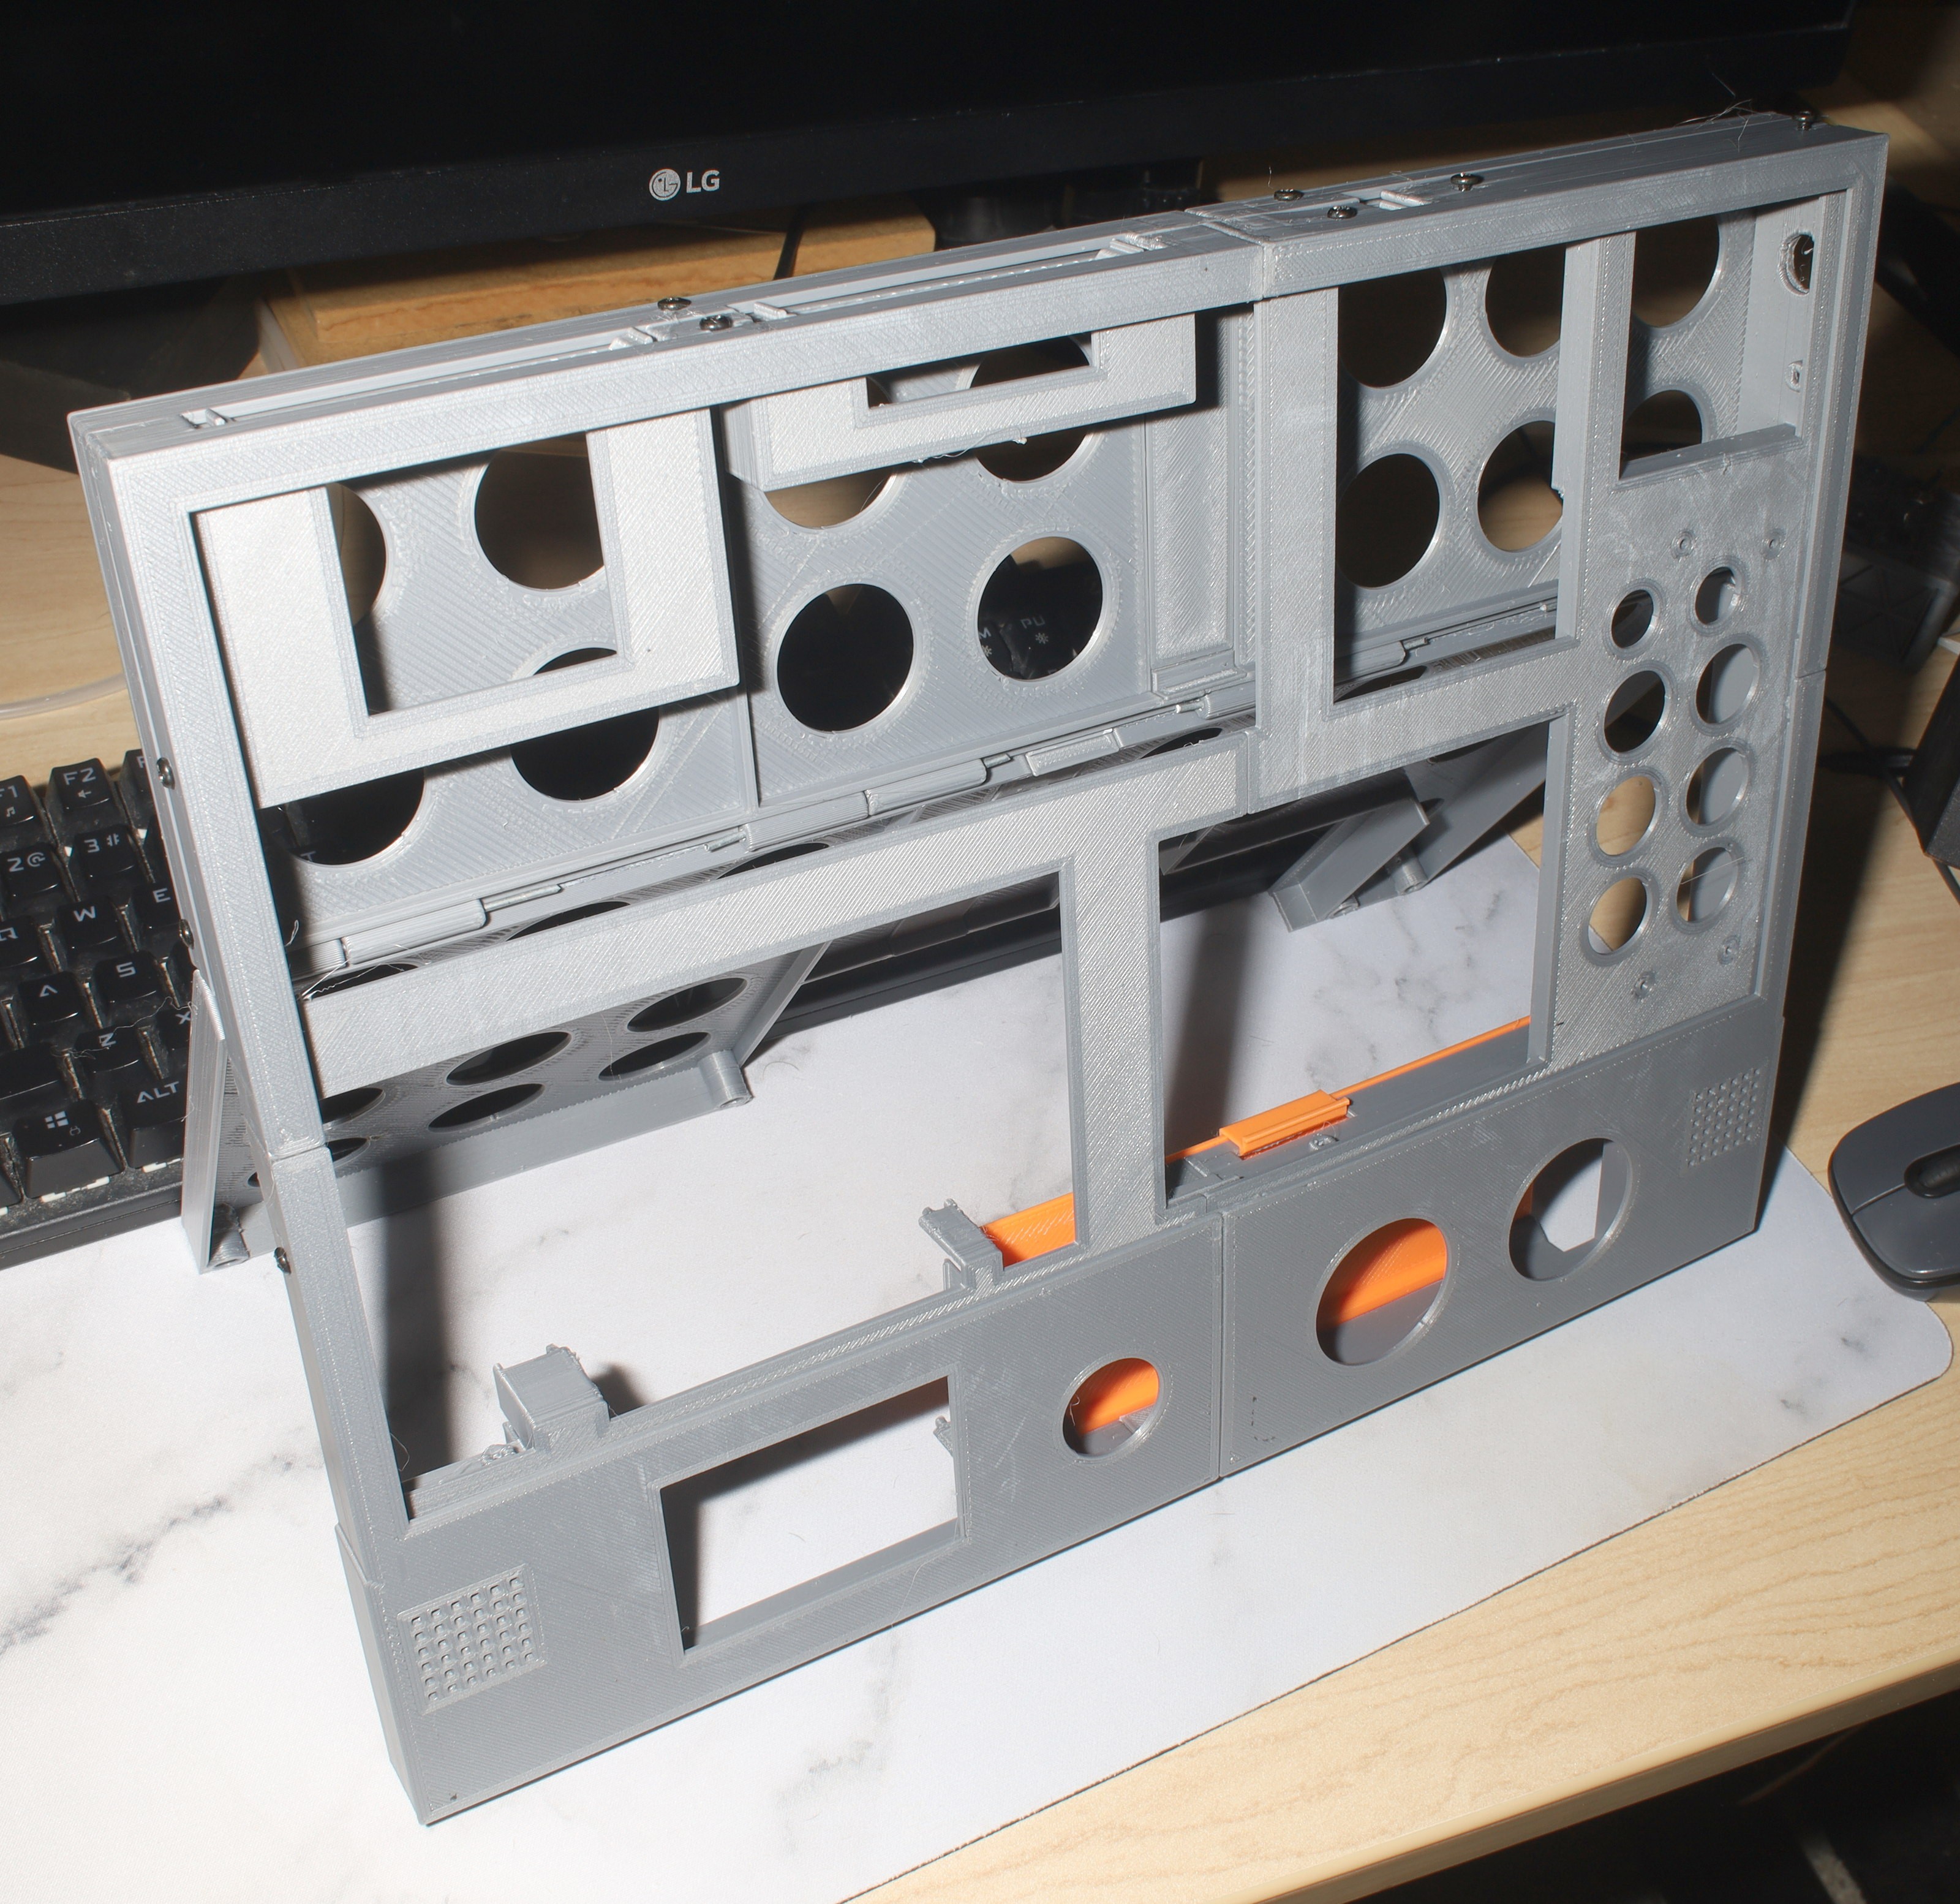
The enclosure took 3 days to print & burned 3/4 of a roll of filament despite all the holes. It ended up needing 24 joiners to fit on the print bed. The enclosure had to be split into 10 sections. Tolerances with the many joined segments are horrendous.
That was brutal, but there are good reasons why print beds aren't getting bigger than 220x220. The mane problems are electronic bed leveling is really slow & not really good enough, it costs a lot to heat the mostly unused space of a larger bed, it costs a lot to make a flat enough piece of metal since bed leveling can't fix everything. Larger format printers continue to have short lifetimes on the gootubes before the reviewers are back to good old 220x220.
The battery compartment can't be opened with the stand closed. The separate battery door is still necessary to strap the battery in when the stand is open. The easiest solution is having the hinge on the top, maybe inset to keep clearance for the wires.
It needs a track to stand up on a wood floor.
The filmsy bits for the jetson & the daughter cards shouldn't be permanently part of the case.
The trick with hinges is to PLA weld the rods in place.
-
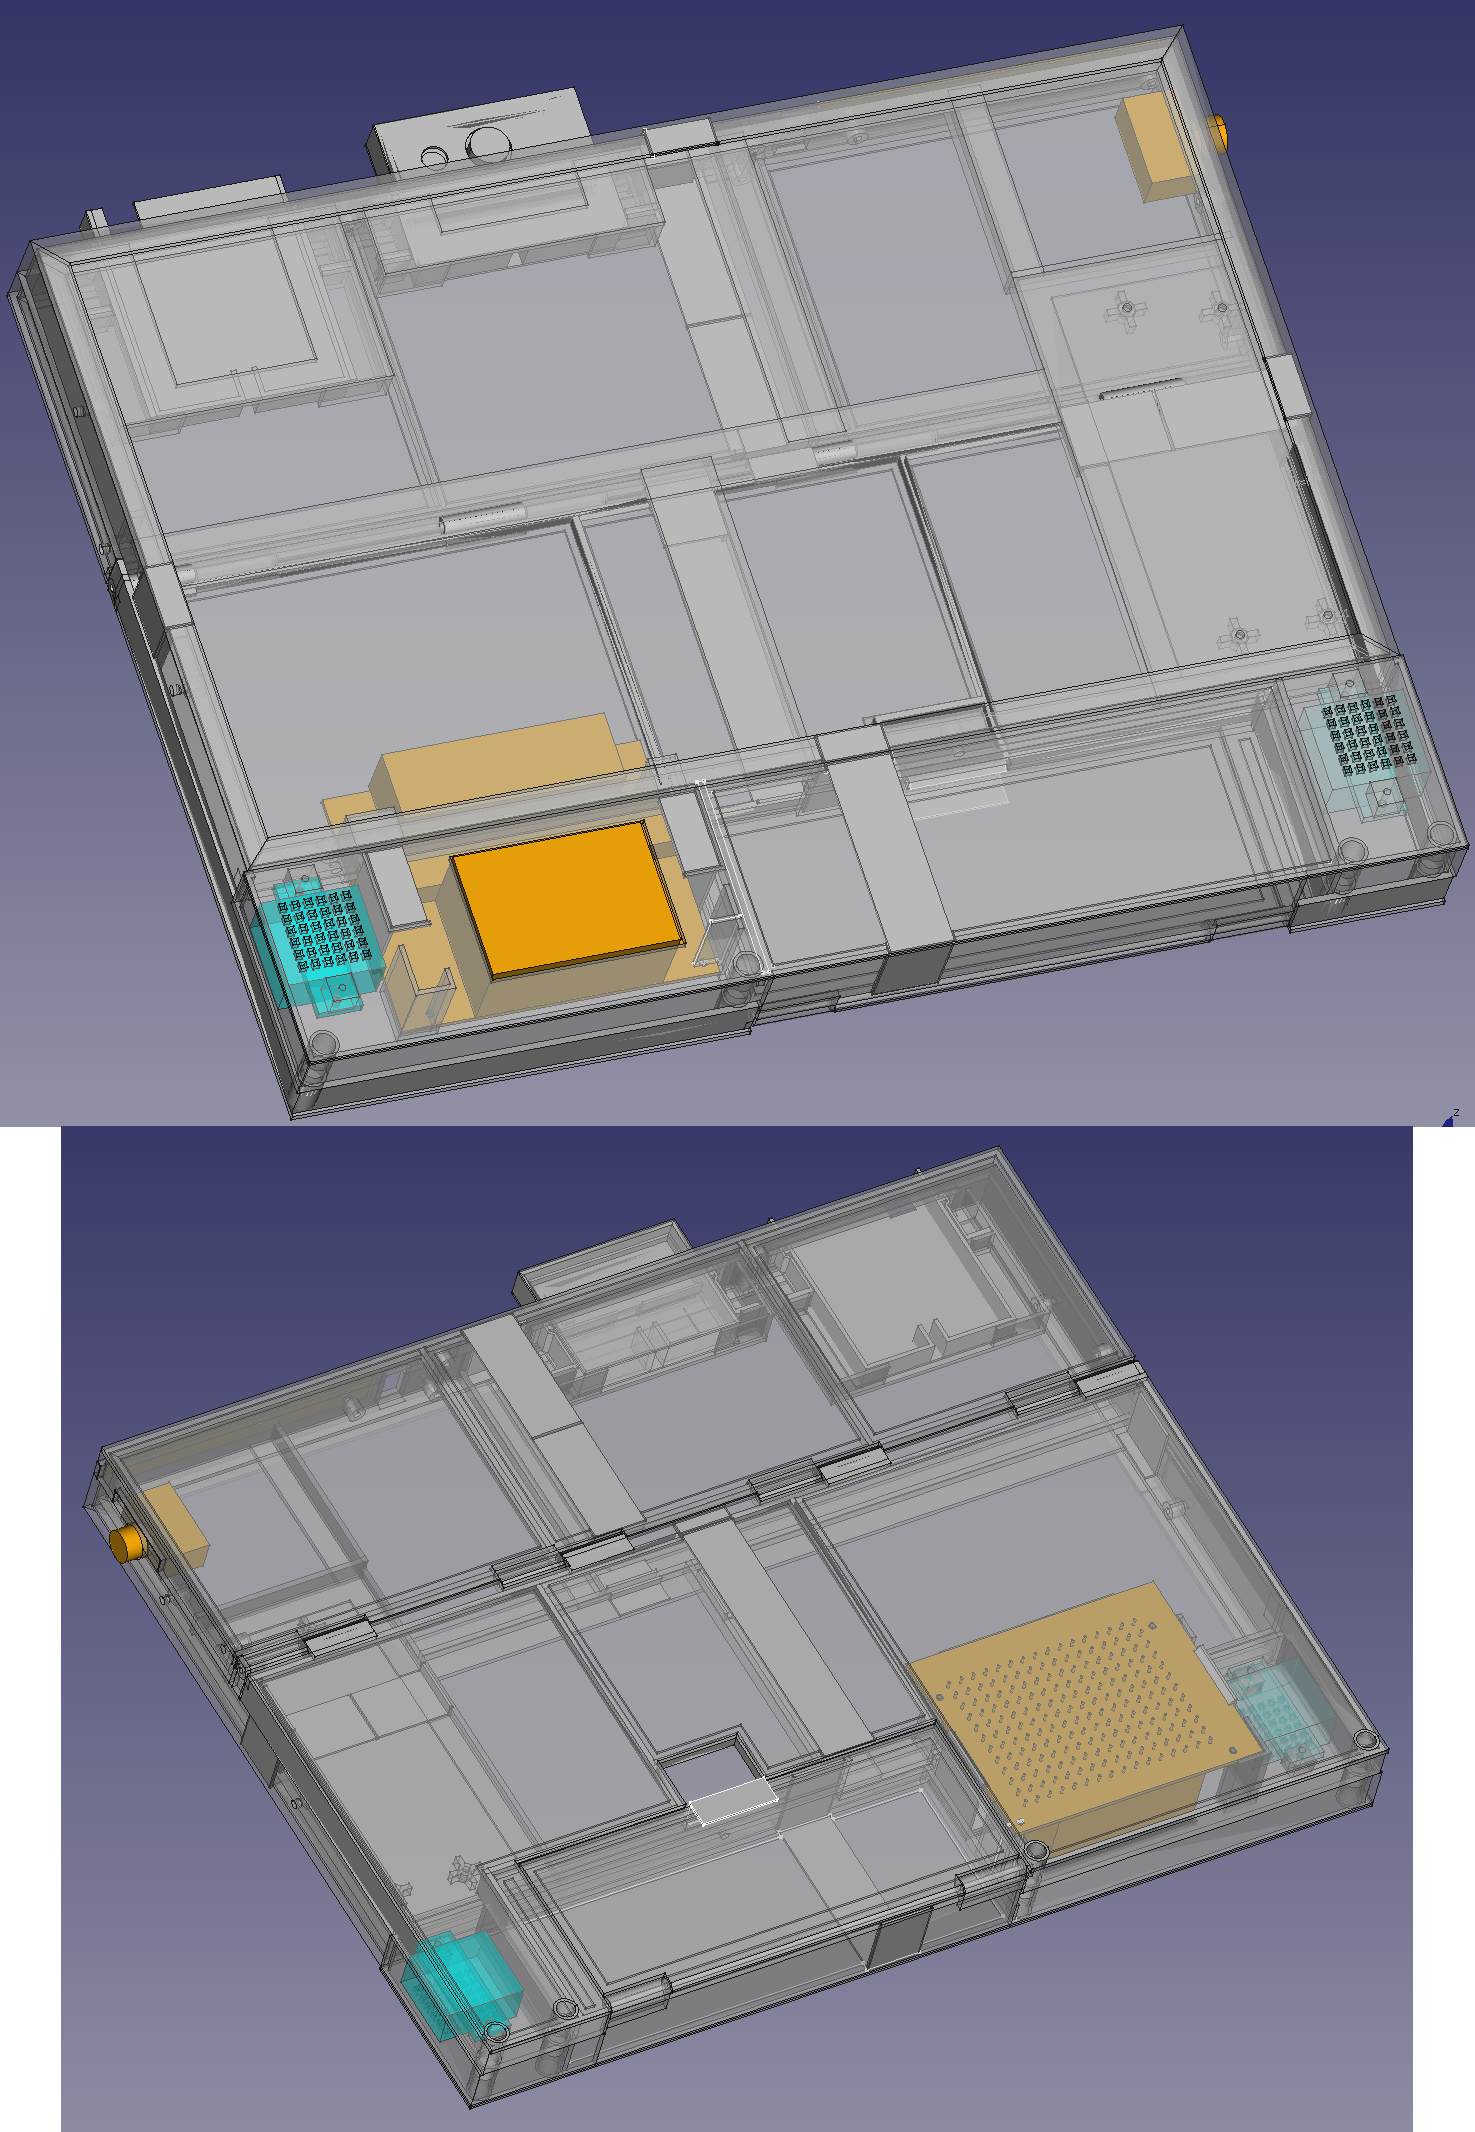
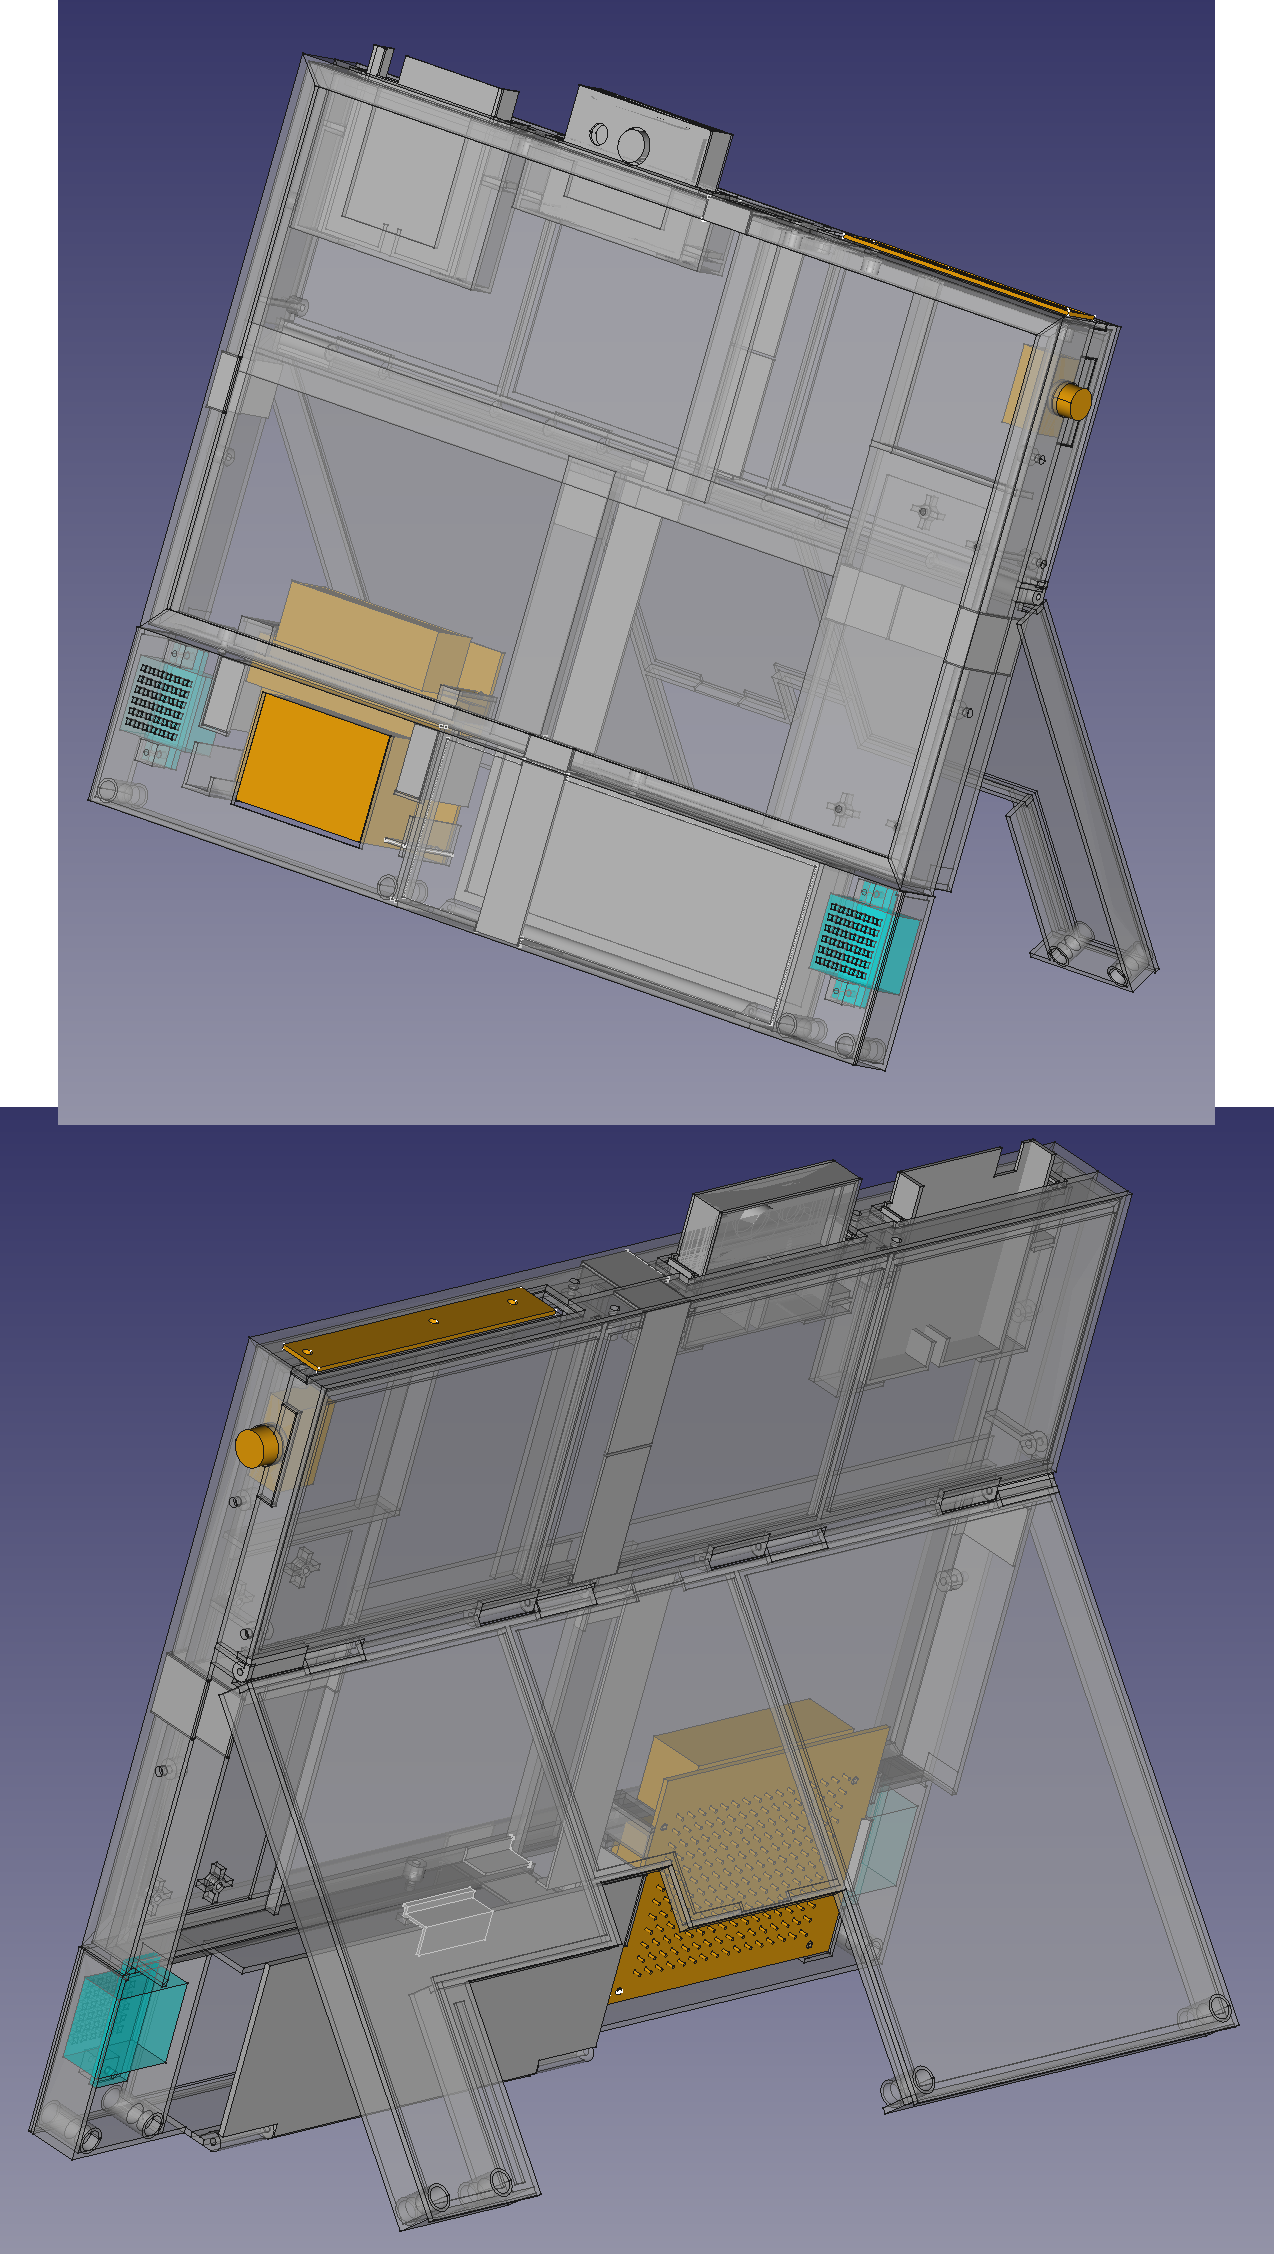
Enclosure test prints
02/09/2023 at 19:27 • 0 comments![]()
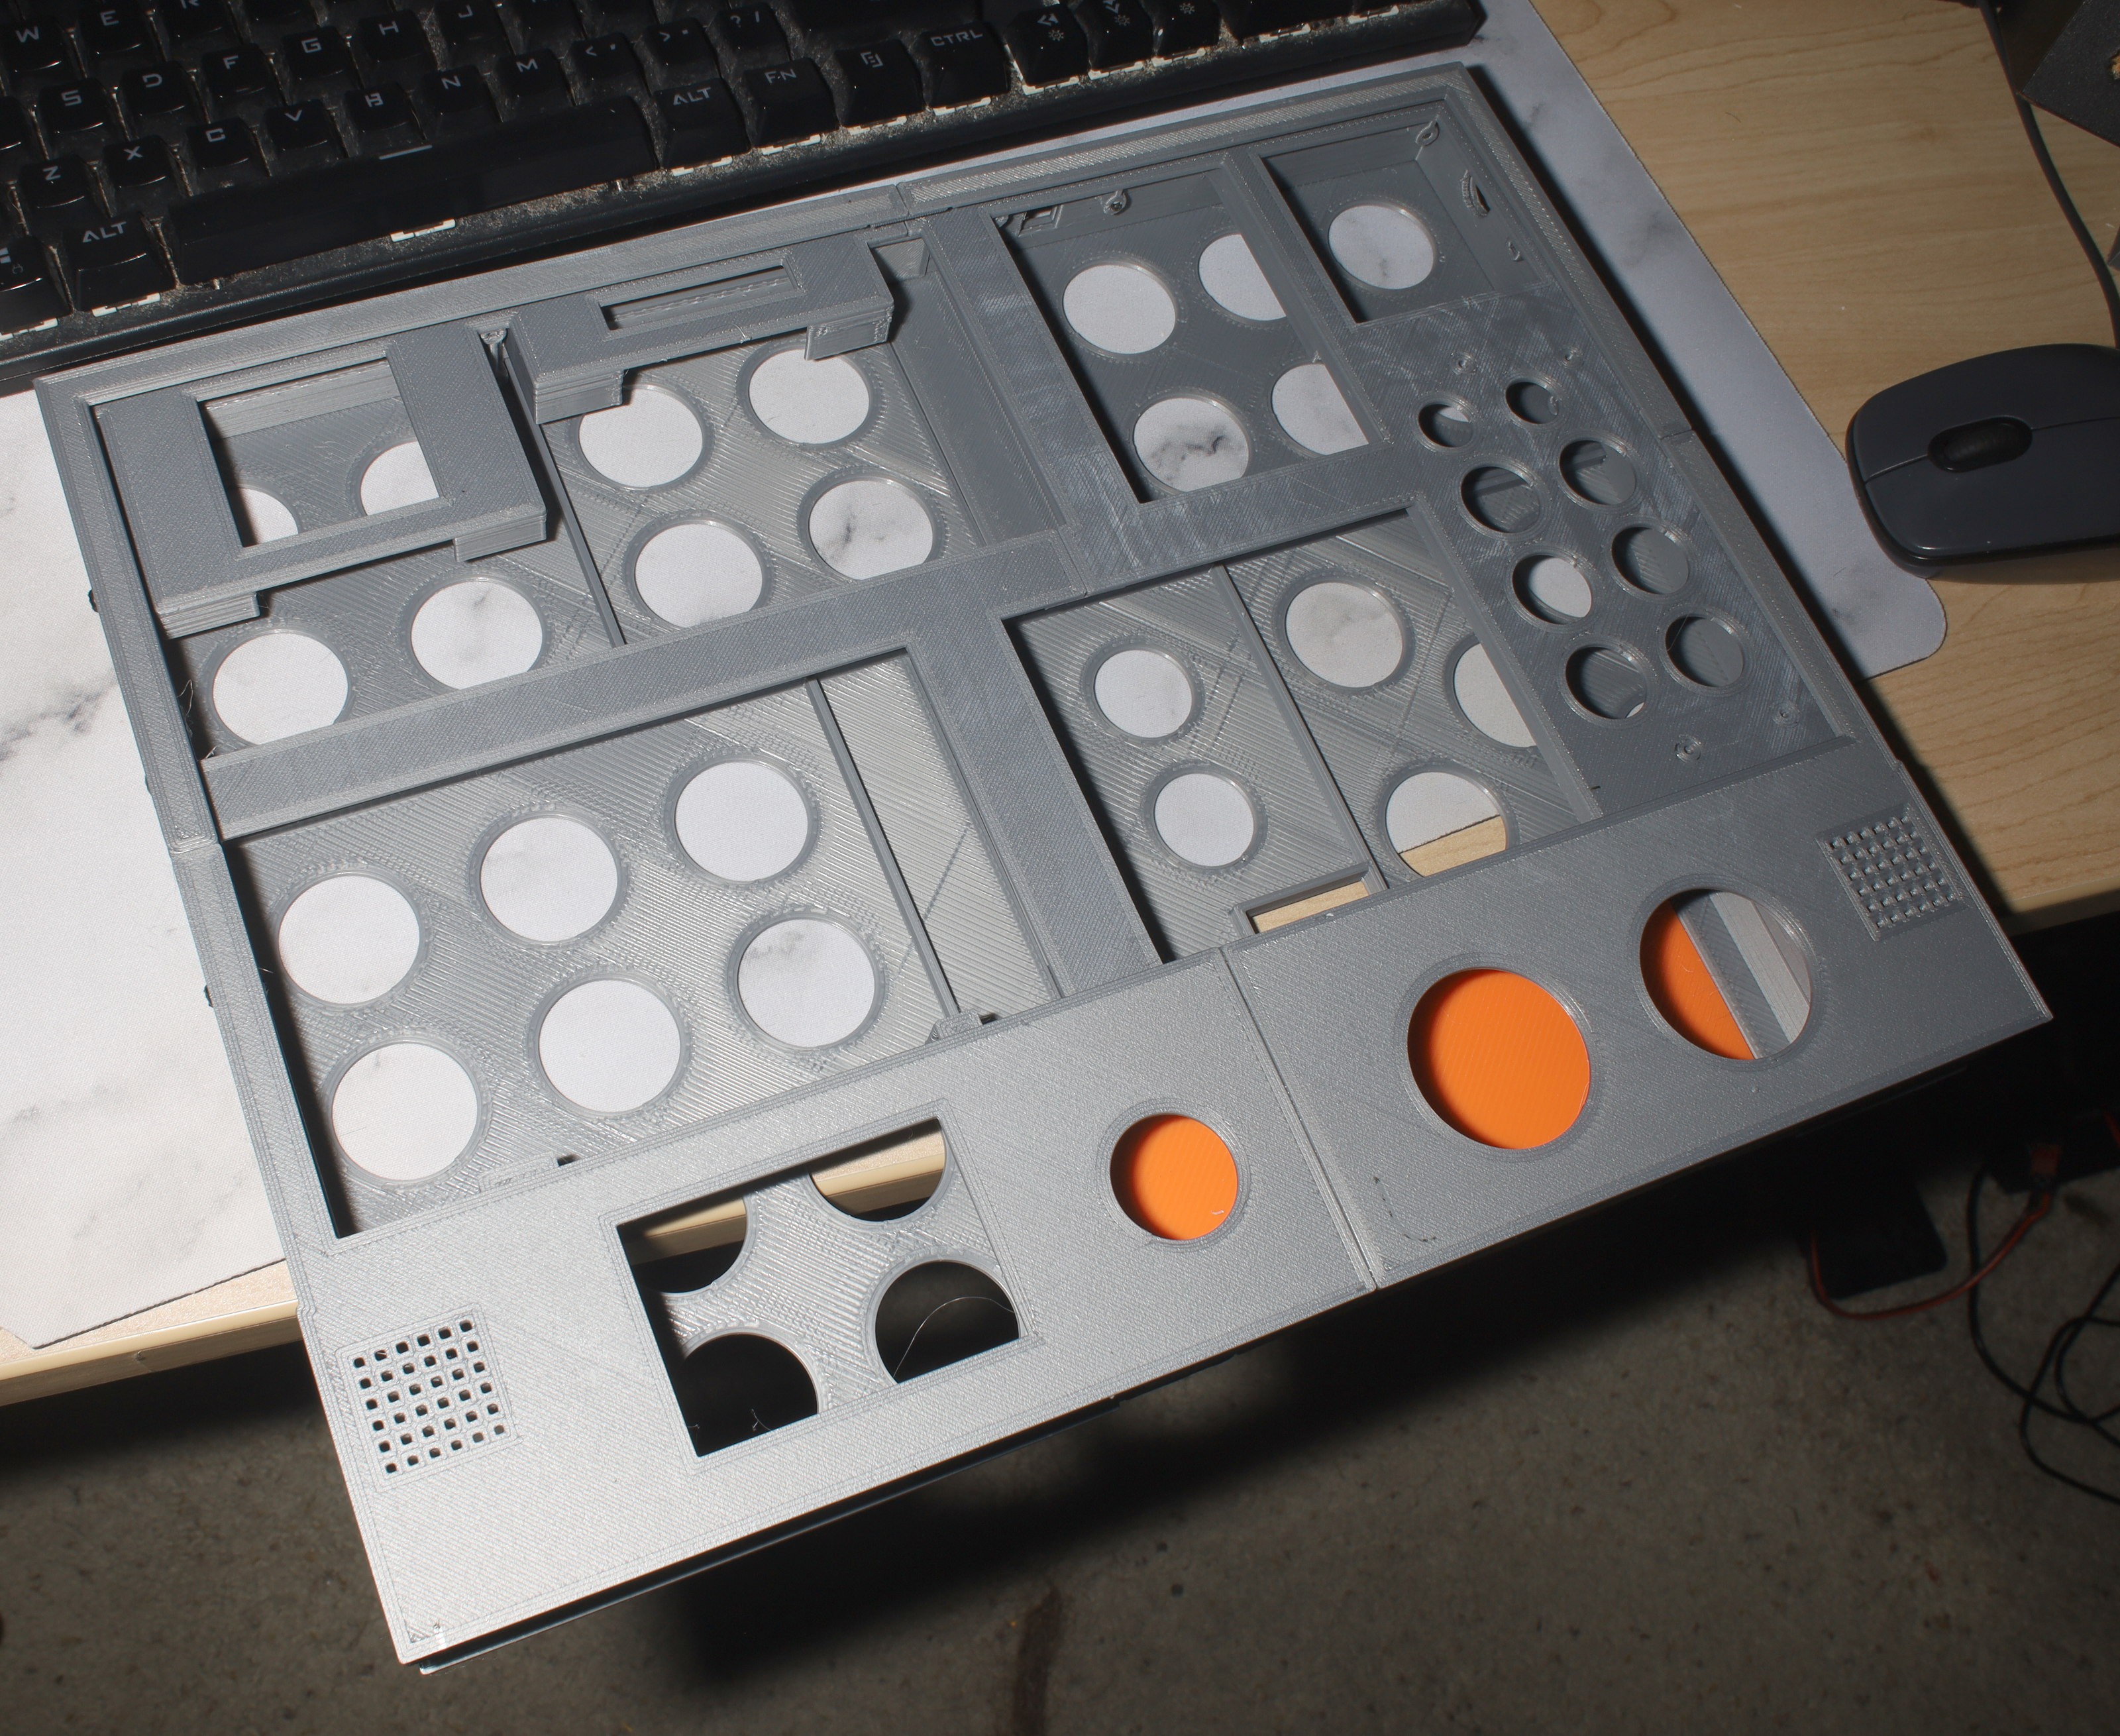
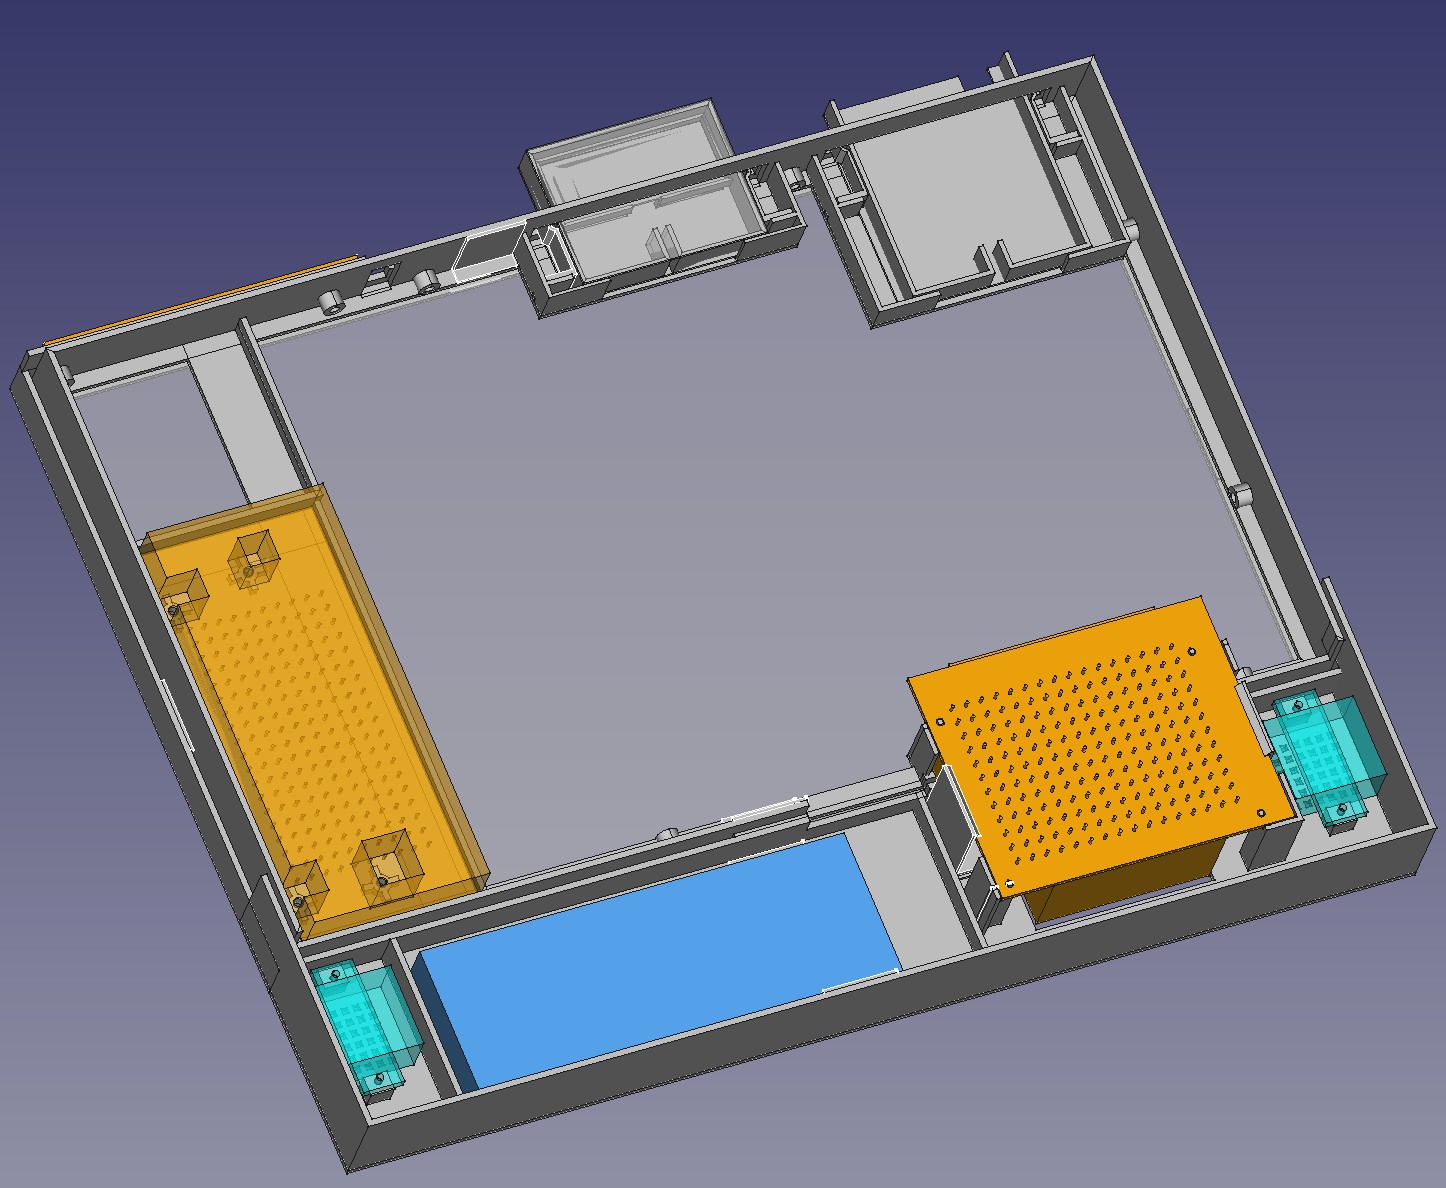
2 weeks of modeling yielded this. The mane task was creating all the joiners so it could fit on the print bed. There's a provision for a power switch. There isn't any provision for external USB ports. They're presumed to be accessed inside the case by opening the back panel.
![]()
The back panel opens to stand it up. In rep counting mode, the webcam & IR are integrated. In tracker mode, the webcam & IR are holes for cables. It still came in at 35mm thick. There's plenty to not like about it. The jetson is held in by tiny PLA bits. Maybe it should use farsteners. It uses the clamps for quick interchange between robots.
![]()
![]()
It seems to work. Adjusting the clamps requires reprinting the entire enclosure.
![]()
![]()
Power switch test prints. The large panels could use some holes.
-
Battery mounting
02/02/2023 at 19:35 • 0 comments![]()
The enclosure design proved to have escalating complexity. Each change required more & more other changes until no more progress could be made. It may just all have to be parametric. That's 1 area where fusion 360 may do a better job. Parametric models in Freecad require entering formulas in a spreadsheet with very little editing functionality. Fusion 360 seems to have point & click relationships between parts.
![]()
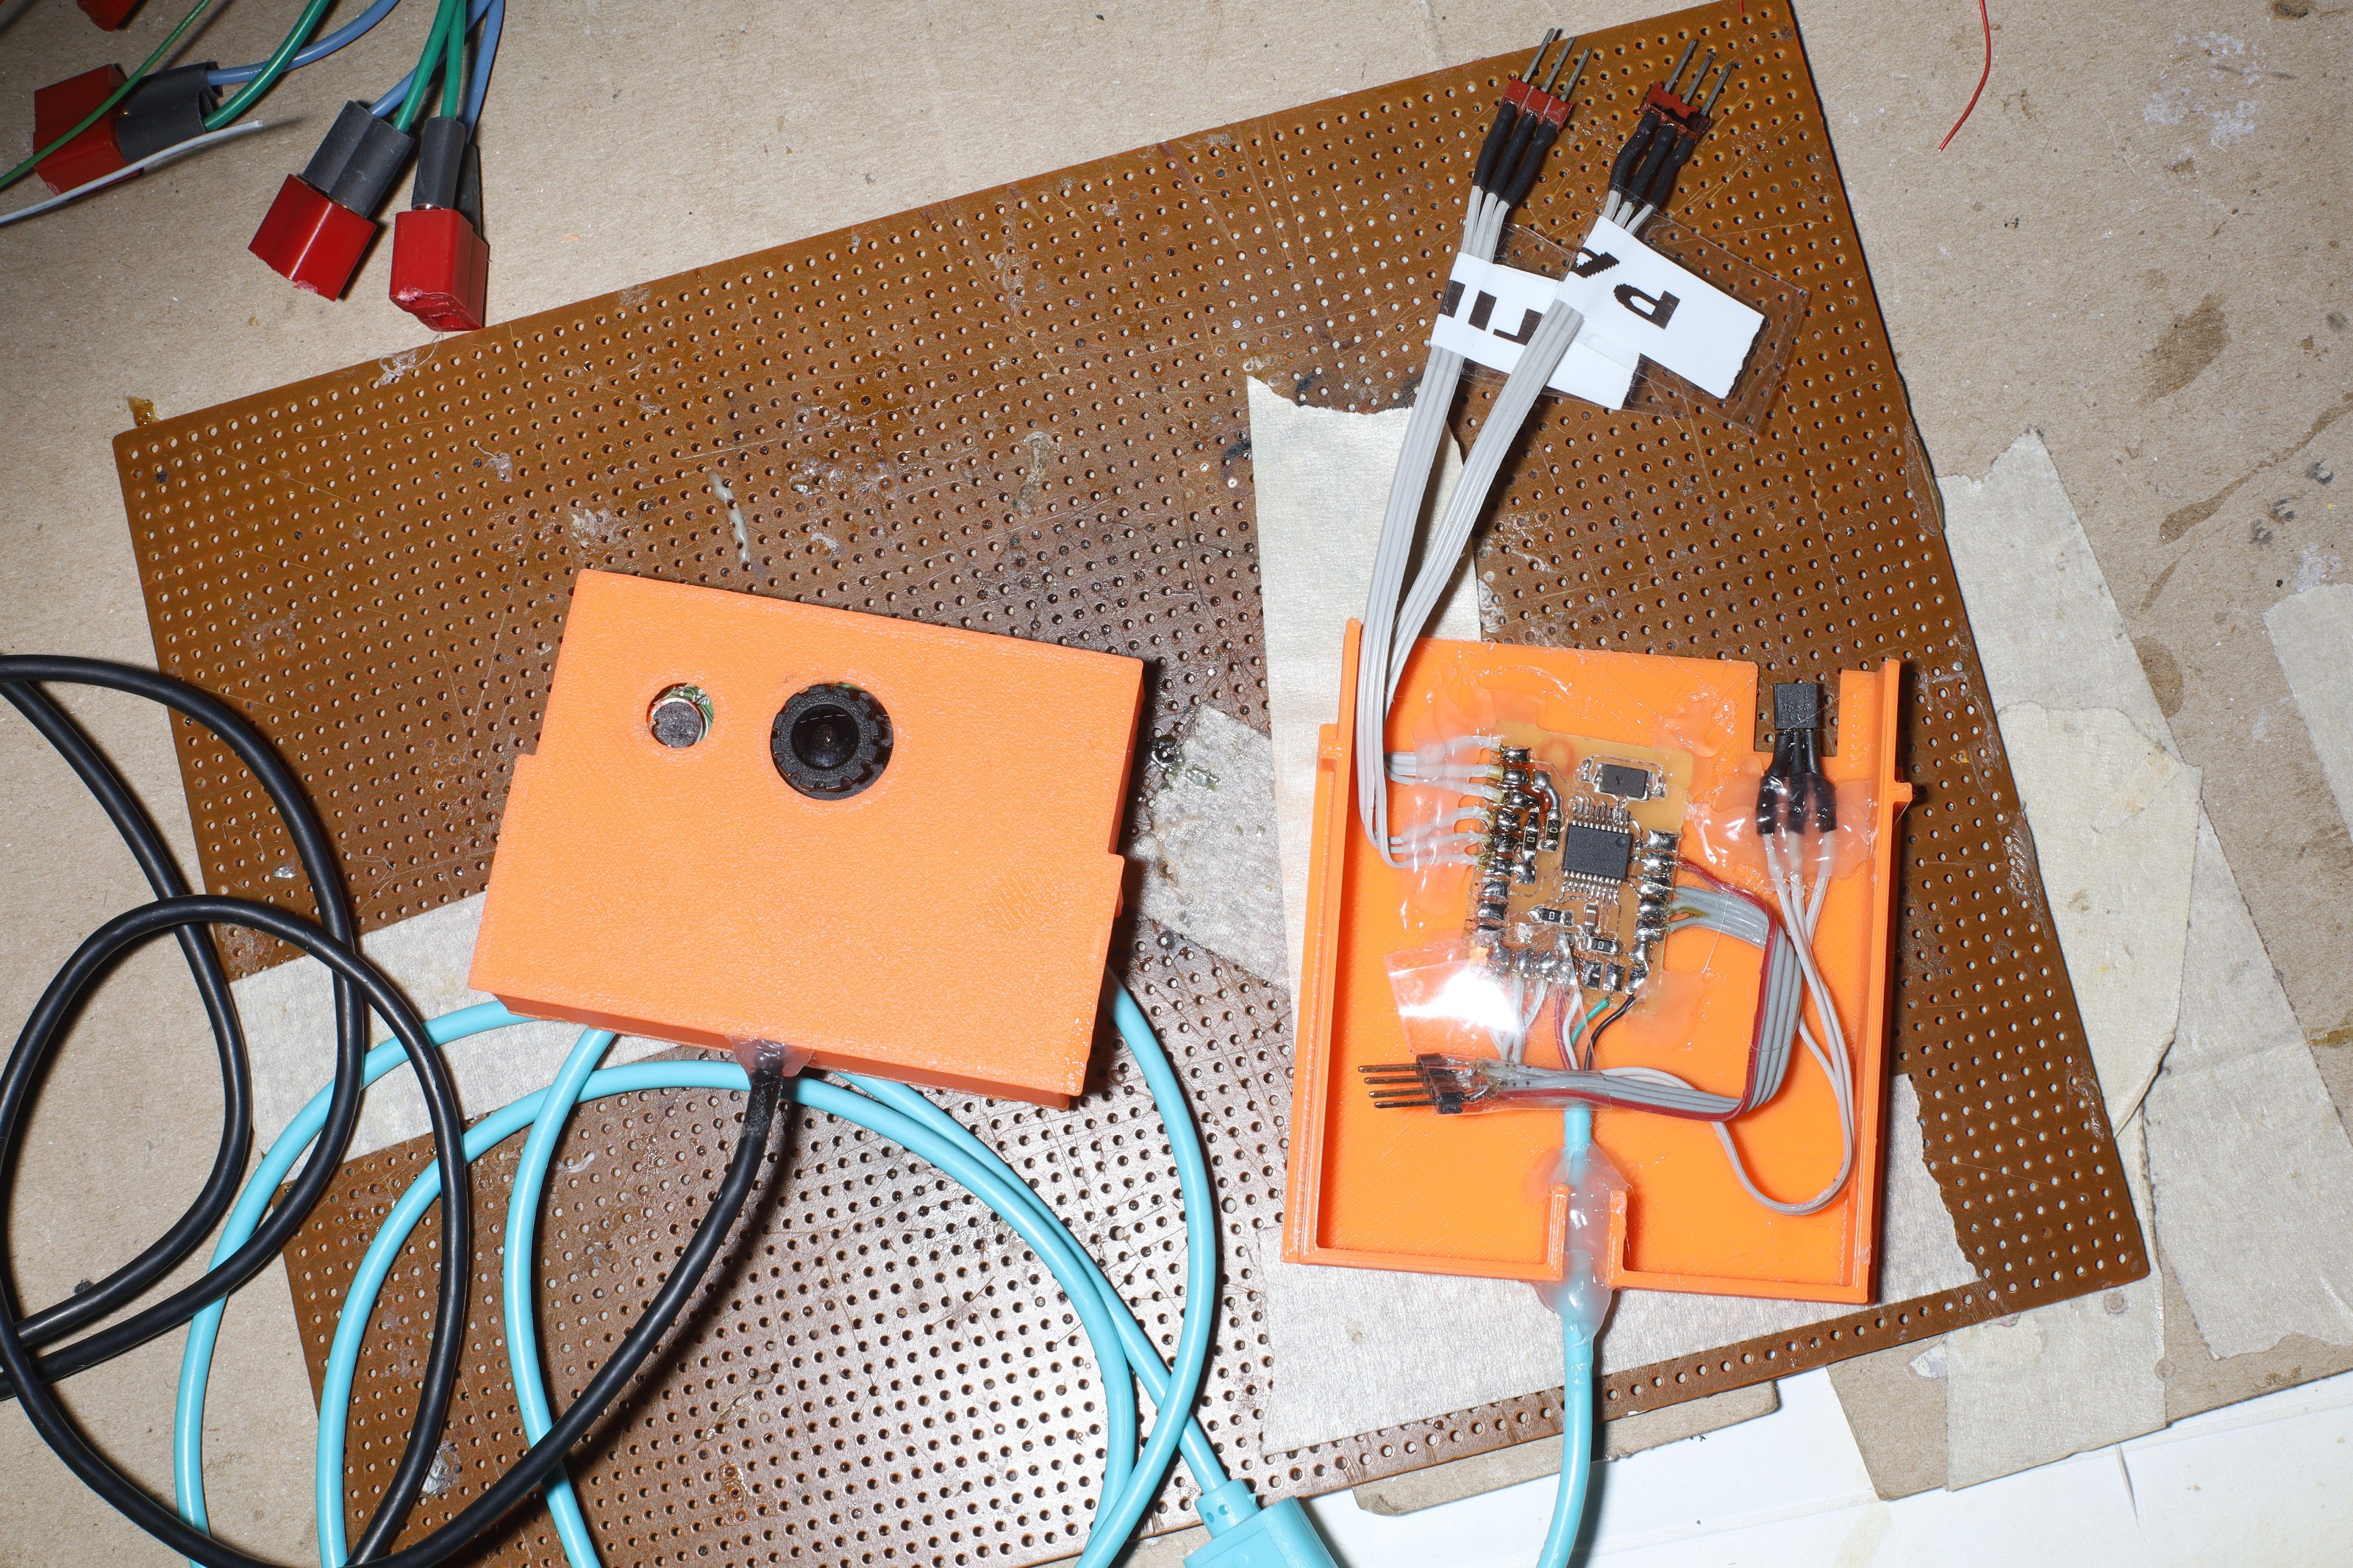
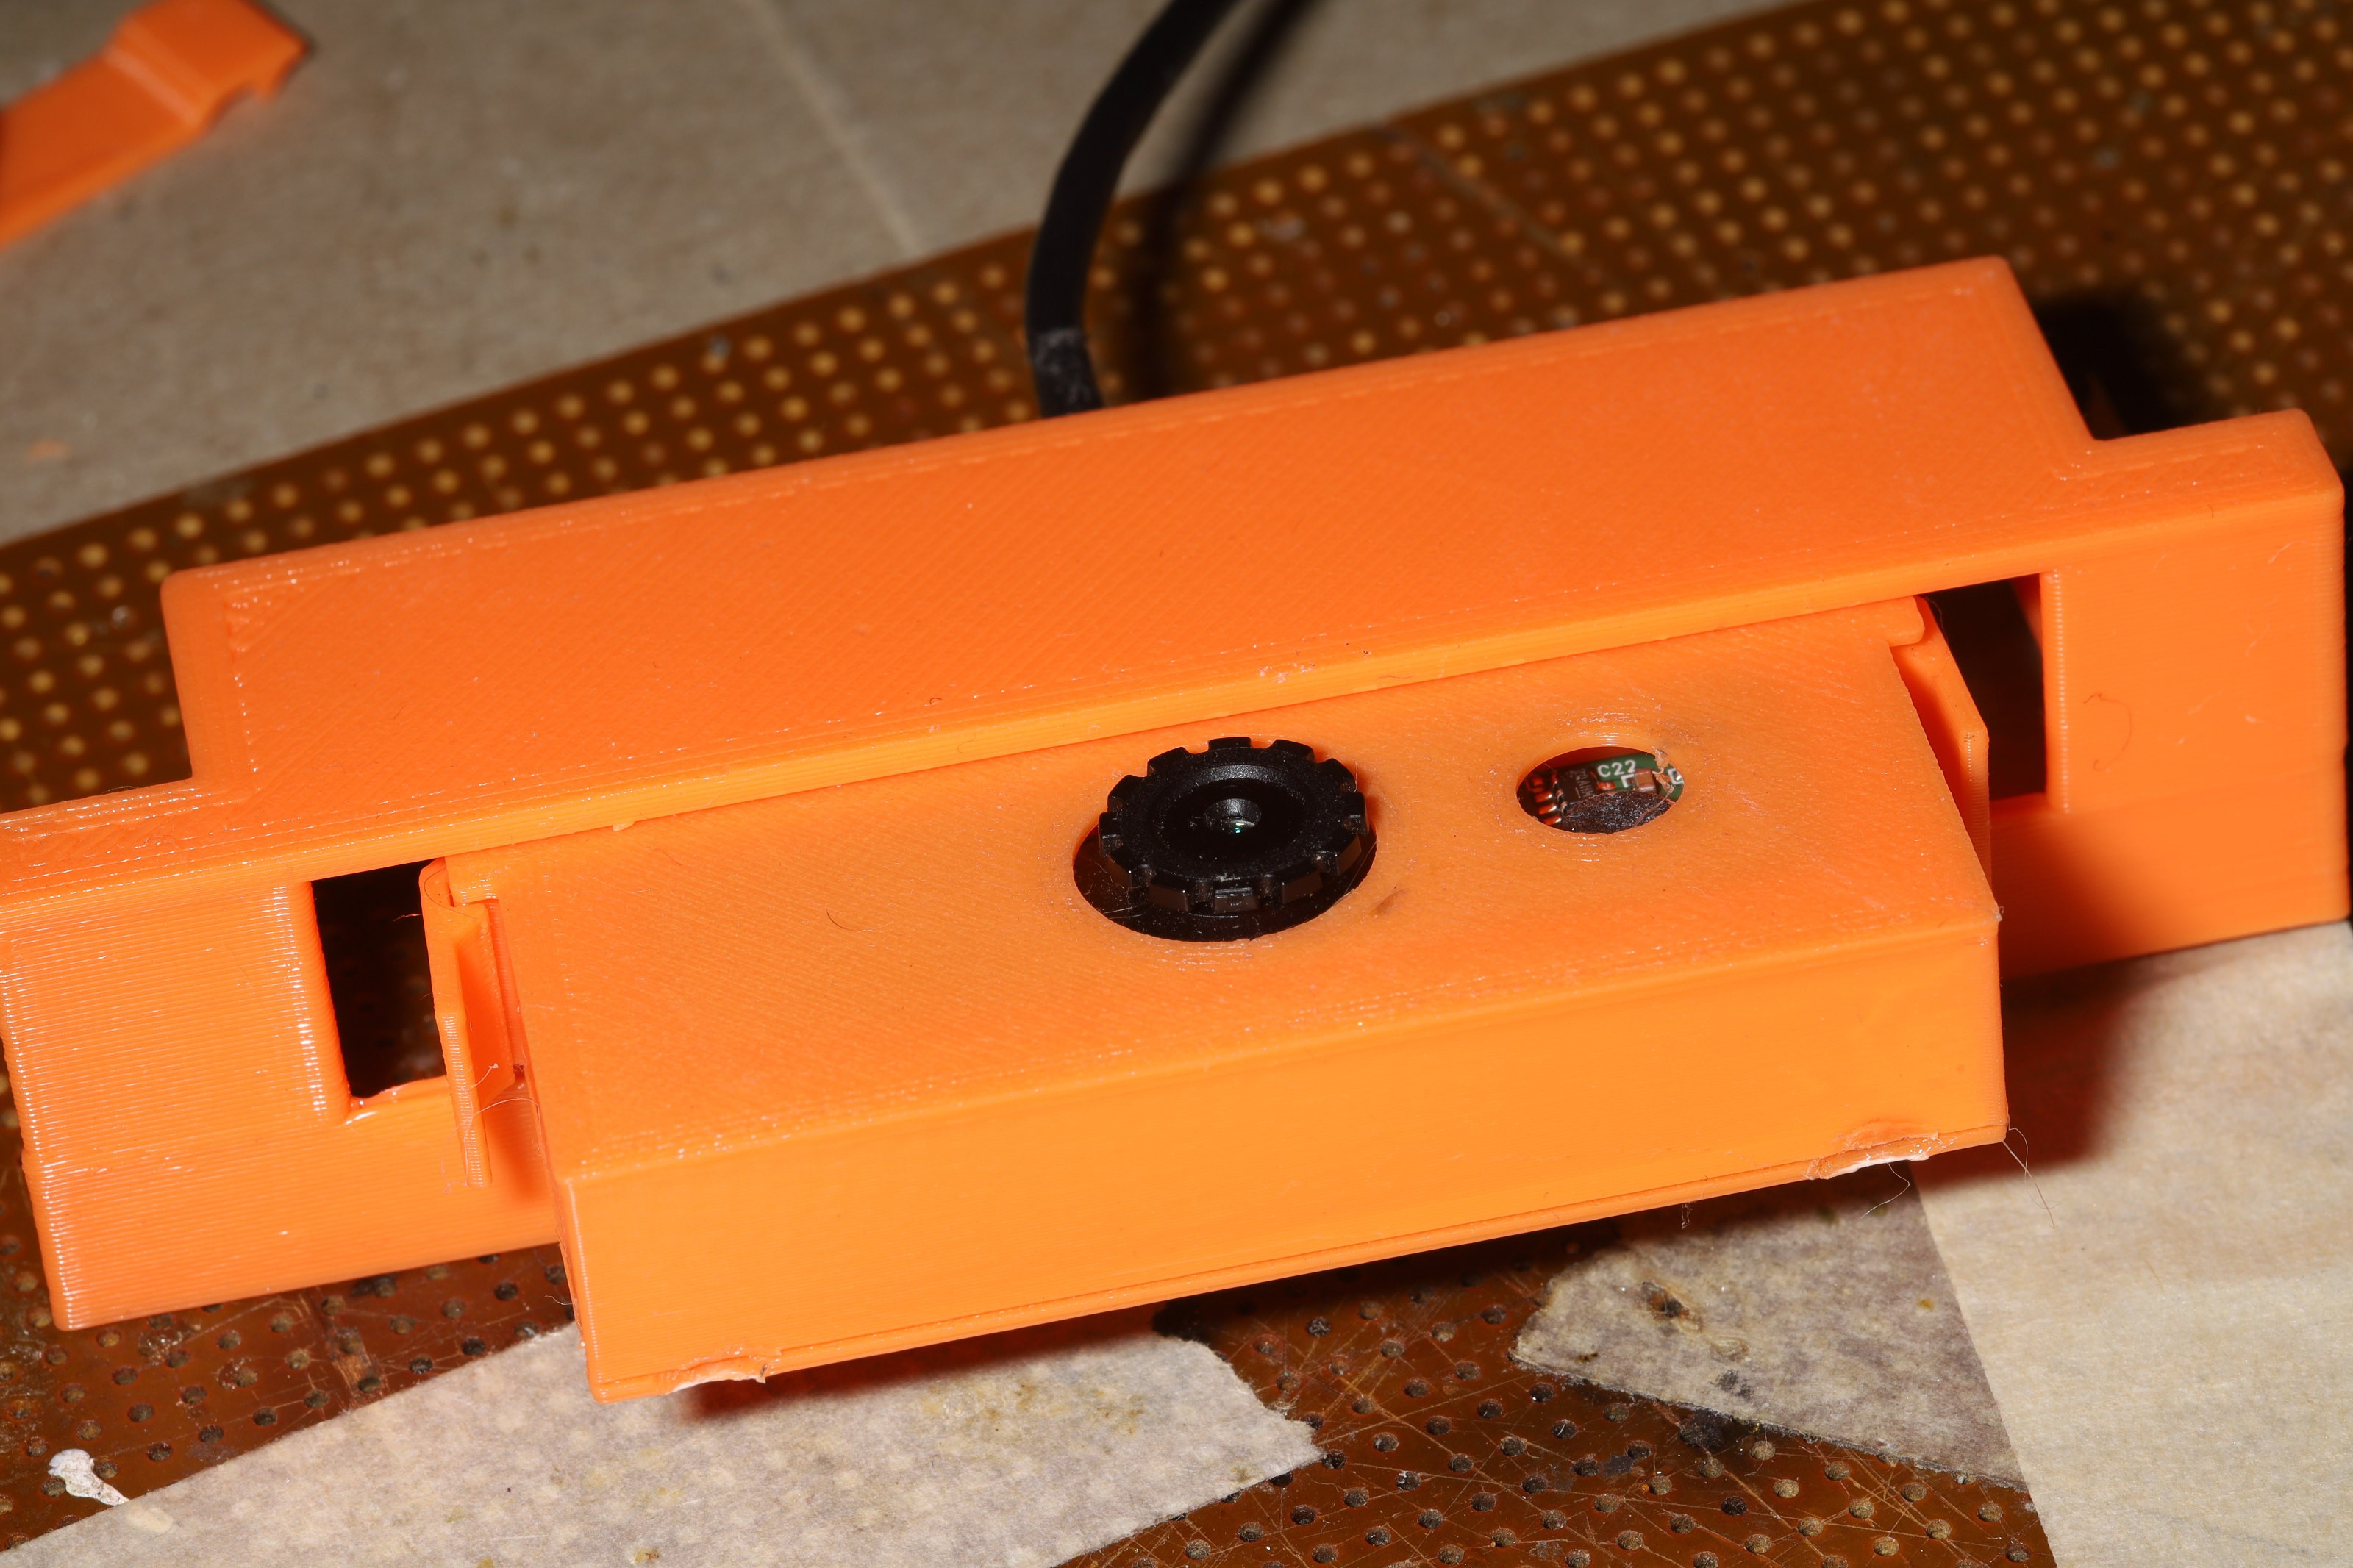
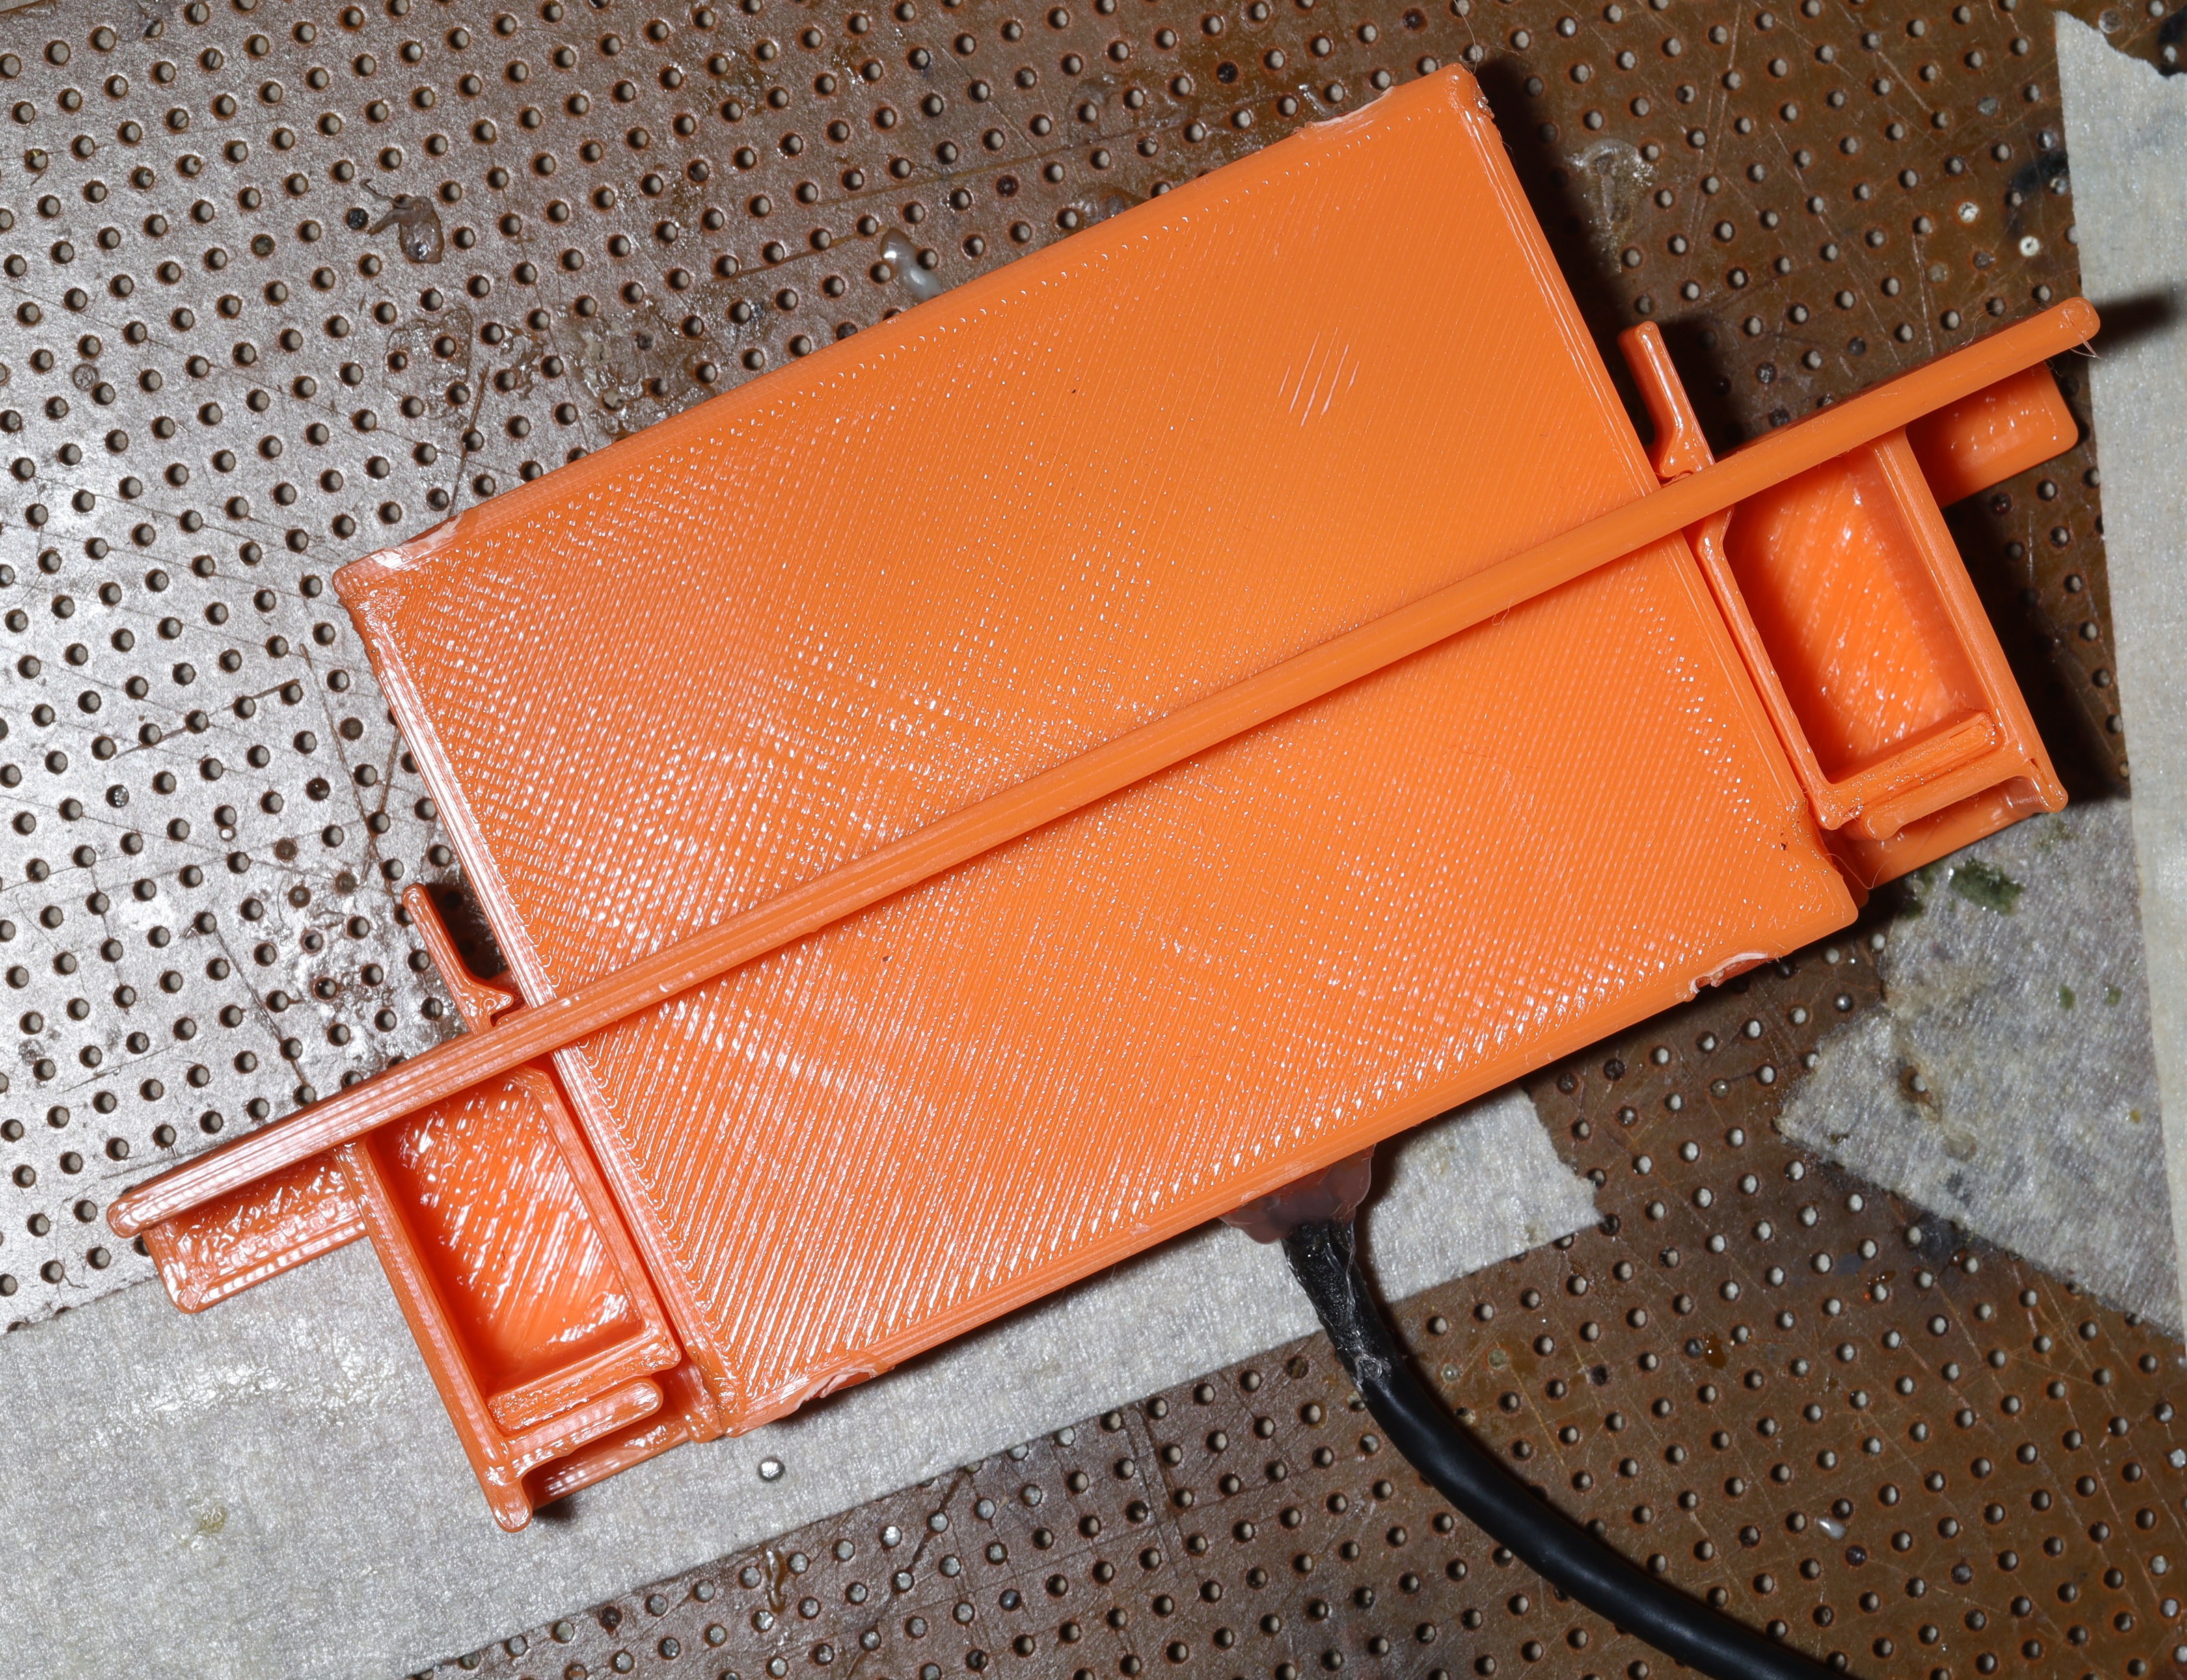
The modules for the webcam & IR ended up being extreme amounts of hot snot on bare boards. The only difference from a bare board is a mechanism for attaching them.
![]()
![]()
There is a crude way of latching them into position. The webcam should be open in the back, but it has a lot of wires flapping around. It might be more useful to design the modules as expansion cards instead of the fully enclosed framework laptop modules.
The battery is once again the biggest problem. The best battery enclosures have had a separate door. The tracker concept originally had a single back panel which opened up to reveal the USB ports & a 12V outlet for the flash. The back panel would become a stand. The battery almost requires a separate door inside the back panel. It doesn't have to cover the entire battery. It has to cover most of it.
The back panel could cover just the speakers & jetson.
The buck converter & wires are envisioned to have some kind of rail to tape onto.
There was a desire for a handle on top but the webcam is in the way. It would have to be a large handle.
Auto tracking camera
A camera that tracks a person & counts reps using *AI*.