Close
0%
0%

ESPresso Scale

Fully open source scale with ADS1232 24-bit ADC, ESP32 MCU and some coffee related software features.

Public Chat
Similar projects worth following
A small size, high resolution, high speed scale with ADS1232 ADC , ESP32 including custom PCB, custom ADS1232 library, custom Ionic v4 application.
ALL resources of the project are open source, please respect the mentioned licenses.

You can download:
PCB schematics, gerber and project files (easyEDA) for 2 PCB designs , one with MAX7221 and one with SPI connector.
Arduino IDE libraries and main .ino project with a lot of comments
stl and fusion 360 files of some cases
BOM and various documentation files
Ionic v4 companion BLE application

The scale is fully operational as is, but I am still testing/changing some things on the hardware and improving the software. Any ideas are welcome.

Software under GPL v3
Hardware under CERN Open Hardware Licence v1.2
Documentation under CC BY-SA license 2.0
v1.1 (current) version of the project also has OSHW certification: GR000002

This is a scale. A normal scale. OK, it has some twists that might help you on a future project.


No more HX711, no more jumper cables  

A -still amateurish- PCB with careful design around ESP32 and ADS1232. Careful means that the charging/power components are on the left side, digital components are on the middle (MCU) and analog are on the top right. You can charge the battery at full speed and measure properly with good resolution. Solder a precision 100g load cell and measure grains of salt.  


Features  

-Scale functions (tare,calibrate,averaging,filtering)

-OTA wifi update mode (not on normal mode - we need to conserve battery)

-BLE weight notification, BLE characteristic for options (read/write)

-Auto tare, auto timer, weight graph (more functions will be added soon)

-Three operation modes with separate timeouts (configurable): normal, snooze (monitor dimming, ADC slow down, instant automatic wakeup), sleep (monitor off, ADC off), deep sleep (ESP32 deep sleep).

-Low power consumption design, around 50mA (max 80mA) with TFT with 100% backlight and ADC working at 80SPS plus BLE. 20mA on snooze mode and of course <1mA on deep sleep (I cannot measure it exactly)

-ESP32 touch buttons (not sensitive enough), external touch modules/buttons connectors

-low battery LED with separate supervisor circuit (ESP can stay on deep sleep, (testing) battery level monitor when ESP is awake. Testing(May 2019): input voltage divider in order to fine tune the battery low warning level depending on your application.

-Almost all useful options/parameters are customizable and changeable in real time through the android app and/or serial interface (for debug).

  • 1 × ESP32 WROOM module (32,32D,32U) Or any other pin compatible module.
  • 1 × MCP73831 Lipo charging controller The whole charging circuit is a copy from the ESP32 thing from sparkfun
  • 1 × ADS1232 24-bit ADC from TI Stop using HX711 :)
  • 1 × Any OLED/TFT/... display with SPI bus PRO version. With support for backlight pin PWM
  • 1 × 7-Segment SMD (5*) and MAX7221 Lunar Eclipse version.

View all 9 components

  • Power consumption

    jousis07/08/2019 at 20:33 0 comments

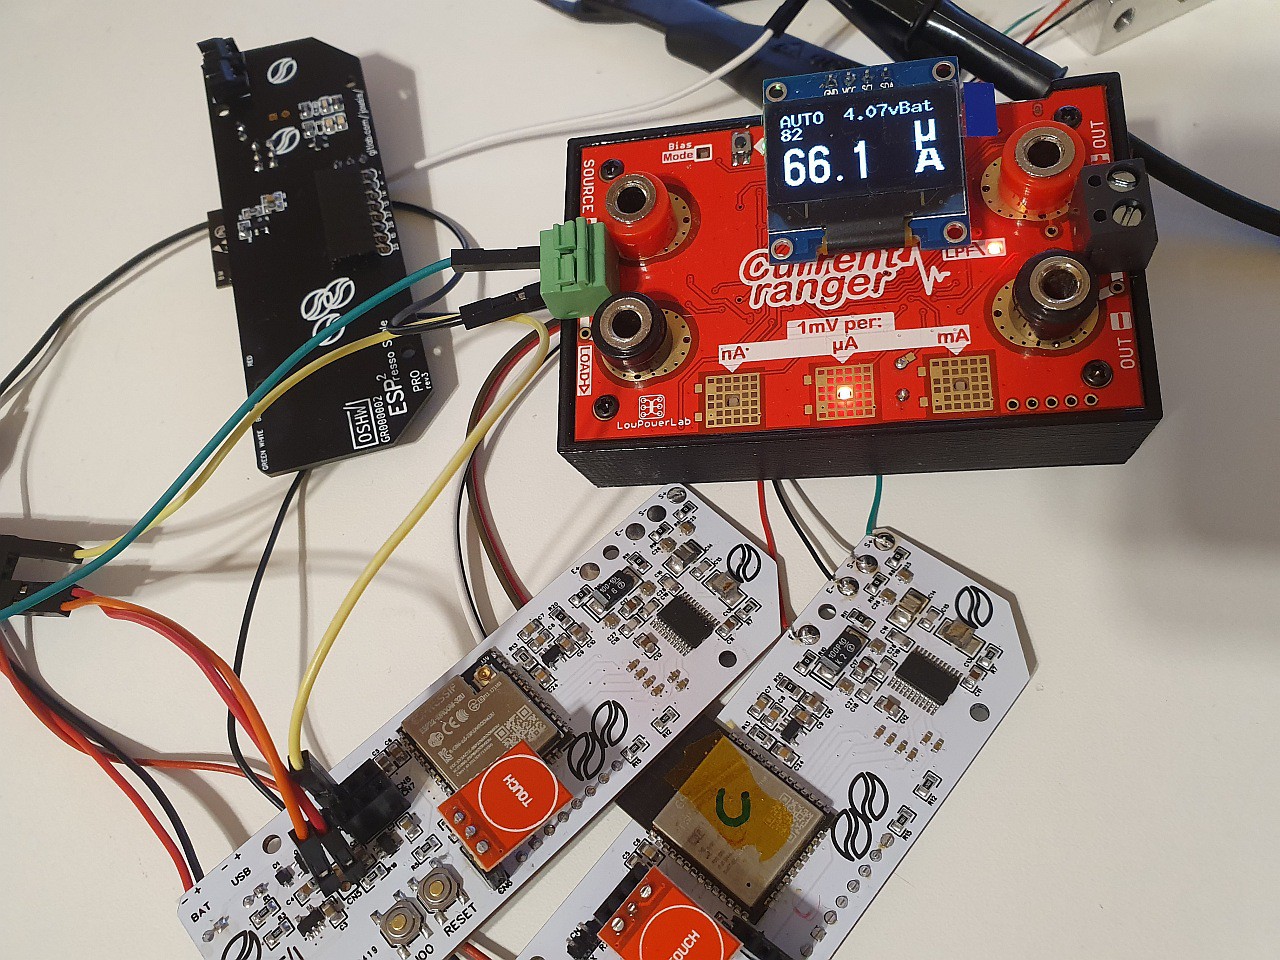
    Currently in a quest to minimize deep sleep power consumption of the latest revisions (white=4layer, black 2 layer).

    I've managed to go as low as 60uA with minor spikes at 70uA with 2 button modules connected (LEDs removed) and one 128x32 OLED.

    My main LDO (TLV75533PDBVR) consumes ~25uA when the scale is in deep sleep. I have some HT7833 that can drop the sleep current further but since I cannot find them as easily as the TI ones I will test them when everything else is set in stone.

    I could save some more uA if I install a switch (mosfet) for the ADC instead of keeping it in sleep mode, but it wouldn't worth the cost and complexity. The analog +3.3V supply for the analog pins and the load cell is controlled by the secondary LDO (0.01uA sleep current).

    For this amateur design around ESP32 WROOM module, I am happy even with 100uA. With a proper lipo (1300mAh) it can last more than a year in stand by (but of course it won't because...real life :D ).

    Will update the gitlab repo with the firmware fixes and the latest revisions after all the tests. As usual, if you are in a hurry, feel free to contact me.

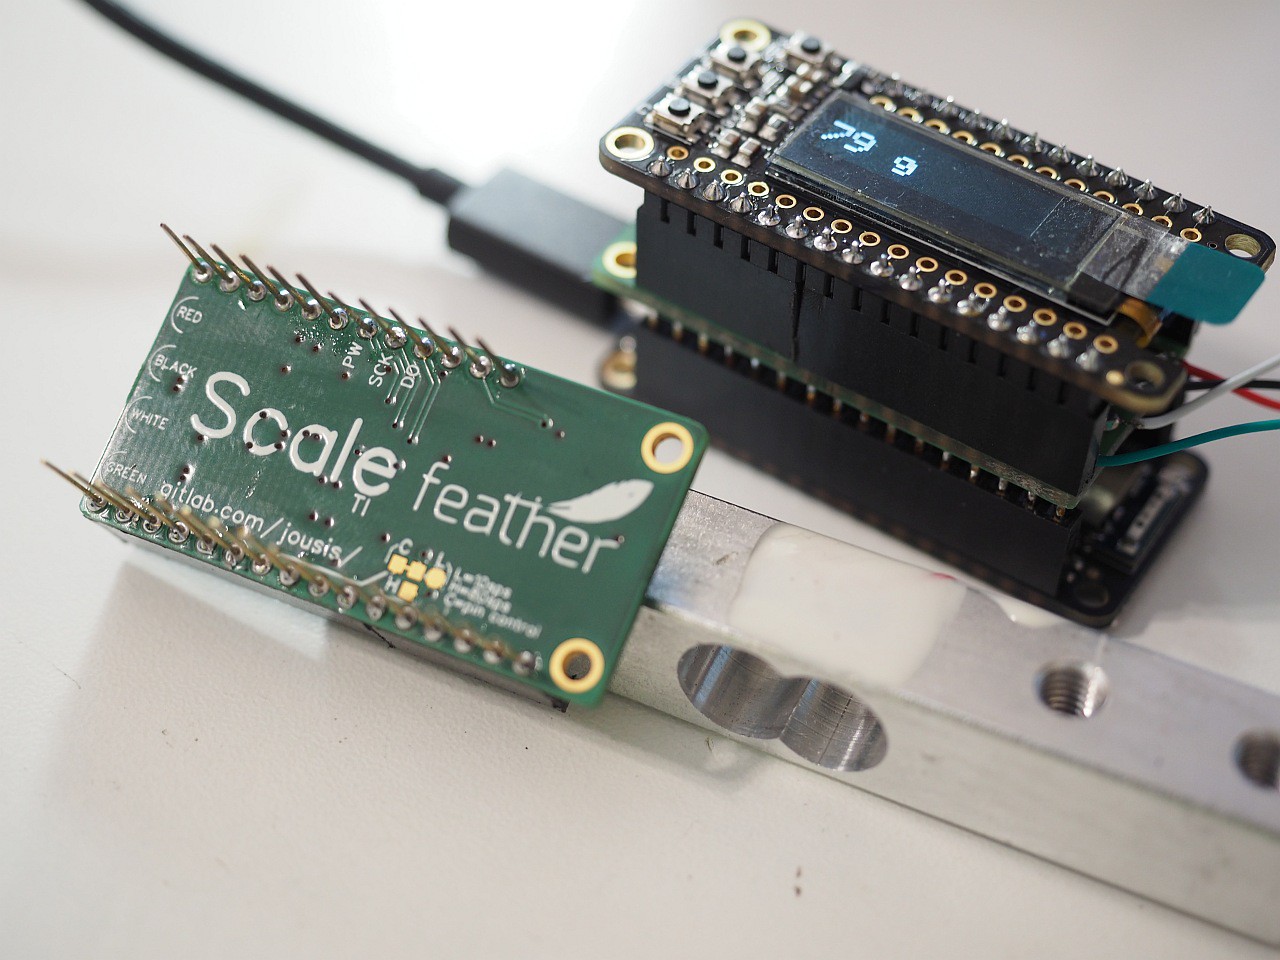
  • Feathers

    jousis06/07/2019 at 14:35 0 comments

    Cheap, check
    Easy to solder, check
    Compatible with I2C wings, check
    Compatible with (most? ) SPI wings, check (not using SPI pins for ADC)
    Compatible even with ESP8266 feather, check (solder jumper for speed control needed)

    If you need it urgently for a project, contact me for BOM/schematics (still under testing though).

  • Will it work ?

    jousis05/25/2019 at 19:58 0 comments

    Reliably measuring weak analog signals above noisy PCBs and (possibly) WiFi/BLE antennas.

    How hard can it be ?

    Place your bets :P

  • How (s)LOW can you go ?

    jousis05/18/2019 at 13:49 0 comments

    It is a known fact that ESP32 is too fast for the crappy HX711.

    Is this the case for ADS1232 as well ? 

    (spoiler: yes, but not so much)

    I wrote a simplistic explanation, aimed at noobs like me showing the problem with charts/screenshots.

    Excel with some charts is here

    Full doc explaining is here


    Too much reading ? No worries, I got you:

    Please note that HX711 is much worse than ADS1232, that’s why we are barely OK with 112ns here but waaay out of spec for HX711.
    SCLK min pulse width for the ADS1232 is 0.1us (100ns) and 0.2us(200ns) for the HX711. 

    But still, the final quick pulse we do to force the DOUT HIGH (optional) is within specs (112ns/112ns > 100ns)

    So, we should not have an issue with those pulses (barely). We don’t need to worry about inserting delay before and during the pulse.

    Most of the times, the DOUT change is done within 20-30ns from the HIGH command, 10-20ns from the clock going HIGH. In extreme cases, I’ve seen 40ns and the datasheet says max 50ns. If our MCU tries to read the DOUT within this period, we will (possibly) have an error bit. And depending on where this bit is, the error impact might be huge

    I am not exactly sure if t3 or t4 (or both) is the issue. 112 is very close to 100ns, but still within specs. On the other hand, I cannot measure the time from SCLK HIGH to digitalRead command to verify that it always is >50ns.

    Frequency

    Delay(+)

    Delay(-)

    Width (+)

    Width (-)

    Total Read

    240MHz

    0

    0

    260ns

    125ns

    9.40us

    ERRORS

    240MHz

    1

    0

    1.9us

    112ns

    51us

    240MHz

    1

    1

    1.9us

    1.9us

    97us

    160MHz

    0

    0

    375ns

    187ns

    13.66us

    160MHz

    1

    0

    2.73us

    175ns

    72us

    160MHz

    1

    1

    2.71us

    2.52us

    133us

    80MHz

    0

    0

    738ns

    362ns

    26.7us

    80MHz

    1

    1

    5.14us

    4.79us

    243us

  • v3 RC1 update

    jousis04/12/2019 at 12:56 0 comments

    New version of firmware & ionic app uploaded with many many more features including:

    -optimized display draw function with real time rotation,foreground color, background color,fps adjustments

    -fully customizable auto timer feature

    -all sections of the display can be changed or disabled

    -real time weight plot on any of the 3 sections of the display

    In the Assembly Guide document (Hardware\Documents) there is a full comparison on all the LDOs I have tested it with battery and DC input.

    Todo:

    -a proper moving average rate of change calculation.

  • Modular Display Function(s)

    jousis03/22/2019 at 23:56 0 comments

    Big code update coming soon plus the new v3 PRO PCB with many changes.

    My main issue with all my projects is the display. I develop using 128*64 SSD1306 but then I decide to go with 96*64 full color OLED. Managing the code with all those display.setTextSize,display.update and designing the display layout is also a pain.

    A Long time ago I wrote a wrapper function that manages the draw/refresh/fill of any display and supports left/middle/right justify (hor/vert) for each segment. After a nice refresh I implemented into this project.

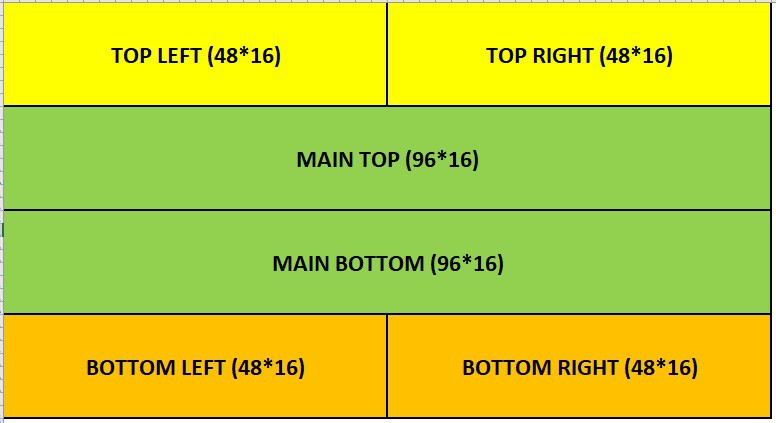
    First, I decide and design the sections (you can draw a simple mockup on excel) and the libraries/fonts, I can easily swap displays anytime and only need to change 2-3 parameters (width/height/cols for each font size and maybe some offsets).

    I think this is a very elegant way to handle any project with a dynamic and static segments in one display.

    More info on the actual .ino on gitlab (very soon)

    void drawSingleRowSection(String leftColText, byte leftColJustify, uint32_t leftColColor, uint32_t leftColBgColor, String rightColText, byte rightColJustify, uint32_t rightColColor, uint32_t rightColBgColor, byte vJustify, byte textMaxSize, byte &lastSectionTextSize, uint8_t sectionYOffset, byte sectionHeight, bool fullFill, bool sectionFill, bool doUpdate) {
      byte leftColTextLength = leftColText.length();
      byte rightColTextLength = rightColText.length();
      
      byte colDivider = 2;
      
      byte textSize = 4; //
      byte maxCols=DISPLAY_COLS_TS1/4; //4 is the max supported size, and DISPLAY_COLS_TS1/4 are its max columns
      byte xOffset = DISPLAY_XOFFSET;
      uint8_t yOffset = sectionYOffset;
      uint8_t yOffsetAdjust = 0;
      
      byte leftPrefixLength = 0;
      byte rightPrefixLength = 0;
    
    
      if (rightColTextLength == 0) {
        //full width top section
        colDivider = 1;
      }
      
    
      if ((leftColTextLength <= DISPLAY_COLS_TS1/(colDivider*4)) && (rightColTextLength <= DISPLAY_COLS_TS1/(colDivider*4)) && textMaxSize > 3) {
        textSize=4;
        xOffset+=DISPLAY_XOFFSET_TS4;
      } else if ((leftColTextLength <= DISPLAY_COLS_TS1/(colDivider*3)) && (rightColTextLength <= DISPLAY_COLS_TS1/(colDivider*3)) && textMaxSize > 2) {
        textSize=3;
        xOffset+=DISPLAY_XOFFSET_TS3;    
      } else if ((leftColTextLength <= DISPLAY_COLS_TS1/(colDivider*2)) && (rightColTextLength <= DISPLAY_COLS_TS1/(colDivider*2)) && textMaxSize > 1) {
        textSize=2;
        xOffset+=DISPLAY_XOFFSET_TS2;
      } else {
        textSize=1;
        xOffset+=DISPLAY_XOFFSET_TS1;
      }
    
      if (lastSectionTextSize != textSize) { 
        sectionFill=true; 
      }
      lastSectionTextSize = textSize;
      maxCols=DISPLAY_COLS_TS1/textSize;
      yOffsetAdjust=(sectionHeight-DISPLAY_FONT_HEIGHT_TS1*textSize)/2;
      yOffset += yOffsetAdjust*vJustify;


      if (leftColJustify == 1) {
        //center
        leftPrefixLength = (maxCols/colDivider - leftColTextLength)/2;
      } else if (leftColJustify == 2) {
        //right
        leftPrefixLength = maxCols/colDivider - leftColTextLength;
      }
    
      
      if ((rightColTextLength > 0) && (maxCols/colDivider > rightColTextLength)) {
        if (rightColJustify == 1) {
          //center
          rightPrefixLength = (maxCols/colDivider - rightColTextLength)/2;
        } else if (rightColJustify == 2) {
          //right
          rightPrefixLength = (maxCols/colDivider - rightColTextLength);
        }  
      }
    
      if (fullFill) { 
        clearDisplay();
      }
    
      if (sectionFill) {
          display.fillRect(0,sectionYOffset,DISPLAY_WIDTH/2,sectionHeight,convertRG888toRGB565(leftColBgColor));
          display.fillRect(DISPLAY_WIDTH/2,sectionYOffset,DISPLAY_WIDTH,sectionHeight,convertRG888toRGB565(rightColBgColor));
      }
      
      display.setTextSize(textSize);   
      display.setTextWrap(false);
      
      //left
      display.setCursor(xOffset, yOffset);
      display.setTextColor(convertRG888toRGB565(leftColColor),convertRG888toRGB565(leftColBgColor));
      for (int i = 0;i<leftPrefixLength;i++) {
        display.print(" ");
      }
      display.print(leftColText.substring(0,maxCols/colDivider));  
    
      if (rightColTextLength > 0) {
        display.setCursor(DISPLAY_WIDTH/2 + xOffset, yOffset);  
     display.setTextColor(convertRG888toRGB565(rightColColor),convertRG888toRGB565(rightColBgColor));
    ...
    Read more »

  • Upcoming changes

    jousis03/07/2019 at 00:01 0 comments

    v1.1 release is working properly but I have major issues with ESP32's capacitive sensors.

    They do not work well behind plastic. Although I new that before I thought I could get away with 0.4mm  walls but I eventually want to plasti-dip the scale and the extra thickness of that made the buttons unreliable.

    So, I am testing now a new version of the PRO pcb with connectors for the usual TTP223 touch button modules. There are 3 headers with separate VCC,IO,GND pins and one built in touch sensor (TTP223). Those TTP modules are very good, I have used them in various projects and I do not expect to have any issues with this approach. At the same time, the headers are very convenient since now I can connect regular buttons (all I/Os chosen have pullups).

    Soon I will also update the firmware project files with many minor changes and improvements.

View all 7 project logs

Enjoy this project?

Share

Discussions

chizuoka wrote 08/31/2020 at 15:53 point

is this project still being maintained :D looks very interesting

  Are you sure? yes | no

jousis wrote 01/06/2021 at 17:53 point

I have done some firmware modifications and some extra tests but due to work schedule it's not very actively maintained.

Please feel free to fork the gitlab repo and go from there.

If you have any questions feel free to ask (preferable on gitlab because I don't see hackaday very often).

Thank you for your kind words :)

  Are you sure? yes | no

Makerfabs wrote 03/14/2019 at 06:33 point

Like +1;

  Are you sure? yes | no

Similar Projects

Does this project spark your interest?

Become a member to follow this project and never miss any updates