Andrés Lopez Pulzovan
-
Drawing with general dimensions uploaded
10/05/2020 at 01:12 • 0 commentsI uploaded a drawing with the chamber's general dimensions, including the cutouts for the LED's.
-
Project video uploaded!
10/04/2020 at 22:13 • 0 commentsI have uploaded a video showcasing the project for the 2020 Hackaday Prize:
-
A solution to the oxygen inhibition problem
10/04/2020 at 18:27 • 0 commentsAs discussed in a previous project log update, a way to solve the oxygen inhibition problem (other than just curing for longer times) is to remove oxygen from the surface of the part. An easy way of doing it is to submerge the part to be glued in a flask of water, if the bond and glue allow it.
A further reduction of the curing time can be achieved if the water is heated (with an inexpensive mains water heater for example) to accelerate the curing reaction.

The curing chamber with a flask of water 
An example of the proposed water heater (source: Aliexpress) -
Tidying up of project details
10/03/2020 at 16:47 • 0 commentsSome small tidying up of the project details. Added captions to the figures and now they open in a new tab.
-
The problem with Oxygen Inhibition
10/03/2020 at 14:34 • 0 commentsOxygen inhibition is a constant problem with UV glues and resins. When the glue or resin is exposed to oxygen, it can diffuse in the superficial layer of the glue or resin and inhibit the polymerization reaction. This results in a tacky surface layer, even after curing for the specified time.
In my case, given that I originally developed this chamber to cure resin 3D prints, this surface tackiness was absolutely inadmissible. The "brute" solution to this problem is to cure harder and longer, that is, to use more UV light power and/or cure for longer times.
Of course, this is an inefficient approach. A more efficient way of preventing oxygen inhibition is to... well... exclude oxygen from the surface. With resin 3D prints, what I did is to submerge the part in a big transparent flask (without the lid) full of water. It is important that the flask has a big opening, since glass can absorb a substantial amount of UV light.
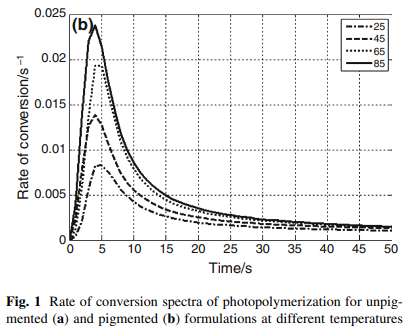
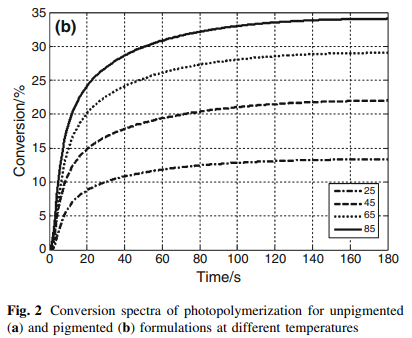
Additionally, the water in the flask can be heated to further accelerate the polymerization reaction. A good temperature for curing is 65ºC, as can be seen in the following figures, that were taken from Kardar et.al.:
![]()
![]()
Of course, the highter the temperature, the better, but in the case of standard UV resin, temperatures higher than 70ºC can have adverse effects on the material.
-
A quick note about wavelengths and additional uses of the chamber
09/17/2020 at 04:35 • 0 commentsThe wavelength selected for the LEDs of the chamber is 405 nm, because that is the wavelength required to cure most 3D printing UV resins, which in turn is the same as that of most UV curing adhesives. These wavelengths correspond to the UVA range, which represents the most "benign" range for human health.
If a different wavelength is required, it is enough to replace the LED's with a set of the correct wavelength, making this project very versatile. A correct matching of the required wavelength of the glue or resin will improve cure times dramatically.
If available, using shorter wavelengths (in the UVC domain) can provide an additional use of the chamber as a sterilization chamber.
-
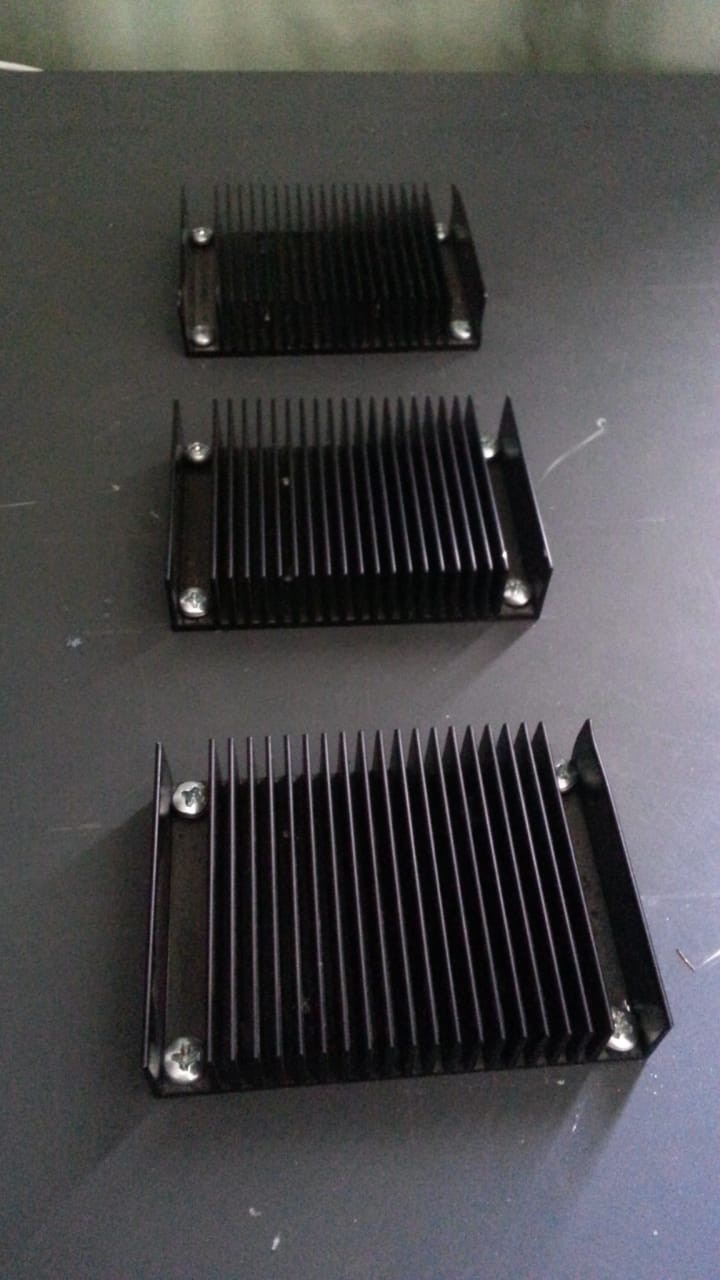
A detail about LED heatsinks
08/29/2020 at 15:18 • 0 commentsHeat sinking on CoB LEDs is critical, because the dissipated heat is substantial and the junction voltage of these LEDs drifts depending on temperature. In this case I used three heat sinks that were salvaged from the same devices extracted from the rack, and they have proven insufficient, because the temperature rise after 3 minutes of continuous operation is unacceptable. Fans will be added to improve heat dissipation
![]()
-
Arduino sketch uploaded!
08/29/2020 at 15:13 • 0 commentsThe Arduino sketch was uploaded to the project page! As mentioned in the project's details, it is heavily based on the Arduino Kitchen Timer project (linked in this project's details) and in the code. The modifications were made to actuate the relay when the timer is started, and turn it off when time runs out (or the timer is manually stopped).
-
STL files uploaded!
08/29/2020 at 15:04 • 0 commentsThe files to 3D print the case were uploaded to the project page! The 16x2 LCD and the relay board should fit right away. Note there is a square perimeter: the (disassembled) wall wart transformer + the rectifier are fitted there to provide isolation.
-
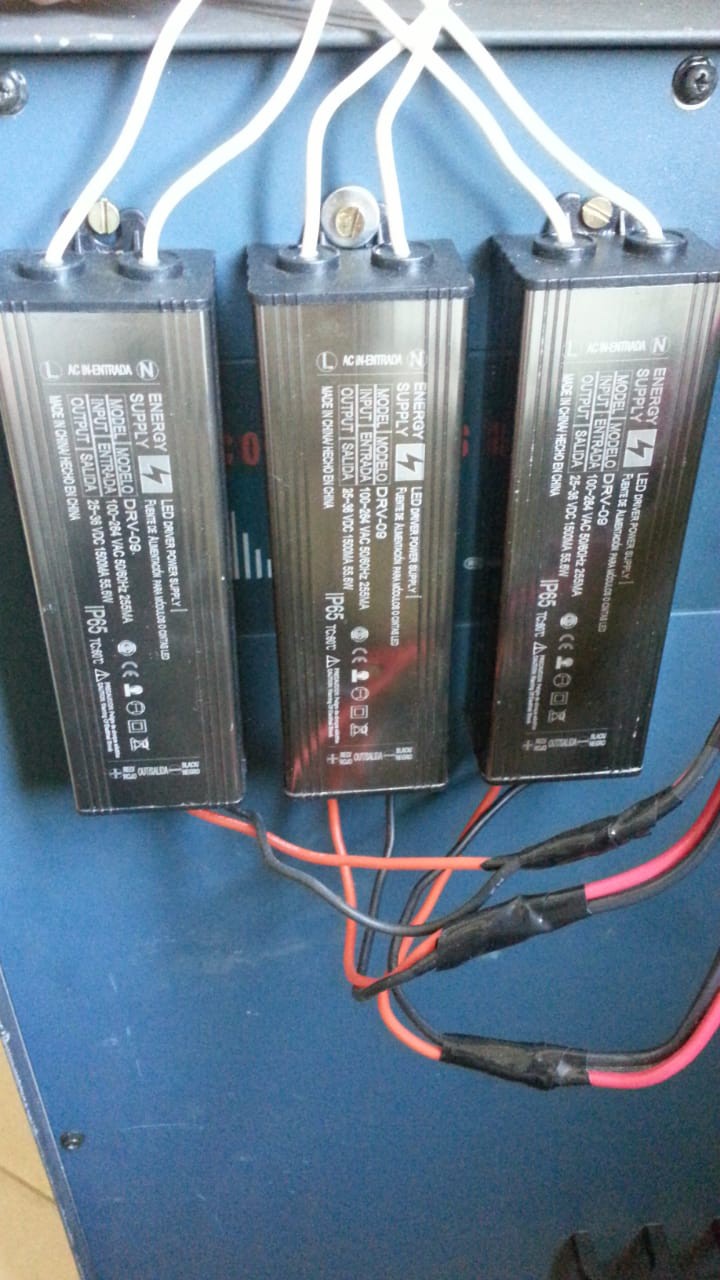
LED drivers installed
08/29/2020 at 14:59 • 0 comments![]()
The three 55.6W drivers were installed. They connect to the mains through the relay, so that the LEDs are turned on or off by connecting the drivers to the mains.
UV Curing Chamber
A UV light curing chamber made with an old rack, some aluminum foil, and three 50W UV LEDS. An Arduino is used as a programmable timer.