 Mike Moore
-
1Get going with the balance controller & simulation
If you're looking to contribute to Bobble-Bot, the easiest and most affordable place to start is the sim. We use the simulator for all of our software development, and you should use it too. We've gone through great effort to validate and build confidence in our simulator. See our GitHub for instructions on how to build the sim from source.
![]()
Start with the controller config file. Mess with some of the gains to see their impact on the control performance. Next, try out changes to the mass properties by making changes to the URDF. Do whatever you want...it's simulation...have fun!
-
2Read the CONTRIBUTING guide.
We welcome contributions to the project. If they are software changes we insist that you follow the rules outlined in our CONTRIBUTING.md file. Following these steps creates a method to our madness when it comes to software. Most importantly, it allows us to run your changes through a suite of automated software tests that rely on our simulation. The process is key to getting your changes folded in quickly.
-
3Run some test scenarios
Now that you've got the simulation built and running, it's time to use it to generate some data. The basic steps are provided below, but you can get a whole bunch more detail by visiting here and here.
source devel/setup.bash
roslaunch bobble_controllers apply_impulse_force.launch impulse:=-1000 out_file:=~/bobble_workspace/src/bobble_controllers/analysis/impulse_test
If all goes well, you should see something like this:
![]()
-
4Learn how to analyze your sim and test results
The simulation repository also comes with helpful tools for analyzing the simulation data. This blog series covers it in detail. You can find sample Jupyter notebooks here.
![]()
-
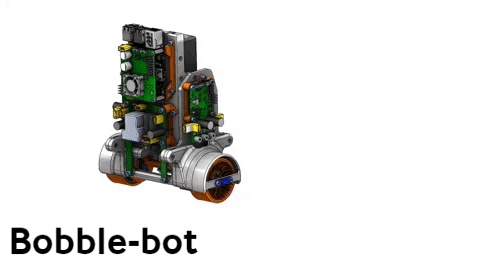
5Enough software, how do I actually make one of these...
Start with CAD & printing. Don't have a printer? Consult the components list and BoM to make your purchases. Send us a message if you need help. Check out the cable harness PDF to make all of the cables necessary to power each component and facilitate communication between all of the electronics.
![]()
Assembly instructions with component listings and exploded views are available in this document: Bobble-Bot Assembly.
-
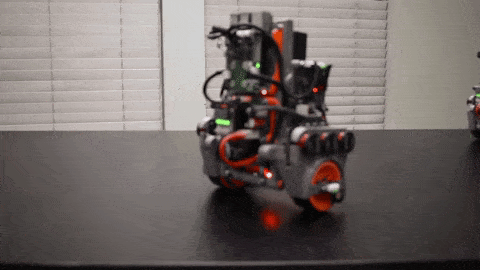
6Watch this assembly video
Once you have the printed assembly and hardware components, you are ready to assemble Bobble-Bot. The assembly video below takes the robot from components to fully Bobbling in 30 minutes!
-
7Load the software
Download a build of the Bobble-Bot software image from our continuous integration server. E-mail us to request access. Load the image on to an SD card using balenaEtcher.
-
8Fire him up!
![]()
Now that you have all the software loaded, it's time to do some Bobbling!
Bobble-Bot
Demonstration robot for learning principles of real-time control using Raspberry Pi, RT Linux, and ROS.


Discussions
Become a Hackaday.io Member
Create an account to leave a comment. Already have an account? Log In.