Timescale
-
Added scaling
04/17/2020 at 15:54 • 0 commentsI was pretty happy with my 3 transform rotate function, but in the adventure engine I had a feature that I had not implemented on this platform. The reason being that this grew from a testbed for platformers where I discovered that using an image map to directly use for the graphic assets resulted in a massive performance loss.
Due to this, I stripped out some functionality of the drawing routines. This included the re-sampling function that also handled animations as these are generally part of the same asset.
In this case, the number of graphic assets on screen are not as much as the platformer or the top down strategy engine, so I wanted to put back in the resampling and frame selection function in such a way that it would neatly work with the 3 transform rotation.
Turns out, this was really easy. Almost a plug in addition to the engine. Of course it scales on one fixed corner, which has to be addressed, but in general it works really well. So, here is the demo!
-
Gamepad.IO
04/14/2020 at 15:28 • 0 commentsFor a while now, I wanted to do some experiments with gamepads. These controller devices are ubiquitous and I often considered them an easy and cheap way to interact with, well, just about anything that needs simple input. Surely I can use these devices in my work, but how to implement them?
I have a collection of input devices I play around with, but mostly I tinker with the more unique stuff like the Sony buzz quiz controllers or various Nintendo input devices. The generic gamepad not so much, but I do have a couple of them in my I/O hardware collection.
My classic Gravis gamepad is of no use as it is a 15 pin din device. I am building an arduino based converter for various types of I/O which I should actually be covering on hackaday.io, but perhaps later I'll do that write-up.
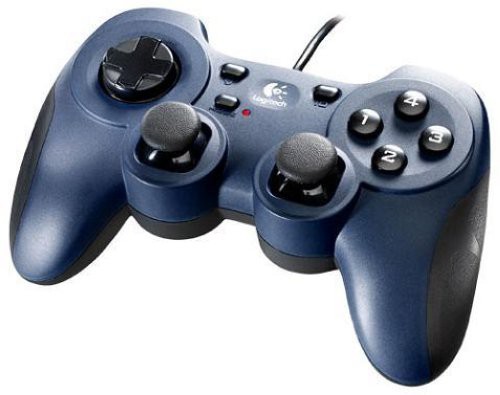
What I found in my bin was a logitech dual action USB gamepad. Just the thing! Nice and generic.
![]()
I knew the HTML5 gamepad API was experimental, so I wanted an implementation that could roll with the times. This means I want the input of the controller to be freely mapped to any control scheme I have got going on. In order to make this, I chose my ArrType test platform as I had allready implemented a keyboard control scheme to move the little ship around.
This scheme was based on readily available code examples and used an object in Javascript to map the event codes to names. The game can now, in its loop, check which buttons are pressed and call the appropriate function like rotate, move or shoot.
var Key = {
      _pressed: {},

      P1_LEFT:65,
      P1_RIGHT:68,
      P1_UP:87,
      P1_DOWN:83,
      P1_SPACE: 32,

      isDown: function(keyCode) {
        return this._pressed[keyCode];
      },

      onKeydown: function(event) {
        this._pressed[event.keyCode] = true;
      },

      onKeyup: function(event) {
        delete this._pressed[event.keyCode];
      },

    };
My idea is to map the buttons of a gamepad to the key names. This would not require any change in the game code that defines the actions and it means that remapping the keyboard controls from say the arrow keys to the A,S,W,D configuration would not affect the gamepad configuration.
var padMapped = new Array();
    padMapped[0] = new Array();
    padMapped[0][14] = "P1_LEFT";
    padMapped[0][15] = "P1_RIGHT";
    padMapped[0][12] = "P1_UP";
    padMapped[0][13] = "P1_DOWN";
    padMapped[0][5] = "P1_SPACE";
This array simply maps the necessary buttons to the names mapped to the keyboard input array. The upside of this method is twofold. Firstly, we do not have to define every button. Buttons pressed but not mapped, will be ignored without errors. The second benefit is that we actually can define keymaps that are outside the scope it can get via the keyboard. This means this setup is equally able to handle separate gamepad events. Multiple gamepads are supported.
The code for the gamepad detection, enumeration and update function, I got from there : https://github.com/luser/gamepadtest
It's a bit old, but it was short, it worked and I could easily fiddle my hooks into it. In any event, If/when I come across better/newer methods to do this, It won't be hard to take the old stuff out and put the new code in without actually having to worry about the underlying control scheme of the game/application itself.
The difference between the keyboard event listener and the gamepad update function is that the first is triggered on a button press and the later is dependent on an function that checks the status of the gamepad X times per second. If there is an event driven gamepad API solution, I'd like to know about it!
So basically all I have to do now is to trigger the keymapped object when a mapped gamepad button is pressed. That turned out to be quite simple.
     if (pressed) {
          padkey = Key[padMapped[j][i]];
          var padEvent = {
              keyCode: padkey
          }
          controllerStatus[j][i] = true;
          Key.onKeydown(padEvent);
          console.log(i)
      } else {
          if (controllerStatus[j][i]){
              controllerStatus[j][i] = false;
            padkey = Key[padMapped[j][i]];
              var padEvent = {
                  keyCode: padkey
              }
                Key.onKeyup(padEvent);
        }
      }
Of course the update function iterates through all the controllers and their buttons (and axis'), but at the core is this. The number of the button is used as the index for the name of the mapped key input. An object is made that resembles the event.keycode object and it is send to the up or down function of that object. As the gamepad API does not track buttonUp events, the state has to be checked with a status array, otherwise the controller would stop the keyboard from working properly.Well, that is about it for the gamepad implementation. Here is a demo I filmed with a potato!
-
The shear revolution
04/11/2020 at 16:34 • 0 commentsWhile it might look like I’m easily distracted and roam from project to project without actually ever finishing any of them, you might have a point but there is some method to my madness. The main objective is to create a toolkit of functions that are easy to implement as building blocks for any sort of retro game. Simple functions like drawing lines or boxes to assets or the screen and functions that can do a whole lot more like scaling, animating “sprites” and other effects.
These function have to be simple, fast and modular. If I build a effect in the adventure engine, it must also be usable in Shovelization and visa versa. Some game paradigms lend themselves better for certain functions than others and that is the reason why I have forked the project into several other game/app types. I now have the Adventure engine, the platform, the top down strategy platform, several audio and input experiments and an asteroids/city command type of environment.
The asteroids platform named “ARRRtype” (Because I imagined something with space pirates) is based on a fire effect with multiple draw layers. I put a random spaceship in there and quickly made it “fly” and rotate. It was a natural evolution for this branche to have the ability to rotate graphics.
The first rotation however wasn’t what I needed. I did a simple source to destination transformation that looked like this.
x = Math.round((Math.cos(rotate) * (tileX - centerx)) - (Math.sin(rotate) * (tileY - centery)) + centerx);
y = Math.round((Math.sin(rotate) * (tileX - centerx)) + (Math.cos(rotate) * (tileY - centery)) + centery);
For every pixel, this calculation has to be made and what you get is a moire mess.. I knew this, but I thought I’d write something better later. I didn’t think it would be that difficult. I understand the principle of using “destination to source” transformation which always results in a pixel to be plotted. I use this type of transformation in a pinch-punch and swirl effect that I have in the same toolbox.
Quickly I realised that for big graphics or many graphics at once, this was quite a costly operation. Then I stumbled on the notion of rotating by shearing the image. While it took me some time to wrap my head around it and adapt this method for full 360 rotation, it ended up pretty fast and versatile. You can read about the principle here : https://www.ocf.berkeley.edu/~fricke/projects/israel/paeth/rotation_by_shearing.html
But the essence is that by shearing the image 3 times, you can rotate a bitmap with all pixels intact. At the beginning you need to calculate a couple of values and then use these in the drawing function to calculate the displacement of each pixel. This is the way I implemented the Alpha en Beta shear values:
aShear = -Math.tan(rad/2).toFixed(2)
bShear = Math.sin(rad).toFixed(2)
And then for all pixels, the following cascade of transformation actually gives the new location.
destX = tileX + Math.floor(aShear * tileY);
destY = tileY + Math.floor(bShear * destX);
destX = destX + Math.floor(aShear * destY);
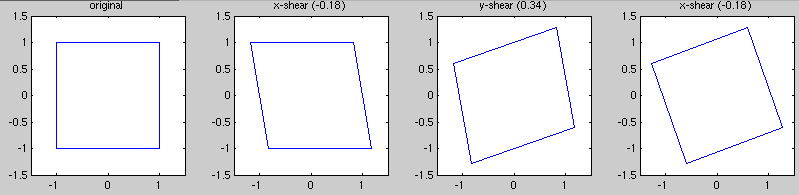
While on a per-pixel level, basically these are the operations that are done in order to rotate the original bitmap.
![]()
Now there are some issues I found with this method. I could not do a full 360 with this method. -90 and 90 degrees (or -100 and 100 rad) worked fine, but out of those boundaries, the image would distort and completely shatter at the top end. This issue was easily resolved by simply mirroring the X and Y axis while doing the same rotation for the lower angles. I’m not sure how neat my solution here was, but for now it works.
Then there was the problem of rotating around the center. The simple rotation method or a dest-to-source method automatically rotates around the center, which is what you’d want in many cases. The shear method however rotates around the top right corner of the image. To make it rotate around another point, you need to find the offset between the pivot point you want and the axis around which the shear method rotates. This is where I like this method more than others because it is trivial to assign a pivot point. All you need to do is use the same cascade calculation on the pivot point and calculate the difference. This could be the center, but in reality it could be any point in or outside the graphic. With a bit of code to account for the image flip, the rotation is flawless.
Top left is the ship rotated with the shear method. The bottom right rotation is the old method with the source to destination method. It is like a piece of Swiss cheese.
Here is the entire function :function drawSprite(x,y,deg,tileName){ var tileID = assetPointer[tileName], centerX = Math.round(sceneGraphics[tileID].width / 2), centerY = Math.round(sceneGraphics[tileID].height / 2); // needed for full 360 rotation with shear transforms. if (deg > 270){ deg -= 360; } if (deg < 90){ var rad = deg2rad(deg) } else { var rad = -deg2rad(180 - deg) } var destX, destY, aShear = -Math.tan(rad/2).toFixed(2), bShear = Math.sin(rad).toFixed(2), curPixel, destScreenPixel; // shear transform just the center var xDisplace = centerX + Math.floor(aShear * centerY), yDisplace = centerY + Math.floor(bShear * xDisplace), xDisplace = xDisplace + Math.floor(aShear * yDisplace), xDiff = centerX - xDisplace,// get the xoffset difference yDiff = centerY - yDisplace;// get the yoffset difference // Draw tile at position on board for(tileX = 0; tileX < sceneGraphics[tileID].width; tileX++){ for(tileY = 0; tileY < sceneGraphics[tileID].height; tileY++){ // the 3 shear transformation for the rotation destX = tileX + Math.floor(aShear * tileY); destY = tileY + Math.floor(bShear * destX); destX = destX + Math.floor(aShear * destY); // Include the offset for the pivot point. if (deg >= 90 && deg <= 270){ // mirror the shear rotation on both axis for full rotation & set pivot point. destX = (destX * -1) - xDiff; destY = (destY * -1) - yDiff; } else { // set pivot point for the other half destX += Math.floor(xDiff - sceneGraphics[tileID].width); destY += Math.floor(yDiff - sceneGraphics[tileID].height)-2; } curPixel = (tileY * sceneGraphics[tileID].width + tileX) * 4; destScreenPixel = ((destY + y - 1) * 320 + (destX + x - 1)) * 4; if (sceneGraphics[tileID].data[curPixel + 3] > 0){ imgdata.data[destScreenPixel + 0] = sceneGraphics[tileID].data[curPixel + 0]; imgdata.data[destScreenPixel + 1] = sceneGraphics[tileID].data[curPixel + 1]; imgdata.data[destScreenPixel + 2] = sceneGraphics[tileID].data[curPixel + 2]; } } } }And a short demo
-
Editor and clean up on isle nine.
03/30/2020 at 16:49 • 0 commentsIn my self-imposed isolation, I found it quite relaxing for the most part working on this pet-project again. There are no real dead-lines and there is nothing much else to do, so I can just chug along being all exited about my pointless and amateurish adventures in building retro games on non-retro platforms.
It turns out that a game editor does much the same thing for insight as a CMS does for understanding the data itself. It makes things clearer and simplifies it. When I started drafting the spec for this concept, I imagined several object and data layers, but now I'm just down to 2.5 ish. I just need an map and an object layer and some method to project the characters and NPC's.
Of course the underlying (literally) data must be represented in a map, but there is no need for those to have their own draw layer. You can only have a single level at a time. That works for the object level as well if I constrain those to 1 per tile.
So what have I managed apart from new enlightenments? Well, The editor now stores the map. I can place tiles and objects anywhere per tile or per selection. I have a minimap of the entire field, which can be arbitrarily big and I did a bit of cleaning up the code.
It could be more refined and elegant, but for the most part, I'm still experimenting of course. The line draw function could have been more advanced having just 1 function. Now it's 4. 2 for normal lines and 2 for the red-white pattern. I'll write a super functional line draw routine later, okay!!??
Well, just to demonstrate the editor as it stands now, here is a short demonstration video.
-
Back to the beginning
03/24/2020 at 19:44 • 0 commentsSo I have been busy with building stuff I get paid for. Some call it a job I guess, but with the current state of the world, this has been kinda shut down. With all this extra free time on my hands, I thought it a nice distraction to re-visit one or two of my dormant projects.
The adventure engine thus far is not finished, but it is quite feature complete. It has animation, asset management, a scripting language and a powerful 2D retro graphics engine. I learned a metric faecal-ton of things about game logic during that experiment. Granted, It spiralled out of control when I got into writing buffers and filter and subsequently went nuts will all types of crazy effects that look nice and retro, but really have little to do with early 90's games.
As I wrote in this projects introduction, this whole suite of experiments began with an attempt to write an archaeologically themes game. I build an engine with isometric tiles which was meant as a turn-bases strategy game a'la Civilization only not with countries but with archaeological sites. With these new tricks I learned, I think building that now is far more likely to succeed than my initial attempt.
This time I'll keep it simple. Not an isometric playing field but simply top down. I can adapt my platformer experiment which was an adaptation of the engine of my adventure engine to do that. It has everything I need. It redraws the screen 30 times a second and has all the graphics function I need, including the ability to construct tiles of arbitrary sizes on the fly which will be handy for menus and panels.
I have taken the system to the point where I am getting ready to split the main project in two. I need an editor to build the maps which are quite large even with an 80 by 80 grid. This is because there are at least 5 layers that need to be designed. Not just the map, but also the geology, archaeology, height info, objects. There could be more, but all these maps combined will inform the player function on how to interact with the environment.
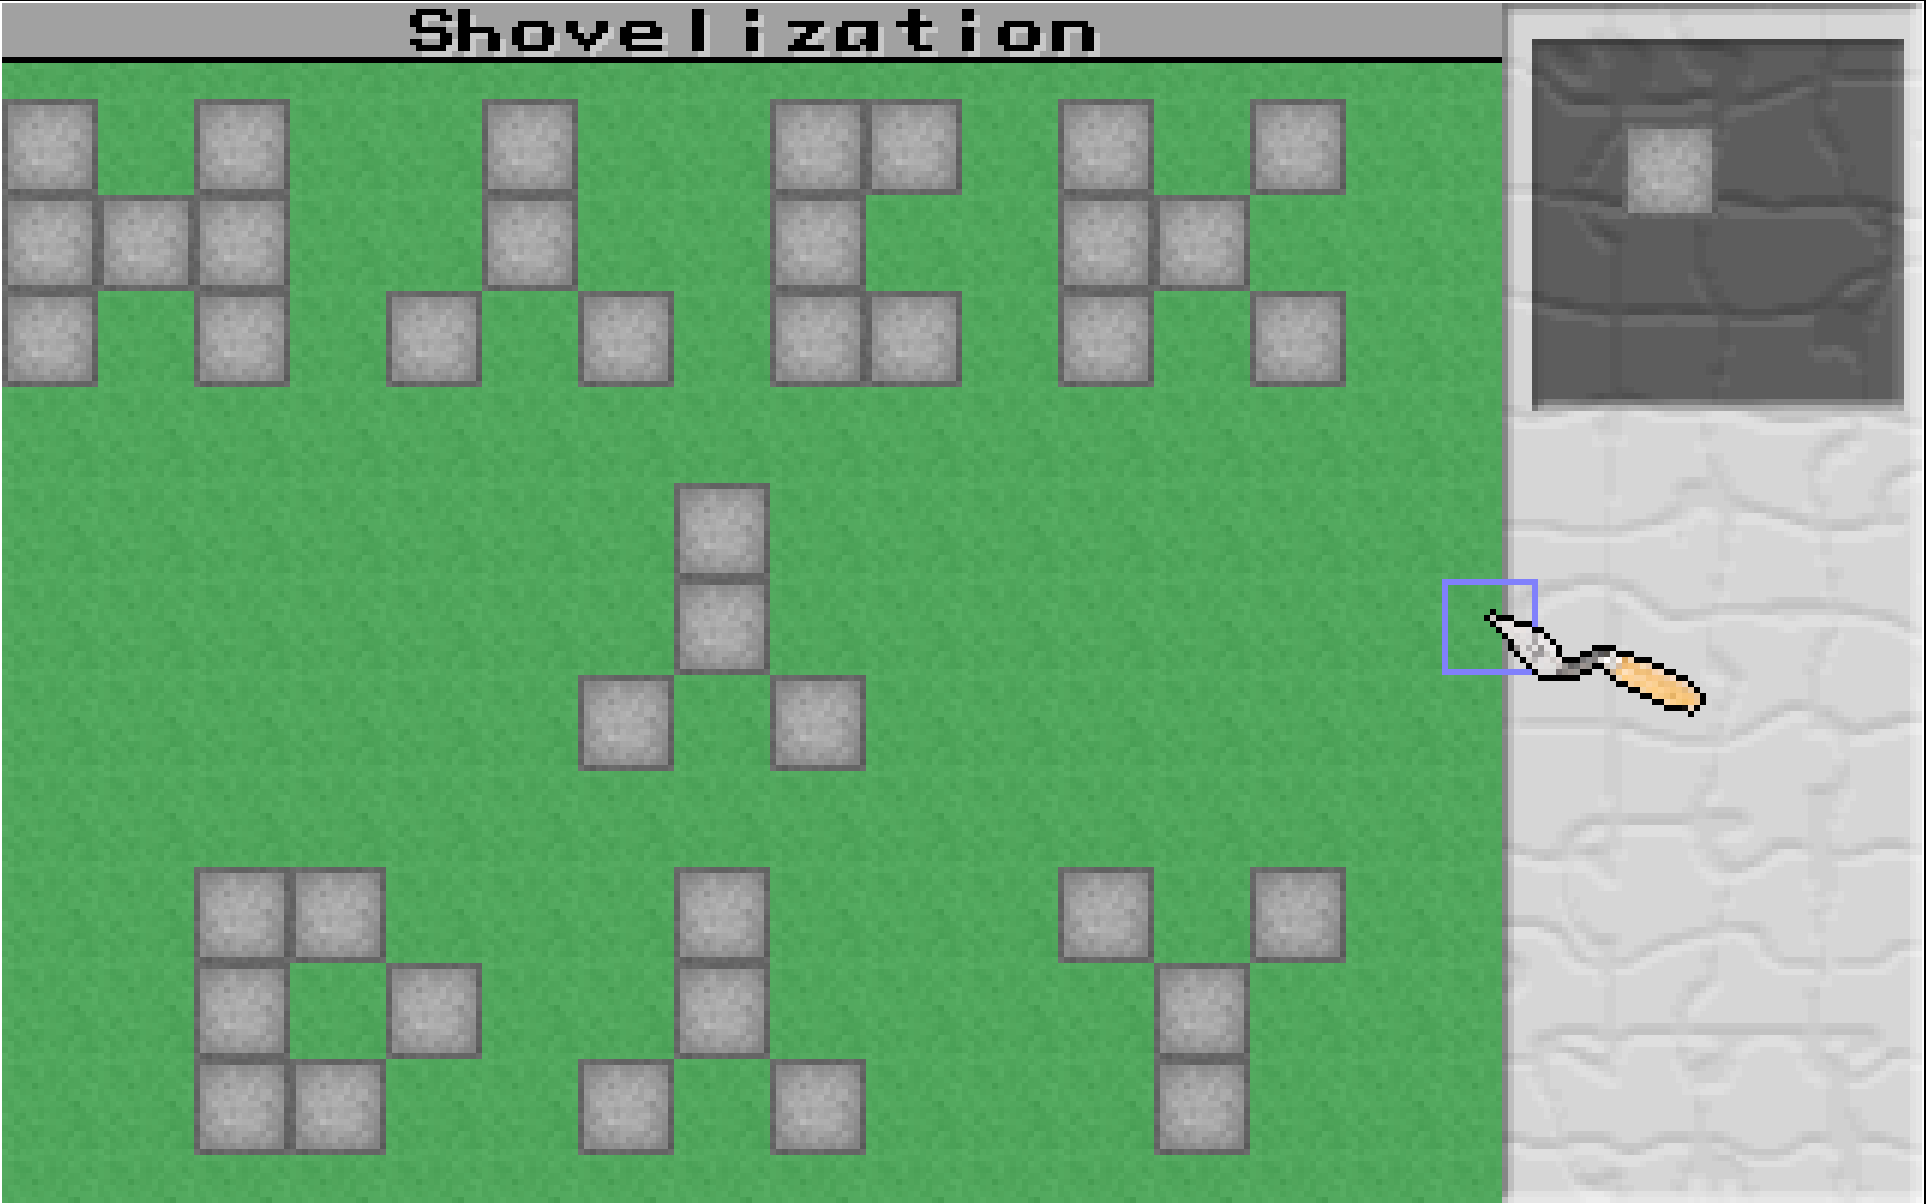
I have implemented the self updating menuing and panel system and the cursor system from the adventure engine and it looks something like this :
![]()
The entire screen is redrawn 30 times a second pixel for pixel and I still have more then enough time per tick to burn for other operations and game logic.
-
Just one more!
07/23/2019 at 17:53 • 0 commentsI admit, I have bee indulging a bit with playing with my.. graphics functions... But just for fun, let me show you one more that perhaps shows a bit more potential when it comes to in game effects.
This, seems to me, to be really handy for your typical bomber command clone!
-
Trying to think like a game dev.
07/22/2019 at 21:17 • 0 commentsIn the Last log where I posted a link to a live version of my adventure engine, I mentioned that I was experimenting with various ways to build up a screen to figure out what works and what not and what methods are efficient and usable. It occurred to me that various game types must have different approaches on how to render a screen that make sense for that specific type and I wasn't sure if my approach was the right one.
So I forked my adventure engine code and retooled it to be a continues side scrolling tile based platformer. The reason for the continues scrolling was because the engine already tries to draw the entire screen 30 times a second. A non scrolling game is easier on the CPU, but more difficult to code as all moving parts will need their own background redraw buffer. I know there are other options in HTML5 Canvas to make assets act more like real sprites, but I would like this project to be as basic as possible controlling every sub-pixel.
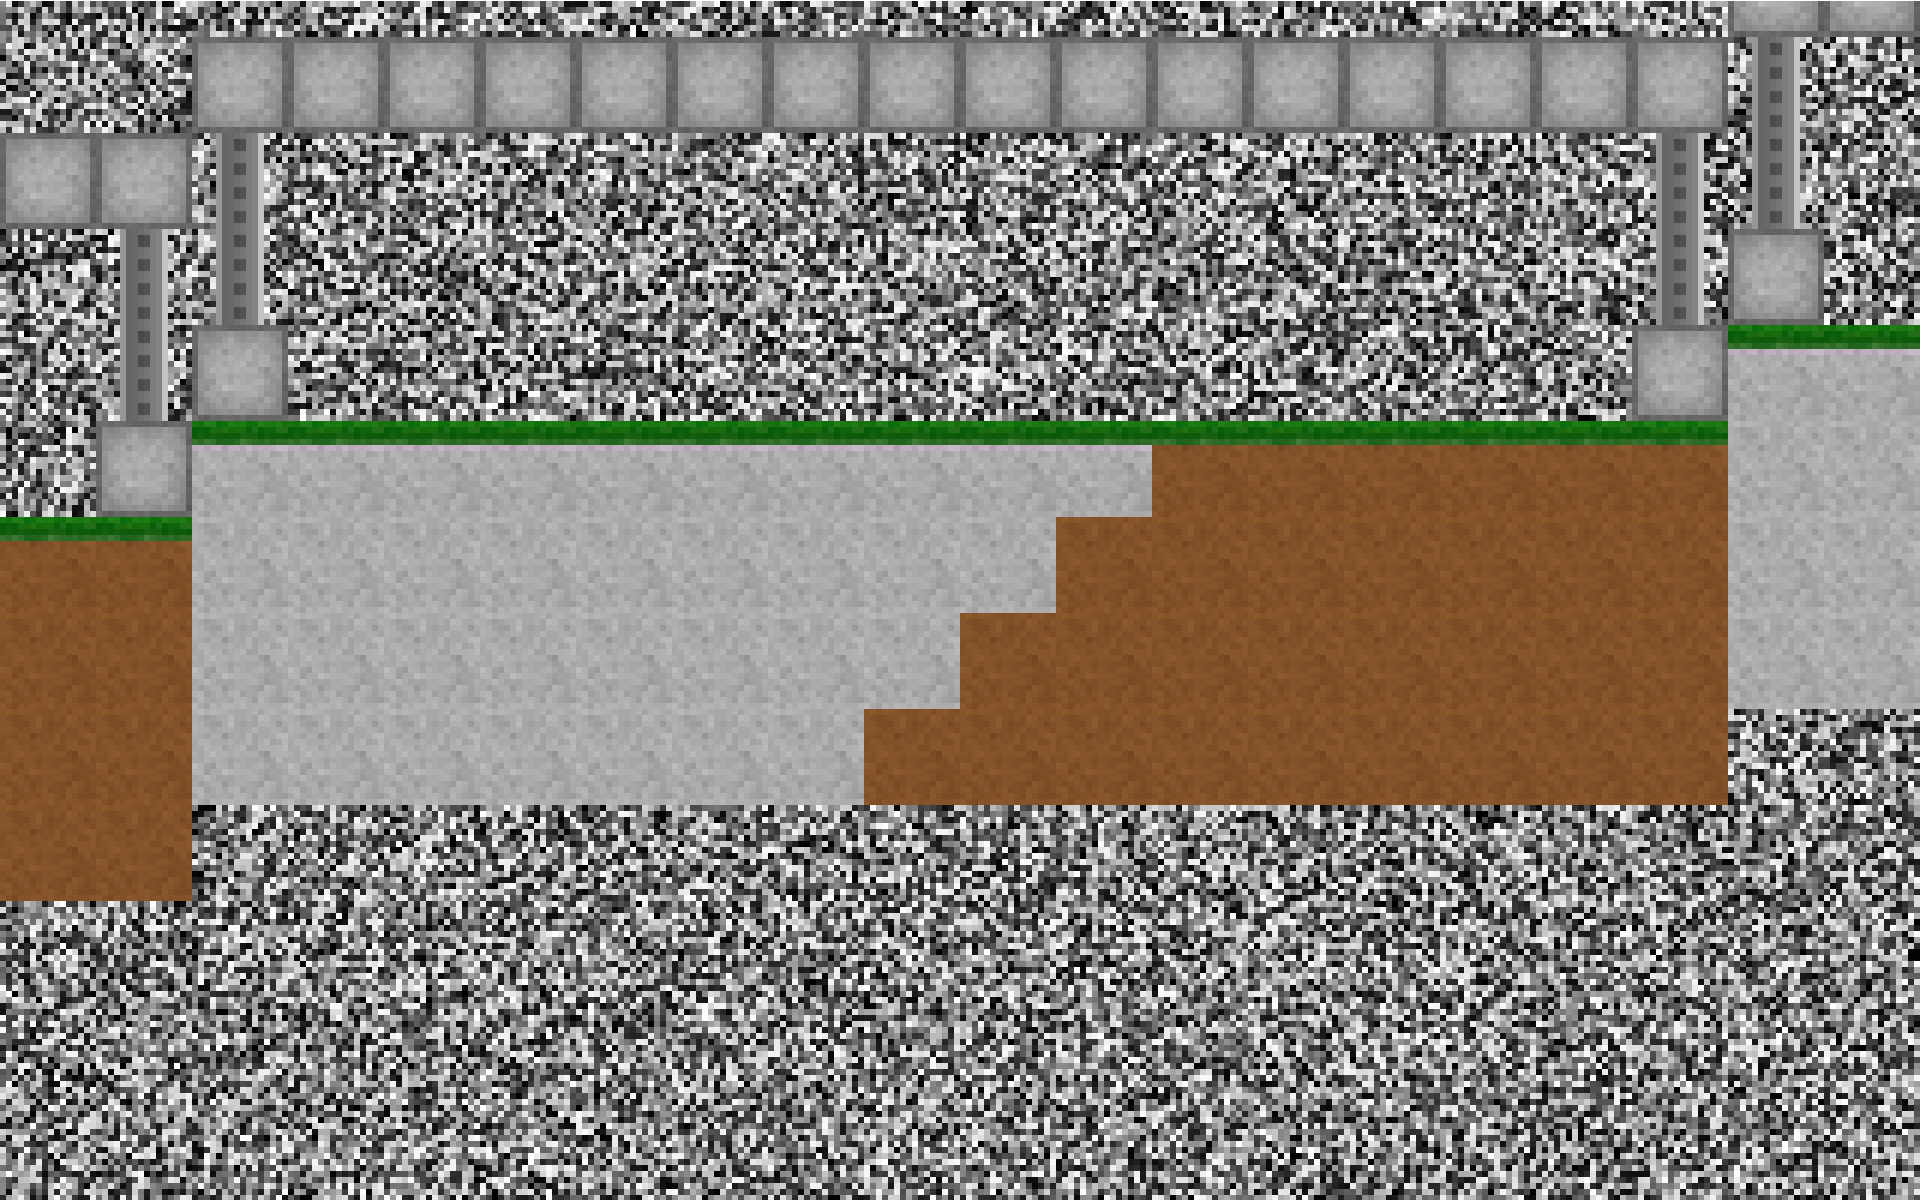
The quick proof of concept I whipped up did yield some interesting results. Instead of going down a list of object to draw as I do in the adventure engine, the platformer just scans the 320 by 200 pixels and using offsets and a tile map, figures out which pixel from which tile to draw. It looks a bit like this :
![]()
The snowy background just is random noise. The draw function also does not clip edges. What this demo does is simply take this data :
<mapData>
    3,3,3,3,3,3,3,3,3,3,3,3,3,3,3,3,
    6,0,0,0,0,0,0,0,0,0,0,0,0,0,0,6,
    6,0,0,0,0,0,0,0,0,0,0,0,0,0,0,6,
    3,0,0,0,0,0,0,0,0,0,0,0,0,0,0,3,
    2,2,2,2,2,2,2,2,2,2,5,5,5,5,5,5,
    1,1,1,1,1,1,1,1,1,4,4,4,4,4,4,4,
    1,1,1,1,1,1,1,1,4,4,4,4,4,4,4,4,
    1,1,1,1,1,1,1,4,4,4,4,4,4,4,4,4
</mapData>
And per pixel uses this to determine where the image data should come from. Now here is where it gets interesting because when I first implemented this I used a tilemap, or simply an image that held all the tiles in order.
![]()
Using only the first tile was fine. Well under one third of a second to draw 30 frames, but as soon as I put in the code that moves the coordinates in the drawing routine to get the data from the second, third to sixth tile, the render loop slowed down by a factor of 10.
This code wasn't that much different from the function I use in the adventure engine for animating the assets, but I never saw any drastic reduction in performance. In this case I did!
It turned out to be a single multiplication in the line where the X and Y coordinates were mapped to the image object. Apparently the impact of that one multiplication, per pixel, either gave an enormous overhead or completely nullified any clever predictive execution methods that I am not aware of to make the whole thing become unusable.
The solution was simple and crude. Instead of an image map, all the tiles were simply loaded into their own containers. The asset loader is quite capable of that, so I just cut them up and did it this way. Just passing the ID of the image data cause no slowdown and the engine now is perfectly capable of drawing the entire screen 30 times a second with a myriad of tiles and tile sized in fractions of a second.
I found this really interesting and it made me realize that this to is an area where it helps to have some intuition from experience. This frame shifting method is fine for a system where only a couple of assets are animated in this way, but not for others.
This set me out to explore other methods to build up a screen. I already named a few, but there obviously are more. Now what I'm doing is in no means using ASM on a 8-bit micro, racing the beam, but the general methods hold true.
This made me experiment with various effects and methods which resulted in a strange screensaver result that I would like to share with you now :
What this is, is the platformer code forked and made to draw the assets more like the adventure game, but also use the scanline function to do some effects. This turned out to be a real cheap way to get rudimentary blurring/dithering on the fly for background and forground effects.
The tile objects are just bounding about, being drawn with various amounts of "chaos", while the buffer is constantly altering and shifting the data around, resulting in a type of iTunes Flurry effect. Also note that this effect is VERY HARD on Youtube's compression algorithm. It looks much cleaner in real life.
These types of effects could be very useful in a space fighter top scrolling game where, at least the characters would be drawn from a list in such a way.
I'll experiment with these types of render methods a bit more and try to formalize it into a single effects/tile/sprite library. I think these adventures are giving me some insight on what data and what attributes should be structured in what way considering game type X or Y.
Perhaps sometimes an asset does need to contain a part of its own drawing function and variables after all and perhaps sometimes the buffer is more then just a blank canvas.
And just for fun, another configuration.. FIREBALLS!!!!
-
Try it yourself!
07/19/2019 at 13:39 • 0 commentsHaving been busy with other (paid) projects, I did not have much time tinkering with the adventure engine for some time. I did experiment with the <canvas> some more and that yielded some interesting results.
But in the meanwhile, I thought perhaps putting this out there is the right thing to do at this point in time. So here you have it !
If you want to look at something, press the L key and to pick something up, press the P key. If you get stuck, you can move the character around with the arrow keys.
There are some test functions available like the filter mode, fades and testing a part of the scripting functions.
Nothing is obfuscated and you can download all the files with any extraction tool to have a go at it yourself. Apart from the "borrowed" graphic asset, all material/code is to be considered under the MIT license (version 2.0).
If anybody wants a zip file, let me know.
-
Storyboard Script
05/06/2019 at 11:15 • 0 commentsIt's time for some game logic! From the very first outline of this project, I wanted to have an engine that used an interpreted scripted narrative to run the game. It is time to start work on that.
The last piece of the puzzle was to implement a global game state. This does a couple of things, but the most important thing is, it stores changed values per scene per object and when a scene (re)-loads, those values are put back. This means if you pick up an item in one scene, go to the next and then return, the item will still be picked up. Having a global game state also makes it easier to implement saved games and do quick testing of various game scenarios.
But now I want something to do in the game. I have not yet made the inventory system, but that is a bolt on accessory that I do not need for this. What I want is for each scene to have a storyboard with an easily readable script that is able to define actions and subsequent reactions all with some logic thrown in there. For this I took some inspiration from other game scripting languages and general scripting languages.
I want the least amount of syntax and maximum readability. That is why I chose to use an indent type of logic that interprets something that kinda resembles the verb based system SCUMM used, but not quite! Here is a snippet.
<storyboard>

    use stick on bolder
        case bolder.pushCounter = 3
        say "enough already!"
        break
    esac
    set bolder.pushCounter ++
    move bolder add 10 0
    play grind
    say "Uuurrggg...."
    case bolder.pushCounter = 3
        say "Well, that went better than expected!"
        hide bolder
        break
    esac
    use bag1 on bolder
        say "That does not seem to work."
    break

    lookAt bag1
        say "That's my bag!"
    break

    lookAt stick
        say "It's a stick! Made of wood."
    break

</storyboard>
The main part here of course is the "use stick on bolder" line. In this case, it is not a description of what can be done, but a label of what to do when this happens. The game engine itself will generate that set of words and will then search the script for this occurance. If it is there, the script level goes up and interprets every line on that level until it breaks or the level goes down again.
Specialized function like say, hide and play are abstracted versions of their actual engine counterparts. It is still possible to directly change game state via the set command. In fact, most commands could be done with set, only it would take more commands to do the same thing like move that would need several in this case as it not only sets an object x and y position, it adds to it which means that you'd need to use set about 6 times making the script less readable.
Another example would be the hide command which does 2 things. First obviously it hides the object but more importantly it sets the global. The alternative version isn't much longer, but it is longer none the less.
case bolder.pushCounter = 3
        set bolder.hidden true
        global bolder.hidden
        break
esac
For commands like say, it would be even more involved as it would mean setting various object attributes and figuring out what object to do it to. The say functions just does that for me.
At this moment, the script does indeed run and most functions are implemented. There are a few things I need to clean up and test, but I think this is looking very promising.
HTML5 Retro Game Engine(s)
A Side project where I try and build various scriptable retro game engines in the browser.