MasterOfNull
-
Transmission test
05/26/2019 at 03:29 • 0 commentsRan into some issues with my transmission. After assembly and during some initial testing it became obvious something was amiss. Well, a couple things.
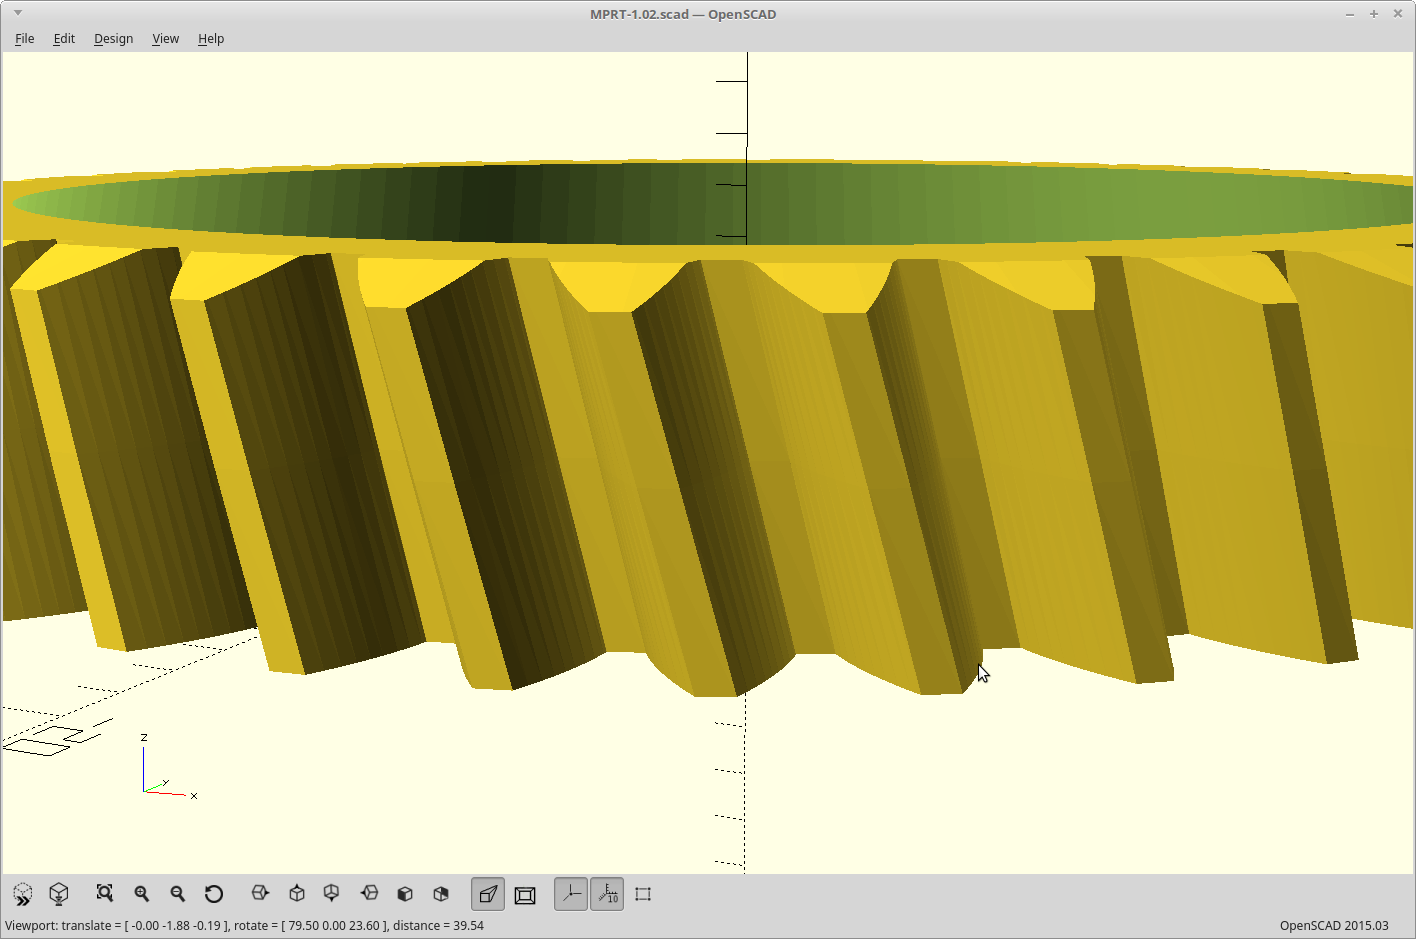
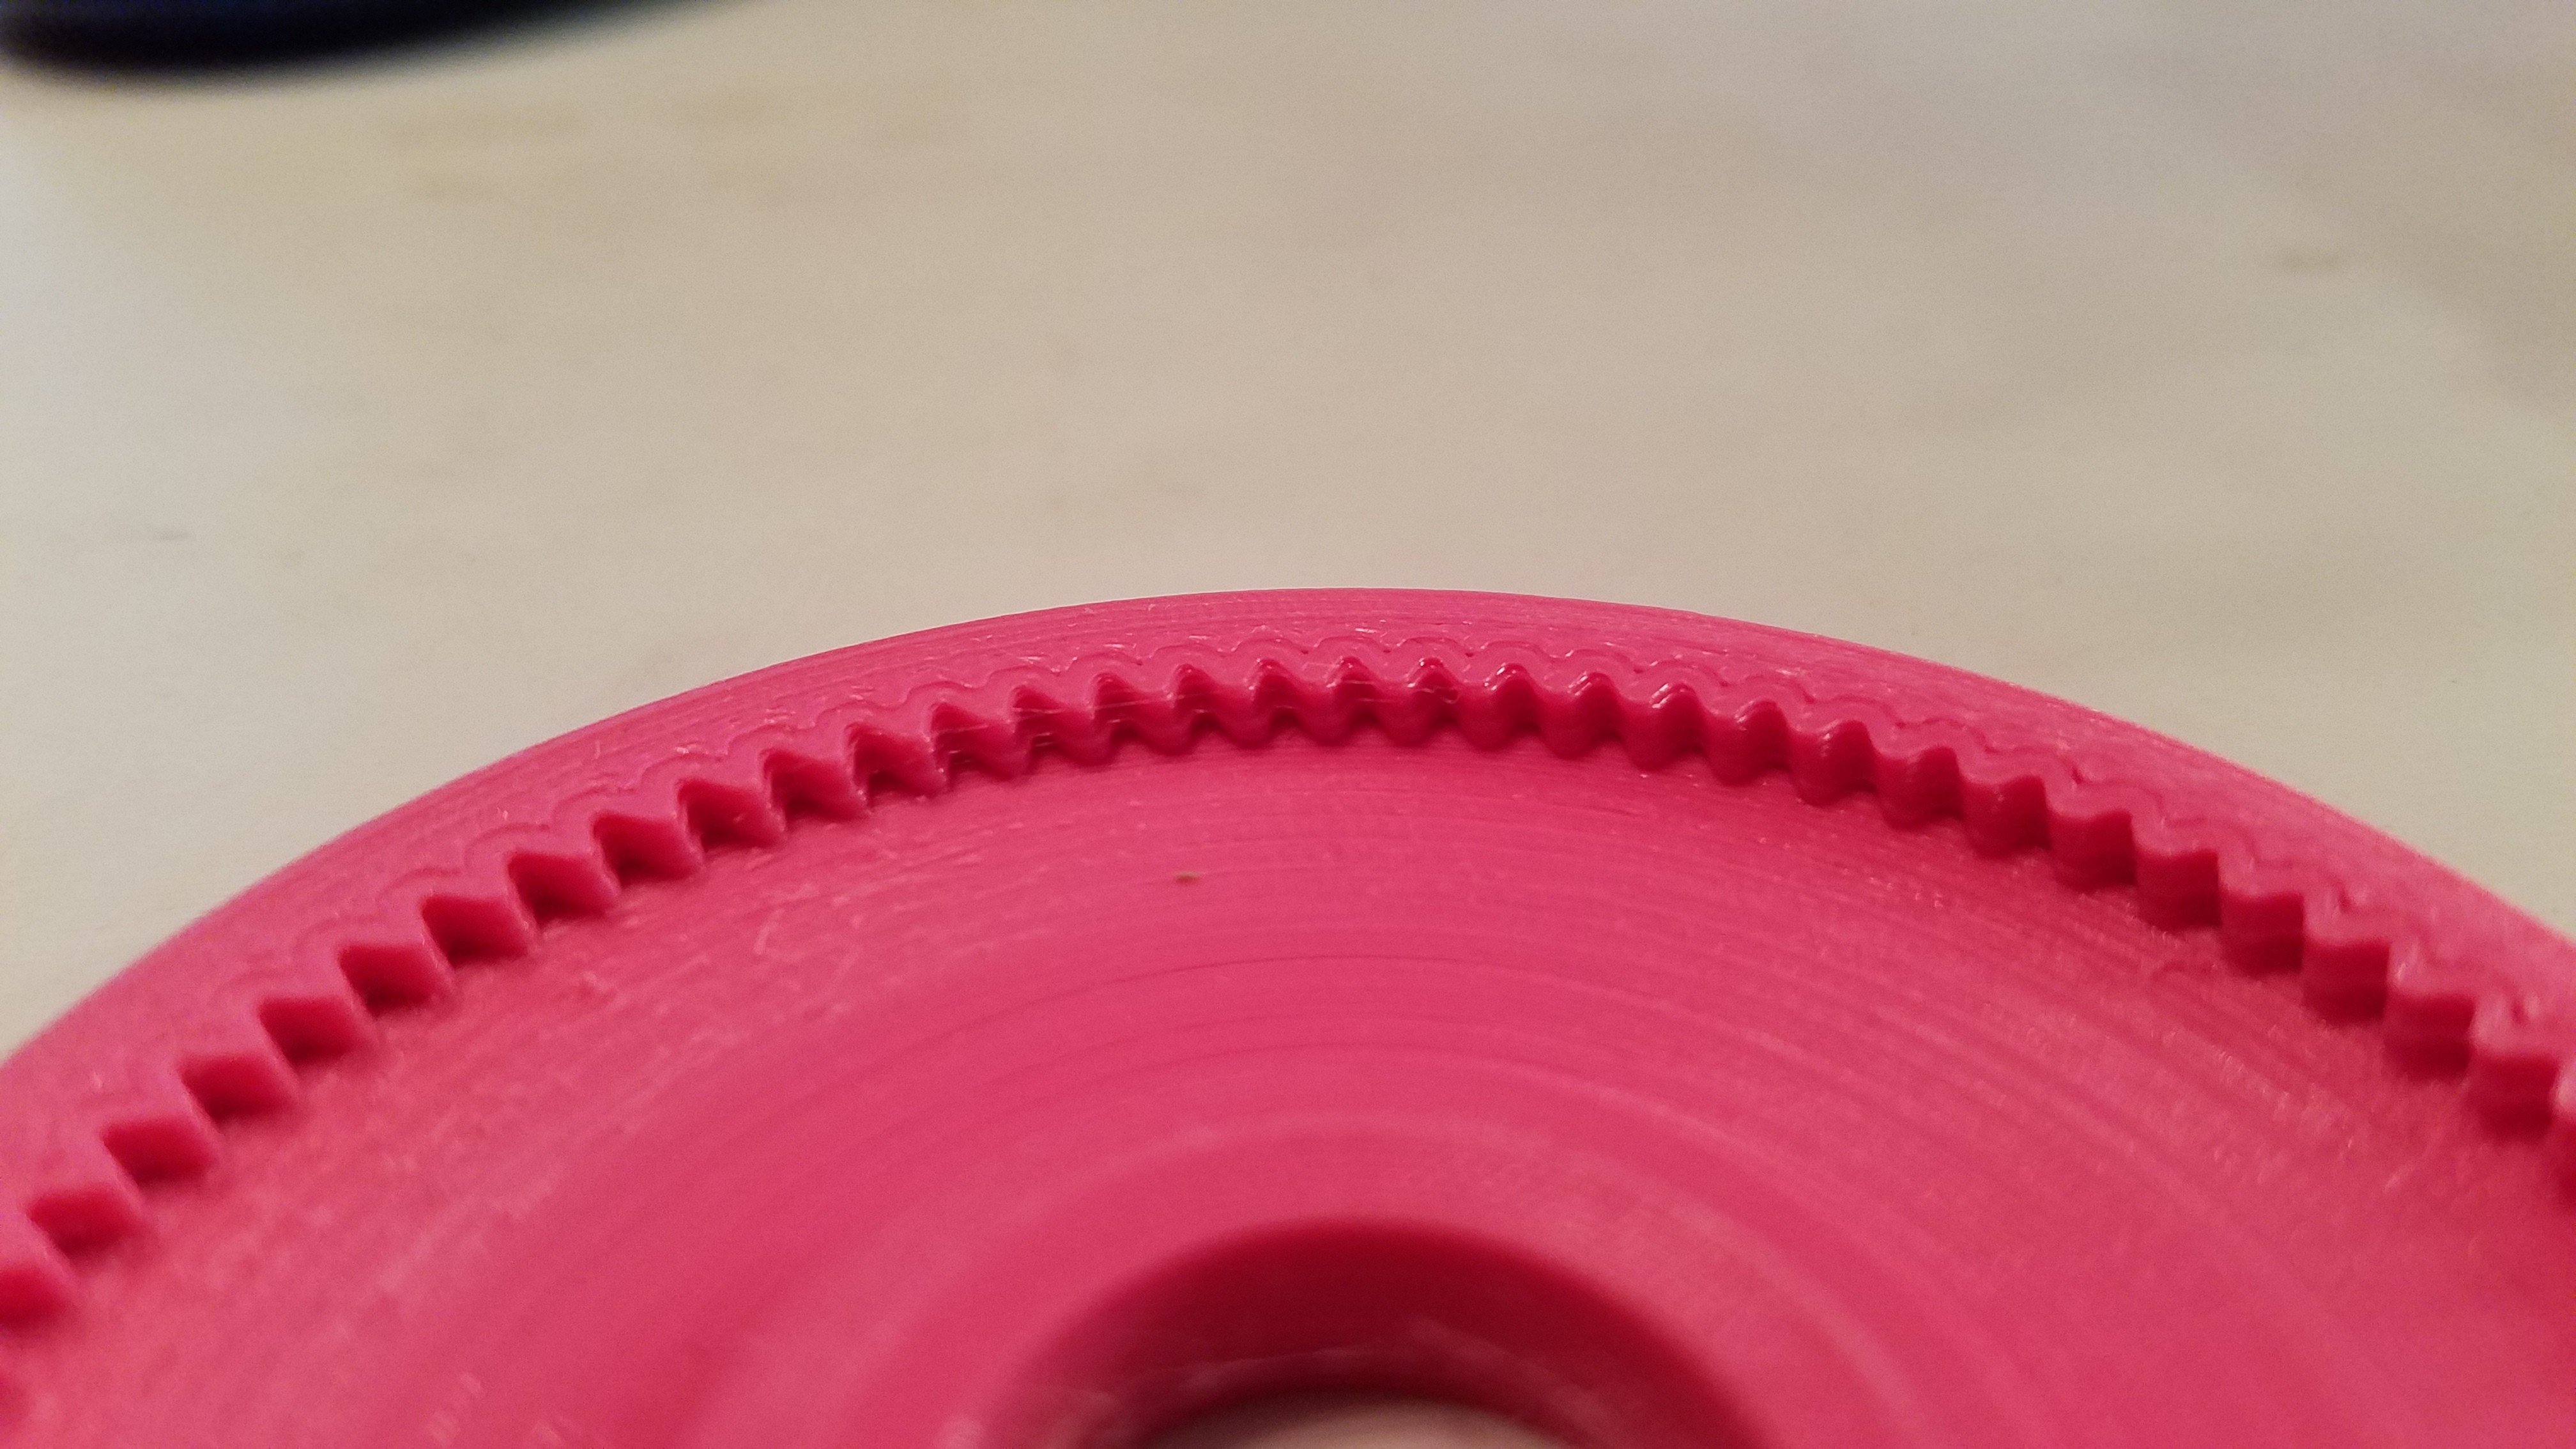
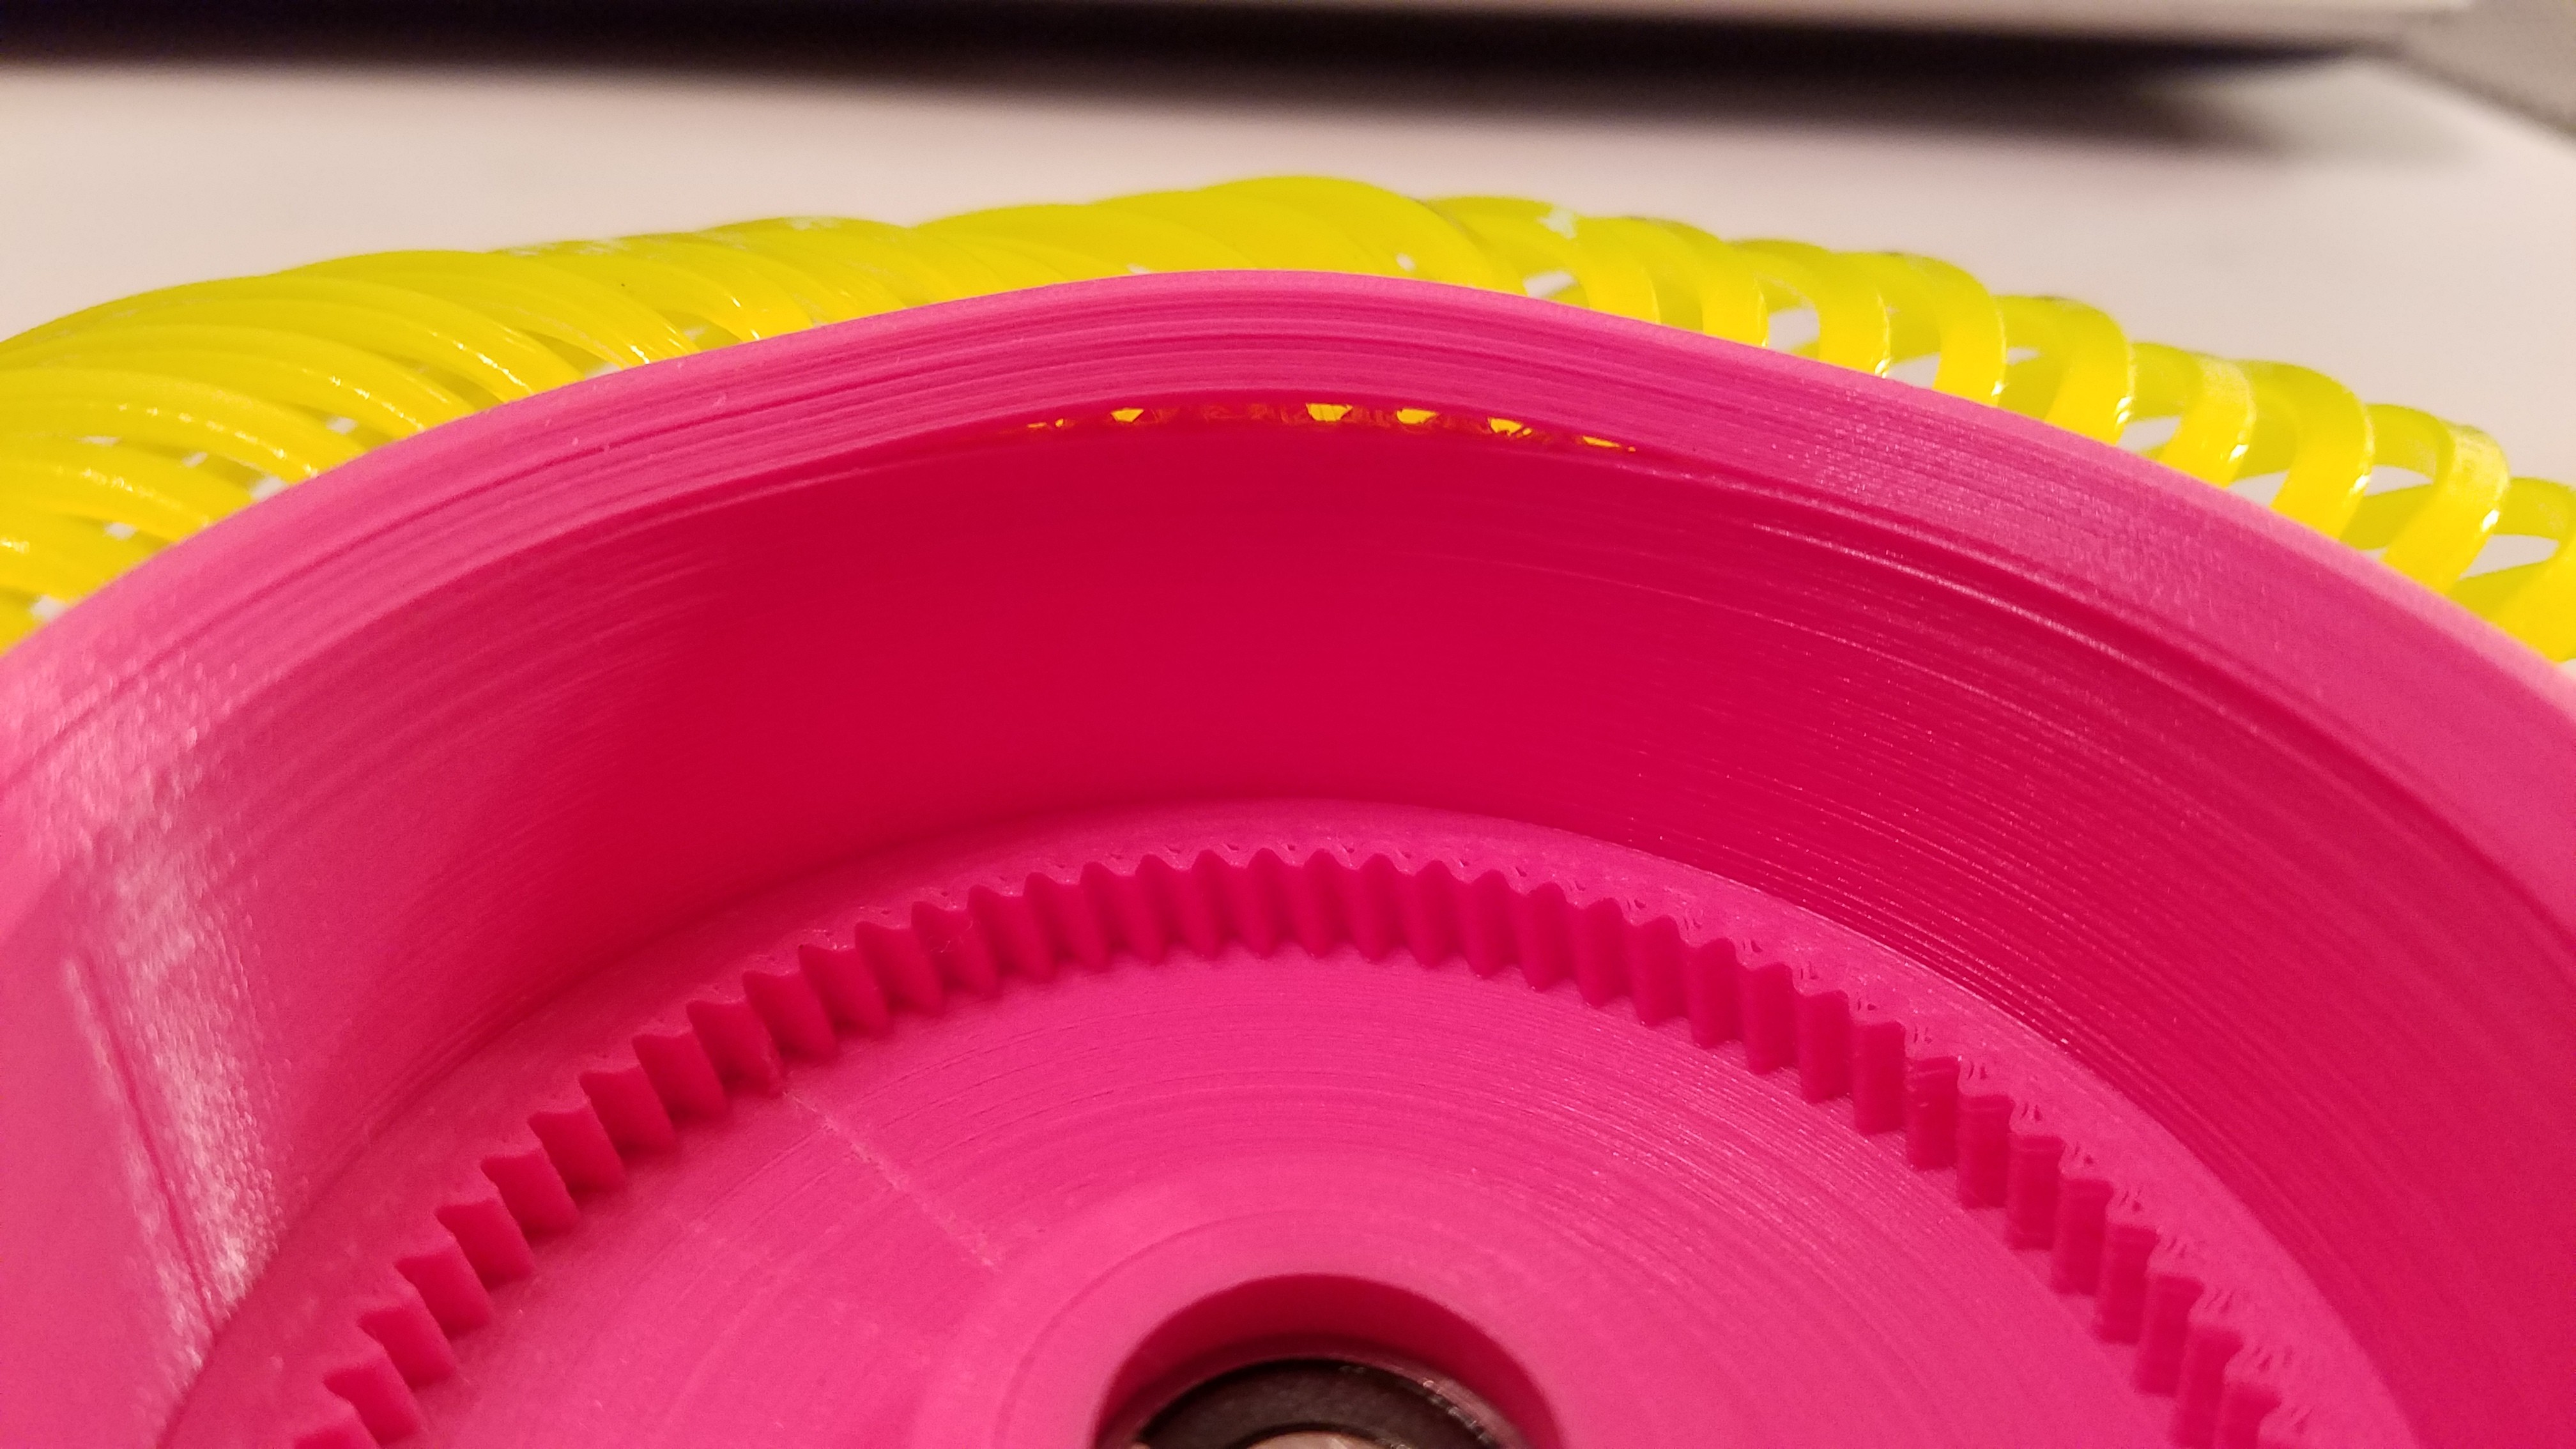
First it was loud. Way louder than the original. This was traced down to a sun gear which was nicking the output ring teeth, and that the sun gear itself was rubbing on the input ring. The latter, because both parts were PLA, actually caused it to fuse to the input ring housing eventually. Ooops.
I have remodeled the sun and idler gears with angled top faces and I adjusted the pin height for the sun. Solved.
![]()
The second issue was I had too much gear tooth clearance (in the code as backlash). I had printed the planets on the conservative side of extrusion for the best quality of the gear faces, and then I decided to heat treat them so they shrunk more in the process.
I was absolutely loving how well they were turning out, and so I decided to do 6 planets per transmission. 24 of those planets were needed then, and due to the small nozzle size I used they took a long time. Like 2 hours per 3 gears? I have decided that I am not reprinting those!
I was able to correct for this though, by just reprinting the sun and idler gears with zero backlash allowance. The gear train is still a bit loose, but it is stable and it will work now without failing.
FYI, nylon gears seem to be a lot stronger when printed with a 0.4mm nozzle than they are with a 0.2mm nozzle. I think this has more to due with just the mass of the extruded plastic than anything else. More plastic has more latent heat, which will heat the substrate more, which then bonds better when your melting temperature is so high.
If I had to do this again, I would probably use less teeth so I could go back to a larger gear profile, larger nozzle, and larger layer height. Lesson learned.
-
That's a lot of plastic.
05/20/2019 at 16:56 • 0 commentsDown to printing the nylon planets now.
![]()
Printed out two of the planets so far.
![]()
The first was a bit too hot at 270C. Lowered that to 260C for the second and it's good.
My layer adhesion wasn't that great, so my roll of nylon is spending the rest of the day in the dehydrator first.
<EDIT> Four hours seems like enough dehydrating to bring my nylon back. No popping noises as I extrude.
I altered the model a little to simplify cleanup of the planets. When using nylon, I basically have to print these with a brim or they don't stay down. Removing said brim after printing is a PITA. But, I have found that if I print the first layer decently fast I can peel the entire first layer off the part very cleanly after printing, along with the brim.
So the model now has the clearance factor removed for the planet gear end which sits against the bed so it is now naturally 0.2mm taller than it should be. On removing my first layer of 1.6mm I'm right about where I should be for my gear height and no tedious gear cleanup. Yay.
I have previously modeled the brim over-extrusion factor right in, by adding a 45 degree slant inward at the bottom of the gear teeth. I don't really want to do that here as it will allow planets which want to tilt already a lot more freedom to do so.
![]()
Printing!
![]()
</EDIT>
<EDIT2>
The planets were turning out so well, I decided to go with 6 instead of 3. It was modeled that way anyway.
![]()
Two more to go...
</EDIT2>
-
It's a revolution... really...
05/18/2019 at 16:39 • 1 commentSo I was experimenting with the FilaMecanum's design in the past few days. I’m Emil by the way. Let me show you my journey so far.
To give some context my goal is to build a small scale rover. (max. 30x30x30 cm) I have some specific constraints and objectives in mind which I won't bore you with for now.
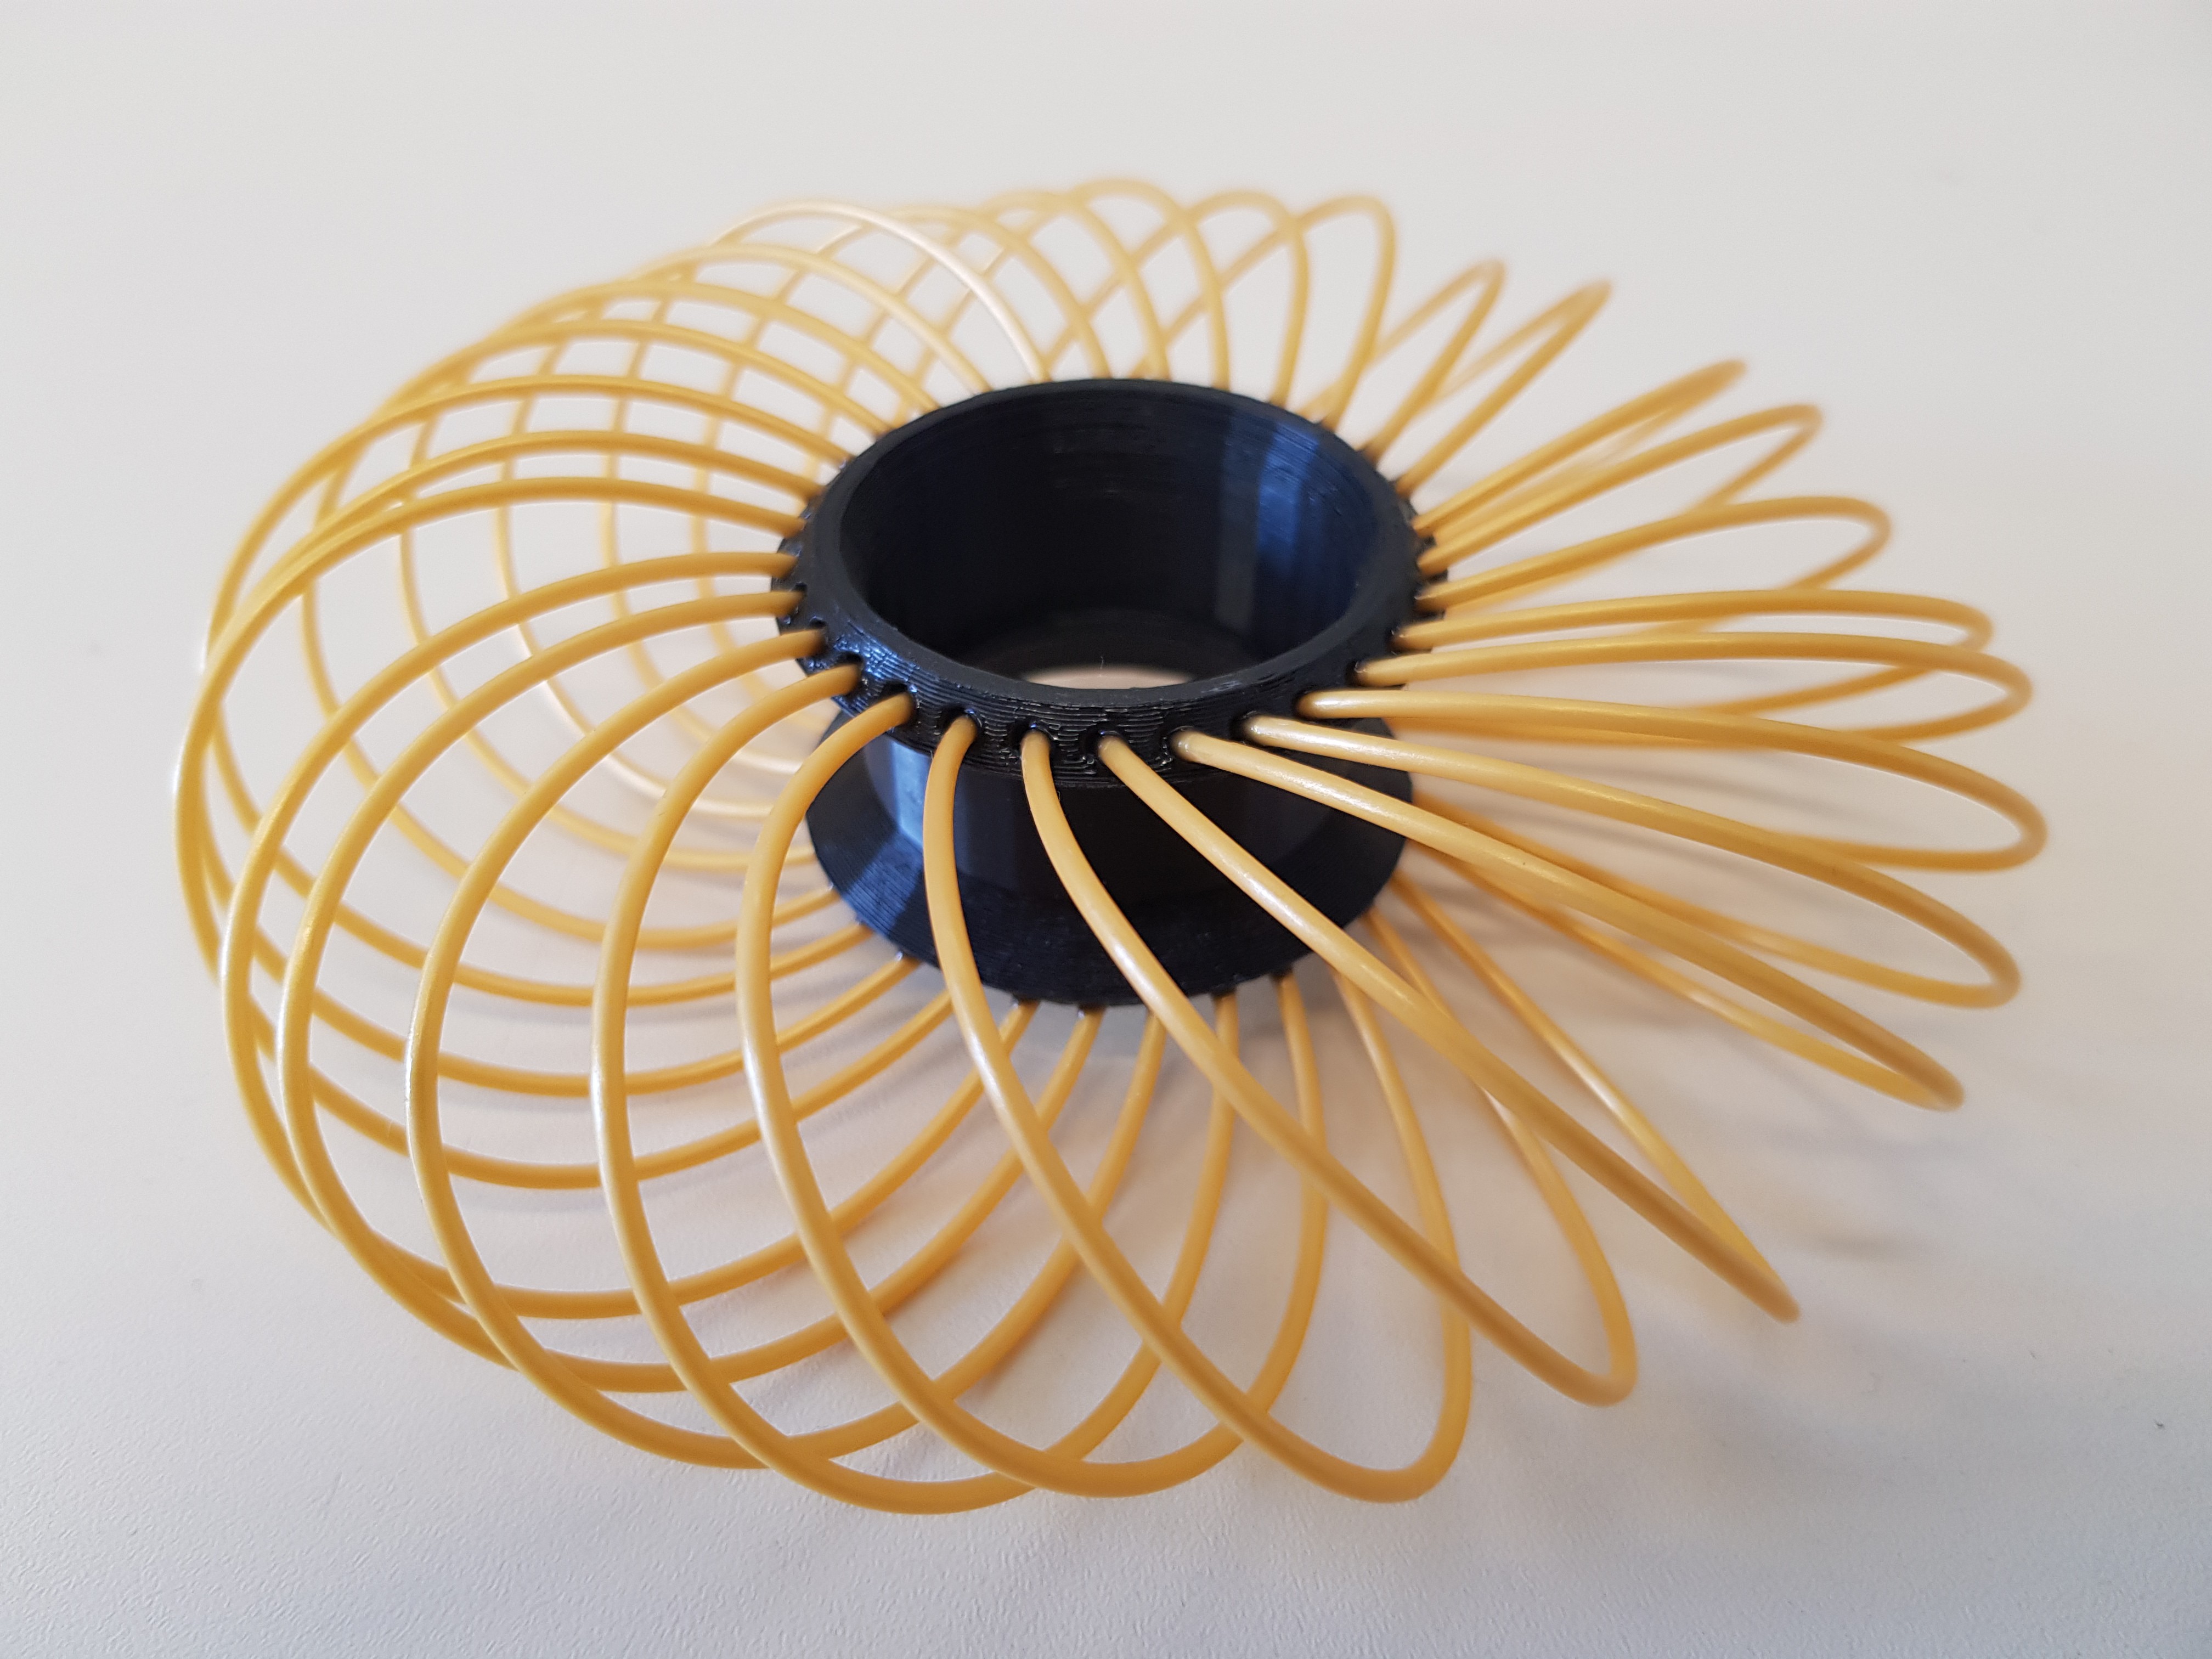
I started with Daren’s design, printed it and had some pla filament as tire. It was stiff, way too stiff so there was two ways to go forward. Either find (potentially buy) some flexible filament or use a different source, like zip ties. I have a 3D printer with a bowden extruder so wouldn’t have much use for flexible filament and as the pictures show, I went with the second option.
Quickly realizing my inabilities with openscad I started operations with fusion.
![]()
(Excuse the filth on my old caliper.)
The first version was press fit to the shaft and had some printing issues. After this I reconsidered the shaft locking mechanism and moved the aforementioned part to the other side.
![]()
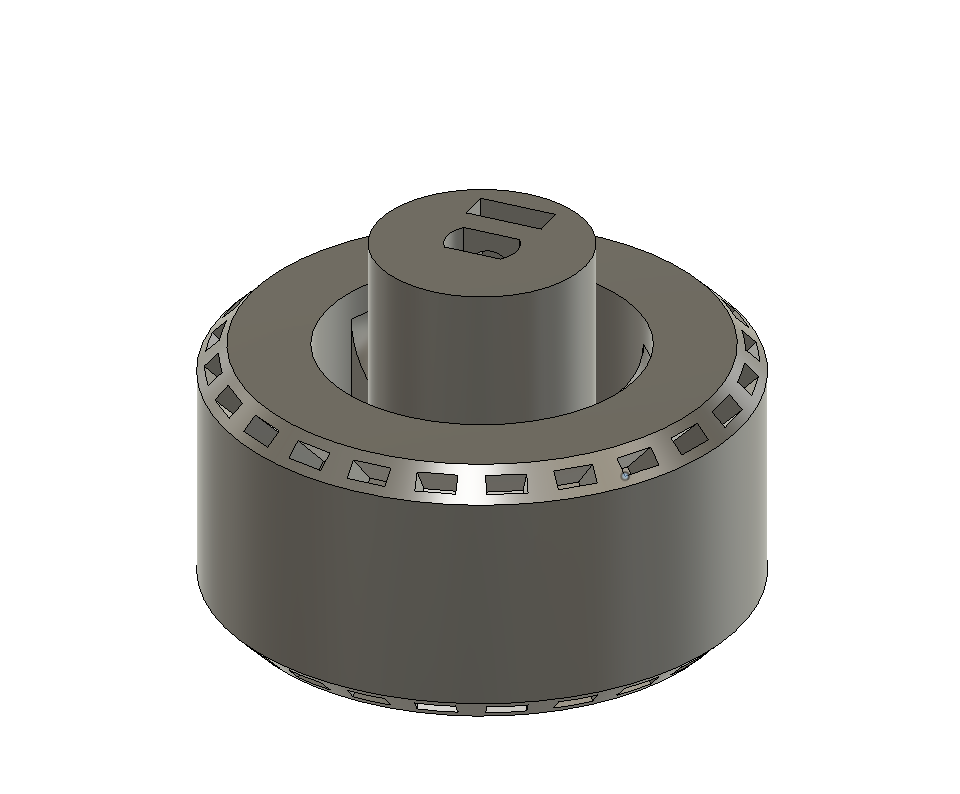
Here I present to you the moving construction.
No fancy inner transmission (yet) only a 5V 28BYJ stepper with bipolar mod driven by an A4988 driver module. The datasheet says the driver is operational from 8V, but seemingly 6.5V works fine too.
I would like to see the mecanum effect working soon so the next step is to order some more steppers and make a skeletal version of a test rover.
P.S.
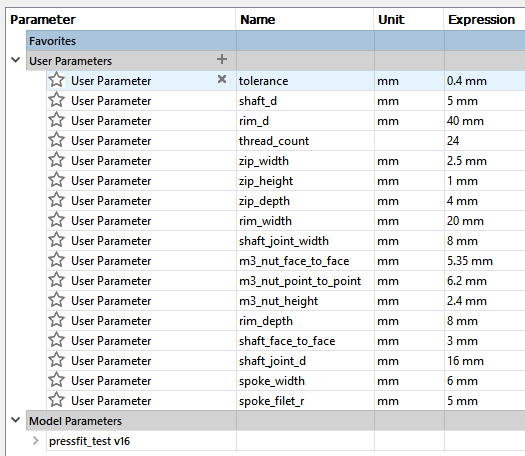
You can find the f3d cad on github; and these are my parameters:
![]()
![]()
-
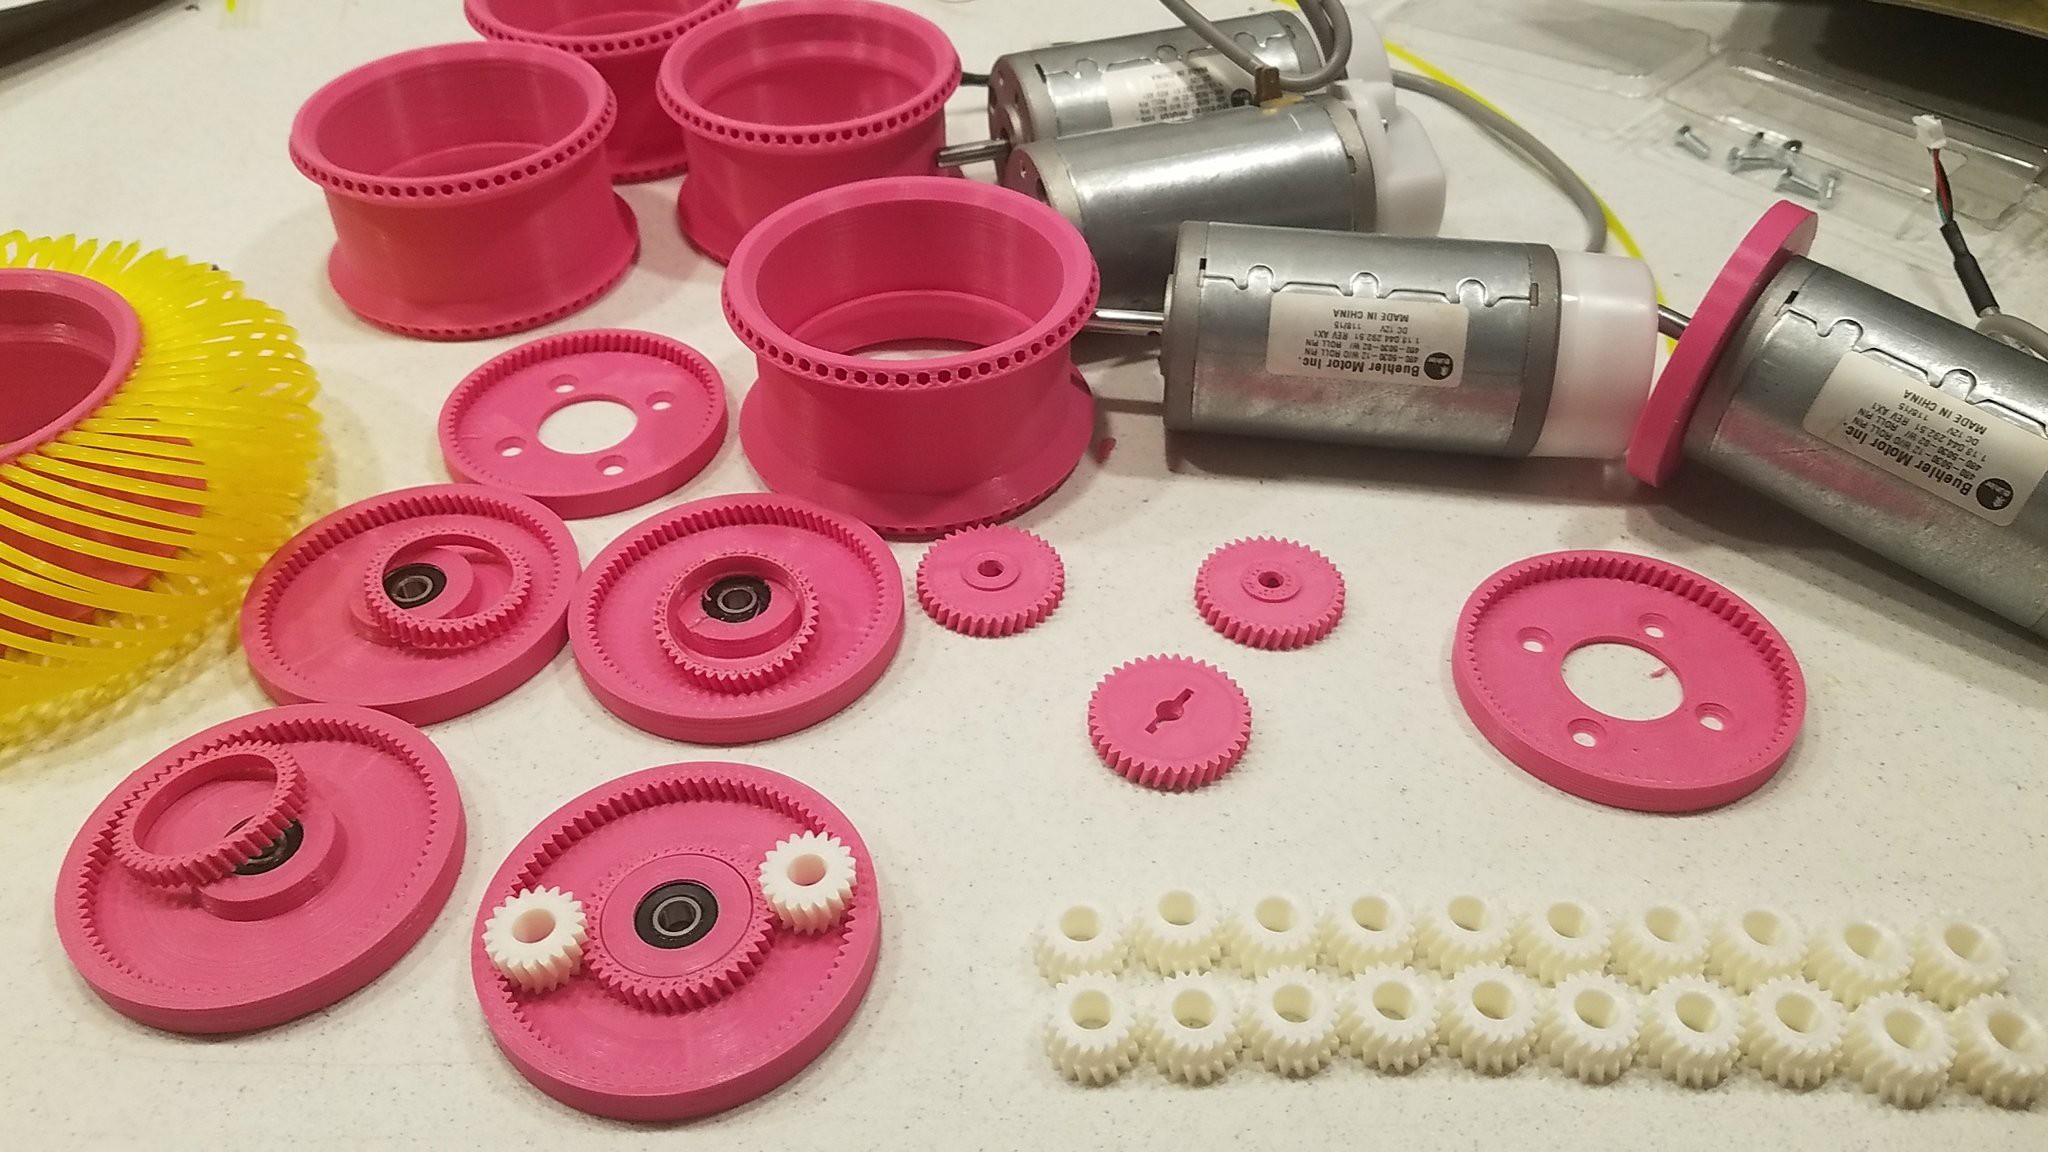
The tedious stuff.
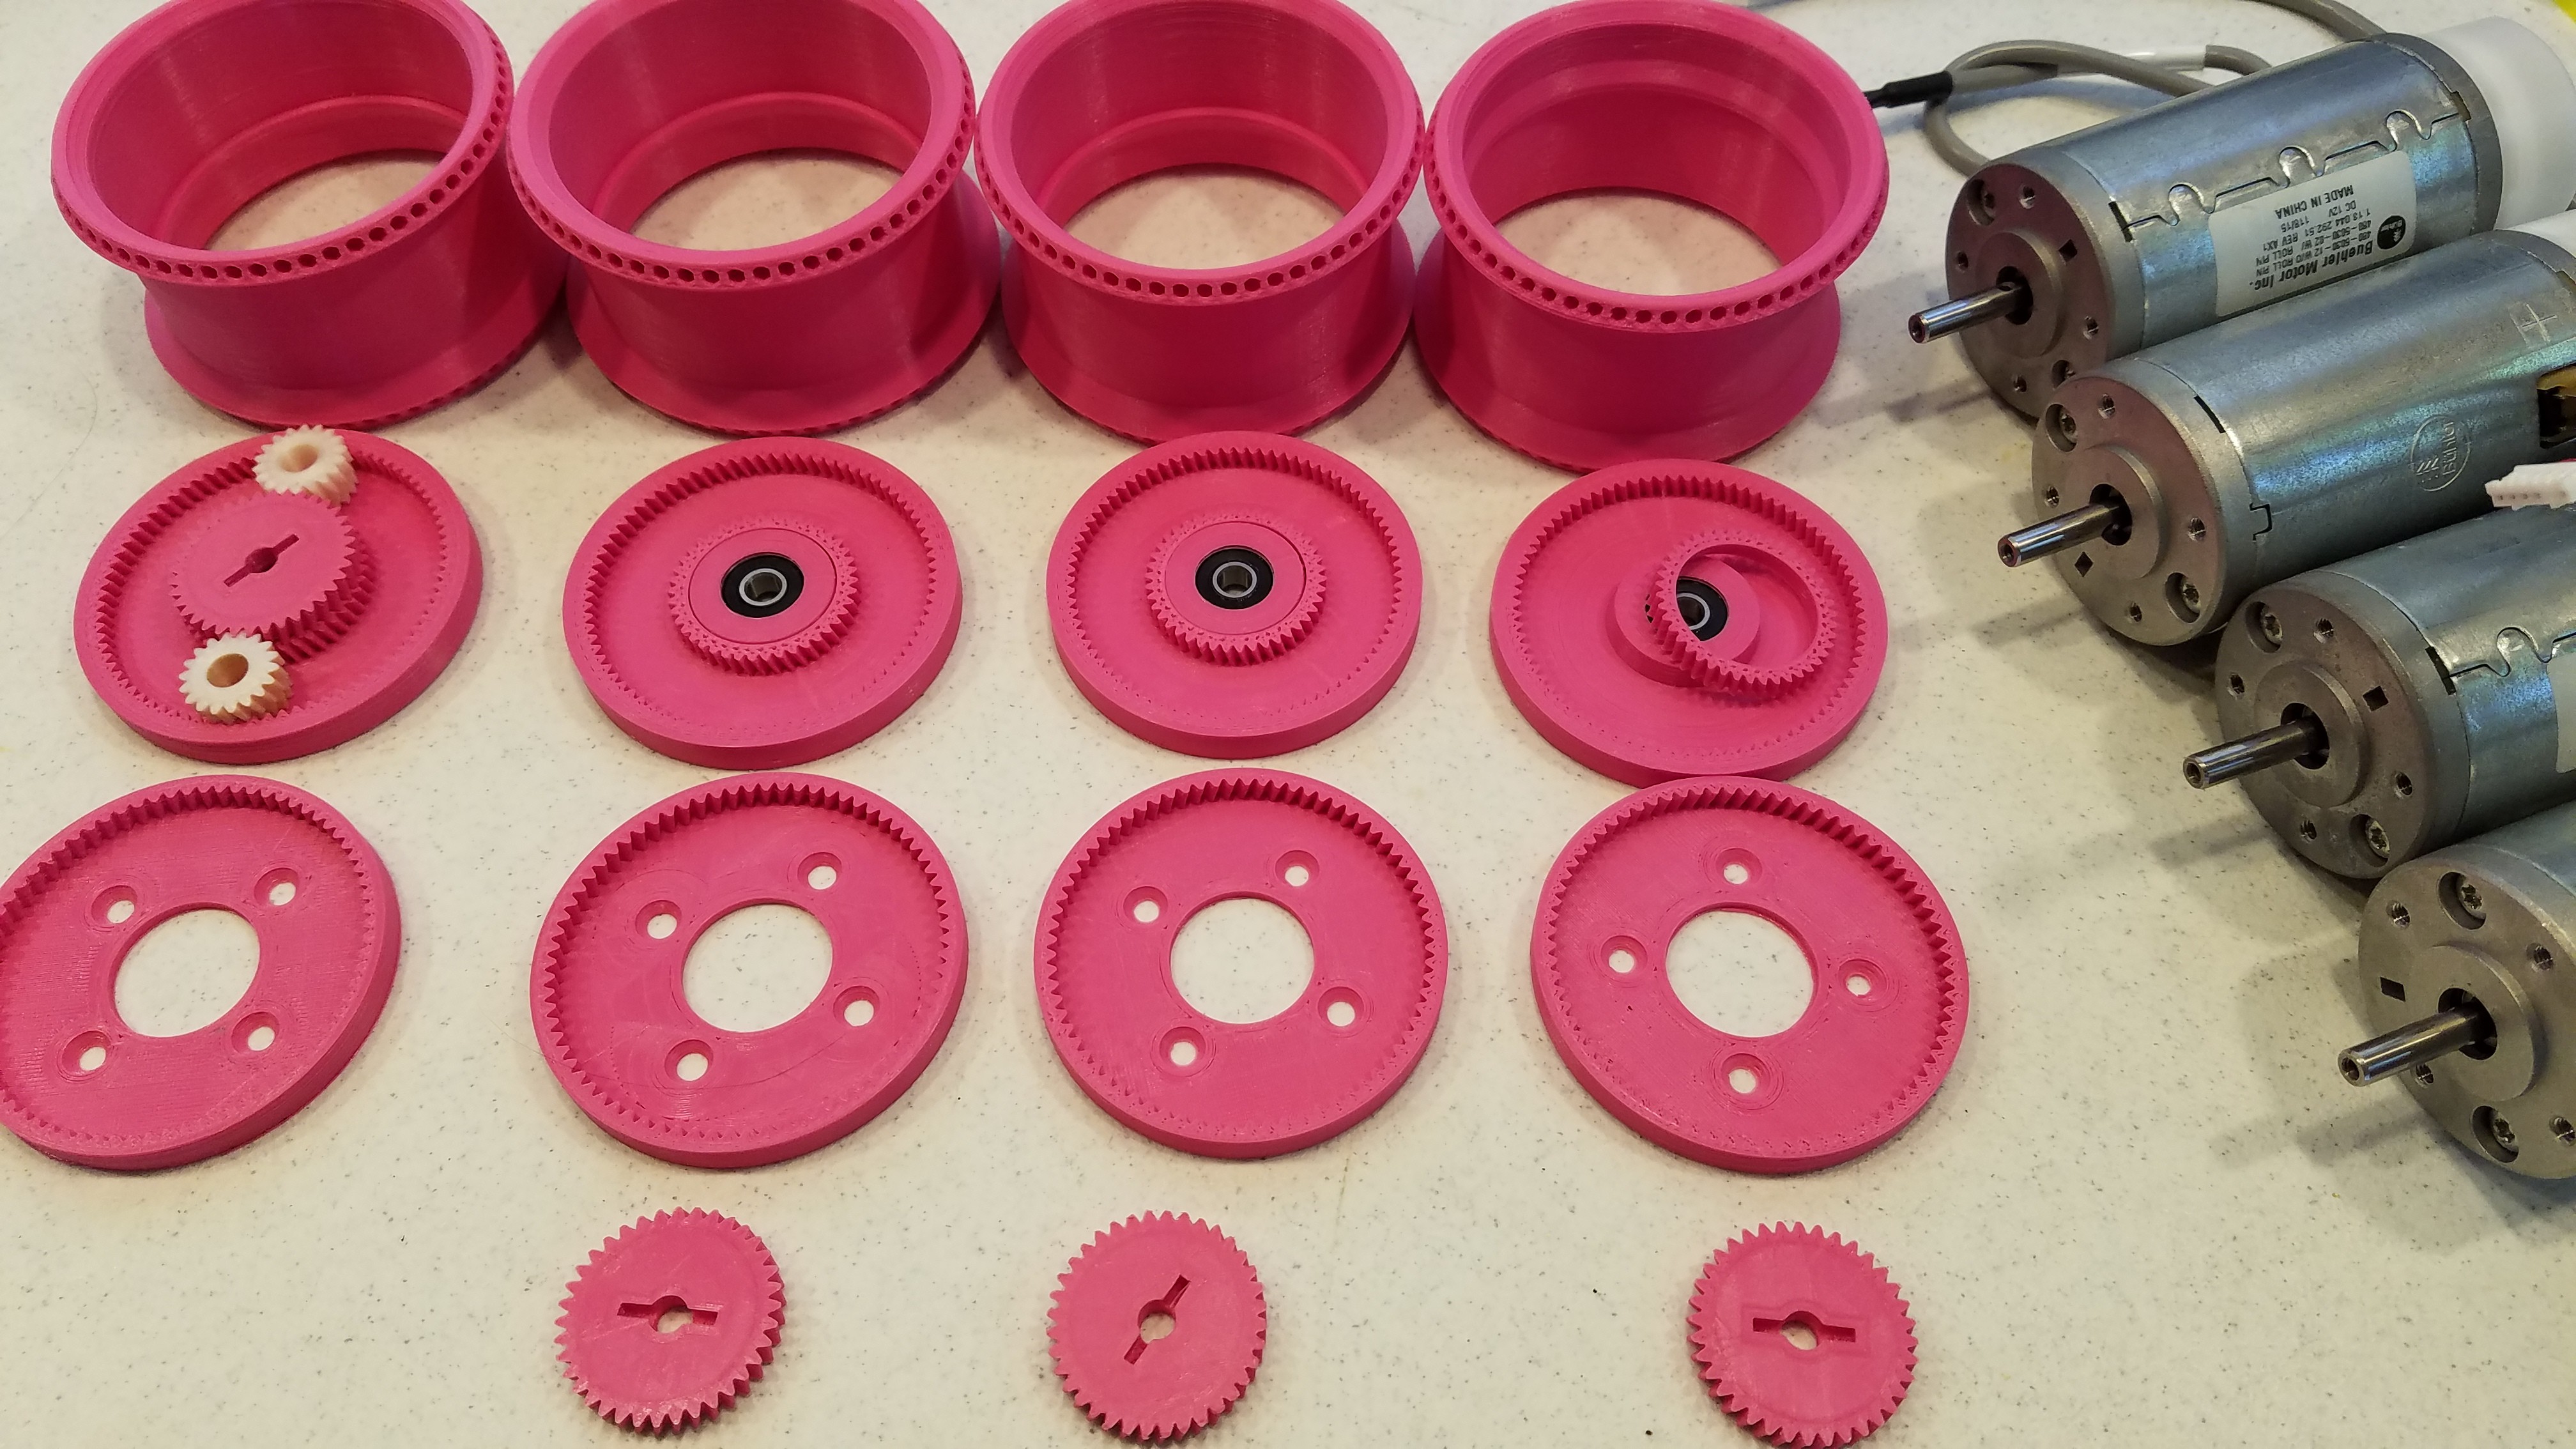
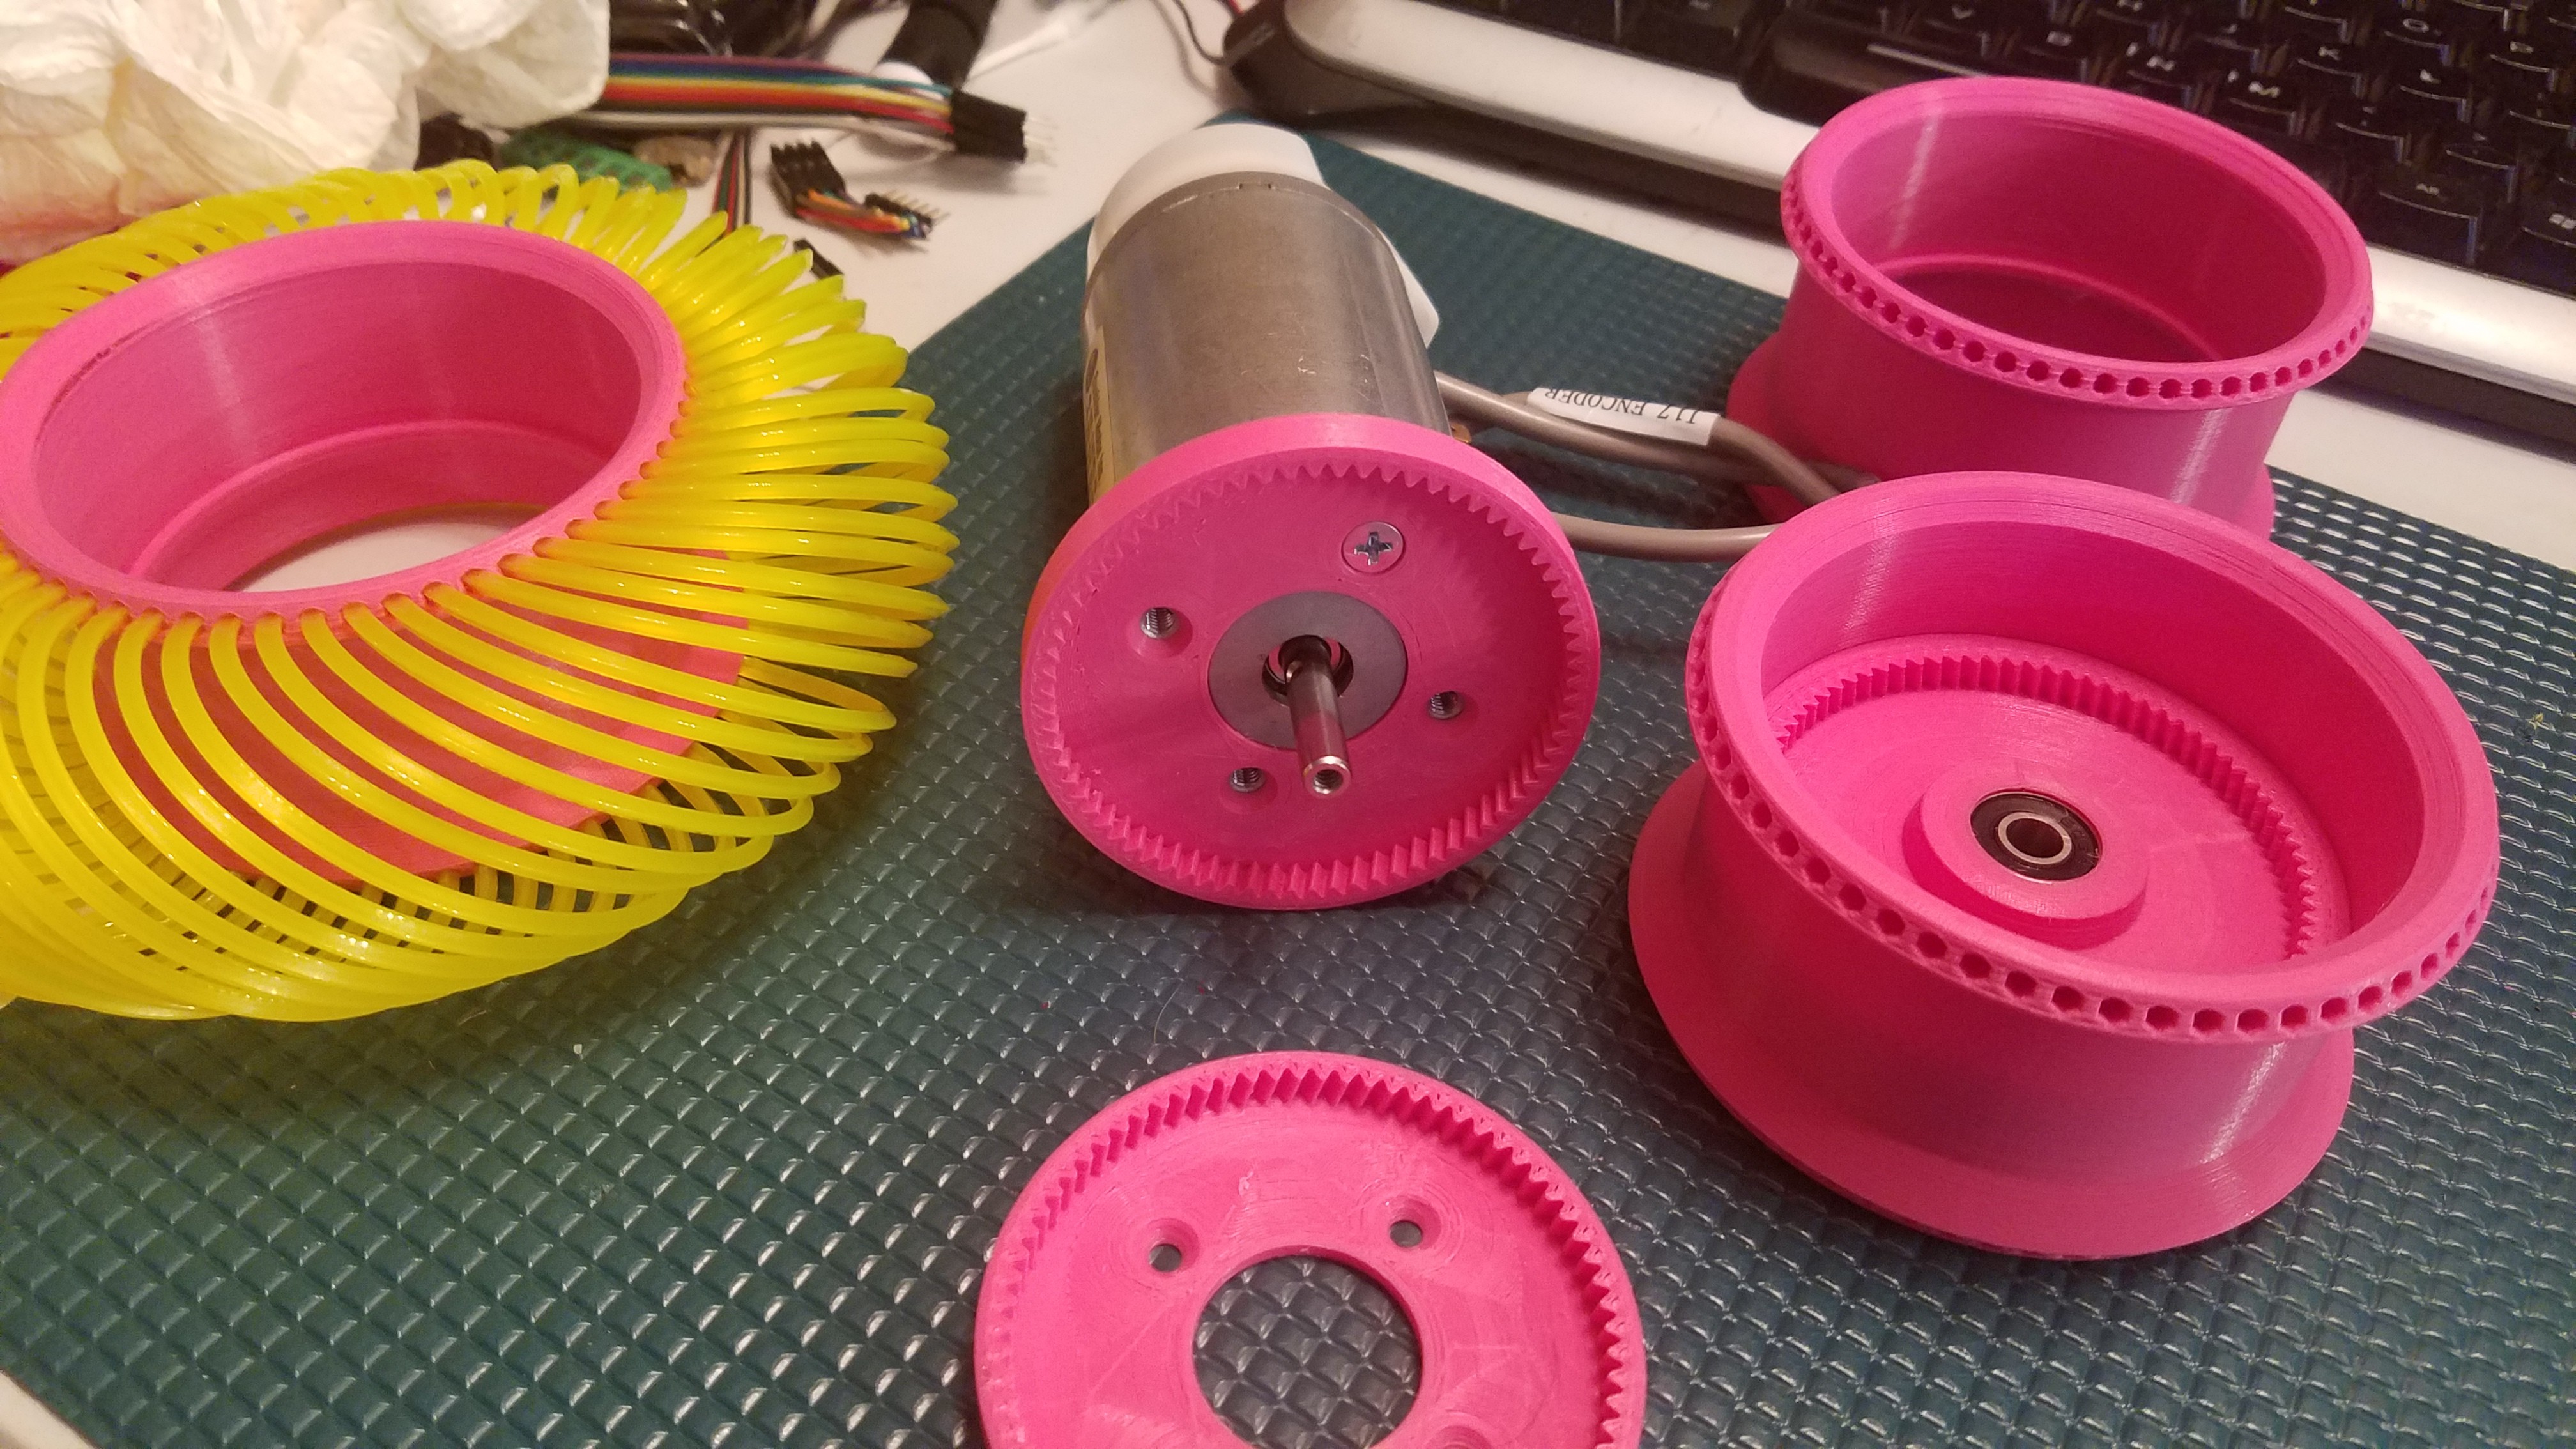
05/17/2019 at 22:00 • 0 commentsSoldiering along printing all the various parts for four wheels. Four rims done, four output ring gear hubs done, three housing ring gears spec'd to fit my motors here, done.
![]()
I ran out of Aquanet and tried to substitute Suave with terrible results. Off to the store to buy the cheapest hairspray known to man, which also happens to be the best at bed adhesion.
<EDIT> Done with all 8 ring gears (4 housing gears, and 4 rim gears). All are acceptable quality with decently accurate gear profiles, and I did it using a 0.4mm nozzle size. I'm glad this part turned out actually. I originally designed this for a 60 tooth ring gear, and mistakenly left this at a 72 tooth ring gear for the final version. That is a little too small of a tooth profile for a 0.4 nozzle.
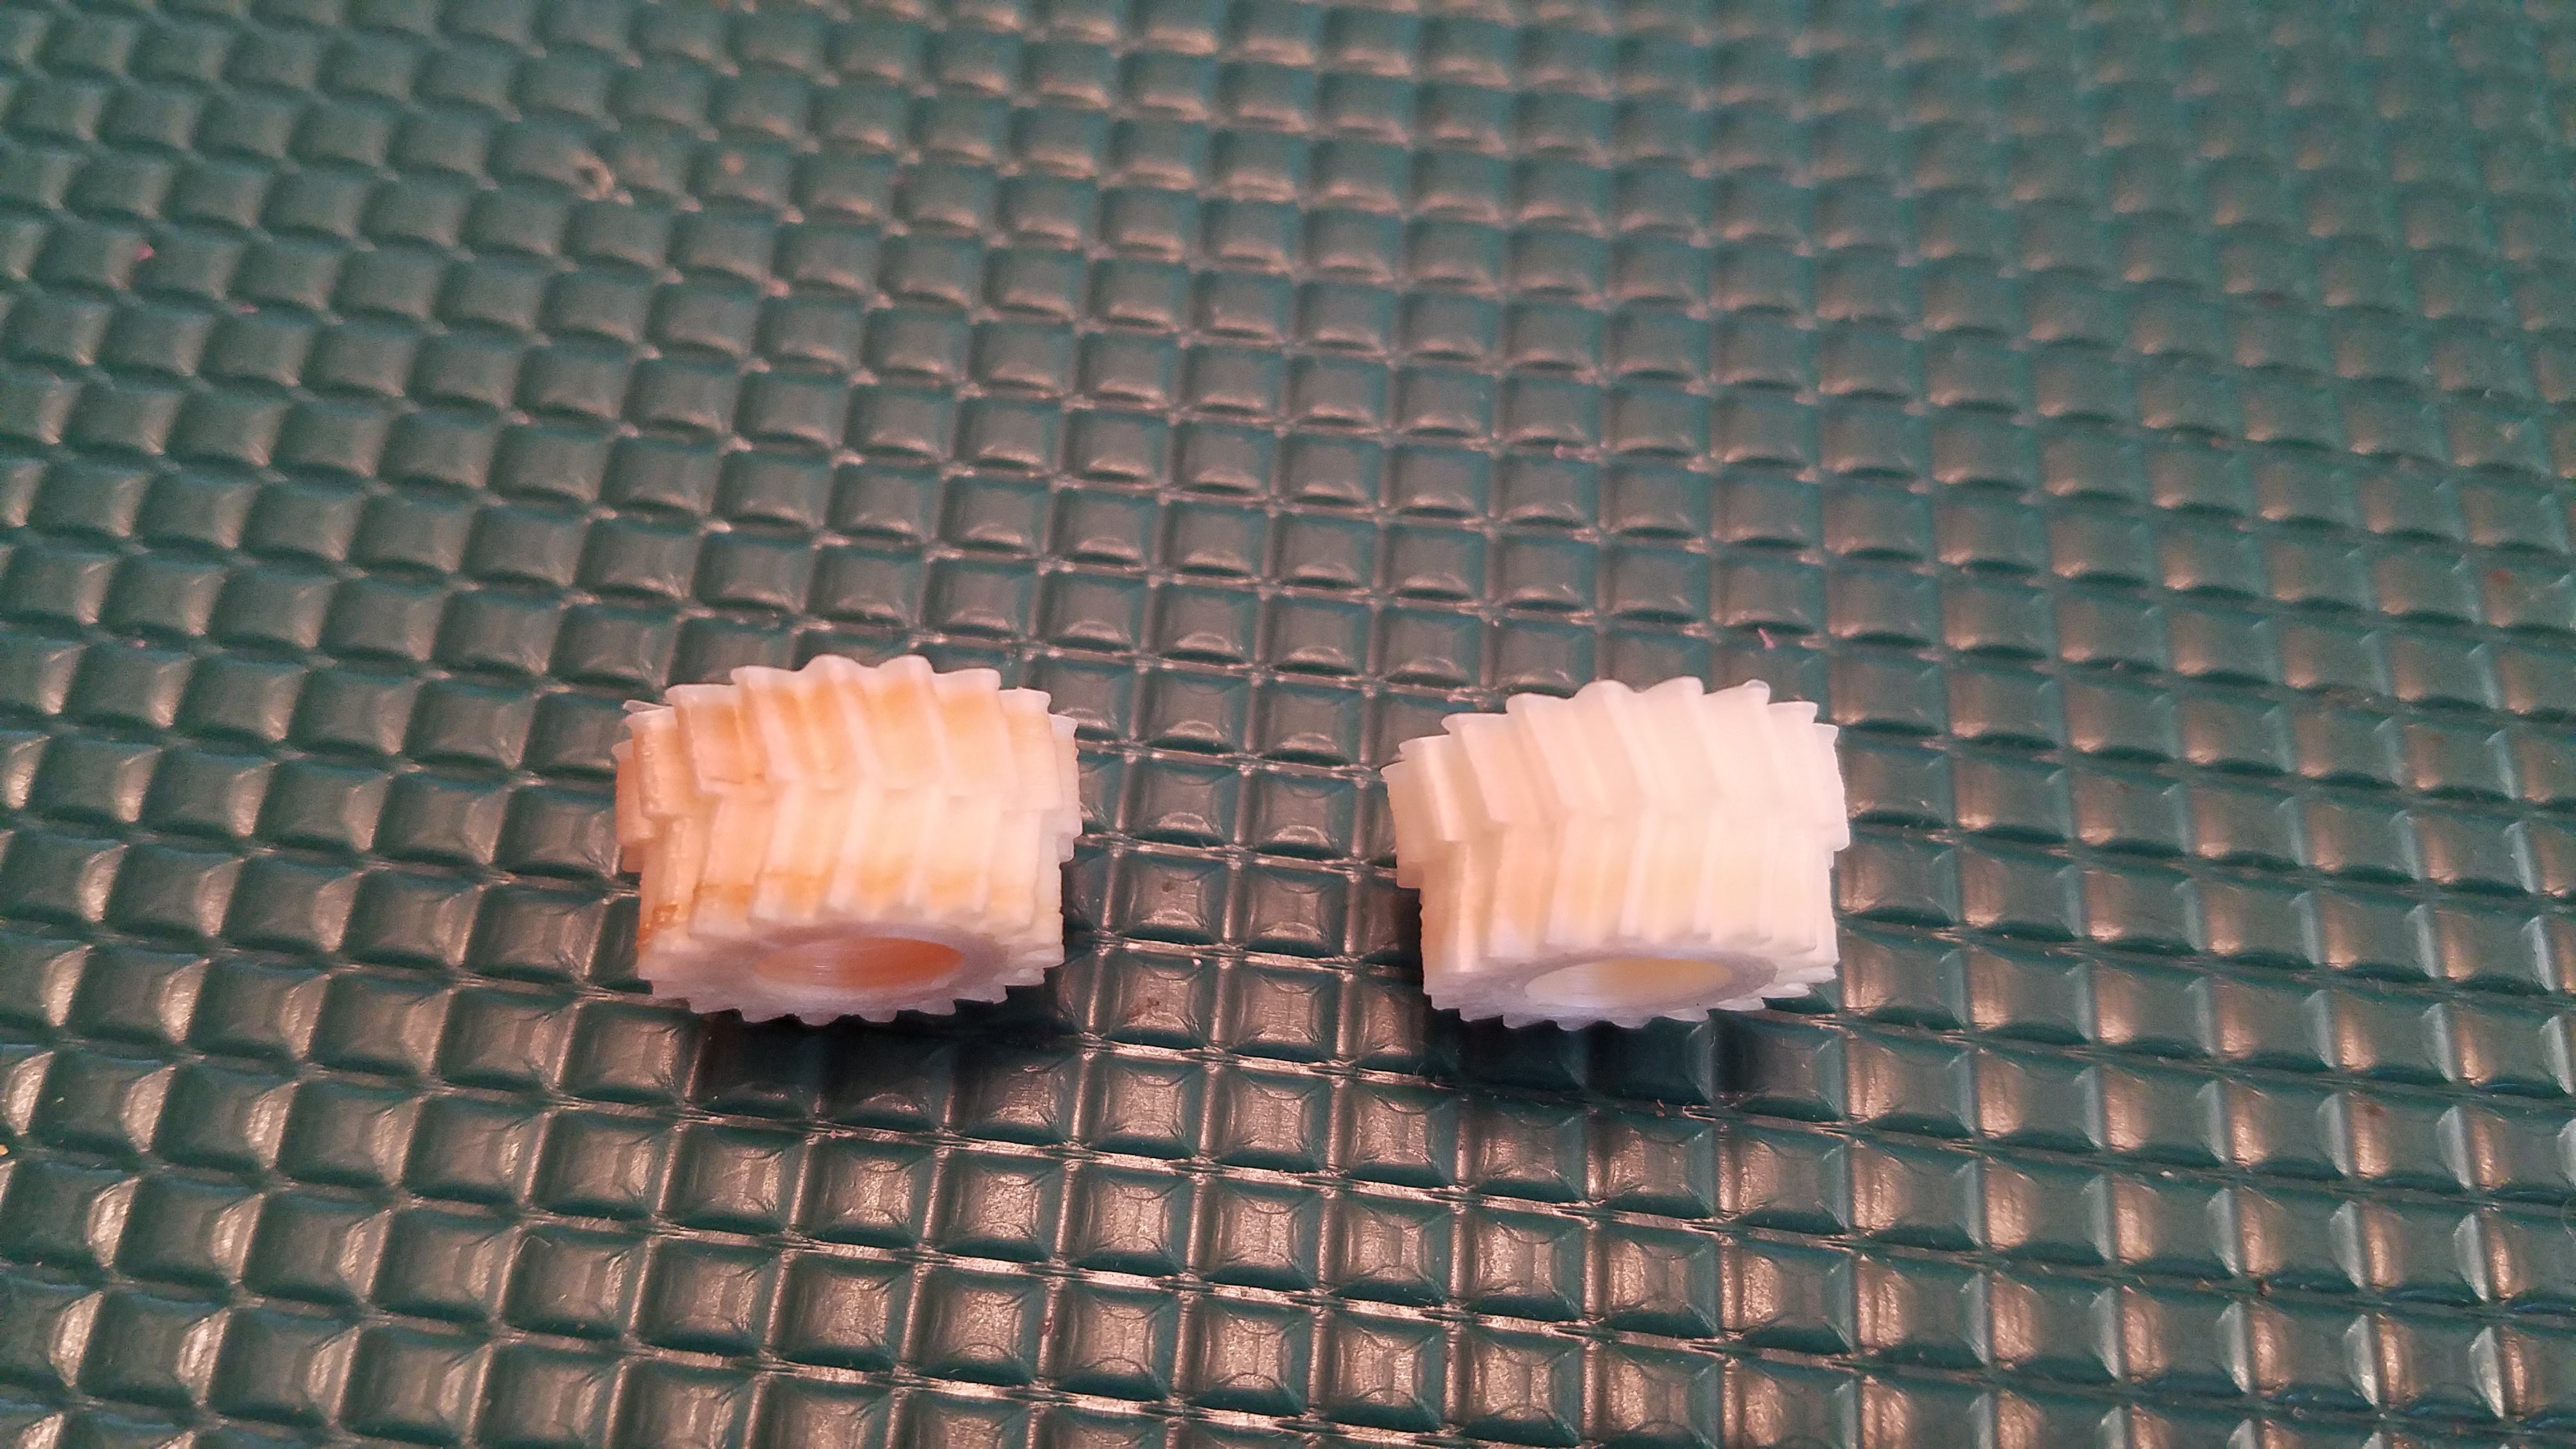
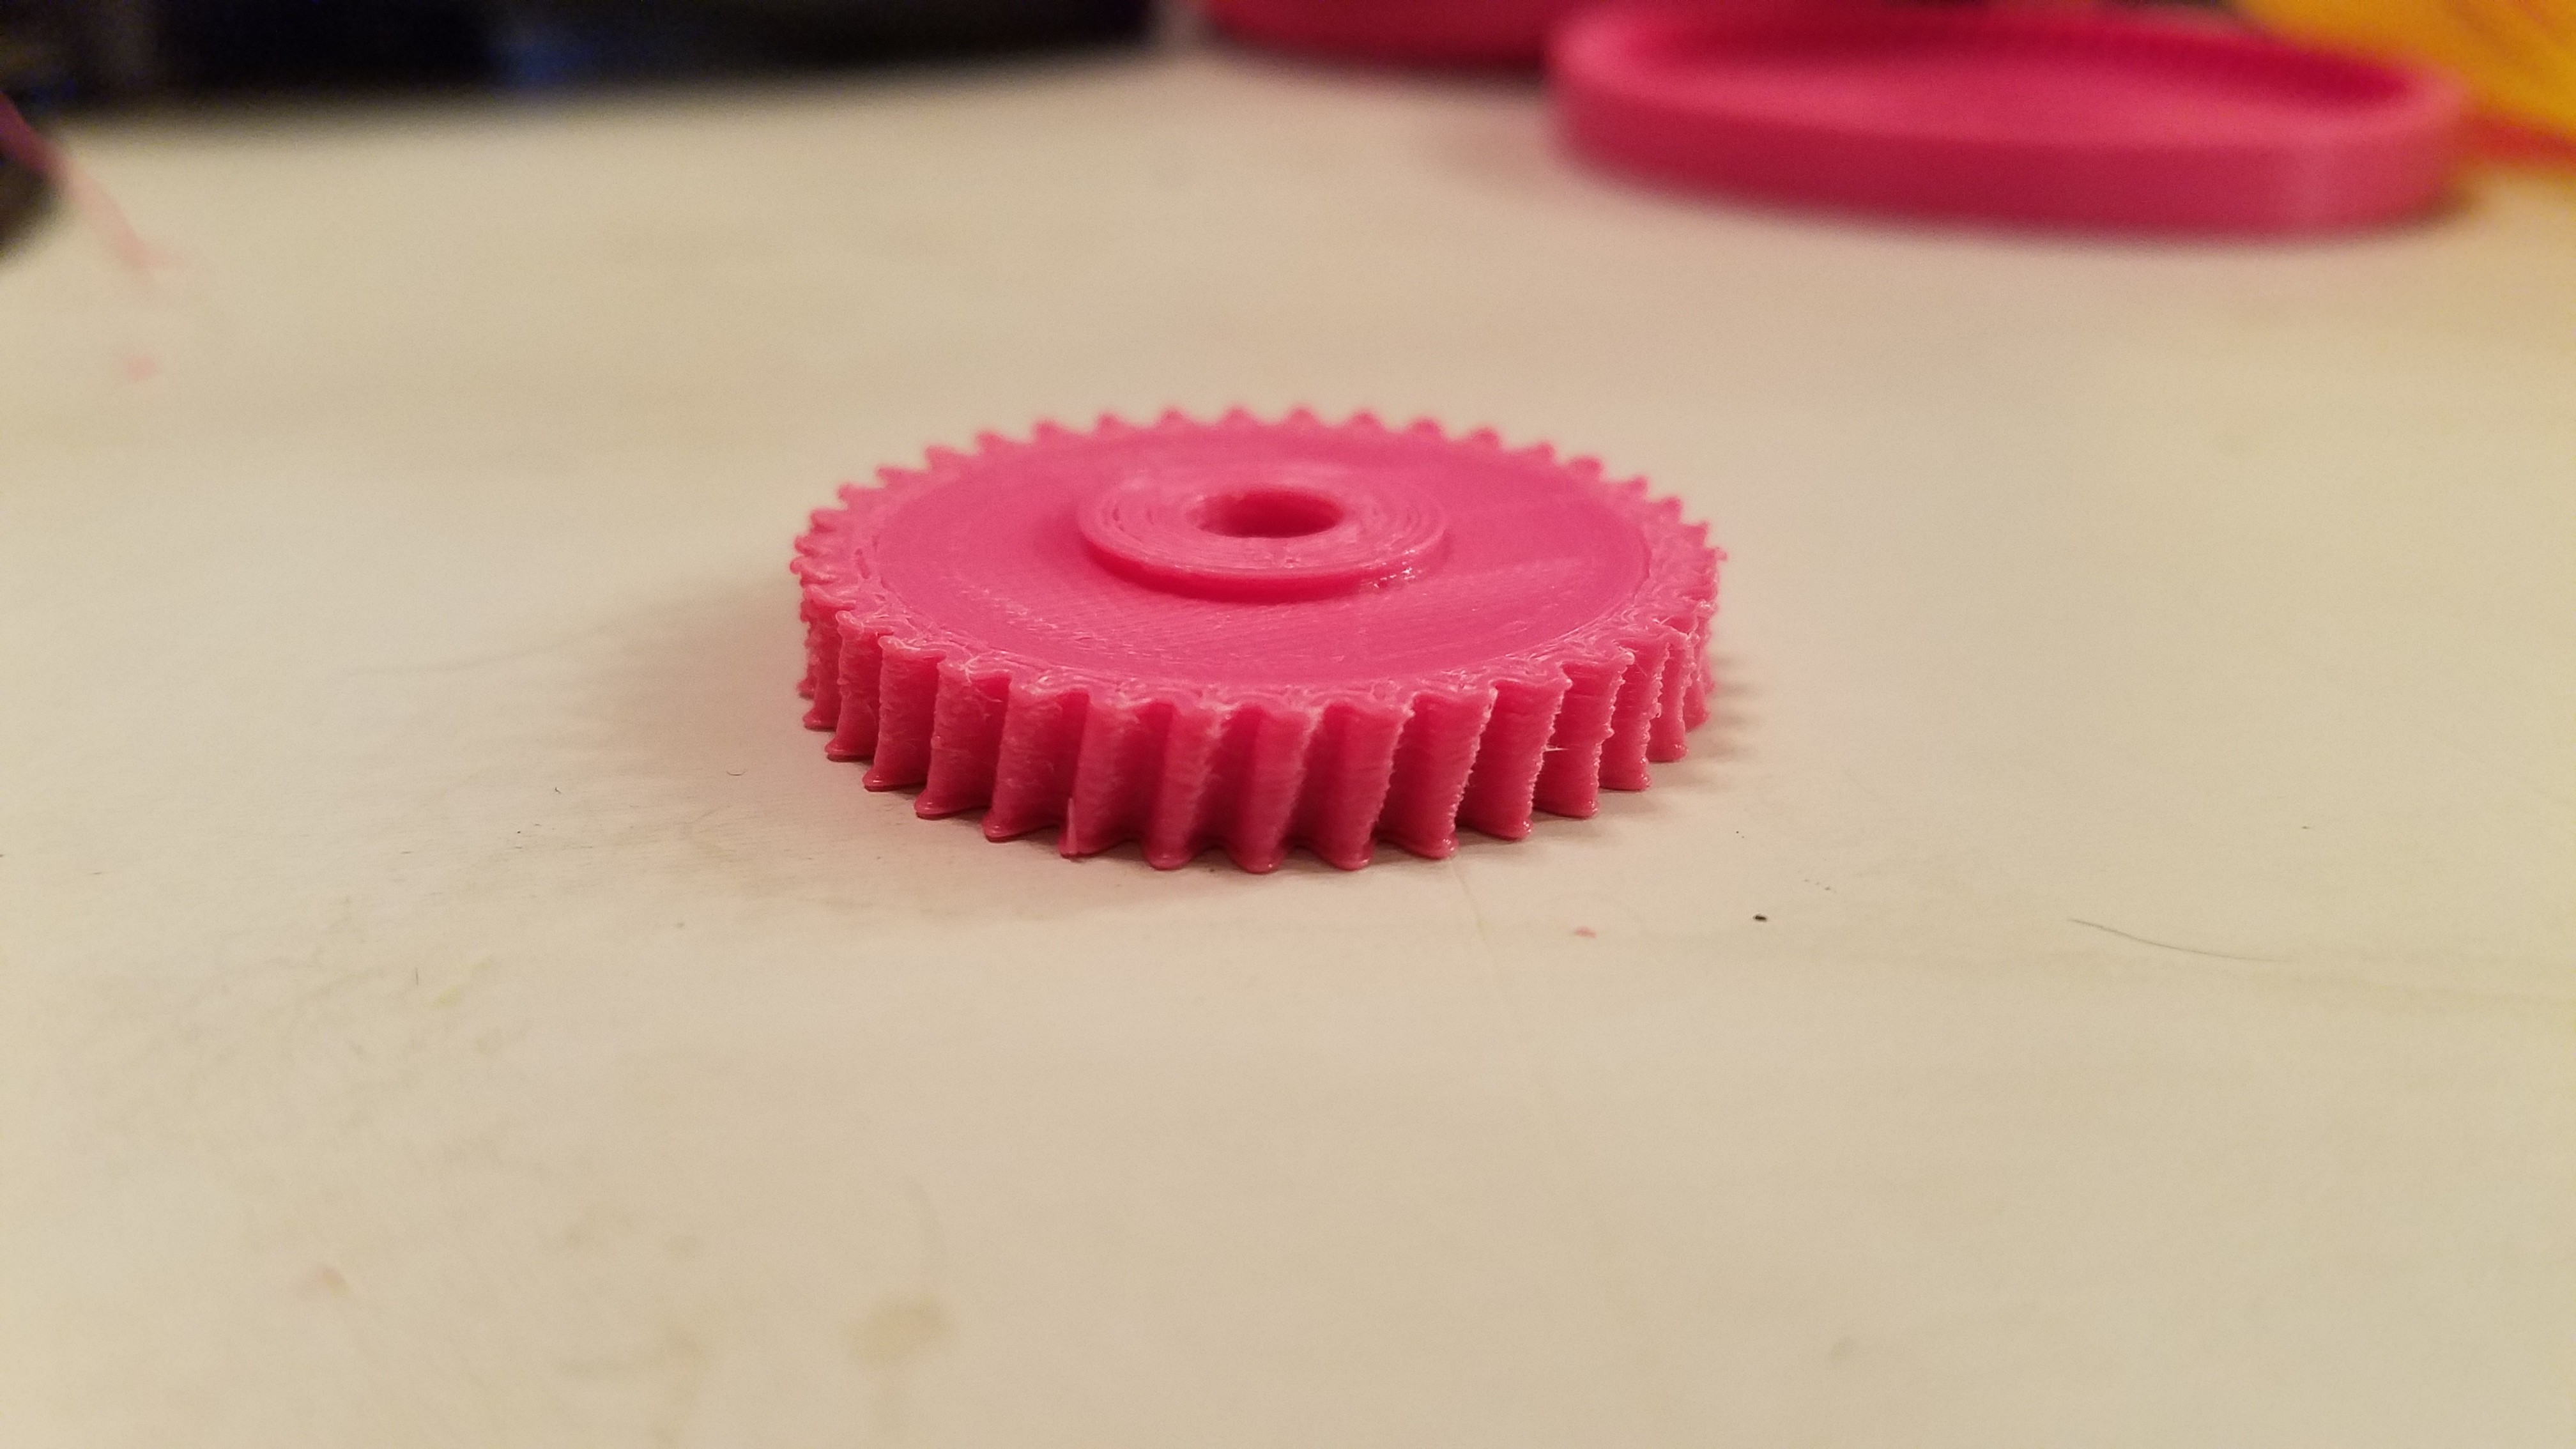
Moved on to the sun gears. Suddenly, this got a lot harder. First I moved to a slower speed, then a lower layer height, then more/less cooling... then...
I switched the nozzle out for a 0.2mm one. That should make most everything easier. It did, but I'm still getting some artifacts in the prints.
![]()
I think I'm now over-extruding just a little, and perhaps I'm getting a little too hot for the reduced diameter. Given the speed this gear will be working at, it really needs to be basically perfect.
Working on it.
Little cooler, slower, and with less cooling print of the sun gear in progress.
Um.. nope. I was over-extruding, a little too fast, and with too much cooling. Now they are strong and look perfect again. Three to go...
</EDIT>
-
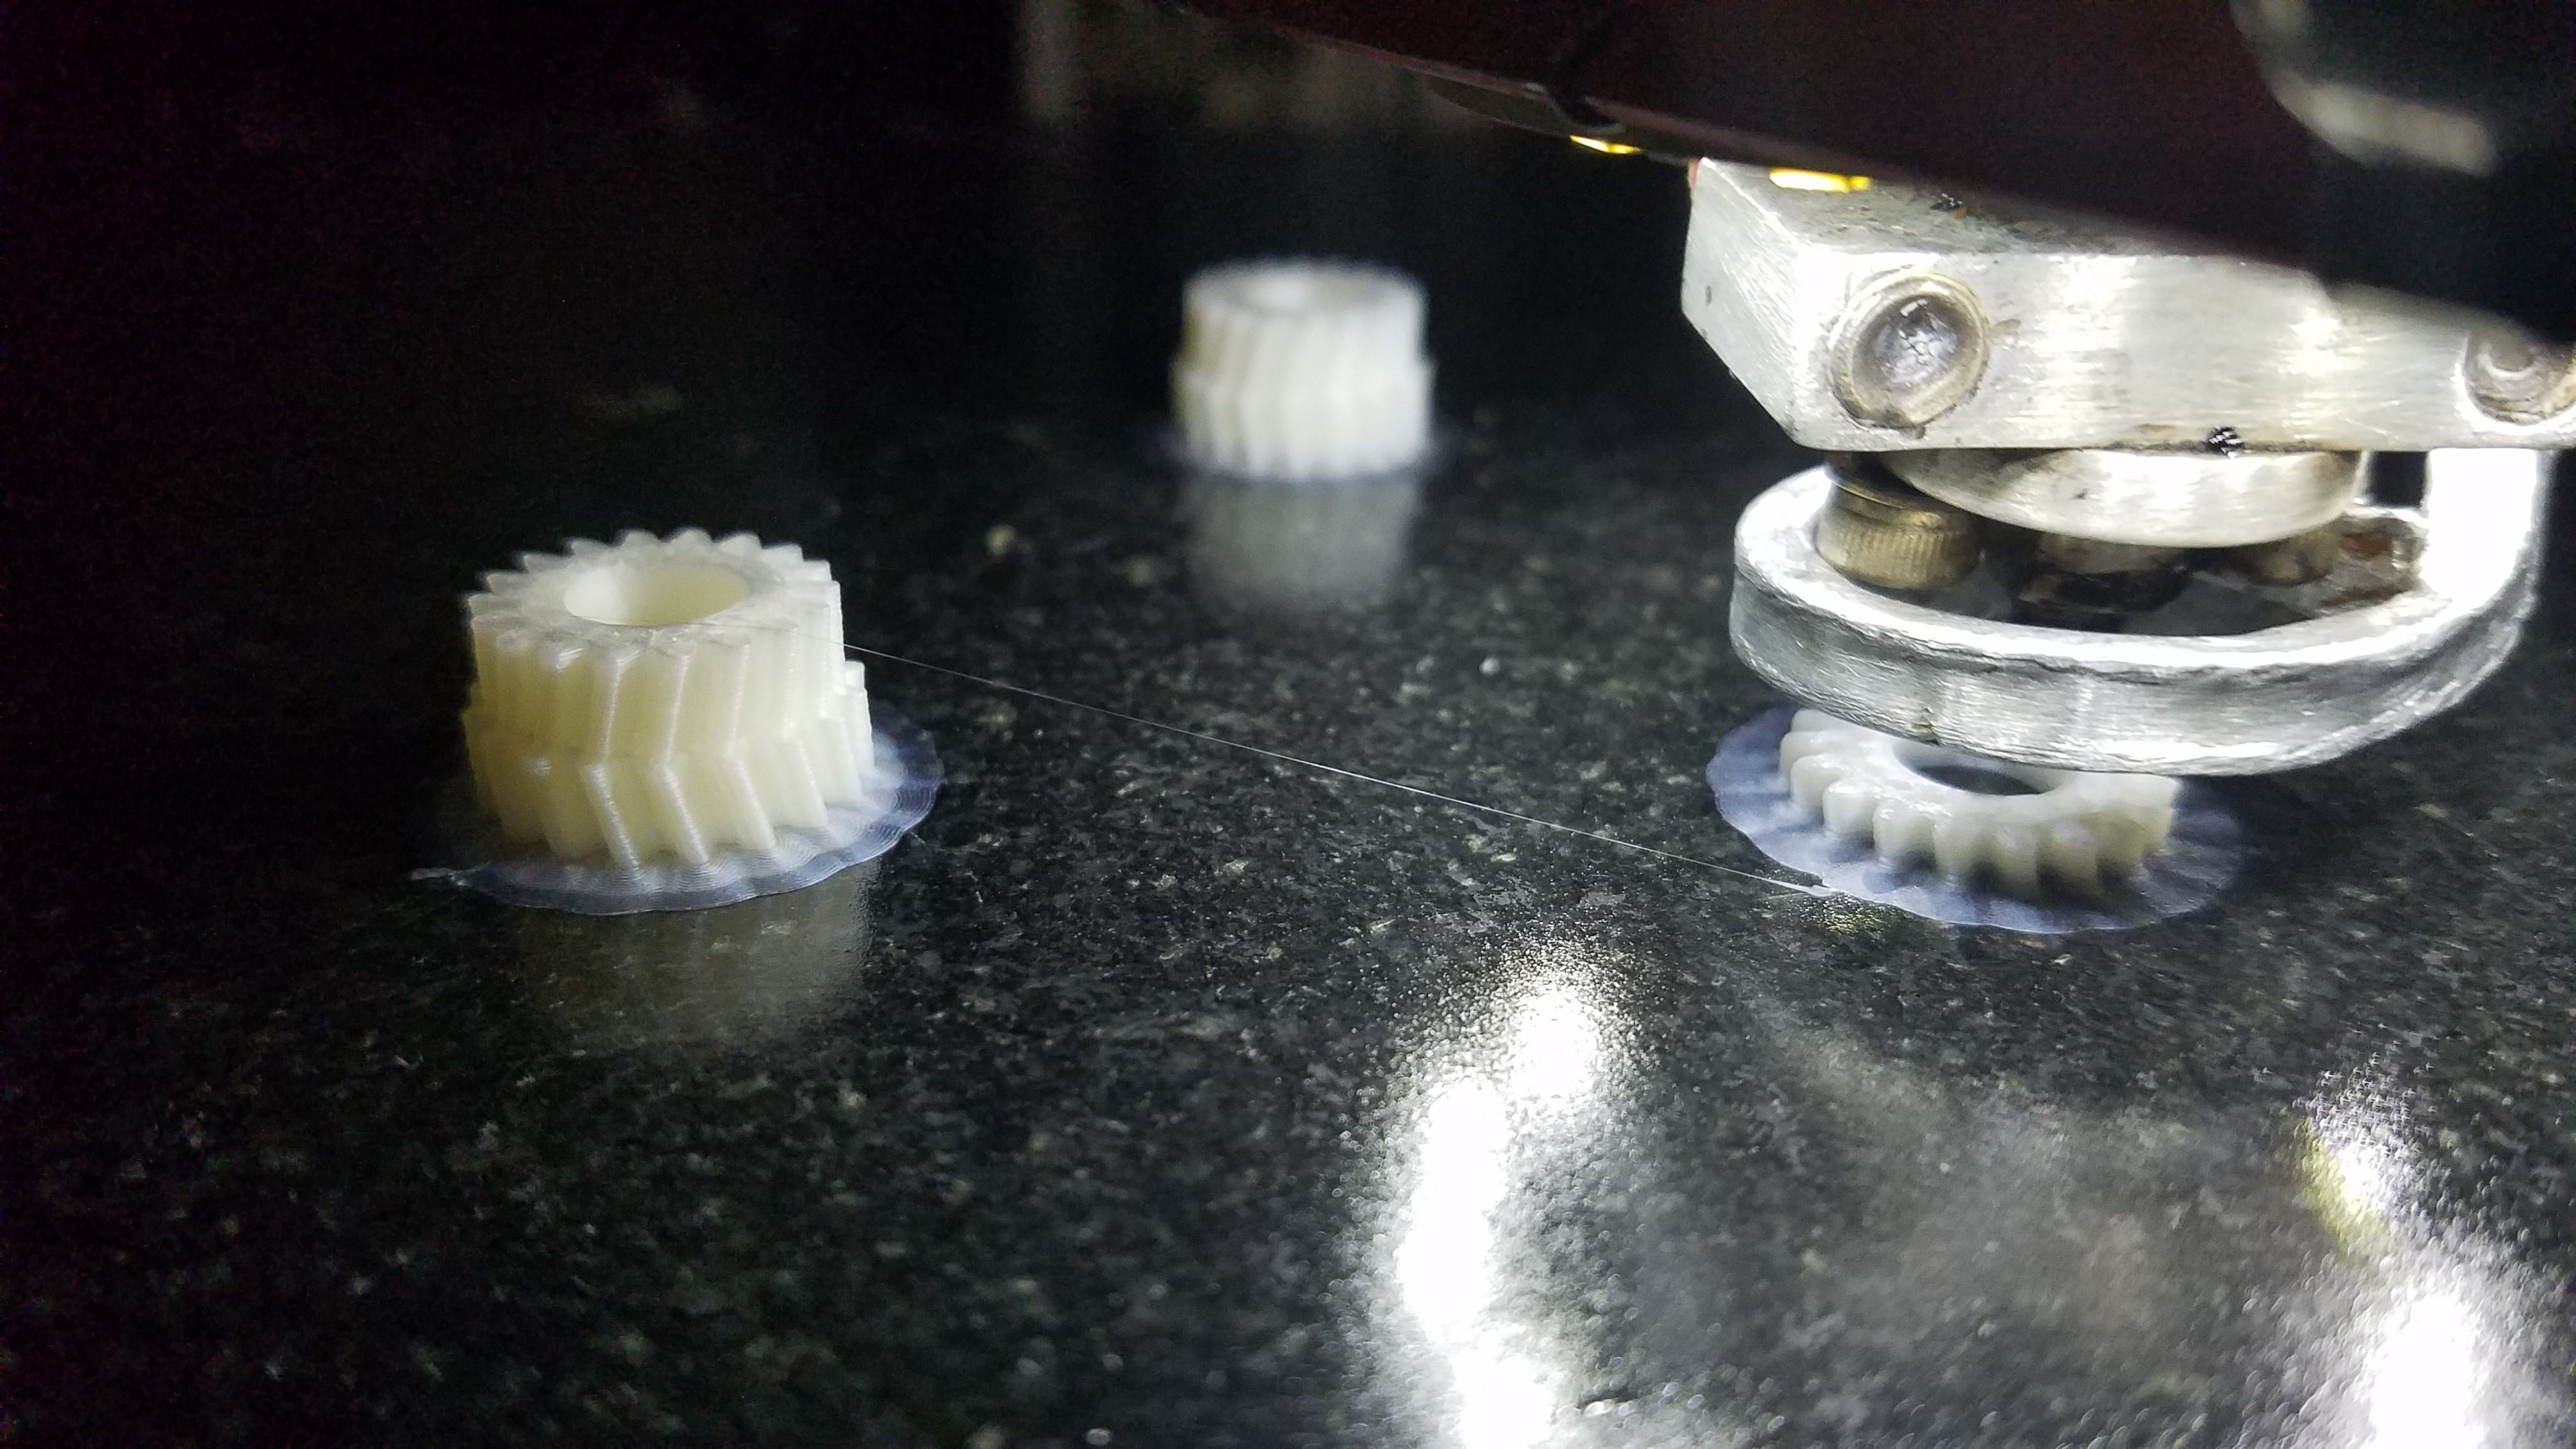
Bad extrusion = bad gears or.. Shifting see?
05/16/2019 at 22:26 • 0 commentsHad a bit of a hangup. My nice gears suddenly started to turn out like this.
![]()
Look close, and you can see the gear profile is screwy with bits sticking out, like the entire thing shifted (like an axis was selectively losing steps). However, that wasn't it...
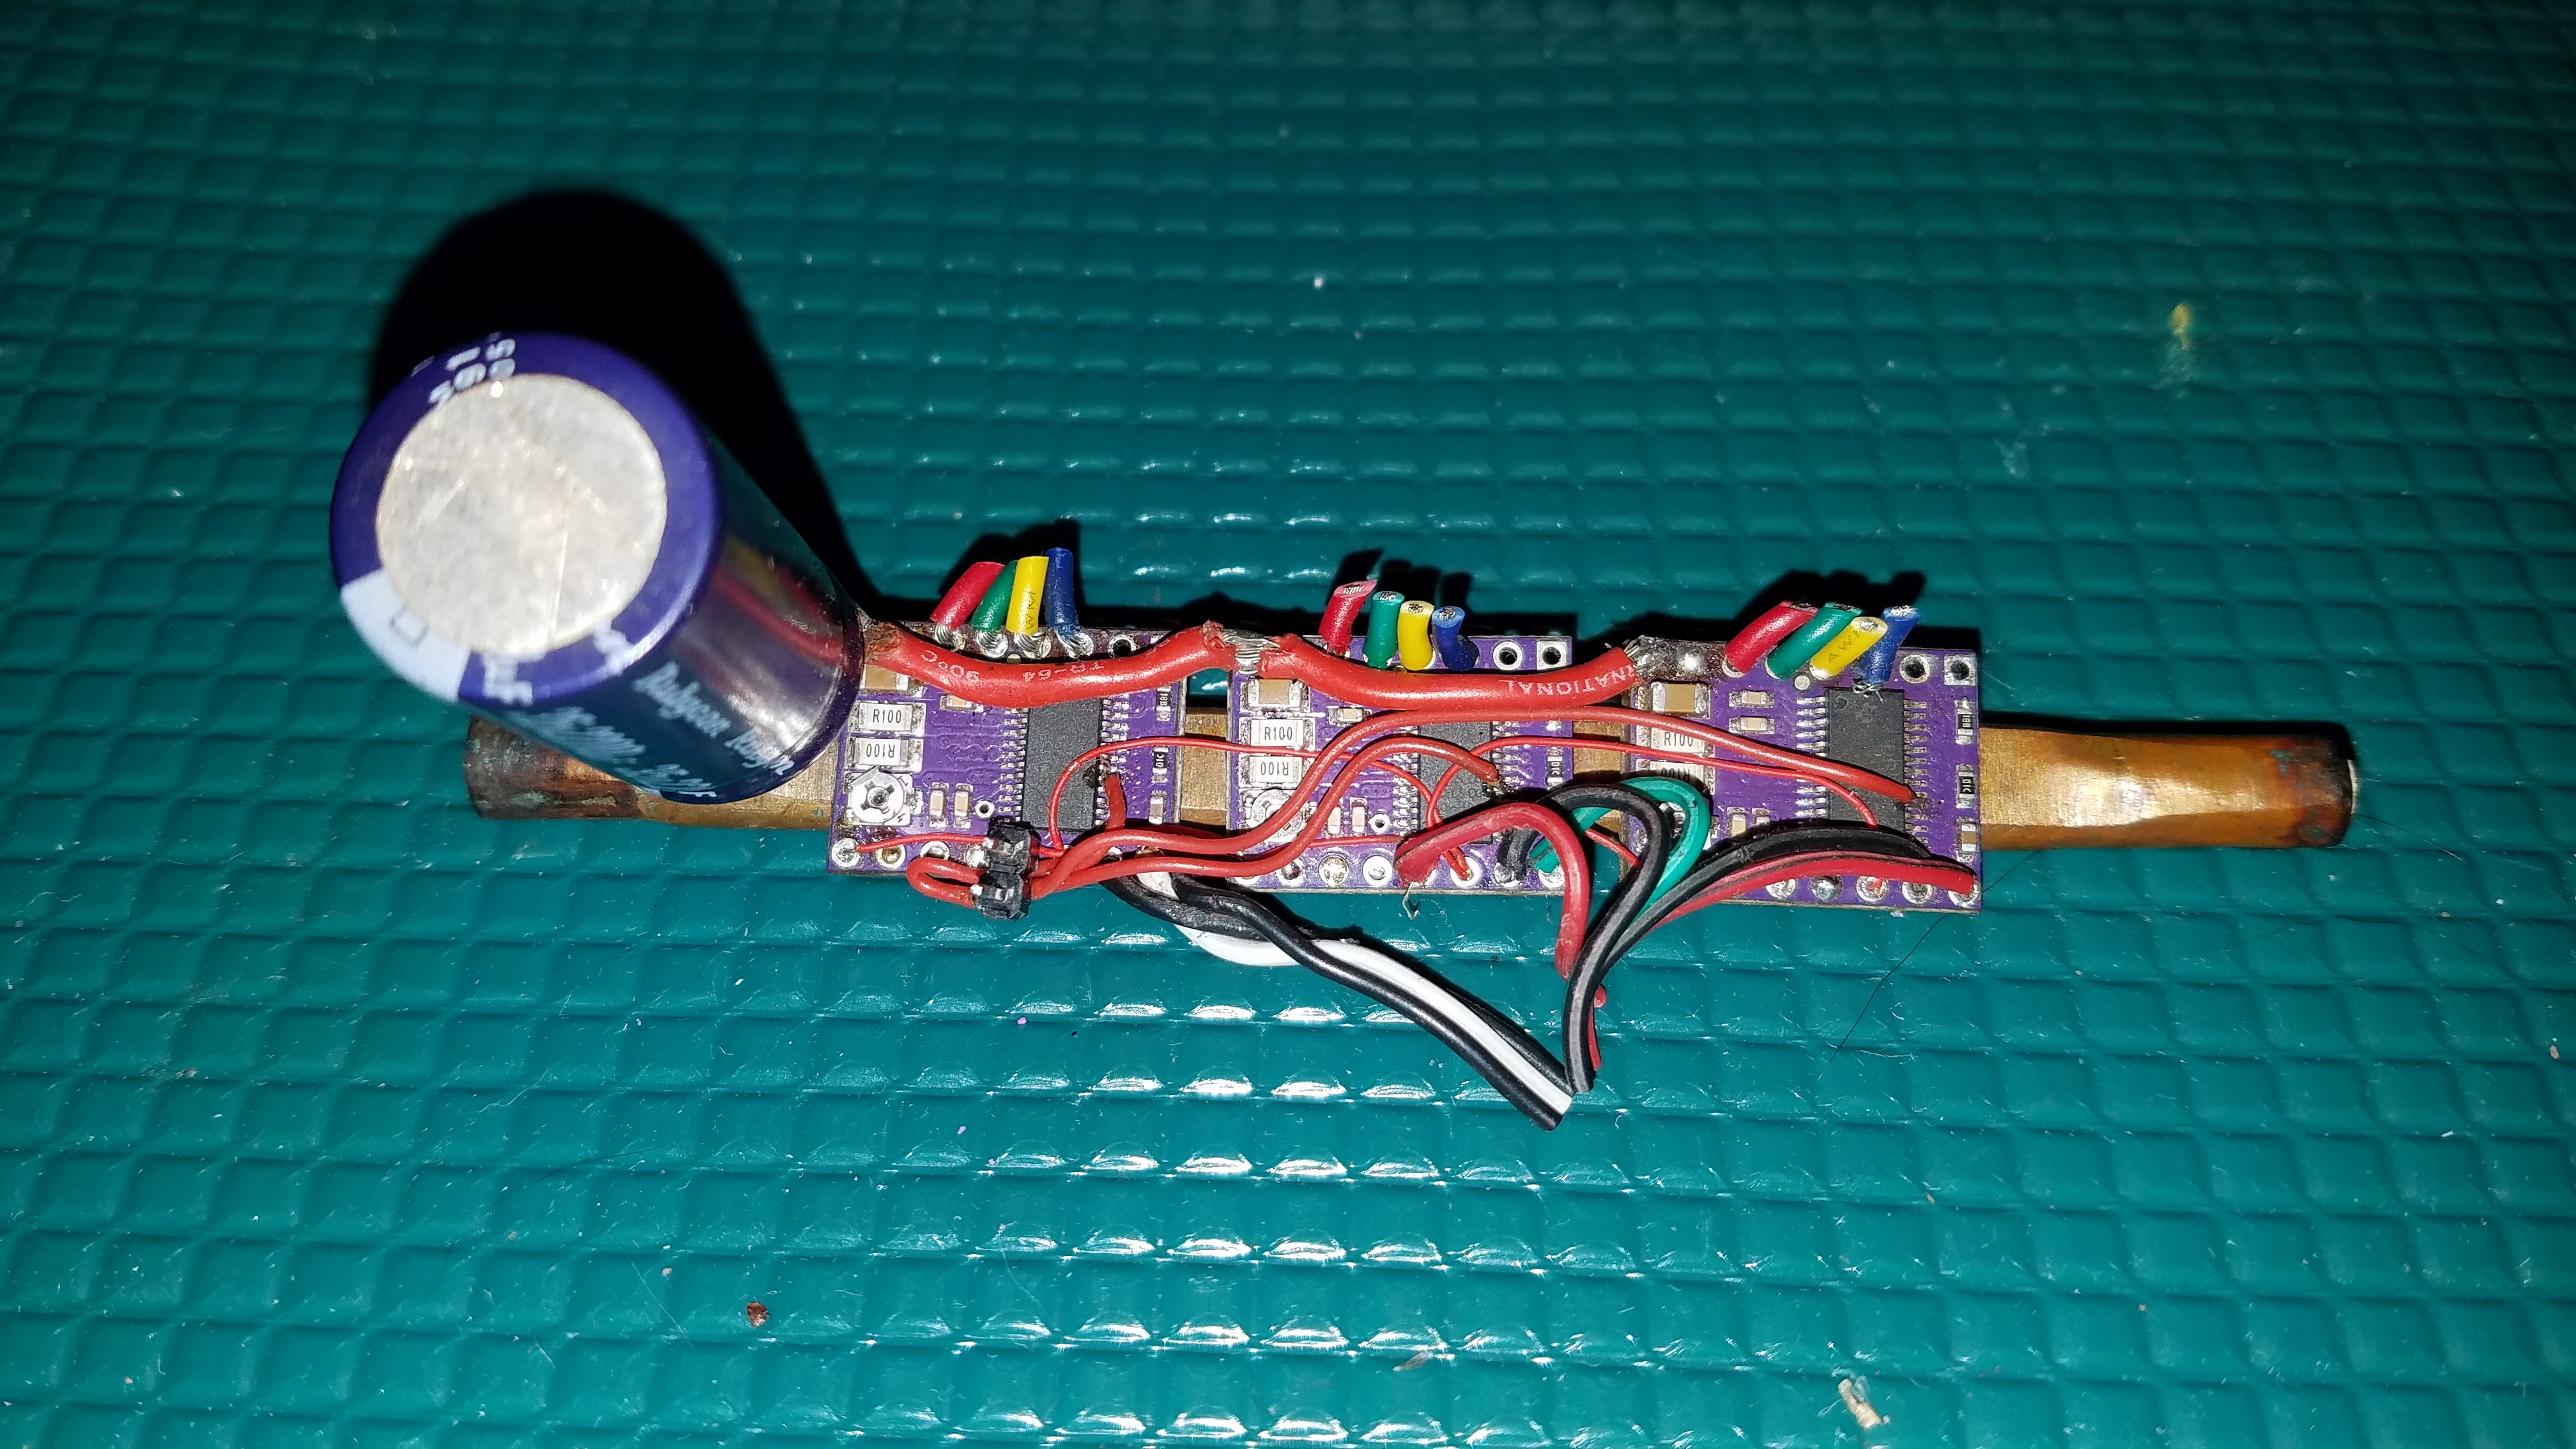
I eventually traced this down to one of the heatsinks on an extruder stepstick not being 'on' the chip. I run them at basically full current so... that matters. So what I think was happening is that one would overheat and then extrude *more* for some reason. Strange.
But, I didn't figure that part out before I replaced my existing DRV8825 water cooled axis stepsticks.
![]()
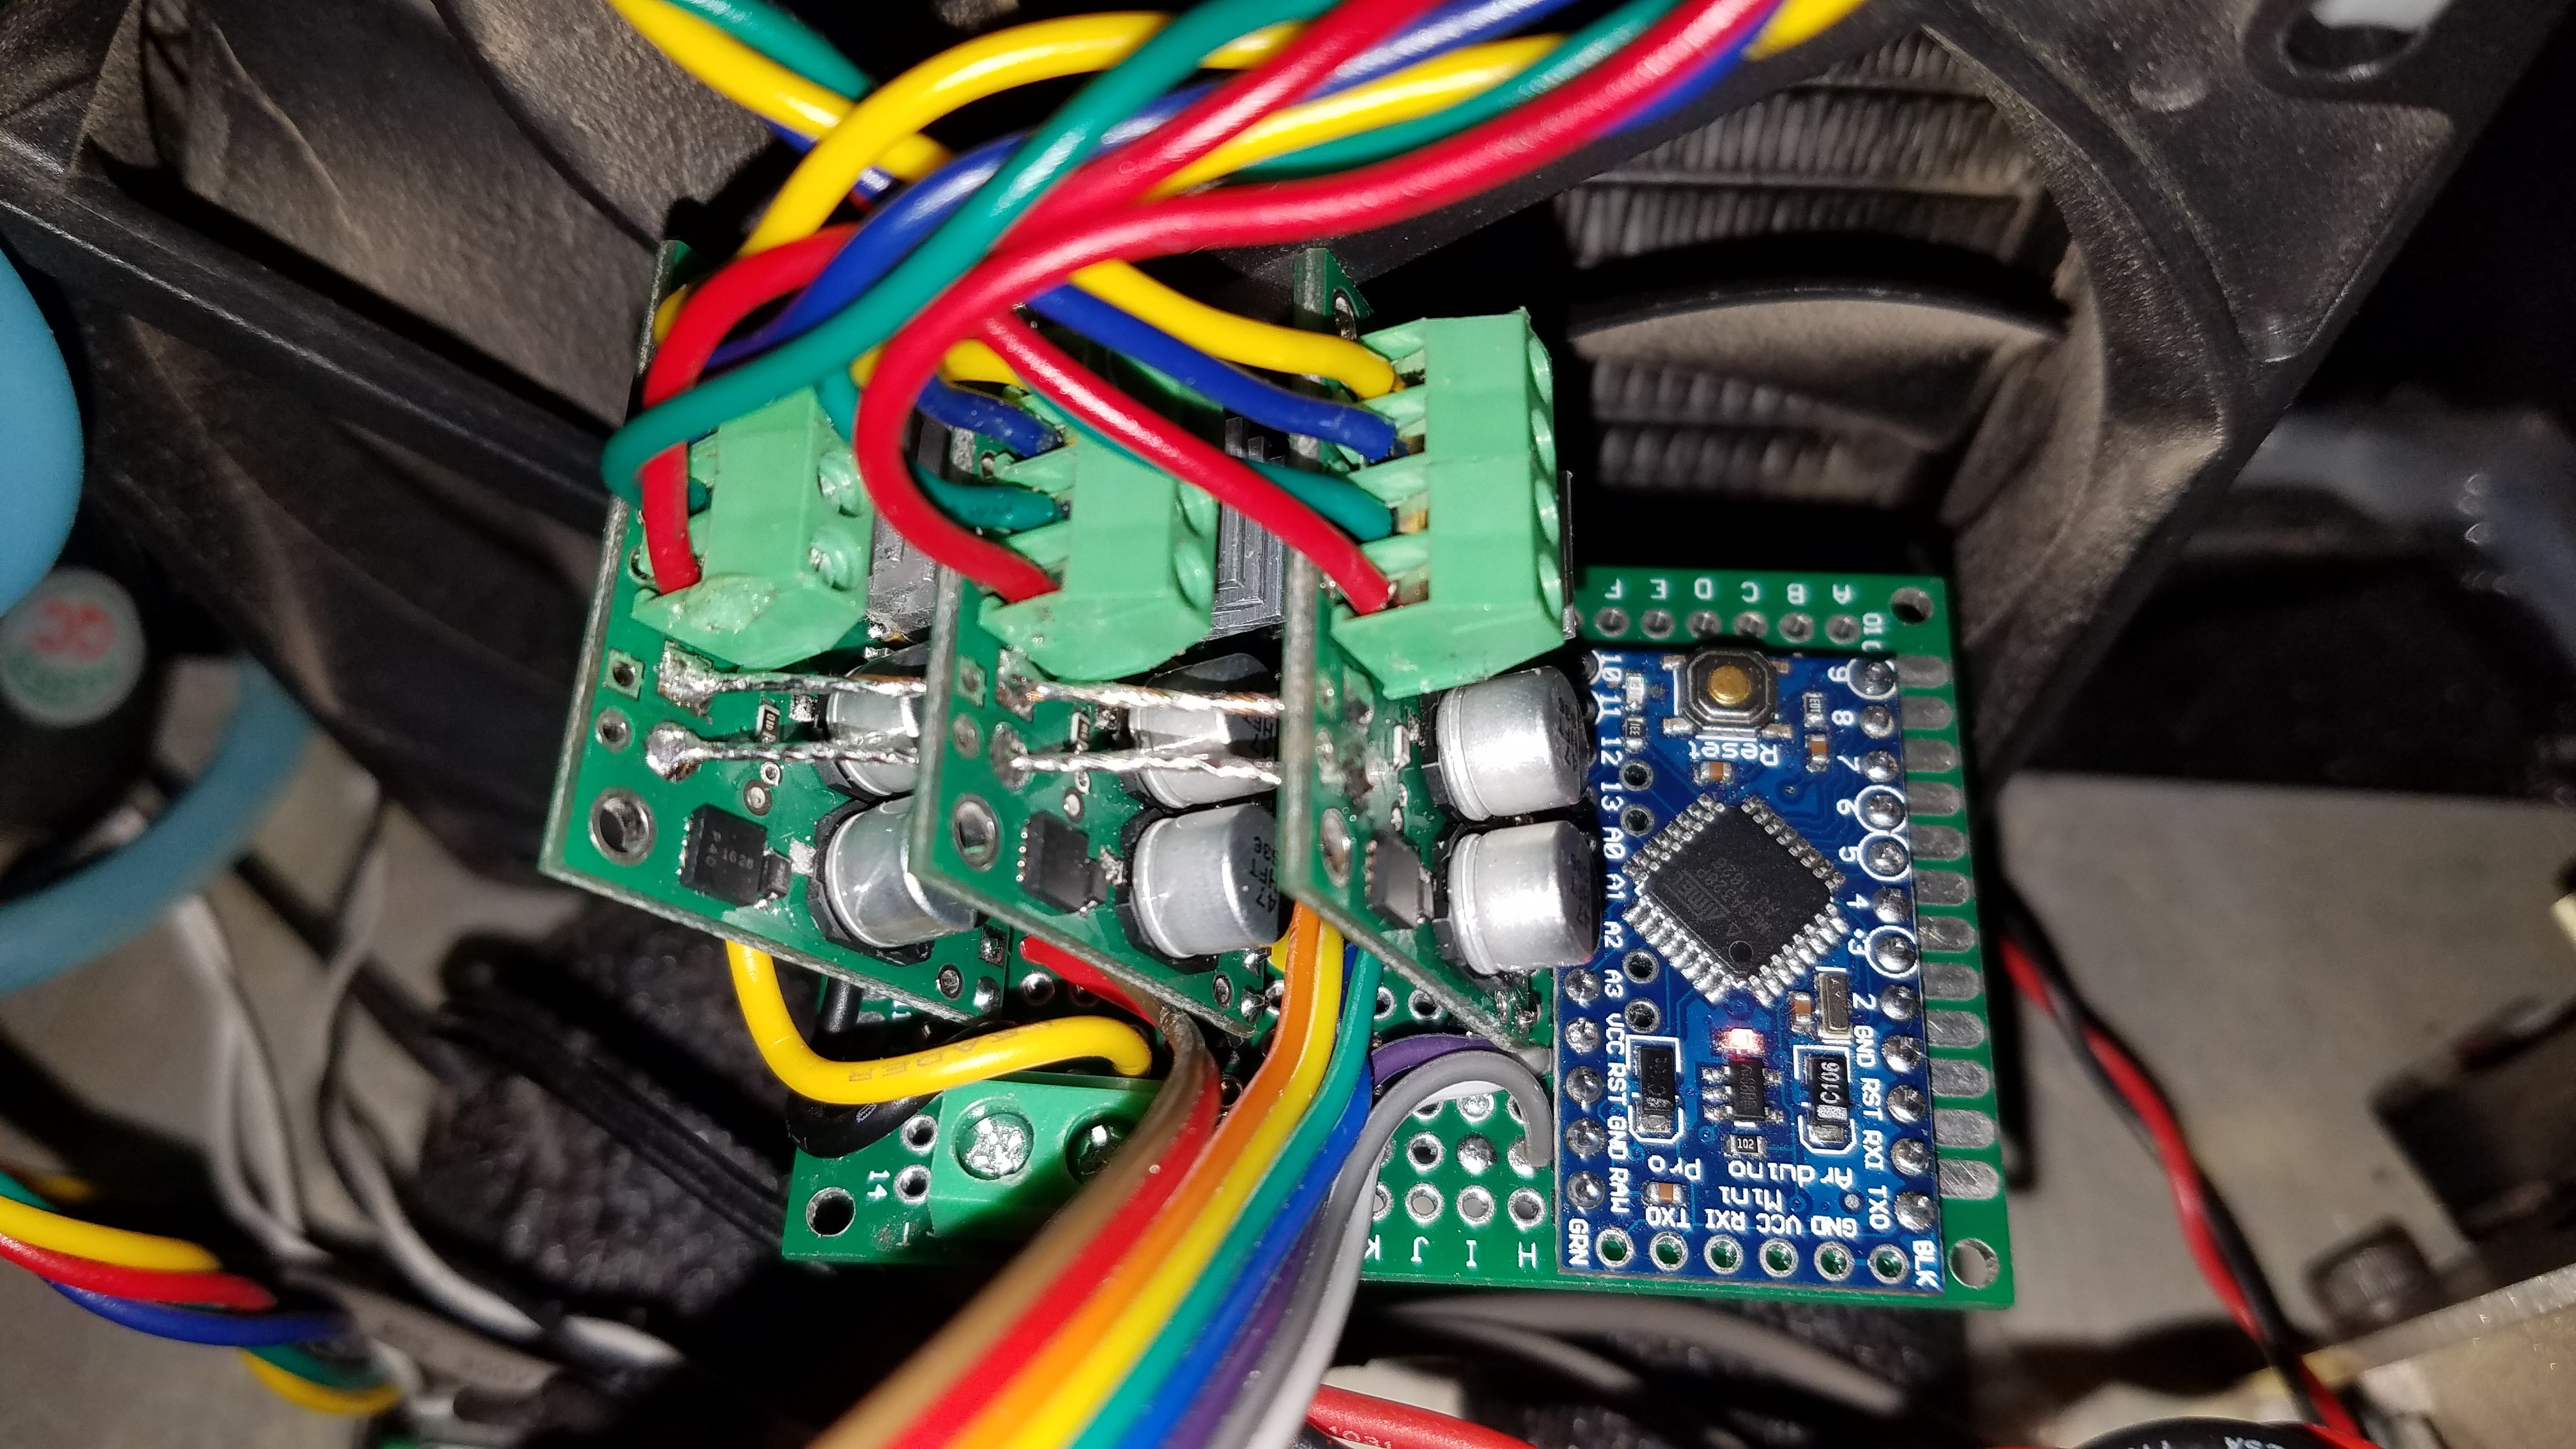
I replaced that bit of 'engineering' with some, now air cooled, AMIS-30543 modules and an Arduino to handle setup/enable/disable via SPI. The DRV8825's have worked well here actually, running at their maximum current with essentially unlimited cooling, for the last 2 years or so
But, I had been meaning to try out the AMIS drivers for a while, so this was as good excuse as any I guess. This actually pretty much sums up 'observer bias'. Also, this is why you probably shouldn't tell the auto repair guy what you think is wrong with your car, even if you think you know. :)
In trying to implement the AMIS interface, I actually ran out of pins on my Beaglebone Black to be able to do more than a single channel of SPI. Kind of impressive, if I do say so myself... :)
![]()
The new drivers have a little bit higher current capability but I'm not using that yet. In any case I'm back up and running and printing.
<EDIT> Print finished, and the printer is back to being glorious. Printing PLA with zero retraction (because I can do 480mm/sec rapids, and that works just as well and is much faster), and printing at 90mm/sec (minus outer walls), and the prints were perfect again. Pictures, in a more on-topic log entry.</EDIT>
-
I'm impatient.
05/15/2019 at 02:45 • 0 commentsI didn't like how convoluted getting #MPRT - Modified planetary robotics transmission adding into this was becoming. Making that into something that I could include here without a master module or something was turning into a mess. I blew away my mess and here we are.
So, I just stuck a copy in the repo and modified it to produce what I wanted.
Good news is you could use it now. Bad news is, everything will probably change.
Any OpenSCAD masters out there with an idea of how to do this better, minus passing all the needed parameters into every child module, feel free to chime in. :)
Source is updated on Github.
-
Hub and transmission.
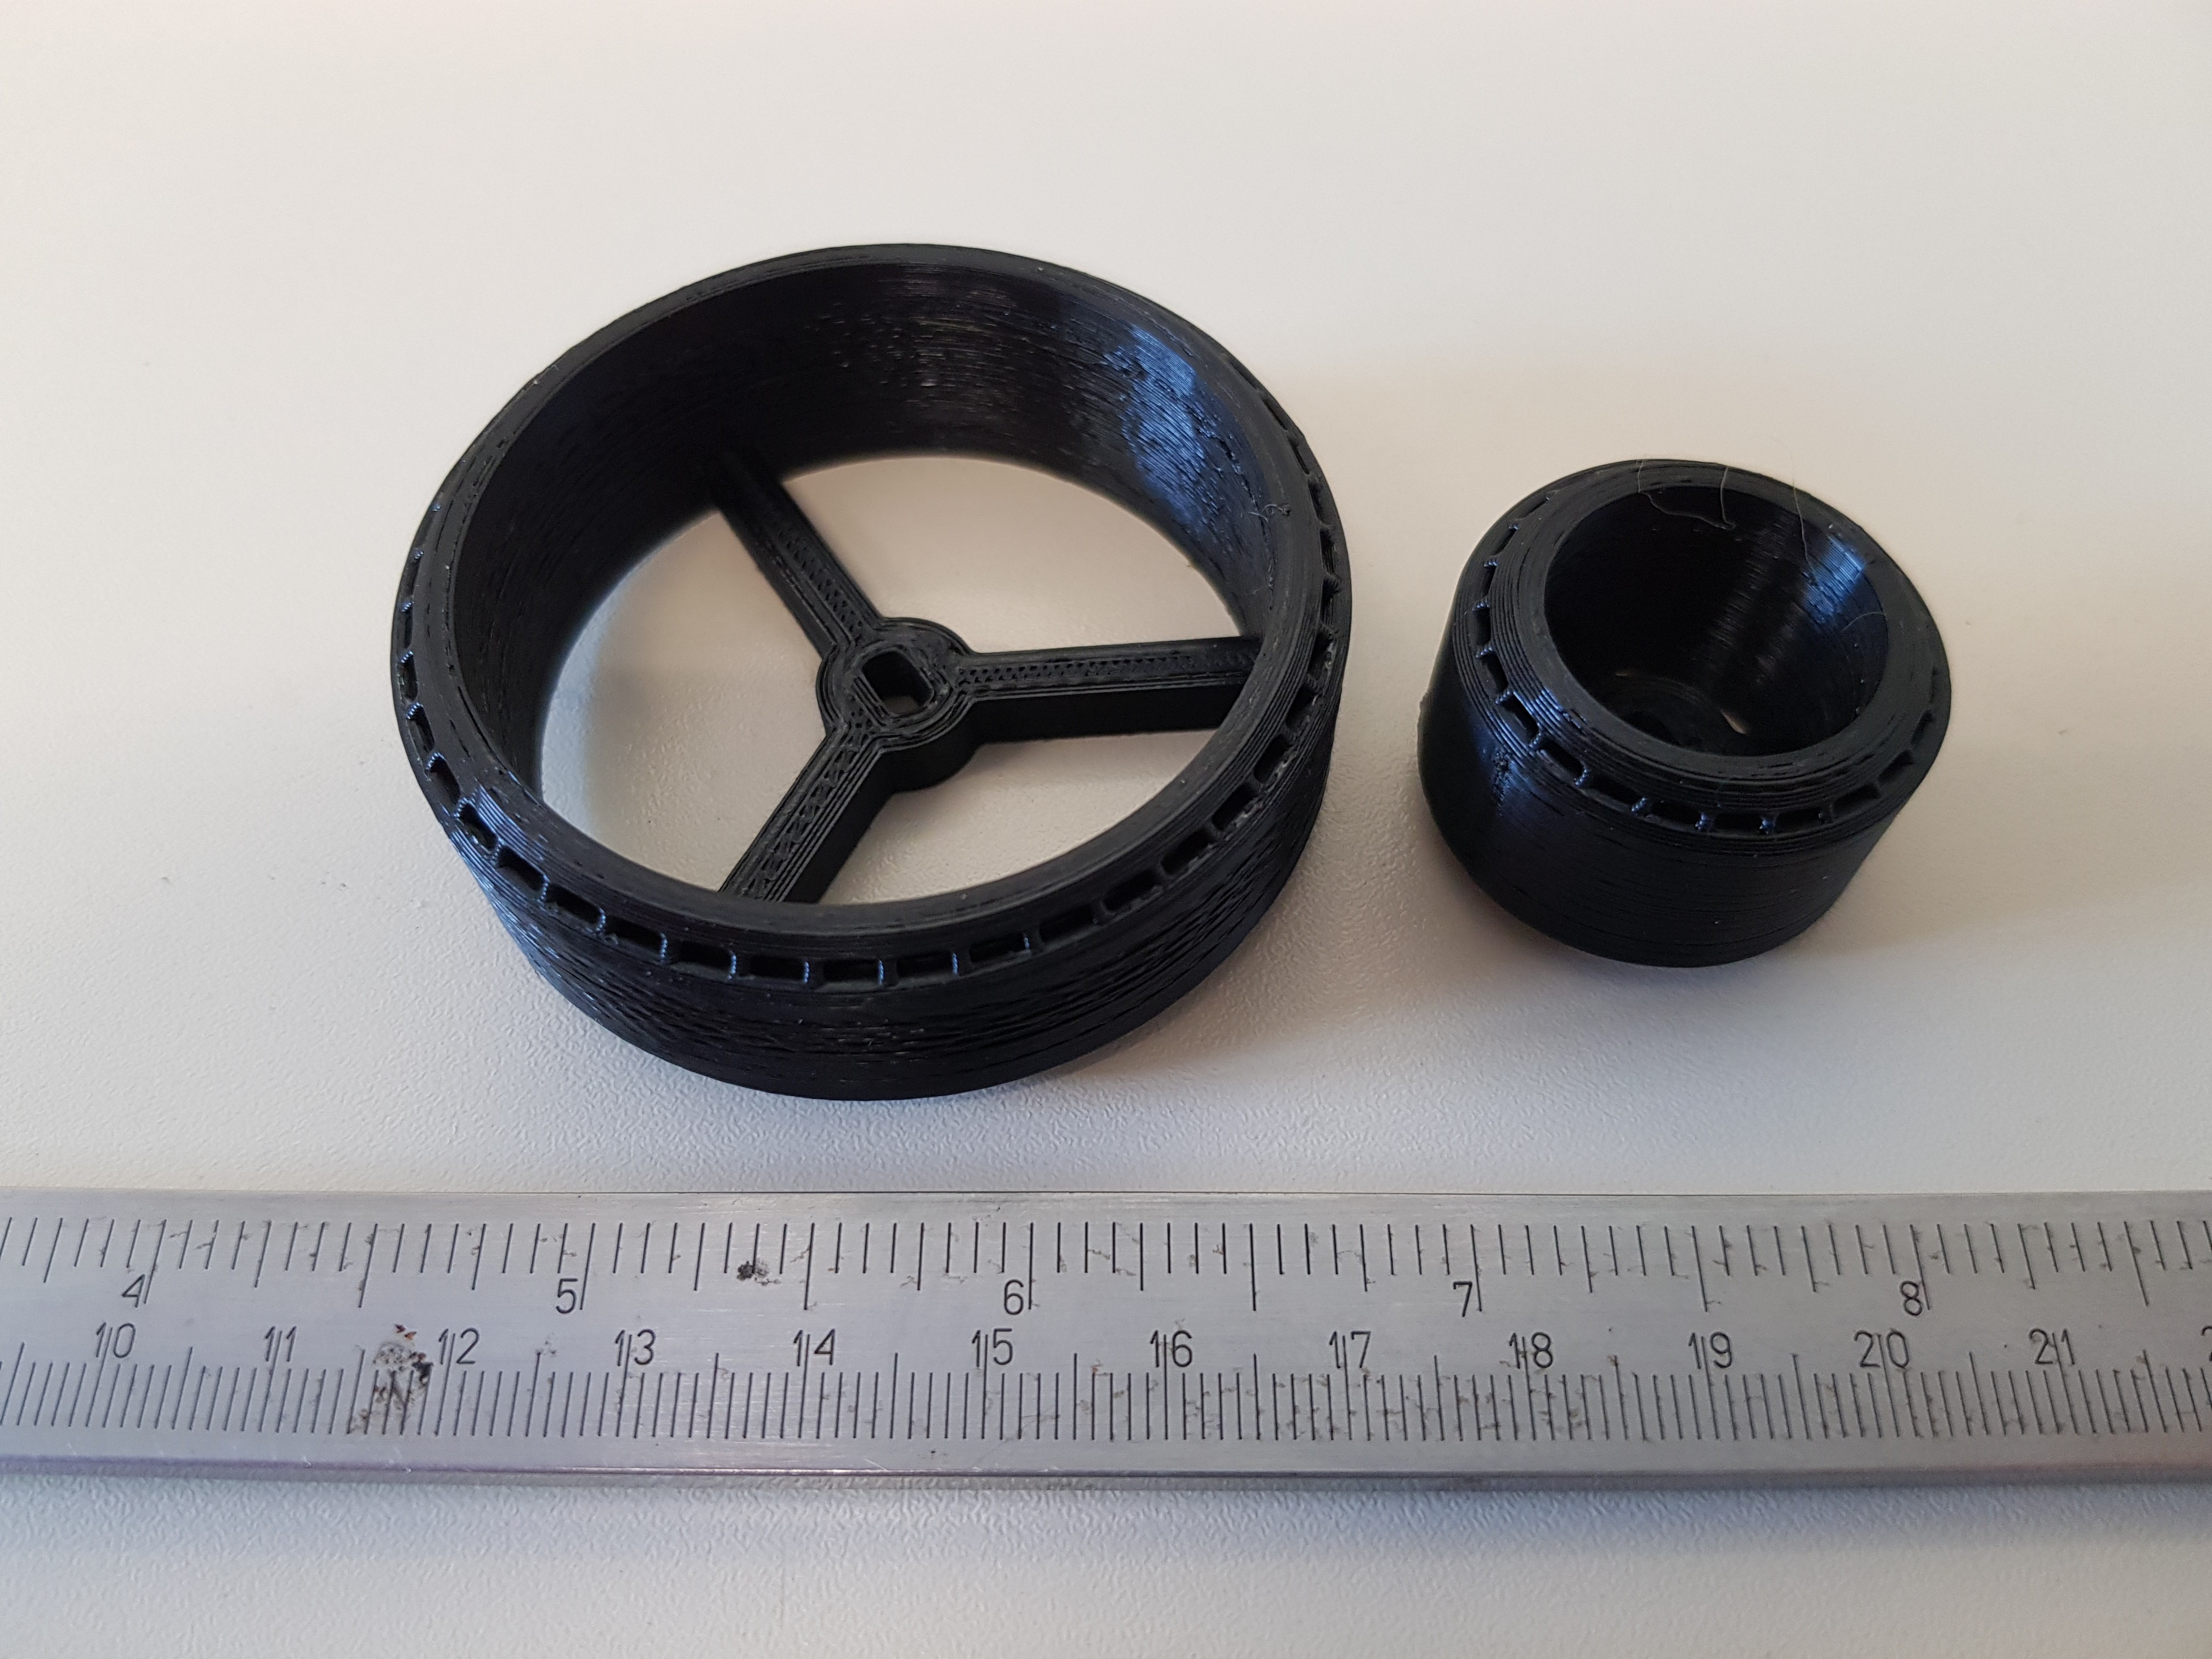
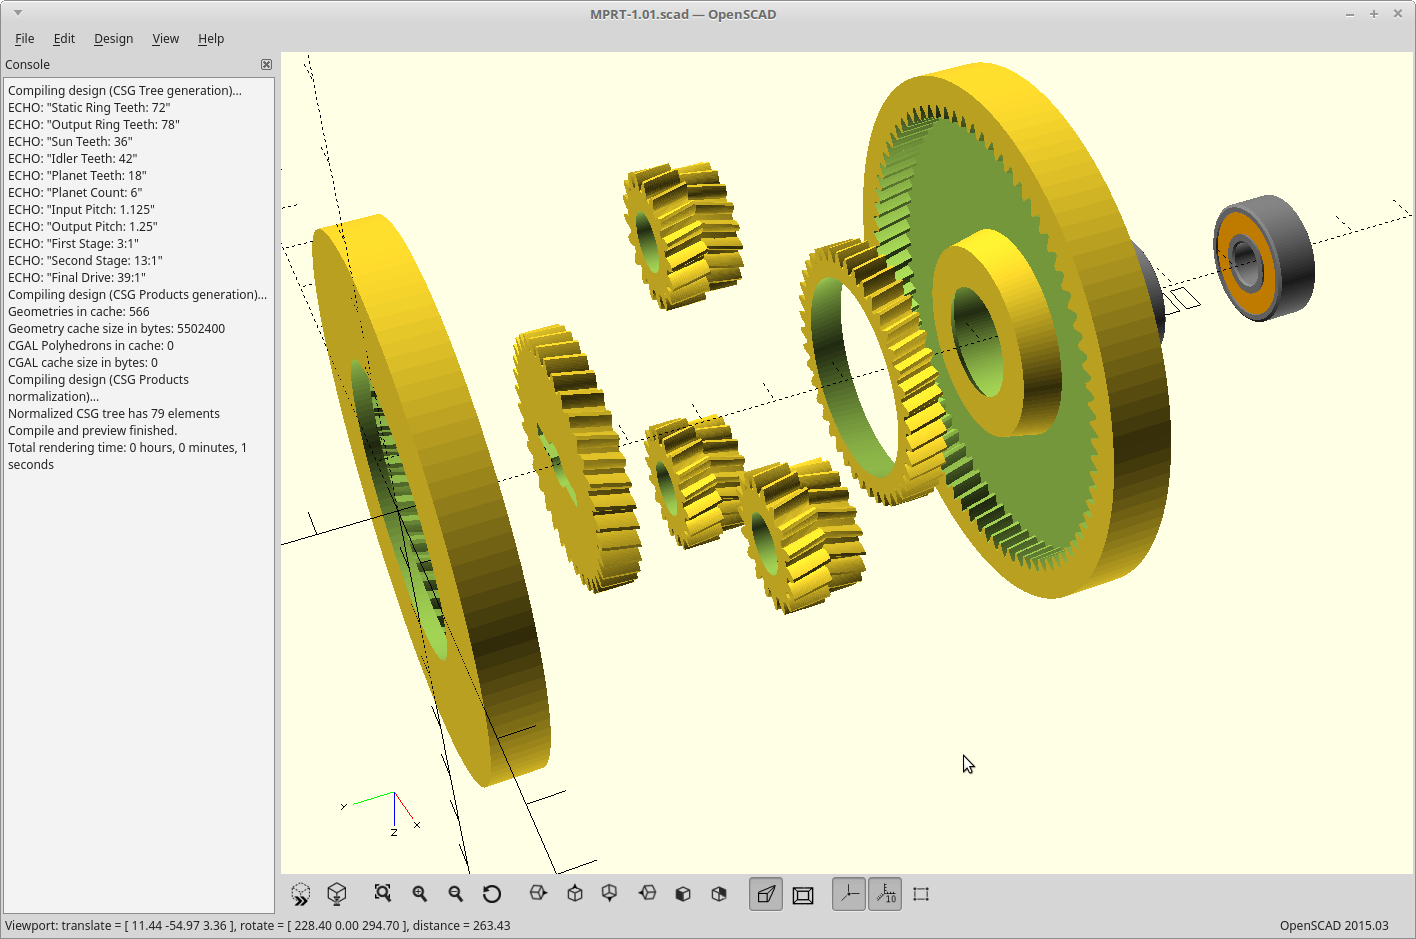
05/14/2019 at 04:29 • 0 commentsFinished my hub/transmission modeling. Everything is properly clearanced.
![]()
I cheated on my transmission to get the gear ratio I wanted. I specified 6 planets, but I'm going to use 3. The calculations for the additional planets changes the output ring tooth count and cuts my gear reduction down to 39:1.
39:1 reduction will give me 77 rpm at my output when my DC motor is running at its rated speed of 3000 rpm.
77 rpm with my 150mm diameter wheels gives me a ground speed of 36 m/min.
36 m/min translates to about 1.35 mph.
That is a little slower than I was aiming for, but I was also going to use larger filament loops before. It will work.
-
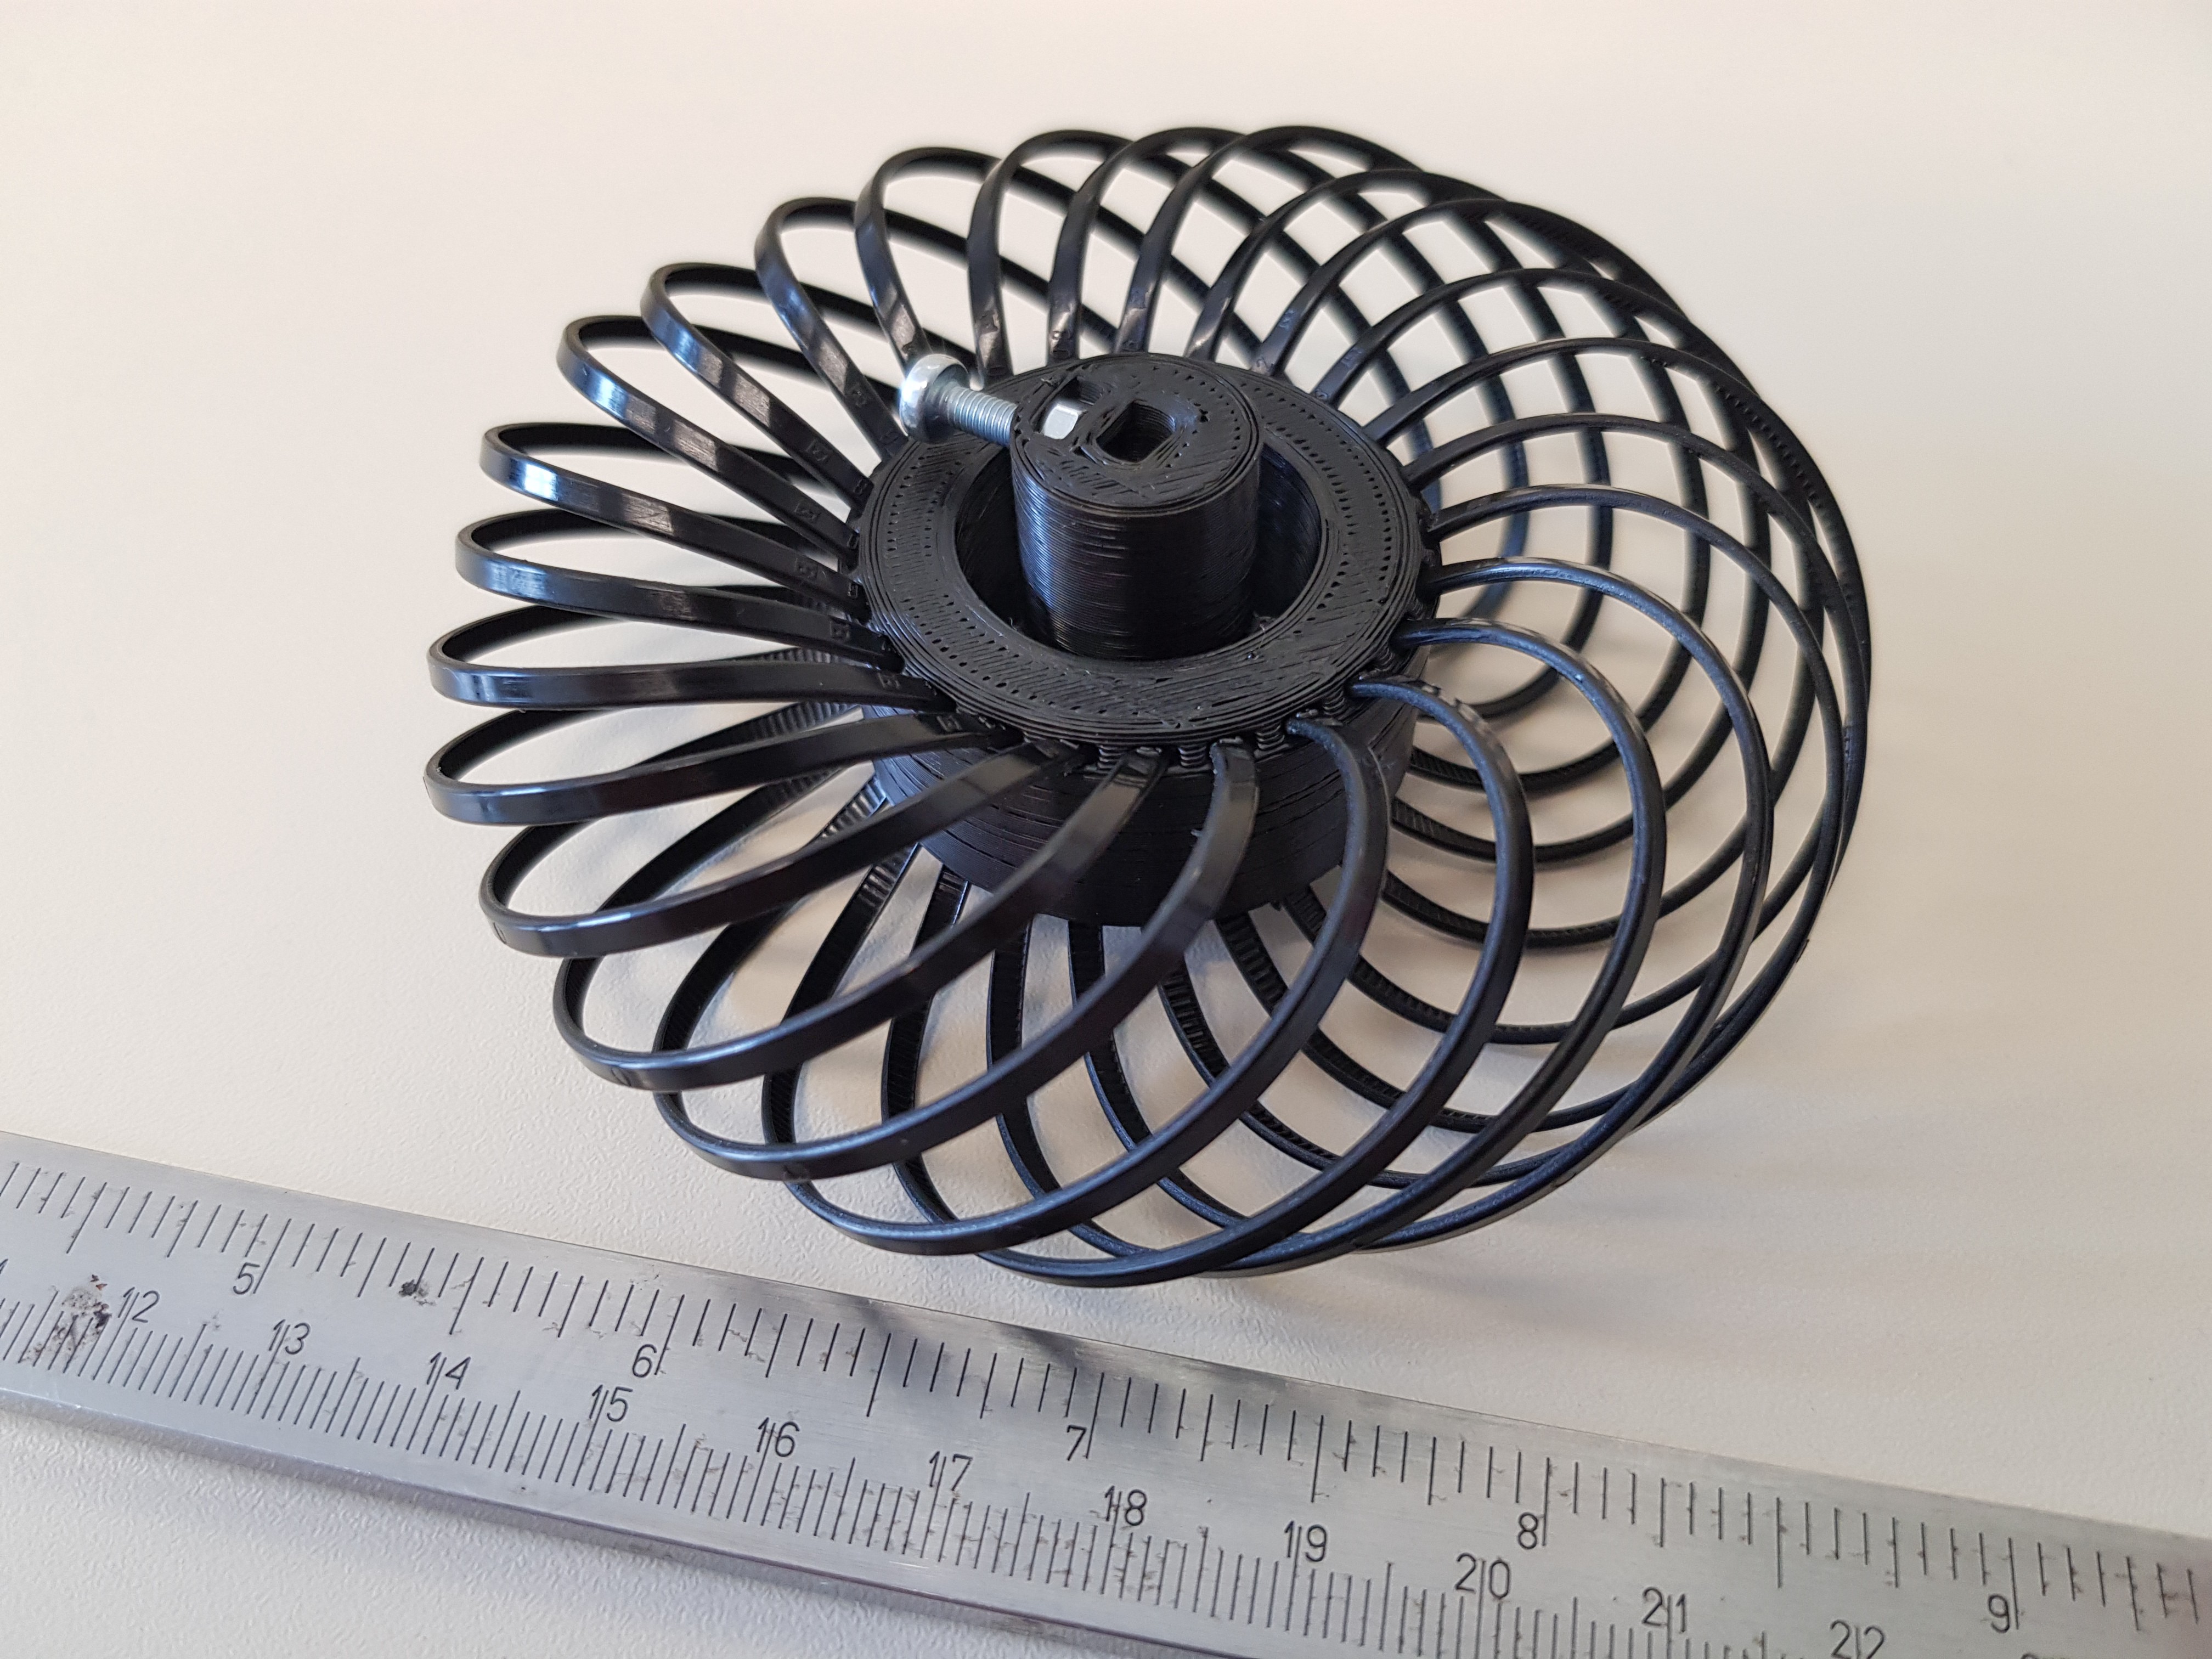
Failure is always an option.
05/14/2019 at 02:34 • 0 commentsI got a little rough with one of the rims, trying to bounce it off the floor and hit the ceiling. :)
It split where the filaments are pressed in.
![]()
I've increased the material thickness for this area in the model, but that won't get posted until I'm done adding back in some rim code. The #MPRT - Modified planetary robotics transmission version is nearly ready.
-
Please welcome N0VA to the project.
05/12/2019 at 05:50 • 1 commentCool hande, I gotta say.
I know it is probably related directly to your last name here @Emil Novak , but I for one grew up watching the PBS TV show Nova, and so a variation on that will inevitably trigger those fond memories.
In any case, welcome to the project sir.
As such, I've created a github for proper collaboration here: https://github.com/Arcus-3d/FilaMecanum and added it to the project.
-
Print settings, and this project "In the wild!"
05/11/2019 at 18:35 • 0 commentsTwo of the latest version of the rims printed, two to go.
I'm printing them with my 'normal' formula for stronger PLA parts. Some of this applies to most filament types, but not all.
- All walls, just because 100% infill was acting strange with a lot of rapids, and was adding like an hour to the print.
- 5-10% over temperature. Must be combined with going faster generally and your hotend needs to handle it...
- 5% over extruded. Surface quality suffers a bit, but most of the internal gaps get filled in for a stronger part.
- As fast as I can with as little cooling as I can and still not deform for my overhangs. That turned out for me to be 60mm/sec for all except outer walls (which are at 45mm/sec) and 80% for cooling. I use an air pump for cooling though so it's very precise and localised with the superpower of cooling right at the extrusion point without cooling the entire part. YMMV.
- 45C bed temp, and a small brim for bed adhesion. Cleans up easily and stays put.
In other news, @Emil Novak has since printed a version of this for a local contest he's interested in, and tried it out.
![]()
I'm not sure about his choice of tire aspect ratio as that caused issues for me, but it's certainly a start. :)
He also has plans for trying out zip-ties as the tire material which he will probably get to faster than I can.
Waiting to see how that turns out, and as promised (if he's old enough), has been invited to the project.