-
1Machining of top plate
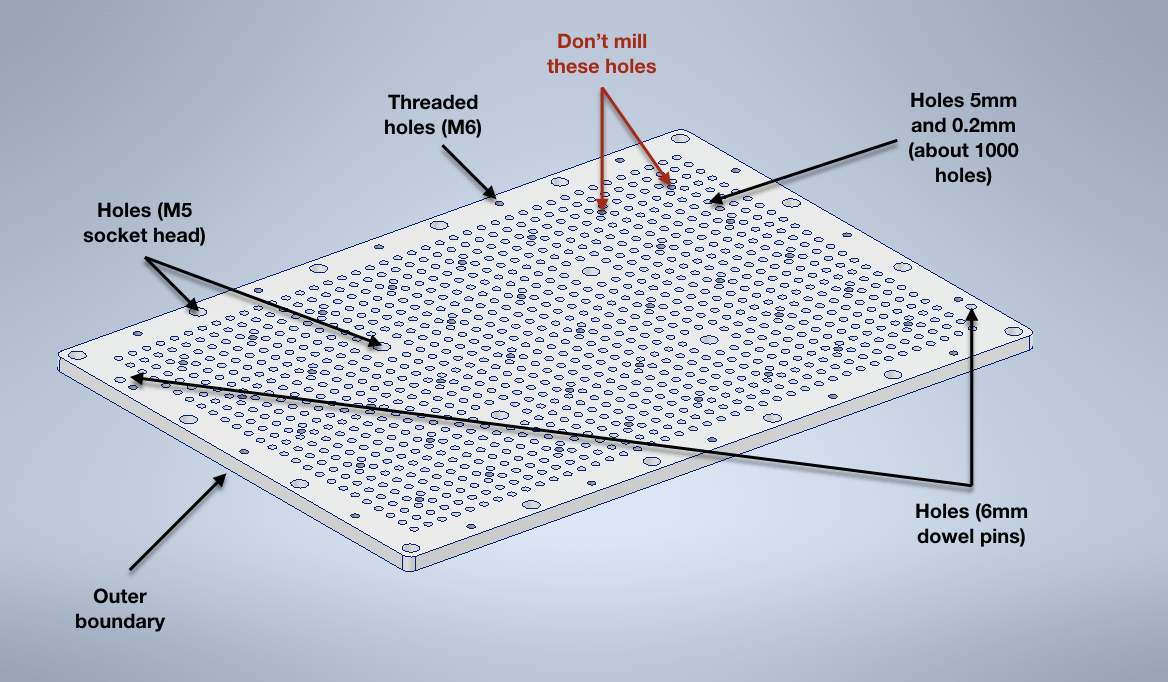
When milling the top plate, it is important that some things of the plate are not milled in this step. So, here is a list of things you should mill in this step:
- Border of the plate, so that you get the correct dimensions.
- Holes for the dowel pins (holes through the plate, 6mm with tolerance m6). Since you will use a milling machine or router, try to create the holes a little bit smaller and than converge to the correct tolerance.
- Sunk holes for M5 screws
- First type of vacuum holes (5mm)
- Second type of vacuum holes (0.2mm)
- Outer thread holes (just the holes with threads at the edge of the top plate, but not the threaded holes between the vacuum holes)
For the vacuum holes please take note of the depths and the angle of the 5mm drill. At the end, just the 0.2mm drill should drill through the plate.
Here is a list of things you should not mill in this step:
- Threaded holes in between the vacuum holes. They are milled after the table has been assembled and go through the top plate into the bottom plate
Below a picture is shown of the top plate. The required things to mill are marked.
![Milling steps of top plate Milling steps of top plate]()
See part 1 of the machining and assembling series on Youtube: https://www.youtube.com/watch?v=dRxbjm6g7WI
-
2Machining of the bottom plate
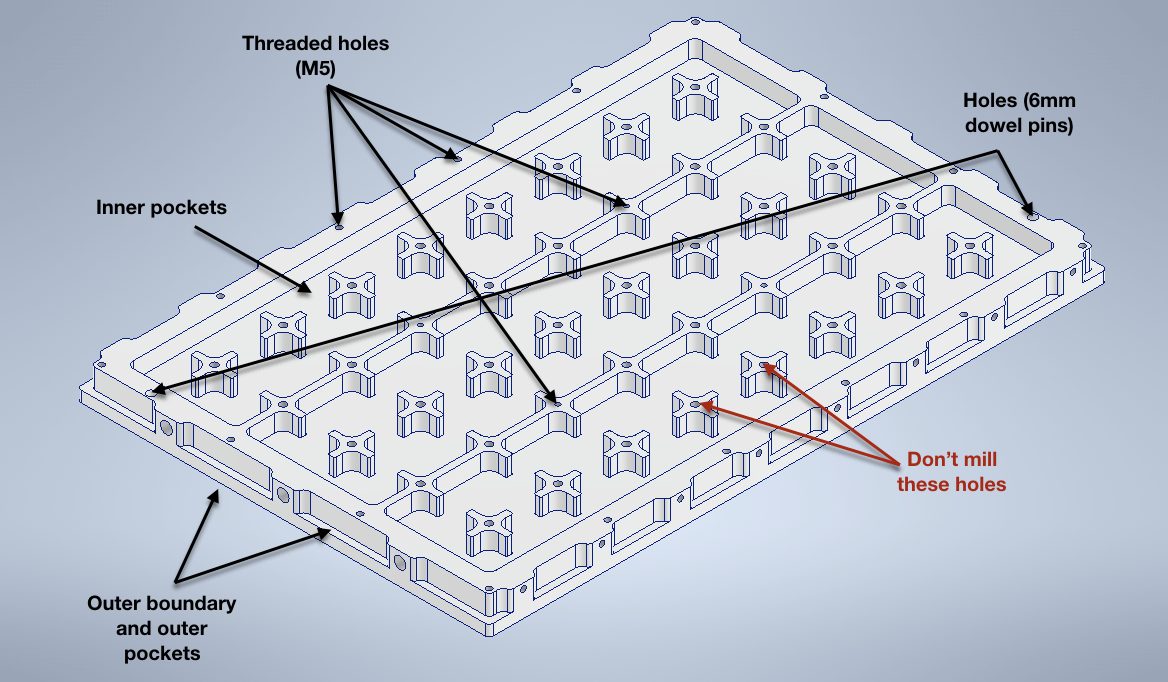
When milling the bottom plate, it is important that some things of the plate are not milled in this step. So, here is a list of things you should mill in this step:
- Border of the plate, so that you get the correct dimensions.
- Outer pockets to get places to mount your vacuum plate to the work table.
- Inner pockets
- Holes for the dowel pins (6mm with tolerance m6). The holes should be so deep that the dowel pins stick out about 4mm, depending on the dowel pins you have available. Since you will use a milling machine or router, try to create the holes a little bit smaller and than converge to the correct tolerance.
- Holes with M5 threads
Here is a list of things you should not mill in this step:
- M6 holes with threads. They are located on top of the "crosses", except 4 holes. They are milled after the table has been assembled and go through the top plate into the bottom plate
Below a picture is shown of the top plate. The required things to mill are marked.
![]()
-
3Drill holes at sides of bottom plate
Since the dimensions are not suitable for a normal CNC router, the holes at the side has to be drilled manually. So mark and center-punch the holes, before drilling. Check the CAD file for correct positions of the holes.
At one side you have to drill the correct holes for a G 1/8" thread, i.e., 8.8mm.
At the other three sides holes for M5 threads have to be drilled (4.2mm).
-
4Cutting threads at sides
As in step 3 cut the correct threads. G 1/8" and 5mm.
-
5Add dowel pins into bottom plate
The pins should stick out about 4mm.
-
6Apply sealing mass
Important: take care about the holes in bottom plate, especially those which have not been drilled.
-
7Add top plate to bottom plate
Aligning is done by dowel pins or if you don't have them or they don't fit due to tolerances of your CNC machine, try to align with all four sides as best as you can.
Important: make sure that the vacuum holes (0.2mm) are clear, so that air can pass.
-
8Add screws between top plate and bottom plate
Screw top and bottom plates together. Be careful to gently tighten the screws, since a thread in aluminium is not good for too much force.
-
9Add connectors
Apply teflon tape to the threads of the connectors and screw them into the holes.
DIY Vacuum Table for CNC machines
Vacuum table for CNC machines made out of aluminium with some useful features
 I'm a maker

Discussions
Become a Hackaday.io Member
Create an account to leave a comment. Already have an account? Log In.