Close
0%
0%

ESPlay Micro

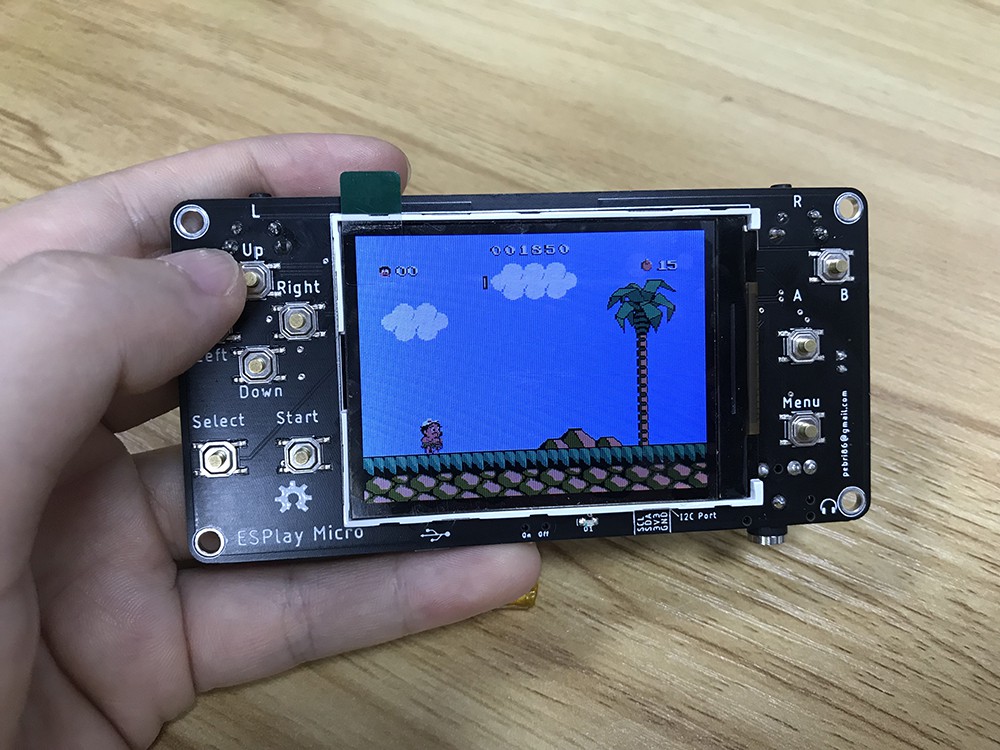
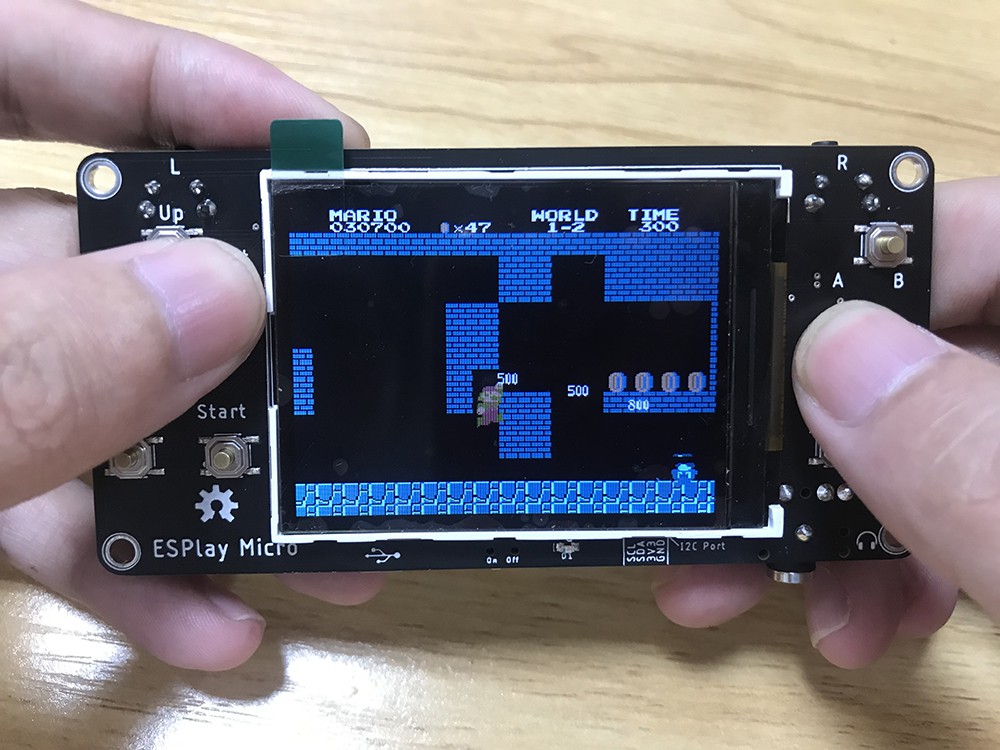
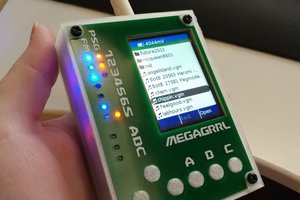
ESPlay Micro is an ESP32 Based emulator device for playing retro games, able to play classic games NES, GB, GBC, SMS, Game Gear and more.

Similar projects worth following
Starting from
$32.90
Makerfabs has 1436 orders / 36reviews
Ships from China
Everyone loves ESP32 chip, it's wonderfull chip from espressif with great functionality and really mature in software development side. This project most inspired by Odroid Go and Pocketsprite, so why making new one despite buy one of them? Well, i know those devices are great and have well community support, but some of them had some issue that i don't really like. Odroid Go had shared it's spi for both display and sdcard, and they need patched esp-idf version for it and sdcard not work very well in spi mode, at least for my experience. Then pocketsprite only have esp32 wroom module without psram and also without sdcard support so limited portability for save my collection of games.

Then i decided to design my own hardware based on both of them so i could port it's software to my own designed hardware then here i presented to you ESPlay Micro.

The board are designed for the following feature :

  • ESP32 WROVER, Dual core processor with Integrated 4MB Flash + 4MB PSRAM
  • Integrated WIFI and Bluetooth 4 BLE
  • 2,4" ILI9341 TFT Panel
  • More button (expanded via PCF8574 I2C GPIO)
  • Micro SD slot connected to SDMMC Host in 1 Line Mode for save GPIO pin
  • Integrated I2S DAC via UDA1334A
  • Integrated USB to Serial for programming and debugging using CH340C
  • Built-in TP4056 Li-Po charger
  • I2C port for expandable function
  • 3,5mm Headphone jack
  • Smaller Size, PCB only 100 x 50 mm.

And planned ability to run LVGL UI both of C and Micropython ( lv_micropython)

btn_assy_2.stl

Standard Tesselated Geometry - 163.75 kB - 11/28/2019 at 06:12

Download

case_design.FCStd

x-zip-compressed - 2.95 MB - 11/28/2019 at 03:35

Download

bottom_body.stl

Standard Tesselated Geometry - 97.15 kB - 11/28/2019 at 03:35

Download

top_body.stl

Standard Tesselated Geometry - 86.41 kB - 11/28/2019 at 03:35

Download

board.stl

Standard Tesselated Geometry - 7.46 MB - 11/25/2019 at 05:27

Download

View all 6 files

  • New journey developing a new bootloader

    Fuji Pebri03/05/2022 at 14:02 1 comment

    Hi, it's been a while but i never abandon this project. My regular work just not let me do this project even on free time. But i will continue with a brand new bootloader firmware so board should be more reliable at switching to another application or games. I just discover a way to load apps from internal spi flash and since makerfabs gave a new specs to ESPLAY with wrover module with 16MB flash, it's a big and we can load the flash with several fw at once, we just need a way how to fast load and start each apps without fleshing and updating partition like we do today. I borrow a concept from pocketsprite which can load compiled bin that stored in flash via custom appfs partition and second stage custom bootloader. Butvthe problem is the pocketsprite code are really old with esp-idf v3. I will ported a code so the bootloader will work with latest esp-idf v4. 4.

    See you next log :) 

  • Arduino available

    Makerfabs09/09/2021 at 10:34 0 comments

    As all know, we can play the ESP32 with Arduino because ESP32 is Arduino compatible, and the ESPlay Micro is no exception. ESPlay Micro is not only a game emulator to provide entertainment, but also a learning tool that is an Arduino programming development platform.

    In order to develop or play the ESPlay Micro easier for more people, I'm going to show you some examples of programming ESPlay Micro using Arduino.

    All the demo codes are available from Github.

    Before using Arduino to develop the ESPlay Micro, it is required to install some Arduino libraries to support it. You can check Github for the library details.

    Clock and audio player

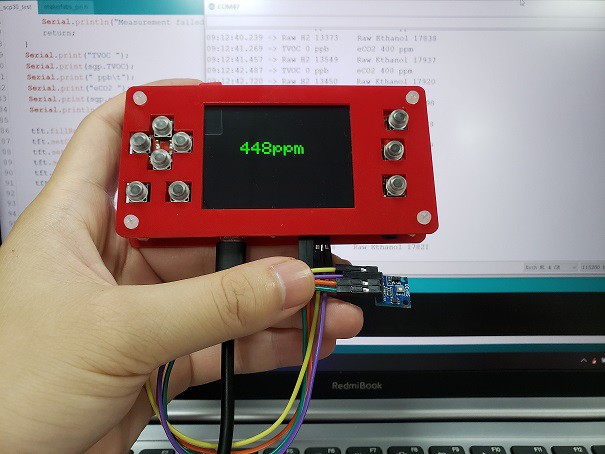
    CO2 monitor

    Have you noticed that the ESPlay Micro provides some IO interface onboard? They are the extensible I2C interfaces, which you can connect some sensors and obtain the measuring through Arduino programming. I connected an SGP30 sensor to it and programmed the ESPlay Micro to be a CO2 monitor.

  • New firmware availible

    Makerfabs12/22/2020 at 07:57 1 comment

    2020/12/22:  The new firmware with some new feature

    • New built-in audio player on launcher, to make it work place the audio files on the audio folder at the root of sdcard.
    • The audio player supports playing MP3, AAC, and FLAC file.
    • Emulator performance enhanced and bugs fixed.
    • New Algorithm for scaling function, you can choose at the setting launcher menu.
      Makerfabs ESPlay micro shipped after 2020/12/22 will be programmed with this new version of firmware.. enjoys..

  • Now available at Makerfabs

    Makerfabs12/19/2020 at 02:02 0 comments

      Makerfabs has produced Esplay Micro at: https://www.makerfabs.com/esplay-micro-v2.html

      compares to the previous batch, some new features:

    • Acrylic case added
    • Upgrade button and caps, to make the pressing feels much better
    • Lipo battery added in the package
    • Upgraded Lipo Charger IC TP4054, for faster battery charging
    • On-board mini speaker
    • 2.54” I2C breakout

  • Case Design Update!

    Fuji Pebri11/28/2019 at 03:40 0 comments

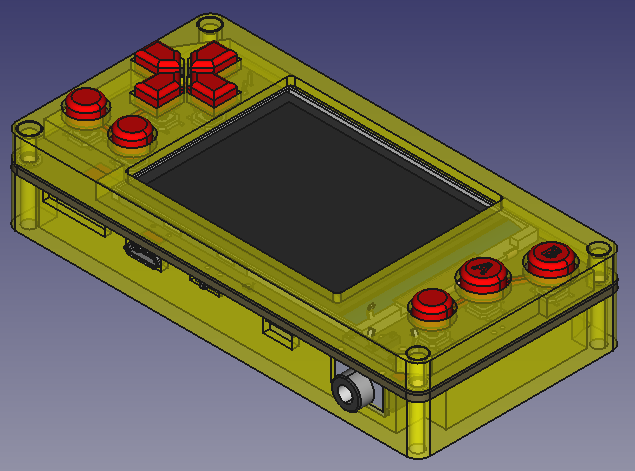
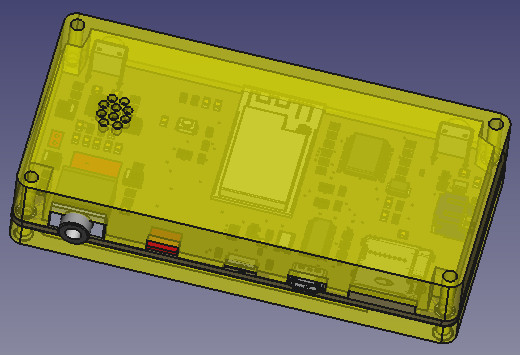
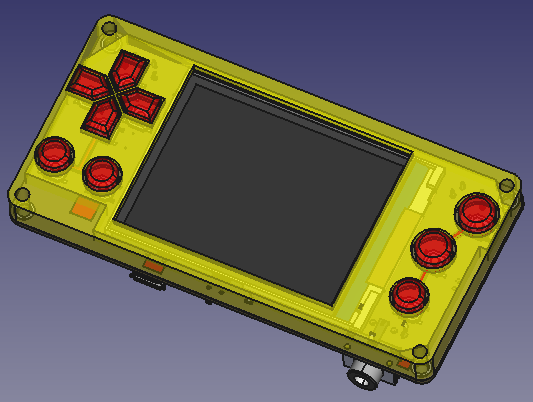
    I have updated the files for 3D Printing case. This time you only need to print 4 stl files.

    • btn_assy_1.stl
    • btn_assy_2.stl
    • top_body.stl
    • bottom_body.stl

    All files can be download on files section.

  • Case Design Experiment!

    Fuji Pebri11/25/2019 at 05:24 0 comments

    After releasing the project on the Makerfabs, some people looking for the case and then i decided to make an experiment how this case should be design.

    After some iteration and made a bunch of failed 3D printed case ( I designed it with OpenSCAD), I decided to use FreeCAD which will be easier. when using OpenSCAD i need to measure the board precisely, but since i have an png and 3d model of the board, using FreeCAD should be precisely without measuring the real board.

    Here some prototype of the case, this won't be the final version but i will update the stl file, so someone should not try the old stl files which will be trashed cause it's useless agains the latest board revision


    If you want to try print yourself, print the following files
    - bottom.stl
    - bottom_layer_stl
    - button_assy_1.stl
    - button_assy_2.stl
    - top_body.stl

    All files including the source FreeCAD files can be found on files section. Please give me feedback if you modify those file so i could update the file.

  • ESPlay Micro MP3

    Makerfabs11/21/2019 at 10:43 0 comments

  • ESPlay Micro Loves LittleVGL and Micropython

    Fuji Pebri10/28/2019 at 06:50 0 comments

    Hi Hackaday,

    Today i introduces you some ability what esplay micro can do. I port micropython with lvgl module built-in from littlevgl repository here. Picture will explain everything.

    the code for screenshot above

    import lvgl as lv
    lv.init()
    
    import lvesp32
    import ILI9341 as ili
    d = ili.display()
    d.init()
    disp_buf1 = lv.disp_buf_t()
    buf1_1 = bytes(320*10)
    lv.disp_buf_init(disp_buf1,buf1_1, None, len(buf1_1)//4)
    disp_drv = lv.disp_drv_t()
    lv.disp_drv_init(disp_drv)
    disp_drv.buffer = disp_buf1
    disp_drv.flush_cb = d.flush
    disp_drv.hor_res = 320
    disp_drv.ver_res = 240
    lv.disp_drv_register(disp_drv)
    
    # Animation helper class
    
    class Anim(lv.anim_t):
        def __init__(self, obj, val, size, exec_cb, path_cb, time=500, playback = False, ready_cb=None):
            super().__init__()
            lv.anim_init(self)
            lv.anim_set_time(self, time, 0)
            lv.anim_set_values(self, val, val+size)
            if callable(exec_cb):
                lv.anim_set_custom_exec_cb(self, exec_cb)
            else:
                lv.anim_set_exec_cb(self, obj, exec_cb)
            lv.anim_set_path_cb(self, path_cb )
            if playback: lv.anim_set_playback(self, 0)
            if ready_cb: lv.anim_set_ready_cb(self, ready_cb)
            lv.anim_create(self)
    
    # An animated chart
    
    class AnimatedChart(lv.chart):
        def __init__(self, parent, val, size):
            super().__init__(parent)
            self.val = val
            self.size = size
            self.max = 2000
            self.min = 500
            self.factor = 100
            self.anim_phase1()
    
        def anim_phase1(self):
            Anim(
                self,
                self.val,
                self.size,
                lambda a, val: self.set_range(0, val),
                lv.anim_path_ease_in,
                ready_cb=lambda a:self.anim_phase2(),
                time=(self.max * self.factor) // 100)
    
        def anim_phase2(self):
            Anim(
                self,
                self.val+self.size,
                -self.size,
                lambda a, val: self.set_range(0, val),
                lv.anim_path_ease_out,
                ready_cb=lambda a:self.anim_phase1(),
                time=(self.min * self.factor) // 100)
    
    # Create the chart
    
    scr = lv.obj()
    chart = AnimatedChart(scr, 100, 1000)
    chart.set_width(scr.get_width() - 100)
    chart.align(scr, lv.ALIGN.CENTER, 0, 0)
    series1 = chart.add_series(lv.color_hex(0xFF0000))
    chart.set_type(chart.TYPE.POINT | chart.TYPE.LINE)
    chart.set_series_width(3)
    chart.set_range(0,100)
    chart.init_points(series1, 10)
    chart.set_points(series1, [76,40,40,40,50,40,50,90,95,90])
    chart.set_x_tick_texts('a\nb\nc\nd\ne', 2, lv.chart.AXIS.DRAW_LAST_TICK)
    chart.set_x_tick_length(10, 5)
    chart.set_y_tick_texts('1\n2\n3\n4\n5', 2, lv.chart.AXIS.DRAW_LAST_TICK)
    chart.set_y_tick_length(10, 5)
    chart.set_div_line_count(3, 3)
    chart.set_margin(30)
    
    # Create a slider that controls the chart animation speed
    
    def on_slider_changed(self, obj=None, event=-1):
        chart.factor = slider.get_value()
    
    slider = lv.slider(scr)
    slider.align(chart, lv.ALIGN.OUT_RIGHT_TOP, 10, 0)
    slider.set_width(30)
    slider.set_height(chart.get_height())
    slider.set_range(10, 200)
    slider.set_value(chart.factor, 0)
    slider.set_event_cb(on_slider_changed)
    
    # Load the screen
    
    lv.scr_load(scr)

  • Trial Producton

    Makerfabs10/17/2019 at 01:59 0 comments

    A small trial production started, and preorder at:https://www.makerfabs.com/esplay-micro.html

    the first batch shipping time woudl be estimated 28th, Oct. 

    We prepared a SD card with some simple game installed, so buyer can start playing with the USB cable connected for power.

  • Start to Play

    Makerfabs10/11/2019 at 06:59 0 comments

    with the new firmware, it works much better.

View all 17 project logs

Enjoy this project?

Share

Discussions

deʃhipu wrote 08/01/2019 at 10:31 point

I don't know why I only saw it now. Very nice project! I can see why you printed a case with button caps — those metal buttons are the worst.

  Are you sure? yes | no

Fuji Pebri wrote 08/01/2019 at 14:36 point

Thanks, yes the buttons are hard to press, later i'll change it with the silicon type. Earlier prototype using the same button with your uGame, those button are really good, but it's easily broken. My son could break it in just 2 months.

  Are you sure? yes | no

Brendan Robert wrote 07/31/2019 at 17:08 point

Cool project!  FWIW, I have a major bug-fixed version of the Nofrendo port which might help; it has SRAM save support (Hello, Zelda!) and SD support also.  It's dangerous to go alone, take this: https://github.com/badvision/esp32_nesemu 

  Are you sure? yes | no

Similar Projects

Does this project spark your interest?

Become a member to follow this project and never miss any updates