Close
0%
0%

ESPlay Micro

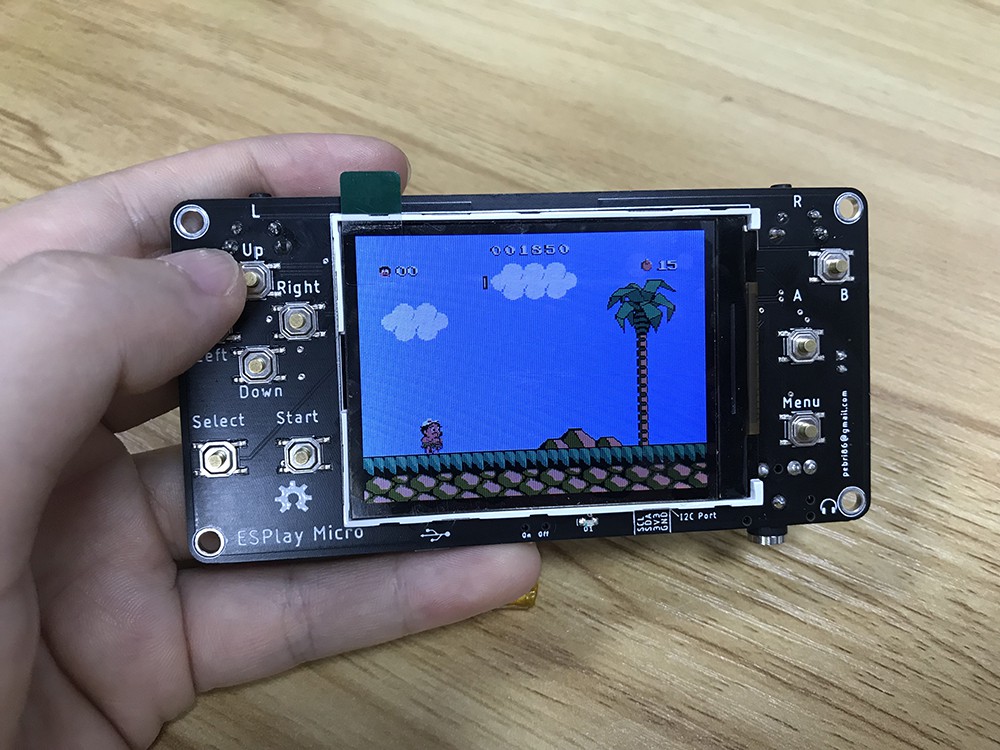
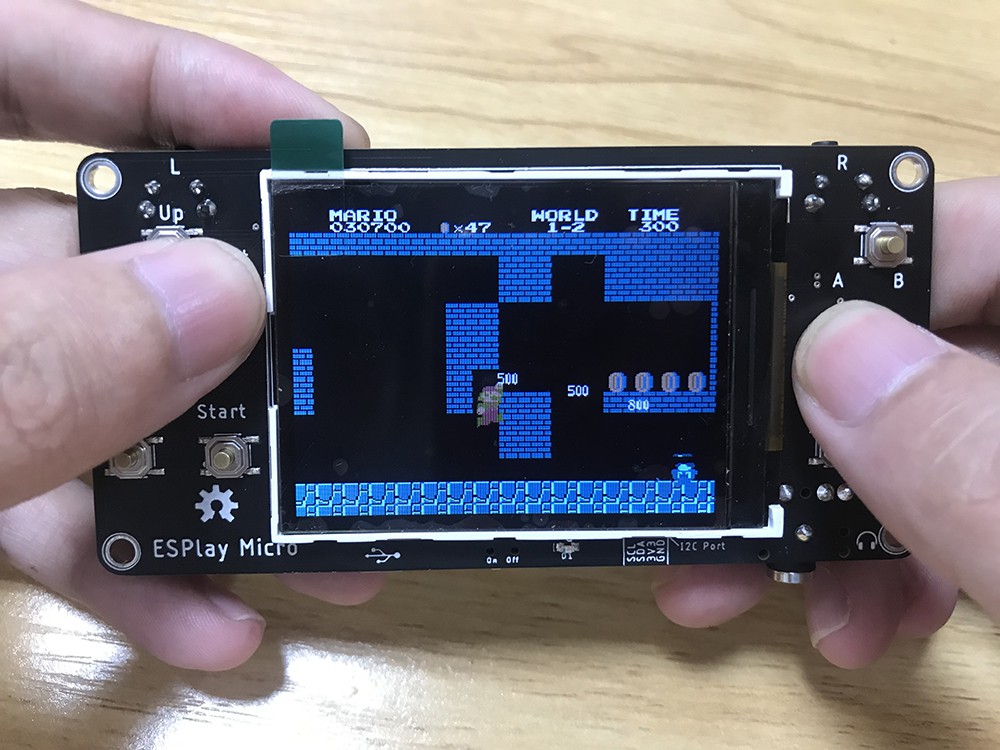
ESPlay Micro is an ESP32 Based emulator device for playing retro games, able to play classic games NES, GB, GBC, SMS, Game Gear and more.

Similar projects worth following
Starting from
$32.90
Makerfabs has 1452 orders / 36reviews
Ships from China
Everyone loves ESP32 chip, it's wonderfull chip from espressif with great functionality and really mature in software development side. This project most inspired by Odroid Go and Pocketsprite, so why making new one despite buy one of them? Well, i know those devices are great and have well community support, but some of them had some issue that i don't really like. Odroid Go had shared it's spi for both display and sdcard, and they need patched esp-idf version for it and sdcard not work very well in spi mode, at least for my experience. Then pocketsprite only have esp32 wroom module without psram and also without sdcard support so limited portability for save my collection of games.

Then i decided to design my own hardware based on both of them so i could port it's software to my own designed hardware then here i presented to you ESPlay Micro.

The board are designed for the following feature :

  • ESP32 WROVER, Dual core processor with Integrated 4MB Flash + 4MB PSRAM
  • Integrated WIFI and Bluetooth 4 BLE
  • 2,4" ILI9341 TFT Panel
  • More button (expanded via PCF8574 I2C GPIO)
  • Micro SD slot connected to SDMMC Host in 1 Line Mode for save GPIO pin
  • Integrated I2S DAC via UDA1334A
  • Integrated USB to Serial for programming and debugging using CH340C
  • Built-in TP4056 Li-Po charger
  • I2C port for expandable function
  • 3,5mm Headphone jack
  • Smaller Size, PCB only 100 x 50 mm.

And planned ability to run LVGL UI both of C and Micropython ( lv_micropython)

btn_assy_2.stl

Standard Tesselated Geometry - 163.75 kB - 11/28/2019 at 06:12

Download

case_design.FCStd

x-zip-compressed - 2.95 MB - 11/28/2019 at 03:35

Download

bottom_body.stl

Standard Tesselated Geometry - 97.15 kB - 11/28/2019 at 03:35

Download

top_body.stl

Standard Tesselated Geometry - 86.41 kB - 11/28/2019 at 03:35

Download

board.stl

Standard Tesselated Geometry - 7.46 MB - 11/25/2019 at 05:27

Download

View all 6 files

  • New journey developing a new bootloader

    Fuji Pebri03/05/2022 at 14:02 1 comment

    Hi, it's been a while but i never abandon this project. My regular work just not let me do this project even on free time. But i will continue with a brand new bootloader firmware so board should be more reliable at switching to another application or games. I just discover a way to load apps from internal spi flash and since makerfabs gave a new specs to ESPLAY with wrover module with 16MB flash, it's a big and we can load the flash with several fw at once, we just need a way how to fast load and start each apps without fleshing and updating partition like we do today. I borrow a concept from pocketsprite which can load compiled bin that stored in flash via custom appfs partition and second stage custom bootloader. Butvthe problem is the pocketsprite code are really old with esp-idf v3. I will ported a code so the bootloader will work with latest esp-idf v4. 4.

    See you next log :) 

  • Arduino available

    Makerfabs09/09/2021 at 10:34 0 comments

    As all know, we can play the ESP32 with Arduino because ESP32 is Arduino compatible, and the ESPlay Micro is no exception. ESPlay Micro is not only a game emulator to provide entertainment, but also a learning tool that is an Arduino programming development platform.

    In order to develop or play the ESPlay Micro easier for more people, I'm going to show you some examples of programming ESPlay Micro using Arduino.

    All the demo codes are available from Github.

    Before using Arduino to develop the ESPlay Micro, it is required to install some Arduino libraries to support it. You can check Github for the library details.

    Clock and audio player

    CO2 monitor

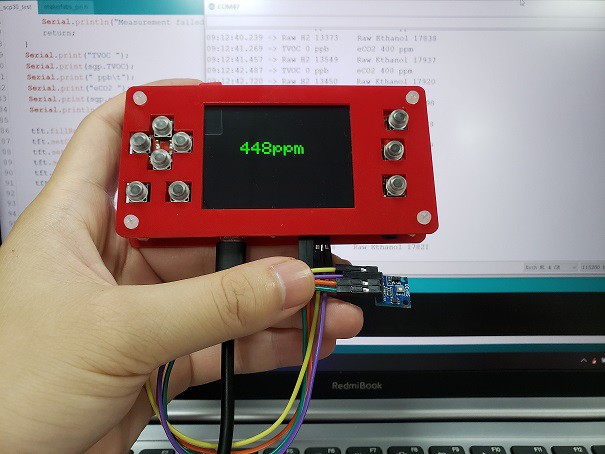
    Have you noticed that the ESPlay Micro provides some IO interface onboard? They are the extensible I2C interfaces, which you can connect some sensors and obtain the measuring through Arduino programming. I connected an SGP30 sensor to it and programmed the ESPlay Micro to be a CO2 monitor.

  • New firmware availible

    Makerfabs12/22/2020 at 07:57 1 comment

    2020/12/22:  The new firmware with some new feature

    • New built-in audio player on launcher, to make it work place the audio files on the audio folder at the root of sdcard.
    • The audio player supports playing MP3, AAC, and FLAC file.
    • Emulator performance enhanced and bugs fixed.
    • New Algorithm for scaling function, you can choose at the setting launcher menu.
      Makerfabs ESPlay micro shipped after 2020/12/22 will be programmed with this new version of firmware.. enjoys..

  • Now available at Makerfabs

    Makerfabs12/19/2020 at 02:02 0 comments

      Makerfabs has produced Esplay Micro at: https://www.makerfabs.com/esplay-micro-v2.html

      compares to the previous batch, some new features:

    • Acrylic case added
    • Upgrade button and caps, to make the pressing feels much better
    • Lipo battery added in the package
    • Upgraded Lipo Charger IC TP4054, for faster battery charging
    • On-board mini speaker
    • 2.54” I2C breakout

  • Case Design Update!

    Fuji Pebri11/28/2019 at 03:40 0 comments

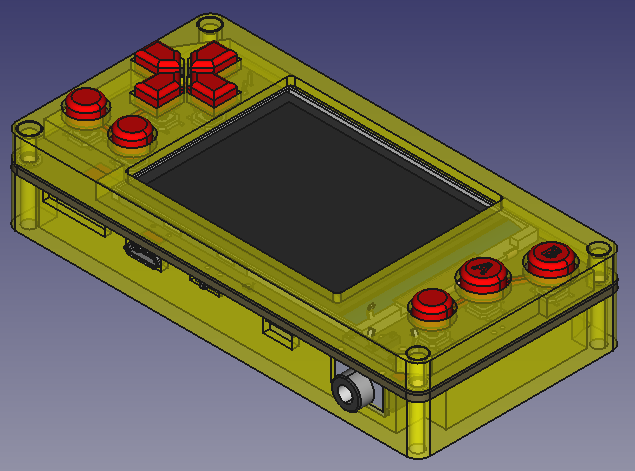
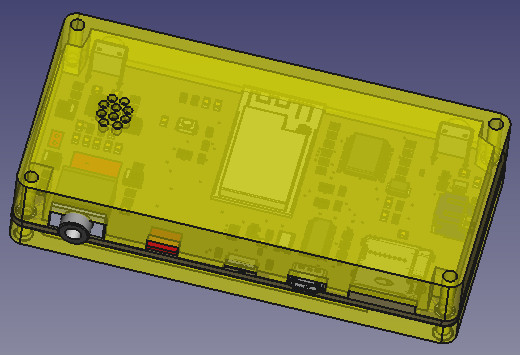
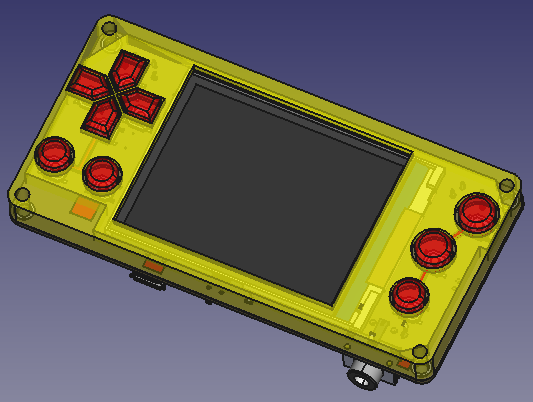
    I have updated the files for 3D Printing case. This time you only need to print 4 stl files.

    • btn_assy_1.stl
    • btn_assy_2.stl
    • top_body.stl
    • bottom_body.stl

    All files can be download on files section.

  • Case Design Experiment!

    Fuji Pebri11/25/2019 at 05:24 0 comments

    After releasing the project on the Makerfabs, some people looking for the case and then i decided to make an experiment how this case should be design.

    After some iteration and made a bunch of failed 3D printed case ( I designed it with OpenSCAD), I decided to use FreeCAD which will be easier. when using OpenSCAD i need to measure the board precisely, but since i have an png and 3d model of the board, using FreeCAD should be precisely without measuring the real board.

    Here some prototype of the case, this won't be the final version but i will update the stl file, so someone should not try the old stl files which will be trashed cause it's useless agains the latest board revision


    If you want to try print yourself, print the following files
    - bottom.stl
    - bottom_layer_stl
    - button_assy_1.stl
    - button_assy_2.stl
    - top_body.stl

    All files including the source FreeCAD files can be found on files section. Please give me feedback if you modify those file so i could update the file.

  • ESPlay Micro MP3

    Makerfabs11/21/2019 at 10:43 0 comments

  • ESPlay Micro Loves LittleVGL and Micropython

    Fuji Pebri10/28/2019 at 06:50 0 comments

    Hi Hackaday,

    Today i introduces you some ability what esplay micro can do. I port micropython with lvgl module built-in from littlevgl repository here. Picture will explain everything.

    the code for screenshot above

    import lvgl as lv
    lv.init()
    
    import lvesp32
    import ILI9341 as ili
    d = ili.display()
    d.init()
    disp_buf1 = lv.disp_buf_t()
    buf1_1 = bytes(320*10)
    lv.disp_buf_init(disp_buf1,buf1_1, None, len(buf1_1)//4)
    disp_drv = lv.disp_drv_t()
    lv.disp_drv_init(disp_drv)
    disp_drv.buffer = disp_buf1
    disp_drv.flush_cb = d.flush
    disp_drv.hor_res = 320
    disp_drv.ver_res = 240
    lv.disp_drv_register(disp_drv)
    
    # Animation helper class
    
    class Anim(lv.anim_t):
        def __init__(self, obj, val, size, exec_cb, path_cb, time=500, playback = False, ready_cb=None):
            super().__init__()
            lv.anim_init(self)
            lv.anim_set_time(self, time, 0)
            lv.anim_set_values(self, val, val+size)
            if callable(exec_cb):
                lv.anim_set_custom_exec_cb(self, exec_cb)
            else:
                lv.anim_set_exec_cb(self, obj, exec_cb)
            lv.anim_set_path_cb(self, path_cb )
            if playback: lv.anim_set_playback(self, 0)
            if ready_cb: lv.anim_set_ready_cb(self, ready_cb)
            lv.anim_create(self)
    
    # An animated chart
    
    class AnimatedChart(lv.chart):
        def __init__(self, parent, val, size):
            super().__init__(parent)
            self.val = val
            self.size = size
            self.max = 2000
            self.min = 500
            self.factor = 100
            self.anim_phase1()
    
        def anim_phase1(self):
            Anim(
                self,
                self.val,
                self.size,
                lambda a, val: self.set_range(0, val),
                lv.anim_path_ease_in,
                ready_cb=lambda a:self.anim_phase2(),
                time=(self.max * self.factor) // 100)
    
        def anim_phase2(self):
            Anim(
                self,
                self.val+self.size,
                -self.size,
                lambda a, val: self.set_range(0, val),
                lv.anim_path_ease_out,
                ready_cb=lambda a:self.anim_phase1(),
                time=(self.min * self.factor) // 100)
    
    # Create the chart
    
    scr = lv.obj()
    chart = AnimatedChart(scr, 100, 1000)
    chart.set_width(scr.get_width() - 100)
    chart.align(scr, lv.ALIGN.CENTER, 0, 0)
    series1 = chart.add_series(lv.color_hex(0xFF0000))
    chart.set_type(chart.TYPE.POINT | chart.TYPE.LINE)
    chart.set_series_width(3)
    chart.set_range(0,100)
    chart.init_points(series1, 10)
    chart.set_points(series1, [76,40,40,40,50,40,50,90,95,90])
    chart.set_x_tick_texts('a\nb\nc\nd\ne', 2, lv.chart.AXIS.DRAW_LAST_TICK)
    chart.set_x_tick_length(10, 5)
    chart.set_y_tick_texts('1\n2\n3\n4\n5', 2, lv.chart.AXIS.DRAW_LAST_TICK)
    chart.set_y_tick_length(10, 5)
    chart.set_div_line_count(3, 3)
    chart.set_margin(30)
    
    # Create a slider that controls the chart animation speed
    
    def on_slider_changed(self, obj=None, event=-1):
        chart.factor = slider.get_value()
    
    slider = lv.slider(scr)
    slider.align(chart, lv.ALIGN.OUT_RIGHT_TOP, 10, 0)
    slider.set_width(30)
    slider.set_height(chart.get_height())
    slider.set_range(10, 200)
    slider.set_value(chart.factor, 0)
    slider.set_event_cb(on_slider_changed)
    
    # Load the screen
    
    lv.scr_load(scr)

  • Trial Producton

    Makerfabs10/17/2019 at 01:59 0 comments

    A small trial production started, and preorder at:https://www.makerfabs.com/esplay-micro.html

    the first batch shipping time woudl be estimated 28th, Oct. 

    We prepared a SD card with some simple game installed, so buyer can start playing with the USB cable connected for power.

  • Start to Play

    Makerfabs10/11/2019 at 06:59 0 comments

    with the new firmware, it works much better.

View all 17 project logs

Enjoy this project?

Share

Discussions

fachrul.fadly.aspan wrote 10/12/2023 at 08:46 point

Salam kenal mas Febri.

Allow me to introduce myself, my name is Fachrul from Tangerang. Thank you for sharing this very interesting and challenging project. I attempted to assemble the PCB and Esplay Micro components myself based on the datasheet and Eagle files you shared. The process turned out to be quite a lengthy struggle, as many components were not readily available in the Indonesian market. However, with a lot of effort and patience, I managed to assemble it.

I had difficulty finding a 10K ohm 0805 SMD resistor with a 1/4-watt rating, so I replaced it with an 0805 SMD 10K resistor rated at 1/8 watt. I also replaced the ESP32 Wrover I with a Wrover E.

The most significant issue I encountered is that the LCD display seems to be dark, and the image is barely visible.

Is the issue related to the LCD backlight problem and is it connected to the component changes I made? The measurement of the current going into the LCD backlight pin shows a reading of as small as 832 millivolts. Is this normal?, considering that as far as I know, the current going into the backlight pin is usually between 3-5 volts? Thank you very much in advance.

  Are you sure? yes | no

Fukai The Demon King wrote 05/21/2023 at 14:56 point

I feel like I'm overlooking something simple, how do you return to the bootloader?

  Are you sure? yes | no

marco wrote 04/30/2023 at 18:18 point

Hello Mr. Pebri,

I've bought from Makerfabs your fantastic Esplay micro V 2, 16Mb SPI flash memory, and I would like to add to it the Zx Spectrum emulator: it is possible ? 

Thanks in advance,

Marco

  Are you sure? yes | no

spiliosniki wrote 01/04/2023 at 08:57 point

Hellow, how to finde the last vertion firmware (.fw) for esplay micro V2? Thanks

  Are you sure? yes | no

marco wrote 05/01/2023 at 08:58 point

hello, I think it's this:

https://github.com/Makerfabs/ESPlay/tree/master/ESPLAY%20Firmware

  Are you sure? yes | no

droid-mechanic wrote 01/03/2023 at 12:46 point

Hi Mr Pebri,

I just received my Esplay Micro as a Christmas present and I just wanted to say thank you, I really love the device.  I wish I could leave a Tindie review but it was bought with a guest checkout so I guess I'll just comment here.  

I have some experience programming the ESP32 and I asked for the Esplay to both play Gameboy games and do some embedded programming.  So far my experience has been great: as a gaming device this is the perfect size for me, fits in my pockets, good button feel, bootup and save/shutdown is fast and easy.  I was also able to follow the Arduino programming instructions from Makerfabs and revert back to the original firmware when done, no problems.  

I am a little disappointed that I haven't gotten the esplay-retro-emulation firmware to compile yet.  It seems to me that Espressif documentation favors automatic tools now that do all the setup for you, but they're not really working for me.  I saw you comment somewhere on Github that you used MSYS but that's been removed from ESP-IDF, so perhaps that's part of it?  I think I'm close to getting everything working under Linux.  Thanks again!

  Are you sure? yes | no

pierregg wrote 10/28/2022 at 18:42 point

Hi !

It would be wonderfull if anyone could port this to esplay :

https://github.com/ducalex/retro-go/

This firmware installs but doesn't launch. SNES on ESP32 ? Amazing ! Even with poor performance ! Who is able to do that ?

In exchange of my request, I've designed a case for v2 ESPlay micro :

https://www.thingiverse.com/thing:5592683

Enjoy !

  Are you sure? yes | no

Steffen Köhler wrote 10/22/2022 at 07:40 point

I've bricked the bootloader??
Just recieved a ESPlay fom Makerfabs and added MicroPython.fw from https://github.com/pebri86/esplay-micro-firmware-collections. Since flashing micropython, micropython itself is always starting, but I can't reach the bootloader anymore - When pressing B at power-on, screen stays black and micropython is starting.

Is there any way to recover this or did I brick the device :-( ???

  Are you sure? yes | no

tunglin wrote 01/12/2022 at 21:58 point

Tried the latest v2.3 version. Still having issues with the audio player (crashes/reboots?) and saving games on any emulator (resets game instead of saving or save+exit). What could the problem be? 

EDIT: just had to add the folders /esplay/data/nes or /esplay/data/gbc to save games. As for the audio player, just had to add an "audio" amongst folders like esplay and roms.

However, I found that the audio player next to the emulator plays mp3 files a bit slower than the separate one that you launch from the bootloader.

  Are you sure? yes | no

Dylan Turner wrote 08/05/2021 at 14:28 point

Despite the additions of a speaker, a decent sized lcd, a LiPo (and presumably a charging circuit), and something powerful enough to run emulators, you've kept this under $35. That's really impressive! Good job

  Are you sure? yes | no

Steven Stanley wrote 04/16/2021 at 11:14 point

Is it possible there will be an Atari 8bit computer (Atari 800) emulator for this device at some point?

  Are you sure? yes | no

marazm wrote 01/19/2021 at 21:12 point

how long this device work?

  Are you sure? yes | no

Ernesto Mejia wrote 11/01/2020 at 12:47 point

Hi! I really love the Esplay Micro but I’m wondering if there is a simple way to swap the A and B buttons? I play mostly NES games and I find the current buttons layout a bit tricky. Don’t know much about programming but maybe anyone has a simple solution for this

  Are you sure? yes | no

Fuji Pebri wrote 11/03/2020 at 04:54 point

Hi @Ernesto Mejia the only way to swap button is to modify in the firmware side but currently i don't have much time to update the firmware, checkout the github and compile by yourself, the instruction is quite clear. thanks

  Are you sure? yes | no

zhang wrote 10/27/2020 at 11:18 point

The game in the NES emulator cannot be saved. What is the problem?

  Are you sure? yes | no

Fuji Pebri wrote 11/03/2020 at 04:55 point

hi @zhang, check the latest release v2.3 on github. It should fixed the problem.

  Are you sure? yes | no

ronan.gaillard wrote 10/07/2020 at 12:29 point

Where can I find the BOM for this project ?

I just made some PCBs but I can't find components to buy !

  Are you sure? yes | no

Fuji Pebri wrote 12/19/2020 at 10:30 point

check the github repo, the bom is lay there in the docs folder. 

  Are you sure? yes | no

knopserl wrote 03/15/2020 at 14:04 point

The 3D case model is perfect (I printed it on my Prusa Mini), however  I did not find any screew to tighten the the top case part. I used 2,5mm screews with 20mm length which fit throu the wholes but they dont hold down the top case as the scree holes are to lage. But 3mm screews dont fit in the lower part and the PCB. So I wonder which screews the author is using and where to get them.

  Are you sure? yes | no

Fuji Pebri wrote 12/19/2020 at 10:32 point

i use 3mm screw so it can hold tight to front printed part. 

  Are you sure? yes | no

fabian wrote 08/27/2019 at 18:43 point

Add sound music player, many people loves radio wifi

  Are you sure? yes | no

Fuji Pebri wrote 08/28/2019 at 00:41 point

Hi, actually it's already on planned list, that's why i added i2s DAC for high quality sound. And the good news is it work in progress, we need a new pcb revision cause the current pcb has bugs with sound design.

  Are you sure? yes | no

Eugene Andruszczenko wrote 08/23/2019 at 18:19 point

@Fuji Pebri has been amazing in his help with rewritting a better launcher with a nicer UI. check out our joint effort on this https://github.com/retro-esp32/RetroESP32

Releases are here https://github.com/retro-esp32/RetroESP32/releases

It includes 11, YES eleven emulators.

 Nintendo Entertainment System
 Nintendo Game Boy
 Nintendo Game Boy Color
 Sega Master System
 Sega Game Gear
 Colecovision
 Sinclair Zx Spectrum 48k
 Atari 2600
 Atari 7800
 Atari Lynx
 PC Engine

  Are you sure? yes | no

Fuji Pebri wrote 08/24/2019 at 04:47 point

Thanks @Eugene Andruszczenko for sending me your Retro ESP32 board, the board are awesome, still wait my GBP case arrive. Btw your retro esp32 has clean sound while esplay micro a lot of noise on low volume on speaker. i2s output has great sound although, i was design audio part carelessly, i will take yours as reference for next revision.

  Are you sure? yes | no

knopserl wrote 03/15/2020 at 14:01 point

does this RetroESP32 fit to the ESPlay HW (buttons, DAC etc.)?

  Are you sure? yes | no

Calebe94 wrote 08/23/2019 at 12:06 point

Good work man.
When I finish my bachelor's degree I will update my project again, and I will definitely use your project as a reference.

  Are you sure? yes | no

Fuji Pebri wrote 08/24/2019 at 14:09 point

Thanks bro, you must update your projects, it was the most inspiration of this projects.

  Are you sure? yes | no

Jonatas wrote 08/06/2019 at 16:01 point

amazing project! could provide a circuit diagram in PDF

  Are you sure? yes | no

Fuji Pebri wrote 08/06/2019 at 16:35 point

Currently the circuit diagram is available in eagle format in my github repository. I'll add pdf format in next commit. Thanks.

  Are you sure? yes | no

Le Roux Bodenstein wrote 08/03/2019 at 17:04 point

Where did you buy the LCD screen? And how do you attach the flex cable to the pcb?

  Are you sure? yes | no

Fuji Pebri wrote 08/05/2019 at 05:40 point

I bought from aliexpress.com, search for 2.4" tft screen ili9341. Normally you need flex cable connector, but for this one i designed just soldered directly to the PCB.

  Are you sure? yes | no

Similar Projects

Does this project spark your interest?

Become a member to follow this project and never miss any updates