Ali
Ali-
Operating Stepper Motor
03/23/2020 at 16:41 • 0 commentsOperation of Motor:
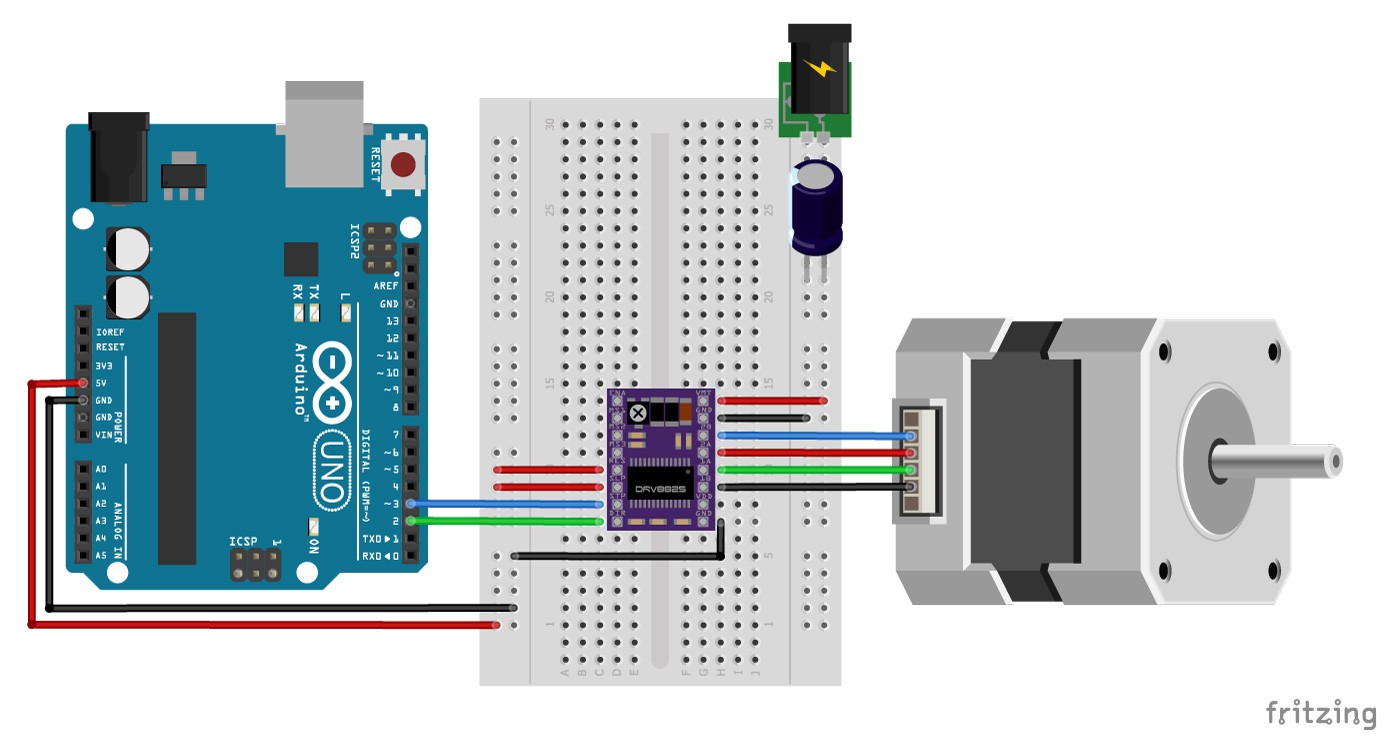
Using the Arduino Uno and a DRV8825 driver I used a code to have the stepper motor to rotate continuously. This allows me to easily test the functionality of my pump whilst the motor is running and once it is functioning properly. I can then later alter the code so that the motor works for a desired number of rotations or time period.
Setup:
![]()
Operation:
Testing of the motor in operation with a rotor attached using a 12V 2A power supply.
![]()
Next steps:
Now it is time to test the motor fitted into the prototype pump and see if it can provide sufficient power to pump fluid.
Acknowledgment:
I was able to successfully setup and run the code with the aid of the following article by makersguide.com:
https://www.makerguides.com/drv8825-stepper-motor-driver-arduino-tutorial/
-
Prototype 1 Construction Notes
03/23/2020 at 15:53 • 0 commentsConstruction:
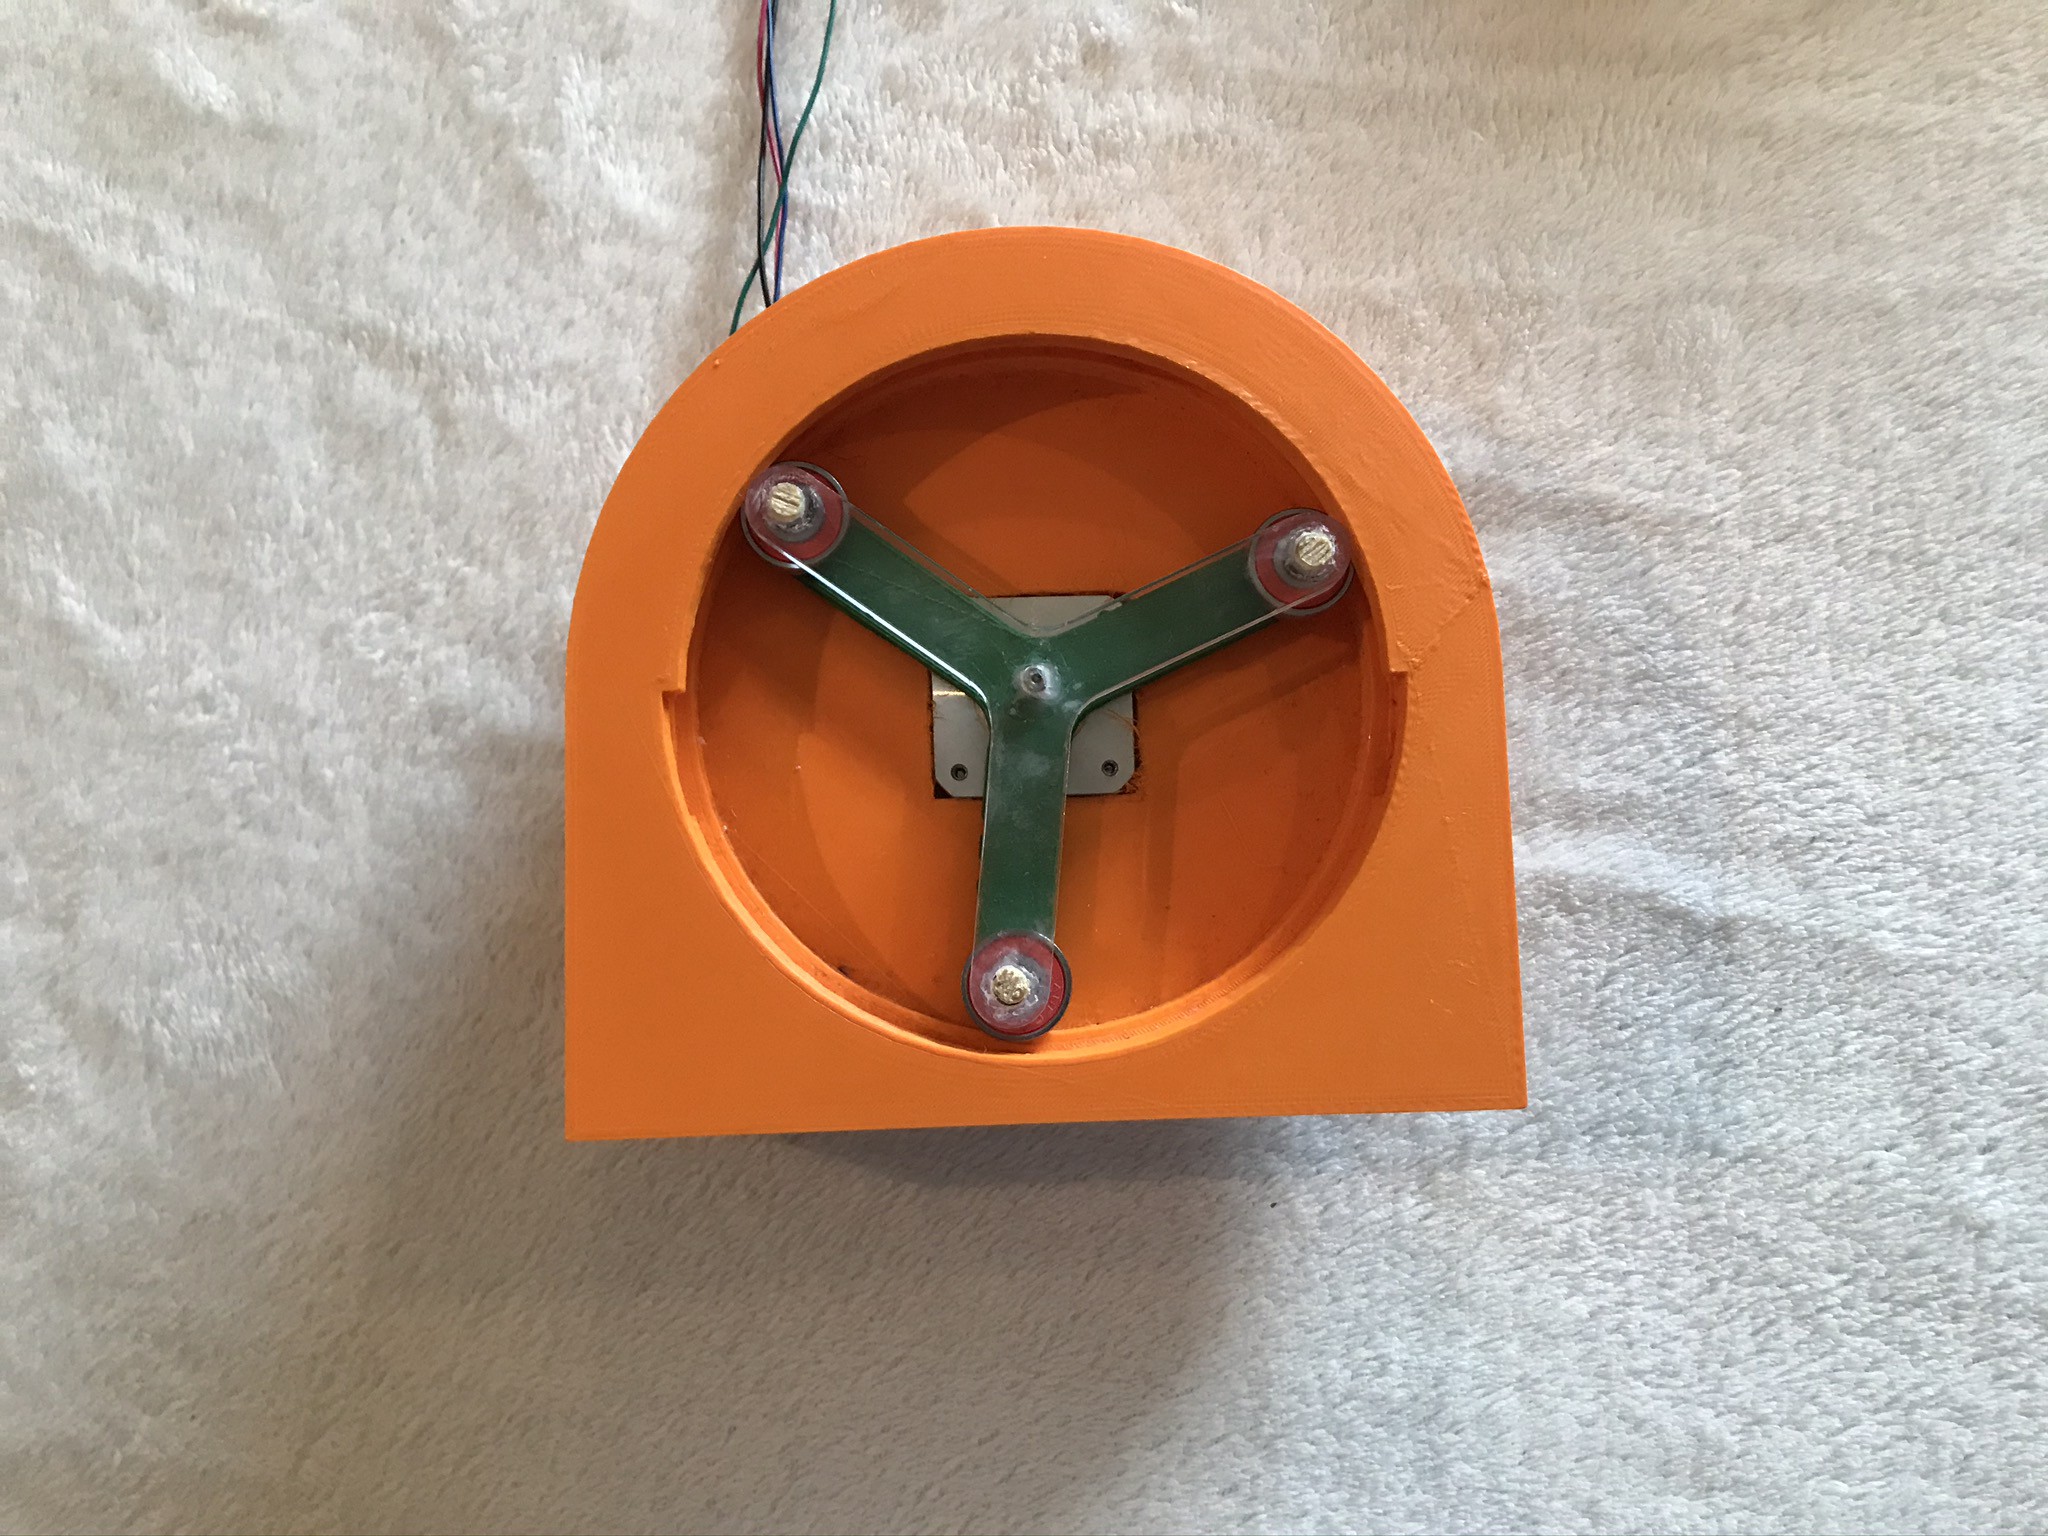
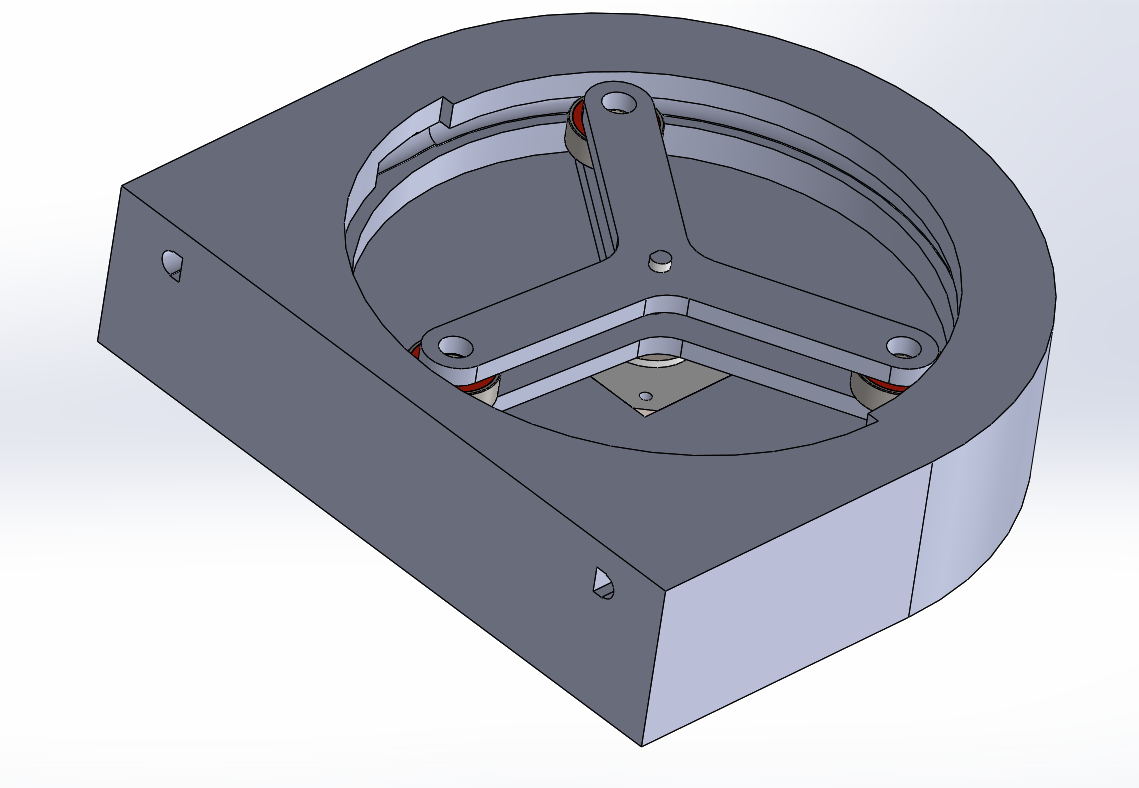
I completed the construction of my first prototype (CAD drawings in previous log).
![]()
Assembly Steps:
- 3D Print Casing and Rotors
- Fit bottom Rotor onto the motor's shaft
- Use Adhesive to attach Plywood rods onto the Rotor*
- Insert the Bearings onto the rods
- Use adhesive to attach the top rotor onto the plywood rods*
Issues and limitations:
- * These steps have been added as the bottom rotor when attached was too weak to withstand the forces and as such an alternative rotor was used which is similar to the top rotor. This meant that instead of the bearings being held in place with the rotor's extrusions, a plywood rod had to be used to hold the rotors and the bearings together and as such an adhesive was used.
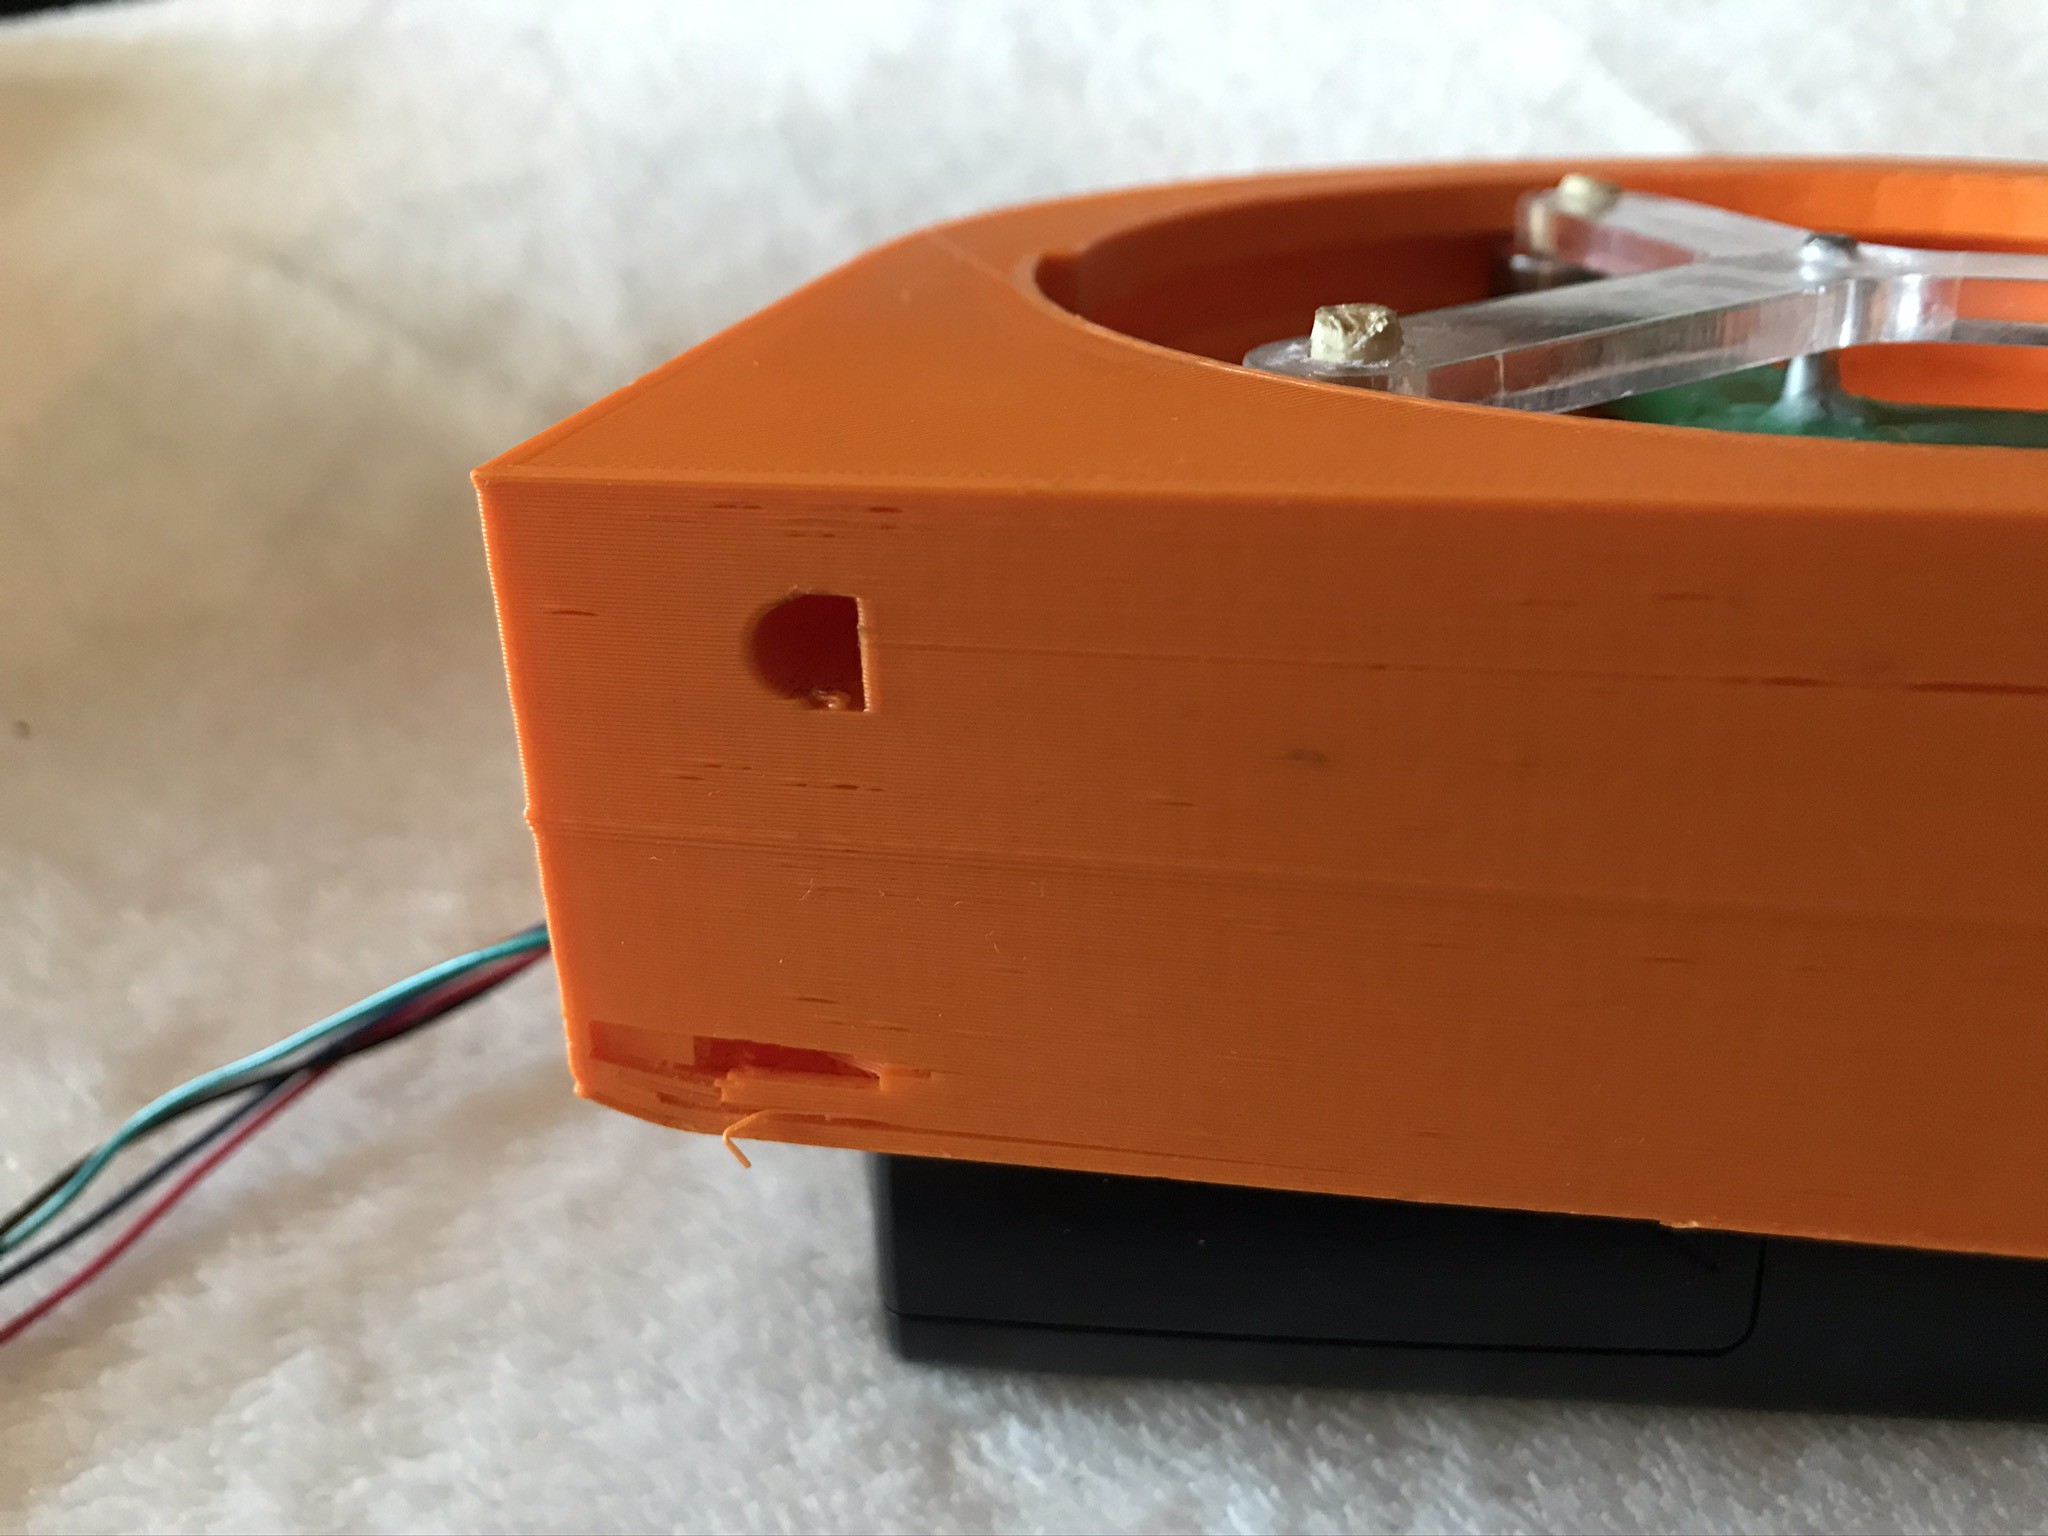
- Inserting the tube into the designated hole ( Shown below) in the casing was quite challenging as the design did not take into account the tolerance and manufacturing error when using 3D prinitng. This was also the case when fitting the motor into the casing.
![]()
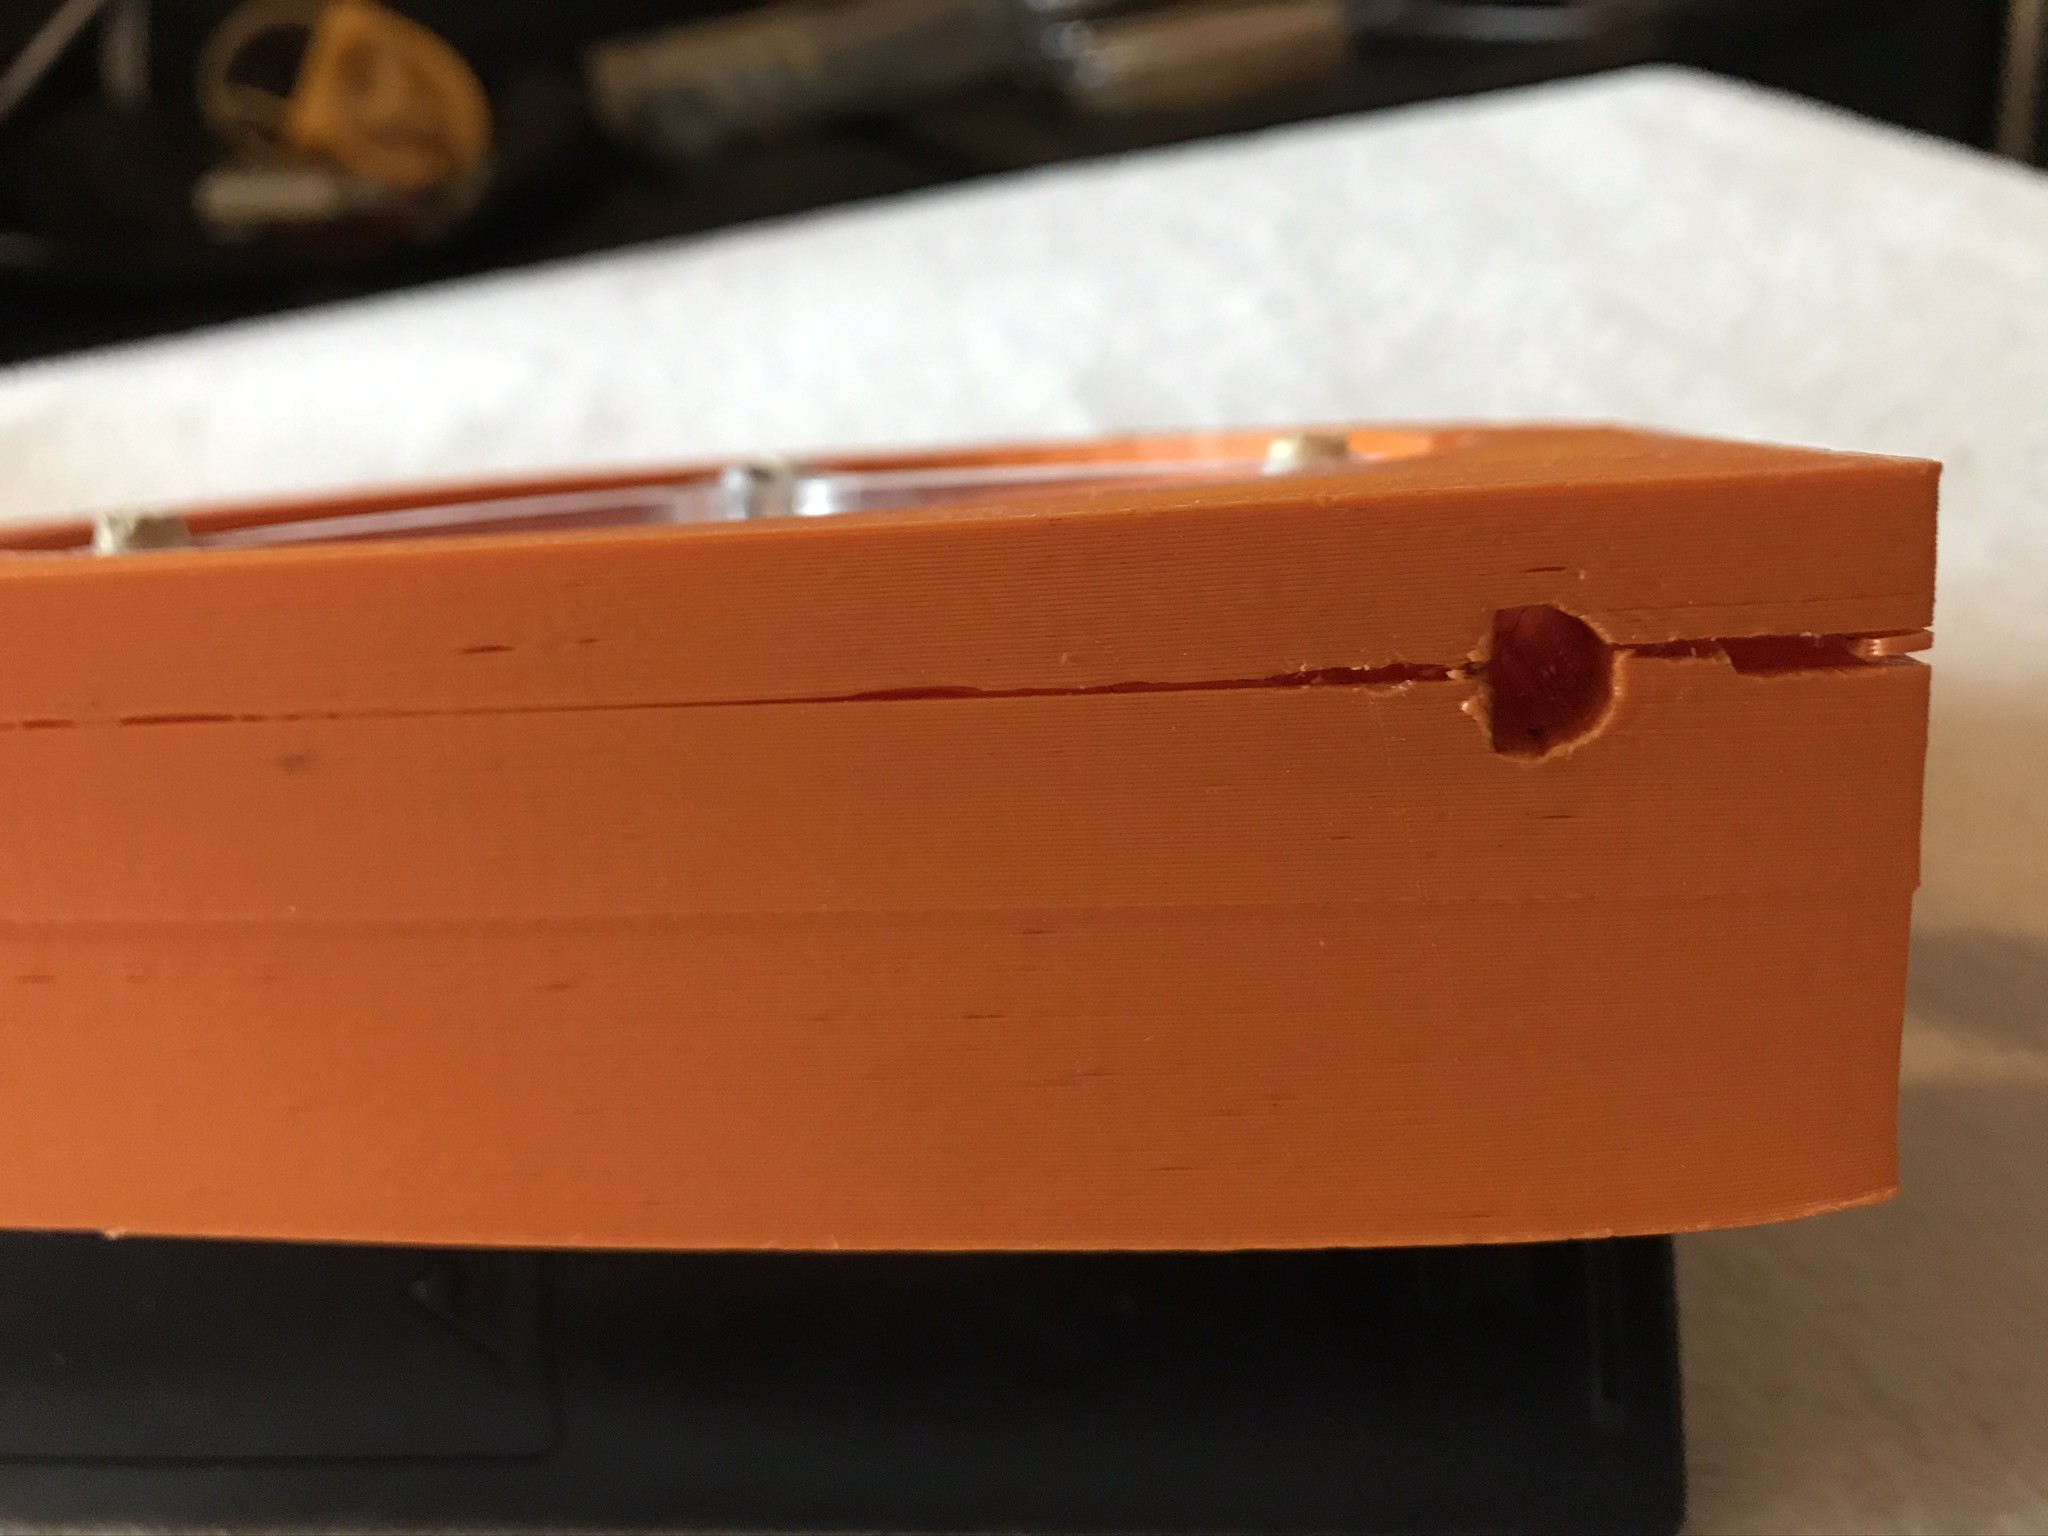
- Additionally, when the pump was operational, parts of the casing structure initiated cracked that later propagated as shown below. While these cracks did not affect the pump's operation they most definitely will affect the overall structure integrity.
![]()
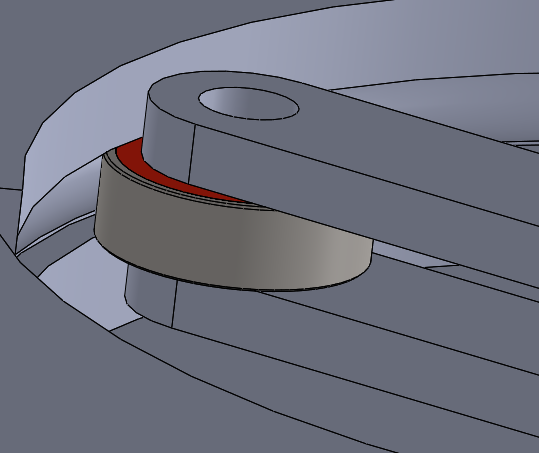
- Finally, the plywood rods' diameter used was not large enough to ensure the bearings are in pure rolling. As shown below one of the bearings wiggles easily in place and this will significantly affect the performance of the pump.
![]()
-
Change of Project Aim and Focus
03/23/2020 at 13:57 • 0 commentsI have decided to change my project's aim to be more focused on the Peristaltic Pump rather than the entire beverage dispenser this will allow me to spend more time and effort on the pump to ensure it meets the required specifications.
Prototype logs will soon be added.
-
Design of Peristaltic pump
12/14/2019 at 17:31 • 0 commentsThese are my initial designs for the peristaltic pump that I have drawn on Solidworks.
![]()
I will be using bearings instead of rollers to squeeze the tubing as shown below.
![]()
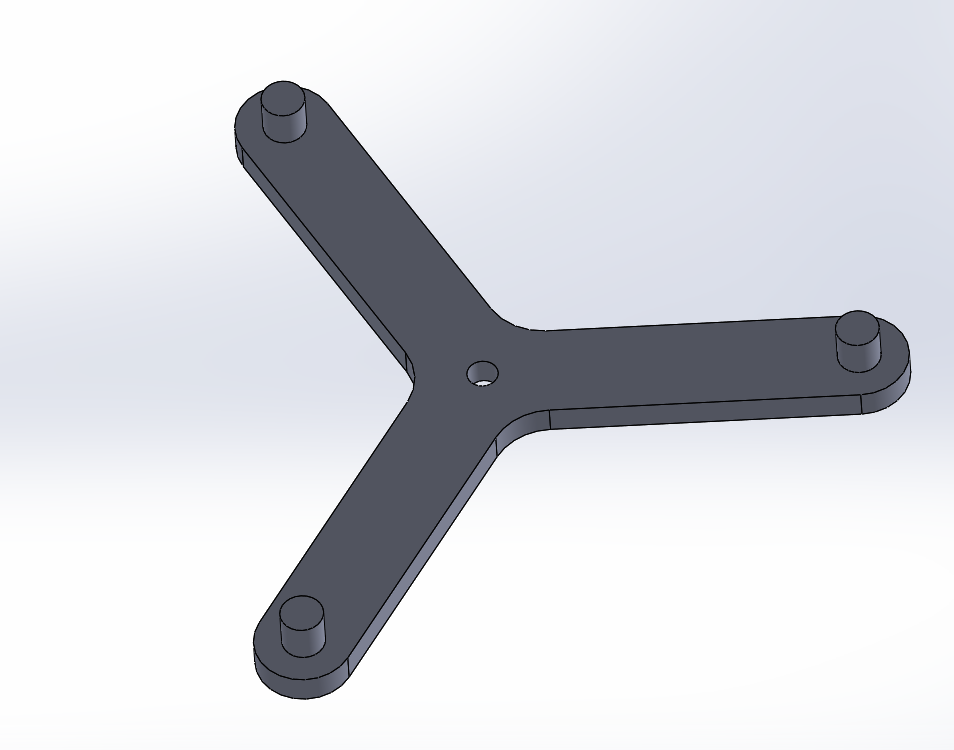
The pump consists of two rotors to hold the bearings in place. The bottom rotor has extrusions as shown below. The extrusions have diameters equal to the bearings's inner diameters to set it in place.
![]()
The bottom rotor has holes instead of extrusion to allow the bottom extrusions to pass through and to be glued onto the surface of the hole.
![]()
Next I will work on manufacturing and assembling the parts together so I can then begin testing the pump.
-
Peristaltic Pump
11/13/2019 at 13:33 • 0 commentsI have decided to use a peristaltic pump for the dispenser for the following:
Advantages:
- No insulation is needed as there is no contact with the fluid
- Can pump high viscosity with large solids.
- Fixed amount of fluid pumper per rotation, hence easy to estimate the rotations needed.
- Pump Design prevents backflow without the need for valves.
- Easy to maintain and clean.
- reverse rotation and flow direction are possible.
I will soon be sketching initial design drawing for the pump to use for my prototype.
-
Type of Dispenser
11/03/2019 at 15:00 • 1 commentDecision made to build a cold beverage dispenser and not a coffee machine and now research, design and manufacture of a pump will be taking place.
-
Coffee Machine vs Beverage Dispenser
10/10/2019 at 11:49 • 0 commentsCurrently trying to decide whether to construct a coffee machine or a beverage dispenser ( and mixer).
Some of the clear differences I can identify for the coffee machine is that it will require a heater, while on the other hand if the beverage mixer and dispenser will require several storage tanks for different liquids and possibly more pumps.
Peristaltic Pump for Beverage Dispenser
Design, build and operate a Peristaltic Pump