Said Alvarado Marin
-
We bought a 3D Printer
08/26/2020 at 13:07 • 0 comments![]()
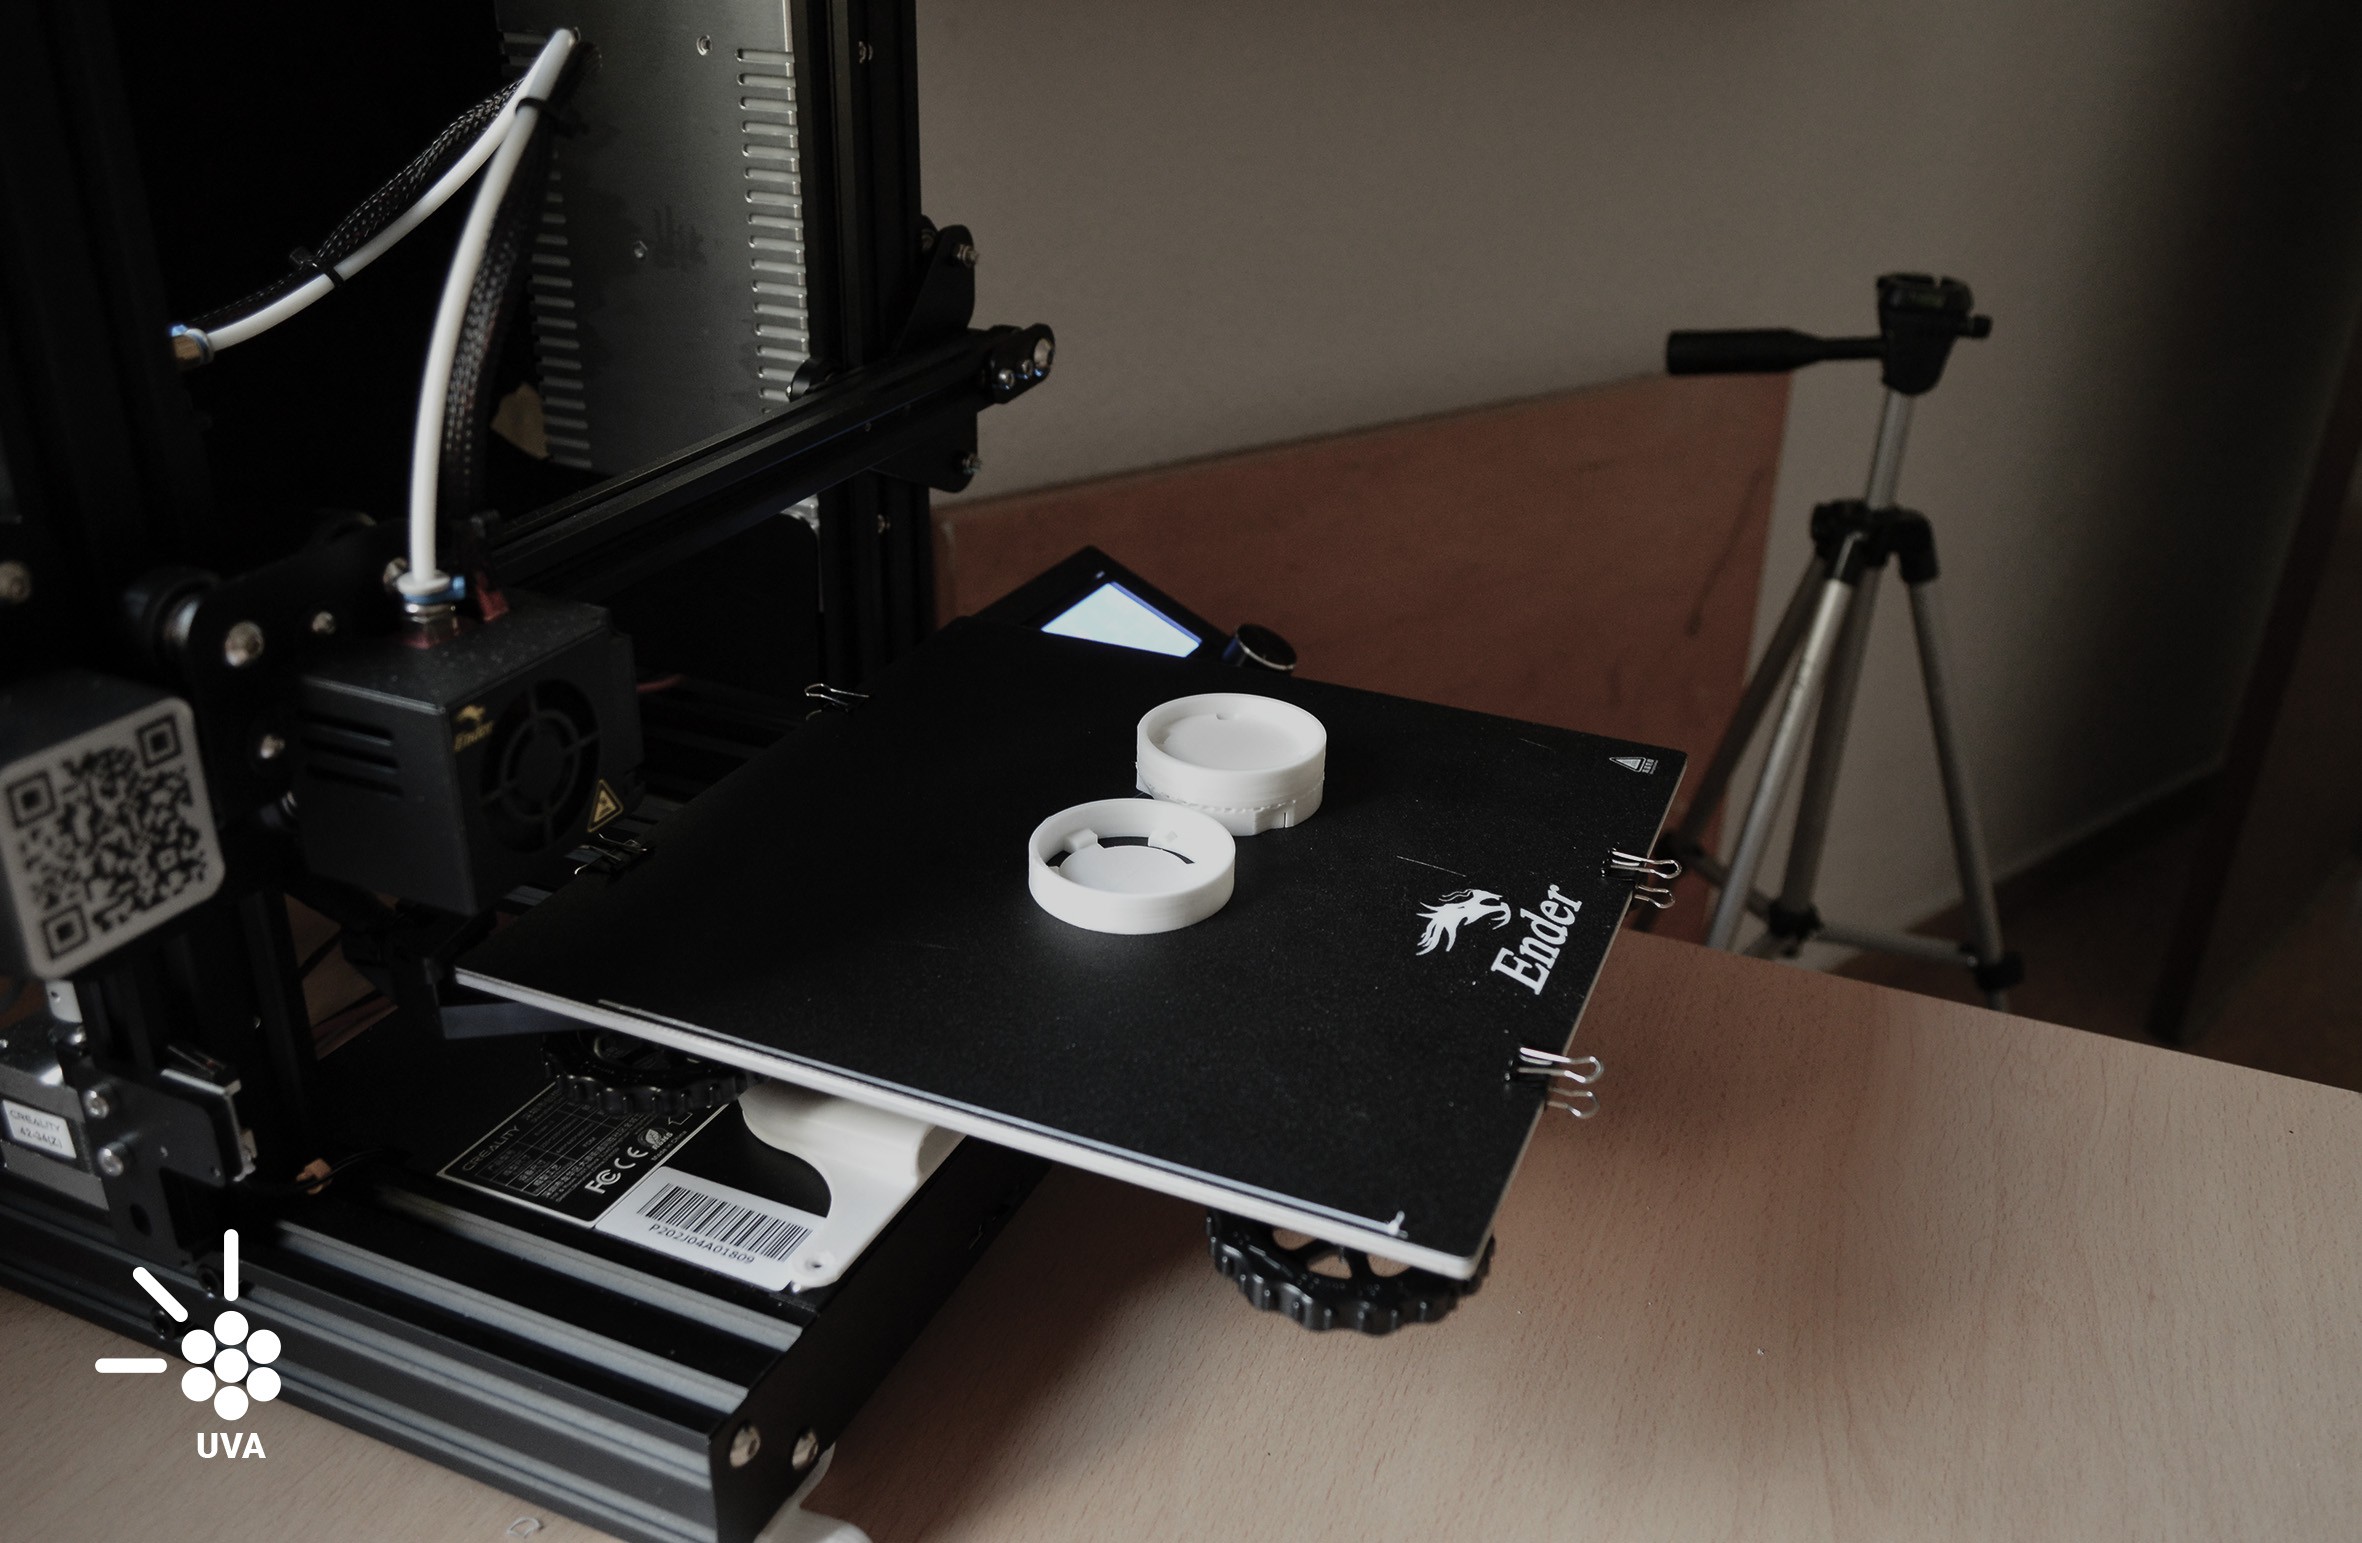
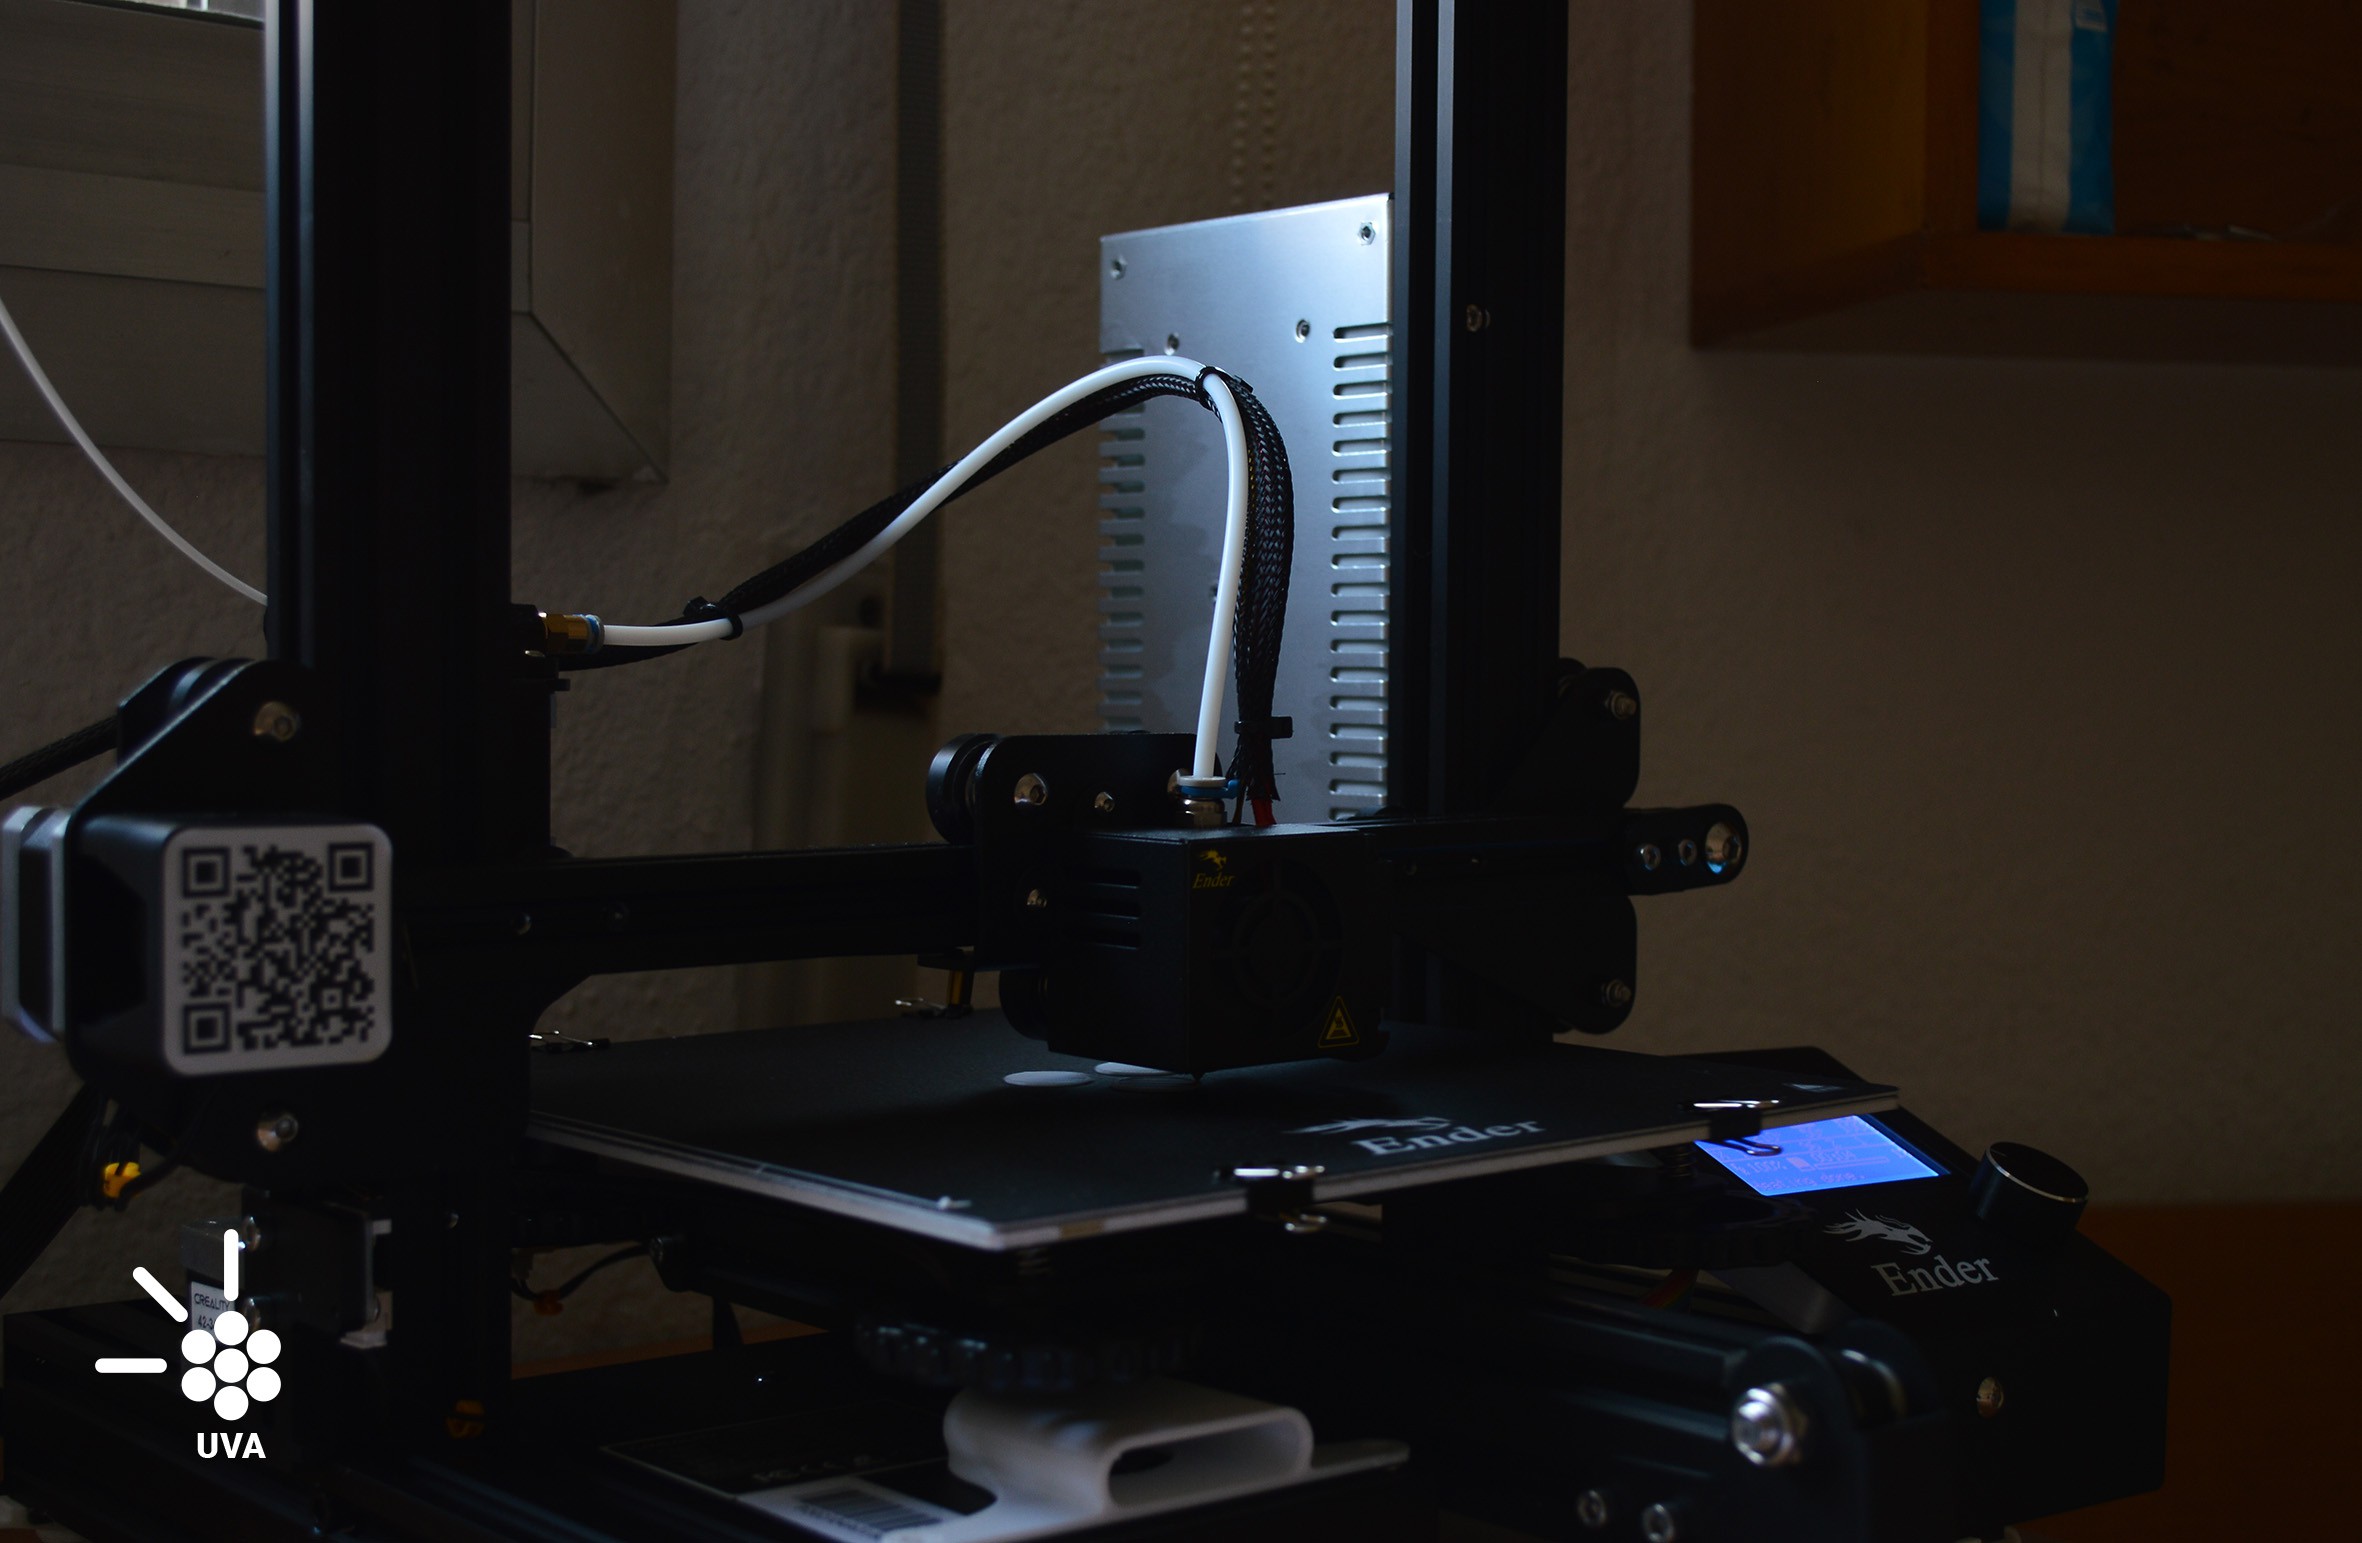
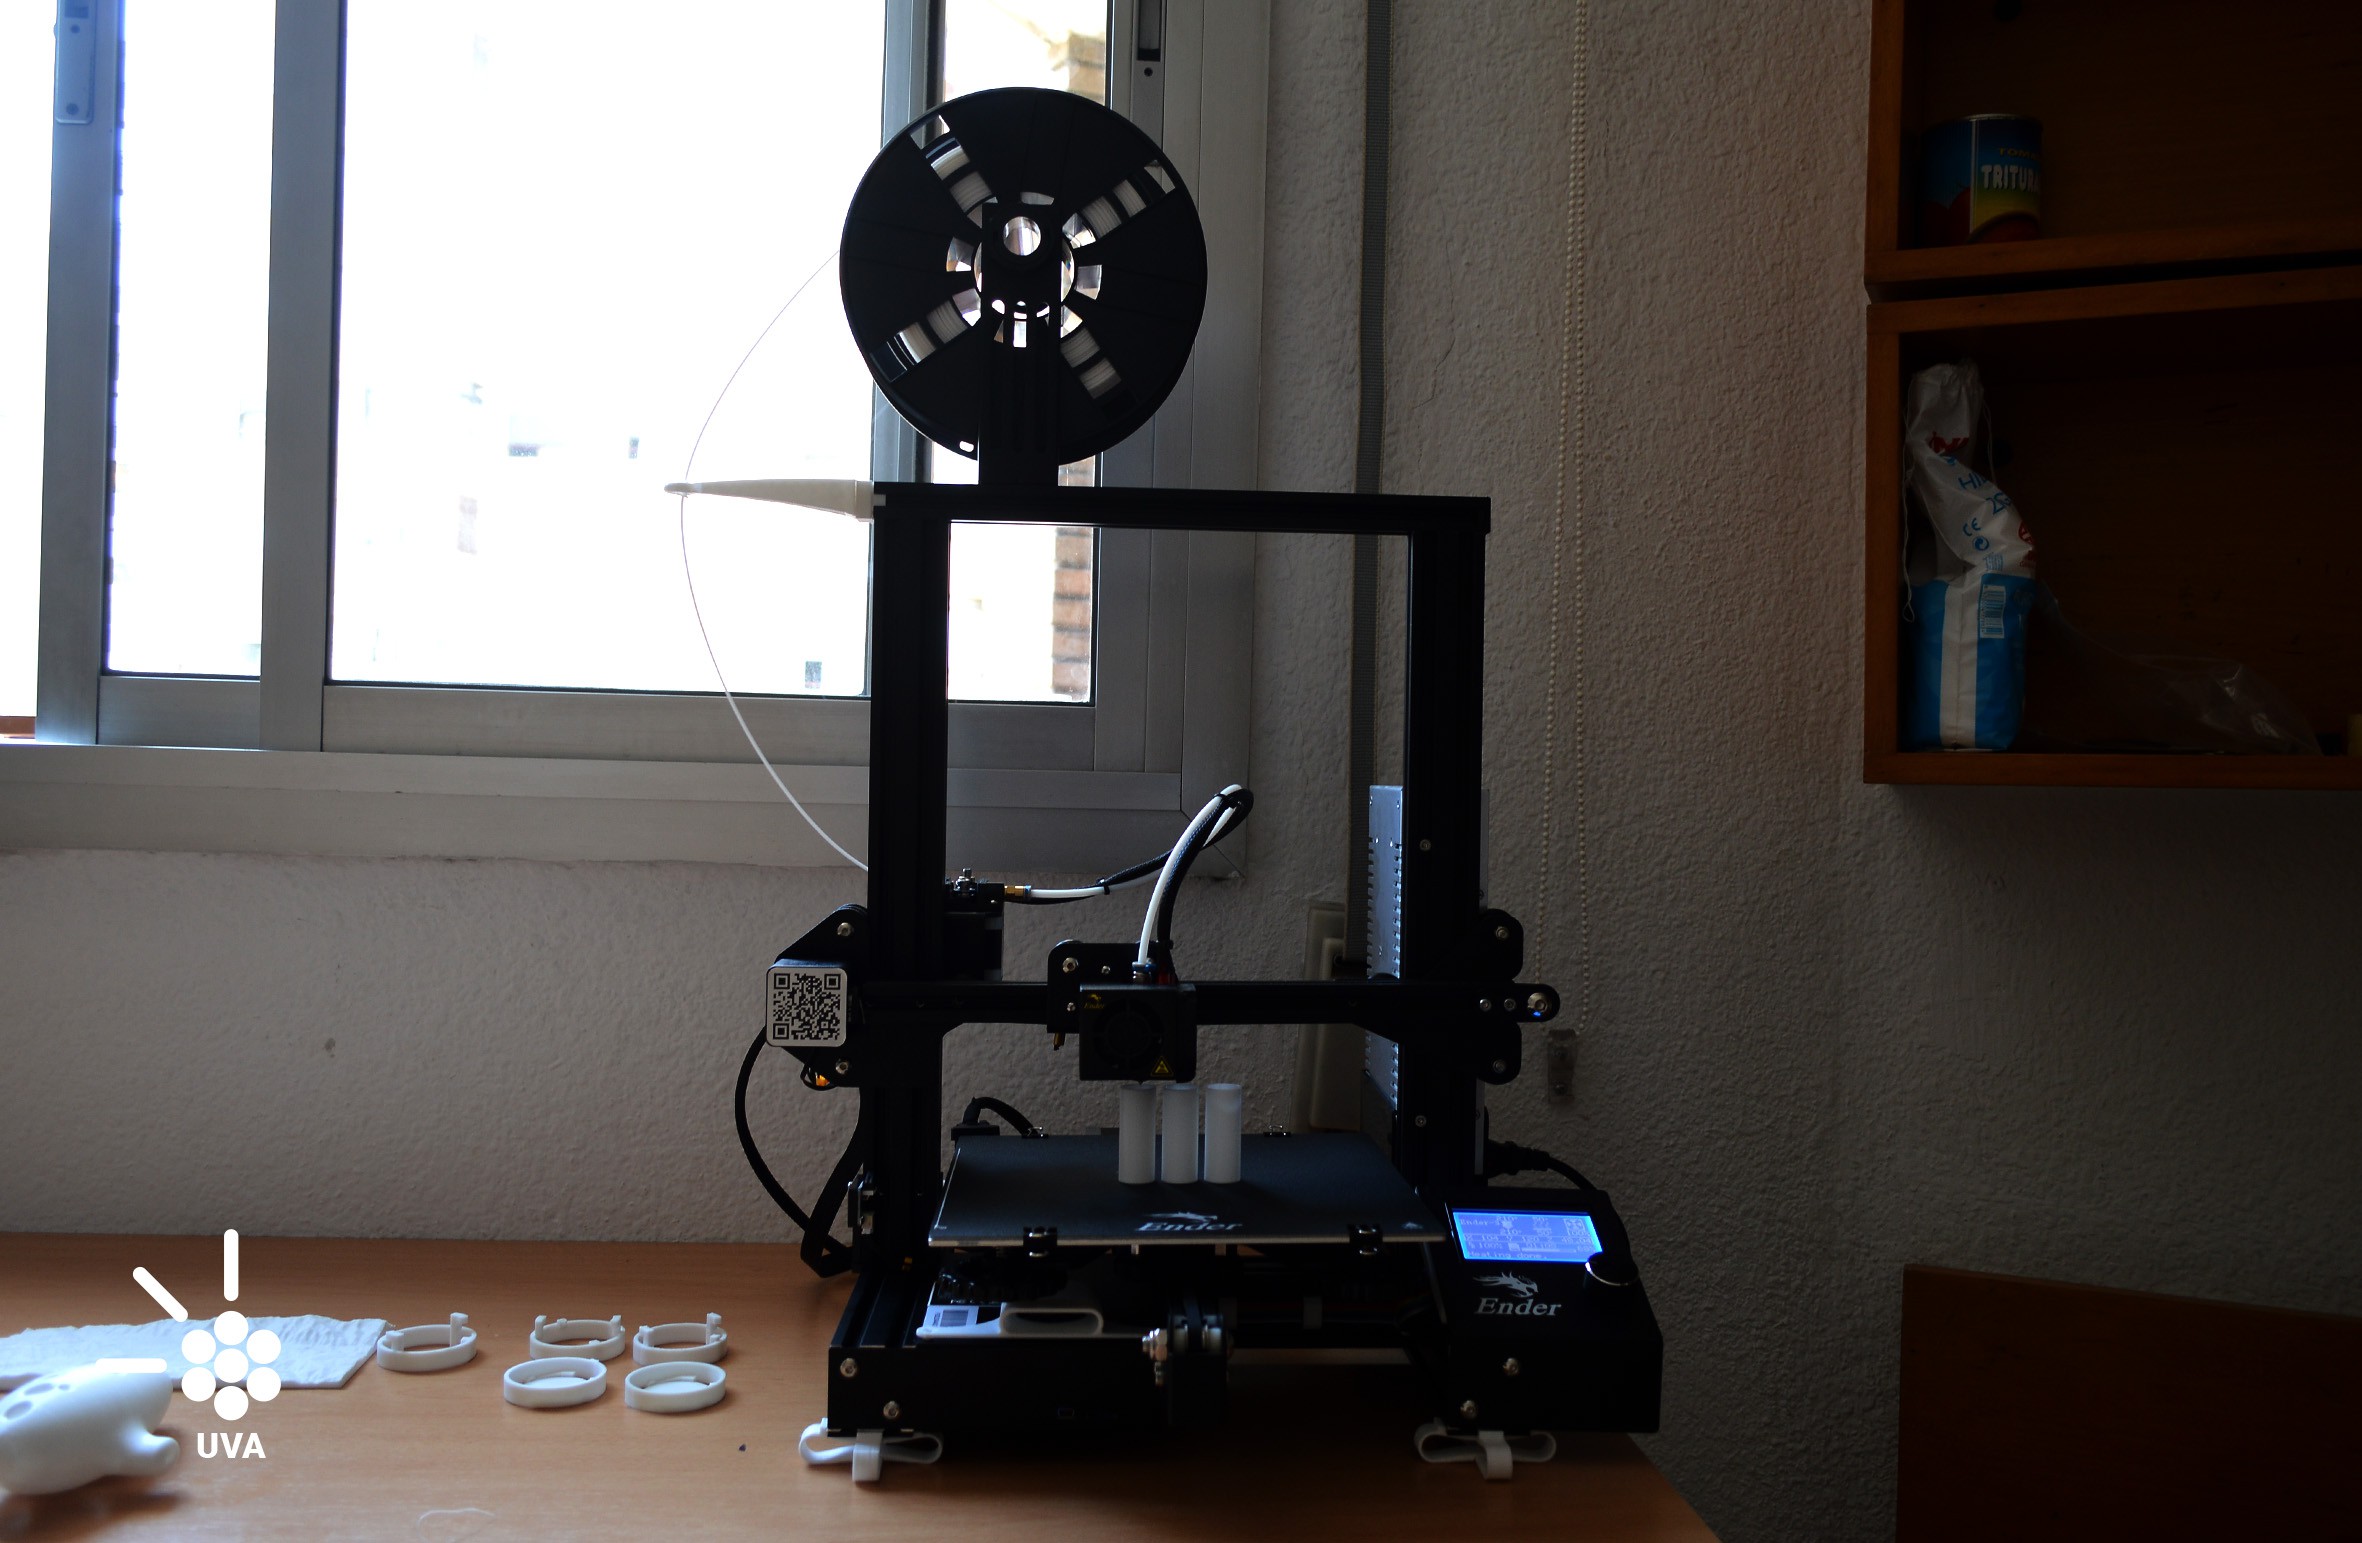
Thanks to Hackaday and the community vote for awarding us with the bootstrap money. One of our investments in the project was to buy a 3d printer. The reason for this decision was based on the fact that we needed to experiment with the 3d printing process. It was necessary to take full control of all the steps of the 3d printing because we have to improve the design in its final stage but also in the fabrication process.
With the 3d printer, we can optimize the use of plastic, temperatures, the resistance of materials, and we have the tool to create a detailed manual of how to produce UVA.
We buy a Creality Ender 3, it's one of the best in relation to price and quality. If we are designing a product to be built in adverse situations, It is interesting to design with a low-cost machine. We know that if our pieces are printable with good quality in Ender 3, it will be possible to print it in better and more expensive machines.
We also made a lot of prints to understood the limits of the machine, the tolerances and the capability to print. Here some important conclusions about the printing process with an Ender 3.
- If you want to print a piece that has to fit really tight, between 0.2 and 0.3 mm of tolerance is ok
- If the fit has to pass through and be gentle and soft we recommend 0.4mm or more
- It is important to be familiar with the tool, try and fail a lot, try to find the limits
We also find these useful resources about the capability and configuration of the Ender 3 and Cura:
https://all3dp.com/es/2/cura-ender-3-configuracion-cura-ajustes-perfil/
![]()
![]()
![]()
-
UVA Joint_V1
07/18/2020 at 12:33 • 1 commentTo achieve a multi-tool kit it is necessary to understand the parts of it. This system is composed of two main elements: The battery pack and the Instrument or tool (in this case the ultraviolet light for curing adhesives).
It's a simple idea based on one challenge, the joint. This is also the most important mechanical part of the design because it is the starting point for the development of different tool-heads. The UVA joint has to achieve 4 principles:
- Simplicity (to encourage people to develop new tools)
- Durability (It has to resist the wear of daily connection/disconnection and also the falls and shocks)
- Reliability (the user should be confident that the electrical and mechanical joint wouldn't fail and the tool will work as it is expected)
- Replaceability (The modular design of the UVA system allow to replace the chassis where the joint is build in without affecting the electronics).
![]()
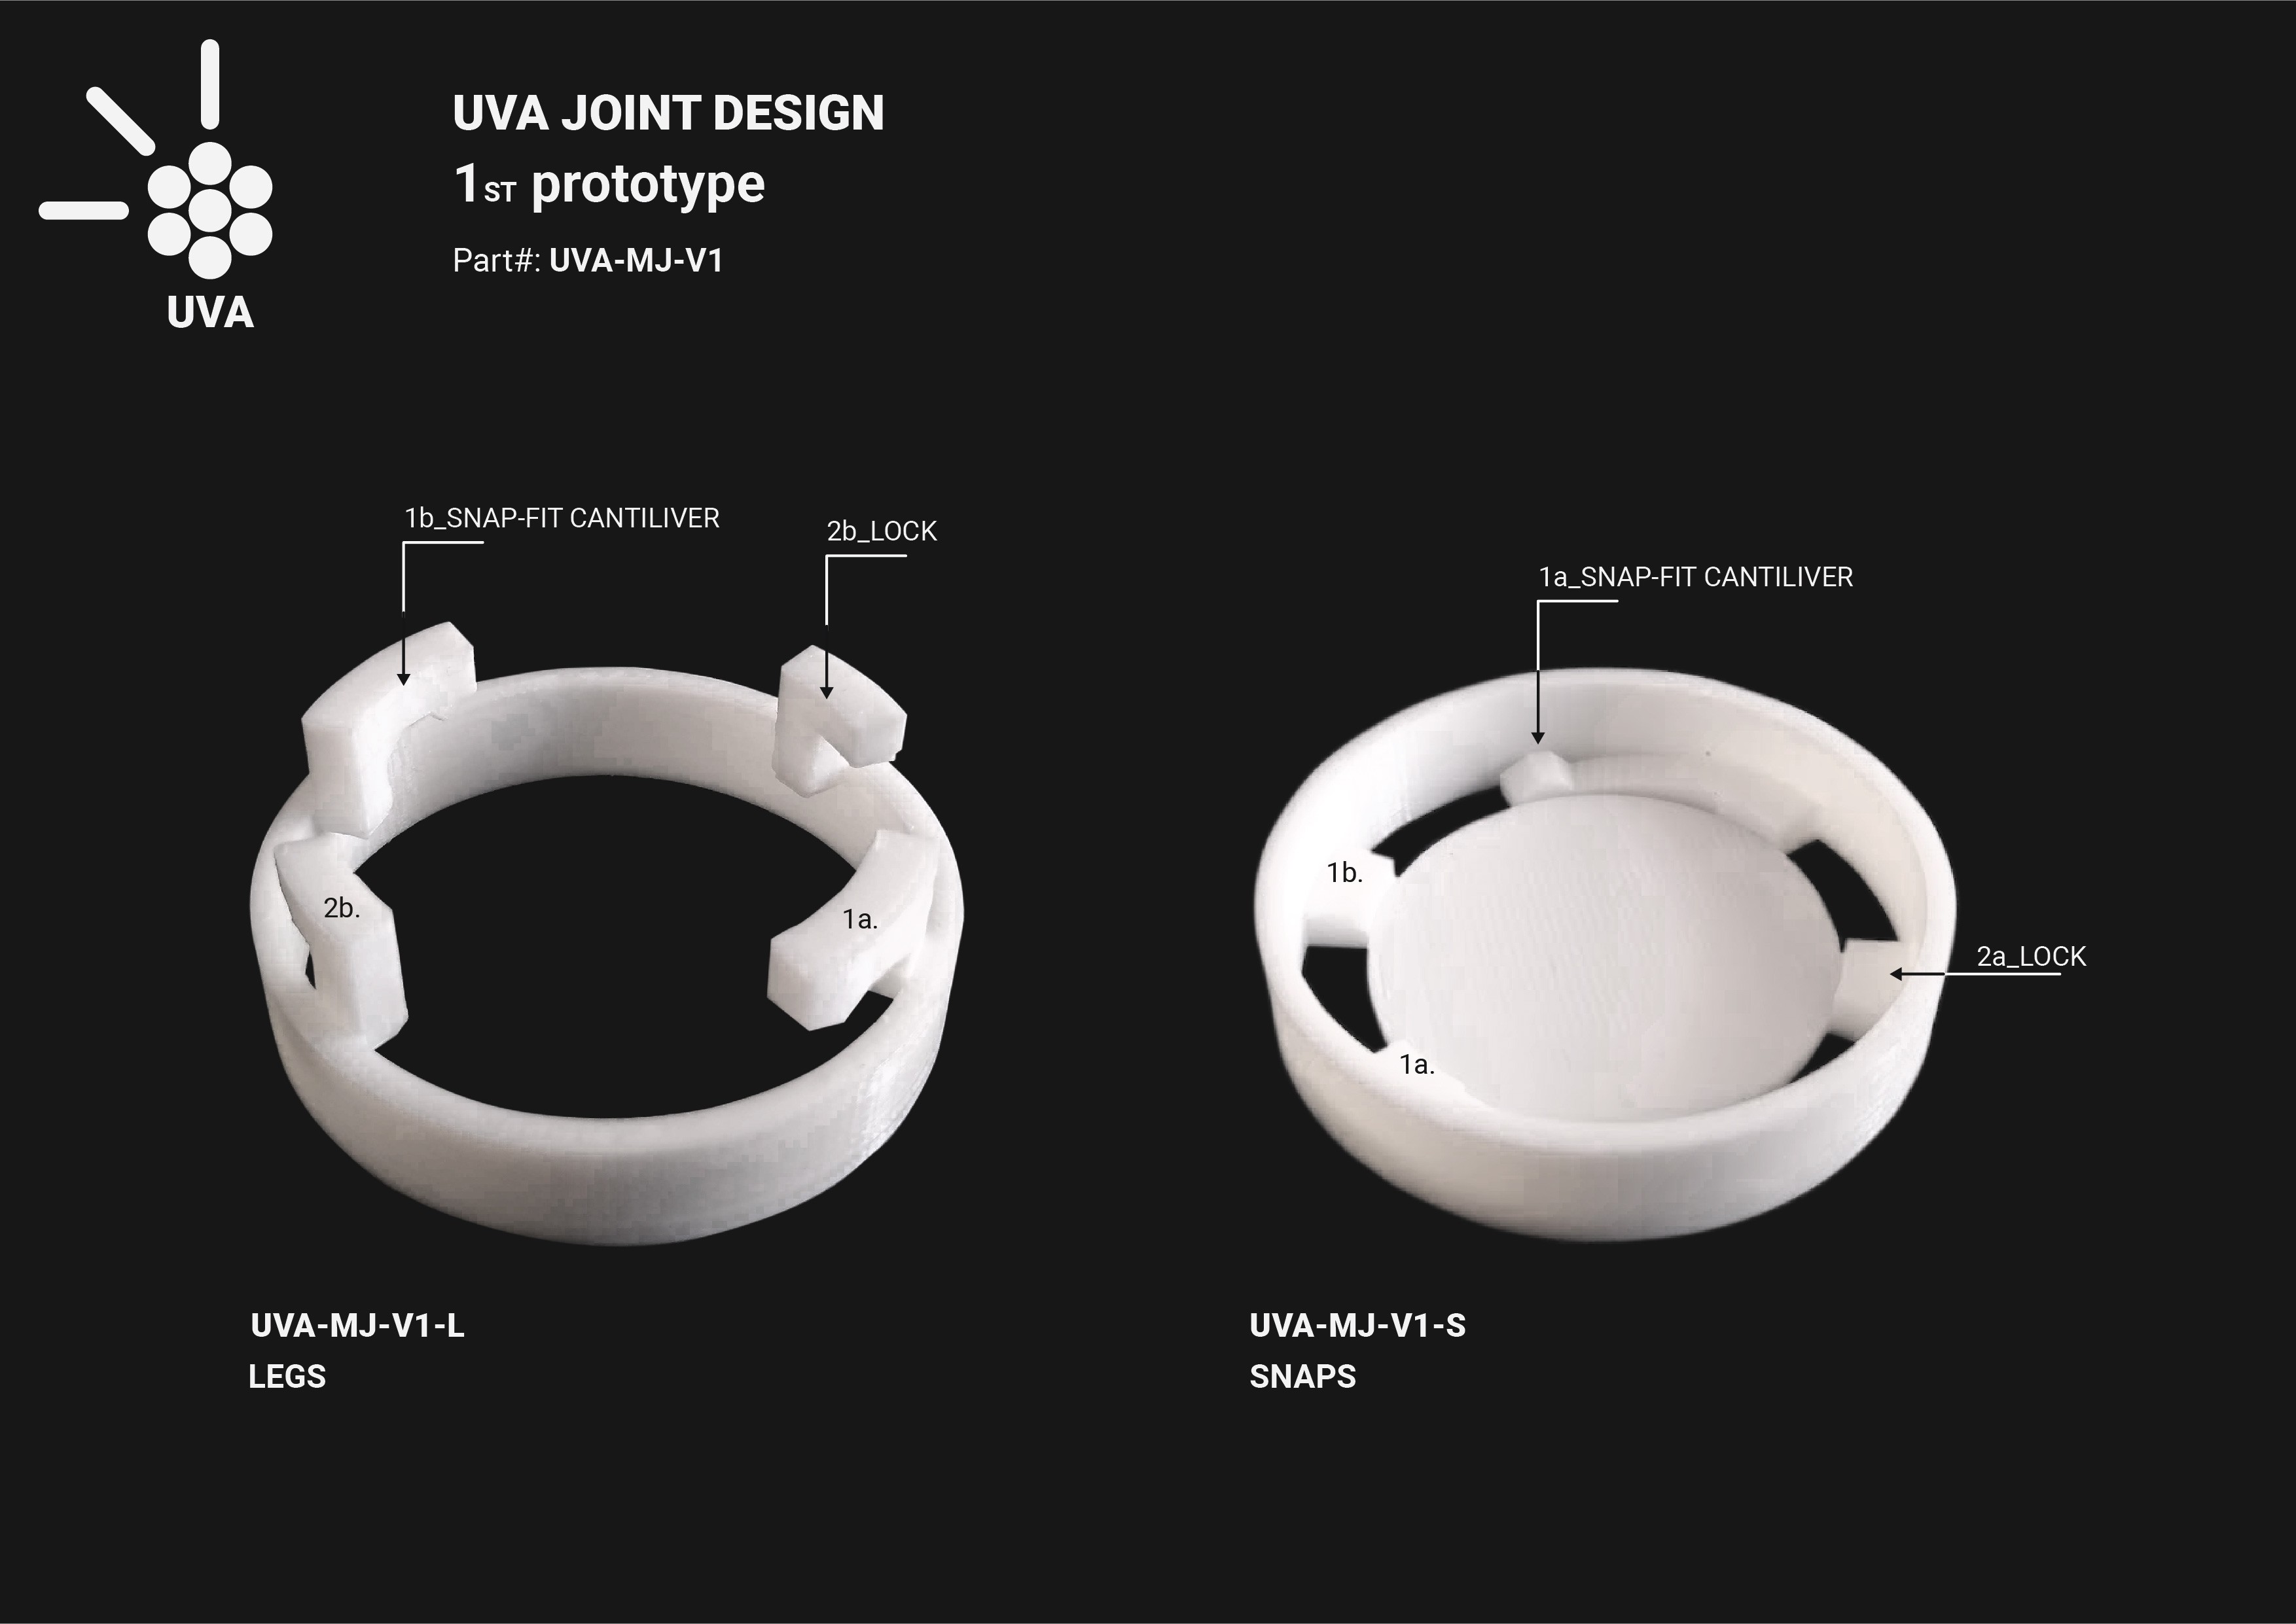
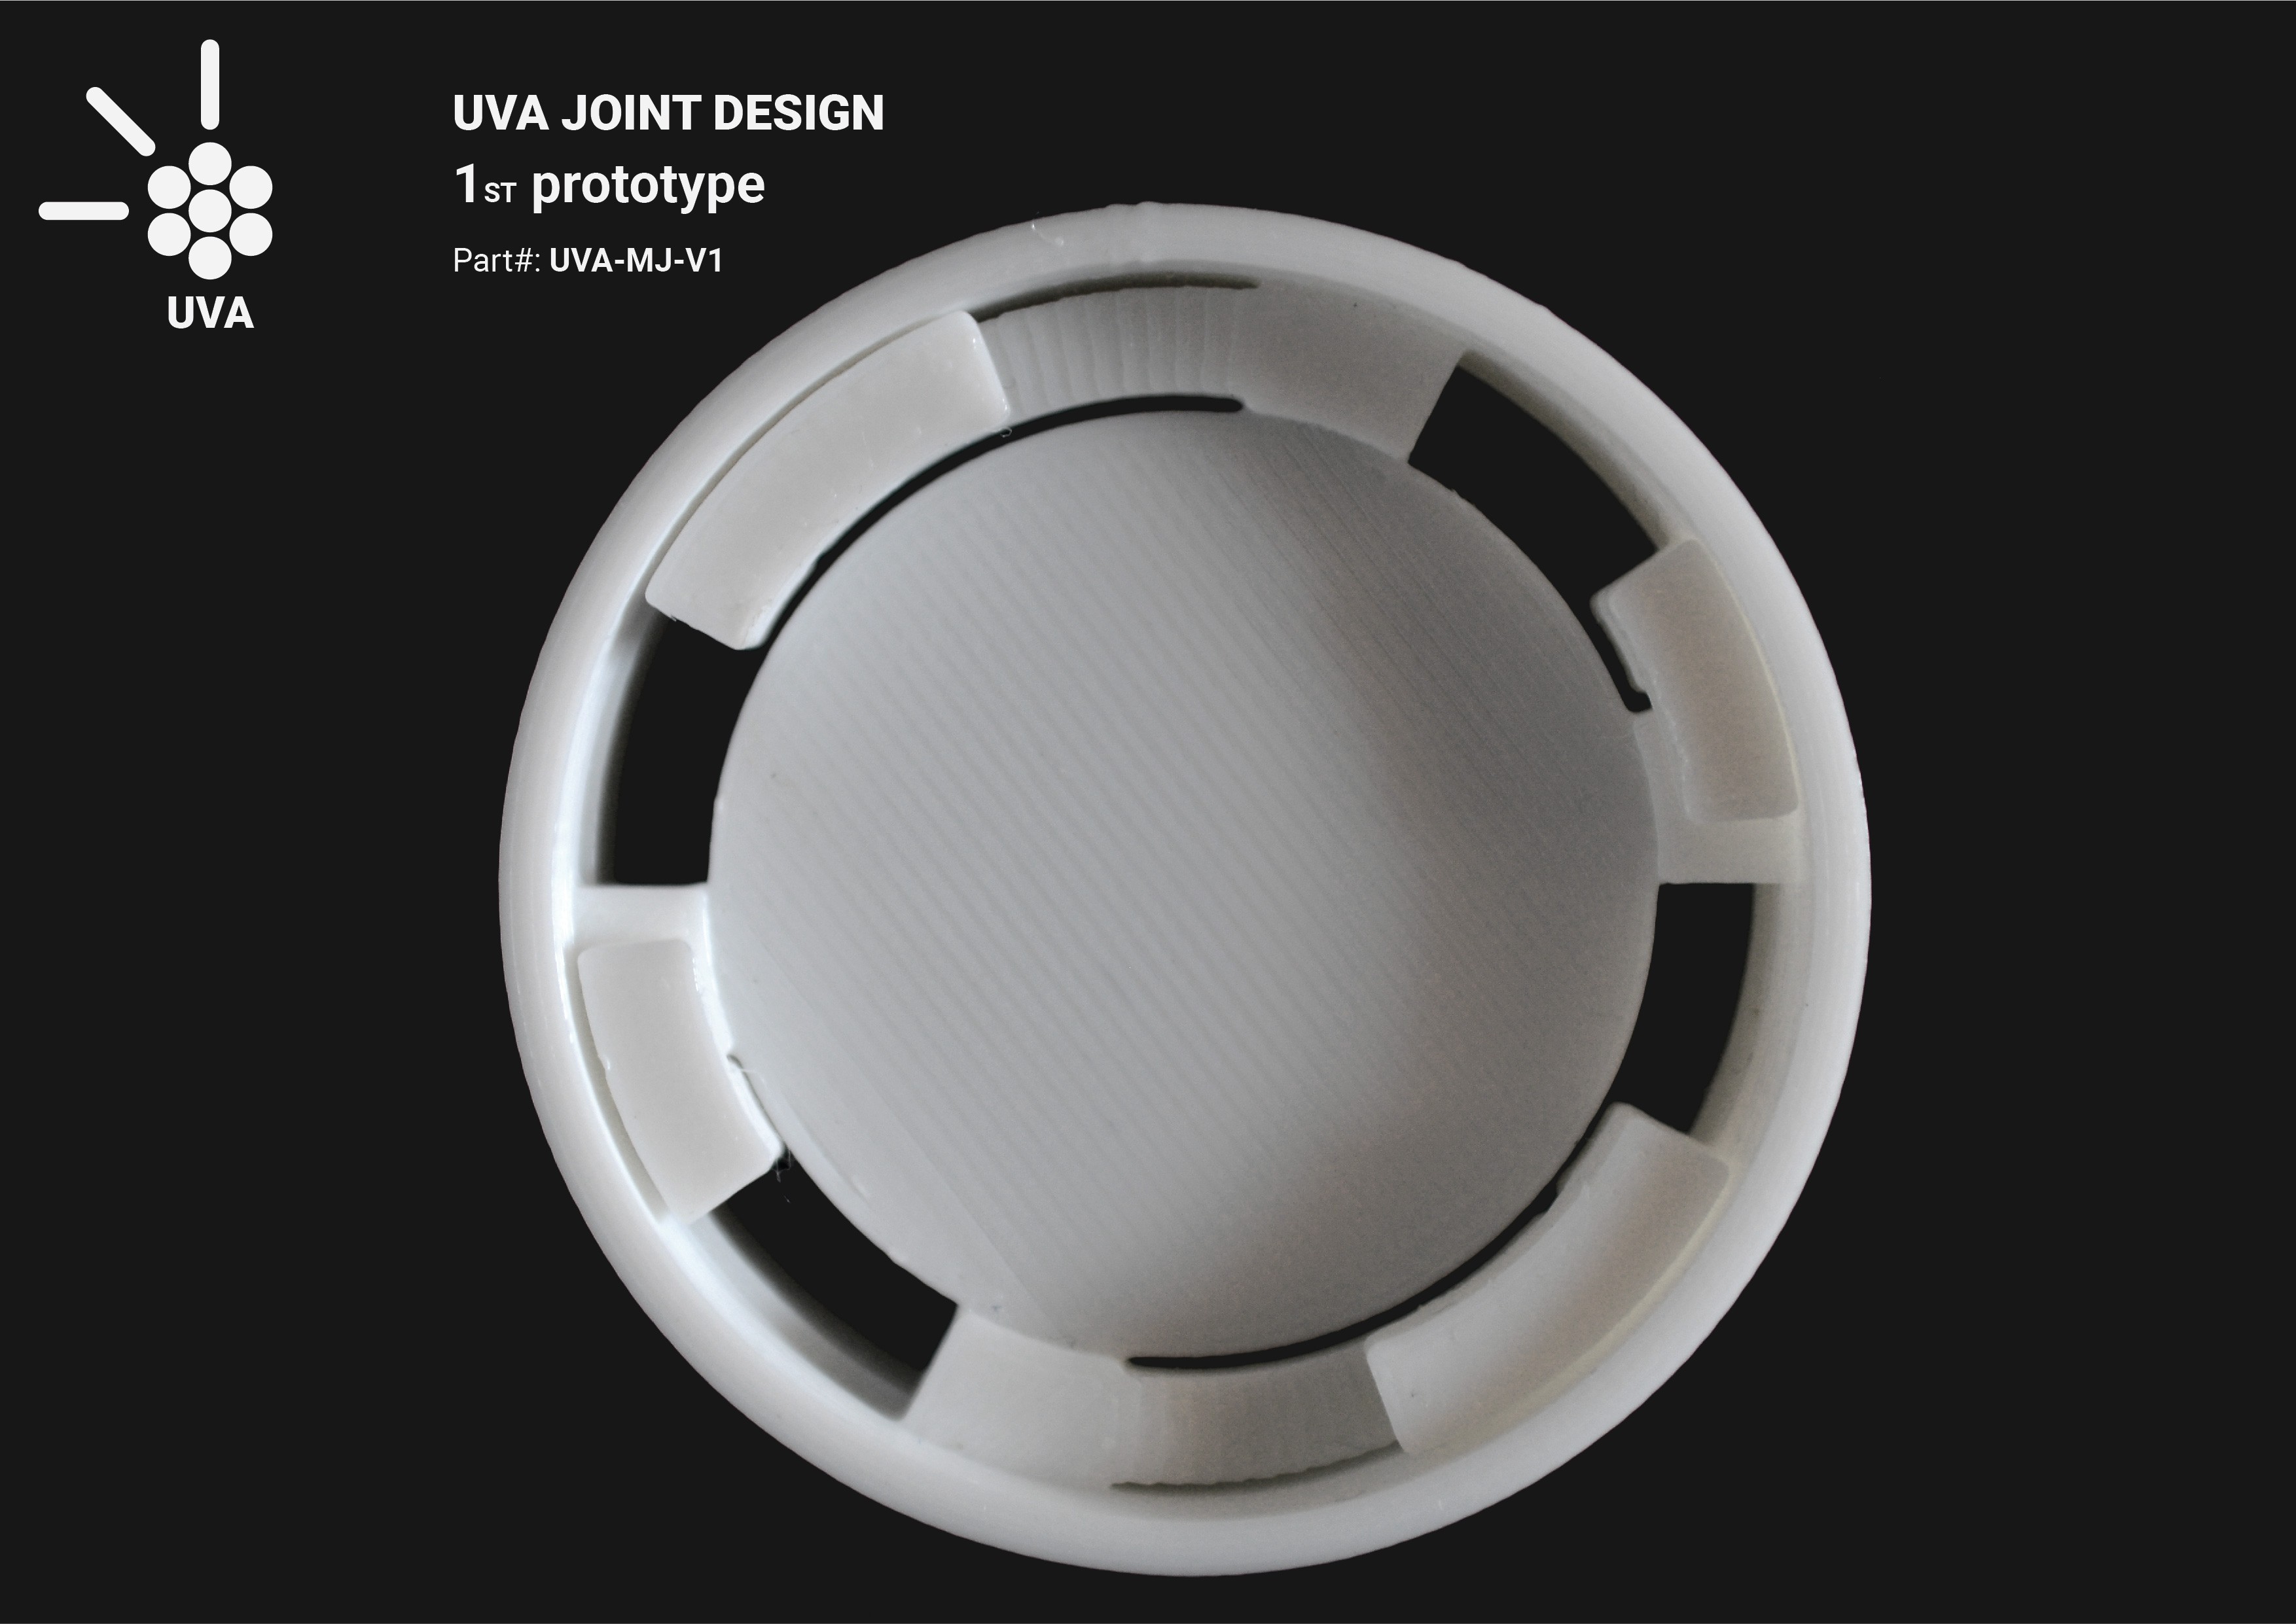
With these bases in mind, we design a rotational joint that is structured by three different connections: the snap-fit cantilever, the electrical contact and the Locks. It is necessary to leave some tolerance (in our case 0.4mm) because FDM prints are not 100% accurate. Calibration, environmental conditions and human interaction could affect the quality of the finished pieces. We need a tight fit because we have to prevent movement between the battery pack and the tool, but also we need to prevent the plastic to fail, crack or to not fit at all.
To fit the part it is necessary to make a 28 degrees rotation in the longitudinal axis. It will snap by this rotation and do not return to the starting point without some force. Every connection has its mission to constraint the parts together.
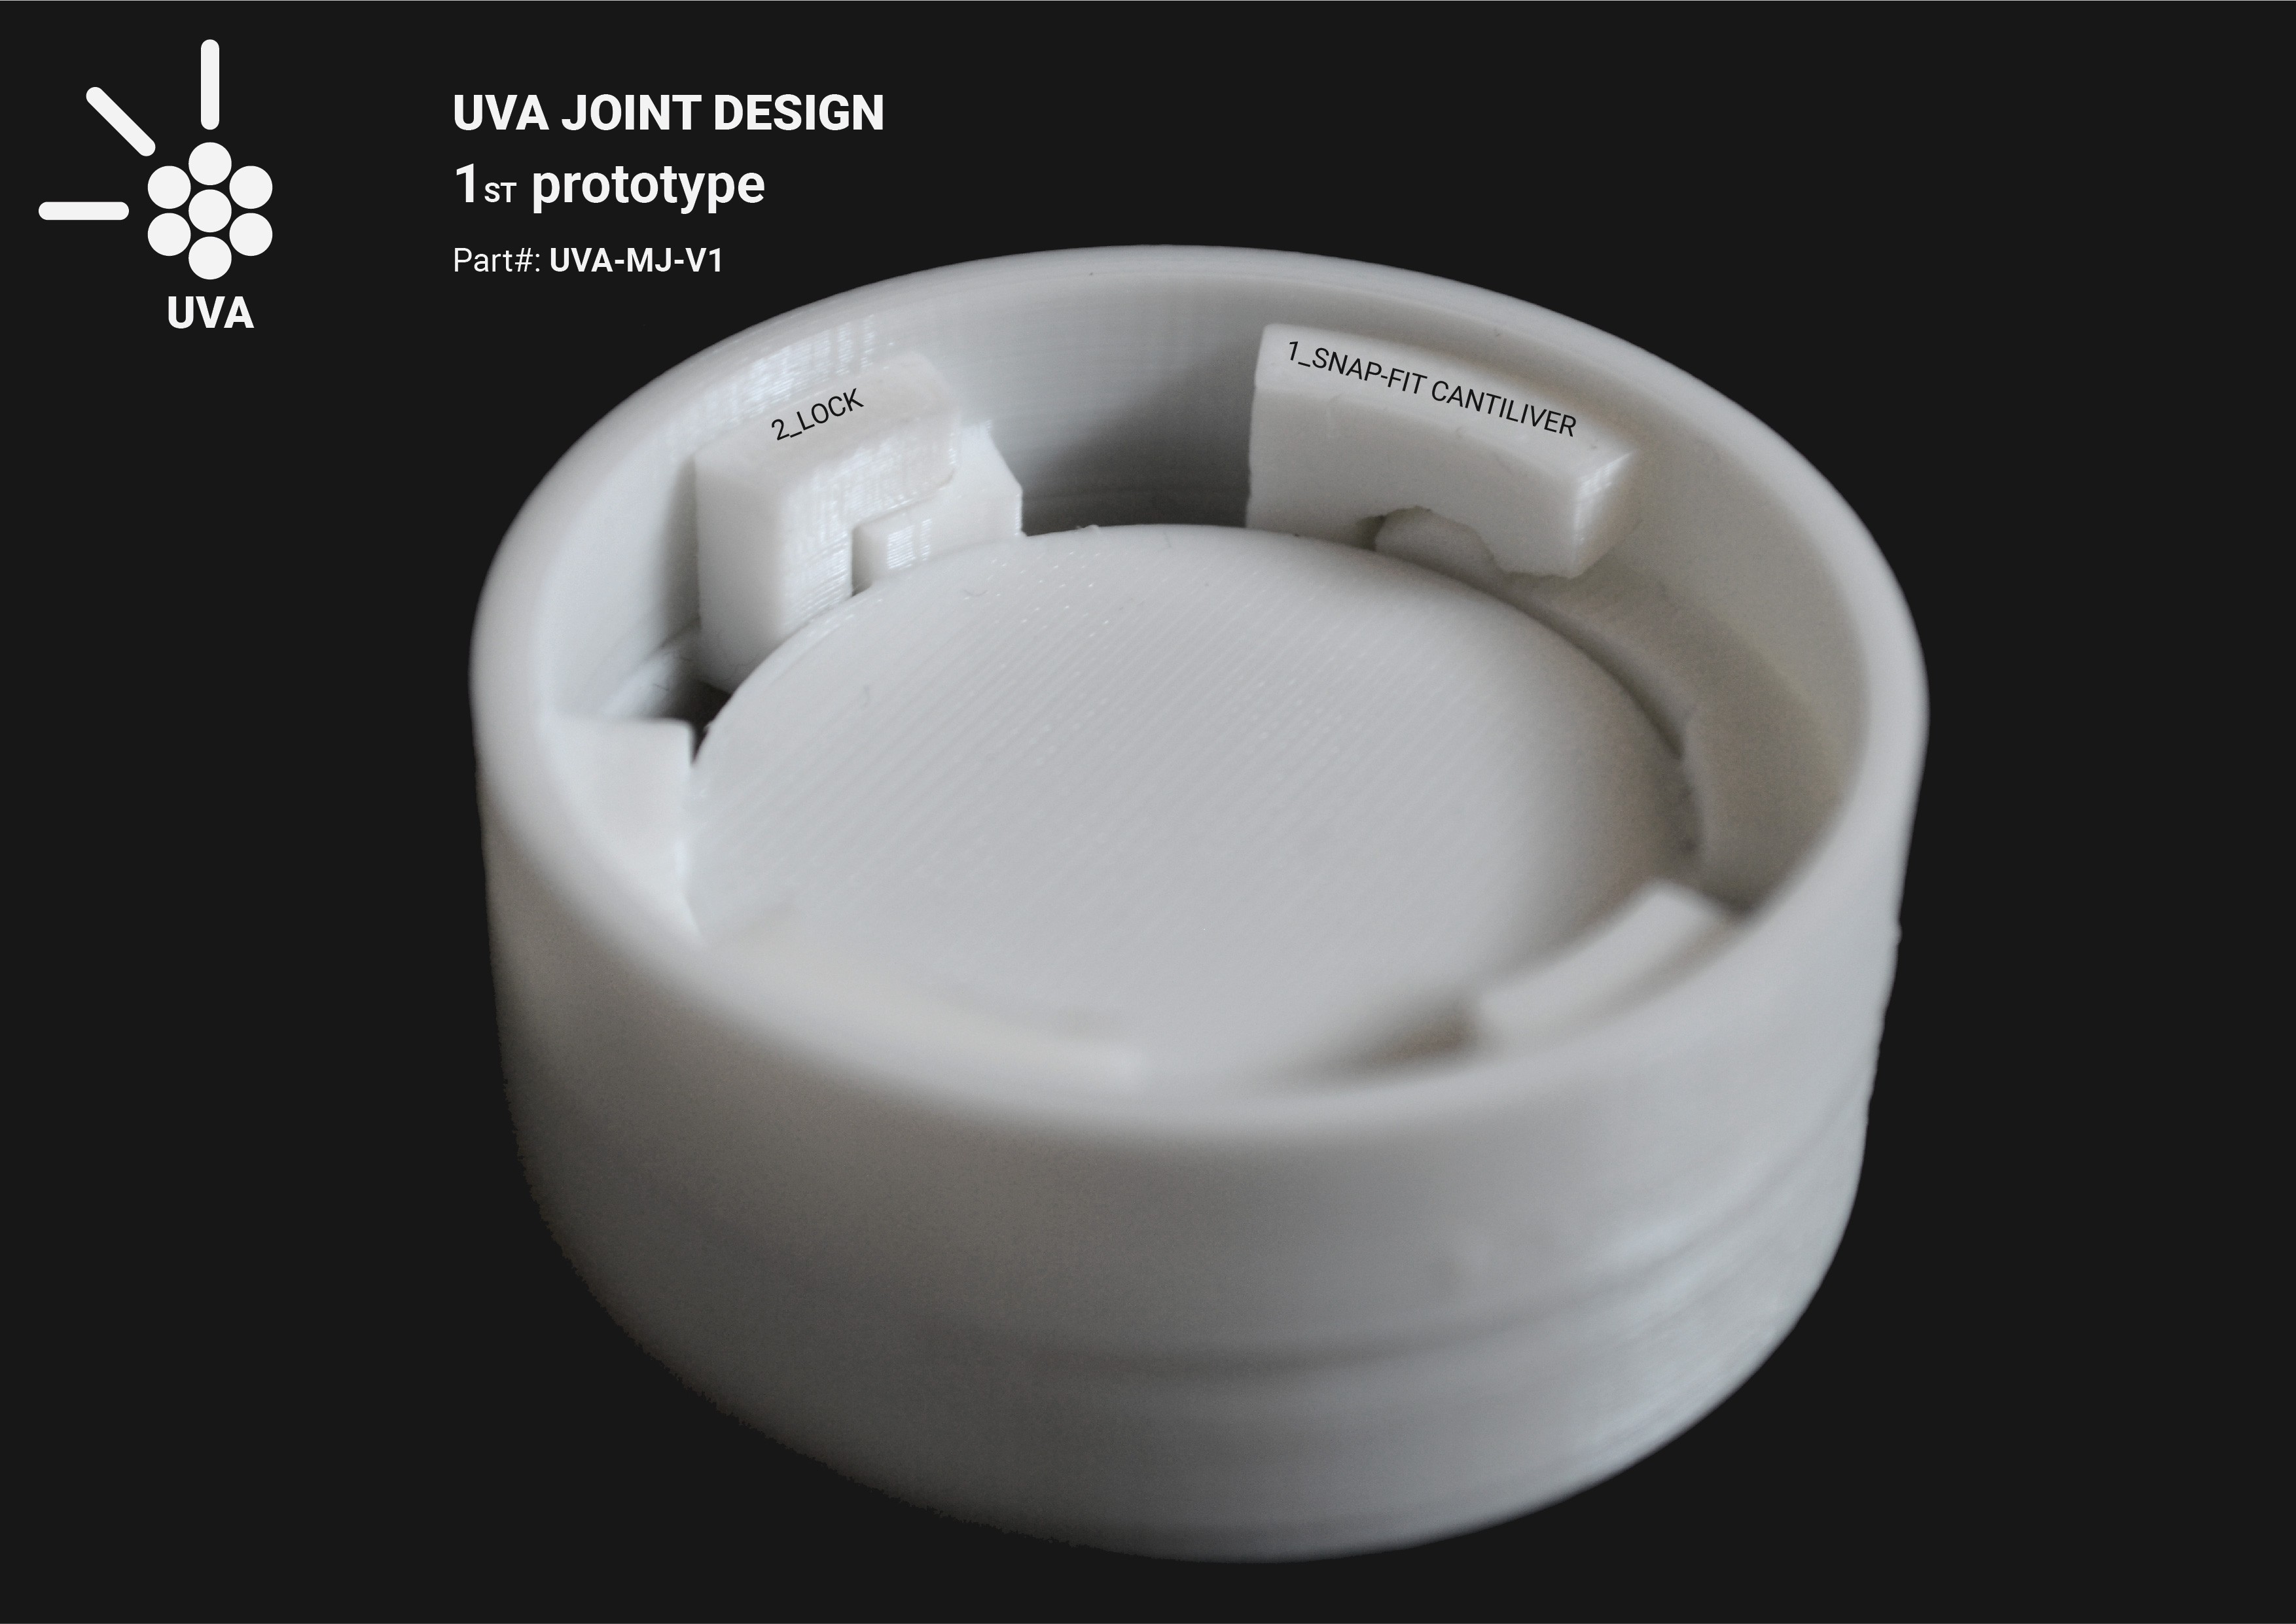
- Snap-fit cantilever: this part is the most complex to design and is the one that ensures that the UVA joint will keep together the battery pack and the tool. It makes a restriction in the rotation after the snap. This rotation restriction could be broken after applying some force to unlock the uva joint.
- Locks: This connection is responsible for avoiding the movement in the vertical axis. The locks will help to reduce or eliminate the forces over the snap-fit cantilever after the snap, increasing the quality of the joint and the durability of the connections.
- Electrical connection: This part is under development. It will be the mechanism responsible to transmit the electricity between the battery pack and the tool.
![]()
![]()
![]()
The joint was modeled with Autodesk Fusion 360, here the link to the model: https://a360.co/2OywktE
We are going to be using this software because it is free and tremendously good for mechanical design. It can also be use to simulate electrical circuits.
Here some information that we used to design the UVA joint:
About conections:
https://www.3dhubs.com/knowledge-base/how-design-snap-fit-joints-3d-printing/
https://drive.google.com/file/d/1E7P1v8KytKME5-KJwtn3b6-2PuZkFO8J/view?usp=sharing
https://drive.google.com/file/d/1D9oW7FTgxugsrYvvysp96yshwzoi6t6p/view?usp=sharing
Snap-fit design calculator:
About PLA:
friction coefficient: 0.492
Secant modulus: 3300 Mpa
http://www.matweb.com/search/DataSheet.aspx?MatGUID=ab96a4c0655c4018a8785ac4031b9278
Allowable material strain: 3%
-
Choosing the UV LEDs
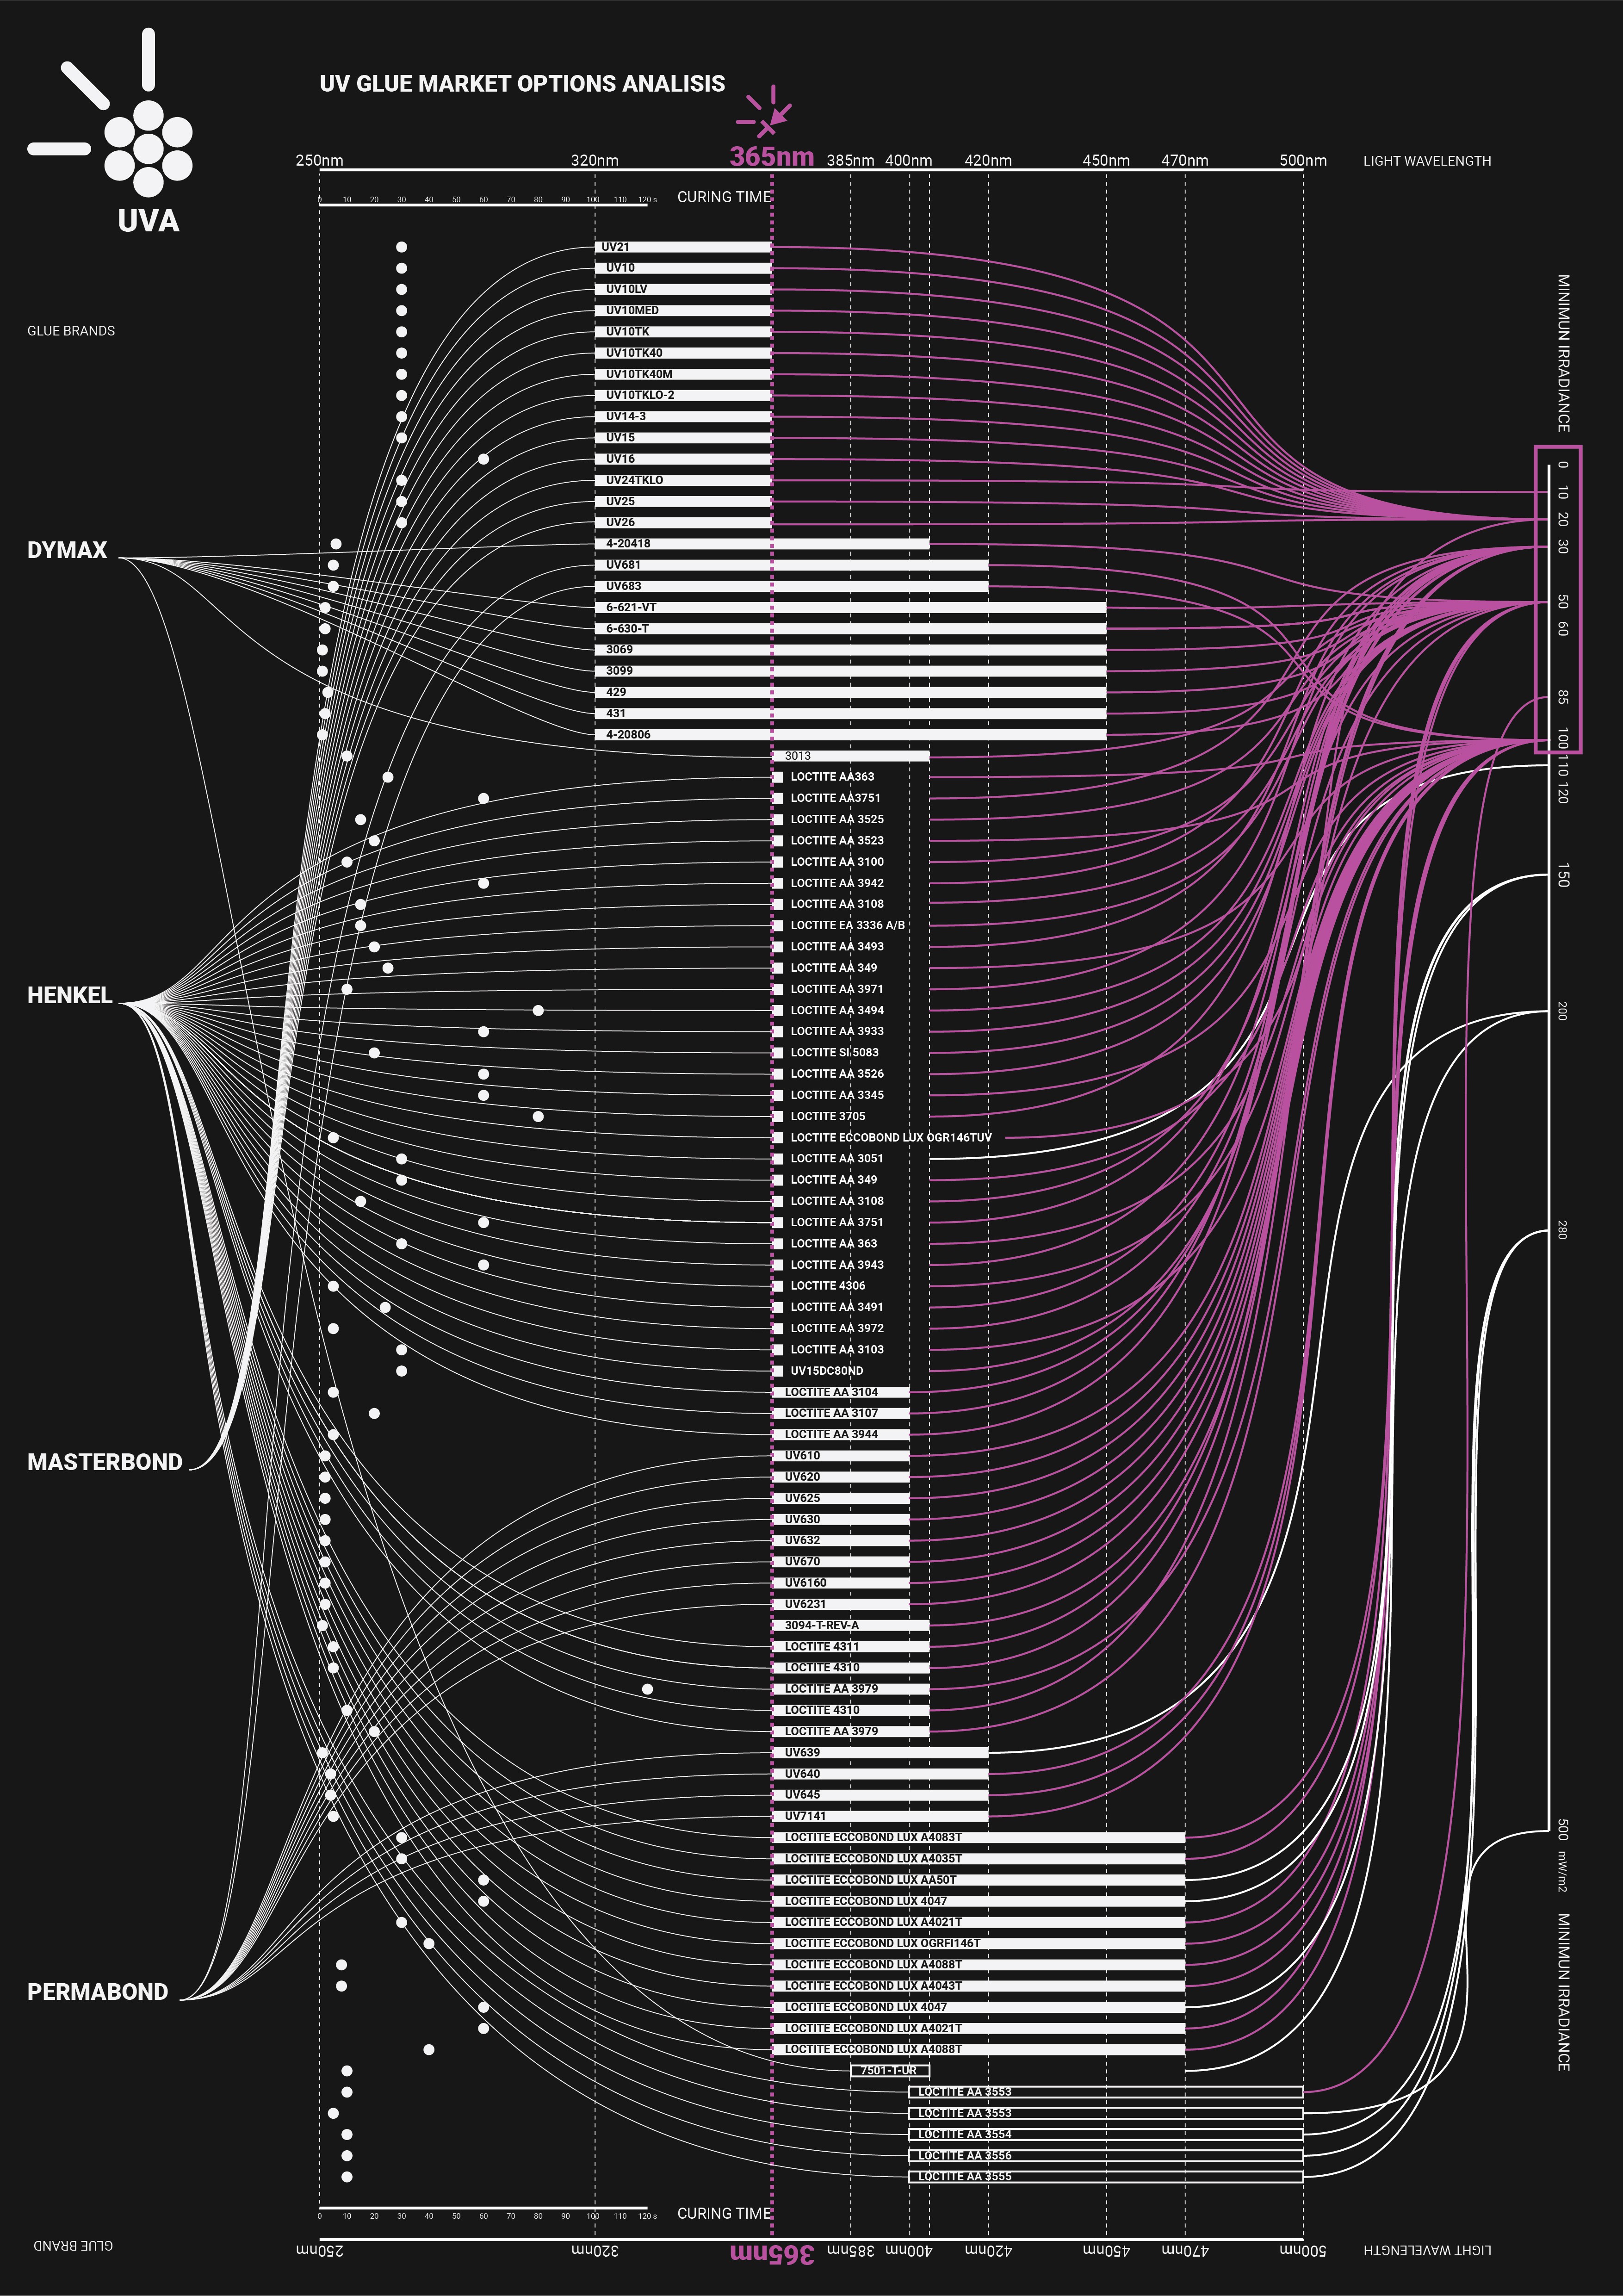
07/05/2020 at 11:58 • 1 commentLEDs come in all manners of sizes, colors and brightness. To be able to choose the most appropriate ones, we need to know what are they going to be used for. For this purpose, we did some market research on UV curing glues. After checking the datasheets of 89 models of adhesives across 4 different companies, we came up with following graph:
![]()
The source of this information can be found in spreadsheet format, here.
Let’s highlight some important aspects of this dataset:
- Save for
a handful of glues specifically designed to be cured by visible
light. All studied adhesives can be cured by a wavelength of 365nm.
- The large majority of datasheets recommend an irradiance of around 100 mW/cm^2 or less for ideal curing conditions. (Though the documentation can be somewhat ambiguous on the absolute minimum irradiation required to still cure the product).
- Small portion of glues from Henkel recommend using a secondary wavelength of 250nm to improve curing on surfaces exposed to oxygen. We will not be addressing this, as it would prohibitively increase the cost of the project.
From this information we can conclude that we should ideally aim for a lamp that emits 100 mW/cm^2 @ 365nm, as this gives the project the best coverage of commercially available glues. Though as we will soon see, it is not trivial to emit light at such high intensity from a battery powered device.
SELECTING THE LEDS ON MOUSER/DIGIKEY
It turns out there are not that many high power UV LEDs available in Mouser or Digikey. Even less when you search for ones that:
- Emit at 365nm
- Have high power and efficiency.
- Are inexpensive.
- Are readily available and well stocked.
- Have small viewing angles (we need a concentrated beam light to reach those 100mW/cm^2)
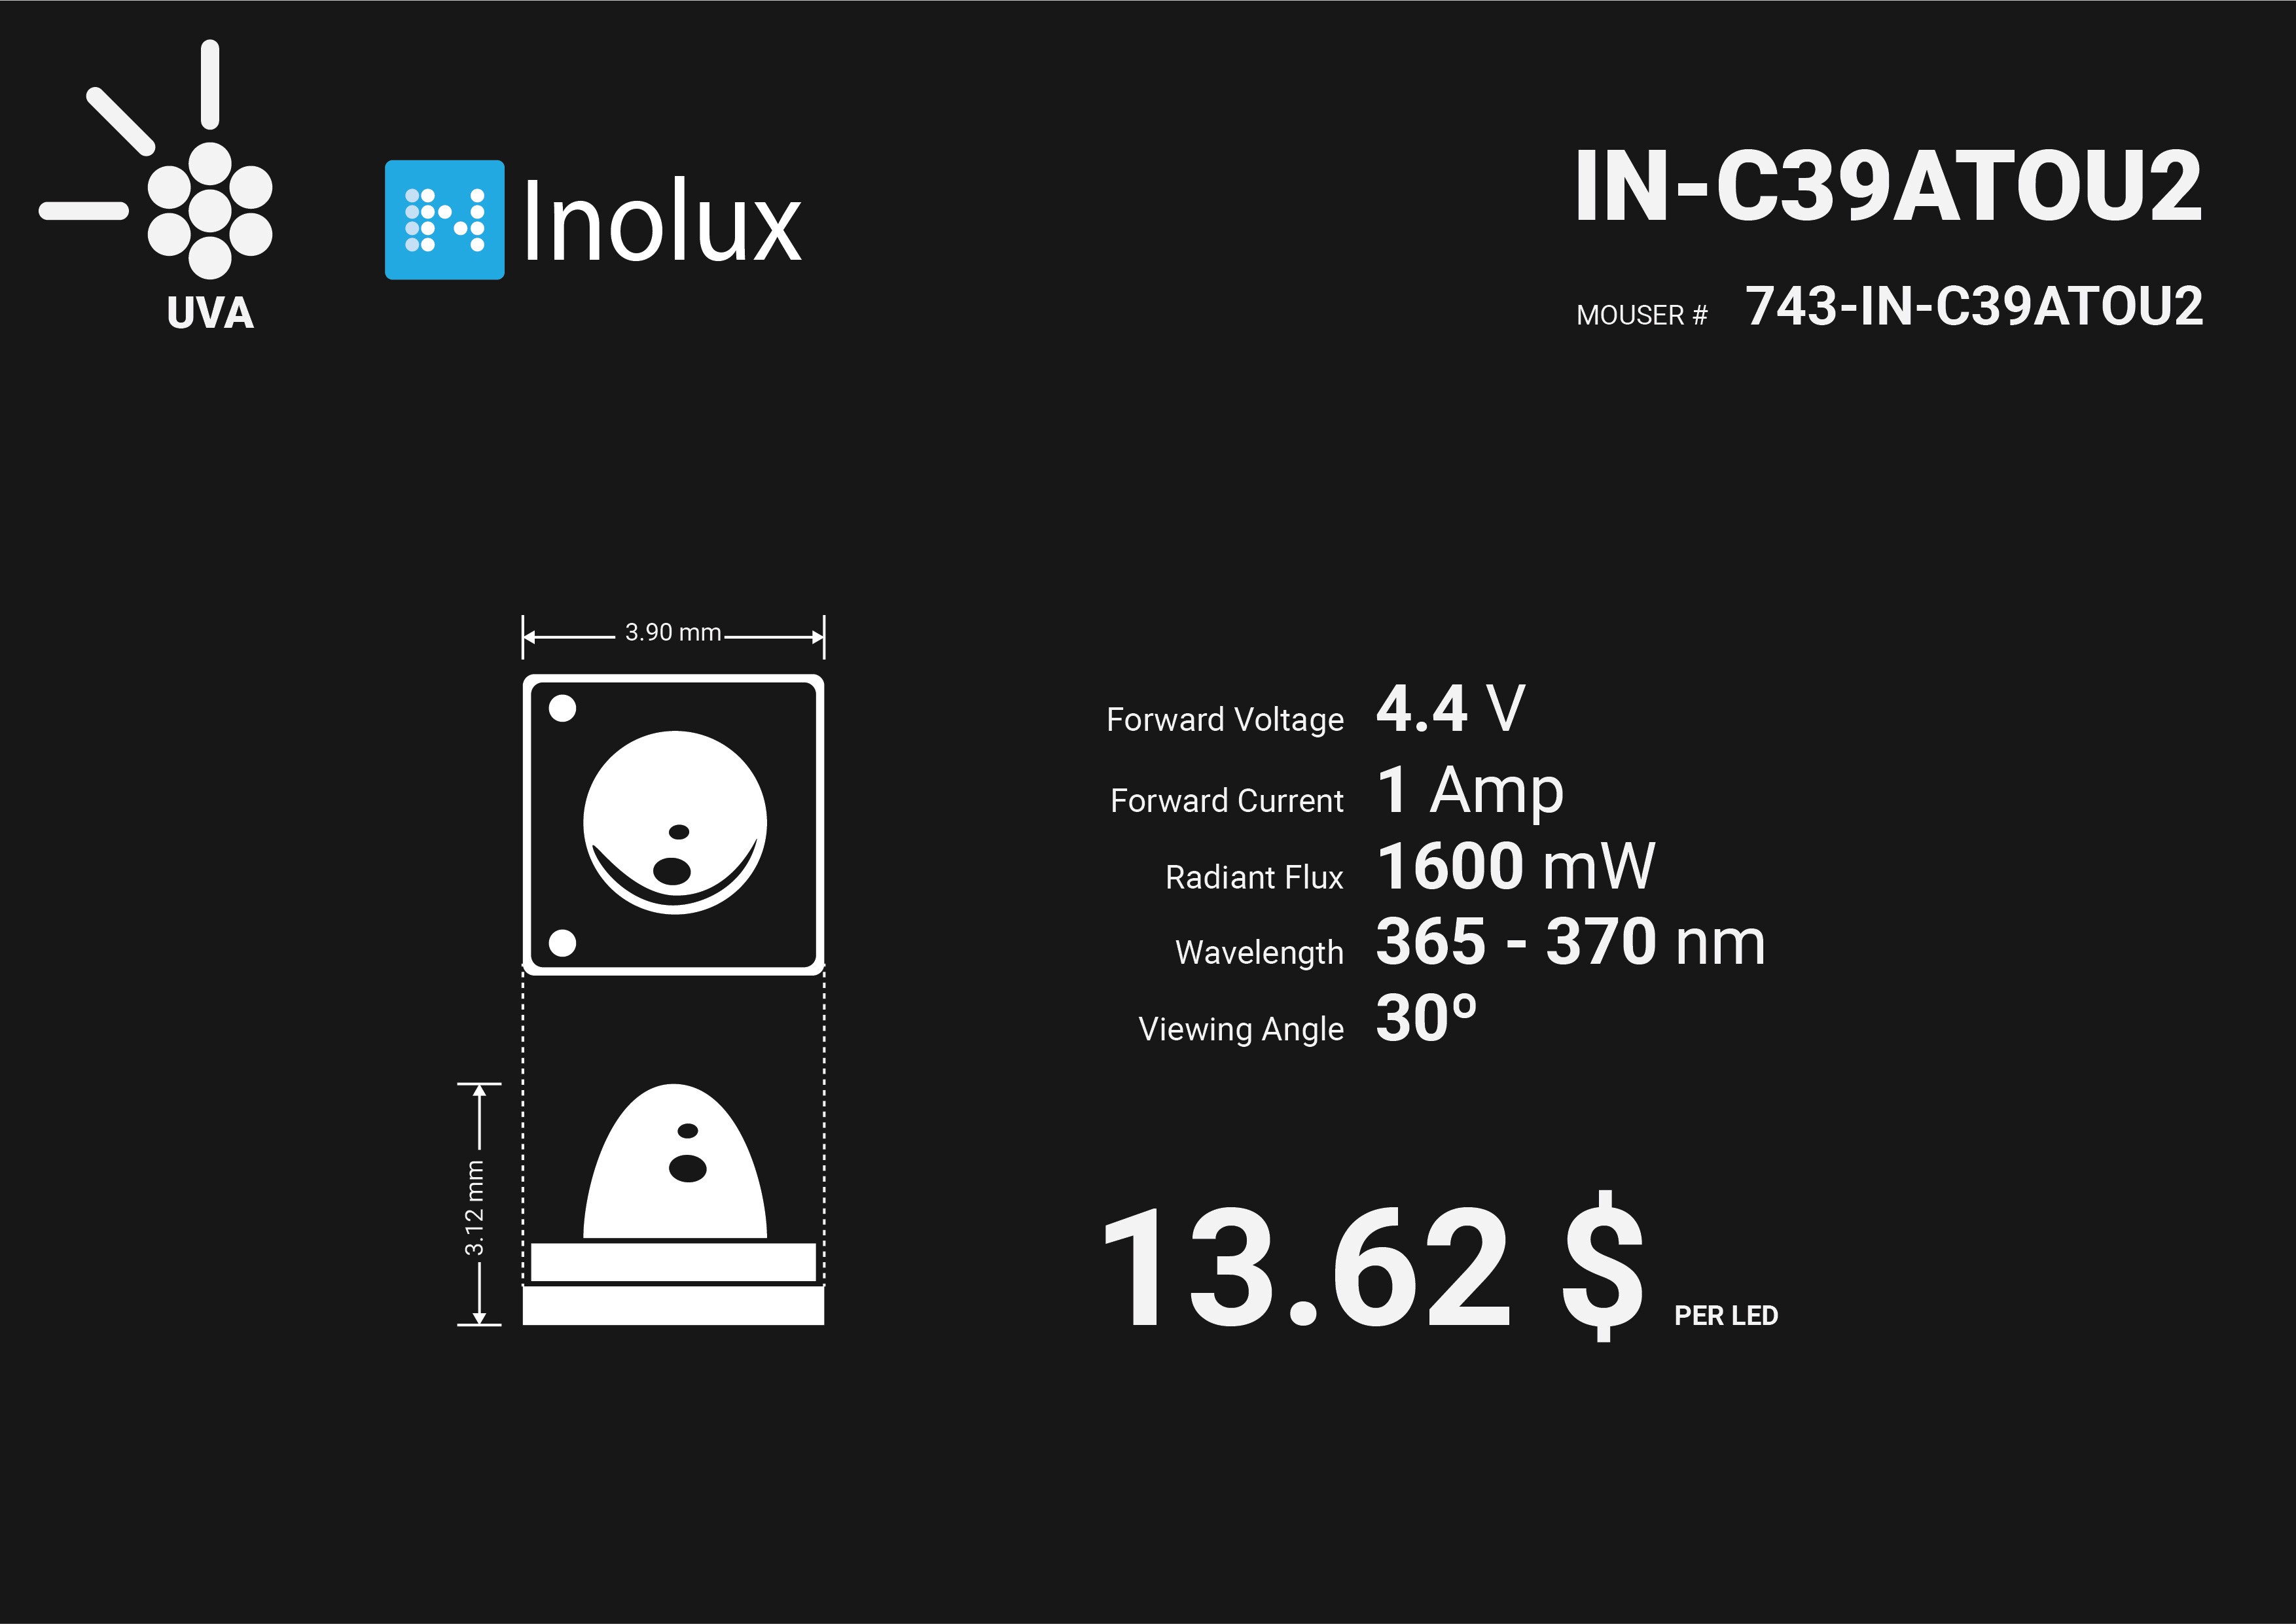
We decided on the IN-C39ATOU2 from Inolux, link to the Mouser listing here.
![]()
Some highlight of the LED are:
- Forward Voltage: 4.4V
- Forward Current: 1Amp
- Radiant Flux: 1600mW
- Wavelength: 365 – 370 nm
- Viewing Angle: 30°
- Size: 4x4mm
- Cost: 13.62 $ per led
Note: Yeah, I know that they look really expensive. But the other were not much better. UV LEDs are just really expensive.
HOW MANY LEDS DO YOU USE ?
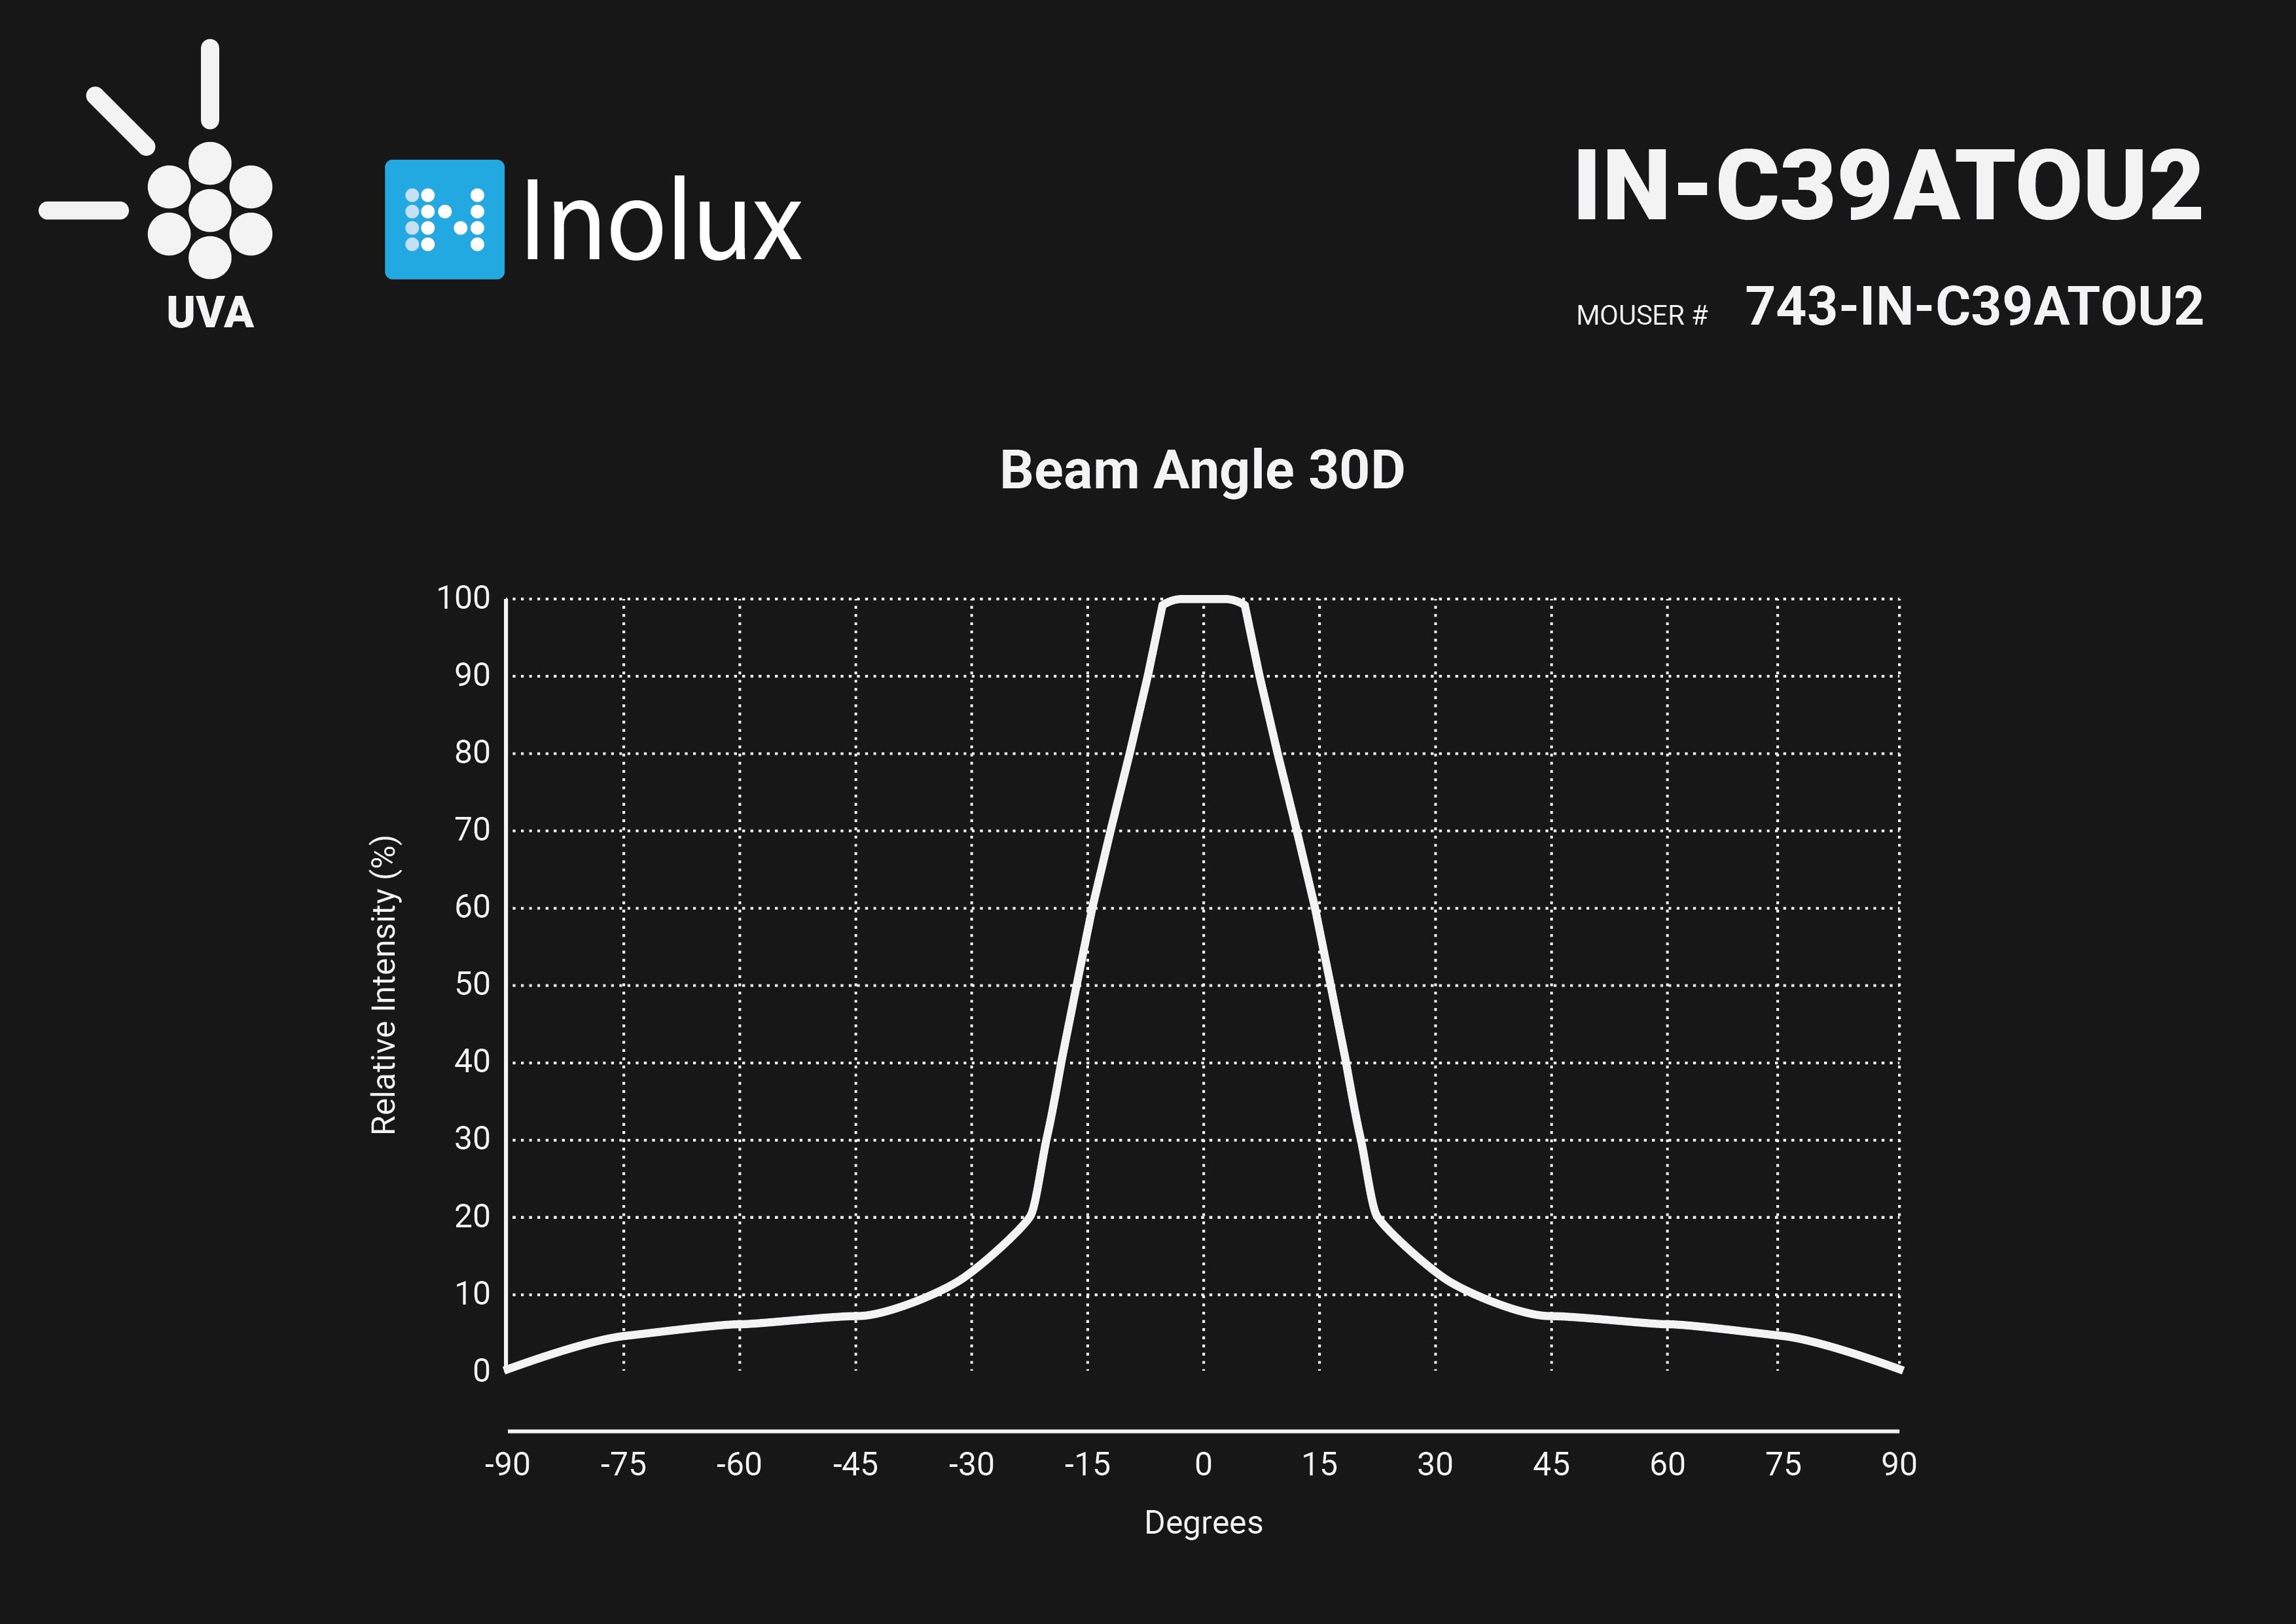
Ideally we don’t want to use more LEDs than absolutely needed, both because of the price, and to save on battery life. Thankfully the datasheet provides us with all the information needed to run a couple of simulations and figure this out. Namely, the total power emitted as light (1.6W) and the radiance pattern, which looks like this:
![]()
Image source: IN-C39ATOU2 datasheet
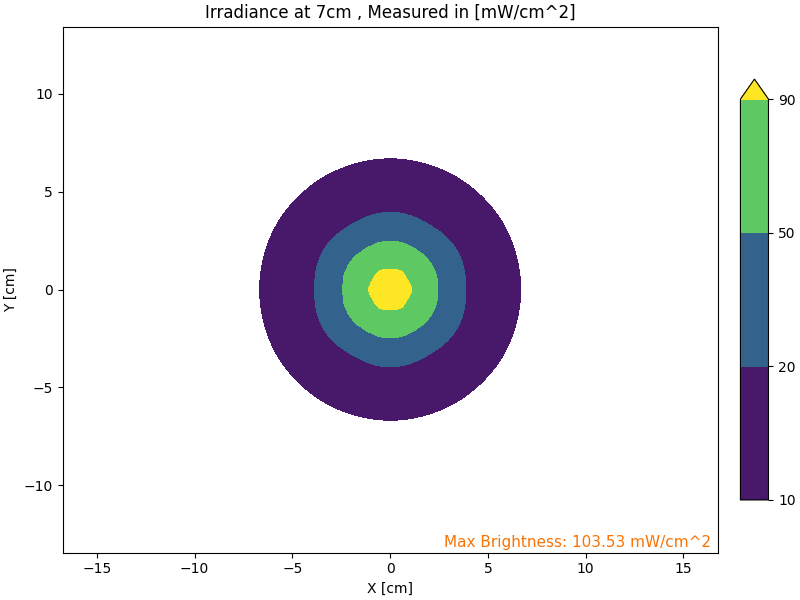
No we can program a small script in Python to calculate how this beam pattern would look projected over a surface, at different heights.
![]()
From here we can see that at its peak, 6 LEDs can indeed generate the 100mW/cm^2 we were looking for, even if it just in a small point. Now let’s look at those irradiance patterns a bit more closely:
At 7cm from the target, the center of the pattern surpasses 100 mW/cm^2, and there is a circle of about 2.4cm in diameter of light above 90 mW/cm^2. Not much in terms of area, but that’s quite an impressive power density.
Now, if you’re working with glue that cures at lower energy levels and prefer less power over a larger area. At 25cm away, the six LEDs can generate a circle of 14cm in diameter with over 20 mW/cm^2. Which is rather respectable for a handheld battery powered device.
CONCLUSIONFor a total electrical power consumption of 26.4W and around 81.72$, these LEDs seem like the most sensible choice for the job. They cover both scenario, focused high intensity UV light from up close for those glues that require it. And, wide area low intensity UV light from far away for when area coverage is more important than high intensity.
EXTRA: WHY NOT USE STANDARD 5MM UV LEDS ?Let’s explore a fair question that might be in your mind after reading this post. If you search on Amazon or Ebay right now for “UV LED” you might find about a dozen of listing like the following, selling 100 UV LEDs for just a few USD.
Image source: Listing of UV LEDs from Ebay.
If this is so, then why pay almost a hundred dollars for just 6 LEDs? Why not use these? After all, they are not only exponentially cheaper, but are even more readily available. Which makes them even more inline with our search criteria. Well,
TL;DR: sadly, they just don’t work for this application.
Two main reasons for this:
- Most of these listings are for ~400nm wavelength leds. Which as we’ve seen above, don’t coincide with the activation wavelength of many of the UV curing adhesives.
- More importantly, they are very weak. So weak in fact that they might not even be able to cure anything but the most sensitive of glues.
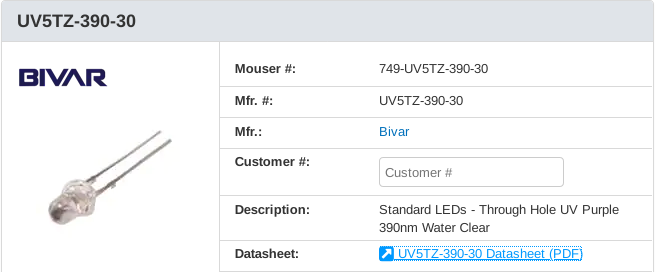
Now, let’s back up this claim by running some simulations. It’s hard to find datasheets for these cheap LEDs, so instead we are going to use the data from a similar well documented LED to feed the simulation. Namely, the UV5TZ-390-30 from Bivar (Link to the Mouser listing here)
.Image source: Mouser listing for the UV5TZ-390-30
According to its datasheet, at maximum power this led can produce 40mW of light with a viewing angle of 30°. As seen below.
.Image source: UV5TZ-390-30 datasheet
To give it the best possible chance we are going to simulate a 7x7 grid of LEDs, for a total of 49 emitters working at maximum power.
![]()
There we can see that even at the point of peak irradiance, this array of LEDs is just barely able to reach 10 mW/cm^2.
Therefore, as attractive as their price seems, they are not suited for this application. As even if they had the correct wavelength for UV glue curing, they don’t output enough power to be effective at this task.
- Save for
a handful of glues specifically designed to be cured by visible
light. All studied adhesives can be cured by a wavelength of 365nm.
UVA
High-power ultraviolet flashlight for curing UV adhesive (https://bit.ly/FldRdy-DB)


 At
7cm from the target, the center of the pattern surpasses 100 mW/cm^2,
and there is a circle of about 2.4cm in diameter of light above 90
mW/cm^2. Not
much in terms of area, but that’s quite an impressive power
density.
At
7cm from the target, the center of the pattern surpasses 100 mW/cm^2,
and there is a circle of about 2.4cm in diameter of light above 90
mW/cm^2. Not
much in terms of area, but that’s quite an impressive power
density.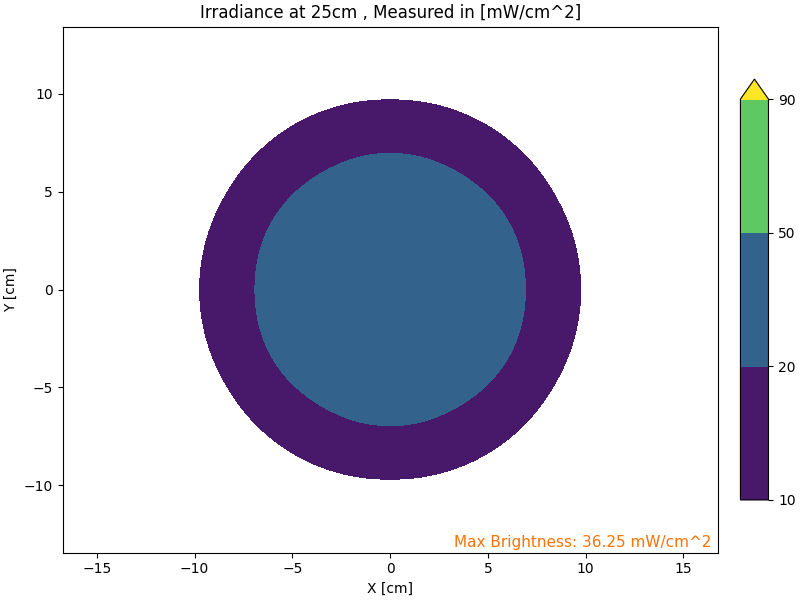 Now, if you’re working with glue that cures at lower energy levels
and prefer less power over a larger area. At 25cm away, the six LEDs
can generate a circle of 14cm in diameter with over 20 mW/cm^2. Which
is rather respectable for a handheld battery powered device.
Now, if you’re working with glue that cures at lower energy levels
and prefer less power over a larger area. At 25cm away, the six LEDs
can generate a circle of 14cm in diameter with over 20 mW/cm^2. Which
is rather respectable for a handheld battery powered device.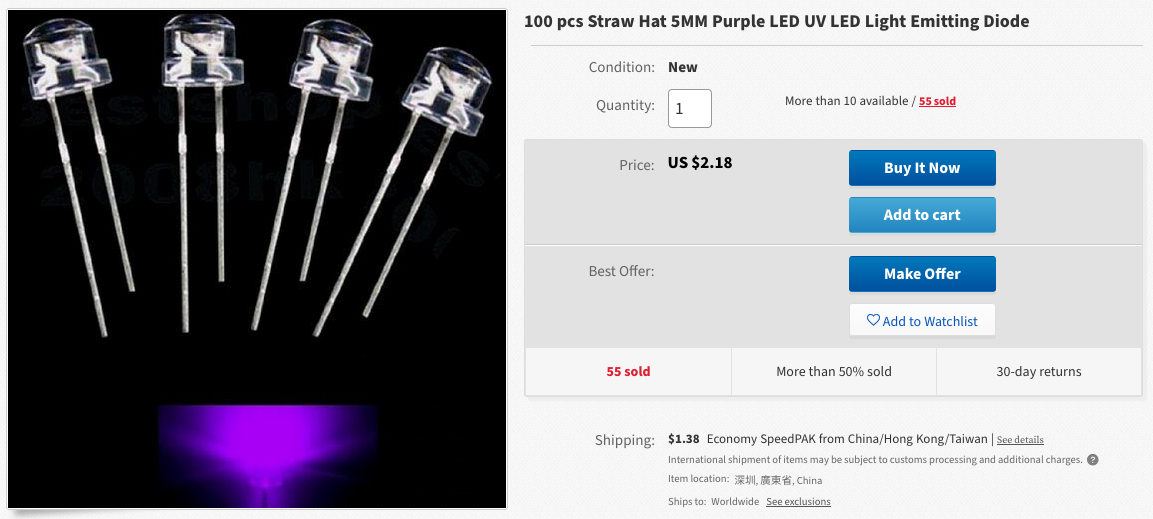
 .Image source: Mouser listing for the UV5TZ-390-30
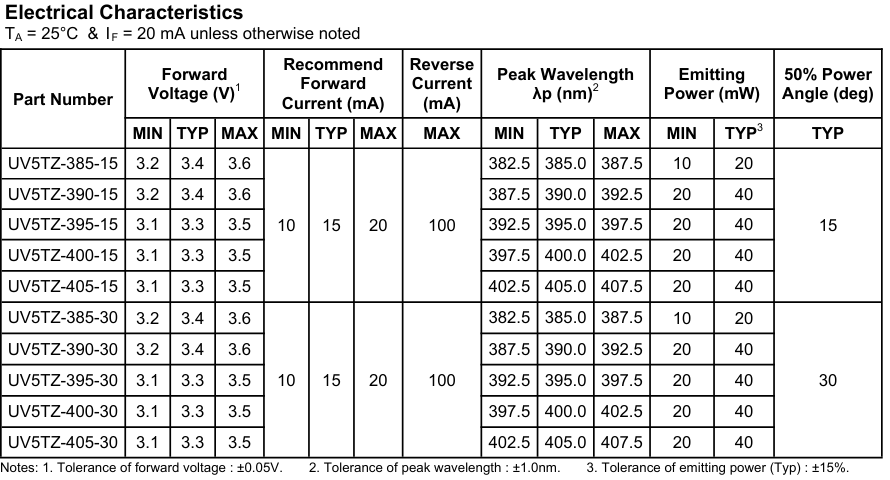 .Image source: