-
Project title de-confliction
08/07/2023 at 23:36 • 0 commentsI've been calling this general theme of design evolution "Minamil" (minimal mill).
Lately I've been working on a variant that seems different enough to warrant distinction -- a mechanically similar design using 3d printed structural parts instead of flat laser cut parts -- and calling it "Minamil 3dp" (3d printed parts).
So I've been retronymically calling this one "Minamil 2dc" (2d cut parts).
I'm not a branding guy. Let's see how this goes...
-
Project title de-complication
07/25/2023 at 16:52 • 0 commentsThe project title used to be "Minamil: a minimal CNC mill. And friends." because that seemed like an economical way to make room for some variations that would be less strictly minimal. That became slightly inconvenient because it clashed with the handy HaD editor function of inserting #projectname inline into sentences where the extra punctuation confuses grammar. In some places I've edited ". And friends." out of the resulting link text to make a sentence flow better -- each time adding a little weight to the thought "maybe I should just change the project title". Meanwhile, ideas spinning off into separate projects, or just not going very far, add lightness to the counter-thought "but it's not all quite so minimal...".
So now it's #Minamil: a minimal CNC mill and #"Desk Accessory" CNC Milling Machine and #A Cheap Compact Linear Slide and longer lead screws happening over here and non-minimal Z axis variations that escaped the local minimum and got even more minimal and dual motor+screws not really happening (yet) and ...
-
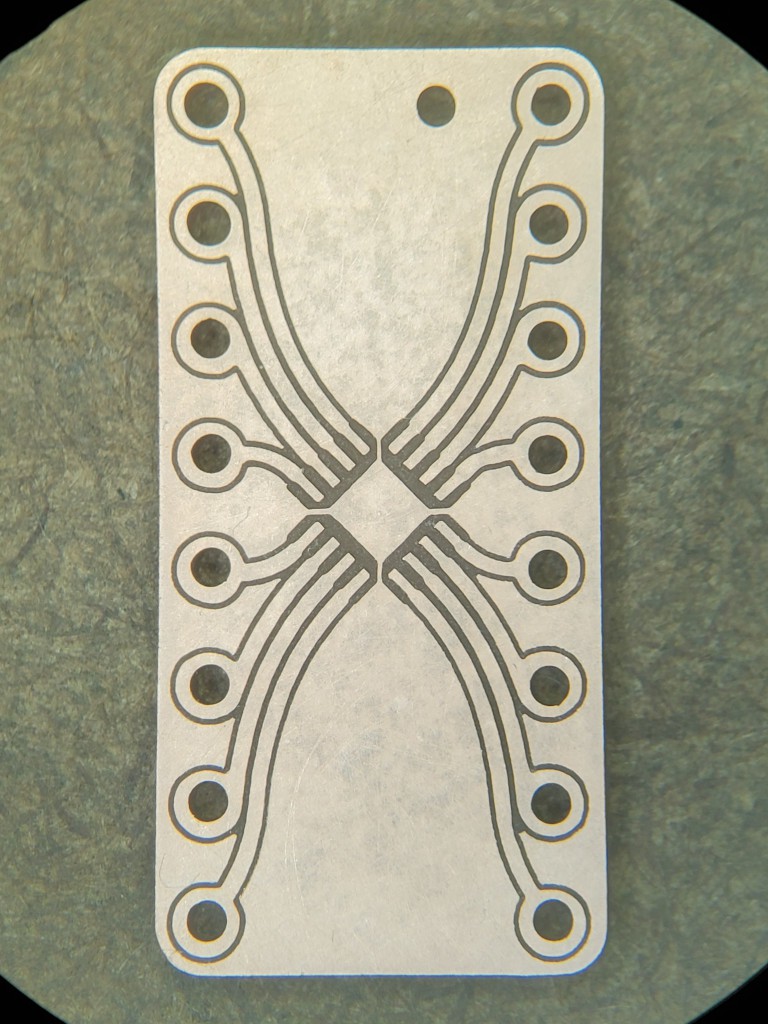
QFN-16 breakout (3mm x 3mm package, 0.5mm pitch, 1.7mm pad)
05/02/2023 at 21:34 • 0 commentsApparently "QFN" is a broad category and "QFN-16" doesn't mean much without parenthetical elaboration. The buried point: 0.5mm pin pitch:
![]()
That beats earlier 0.65mm "fine pitch" results.
Yes, the two top-left holes are a little bigger. Getting through the whole process without error eludes me. Defaults and scripting in the toolchain (mainly FlatCAM & bCNC) would help, but first efforts at that haven't yielded much yet. In this case, I (i.e. it) drilled all the holes with a 0.9mm drill (25mil * 2^0.5), then switched the drill for a 1mm 2-flute end mill to cut the outline, then watched it re-drill two holes before remembering to load the cutout file. Sigh. (Earlier I tried plunging holes with the 1mm end mill, which would save a tool change, and which worked until the piece where each hole got shallower as end of the bit got duller.) -
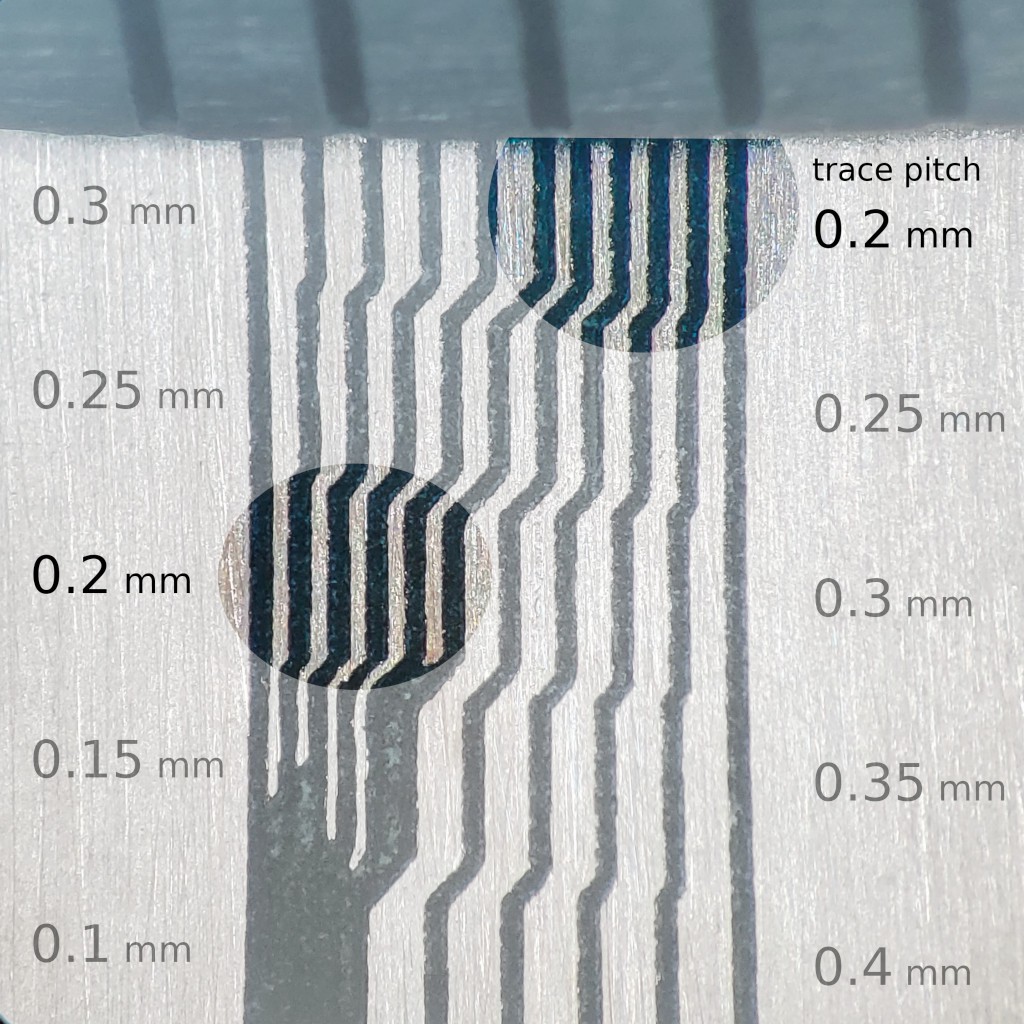
0.2 mm center-to-center circuit board traces
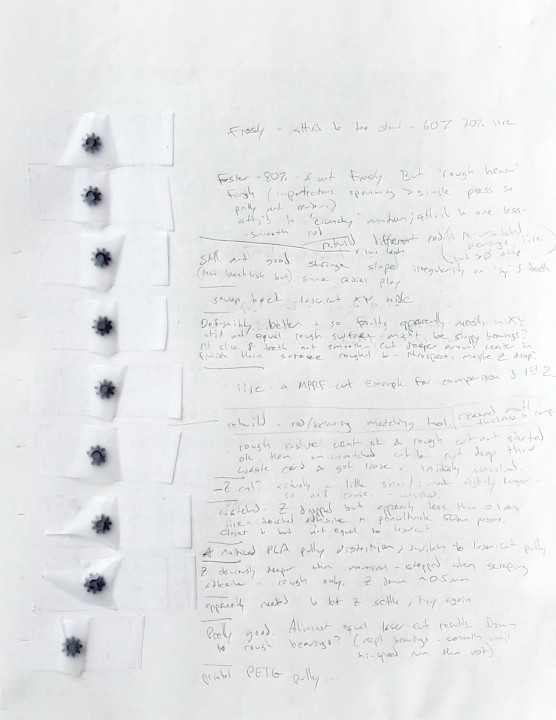
04/28/2023 at 21:14 • 0 comments- getting the 3d printed XY stage sorted well enough to match the laser-cut version
- some "0.1 mm" Vbits are more equal than others
![]()
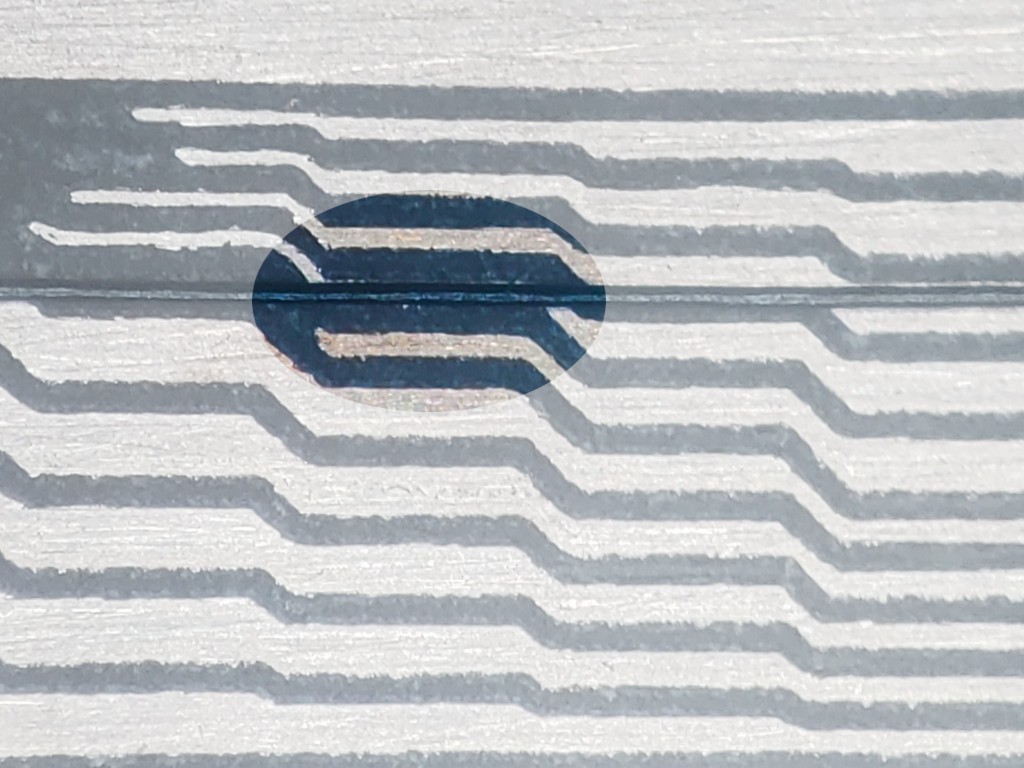
At 0.2 mm pitch, the remaining copper is pretty near exactly one hairsbreadth:
![]()
...and the 0.15 mm traces -- even more thin than a hair -- aren't completely obliterated. The ends anchored to the 0.2 mm traces fared better than the ends that got cut free at the last pitch shrink to 0.1 mm. Maybe <0.2mm could work for short straight links between less thin copper areas -- like sneaking a trace between fine-pitch IC pins? Counting copper and two cuts, that would get a trace through a 0.3 mm gap or maybe smaller.
-
Change one thing at a time. Or not.
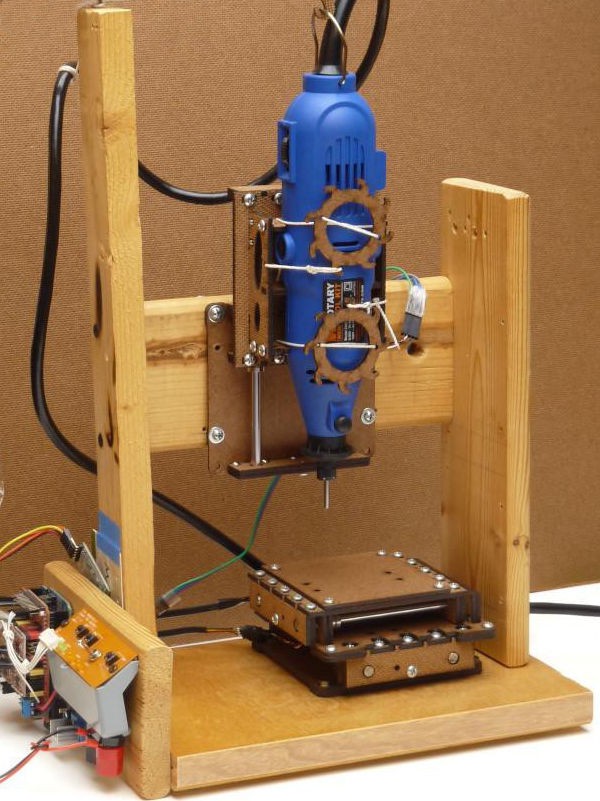
04/22/2023 at 20:20 • 0 commentsThis appears to be working well enough to risk saying so.
![]()
Little stepper+screw units for $5 shipped got this project started. That price has multiplied while the cost of longer but otherwise similar units has come down some. So I wanted to try stretching the XY dimensions a little to fit the longer screws.
One thing.
Simples, right? But people asking about 3d printing and Micro Center dumping Enders. But design for 3d printing is different. But doable. But the frame/box limits longer X travel, which doesn't actually prevent testing. But thinking about different frame. XY works but not great so rebuild, and thinking about accessory stuff that I could fit into the box but haven't yet but can start but halfway = finish before more actual testing, which wasn't great on the 2nd try either. Etc. I was getting a little fretty about dumping time into a new thing that wasn't matching the performance of the old thing.
Test, rebuild, digress, test, revert, test, digress, rebuild, test, tweak, test, ...
![]()
I think it'll be ok.
"One Thing" short leadscrews ➽ long (less short) leadscrews 55mm x 55mm work area ➽ 75mm x 75mm work area laser cut 2D parts ➽ 3d printed 3D parts 100mm rods ➽ 120mm rods many screws ➽ not so many zip ties compact stowed footprint ➽ compacter stowed footprint exposed electronics ➽ enclosed electronics unreachable hold/resume/abort & motor power switch; invisible indicator LEDs ➽ reachable hold/resume/abort & motor power switch; visible indicator LEDs "compact" but: add'l acquarium air pump + hose over the side, two power bricks, external switched AC for spindle, blower & vent fan (four power cords + spindle signal to hacked power strip) ➽ integrated chip blower, DC power, switched AC outlet for spindle (not actually in there yet), chip blower DC switched with spindle, vent fan DC switched as "coolant" (one power cord)
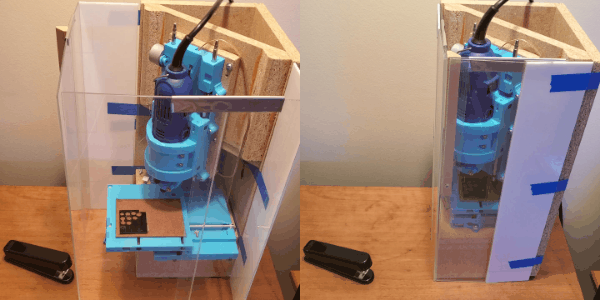
Two projectsBut really, this is two distinct and very different projects: the CNC mechanics and the frame.
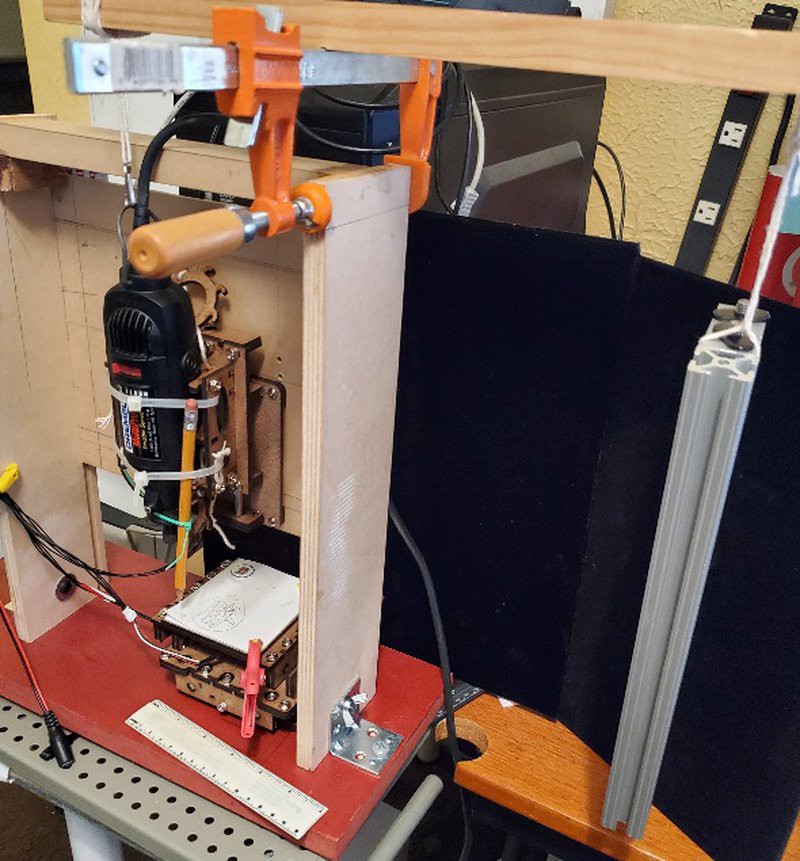
The frame can still be dirt simple if you just want the CNC stuff to work.
![]()
(simple frame pic cropped/edited to (mostly) hide the obsolete counterweight)
Fancy packaging is already its own project: #"Desk Accessory" CNC Milling Machine. That project has been pretty static so far but this iteration brings it more to the front. More about fancy packaging will probably appear in that project instead of this one here.
I haven't decided yet whether to continue writing about the 3d printed CNC mechanics here, or to start a new project for that. It's basically the same mechanics, but also a significantly different "project" if you want to build one. I do plan to post at least STLs, maybe CAD, and info for building one.
-
Brass (thin)
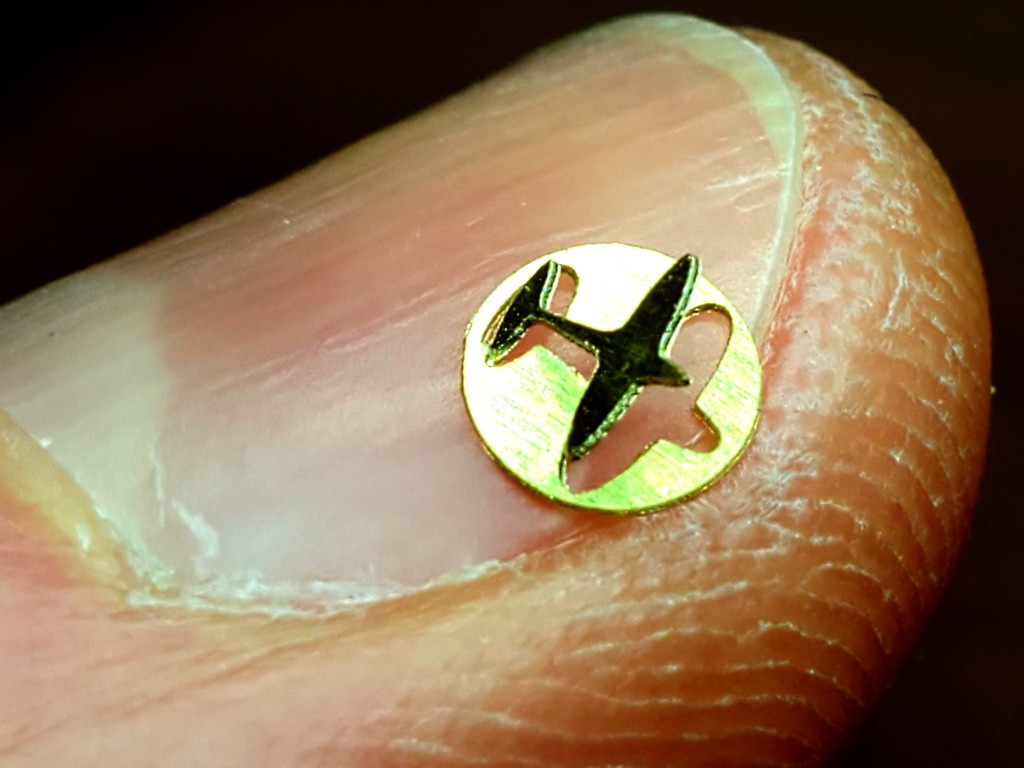
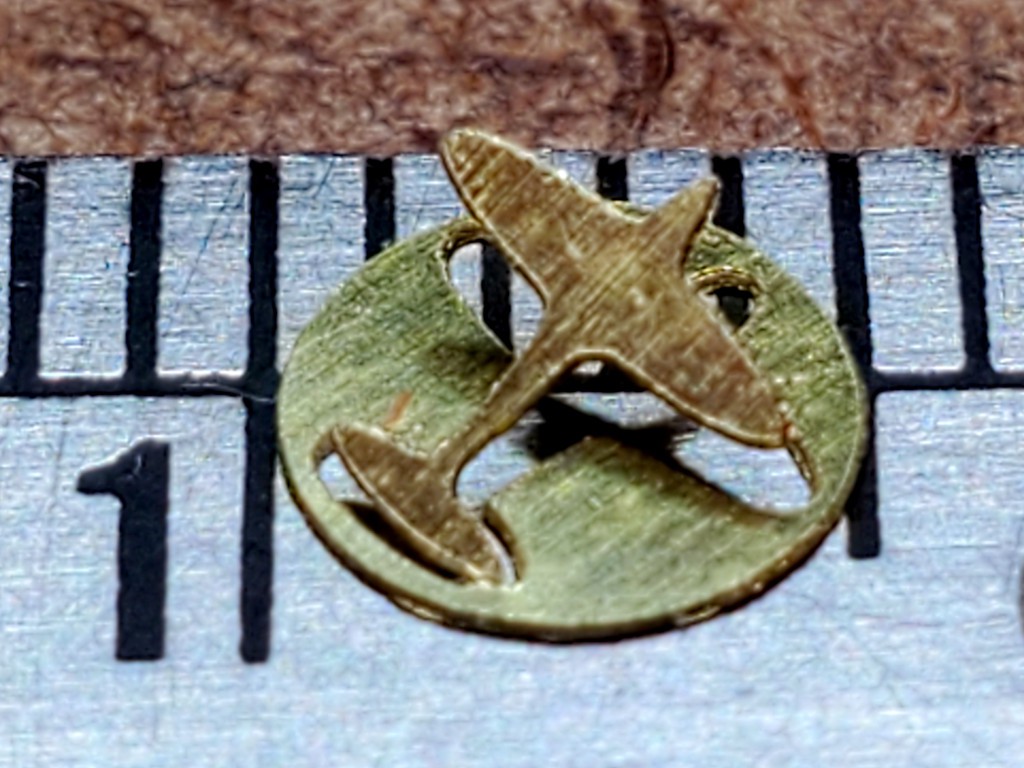
03/05/2023 at 04:18 • 0 commentsOk, it's just 0.005" / 0.12mm shim stock. But brass is harder than copper and 0.005" is thicker than 1oz copper cladding, so that's a capability expansion.
![]()
Cut with a 0.1mm 30° V-bit.
![]()
Cutting more substantial brass stock with an actual milling cutter remains to be tried.
... and just for fun, I tried skimming the side of a razor blade:
![]()
That produced a very small pile of metal slivers, so it wasn't just scratching the steel. Interesting. I didn't try to do any more with that today. Also interesting: at this scale, there's enough magnetic attraction between the steel blade and slivers thereof that the slivers don't leave the immediate area around the action. Convenient because, not expecting to cut anything ferrous or particularly hard, I haven't given much thought to keeping magnetic or hard bits out of the works. Dunno if the blade was already magnetized or magnetized by cutting.
-
new Z: killed the counterweight
01/18/2023 at 05:11 • 2 commentsNearly half a year since first log about dumping the Z counterweight, maybe increasing stiffness, and further reducing cost, here's the goods: Instructable; CAD.
![]()
This Z axis has hit the same micron (±0.8μm) more than 200 times in a row over most of an hour of Z probes in a "Minamil" rig (this project). Practical repeatability appears to be within 25μm (0.001") after warm-up. In other words, it can resolve micron-scale dimensional creep as stepper heat spreads through a structure.
So how did that take half a year?
- June: #MRRFX and whY rethink Z
- July: Z v3: counterweight delete (& other wins)
- August: Z v3 -- counterweight delete -- progress
- September: ... still sorting Z axis repeatability ... (& Byproduct of debugging Z repeatability)
- October: Z v3 survives slow learning -- and a bonfire of time
- NovemberDecemberJanuary: writing the how-to very slowly
Someone at Instructables apparently liked the 'ible enough to send it straight to the home page:![]()
-
strings
11/09/2022 at 23:38 • 0 comments(coders: relax -- not a trigger hazard)
So I'm trying to write up how to build a nouveau Z axis. The "find some string" part was getting too long. So instead I'll drop the TMI dump here to simplify that there
This design uses a bit of string on a pulley to winch up a load against gravity (or other orientation / opposing force).
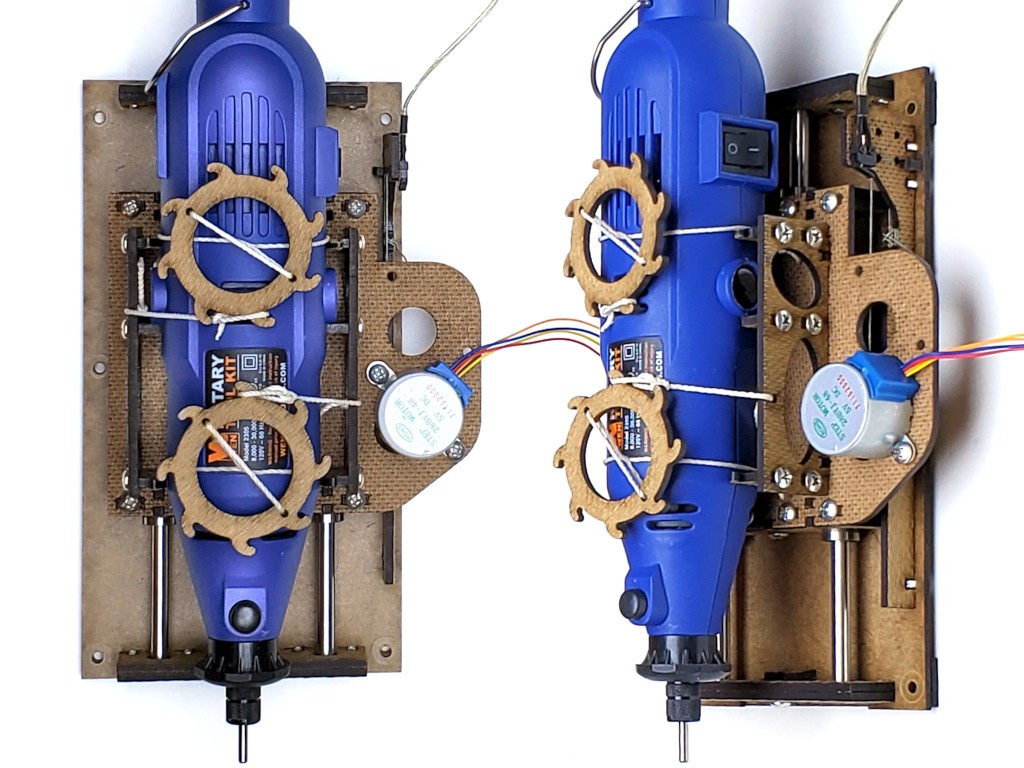
The previous design already used string as part of a low cost clamp for firmly holding a round tool with flat laser cut parts.
It looks like the two uses will require two different kinds of string.
Initially I used the same kind of string for both purposes, then shifted to preferring smaller diameter string for the hoist cord, then fully committed the pulley design to use <1mm cord for the hoist. Although I haven't actually tried it, I suspect that such small diameter cord that was also strong and tough enough to use for the tool clamp would be too much like a wire saw for that job. So, two kinds of string to do two kinds of things.
The tool holder uses a “Spanish windlass” variant to firmly clamp the tool in place. I’ve arbitrarily used some synthetic, maybe nylon, 3-strand laid cord about 1.4mm diameter that was handy when I started. I thought that it might be too thin and fragile and anticipated changing to something like 2mm braided cord (which I still suspect would be "nicer" so if you're parts shopping...). But so far it’s worked well enough for that purpose that I haven’t given it any further consideration. Parts are designed for cord up to about 2ish mm diameter. The cord needs to be flexible enough to bend around its own diameter repeatedly under tension without breaking fibers.
For the new tool lift idea, I started with the cord described above. That worked ok until I started tweaking for tighter repeatability. Based on nothing, I guessed that maybe it was thick enough to affect the effective diameter of the lifting pulley but irregularly so and didn’t always wrap onto the pulley in exactly the same way every time. Other things I tried:
- single strand of three-strand cord
- fail: too frizzy to work with
- heavy sewing thread
- works well
- better repeatability than 3-strand cord
- unknown composition “extra strong for buttons, carpets, very heavy fabrics”
- seems vulnerable to progressive wear
- redundant lift is cheap insurance against sudden breakage
- low stretch holds ~constant load at ~constant length
- braided Spectra® (UHMWPE) fishing line
- works great
- tested with 50lb strength, 0.38mm diameter (nominal)
- initially appears invulnerable to wear
- redundant lift is still cheap insurance
- practically zero stretch
- retail purchase of branded product = mo$t co$tly component, but generic UHMWPE exists
Because the pulley surface is only a few mm across, the 1.4mm cord I tried first only fit a couple of wraps on the pulley before it started to wrap back over itself, which changes the steps/distance ratio. I didn't worry about that since my application calls for precision only in the lower range of motion. I did try increasing the pulley diameter to cover the full range of motion in <two turns, and confirmed that a single motor had sufficient torque to manage that. Then I changed back to smaller pulley diameter for finer precision (more steps/distance) because, IME, the 28BYJ-48 motor steps are very unequal so two full steps is the minimum consistent stride. In the current version the pulley diameter makes two full steps ≈ 0.001"/25μm and covers the full range of motion in a little under three revolutions (plus at least a partial wrap at full extension). For ~3mm material, that requires <1mm diameter cord to fit all in one layer on the pulley.
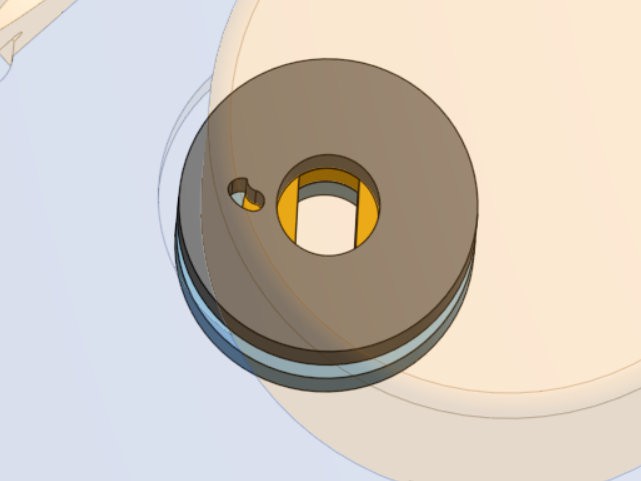
The current design further commits to <1mm diameter hoist cord where the cord attaches to the pulley. I doubt these motors are meant to bear lateral loads, so to minimize the degree of abuse I wanted to load the shaft closer to the motor rather than hanging the load out closer to the end of the shaft. The difference is only a few mm so maybe it doesn't matter, but anyhow because mumble foo the cord attaches on the motor side of the pulley. For larger pulley diameters I could turn the cord back through the pulley to the outward face and tie a stopper knot there. Also thicker cords make bigger stopper knots. With smaller pulley diameter there's less room to turn the cord back through the pulley without committing to a very small hole or very small margin of solid material around the shaft. Also I was hunting sources of variation and preferring a short direct path to a hard anchor over a convoluted path around corners of compliant material to a compliant anchor. That favored routing through the inner (motor side) face of the pulley directly to a loop around the motor shaft. But there is a sharp stamped metal edge around the shaft with smaller diameter than the pulley. So in the latest iteration the inner pulley face has a small radial slot from outside the larger pulley diameter to inside the smaller sharp edge diameter so the cord can cross that thickness of material diagonally from larger to smaller radii. That then makes a further commitment to using cord fine enough for a knot to fit in the small gap between the shaft and surrounding sharp edge.
Also the outer end of the slot has a little hook which is an attempt to make that piece bear some of the load of turning the cord around that sharp corner instead of letting the cord act as a wire saw to cut between the two layers of the laminated pulley.
![]()
- single strand of three-strand cord
-
Other builders
11/04/2022 at 05:21 • 0 commentsIn contrast to the preceding one-off hack, a central idea of this project has been predictable reproducibility from a short list of parts and adequate construction instructions. I can say so, but proving so remains for others to do.
So far a couple of people have contacted me about their builds-in-progress.
@alkrever has just produced first results from his XY table:
![]()
There's payoff for having some flanged hex head screws in the stash that I measured to decide how much clearance to allow for screw heads!
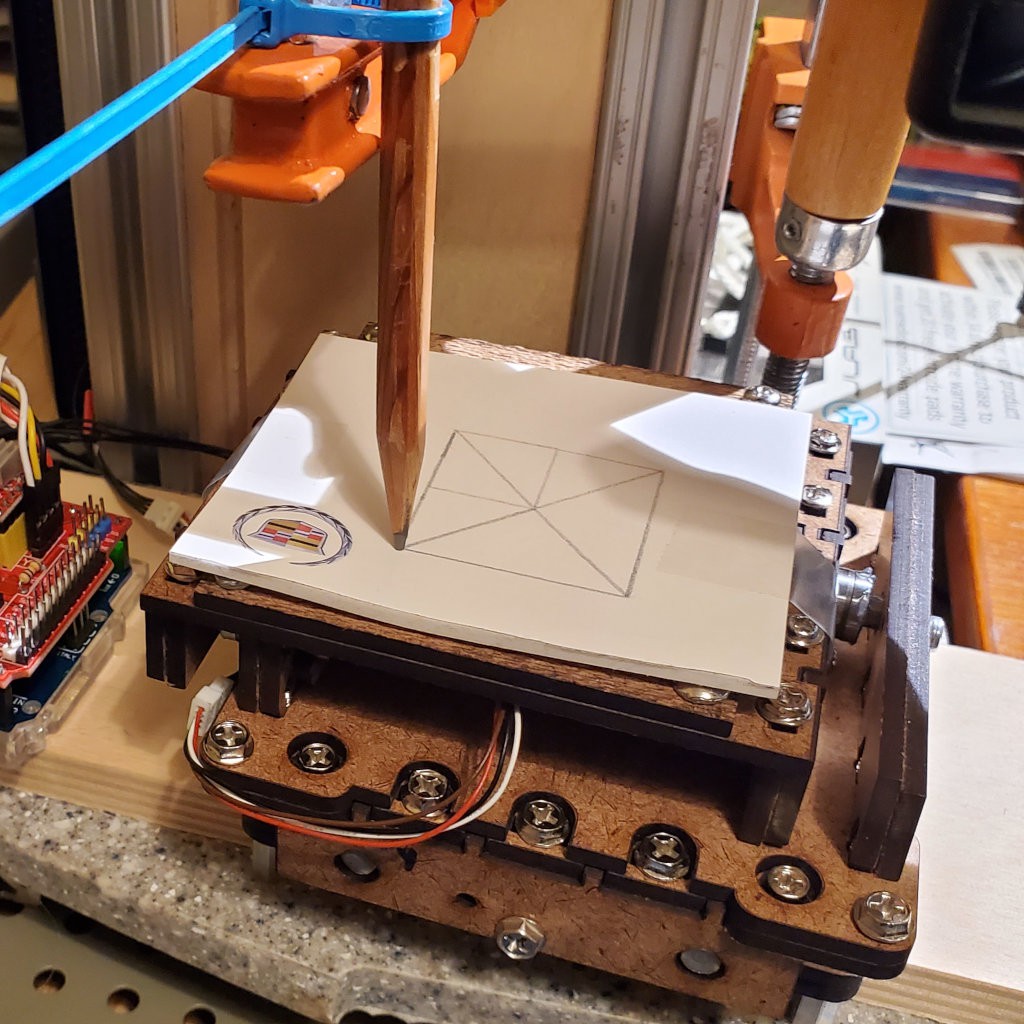
...@alkrever continues with Z axis + counterweight. "Currently I can draw fairly detailed and repeatable pencil sketches."
![]()
Another builder got the basic assembly together before Other Life suspected his work for the moment:
![]()
Wherever he found black screws, I think they look ... elegant:
![]()
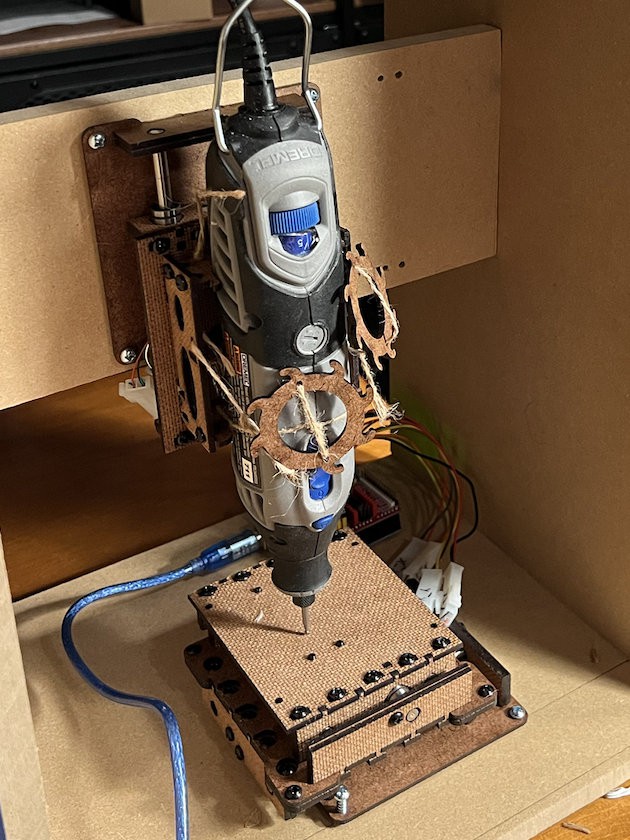
Minamil 2dc: a minimal CNC mill
Each axis: ̶$̶5̶ ̶$̶8̶ $10 motor+lead screw, 3x LM6UU, 3x 6mm x 100mm rod, 1/8in hardboard, PC case screws
 Paul McClay