-
Android App
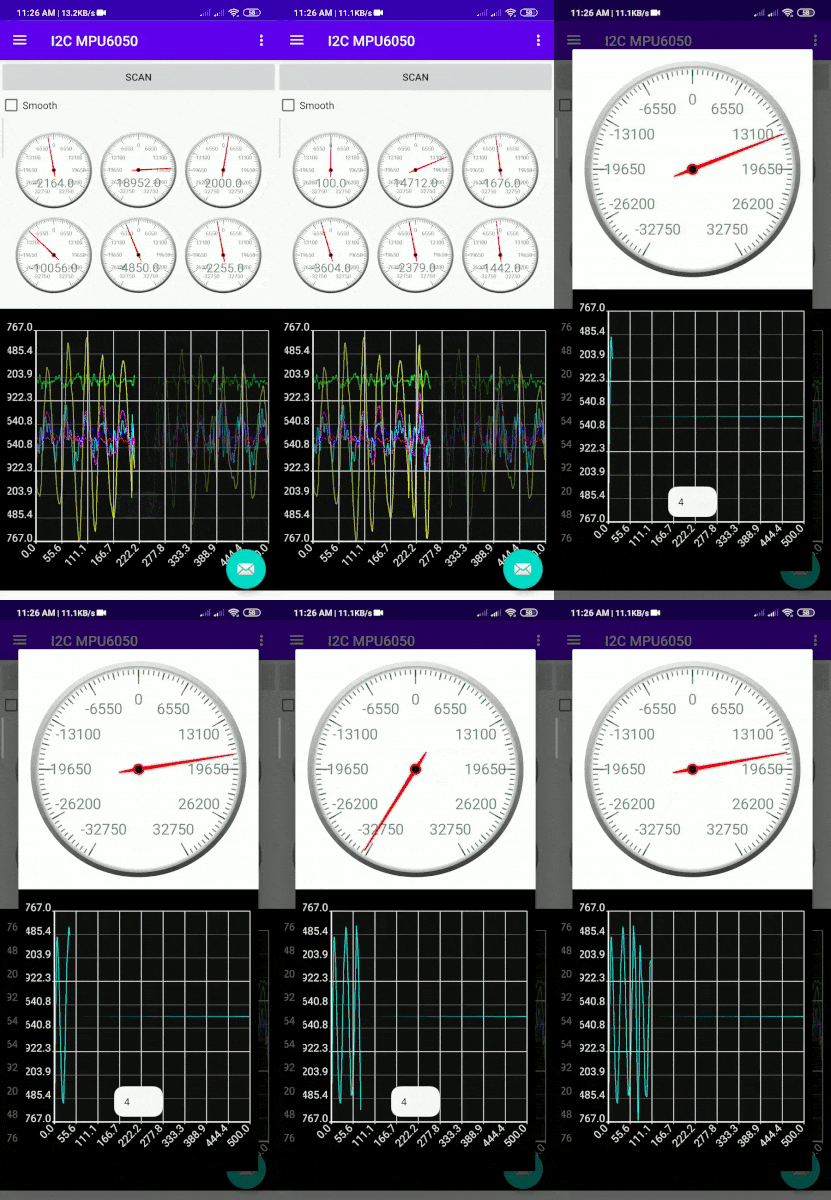
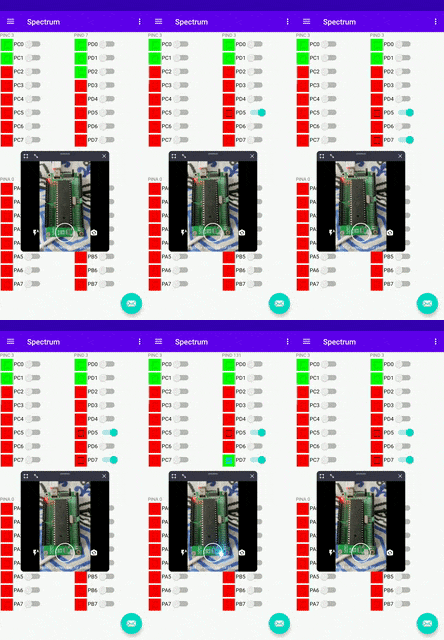
08/29/2020 at 23:14 • 0 commentsKuttyPy hardware can be connected to an android phone via a USB OTG cable.
The app has basic IO capabilities implemented, and can also log data from 2 sensors as of now
- MPU6050 - a 6 DOF intertial measurement unit
- BMP280 - Pressure and temperature sensor
![]()
Around 8 more common I2C sensors will soon be ported
![]()
The source code link is on the homepage, and is begging for contributors. I am very new to android coding, and it is rather painful.
The app currently supports only ATMEGA32 (version code 99), but can easily be extrapolated to include 238p(Arduino Uno/Nano). No modifications will be required for the I2C sensor loggers since the registers are the same on both processors. -
Monitor I2C Sensors
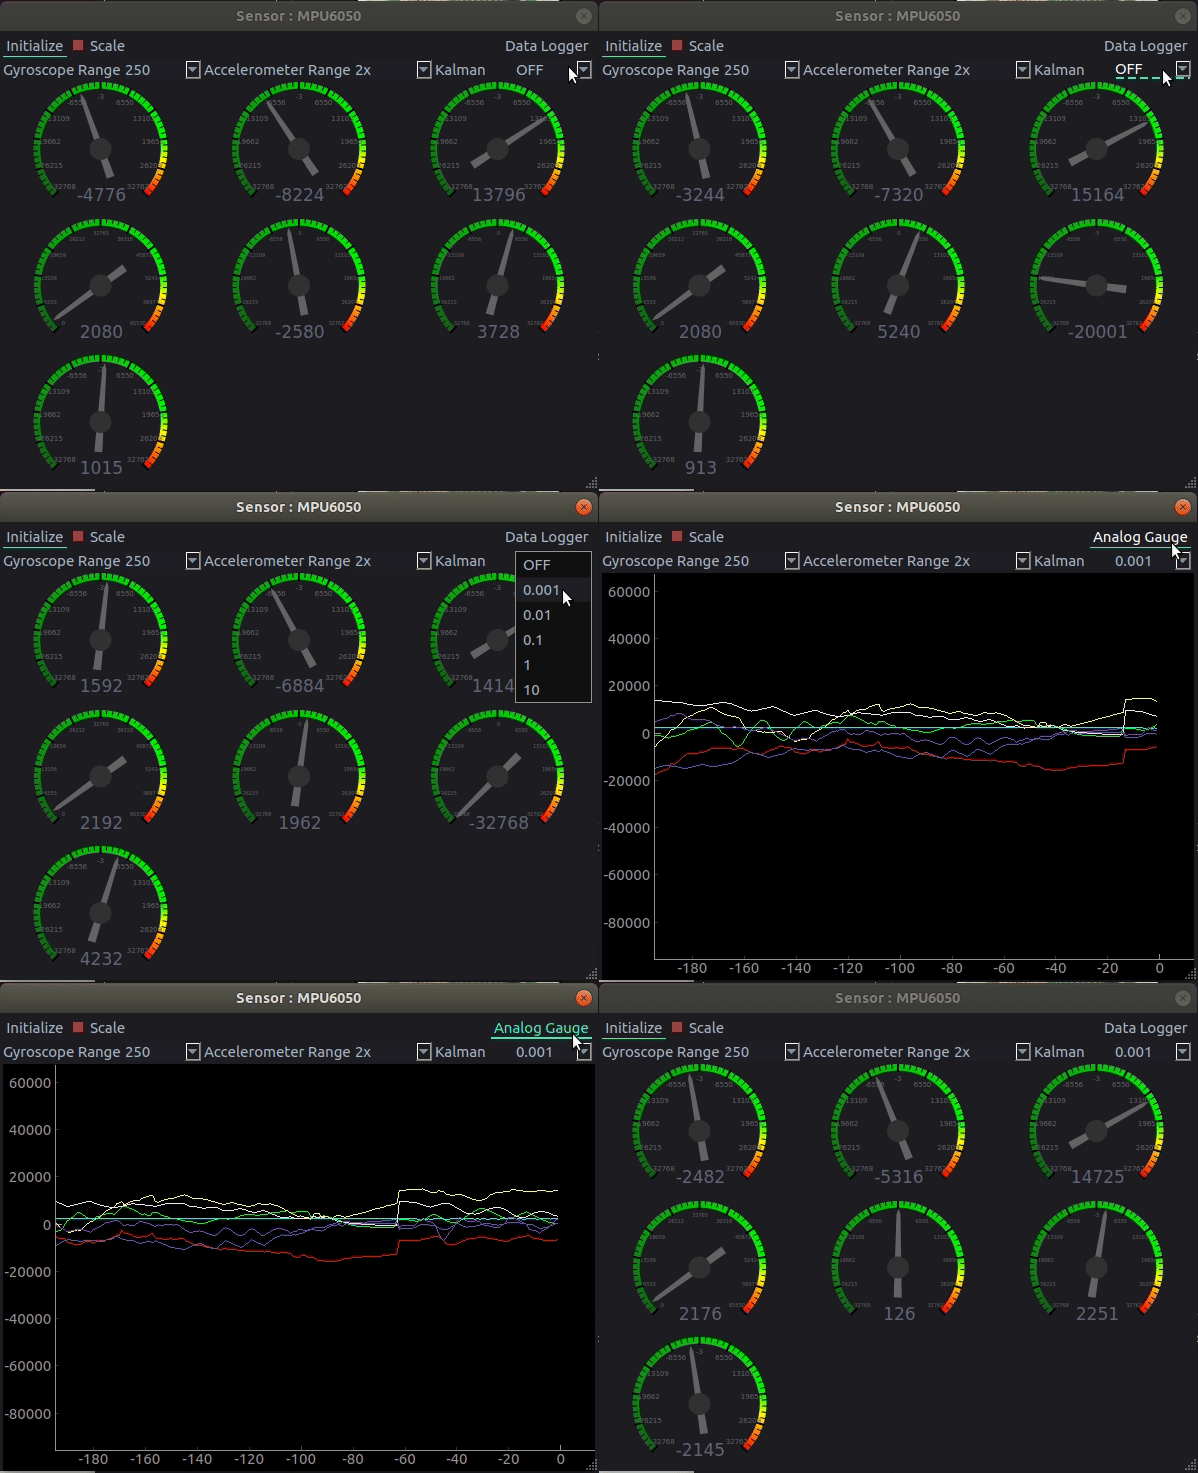
08/29/2020 at 23:08 • 0 comments![6 DOF inertial measurement unit MPU6050 Screenshot]()
Procedure for using I2C sensors
- Scan for Sensors
- Click to monitor via analog gauge
- List of I2C sensors supported thus far (Minimal data logging. Configuration options via the graphical utility might be incomplete)
- MPU6050 3 Axis Accelerometer, 3 axis Angular velocity (Gyro)
- MPU9250 9-DOF sensor
- MS5611 : 24 bit pressure and temperature sensor. Can resolve 15cm height variations
- TSL2561 Luminosity measurements
- BMP280 Pressure and Temperature sensor
- MCP4725 Single channel DAC
- PCA9685 PWM controller
- MLX90614 Passive IR
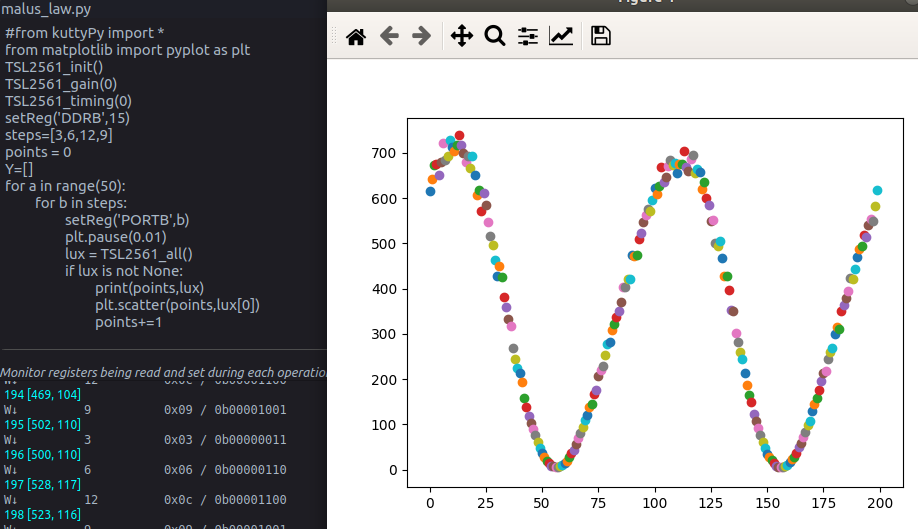
results from a Malus Law experiment carried out using a TSL2561 Luminosity sensor, a laser diode, two pieces of polarizers ripped out of an LCD screen, and a hollow shaft stepper motor
The analyzer was rotated step by step, and light intensity was recorded using the light sensor. It confirms maximum transmission when both polarizer and analyzer are parallel, and minimum when orthogonal. It does not go to exactly zero because ambient light was not fully blocked by leveraging a dark room. However, curve fitting showed that the shape was sinusoidal (cos^(theta))![https://kuttypy.readthedocs.io/en/latest/images/malus.png]()
-
R2R DAC based sine wave generator
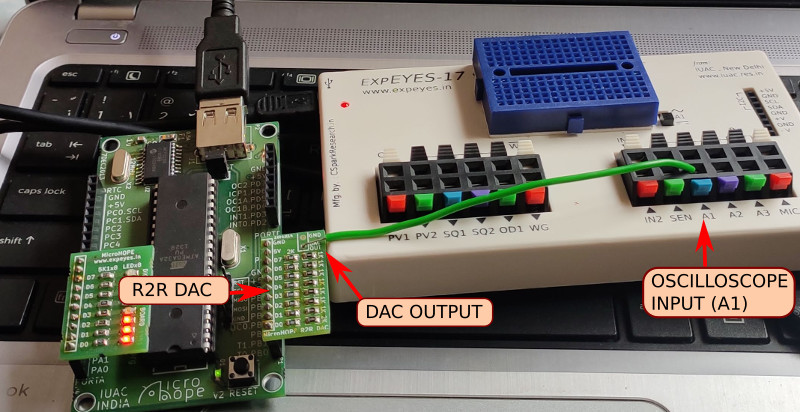
08/29/2020 at 23:05 • 0 commentsA simple resistor ladder Digital to Analog Convertor(DAC) was connected to PORTB.
Then, a C code was written to vary the output in a sinusoidal pattern by writing
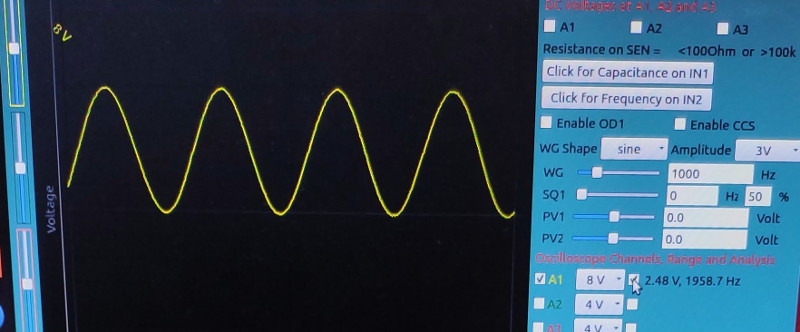
a periodic sequence of values to PORTBKuttyPy with R2R DAC Connected to ExpEYES17 oscilloscope
Scipy based sine fitting reveals the frequency to be 1958.7Hz![R2R DAC]()
![R2R DAC]()
Since calculation of sine values is resource intensive, a set of 128 values between 0 and 255 were generated beforehand and saved in the form of a table into the C code. This task is very easy with Python.
Create the sine table with Python
- Create an x axis from 0 to 2*pi
- Calculate sine of each point (Output between -1 and 1)
- Scale these values (-1 to 1) to 0-255
- round off to integers and print
Python Code
code to generate table
import numpy as np
x = np.linspace(0,np.pi*2,128) #128 points between 0 and 2*pi
y = 255*(np.sin(x) + 1)/2.
print([int(a) for a in y])
Output
[127, 133, 140, 146, 152, 158, 164, 170, 176, 182, 188, 193, 198, 203, 208, 213, 218, 222,
226, 230, 234, 237, 240, 243, 245, 247, 249, 251, 252, 253, 254, 254, 254, 254, 254, 253, 252, 250, 248, 246, 244, 241, 238, 235, 232, 228, 224, 220, 215, 211, 206, 201, 196, 190, 185, 179, 173, 167, 161, 155, 149, 143, 136, 130, 124, 118, 111, 105, 99, 93, 87, 81, 75,
69, 64, 58, 53, 48, 43, 39, 34, 30, 26, 22, 19, 16, 13, 10, 8, 6, 4, 2, 1, 0, 0, 0, 0, 0,
1, 2, 3, 5, 7, 9, 11, 14, 17, 20, 24, 28, 32, 36, 41, 46, 51, 56, 61, 66, 72, 78, 84, 90,
96, 102, 108, 114, 121, 127]
The final C code for sine waves
This iterates repeatedly through our sine table , and the output can be connected to any oscilloscope for viewing
#include <avr/io.h> // The table we made earlier using Python uint16_t table[] = {127,130,133,136,140,143,146,149,152,155,158,161,164,167,170,173,176,179,182,185,188,190,193,196,198,201,203,206,208,211,213,215,218,220,222,224,226,228,230,232,234,235,237,238,240,241,243,244,245,246,247,248,249,250,251,252,252,253,253,254,254,254,254,254,254,254,254,254,254,253,253,252,252,251,250,249,248,247,246,245,244,243,241,240,238,237,235,234,232,230,228,226,224,222,220,218,215,213,211,208,206,203,201,198,196,193,190,188,185,182,179,176,173,170,167,164,161,158,155,152,149,146,143,140,136,133,130,127,124,121,118,114,111,108,105,102,99,96,93,90,87,84,81,78,75,72,69,66,64,61,58,56,53,51,48,46,43,41,39,36,34,32,30,28,26,24,22,20,19,17,16,14,13,11,10,9,8,7,6,5,4,3,2,2,1,1,0,0,0,0,0,0,0,0,0,0,1,1,2,2,3,4,5,6,7,8,9,10,11,13,14,16,17,19,20,22,24,26,28,30,32,34,36,39,41,43,46,48,51,53,56,58,61,64,66,69,72,75,78,81,84,87,90,93,96,99,102,105,108,111,114,118,121,124,127}; int main (void) { uint16_t value=0,position = 0; DDRB = 255; // Data Direction Register for port B for(;;) { value = table[position++]; if(position==255){position=0;} /* WRITE VALUE TO DAC PORTB which should have a R2R DAC ladder*/ PORTB=value; } return 0; }- Save this code to example.c
- Open it using the kuttyPy software
- Compile and upload!
-
Upgrade an Arduino Uno to KuttyPy
08/29/2020 at 22:46 • 0 commentsReplace the arduino Uno bootloader with the kuttypy bootloader compiled from source at https://github.com/csparkresearch/KuttyPy-GUI/tree/master/docs/firmware
In the Python app , run the Graphical interface for Arduino Unopython3 KuttyPyUno
![]()
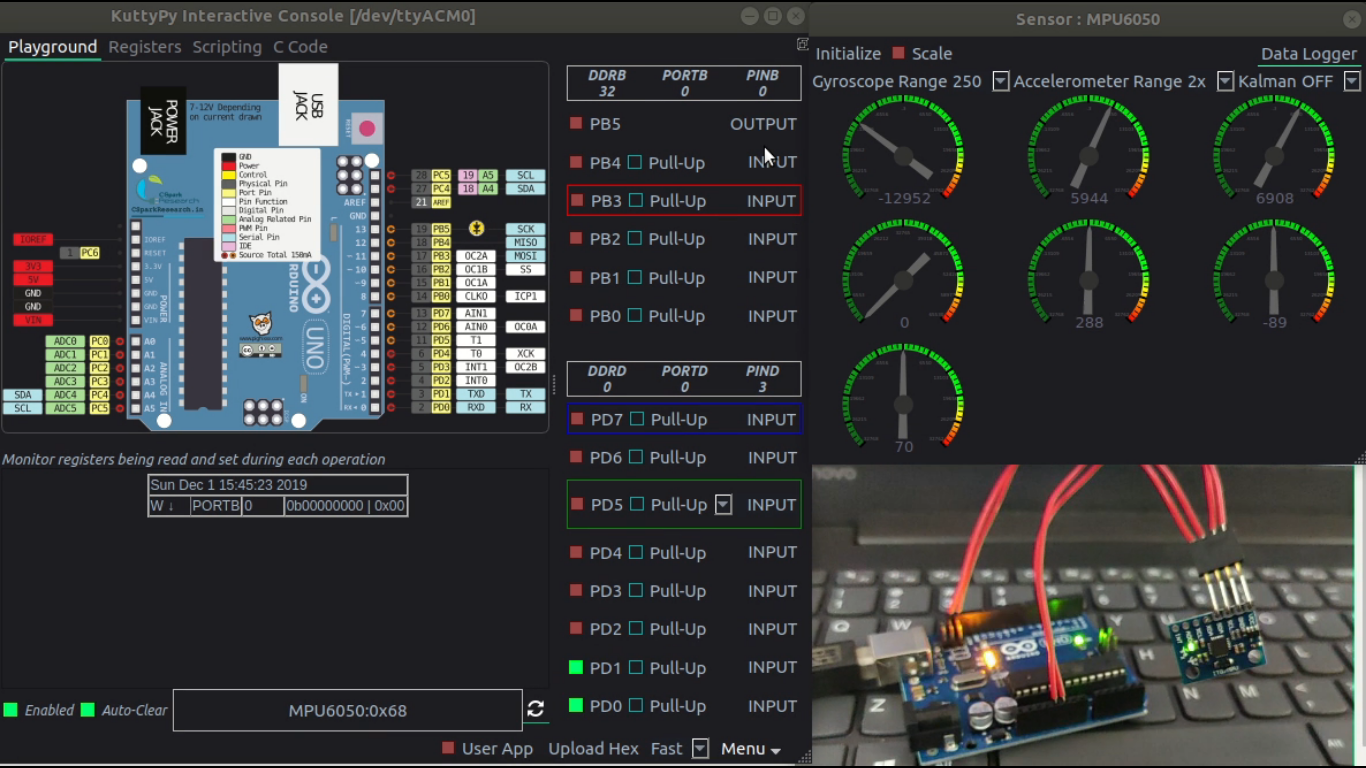
You're looking at an arduino uno running the kuttyPy bootloader, and the Python App reading values from an MPU6050 and showing them on nice looking Guages.
More at the project page : https://csparkresearch.in/kuttypy#Plug%20and%20Play%20%20I2C%20sensors
You can simply plug and play a range of I2C sensors, and also add support for more by modifying the Python Library. This is probably the most affordable sensor testing/logging jig out there
 Jithin