 Neil Lambeth
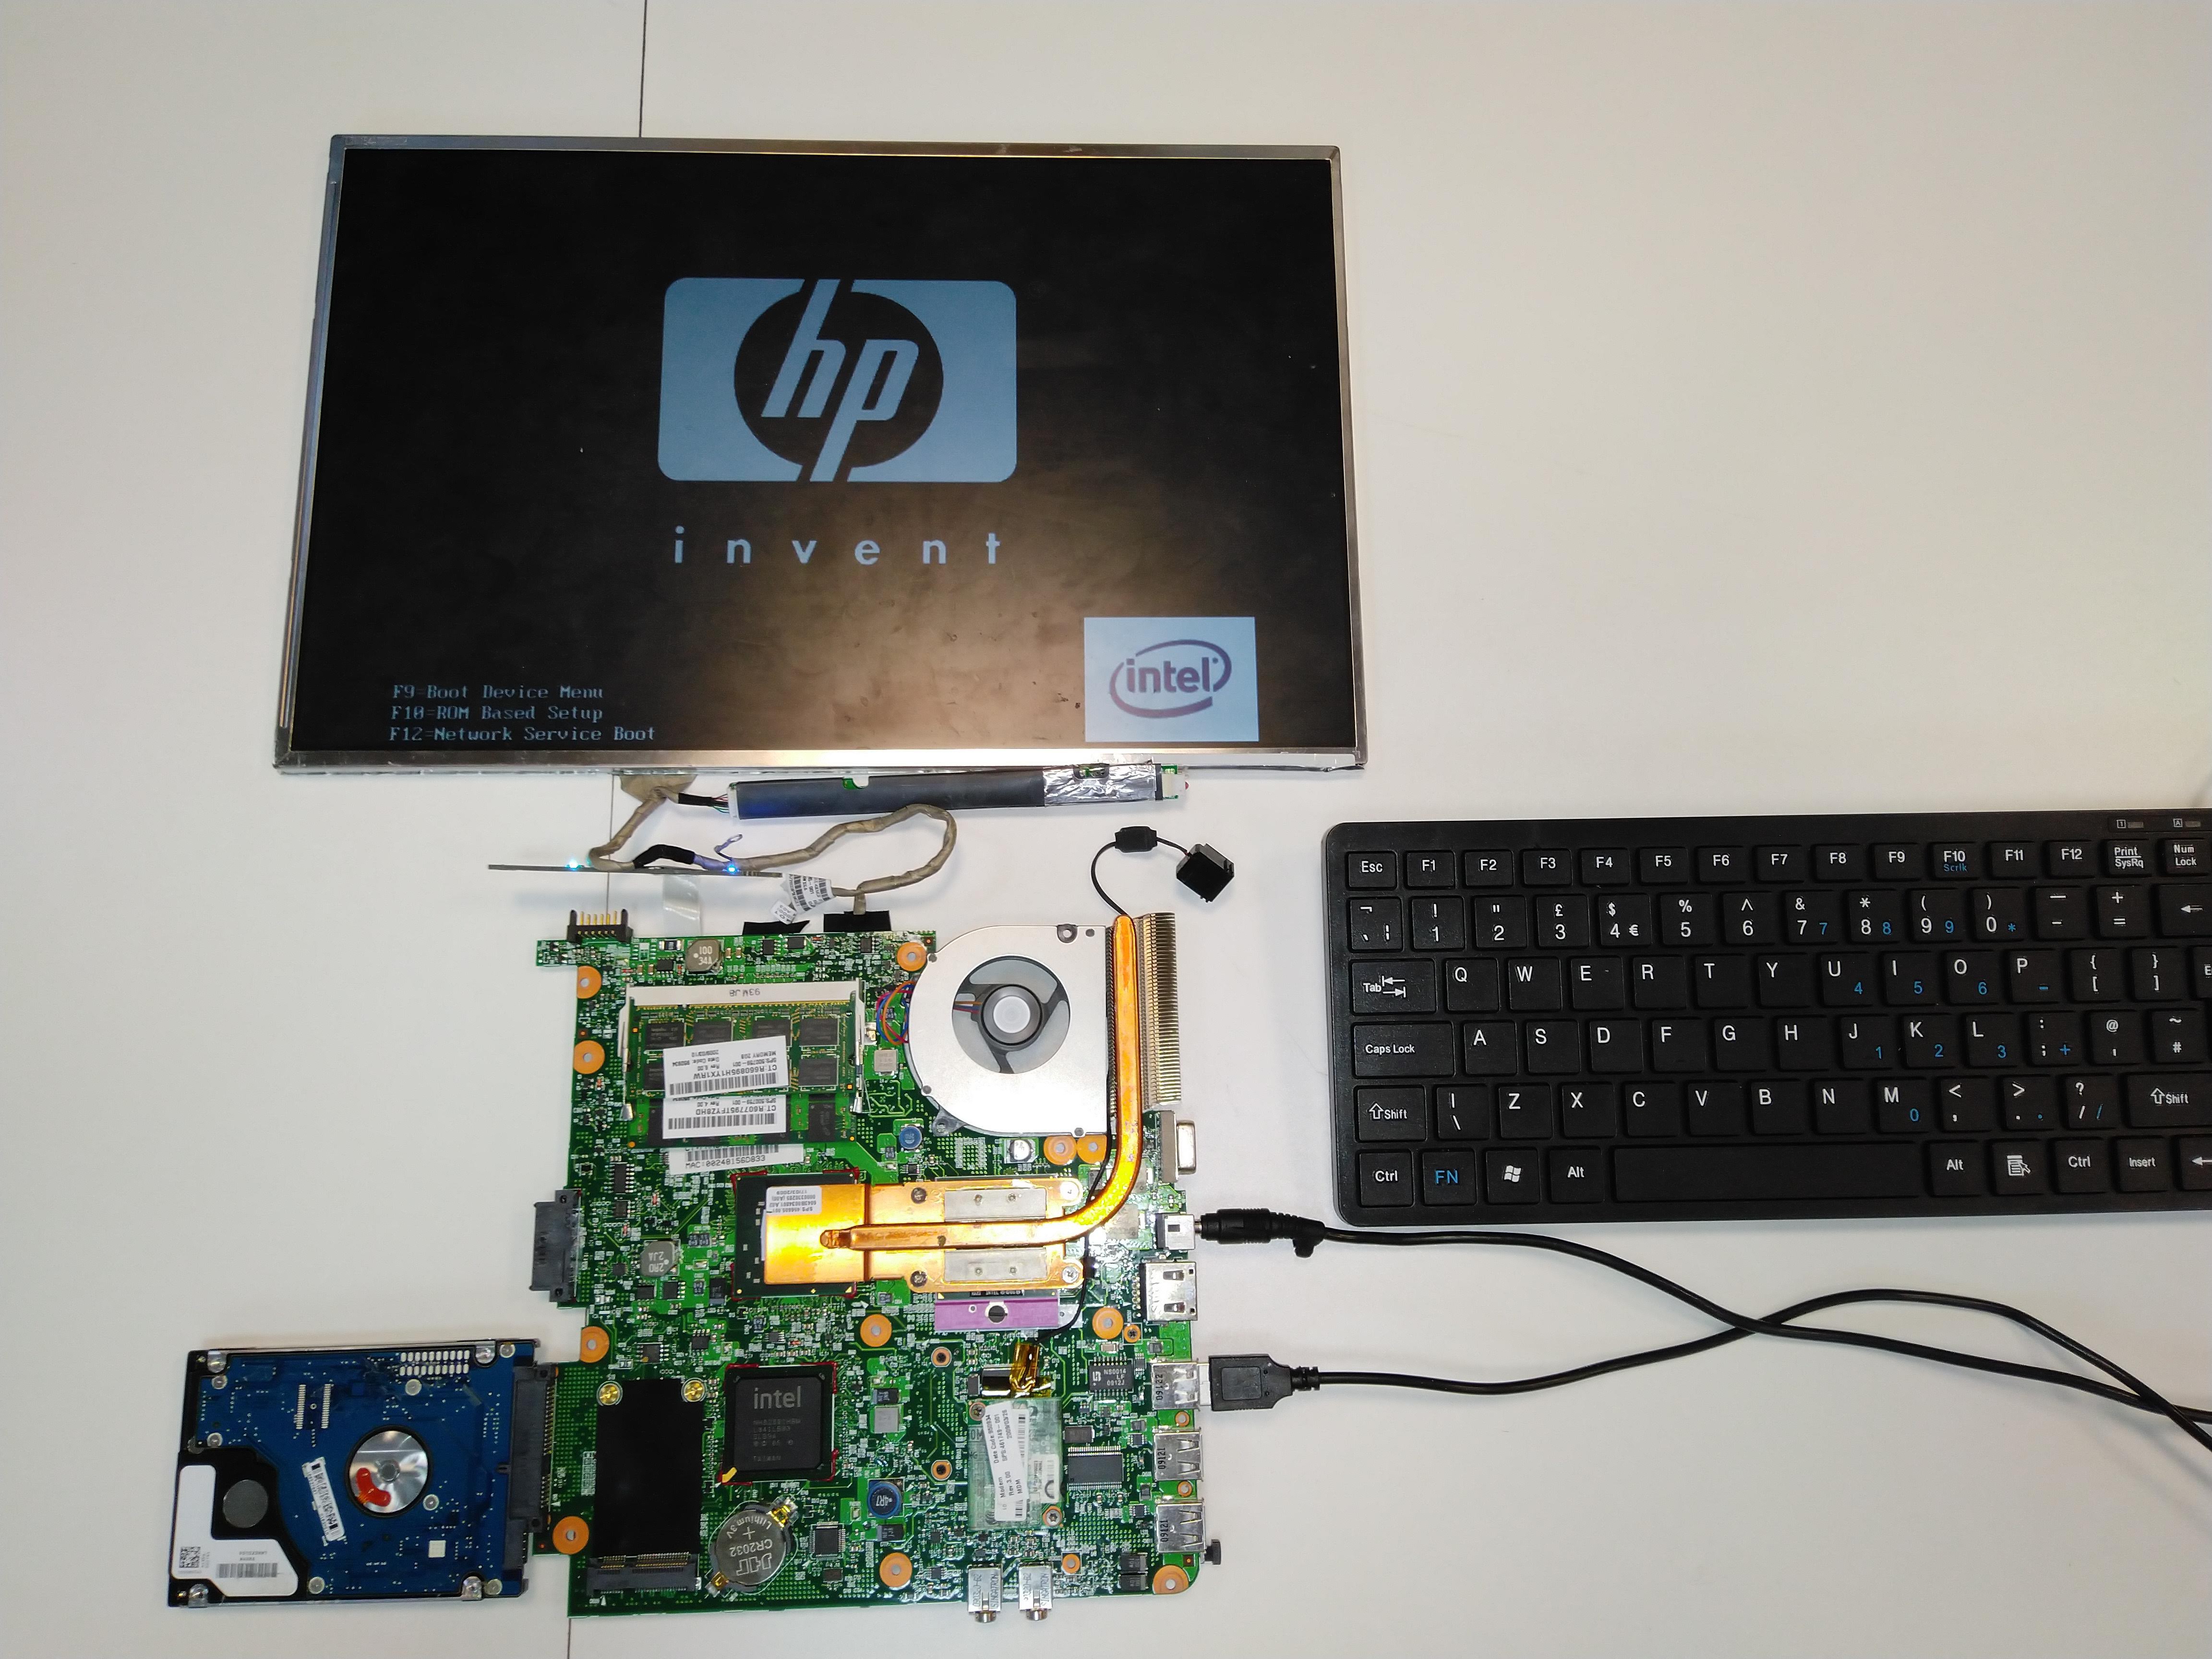
The motherboards were in good working order as were the screens, so I started to disassemble one. Once all the parts were removed, I connected a USB keyboard and powered it up. Everything worked so I set about designing a new housing to hold all of the bits.
There were a few things I wanted to achieve with this design.
1. Attached USB keyboard and mouse - cheap to replace if they get broken and fixed to the computer so they can't go missing.
2. Attached internal power supply unit - so It can't go missing and less chance of breaking.
3. Restricted access to the computer ports and switches - The students tend to fiddle with everything on the computers especially the WiFi switch, and plug things in where they're not supposed to be plugged in.
4. Portability, a carry handle and the ability to store the keyboard and mouse.
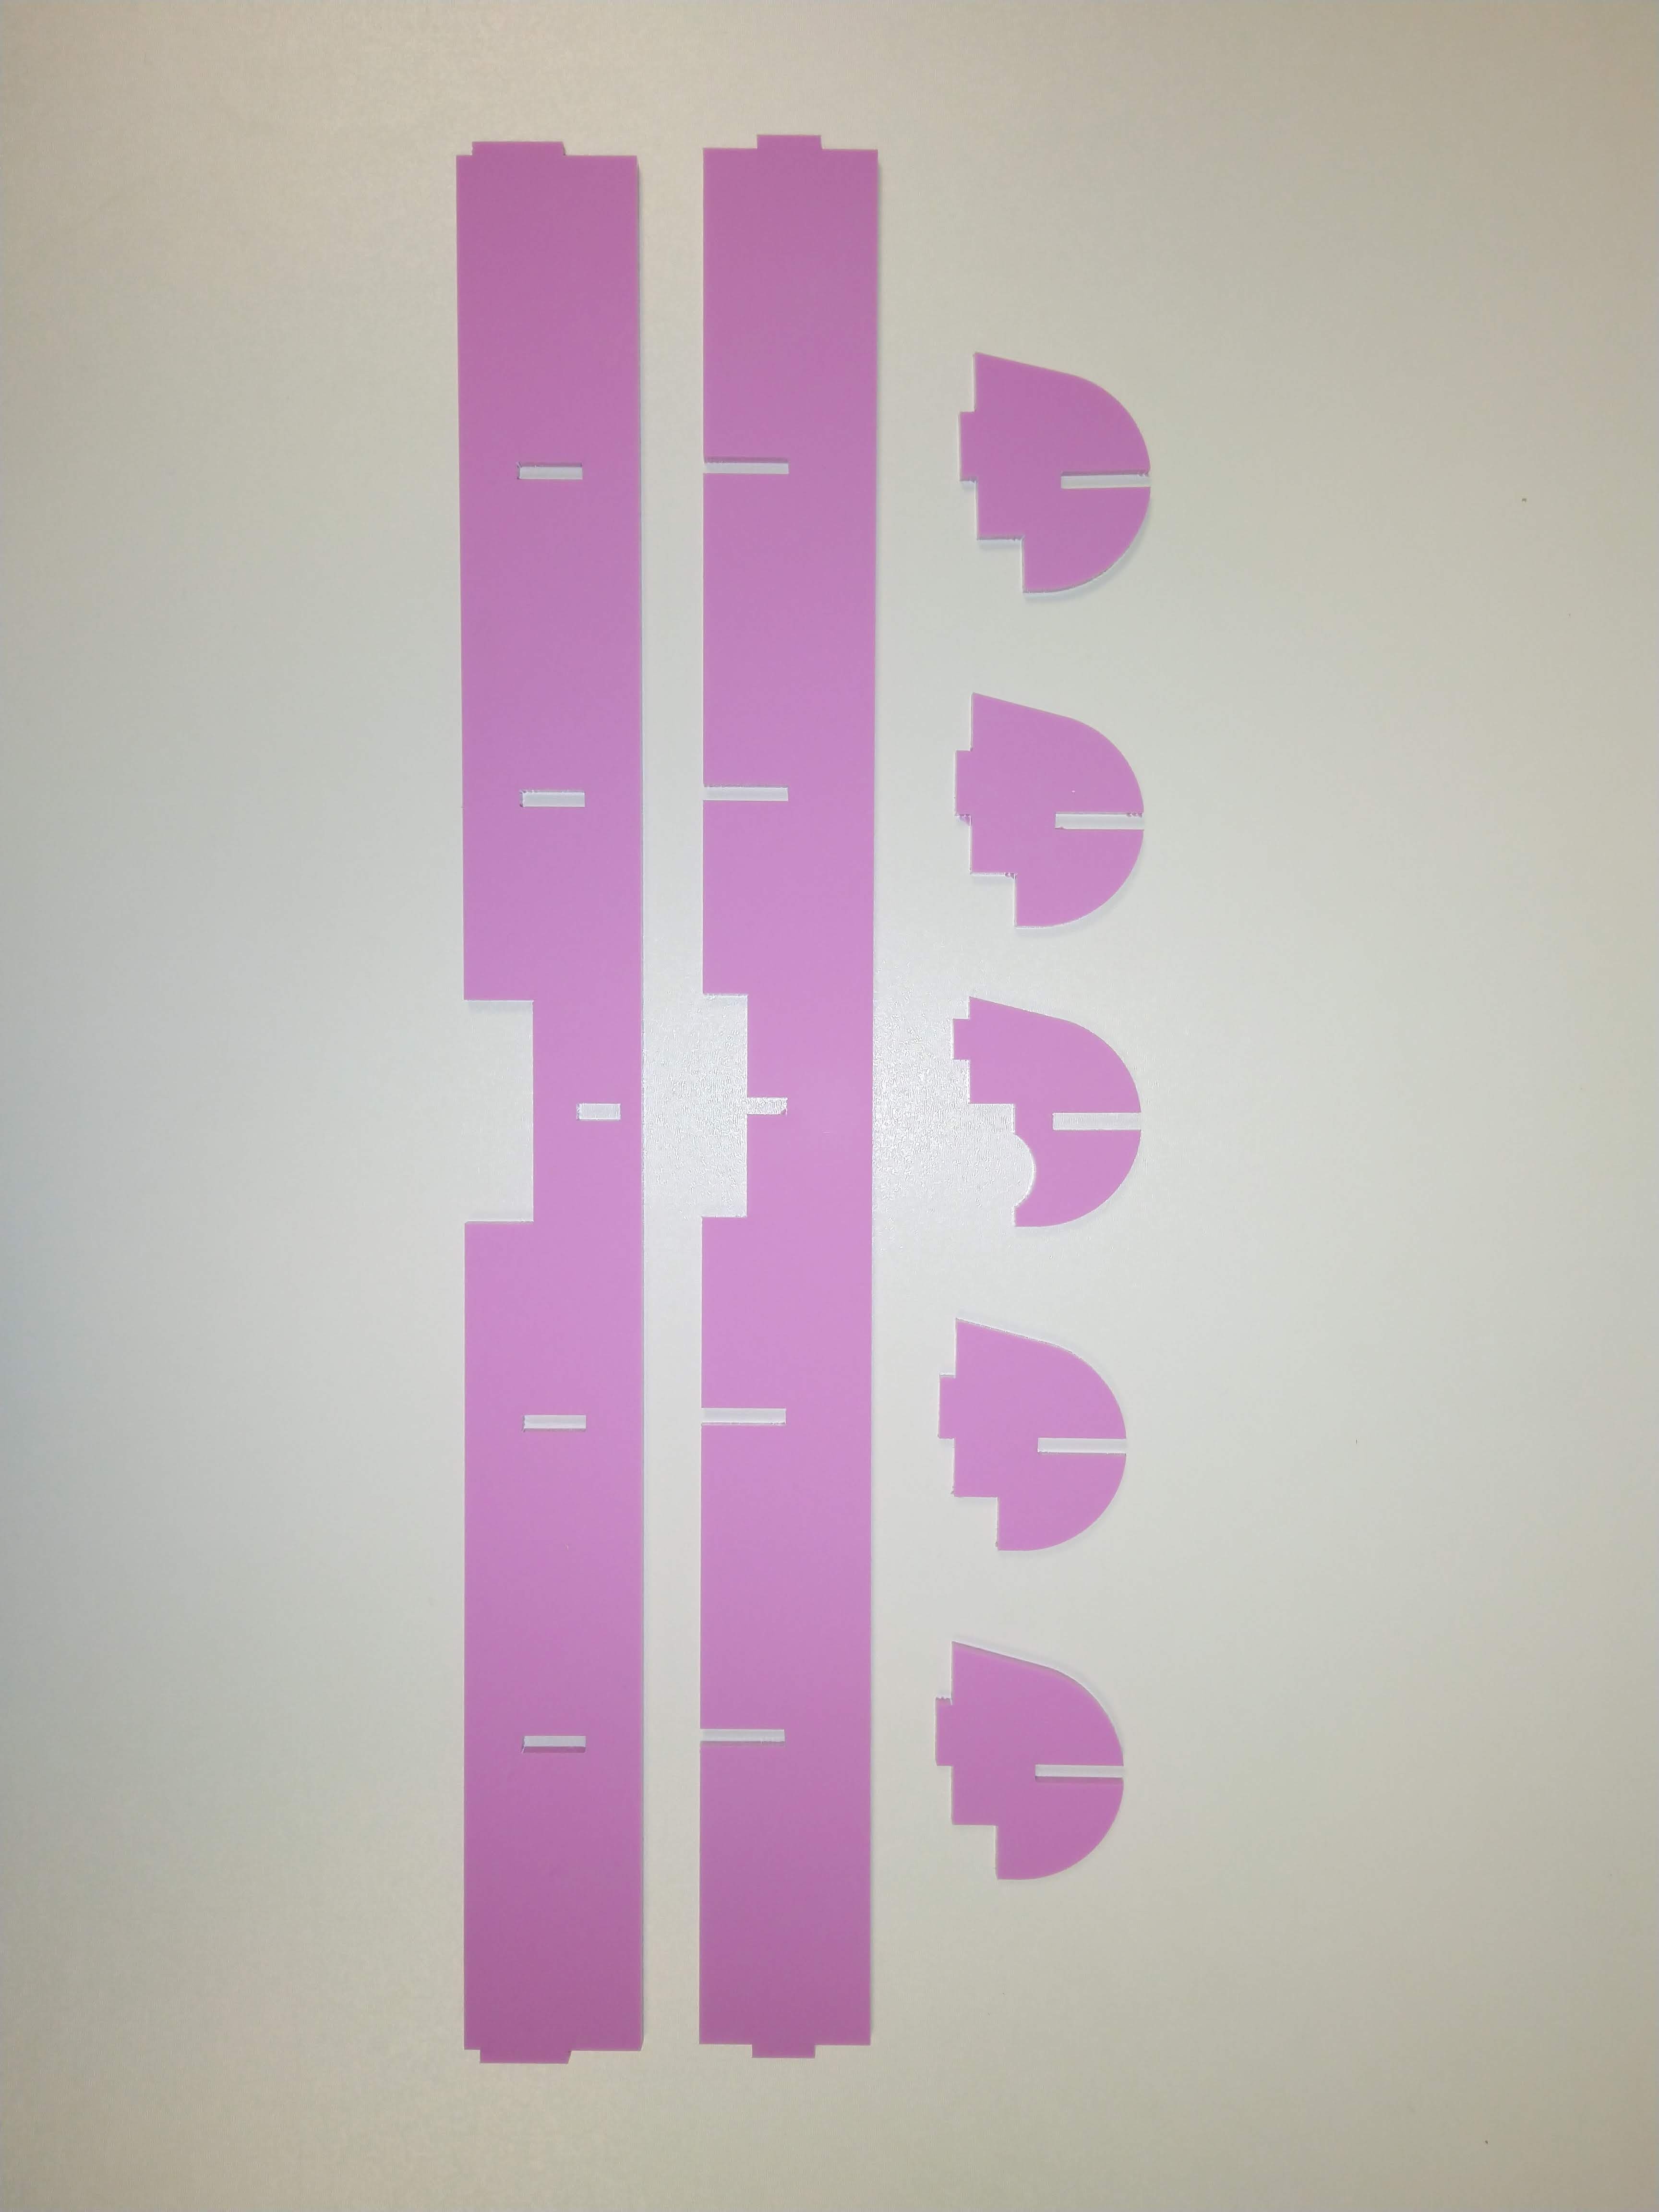
5. To be manufactured from acrylic using a Laser cutter.
5. Good looks!
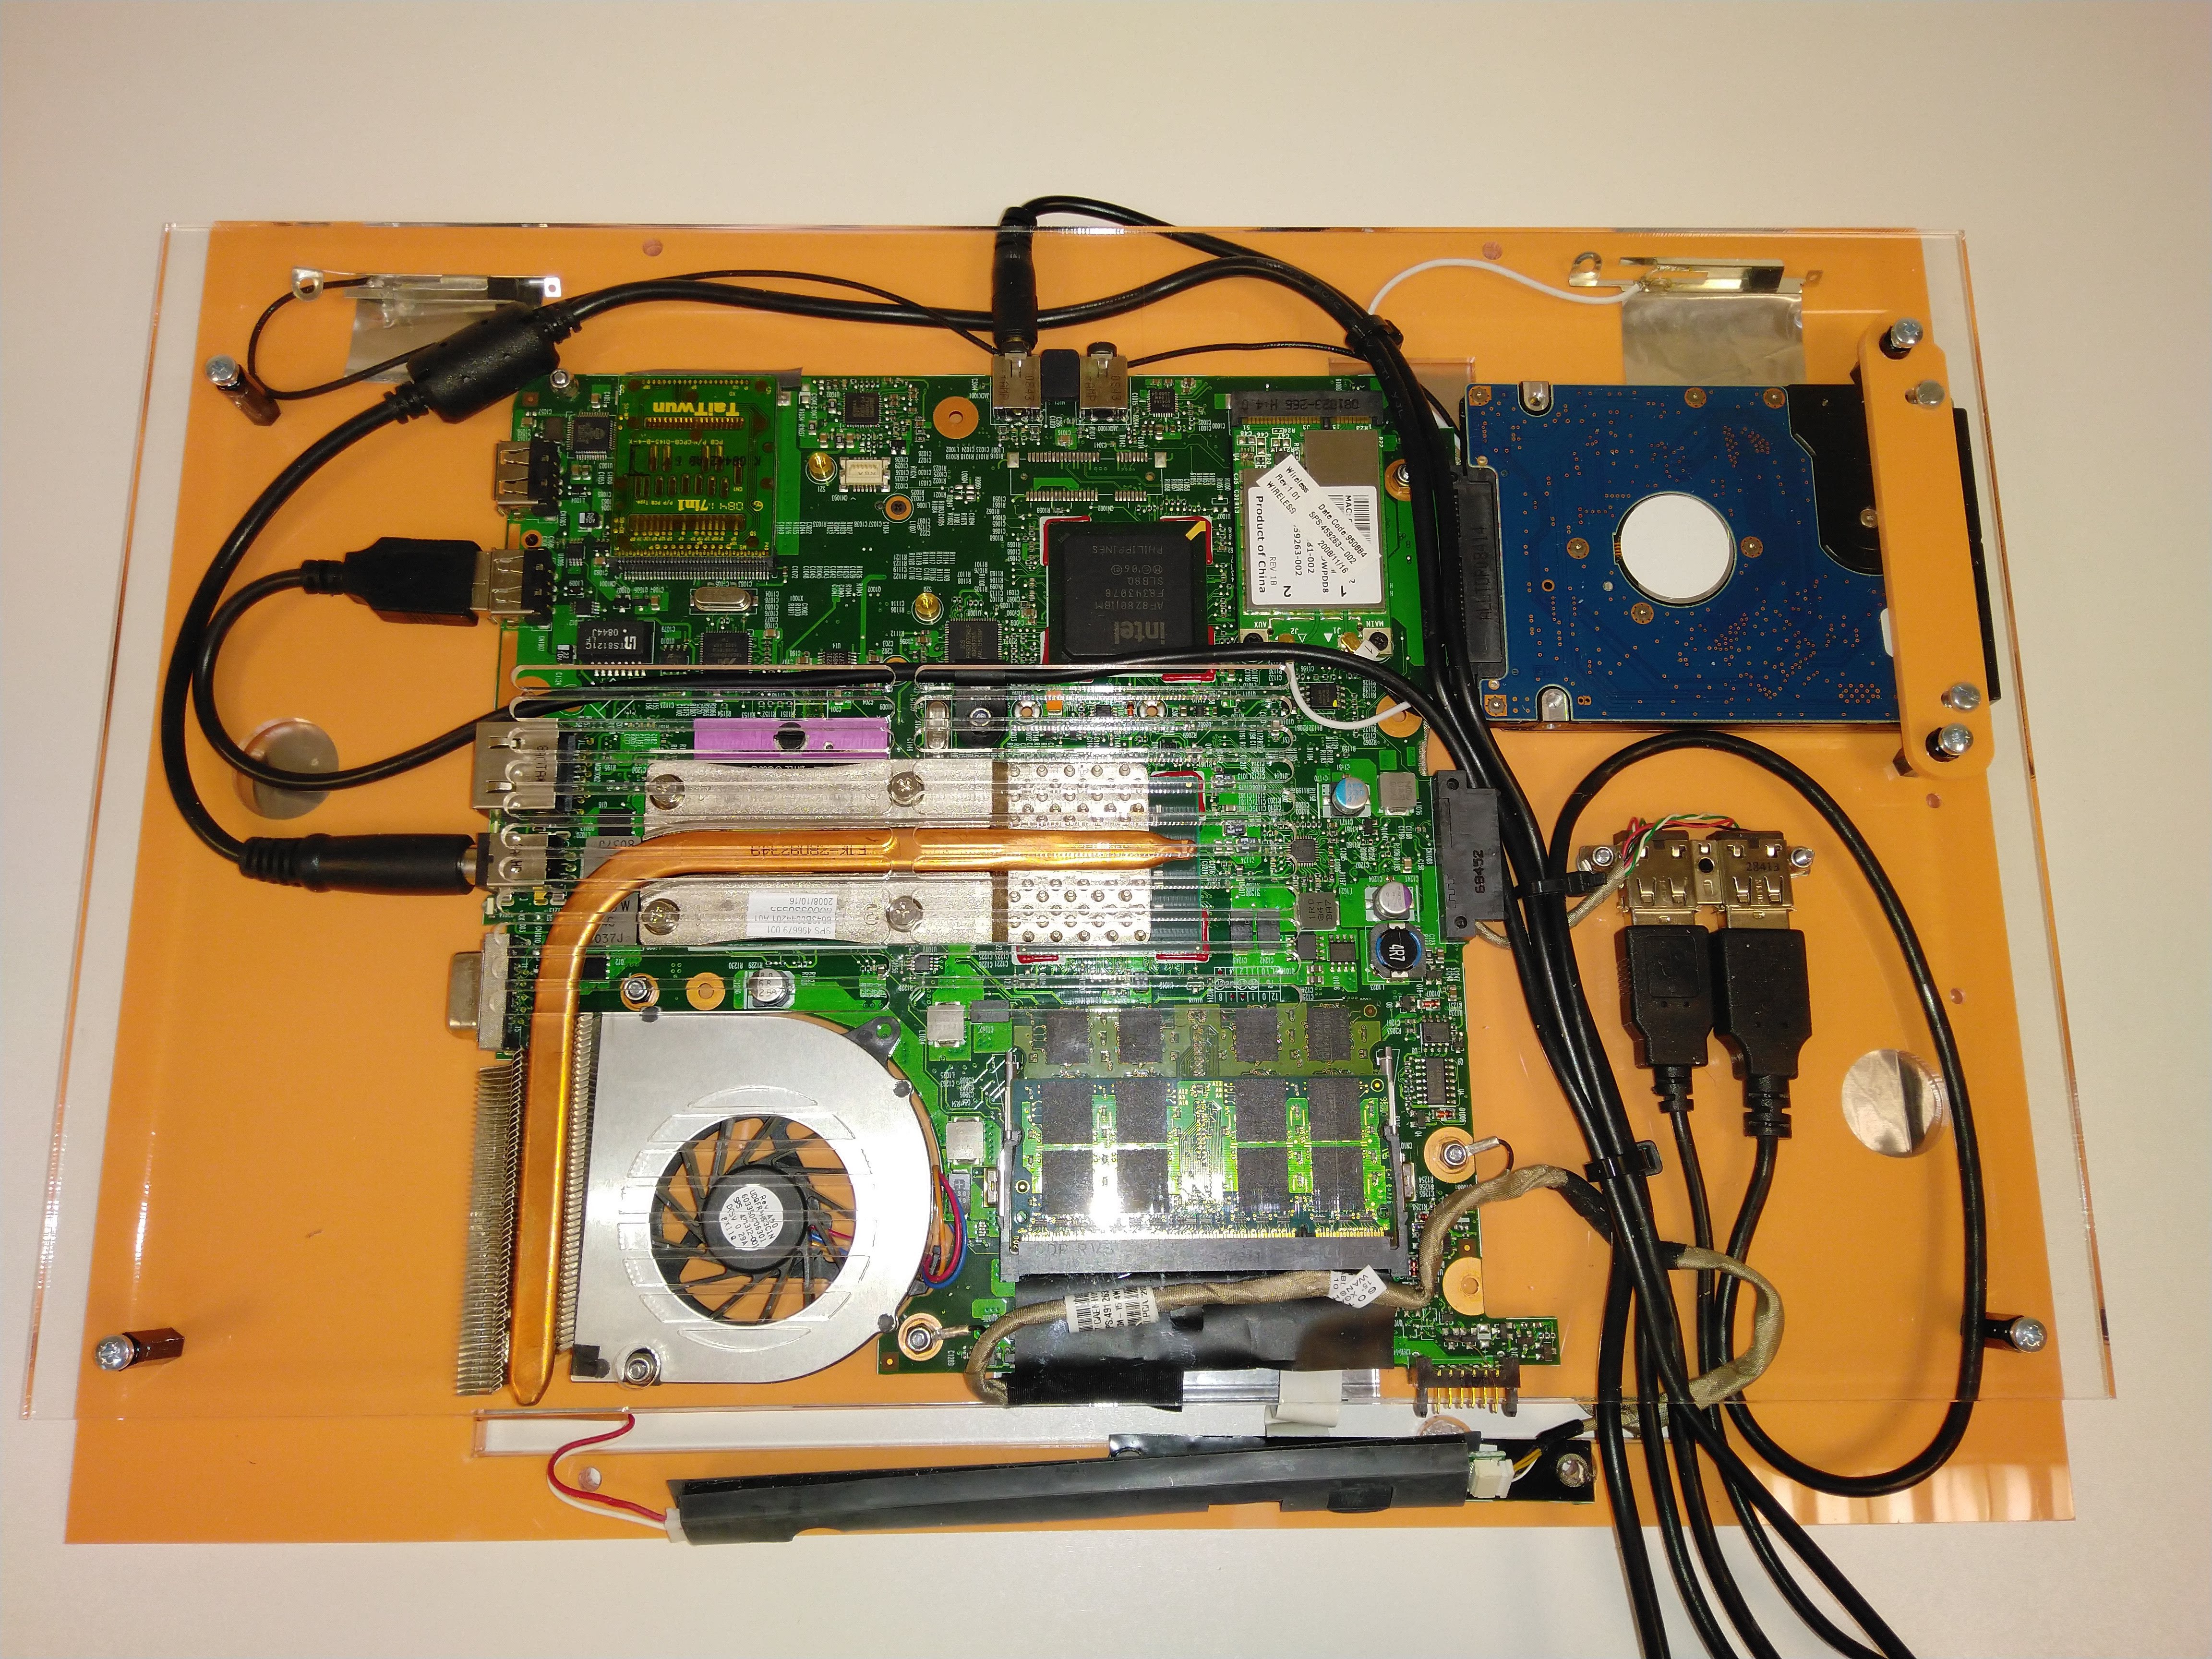
First I started to design a mount for the motherboard. The tricky bit here was getting all of the mounting holes to line up.
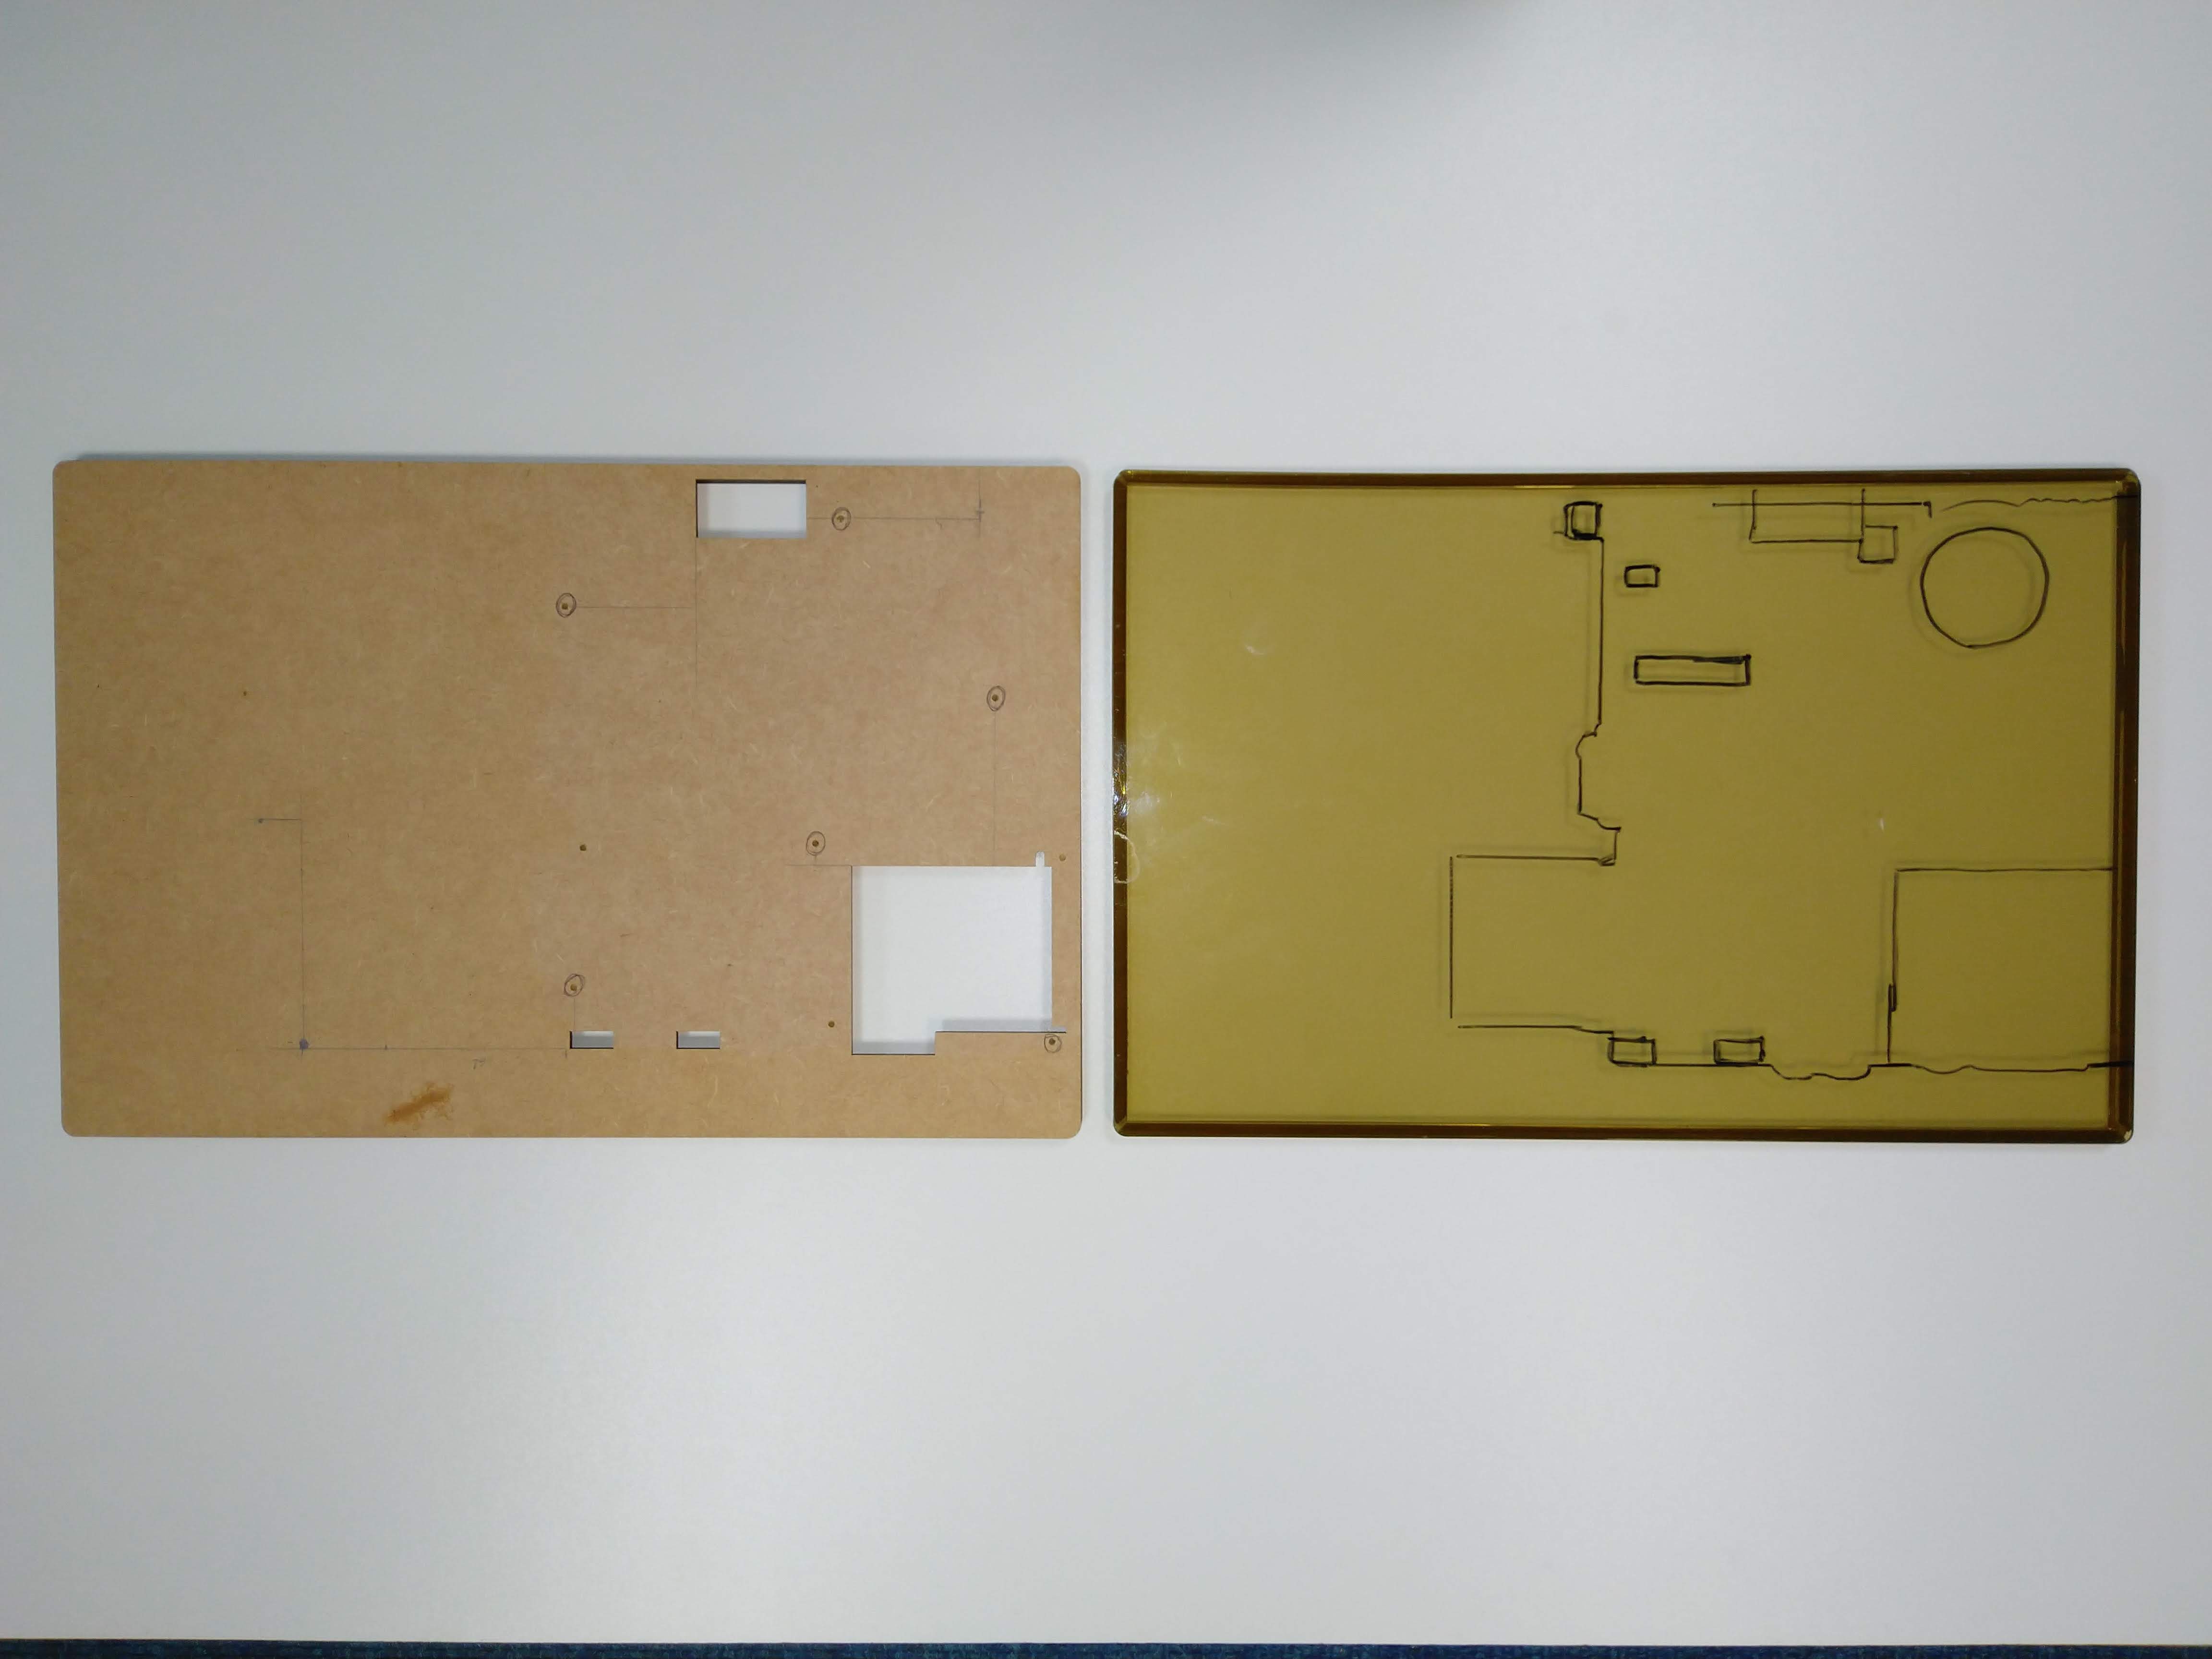
I used a piece of transparent acrylic to trace the outline of the motherboard and any protruding parts. I then marked and measured the mounting holes that I wanted to use.
I laser cut a prototype out of 3mm MDF to test the positions. It took a few attempts to get this right.
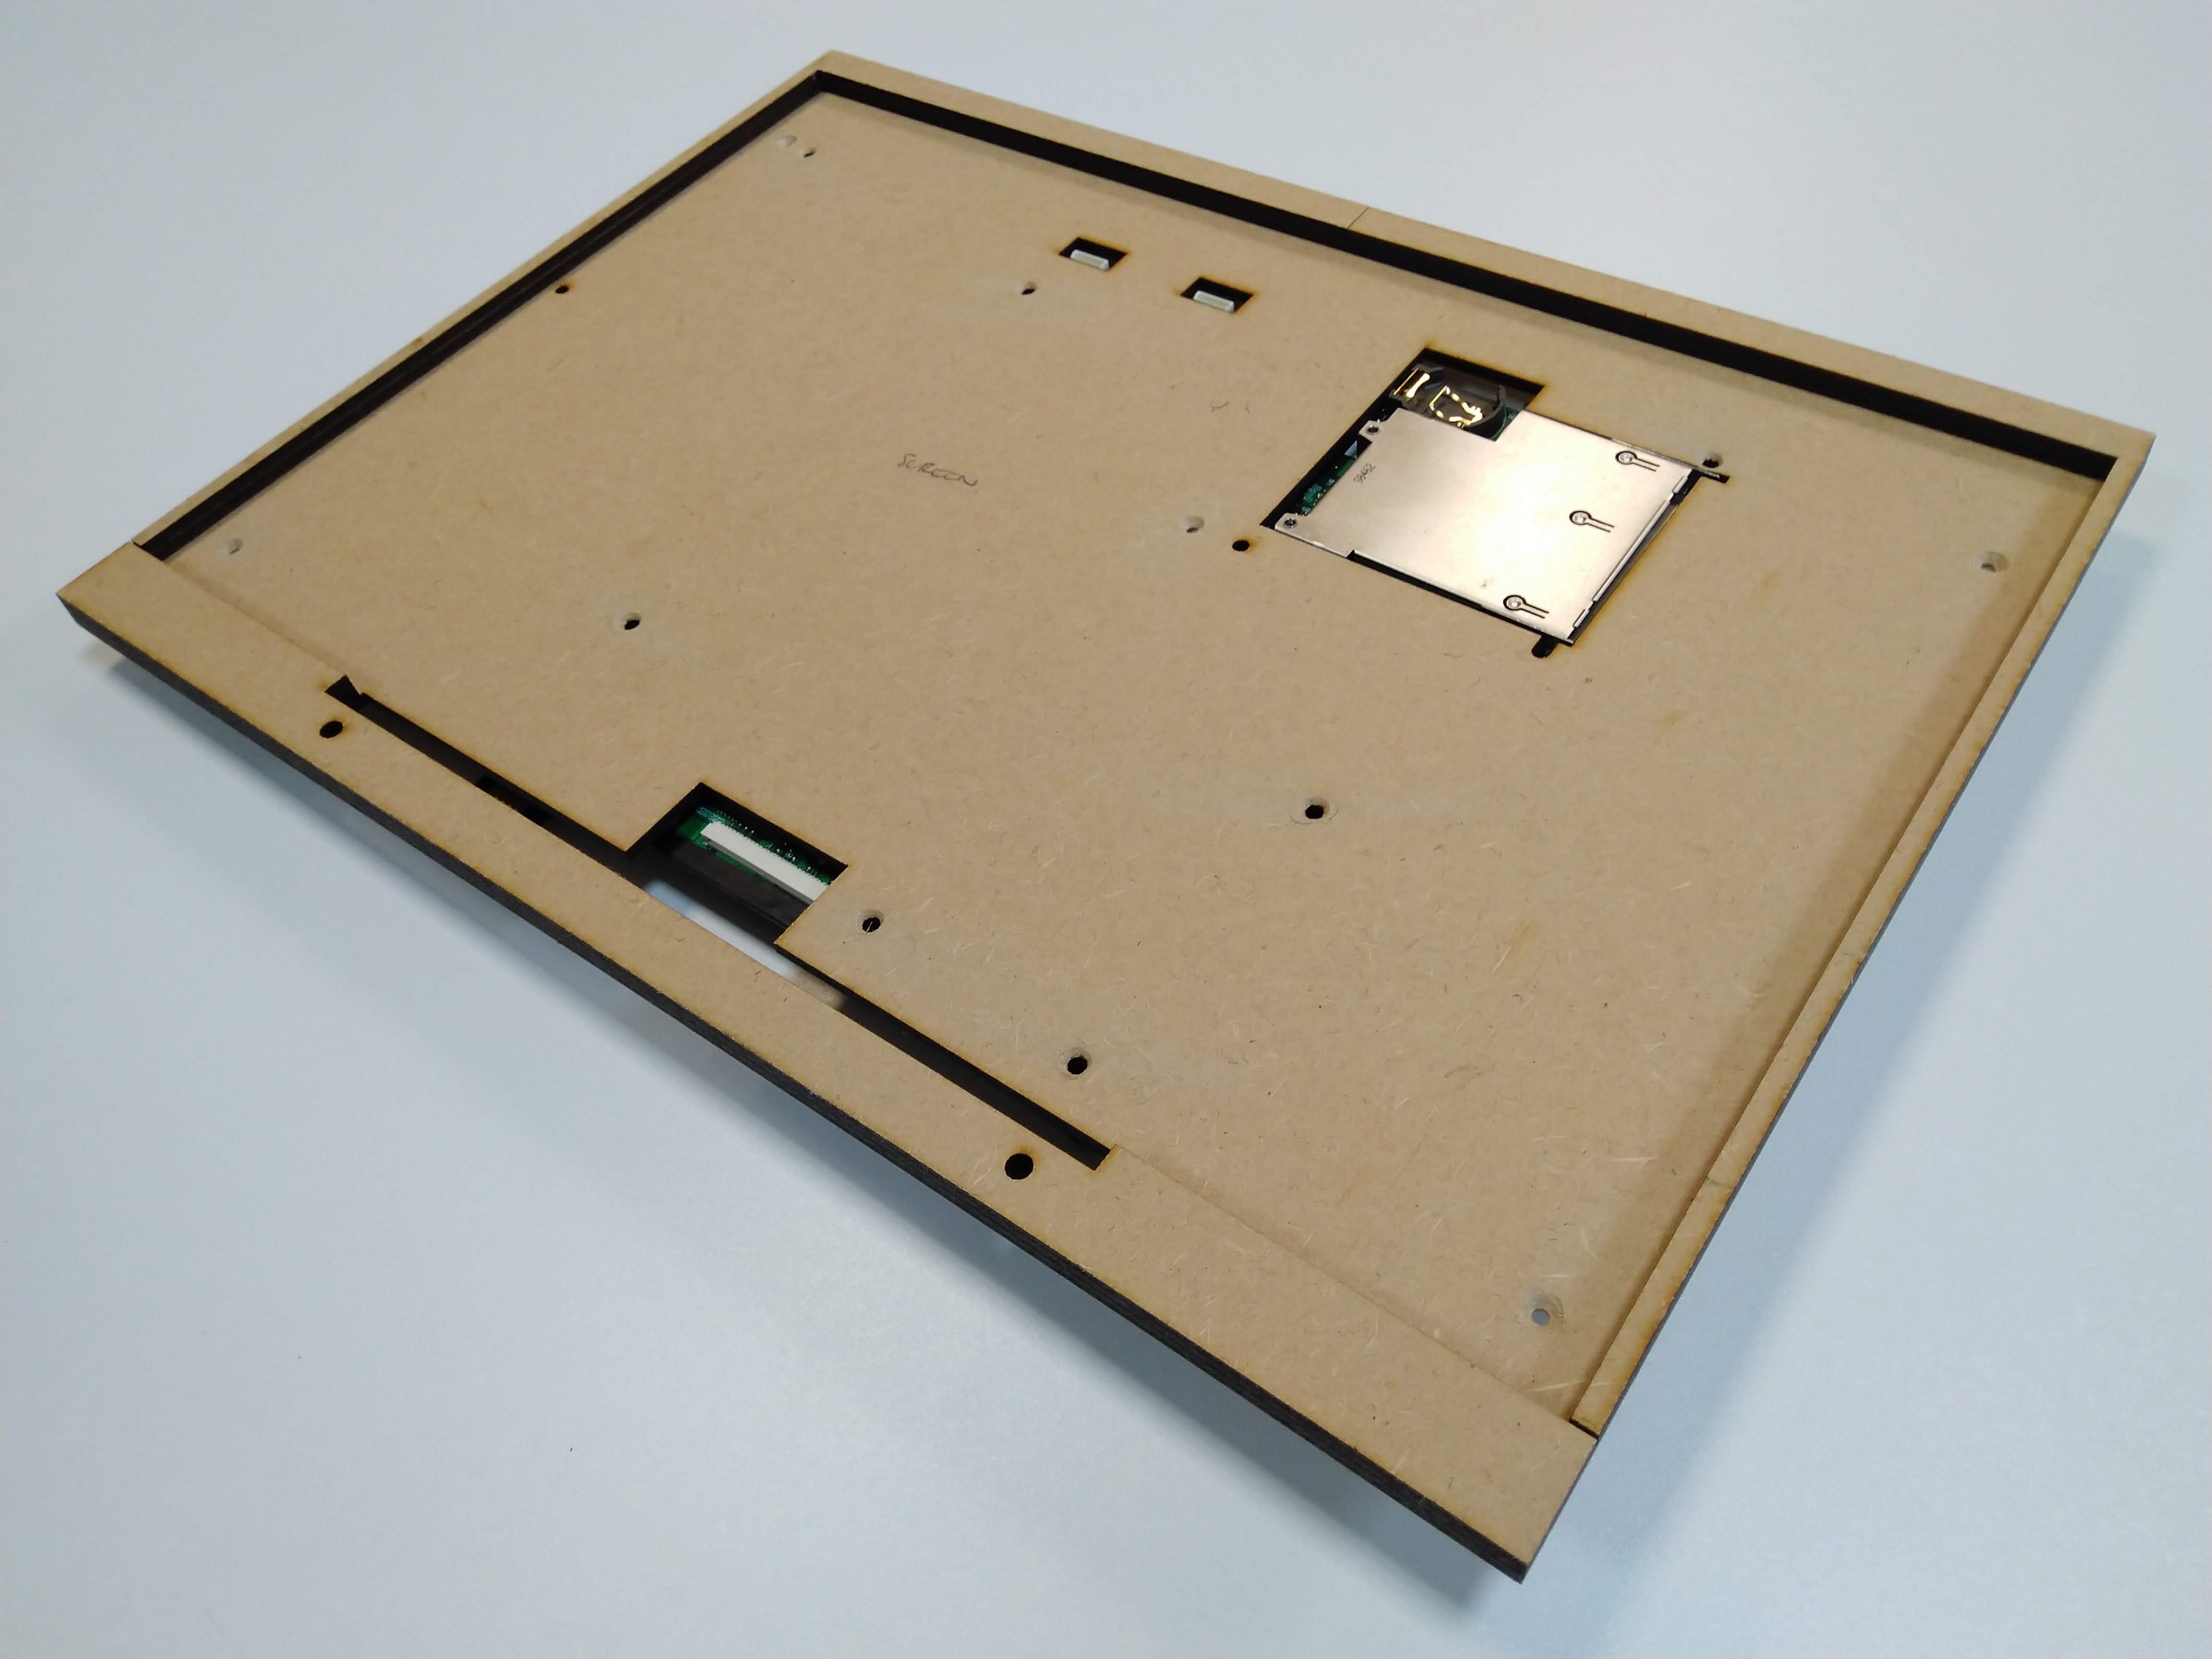
After a few more iterations I'd made a panel with a bezel to hold the screen and mounting holes for the motherboard to attach to the back.
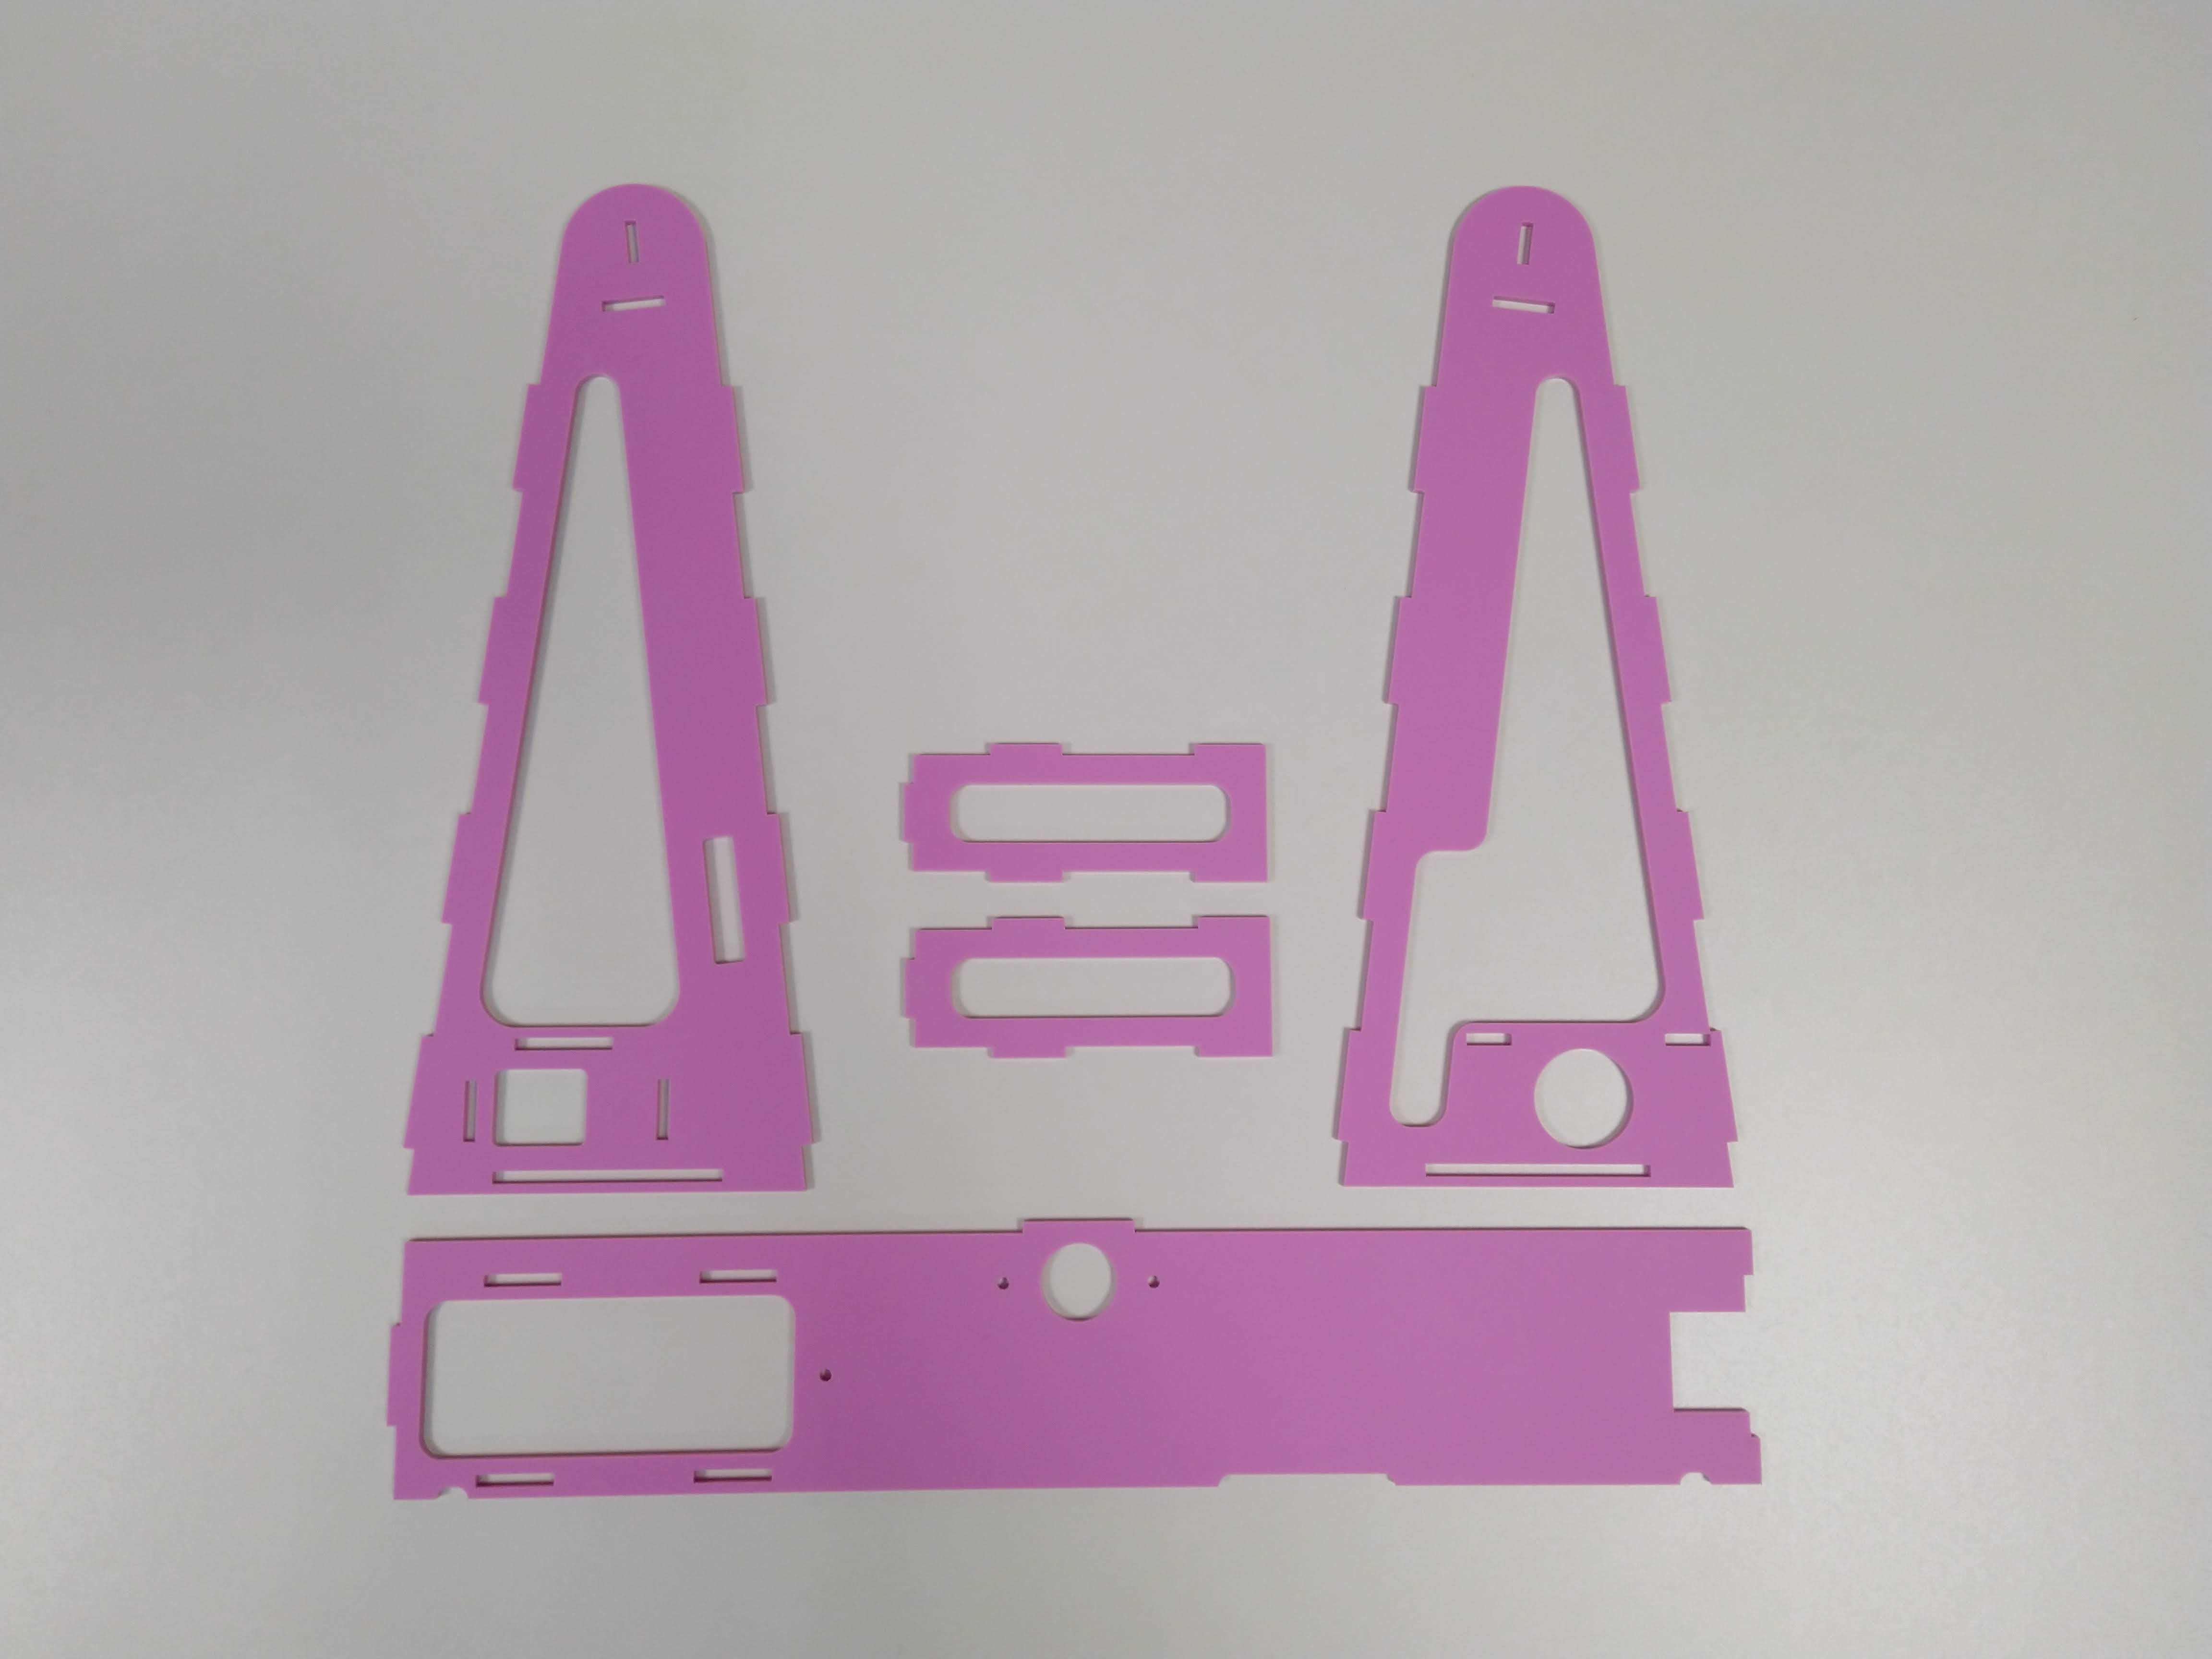
Next I started to design the frame to hold everything together. I toyed with the idea of using a hinge to adjust the angle of the screen a bit like as MS Surface (possibly reusing the original laptop screen hinges) but soon moved away from this as I wanted to keep it simple and have less chance of parts breaking.
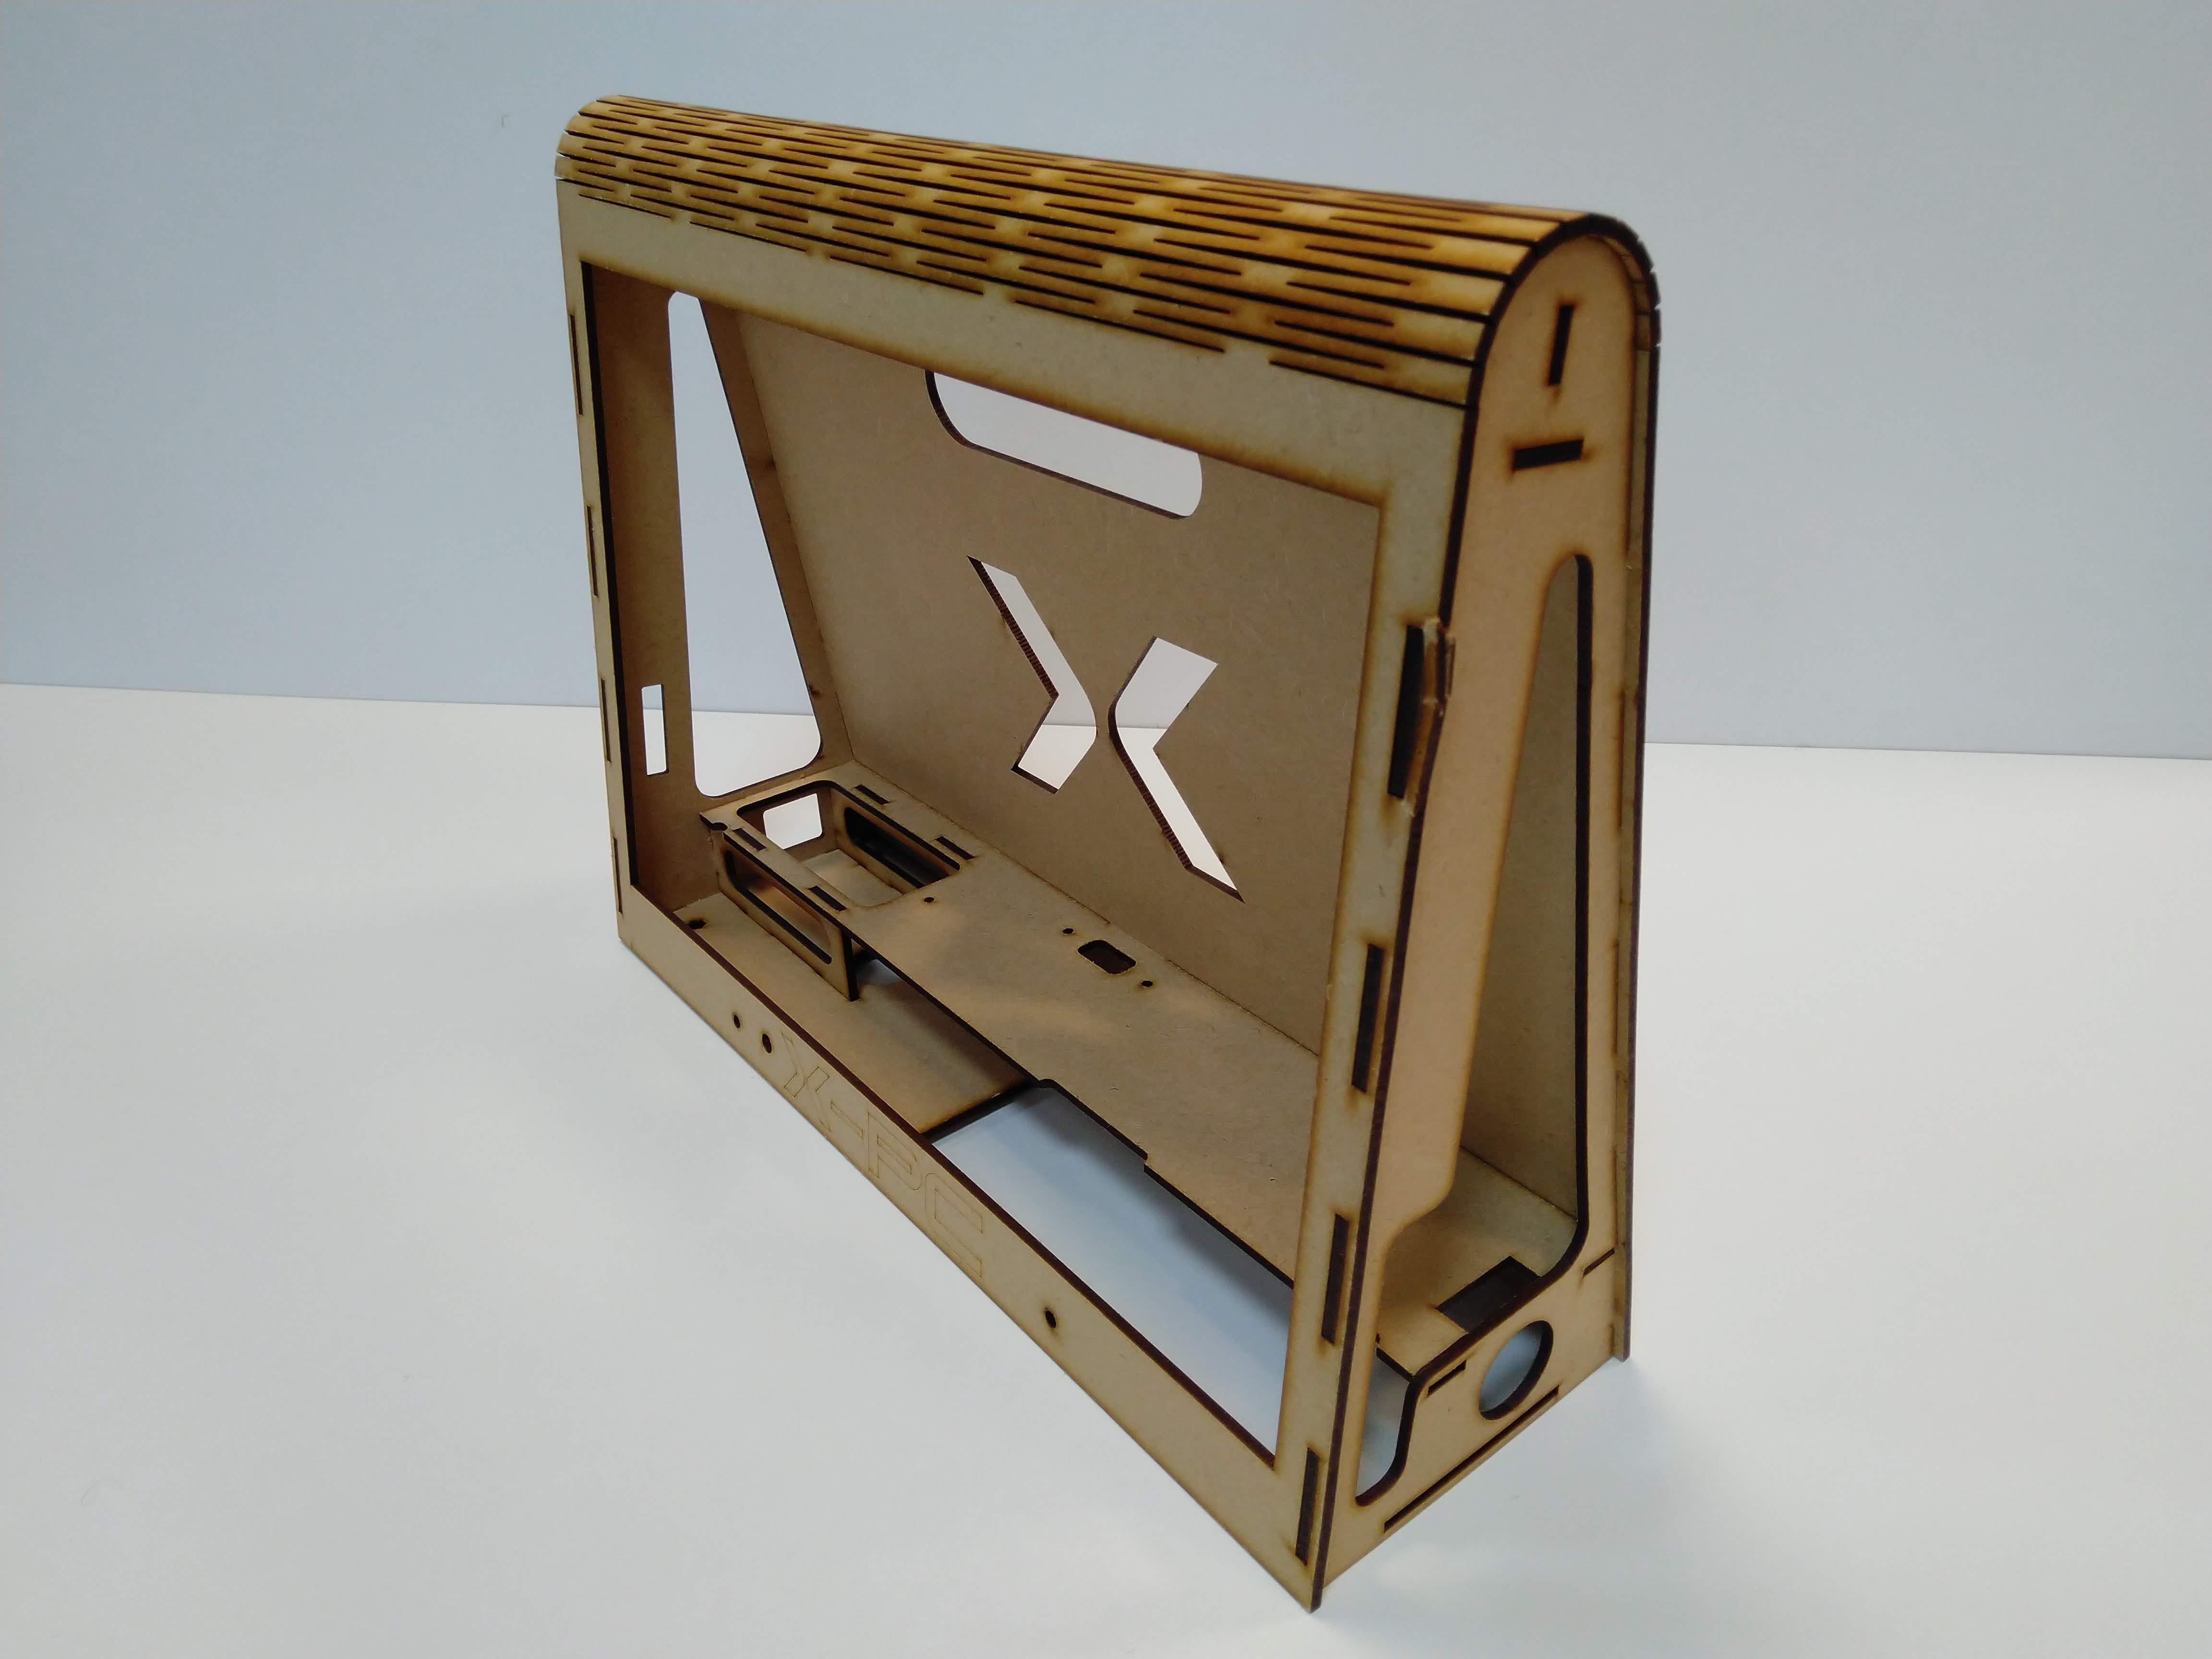
I started looking at an A-frame design, this seemed like a good solution as it has an angled front for the screen a wide base for stability and a space to store the keyboard. I also liked the idea of using a living hinge at the top to add a curve to the normally angular looks of laser cut designs.
Here's my prototype after a few iterations:
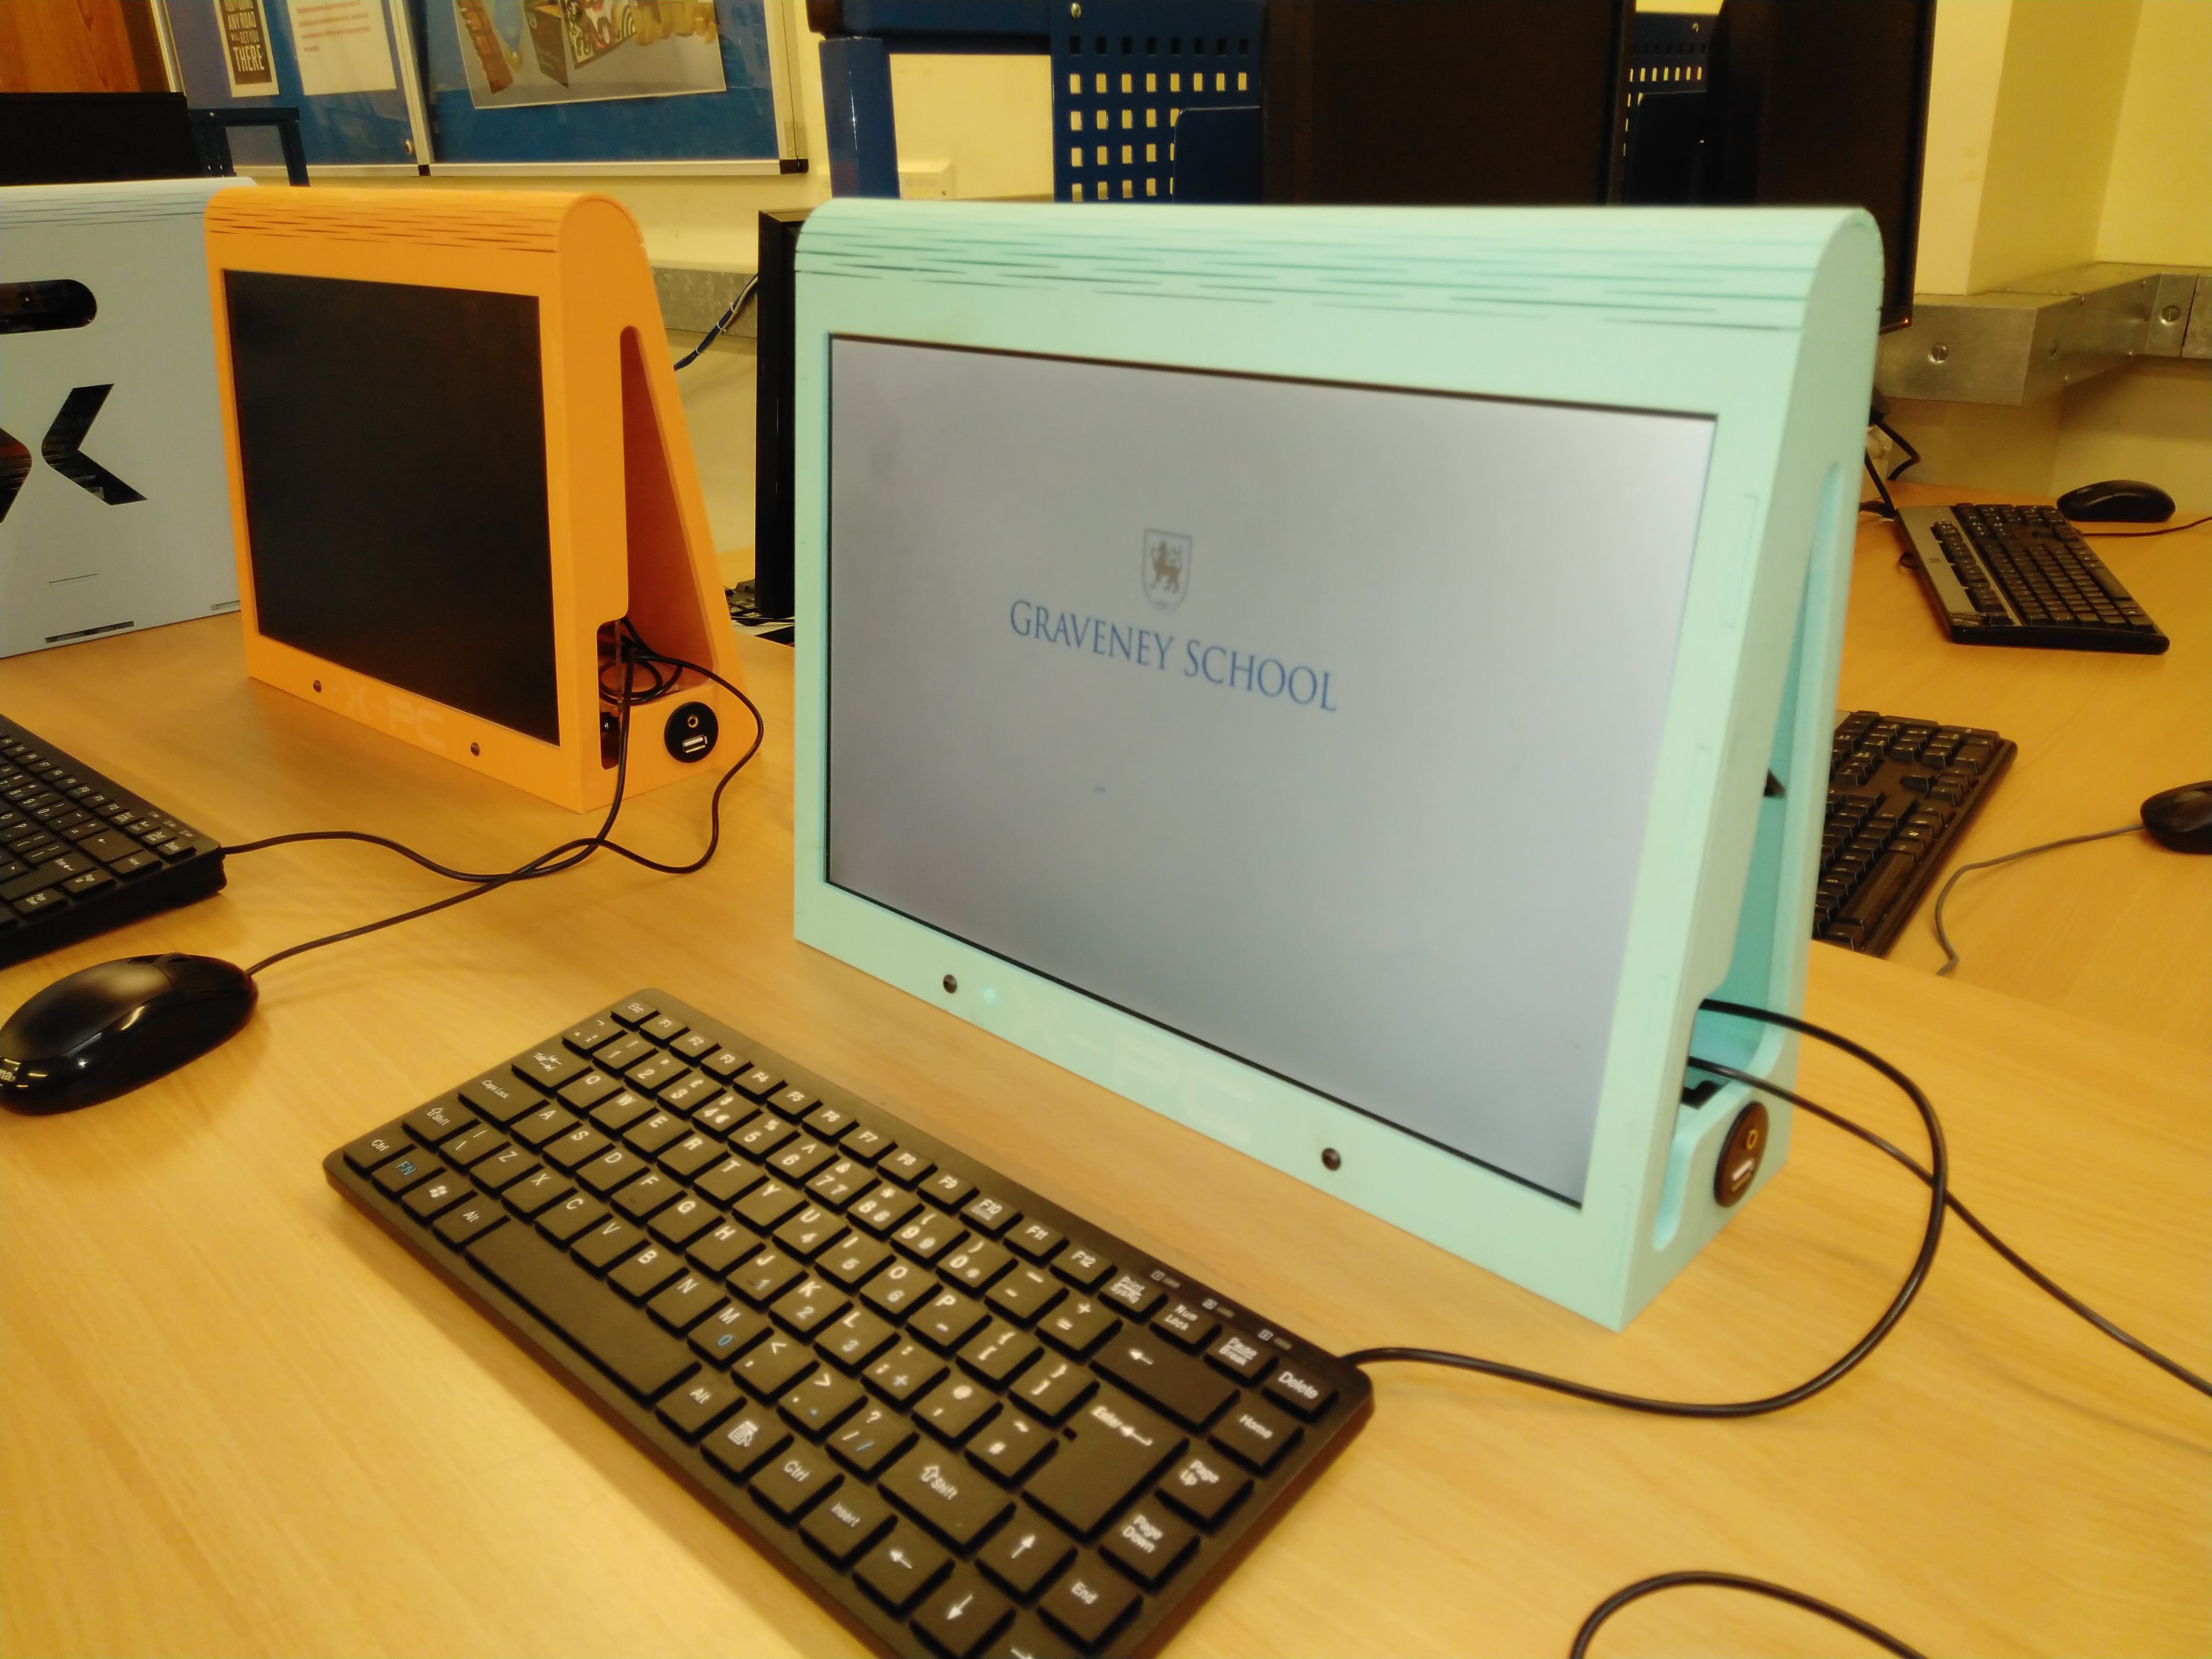
And my final version in acrylic:
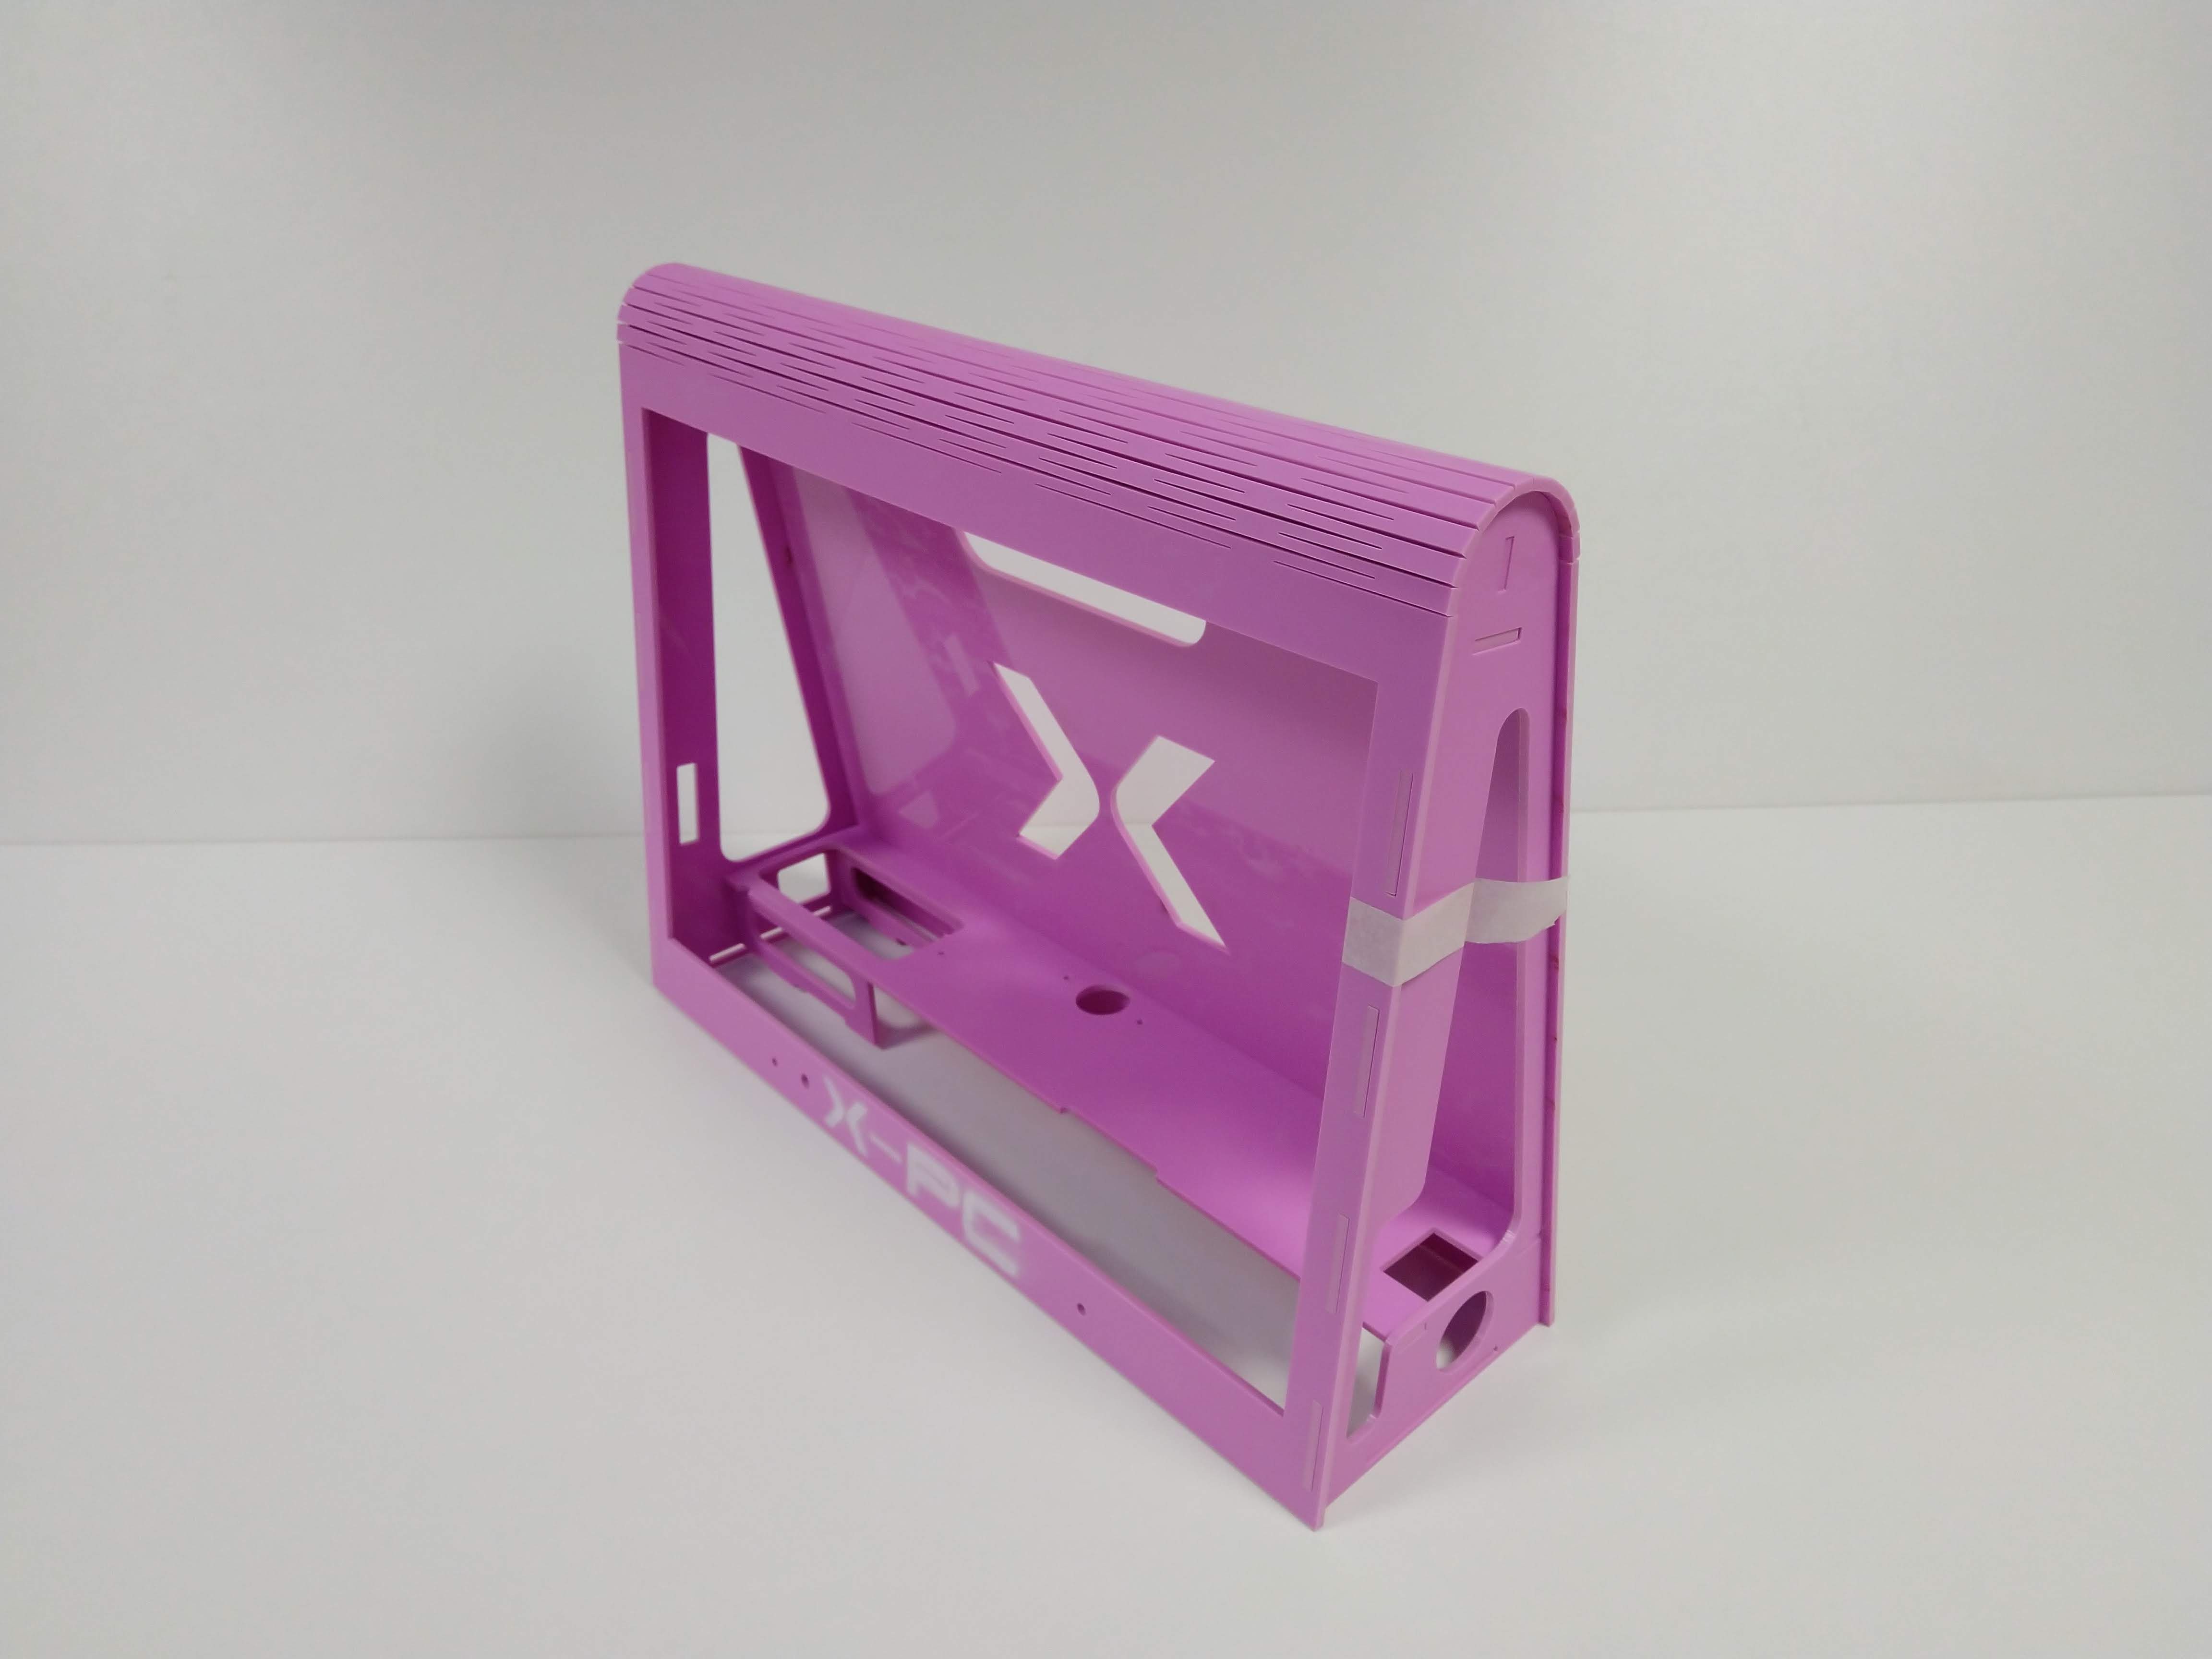
Here's an assembled screen and motherboard mount with a clear acrylic back panel for protection.
This whole unit slides up inside the front of the A-frame and is held in place with a couple of screws.
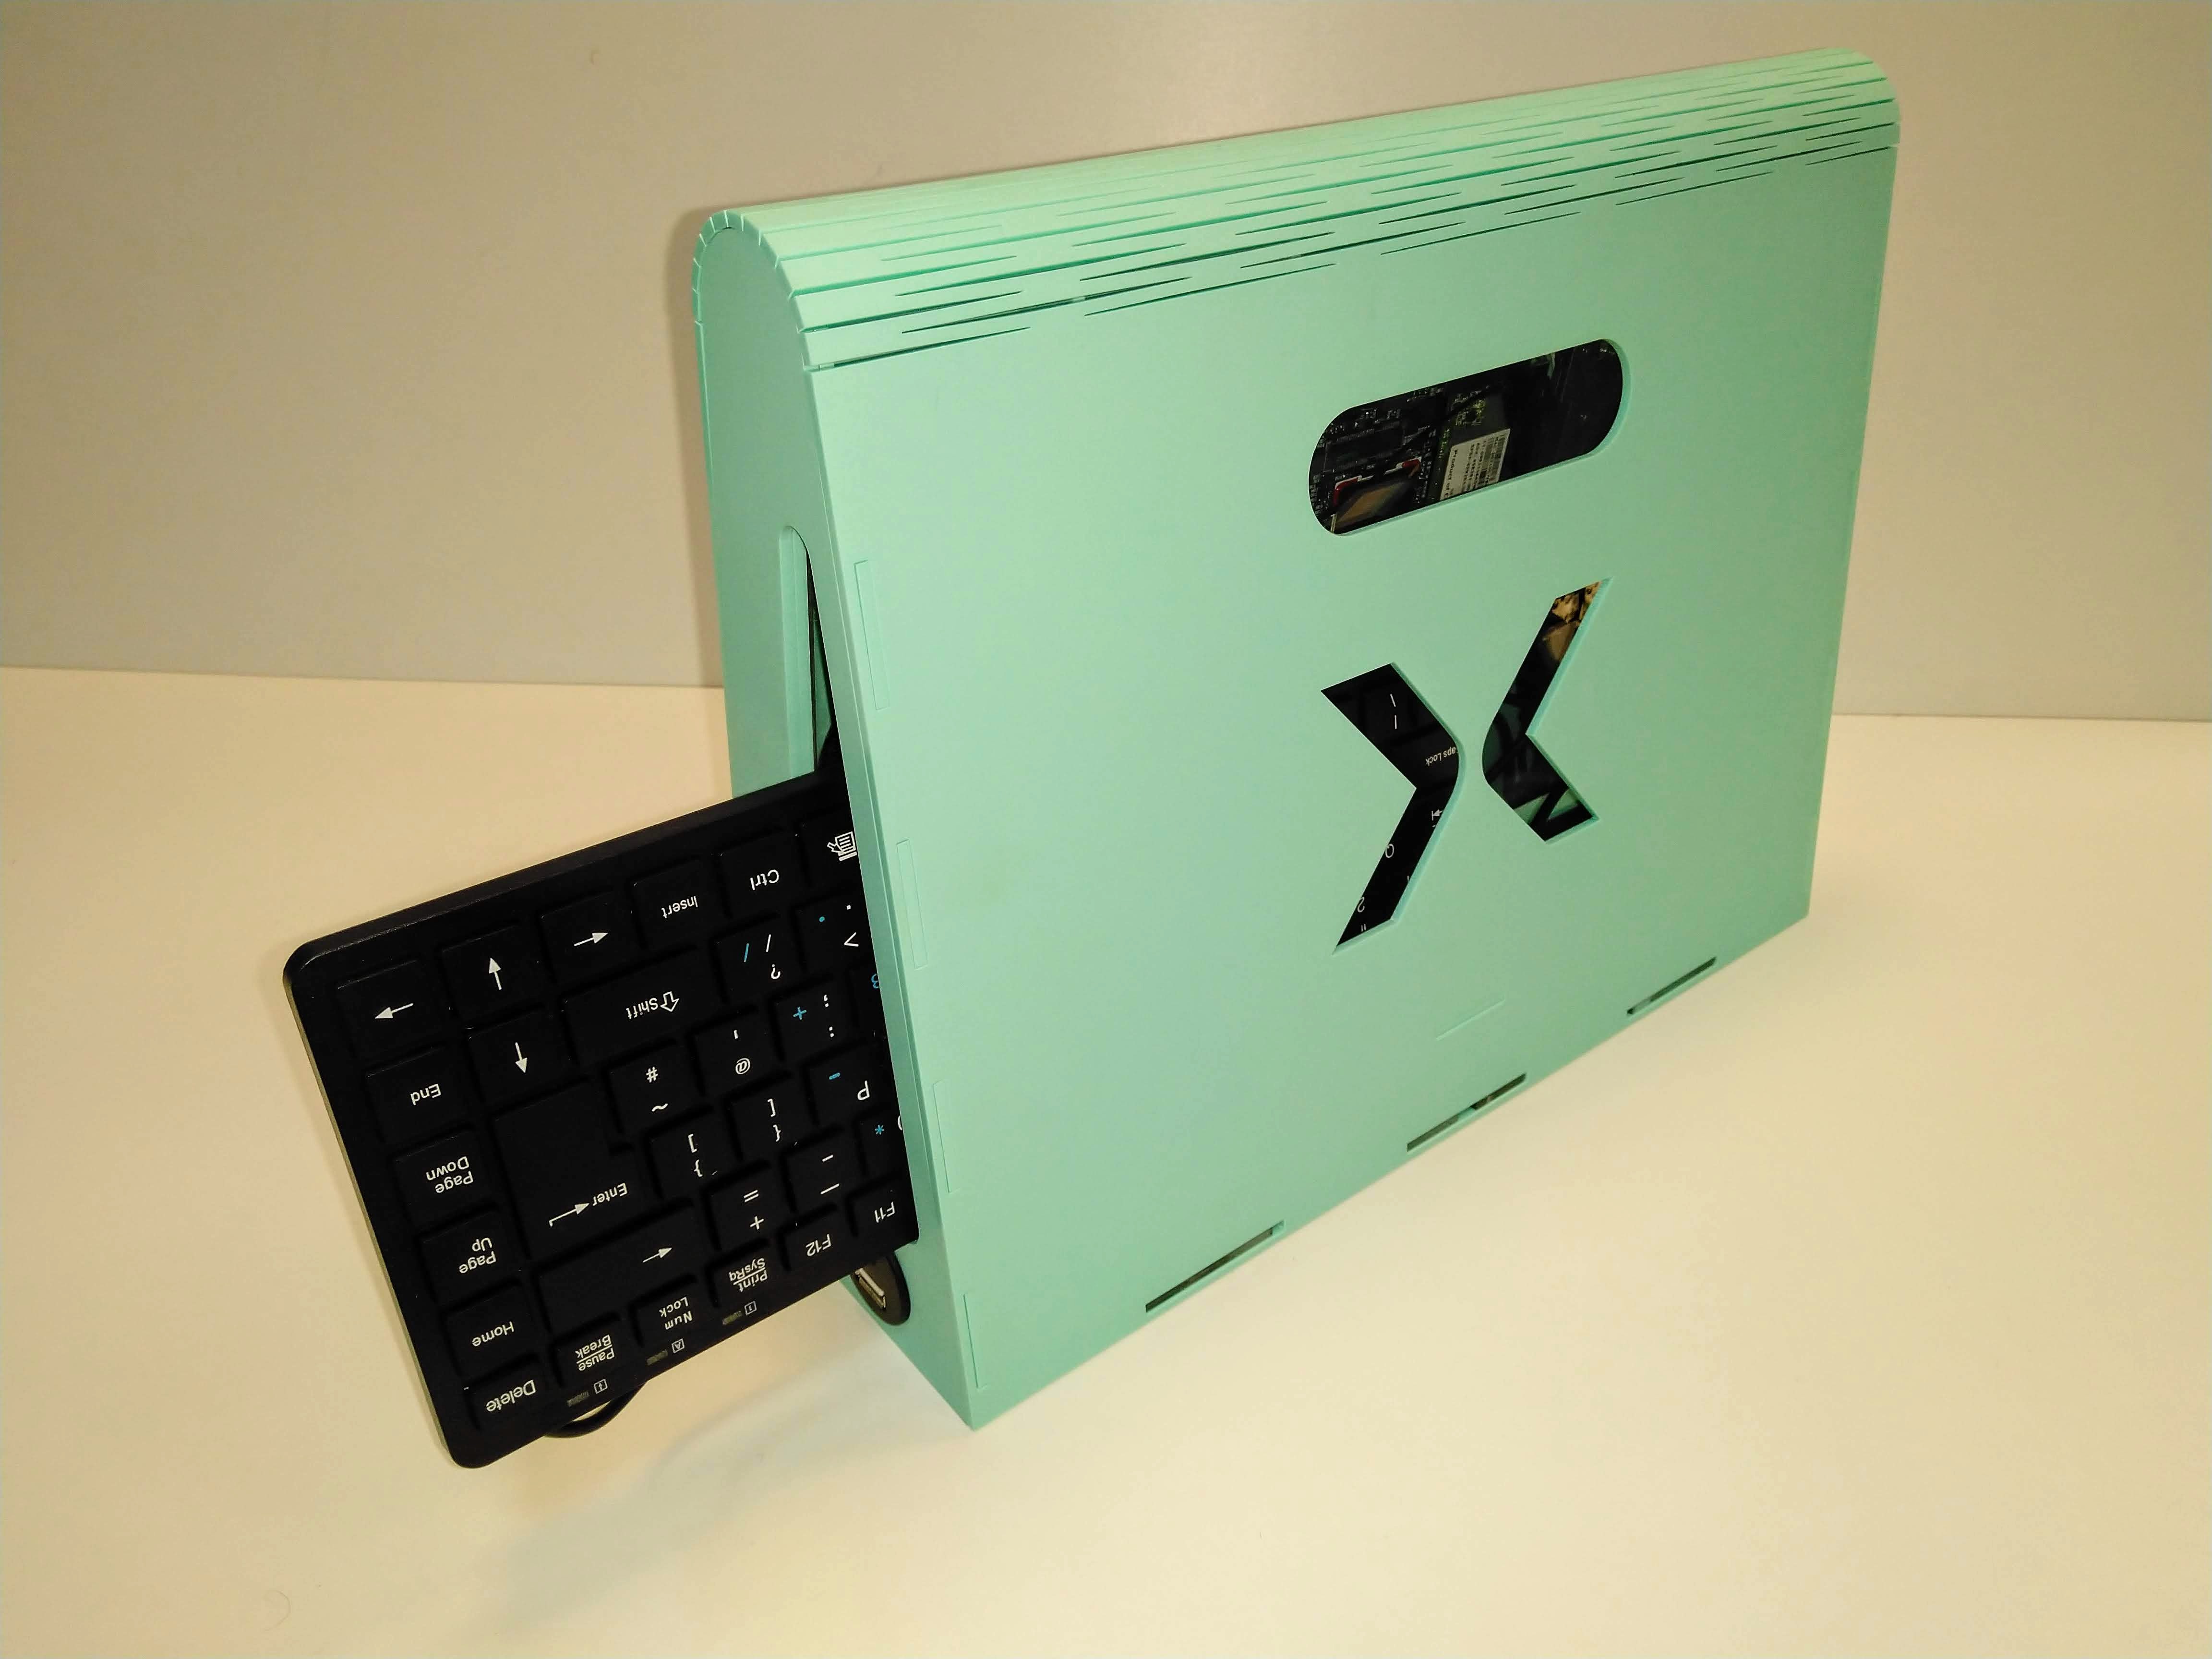
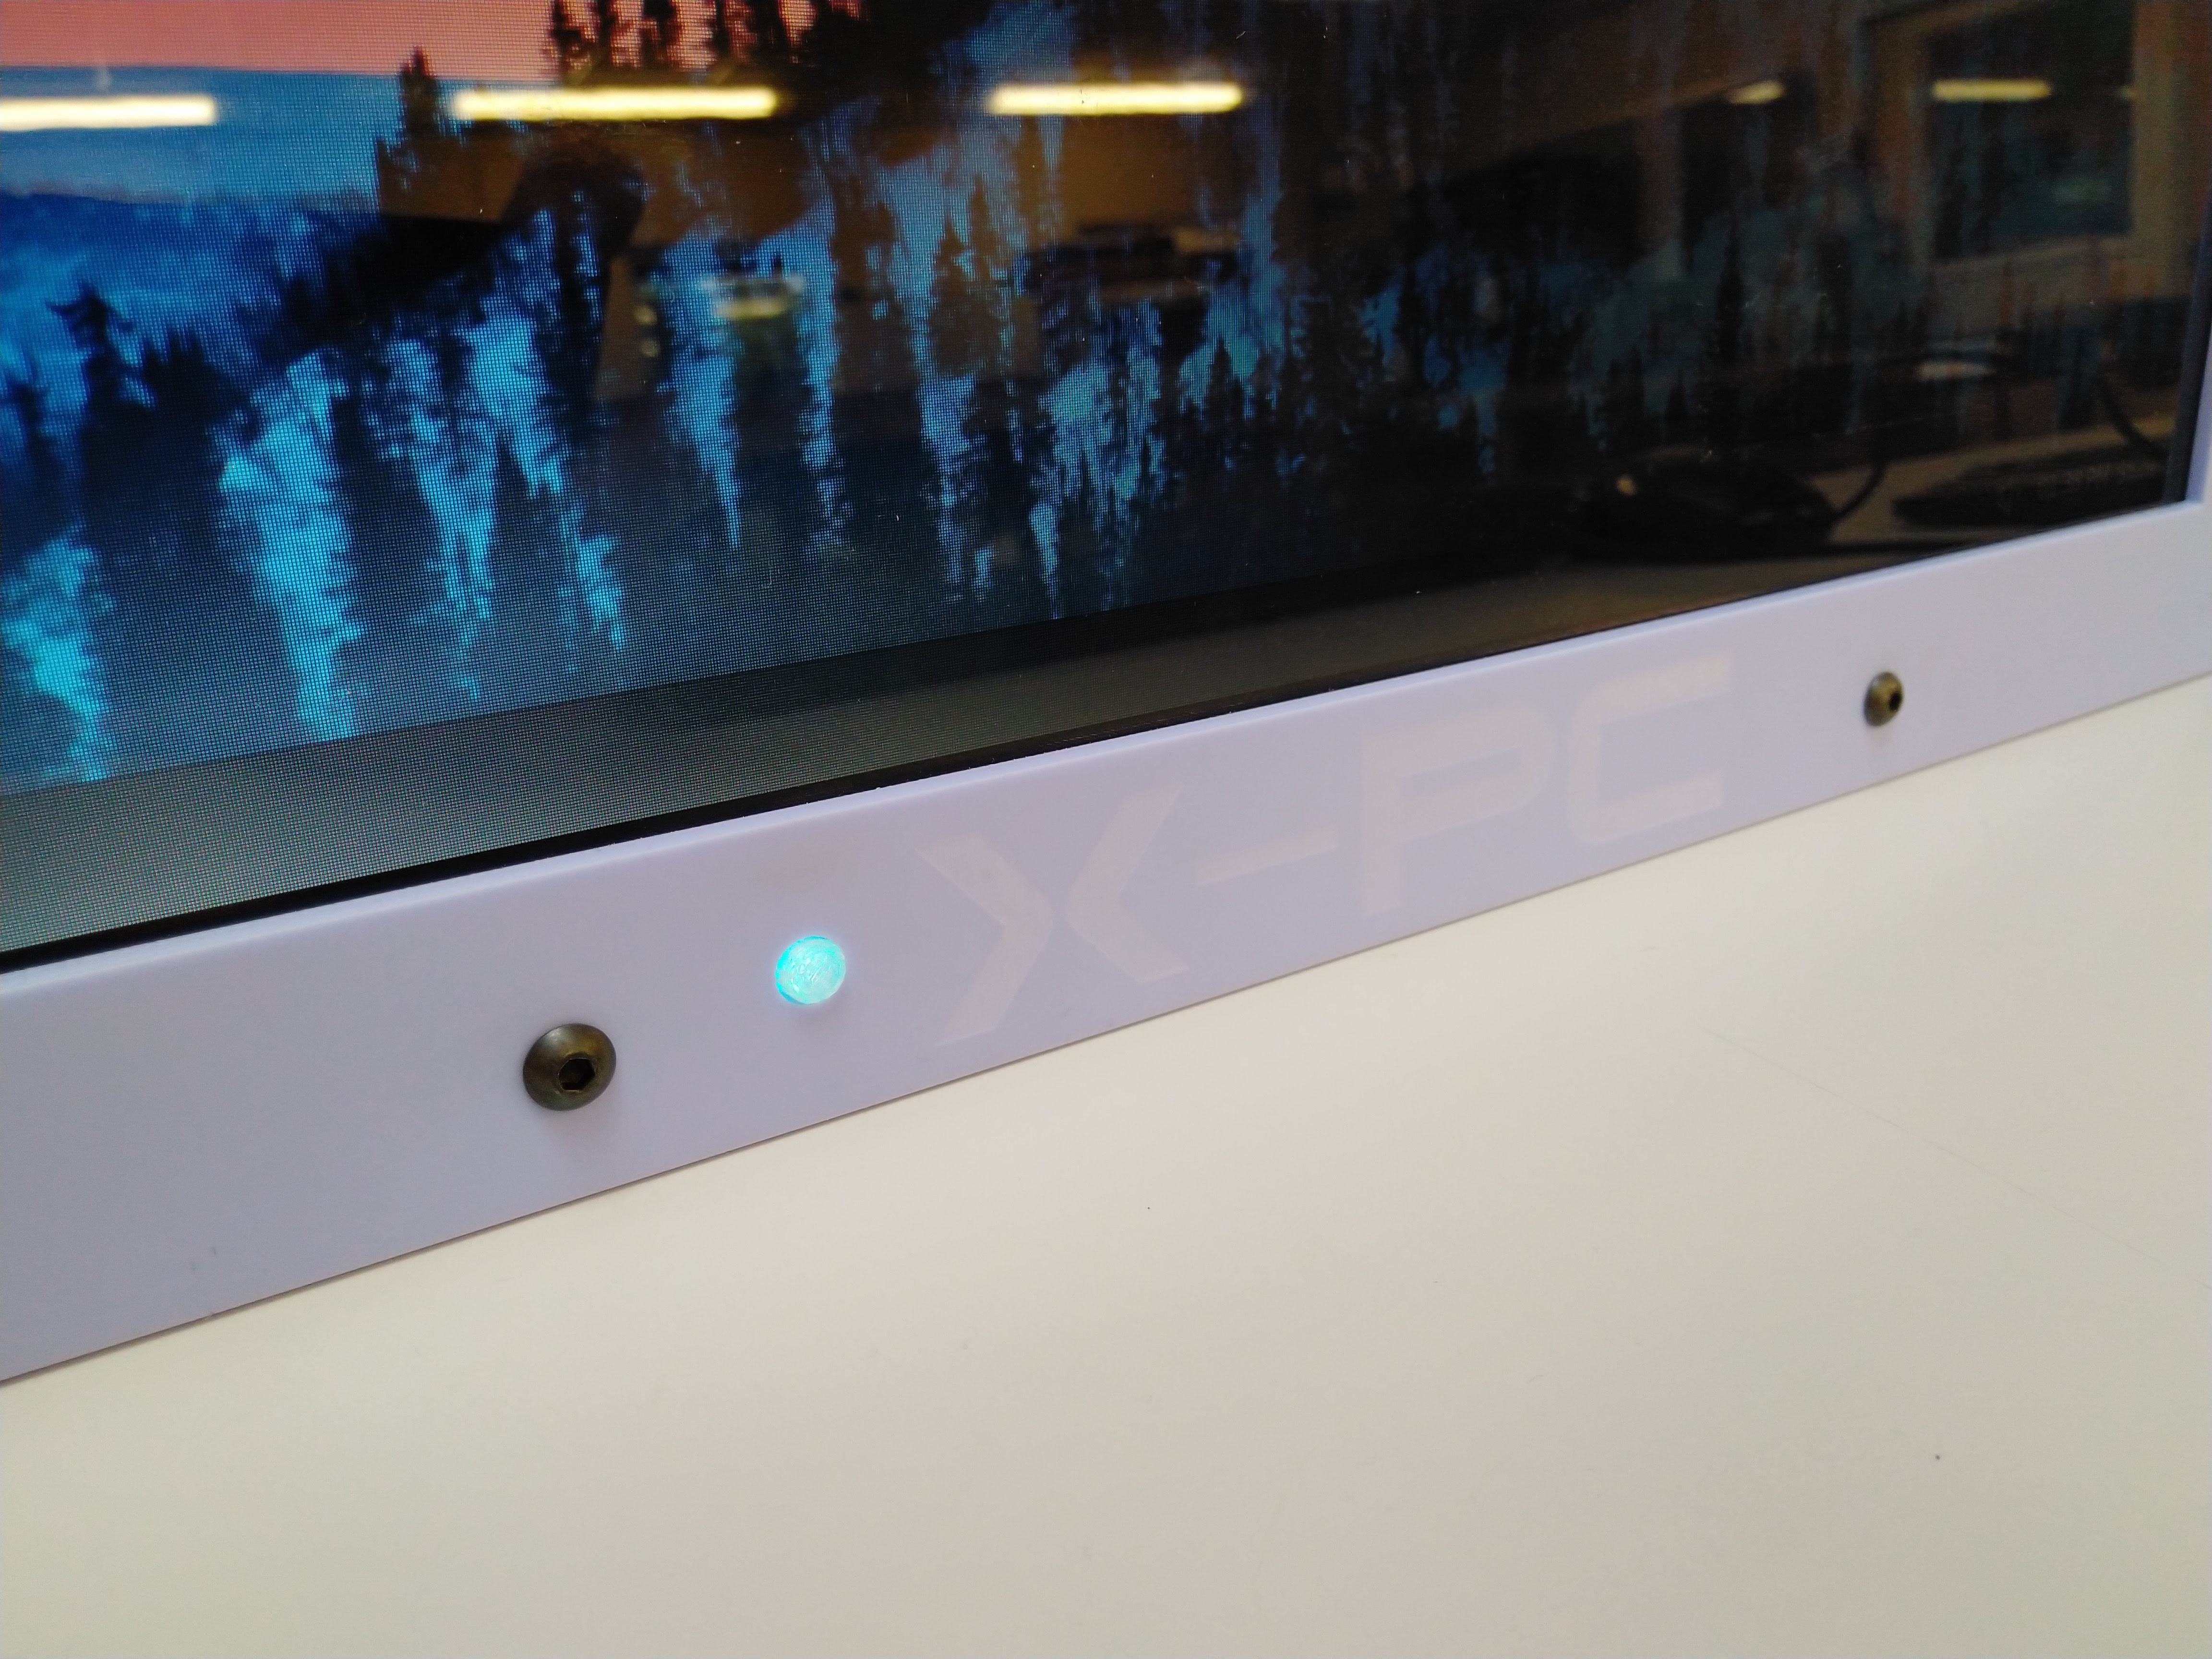
Some pictures of an assembled unit, showing keyboard storage, internal PSU and the USB and headphone socket (from a car dashboard mounting kit).
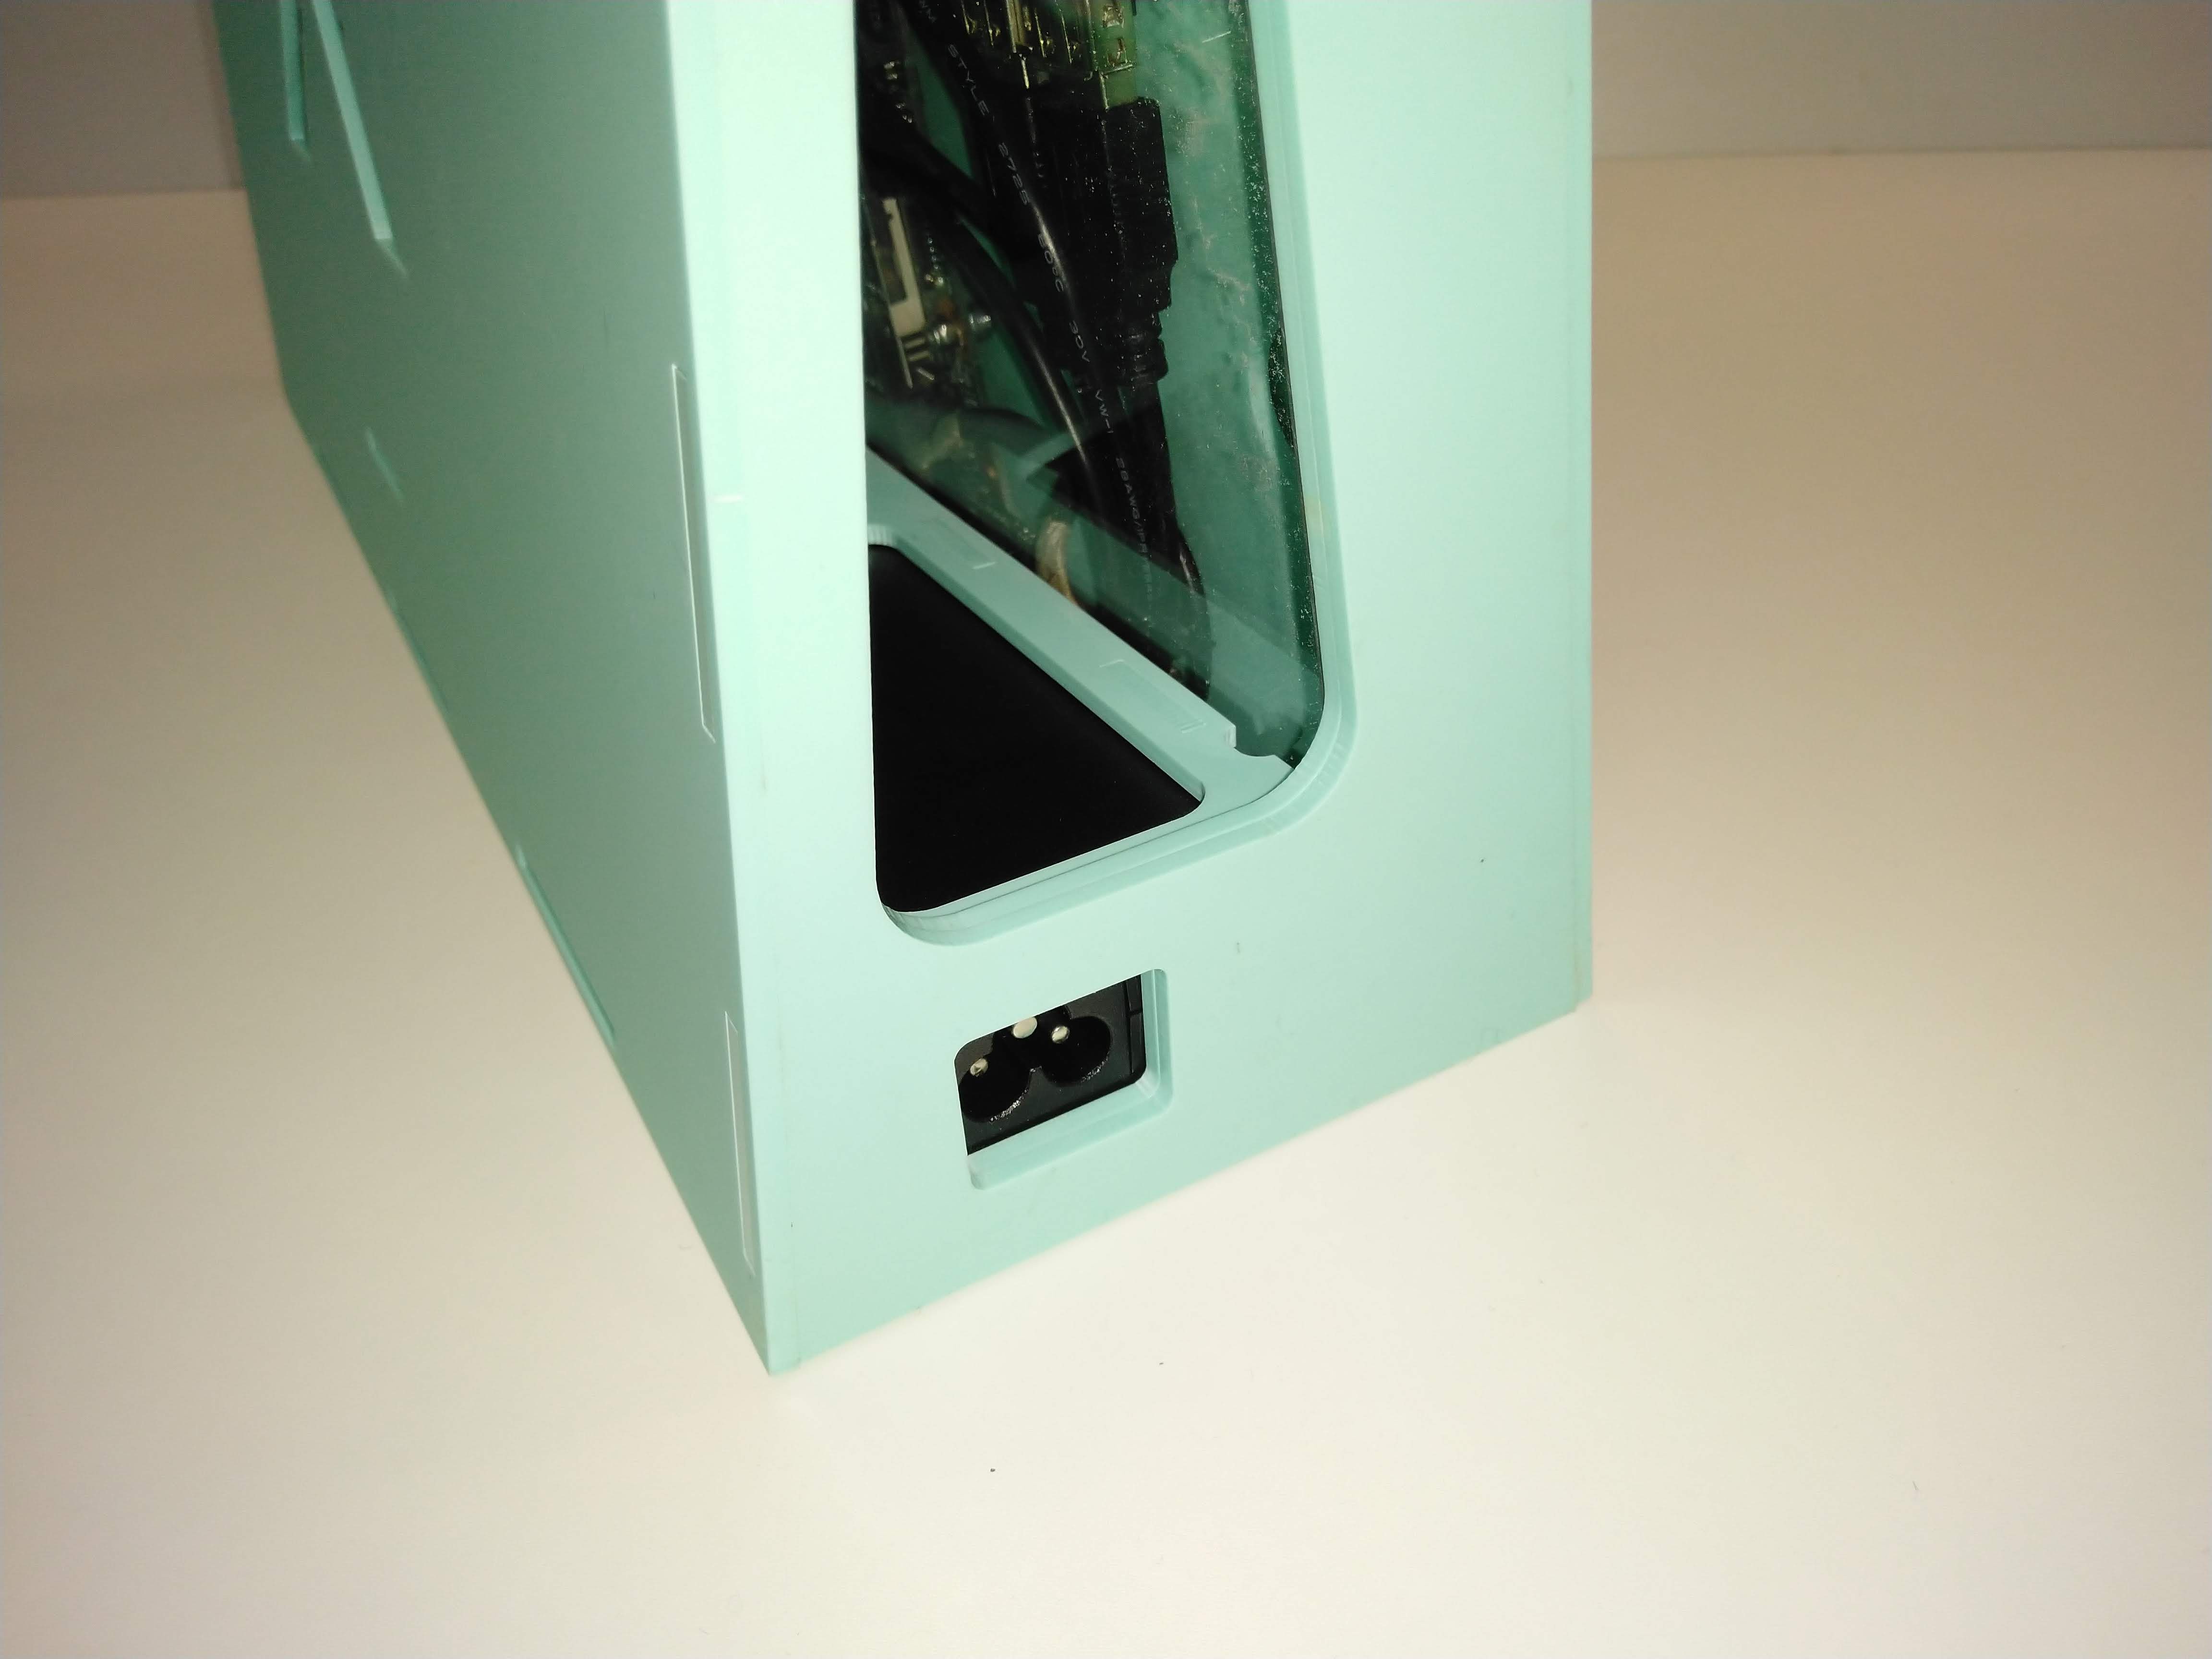
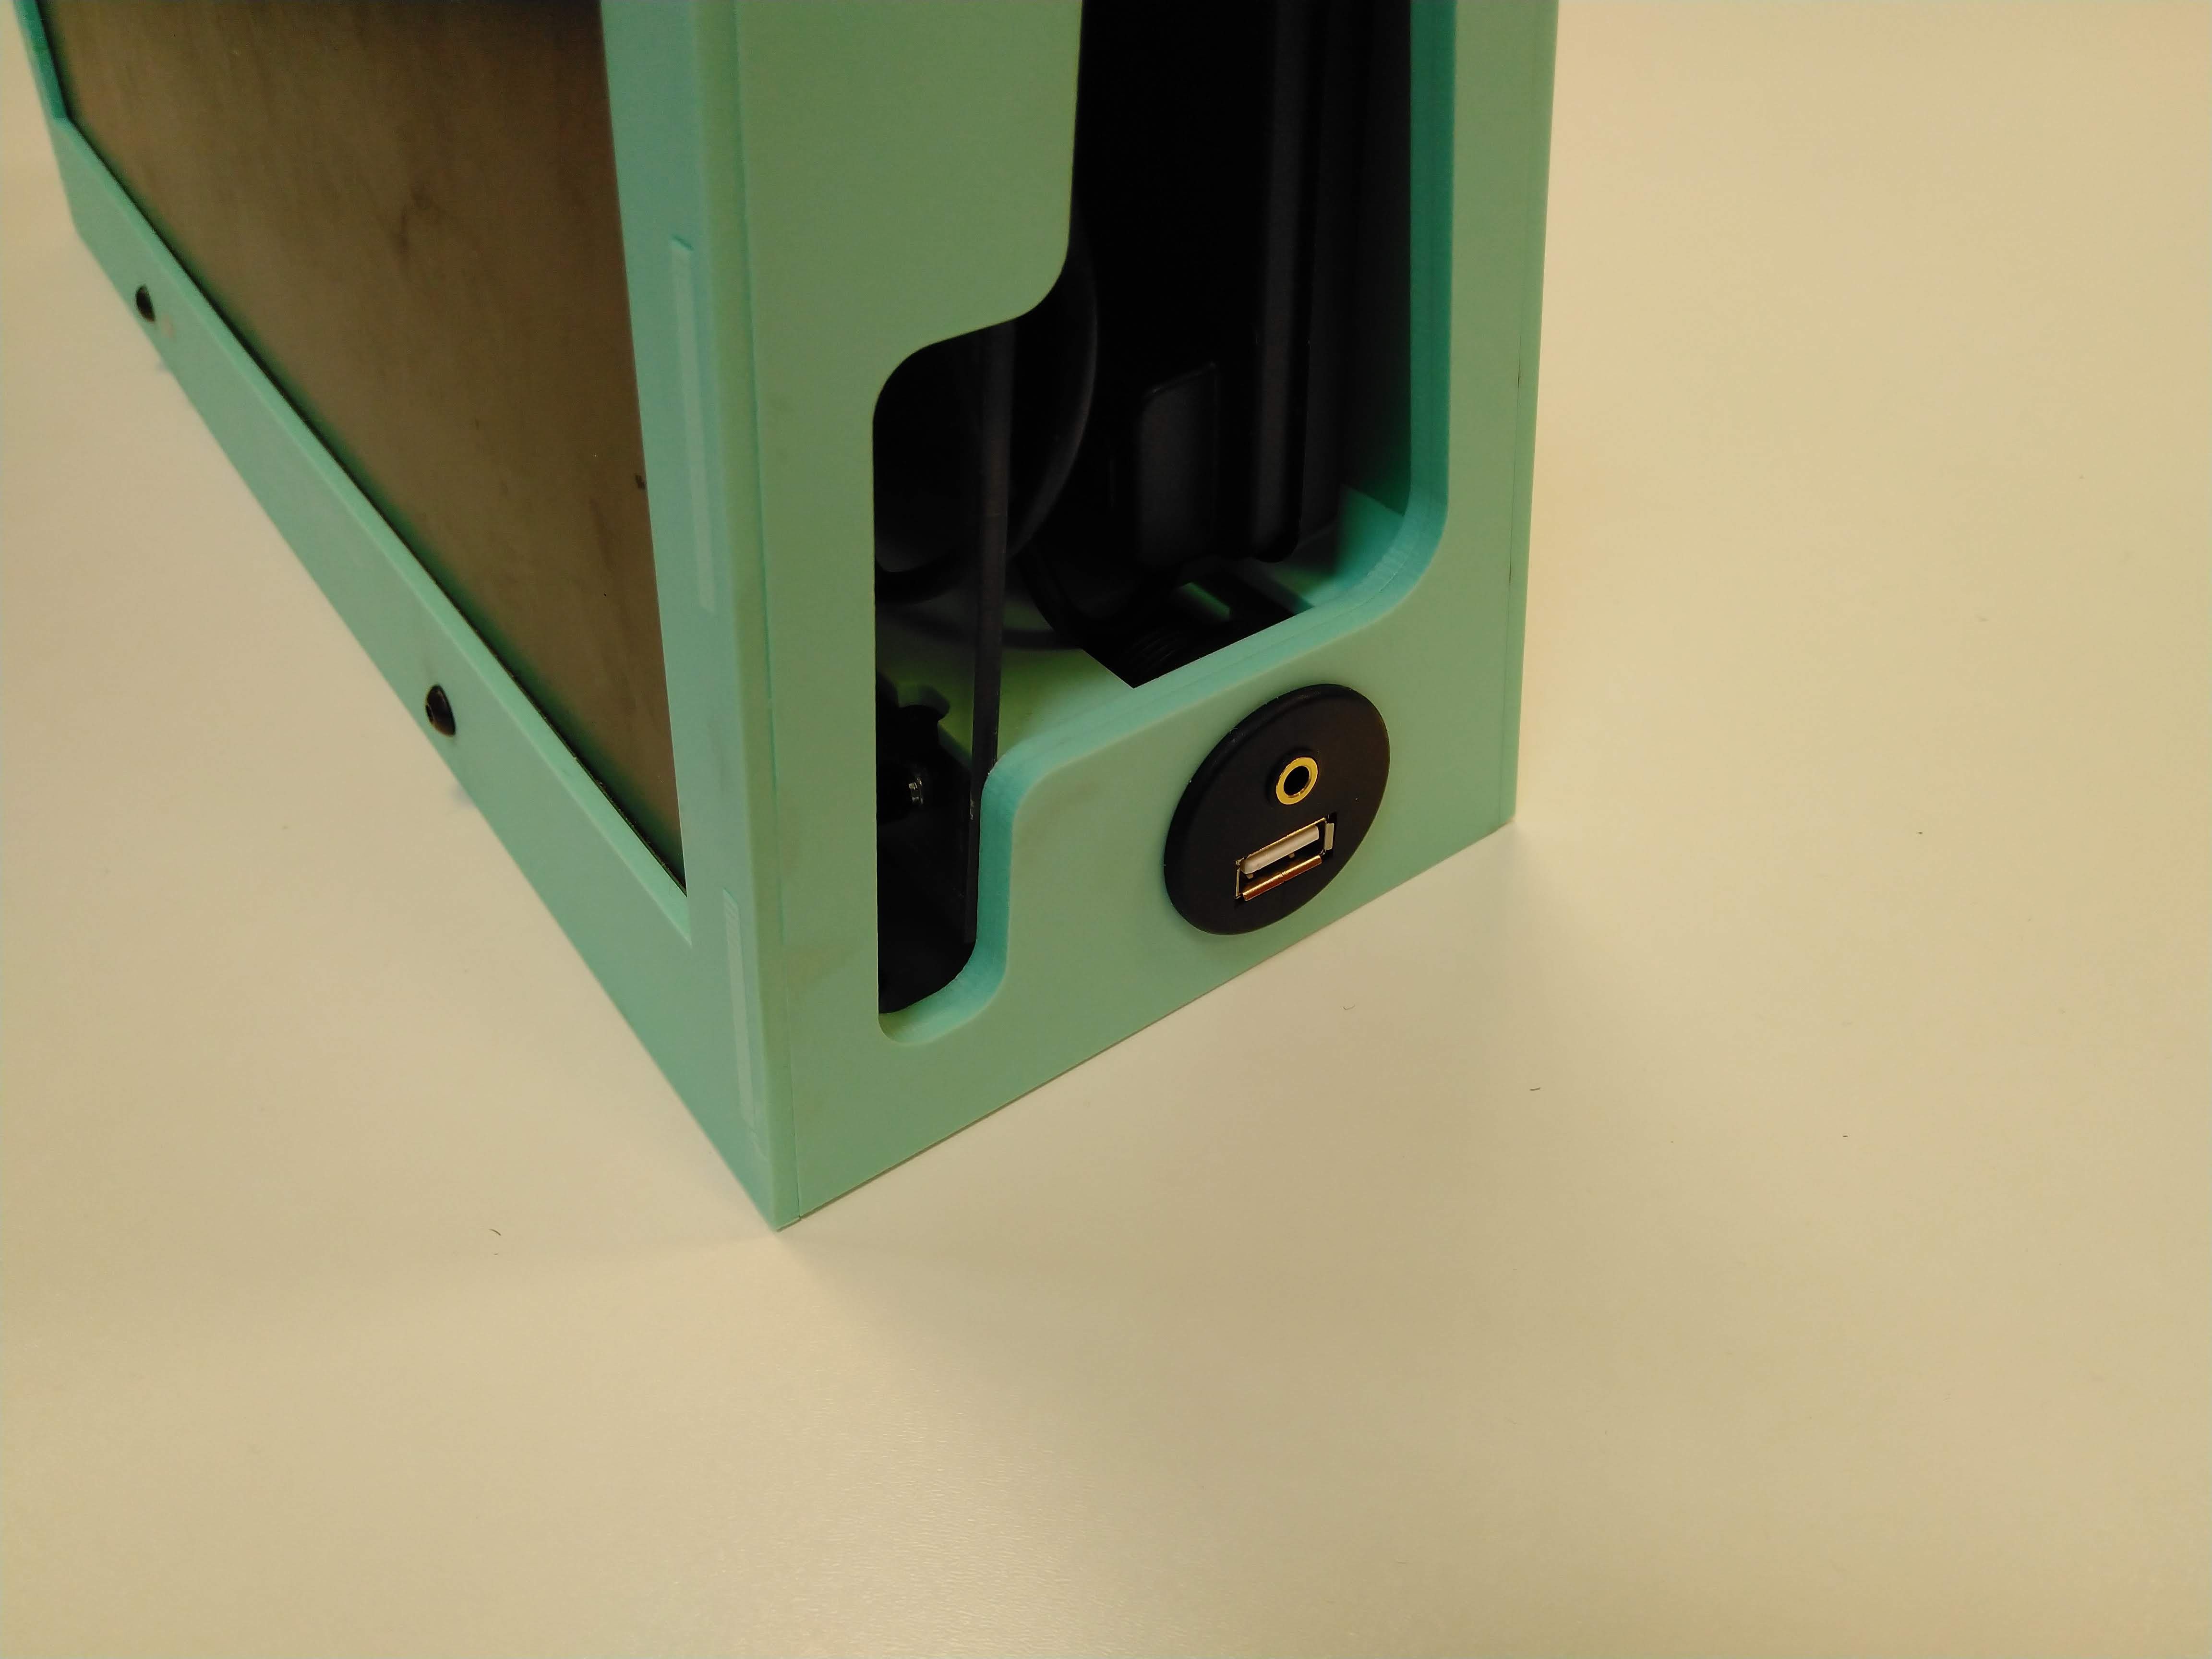
The power switch PCB is mounted at the bottom of the front panel, I 3D printed a button in clear PLA so it would light up when switched on.
In the classroom:

What's next ?
I've been given about thirty more old laptops. So I'll start converting these into more X-PC's, unfortunately they have slightly different motherboards so I'll need to modify the design to make them fit.
I'm also planning to do a Raspberry Pi version (obviously!).


wow, these look gorgeous! As a laptop motherboard repurposing aficionado, I approve!