 Alex M Sunny
UV BOT WORKING VIDEO
UV BOT APP WORKING
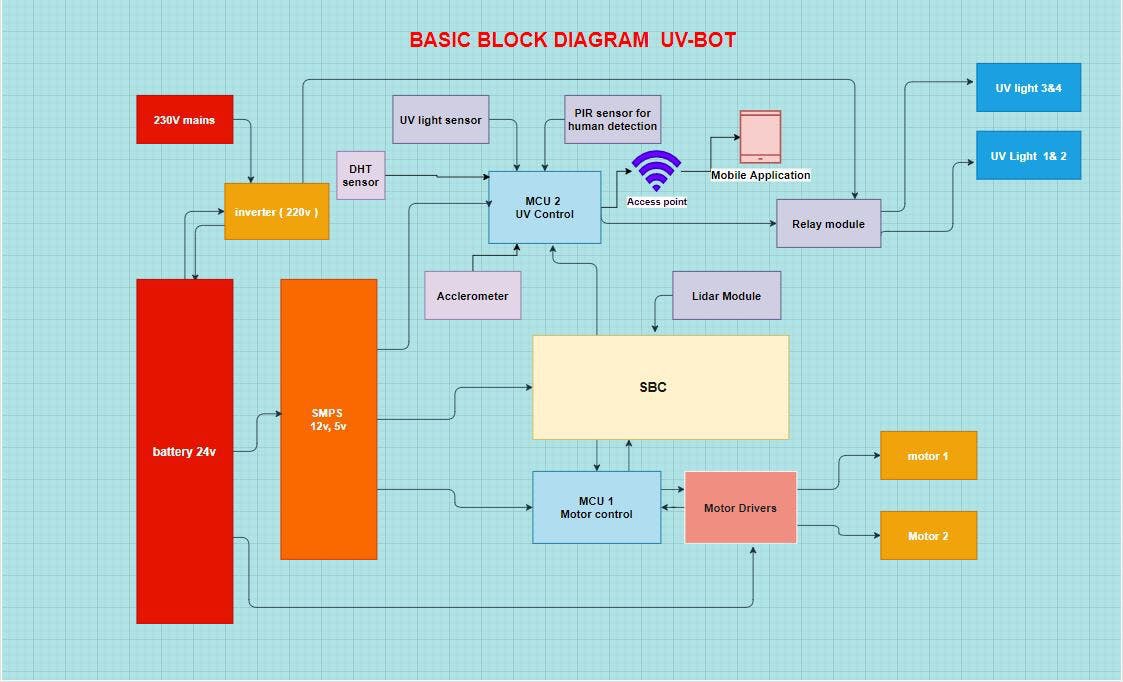
Wio terminal
We are using the Wio terminal which has many inbuilt sensors. The Wio Terminal is a SAMD51-based microcontroller with Wireless Connectivity supported by Realtek RTL8720DN that’s compatible with Arduino and MicroPython. It runs at 120MHz (Boost up to 200MHz), 4MB External Flash, and 192KB RAM. It supports both Bluetooth and Wi-Fi providing the backbone for IoT projects. The Wio Terminal itself is equipped with a 2.4” LCD Screen, onboard IMU(LIS3DHTR), Microphone, Buzzer, microSD card slot, Light sensor, and Infrared Emitter(IR 940nm). Really cool features in one single device right. In our case, it acts as a wifi access point and we can connect the raspberry pi and our Virtual machine to a single access point. The inbuilt display will show the time and other messages.
We are using the IMU sensor, inbuilt temperature sensor, and buzzer in the WIO terminal to detect a collision, overheating and it alerts through buzzer as well as our mobile app.
We are adding the UV light sensor to detect and get the feedback if UV light is ON or OFF.
The WIO terminal is also connected to the relay to control the UV lights. The WIO terminal acts as an access point as well as a server. So that we can control the relay from
UV SENSOR
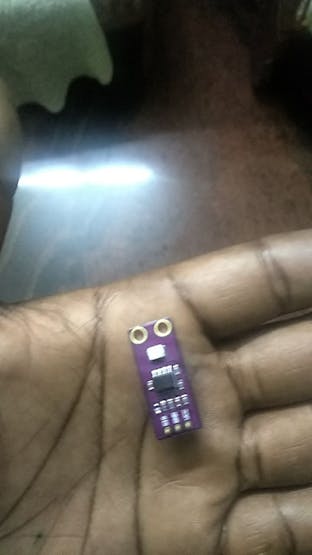
Uv sensor photo
It uses a UV photodiode, which can detect the 240-370nm range of light. The signal from the photodiode is a very small level, in the nano-ampere level, hence an opamp to amplify the signal to a more Manageable voltage-level.
Use this basic code to test it
//input this code to test UV sensorvoid setup() {Serial.begin(115200);pinMode(A8, INPUT);}void loop() {int uvsensor = analogRead(A8);Serial.print("UV intensity: ");Serial.println(uvsensor);delay(50);}
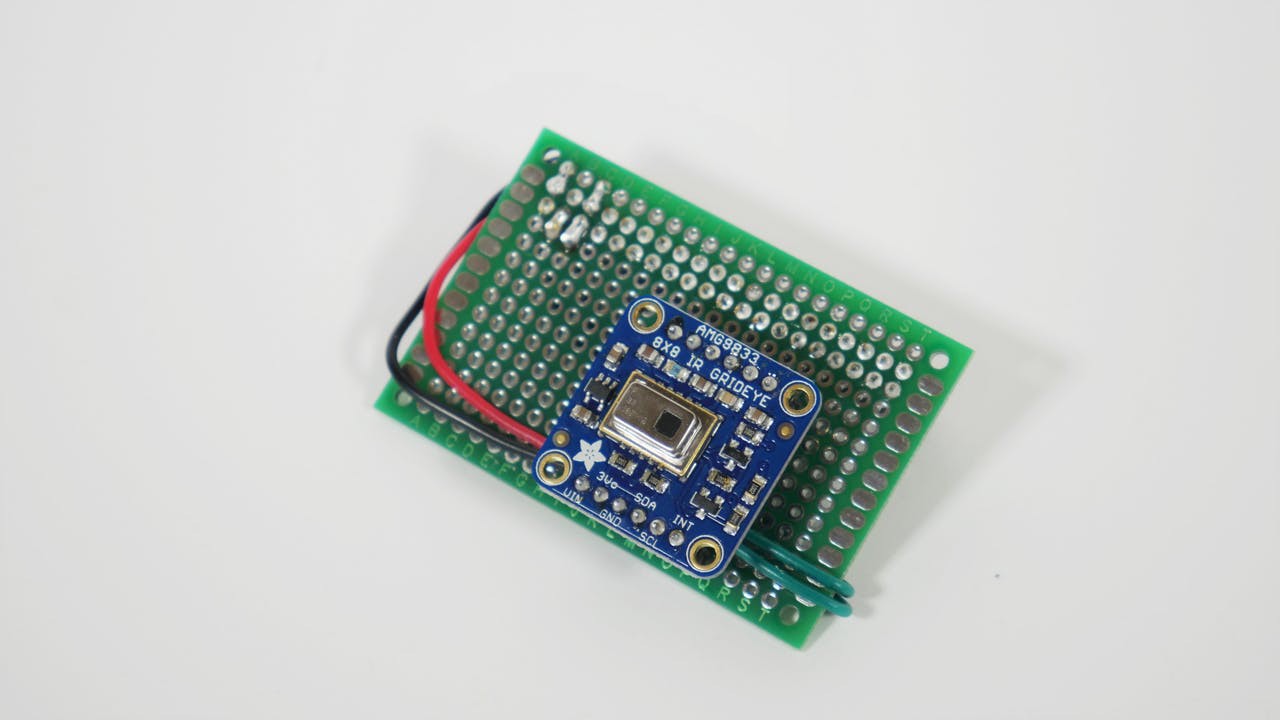
DHT sensor
There is a thermistor. There is also a very basic chip inside that does some analog to digital conversion and shows a digital signal with the temperature and humidity. The digital signal is fairly easy to read using wio terminal. Here we are using it as a safety feature. The internal temperature of the robot is being measured here. If it is getting really high the complete system will shut down.
UV light
We are using 20w unit 2ft Sanyo Japan UVC lamp with a full assembly which provides an area coverage of 70 sqft which is sufficient for our application. You can refer to these articles to find out more regarding the disinfection properties of UVC light.
- https://www.ncbi.nlm.nih.gov/pmc/articles/PMC6801766/
- https://www.who.int/emergencies/diseases/novel-coronavirus-2019/advice-for-public/myth-busters?gclid=EAIaIQobChMIsPPlg4K-6wIVU7eWCh2E7QtREAAYASAAEgK7HfD_BwE#uv
PIR sensor
PIR sensors allow you to sense motion, almost always used to detect whether a human has moved in or out of the sensors range. They are small, inexpensive, low-power, easy to use, and don't wear out But it is a little inaccurate in our case we have to use Contact-less Infrared Thermopile Sensor with OpenCV to get more accurate data for human detection. We are working on the Thermopile sensor we will update in this tutorial really fast.
We are running the access point in the Realtek board and sensors are working from the wio terminal.
You have to burn the bootloader to get access to the Realtek board in Wio terminal, follow this link to do it.
This is the code we used.
#include <WiFi.h>// Current timeunsigned long currentTime = millis();// Previous timeunsigned long previousTime = 0;// Define timeout time in milliseconds (example: 2000ms = 2s)const long timeoutTime = 2000;String header;// Auxiliar variables to store the current output stateString output5State = "off";String output4State = "off";const int output5 =5;const int output4 = 4;char ssid[] = "UV bot"; //Set the AP's SSIDchar pass[] = "12345678"; //Set the AP's passwordchar channel[] = "1"; //Set the AP's channelint status = WL_IDLE_STATUS;...Read more »


 Mr.Else
 Sebastian Goscik
Nice work 👌