Guillermo Perez Guillen
-
Step 9. Test and Conclusion
06/28/2021 at 02:33 • 0 commentsTEST
Before we start to do tests, we need to do next actions:
On your Raspberry Pi type node assistant.js
![]()
On your computer's terminal type sam status and sam watch
![]()
Congrats! now you can test your robotic arm
CONCLUSION
The prototype worked very well, and is very useful to develop more complex actions with the robotic arm. however, I also had some difficulties such as:
- The board worked very well with 5 servos and when I used 6 servos the system was collapsed and the robotic arm made strange movements. Also in the servomotor configuration I changed to the value of: min_pulse_ms: 0.2 and the robotic arm worked much better.
- As I explained at the beginning of this tutorial, I had problems configuring the audio board, but this was successfully solved and now the MATRIX Creator board is very efficient even when it receives keywords at half a meter.
It's easy to say that in the future this prototype can serve as a model in every home, and may be, we will have a robotic arm at our tables to help us in multiple tasks.
-
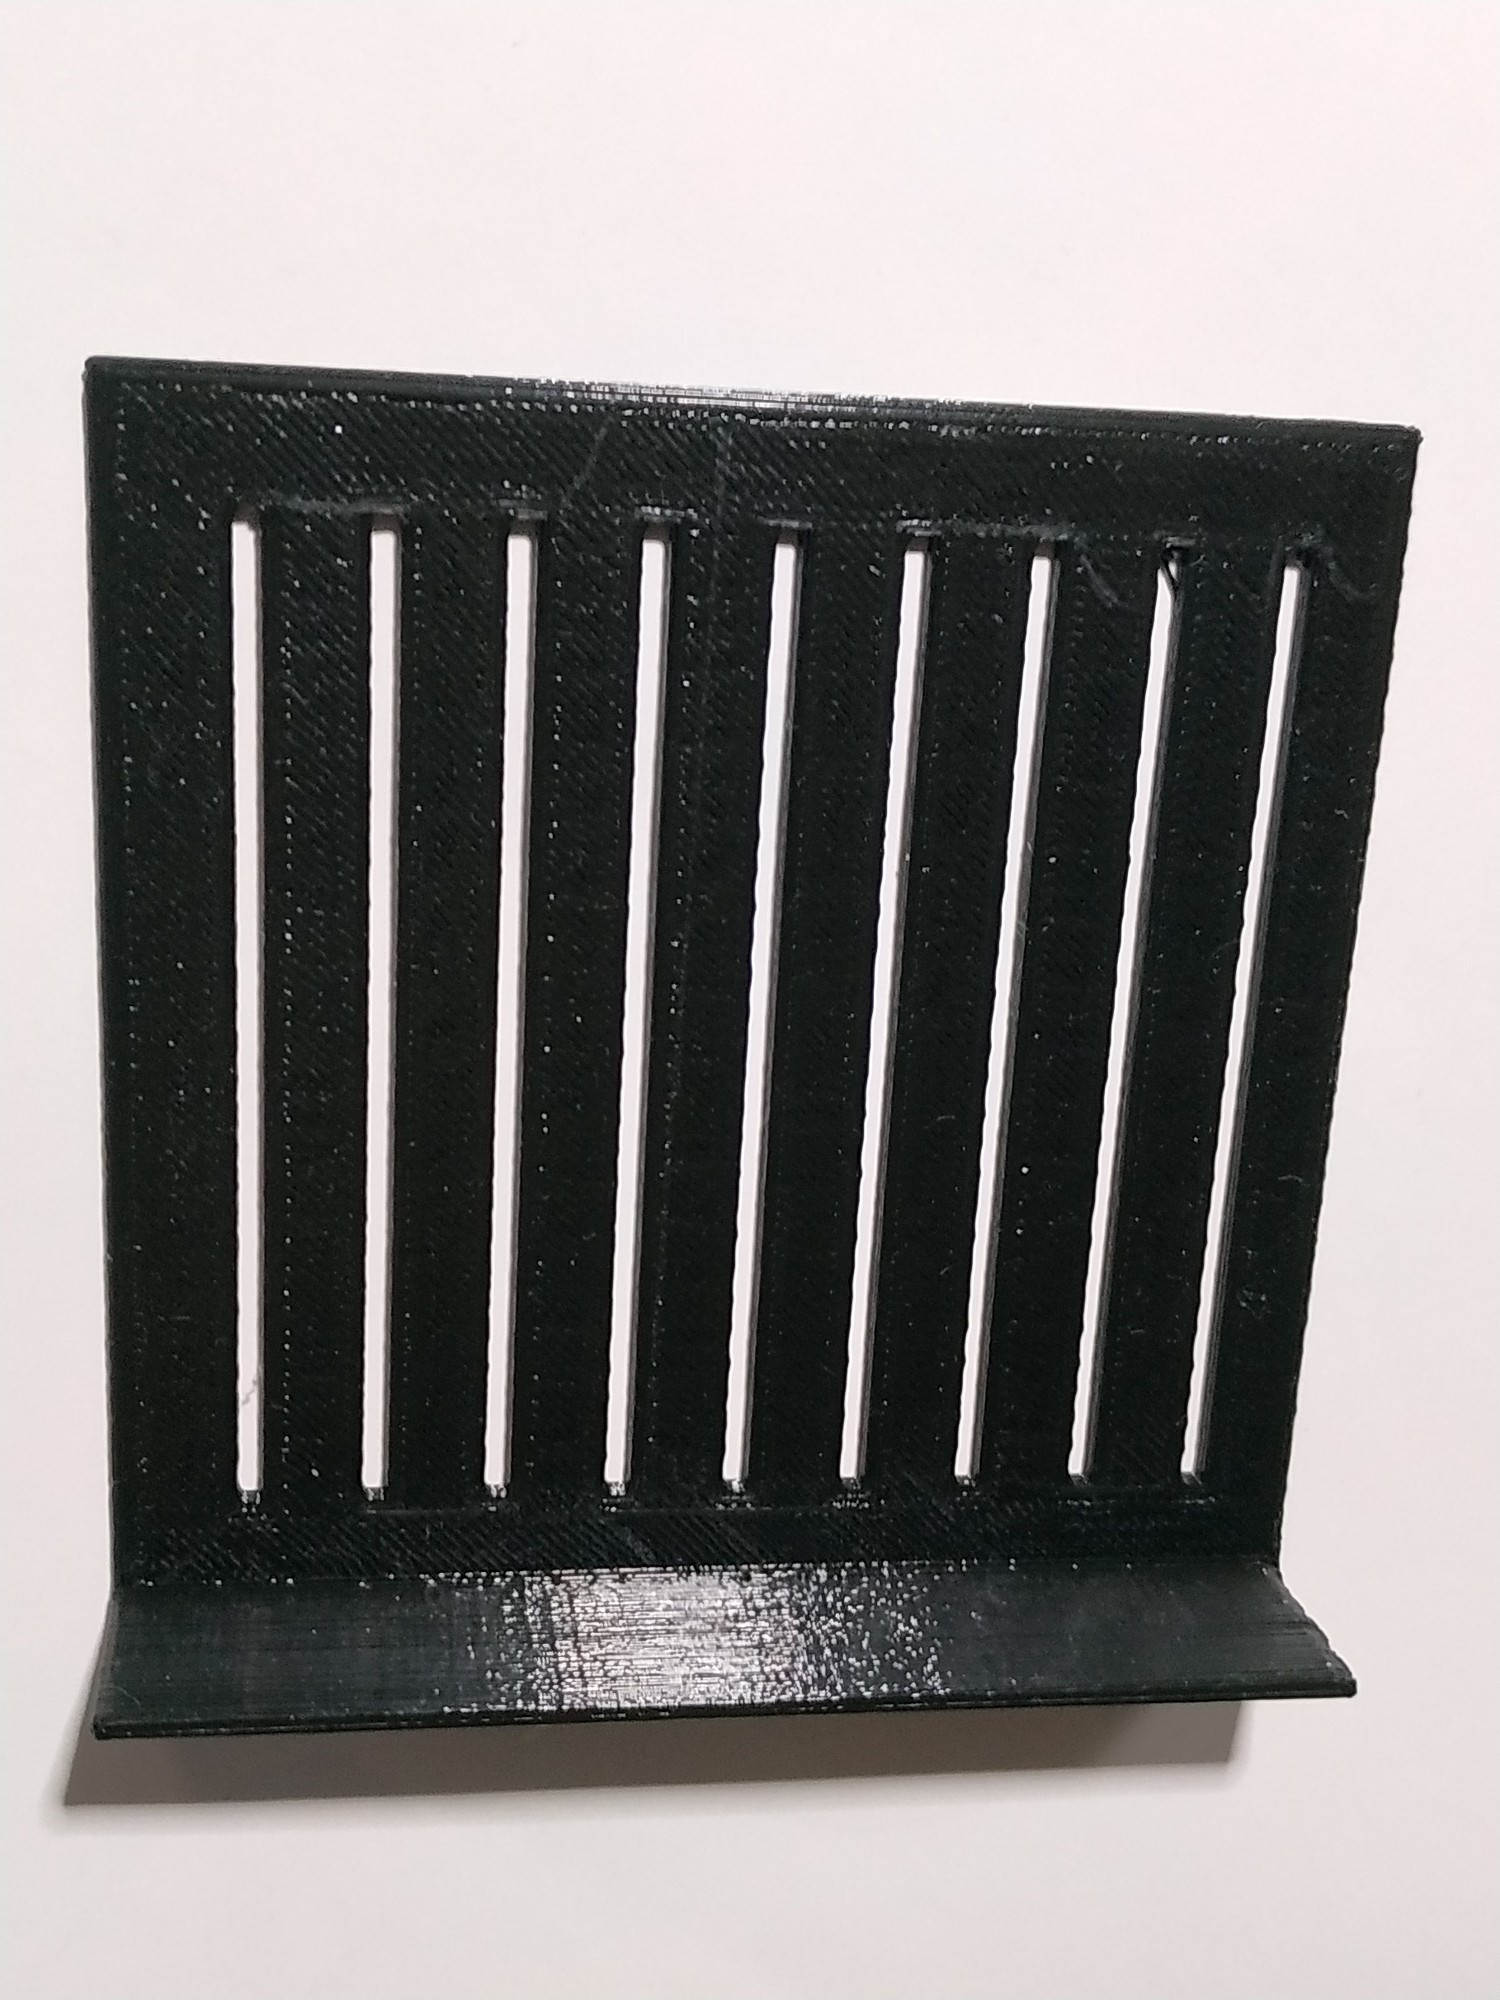
Step 8. Printing and Assembling the Panel
06/28/2021 at 02:27 • 0 commentsI have designed a 10 x 10 cm panel for three functions:
- The first is to hold the cables of the servos and that these don't get disconnected.
- The second is to hold the connector of all physical grounds of the servos.
- The third is to hold the connector of all Vcc connections of the servos.
Below you can see a picture and download the STL file on my GitHub repository here: https://github.com/guillengap/guillengap-robot-arm
![]()
-
Step 7. Wiring the Robot Arm
06/28/2021 at 02:17 • 0 commentsBelow you can see the electrical diagram with the connections of this project, it's recommended to do it patiently so as not to make mistakes because there are many cables to be connected.
![]()
I suggest you not wire the servo 5, since in the tests I carried out the system collapsed when I connected the six servos. Then I decided to disconnect the servomotor that was less used.
-
Step 6. Creating assistant.js
06/28/2021 at 02:15 • 0 commentsThis step will go show you how to setup a MATRIX Lite project with Snips.
First, MQTT must be installed and used to listen in on events from Snips.
npm install mqtt --save
assistant.js will be used to listen and respond to events from your Snips assistant. This file combines all the code from
everloop.js&relay.jsto control the everloop and relay switch through voice./////////////////////////////////// //AUTHOR: GUILLERMO PEREZ GUILLEN// /////////////////////////////////// ///////////// //VARIABLES// ///////////// var mqtt = require('mqtt'); var client = mqtt.connect('mqtt://localhost', { port: 1883 }); var relay = require('./relay.js'); var everloop = require('./everloop.js'); var snipsUserName = 'guillengap'; var wakeword = 'hermes/hotword/default/detected'; var sessionEnd = 'hermes/dialogueManager/sessionEnded'; var lightState = 'hermes/intent/'+snipsUserName+':roboticArmState'; ////////////// //ON CONNECT// ////////////// client.on('connect', function() { console.log('Connected to Snips MQTT server\n'); client.subscribe('hermes/hotword/default/detected'); client.subscribe('hermes/dialogueManager/sessionEnded'); client.subscribe(lightState); }); ////////////// //ON MESSAGE// ////////////// client.on('message', function(topic,message) { var message = JSON.parse(message); switch(topic) { // * On Wakeword case wakeword: everloop.startWaiting(); console.log('Wakeword Detected'); break; // * Robotic Arm Change case lightState: // Turn robotic arm Here/There try{ if (message.slots[0].rawValue === 'here'){ relay.roboticarmHere(); everloop.stopWaiting(); console.log('Robotic Arm Here'); } else if(message.slots[0].rawValue === 'there'){ relay.roboticarmThere(); everloop.stopWaiting(); console.log('Robotic Arm There'); } } // Expect error if `here` or `there` is not heard catch(e){ console.log('Did not receive an Here/There state') } break; // * On Conversation End case sessionEnd: everloop.stopWaiting(); console.log('Session Ended\n'); break; } });everloop.js incorporates the code required to control the LEDs on the MATRIX Creator.
///////////////////////////////////
//AUTHOR: GUILLERMO PEREZ GUILLEN//
///////////////////////////////////

/////////////
//VARIABLES//
/////////////
const matrix = require('@matrix-io/matrix-lite');
var matrix_device_leds = 0;// Holds amount of LEDs on MATRIX device
var methods = {};// Declaration of method controls at the end
var waitingToggle = false;
var counter = 0;

setInterval(function(){
   // Turns off all LEDs
   if (waitingToggle == false) {
           // Set individual LED value
           matrix.led.set({});
   }
   // Creates pulsing LED effect
   else if (waitingToggle == true) {
           // Set individual LED value
           matrix.led.set({
               b: (Math.round((Math.sin(counter) + 1) * 100) + 10),// Math used to make pulsing effect
           });

   };
   counter = counter + 0.2;
   // Store the Everloop image in MATRIX configuration
},50);
///////////////////
//WAITING METHODS//
///////////////////
methods.startWaiting = function() {
   waitingToggle = true;
};
methods.stopWaiting = function() {
   waitingToggle = false;
};
module.exports = methods;// Export methods in order to make them avaialble to other files
relay.js includes the code required to turn the robotic arm here and there. This relay will control power to the robotic arm.
///////////////////////////////////
//AUTHOR: GUILLERMO PEREZ GUILLEN//
///////////////////////////////////

/////////////
//VARIABLES//
/////////////
const matrix = require('@matrix-io/matrix-lite');
var methods = {};// Declaration of method controls at the end

matrix.gpio.setFunction(0, 'PWM');
matrix.gpio.setFunction(1, 'PWM');
matrix.gpio.setFunction(2, 'PWM');
matrix.gpio.setFunction(3, 'PWM');
matrix.gpio.setFunction(4, 'PWM');
matrix.gpio.setFunction(5, 'PWM');

matrix.gpio.setMode(0,'output');
matrix.gpio.setMode(1,'output');
matrix.gpio.setMode(2,'output');
matrix.gpio.setMode(3,'output');
matrix.gpio.setMode(4,'output');
matrix.gpio.setMode(5,'output');

////////////////////////////////////THERE METHOD
methods.roboticarmThere = function() {
{
    for(i_0 = 75; i_0 <= 155; i_0++) {    // Rotating base servo
        matrix.gpio.setServoAngle({
            pin: 0,
            angle: i_0,
            min_pulse_ms: 0.2
        });
        for(i_delay0 = 0; i_delay0 < 2000000; i_delay0++) {
            ///////////////// delay servo
        }
    };
}
{
    for(i_2 = 100; i_2 <= 135; i_2++) {    // Third axis servo
        matrix.gpio.setServoAngle({
            pin: 2,
            angle: i_2,
            min_pulse_ms: 0.2
        });
        for(i_delay2 = 0; i_delay2 < 2000000; i_delay2++) {
            ///////////////// delay
        }
    };
}
{
    for(i_5 = 105; i_5 <= 135; i_5++) {    // Mechanical claw servo
        matrix.gpio.setServoAngle({
            pin: 5,
            angle: i_5,
            min_pulse_ms: 0.2
        });
        for(i_delay5 = 0; i_delay5 < 2000000; i_delay5++) {
            ///////////////// delay servo pinza
        }
    };
}
{
    for(i_2 = 135; i_2 >= 100; i_2--) {    // Third axis servo
        matrix.gpio.setServoAngle({
            pin: 2,
            angle: i_2,
            min_pulse_ms: 0.2
        });
        for(i_delay2 = 0; i_delay2 < 2000000; i_delay2++) {
            ///////////////// delay
        }
    };
}
{
        for(i_0 = 155; i_0 >= 45; i_0--) {    // Rotating base servo
        matrix.gpio.setServoAngle({
            pin: 0,
            angle: i_0,
            min_pulse_ms: 0.2
        });
        for(i_delay0 = 0; i_delay0 < 2000000; i_delay0++) {
            ///////////////// delay servo base
        }
    };
}
{
    for(i_2 = 100; i_2 <= 135; i_2++) {    // Third axis servo
        matrix.gpio.setServoAngle({
            pin: 2,
            angle: i_2,
            min_pulse_ms: 0.2
        });
        for(i_delay2 = 0; i_delay2 < 2000000; i_delay2++) {
            ///////////////// delay
        }
    };
}
{
    for(i_5 = 135; i_5 >= 105; i_5--) {    // Mechanical claw servo
        matrix.gpio.setServoAngle({
            pin: 5,
            angle: i_5,
            min_pulse_ms: 0.2
        });
        for(i_delay5 = 0; i_delay5 < 2000000; i_delay5++) {
            ///////////////// delay servo pinza
        }
    };
}
{
    for(i_2 = 135; i_2 >= 100; i_2--) {    // Third axis servo
        matrix.gpio.setServoAngle({
            pin: 2,
            angle: i_2,
            min_pulse_ms: 0.2
        });
        for(i_delay2 = 0; i_delay2 < 2000000; i_delay2++) {
            ///////////////// delay
        }
    };
}
{
        for(i_0 = 45; i_0 <= 75; i_0++) {    // Rotating base servo
        matrix.gpio.setServoAngle({
            pin: 0,
            angle: i_0,
            min_pulse_ms: 0.2
        });
        for(i_delay0 = 0; i_delay0 < 2000000; i_delay0++) {
            ///////////////// delay
        }
    };
}
   console.log("Robotic Arm Have Been Turned There");
};
////////////////////////////////////HERE METHOD
methods.roboticarmHere = function() {
{
    for(i_0 = 125; i_0 >= 75; i_0--) {    // Rotating base servo
        matrix.gpio.setServoAngle({
            pin: 0,
            angle: i_0,
            // minimum pulse width for a PWM wave (in milliseconds)
            min_pulse_ms: 0.2
        });
        for(i_delay0 = 0; i_delay0 < 2000000; i_delay0++) {
            ///////////////// delay servo base
        }
    };
}
{
    for(i_1 = 90; i_1 >= 85; i_1--) {    // Second axis servo
        matrix.gpio.setServoAngle({
            pin: 1,
            angle: i_1,
            min_pulse_ms: 0.2
        });
        for(i_delay1 = 0; i_delay1 < 2000000; i_delay1++) {
            ///////////////// delay
        }
    };
}
{
    for(i_2 = 120; i_2 >= 100; i_2--) {    // Third axis servo
        matrix.gpio.setServoAngle({
            pin: 2,
            angle: i_2,
            min_pulse_ms: 0.2
        });
        for(i_delay2 = 0; i_delay2 < 2000000; i_delay2++) {
            ///////////////// delay
        }
    };
}
{
    for(i_3 = 135; i_3 >= 120; i_3--) {    // Fourth axis servo
        matrix.gpio.setServoAngle({
            pin: 3,
            angle: i_3,
            min_pulse_ms: 0.2
        });
        for(i_delay3 = 0; i_delay3 < 2000000; i_delay3++) {
            ///////////////// delay
        }
    };
}
{
    for(i_0 = 75; i_0 >= 45; i_0--) {    // Rotating base servo
        matrix.gpio.setServoAngle({
            pin: 0,
            angle: i_0,
            min_pulse_ms: 0.2
        });
        for(i_delay0 = 0; i_delay0 < 2000000; i_delay0++) {
            ///////////////// delay
        }
    };
}
{
    for(i_2 = 100; i_2 <= 135; i_2++) {    // Third axis servo
        matrix.gpio.setServoAngle({
            pin: 2,
            angle: i_2,
            min_pulse_ms: 0.2
        });
        for(i_delay2 = 0; i_delay2 < 2000000; i_delay2++) {
            ///////////////// delay
        }
    };
}
{
    for(i_5 = 105; i_5 <= 135; i_5++) {    // Mechanical claw servo
        matrix.gpio.setServoAngle({
            pin: 5,
            angle: i_5,
            min_pulse_ms: 0.2
        });
        for(i_delay5 = 0; i_delay5 < 2000000; i_delay5++) {
            ///////////////// delay servo pinza
        }
    };
}
{
    for(i_2 = 135; i_2 >= 100; i_2--) {    // Third axis servo
        matrix.gpio.setServoAngle({
            pin: 2,
            angle: i_2,
            min_pulse_ms: 0.2
        });
        for(i_delay2 = 0; i_delay2 < 2000000; i_delay2++) {
            ///////////////// delay
        }
    };
}
{
        for(i_0 = 30; i_0 <= 155; i_0++) {    // Rotating base servo
        matrix.gpio.setServoAngle({
            pin: 0,
            angle: i_0,
            min_pulse_ms: 0.2
        });
        for(i_delay0 = 0; i_delay0 < 2000000; i_delay0++) {
            ///////////////// delay servo base
        }
    };
}
{
    for(i_2 = 100; i_2 <= 135; i_2++) {    // Third axis servo
        matrix.gpio.setServoAngle({
            pin: 2,
            angle: i_2,
            min_pulse_ms: 0.2
        });
        for(i_delay2 = 0; i_delay2 < 2000000; i_delay2++) {
            ///////////////// delay
        }
    };
}
{
    for(i_5 = 135; i_5 >= 105; i_5--) {    // Mechanical claw servo
        matrix.gpio.setServoAngle({
            pin: 5,
            angle: i_5,
            min_pulse_ms: 0.2
        });
        for(i_delay5 = 0; i_delay5 < 2000000; i_delay5++) {
            ///////////////// delay servo pinza
        }
    };
}
{
    for(i_2 = 135; i_2 >= 100; i_2--) {    // Third axis servo
        matrix.gpio.setServoAngle({
            pin: 2,
            angle: i_2,
            min_pulse_ms: 0.2
        });
        for(i_delay2 = 0; i_delay2 < 2000000; i_delay2++) {
            ///////////////// delay
        }
    };
}
{
    for(i_0 = 155; i_0 >= 75; i_0--) {    // Rotating base servo
        matrix.gpio.setServoAngle({
            pin: 0,
            angle: i_0,
            min_pulse_ms: 0.2
        });
        for(i_delay0 = 0; i_delay0 < 2000000; i_delay0++) {
            ///////////////// delay servo base
        }
    };
}
   console.log("Robotic Arm Have Been Turned Here");
};
module.exports = methods;// Export methods in order to make them avaialble to other files
Copy and paste this files into the /home/pi/lite_js folder of your Raspberry Pi board. You can download this files on the "Code" section.
![]()
Notes:
- To make this code I used the information on the following page: https://matrix-io.github.io/matrix-documentation/matrix-lite/js-reference/gpio/
- Be careful with quotes, since you can make the mistake of typing the single quotation marks incorrectly.
- In the example of "Set servo" it indicates a value of min_pulse_ms: 0.8 which did not help me and I changed it to the value of: min_pulse_ms: 0.2 to trial and error.
- You can download the code files on my GitHub repository here: https://github.com/guillengap/guillengap-robot-arm
-
Step 5. Deploy your Assistant
06/28/2021 at 02:07 • 0 comments -
Step 4. Adding an Intent
06/28/2021 at 02:02 • 0 commentsIntents are what Snips uses to handle user requests. For this Assistant, we'll start by creating an intent for turning Here/There the MATRIX Creator's App.
Create a new intent roboticArmState for your RoboticArm app
![]()
Once you've defined your intent, you need to extract whether the user wants their robotic arm here or there. This is where slots come in.
Create a new slot called
powerand a custom slot type with the same name.![]()
Make sure your
powerslot type has here & there as values.![]()
Create example sentences containing the words here and there. Highlight these words in your example sentences to assign them to your recently created
powerslot.![]()
Be sure to save!
-
Step 3. Creating a Snips Assistant and App
06/28/2021 at 01:59 • 0 commentsSign into your Snips.ai account.
![]()
Create an assistant called Robotic Arm
![]()
Create an App named RoboticArm
![]()
-
Step 2. Connect Sam to Your Raspberry Pi
06/28/2021 at 01:54 • 0 comments -
Step 1. Let's Get Started
06/28/2021 at 01:37 • 0 commentsHardware Prerequisites
Before getting started, you can check with more details what hardware I used:
- Raspberry Pi 3 B+
- MATRIX Creator ,first steps, and datasheet, and you can buy a MATRIX Creator board here
- Micro-USB power adapter
- Micro SD Card (16 GB & class 10 speed)
- Micro-USB Cable
- USB Keyboard & Mouse & HDMI Monitor
- Internet connection
- A diymore Black ROT3U 6DOF Aluminum robotic arm (maximum extension: 45 cm) and six servos MG995 (Stall torque: 8.5 kgf·cm with 4.8 V, 10 kgf·cm with 6 V) dataseeht here
Software Prerequisites
You can check what required software on my personal computer I used:
- SD Card Formatter: To easily format our Micro SD Card
- balenaEtcher: To easily flash our compressed Raspbian Stretch image
- MATRIX kit image here which includes Stretch + MATRIX packages (2.18 GB)
- Node.js: Dependancy for Sam CLI Tool (Windows 64 bits)
- Git Bash: requirement asked by Node.js
- Snips' Sam CLI Tool: Creates & manages Snip assistants on your Raspberry Pi
Setting Up the Hardware
- First at all, You need a registered snips.ai account.
- Be sure to setup your Raspberry Pi with your MATRIX Creator device.
- Enable SSH on your Raspberry Pi. This allows the SAM CLI tool to connect to your Raspberry Pi board
- Install MATRIX Lite JS. This allows Snips to work on you Raspberry Pi board
- Configure Snips.ai
Once everything is well installed on your Raspberry Pi board, You can check the versions of: npm, node and nodejs.
![]()
In my case, I had two serious problems with the configuration of my hardware and these are the solutions:
FIRST SOLUTION: to activate the pcm.speaker, I had to add a rate of 16000 in the assound.conf file.
pcm.speaker {
type plug
slave {
pcm "hw:0,0"
rate 16000
}
}
SECOND SOLUTION: My Raspberry Pi board has better audio with the "portaudio" board, so I had to activate it in the snips.toml file
[snips-audio-server]
# frame = 256
# bind = "default@mqtt"
mike = "MATRIXIO-SOUND: - (hw:2,0)"
# disable_playback = false
# disable_capture = false
portaudio_playback="default"
GUILLENGAP Cobot
Collaborative Robot Arm with Artificial Intelligence, and Used as Assistant in: 1) Voice Command System & 2) Sorting Objects System