 Nelson Bairos
-
1Interface assemble
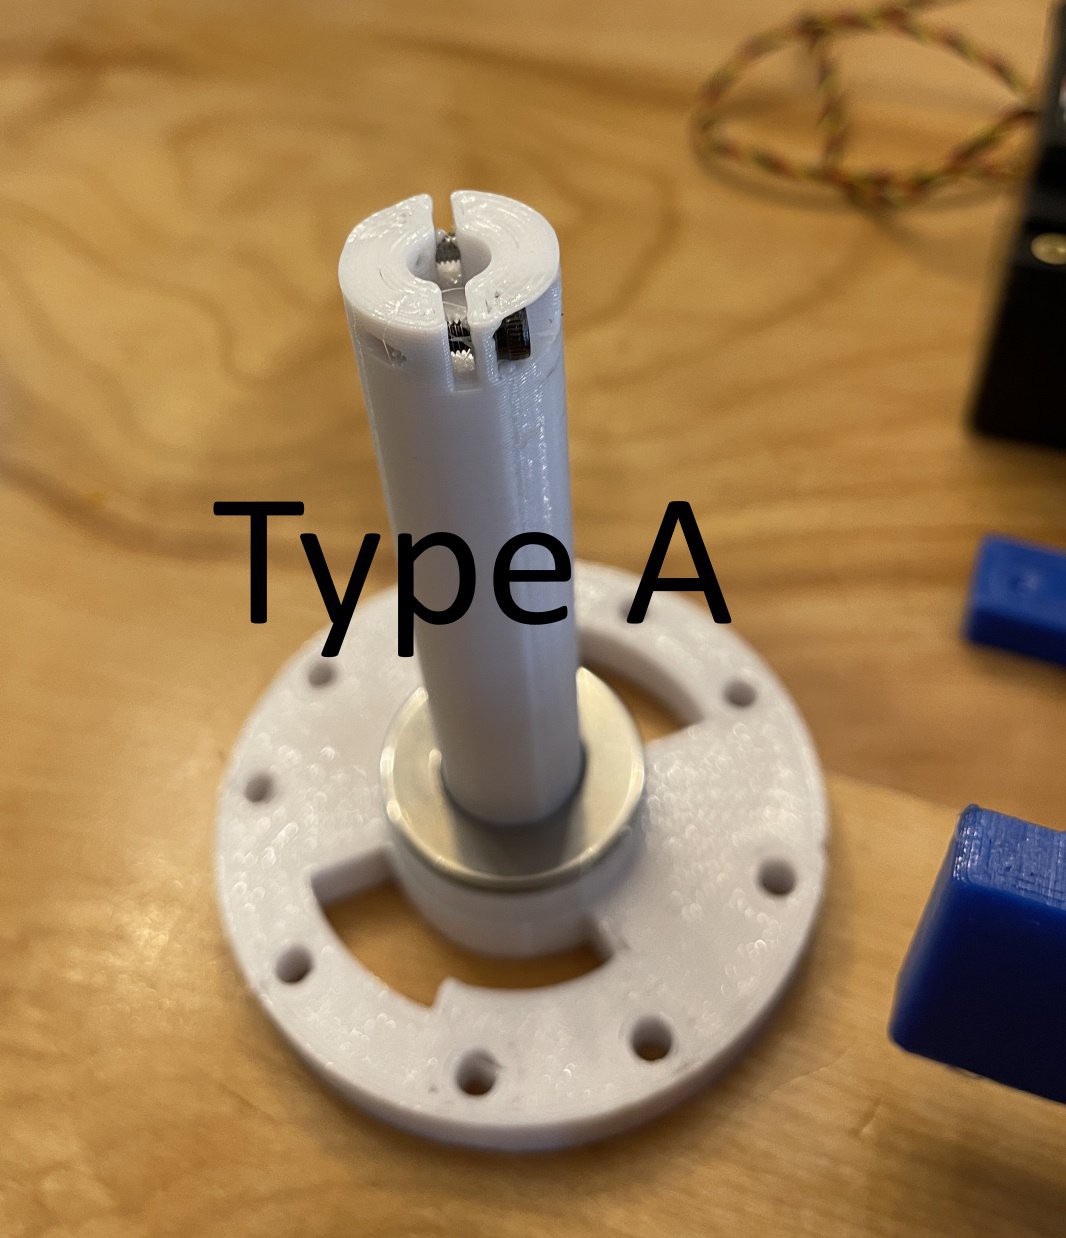
NOTE: THERE ARE NOW 2 STYLES OF INTERFACE, THE PROCESS IS NEARLY IDENTICAL BUT PAY ATTENTION TO THE DIFFERENCES IN THE INSTRUCTIONS.
Start with the (white) 3D printed part called "Skull_Mech_V3_Interface" This connects to the neck of the skeleton.
- Make sure the shaft is smooth, sand it down a little if needed.
- Slide the thrust needle bearing assembly down (washer, bearing, washer)
- This step varies based on the Type of Interface
- Type A: Screw in the two M3 screws (thread length around 12mm) at the top of the part. These will tighten the rotation servo onto this part later. Don't tighten the screws.
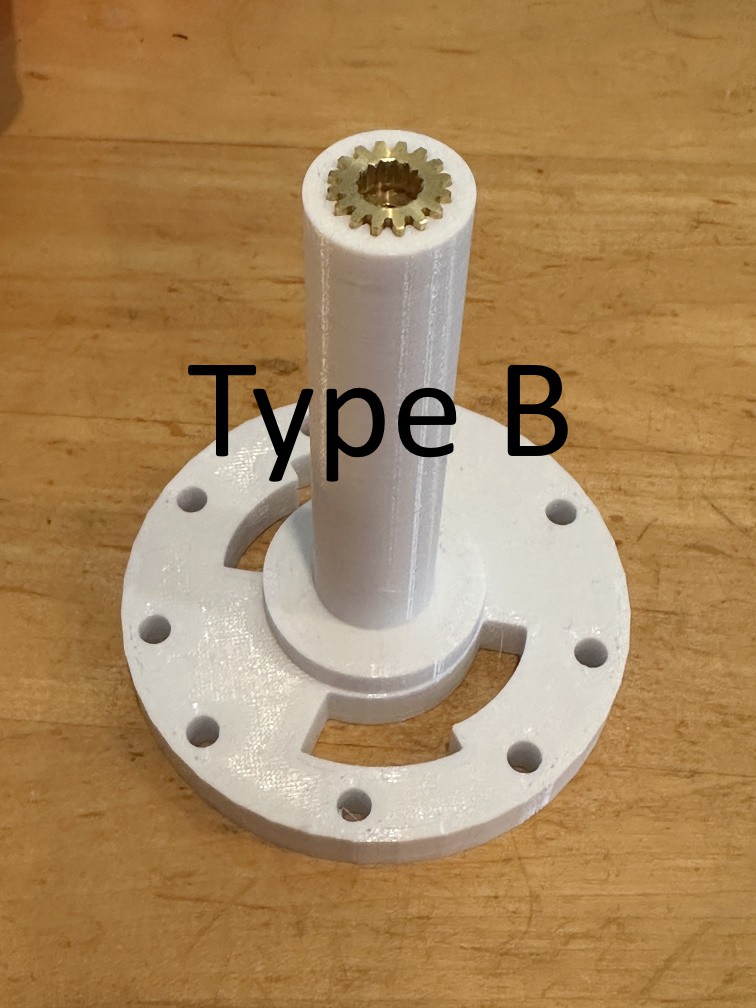
- Type B: Skip this step. You will attach the gear onto the Rotation Servo.
![]()
-
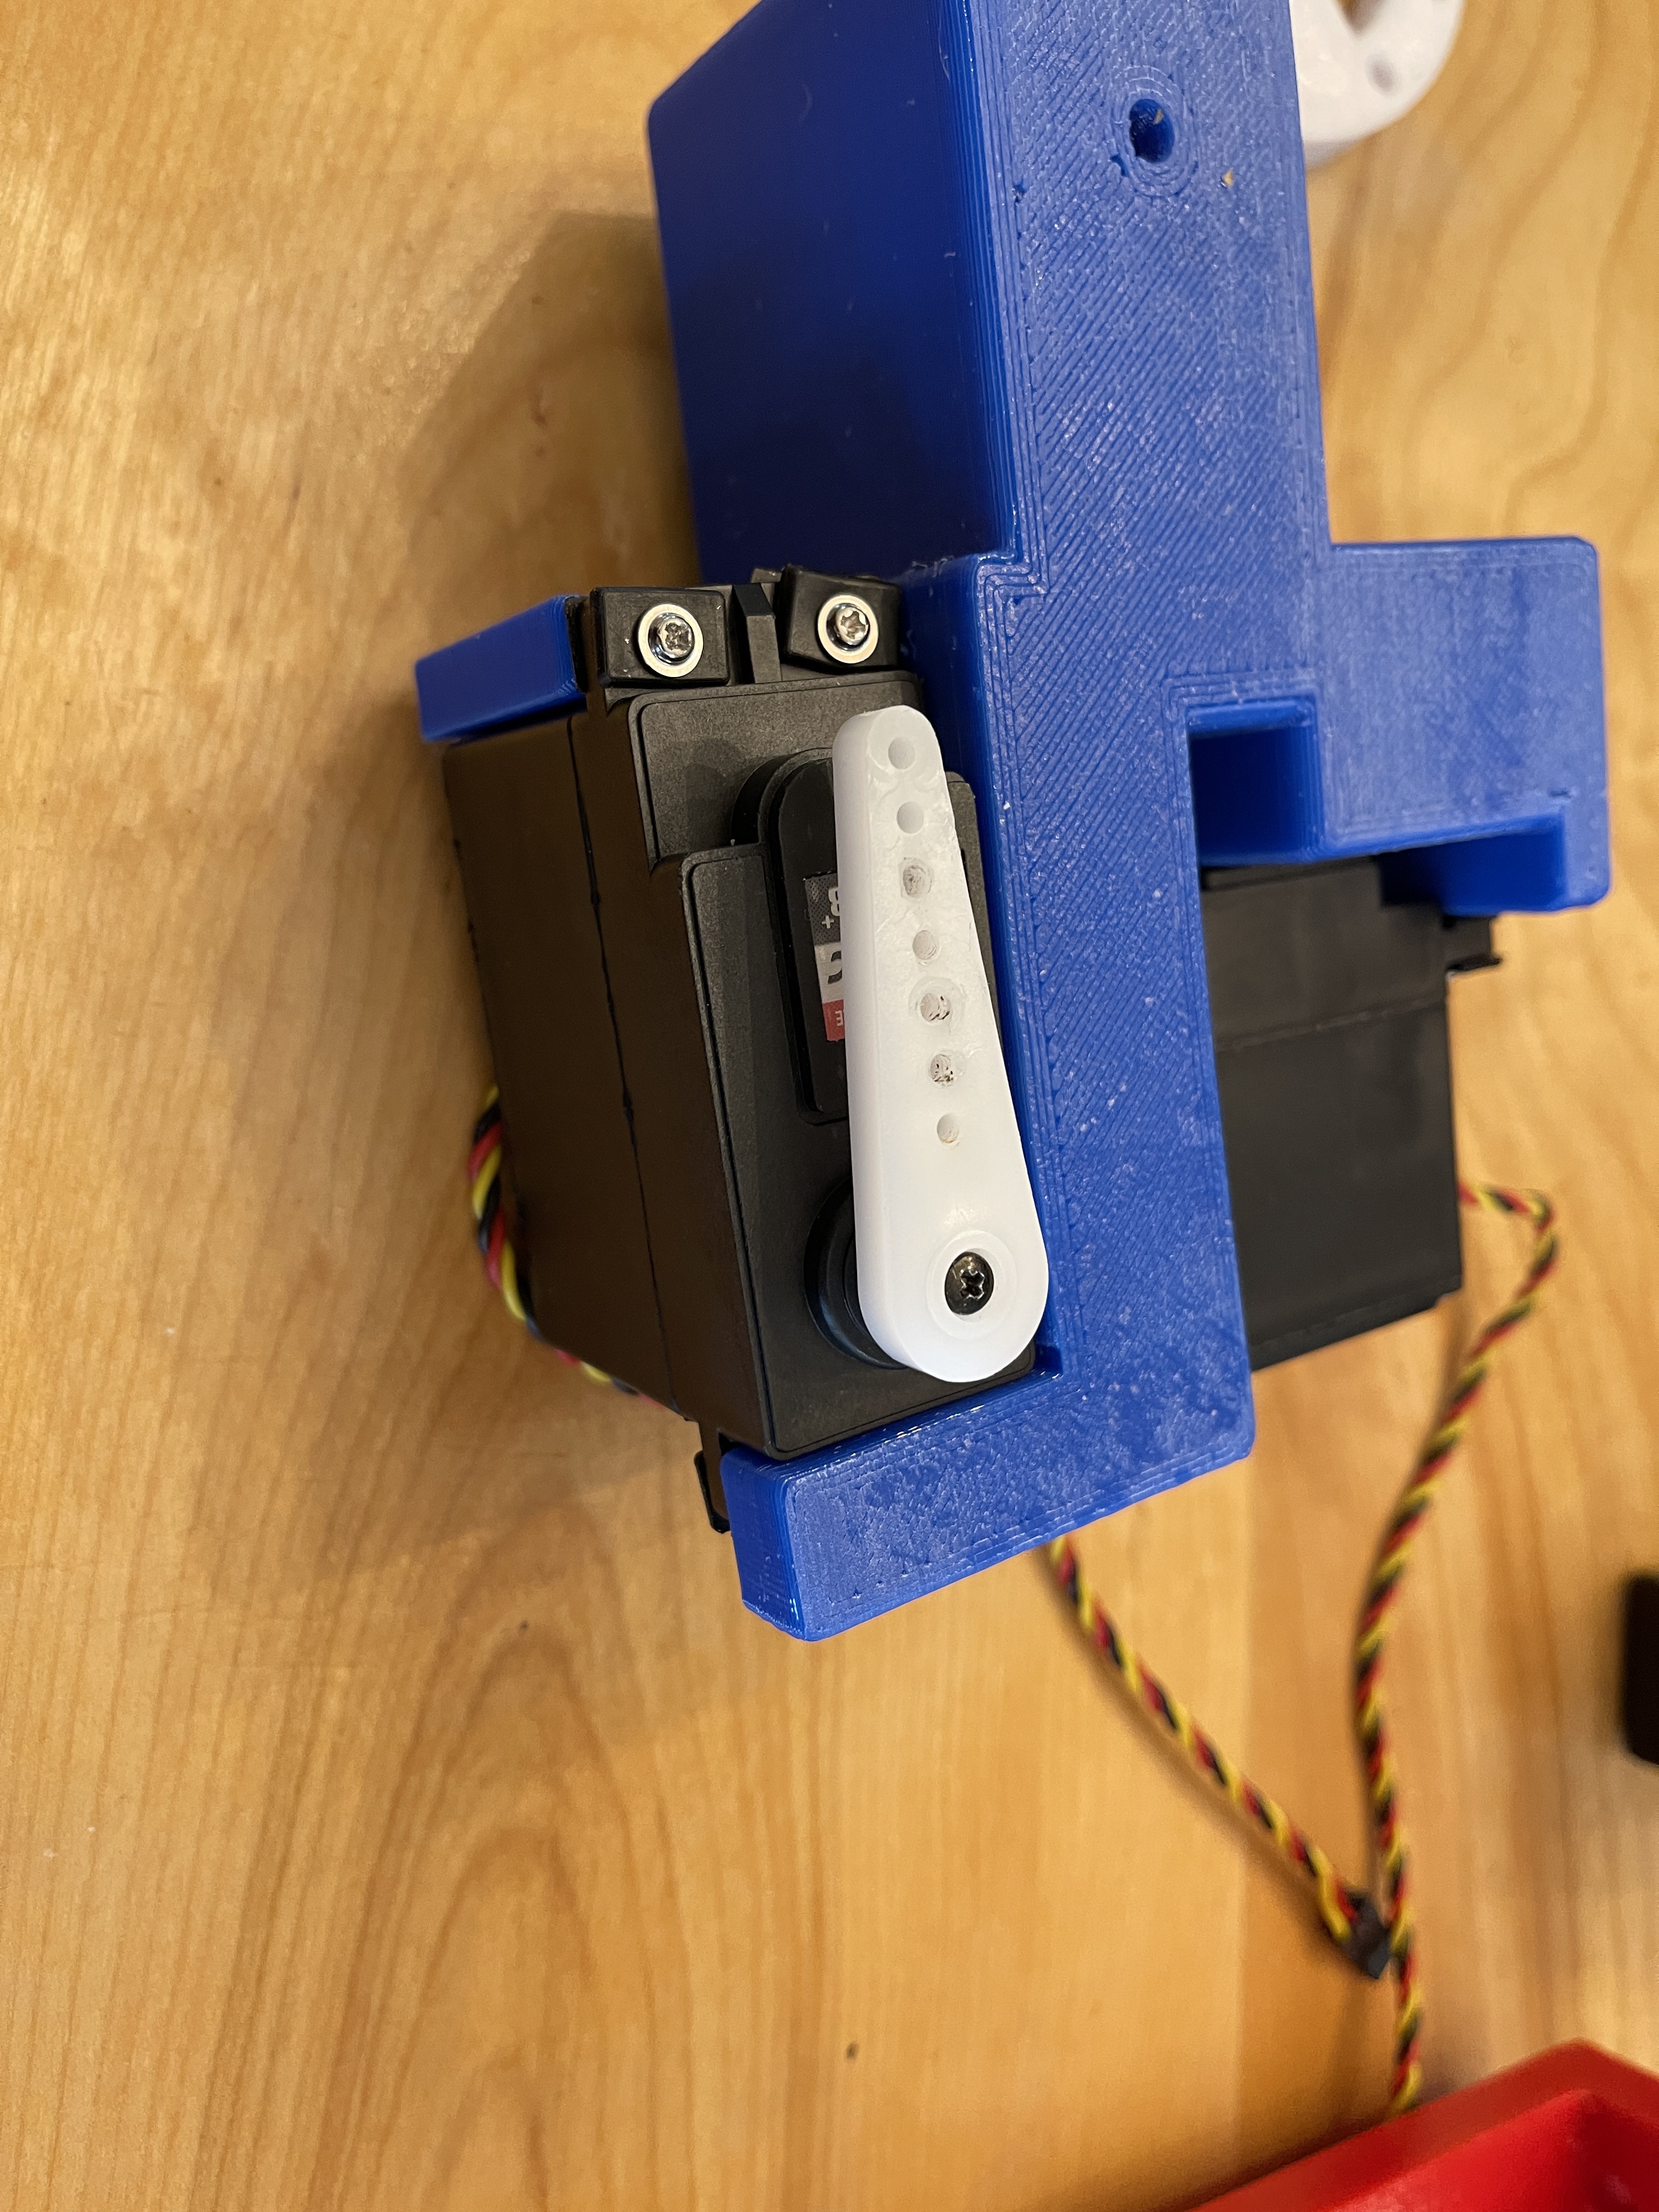
2Rotation Servo installation
You will be using the 1st level (blue) 3D part labeled "Skull_Mech_V3_1stLvl"
- Remove the servo arm (and screw) from the servo.
- Type B Only: Attach the servo gear (from ServoCity) onto the servo. (Not pictured).
- Position the Rotation servo as shown and attach with the included hardware.
- There are holes in the 3D model for aligning the servo screws.
![]()
-
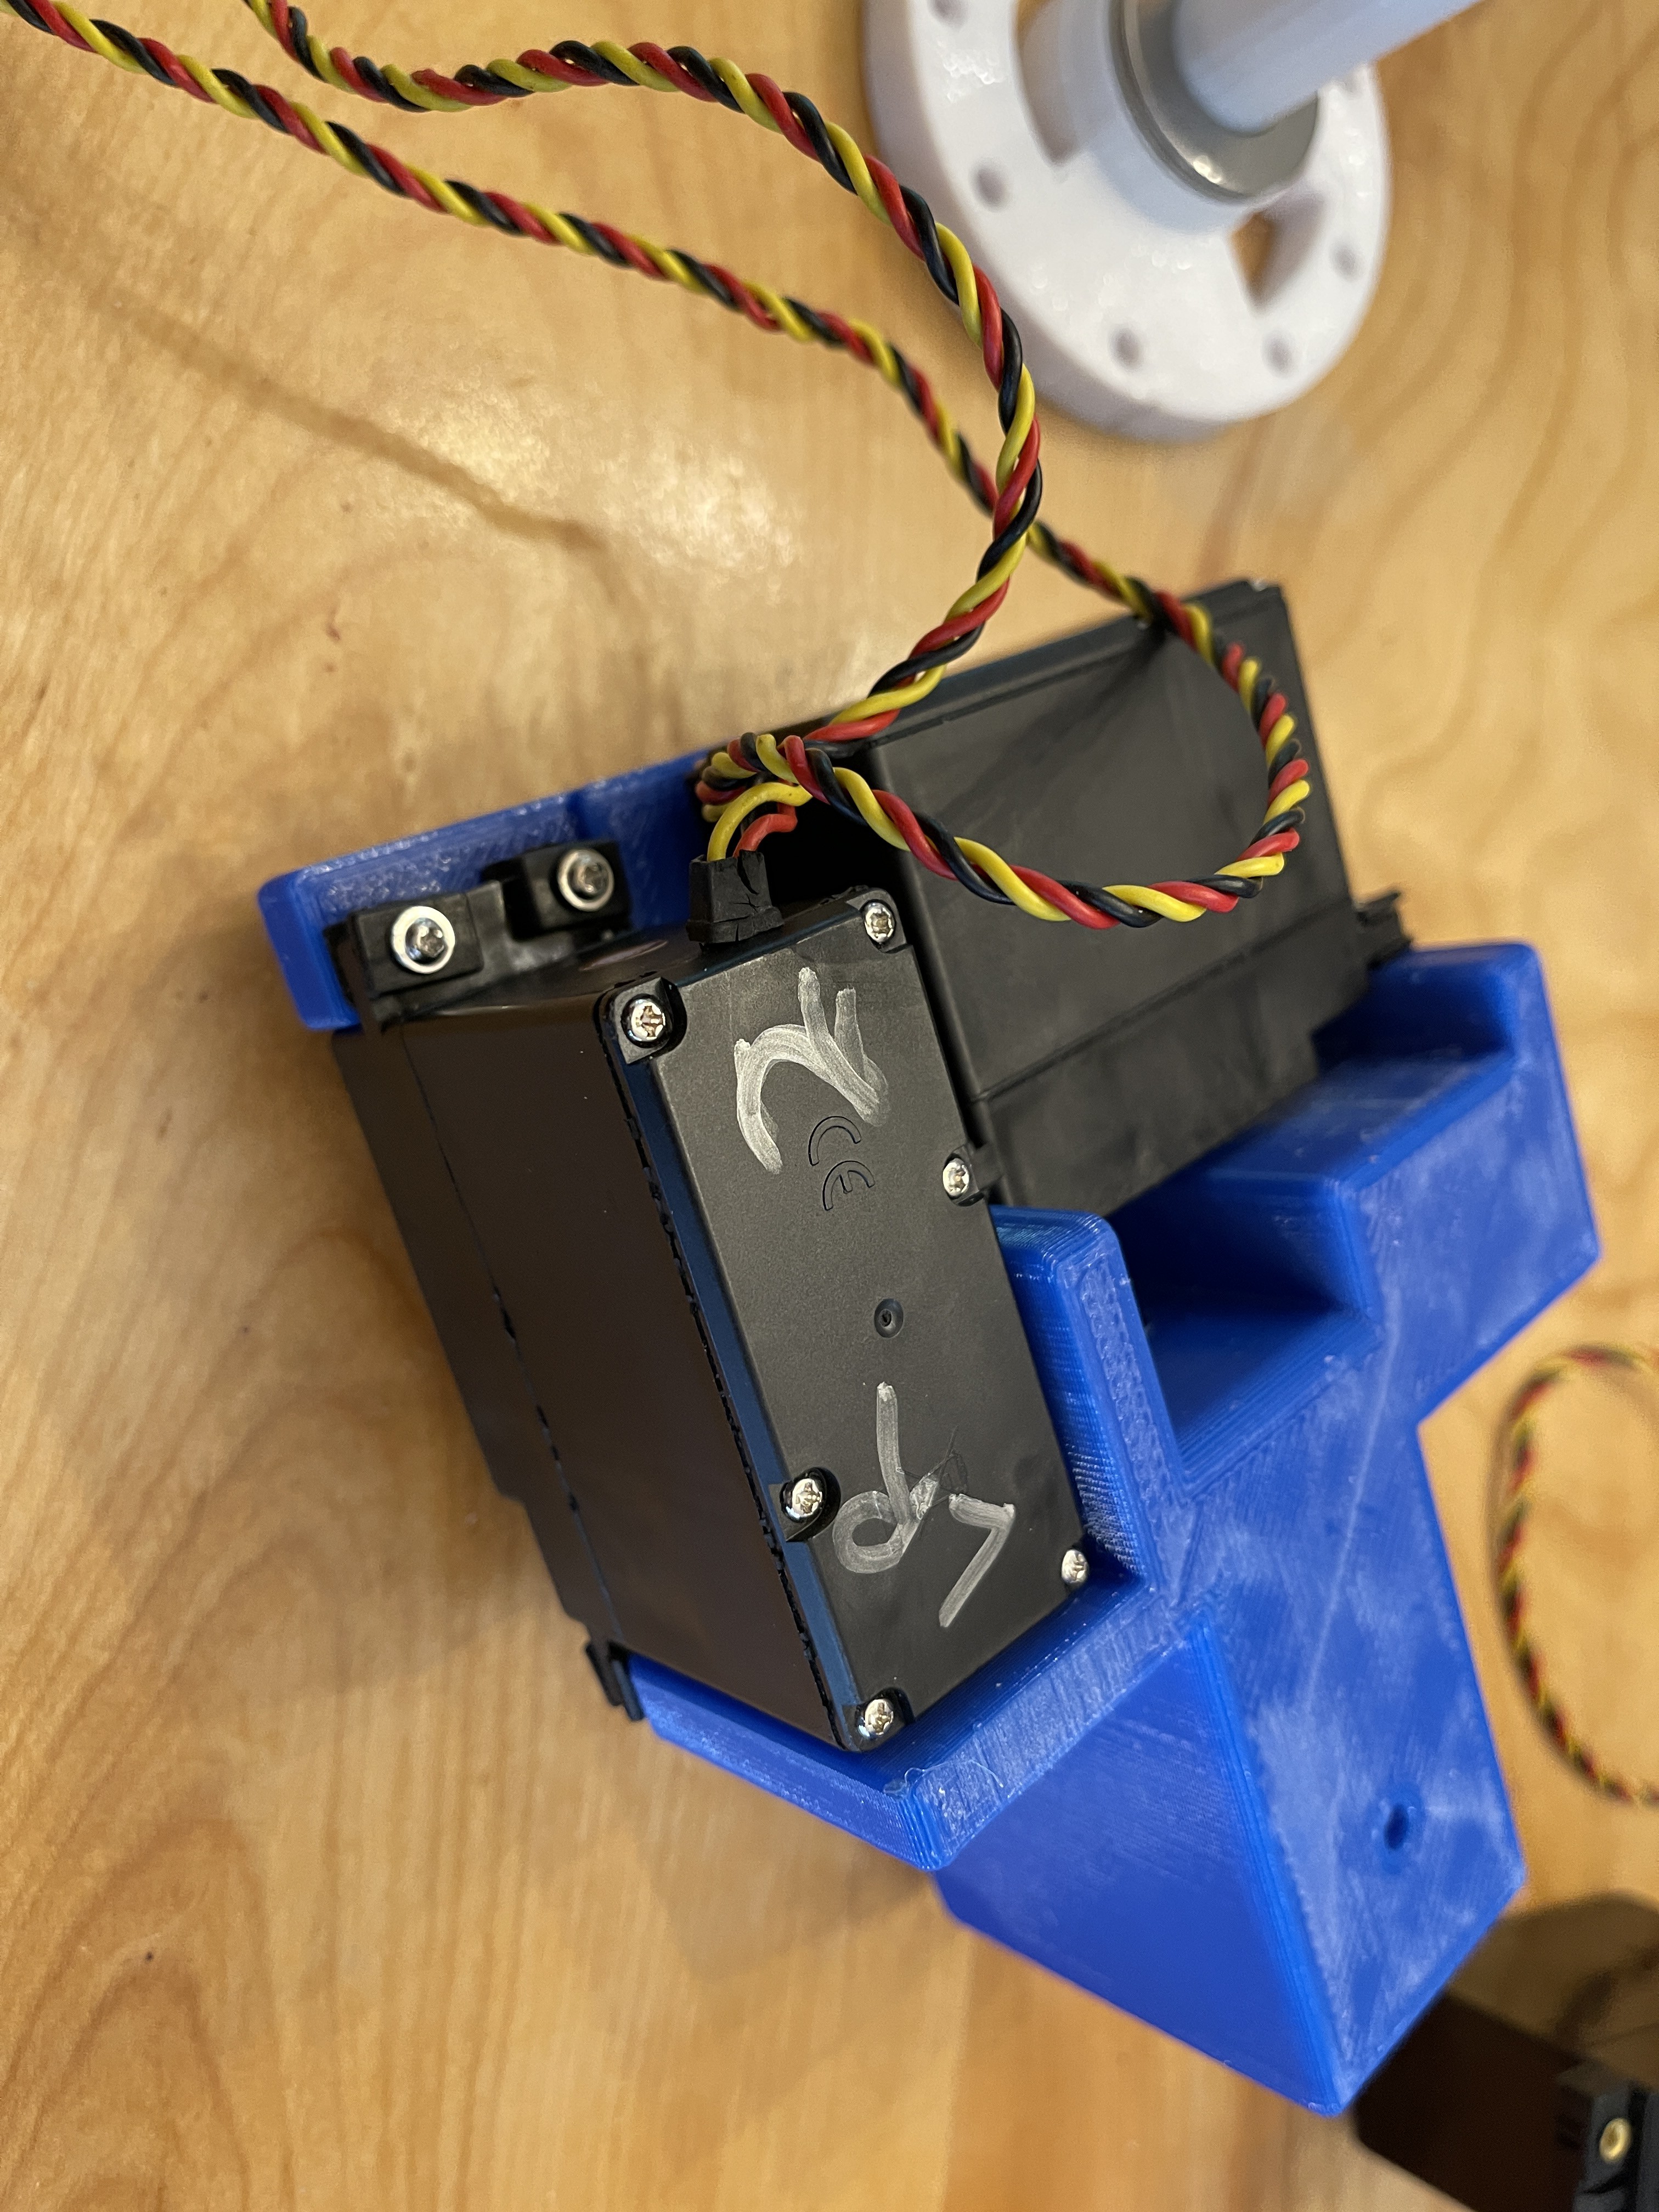
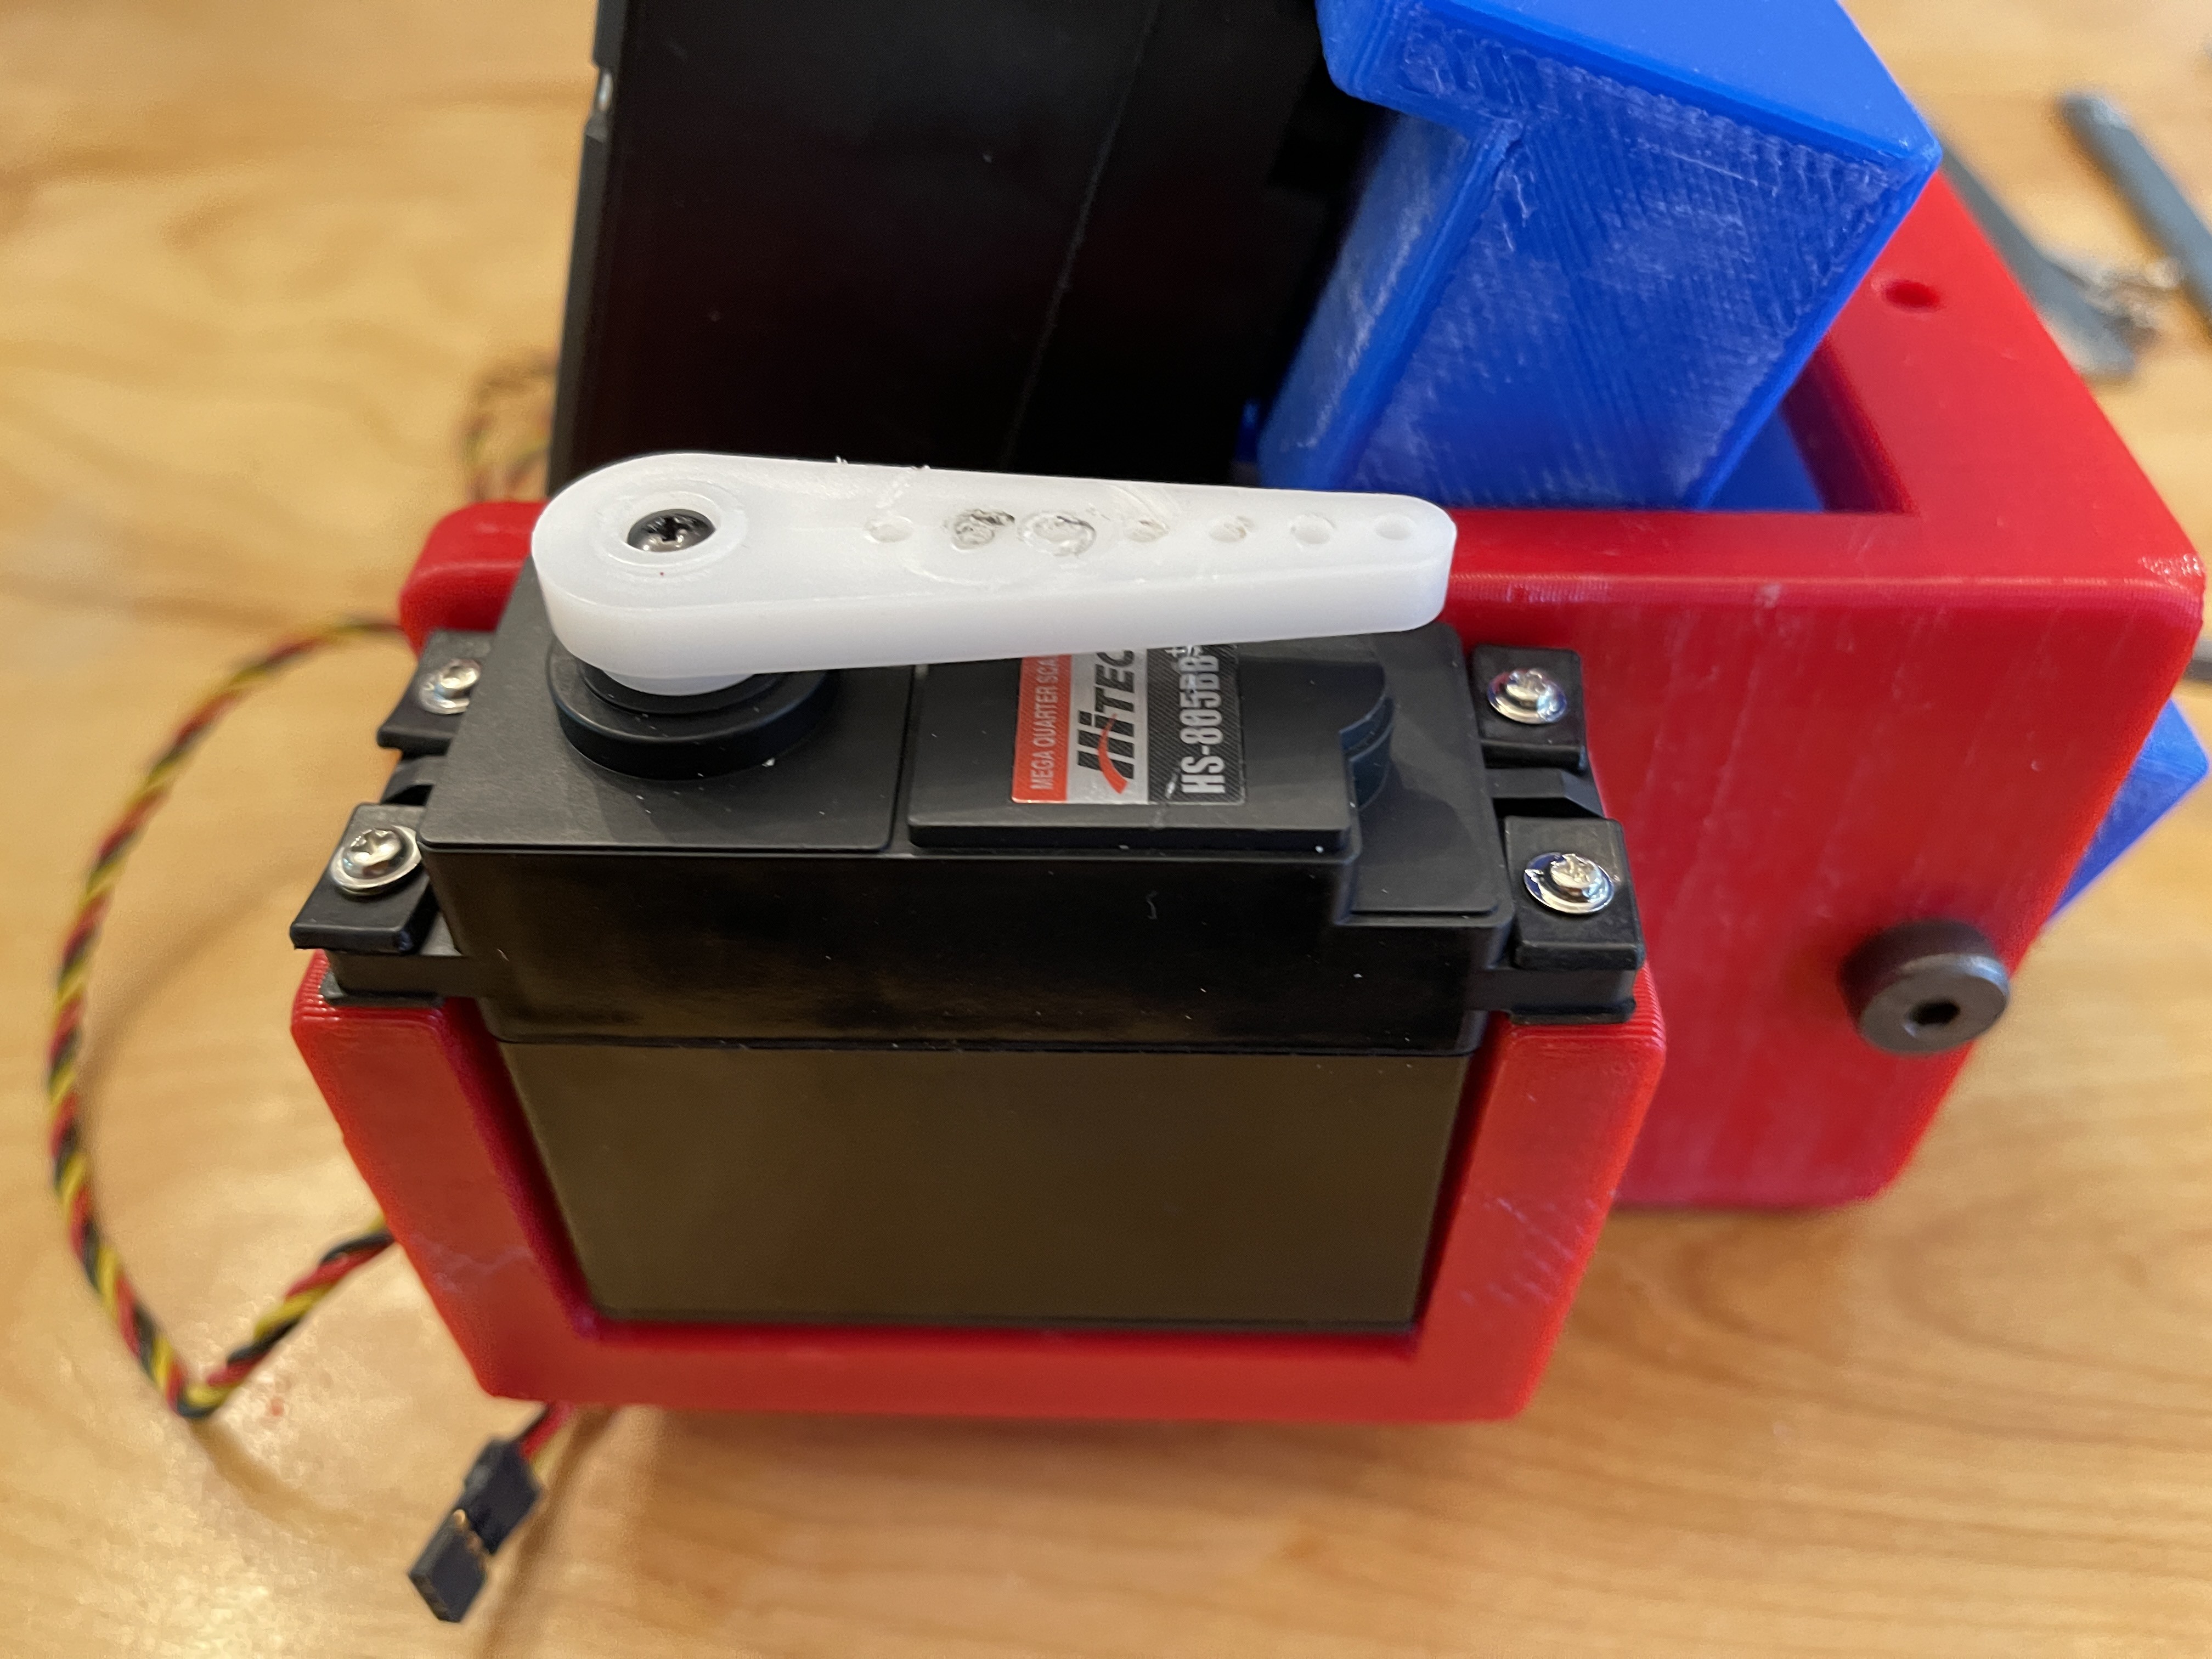
3Tilt Servo Installation
Still using the 1st level (blue) 3D printed part.
- Install the servo arm shown (you may need to remove and adjust its position later on).
- Position the Tilt servo as shown and attach with the included hardware.
![]()
![]()
-
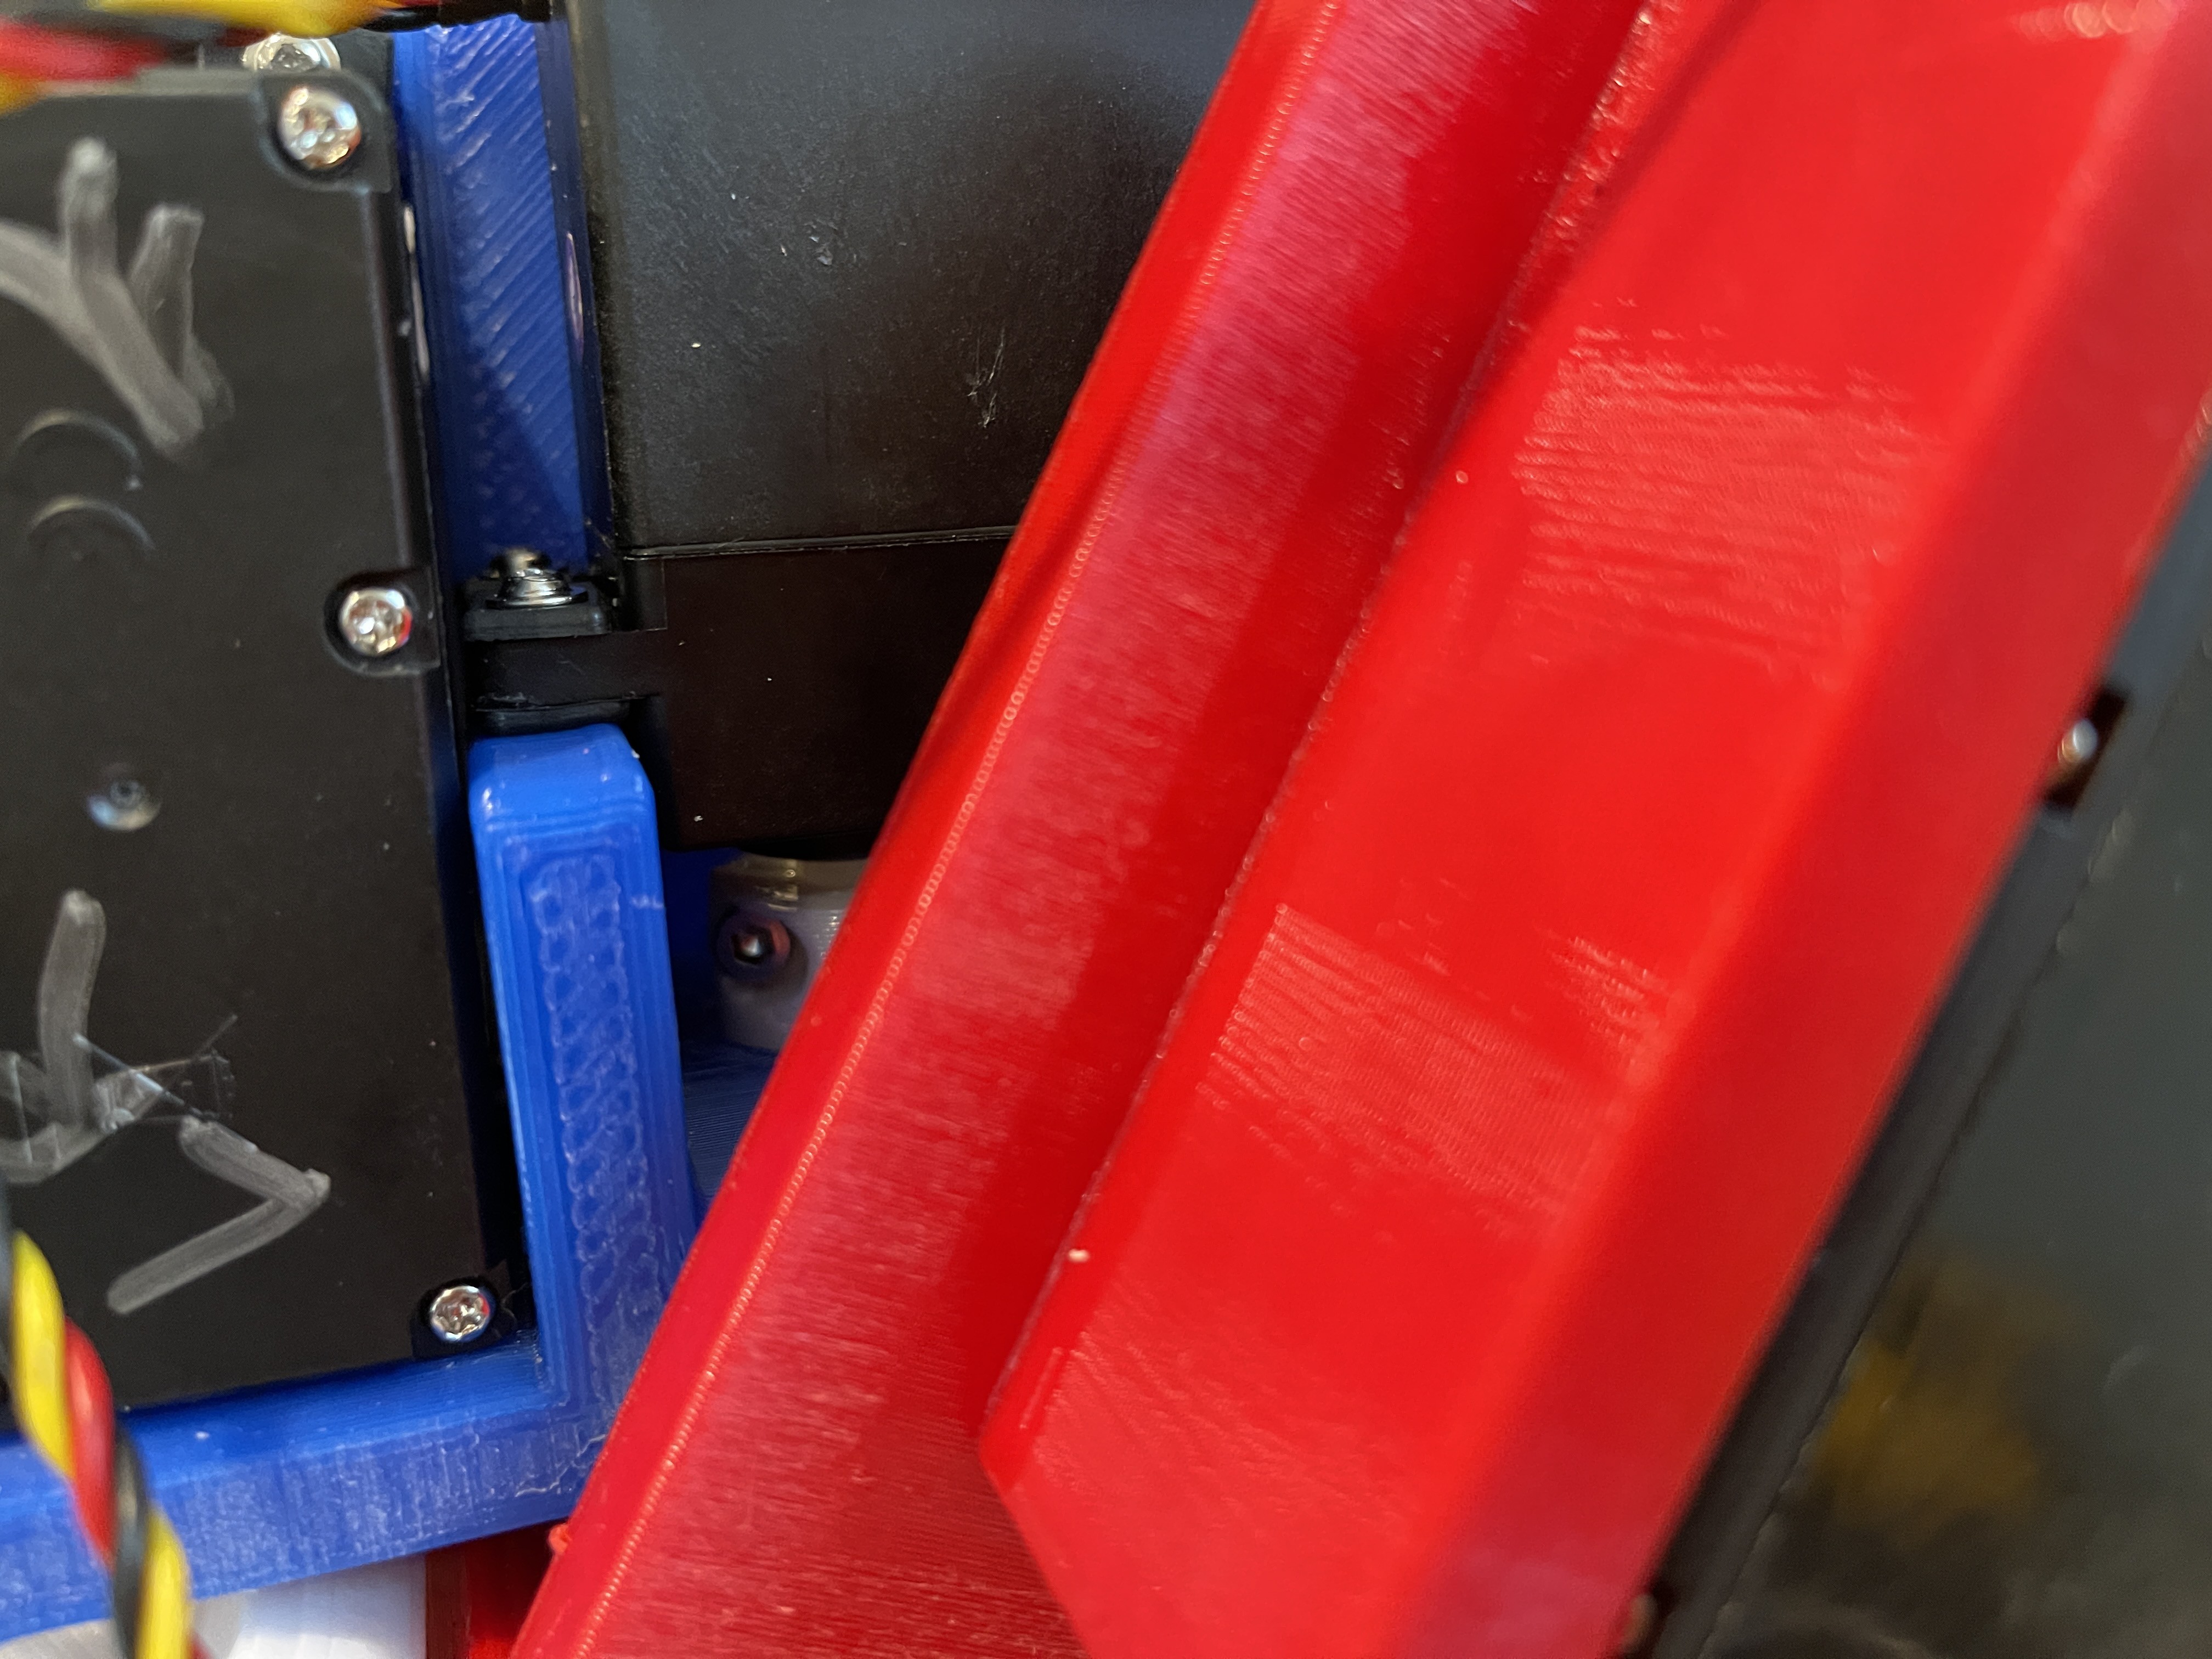
4Attaching 2nd Level to 1st Level
You will be adding the 2nd level (red) 3D part labeled "Skull_Mech_V3_2ndLvl"
- Attach the 2nd level (red) part to the 1st level (blue) part with 2 of the shoulder bolts.
- The spacing between the parts should be equal on both sides
- Do no over tighten these bolts, they should not restrict the 2nd level (red) part.
NOTE: You may need to open up the holes in the 2nd level (red) part for the shoulder bolts, the bolts should fit in smoothly and the part should be able to twist freely.
![]()
-
5Nod Servo Installation
Still using the 2nd level (red) 3D printed part.
- Install the servo arm shown (you may need to remove and adjust its position later on).
- Position the Nod servo as shown and attach with the included hardware.
![]()
-
6Attach Linkage for Tilting
I tried many different types of linkage/pushrods and most ended up bending or had too much slop.
- Power up the Tilt servo and command it to be in its default/center position.
- Re-attach the servo arm as shown below.
- Create a linkage out of the steel bar.
- Measure the distance between the servo arm mounting hole (2nd from the center) and the hole in the 2nd level (red) part. Mine was approx 93mm.
- Cut the steel bar a bit longer than the length measured
- Mark and drill holes for screws to fit (1/8" bit I believe)
- Grind off any sharp edges.
- It doesn't need to look pretty as my example shows. :)
- Attach to the servo arm with an M3 screw (approx 10mm thread length)
- Attach to the 2nd level (red) part with an M# screw (approx 20mm thread length)
![]()
-
7Attaching 3rd Level to 2nd Level
You will be adding the 3rd level (white) 3D part labeled "Skull_Mech_V3_3rdLvl"
- Attach the 3rd level (white) part to the 2nd level (red) part with 2 of the shoulder bolts.
- The spacing between the parts should be equal on both sides
- Do no over tighten these bolts, they should not restrict the 3rd level (white) part.
NOTE: You may need to open up the holes in the 3rd level (white) part for the shoulder bolts, the bolts should fit in smoothly and the part should be able to twist freely.
![]()
-
8Attach Linkage for Noding
- Power up the Nod servo and command it to be in its default/center position.
- Re-attach the servo arm as shown below... Actually, the picture wasn't taken with the different parts straight. The servo arm shouldn't be a bit more clockwise to make the 3rd level (white) straight with the 2nd level (red).
- Create a linkage out of the steel bar.
- Measure the distance between the servo arm mounting hole (3rd from the center) and the hole in the 3rd level (white) part. Mine was approx 93mm (same as the other linkage).
- Cut the steel bar a bit longer than the length measured
- Mark and drill holes for screws to fit (1/8" bit I believe)
- Grind off any sharp edges.
- Attach to the servo arm with an M3 screw (approx 10mm thread length)
- Attach to the 3rd level (white) part with an M3 screw (approx 20mm thread length)
![]()
-
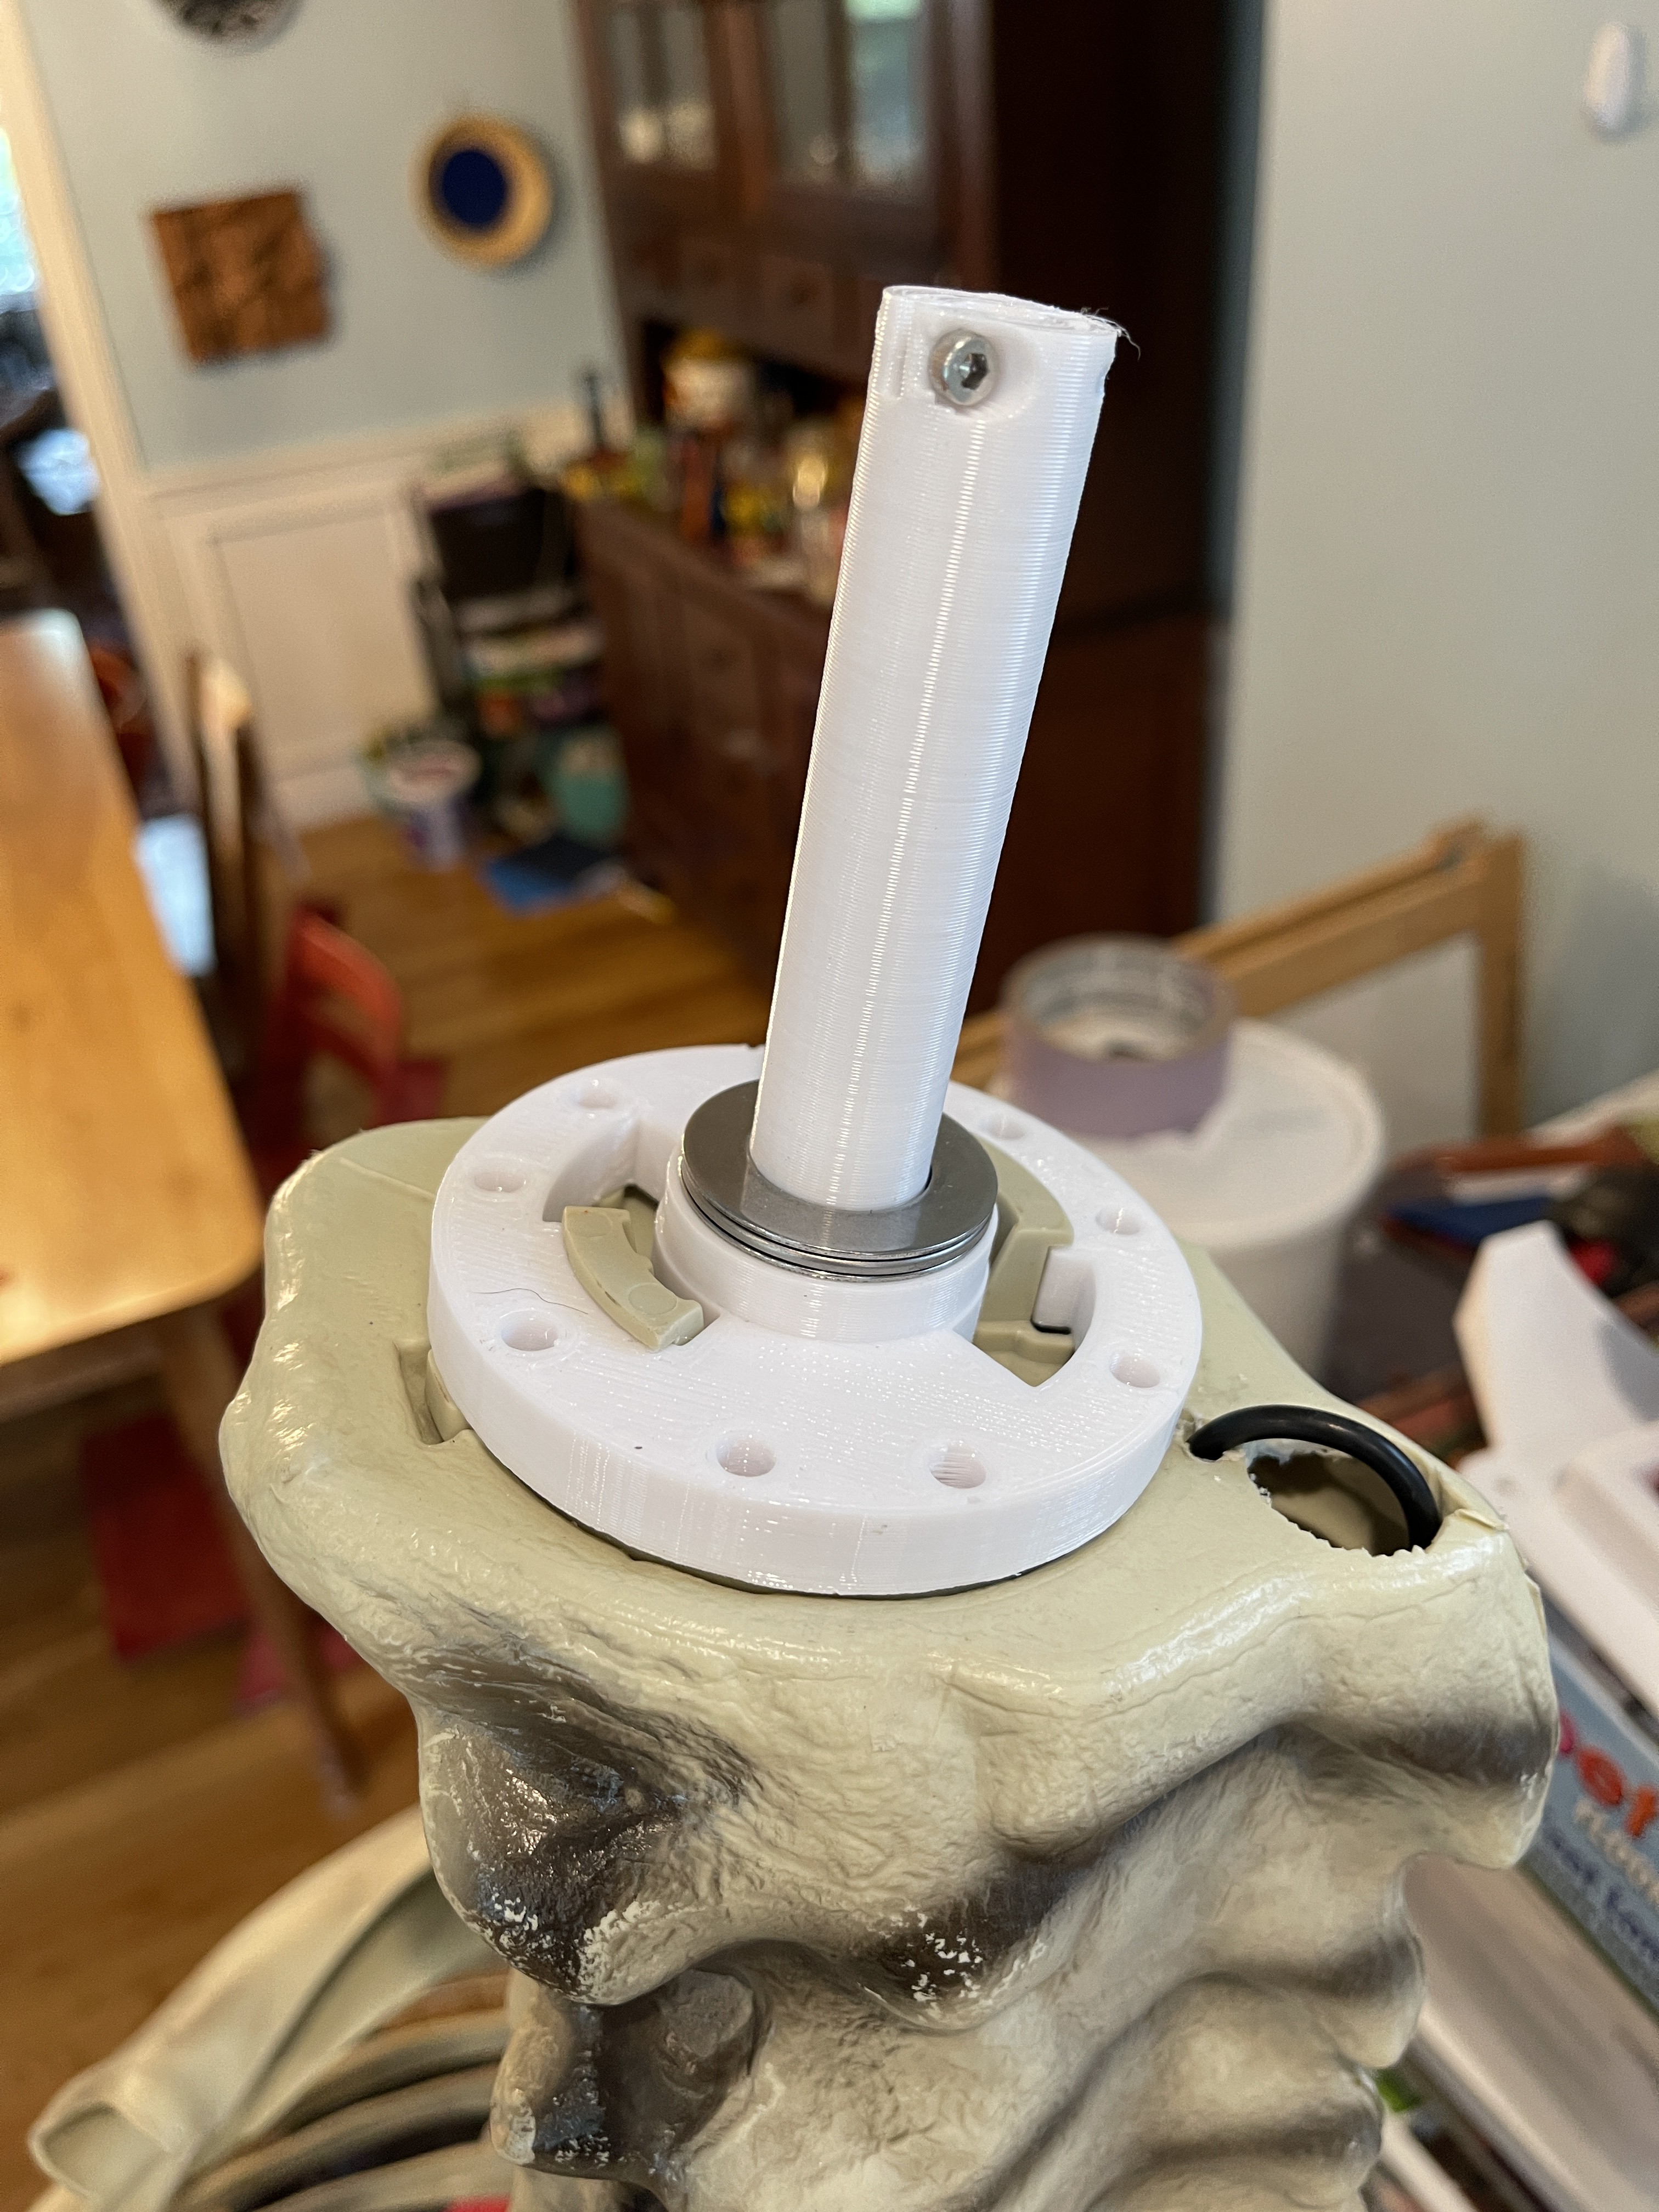
9Attaching Interface to Skeleton's Neck
Using the Interface (white) part
- Attach it to the skeleton's neck and twist to lock it in place.
Note: I haven't tested this with the metal post that goes up the back, you will most likely will have to cut it. I created a small amount of room in the interface (white part) but it's not enough.
![]()
-
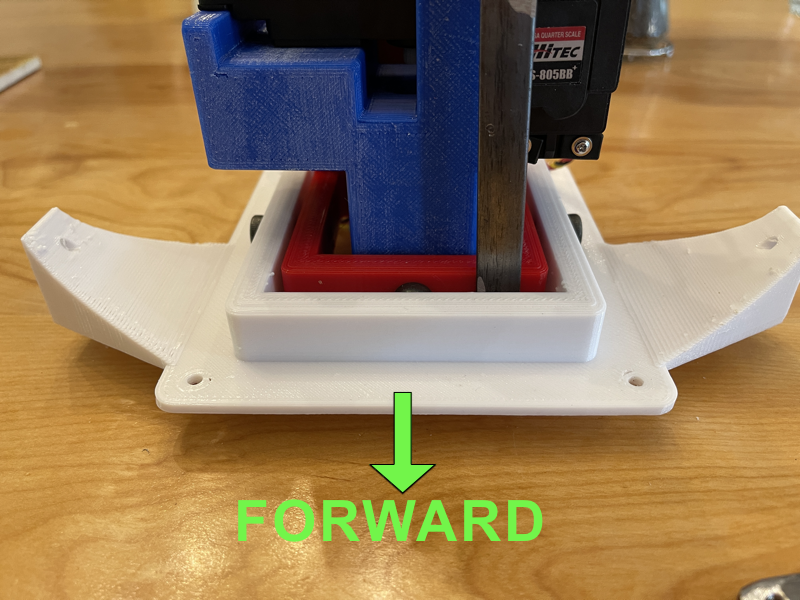
10Connecting the Parts Together
- Power up the Rotation servo and command it to be in its default/center position.
- Lower the rest of the assembly over the Interface (white) part, sliding the rod up the middle
- Make sure the front of the assembly is facing forward (this will be the front of the skull)
![]()
3. Type A: Push down on the assembly until the servo spline is inside the top of the interface (white) part. Type B: Push down until the gear is seated inside the top of the interface (white) part.
4. Power down the servo so you can twist the assembly.
5. Type A Only: Twist the assembly SLOWLY so you can see the tightening screw at the top of the Interface (white) part.
a. Do not over tighten the screw, just enough to have a good grip on the servo spline.
6. Repeat for the screw on the other side.![]()
![]()
3-Axis Skull Mod for 12ft Skeleton
The 12ft skeleton (Skelly) from Home Depot is an impressive decoration, but needs an extra kick to make it truly incredible!!!


Discussions
Become a Hackaday.io Member
Create an account to leave a comment. Already have an account? Log In.
Hi Justin, I used a Pololu Micro Maestro 6-Channel USB Servo Controller attached to a tiny PC. However, take a look at https://github.com/phatwila/skelly-animatronics which uses a Arduino board,
Are you sure? yes | no
could you by chance provide the controller board specs or board that you are using to drive this project?
Are you sure? yes | no
Hi Brent, that isn't covered here because there is a lot of information out there about servo based animatronics. You can start by looking at Cat's Menagerie, she covers the basics really well. https://www.youtube.com/channel/UCx1eztFY-gj_xPZ5vICyo9Q
Are you sure? yes | no
Wait, I don't see anything about the device to control everything, or how to setup the animations?
Are you sure? yes | no