-
Dowel Experiment Concept
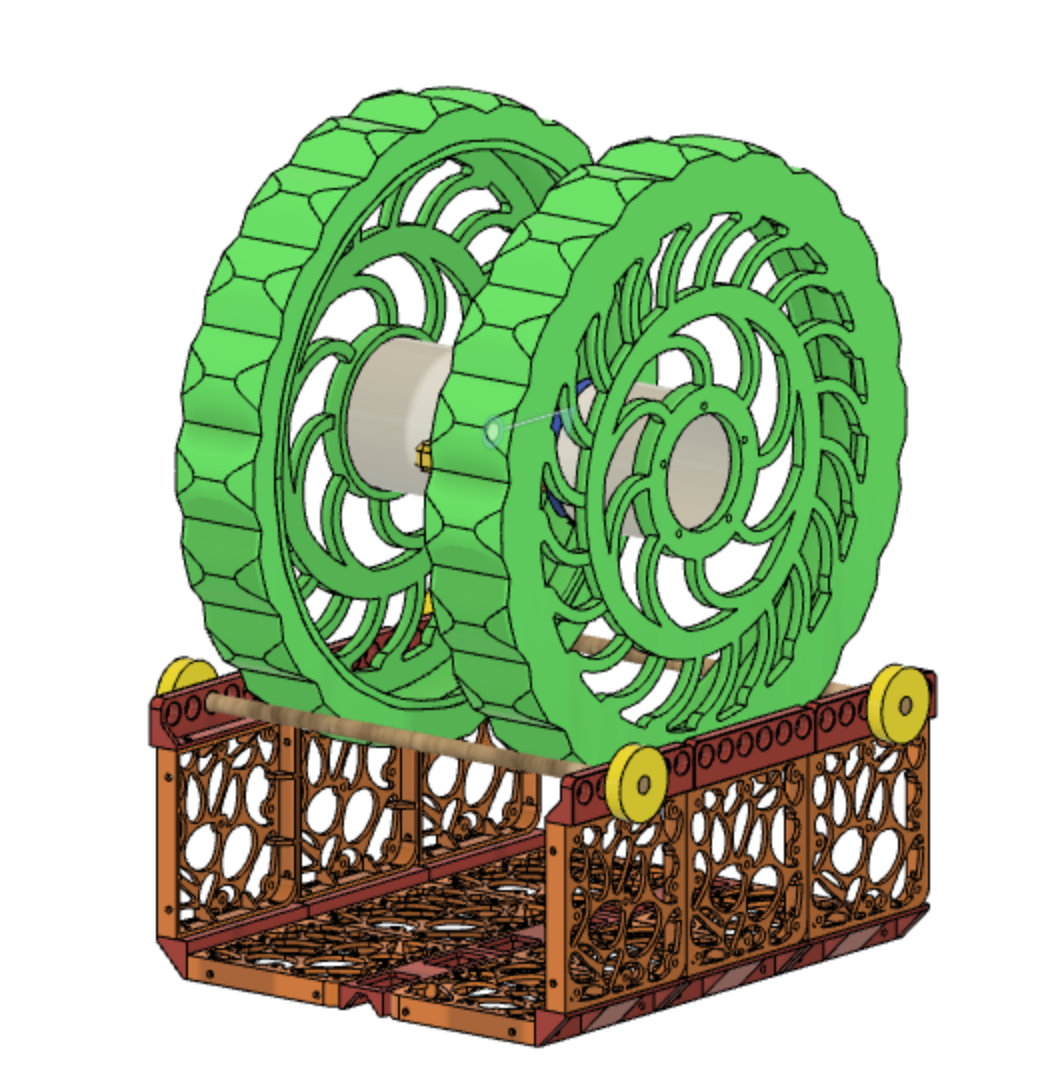
05/27/2022 at 02:56 • 1 commentThe next experiment will place the wheel onto two freely rotating dowels. Hypothesis: the wheel will remain in place on those dowels while rotating, and while being pulled by the kite.
![]()
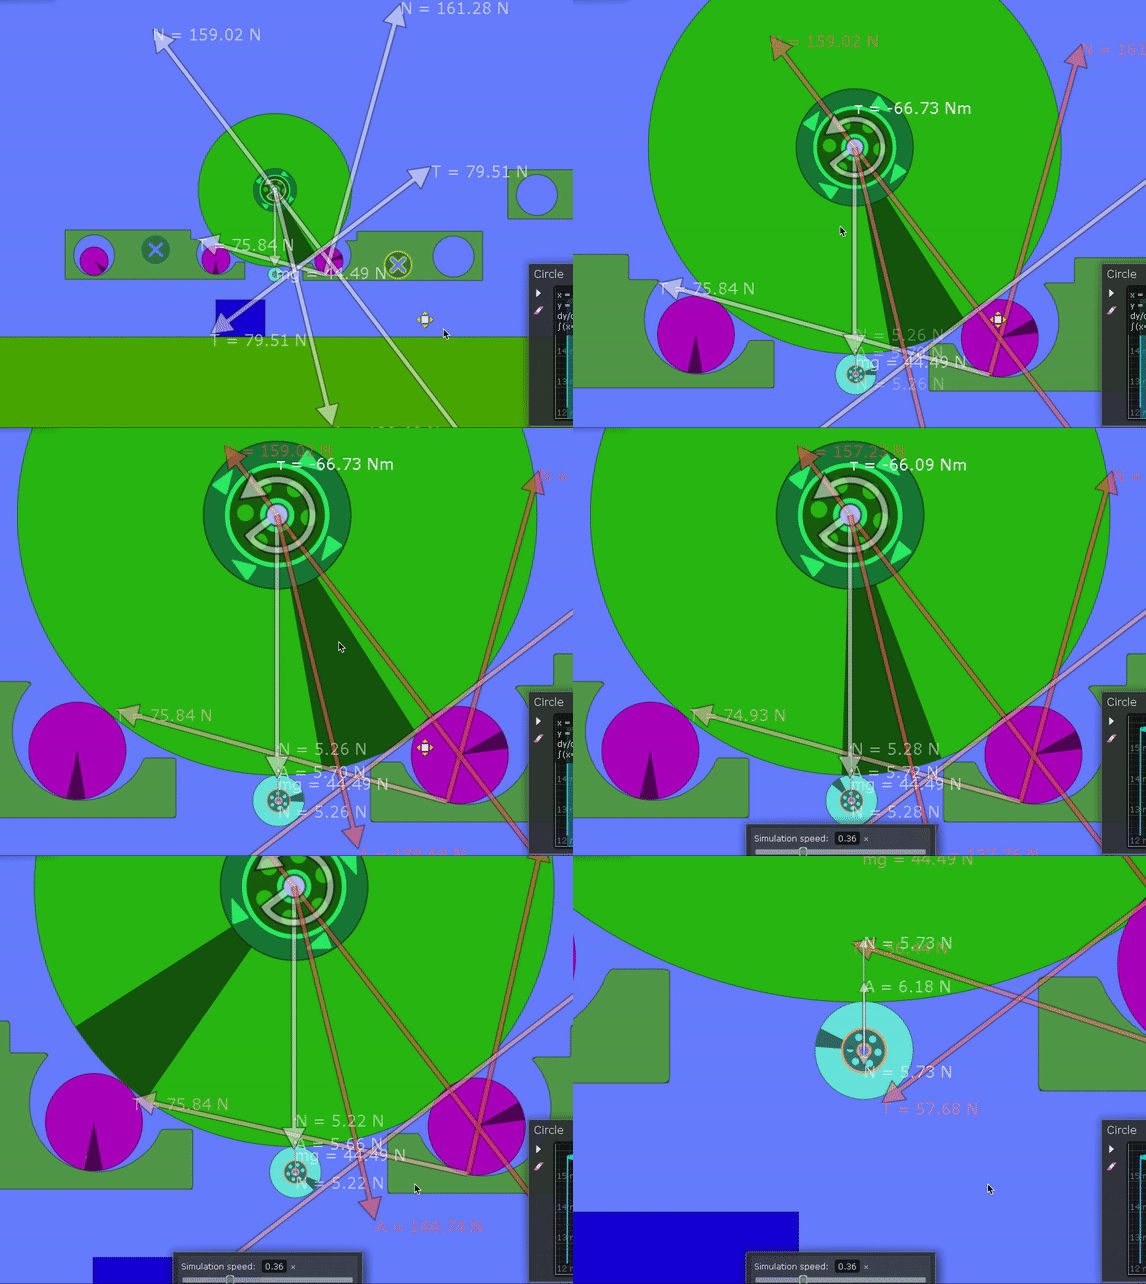
A simulation was conducted to double check the bodies rotate as expected. The smaller light-blue wheel below depicts a possible generator location.
![]()
This experiment will address a few unknowns:
- Spacing of the dowels to support wheel
- Angle of the line that would cause the wheel to ‘pop’ off the dowels
- Are the dowels able to freely rotate, or will they need ball bearings?
- Does it require a lot of force to spin?
- Are the indented grouser designs problematic?
The structural tile pieces are re-used from a different project (Bowie the robot).
The next step will be to 3D print the extra pieces, assemble, and test! -
Outdoors Test - Roll Experiment
05/19/2022 at 04:10 • 0 commentsCan the kite do Work? This question formed the basis of the hypothesis: when the kite is pushed from the wind, the tension on the line transfers to the wheel, causing the wheel to roll and have a displacement by moving a distance.
Time for an outdoors experiment. Winds: 20 km/h WNW. Conditions: pouring rain then turned to overcast.
![]()
There are numerous ways this experiment could not work:
- Not enough drag force from the kite
- Not powerful enough winds
- Kite not large enough
- Roll wheels too heavy
- Remains in place
- Friction too much
- Remains in place
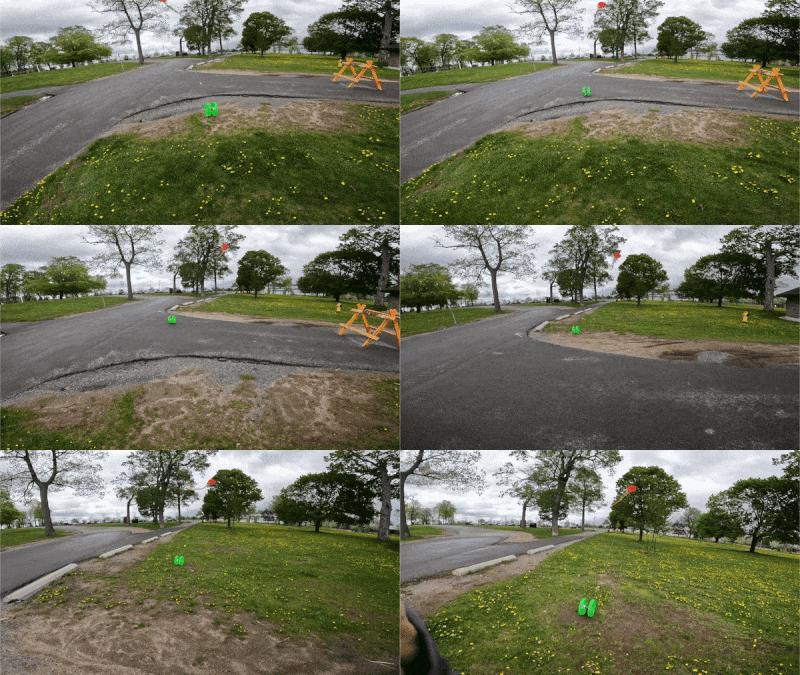
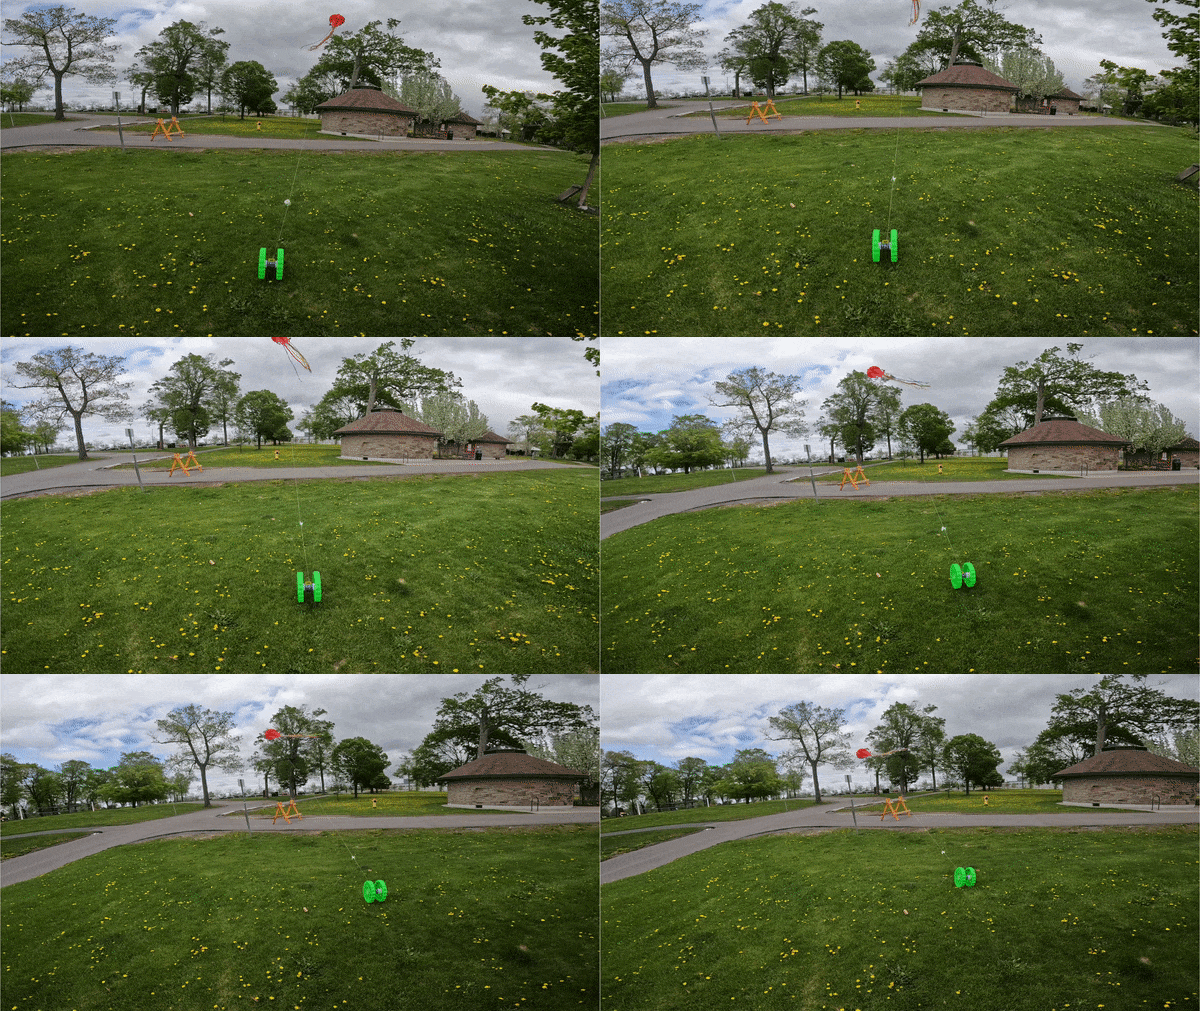
A baseline understanding is needed. This experiment will test to see if the kite can move the wheels. Yes! It does work!
Learnings from this experiment:
- Sometimes the wheels can tip over
- Need a more secure way of tying the line at a certain distance
![]()
A discovery from this experiment is that perhaps another method of control could be to move the two wheels themselves. The motors could serve as generators when not active. However, it would come with the large downside of the device not being stationary. If this were on Mars, it would be a benefit, as there are vast areas to explore.This is where the conveyor belt idea is useful (see previous progress log) — it would remain stationary.
W=Fd. That is Work, and it’s measured in Joules. From there, we can get Power, which is the rate at which Work is done (P = W/t), measured in Watts. Further down the line, this can help for efficiency calculations when compared to the generator motors.
What’s next? More work on the steering module
-
Roll Experiment Design
05/18/2022 at 00:20 • 0 commentsWhat if the kite could spin a conveyor belt platform via an external wheel? Instead of capturing a rotating wheel inside a housing with contact bearings. The first step is to verify that the kite can move a wheel on the ground.
The Roll Experiment design is comprised of 3 main pieces:
- 2 large 30 cm diameter wheels
- Axels and mating pieces
- Collar with carabiner clip
Cross-section view to show the mating axels
Complete view
Both wheels are fixed to each other, they do not rotate independently. The 2 wheels are recycled from a previous project, which were 3D printed on a large format FDM printer in PLA.
The collar (yellow) is freely rotating about the axle (blue). This is where the carabiner attaches. The axle pieces mate and are fastened in place with 4x M3 fasteners.
The axle extends from the wheel using white ‘spacers’ with heat-set inserts.
After fabrication and assembly, it was time to test it. However, the kite was grounded at 0.0 km/h winds. Testing will happen next time!
-
Stepper Motor Spinning
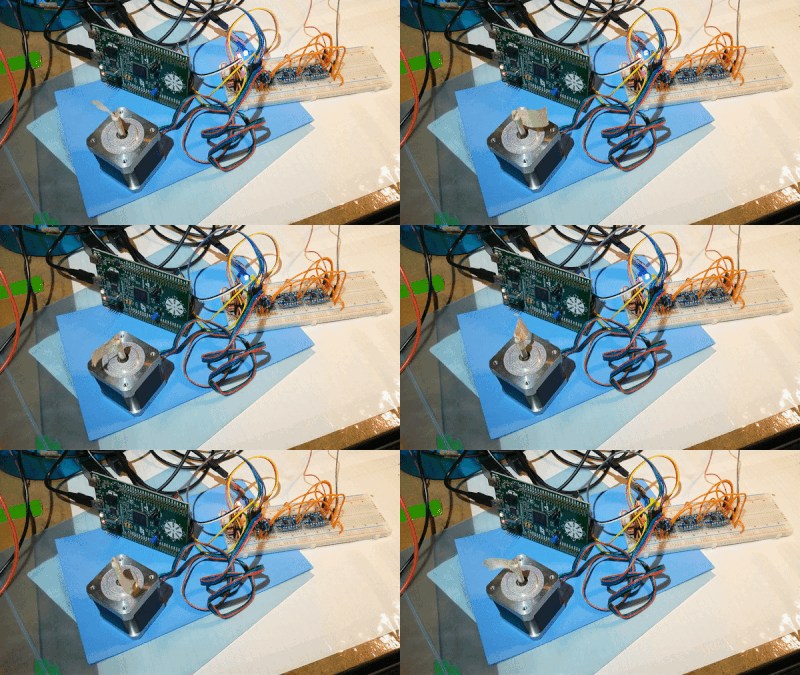
05/11/2022 at 03:38 • 0 commentsThe stepper motor is spinning!
![]()
In the firmware, a timer interrupt triggers the next step of the motor. When this happens, the HAL toggles the 4 pins in a marching sequence.
The timer configuration uses HCLK, PSC, and ARR to get the frequency. To calculate these values, I made a spreadsheet. The green cells are values to be input. This means the prescaler and desired output time are modified. The auto-reload register value is calculated.
To adjust the speed dynamically, the timer’s ARR value will be changed in the code.
The motor driver electronics is a DRV8833. In the above demo it was powered by 4V @ 0.3A.
There were some troubles while making this work, in the end relating to loose connections. The solution was to add solid core wire to the stepper motor cables, which then plug in to the breadboard. Once we make a pcb, screw terminals will be used to reduce that problem.
The next step for firmware is implementing the custom stepper driver into the interrupt and writing the supporting methods.
Stay tuned for the next update which will cover an idea for the next experiment prior to the next Generator prototype iteration! Spoiler alert - it surprisingly involves a trip to a fabric store?!
-
Selecting Microcontroller Pins
05/05/2022 at 18:15 • 2 comments![]()
There is a list of peripherals needed for the module that will control the kite line:
- 4x Stepper Motor Drivers (4 pins each)
- 2x Endstops for each stepper
- 4x Analog inputs (2x for DC motor in, 2x for Current sensor in)
- 4x Timers (1 pin output compare each)
- 1x UART (connects to computer)
‘Nice to have’ with remaining pins are:
- UART
- 5x ADC inputs
- 6x Output pins for debug
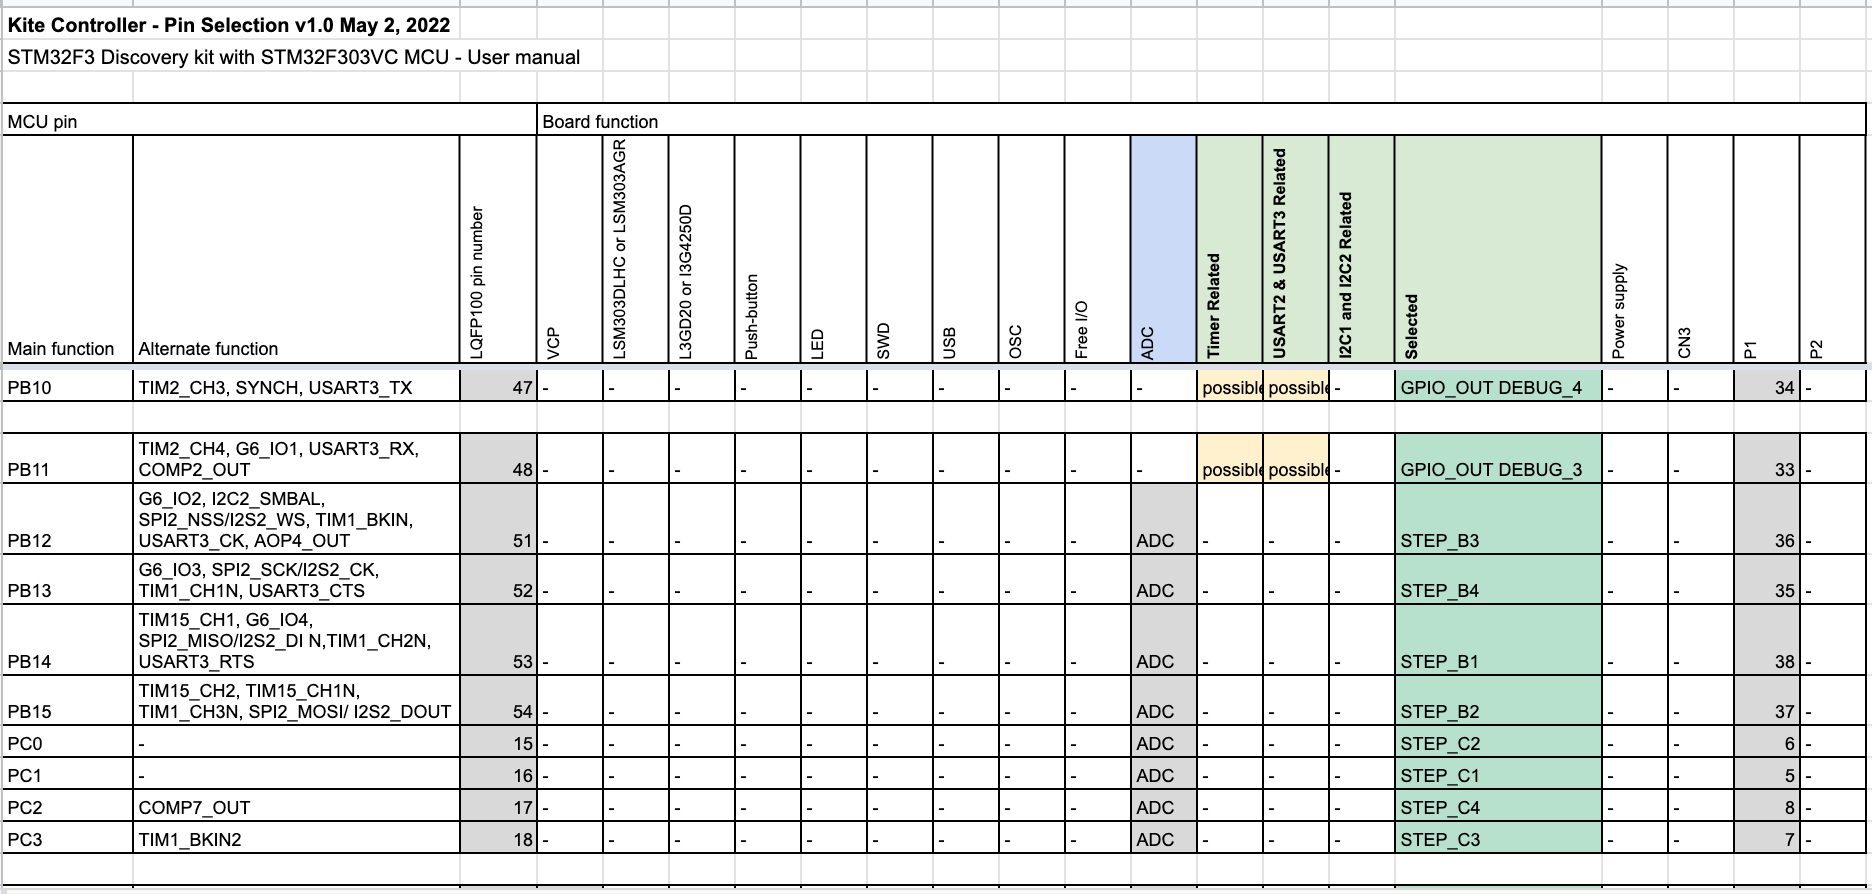
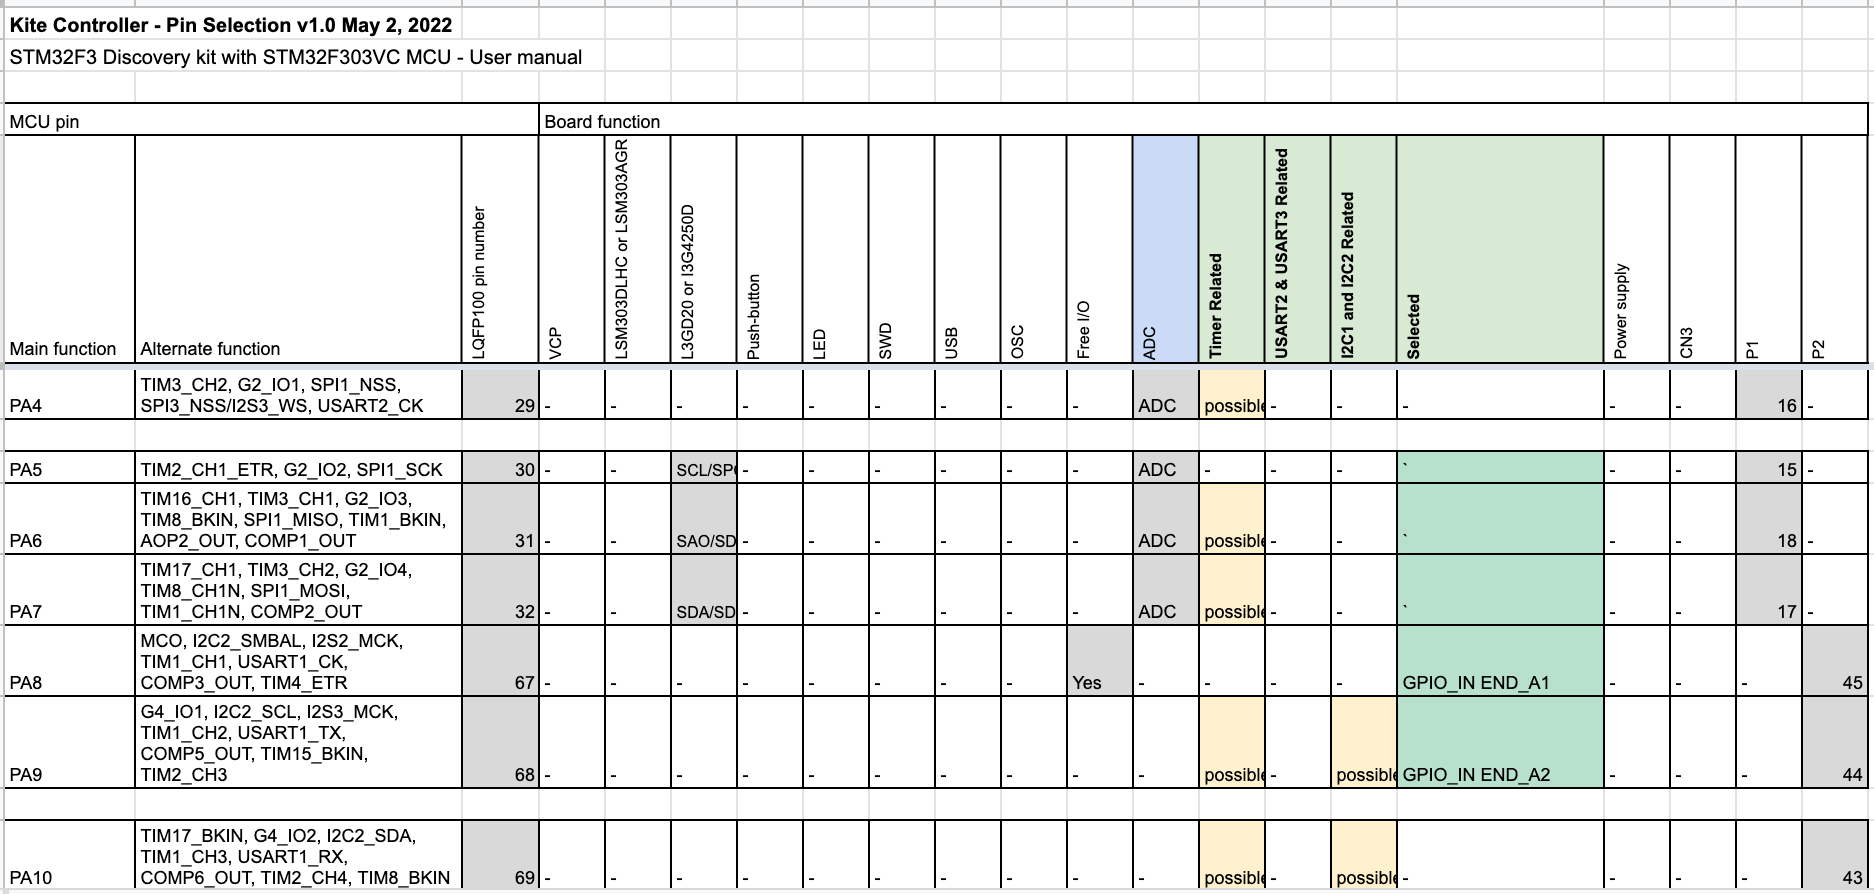
Planning out the usage of the pins began by referring to the User Manual: STM32F3 Discovery kit with STM32F303VC MCU. “Table 7. STM32F303VCT6 MCU pin description versus board function” shows the pins in use by the on-board peripherals, and the alternate functions.
![]()
That table does not include the ADC pins however. By referring to the Datasheet: STM32F303xB STM32F303xC, the table “Table 13. STM32F303xB/STM32F303xC pin definitions” has the column “Additional functions”, which details which pins have the ADC available. The pins with ADC were marked into the ongoing table to get a complete picture of the pin usage.A list of priority pin usages were determined, and placed into their own column:
- Timer
- USART2 & USART3
- I2C1 and I2C2
- ADC
The next step was to go through each row by row for a single column and check off if it was possible to use that pin. If a peripheral on the board was already using that pin, then it was skipped. Once all the columns were complete, it was a matter of selecting the pins.
Timer output compare pins were the first pins to be selected. Afterwards, steppers were selected, looking for a sequence of pins on the header connectors P1 and P2. Following that, the uart, endstops, analog inputs, debug, and extra.
The remaining step for pins will be to work on the power input. This ties into a separate electronics subsystem about also powering the steppers, power source, and voltage regulators.
Now that the pins are selected, progress can be made on the firmware and electronics board!
The entire spreadsheet can be seen on the Github repository.
-
KiteView Software Overview
05/01/2022 at 10:38 • 0 commentsKiteView is the software that tracks the kite using computer vision. This is key to controlling the kites for autonomous flight.
The goal is for KiteView to control the kite to its target location and communicate with the steering module microcontroller to move the motors.
KiteView is built on Processing.org (desktop Processing version 3). The reason for choosing this was for the fast customizability of the interface, tracking, filtering, and more, as well as connectivity to serial ports, all in one place. This flexibility is needed for the fast paced changing development of this type of robot system.
Features
Hue tracking
The hue of the kite is tracked using computer vision. There are parameters in the code to change such as the range of the hue.
Set the landscape line
Connect to microcontroller over uart
Camera
In the middle of the view is the camera. This can either be a usb camera feed, or from a usb video source. The camera is 1296 x 972 pixels, scaled by 0.5x to this size.
Data logging
Data logging of the trace points (x, y, w, h) is saved to a .csv file in the sketch’s data folder. Data is logged on each time a trace point is added.
Actuators
The pitch and yaw user interface elements will control the motors on the steering module. Reel is similar, but will be a separate module. This is a work in progress and dependent on the communication to the microcontroller. The interface might change.
Code Used
The following libraries are used:
The following code is used:
Next Steps
On my computer, the frames per second that is able to be achieved ranges from 4 - 10 fps.
In the future, the aim is for this to be running on a single board computer, such as the Nvidia Jetson Nano.
The next step is to get bidirectional communication working to the microcontroller.
-
Generator Prototype 1.0
05/01/2022 at 09:28 • 0 commentsWelcome, Generator Prototype 1.0! This is a small version of future scaled-up models.
The goal of this prototype was to be a quick MVP to test the generator with the kite, as we need that data to move forwards with the electronics. This requires a free-spinning wheel that a DC motor axle makes contact with to generate the electricity.More information about the CAD design and constraints here
The small DC motor is mounted to the back of the generator, making contact with the wheel. Multiple materials for the axel were tested, including electrical tape, gaffers tape, and a rubber band. The rubber band provided the most grip. This could be due to the geometry of the rubber band having more surface area than the other two methods.
The bearings at the top are free moving in their fastener slots to apply downwards pressure on the wheel. The DC motor with rubber band on its axle is applying the upwards force.
Most importantly, from this prototype we are able to conduct a benchtop test of the DC motor as a generator. Moving the kite armature back and forth every 0.6 seconds, a voltage of 70 mV to 260 mV peak to peak can be generated.
Data from the oscilloscope available here:
https://github.com/RobotGrrl/KitePropulsion/tree/master/Data/generator_05-01-22
This data enables us to start determining which energy harvesting ICs would be best suitable.
Here is a video of the benchtop prototype test in action:
The next step will be to test the kite attached to the mechanism. This will verify that the tension on the line from the drag force of the kite will be able to move the armature and spin the wheel.
The kite line is to be attached to the yellow armature. There is enough clearance for a carabiner, making the user experience easier with a quick release and not dealing with knots in tiny strings.
-
KiteView Software Outdoors Test
05/01/2022 at 09:15 • 0 commentsOn April 20th an outdoors field test was conducted to test the most recent KiteView software and gather information about the kite.
Winds were 17 km/h SSW, and temperature 7 degrees Celsius.
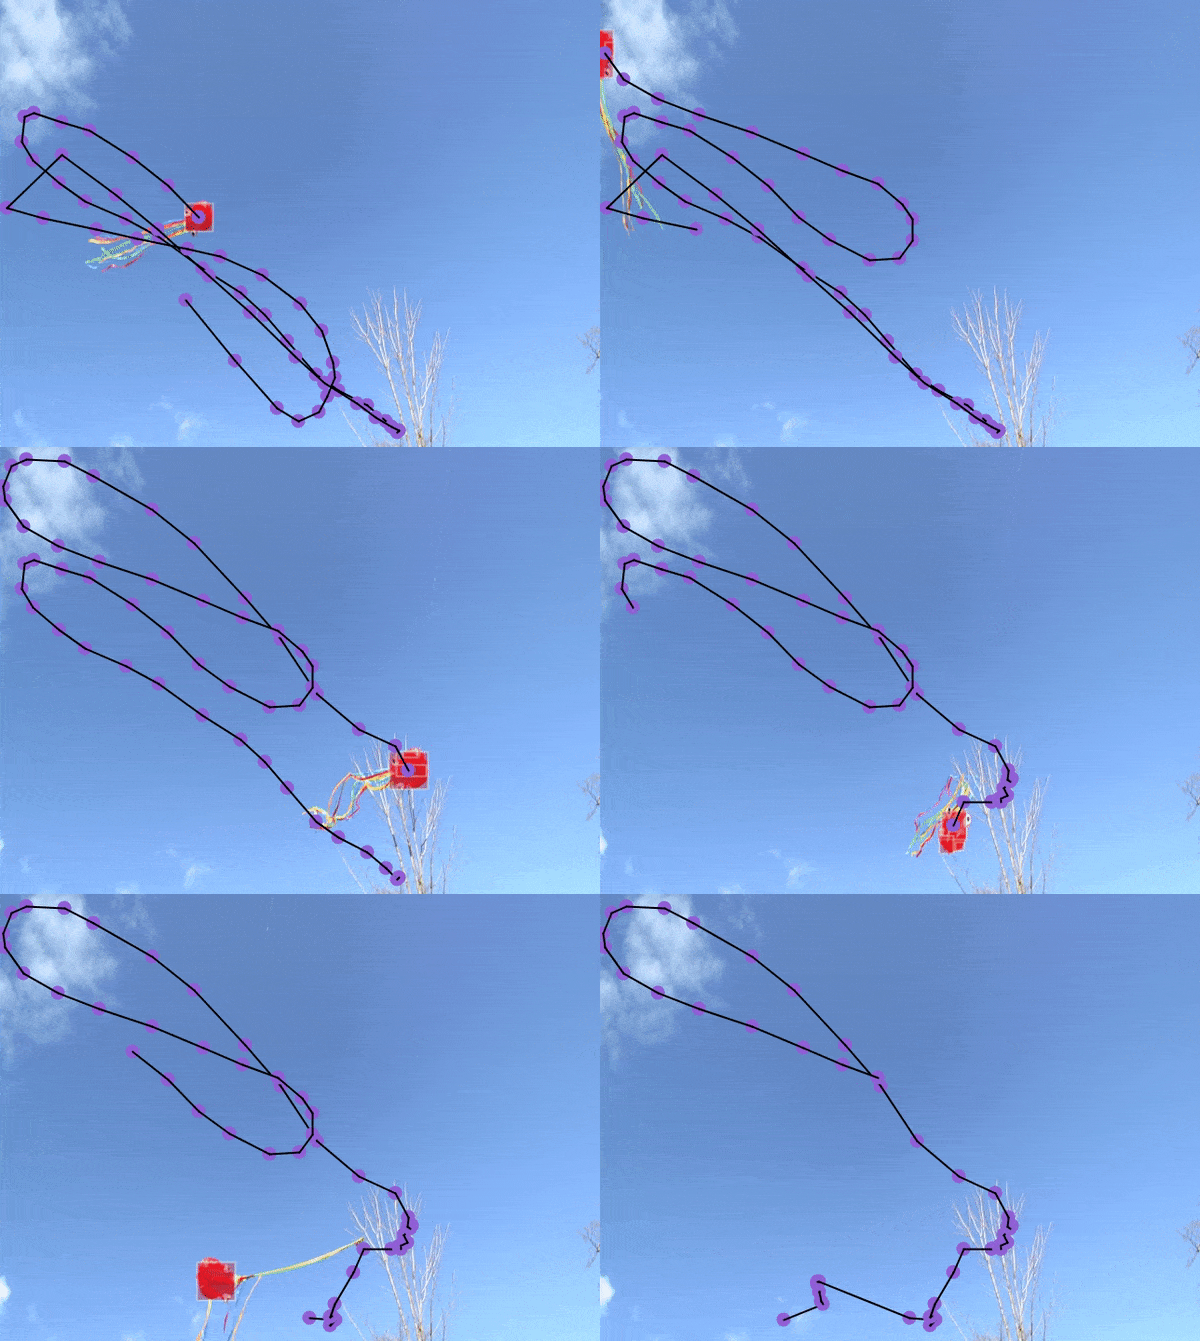
To jump right in, the kite got stuck in a tree, then freed itself — and our software tracked it all!
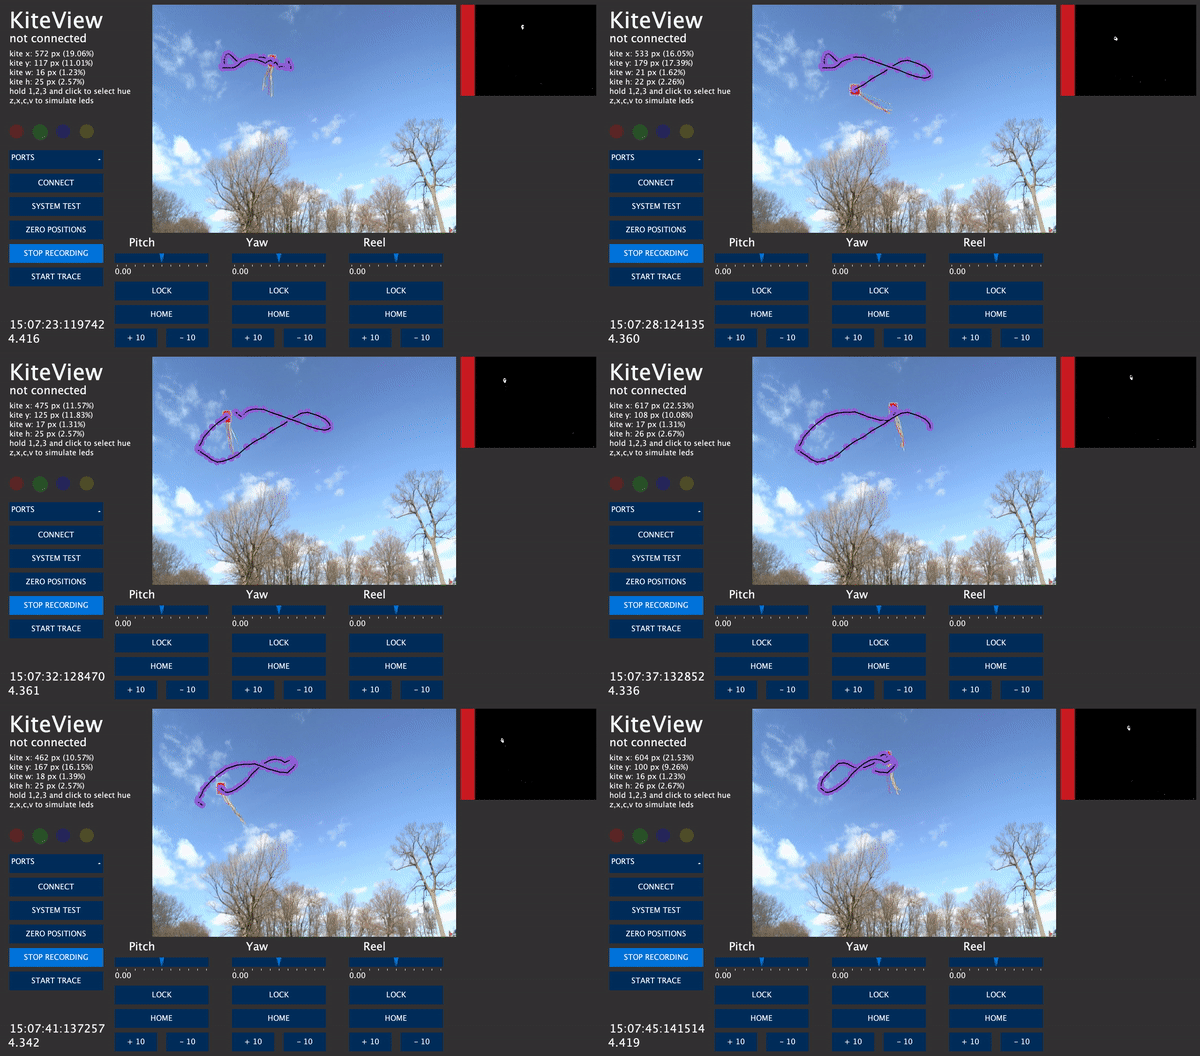
![]()
When the tail is stuck on the tree and the kite re-appears from out of frame, the code picks up the track again as it was lost for a given time. This proved that the feature worked in the field.We had a good flight with the software tracking multiple figure 8’s of the kite!
![]()
The key lessons learned were:
- Kite line should be directly behind the camera (future design related)
- A landscape filter for the hue tracking will be necessary (software related)
Here was the setup of the test:
The final camera angle for the software:
At that angle, here’s what the view looked like:
During the test, a “decent” length of line was determined. To do so, the kite was reeled in and out until it reached the desired stability. Tape was used to mark the location on the line, which was later measured. This was determined on these factors:
- Stability
- Tension on the line - has to be fully tense, the drag force pulling
- Not too long to interfere with trees
- Wide wind window
The length of the line is 11.3 m. This will be rounded up to 12 m for future tests that involve a new line.
Properties of the kite:
- 8 km/h - 25 km/h
- 70 cm x 70 cm (majority of the surface area)
- 90 g (including tail)
The aspect ratio being 1:1 will prove interesting in the physics model. Kites with a high aspect ratio, that is wider than long, can be difficult to stabilize. Whereas kites with a low aspect ratio, longer than wide, are very stable but have a high sink rate. Source
Near the end of the test, a strange error was encountered. The camera view was completely black, yet there were tracks happening. The source of the error was not able to be found while in the field. It was getting cold. Upon return to the lab, after charging the laptop and plugging in the camera, everything worked as expected.
With the information gathered from this test, it will help to inform a physics model, as well as making more improvements to the software.
-
Generator Prototype Design
04/26/2022 at 04:11 • 0 commentsThe generator consists of a freely rotating wheel, held in place with contact from 8 bearings. The kite line attaches to the movable arm. The wind is pulling the kite, causing tension on the line, which results in the arm “pulling” the wheel.
A motor axel will make contact with the wheel, mounted with the perpendicular slots. From the motor axel spinning, this will generate a voltage, and be used to charge (electronics to be determined).
The prototype is 11 cm long, 12.6 cm tall (without the handle or movable arm), and 9 cm wide (measured from end of feet to feet).
Fabrication
The lower and upper plates can be fabricated with a 2D manufacturing option (laser cutter, waterjet cutter, etc). The bearing mounts could be CNC milled. The rest would be 3D printed, and those pieces use heatset inserts.
In reality, everything can be 3D printed. The dimensions above were working with the constraint of my 3D printer build platform (Makerbot Replicator 1). Fabrication with the 3D printer has been going slow, there’s some problem with the X axis skipping.
The goal of the prototype is to test the hypothesis that this concept works. Further testing could correlate the RPM of the wheel to windspeed. The steering assembly to guide the line to move the kite, will be a separate design.
-
Outdoors Technology Test
04/23/2022 at 13:58 • 0 commentsOn April 12th, I conducted an outdoors technology test. The purpose was to run through all the steps of setting up the experiment outdoors. The reason was to see what roadbumps occurred and why, in order for subsequent tests to be easier.
In the setup there is a green magic carpet to place all the equipment on, including an anemometer, laptop, mini tripod, camera, usb webcam, and two backpacks with additional items (such as bug spray). The laptop is running the KiteView software.
Winds were 10 km/h. The temperature reading on the anemometer is vastly incorrect, the temperature was more around 8 deg C.
Pairing the usb webcam and camera on the mini tripod together with tape.
Lessons learned:
- Find the direction of wind first before setting everything up
- Camera really has to be pointed up - make sure it can see a little of the horizon (for post editing if needed), but the rest should be the sky
- Might need usb extension for the webcam
- Attaching the usb webcam to the GoPro mount was a cool idea
- Can hardly see the computer screen on a sunny day
- Use key presses instead of buttons?
- Have auditory sounds for the key presses?
- The red mollusc kite is actually pretty great for control compared to the other one
- Other one is more turbulent
- Laptop battery ran out quickly (20 mins)
The first lesson learned was really key, and this will be added to future outdoors tests.
The footage captured from this test was used to test KiteView software further and develop the kite tracking code.
Obligatory photo of kite flying :)
 EK
EK