Sam Smith
-
[backlog] November 30, 2019
10/07/2022 at 21:40 • 0 comments[ Backlog - This log was adapted from my Patreon, to fill in the details about how this project has developed over the years. Check the link for the full post, and if you appreciate this project, consider supporting it! ]
![]()
November has been a very productive month! Here's what happened:
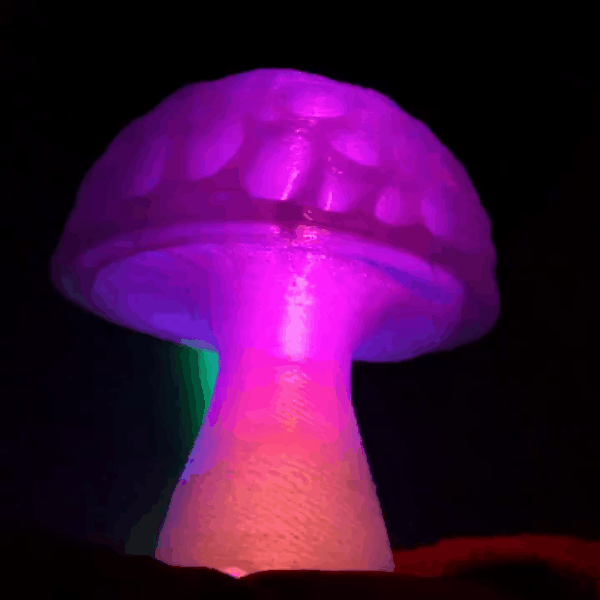
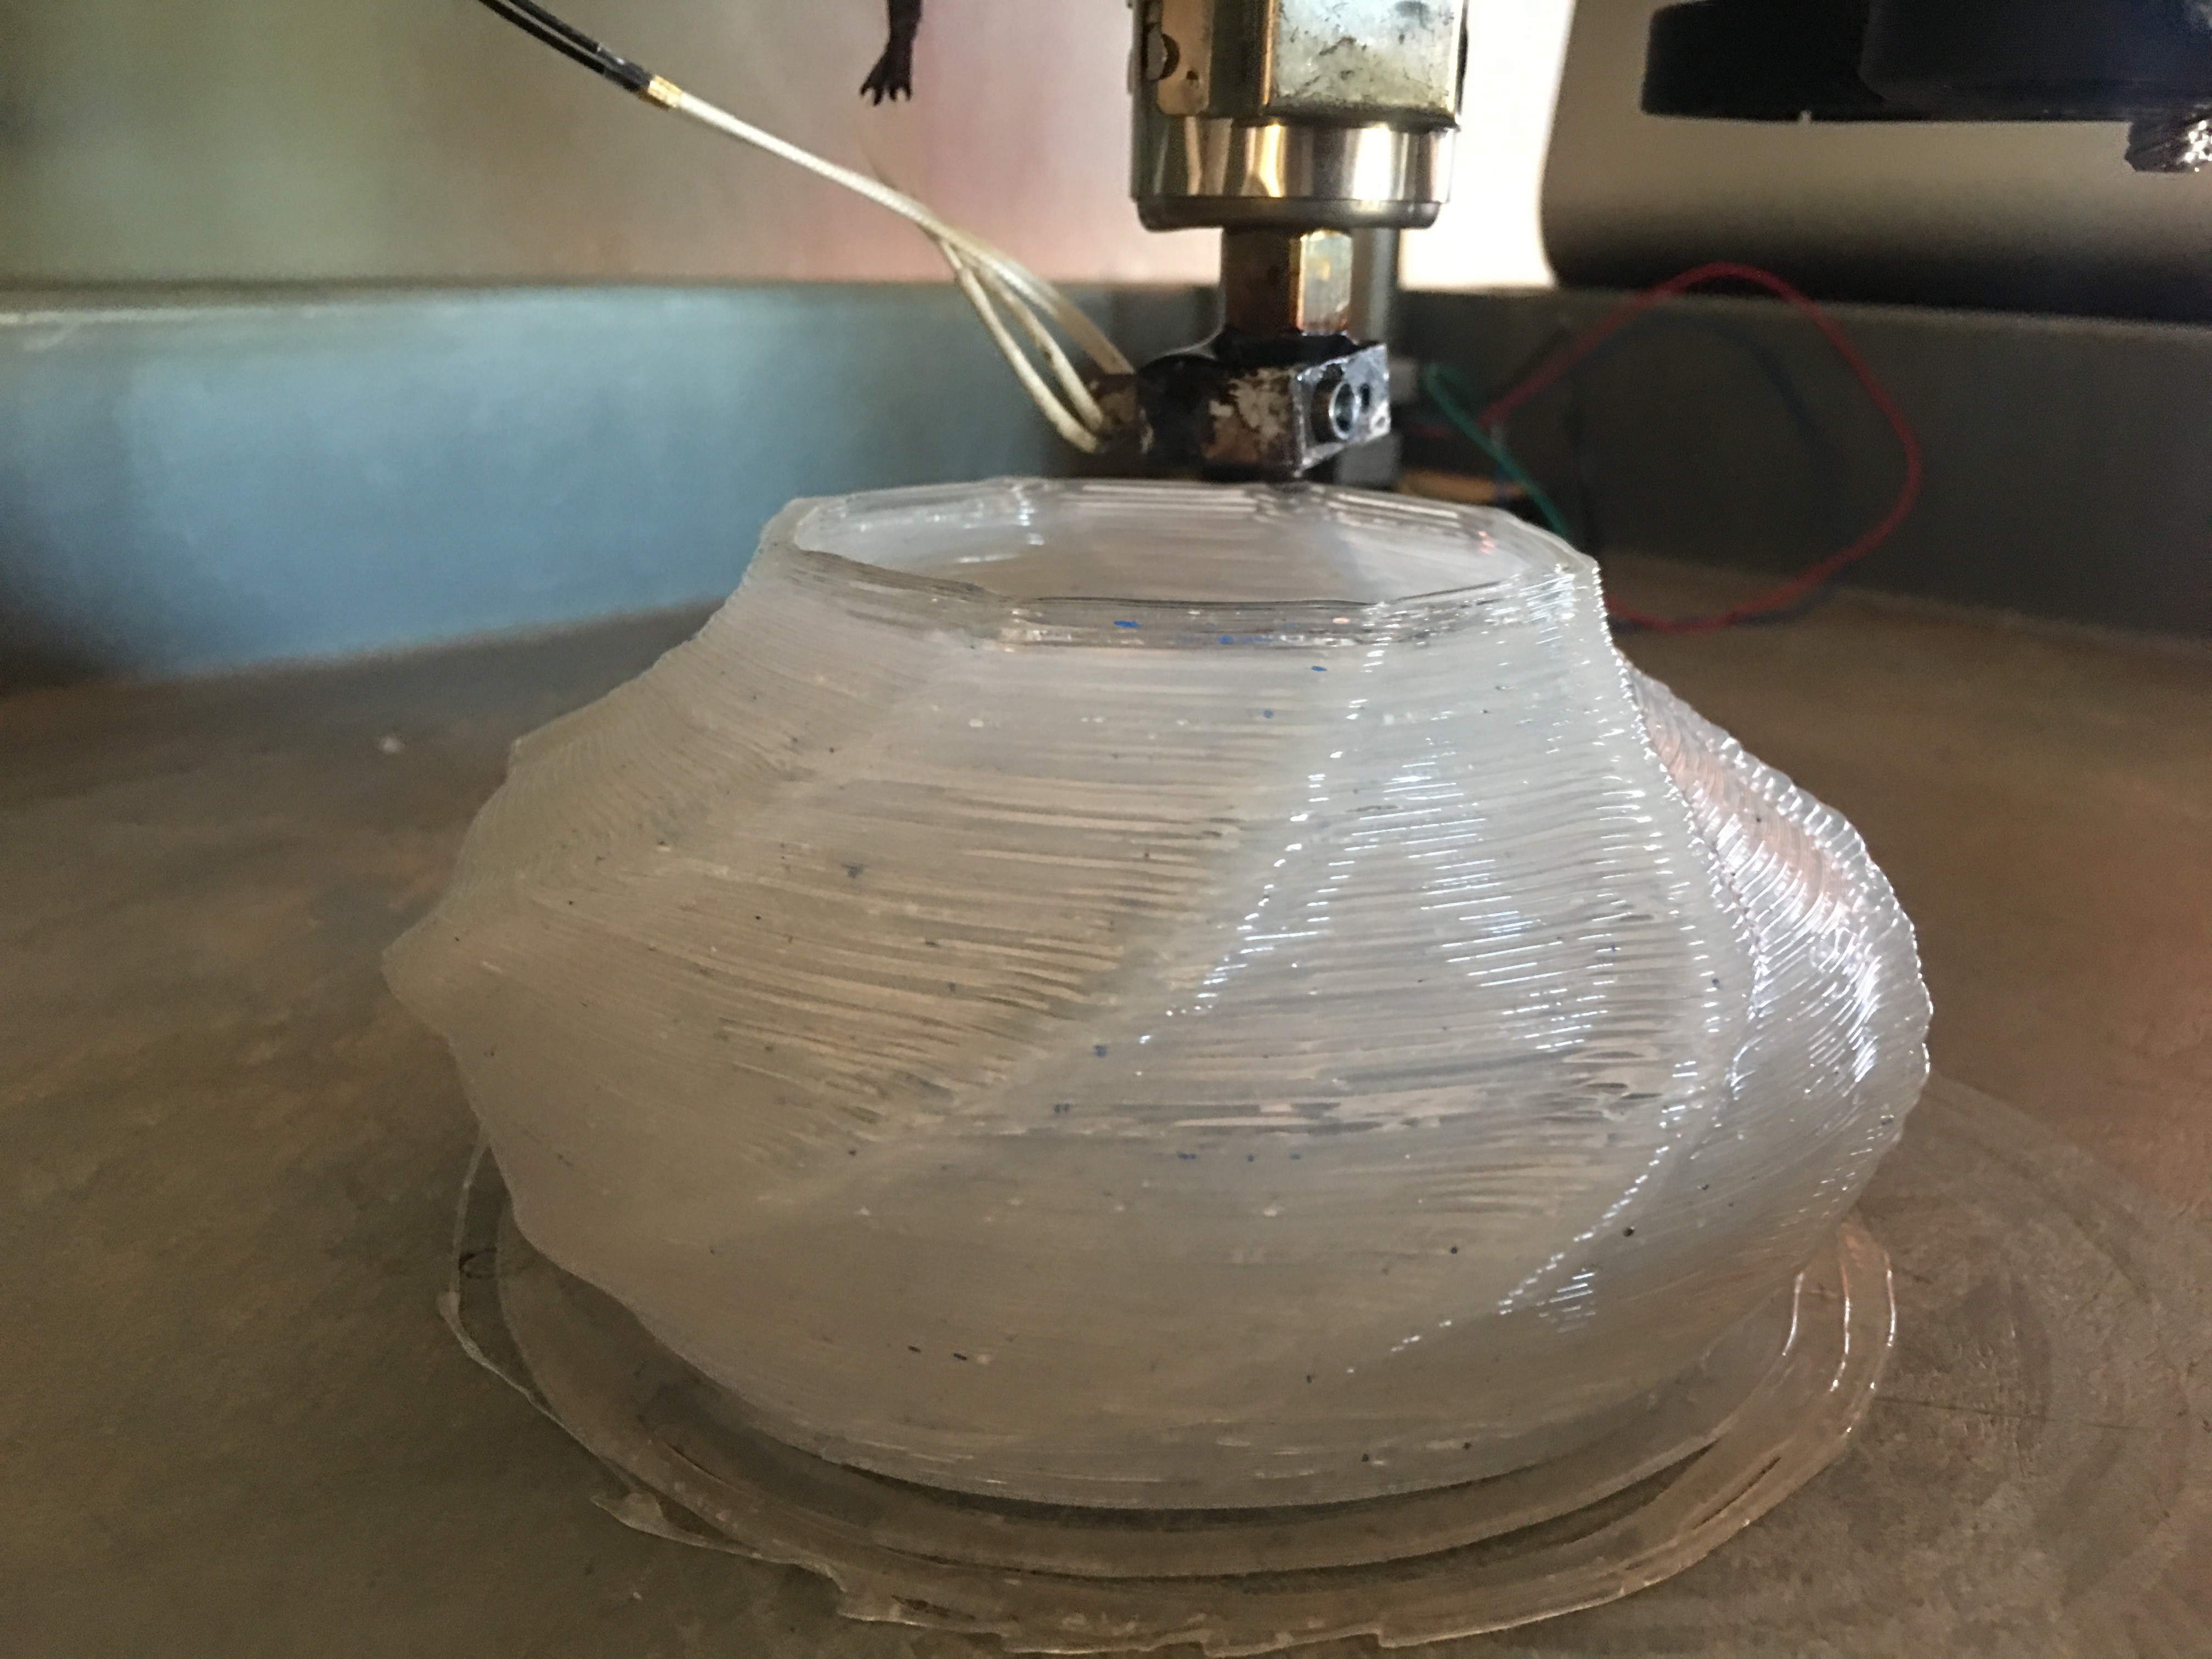
First, I successfully printed my most complex part ever with the trash printer- a 12" tall mushroom lamp. I found the model on Thingiverse, and wanted to see if I could get it to print on the Trash Printer. The biggest challenge was that most of my prints to date have been "spiral vase" style prints, which means that the extruder just moves in a continuous spiral for the entire print.
Spiral vase prints are fast and easy, but if ALL you can print with a printer is spiral vase parts, it limits the usefulness significantly. Since the trash printer extruder oozes a lot, stopping it and moving it can cause problems. I dialed in the settings in the software, so that it would give "extra length on restart", so that it would pause and feed extra material after a move, and that worked pretty well! I still had to watch it pretty closely, but it worked and that's a really good sign!
![]()
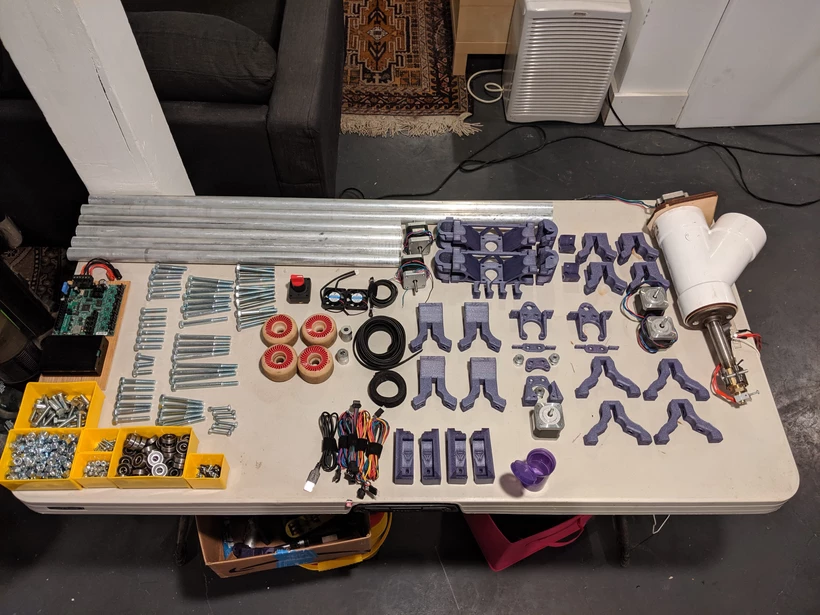
Next, I printed out all the parts I need to build an entirely new Trash Printer from scratch, so that I can record a full, step by step tutorial video. I uses this awesome sparkly purple filament we got from Proto Pasta at Maker Faire.
![]()
Now I'm just waiting on some pulleys and lead screws to arrive, and I can film the whole build one go. Look for that video by the end of December!
![]()
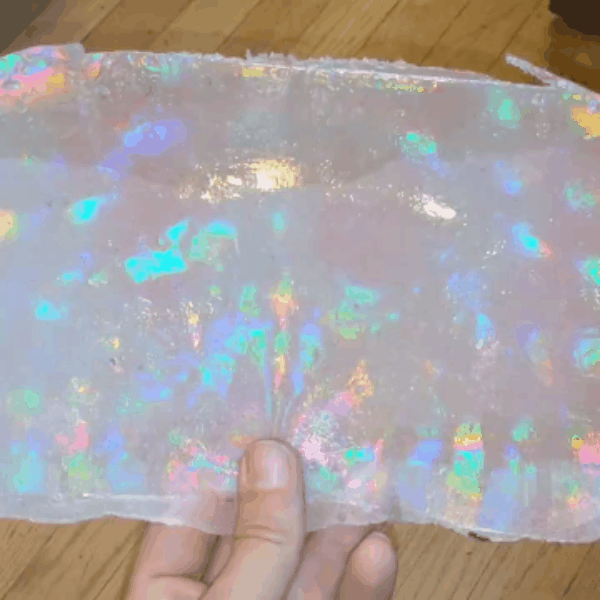
I also did some experiments with recycled plastic and diffraction grating. Diffraction film is made from PET plastic and has a much higher melting point than PP. The film has tiny microscopic ridges on it that give it that rainbow effect, and when you heat-press the film onto the PP sheet at around 425F, the PP melts, but the PET doesn't, and the PP makes a mold of the ridges on the film and becomes diffractive as well! The film is not destroyed in this process and you can just rainbow-ify recycled plastic over and over using only heat and pressure.
Neat!
-
[backlog] October 31, 2019
10/07/2022 at 21:33 • 0 comments[ Backlog - This log was adapted from my Patreon, to fill in the details about how this project has developed over the years. Check the link for the full post, and if you appreciate this project, consider supporting it! ]
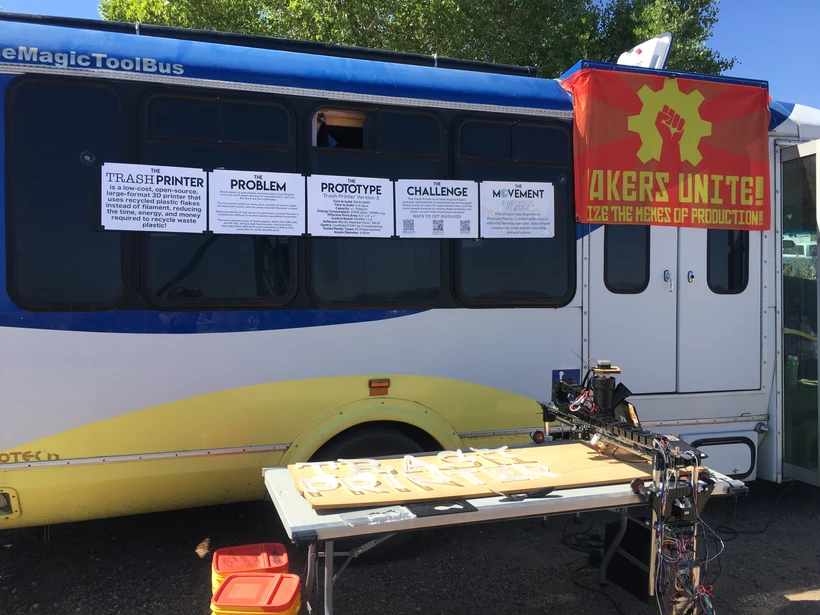
This has been a crazy month and a lot has happened! We set off on a 3-week West Coast tour in the Magic Tool Bus. First, we landed at Arcosanti in Arizona for their 3rd Convergence event.
There we did a demo of the Trash Printer, and I made my first ever "print" using HDPE and a new extruder design.
![]()
![]()
Unfortunately, as with all first drafts, the design needs more work to be consistent, but this is at least a promising first step!
Next, we headed out to the Ecosa Institute for Ecological Design, where I did a talk on open-source distributed infrastructure!
Last week, we presented the Metabolizer at the Institute for the Future's "Age of distributed super powers" conference, which was a blast!
![]()
![]()
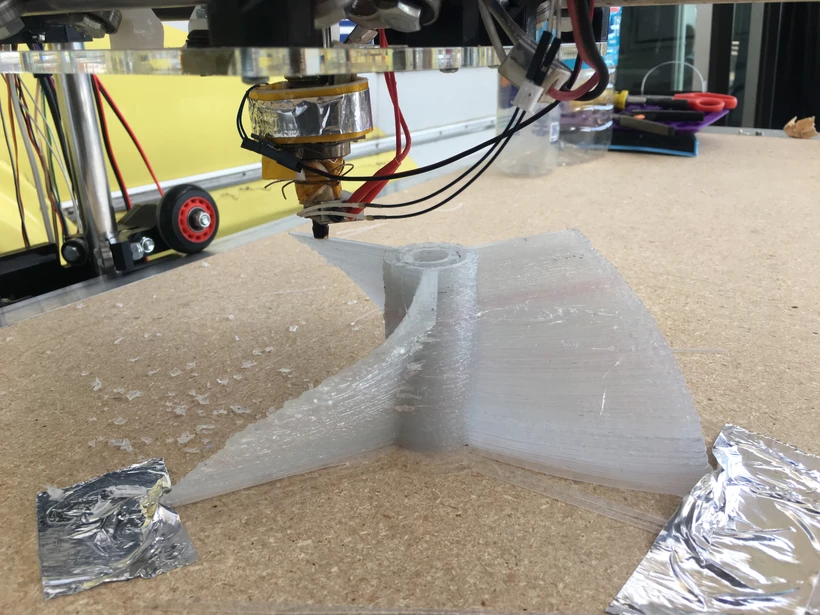
Our exhibit wasn't open until the big reveal on the second day of the conference, so I spent most of the first day tuning and calibrating the printer. I had been having some annoying motor issues, which I finally diagnosed as faulty wiring, and I rebuild the wiring harness, and it worked much better, just in time. I was able to print my first fully functional part: A wind/water turbine that I attached to a stepper motor so it would light up LEDs when it spins.
Now that the printer is working better, I'm going to focus on content production over the course of November, and work on posting educational media that teaches folks how to build the Trash Printer, since my existing documentation is still a little thin. Now that I know what works, it's time to make better documentation!
-
[backlog] September 30, 2019
10/07/2022 at 21:28 • 0 comments[ Backlog - This log was adapted from my Patreon, to fill in the details about how this project has developed over the years. Check the link for the full post, and if you appreciate this project, consider supporting it! ]
Here’s what happened this month!
![]()
We set up the Trash Printer at Portland Mini Maker Faire, and printed a sign that says TRASH PRINTER out of trash!
![]()
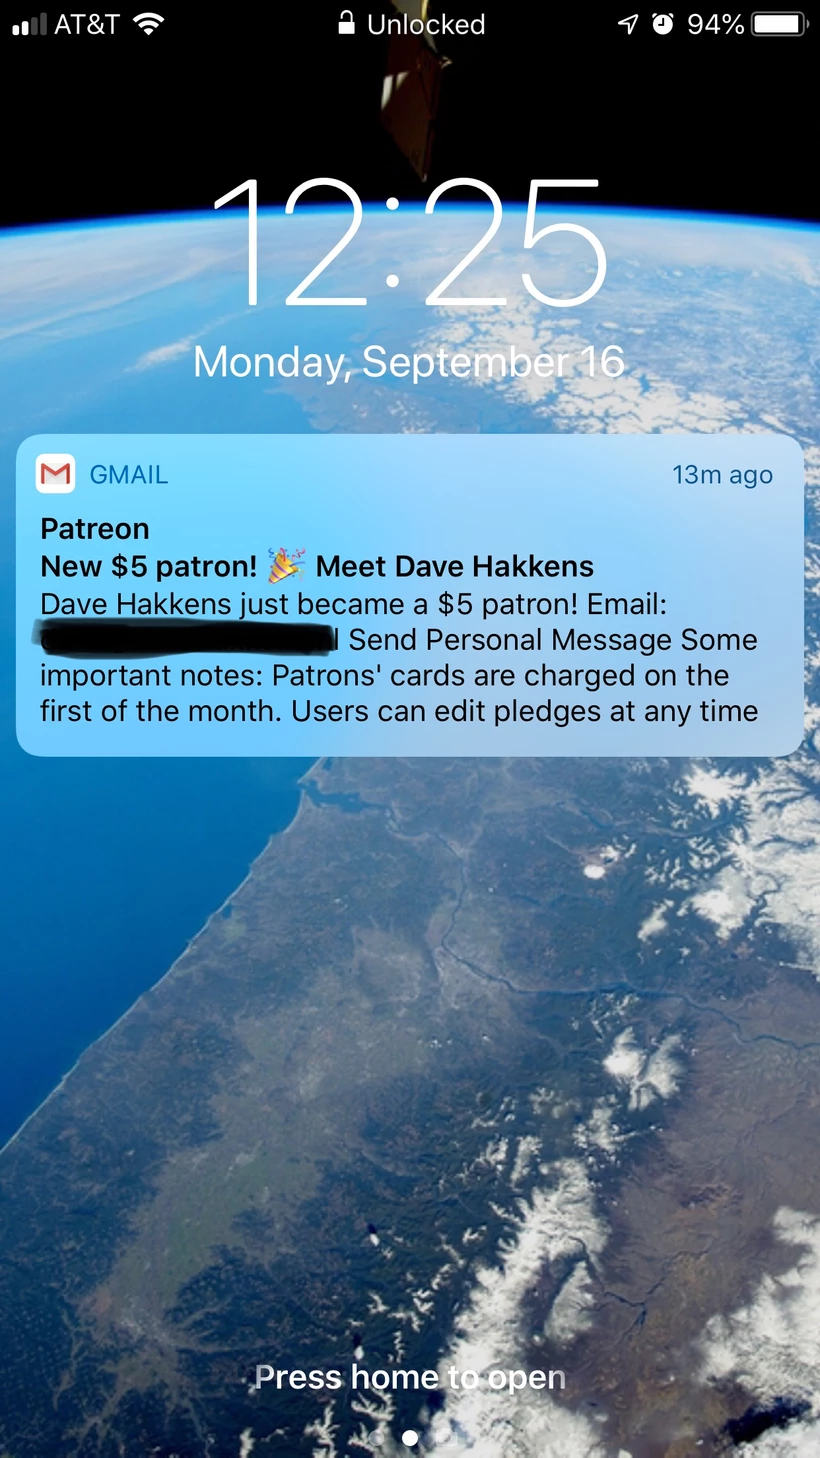
Dave Hakkens, the founder of the Precious Plastic movement, and a big inspiration to me, became one of my Patrons! Dave's detailed documentation and helpful videos are what got me started working on plastic recycling, and I aspire to make stuff as useful and accessible as he has. Thanks Dave!
![]()
What I learned this month:
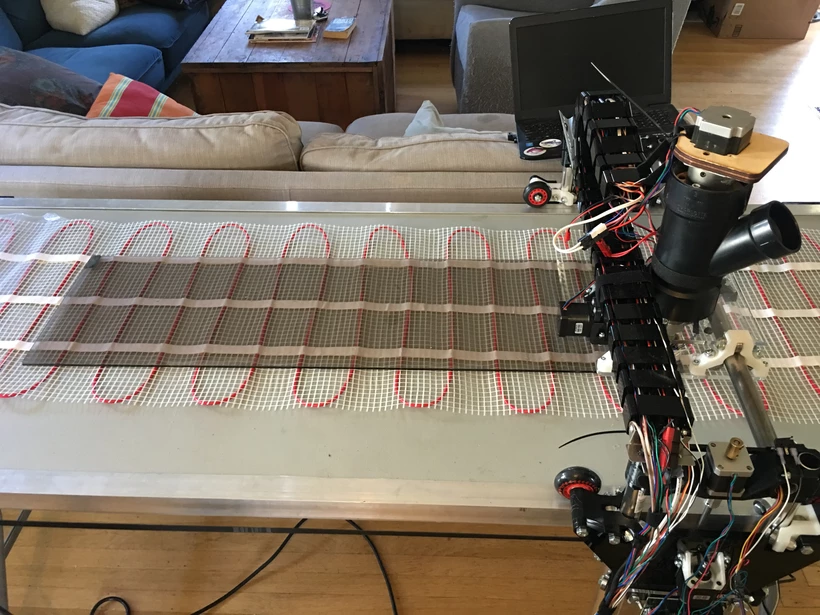
Printing on glass with a heated bed made out of a radiant floor heater doesn't work very well. The PP just falls right off as it cools...
![]()
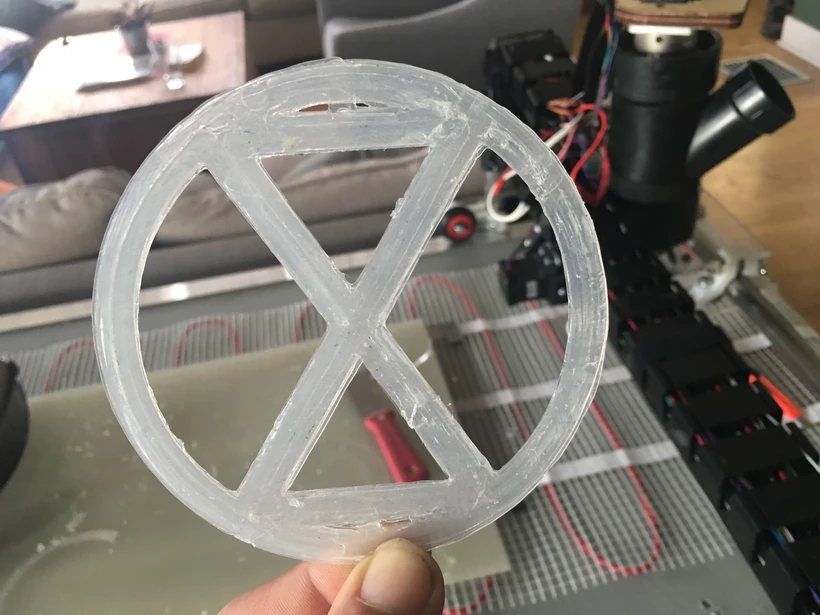
But printing on a sheet of solid polypropylene, with polypropylene, with the heated bed works pretty well! I made this little Extinction Rebellion emblem for the Climate Strike.
![]()
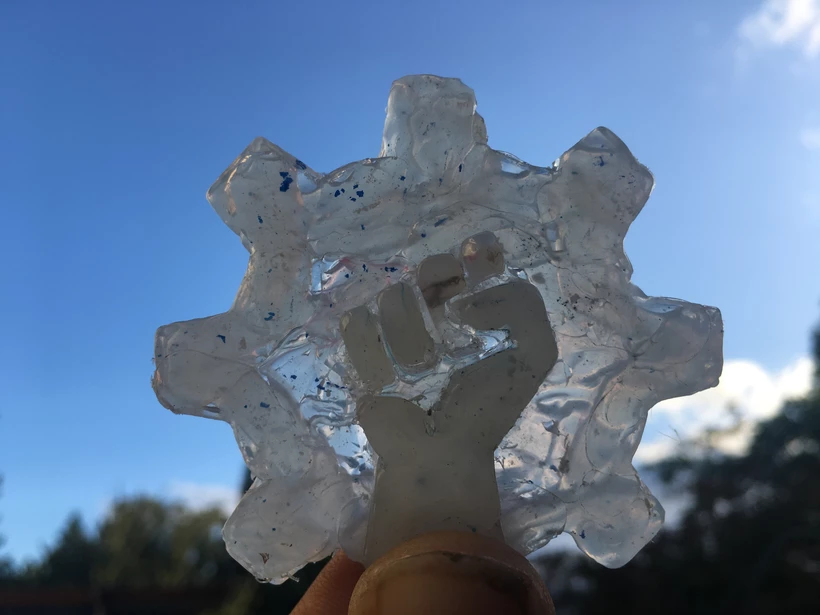
I made this little token using a combination of 3D printing and molding making. I made a laser-cut acrylic mold, and then just manually extruded the plastic into it. This one turned out OK, and I think the process has some potential!
-
[backlog] August 31, 2019
10/07/2022 at 21:21 • 0 comments[ Backlog - This log was adapted from my Patreon, to fill in the details about how this project has developed over the years. Check the link for the full post, and if you appreciate this project, consider supporting it! ]
I spent most of August building a new gantry with a MUCH larger print area, getting it moving, and dialing in the settings. I was actually really surprised how quickly it all went together- the first gantry took me about 11 months to get working, this one only took me about 2 weeks!
![]()
So most of my budget this month went to buying little things like lead screws, shaft couplers, and various other parts. The printer is now printing better (and larger!) than ever, but I've pretty much reached the limit of what the motor I'm using can handle, and without more speed and more torque, I can only extrude so fast, which limits how fast I can print and how fat and consistent the layers can be.
![]()
So I bought a neat little board called a "Tarocco Board" that acts as a controller that reads the step/direction pulses coming from the 3D printer board, and translates them to control a brushless DC gear motor- the same kind of motor used in cordless drills. These motors are much more powerful for the same size and weight (and much cheaper!) and I'm hoping this improvement will make a big difference in speed and consistency of the extrusion.
I also bought a bed-leveling sensor, so that I can account for warp in the table, although all in all, the new table design is much smoother than the old one, and variations are kept to within +/- 1mm, but still, getting that down to fractions of a millimeter will make a big difference for adhesion and consistency of the prints.
The whole setup I'm using to do this, only costs around $600 to build! Next month, I'm going to focus on bed leveling, and building a new extruder with a more powerful motor, and see if that gets me any closer to printing a surfboard!
Come check out the TrashPrinter in action at the Portland Mini Maker Faire next weekend at OMSI!
Stay tuned, and thank you for your support!
Here is an itemized run down of how I spent this months budget:
$85 - HDPE 6' Folding Table
$6.55 - 2x Flexible Shaft Couplers
$7- 6mm-8mm coupler for gear motor
$12.99- 300rpm 24V Brushed DC gearmotor
$25.38 - 2x 400m T8 Leadscrews and nuts
$11.99 - Silicone Gaskets
$15.99 - 2” Tri-clamps
$27- 2x 6’ Aluminum L-bars
$55- Tarocco Board
$10- 3/8” Auger
-
[backlog] July 31, 2019
10/07/2022 at 21:17 • 0 comments[ Backlog - This log was adapted from my Patreon, to fill in the details about how this project has developed over the years. Check the link for the full post, and if you appreciate this project, consider supporting it! ]
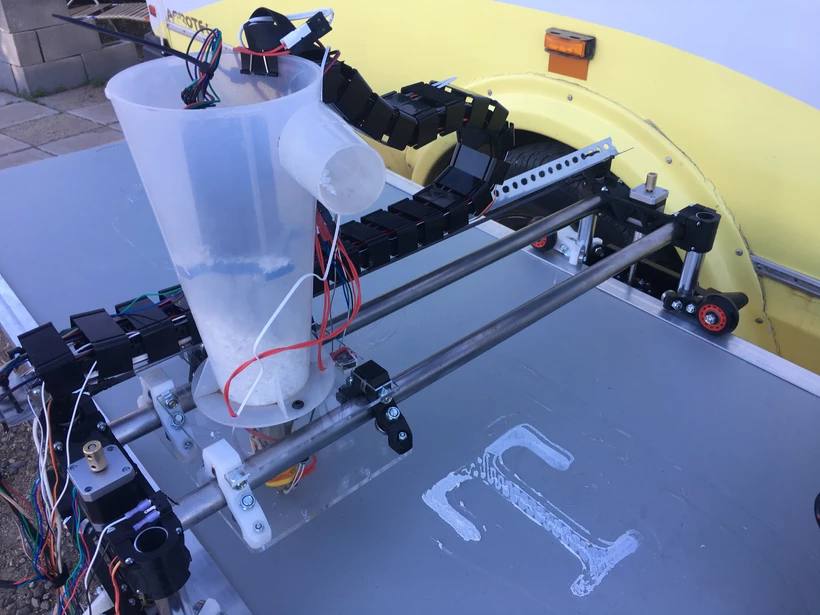
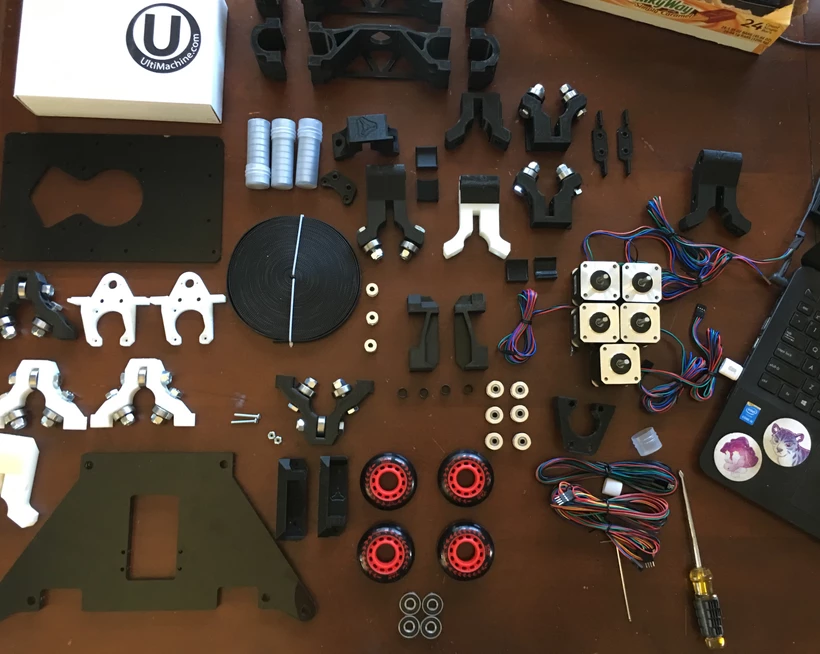
This month I built a whole new trash printer! The one that I have been using was intended to be a proof of concept, and now that I know it works, it's time to scale up! Being able to print flower vases is cool, but I want to print whole surfboards!
The new version utilizes the 3D-printable "LowRider2" CNC gantry. It took me about 4 days and $10 worth of filament to print all of the parts I needed to build it, and I spent this months budget on the rest of the parts. Here's the breakdown:
Control Board - $127
Non- Printable Parts (Wheels, belts, etc) - $85
Hardware- $24
Bearings and Motors- $45
![]()
-
[backlog] - April 30th 2019
10/07/2022 at 21:13 • 0 comments[Backlog - This log was adapted from my Patreon, to fill in the details about how this project has developed over the years. Check the link for the full post, and if you appreciate this project, consider supporting it!]
![]()
Here's what I did this month:
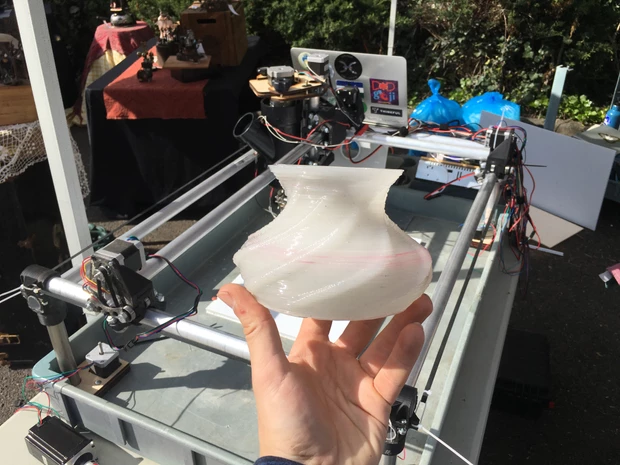
-Printed my best vase ever at the ReClaim It Earth Day event! (above)
-Put the trash printer on a service cart so that I can move it more easily
-Started building a second (and much improved) print head so that I can try printing with HDPE (#2) in addition to PP (#5)
And here's what I'm working on next:
-Adding a Z-bed to let me print objects taller than 5"
-Building a new version of my extruder to print with HDPE (I sure HDPE so at least)
-Creating a step-by-step build tutorial for the extruder
![]()
![]()
![]()
The Trash Printer - Version 3
An open-source, low-cost, large-format 3D printer that can print directly from shredded plastic trash instead of filament