Neil Lambeth
-
Raspberry PI X-PC
10/22/2022 at 20:02 • 0 commentsAs previously mentioned, I've been given lots of old laptops. Most have working motherboards and screens so they can be turned into X-PCs.
But I've also got a load with dead motherboards, this means I've now got a lot of working laptop screens with nothing to drive them. I thought about turning them into monitors but I really wanted to turn them back into working computers. I touched upon this in my original post where I mentioned making a Raspberry Pi version, back when you could actually buy them! I also wanted to develop the idea of using some sort of hinge to set the screen angle.
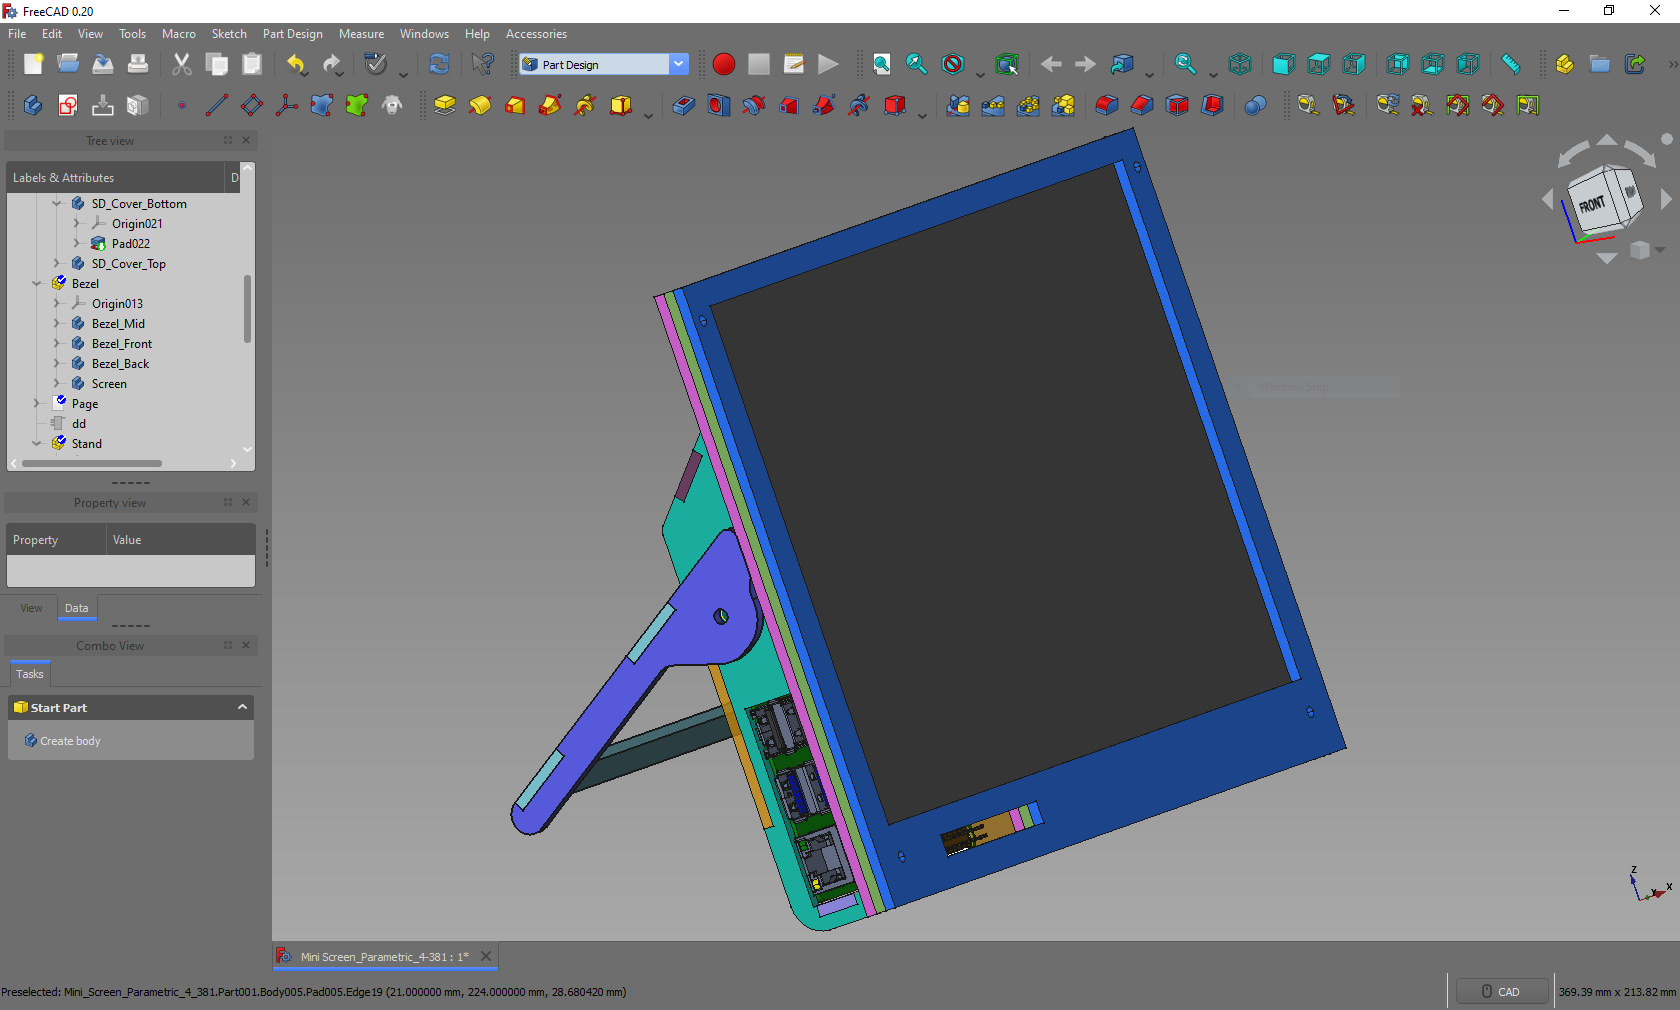
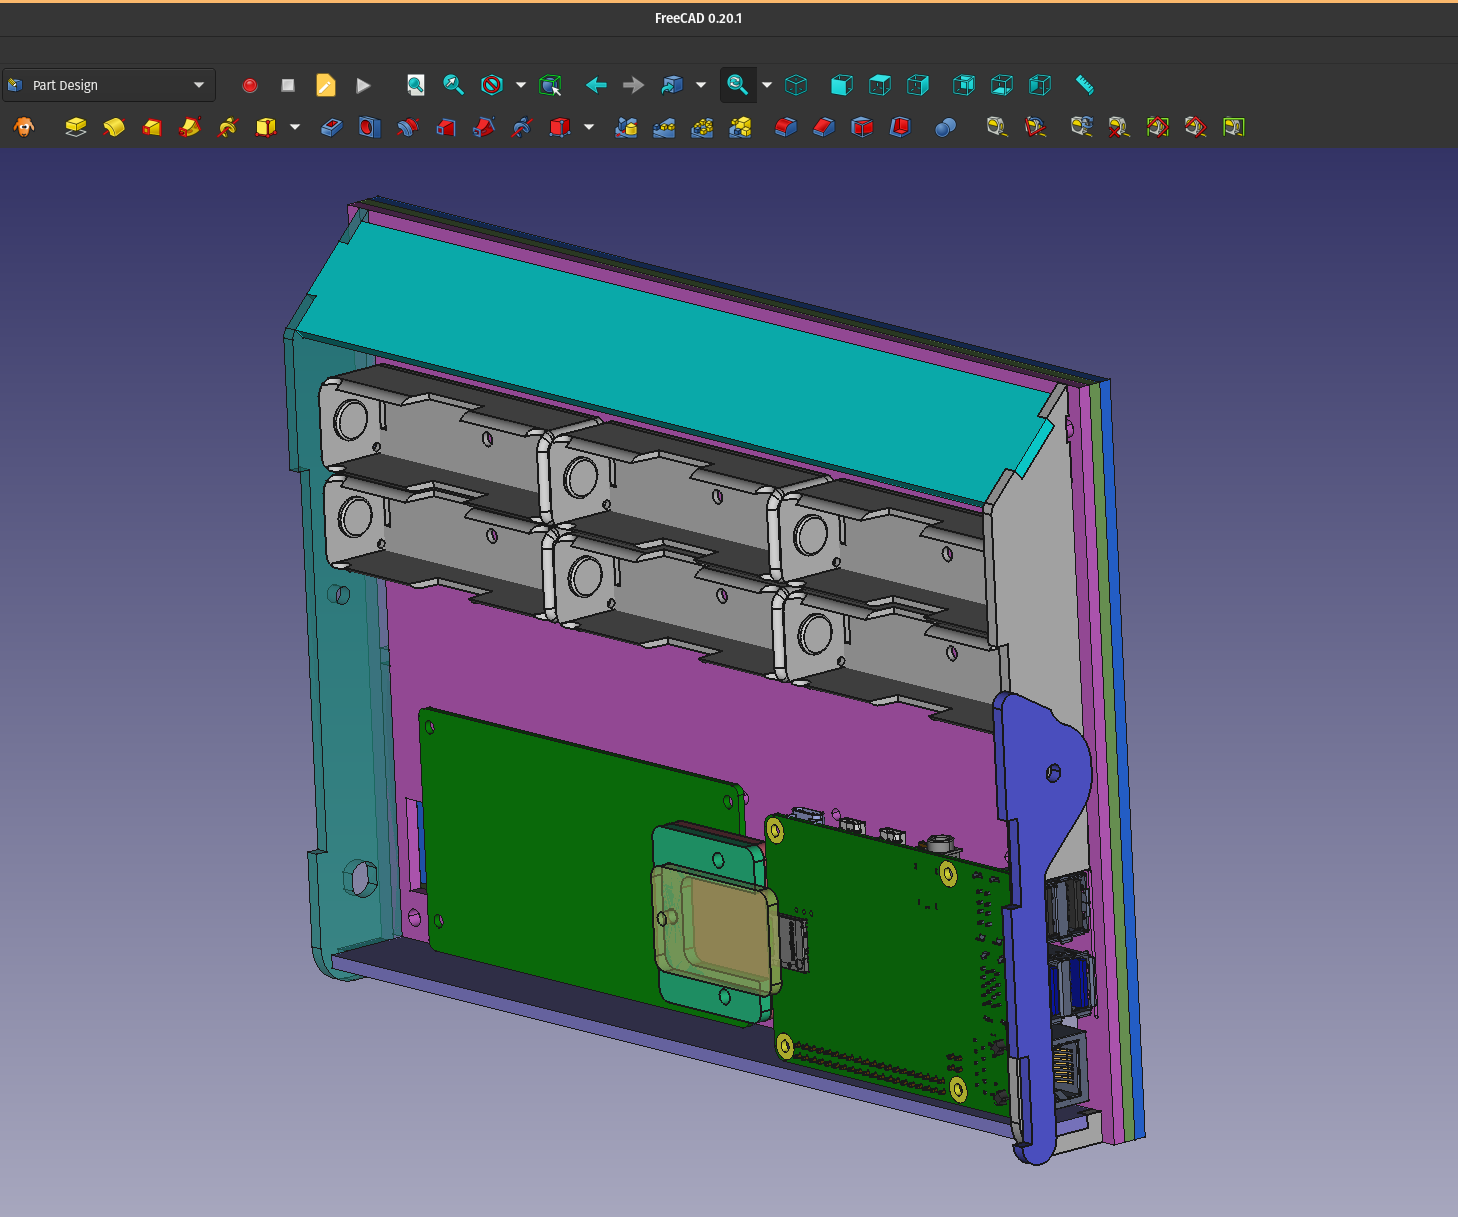
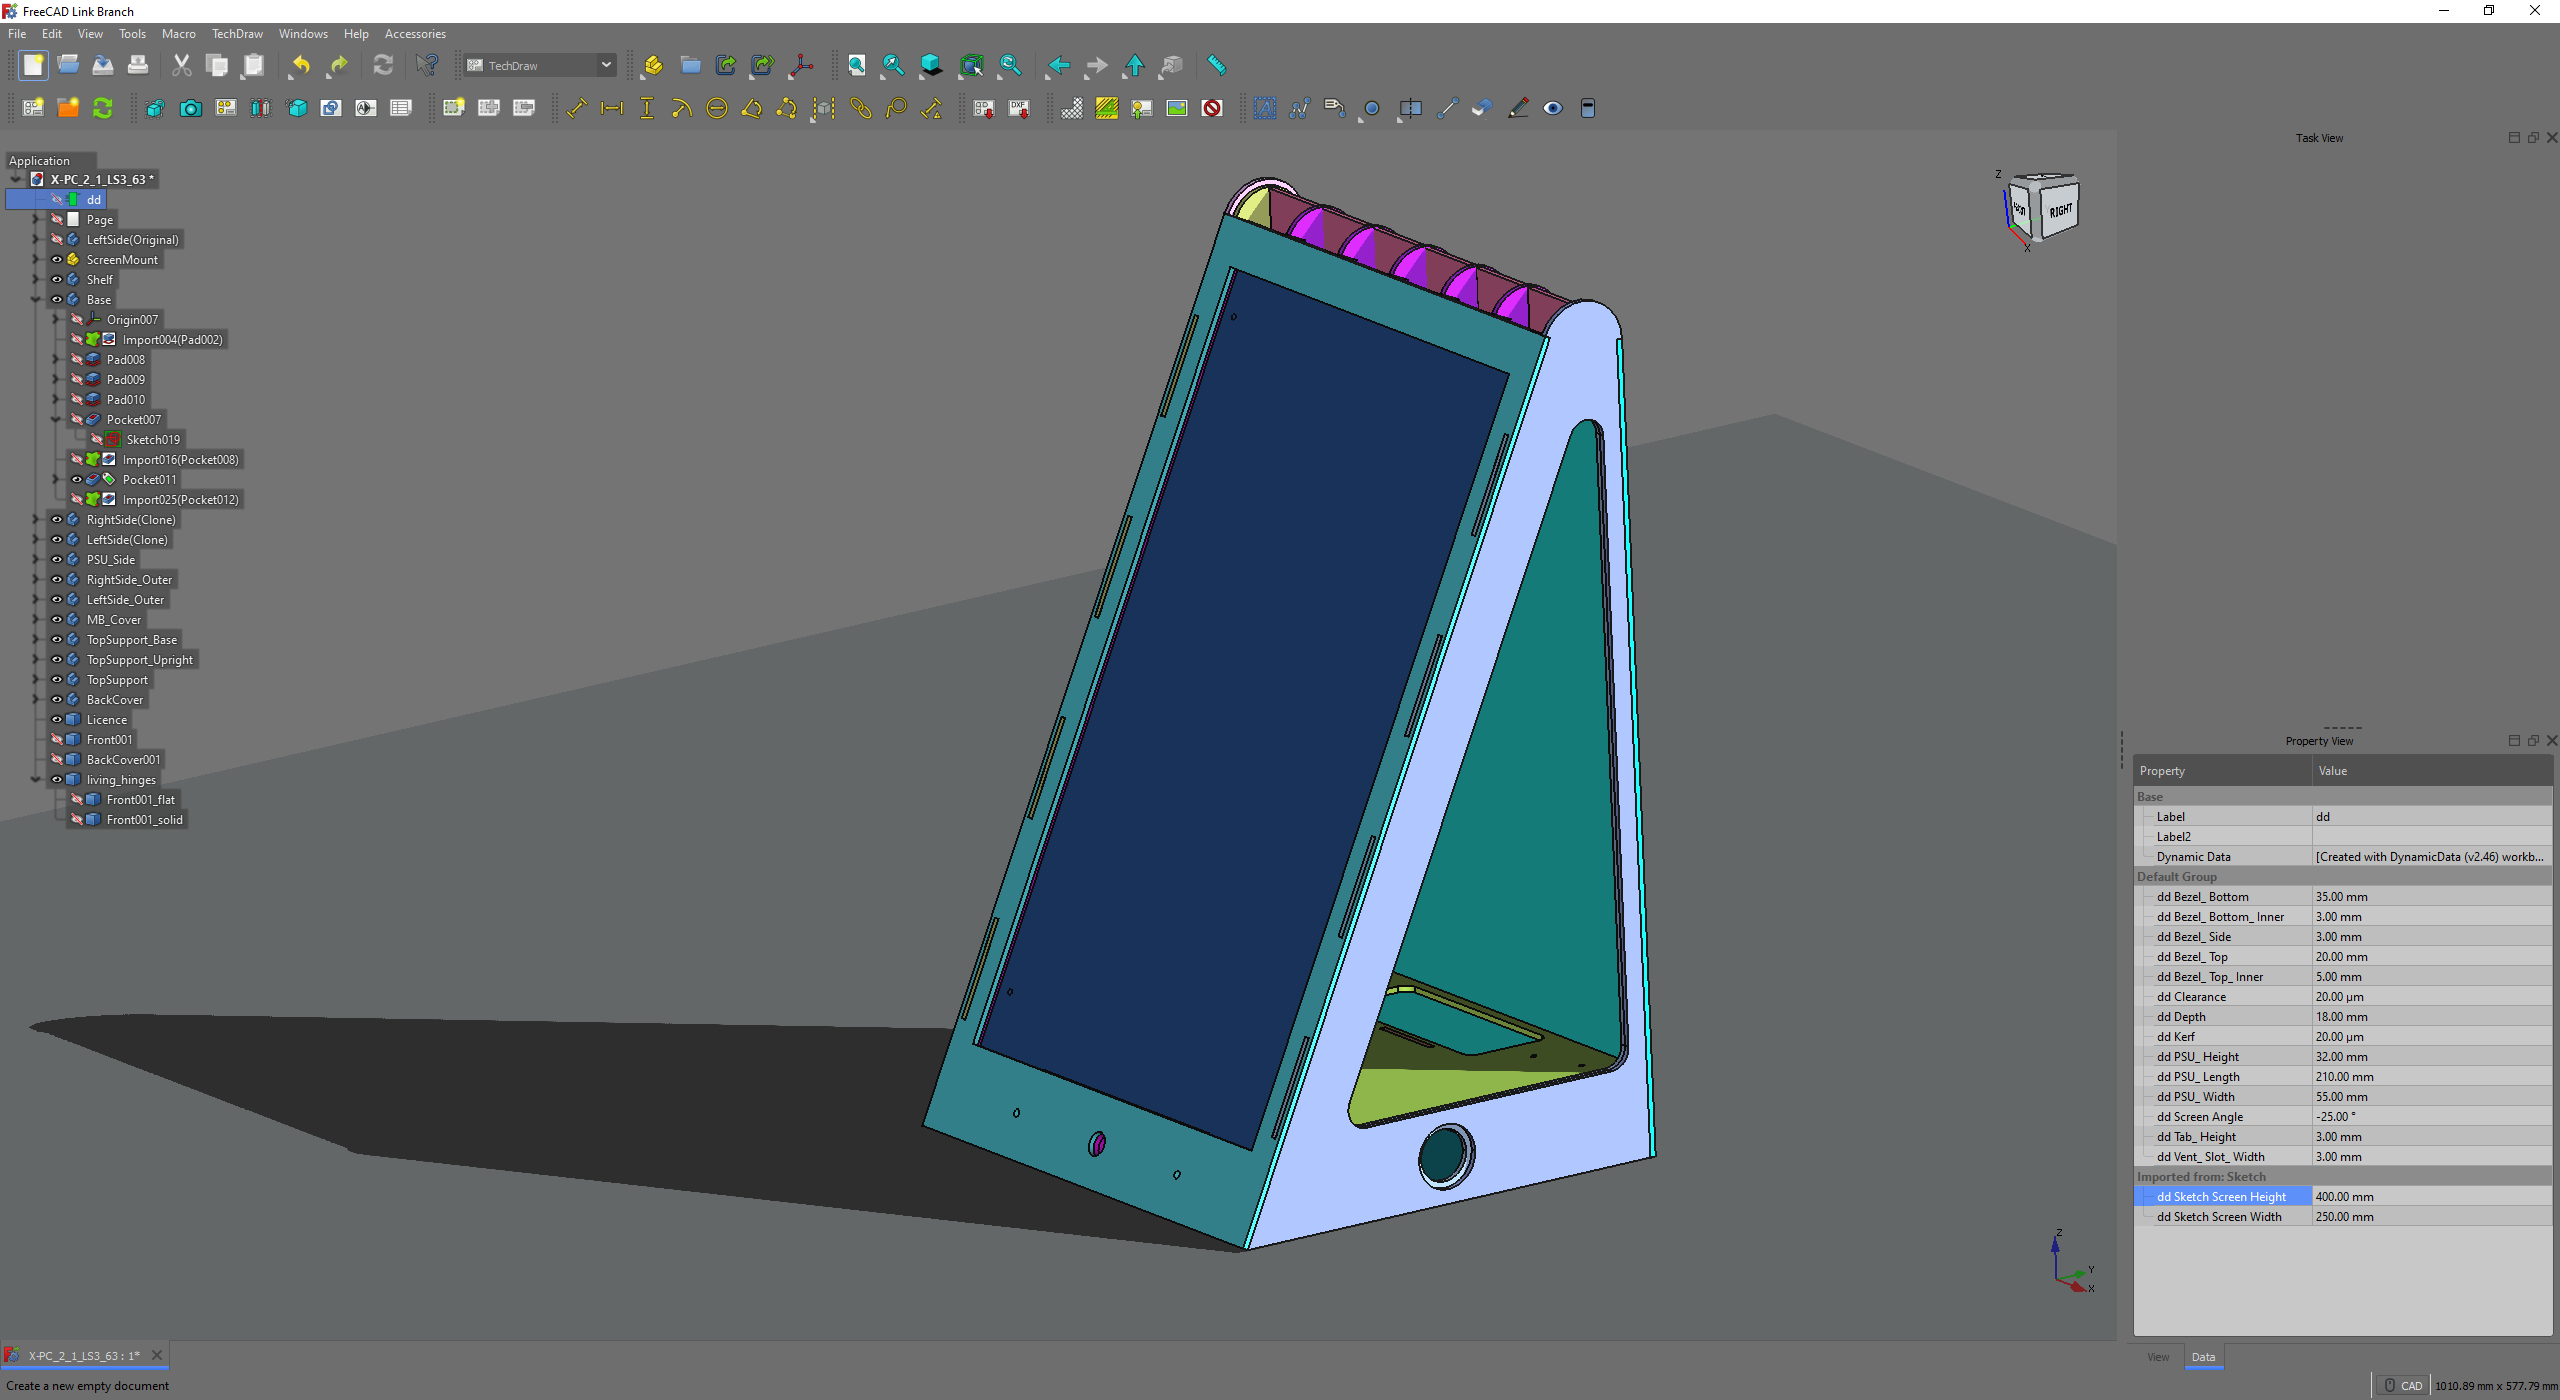
So I fired up FreeCAD again and started designing the Raspberry Pi X-PC (will also work with other SBCs in the same form factor).
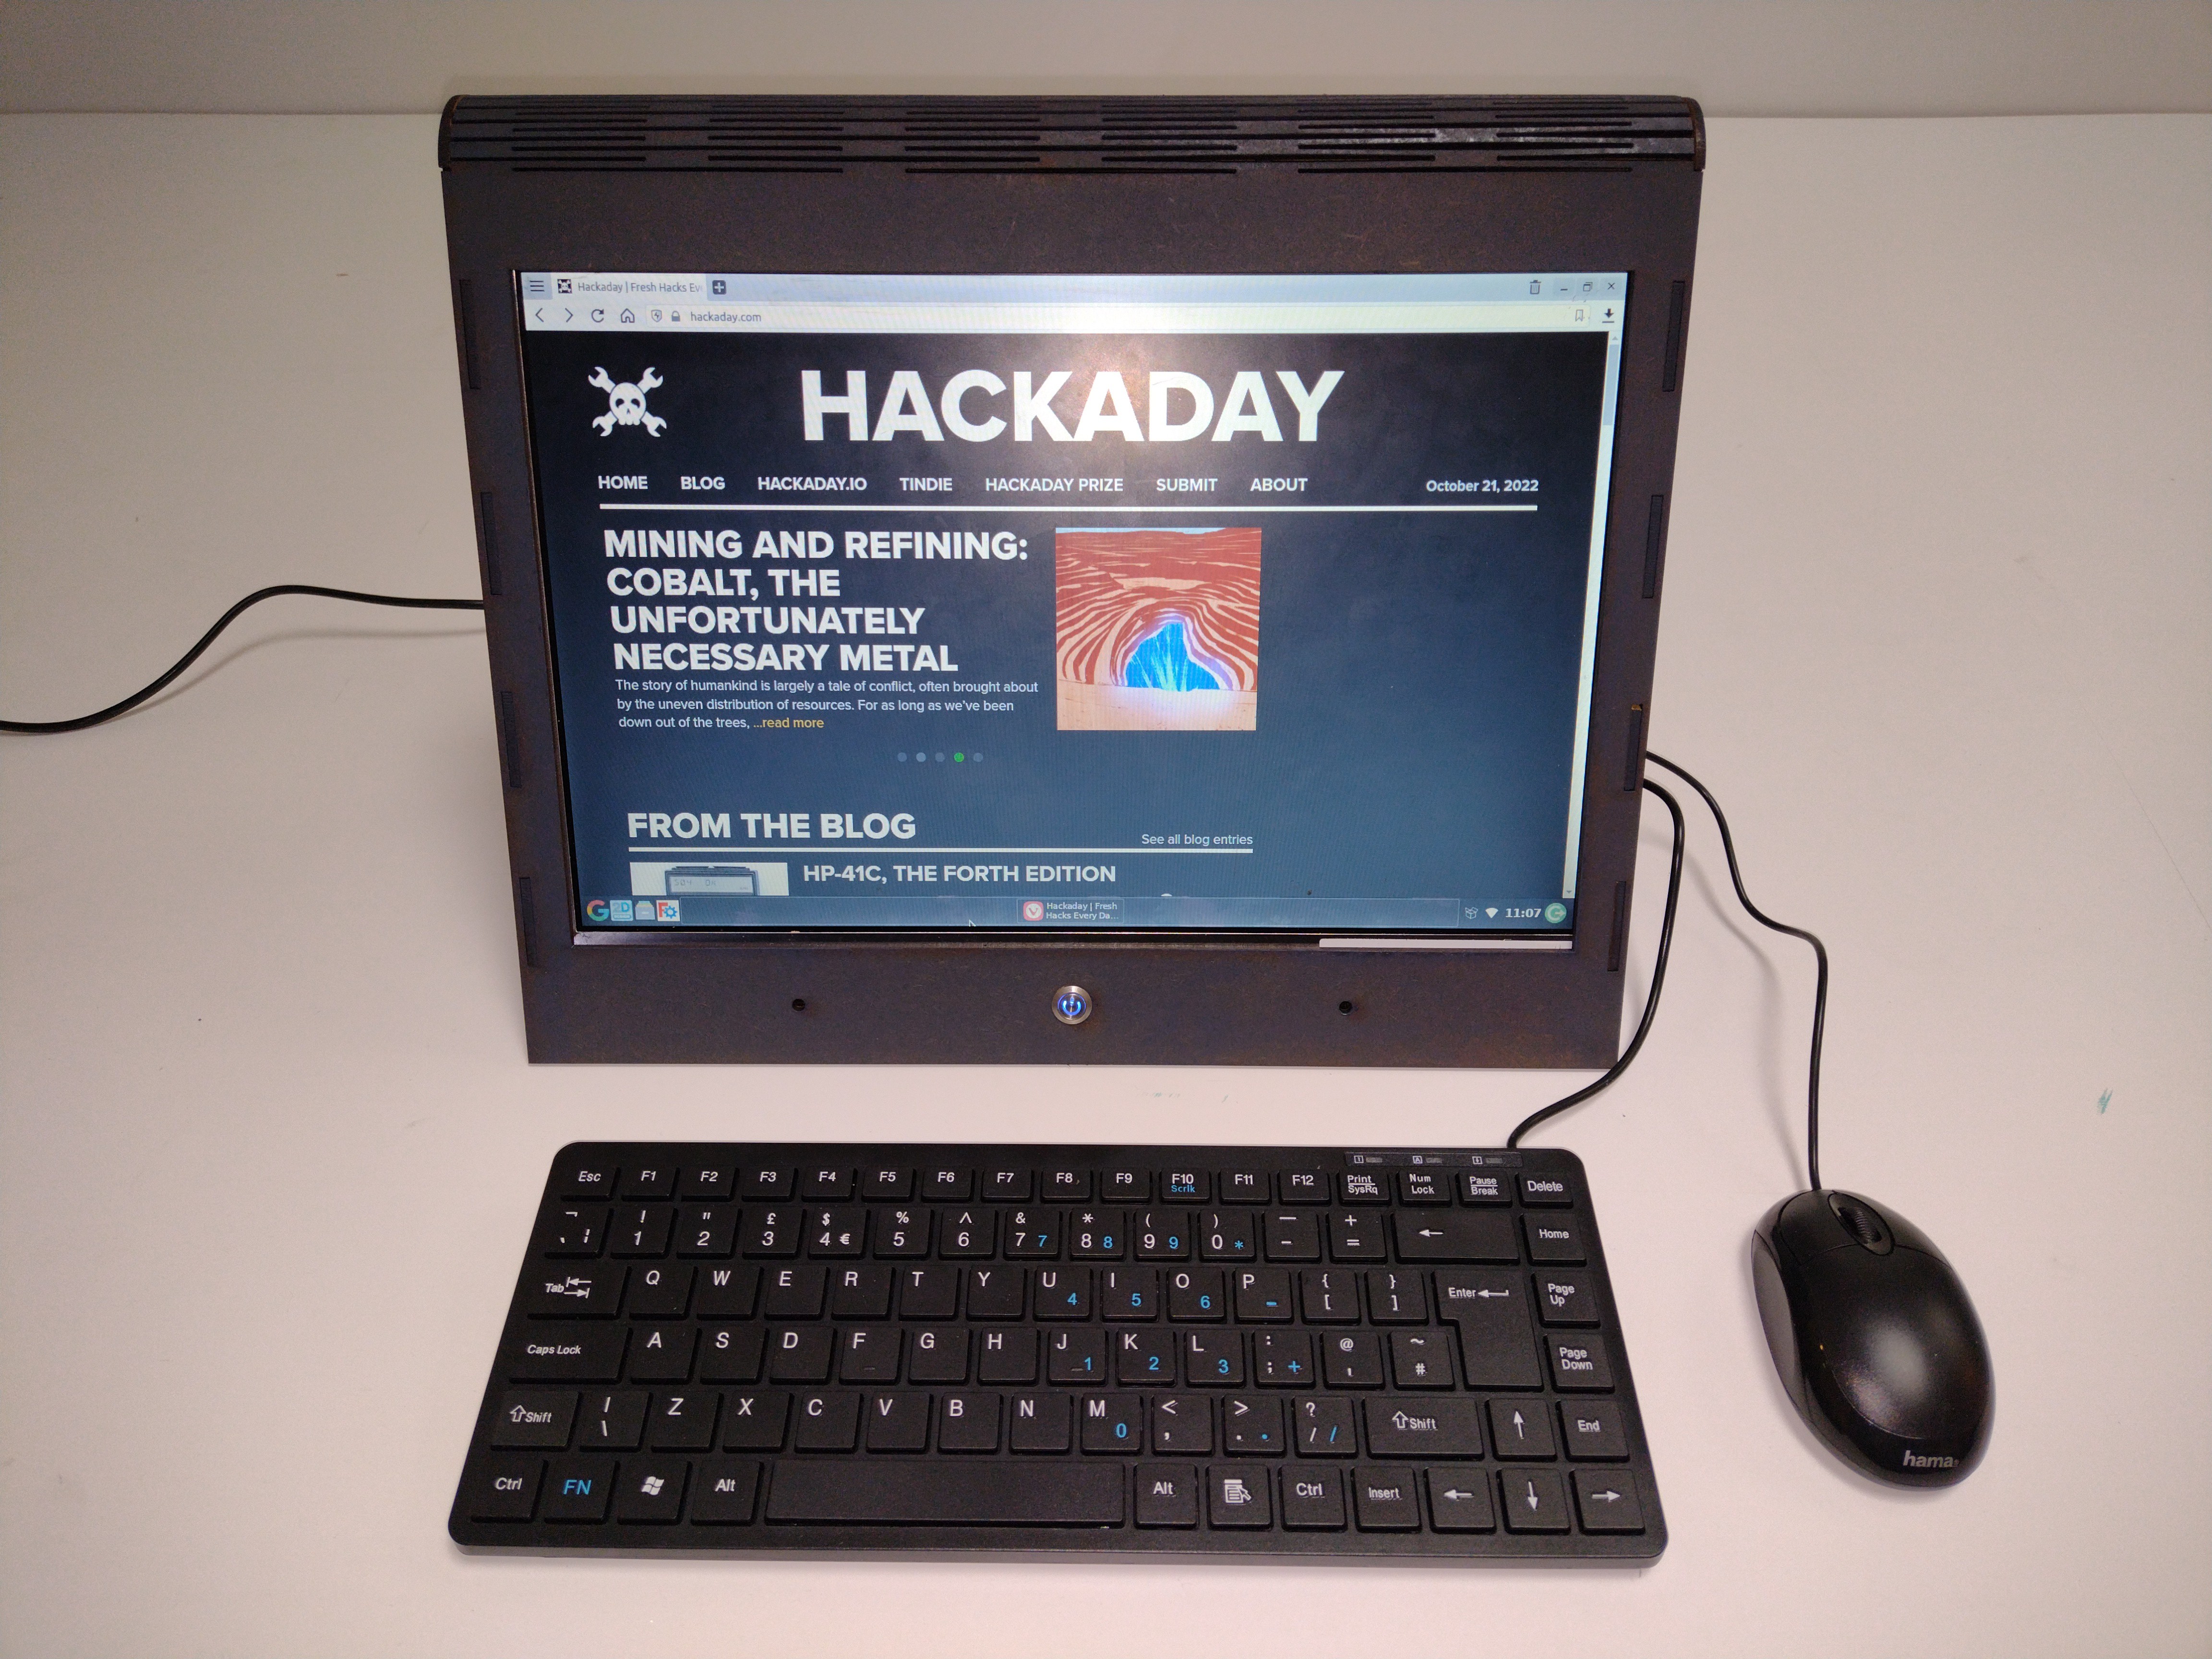
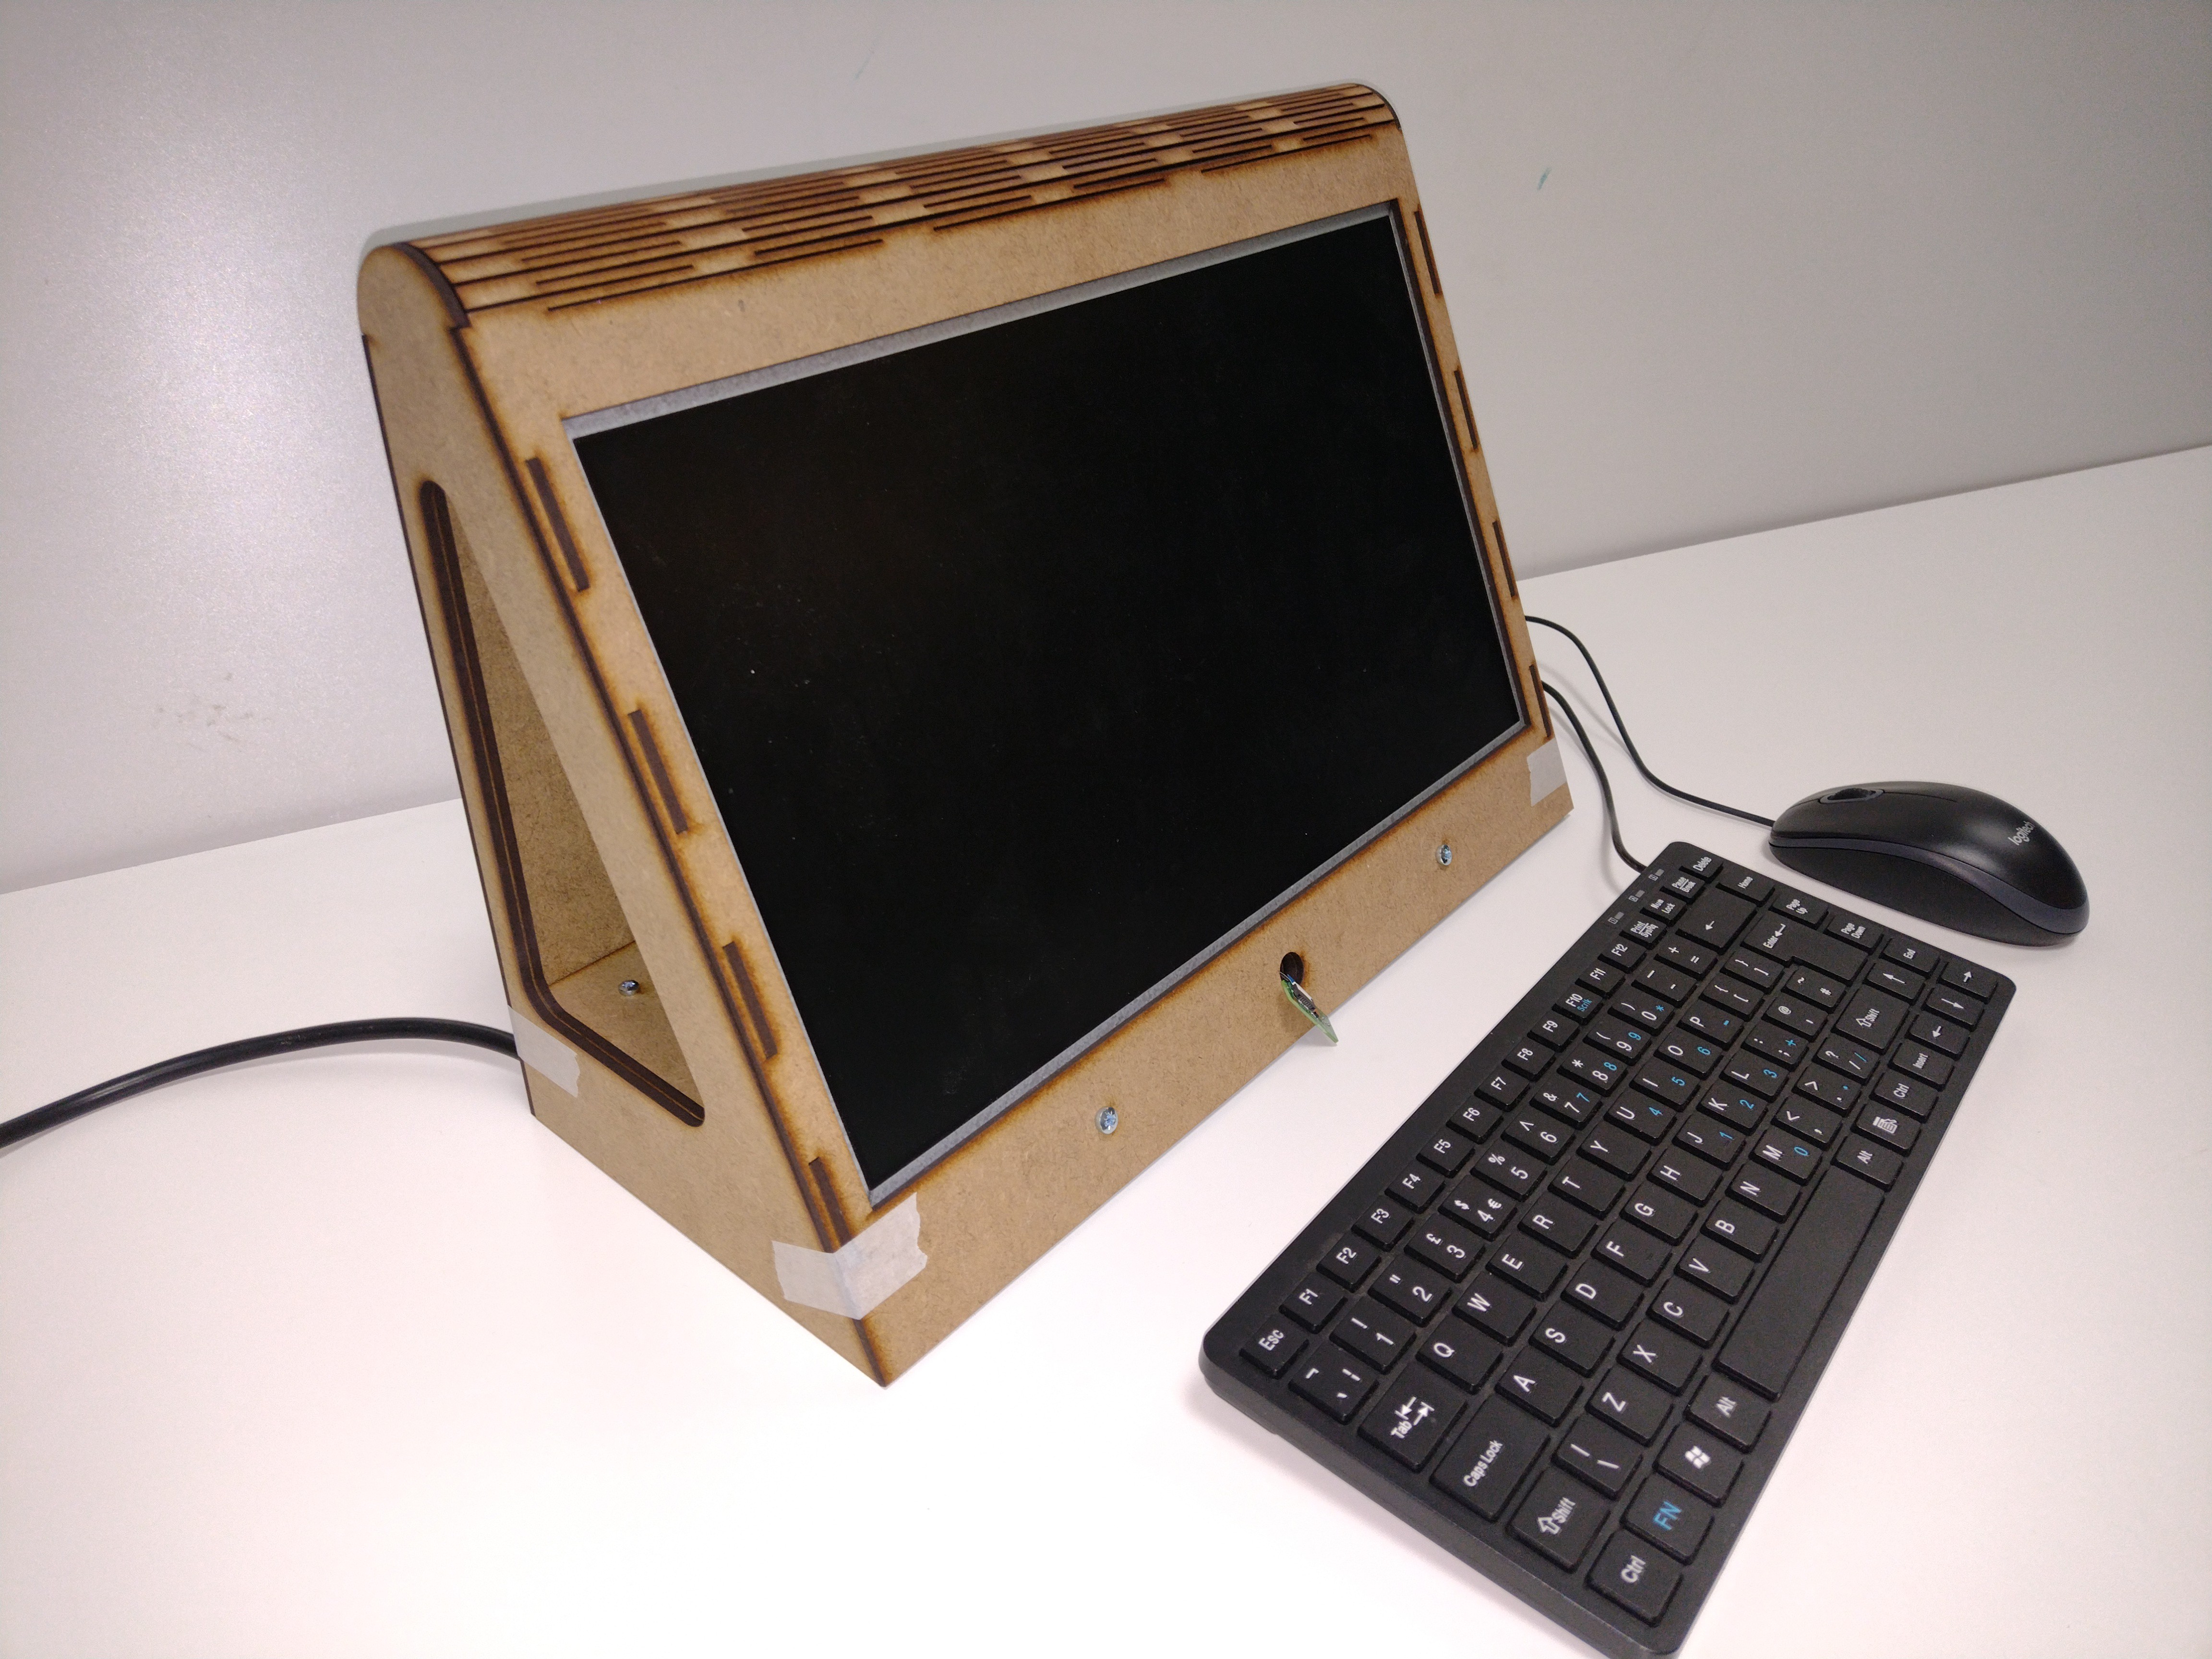
Here's my first prototype, this is also designed parametrically, so the screen size can easily be changed to match your laptop screen.
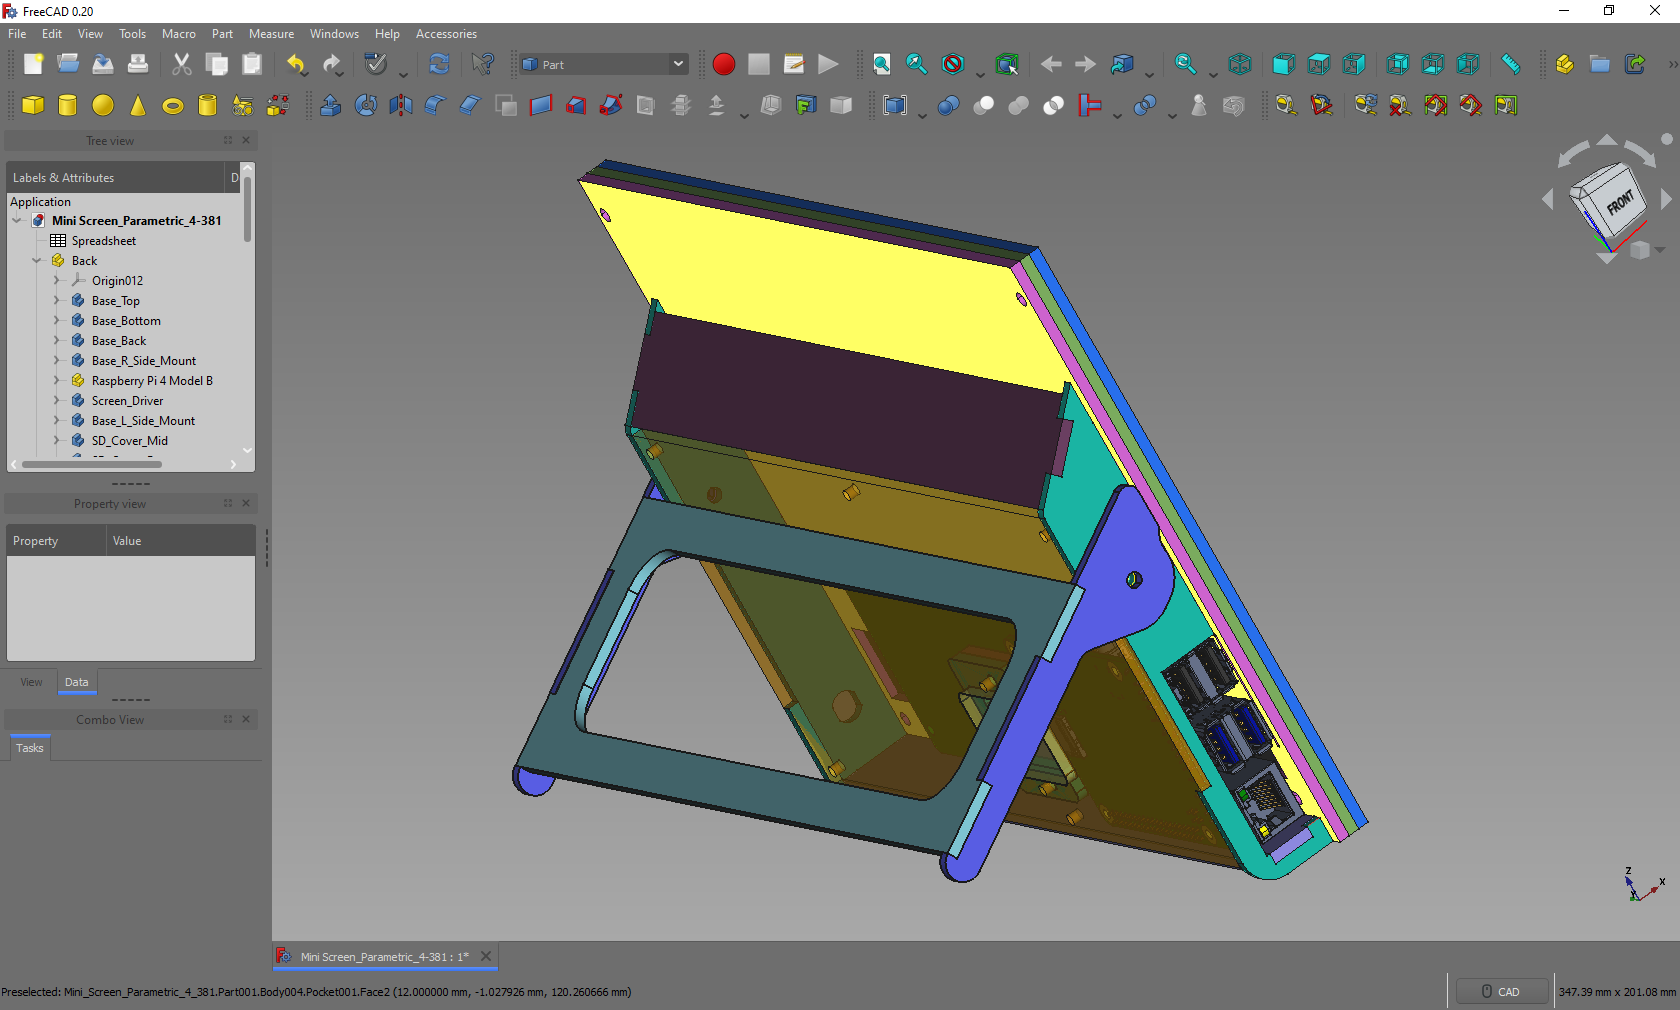
You'll need to add a screen driver for your laptop screen, but these are pretty easy to find on AliExpress. I'll add more details on this later.
![]()
![]()
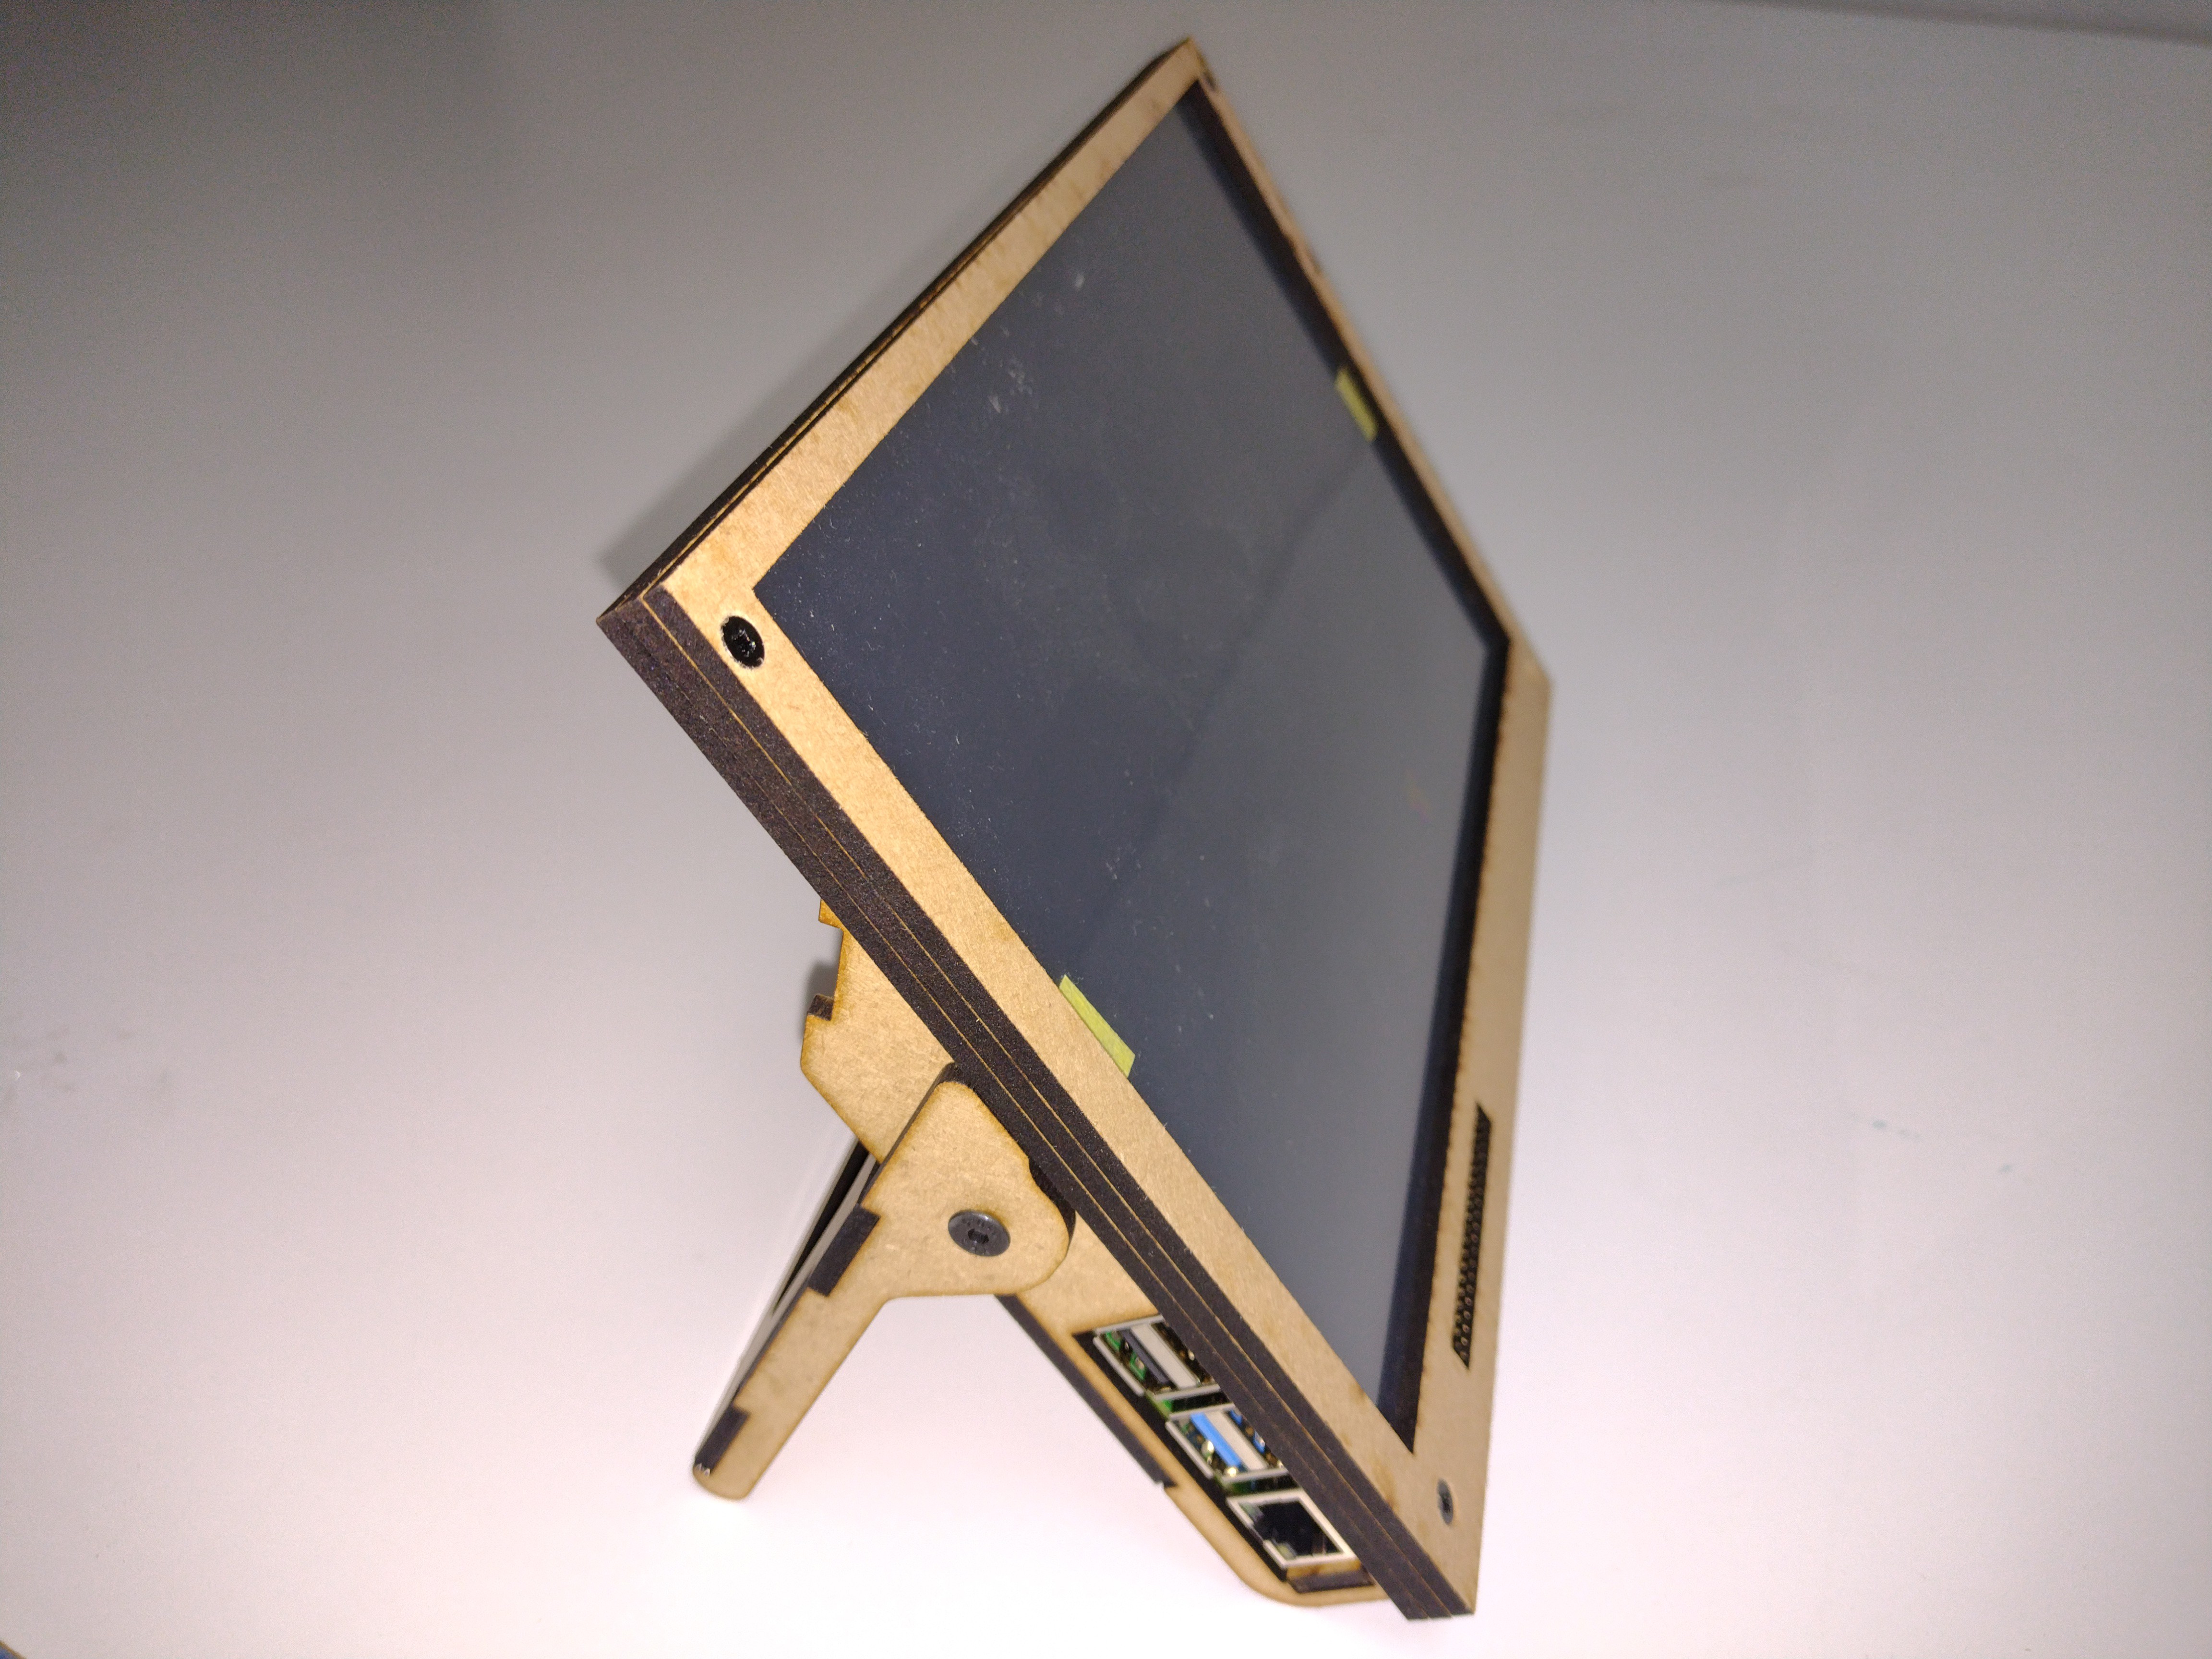
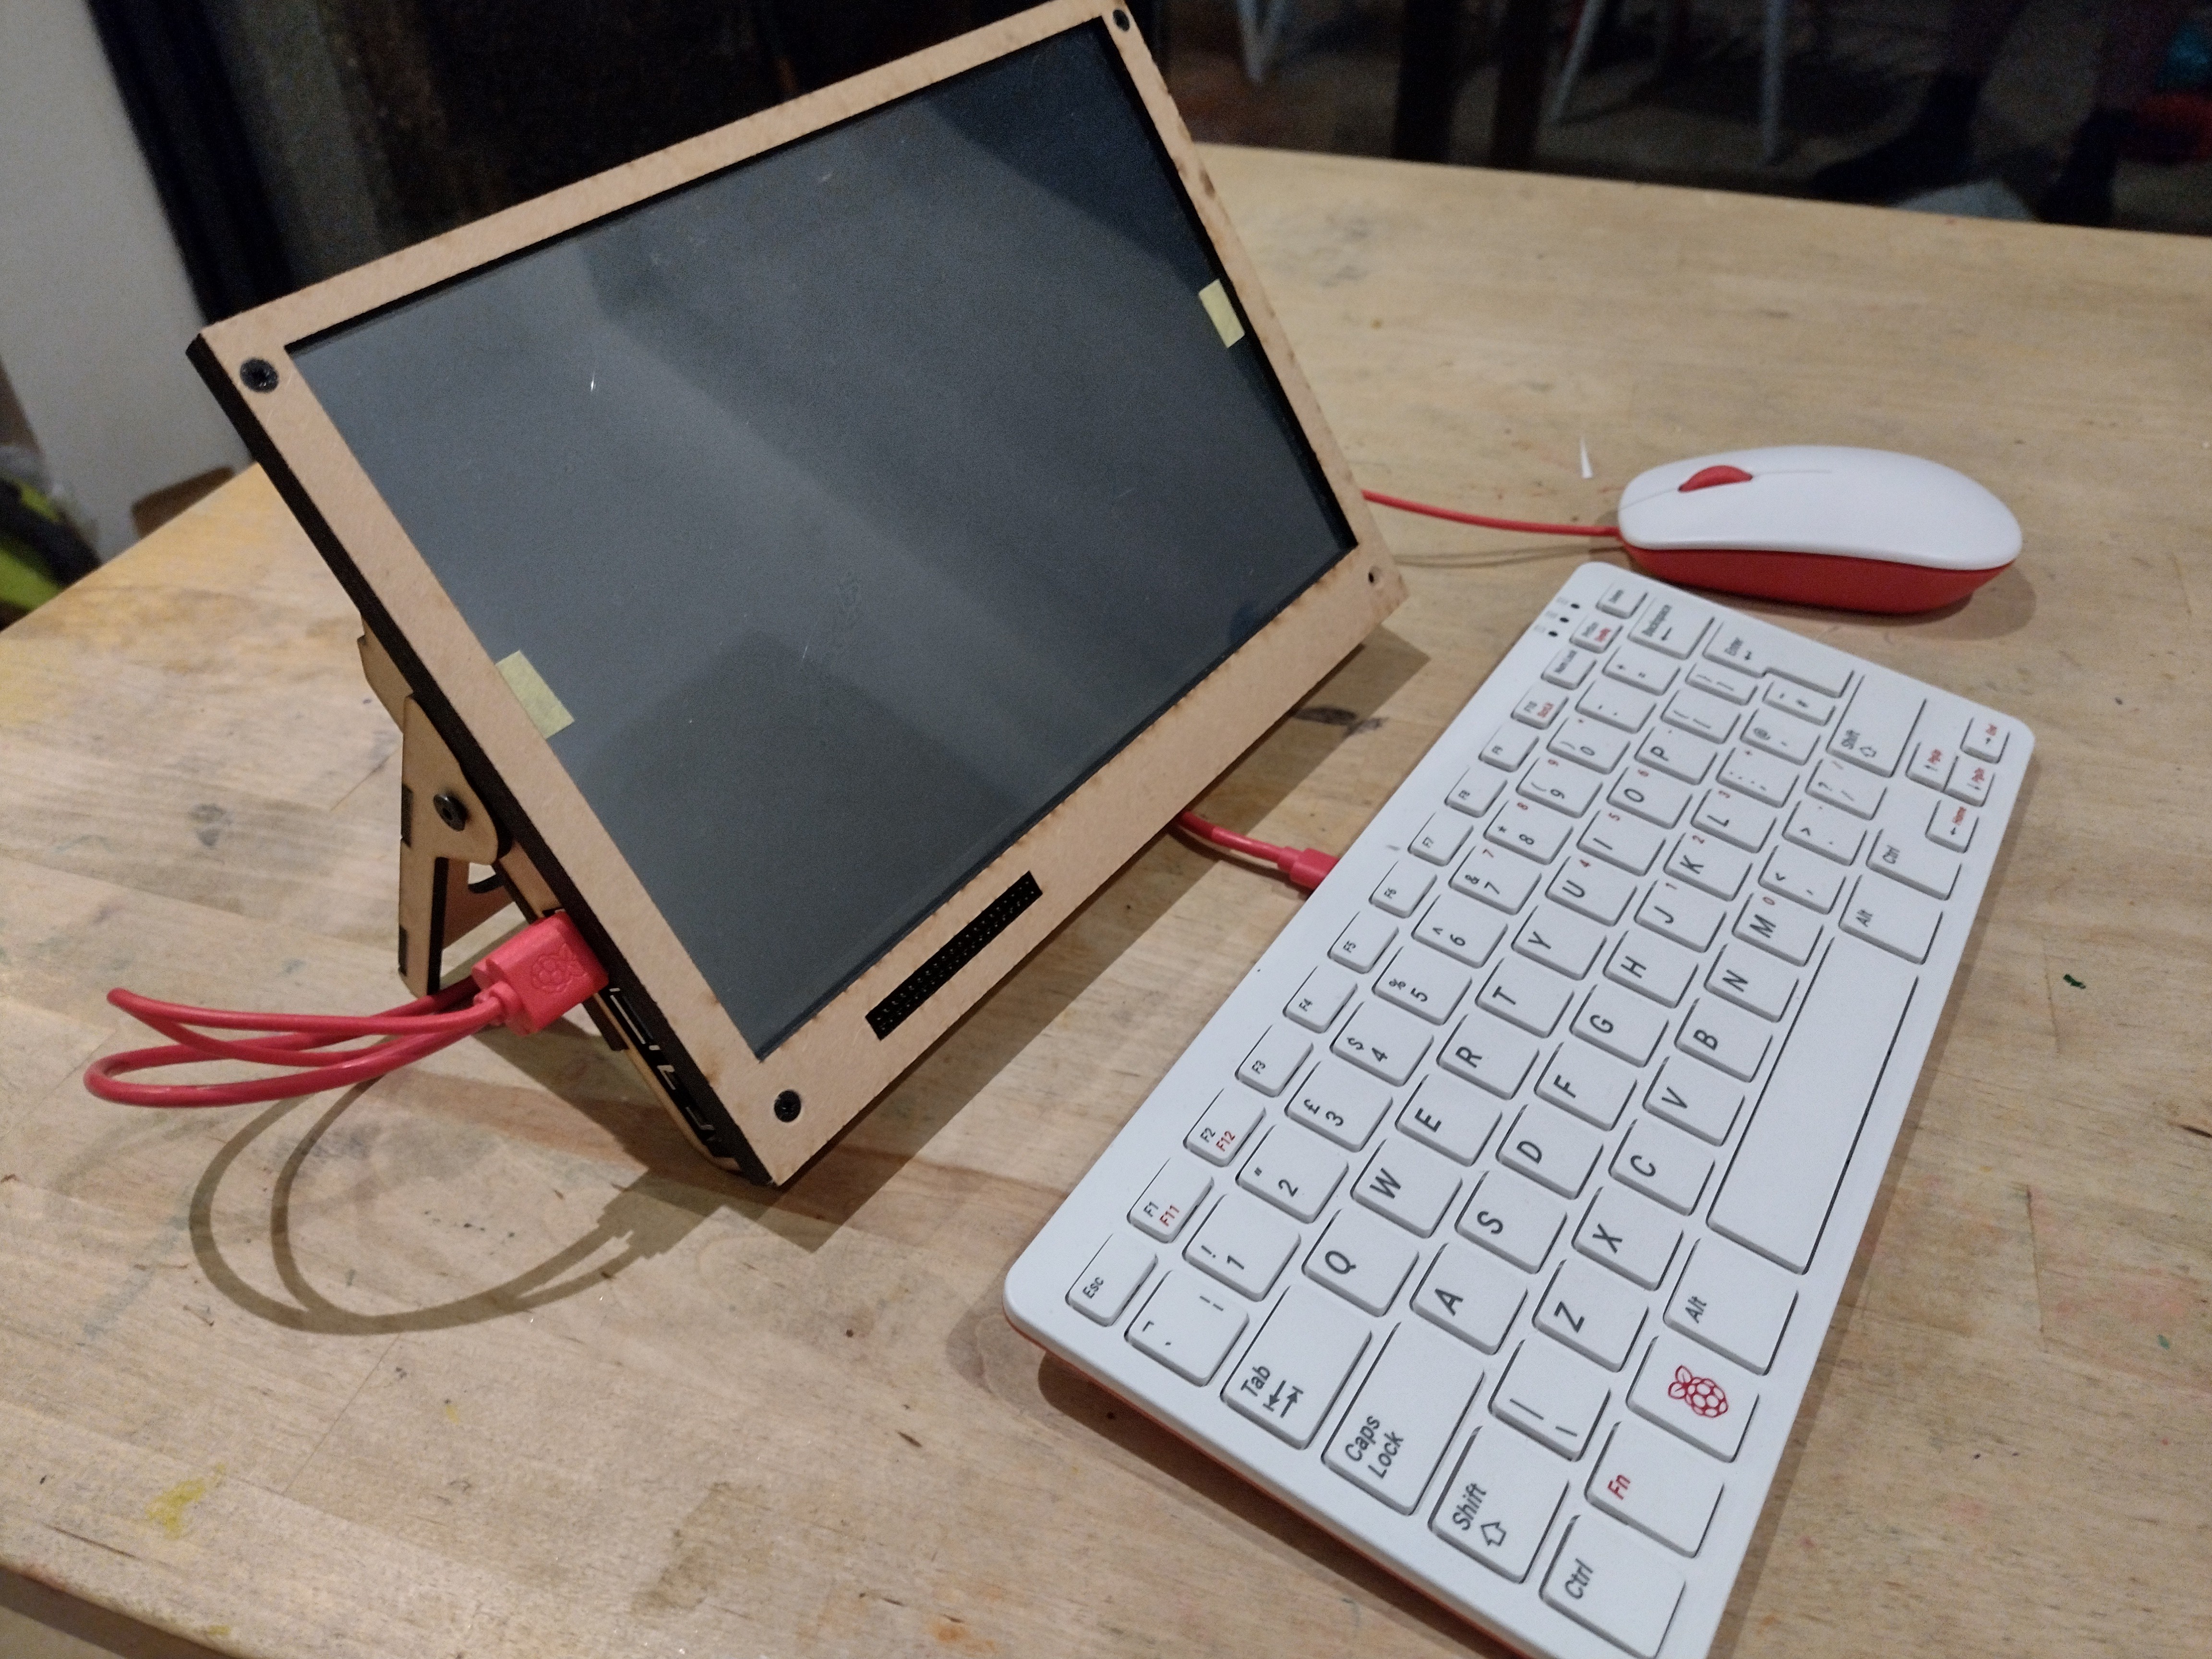
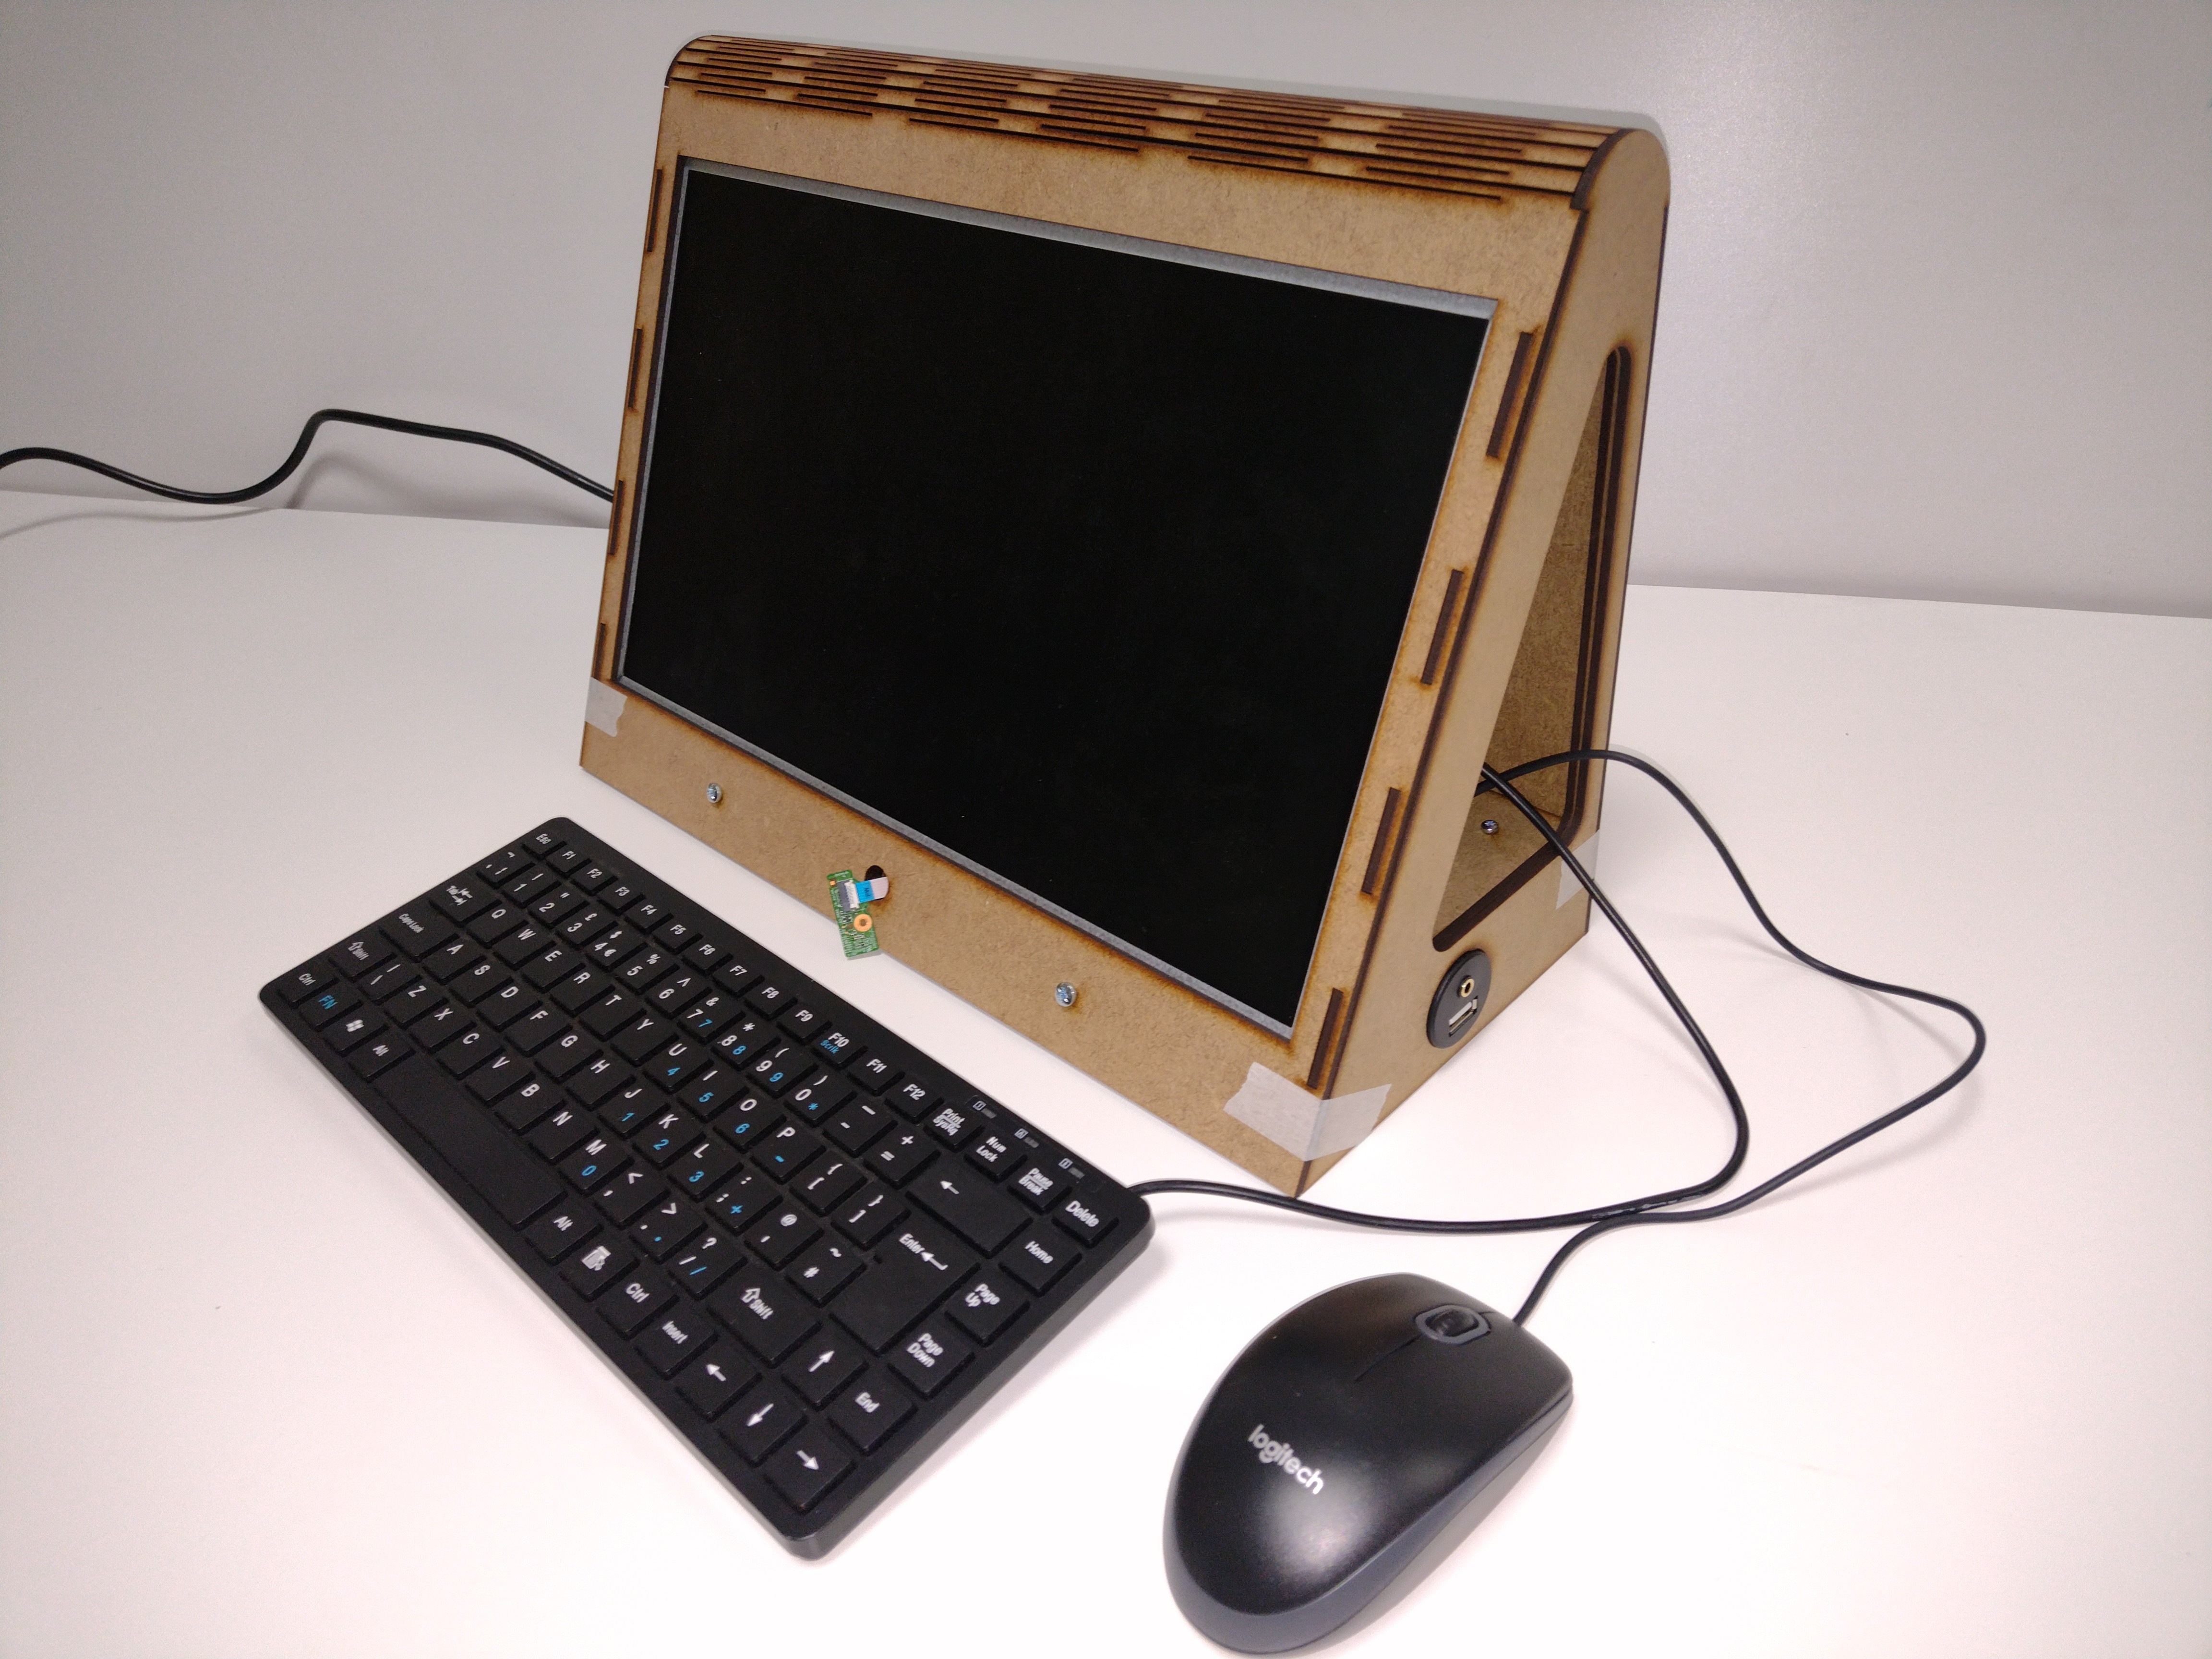
I've made an MDF prototype using a 10" screen, this makes a nice compact system.
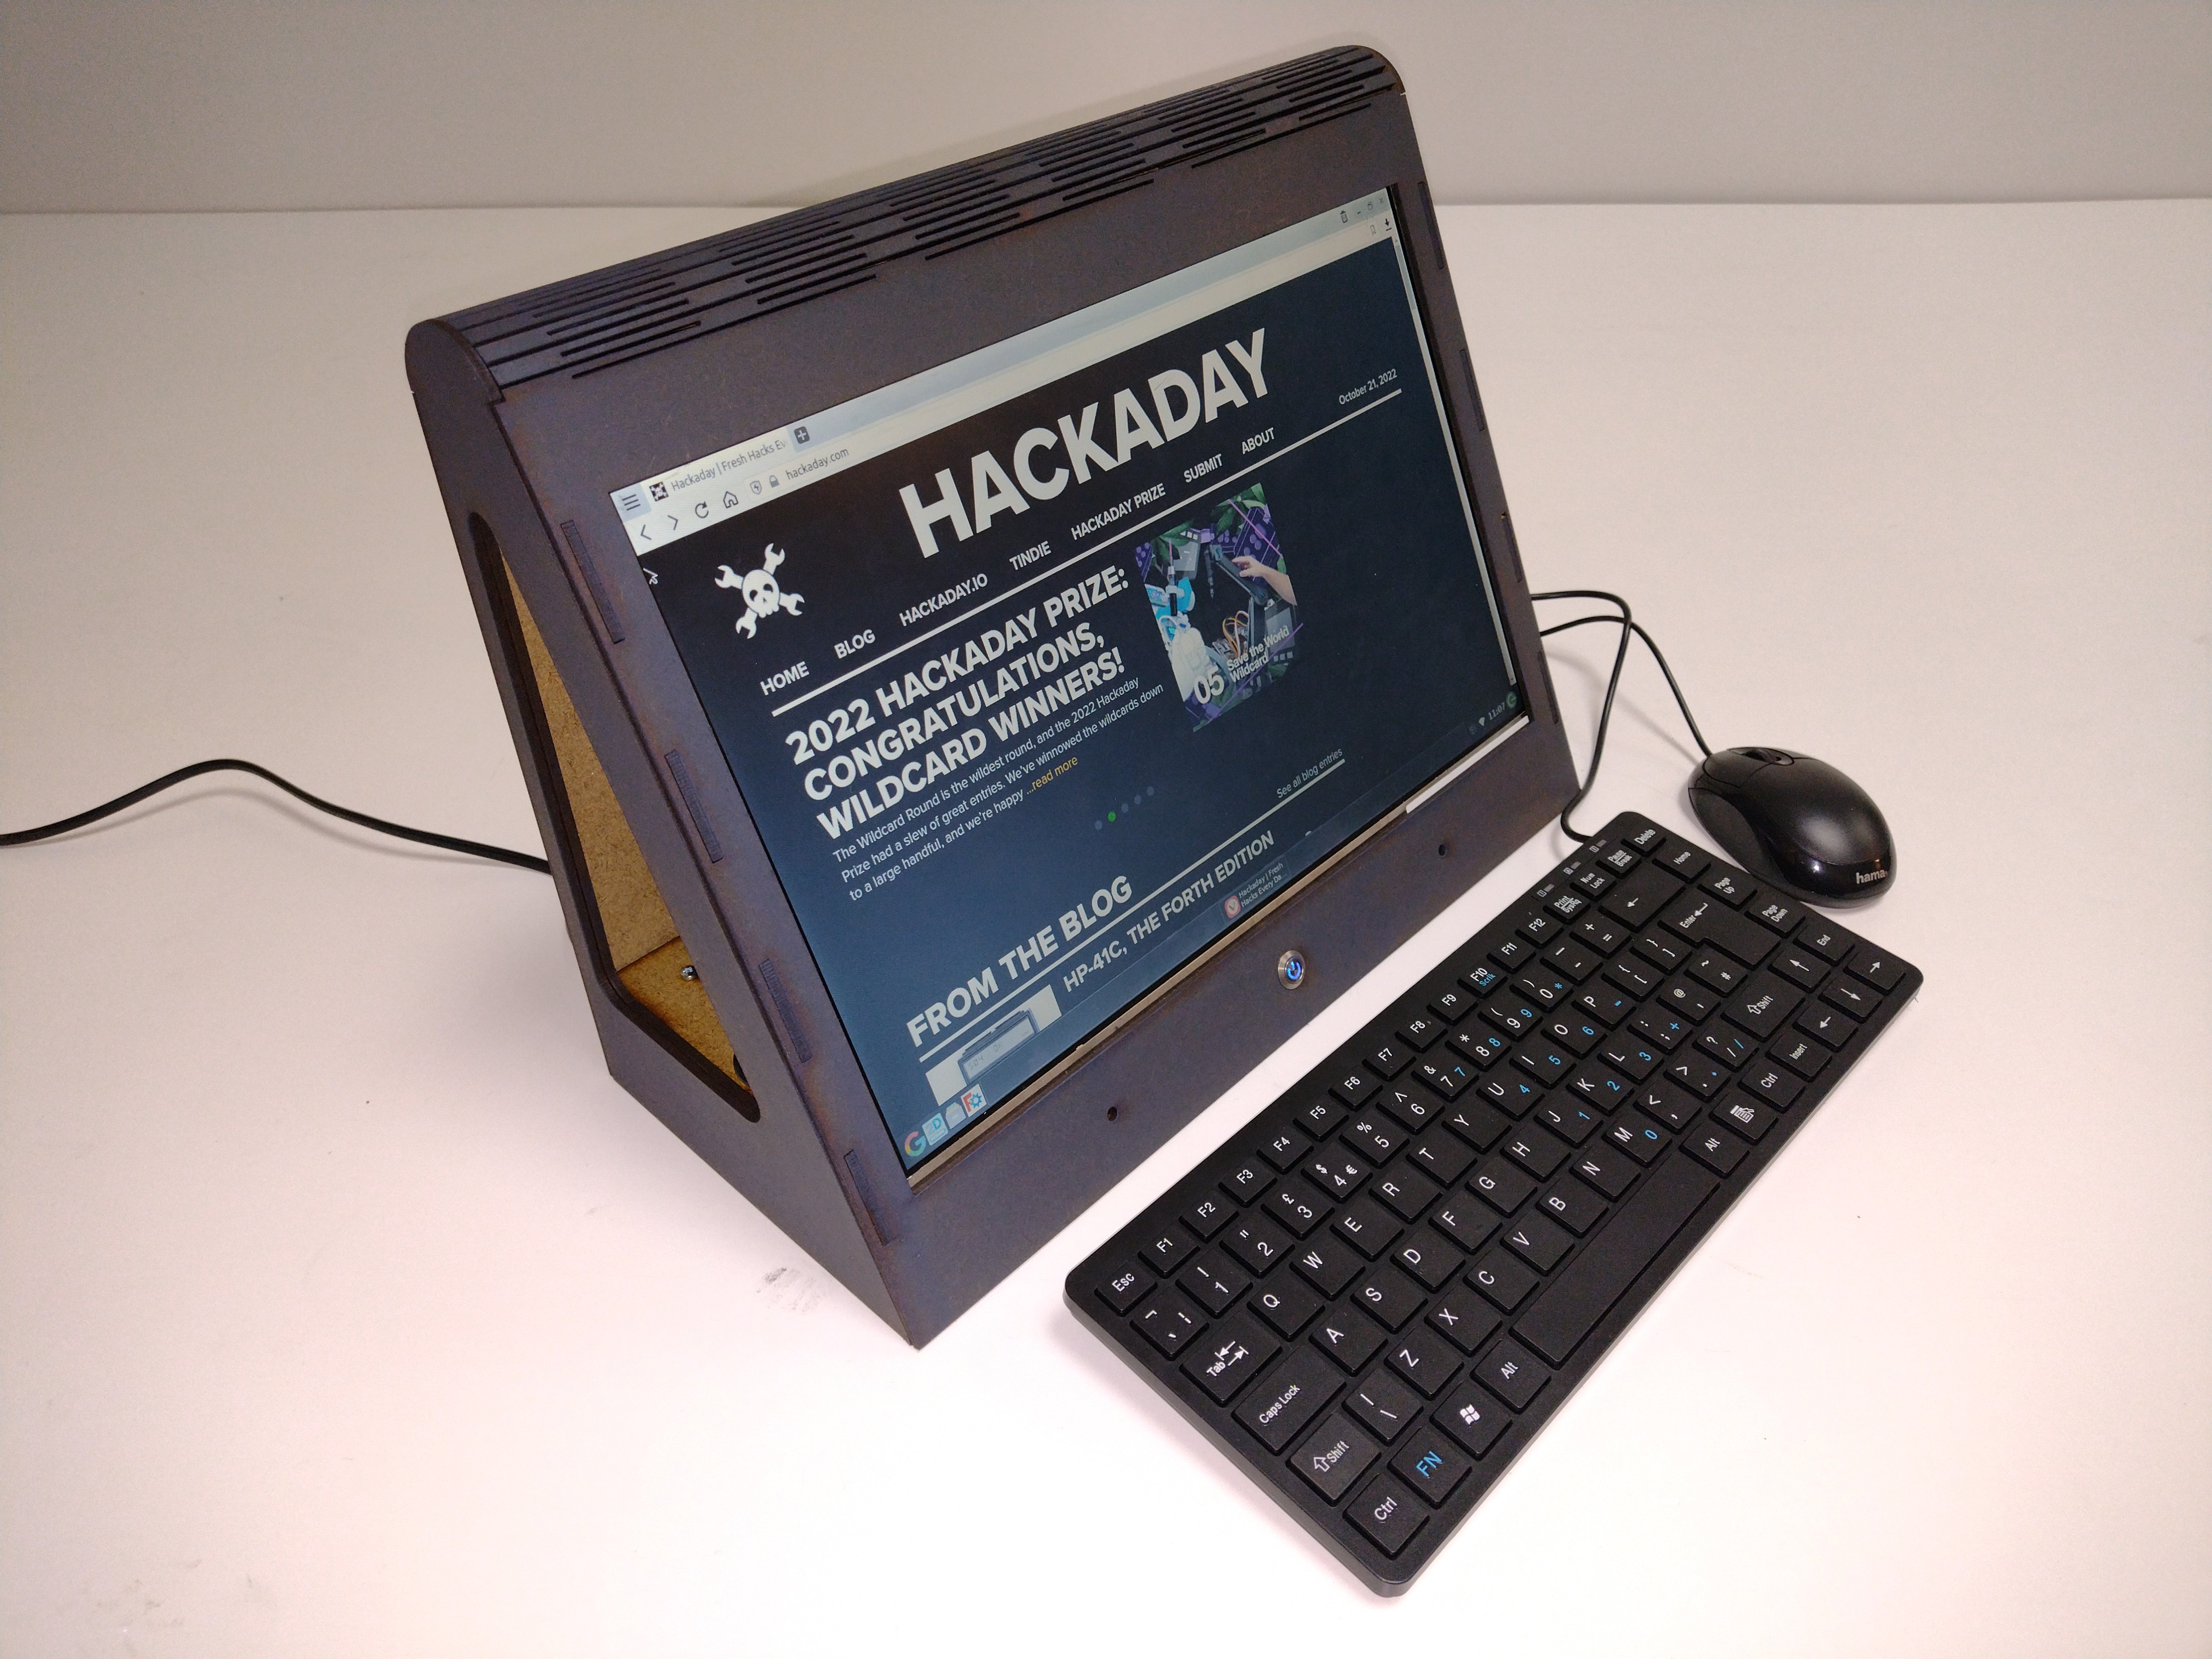
It's very much a work in progress, but the hinge works surprisingly well!
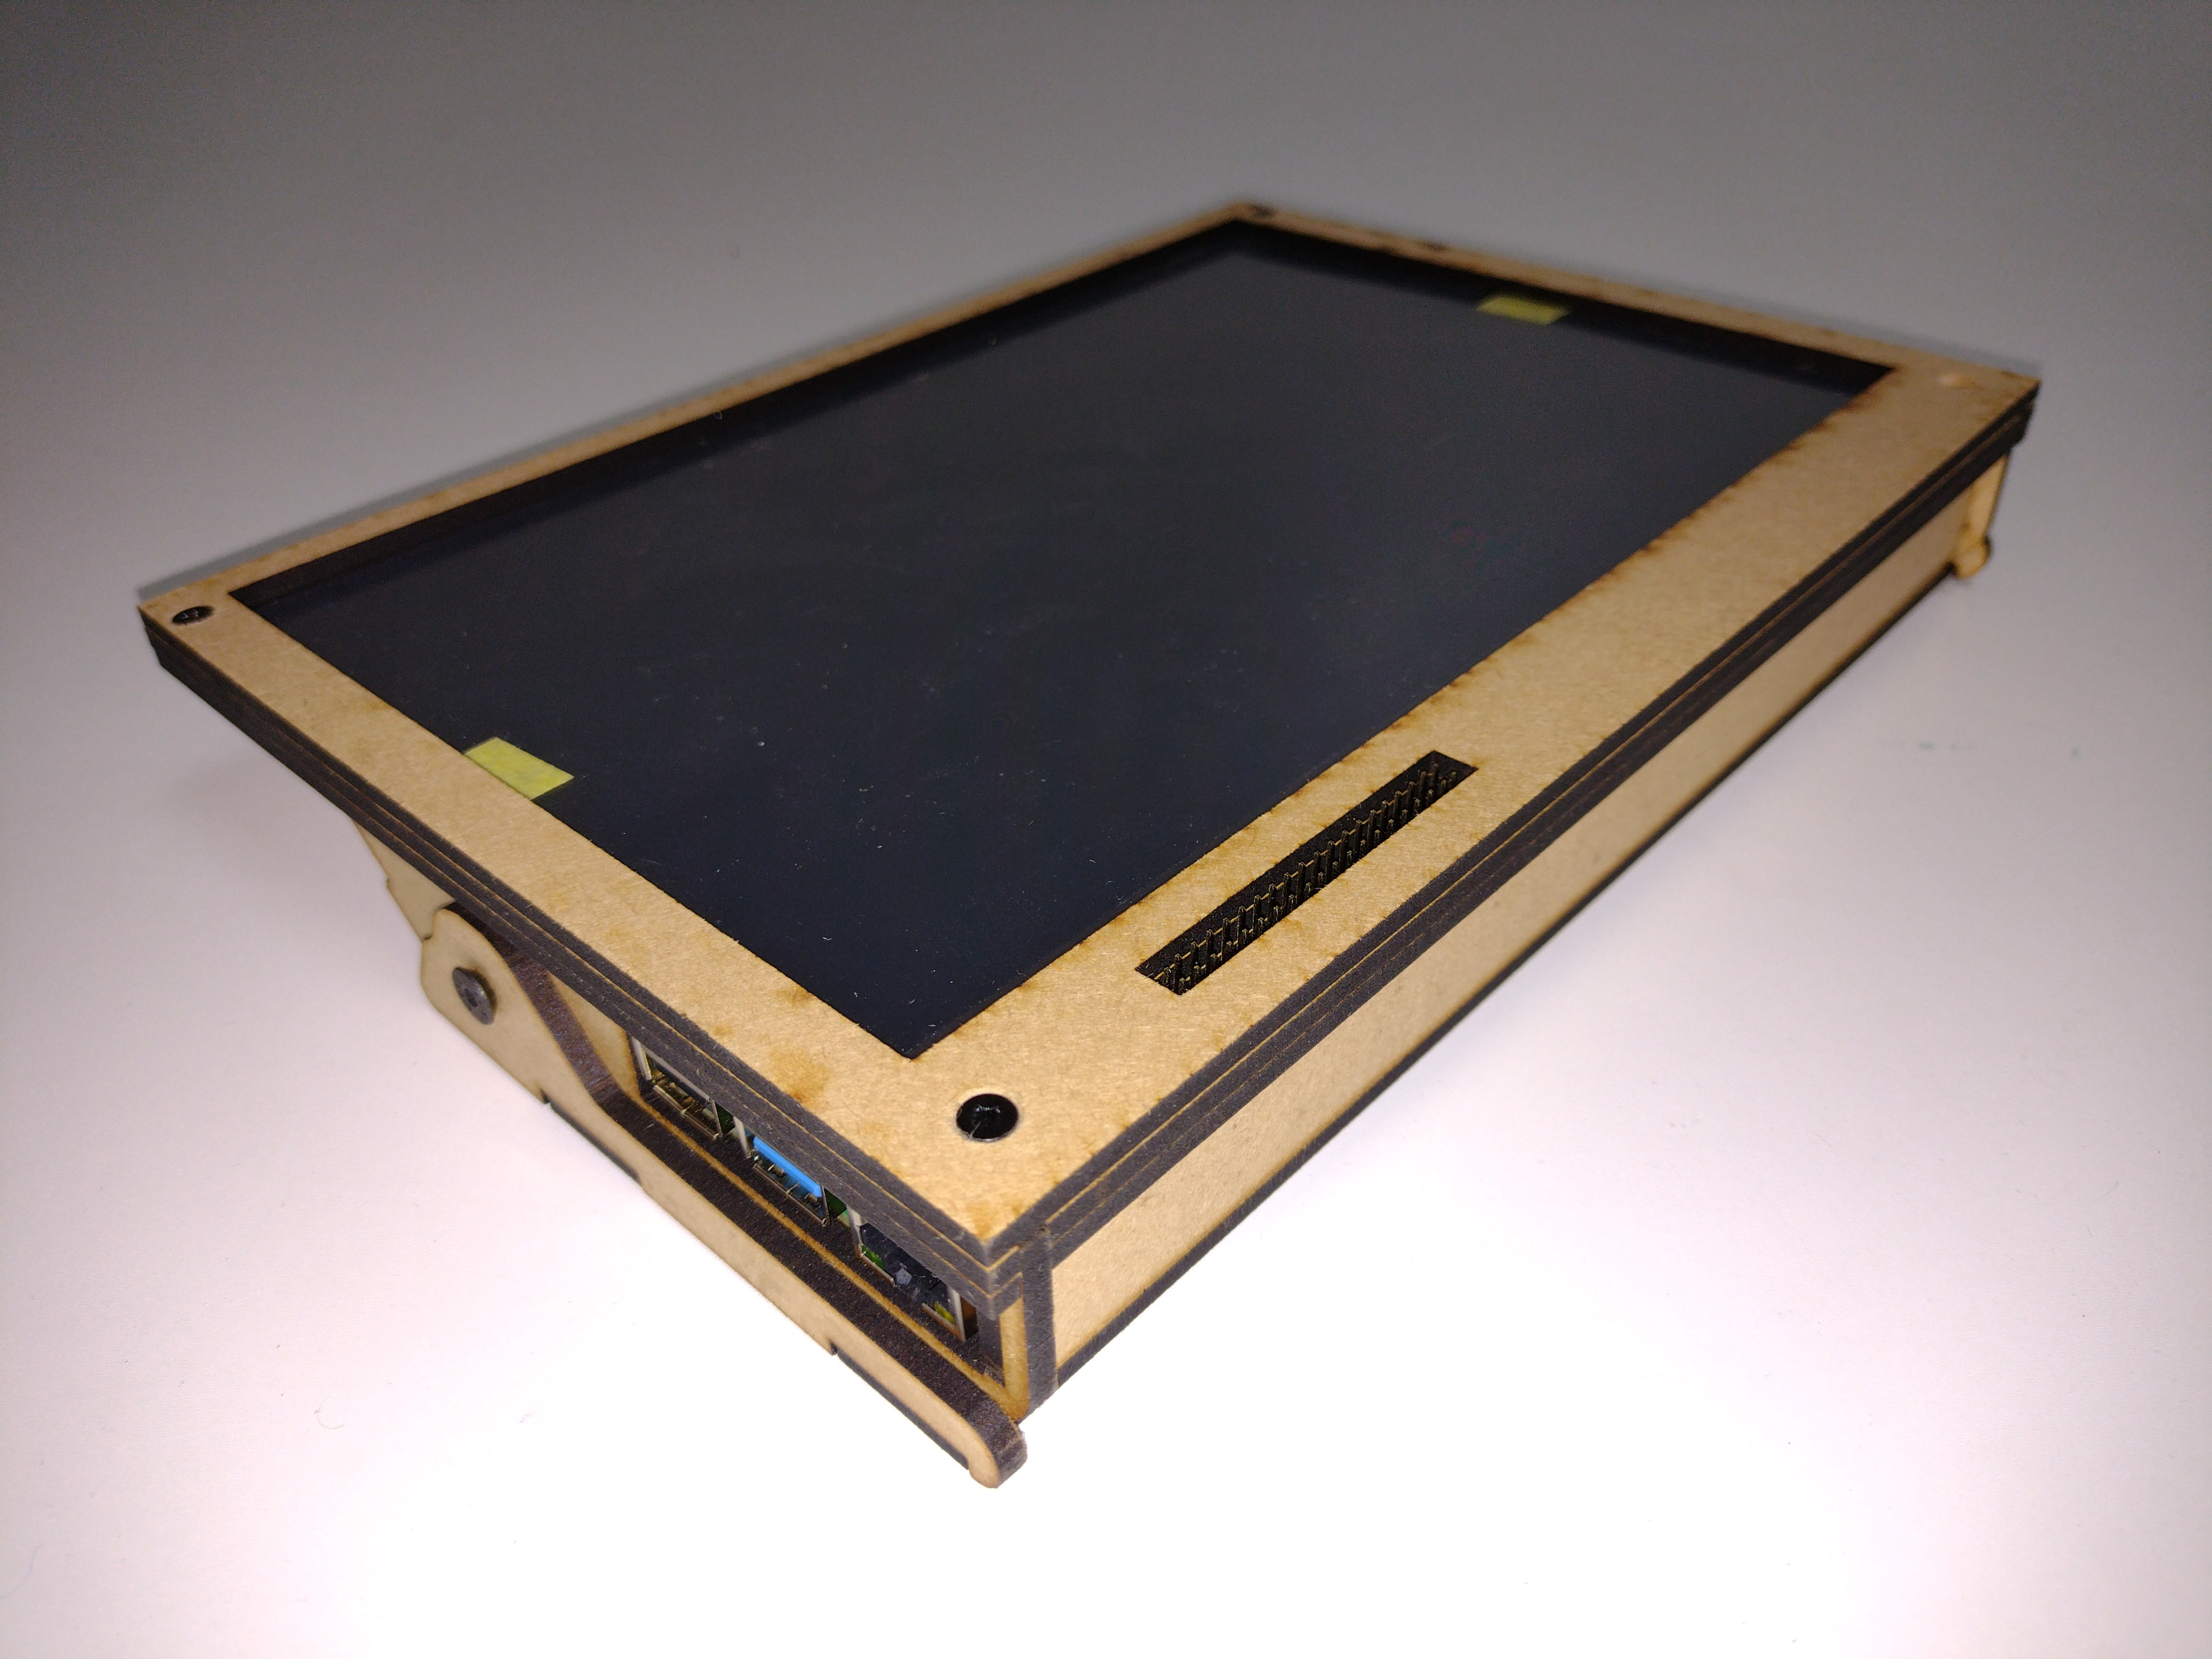
There's access to the USB and network ports on the Raspberry Pi. As well as access to the GPIO header on the front.
![]()
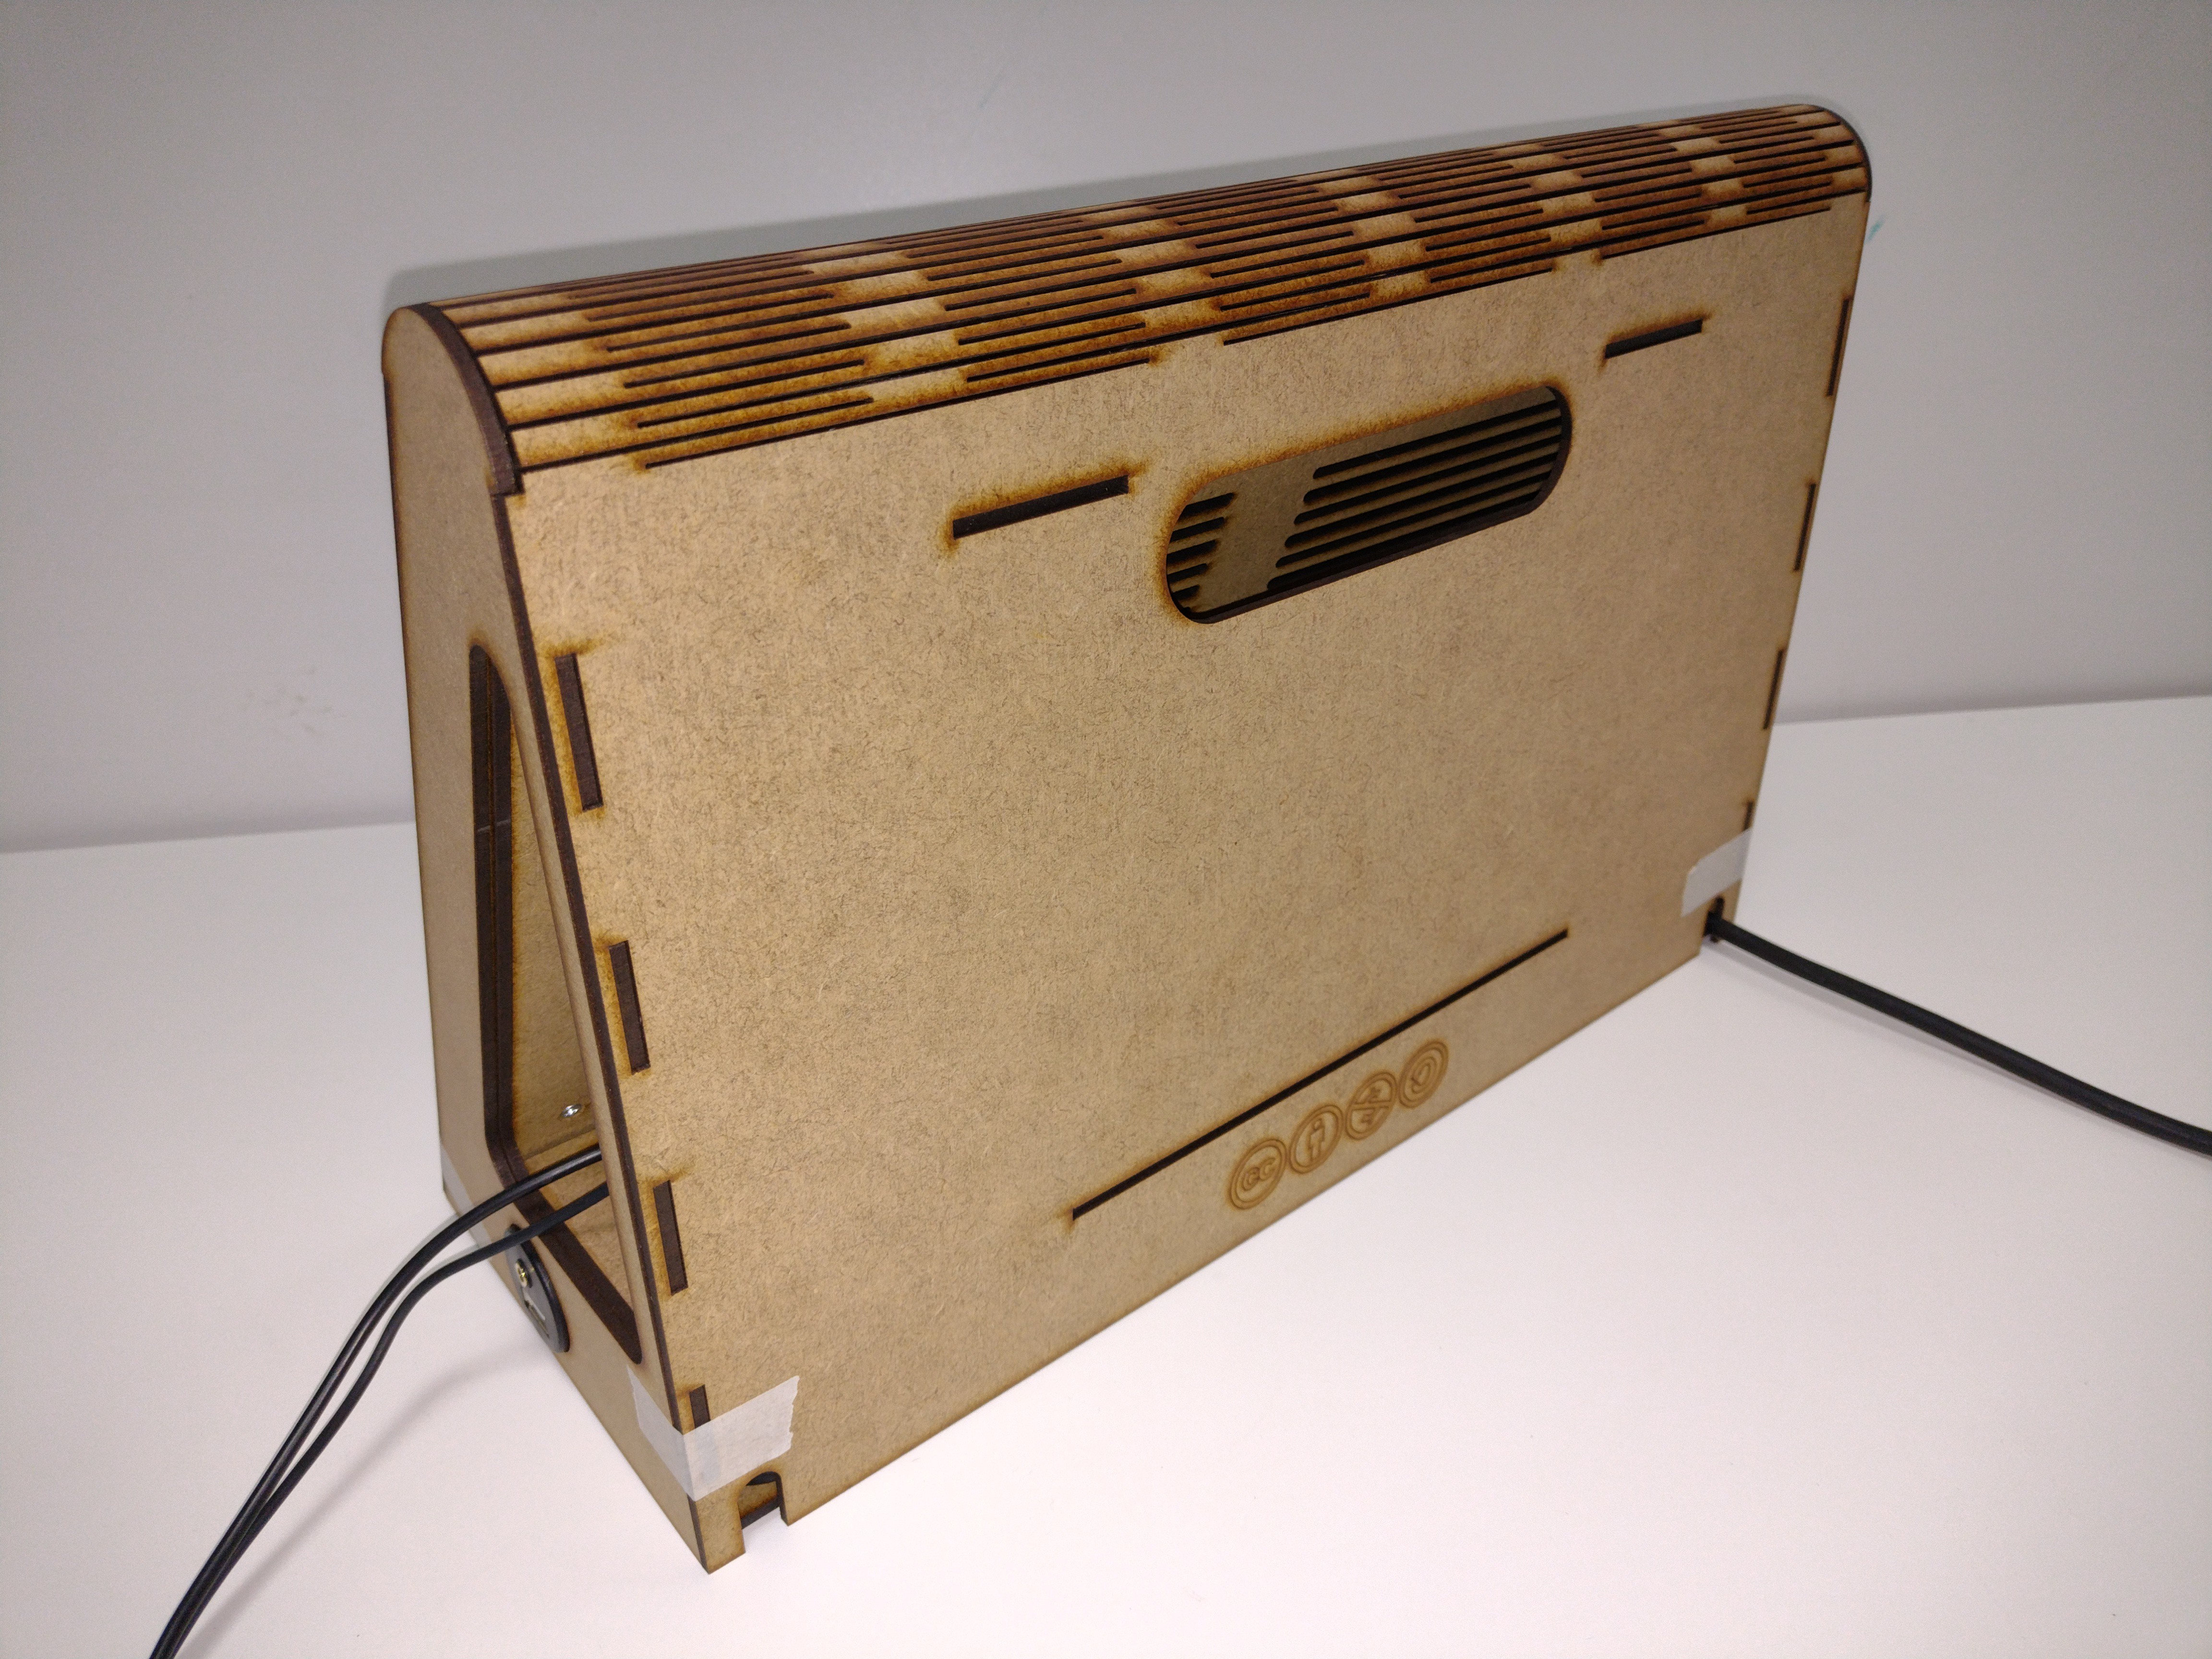
Here's the hinge folded flat.
![]()
![]()
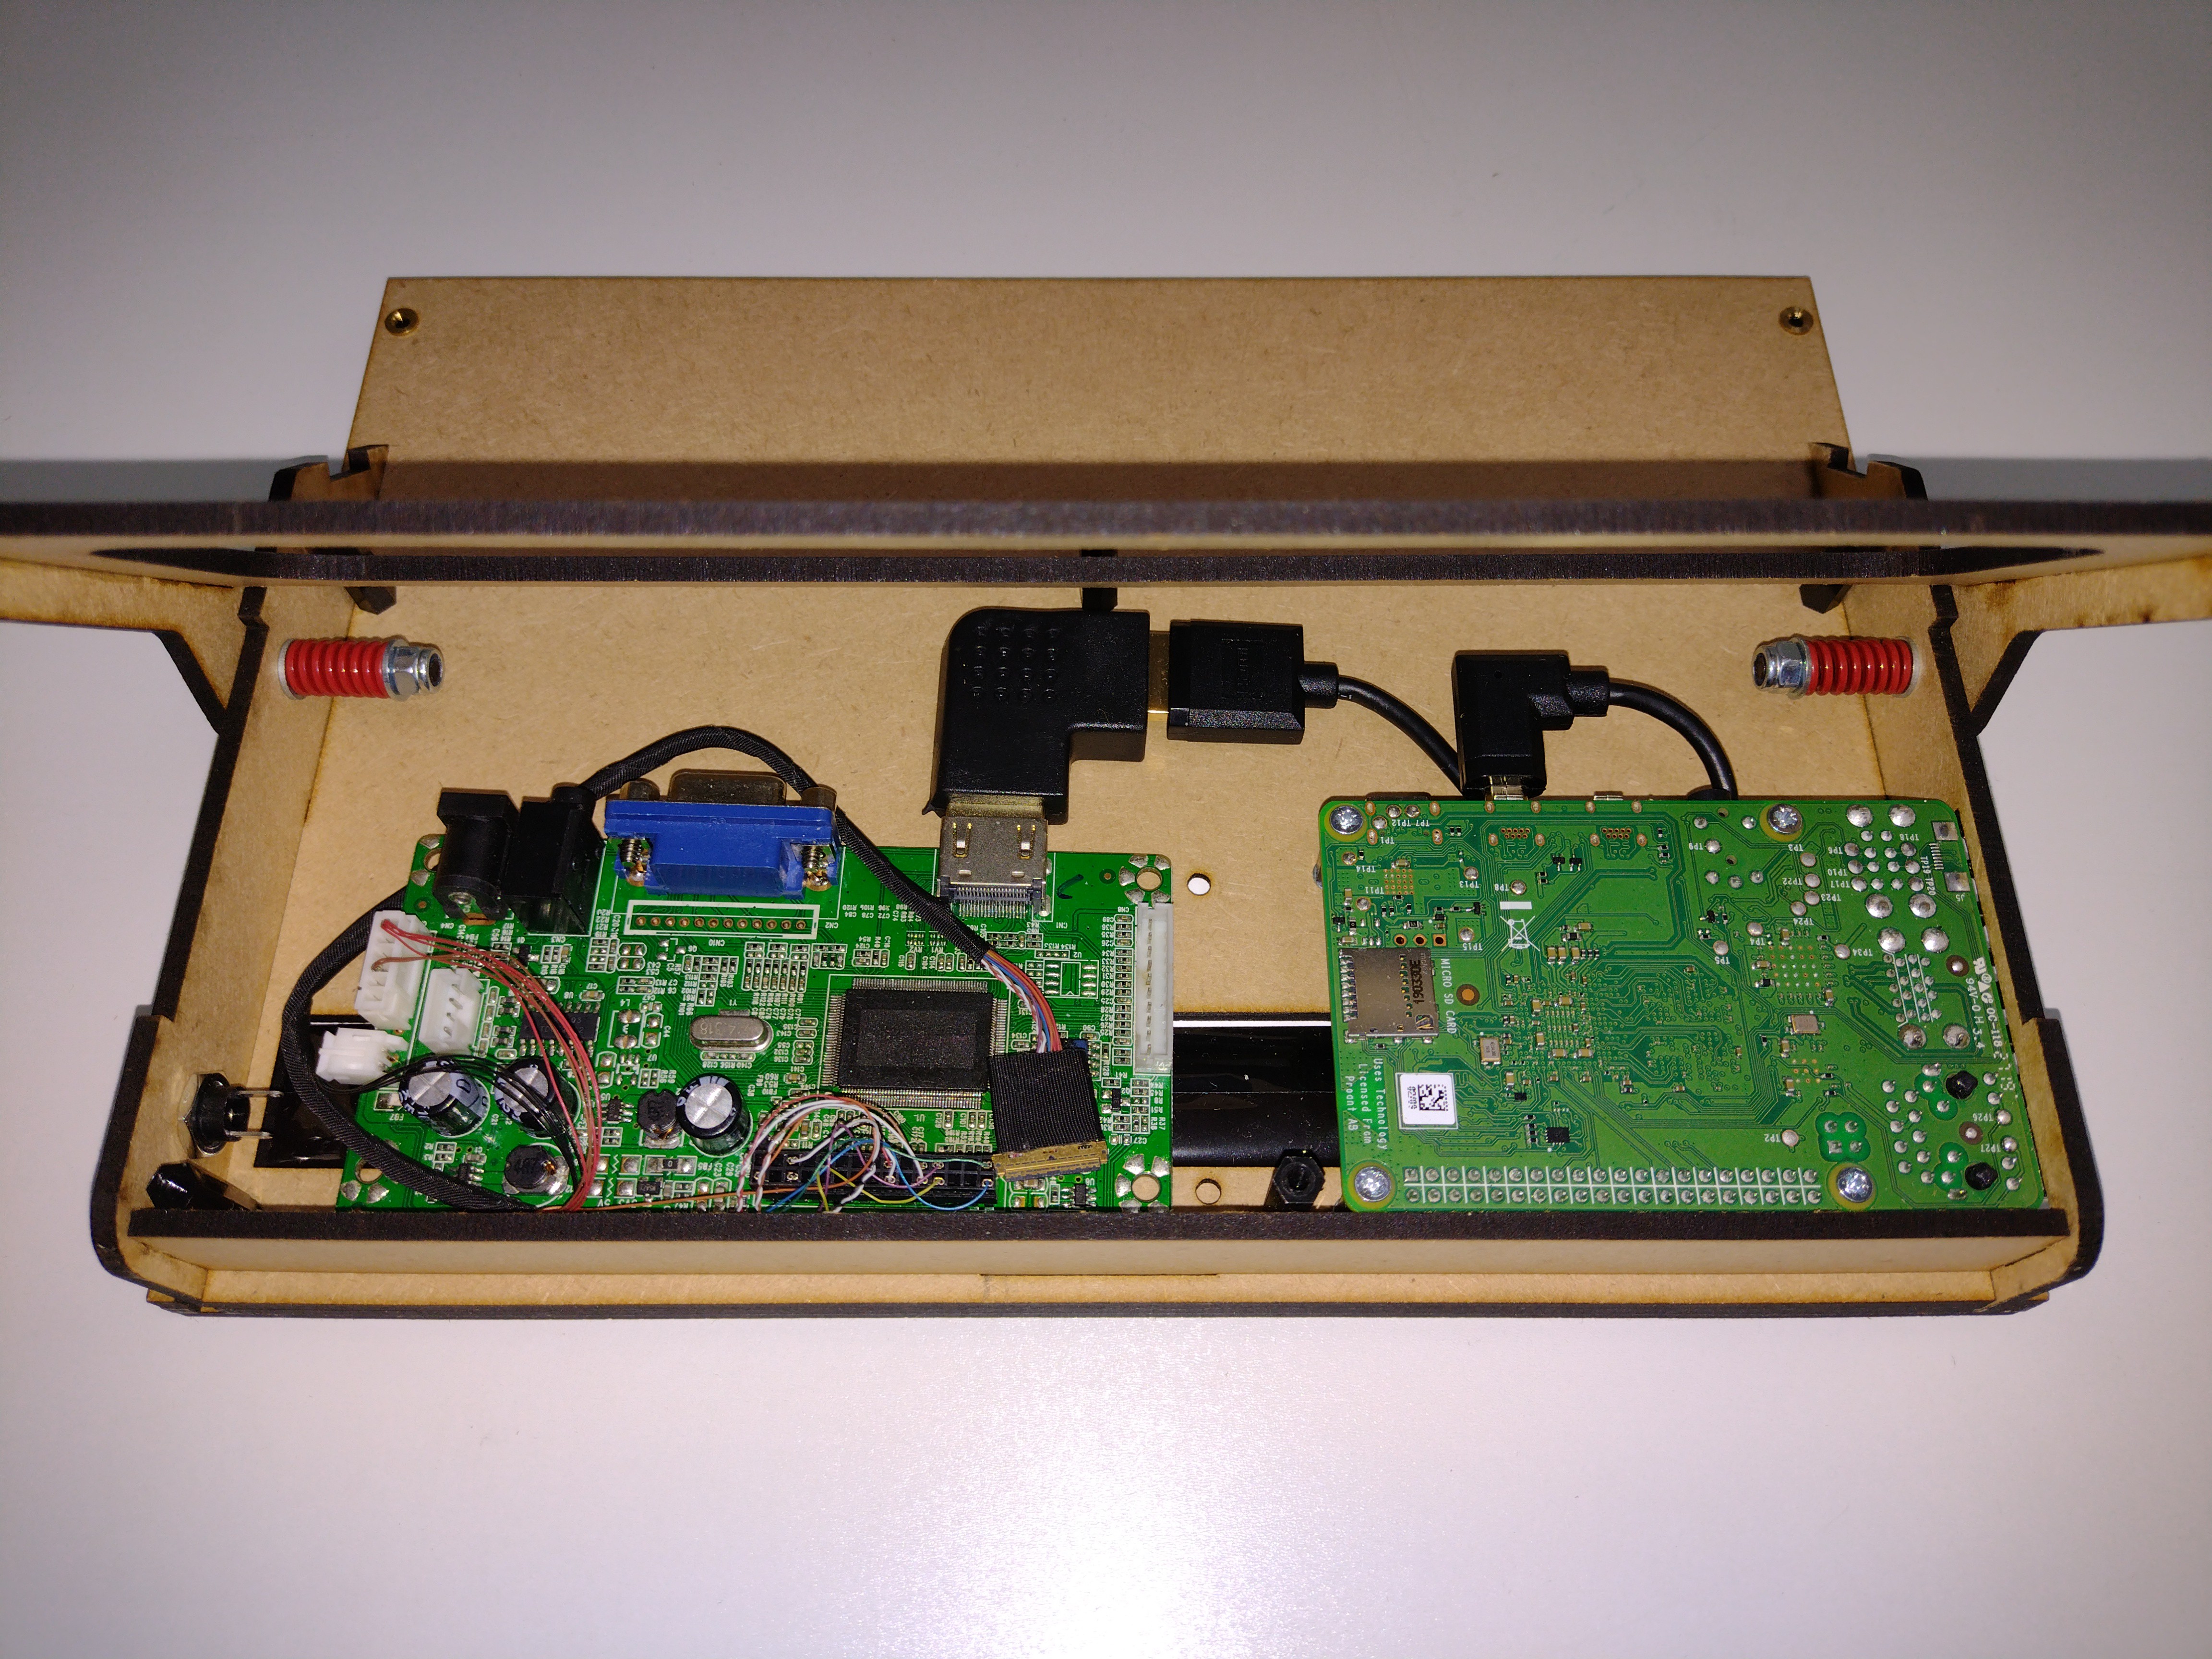
Here's the inside, It still needs some work but you can see the RPi and screen driver.
![]()
I think this has the potential to make a great portable system, so I started adding space for batteries.
![]()
I'm really pleased with this design and I'm looking forward to getting it finished so I can put it to work.
More updates coming soon!
-
Black MDF
10/21/2022 at 21:44 • 0 commentsThe first X-PC was laser cut out of acrylic, this looked great but I was always a bit concerned with the use of plastic. When laser cutting the parts I always try to get the best use out of the material but you are always left with a load of off cuts that just go in the bin.
So I started looking for an alternative. I'd already make a few prototypes out of MDF, which is great for that purpose but it doesn't look so good.
I considered painting it or applying some other type of finish but that takes a lot of time.
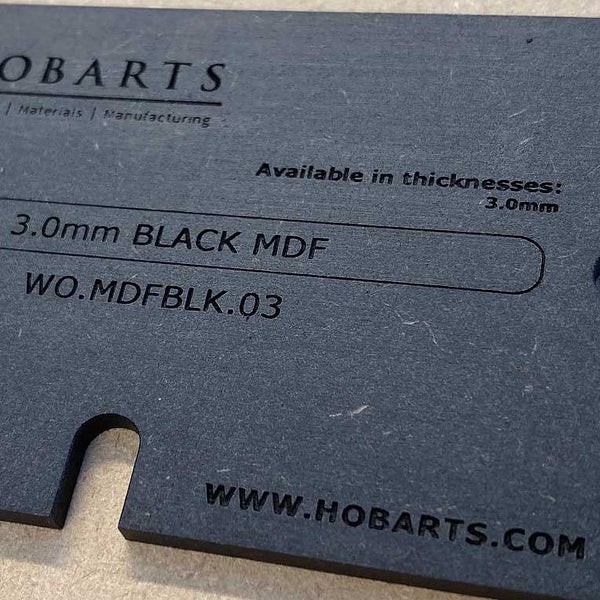
I then started looking at some laser cutting materials suppliers and I came across Black MDF.
![]()
This is possibly exactly what I was looking for!
It's a bit cheaper than acrylic, and better for the environment.
I've ordered some but It didn't turn up in time for this update. So to get an idea of what an X-PC would look like made out of this material I found some dark grey wood stain (I didn't have any black) and applied it to one of the MDF prototypes.
Here's the result:
![]()
![]()
I think it looks great and the students do too! And it should look even better when made from the actual black MDF.
I'll need to leave it in the classroom for a while to see it it stands up to the abuse from the students.
-
X-PC 2, Second Prototype.
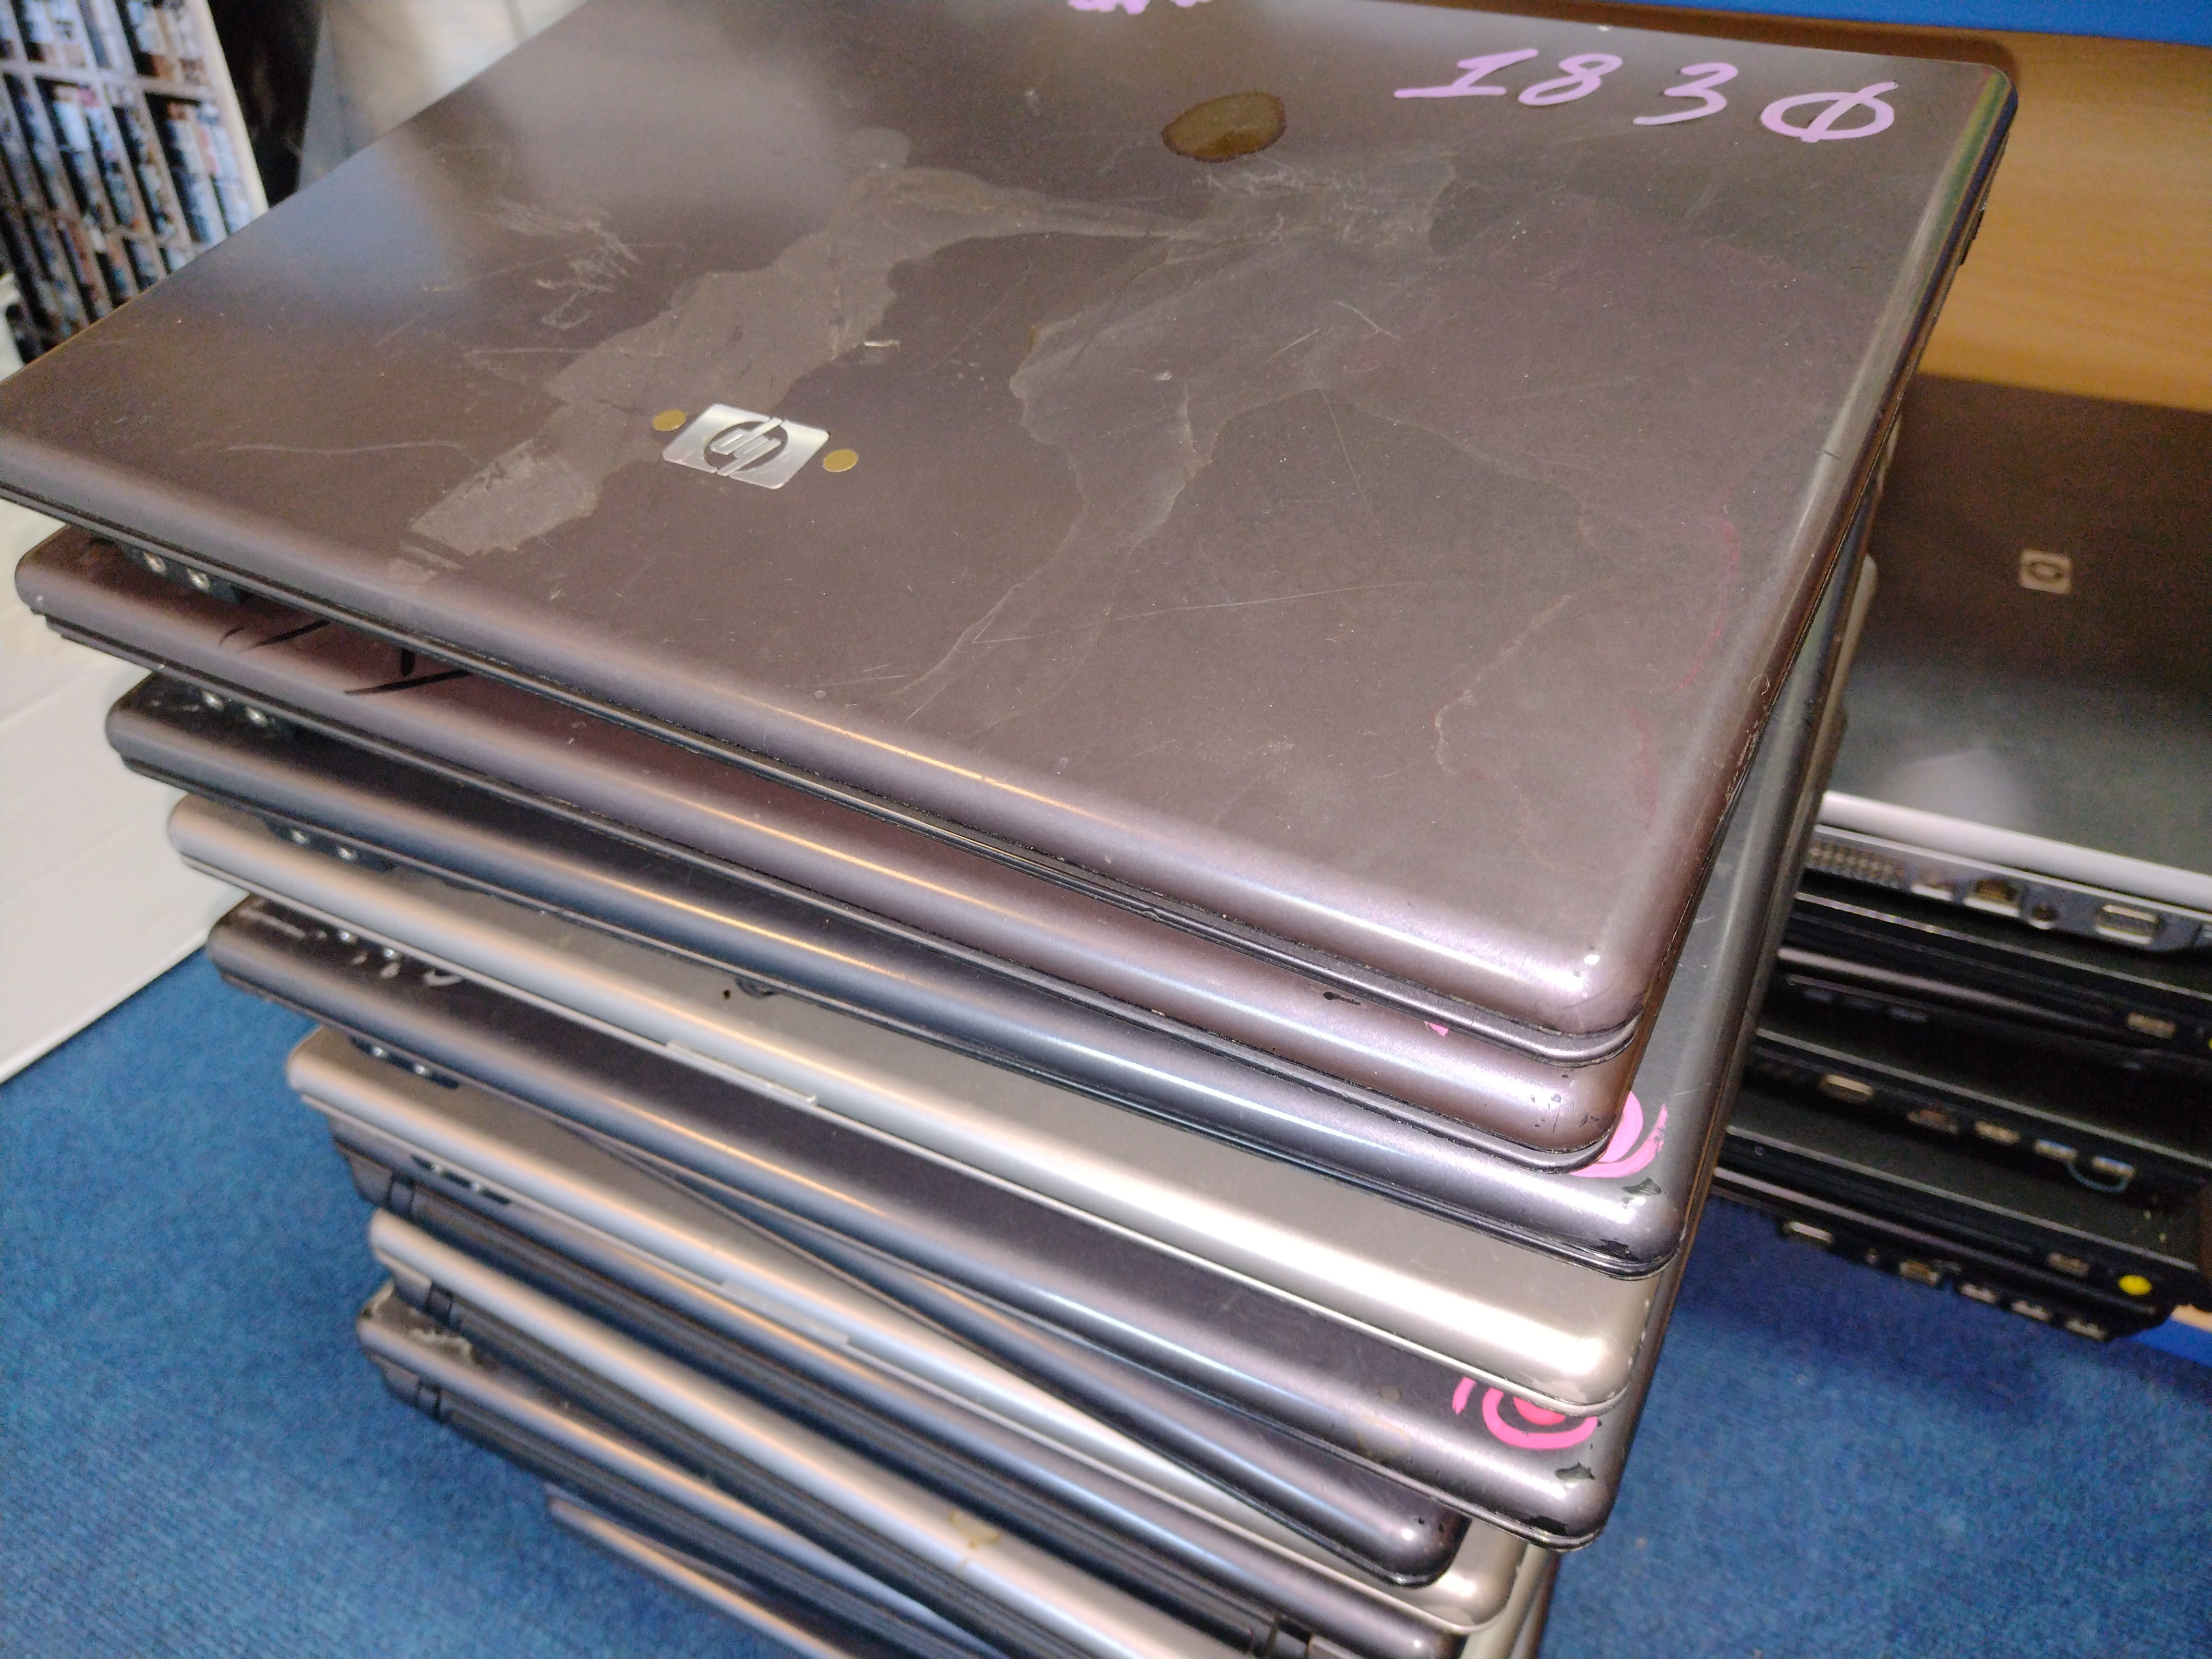
10/20/2022 at 18:53 • 0 commentsI've been given about 30 HP550 laptops. These are old and battered and perfect for turning into new X-PCs!
![]()
I also wanted to test my FreeCAD model with another laptop, to make sure everything works as it should.
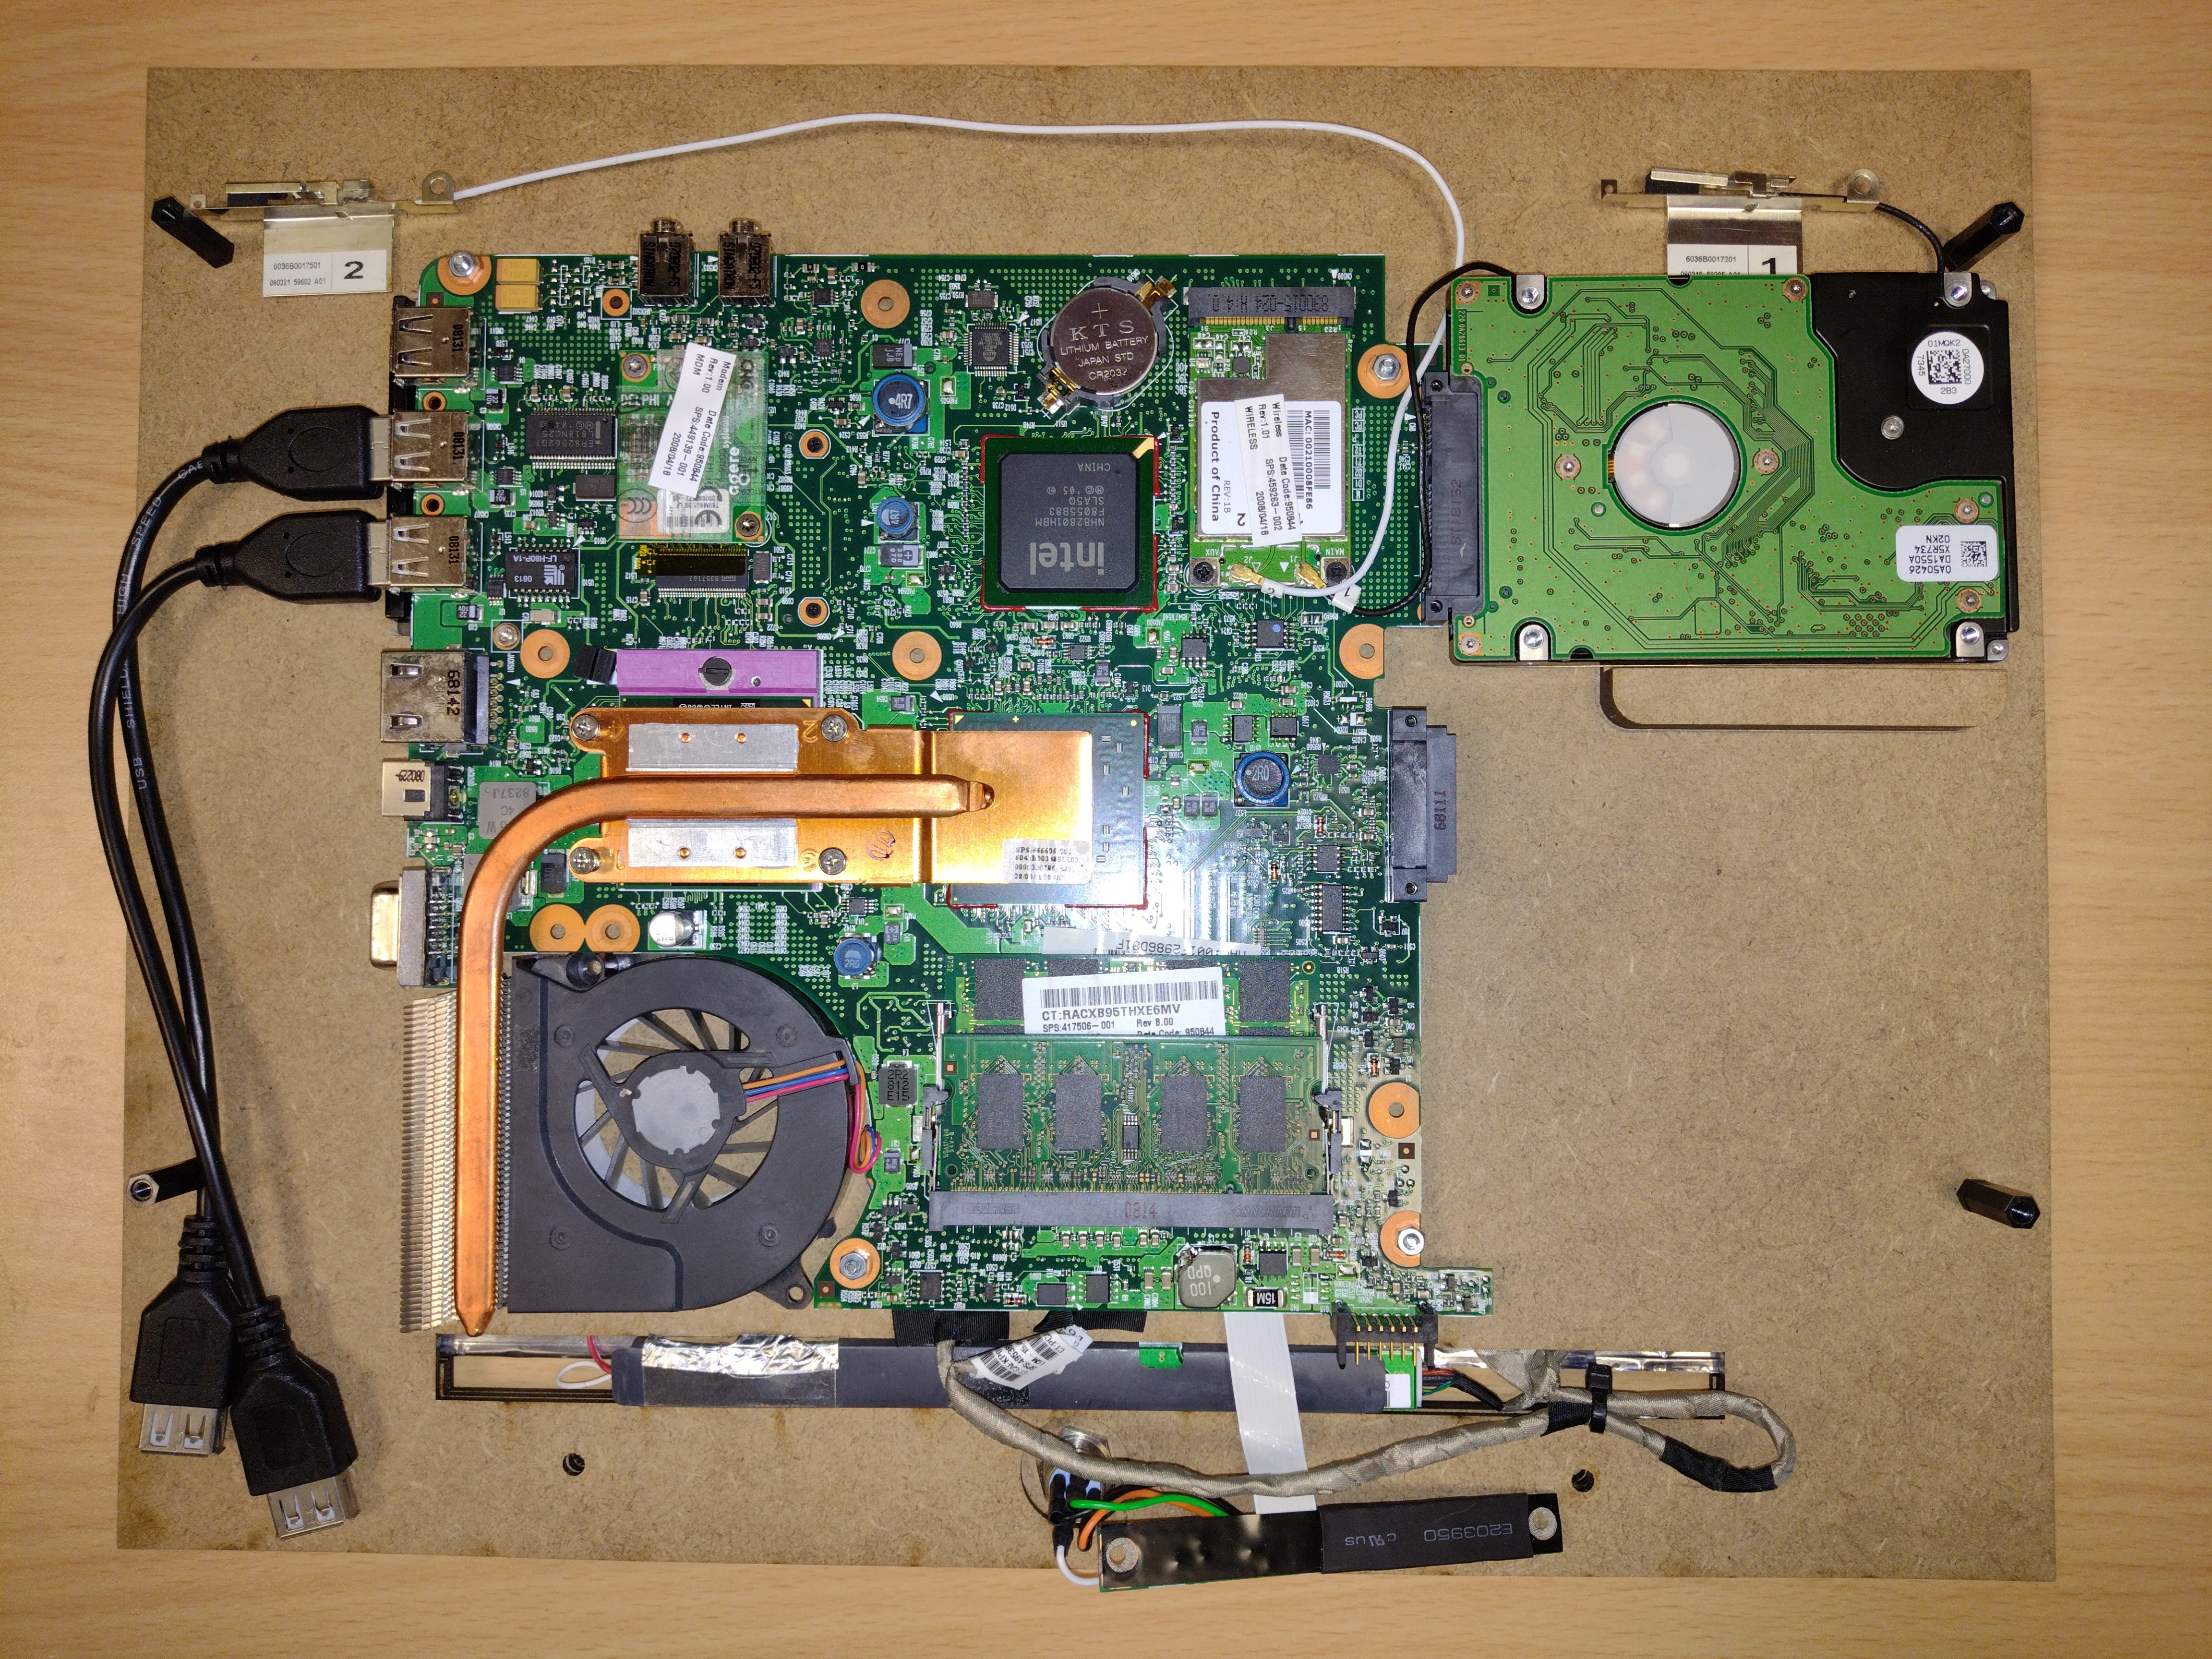
I stripped down one the laptops, removed all the parts, then checked that everything still worked.
I then measured the screen width and height, and the size of the PSU. I entered these parameters into the FreeCAD model and generated the 2D layout for the laser cuter.
Once I'd cut the parts out, I set about positioning and mounting the motherboard.
![]()
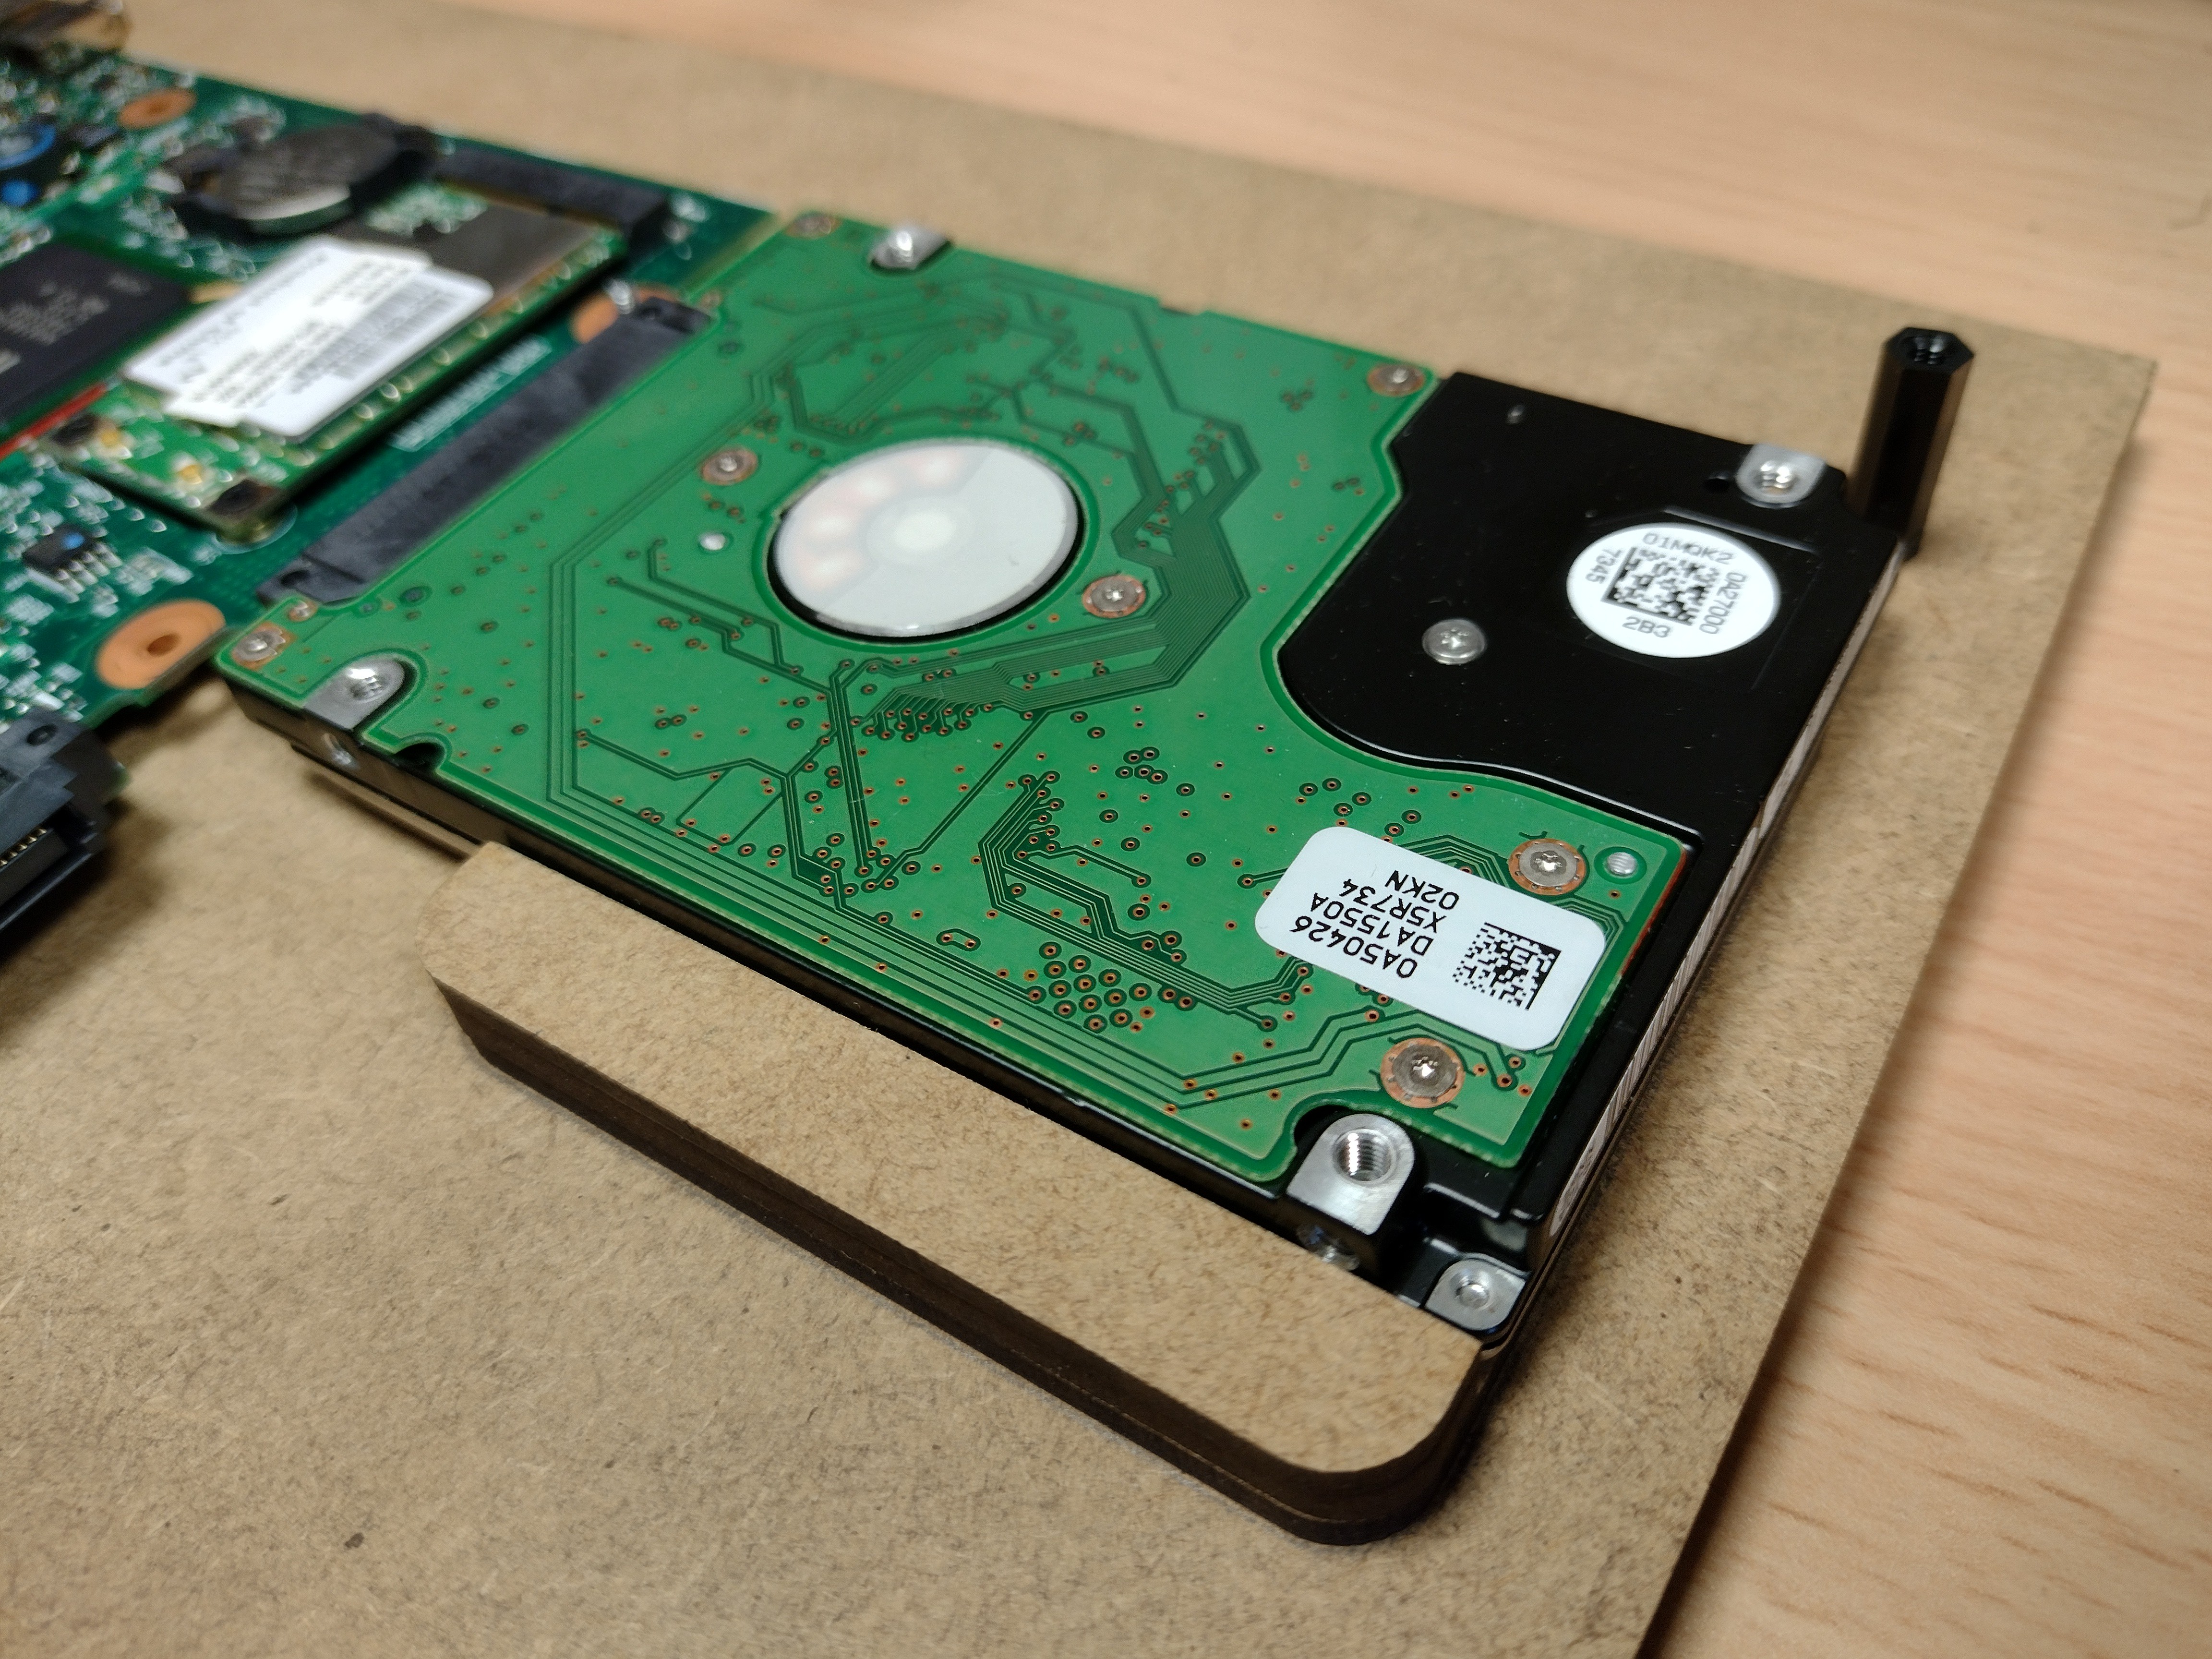
Each laptop is going to be different, for this one I had to make a little shelf for the hard drive to sit on to keep it supported.
I made this with some off-cuts of MDF.
![]()
I then put a screw through the motherboard cover to attach a standoff - to stop the HDD sliding out.
![]()
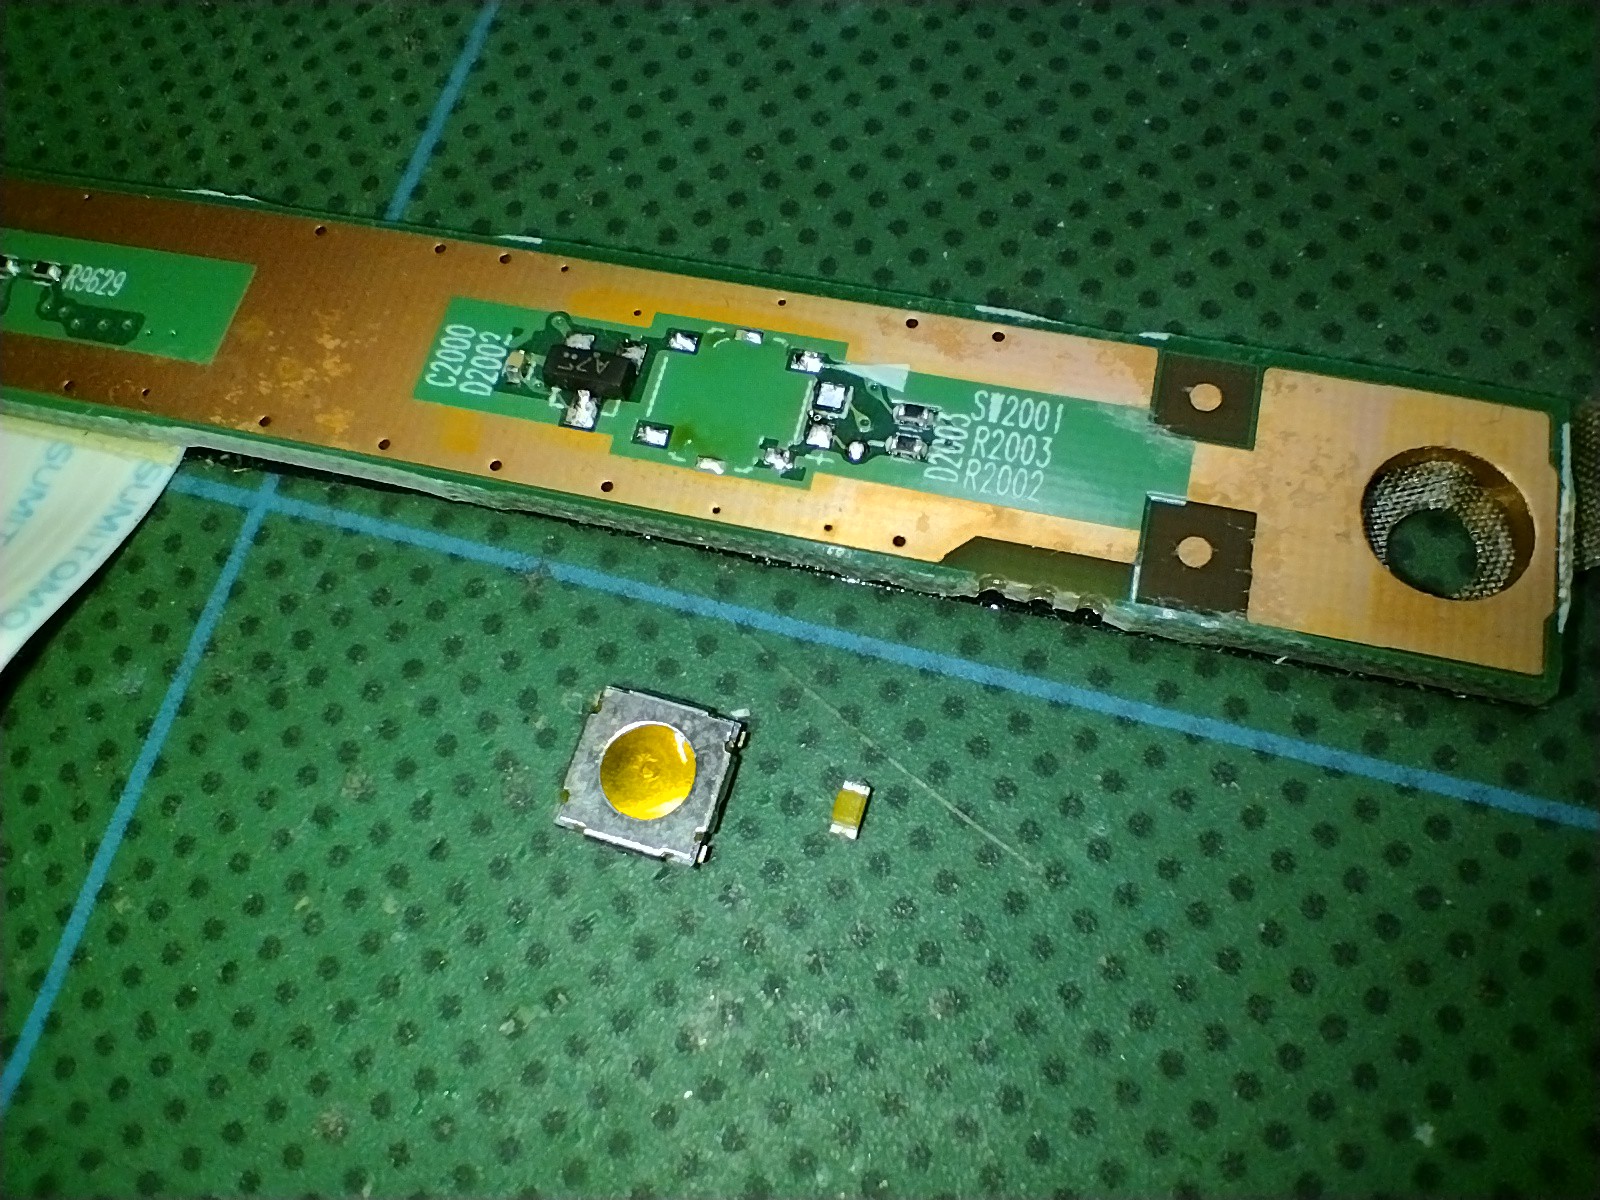
The power PCB looks different but works in the same way. I removed the button and LED with a hot air gun.
![]()
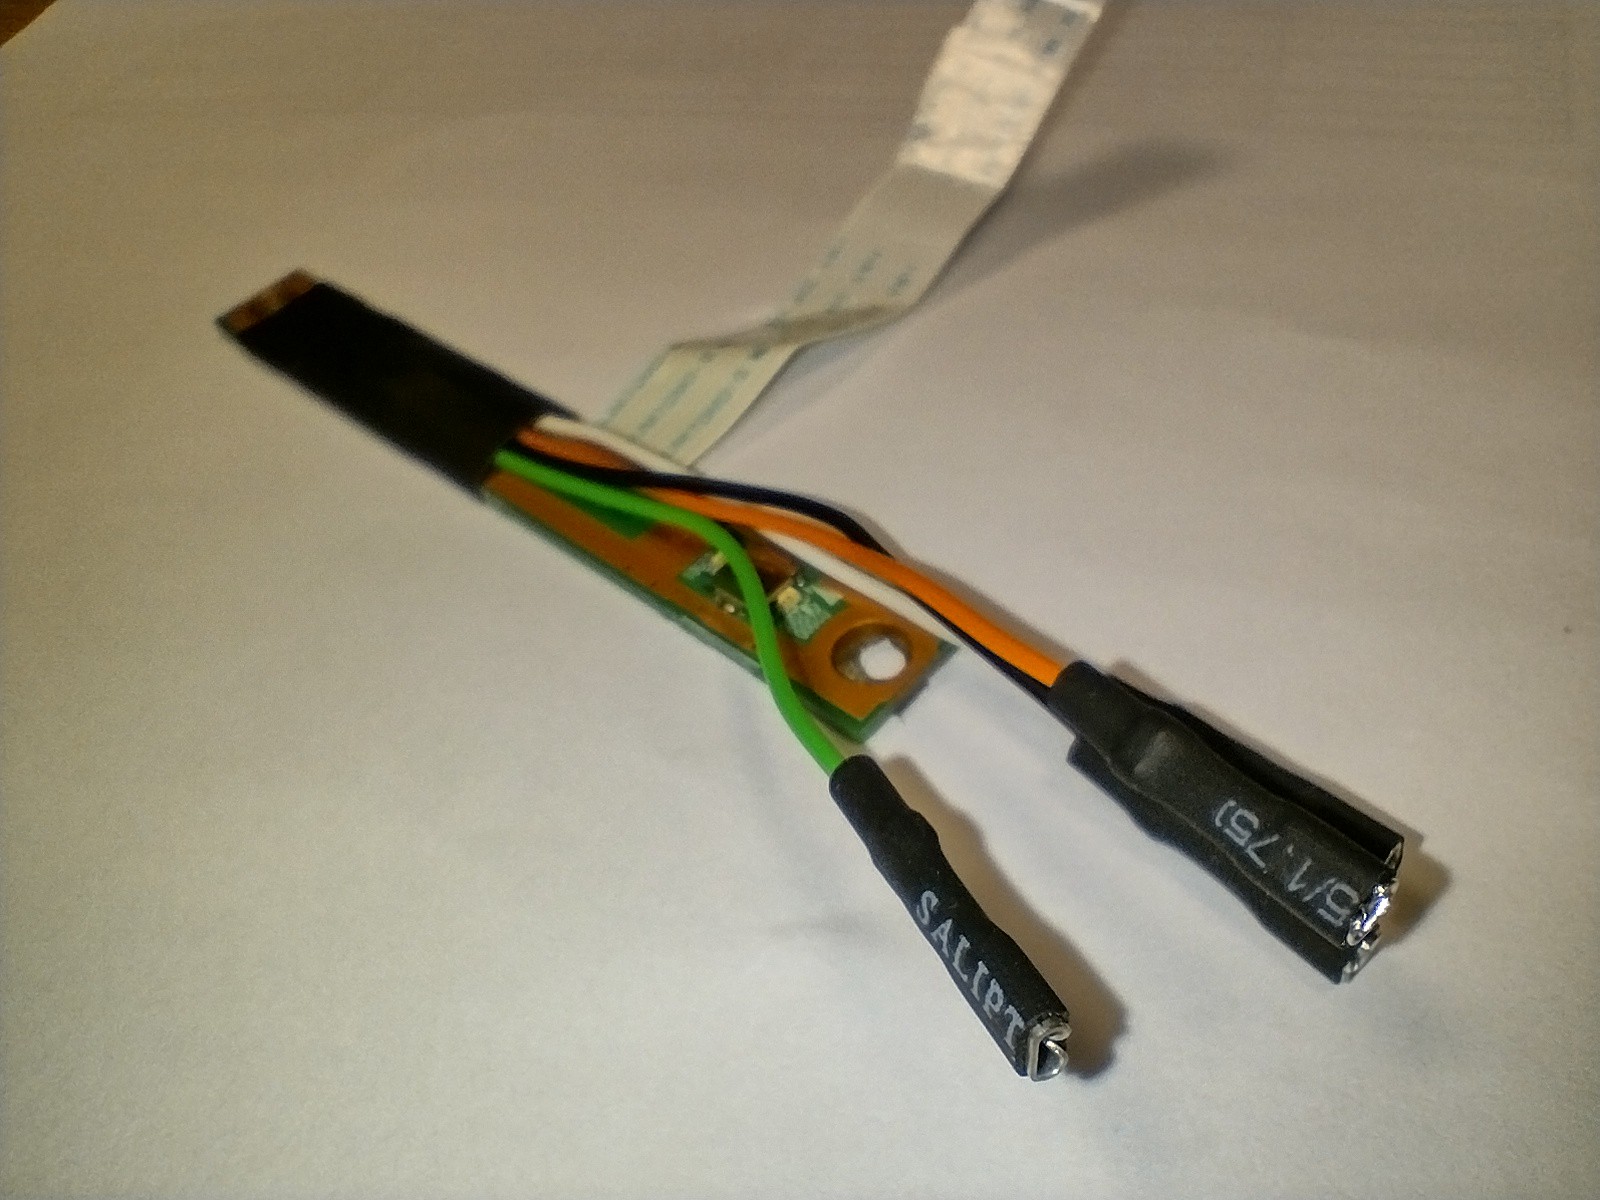
Then soldered on the wires.
![]()
I then attached crimp terminals to the ends of the wires - this makes it mush easier to attach them to the switch terminals, and remove the switch if necessary.
![]()
![]()
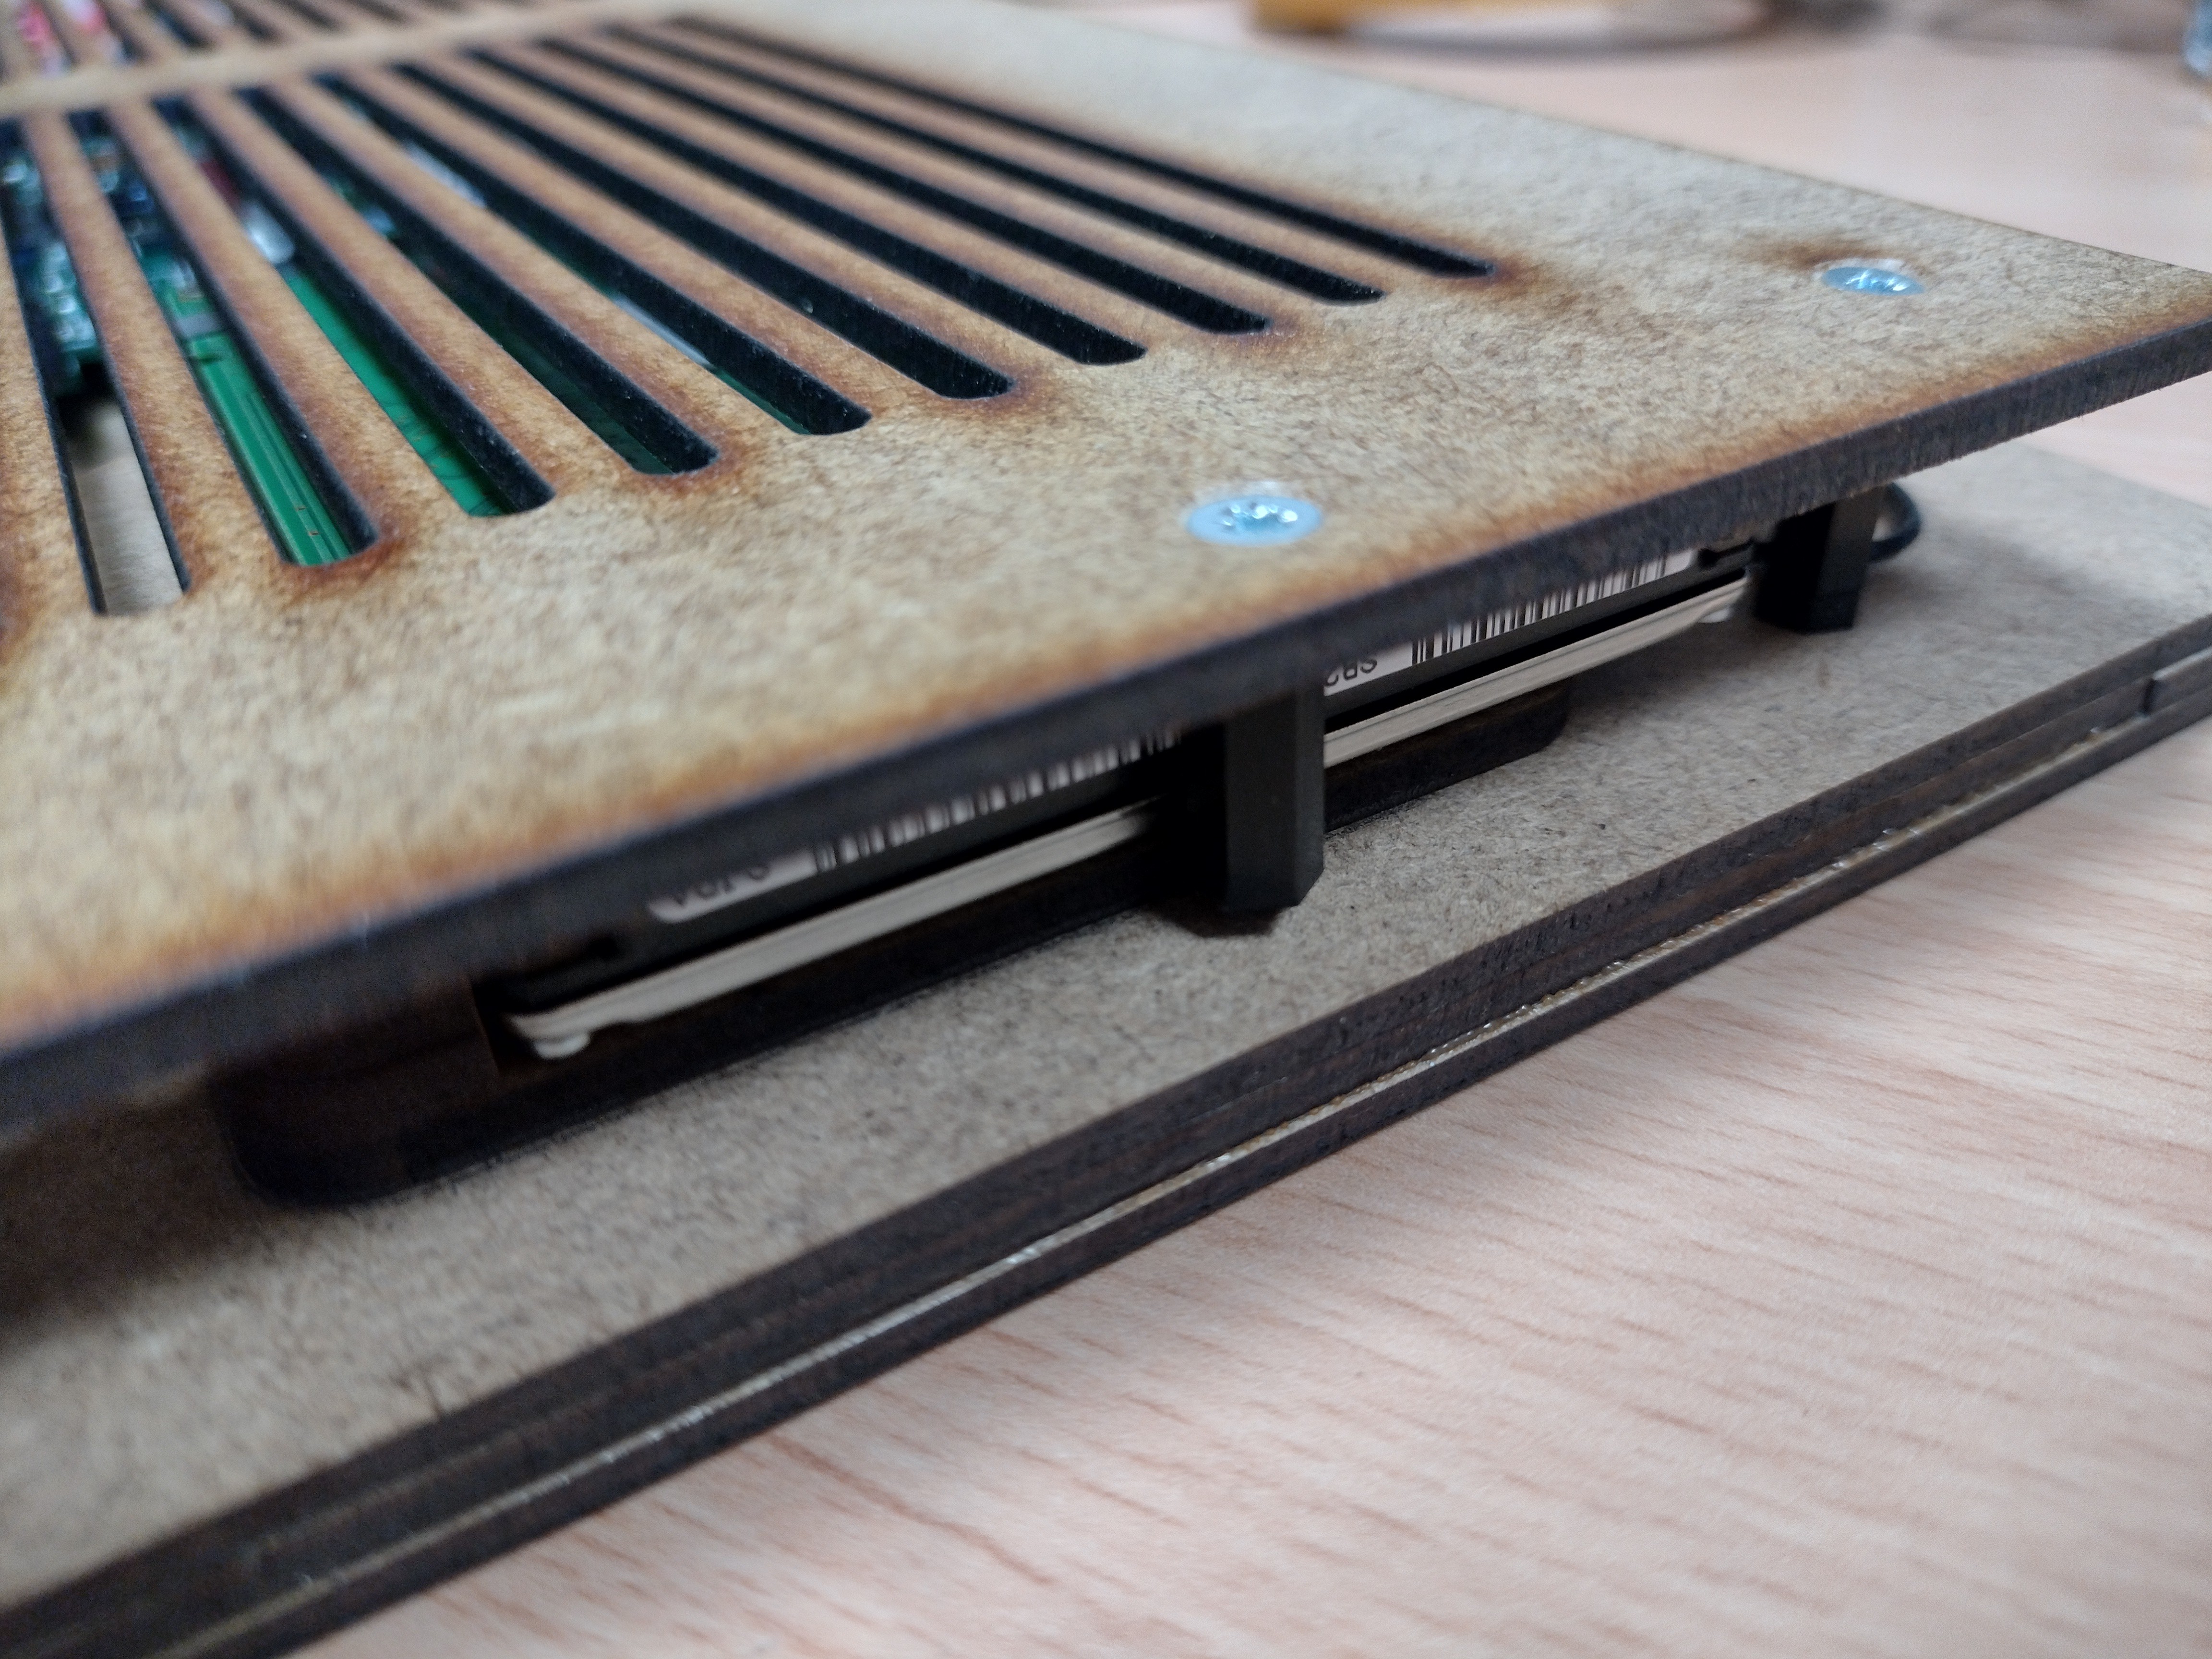
I then put the rest of the frame together, everything worked perfectly!
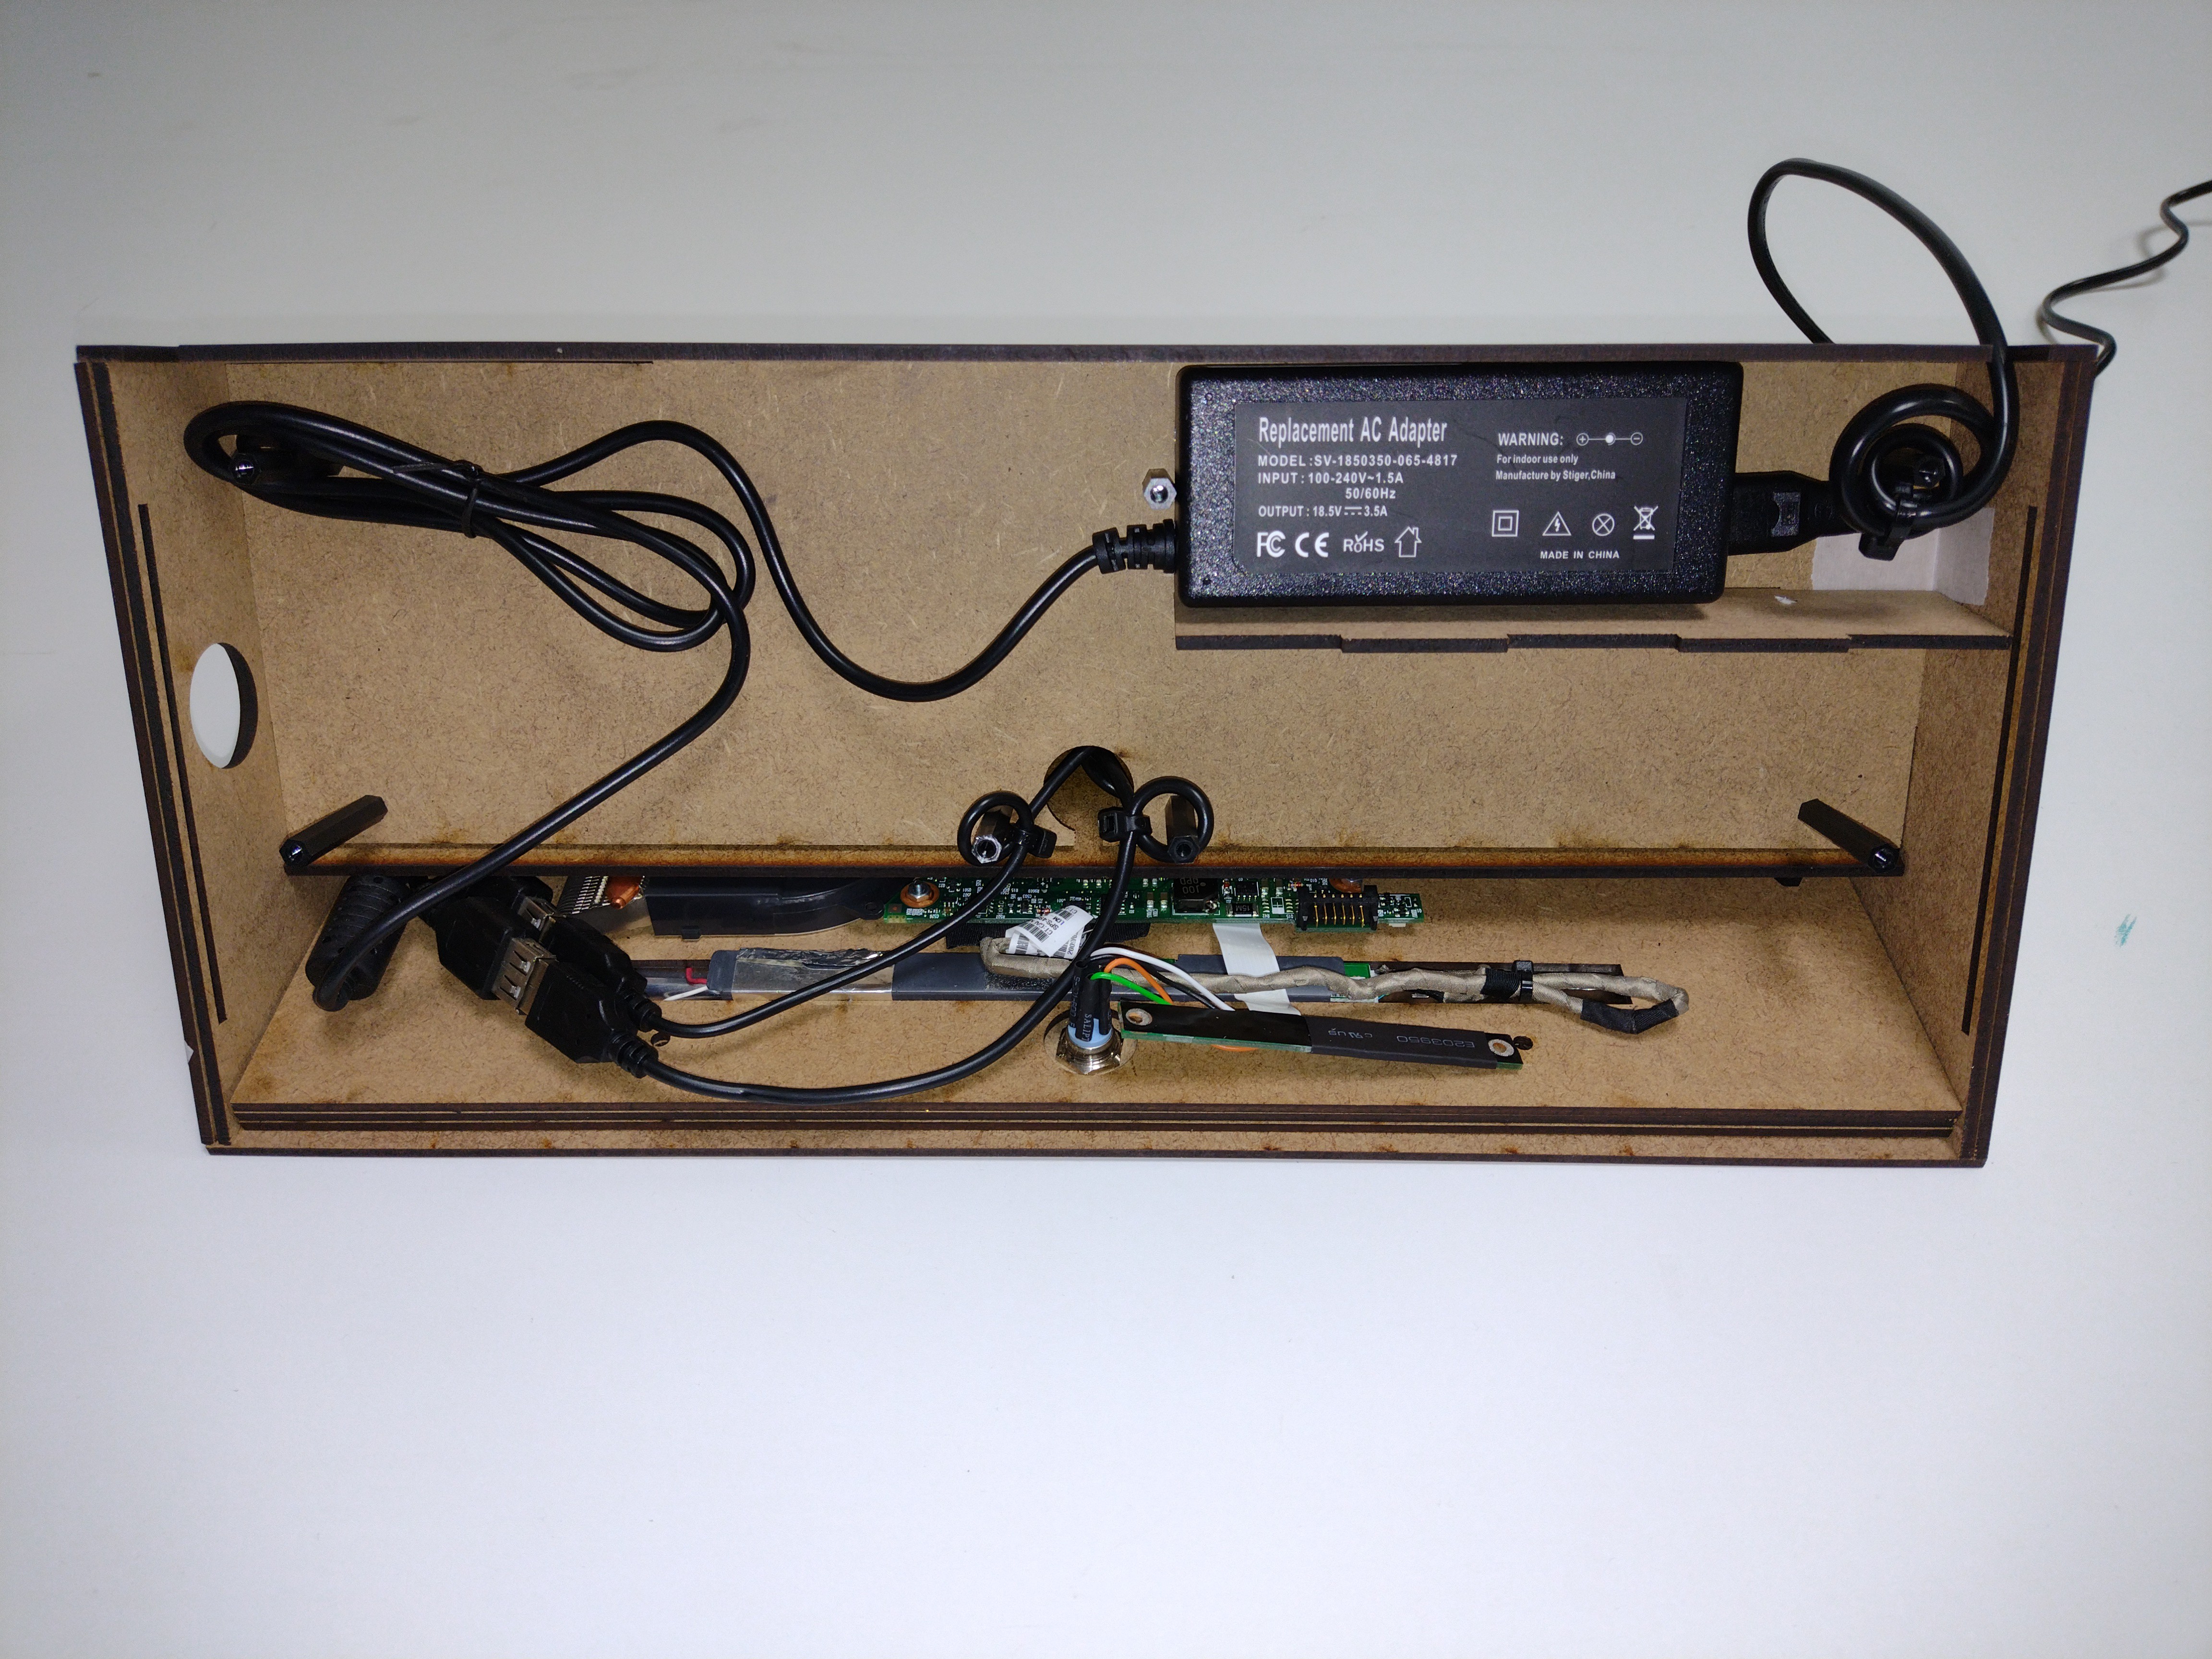
Here's the view from the underside showing all the parts in place. I ran out of the dash mount USB/headphone connector, but it's not needed for this test.
![]()
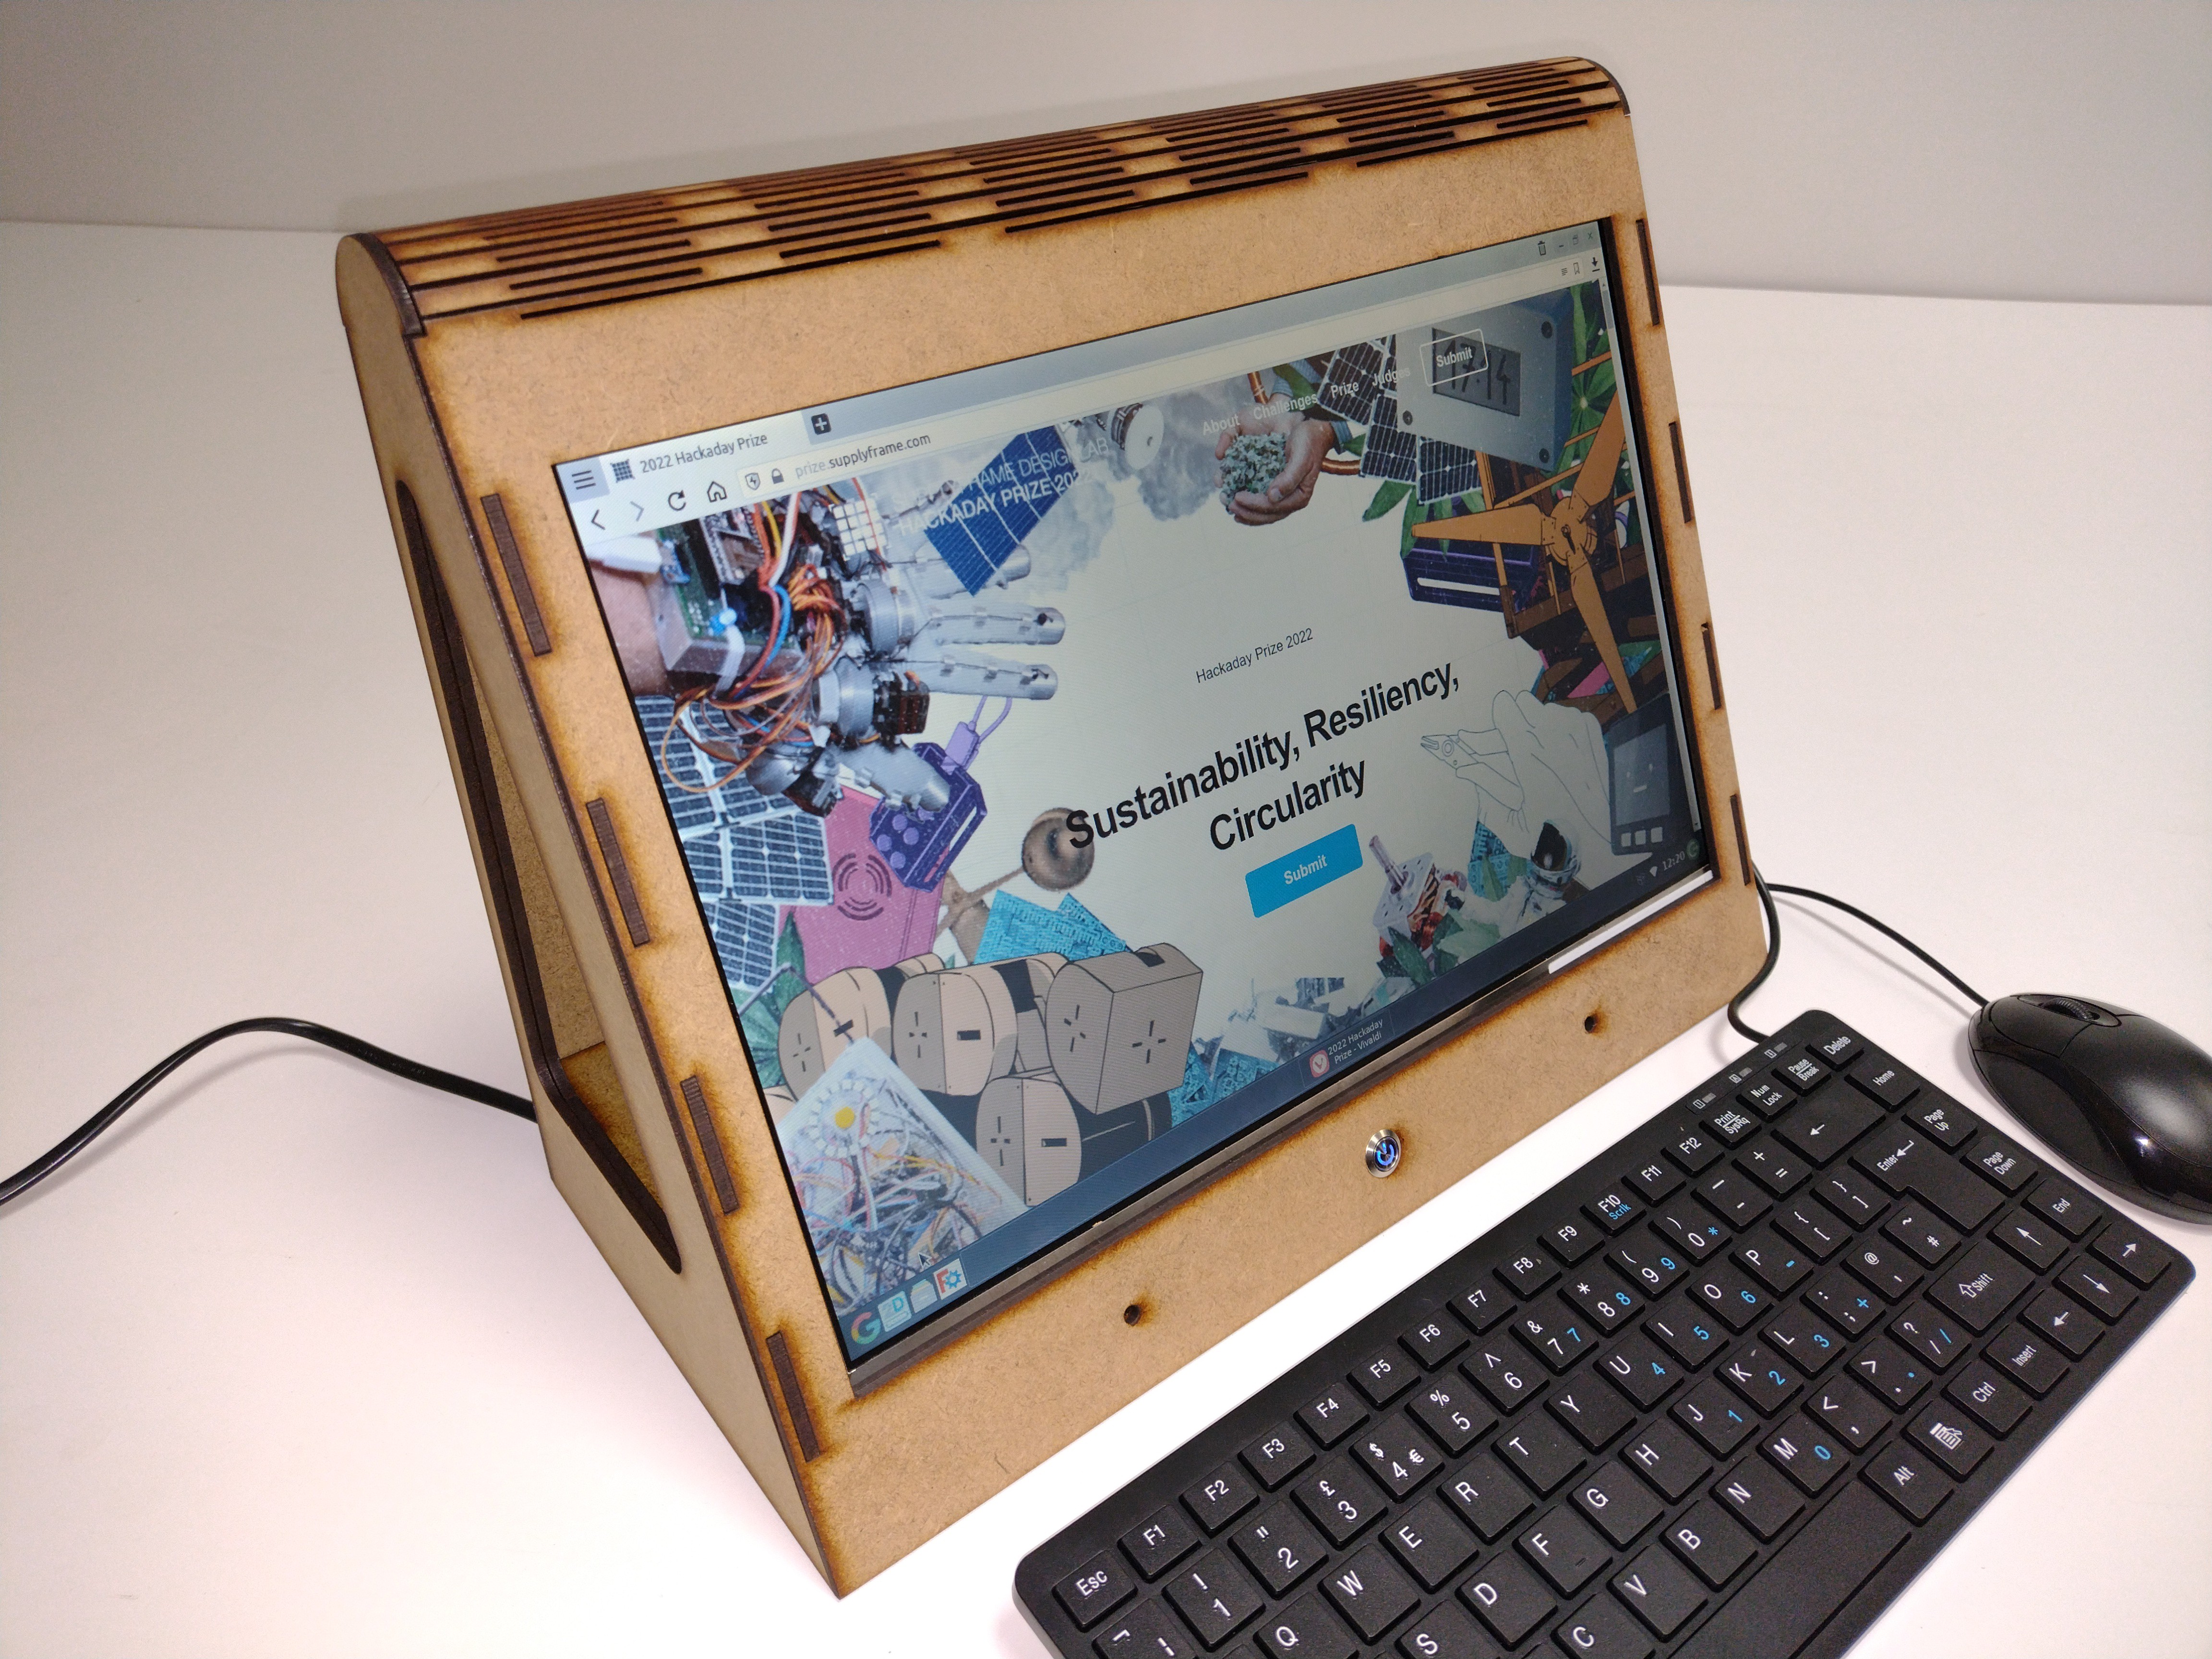
And here's the finished prototype. It worked first time!
![]()
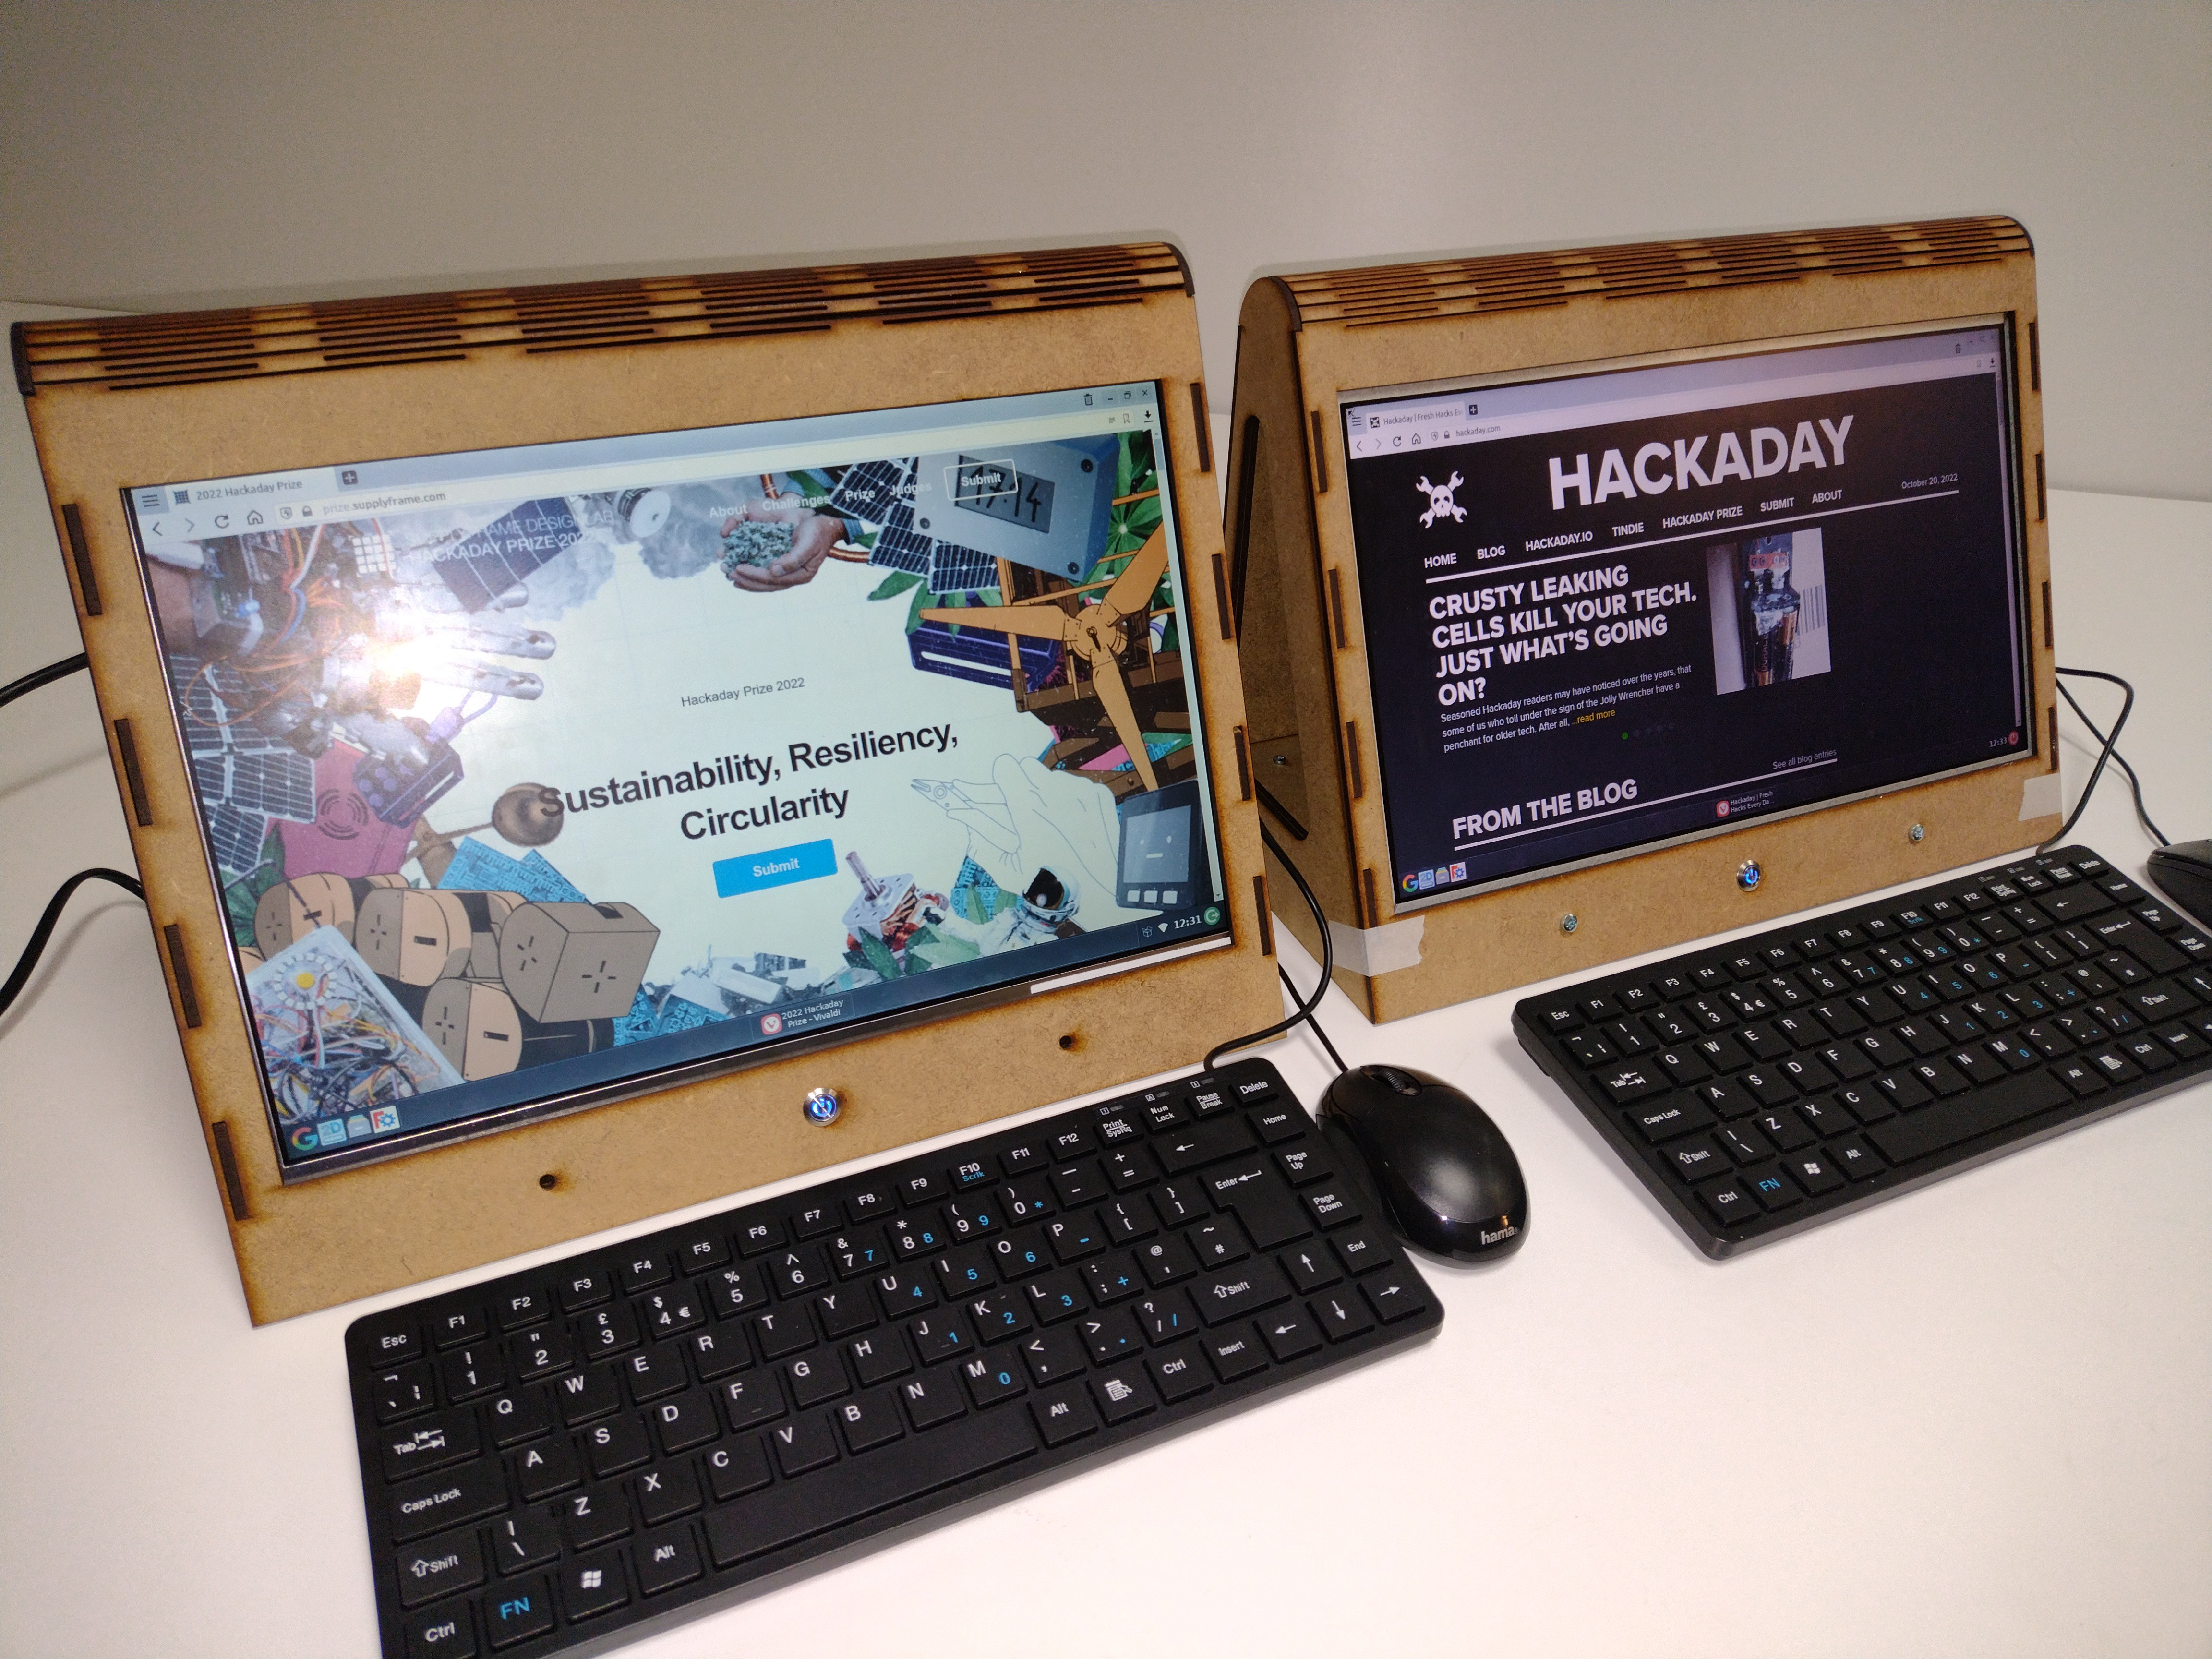
Here are my two X-PC 2 prototypes side by side for comparison. HP550 on the left, and Lenovo B590 on the right.
![]()
-
FreeCAD Parametric Model & Living Hinge
10/06/2022 at 22:00 • 0 commentsA video showing how to adjust the parameters of the model and how to generate the living hinge.
-
Parametric Model in Action.
10/03/2022 at 21:00 • 0 commentsHere's a video showing me changing the width, height and screen angle of the X-PC 2.
The video is sped up in parts, as all that resizing seems to slow my computer down!
-
Universal Power Switch
09/30/2022 at 20:08 • 0 commentsFor the first X-PC, I reused the original laptop power switch PCB. This worked but it required quite a bit of effort to make it fit and I also had to design and 3D print a button to make it usable.
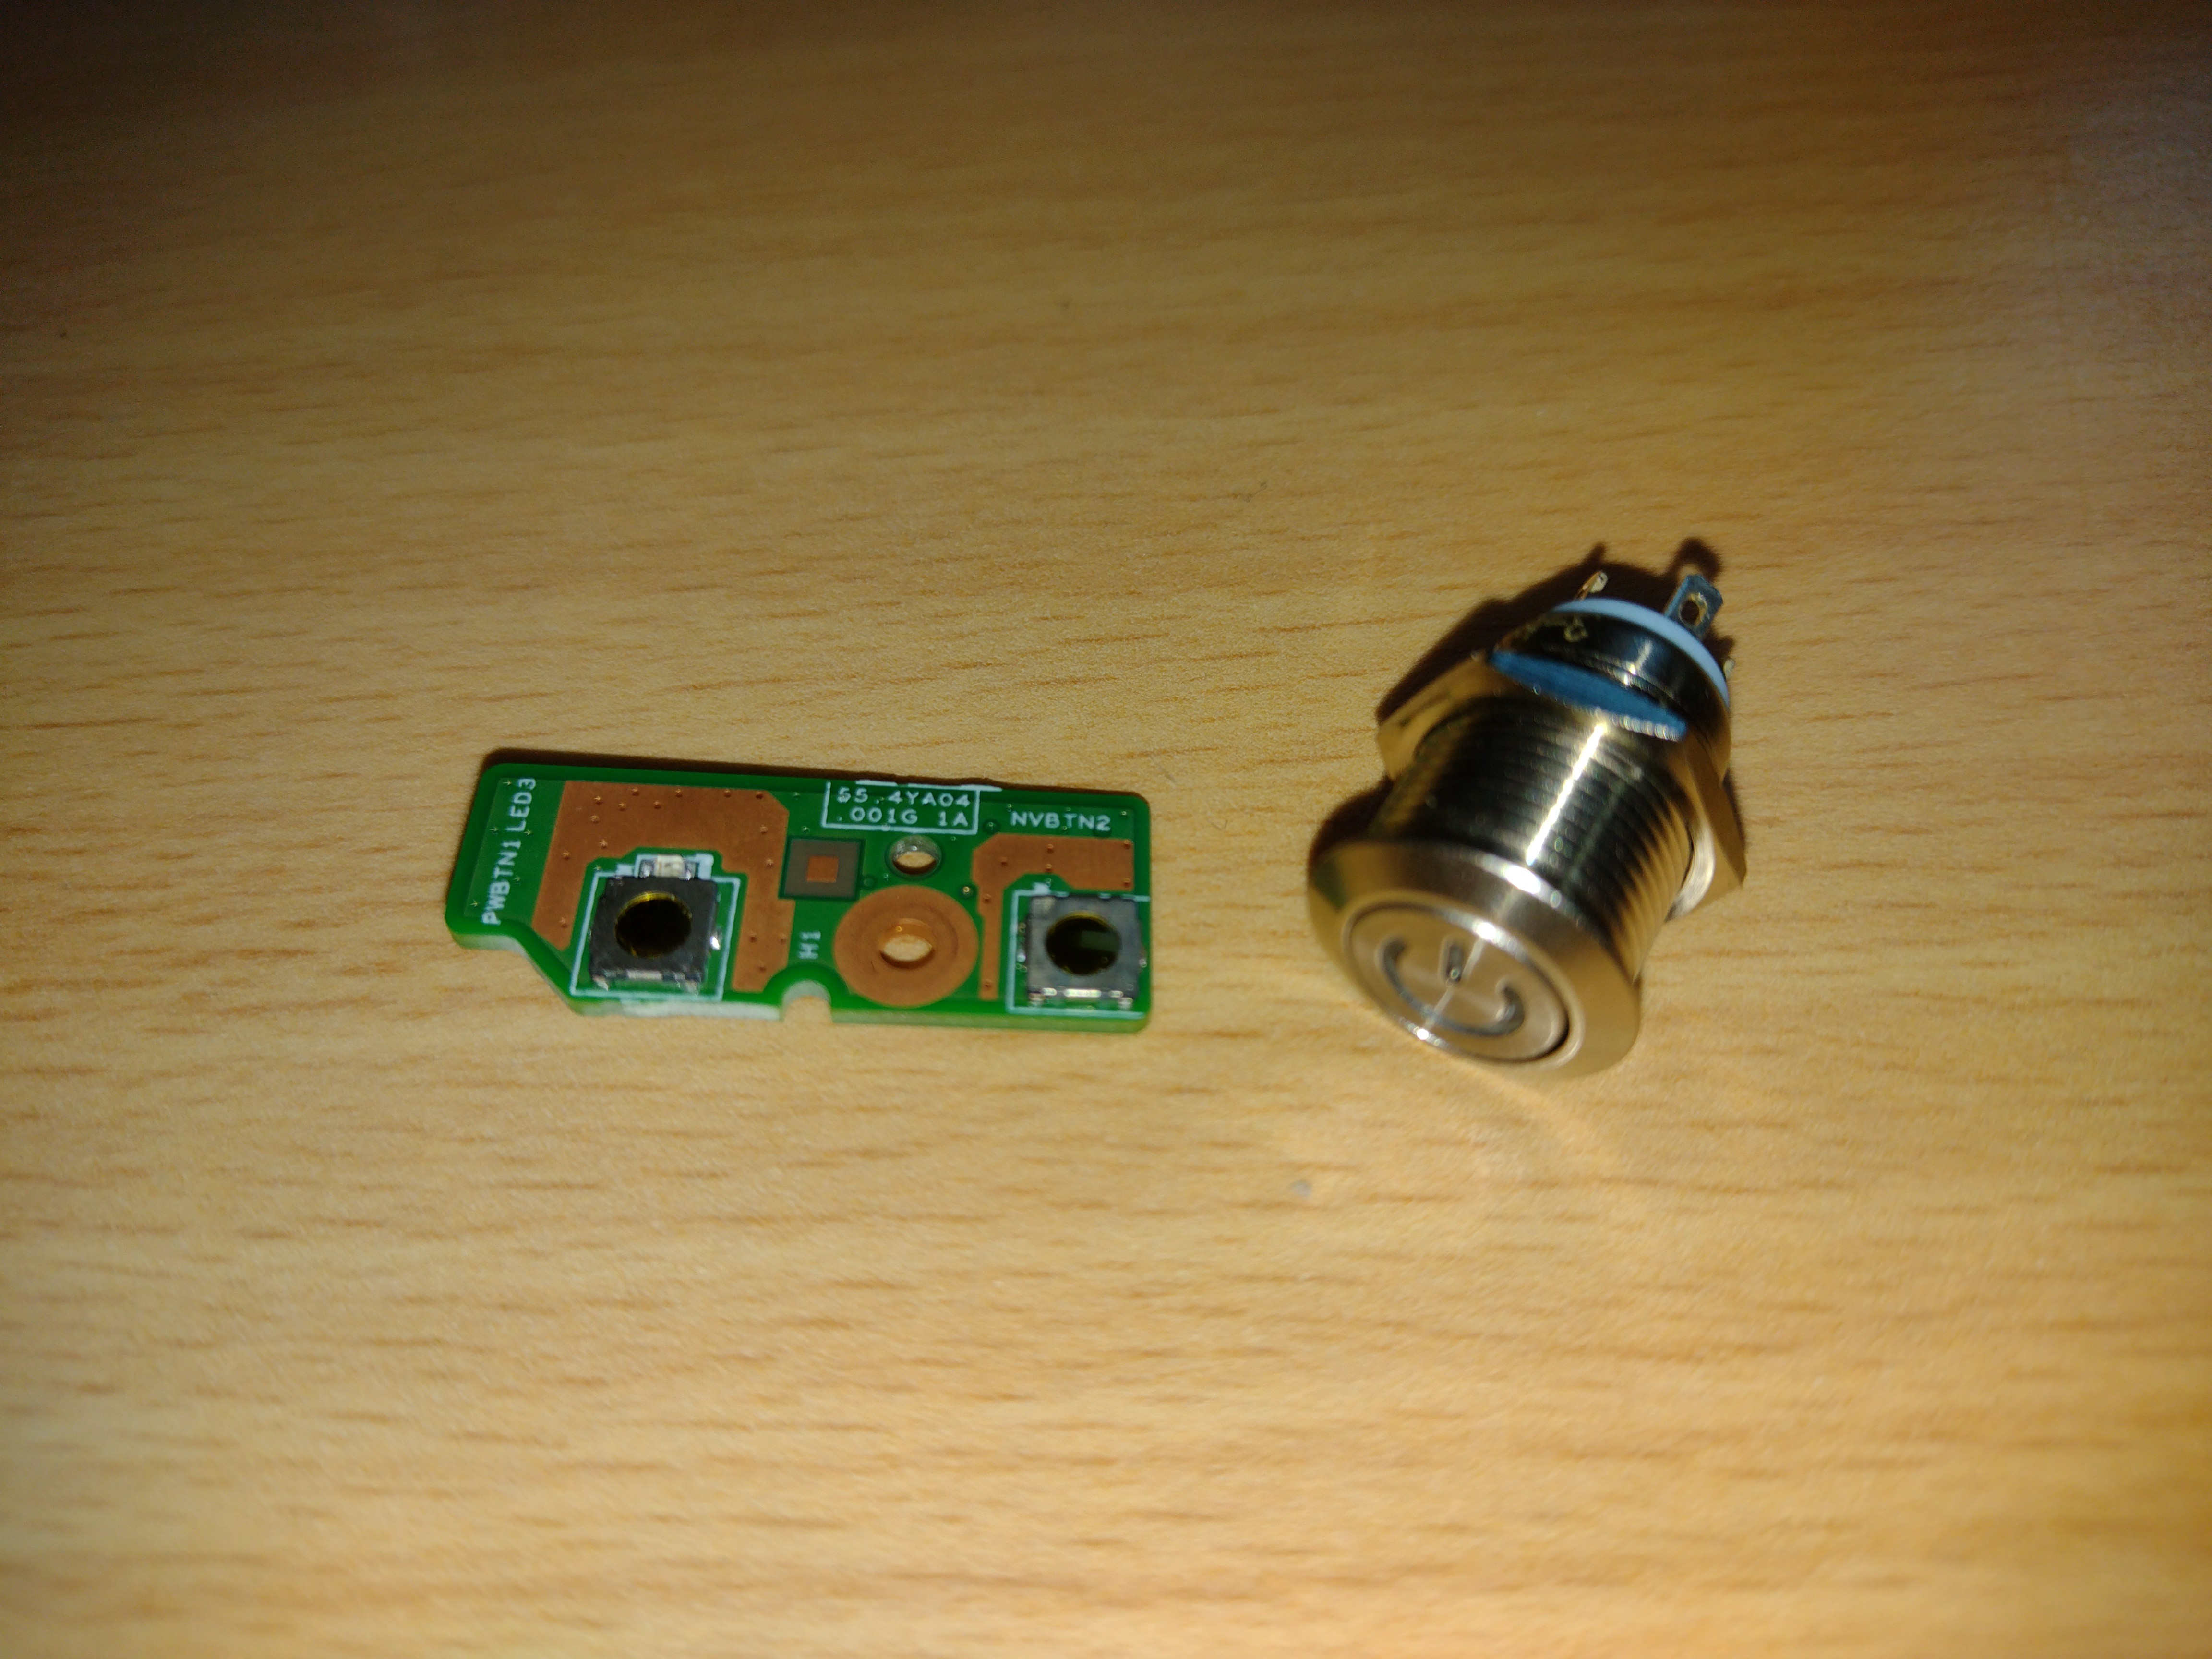
For the X-PC 2 I didn't want to have to redesign any parts of the case or create custom buttons, so I needed a more universal solution. I started researching illuminated buttons and found these (shown with the laptop switch PCB):
![]()
This switch is for custom PC builds and has a built-in 3v LED, so it was perfect for my needs. I ordered these ages ago but they only just turned up. I'd already designed the case with this switch in mind, so I'd already put the 12mm mounting hole in the front of the case.
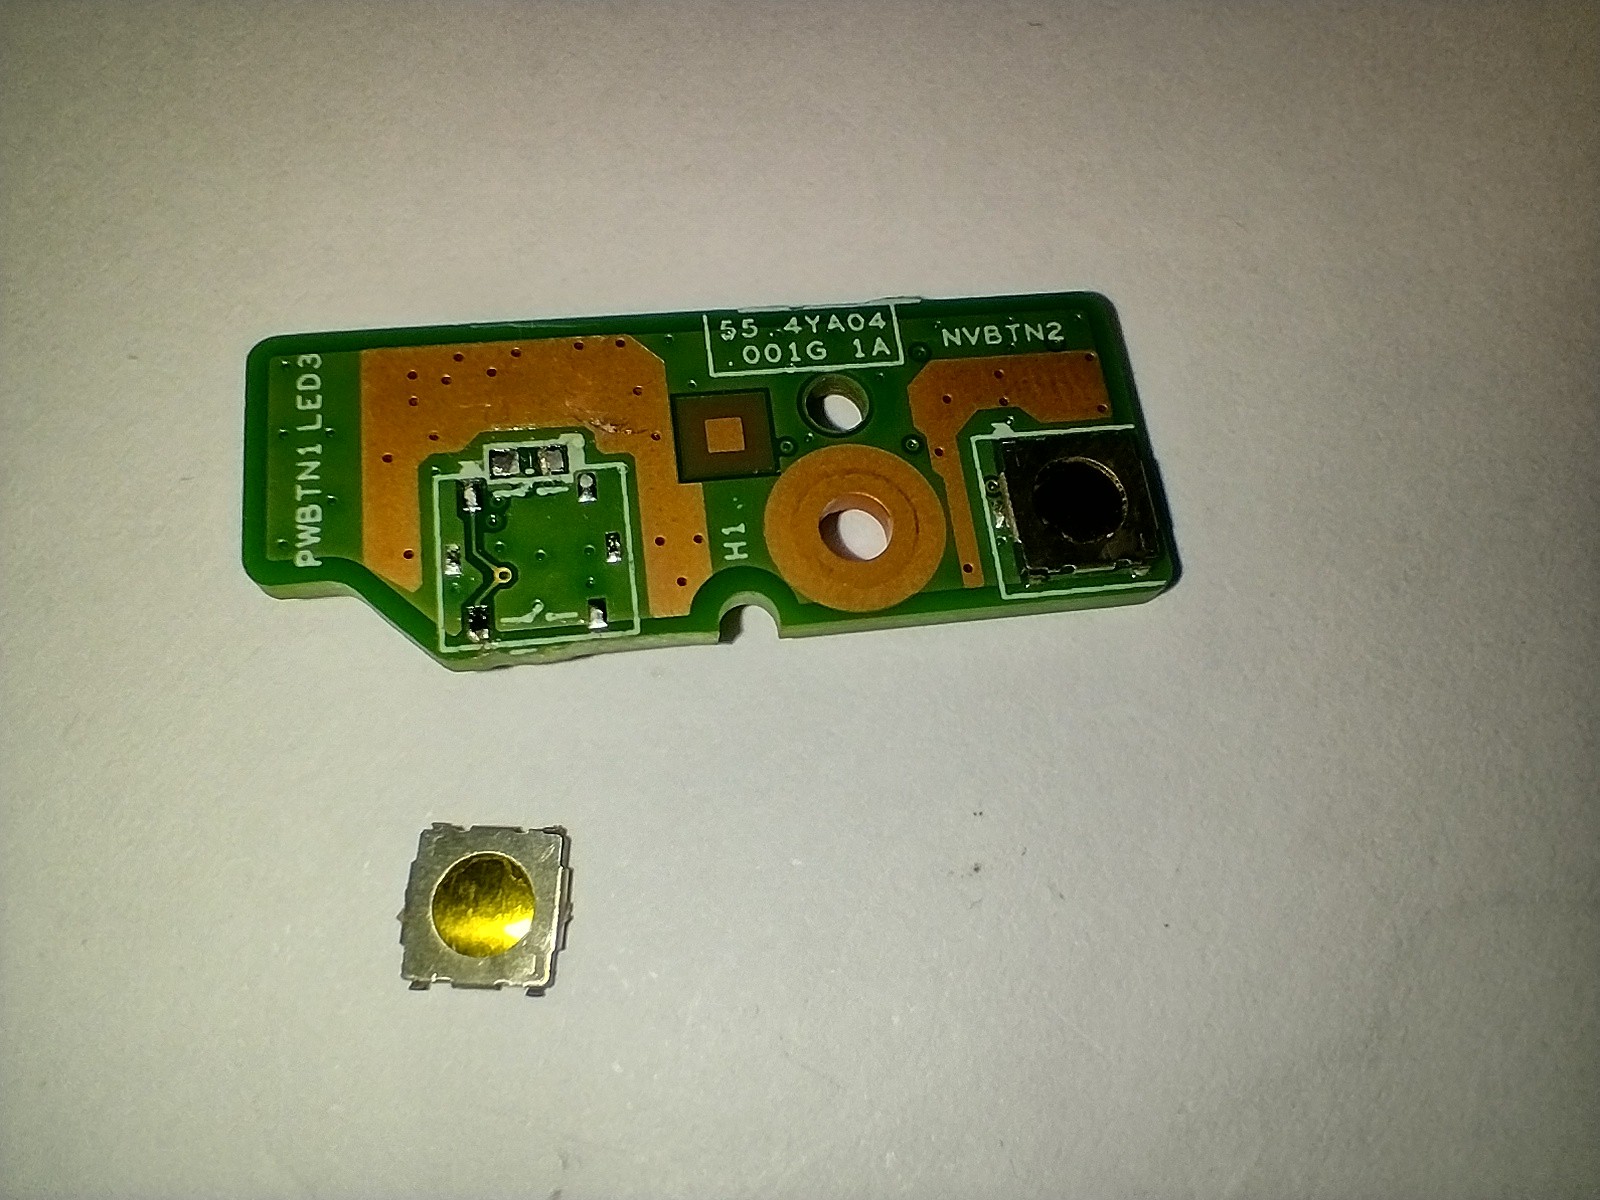
The first job was to remove the existing switch and LED. I did this with an SMD hot air gun.
![]()
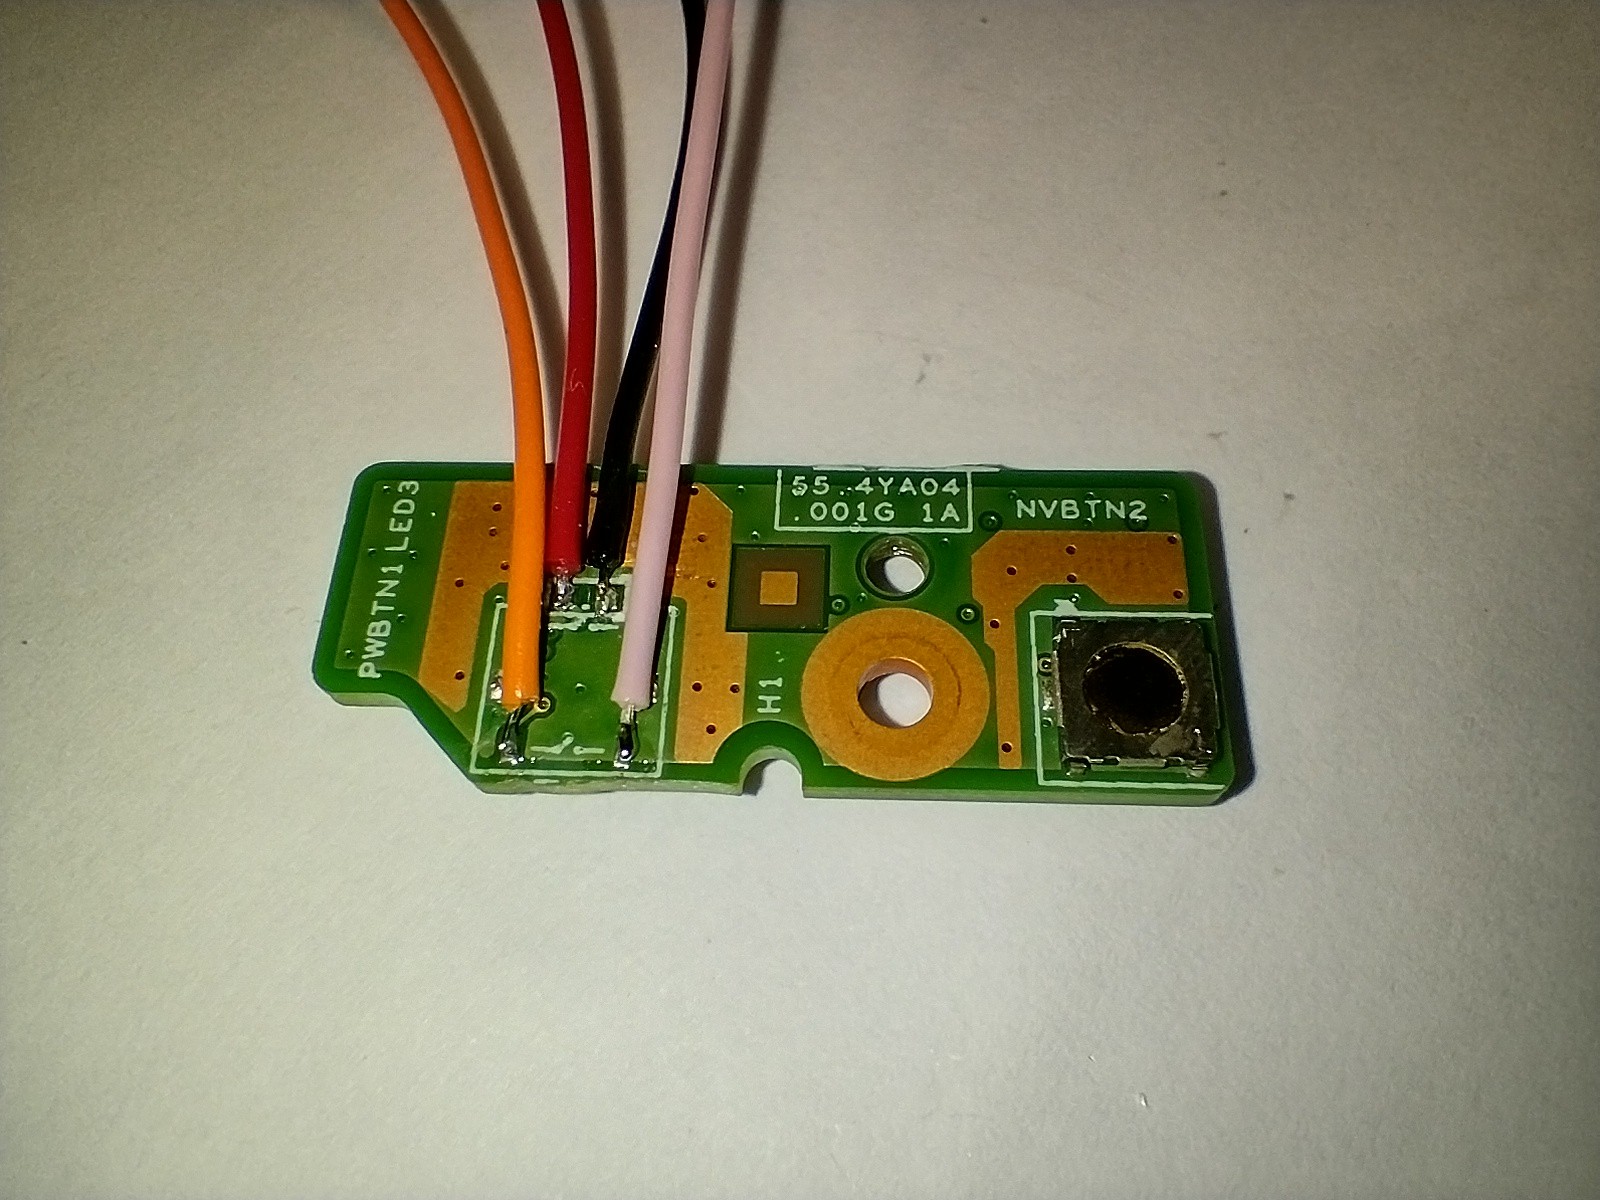
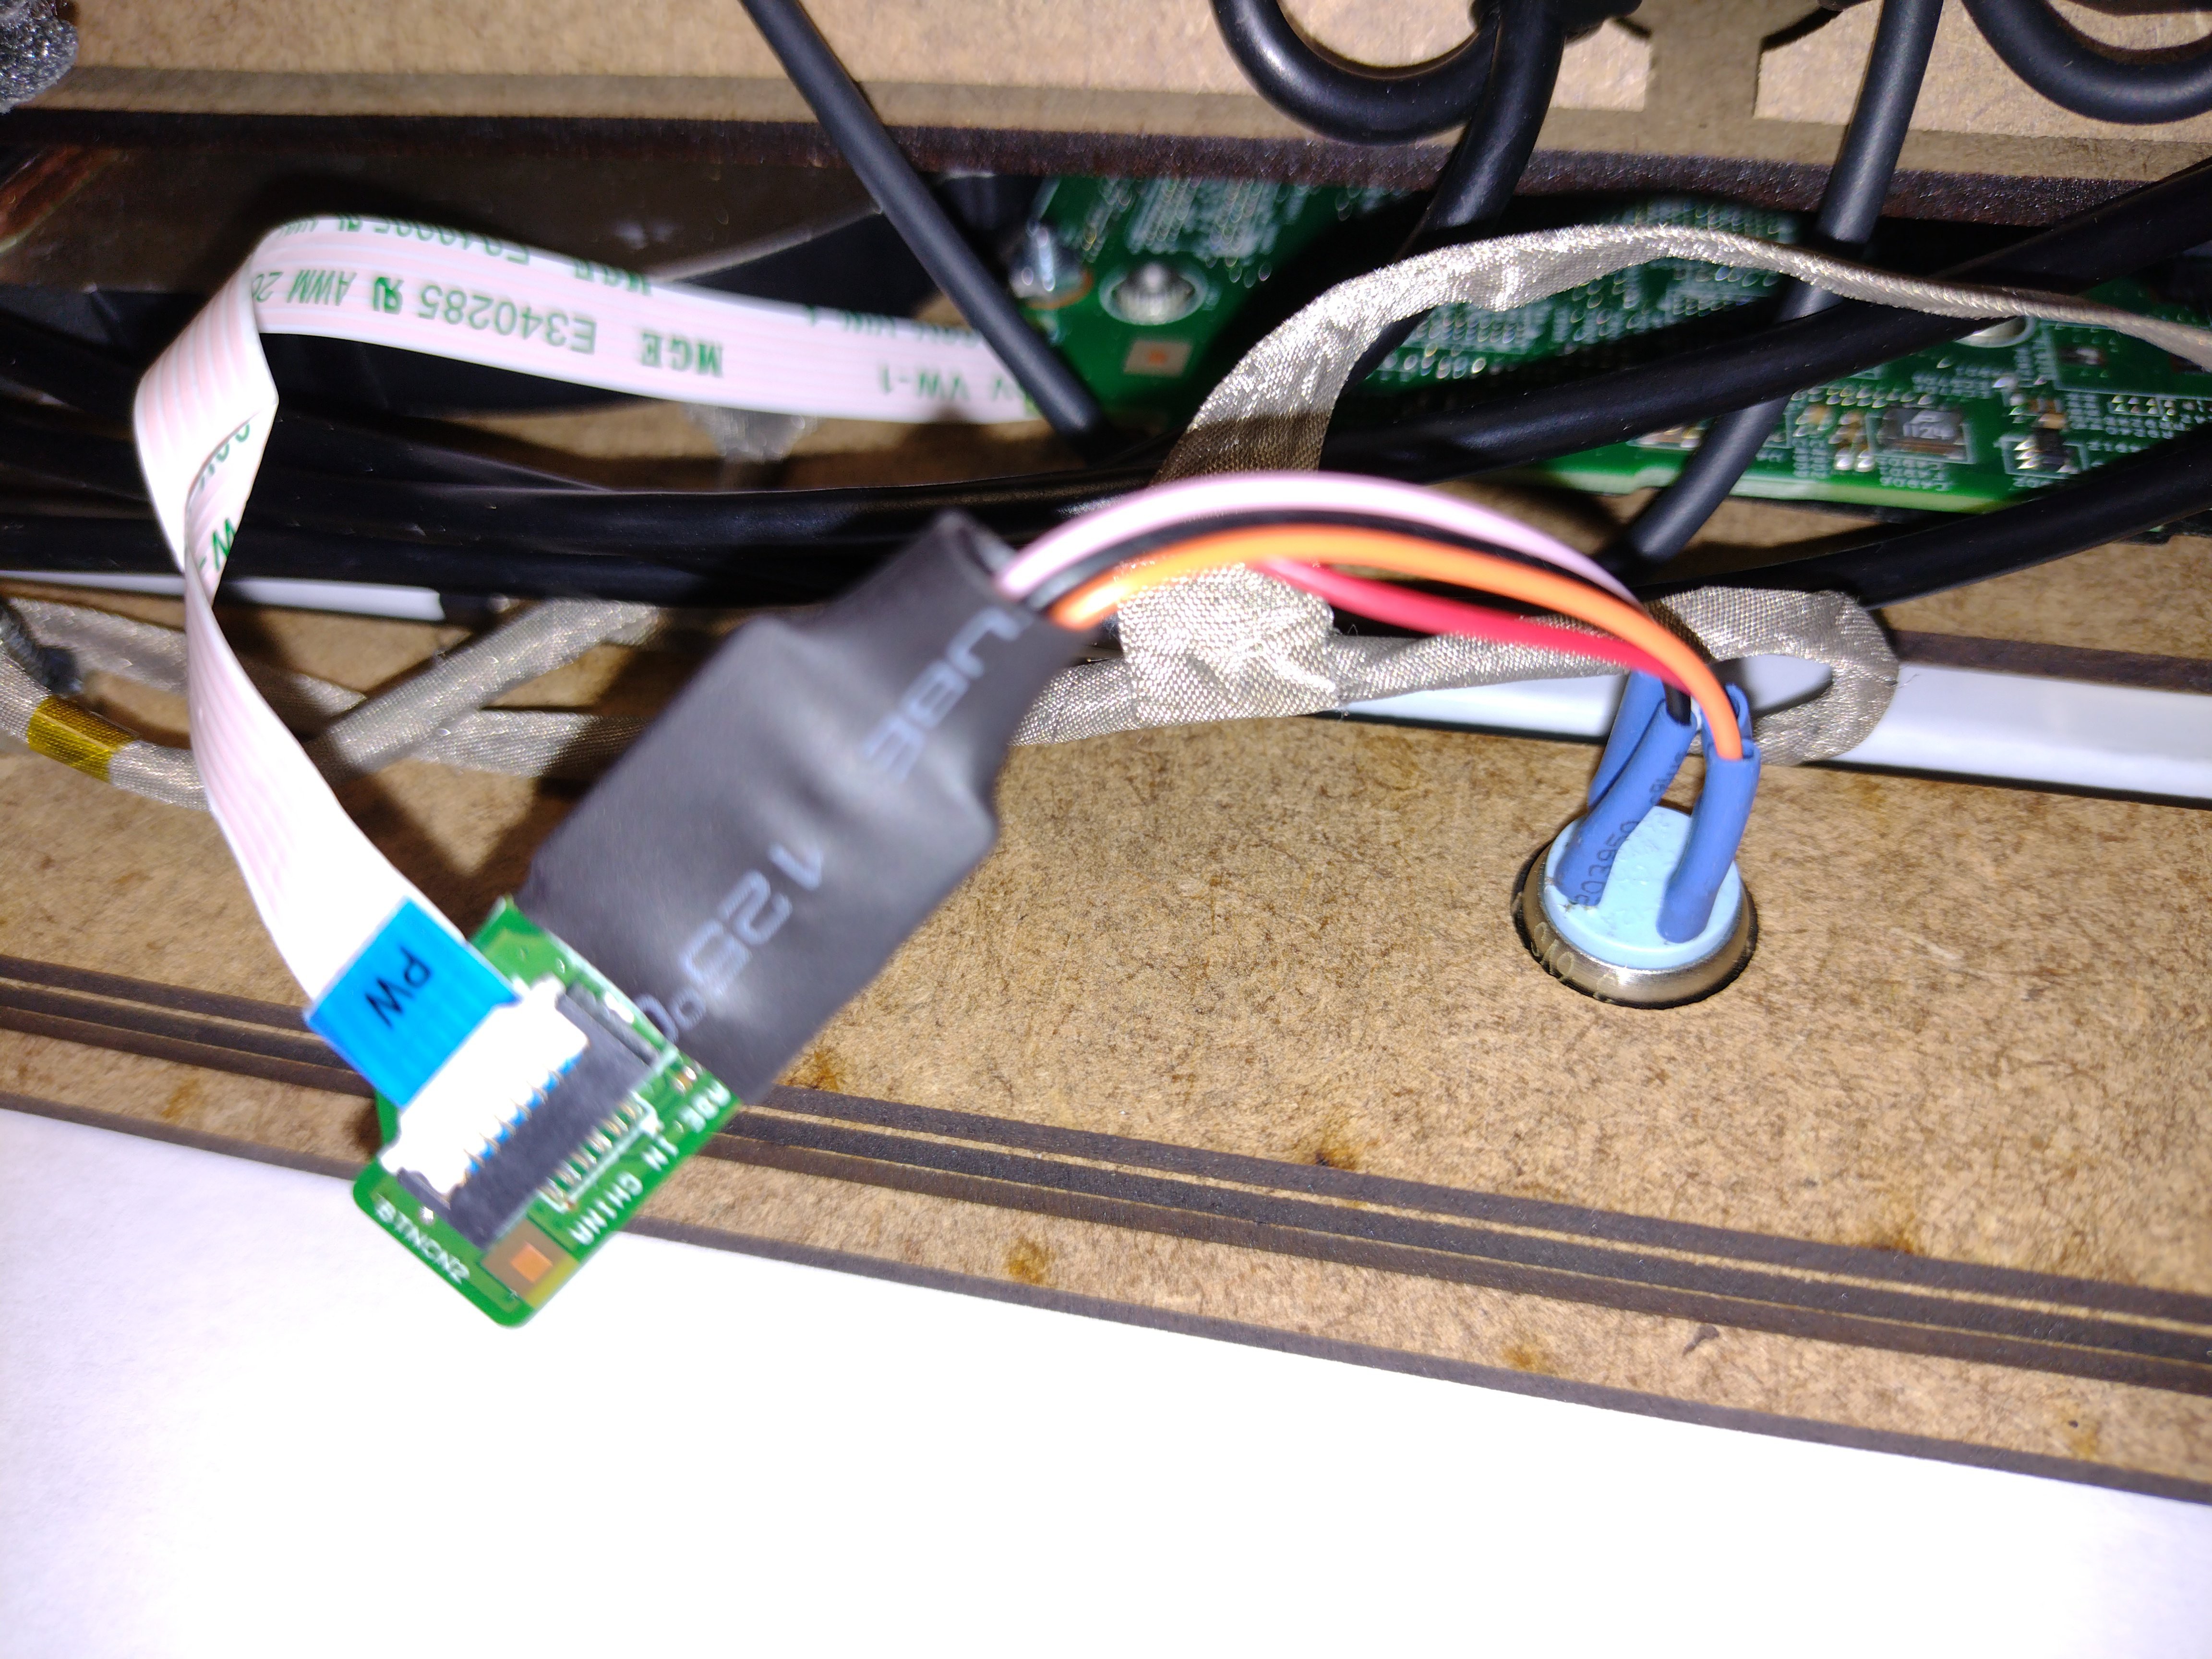
I then soldered wires to the pads, the black and red wires go to the - and + for the LED and the pink and orange are for the switch.
![]()
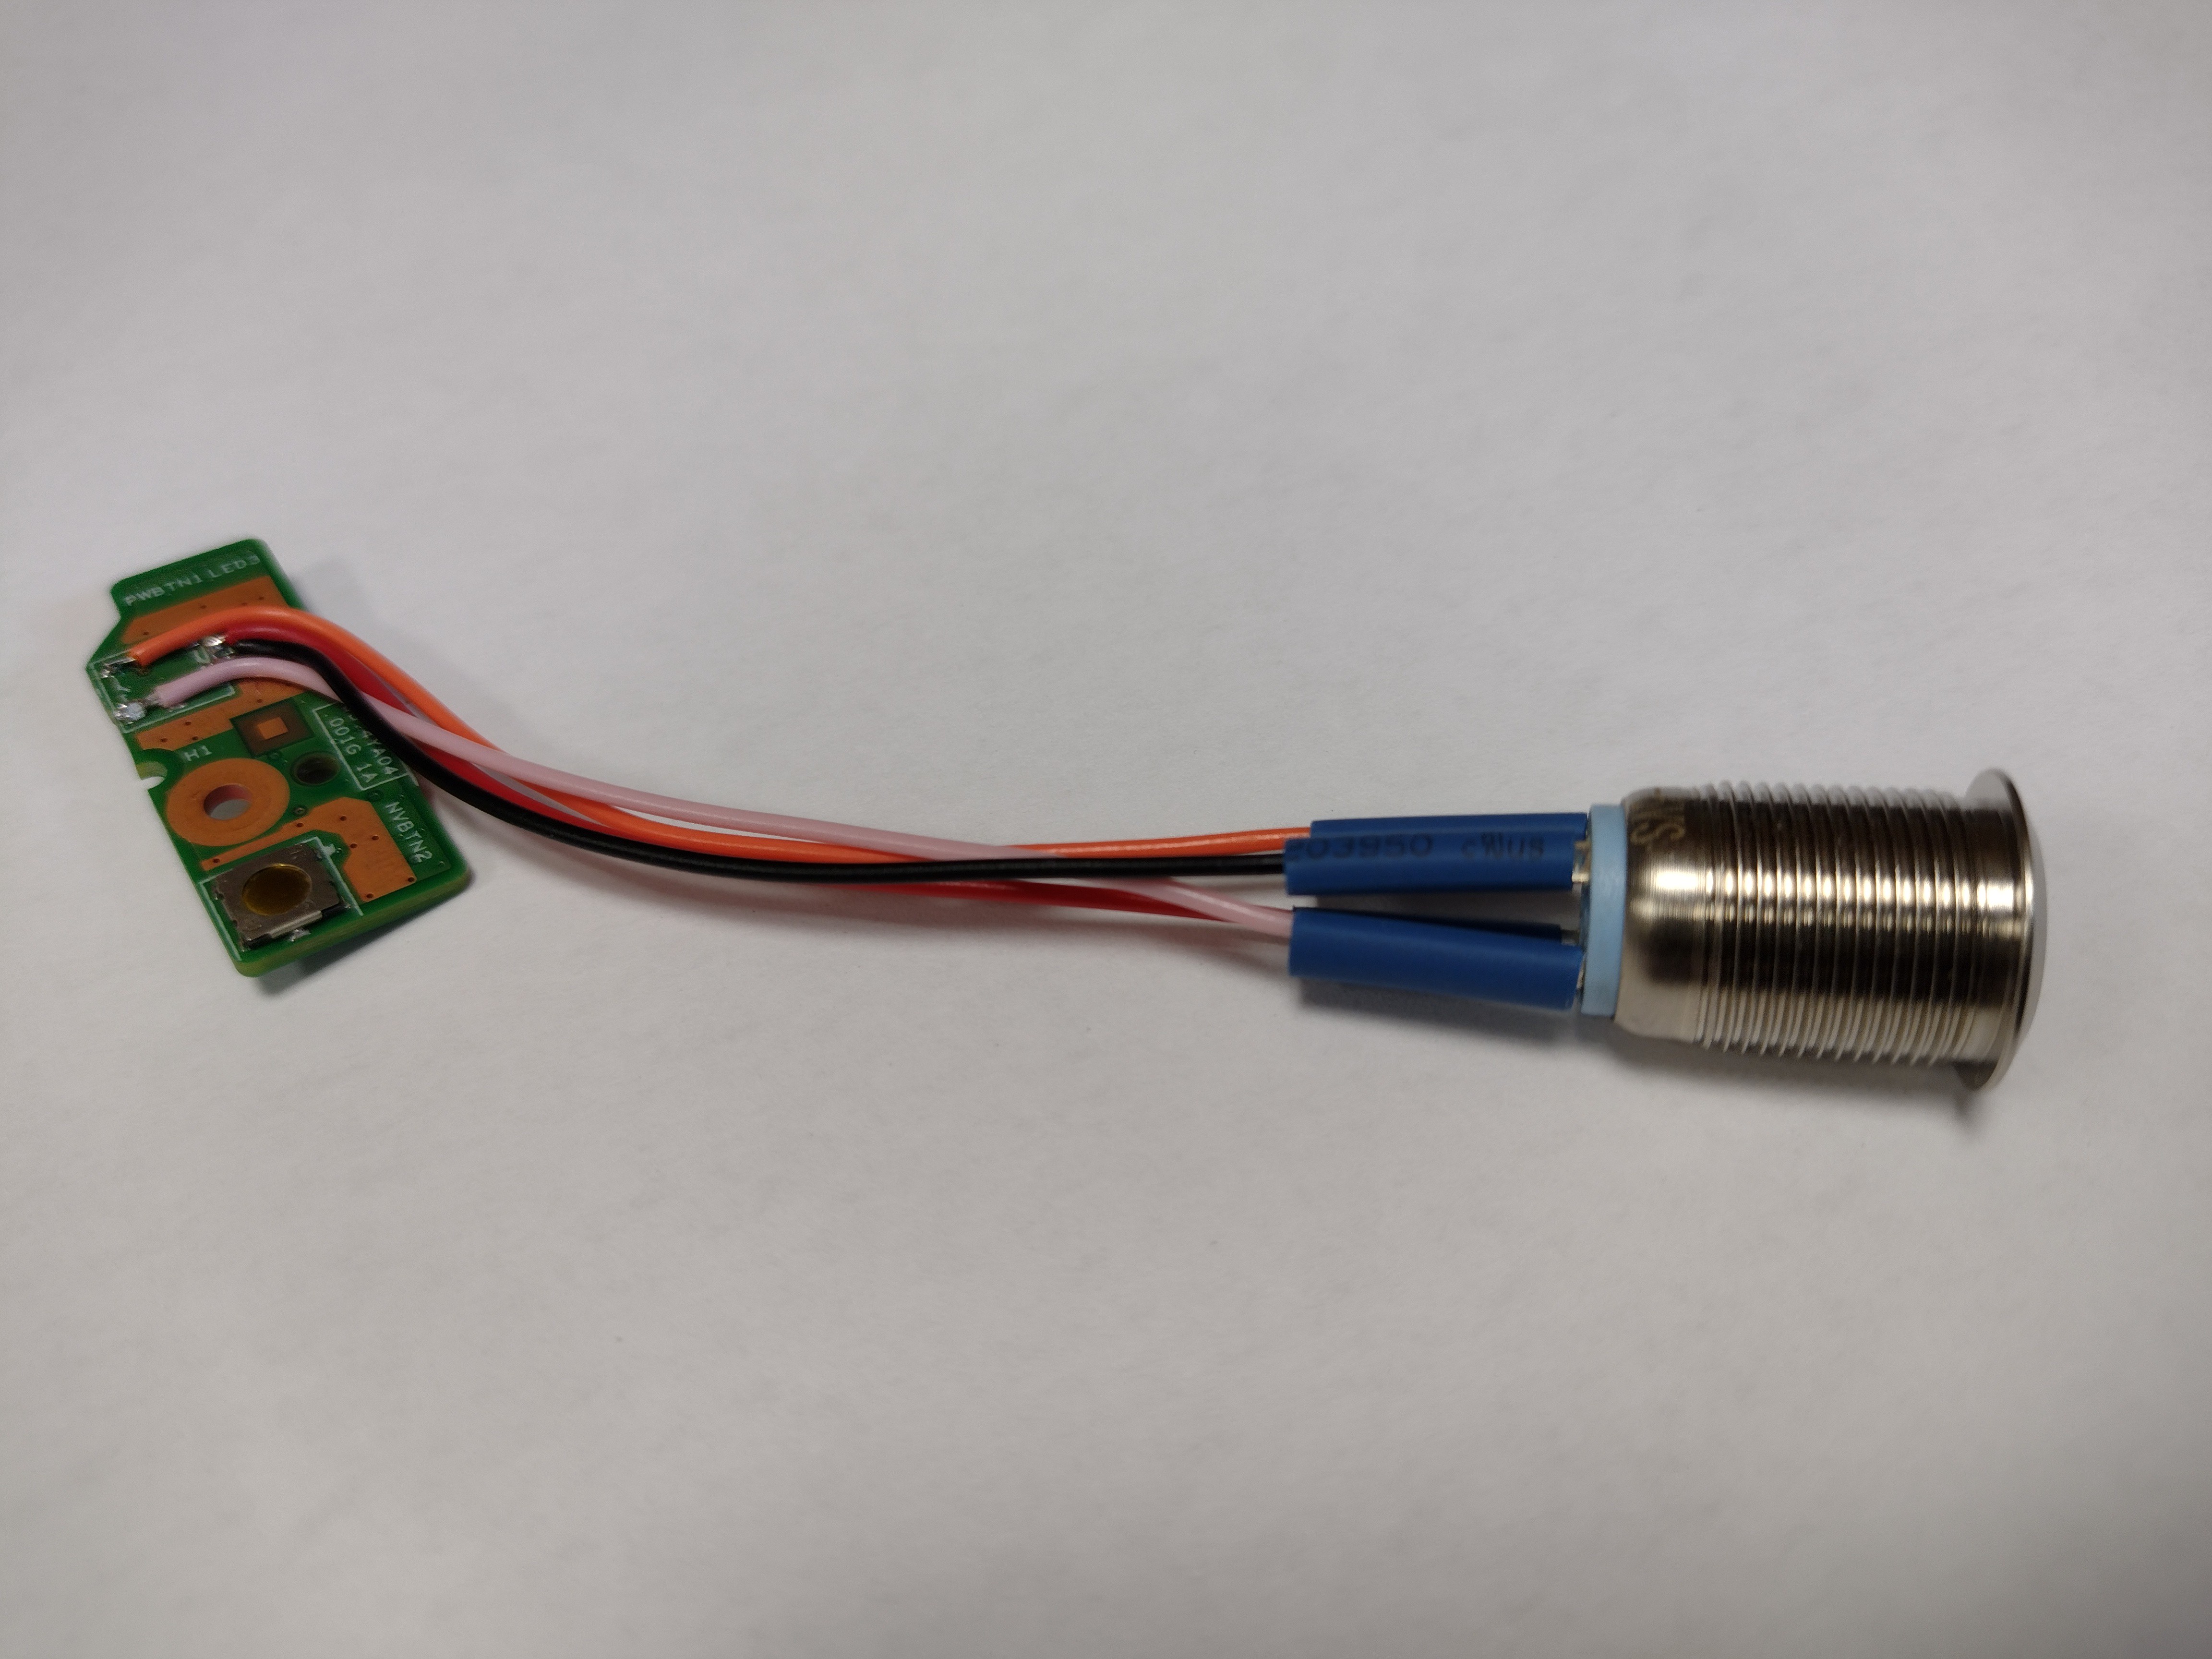
Next, I soldered the wires to the switch terminals (push on connectors would probably be better here, but this is just to see if it works!).
![]()
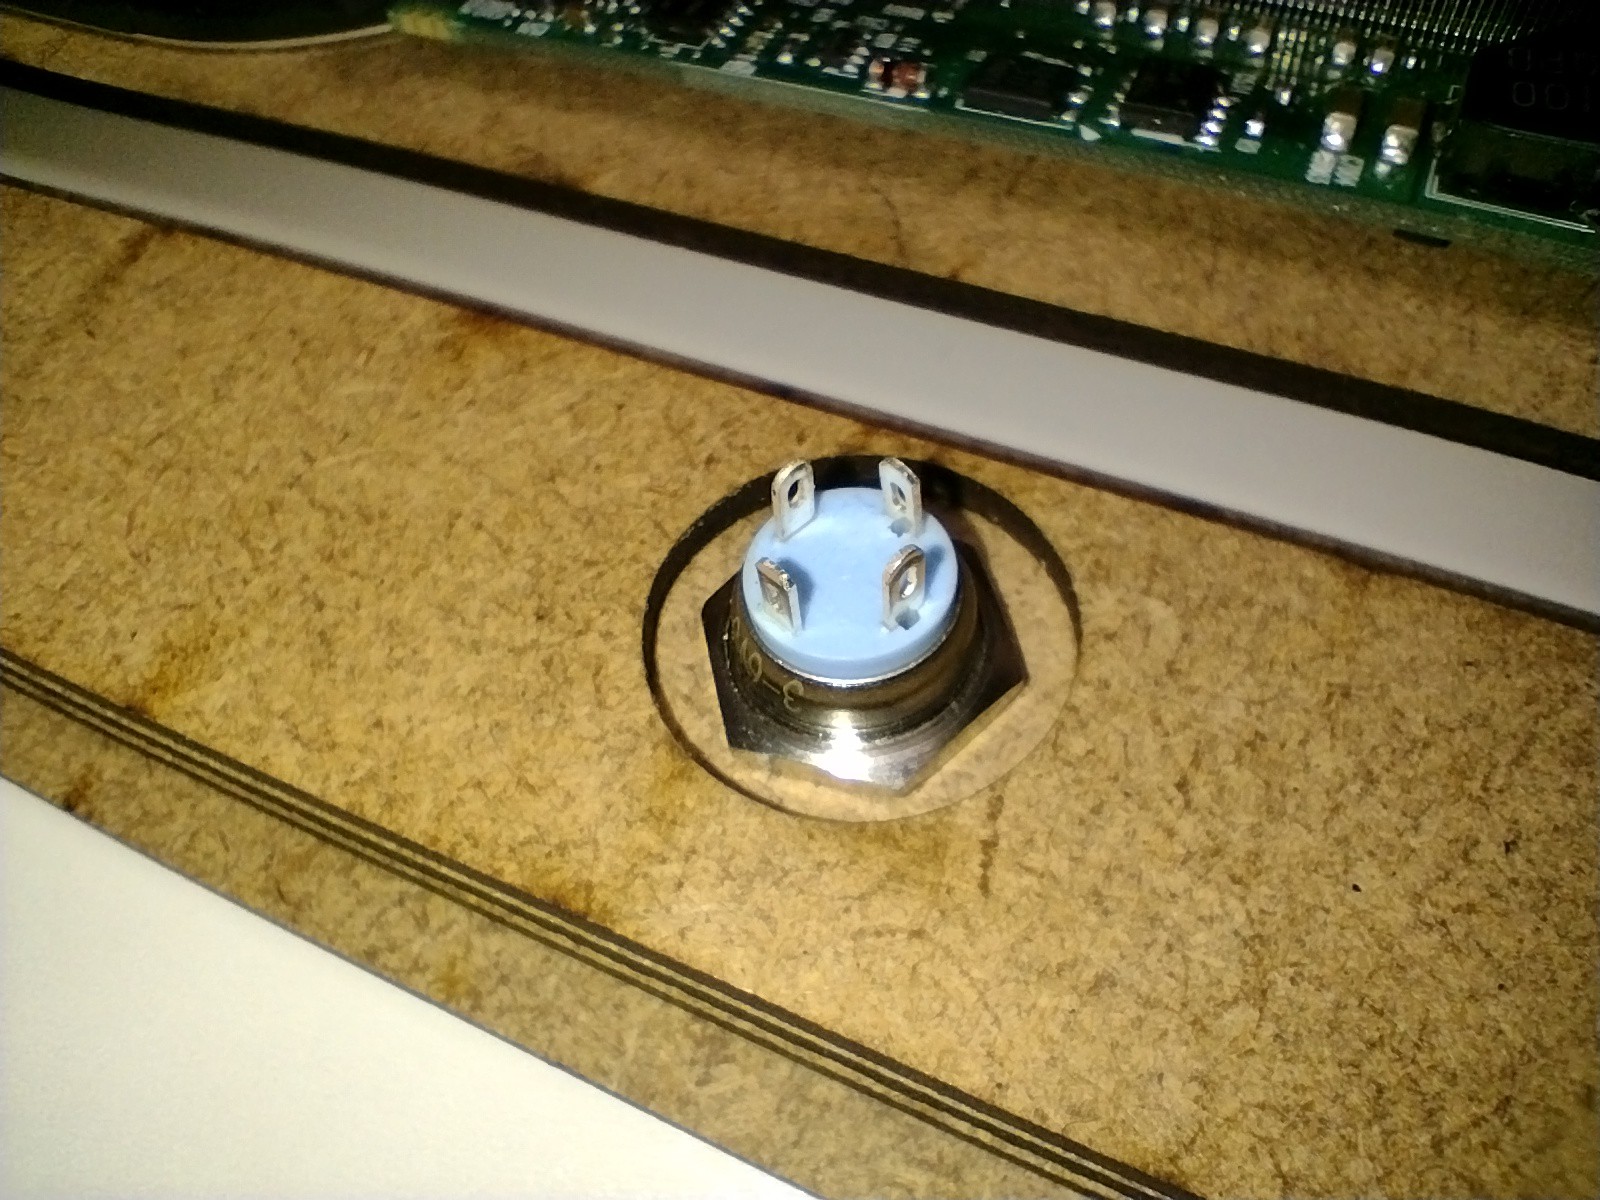
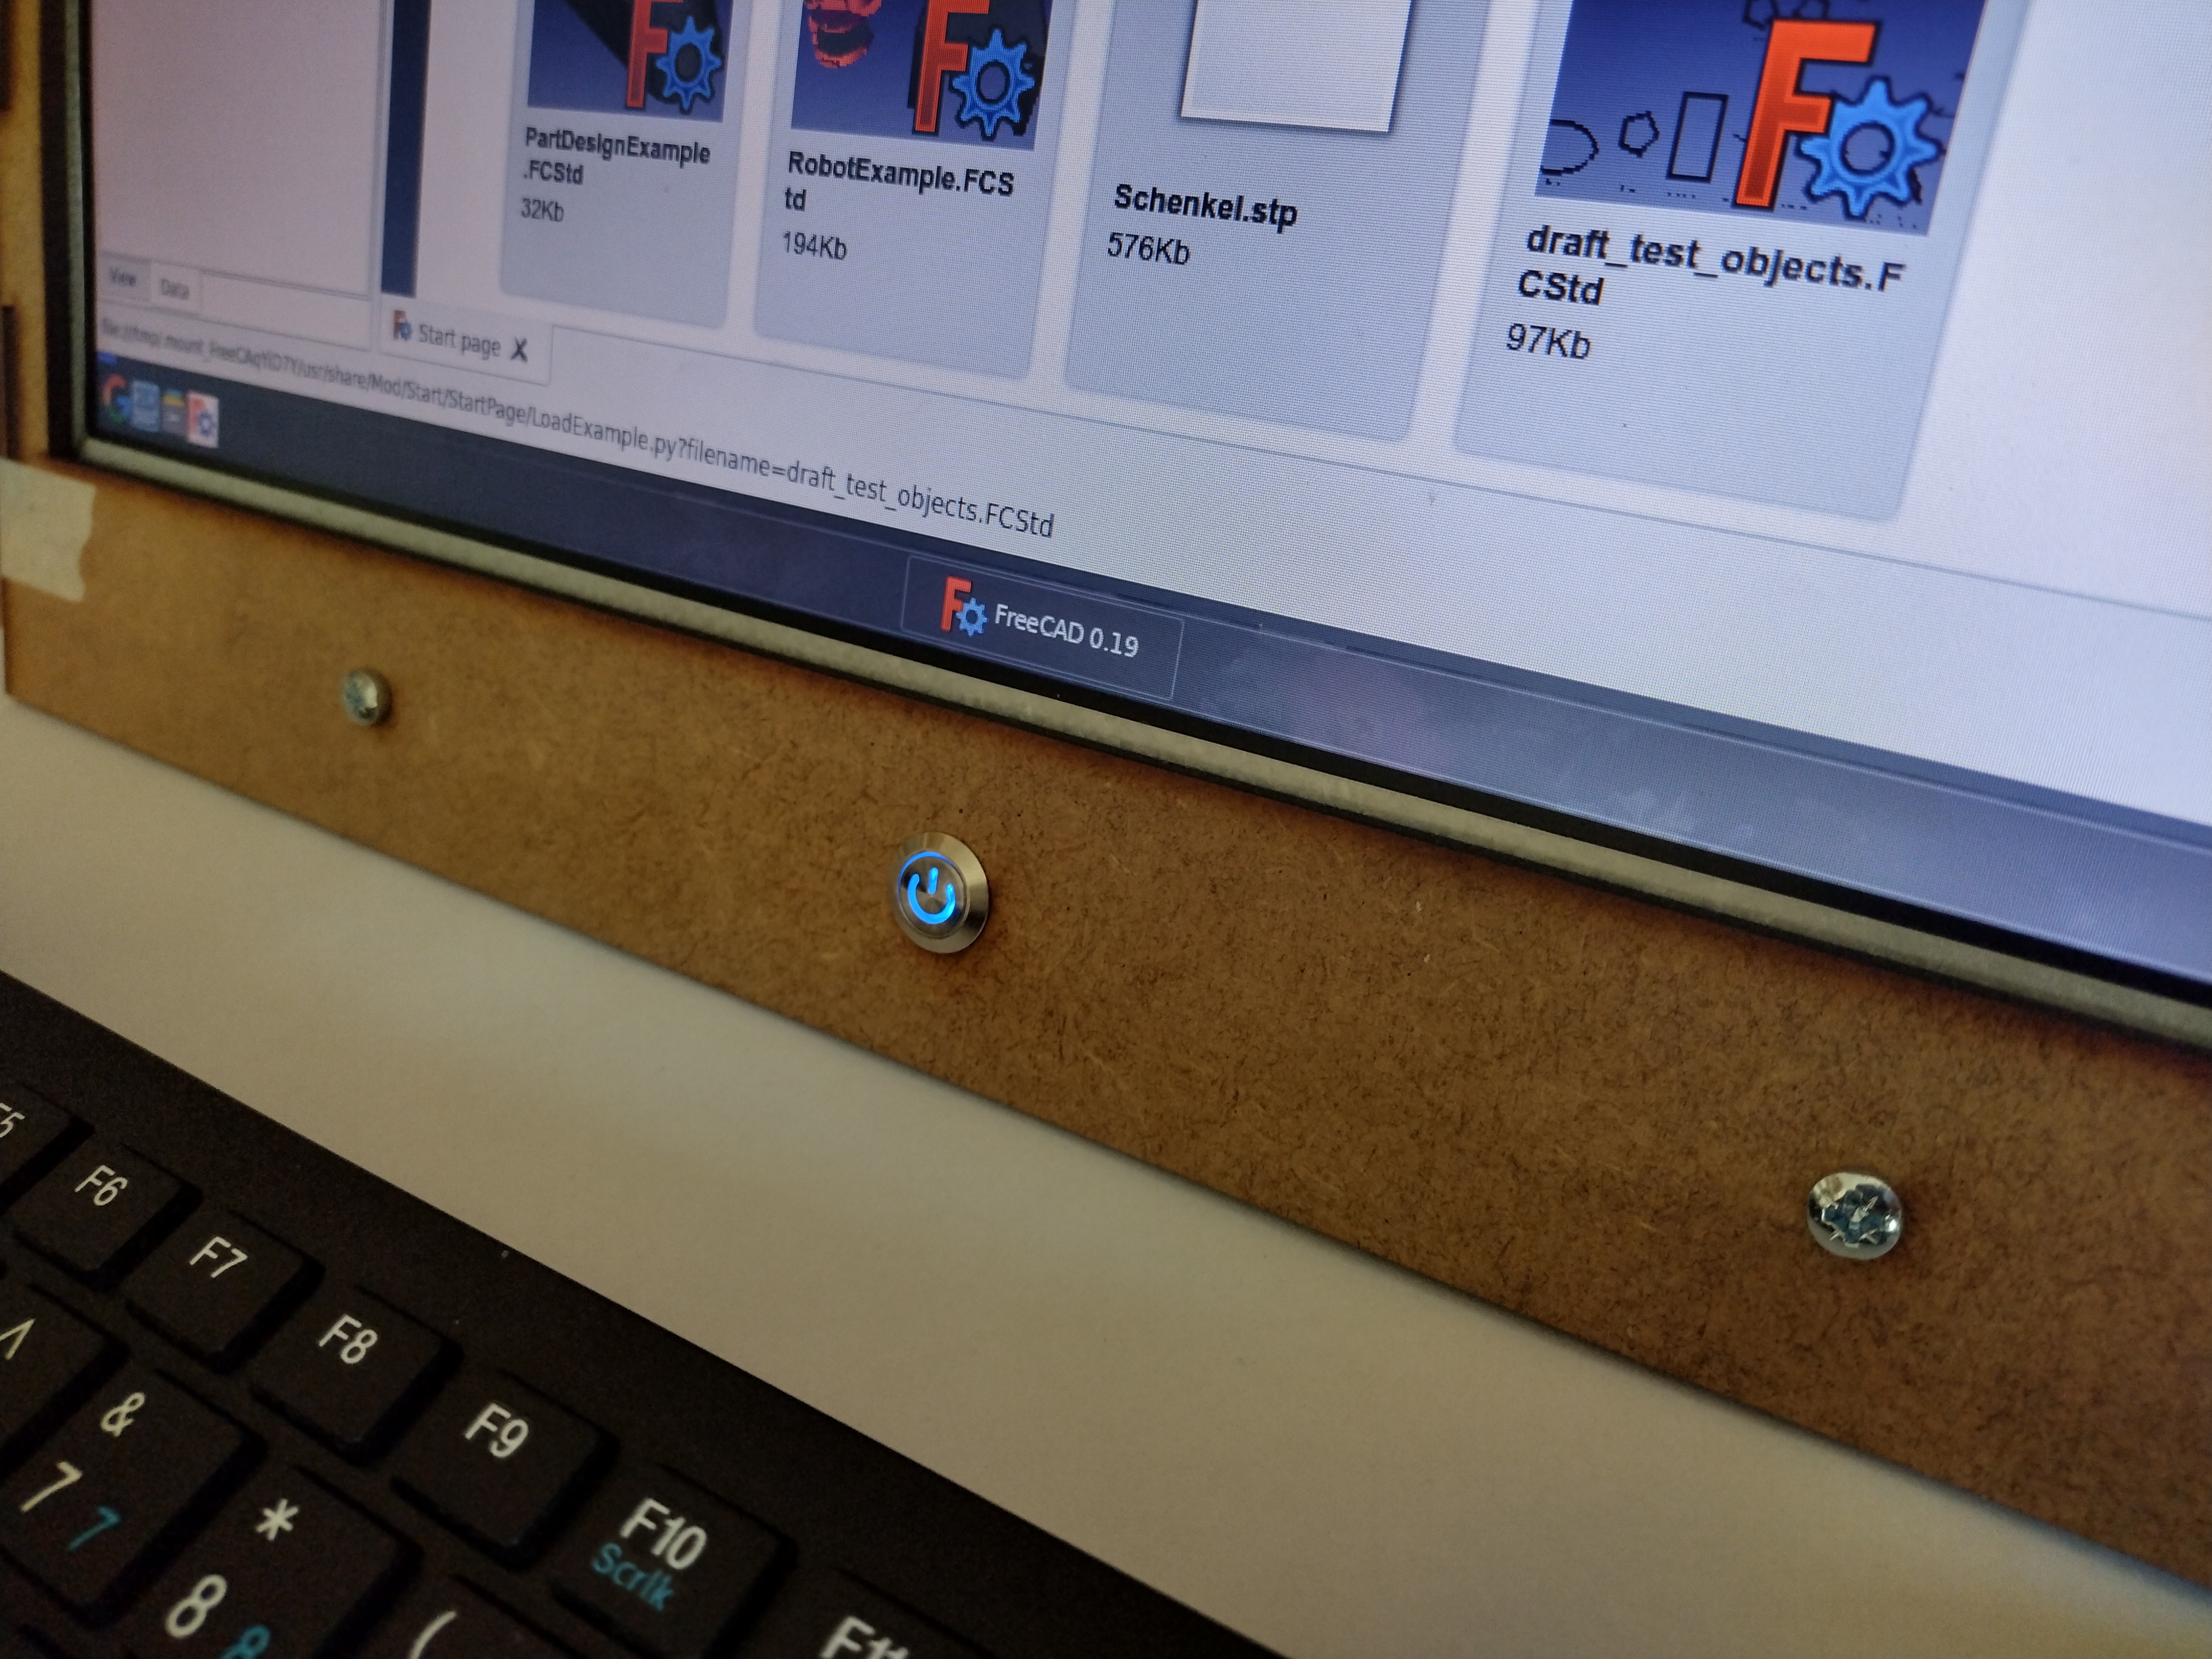
Here's the switch mounted through the case. I just need to make a bigger hole in the back panel to get the nut on. I also added some heat shrink around the PCB to protect the wires.
![]()
Add here's the finished button working and lit up. Perfect!
![]()
-
X-PC 2, The first prototype.
09/28/2022 at 21:02 • 0 commentsAfter producing the first X-PC, I was given a lot of old laptops. These come from different departments around the school, but all have the same problem of the keys going missing.
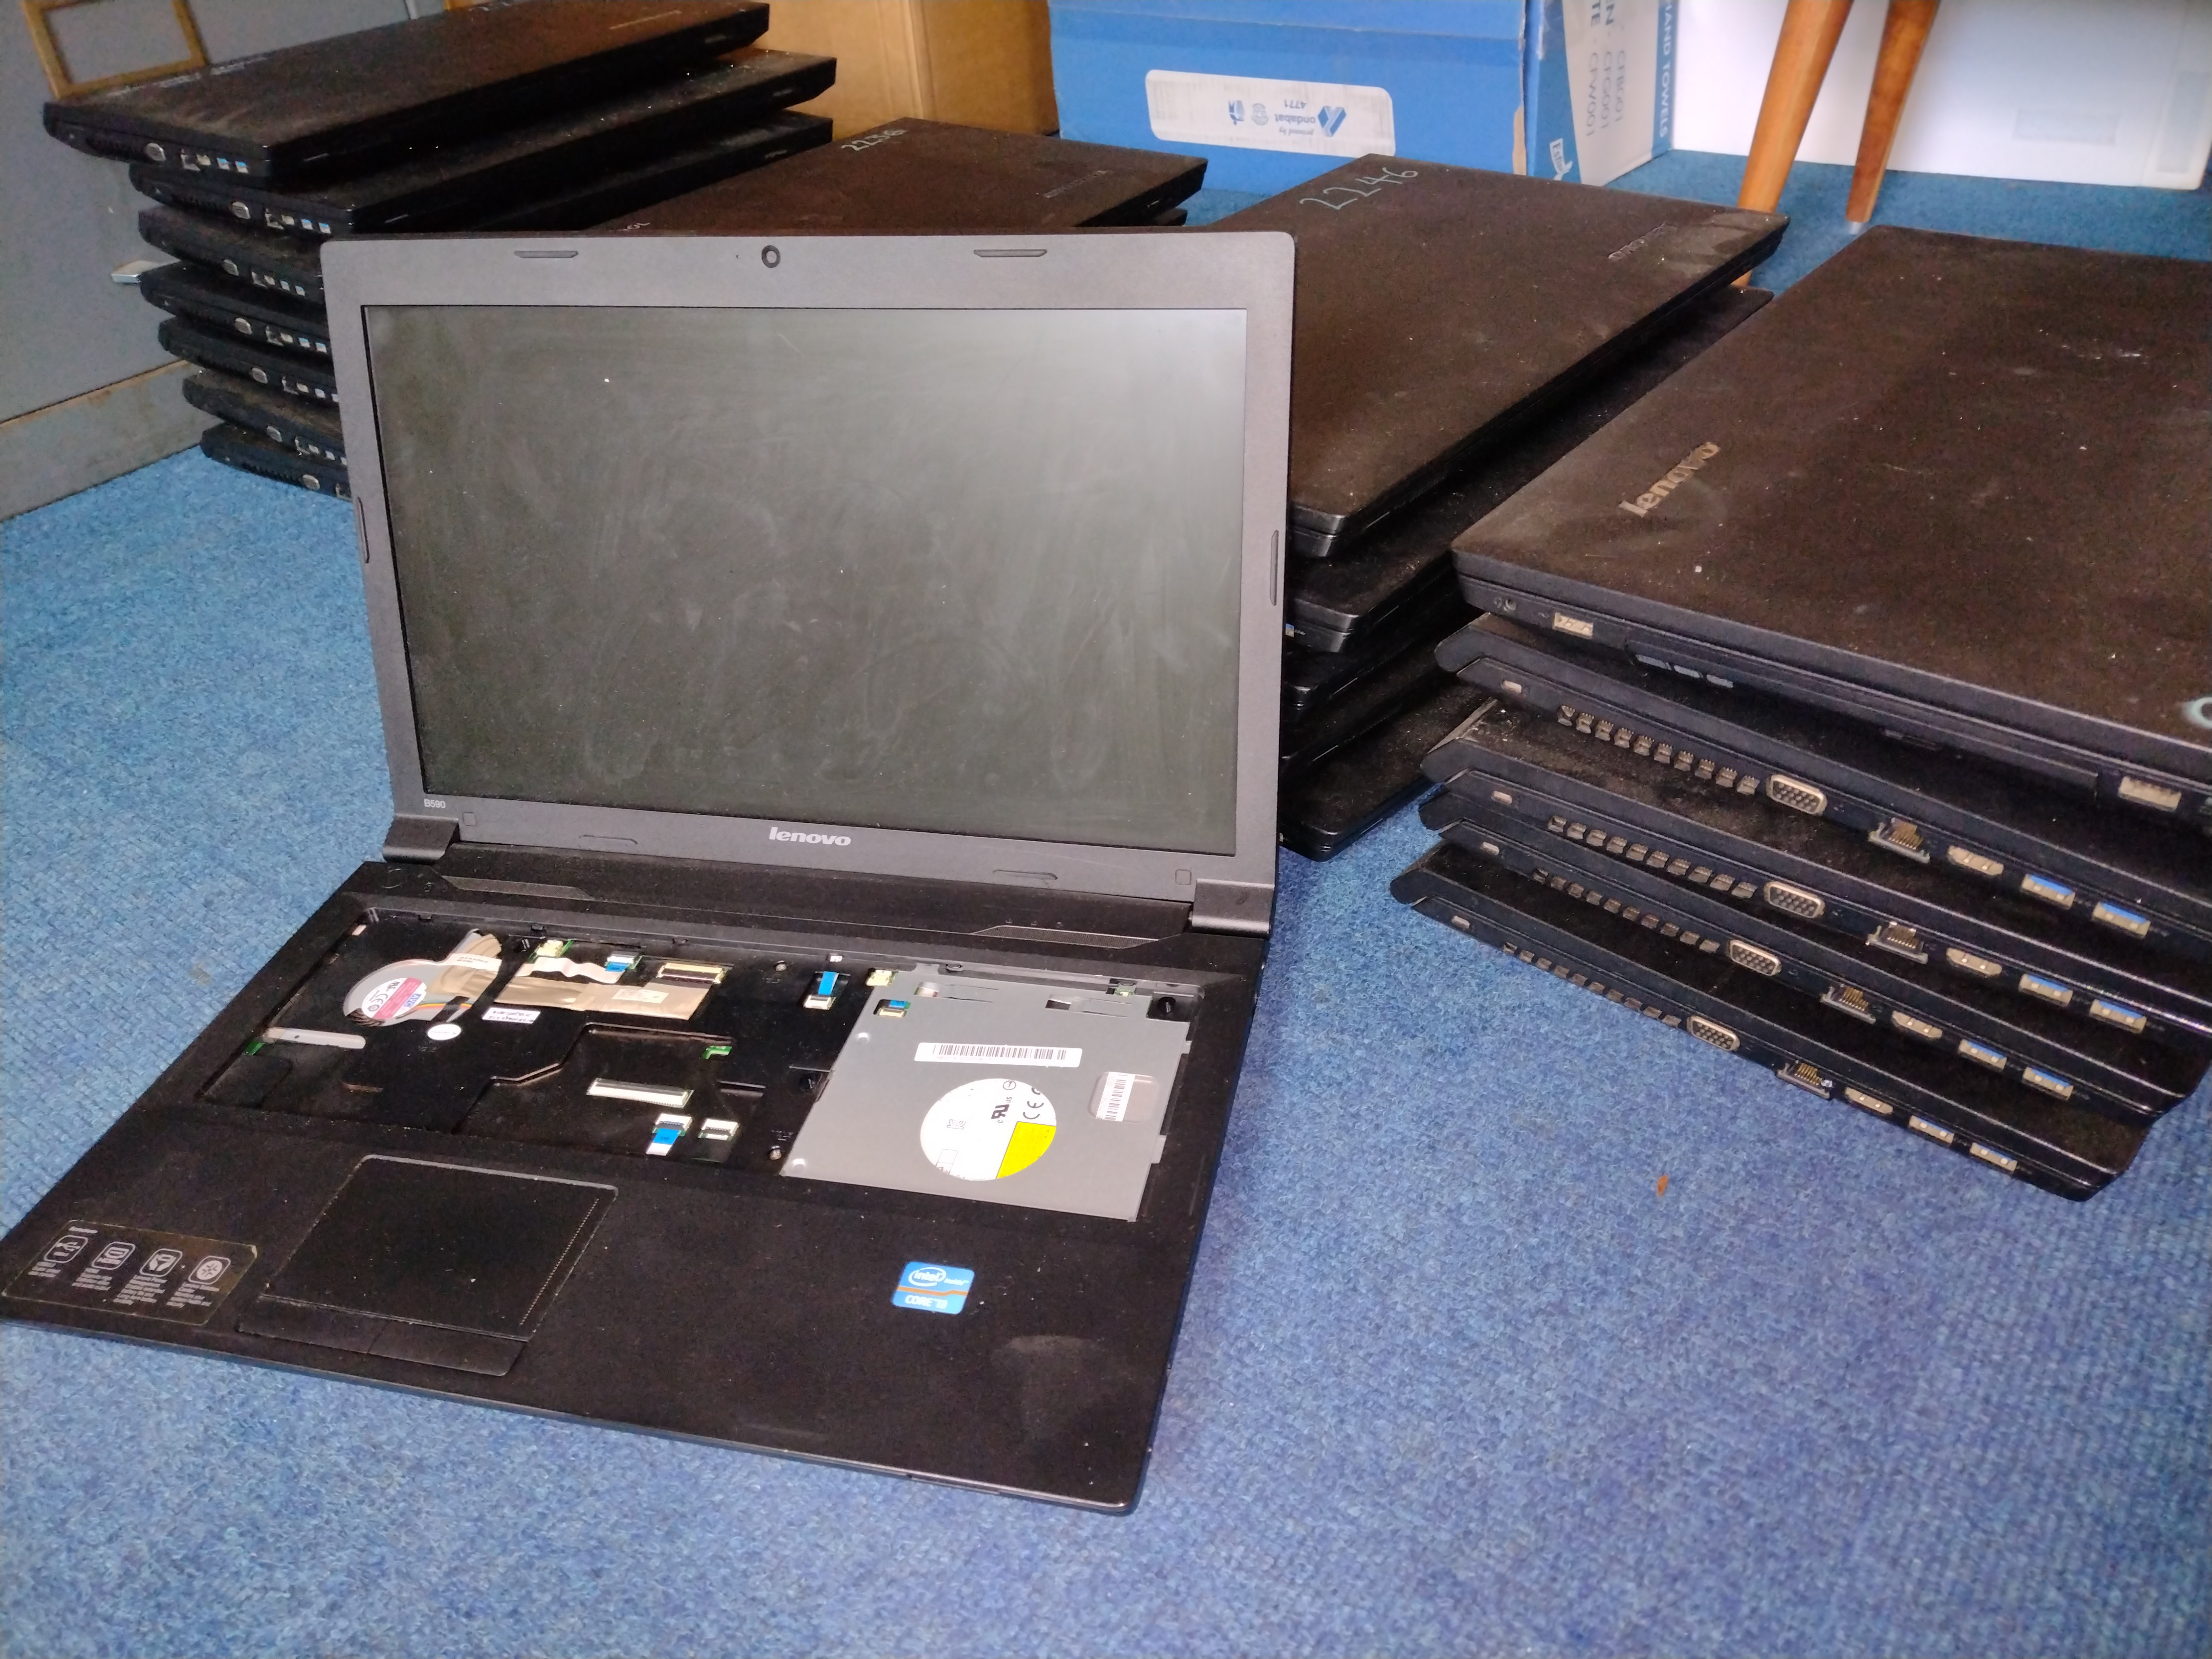
Here's a stack of Lenovo B590 Laptops, all with missing keys or even no keyboards at all. All ready for the bin!
![]()
These are still quite capable computers and too good to be thrown away, so they became the first candidate for the new X-PC 2.
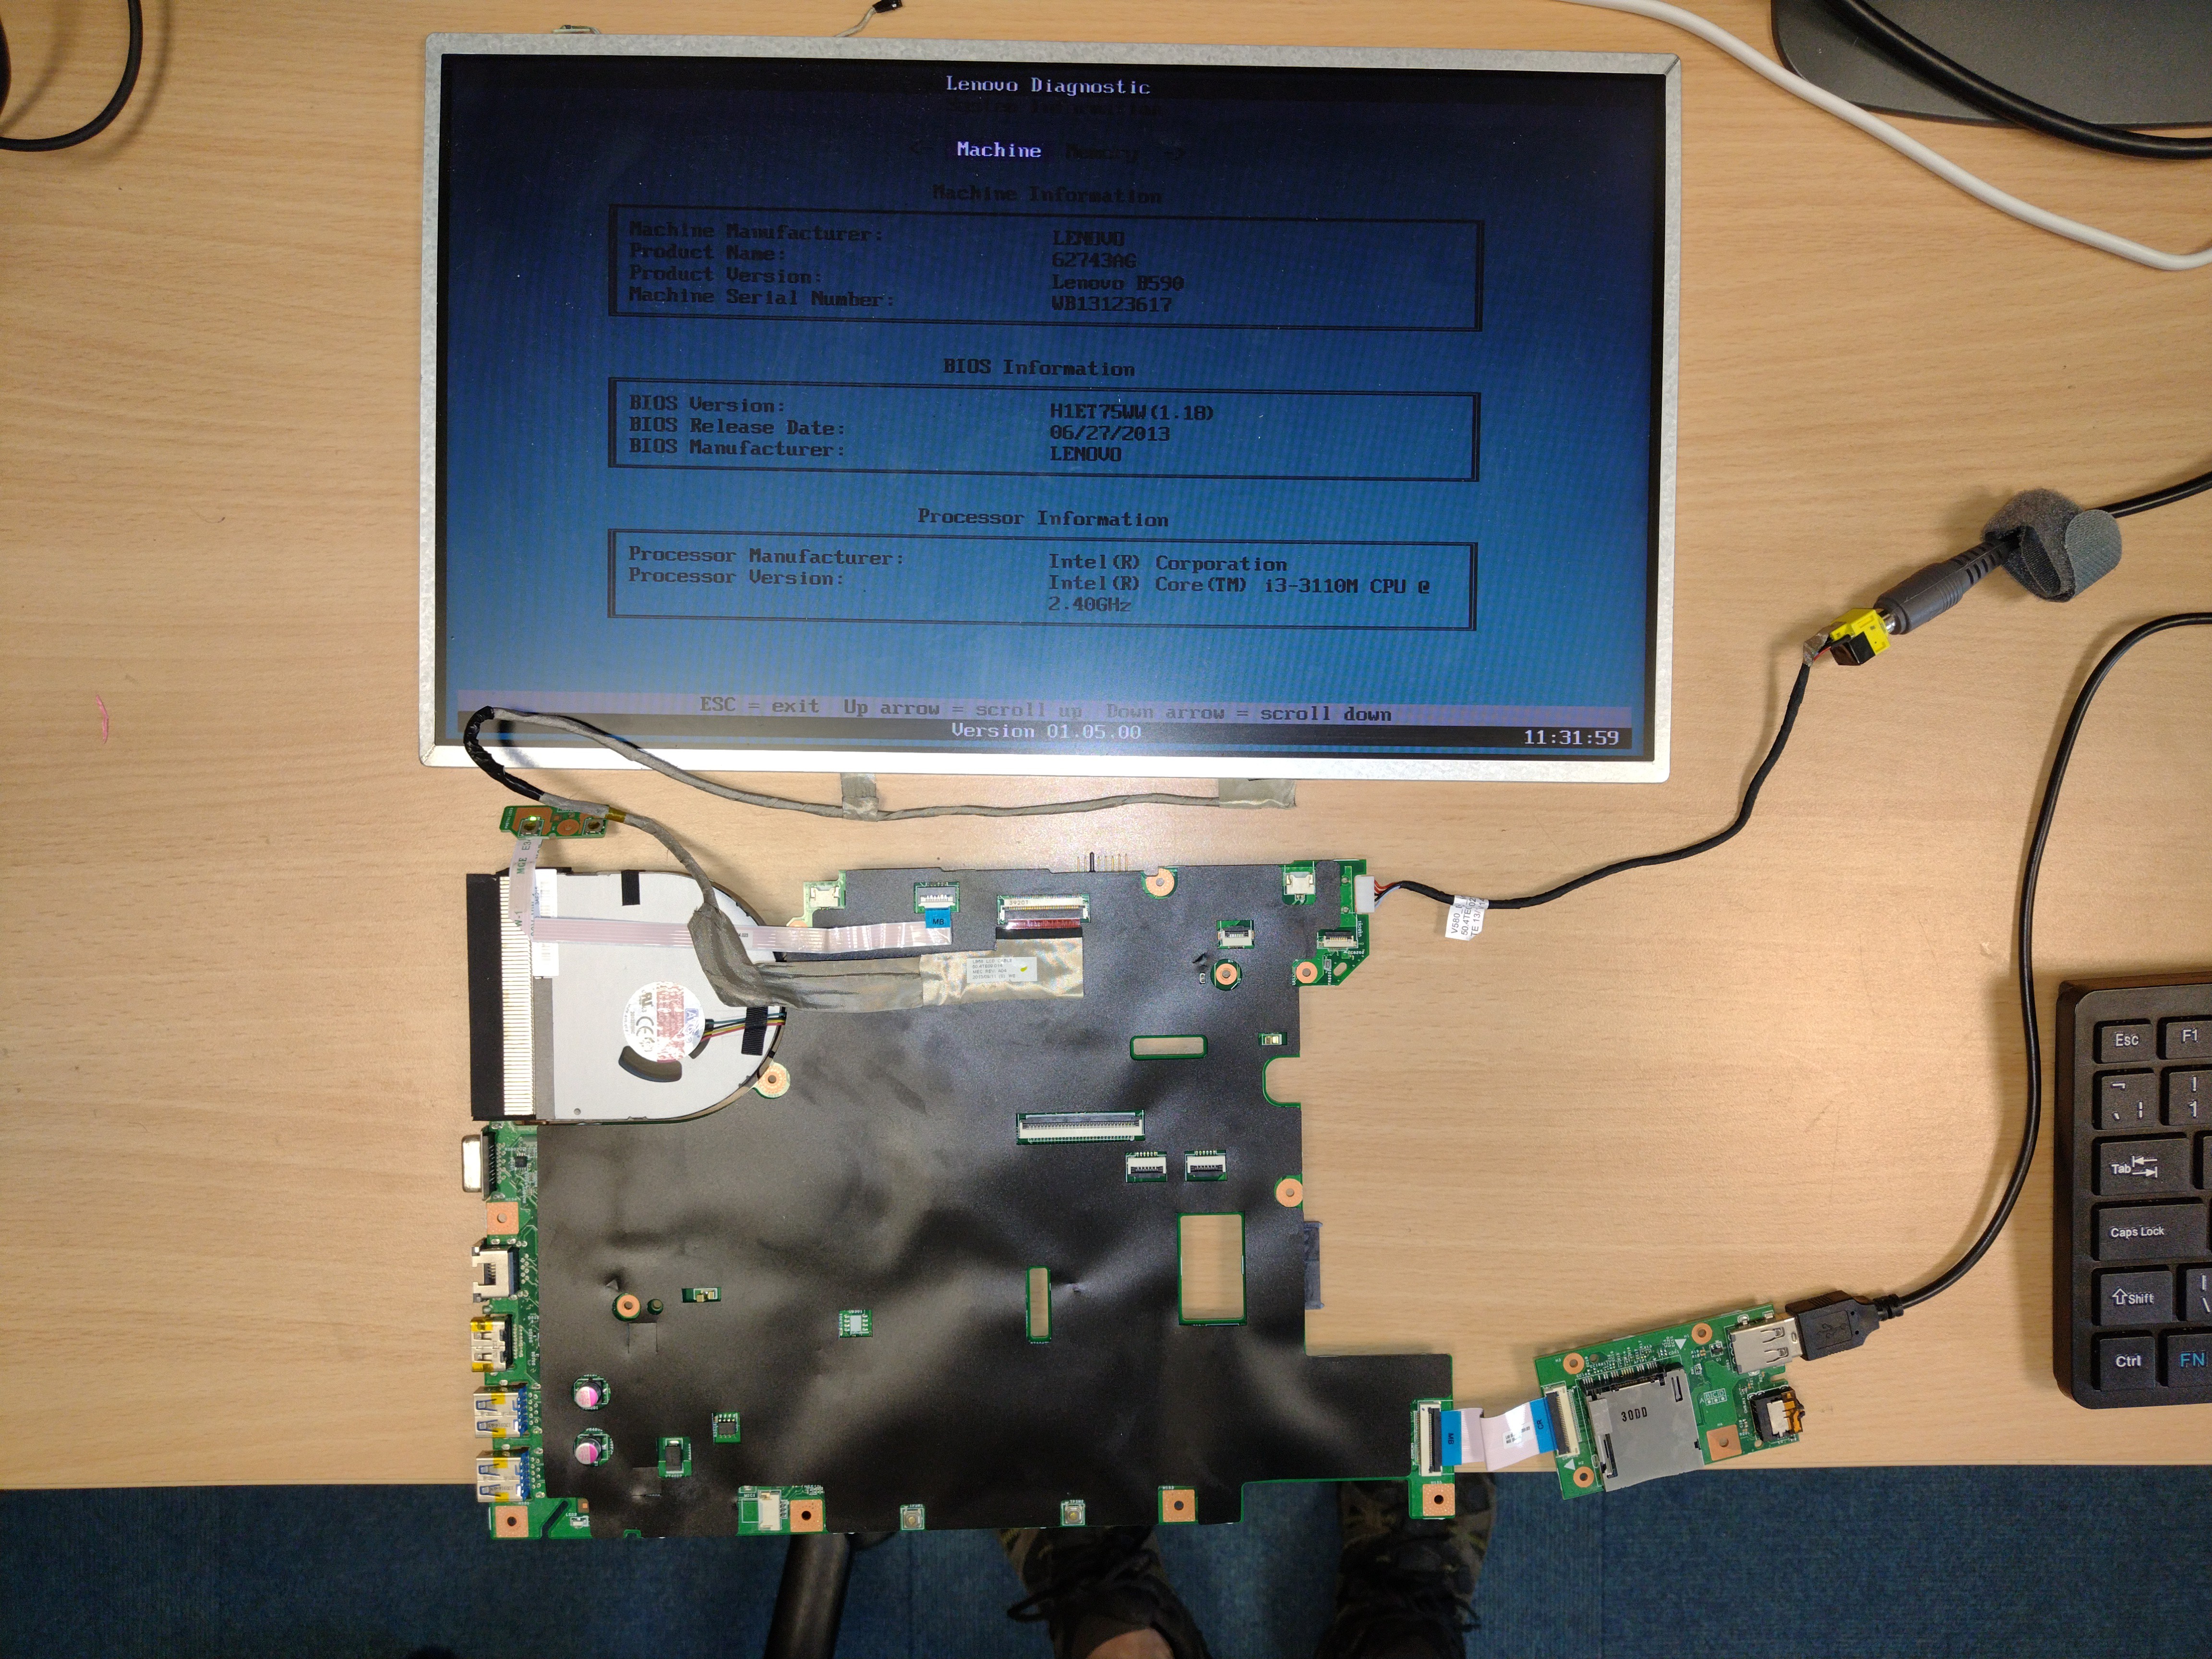
The first job was to strip one down and make sure that everything still worked.
![]()
Everything is working fine, so now to measure the screen and enter the dimensions into the FreeCAD parametric model.
You don't ned any experience with FreeCAD to make changes to the model, it's just changing a couple of numbers.
I'll go into more detail in the build instructions, but for now you can see the list of parameters in the box on the right hand side. At the bottom of the list are the parameters for the height and width of the screen. Here's a few screen shots of some different sizes.
Extra Tall.
![]()
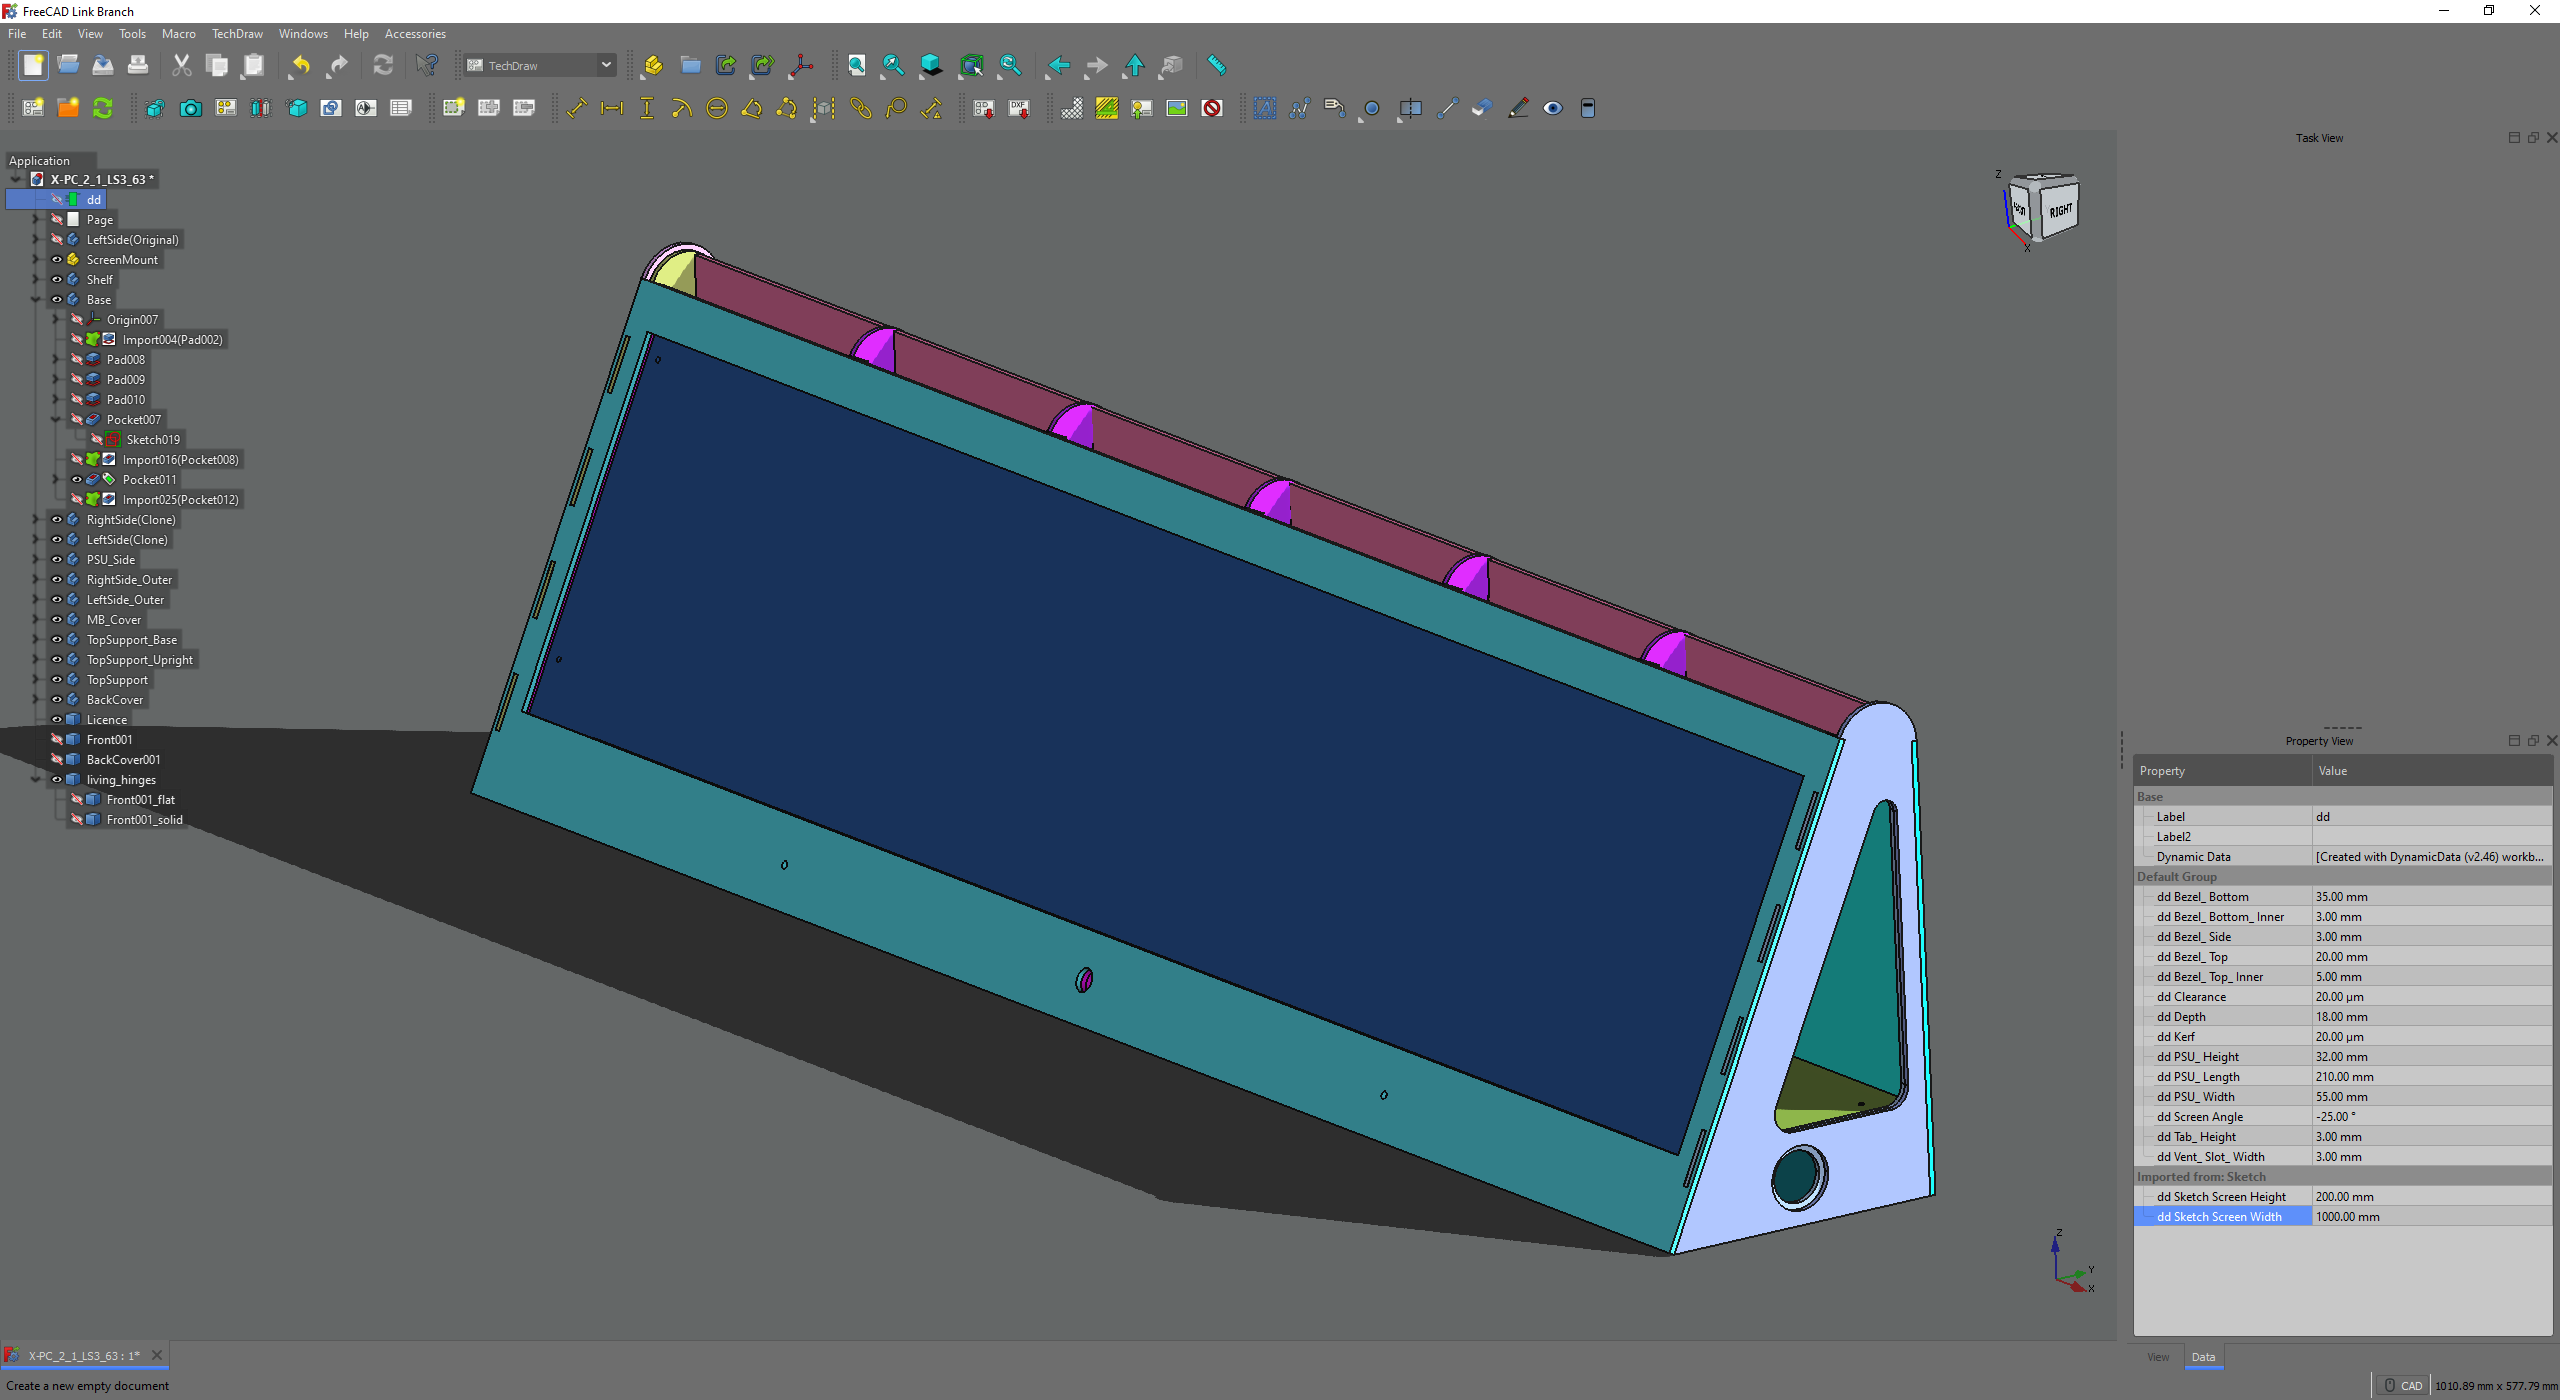
Extra Wide.
![]()
And just playing with the screen angle.
Here's the correct size for our laptop screen.
![]()
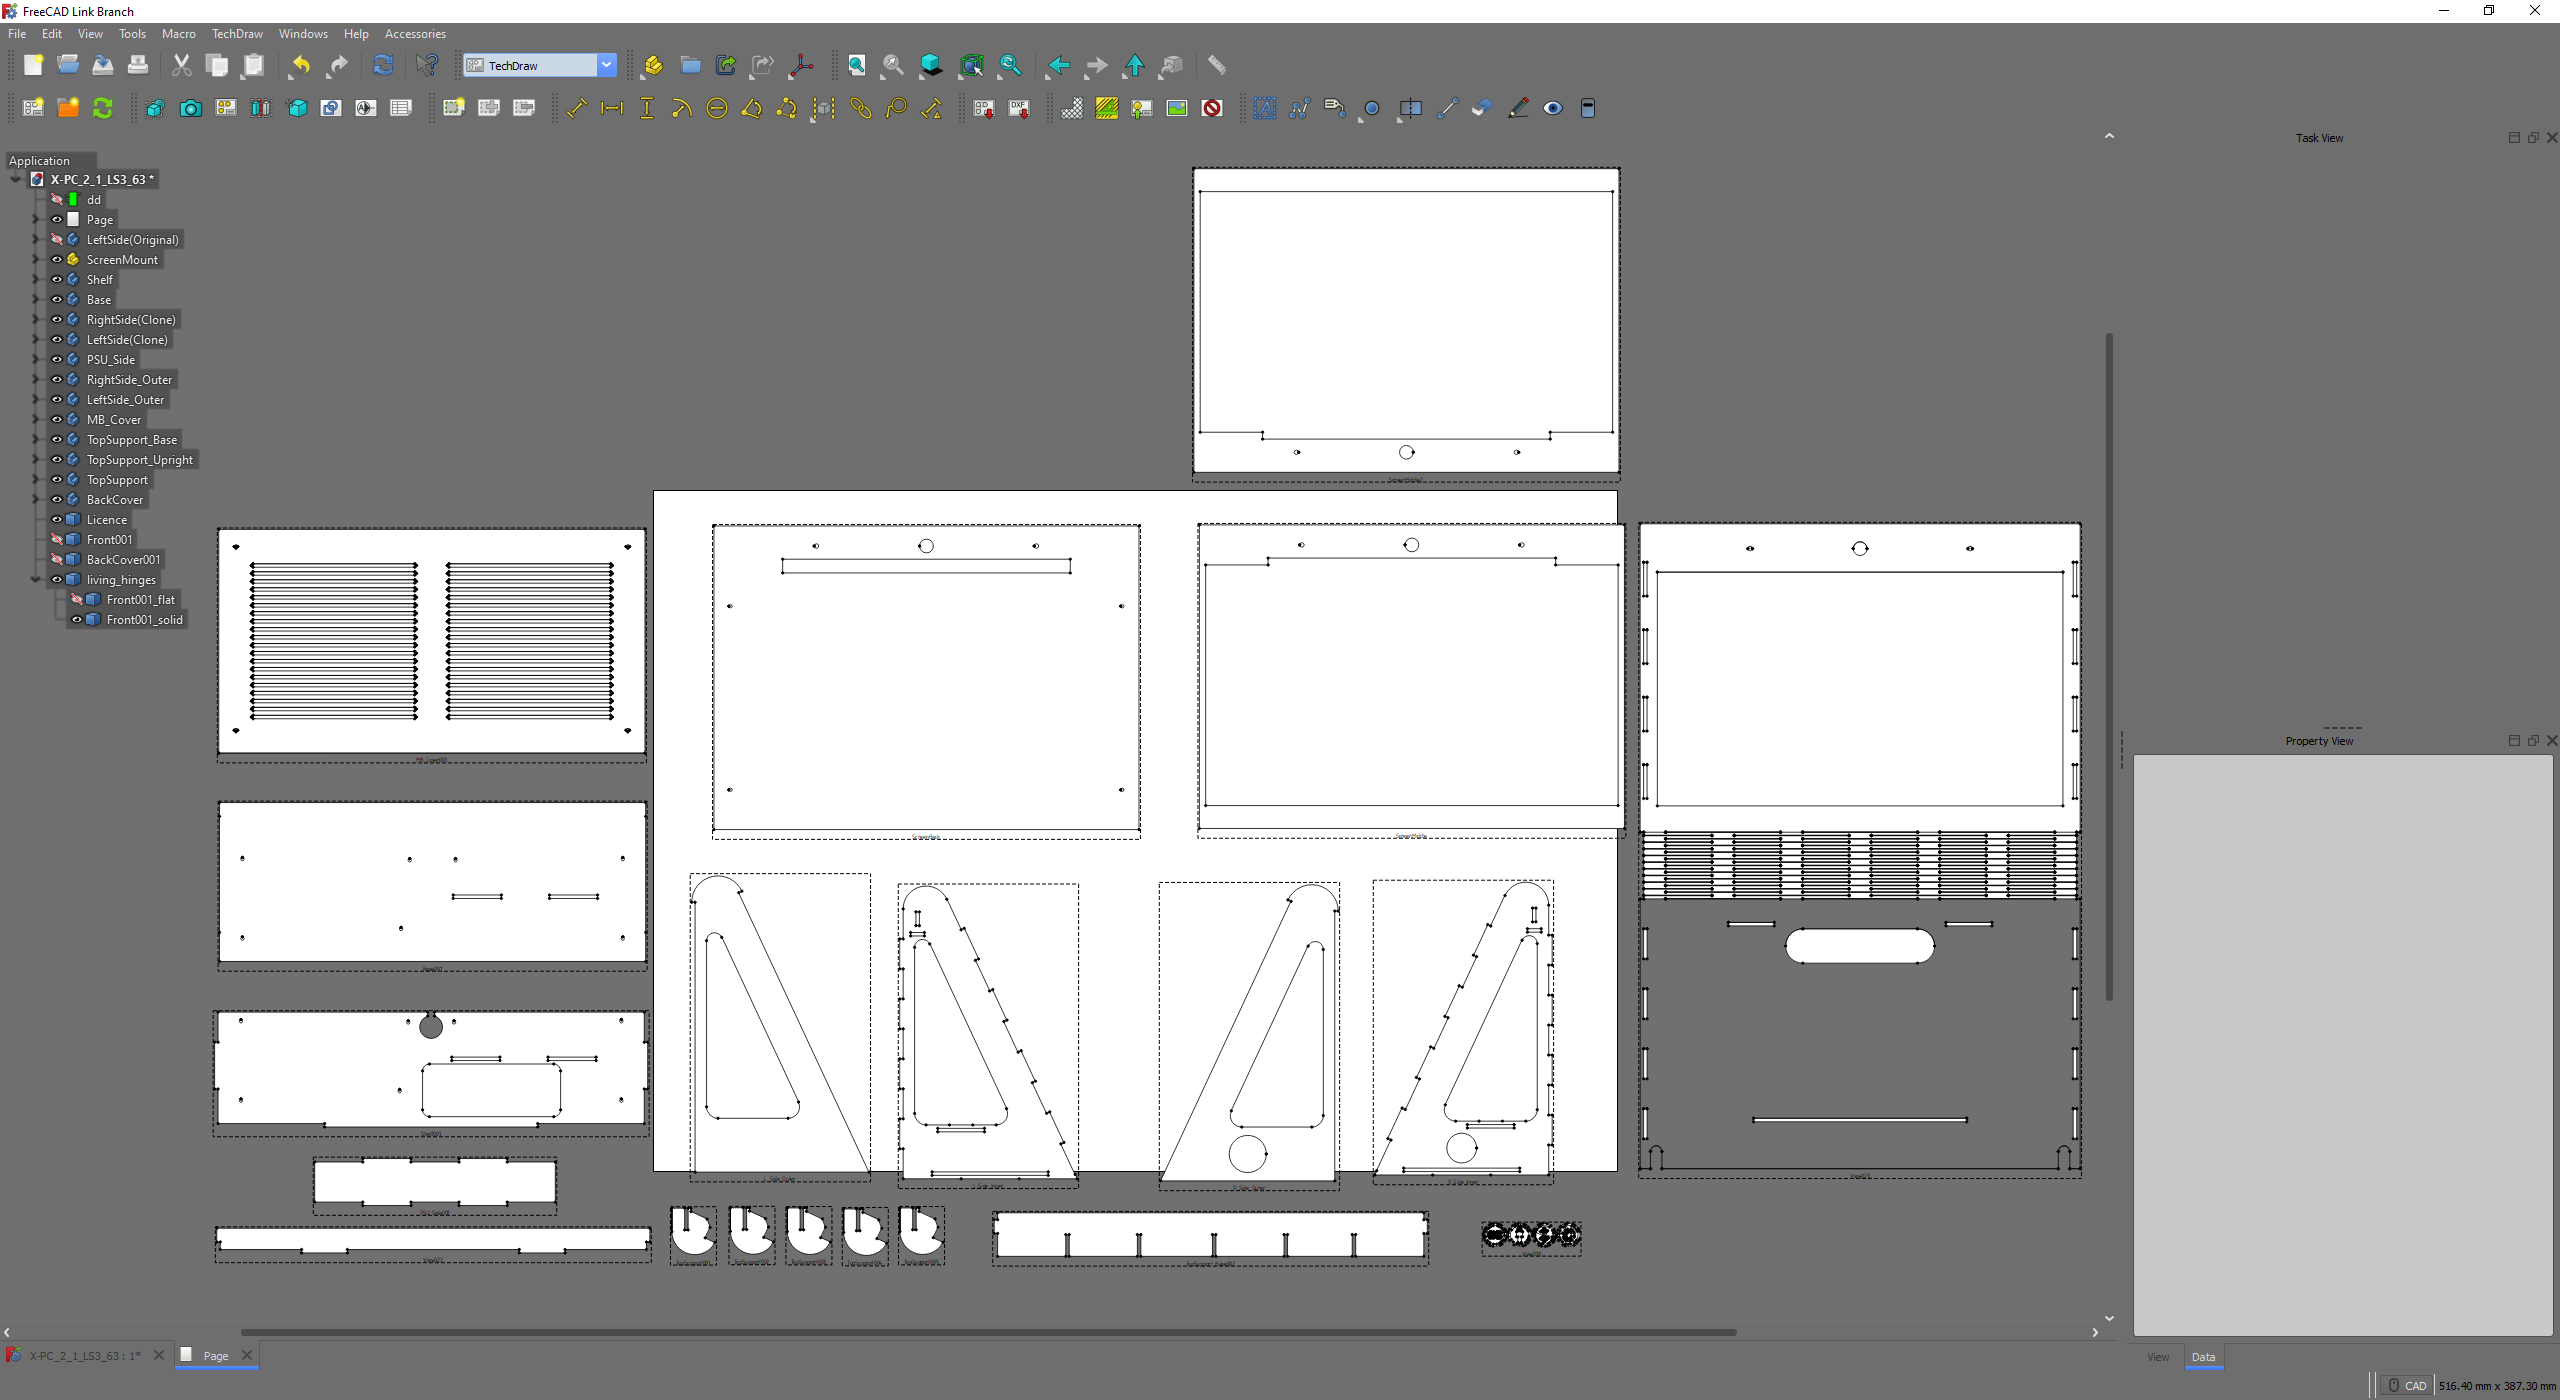
Now we have resized the case of the X-PC, we need to export all of the parts as a 2D CAD file for laser cutting. FreeCAD can do this easily using the Techdraw Workbench.
![]()
What's great here, is that any changes made to the 3D model automatically change the 2D parts. This file is now exported and then imported into your laser cutting software. There's a bit of tidying up to do so that all the parts fit nicely for the material you're using / bed size of your laser cutter. Once you have done that, you are ready to cut!
Here's the first prototype, cut out of 3mm MDF. Everything went together first time!
FreeCAD can also generate the Living Hinge, but more on that in another post.
![]()
![]()
![]()
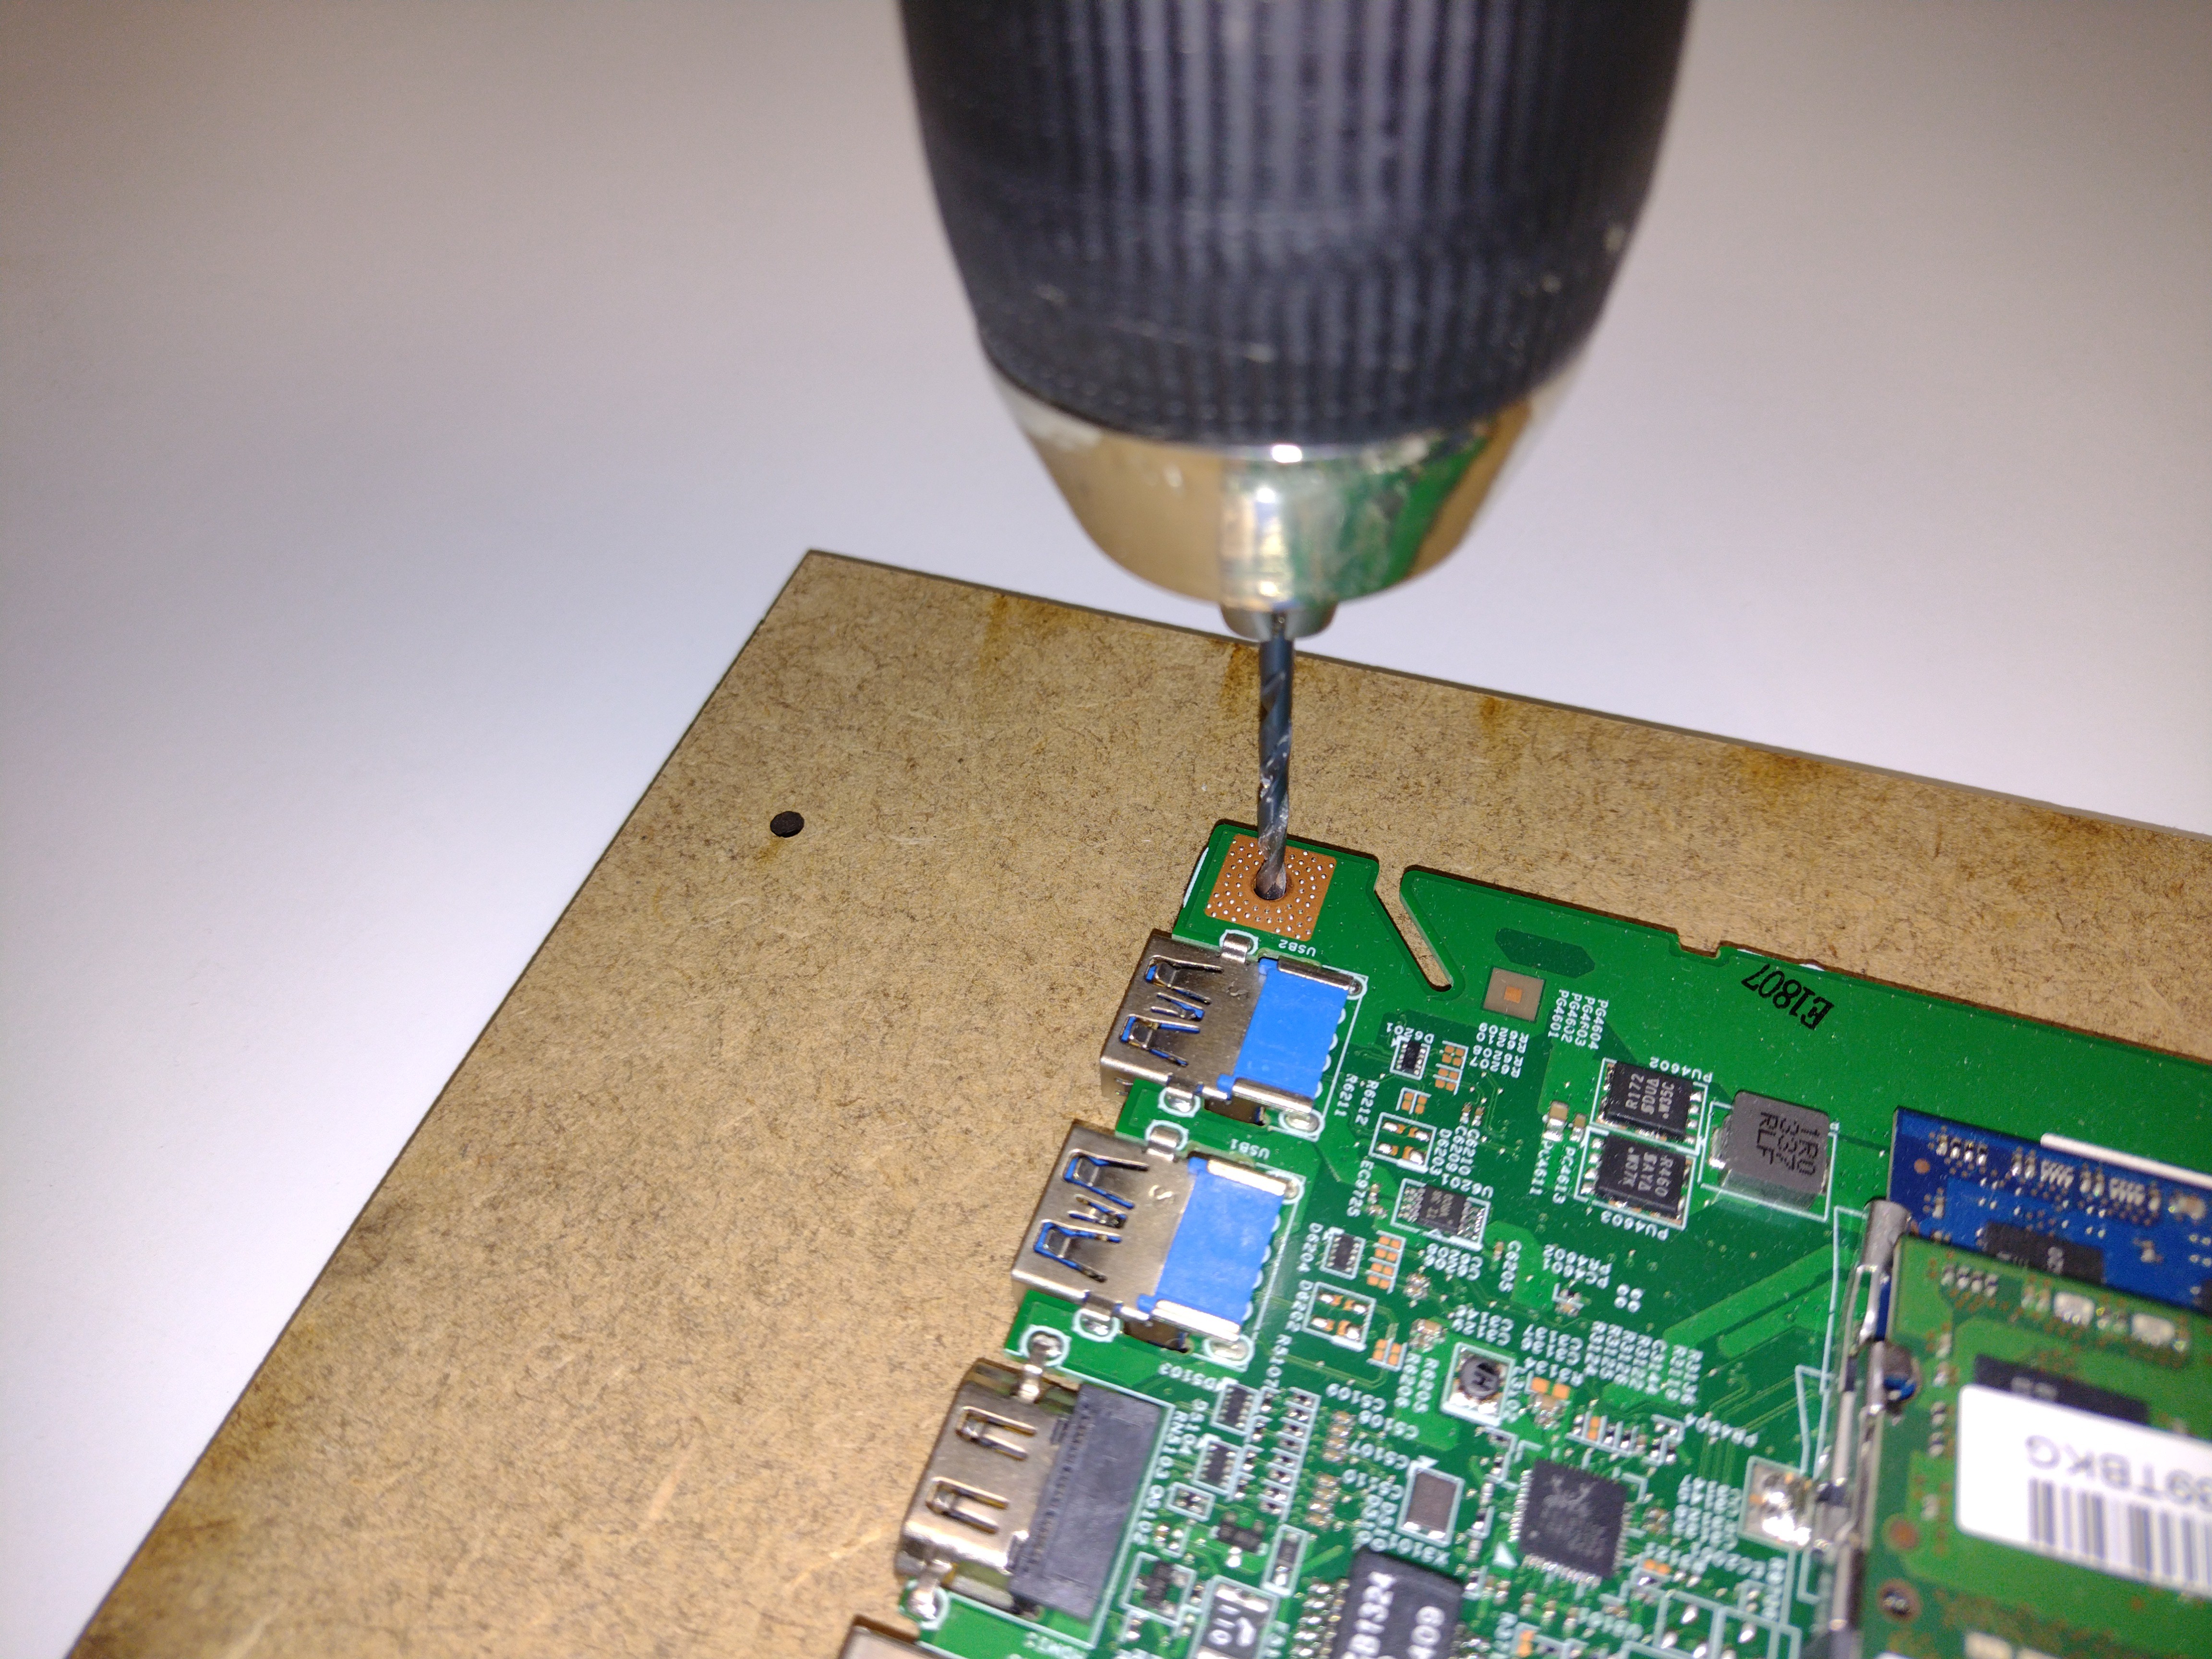
One significant change from the first X-PC is the mounting of the laptop motherboard. Originally all of the mounting holes were lasercut, but because this version is supposed to work with any laptop, I've left the mounting plate blank. I positioned the motherboard in a suitable place, then just drilled through the four holes nearest the corners.
![]()
Here's the motherboard mounted to the plate.
![]()
Next on the To-do list is to make a universal power switch. You can see the original laptop switch PCB hanging out of the hole in the bottom of the front panel. It was quite tricky getting the power switch working in the original X-PC, so I need an easier solution...
-
FreeCAD
09/26/2022 at 21:56 • 0 commentsAs mentioned in my previous log post I’ll be doing a big update soon (hopefully in the next week). I originally made 8 X-PCs, these have all been in use in the classroom for over a year and a half now. They have been used every school day and have had a lot of (ab)use from the students! I’m extremely pleased with how they have performed; they all still work and are all still in use.
There are a few things though that I wanted to change.
Firstly, the screen angle is a bit steep which can make it hard to see. I’ve seen some of the students prop up the front of the screen to angle it back a bit, which does work but I wanted a better solution.
Secondly, the living hinge is a bit prone to damage on the sides. The students tend to clip them with their bags as the walk past so some of them have taken a bit of damage.
Thirdly, some of the students like to yank the power cables out of the side, then leave them not quite plugged so the next user doesn’t quite know why they are not turning on.
Lastly and possibly most importantly, this design only works for one type of laptop. I have since been given loads more, so I wanted a way of making the design fit any type of laptop, so I can save them from being thrown away.
All of these issues meant a redesign of the whole project. I wasn’t too thrilled with this idea as it was originally designed in a 2D CAD package. I would’ve had to redesign every single part which is time consuming but also wouldn’t address the issue of making the design work with any type of laptop.
Just after finishing the original eight X-PCs I wanted to start work on a new 3D CAD project. At the time there was a lot of talk about FreeCAD https://www.freecadweb.org/ so I wanted to see what all the fuss was about. Conveniently, at the same time Hackspace Magazine were running a series of excellent tutorials, which I started to follow (These tutorials are now available as a book and free download https://hackspace.raspberrypi.com/books/freecad ). One of the tutorials was on parametric modelling, and this is as it turns out was exactly what I was looking for!
After getting stuck in with FreeCAD for the past year or so, I can now say It’s my favourite 3D CAD package. So I set about redesigning the X-PC as a FreeCAD parametric model. The design is now pretty much finished, with lots of changeable parameters. Most importantly you can change the screen height and width so the X-PC is now a universal design which will hopefully work with all sizes of laptop, which otherwise would’ve been destined for landfill. You can of course change the screen angle and I’ve also addressed the other issues – the PSU plug is now internal so it can’t be removed and the sides of the living hinge have been redesigned to make them more robust.
I have made a prototype of the new X-PC with the 2D file for laser cutting generated from the FreeCAD 3D model. I’m very pleased with how it has turned out and I’ll be posting some pictures over the next few days. I’ll also make a video of the parametric model so you can see the changes in action.
-
Updated X-PC
06/12/2022 at 11:15 • 0 commentsI have been working on a new version of the X-PC, one that can be adapted to work with any size laptop screen - more details coming soon!
-
X-PC Files For Laser Cutting
06/12/2022 at 11:04 • 0 commentsI've added the FreeCAD 3D Parametric model to the Files section.
From this you can generate the 2D files for lasercutting.
If you are using Techsoft 2D Design (as used in UK schools) export the file from FreeCAD as a.dxf. Then in Techsoft 2D Deign select Import from the File menu, then change the units to mm in the DXF Import setup.
Licence: Attribution-NonCommercial-ShareAlike 4.0 International (CC BY-NC-SA 4.0)
The X-PC. Hackaday Prize 2022 Entry
Old laptops reconfigured into new computers for schools.