-
1Remove the speaker covers and remove screws
Remove the speaker covers (they are just glued) and the top rubber caps and then remove the underneath screws.
![]()
-
2Open the round case
Open the round case with a credit card, your nails or just something soft to avoid damaging the case
-
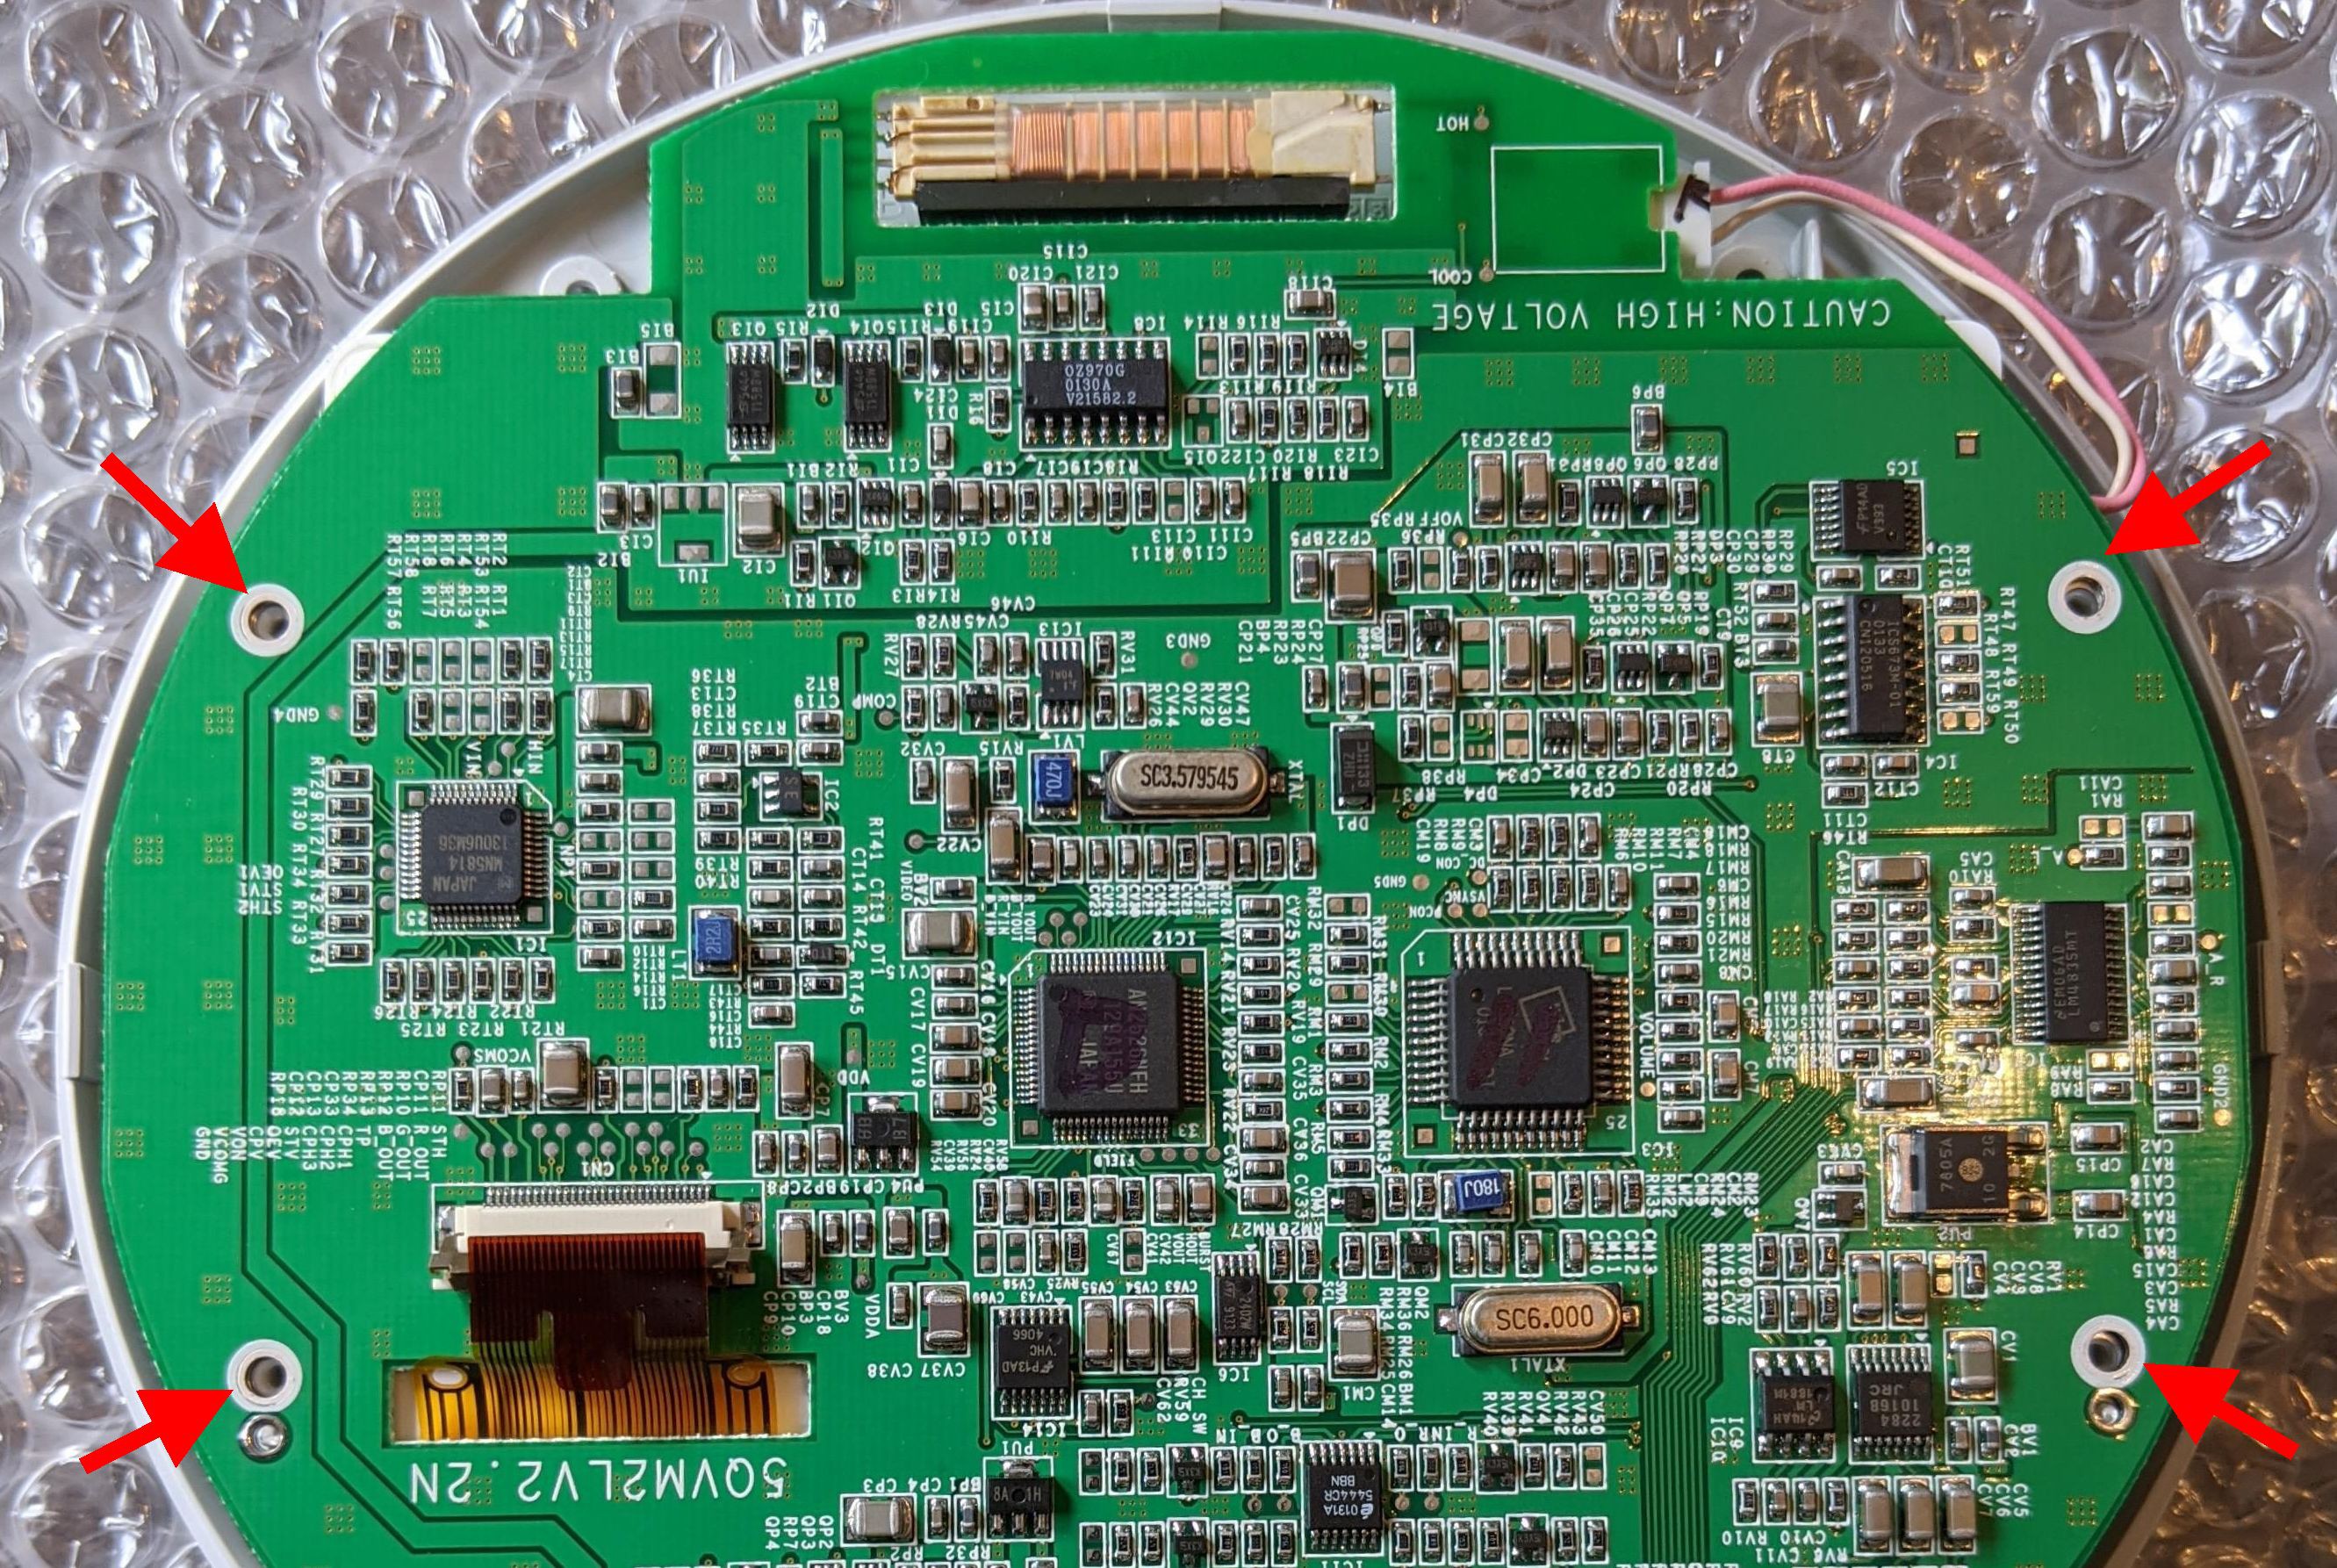
3Remove the PCB screws
Remove the screws, but don't remove the PCB from where it's sitting, we just need to lift it a little bit from the left to put our PCB bellow.
![]()
-
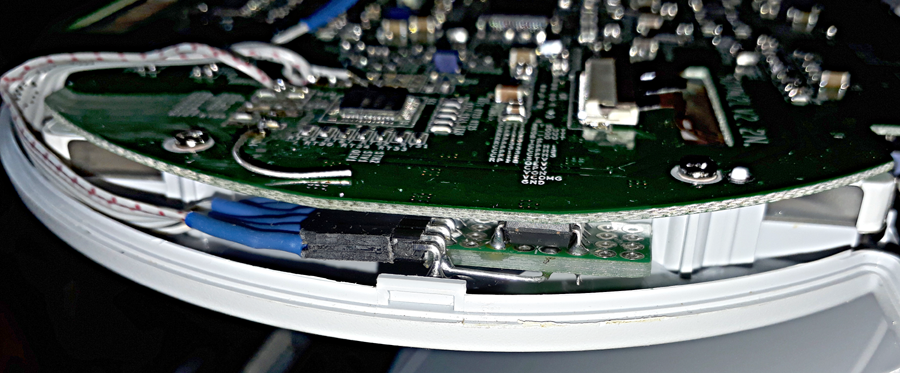
4Remove some resistors / bridges
Remove the components highlighted in yellow.
The connection points for the mod are highlighted in red![]()
-
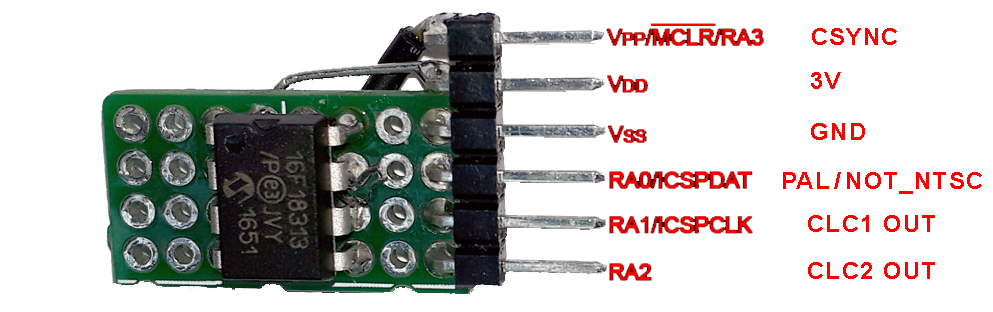
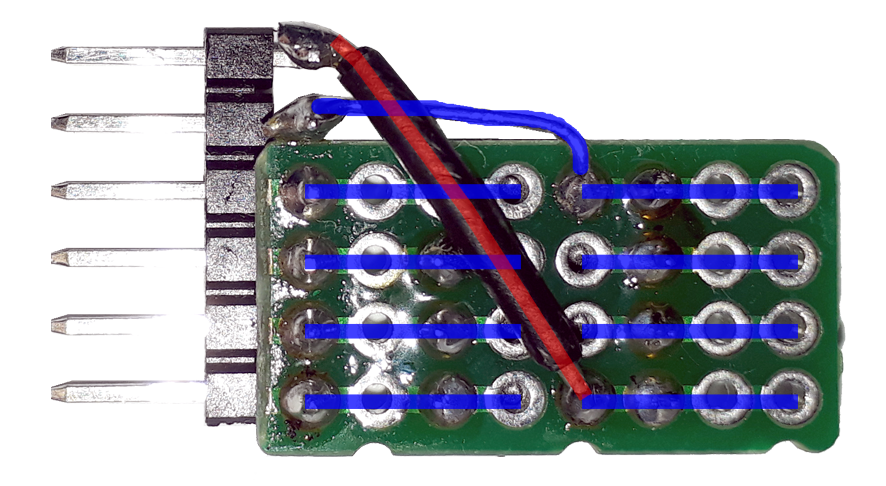
5Prepare the PCB with the microcontroller.
Prepare a PCB with the following wiring.The pinout is compatible with microchip ICSP, so, it can be flashed even after soldering.
![]()
![]()
-
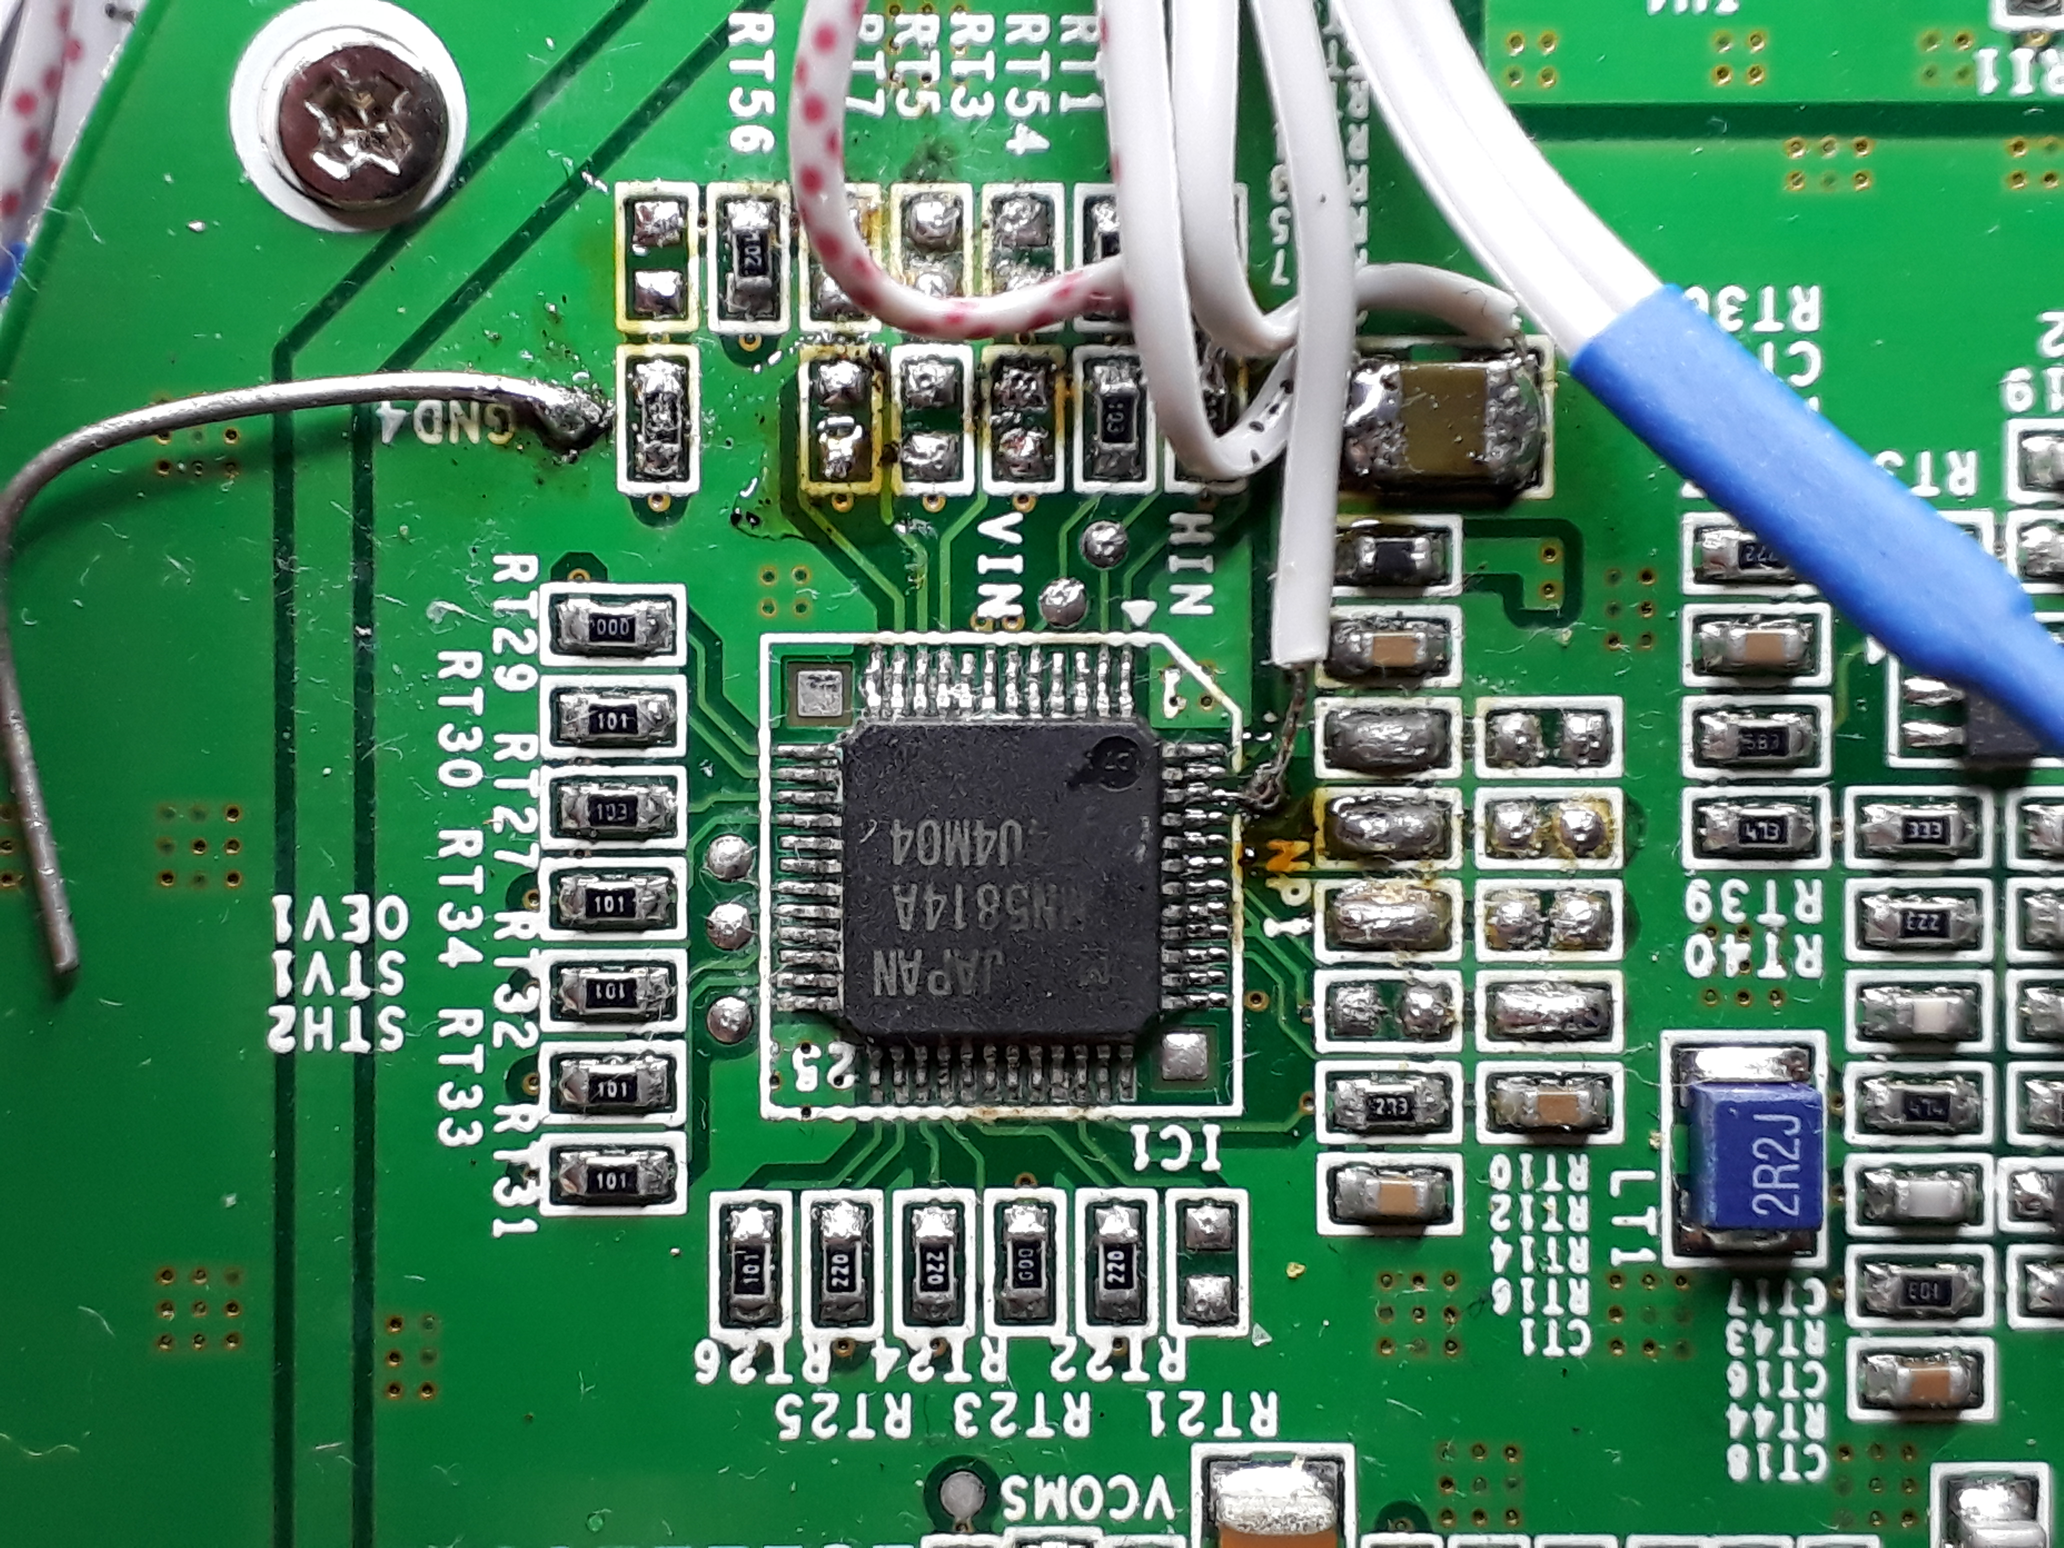
6Solder the wiring
Solder the wires to the PSONE PCB.
3V
GND
CSYNC (microcontroller input for detecting the type of signal)
PAL / NOT_NTSC (output to select the timing)
![]()
And solder the female header on the other side.
I just left 2 spare wires for future uses.
(The rigid wire at the left was just for testing purposes)
-
7Flash the microcontroller
Flash the microcontroller with the provided hex file.
-
8Fit it all together
Put the PCB bellow as shown:
![]()
With this orientation, you will see that there is no need for insulation, but feel free to add some insulating tape or heat-shrink tube to the PCB.
Now you can tighten the four screws to secure the PSONE PCB.
-
9Route the wires test and close.
Route the wires as shown and you should be able to put the case back without forcing anything.
![]()
-
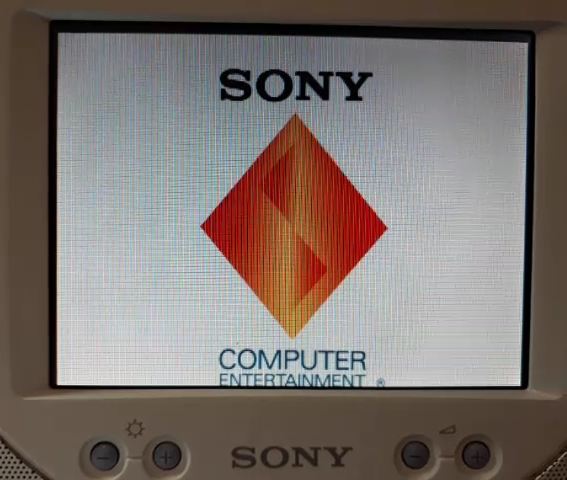
10End result
This is the expected result:PAL boot screen:
![]()
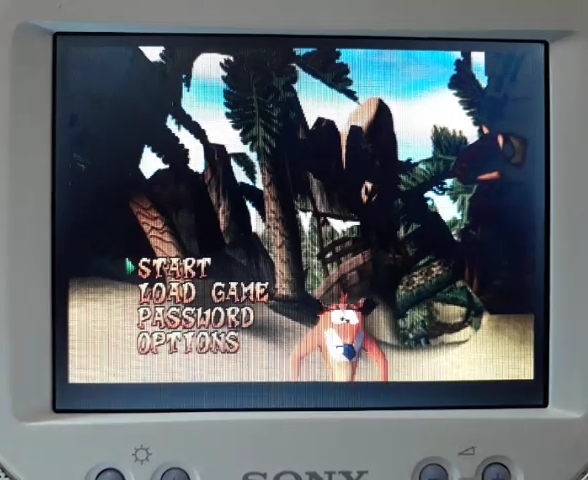
NTSC game:
![]()
PAL - NTSC auto switch for PSONE LCD
Use your PSONE LCD with both PAL and NTSC sources - games


Discussions
Become a Hackaday.io Member
Create an account to leave a comment. Already have an account? Log In.
Hi there, I've done this mod on a SPCH-130 NTSC-J and I can confirm it works!
Thank you! :)
Are you sure? yes | no