TraceSpazer
-
"Final" Assembly (Not final at all)
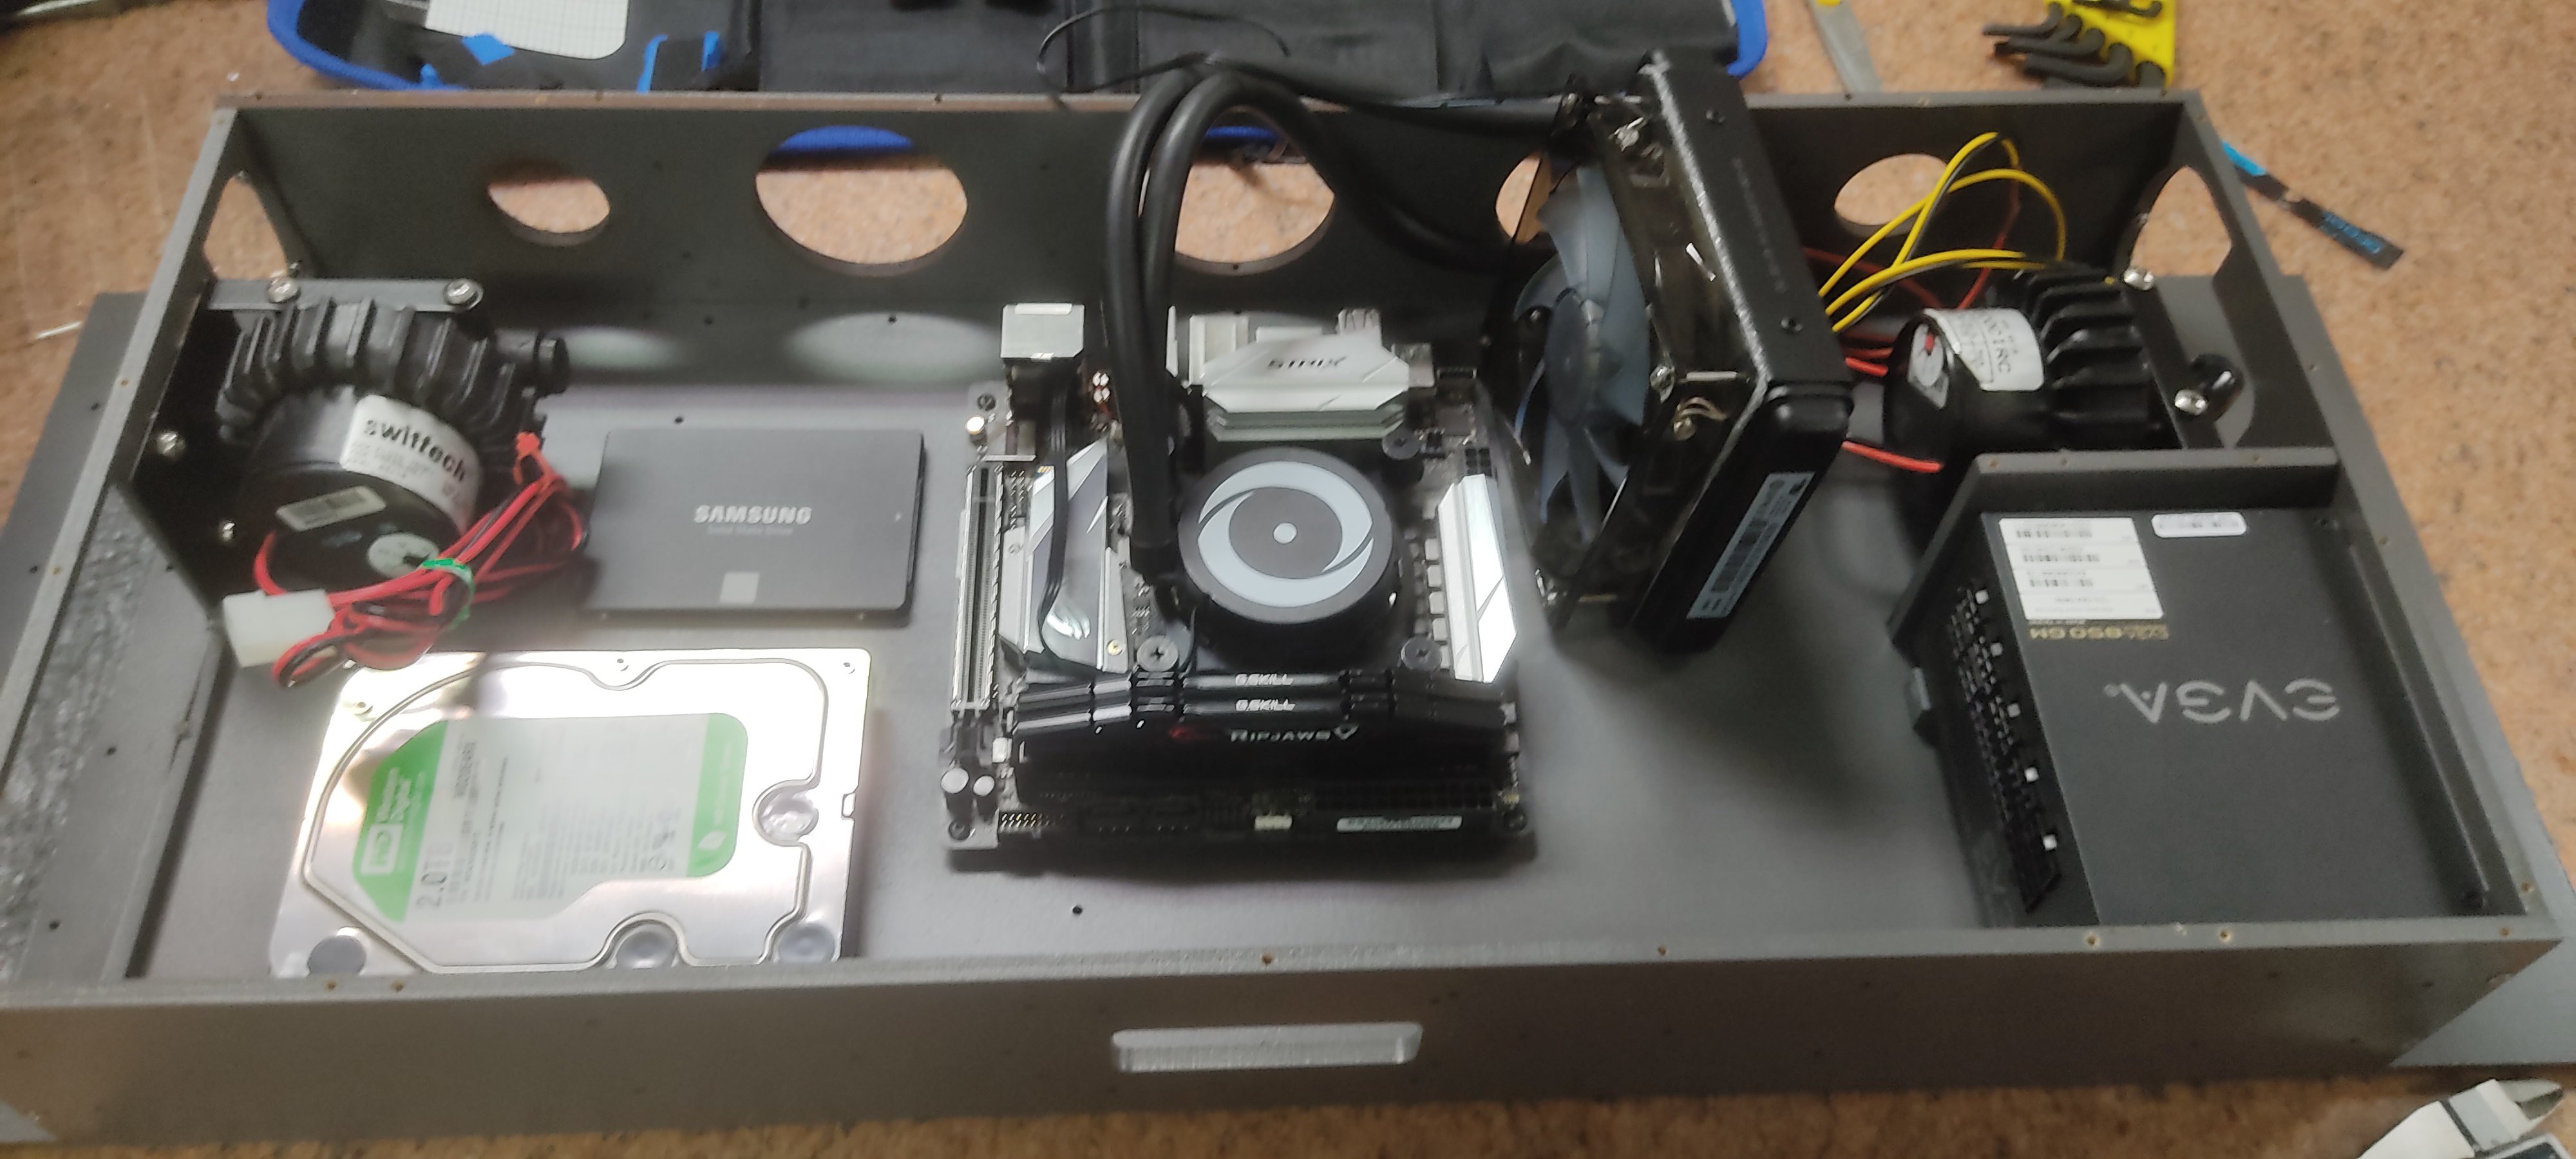
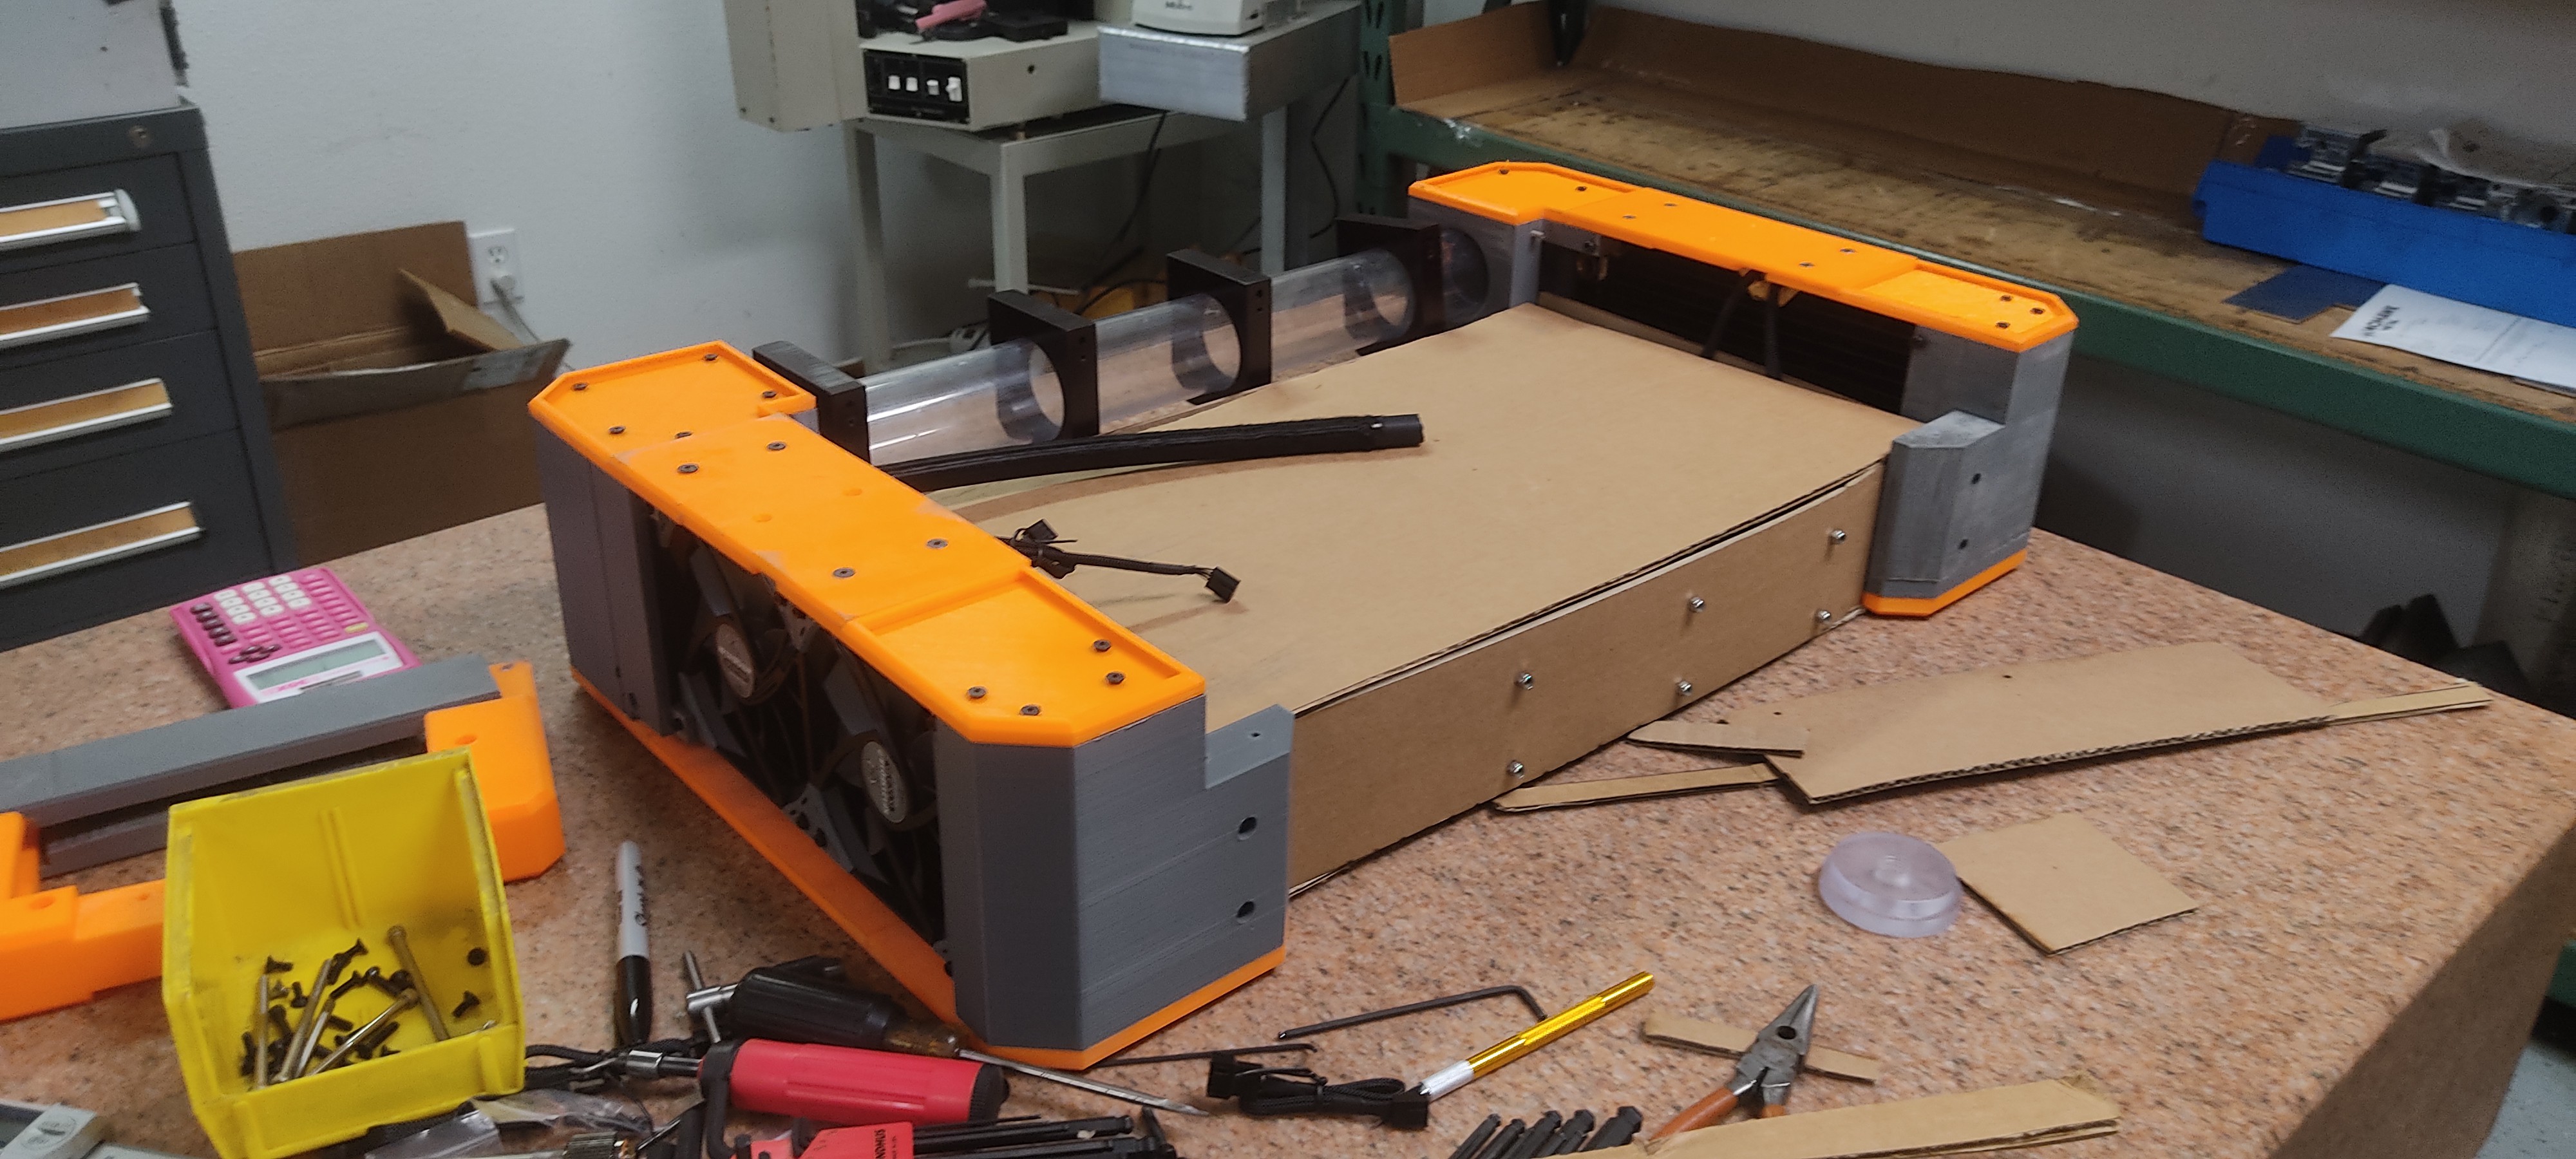
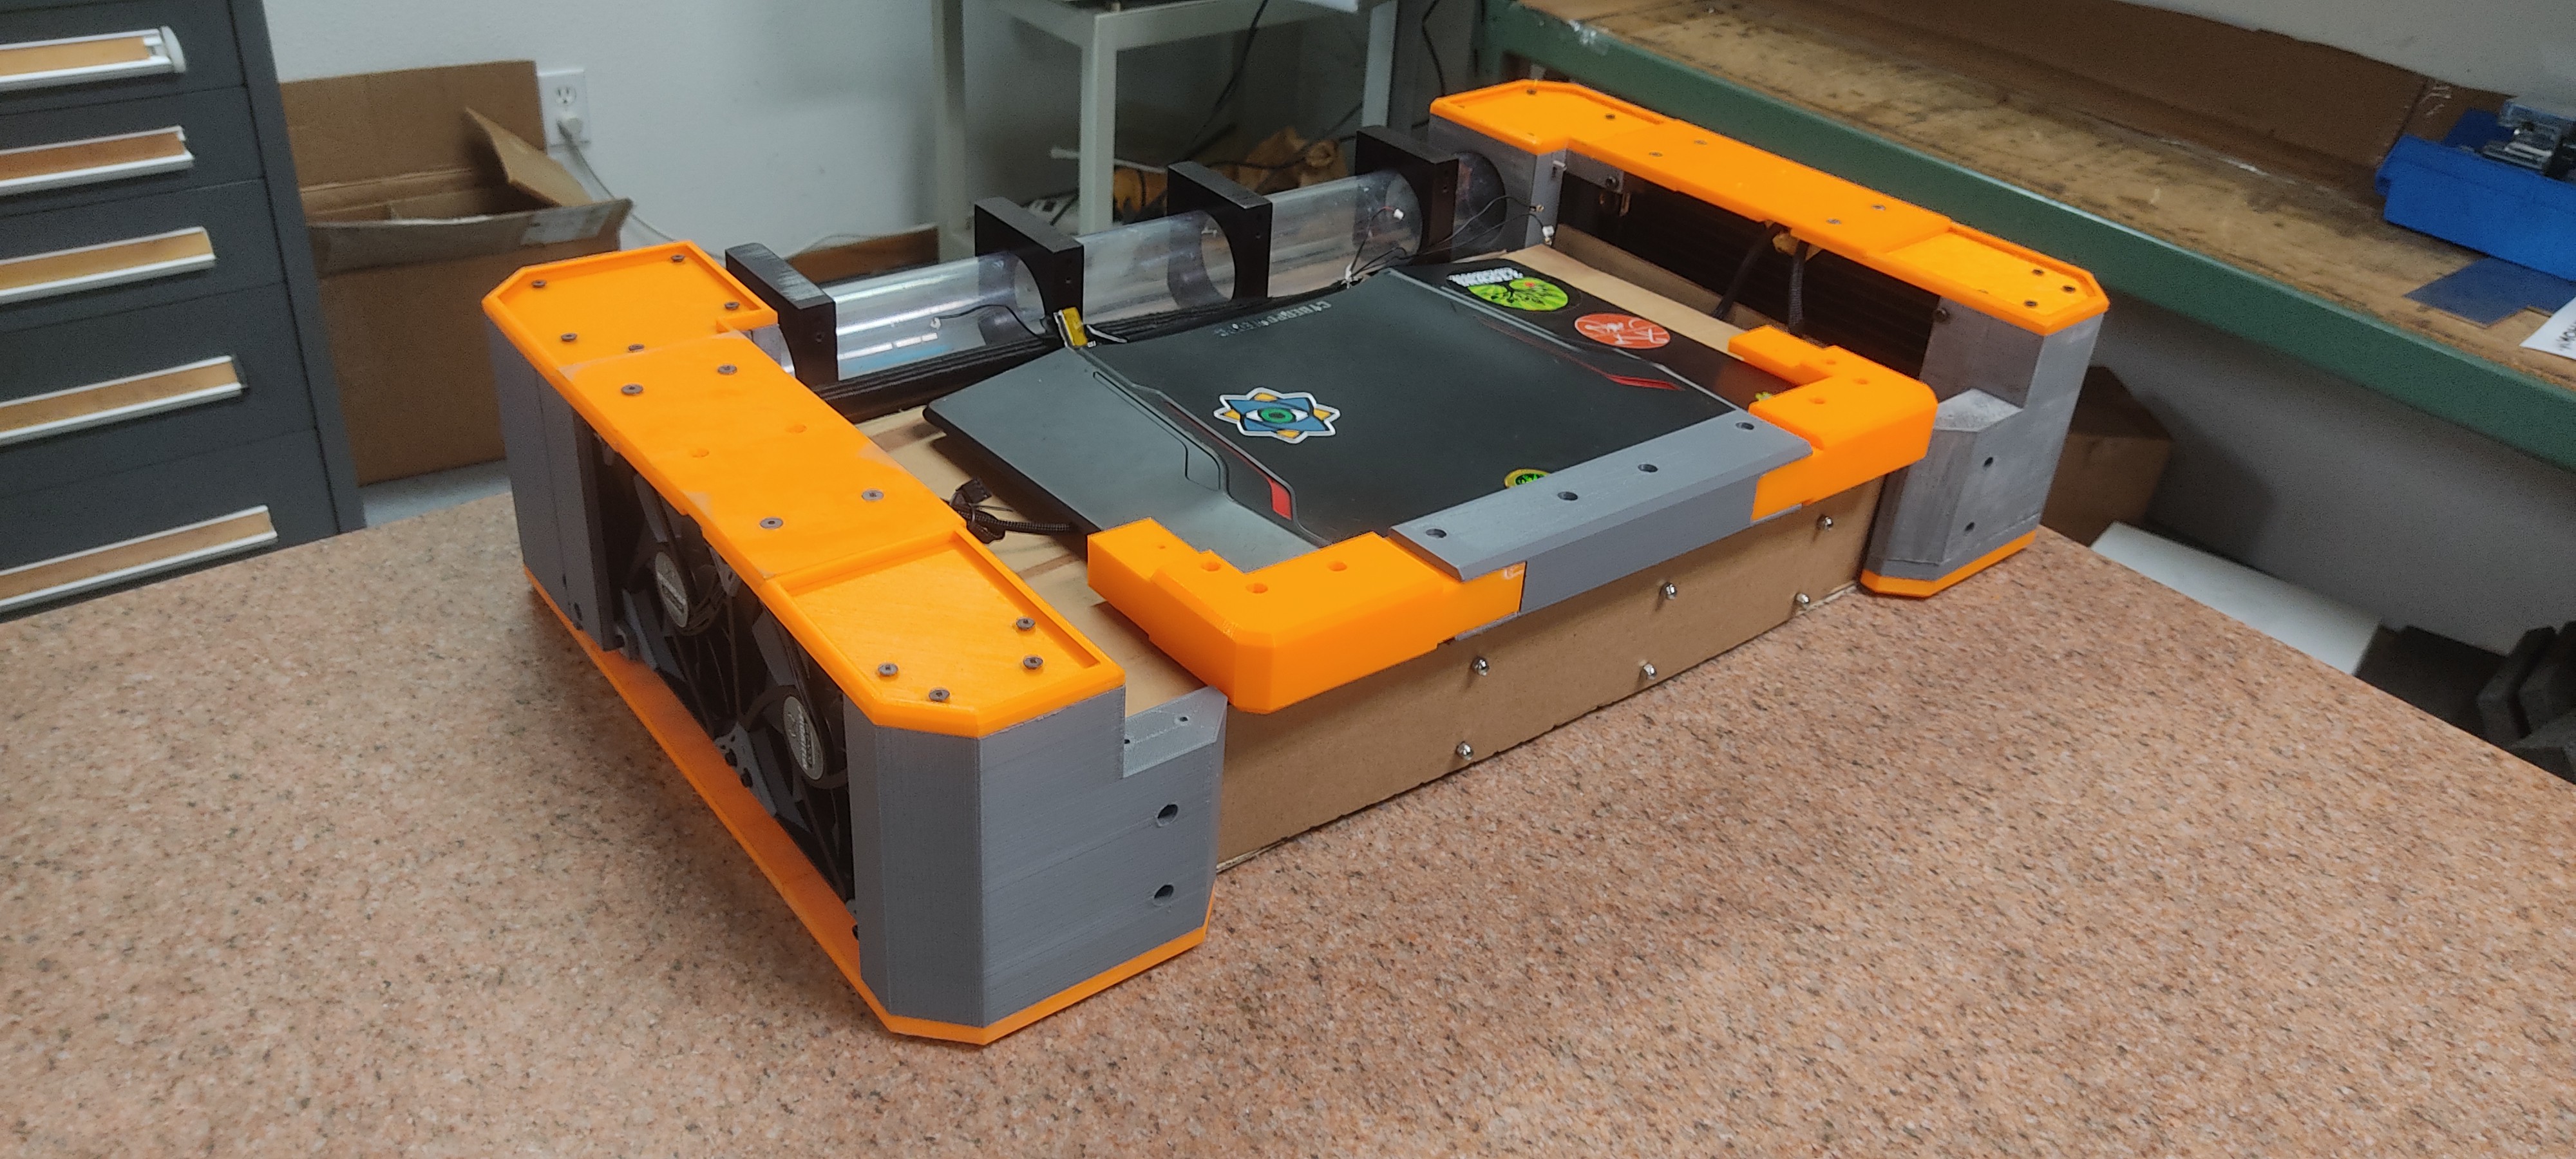
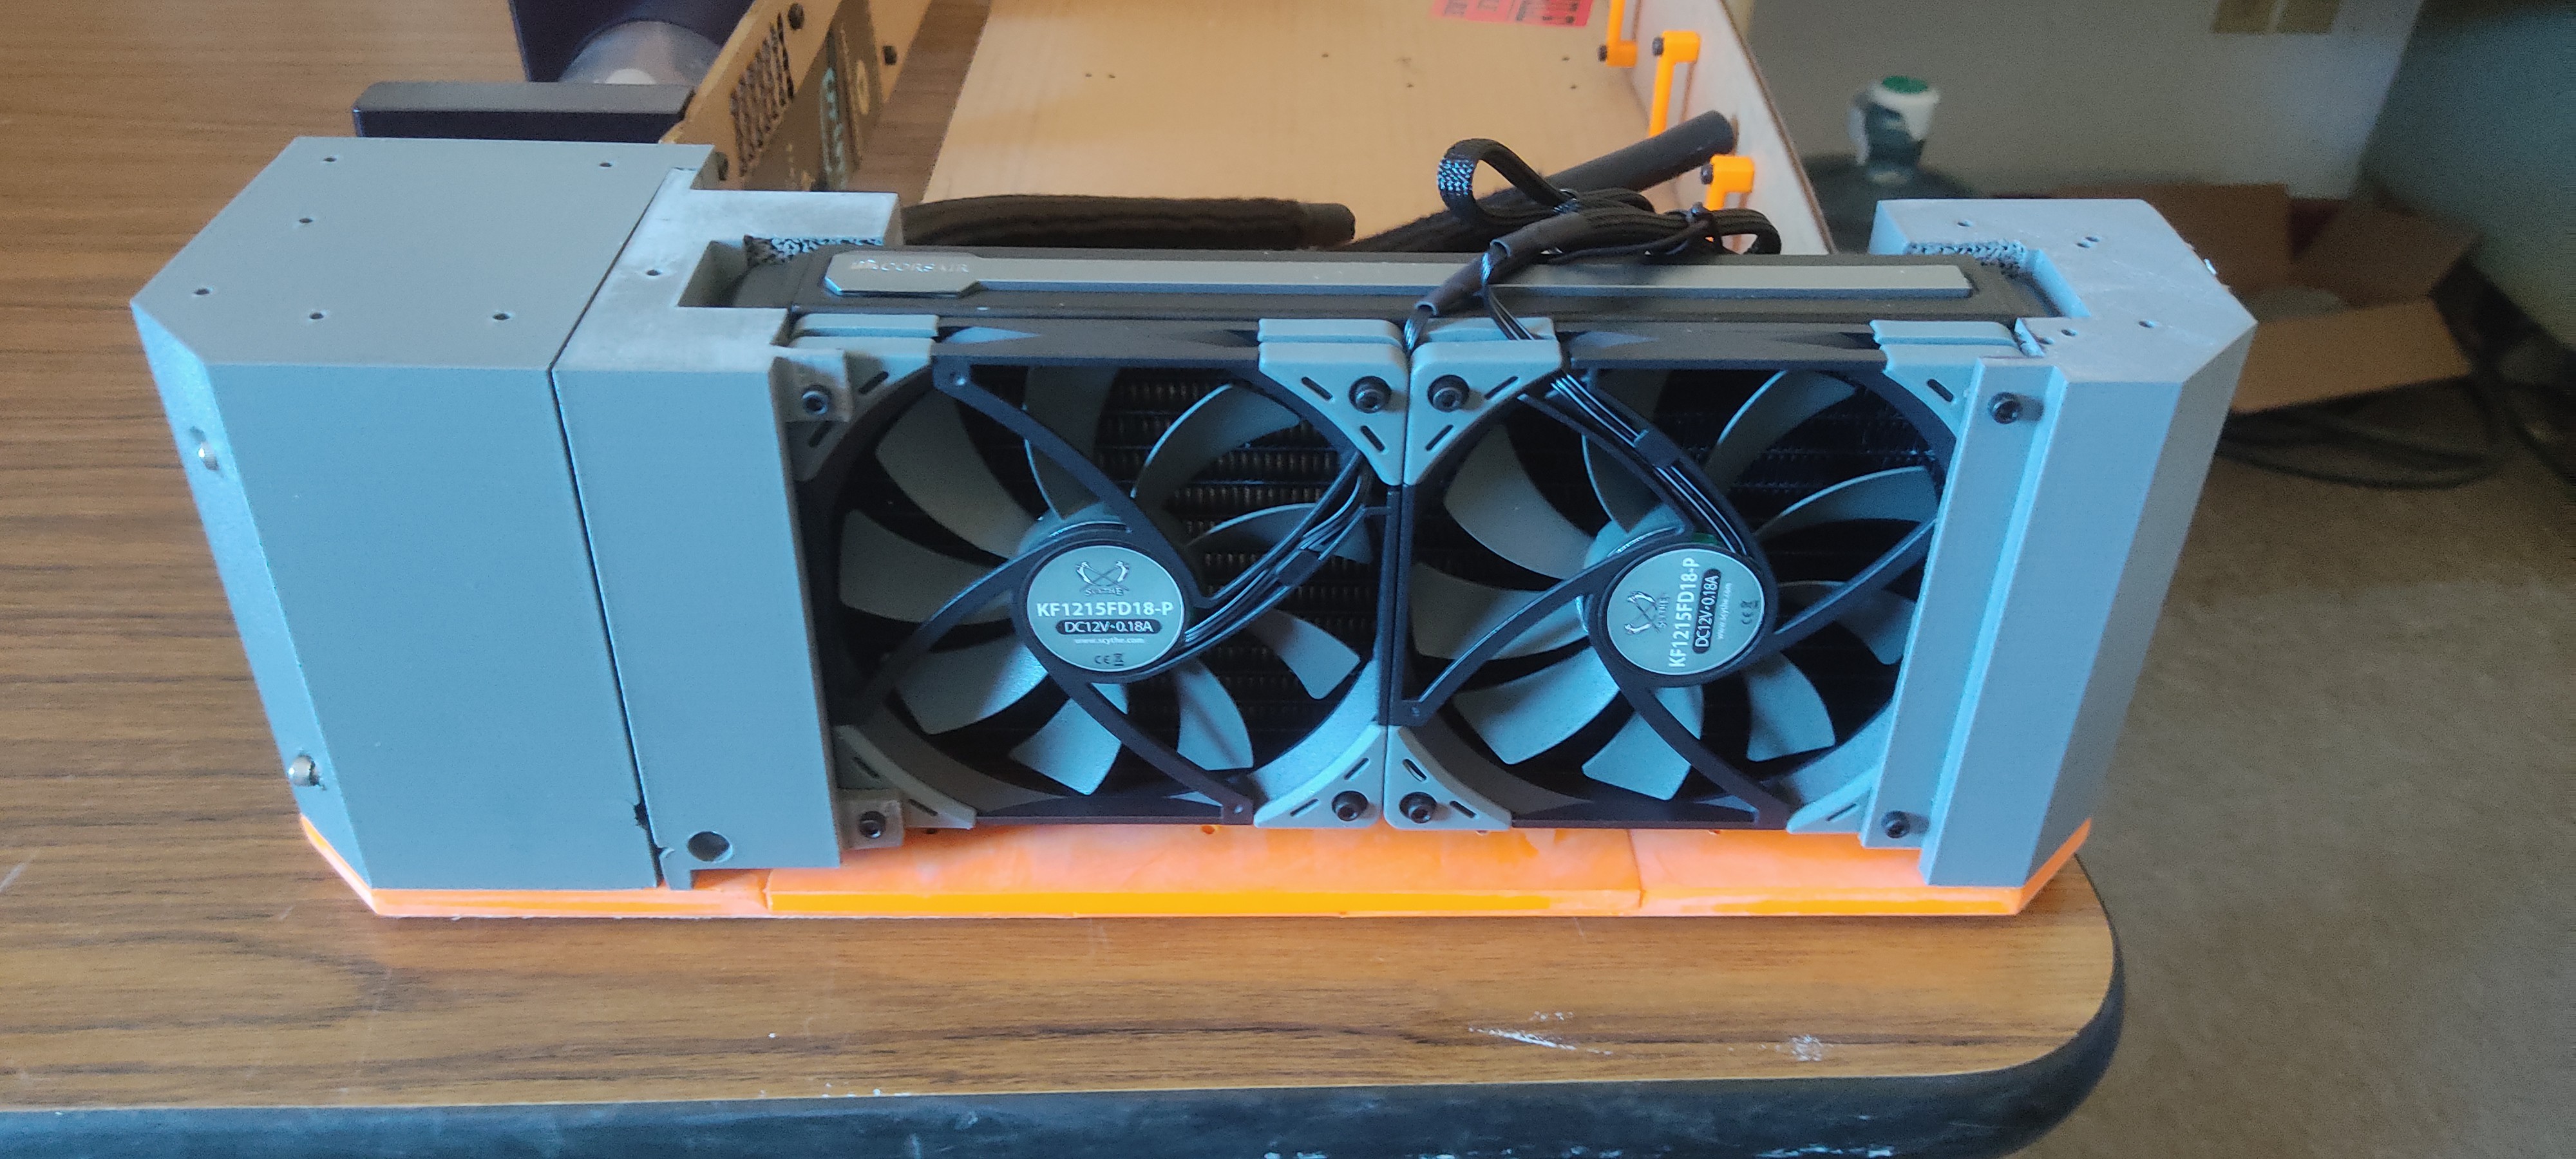
10/03/2022 at 04:27 • 0 commentsAgain, wanting to get something to show from this project. I assembled the painted pieces.
![]()
![]()
Problems were found pretty much immediately. I neglected to acquire a new mobo watercooler and am reluctant to tear apart the existing AIO cooler. Luckily I found a spot for it, but it isn't connected to the planned loop.
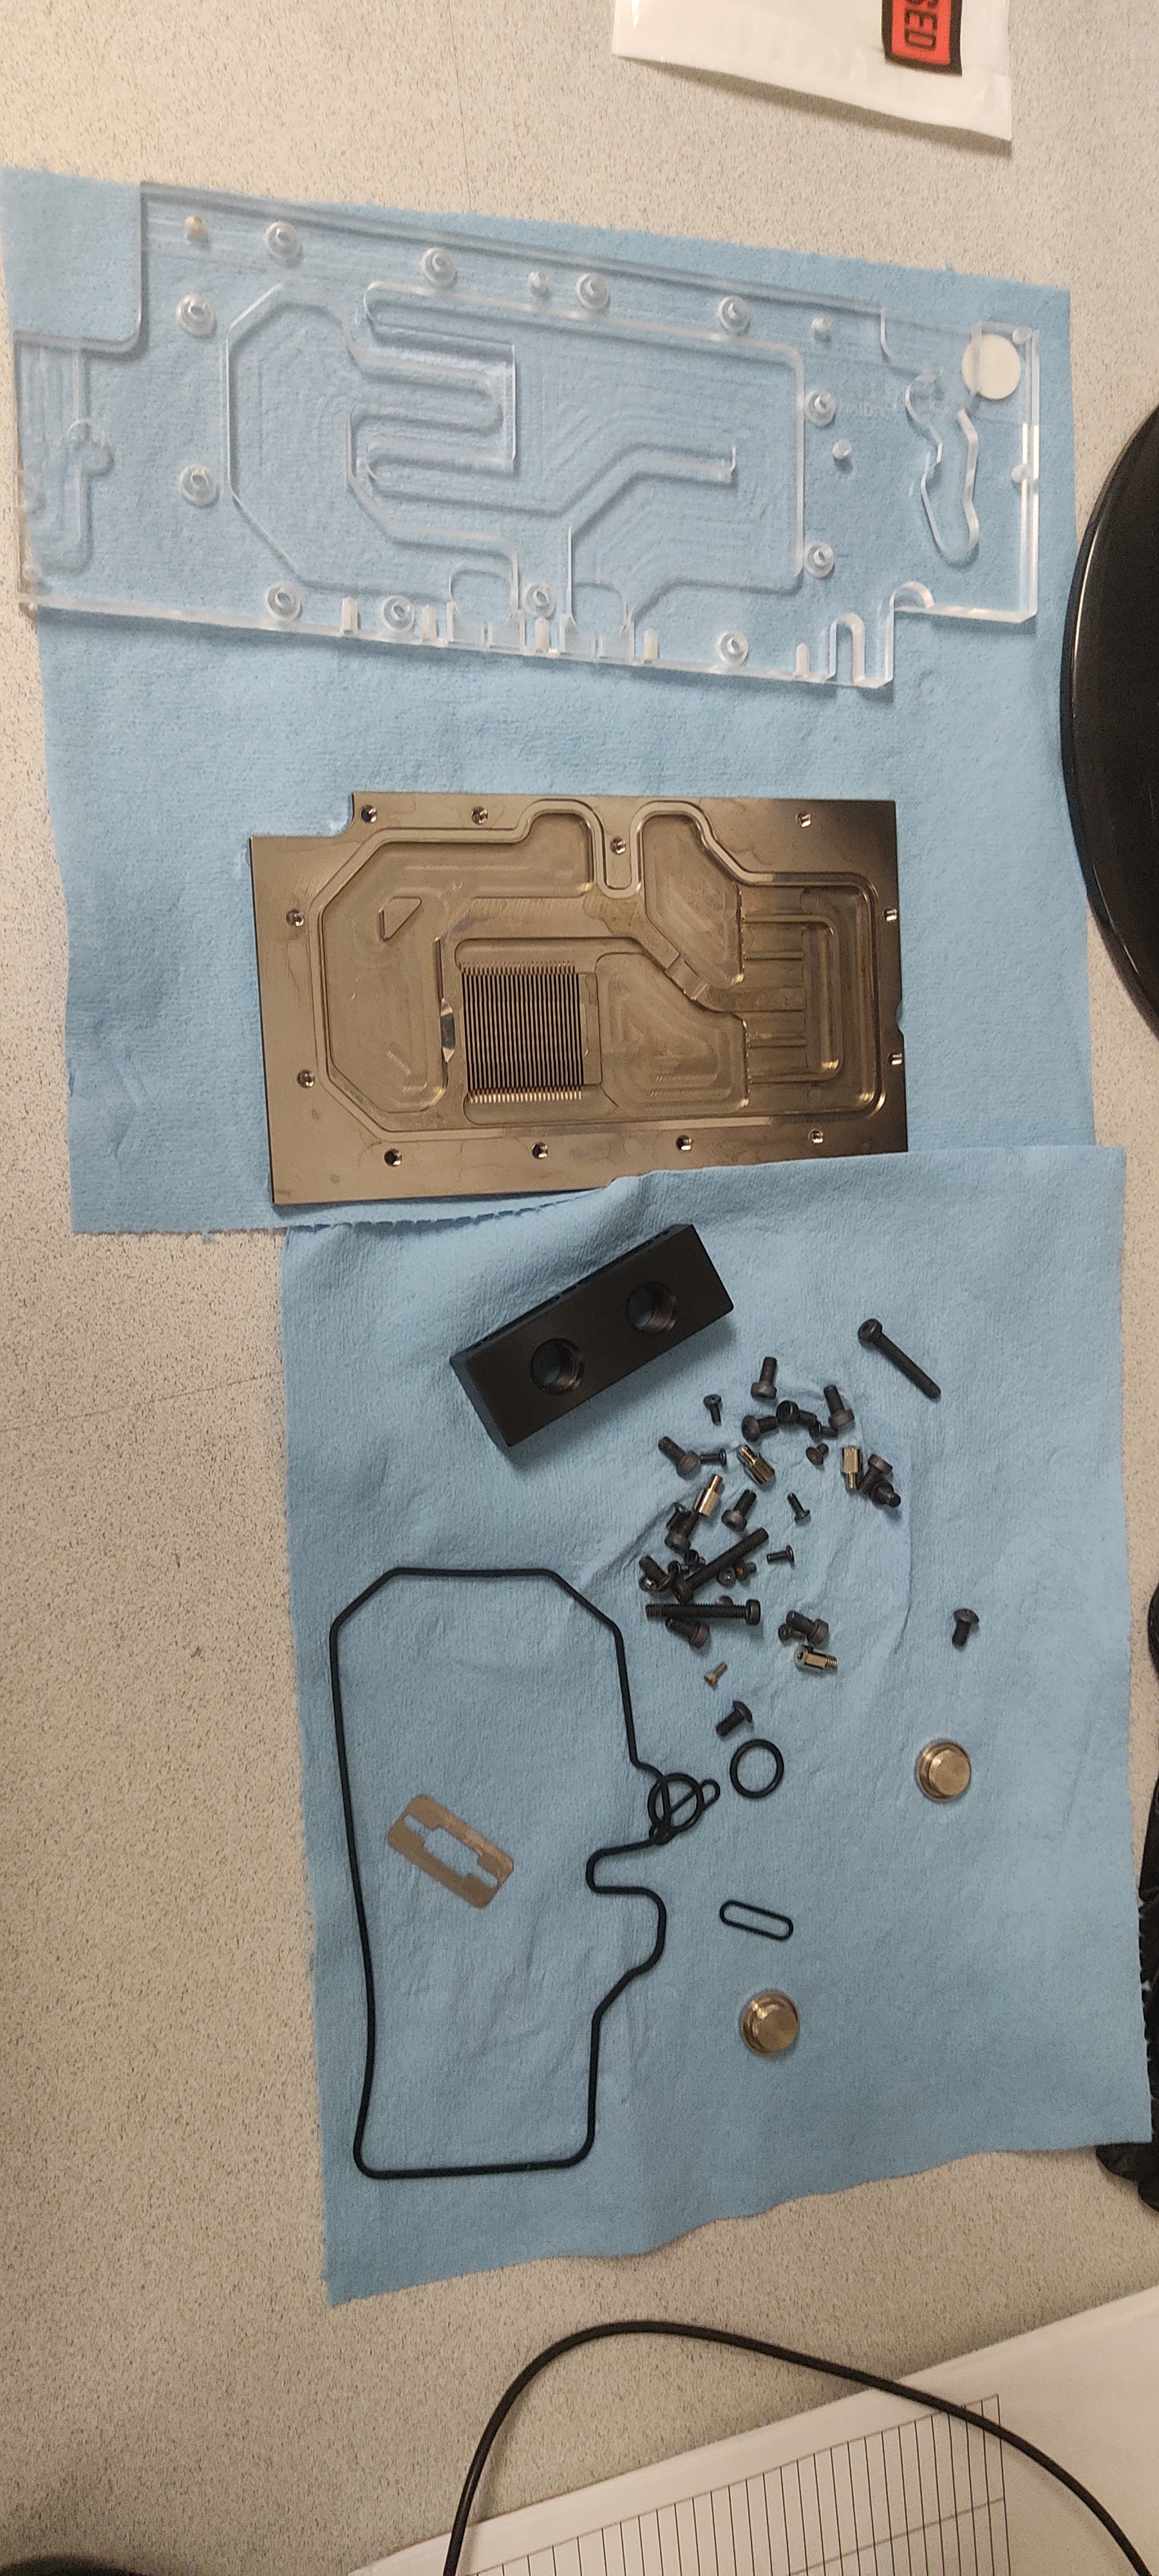
And then the graphics card as well, I didn't have the new thermal pads on hand so the waterblock was postponed. (It's all air-cooled now but changes planned for next revision)![]()
![]()
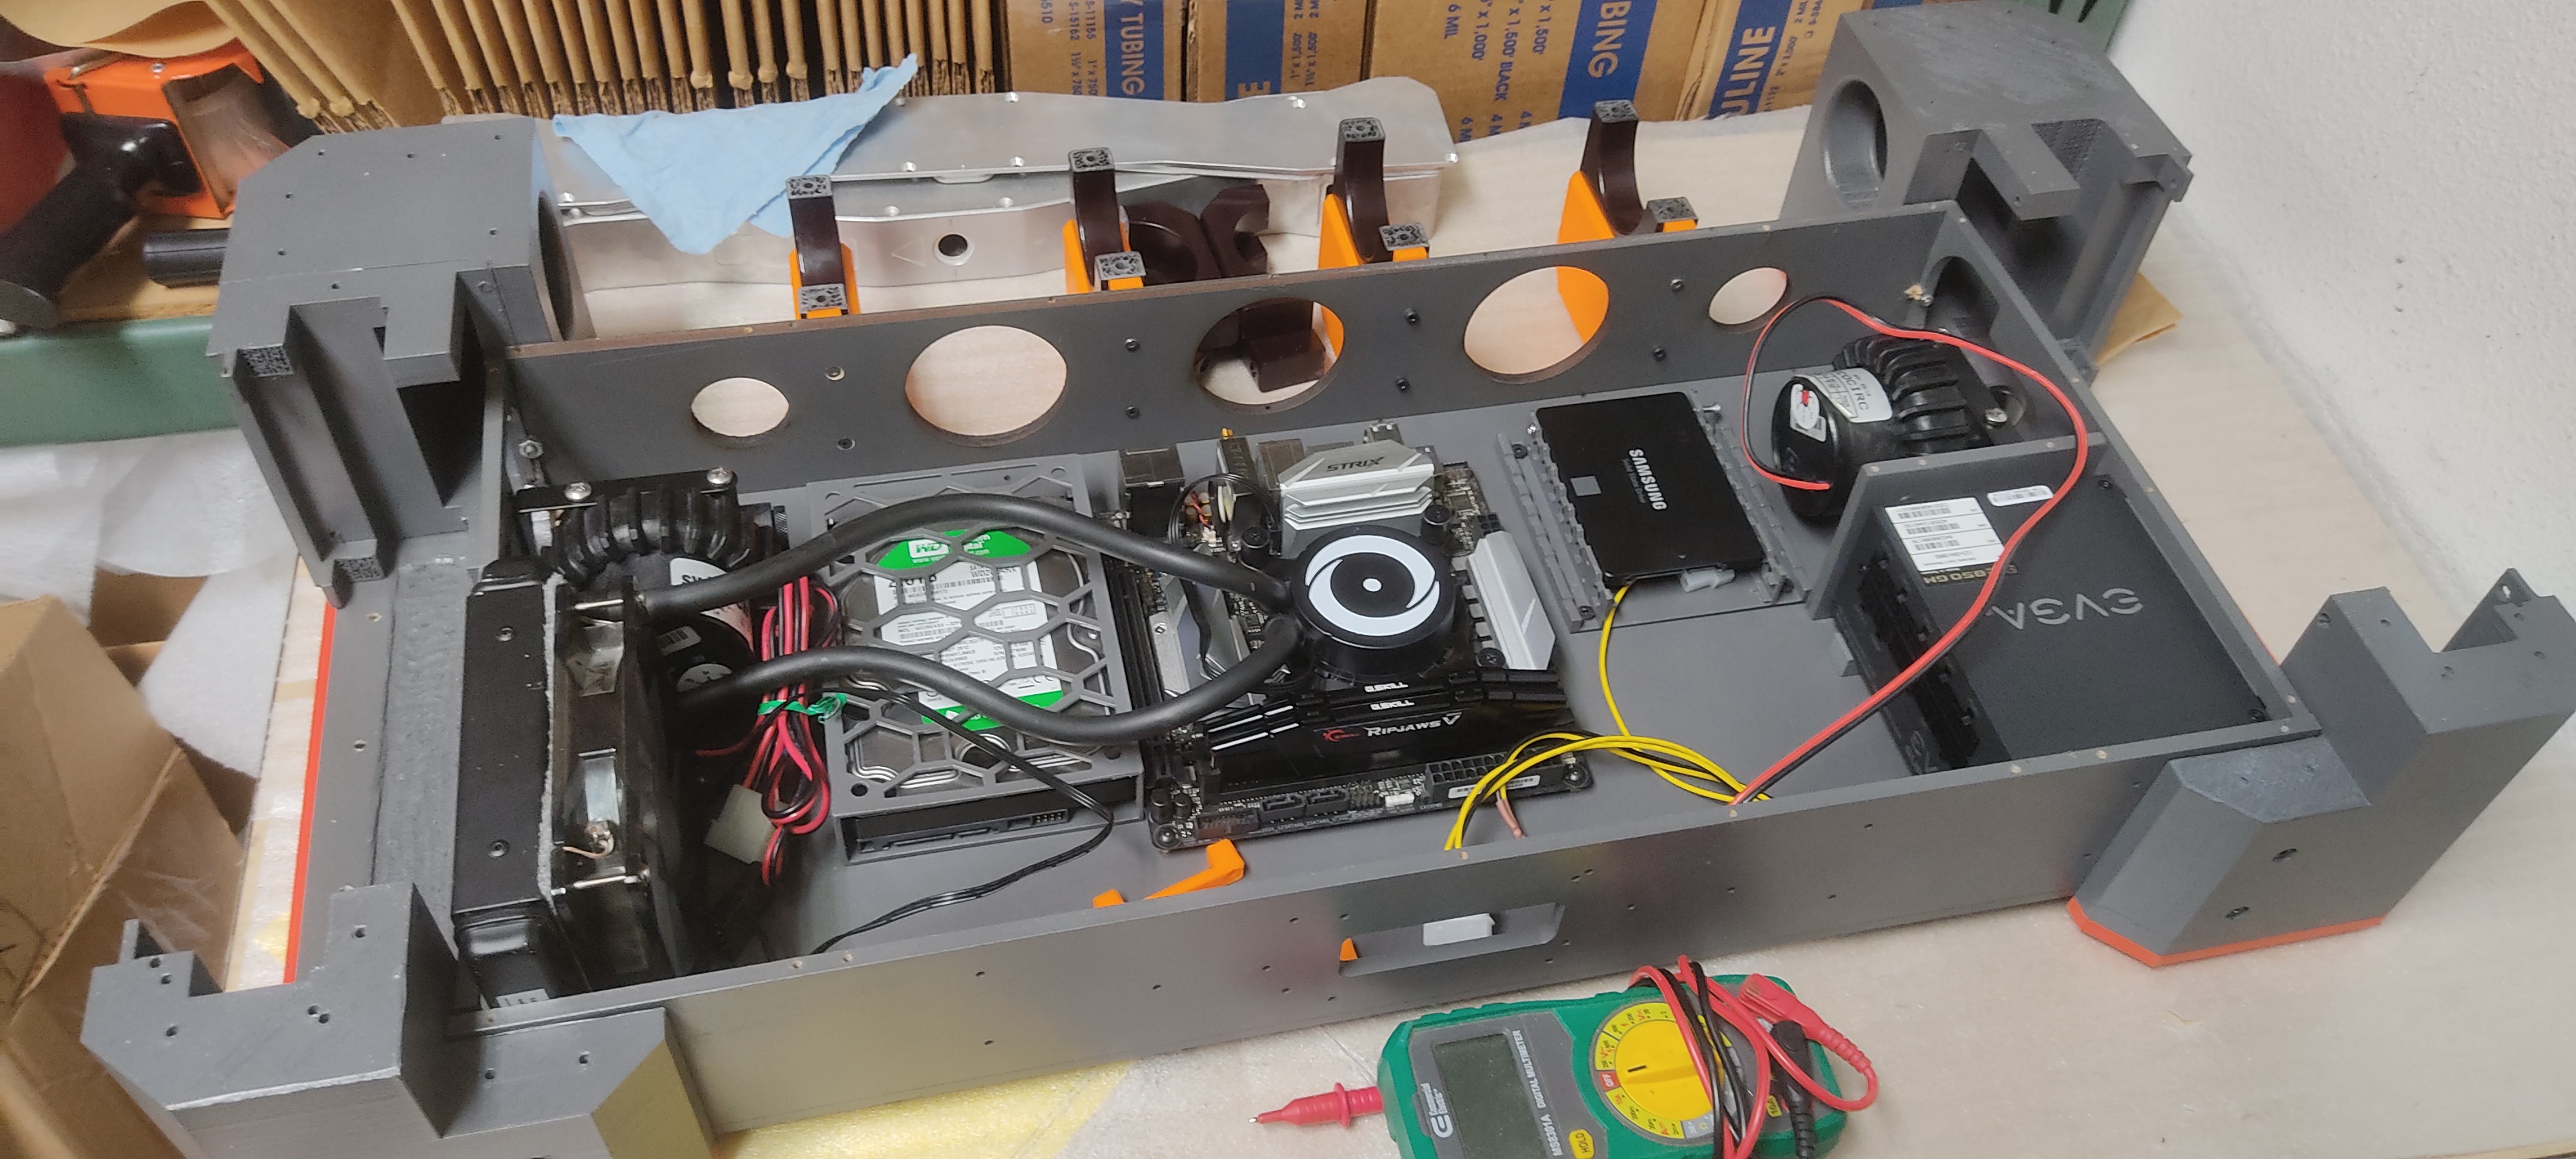
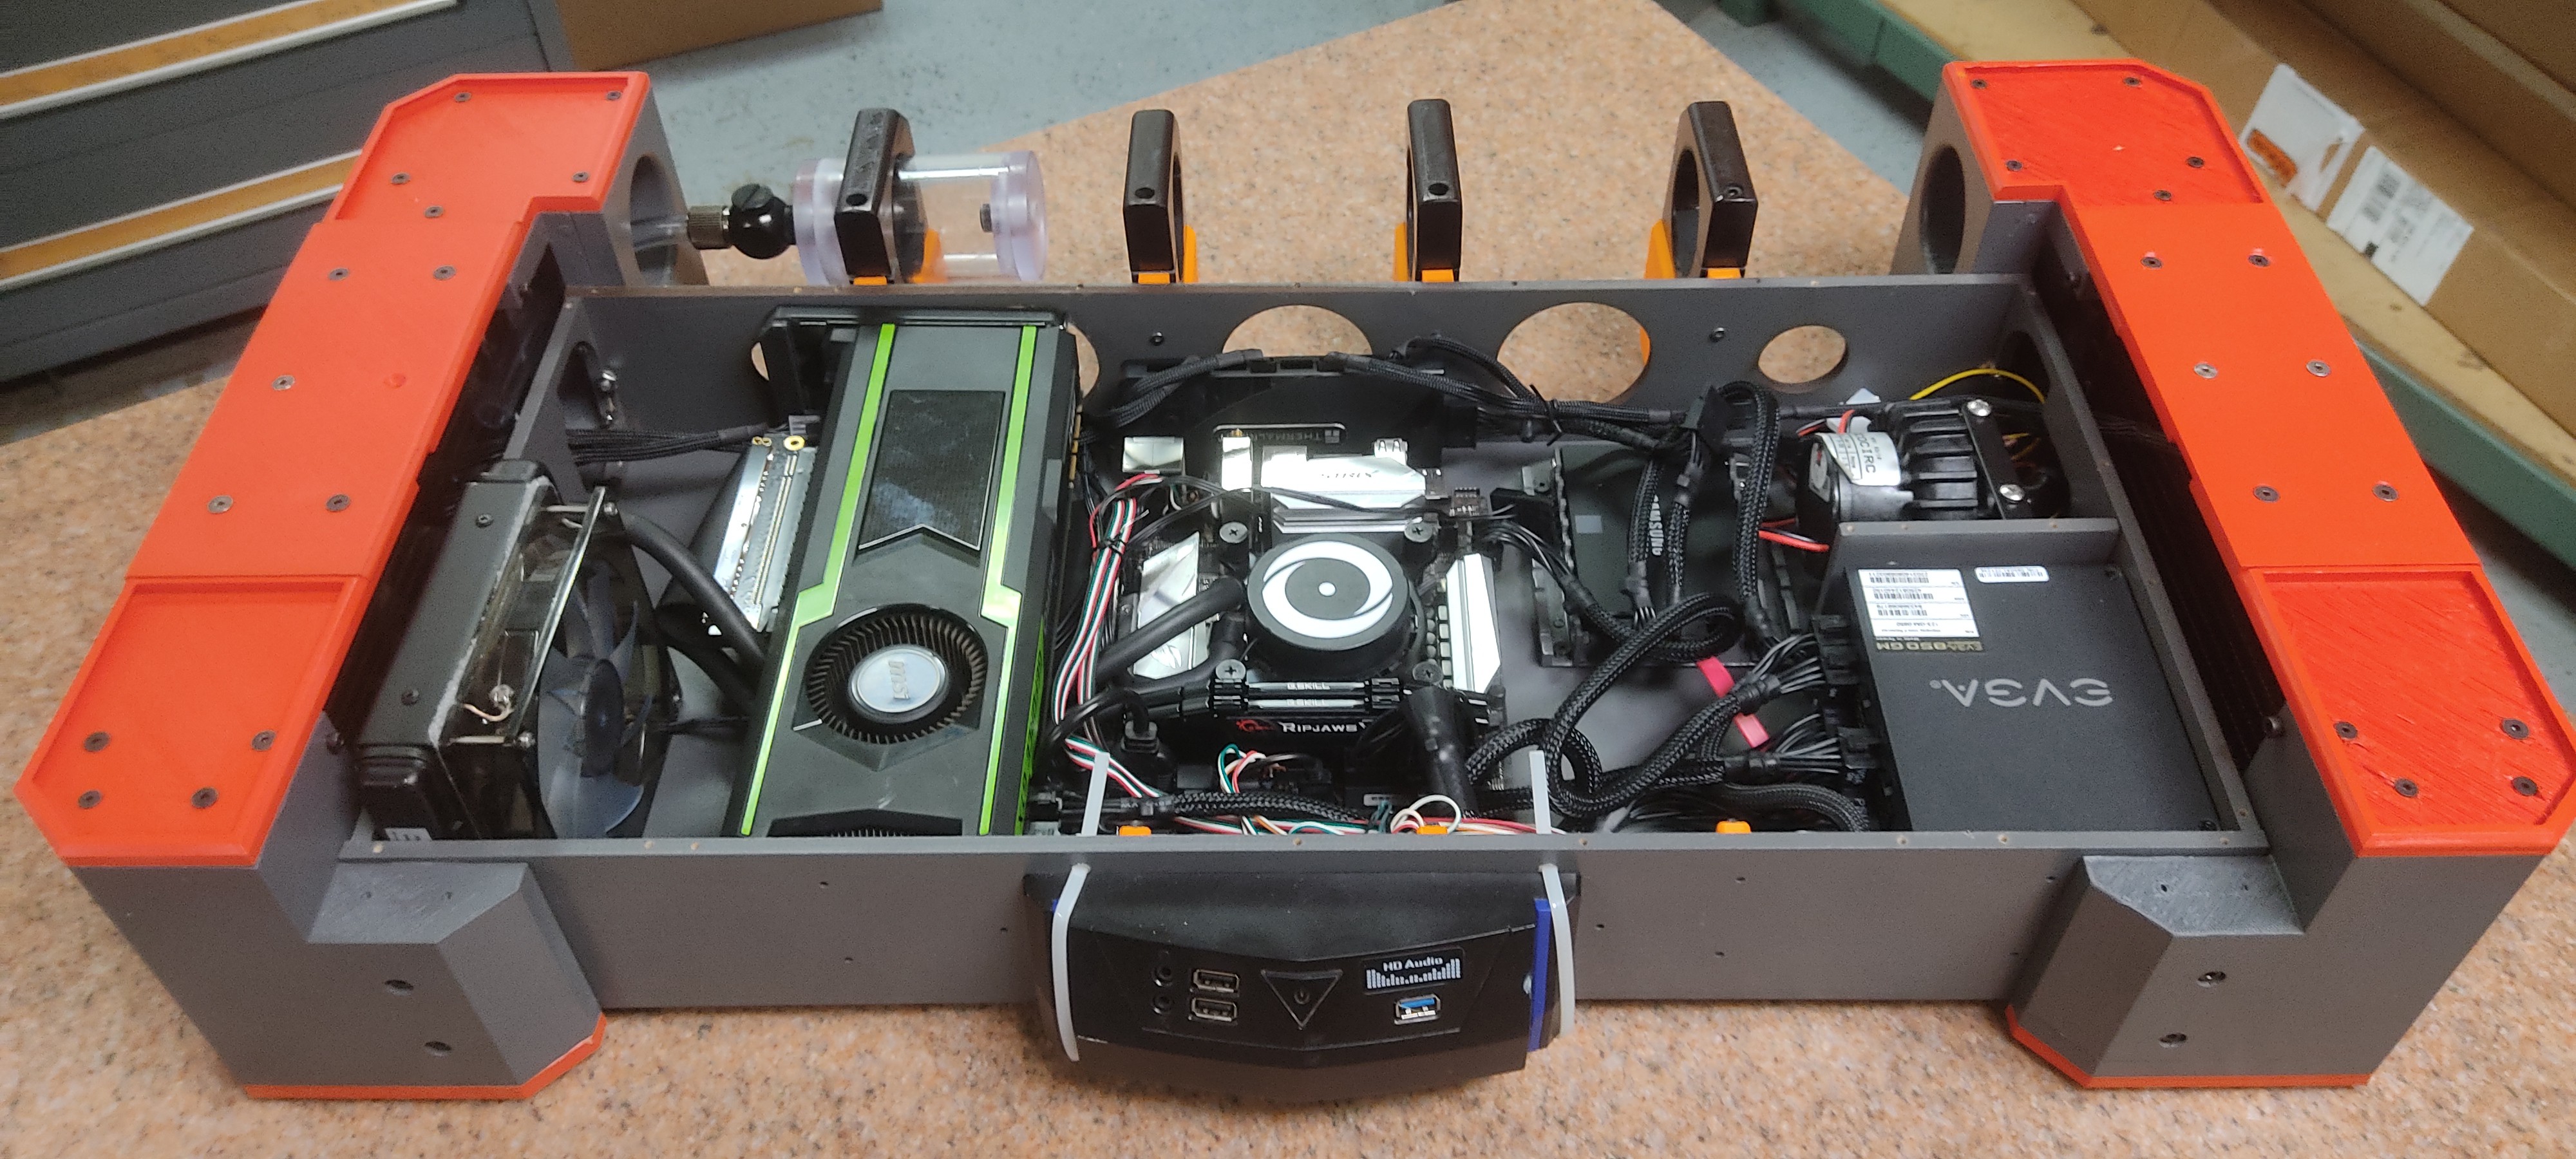
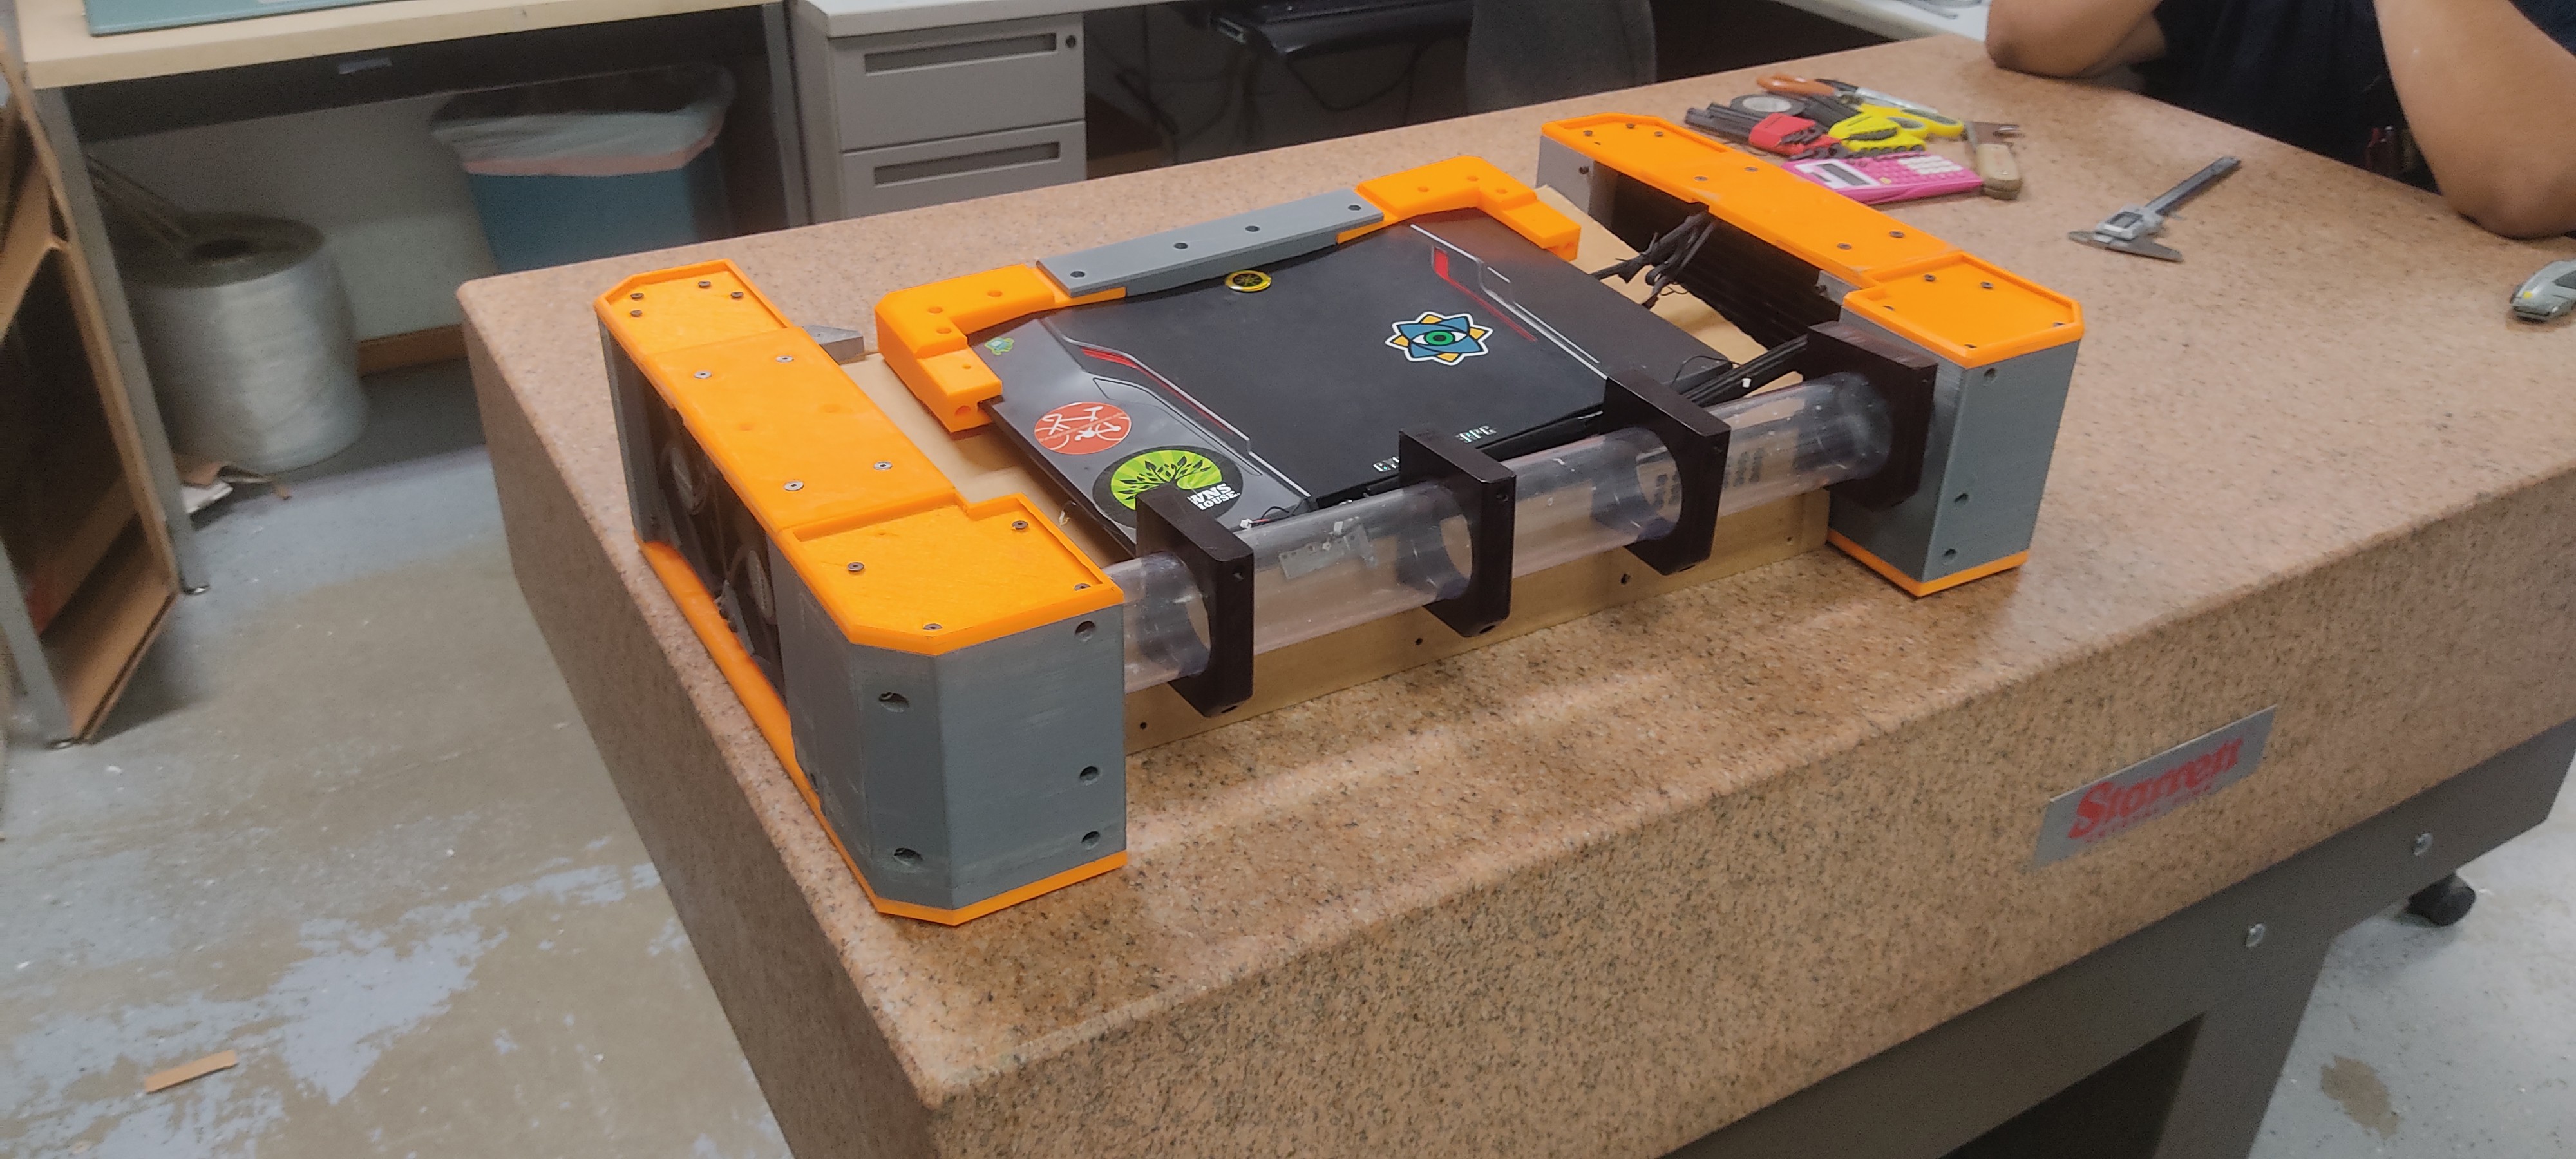
As a last minute attachment, I hacked the front panel off my old case with a band saw and elegantly mounted it onto the new chassis.
![]() And that's where it's at! Works, but I had to disassemble one of the radiators due to a lack of clearance for the power cable. Still very much a work in progress, bigger than I'd like and has many issues still...but I like it and I'm having fun. Looking forward to setting this thing up as a portable VR workstation.
And that's where it's at! Works, but I had to disassemble one of the radiators due to a lack of clearance for the power cable. Still very much a work in progress, bigger than I'd like and has many issues still...but I like it and I'm having fun. Looking forward to setting this thing up as a portable VR workstation. -
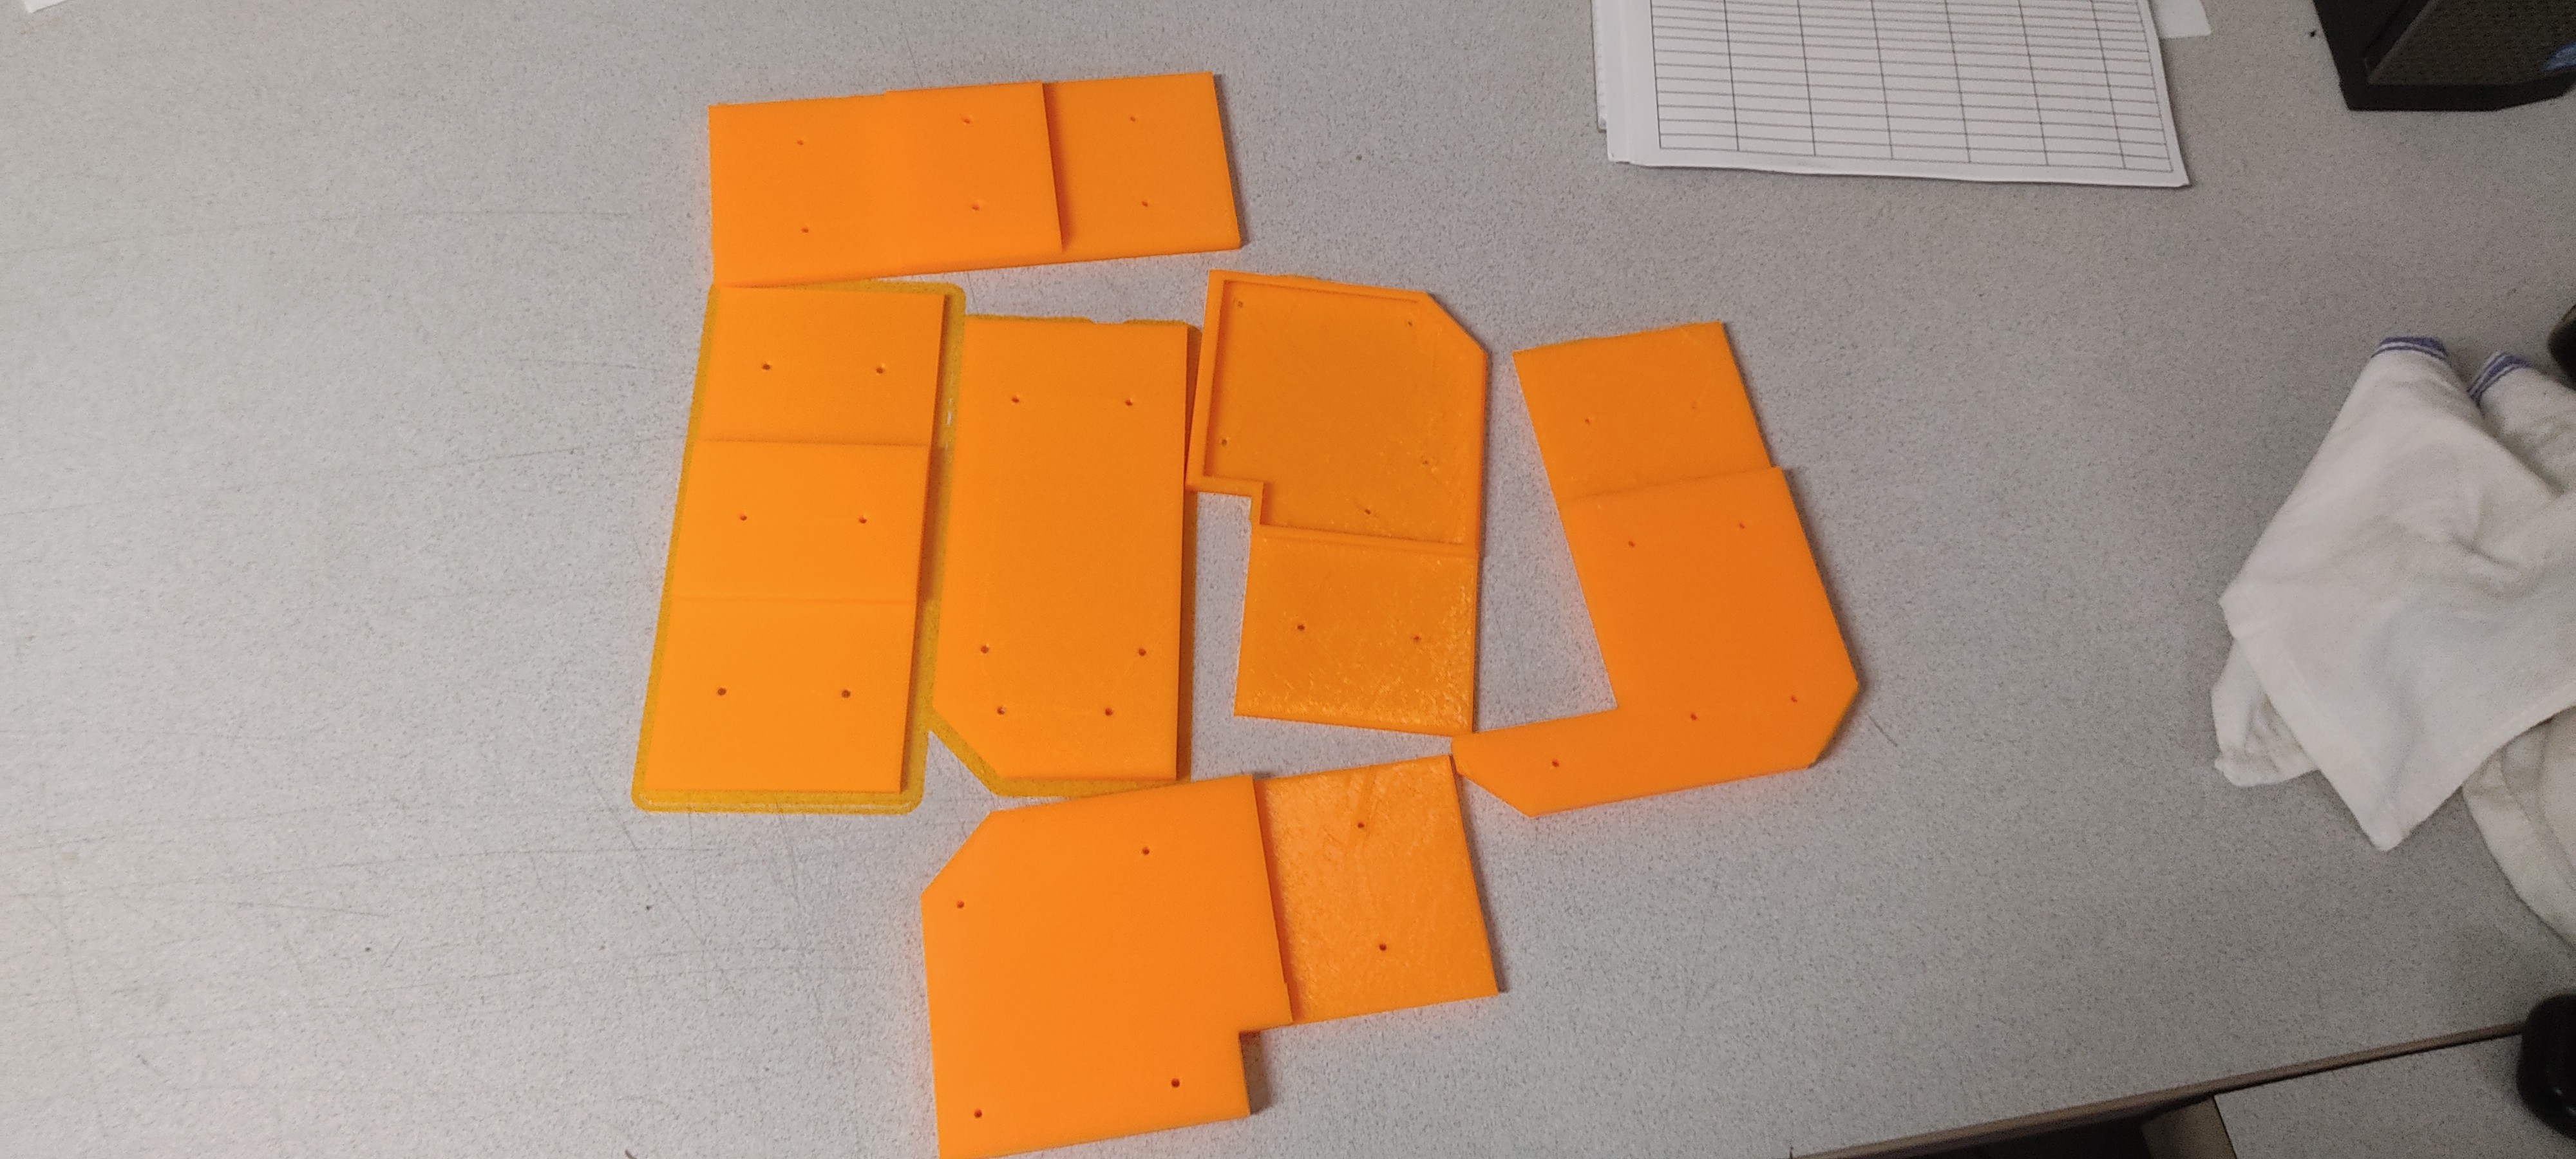
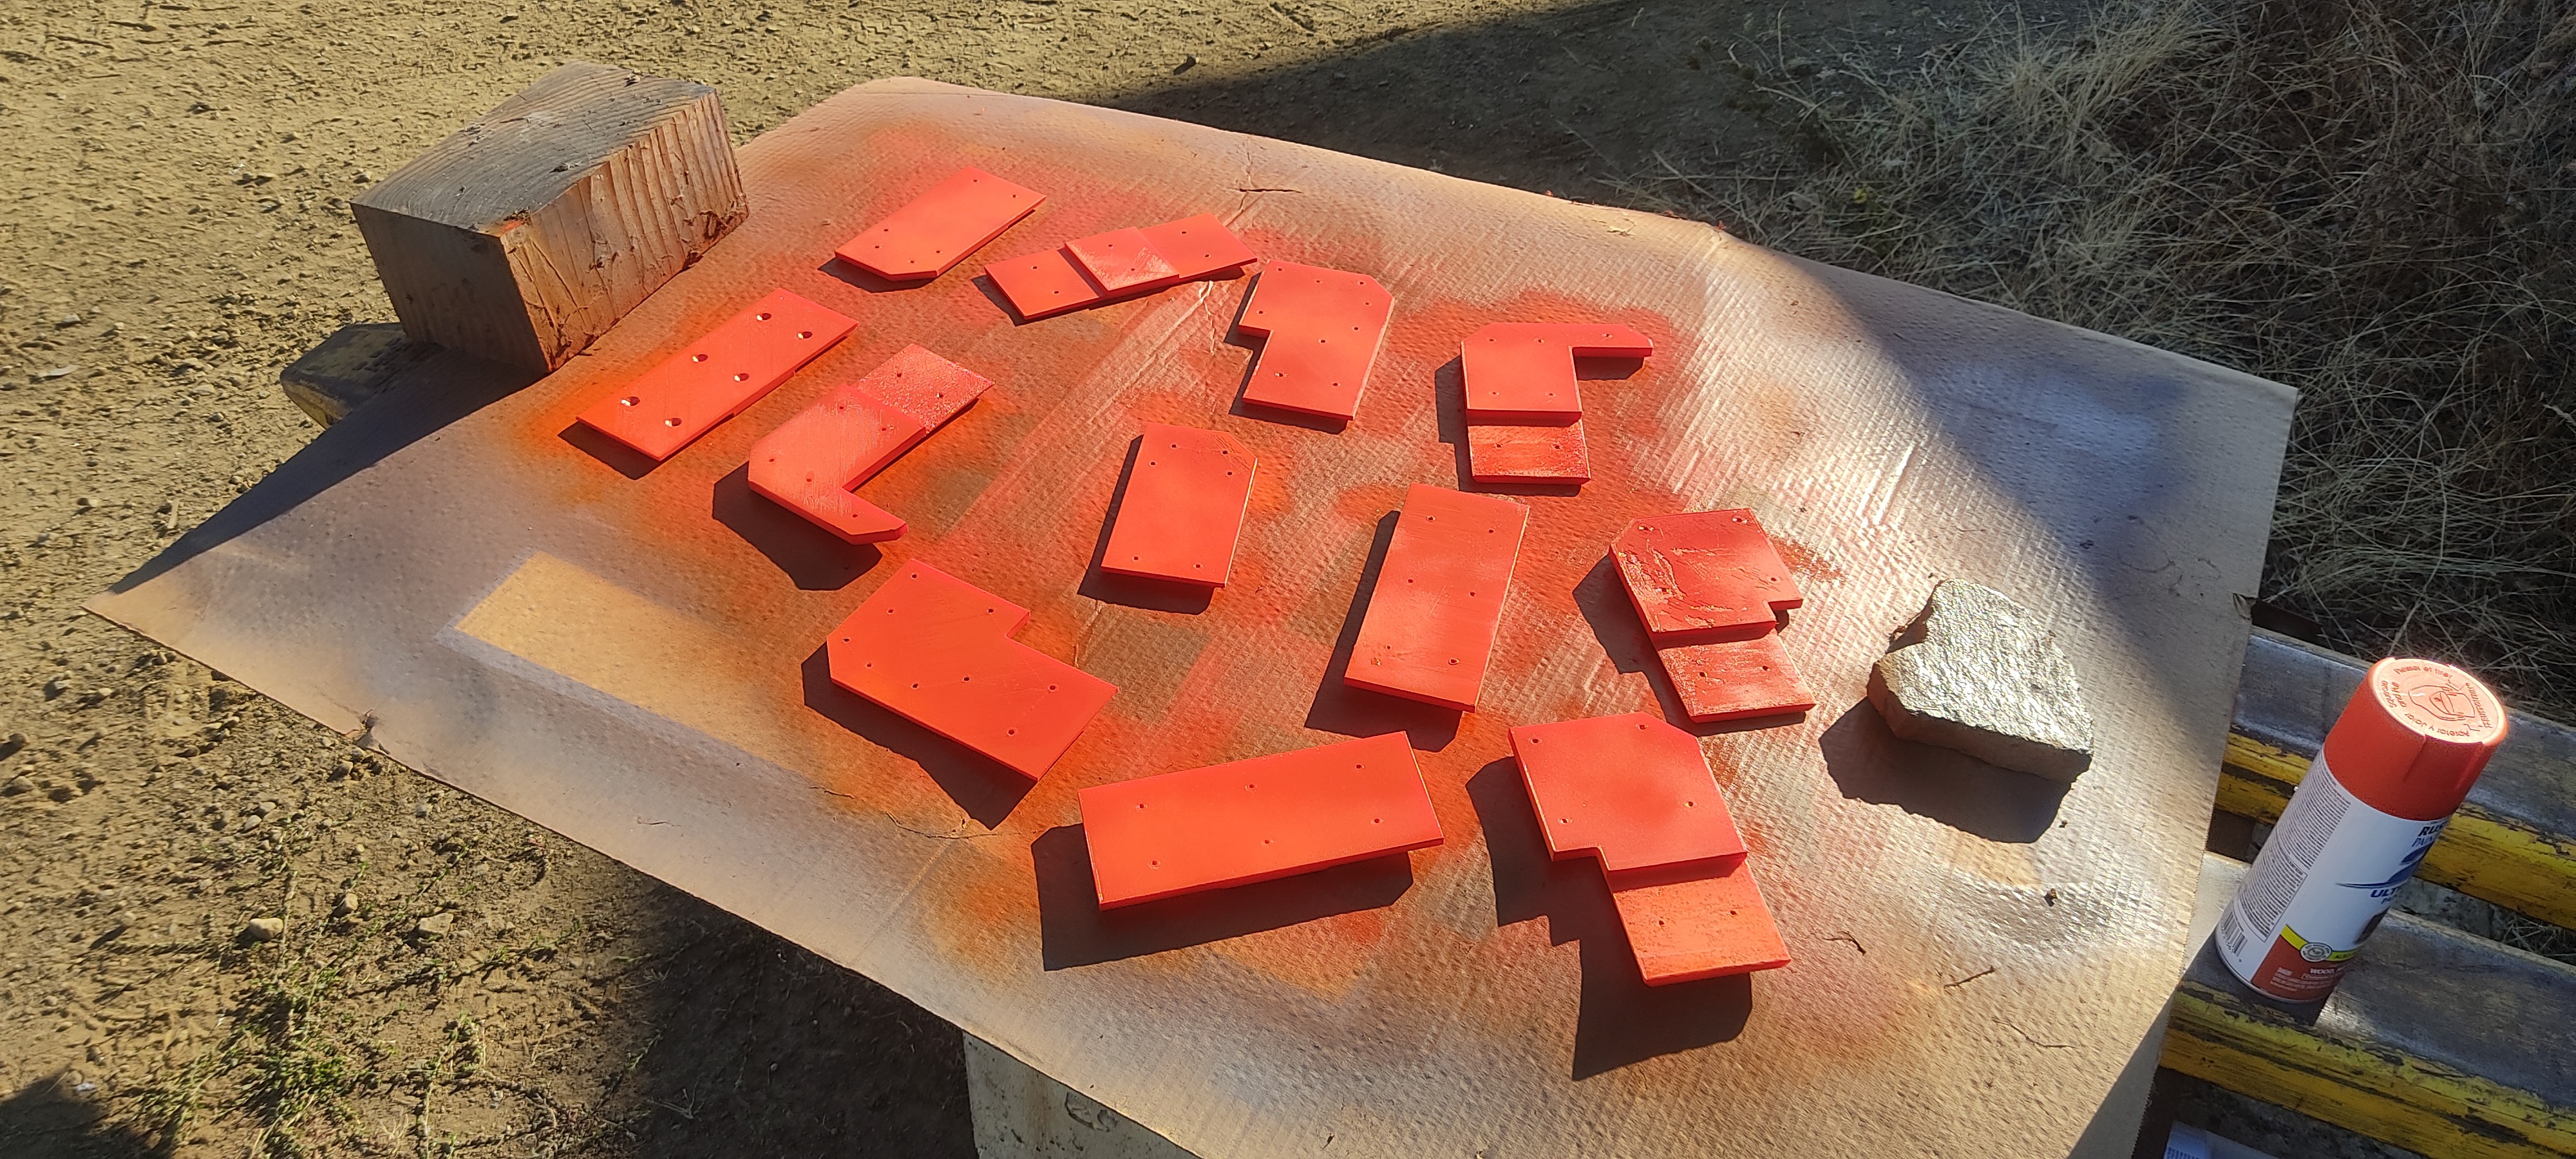
Painting (Rushing to get something ready for the Cyberdeck contest)
10/03/2022 at 04:20 • 0 commentsThe deadline was coming up so I decided to push forward (despite not having the keeb and monitor connectors up) and paint/assemble/build. I could add more later.
I laser cut the case, as is, out of mdf.![]() And the radiator assemblies were disassembled and sandblasted for paint adhesion. (Here's a before/after)
And the radiator assemblies were disassembled and sandblasted for paint adhesion. (Here's a before/after)![]()
Then primed, painted and clear coat.
![]()
![]()
![]()
-
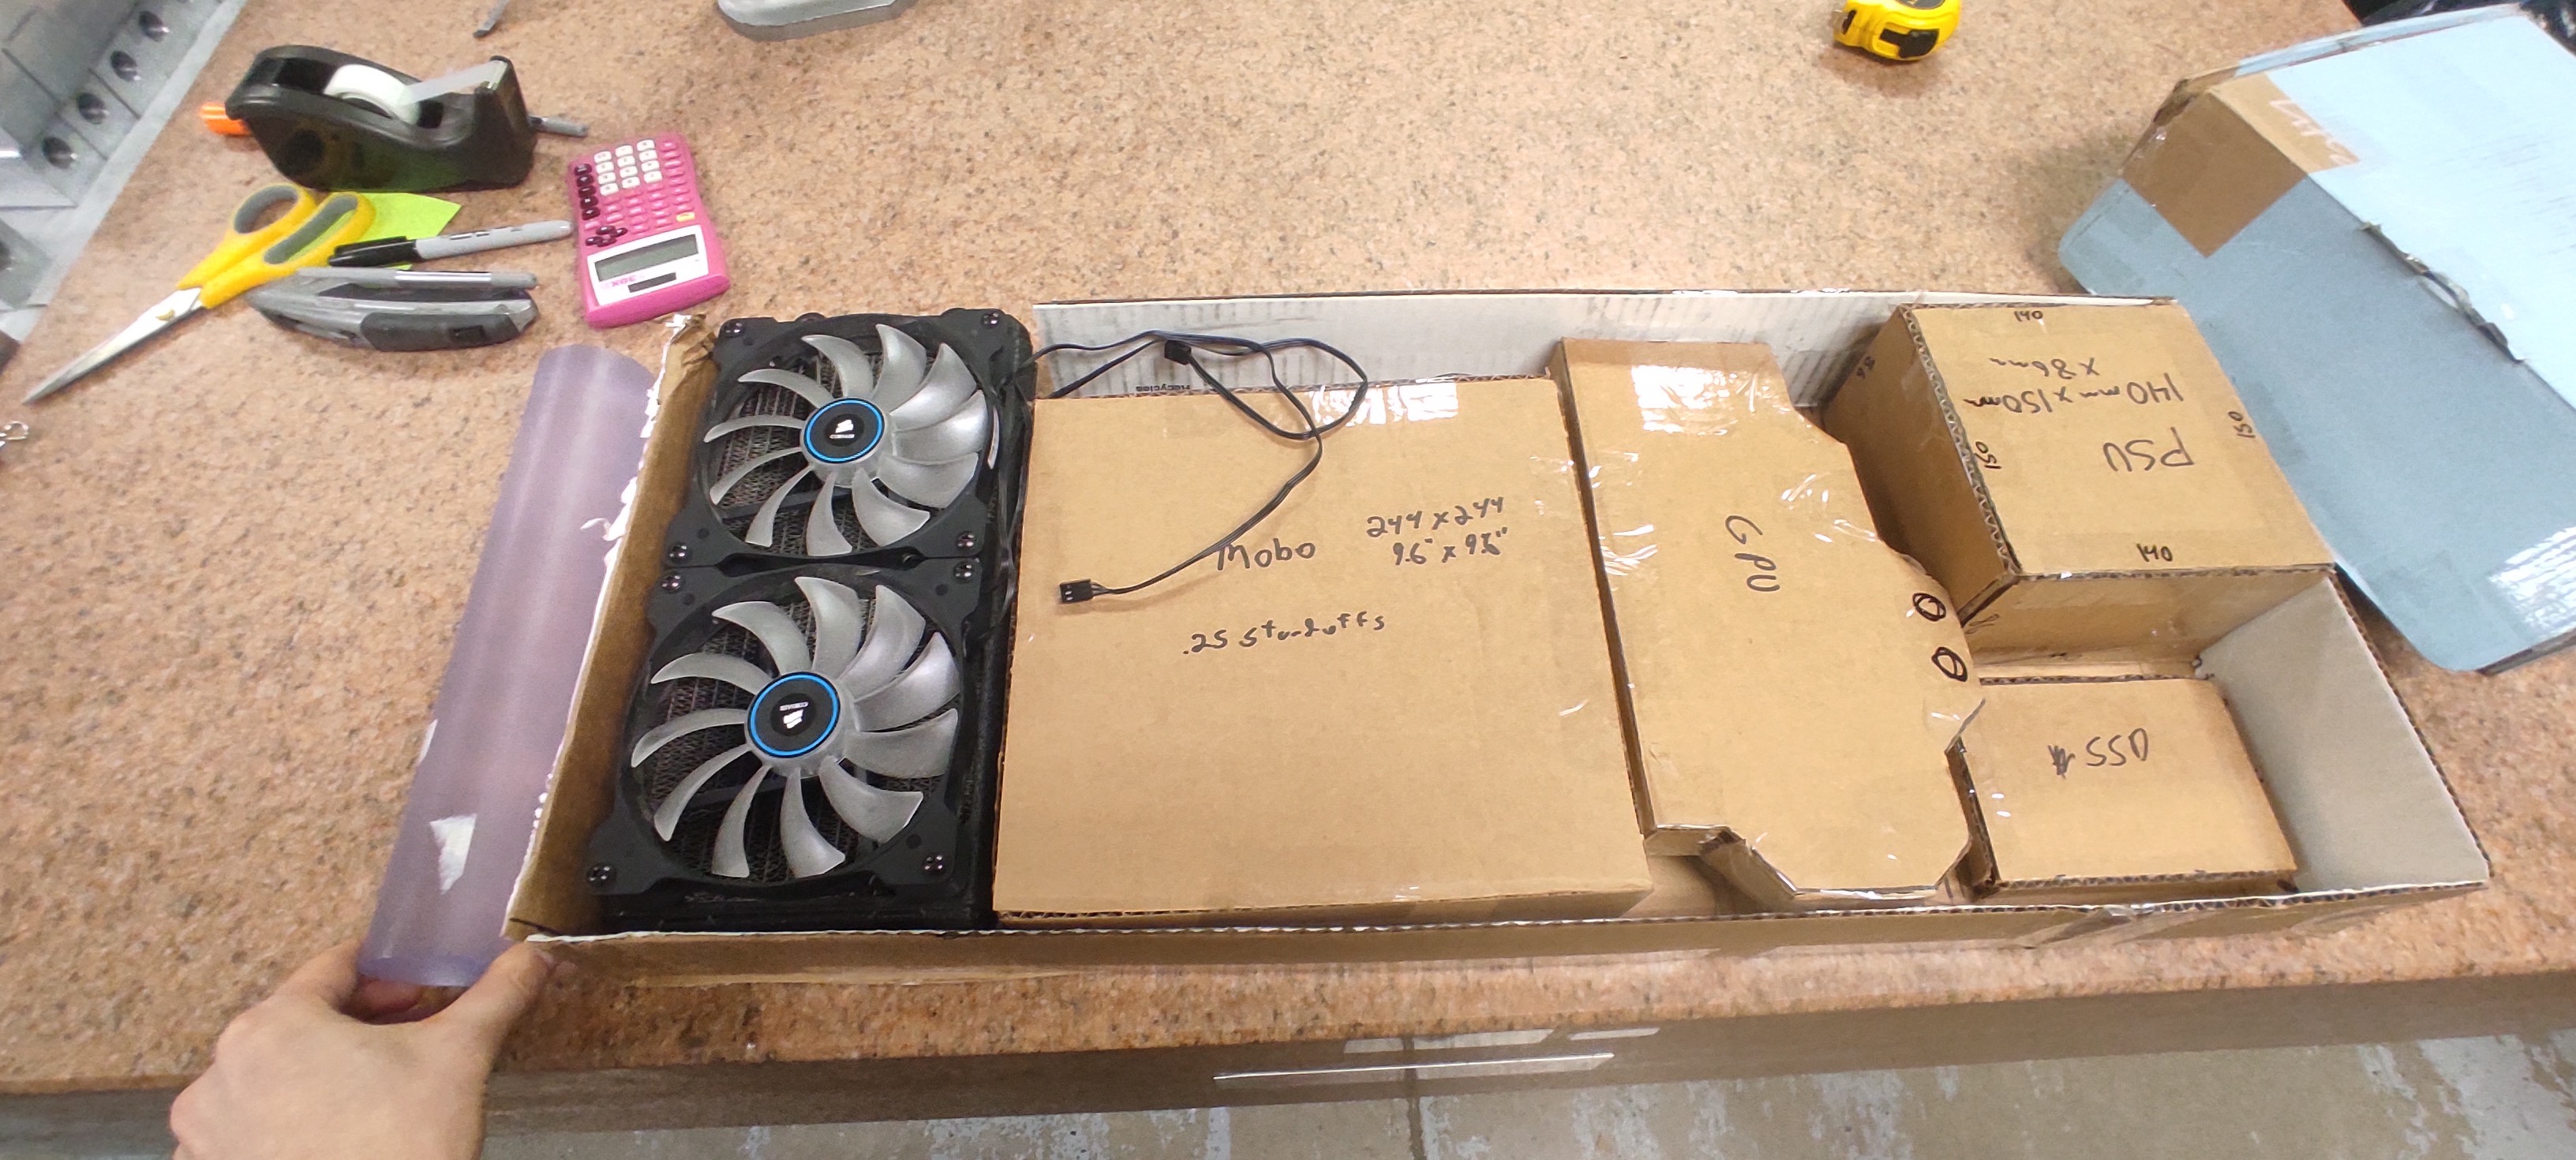
More test fitting
10/03/2022 at 04:12 • 0 commentsIt came time to check out progress so far and see how it'll fit.
![]()
![]()
![]()
![]()
Looking all right so far. Still lots to change. (Like a sturdier case than this cardboard.)
-
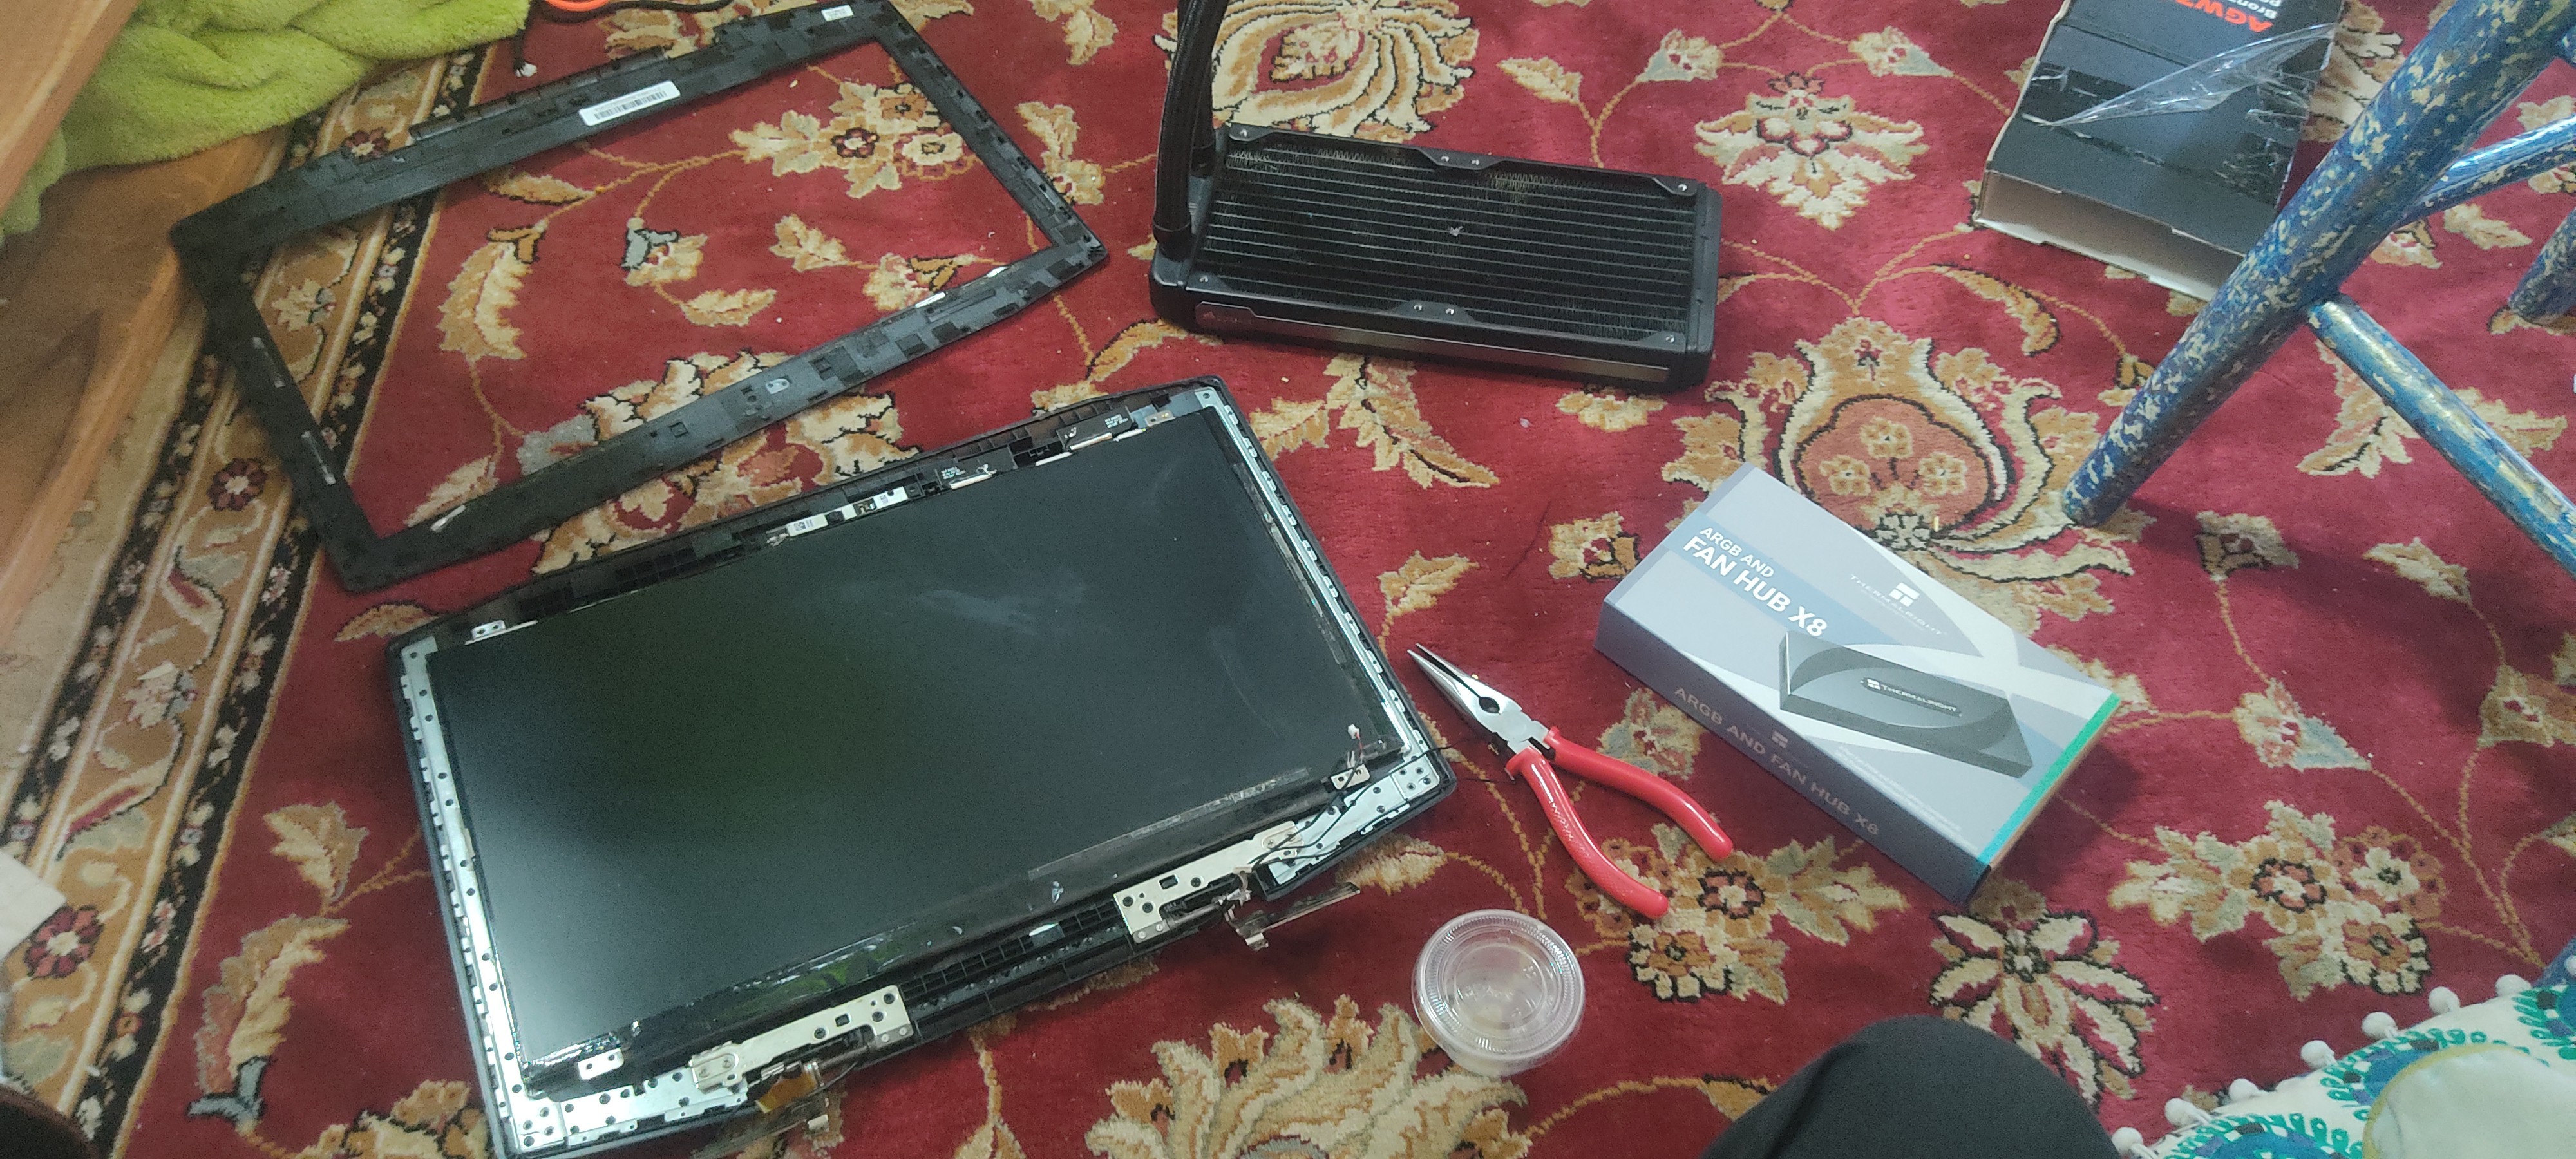
More Component Modification (Monitor and Keyboard)
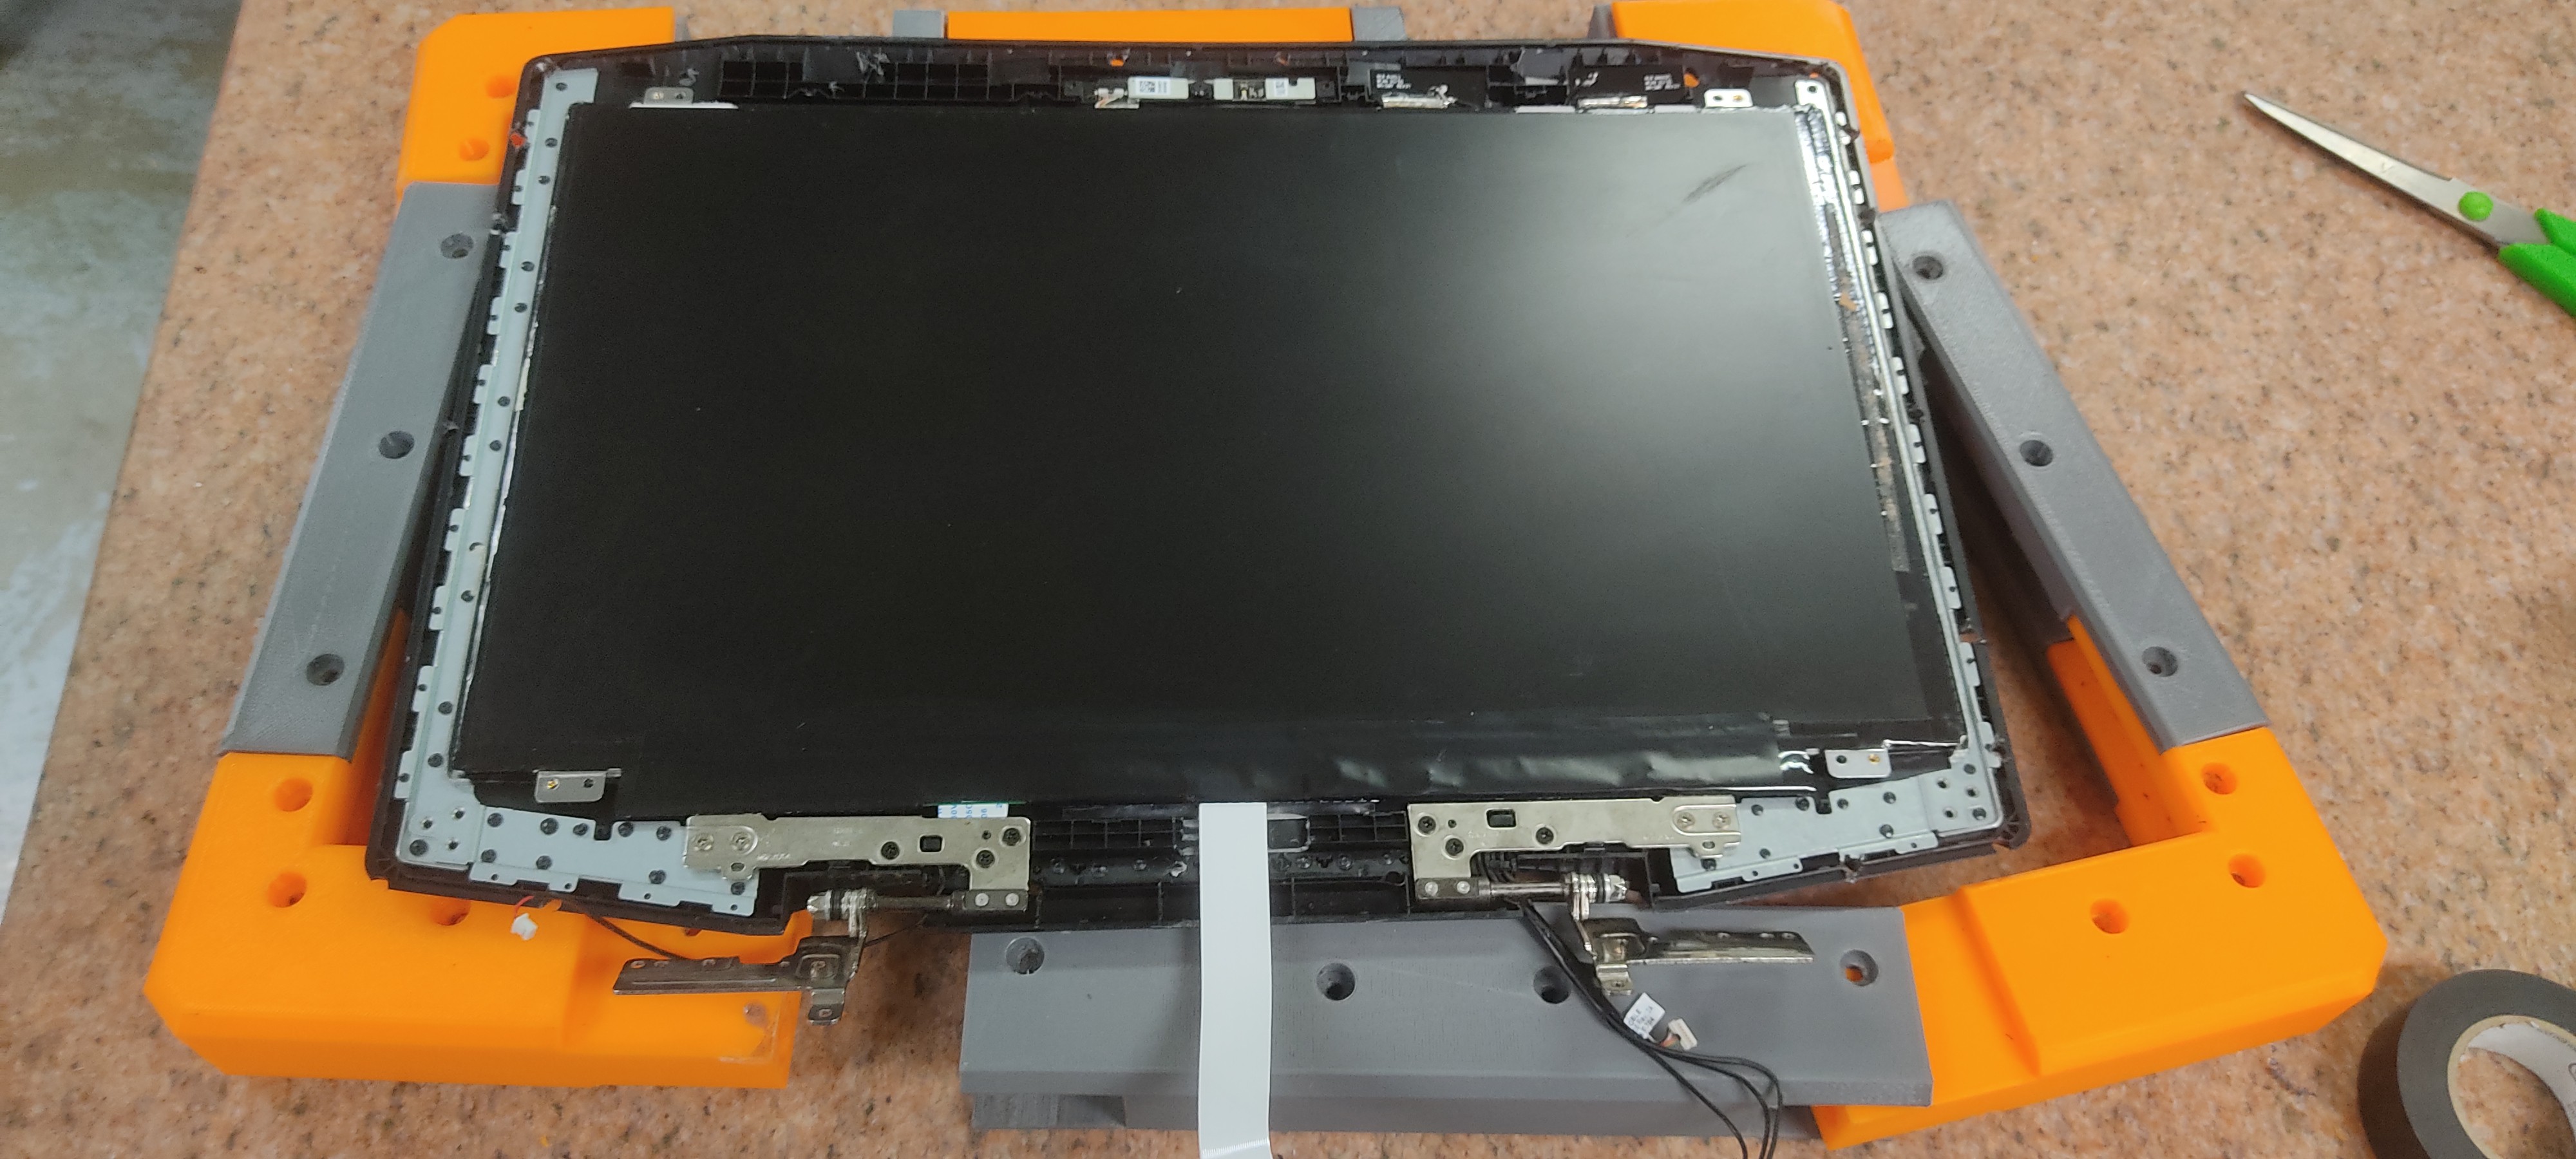
10/03/2022 at 04:09 • 0 commentsI wanted a folding screen and had an old laptop I had broken previously. Great for a donor and instructables led me to a seller on ebay for pc-boards that convert the format to hdmi. I set to building a rugged case for it to work with.
![]() First it was disassembled and I figured out where I could drill without harming the monitor. Then did a 3-d model of such in Fusion360 and printed the components.
First it was disassembled and I figured out where I could drill without harming the monitor. Then did a 3-d model of such in Fusion360 and printed the components. ![]()
Once everything was printed, drilled and set out, it was time to assemble.
![]() The cable was particularly tricky as I forgot to make a slot for it and just drilled a hole instead of re-printing. (It's a prototype, no need for "perfection")
The cable was particularly tricky as I forgot to make a slot for it and just drilled a hole instead of re-printing. (It's a prototype, no need for "perfection")![]()
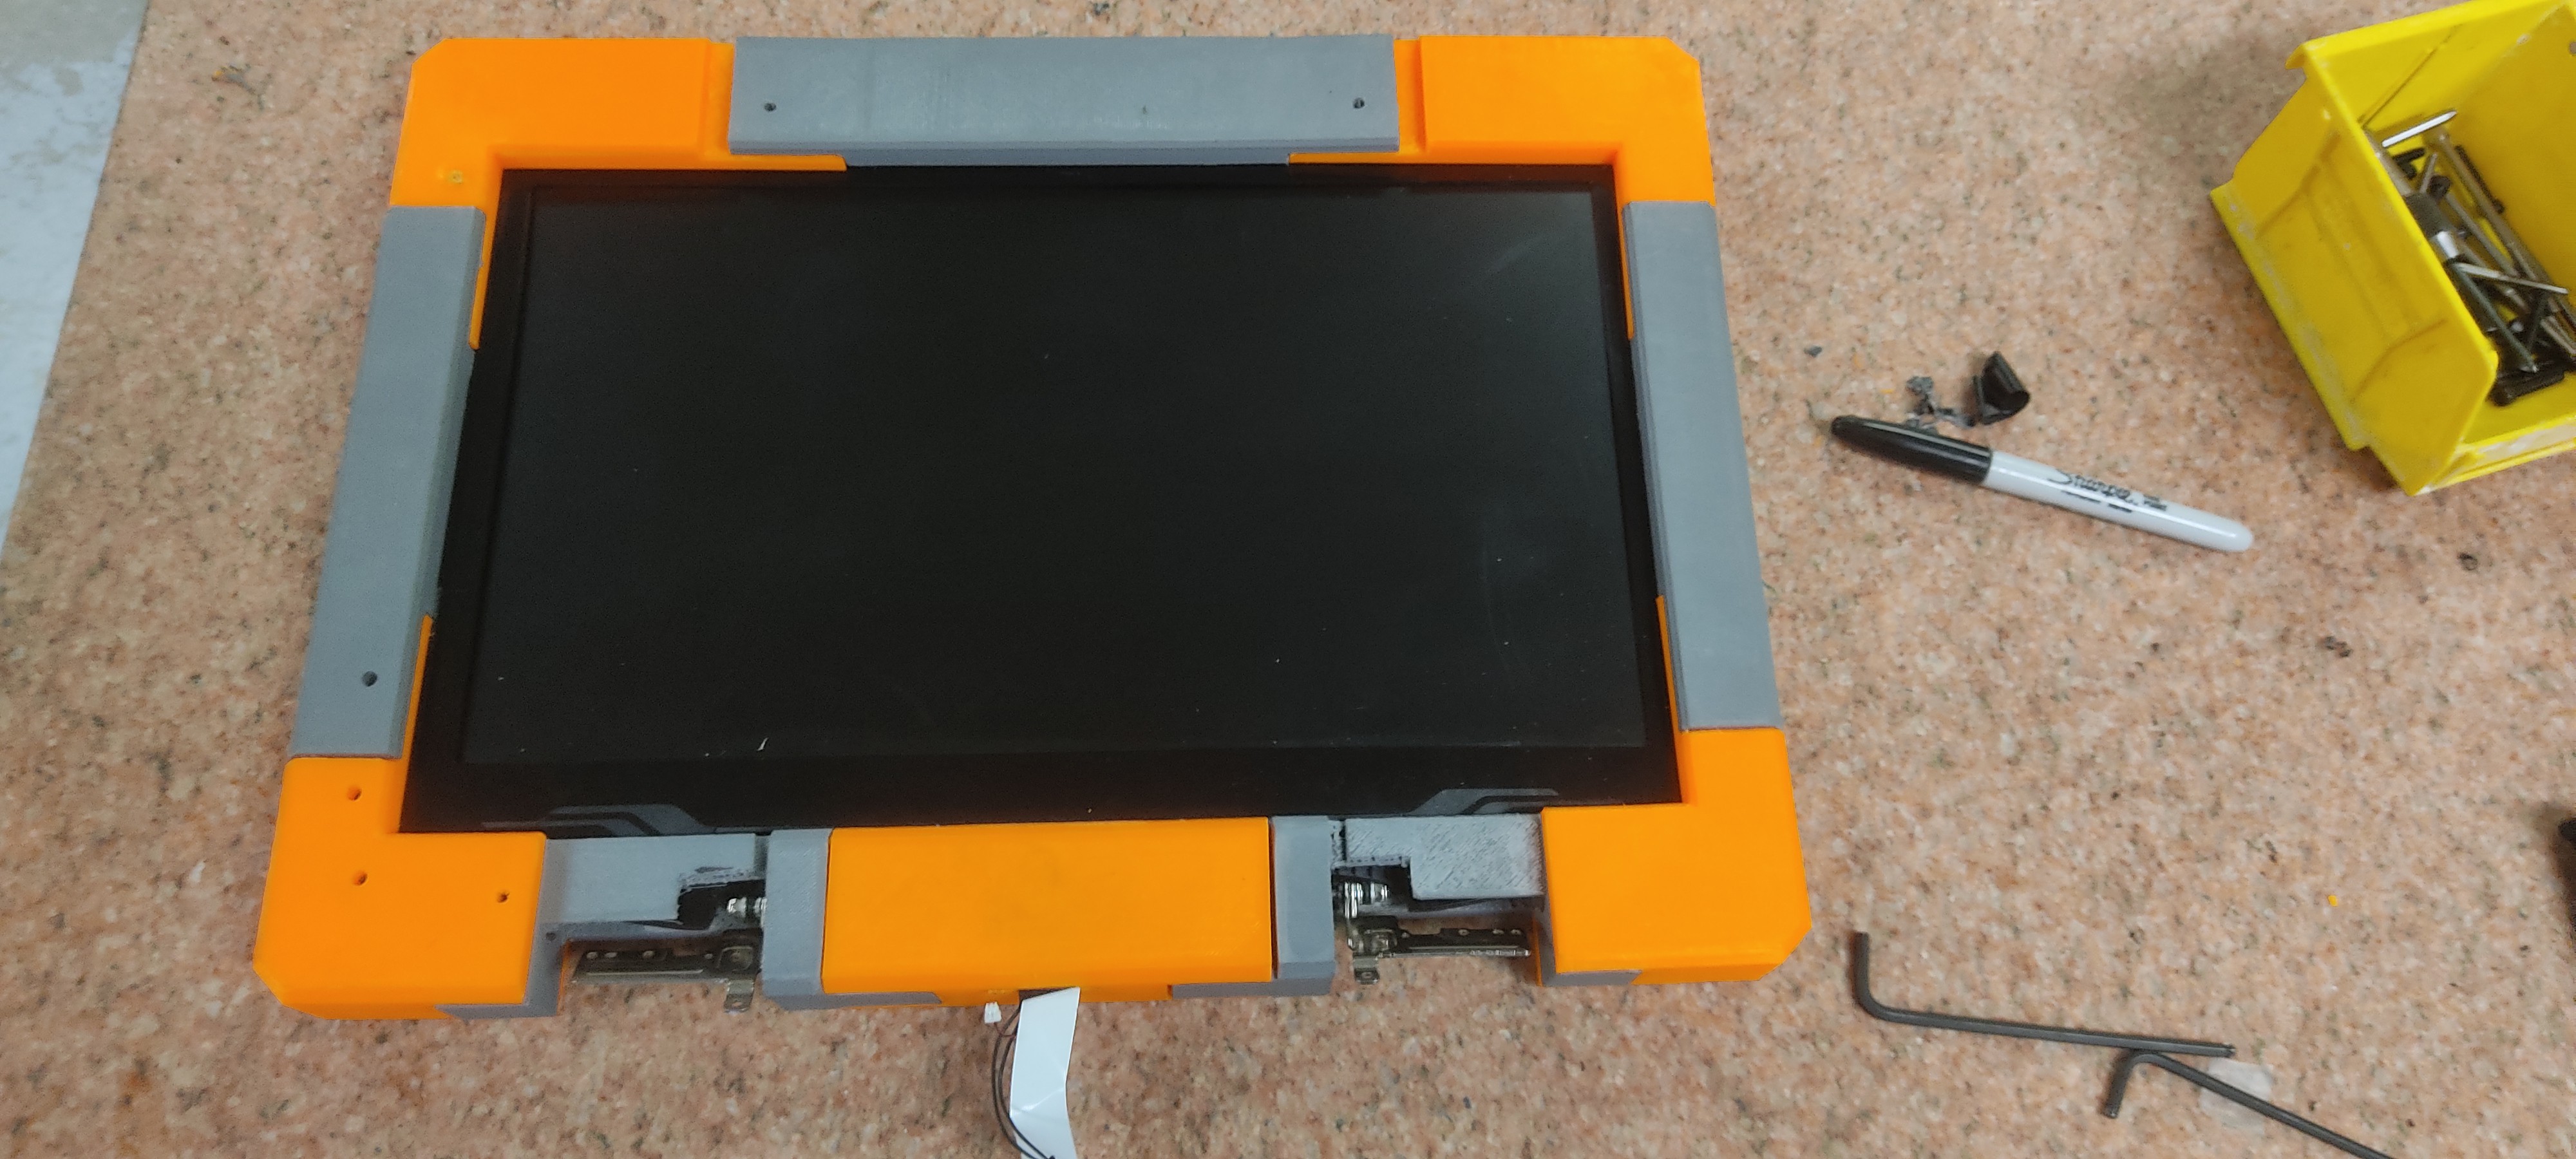
And put together!
![]() I even could use the same hinges!
I even could use the same hinges!
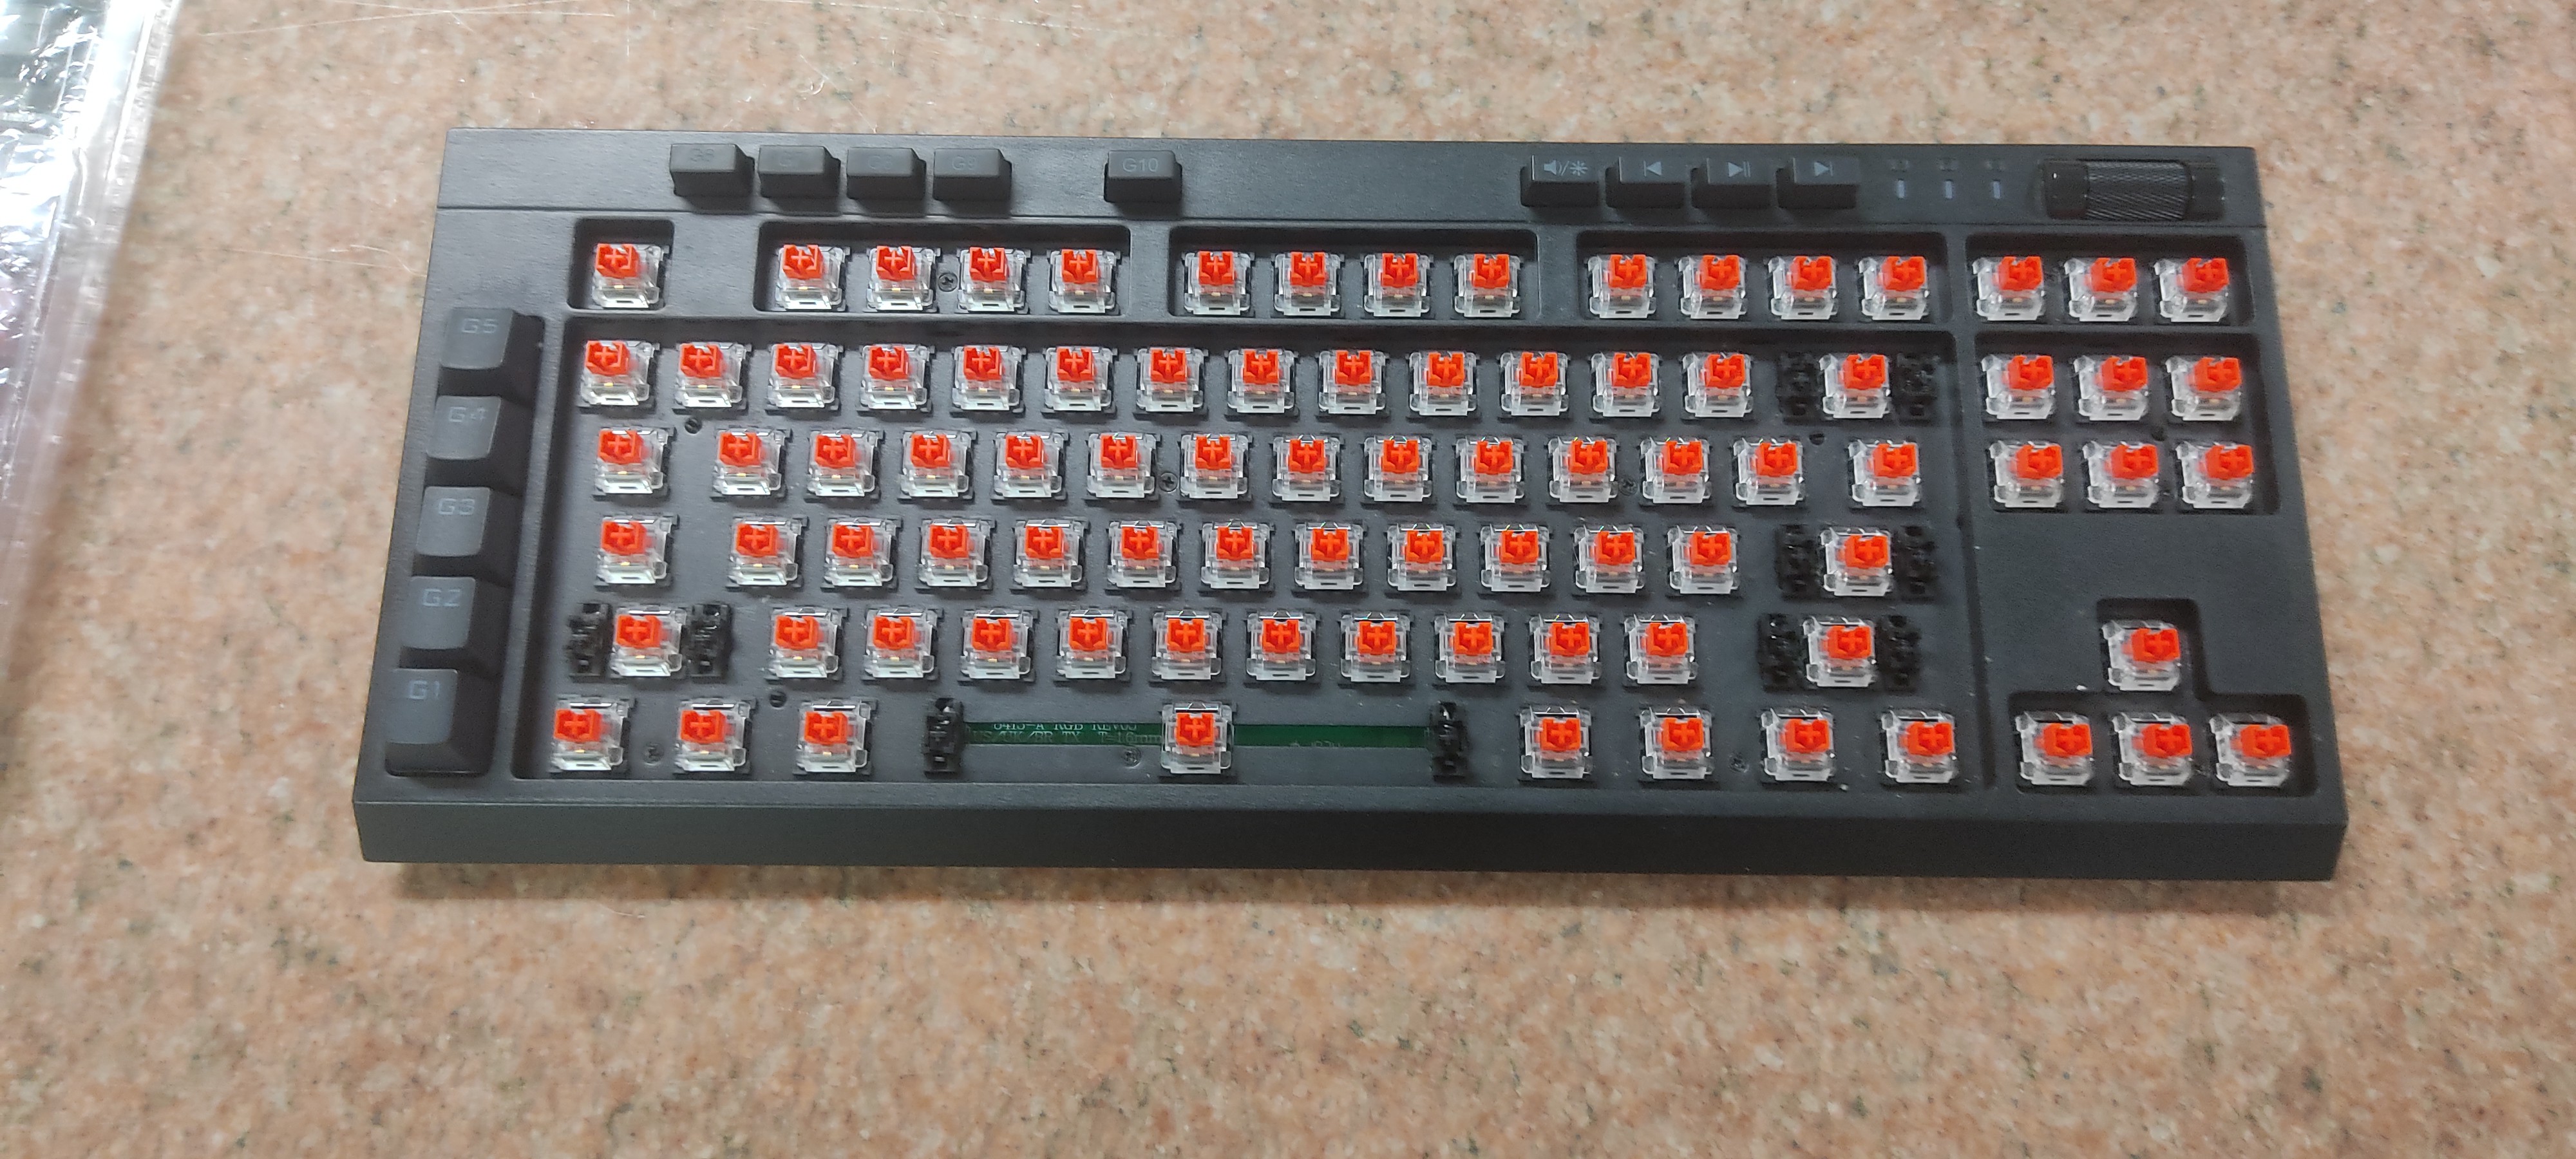
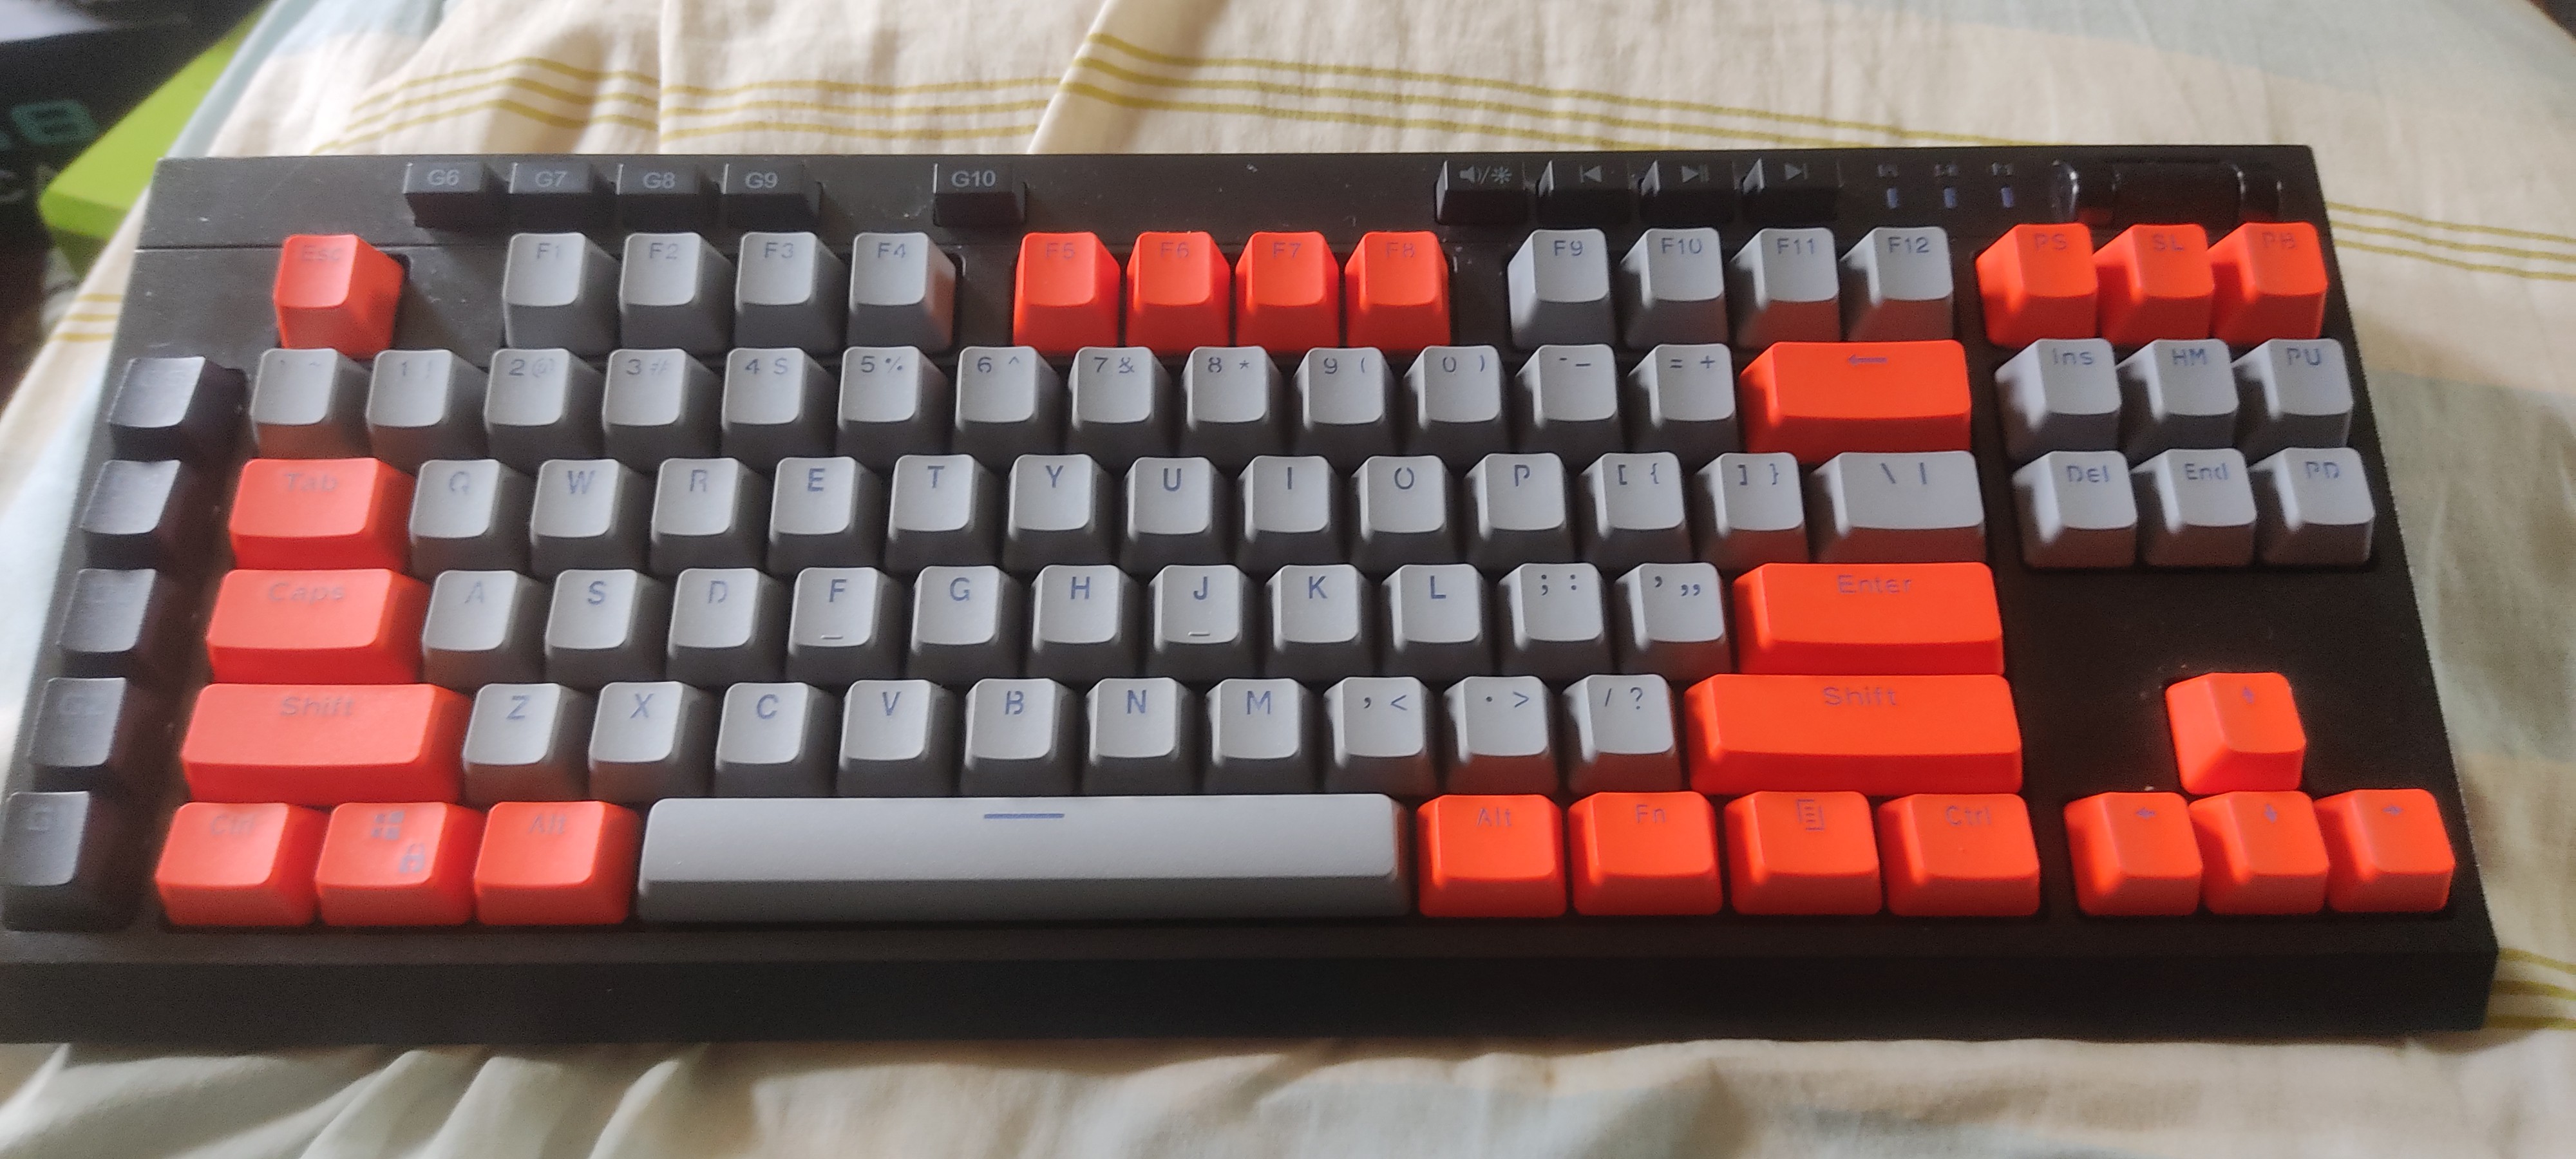
Next up, the keyboard was pretty easy to mod. I just ordered some new keys with shine-through lettering in matching colors...![]()
![]()
Took the old keys off...
Then put the new ones on. (After cleaning)
![]() Next up for these is to figure out the interface between the monitor, keyboard and case.
Next up for these is to figure out the interface between the monitor, keyboard and case. -
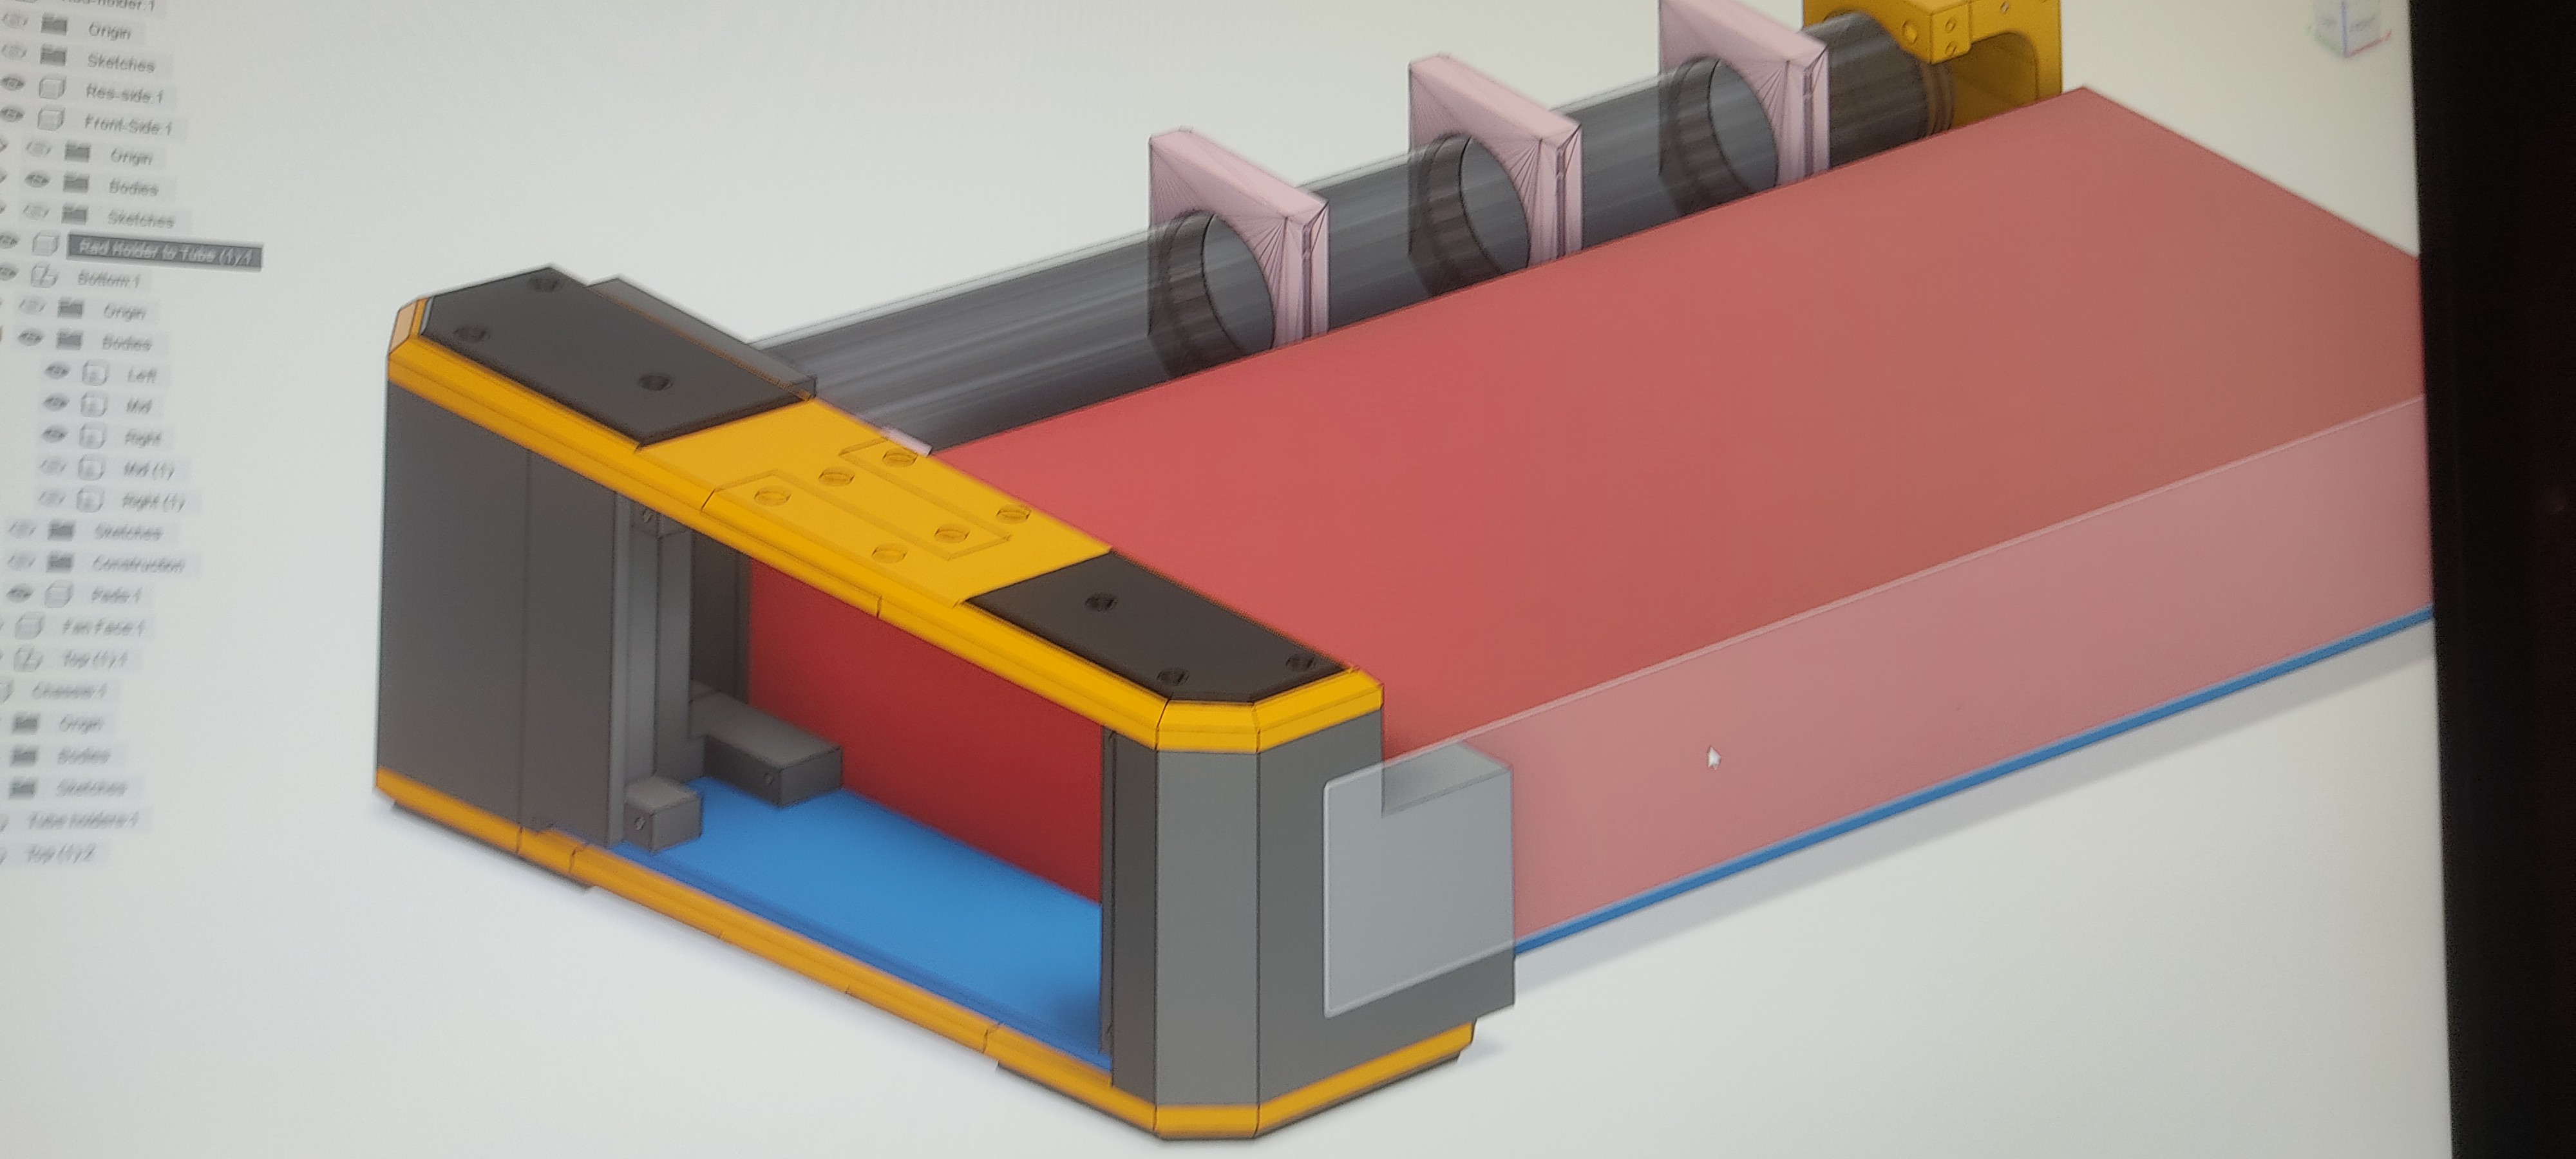
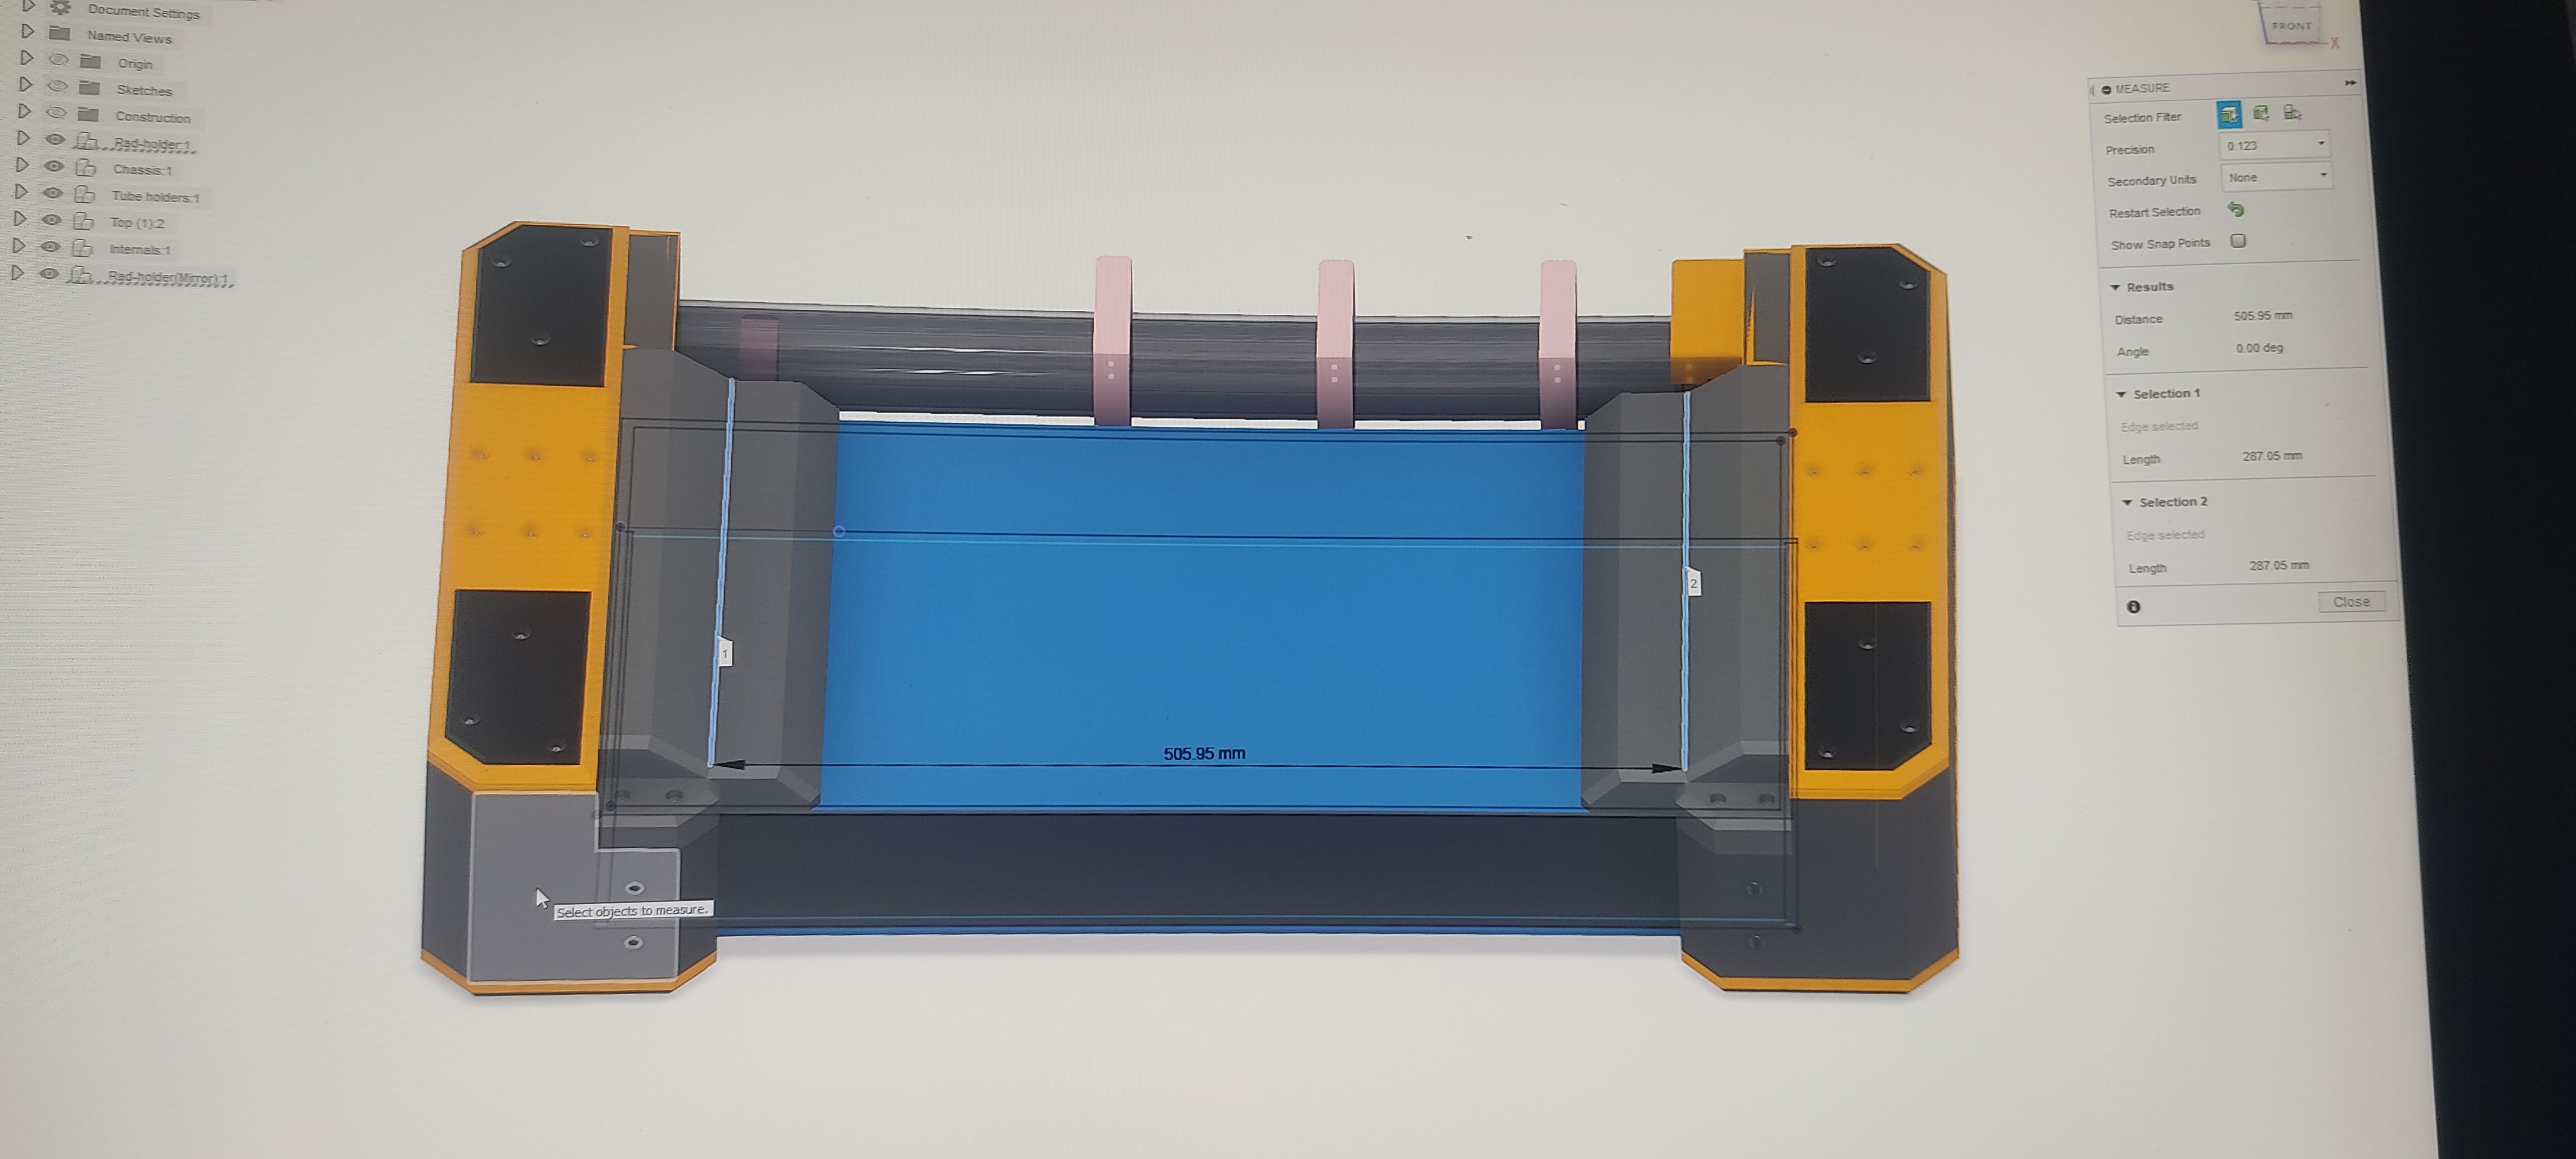
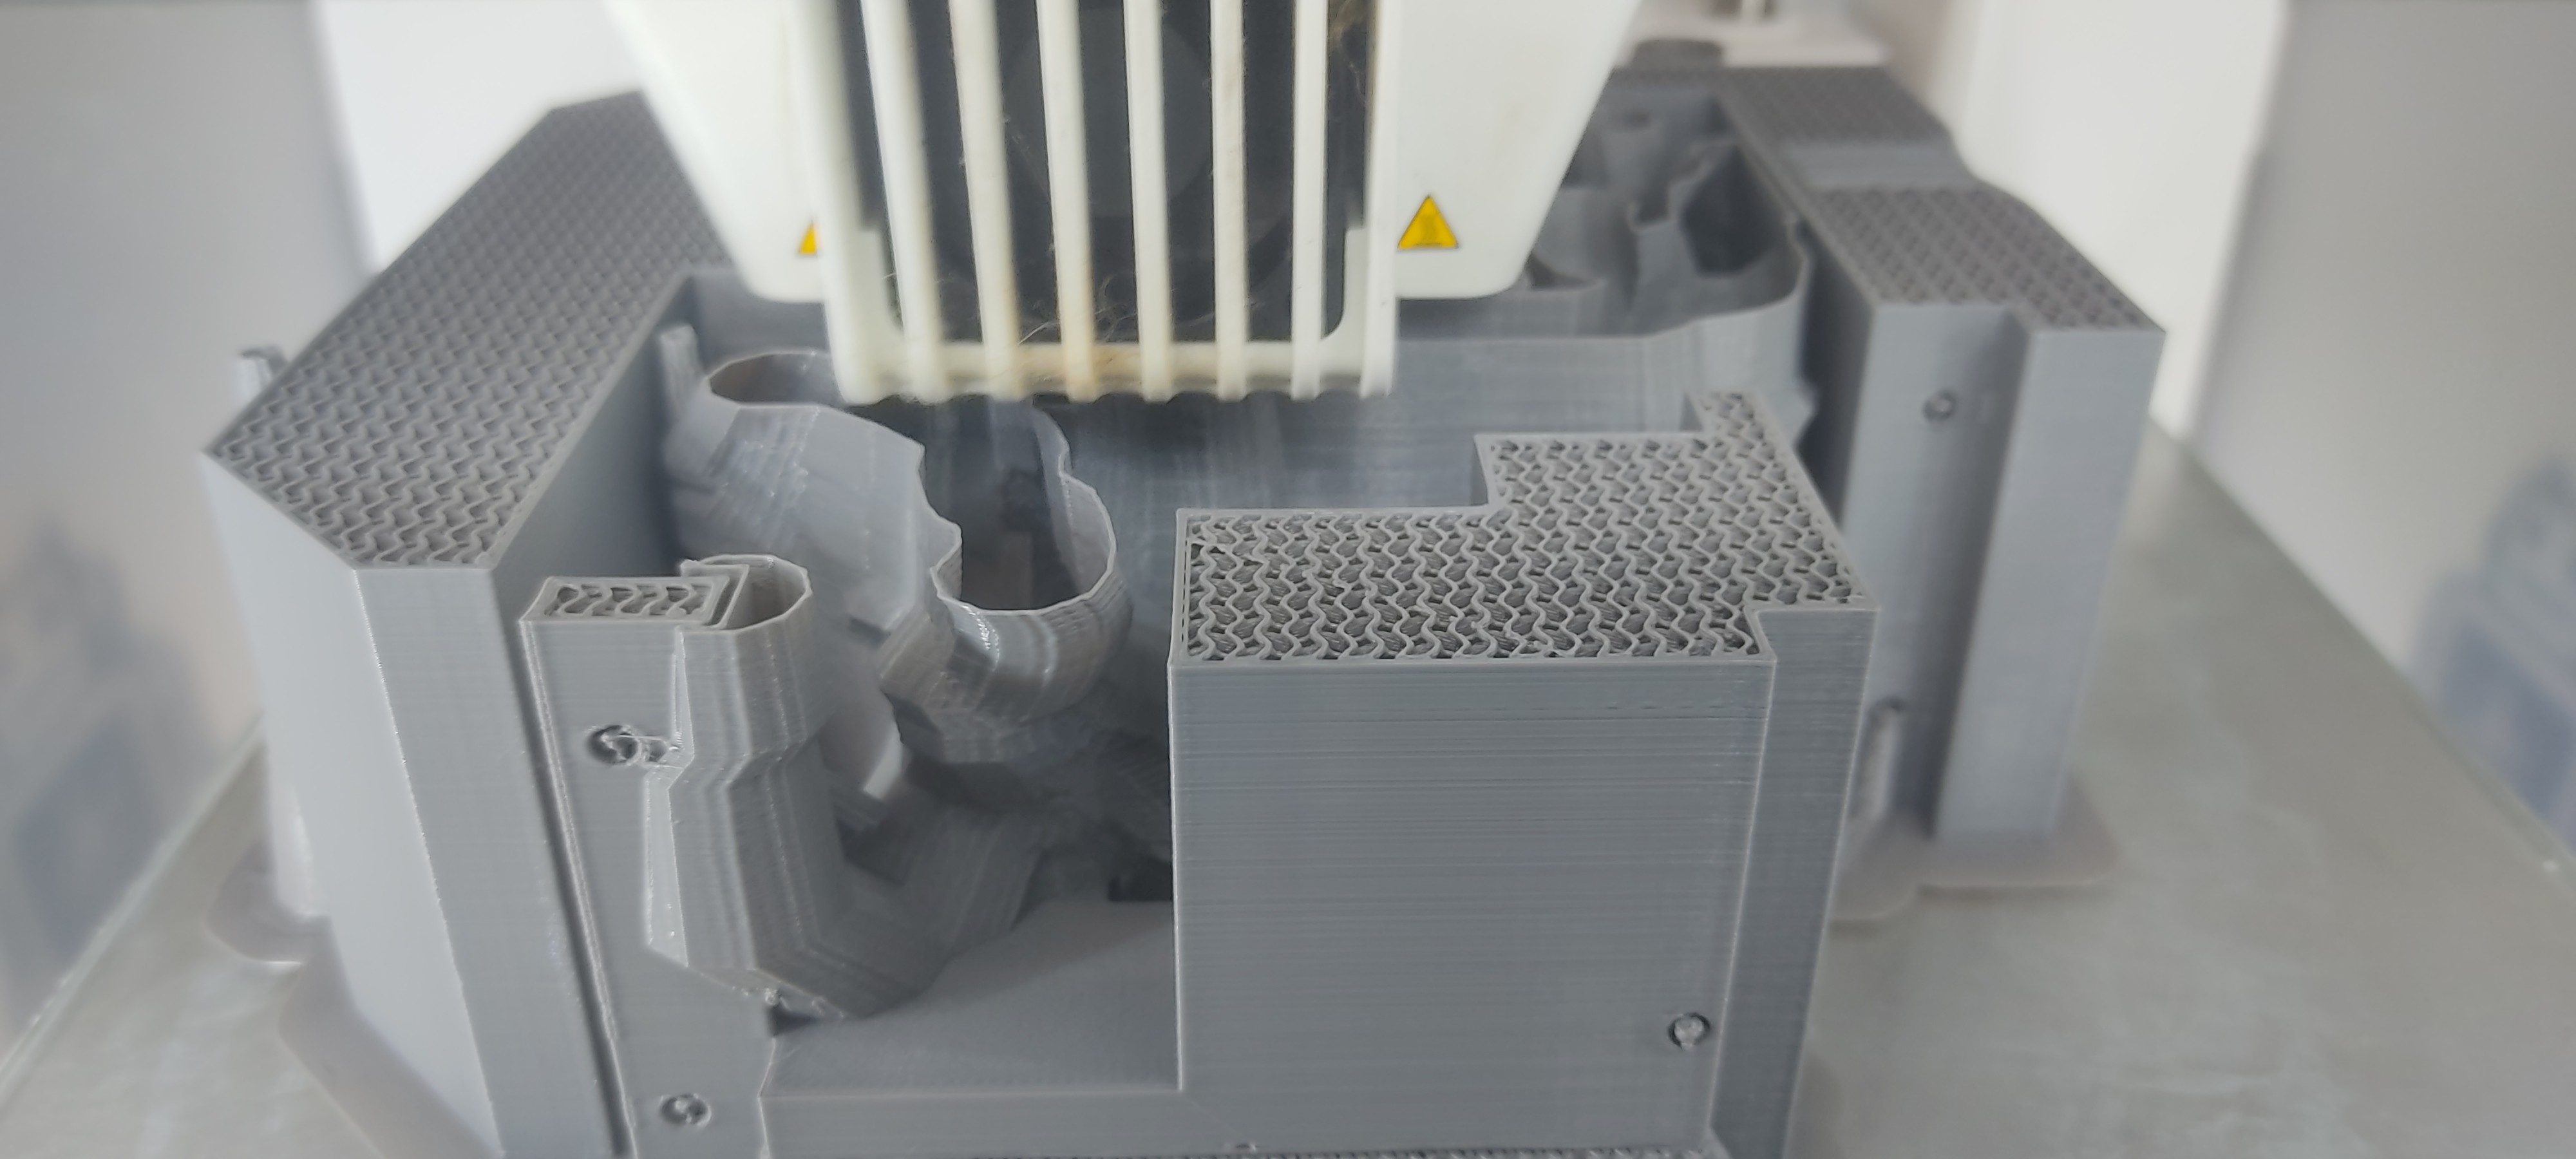
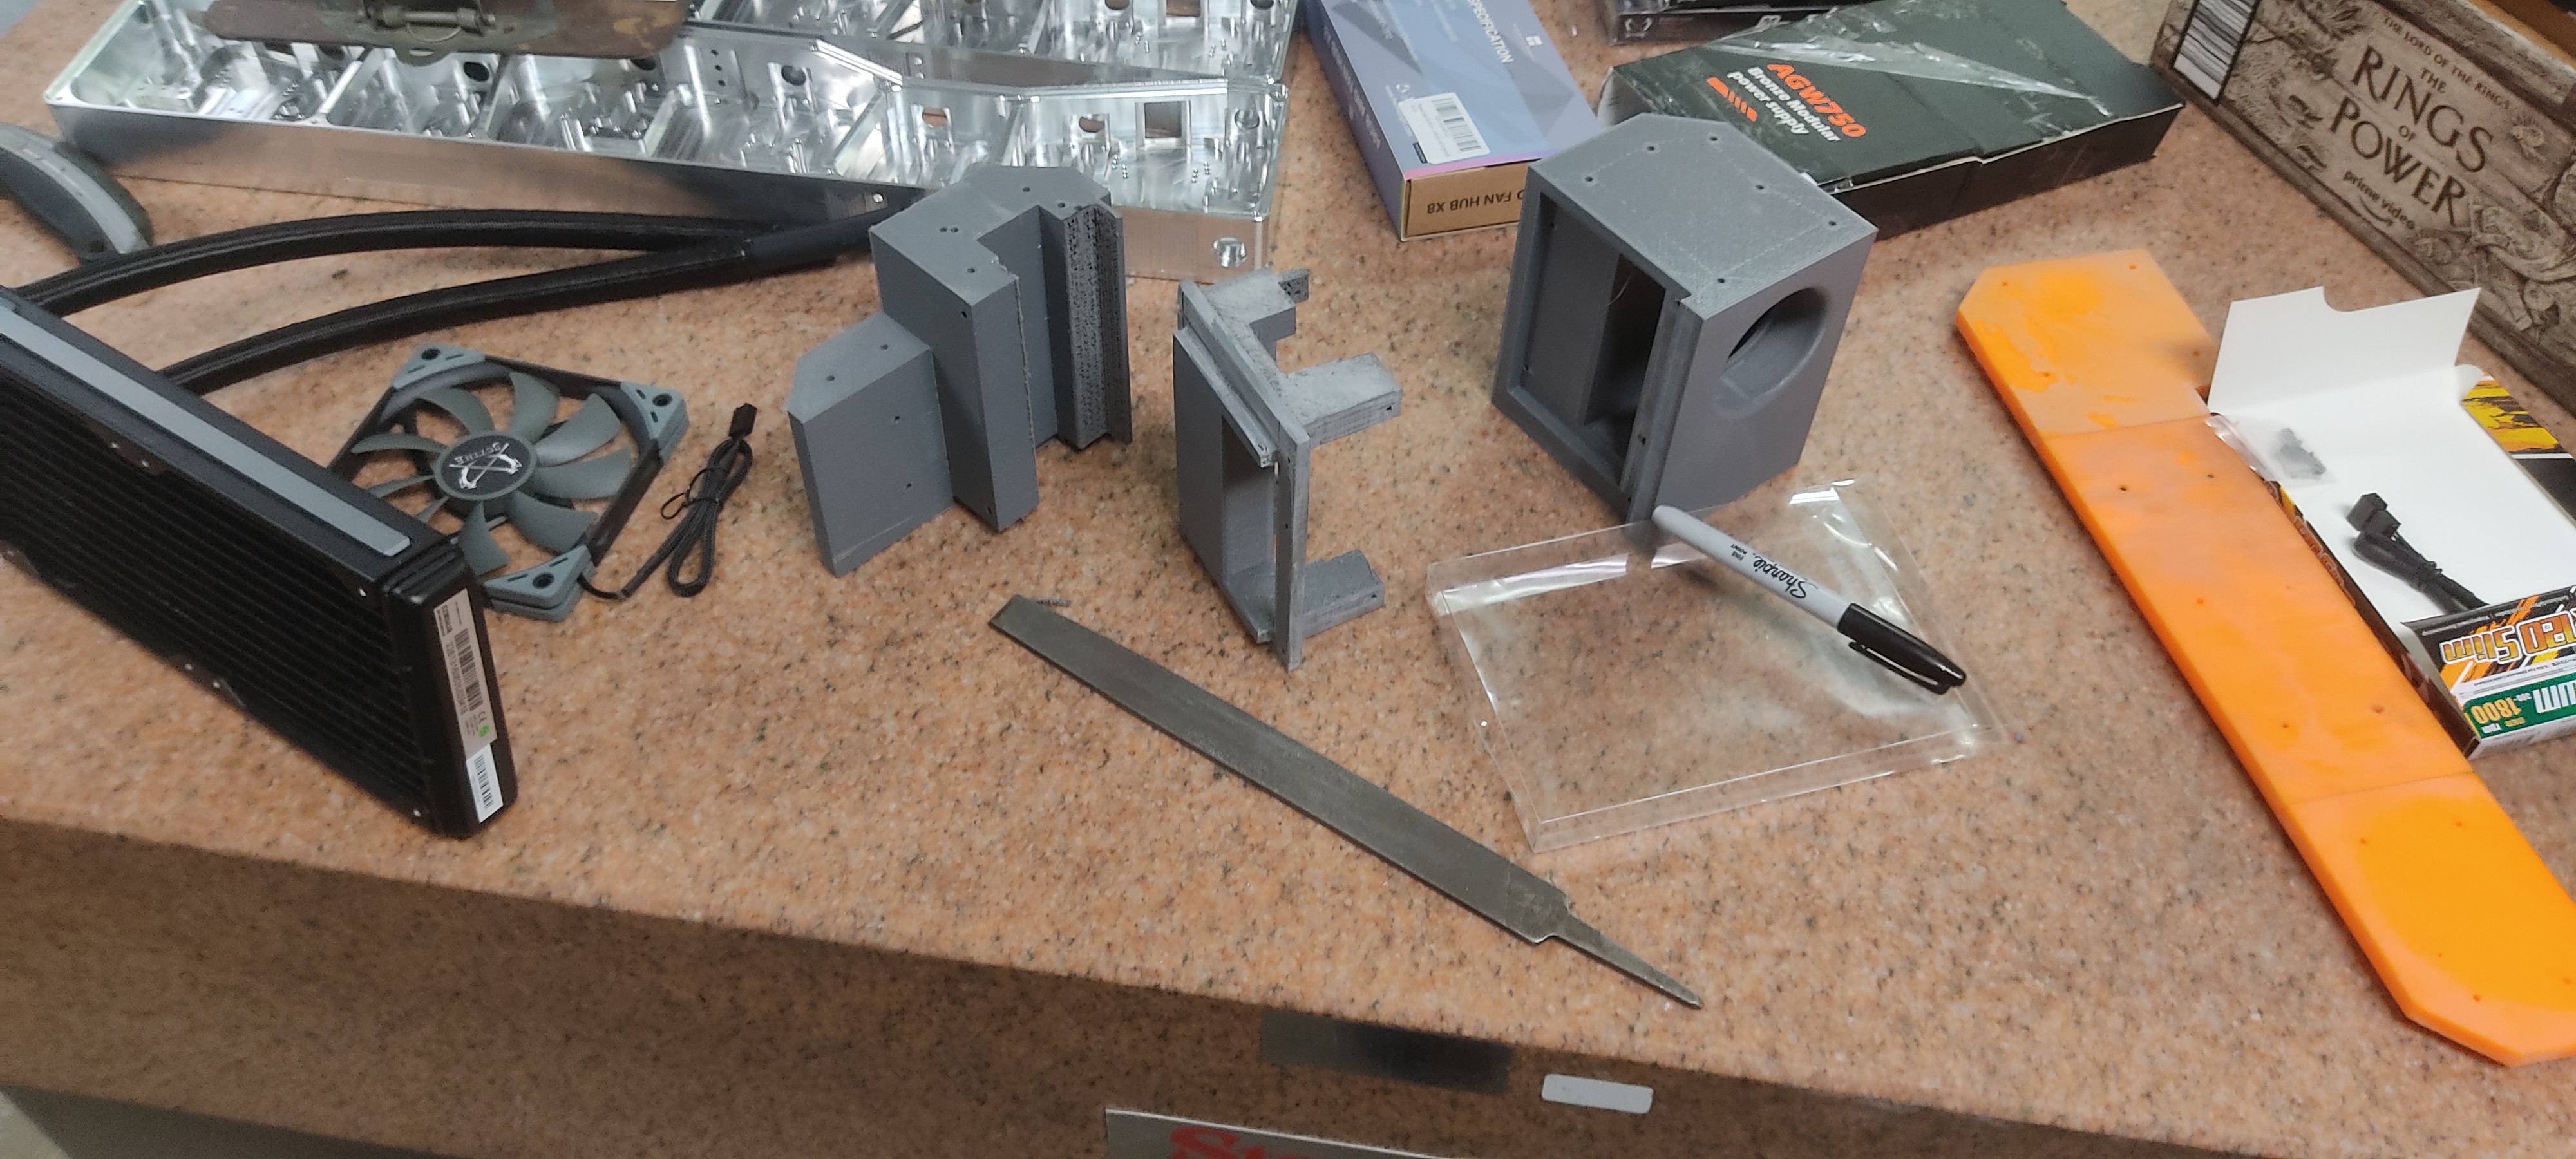
3-D Design and printing
10/03/2022 at 03:53 • 0 commentsI redesigned the radiator to being it's own enclosure rather than just bolted to the side. This hopefully would grant the assembly greater strength as well as visually look better.
![]()
![]()
And kept printing, sanding, assembling...
![]()
![]()
Looks good!
The experiment with TPU (I wanted bumpers) not so much...![]() Probably going to need a direct drive extruder for that. (I'm using an Ultimaker 3 currently)
Probably going to need a direct drive extruder for that. (I'm using an Ultimaker 3 currently) -
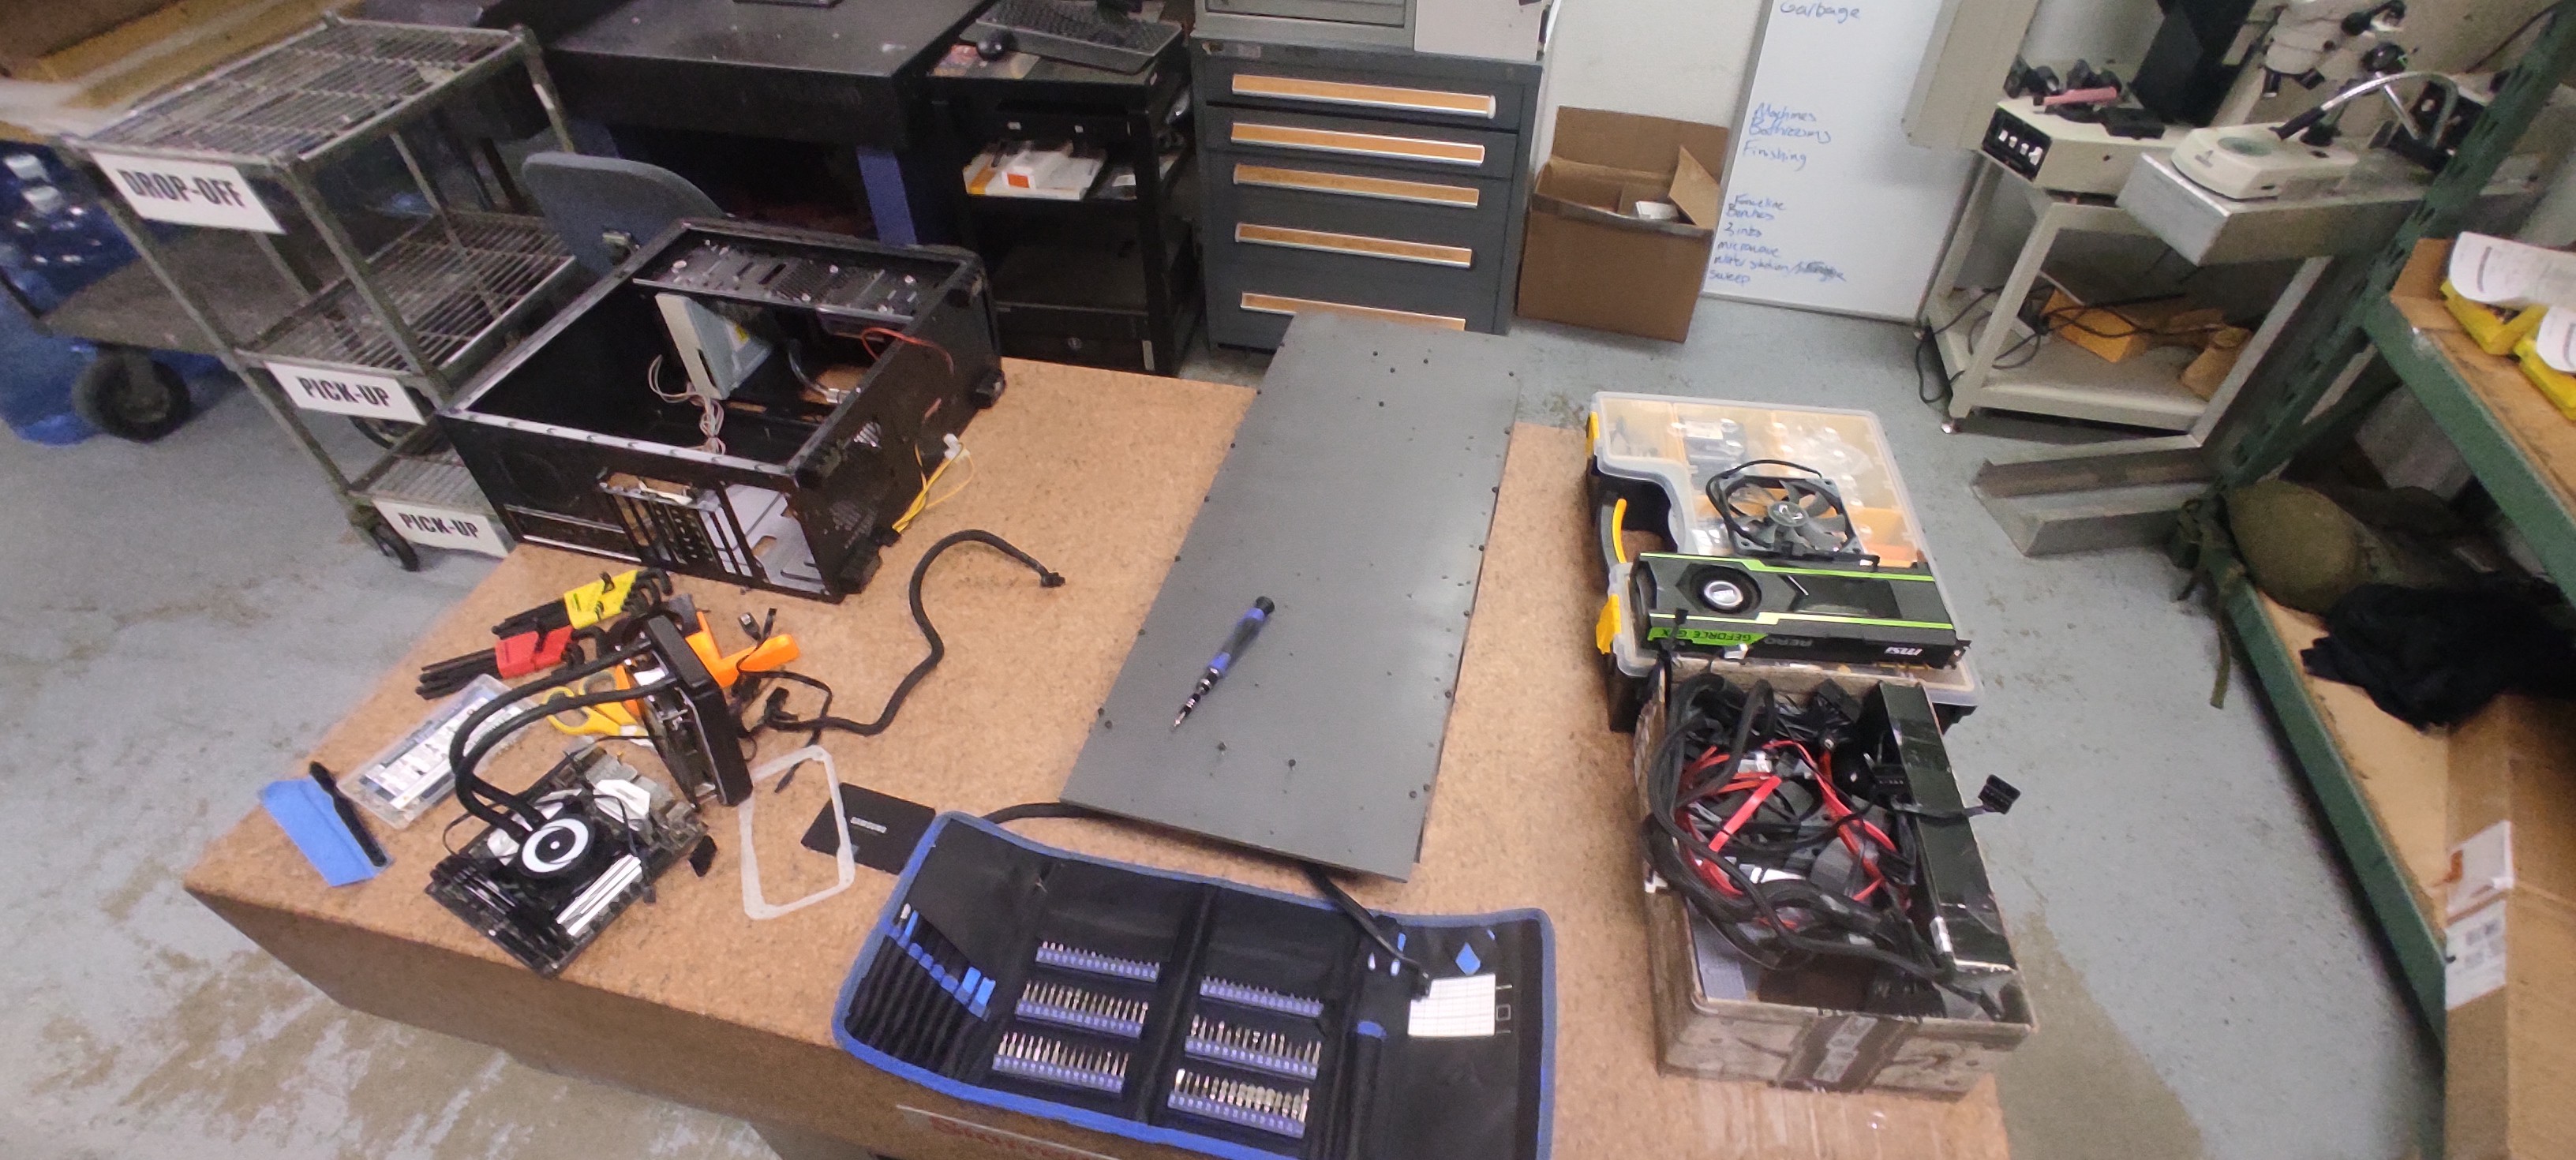
Test fitting and continued development
10/03/2022 at 03:39 • 0 commentsI'm a tactile learner, so generally need to get my hands on something to figure out if it's going to work or not. At this stage I put together what I had to see how it could fit together.
![]()
![]()
This version I had already 3-D printed a few things and was using a larger radiator I came upon. The asymetry was neat, but with modern graphics cards generating so much heat, I determined I needed to distribute the load further. Revisions incoming.
-
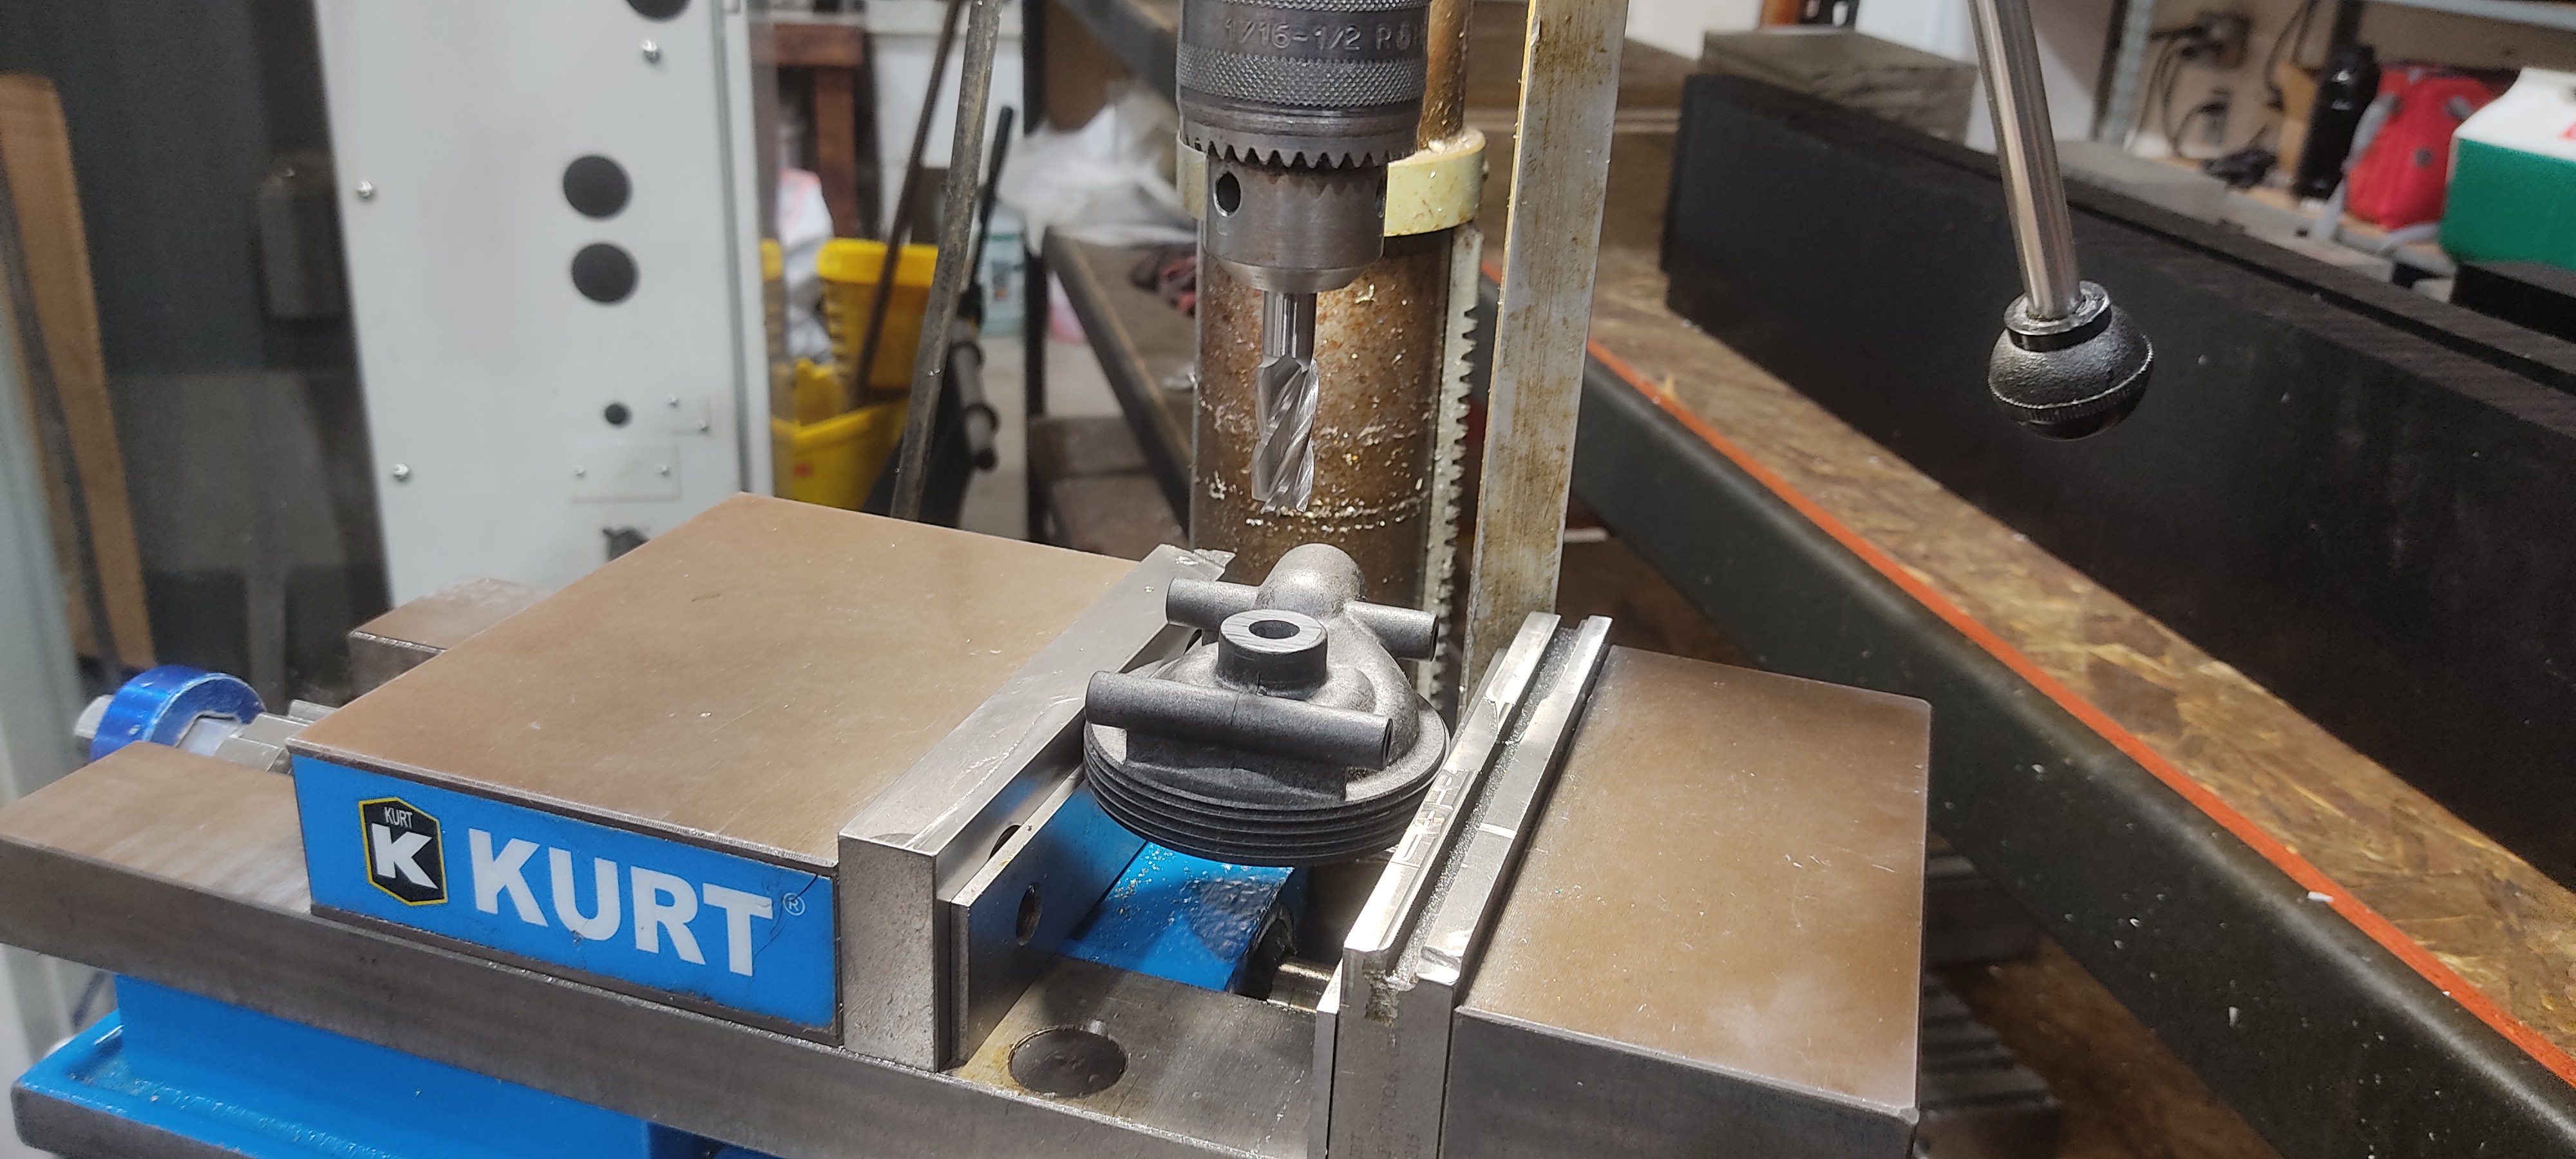
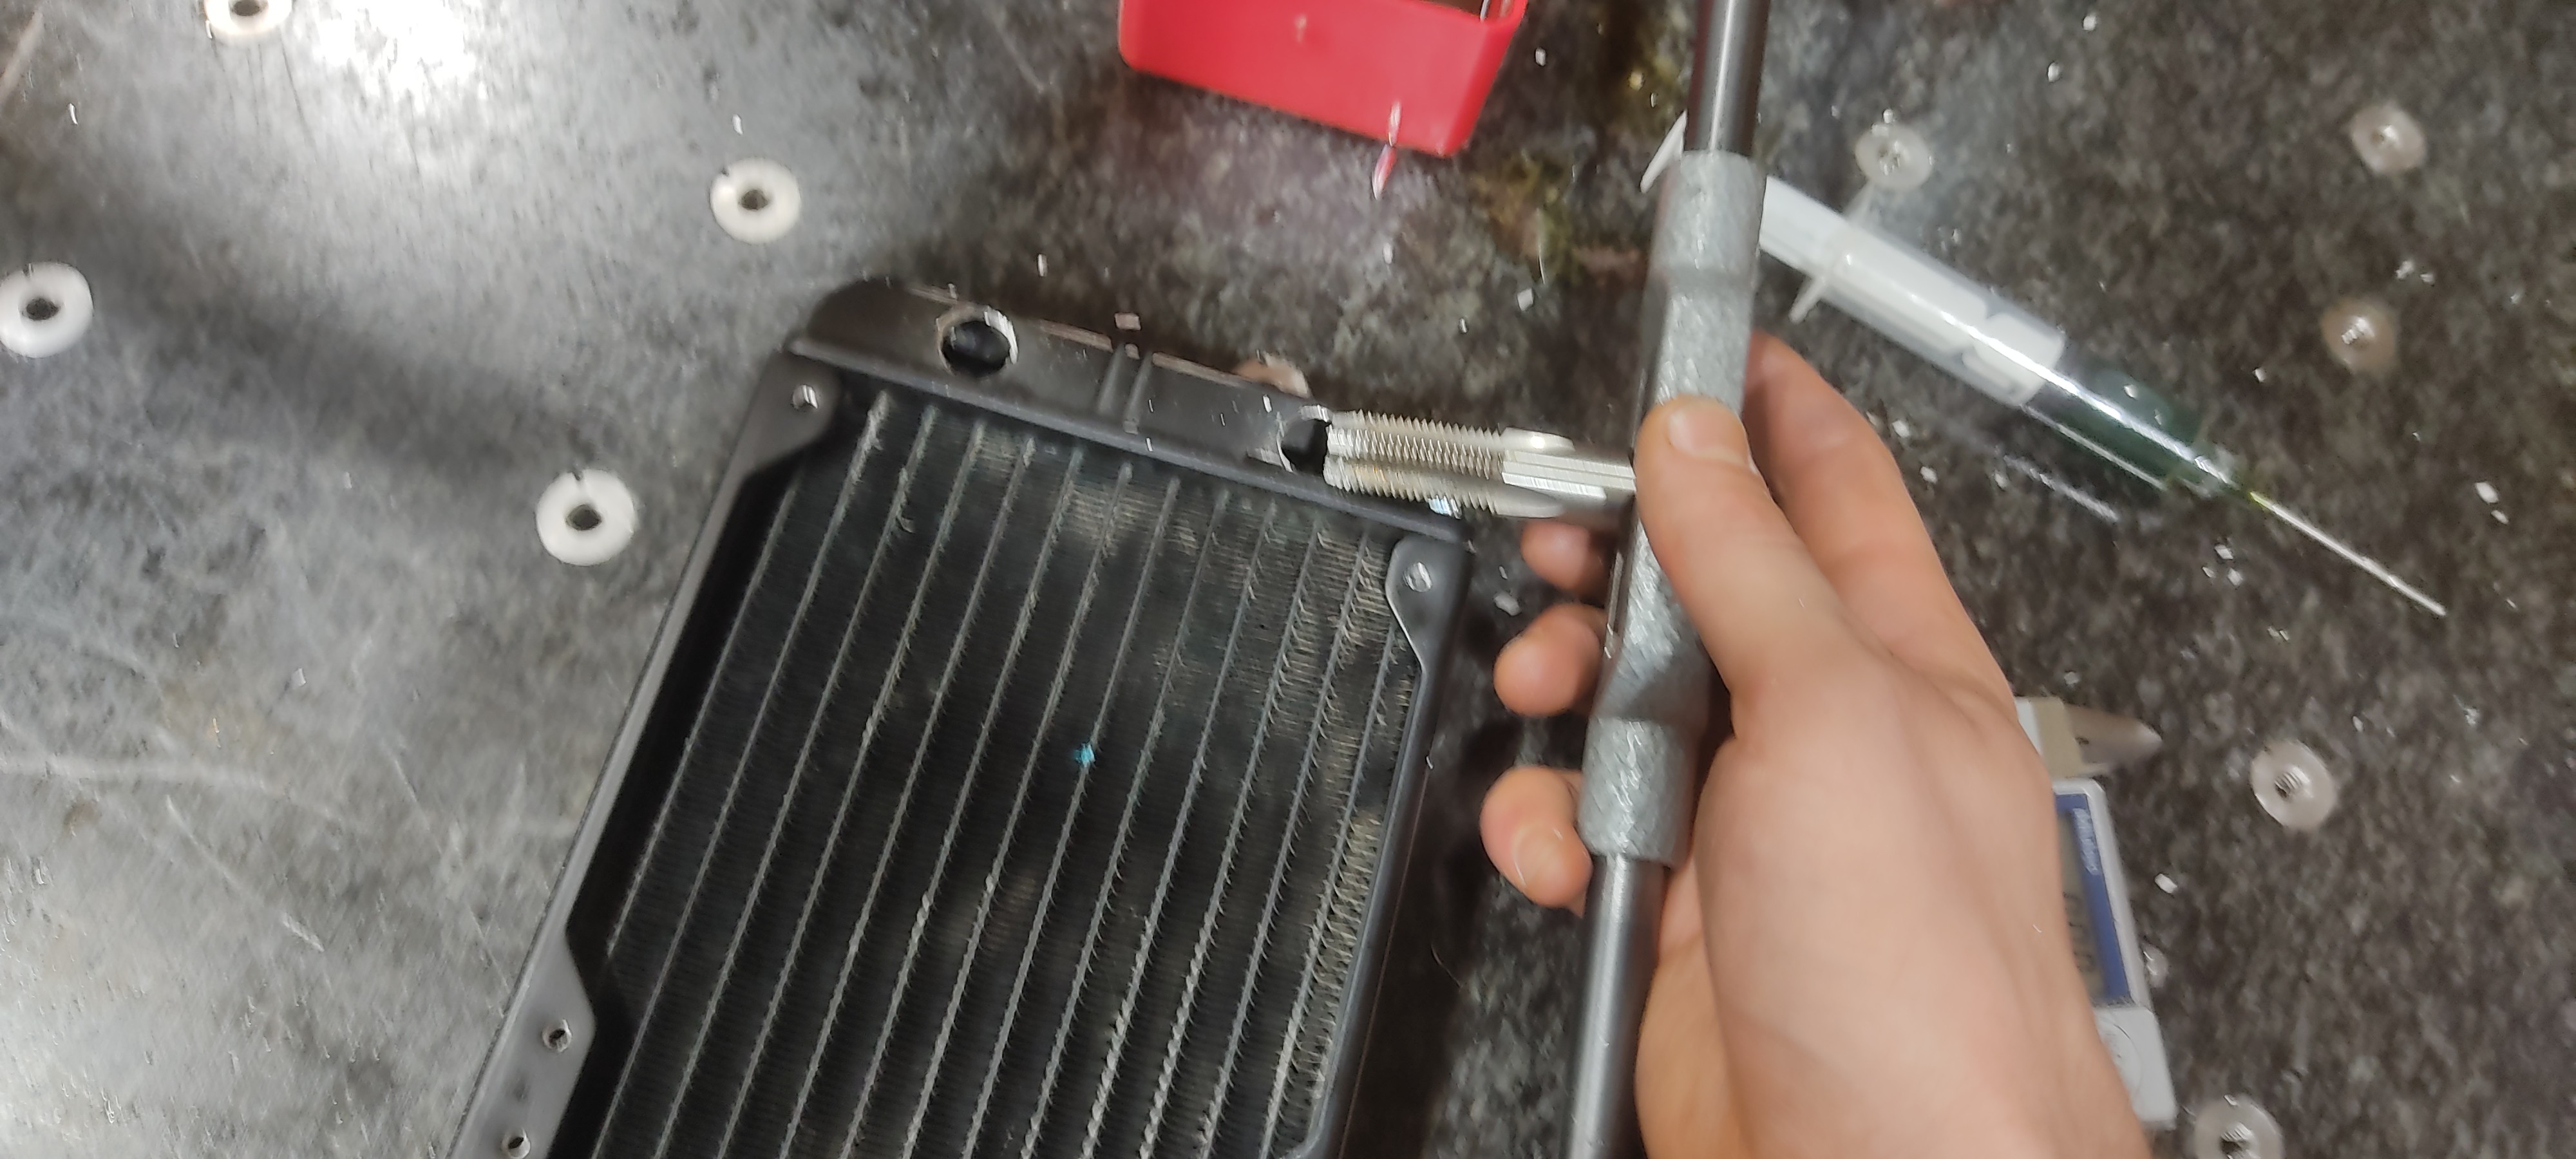
More Component Modification (Pumps)
10/03/2022 at 03:34 • 0 commentsThe pumps were another used item that would require modding.
They both had standard fittings, but they were for soft-tube and I'd like the option to do hard-tubing later on. So a-modding we go.![]()
![]()
Tapping
![]() And then finished!
And then finished!![]()
-
Fabricating
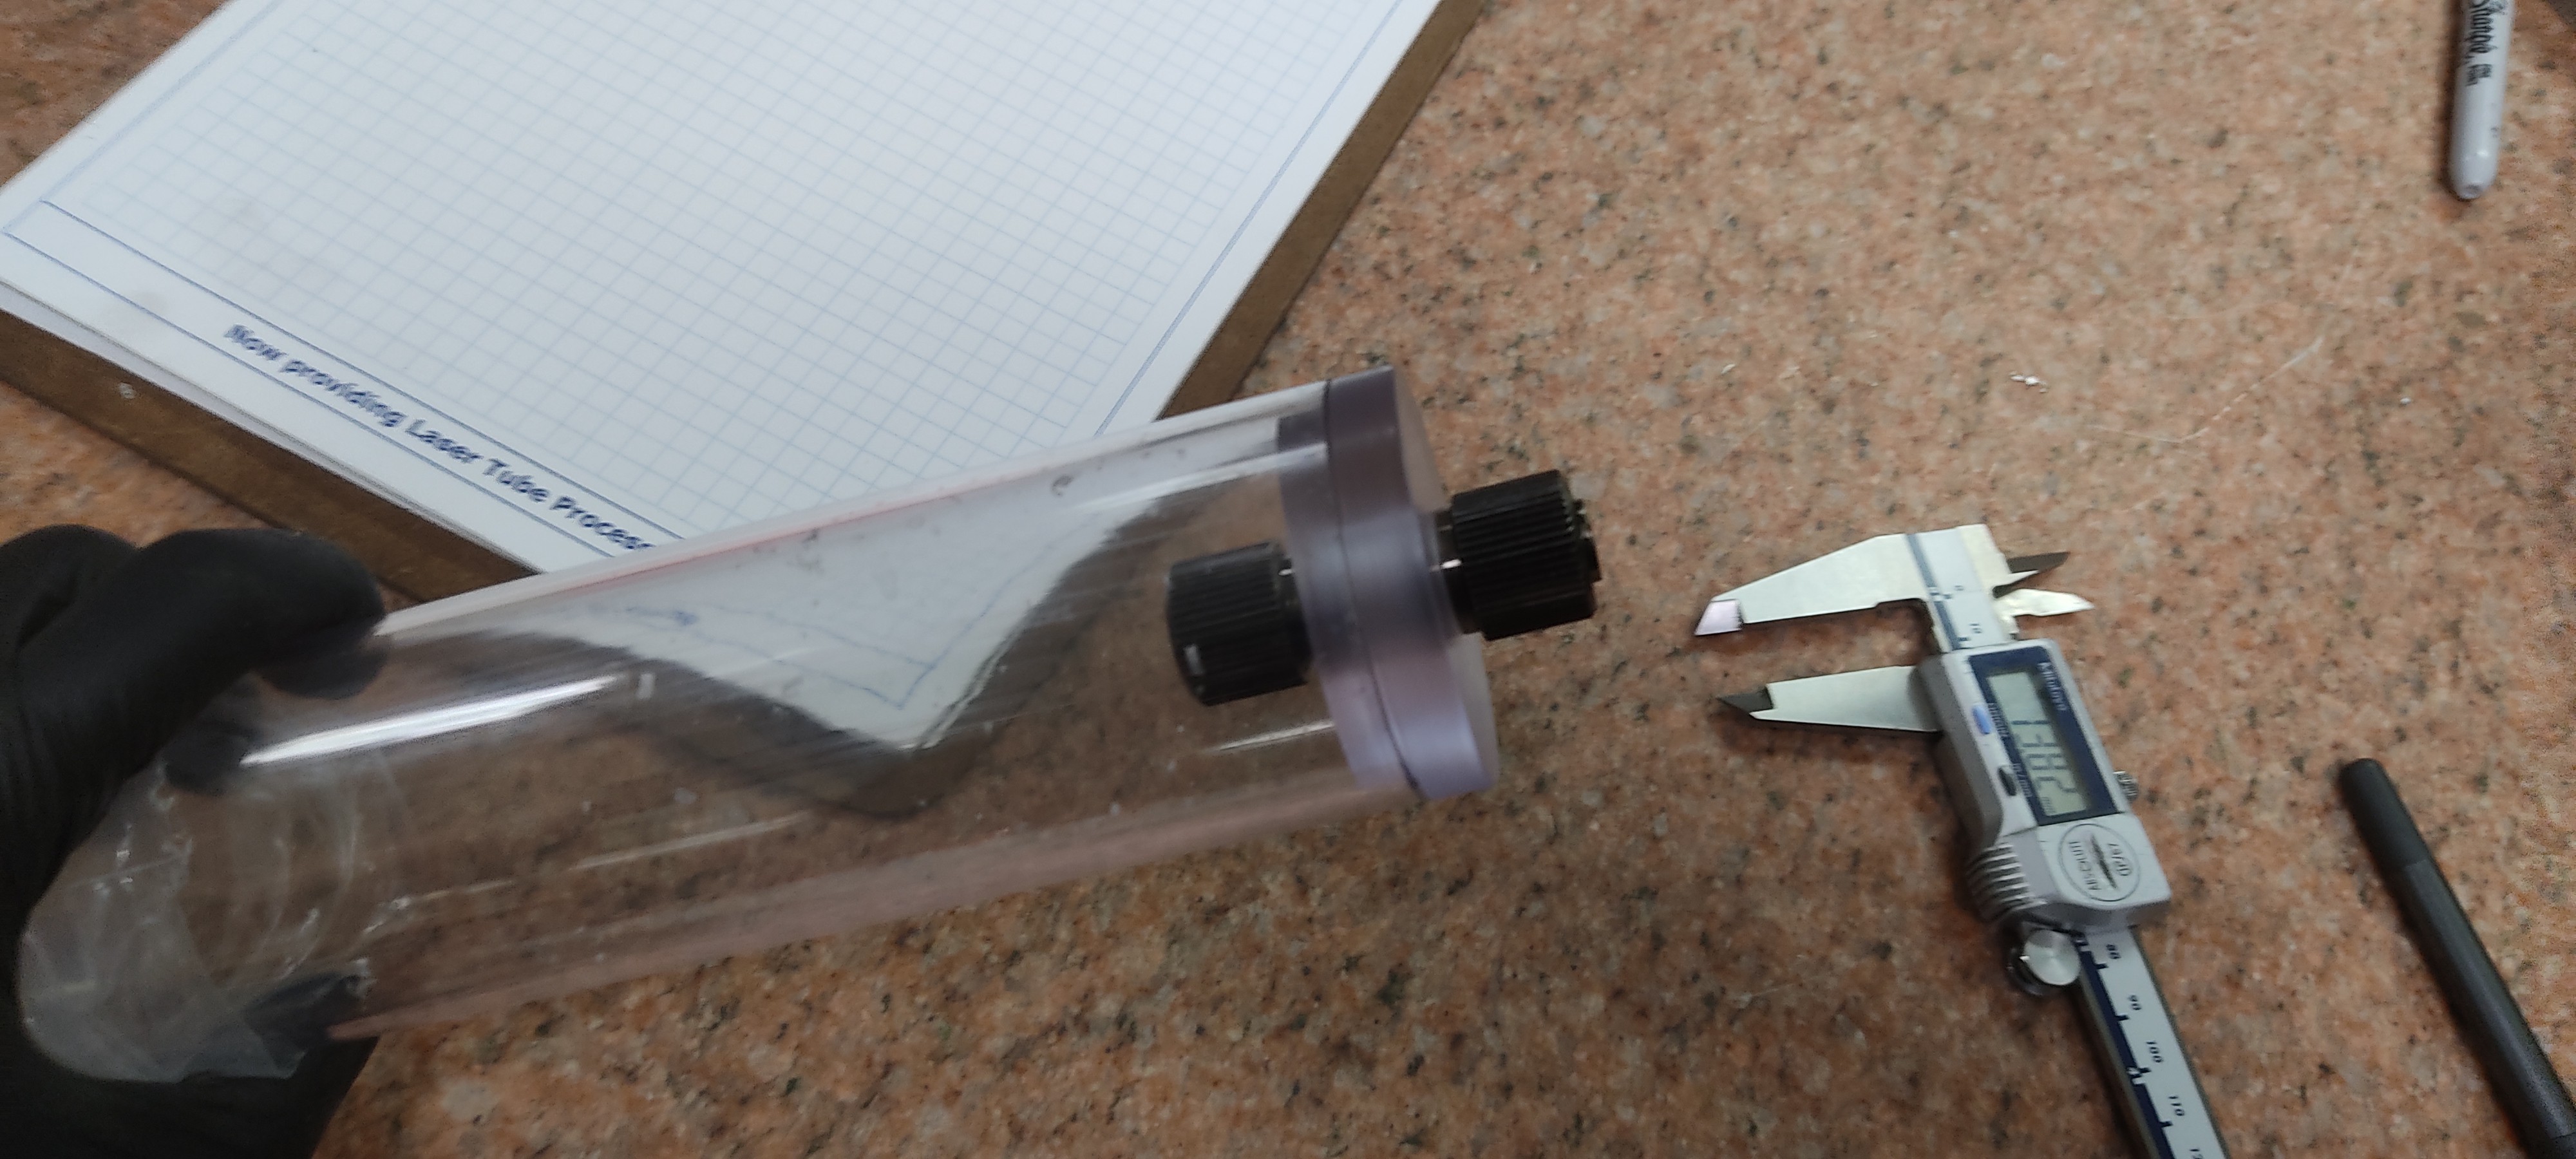
10/03/2022 at 03:29 • 0 commentsI really wanted a cool tube full of neon-colored liquid on this project somewhere. So, I scoured the internet and found a good deal on 2.25" Diameter, clear polycarbonate tubing. (Wound up with 8' of the stuff.) And then found 2.25" diameter Rod to go with it.
The tube became the body and the rod was cut and then machined on the lathe to fit within it with G1/4 threads.![]()
-
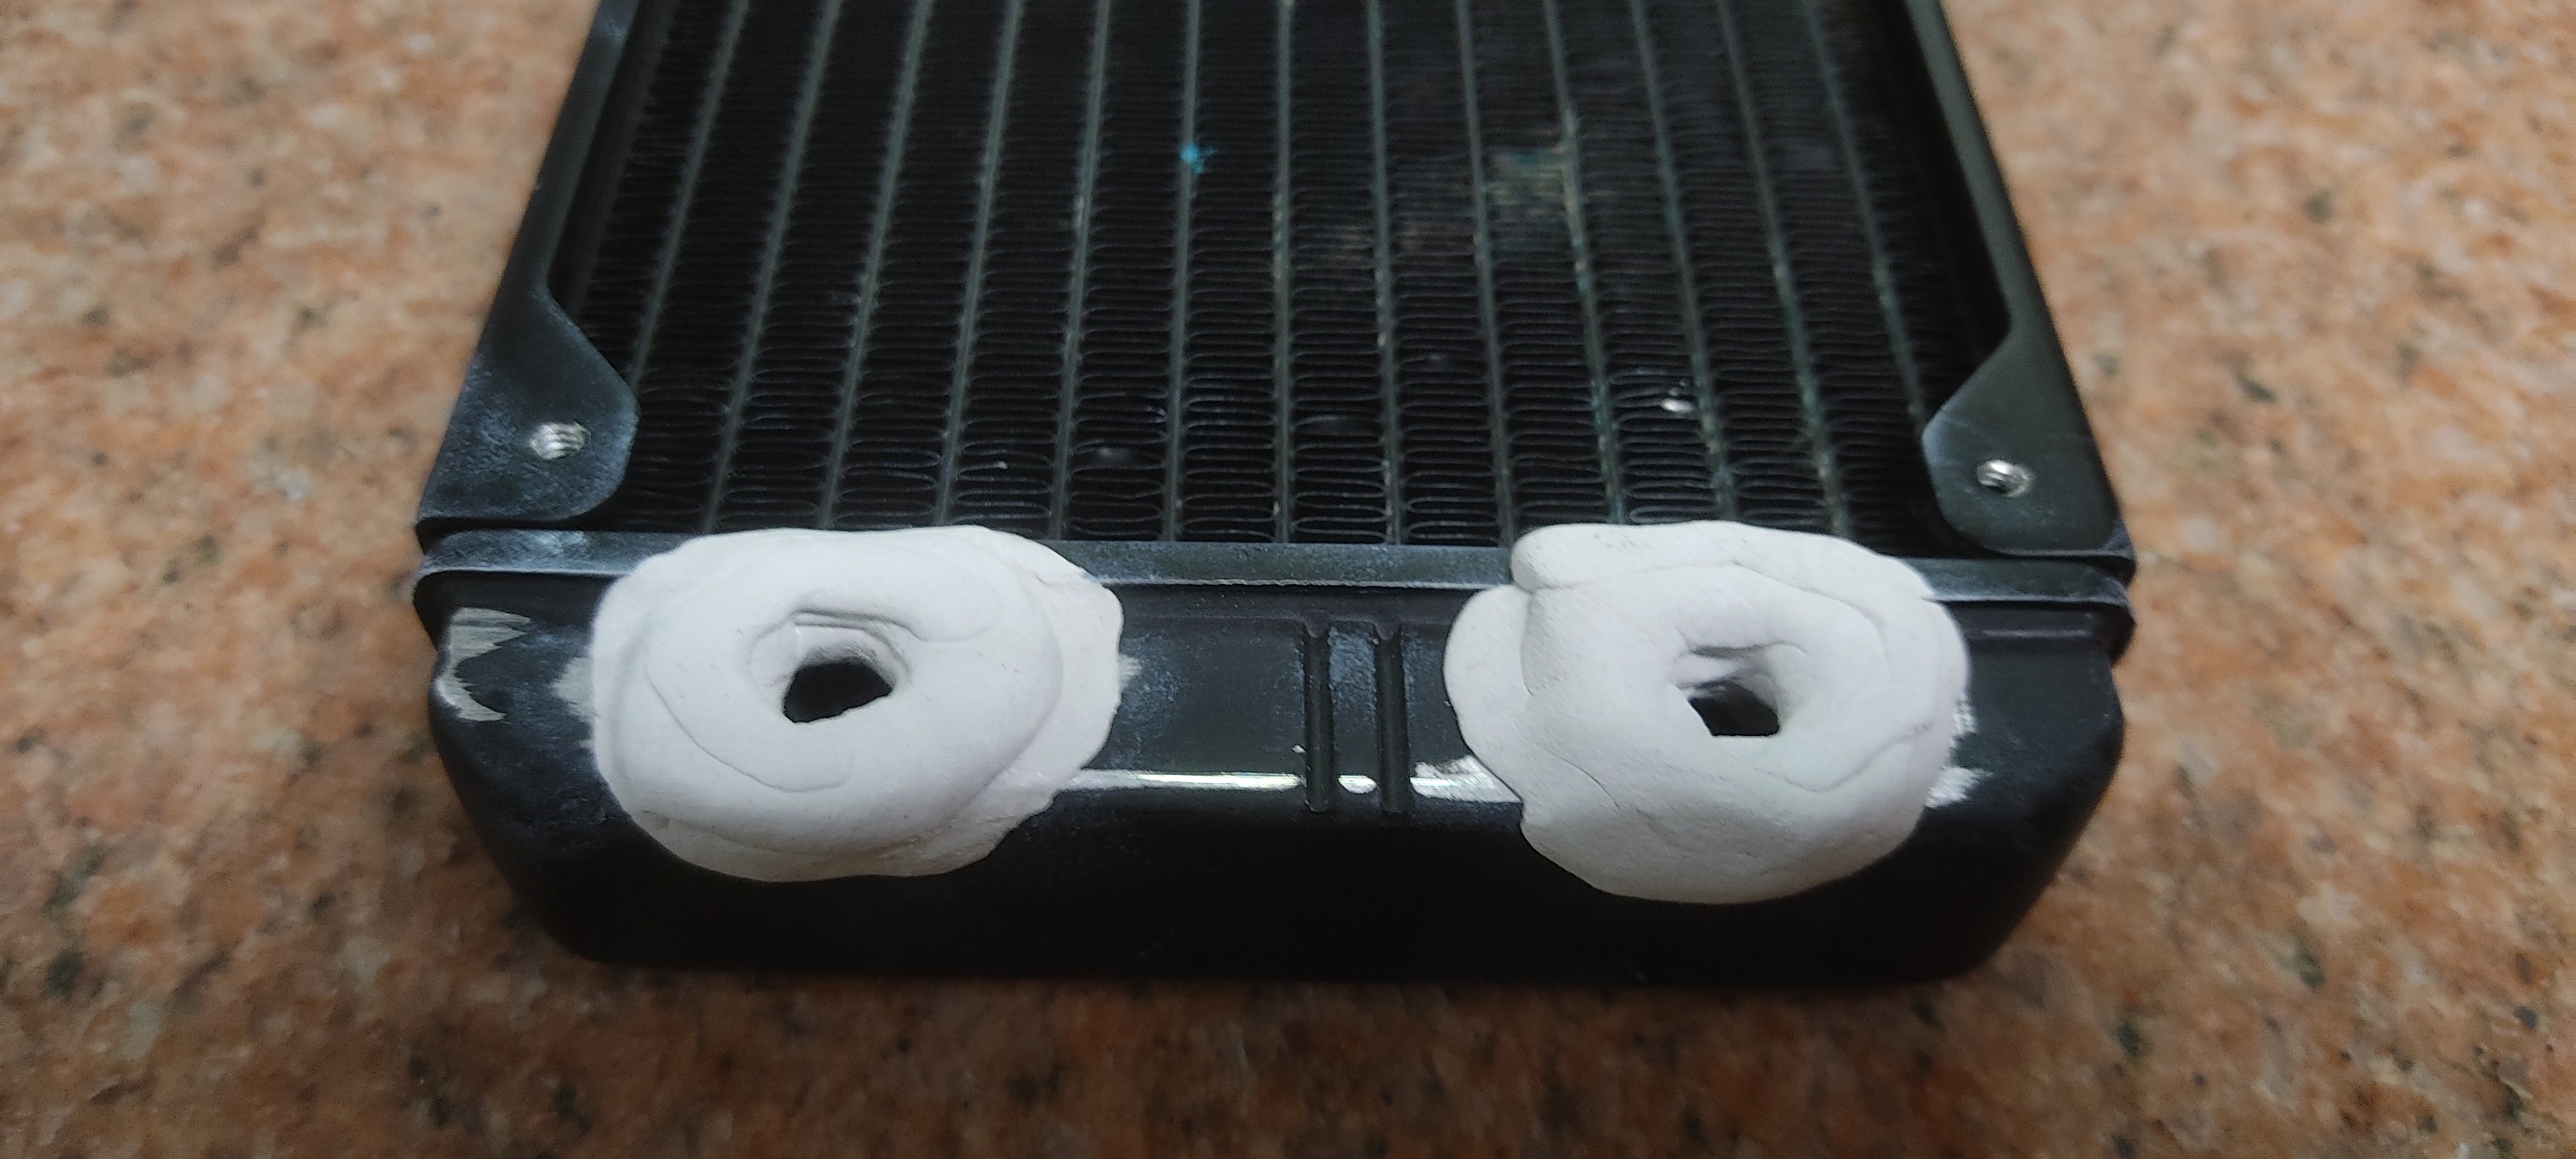
Component Modification
10/03/2022 at 03:13 • 0 commentsWhile that was going on, I needed to make ready the parts scrounged to be cross-compatible.
The radiator on the left needed to undergo a transformation from being used in an AIO (All-in-one) with proprietary sizes to standard watercooling sizes. So the hoses were cut off and threads readied for G1/4 bspt fittings.![]()
Cut, drilled and tapped...
![]() But then I found out the connectors needed more clearance, and accidentally ground too deep while creating some...
But then I found out the connectors needed more clearance, and accidentally ground too deep while creating some...![]()
So that was remedied with Epoxy putty.
![]() The other radiator, which was supposed to be easier (requiring only cleaning) somehow became problematic as well...
The other radiator, which was supposed to be easier (requiring only cleaning) somehow became problematic as well...![]()
To get this oxidation out, I threw it in the ultrasonic cleaner at 50 degrees C.
![]()
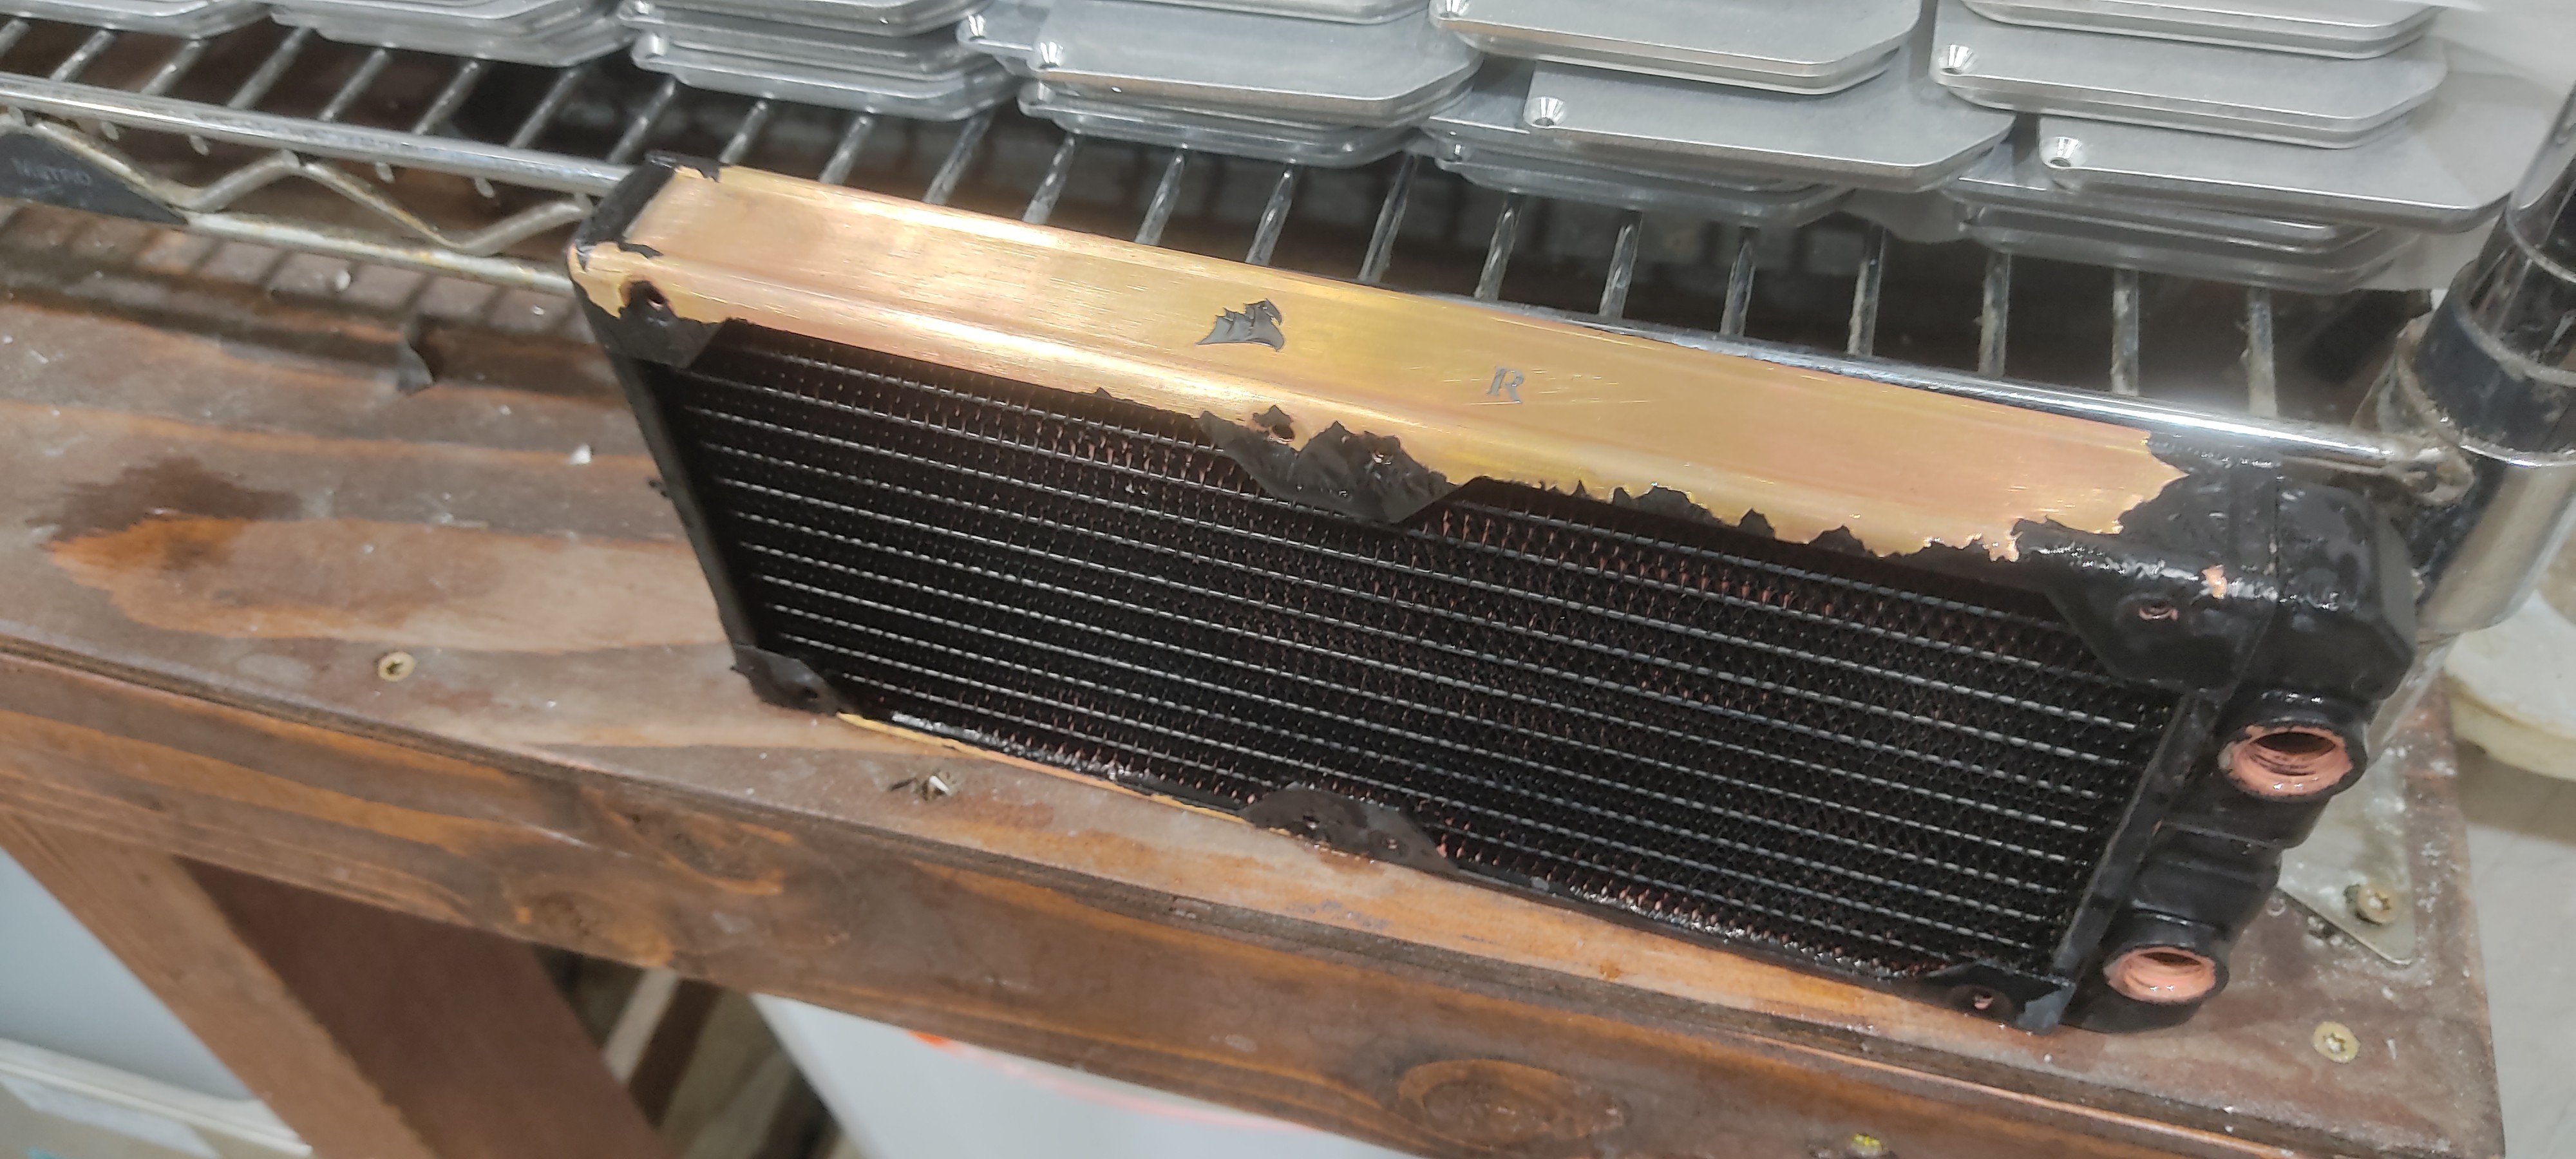
It worked wonders for the oxidation! But, kind of stripped the paint off the device as well.![]() A similar treatment (With colder settings) were used in conjunction with liberal application of a toothbrush to clean the used waterblock I found relatively cheap.
A similar treatment (With colder settings) were used in conjunction with liberal application of a toothbrush to clean the used waterblock I found relatively cheap.
Before:![]()
And after:
![]() The screws and orings were thrown in for a shorter amount of time and then washed with soap.
The screws and orings were thrown in for a shorter amount of time and then washed with soap. -
Prototyping and Revisions
10/03/2022 at 02:03 • 0 commentsThe process wasn't neccessarily straight-forward either. Lots of mistakes, lots of new factors that were unknown.
I started by blocking out shapes with cardboard, tape, a marker and ruler.![]()
Then 3-D modeled using fusion360.![]()
Decided on changes and made them...
![]()
Laser cut the template, checked it out again and began to design the "final revision"![]()
Luggable Cyberdeck
Watercooled MATx build with built in goodies for plug-n-play computing and art.
 And that's where it's at! Works, but I had to disassemble one of the radiators due to a lack of clearance for the power cable. Still very much a work in progress, bigger than I'd like and has many issues still...but I like it and I'm having fun. Looking forward to setting this thing up as a portable VR workstation.
 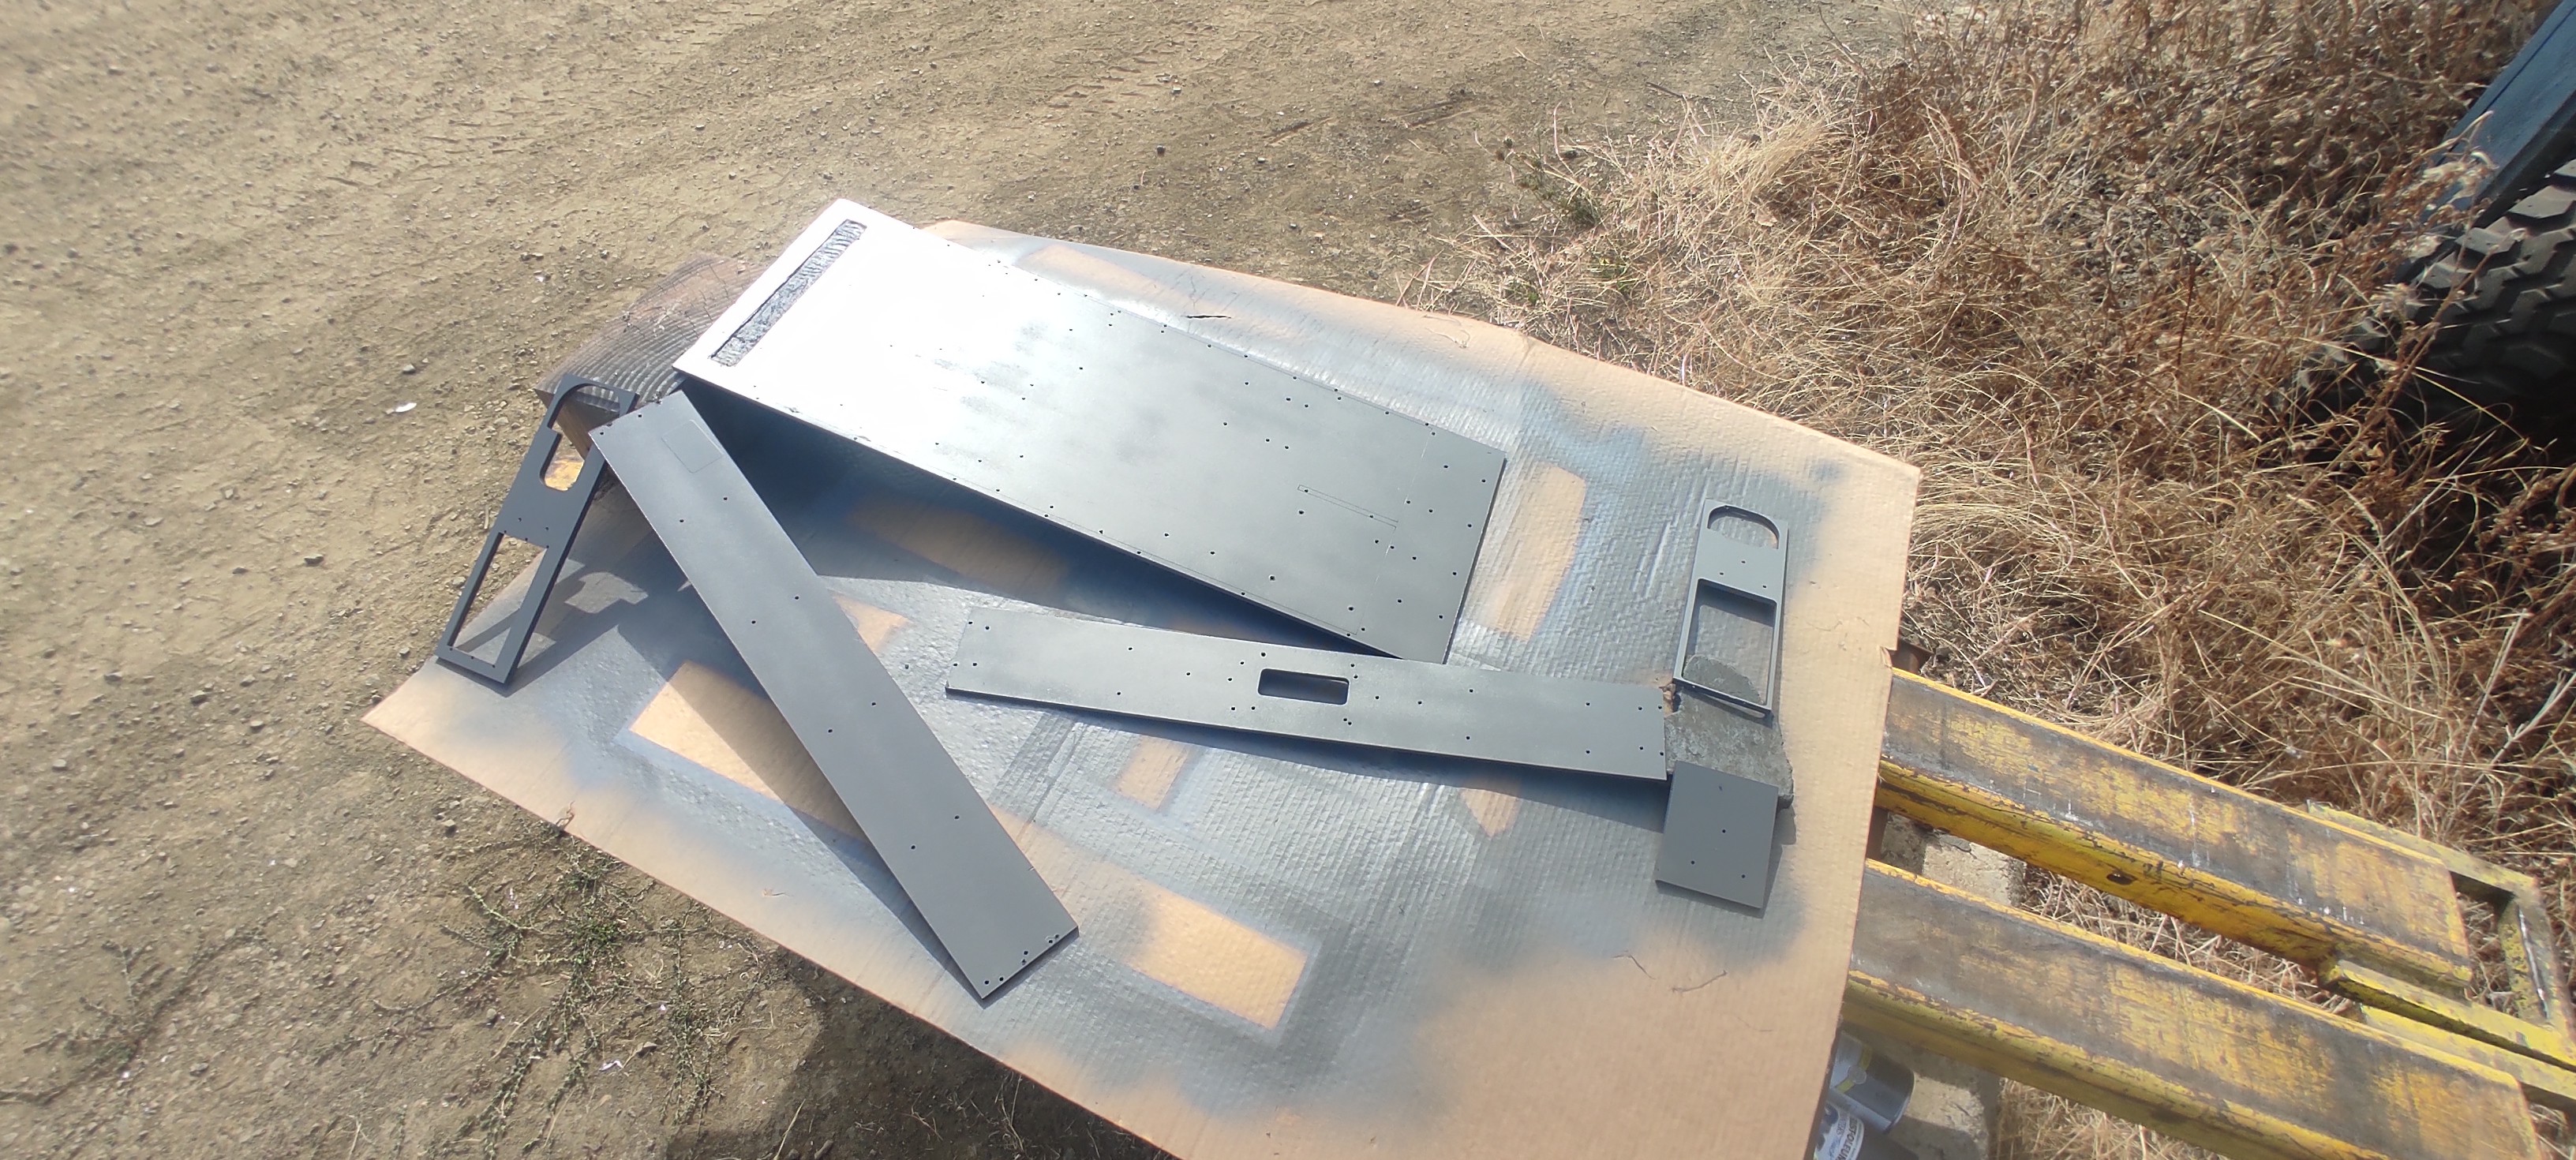 And the radiator assemblies were disassembled and sandblasted for paint adhesion. (Here's a before/after)
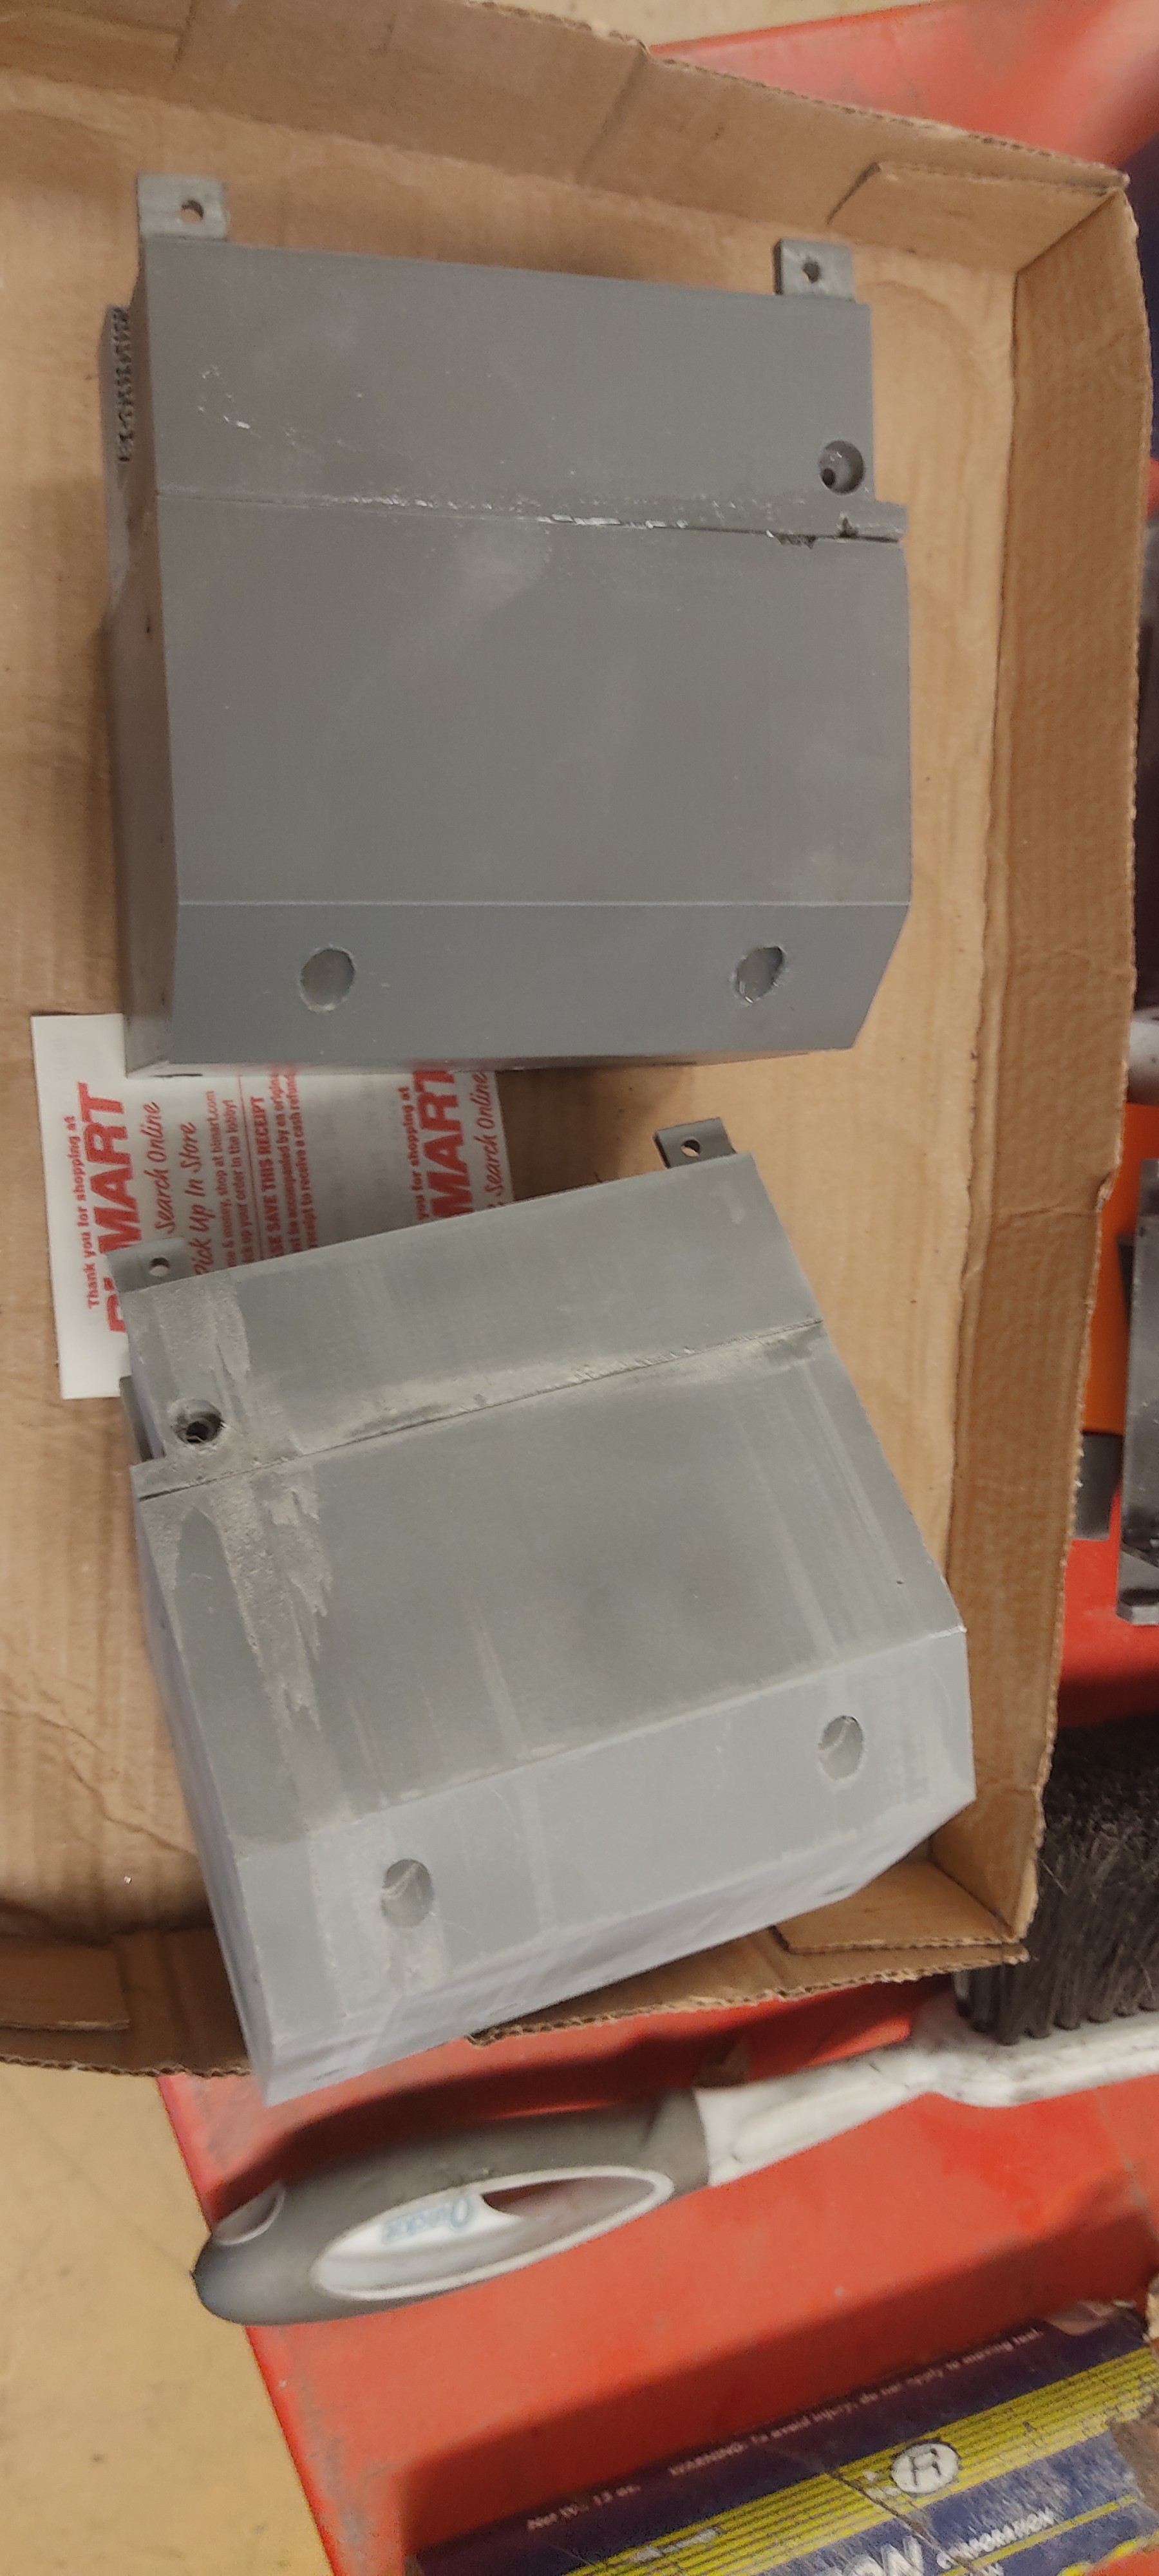


 First it was disassembled and I figured out where I could drill without harming the monitor. Then did a 3-d model of such in Fusion360 and printed the components.
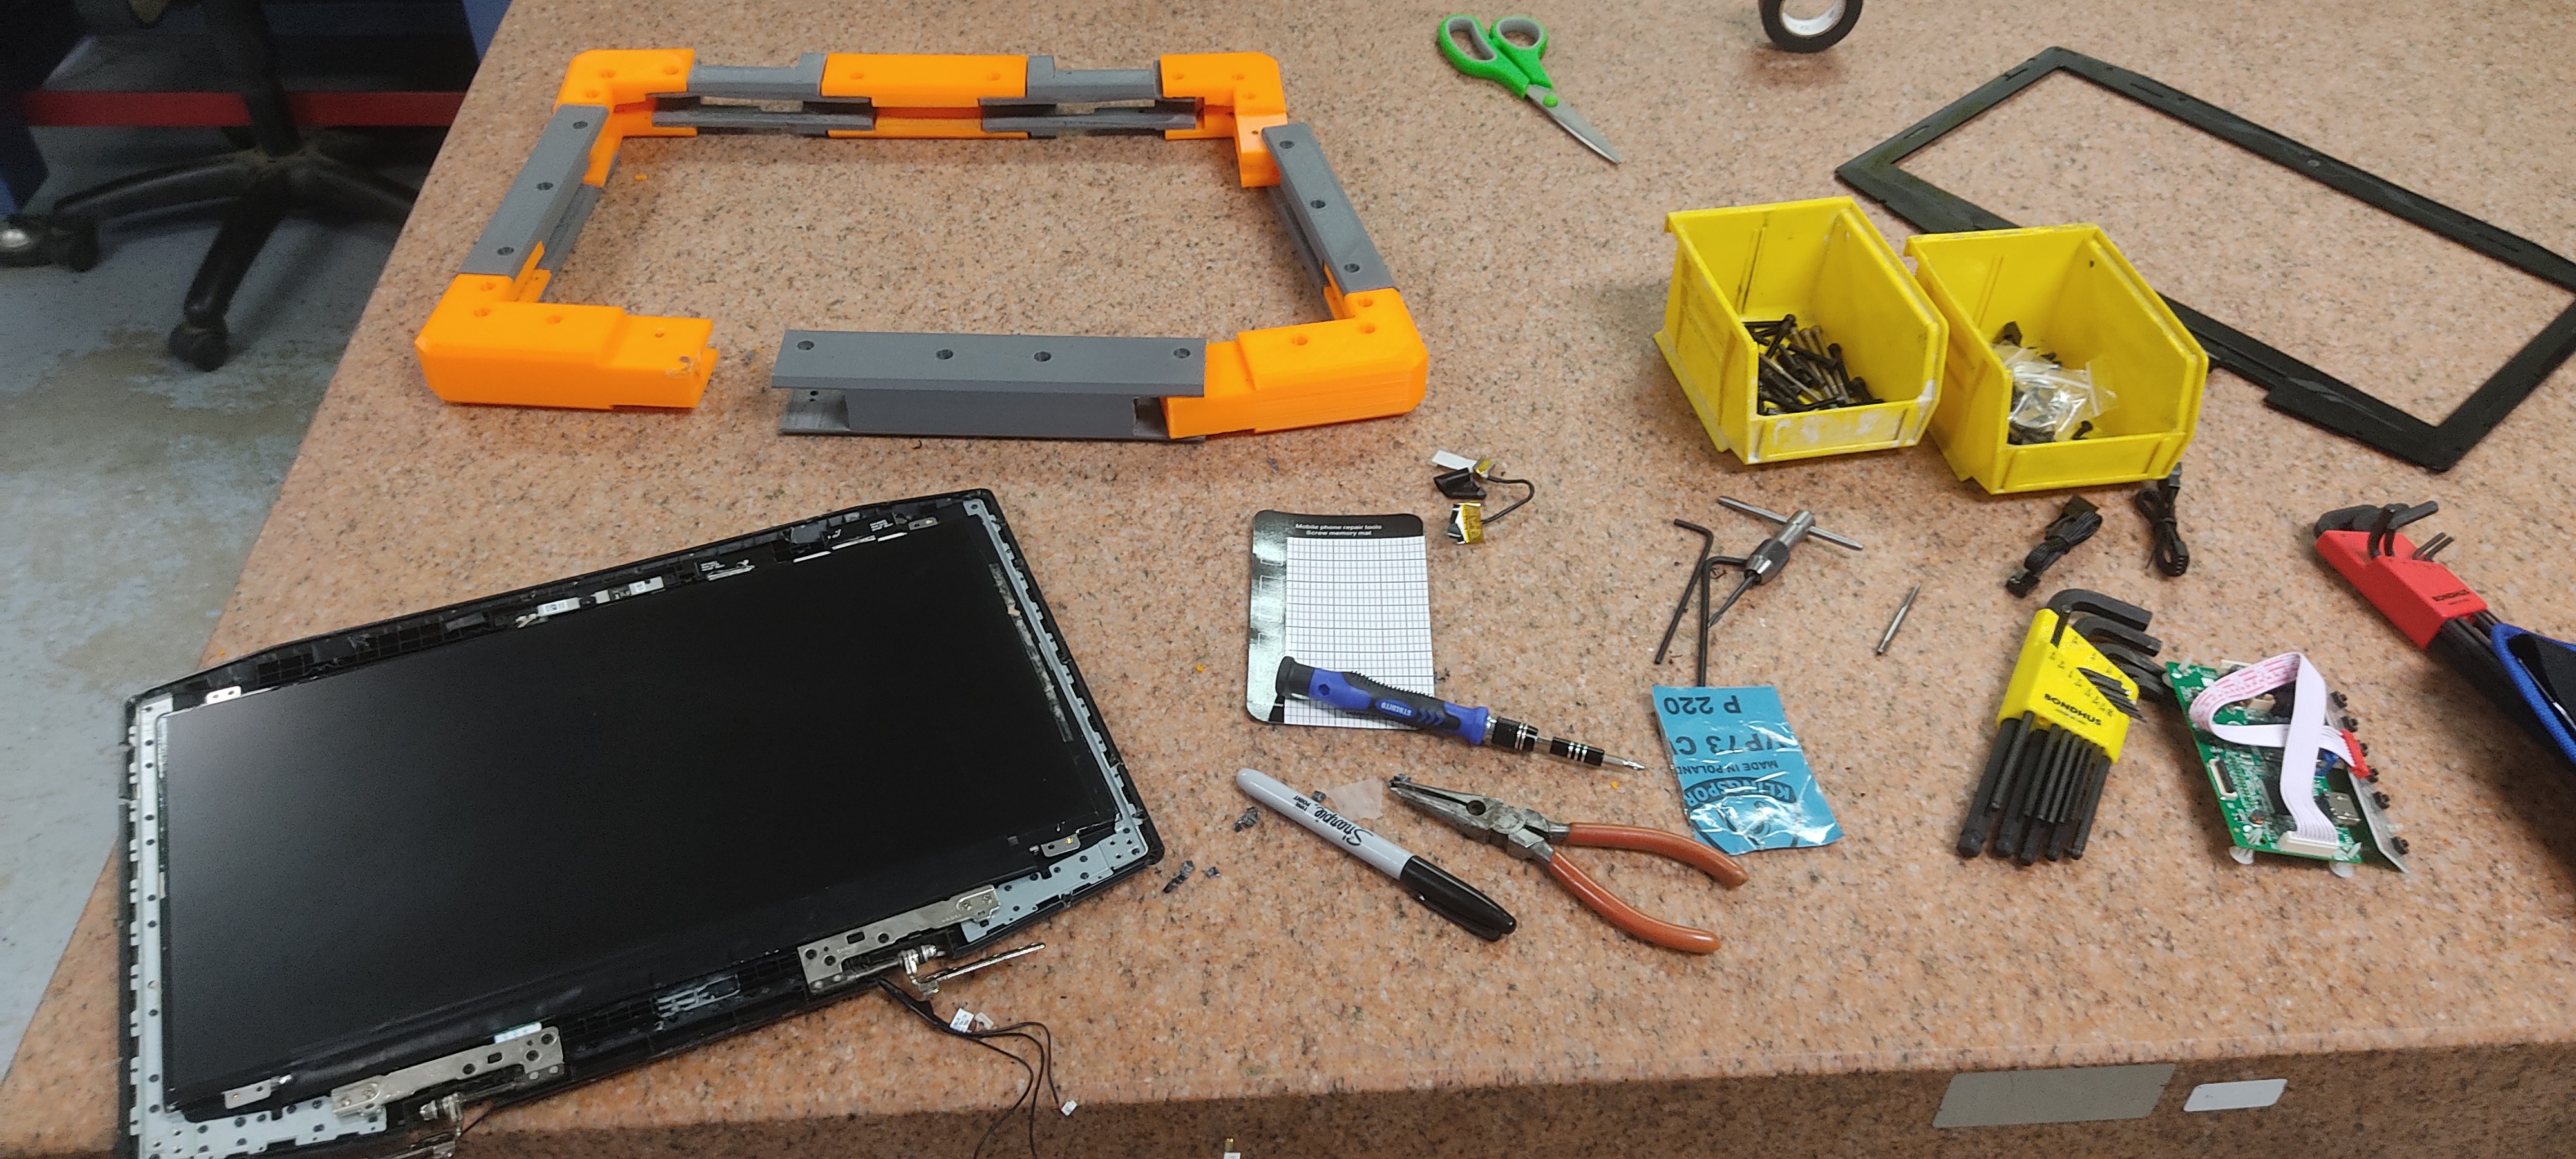
 The cable was particularly tricky as I forgot to make a slot for it and just drilled a hole instead of re-printing. (It's a prototype, no need for "perfection")
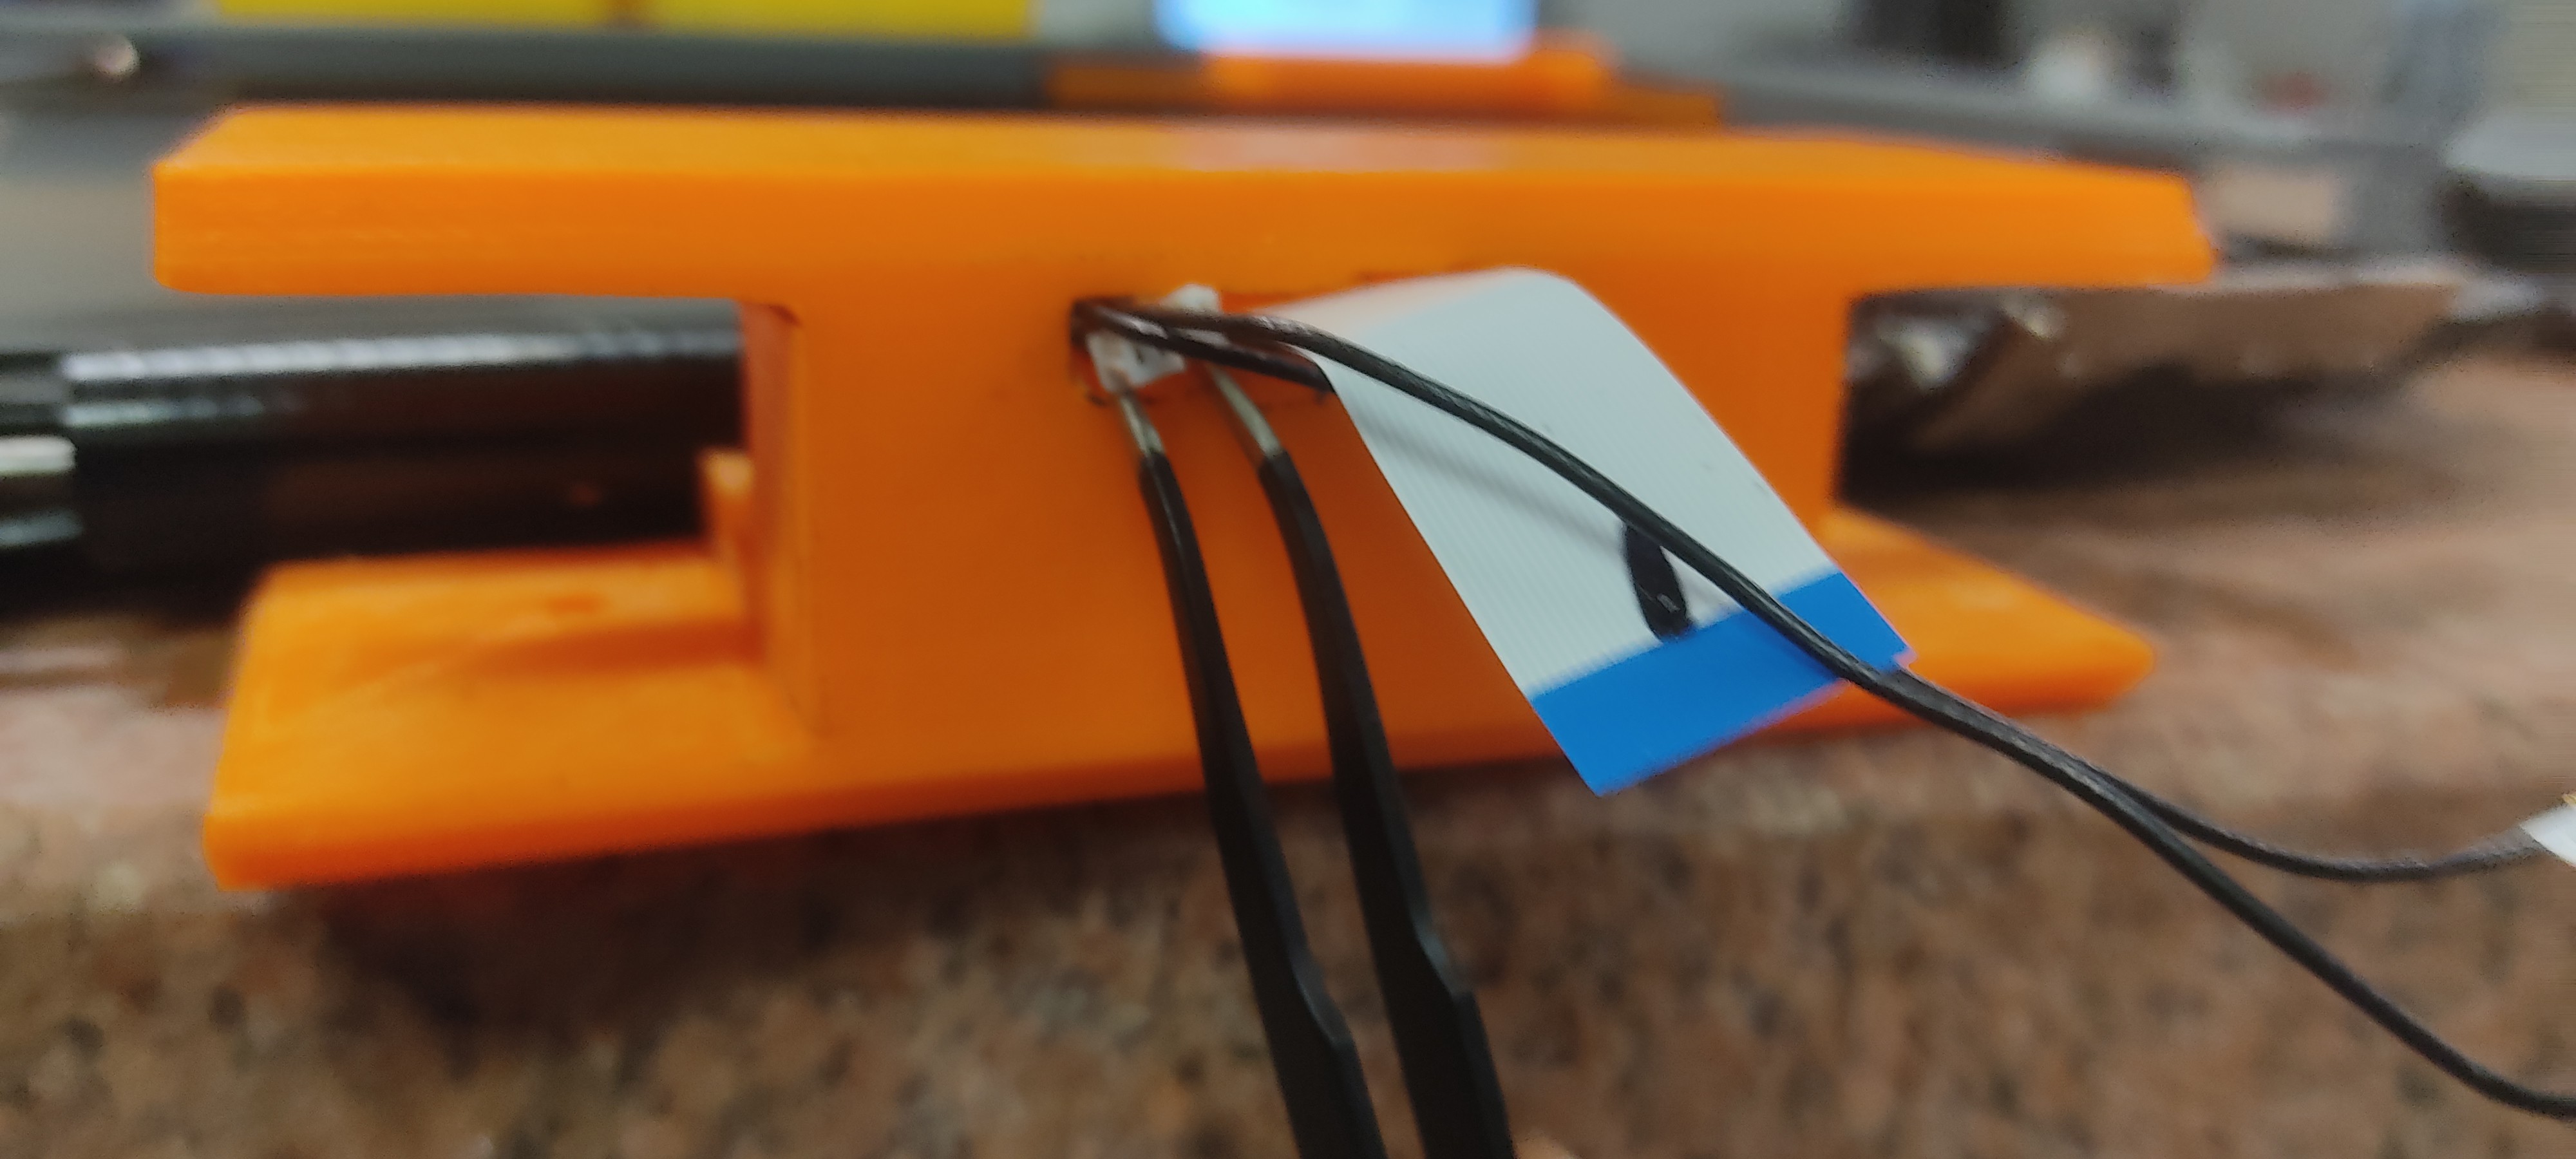
 I even could use the same hinges!
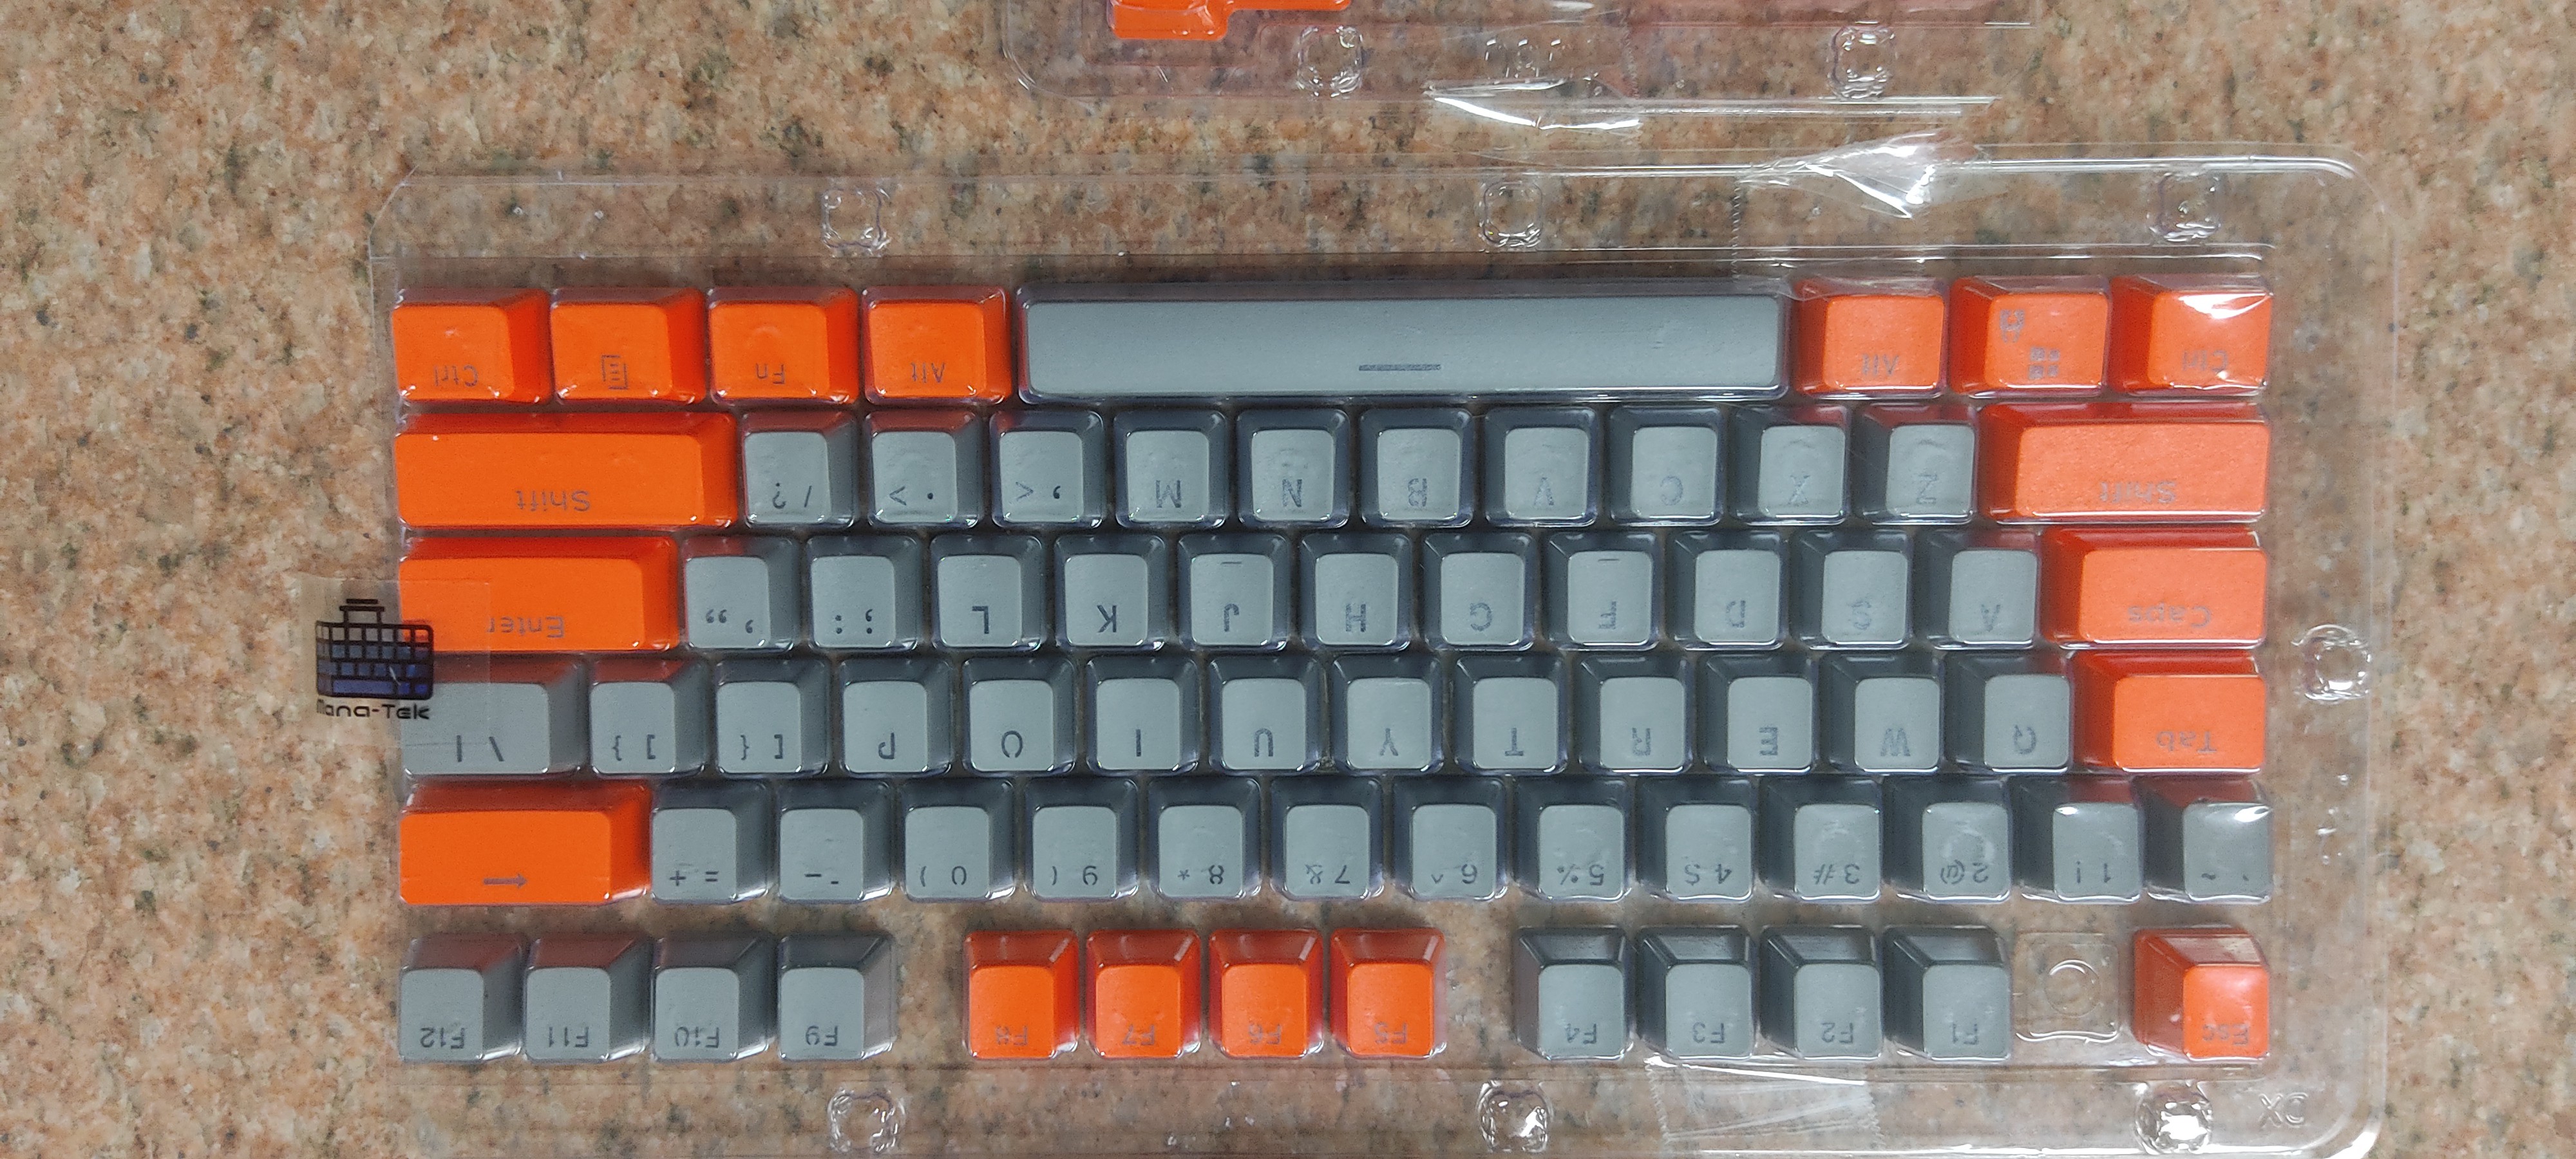
 Next up for these is to figure out the interface between the monitor, keyboard and case.
 Probably going to need a direct drive extruder for that. (I'm using an Ultimaker 3 currently)
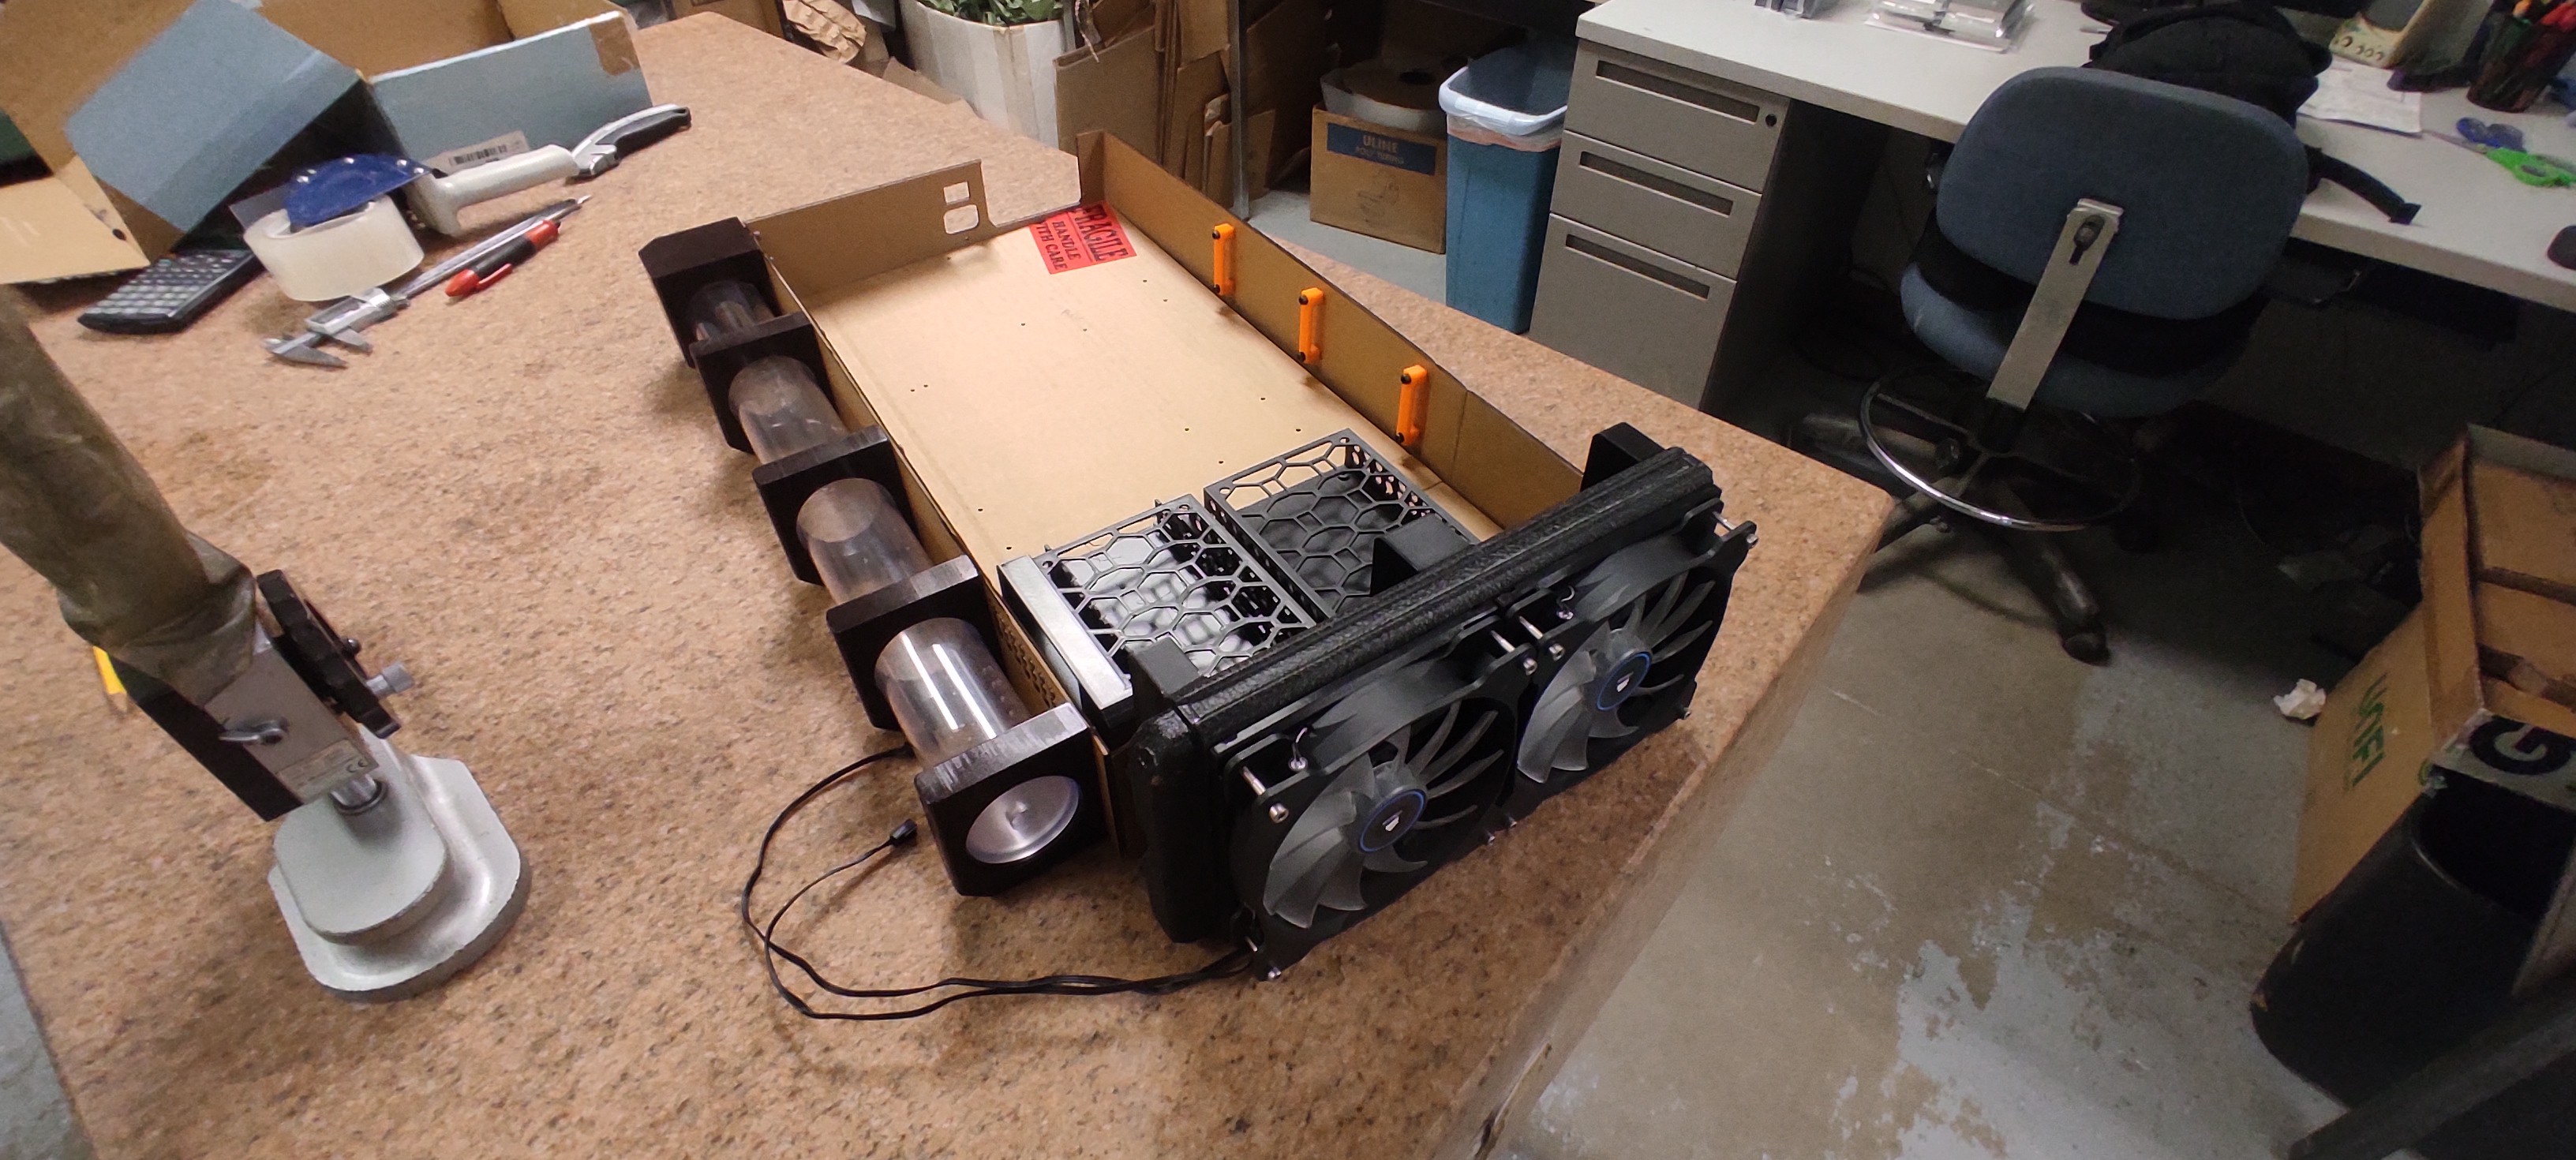


 And then finished!
 But then I found out the connectors needed more clearance, and accidentally ground too deep while creating some...
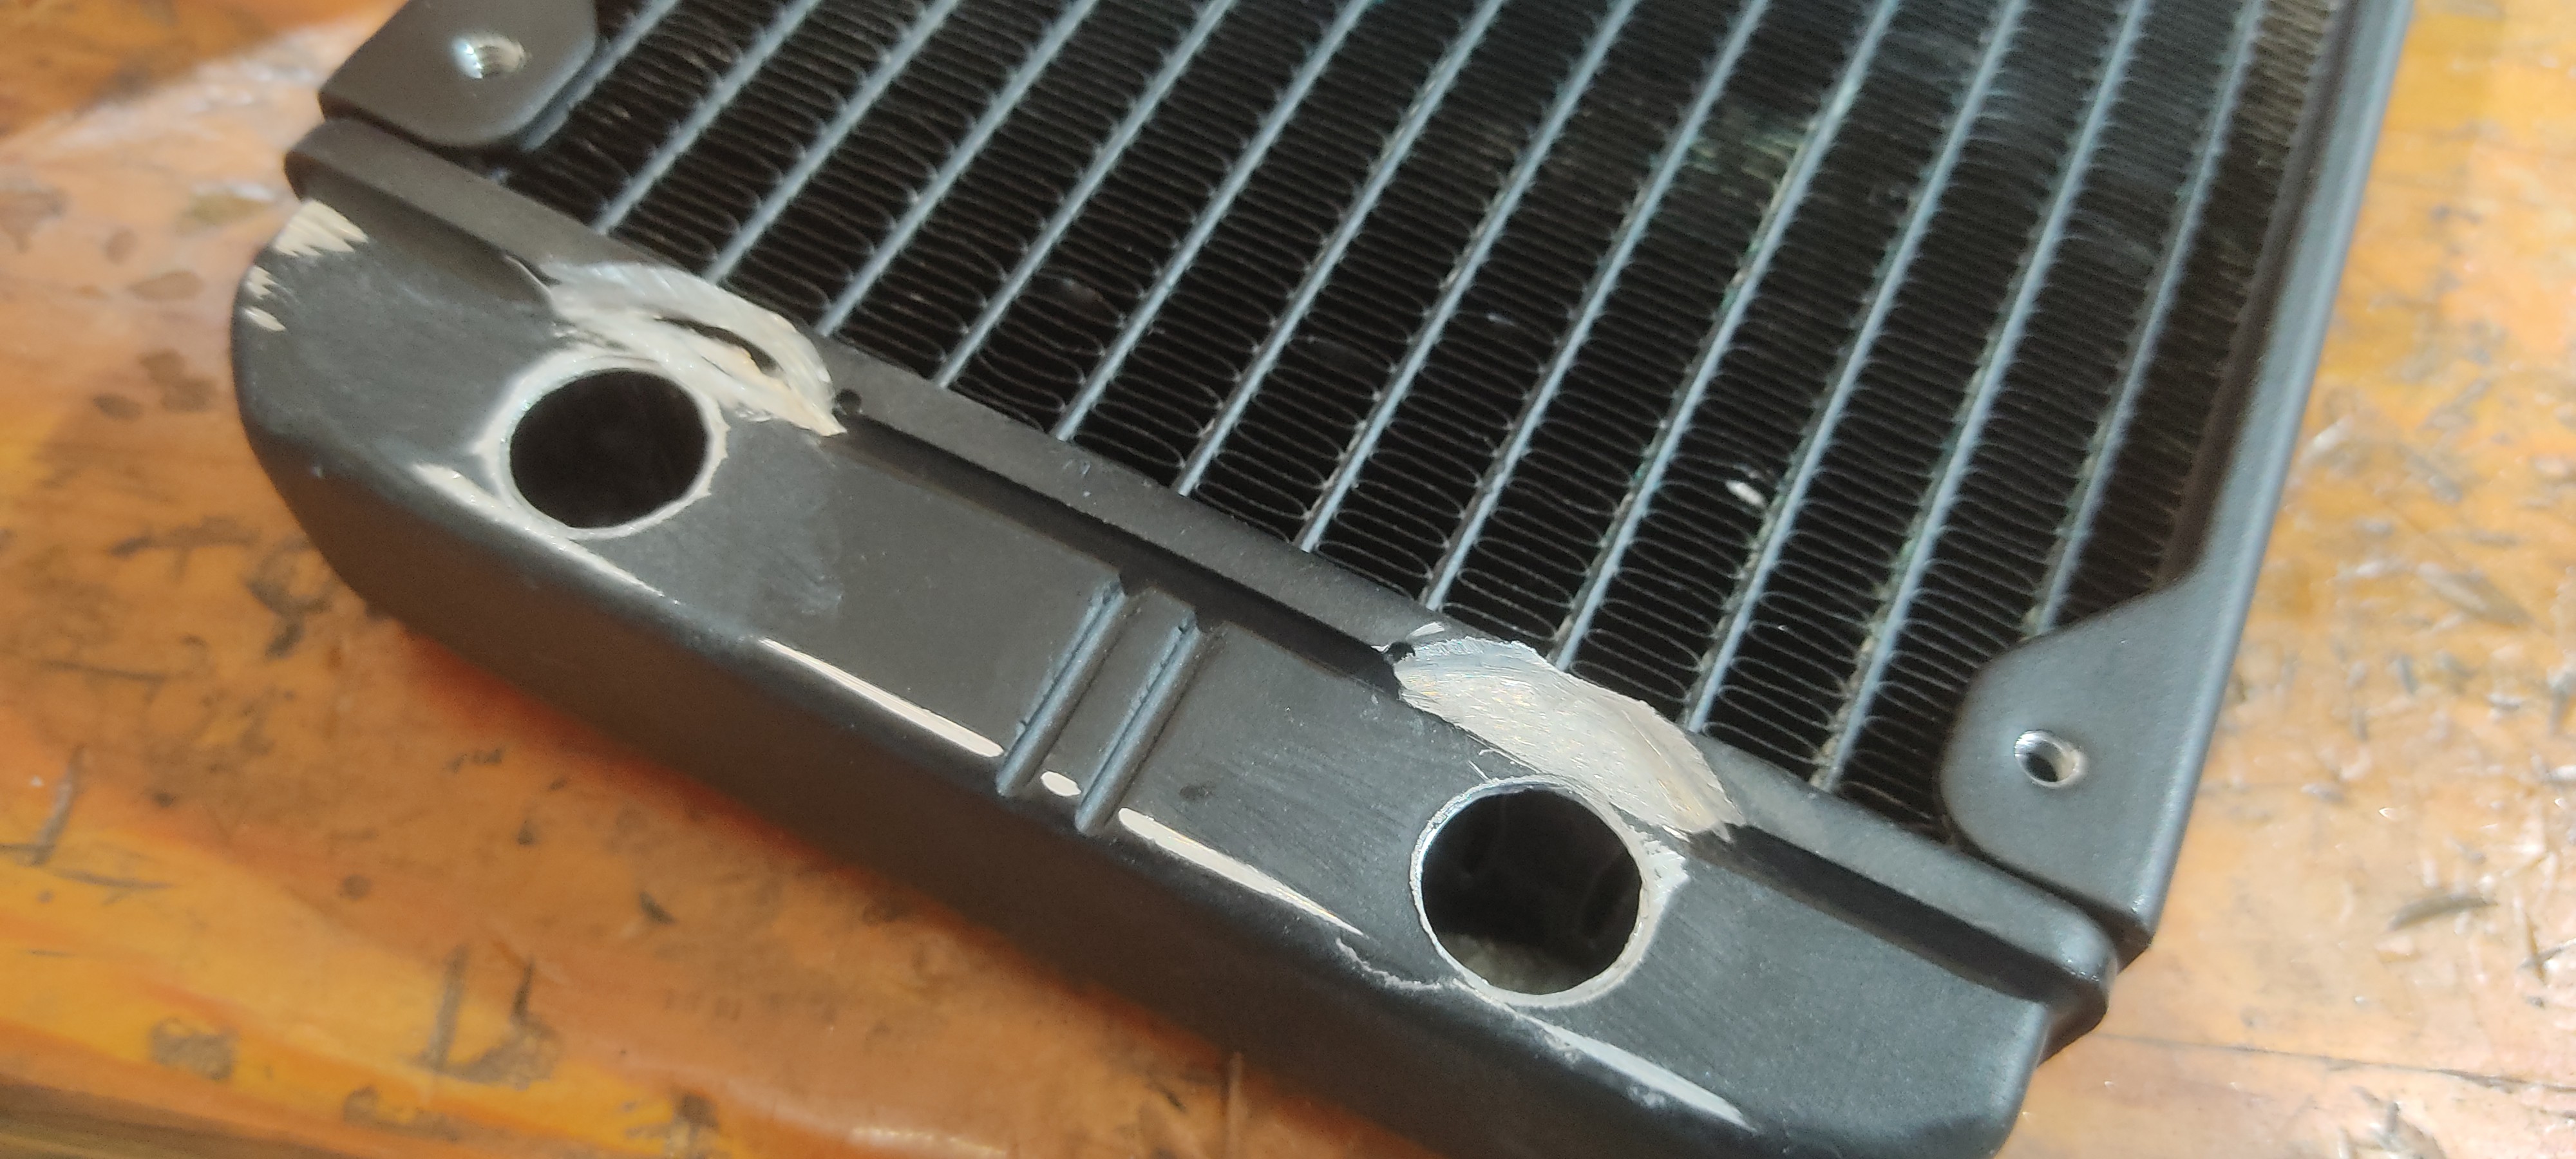
 The other radiator, which was supposed to be easier (requiring only cleaning) somehow became problematic as well...
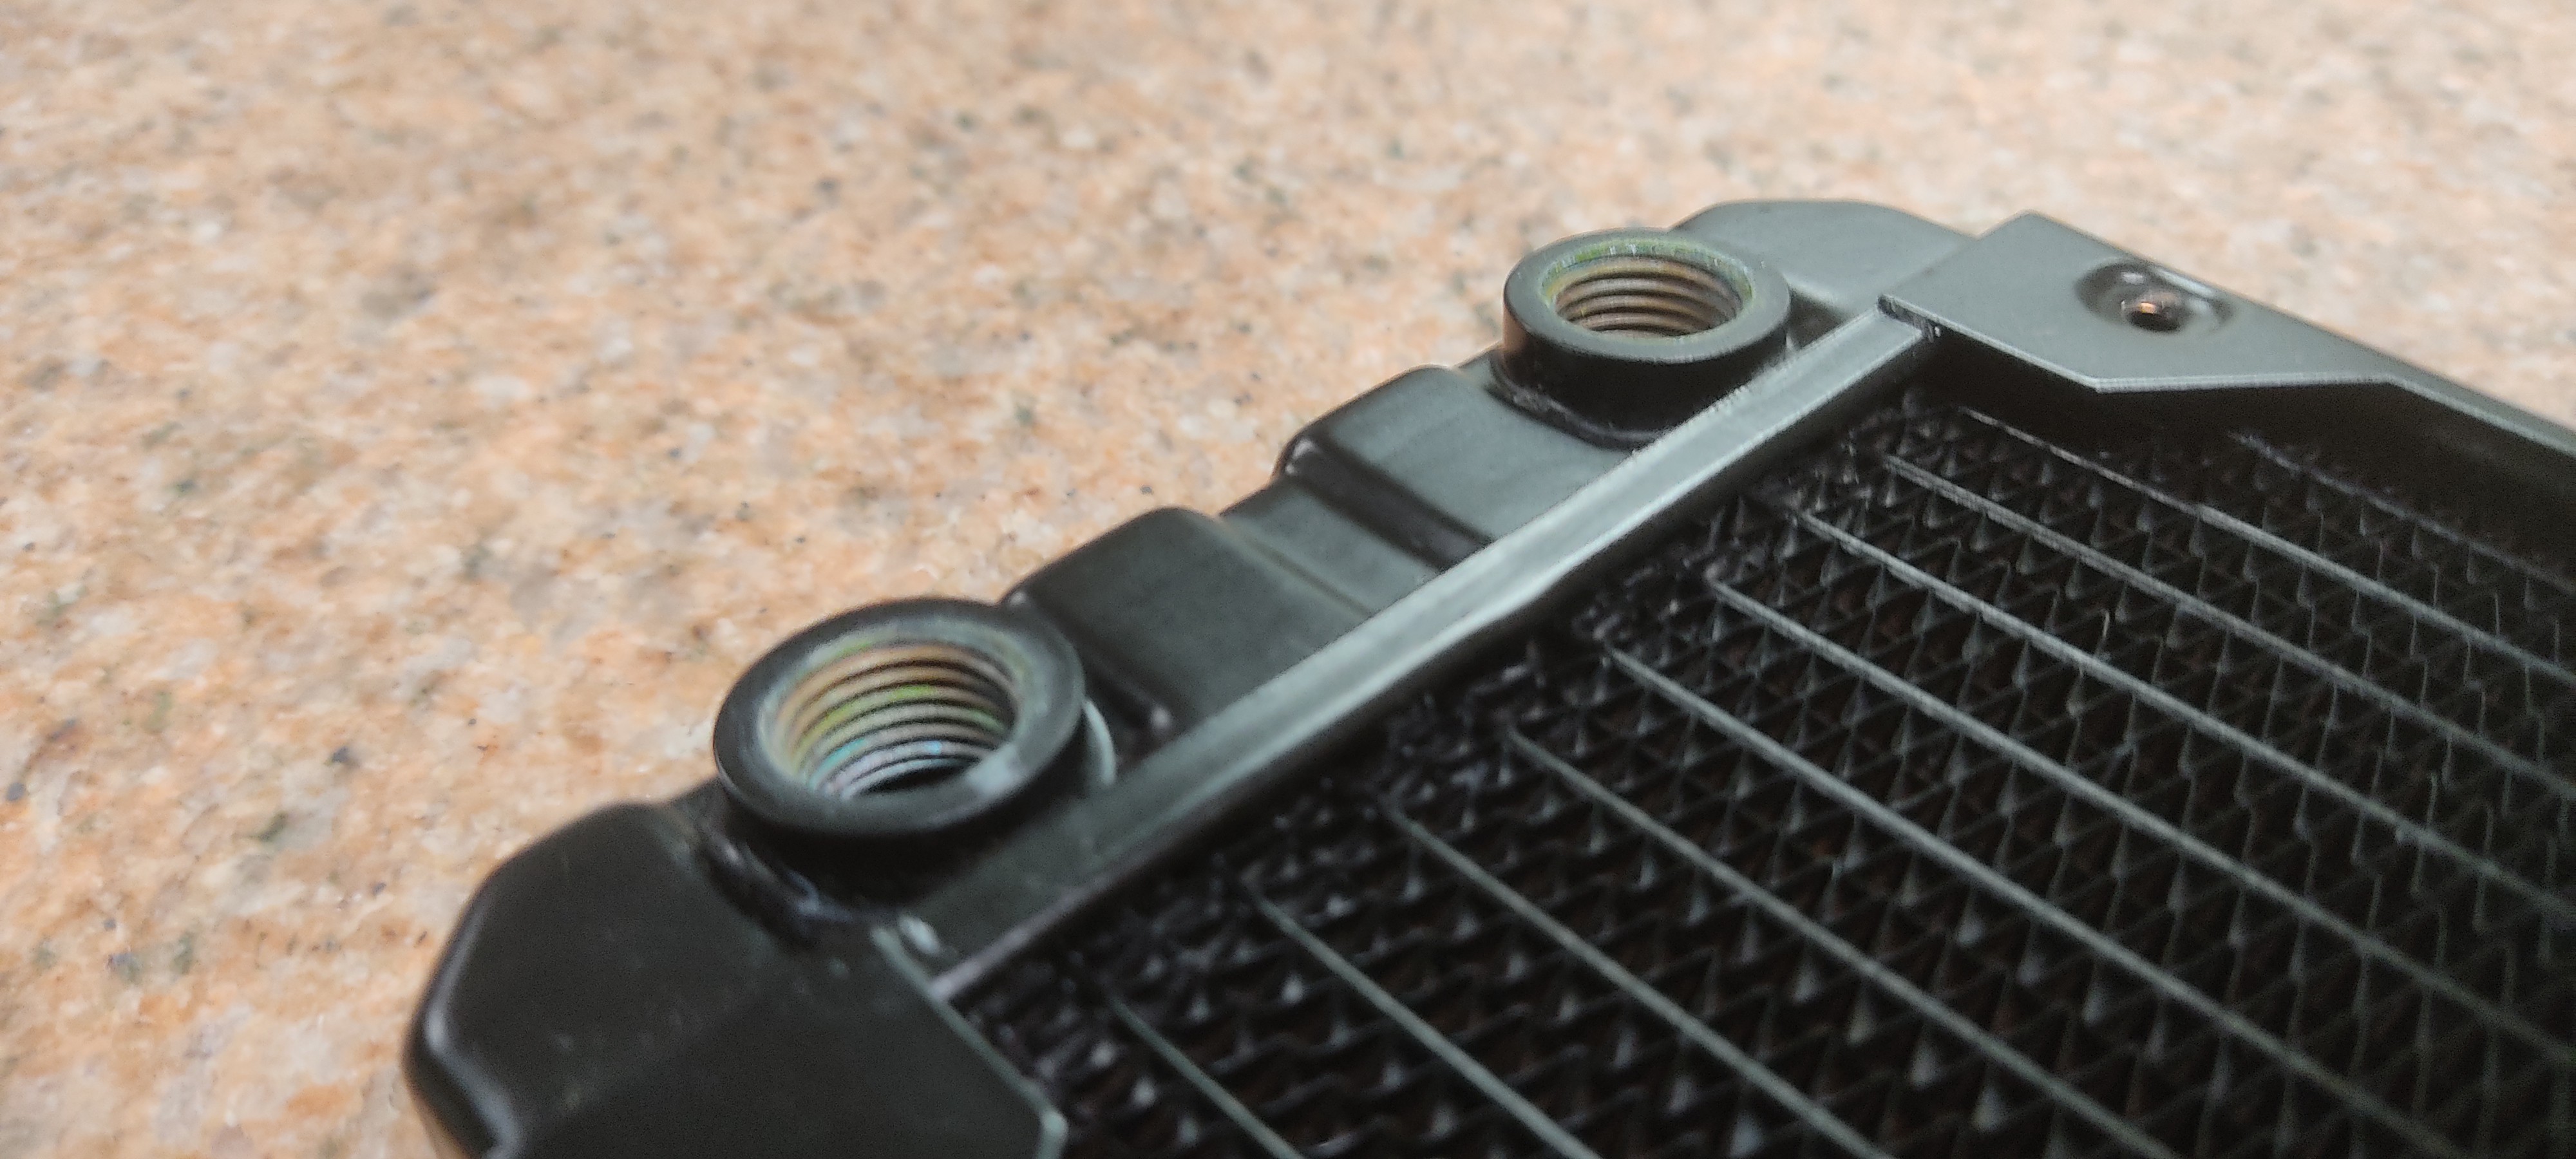
 A similar treatment (With colder settings) were used in conjunction with liberal application of a toothbrush to clean the used waterblock I found relatively cheap.
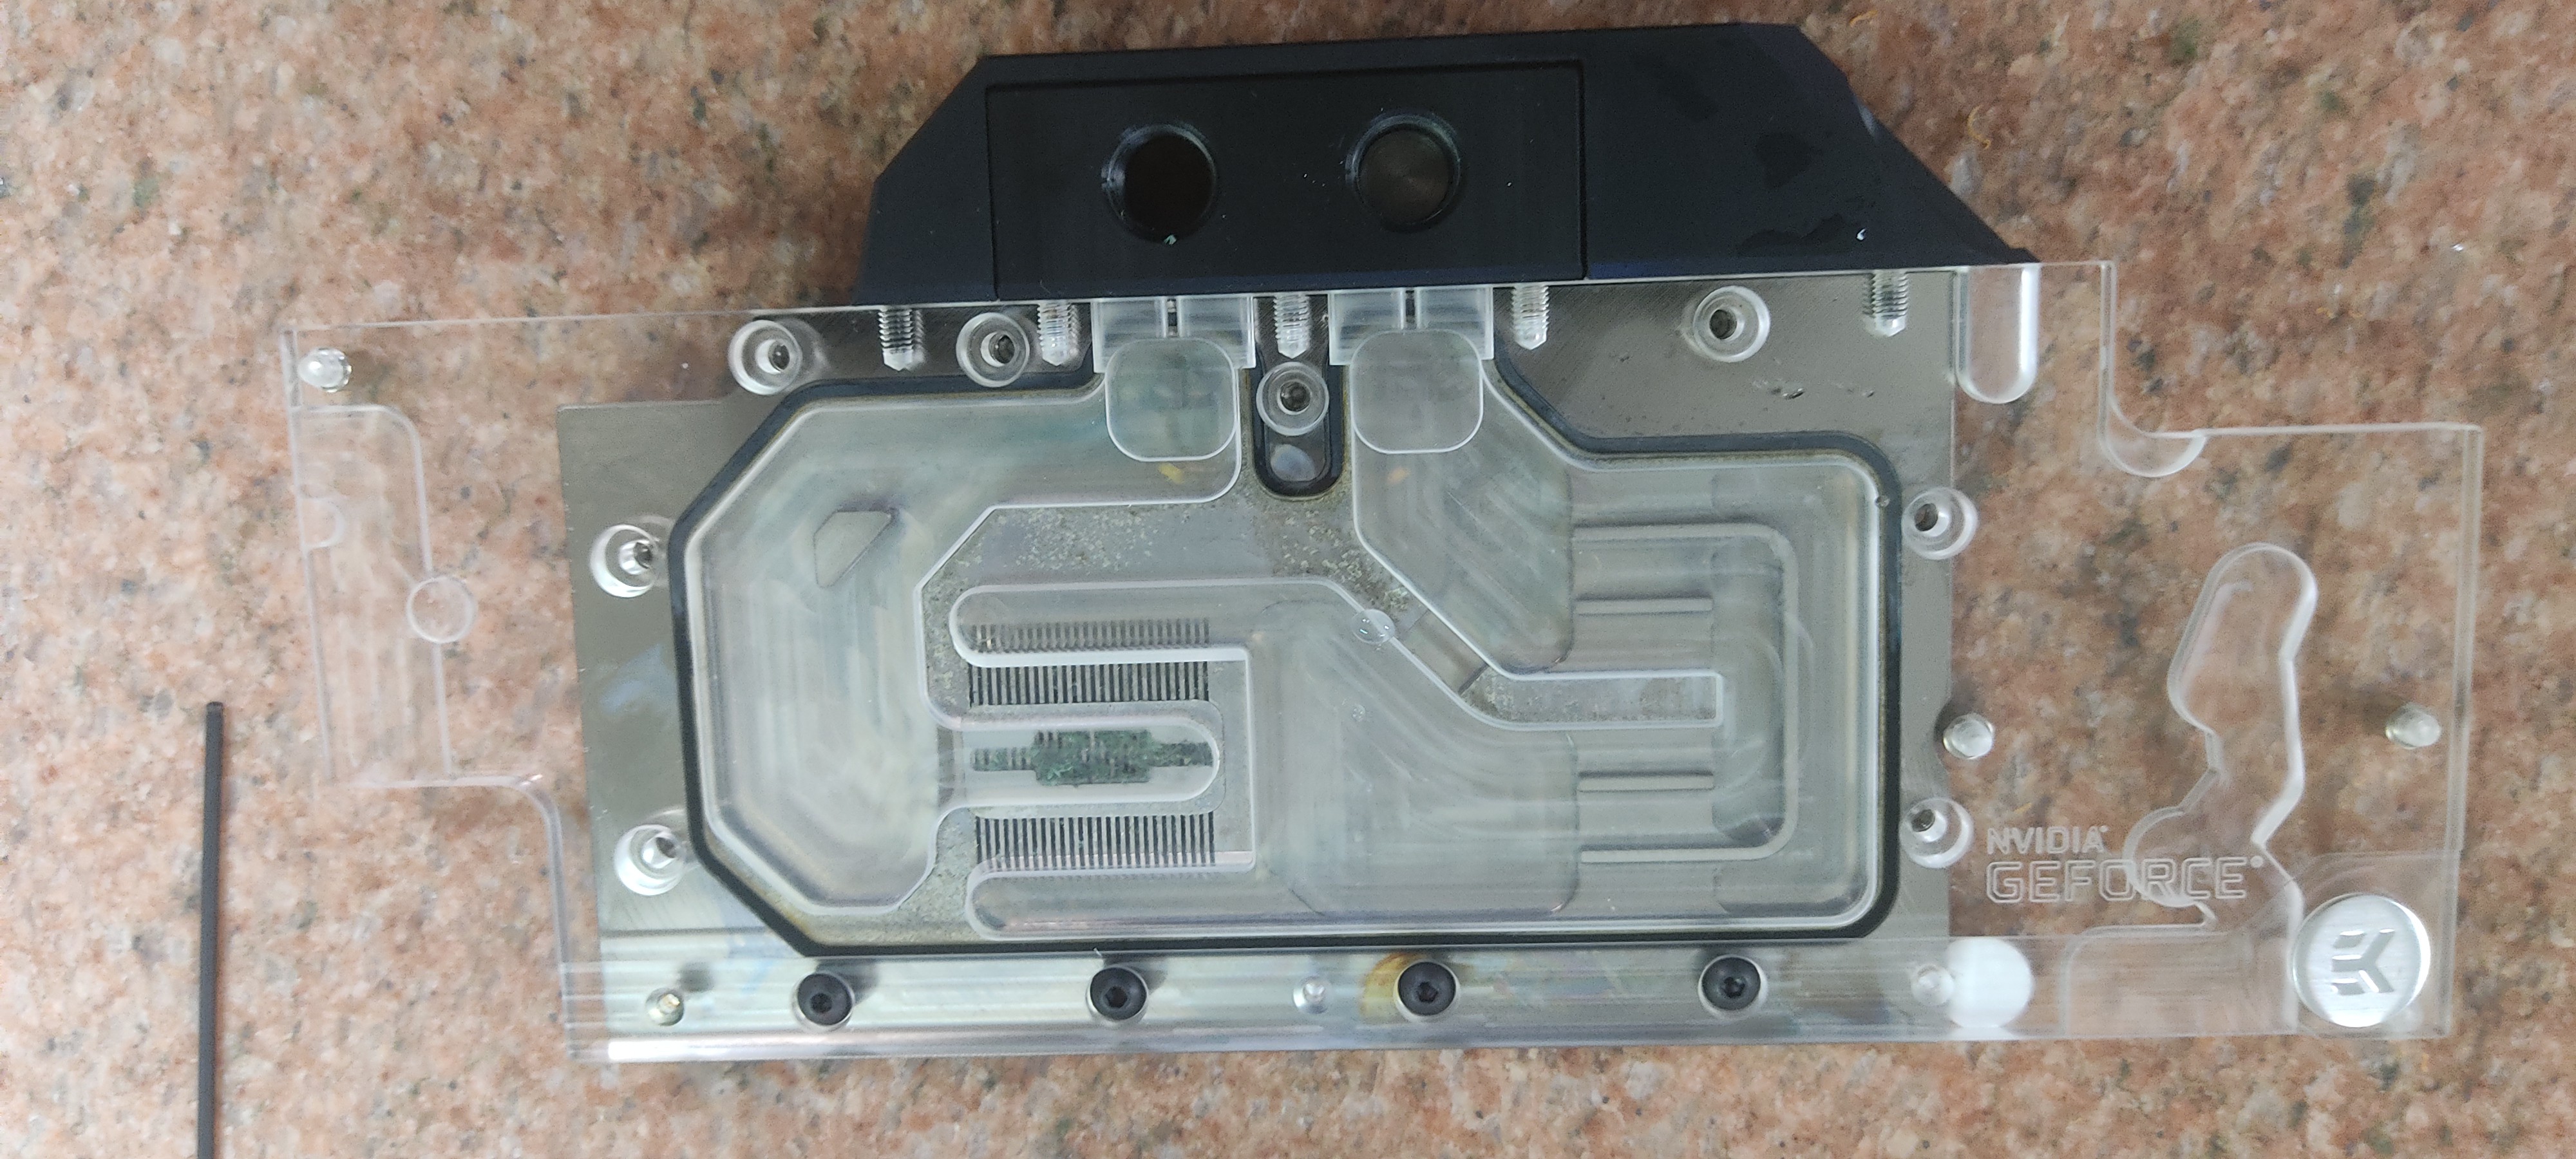
 The screws and orings were thrown in for a shorter amount of time and then washed with soap.