-
On making a "simple frame" simply
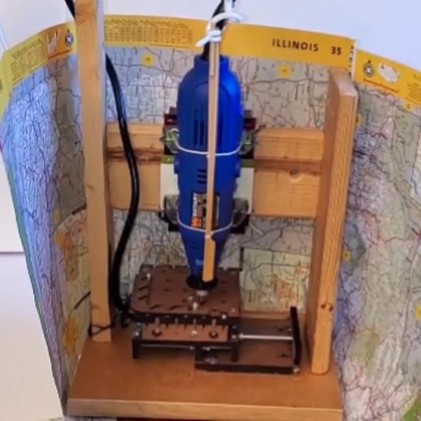
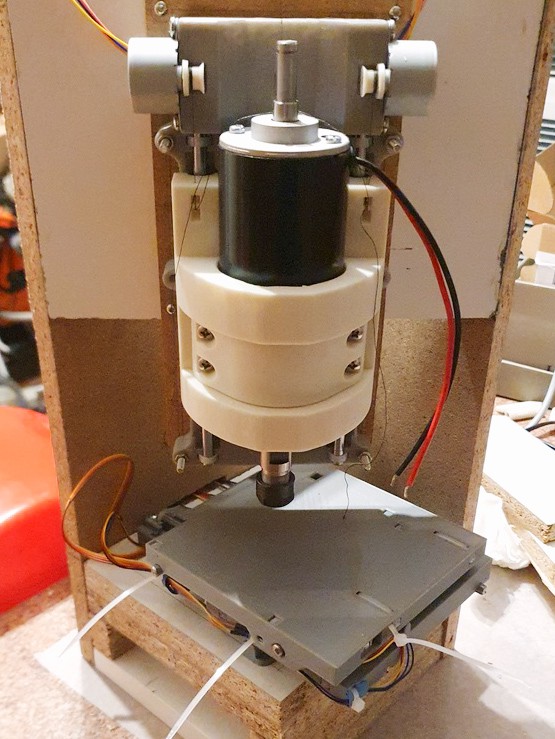
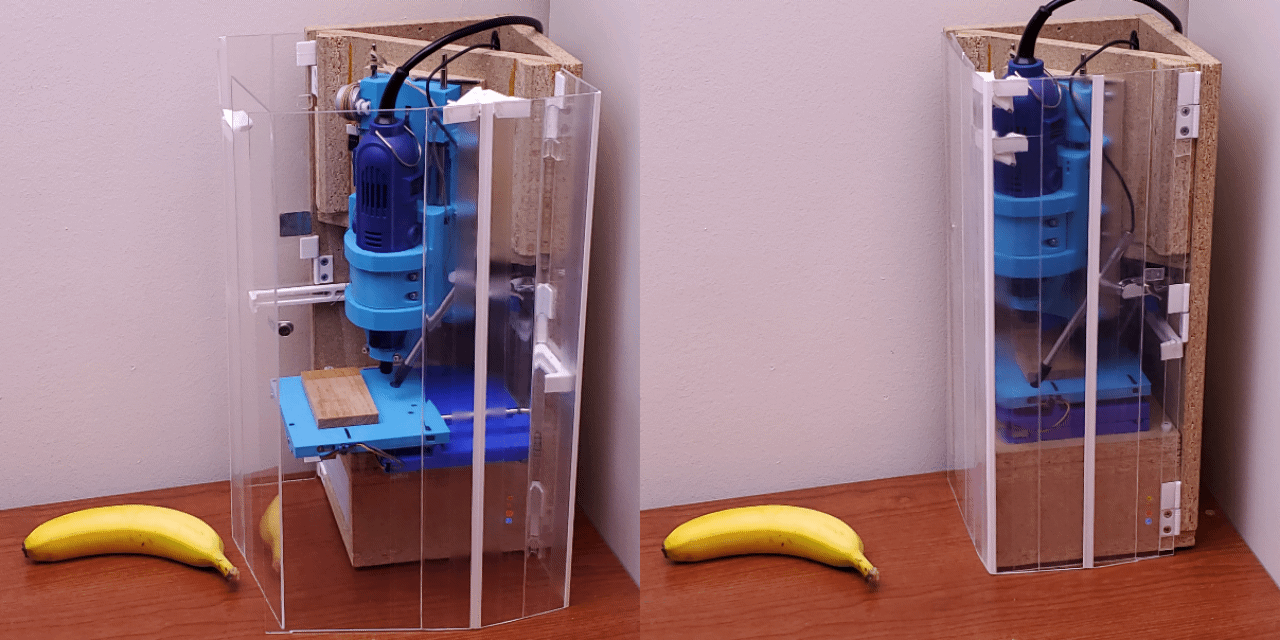
7 days ago • 0 commentsTo repeat a theme: this project focuses on the CNC mechanics, and the shortest path to building your own and making it work includes not following me down the fancy box rabbit hole. Yet. This is enough to get started:

Made from a few rough scraps, drywall screws, and eyeball "measurements" If you have access to a table saw, or some other way to make straight square cuts, you can make a slightly less haphazard version of the same thing:

Same thing but looks better if you have means to make straight square saw cuts While square parts look good, that's still only "slightly less haphazard" because the four frame parts are sized by eye with no measured dimension. Keeping it simple!
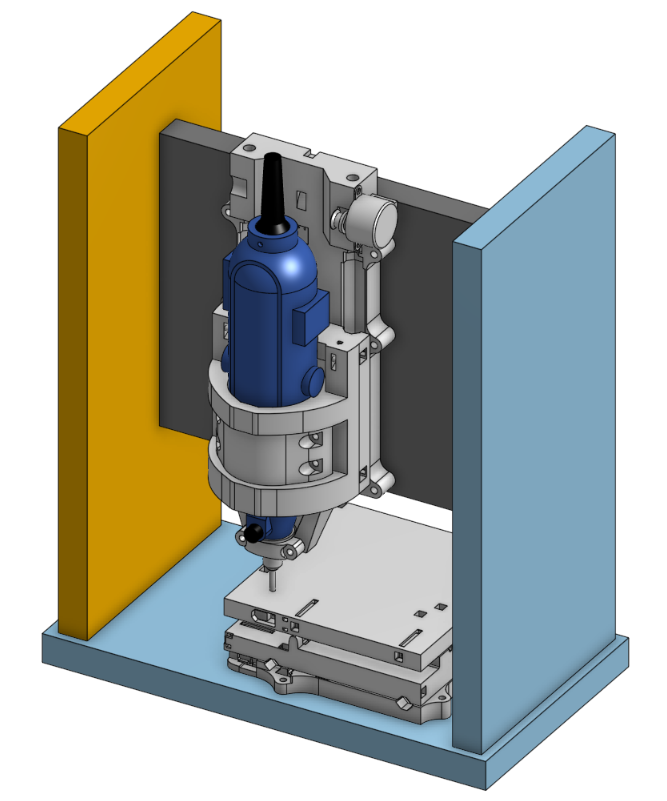
Placement of Z over X&Y
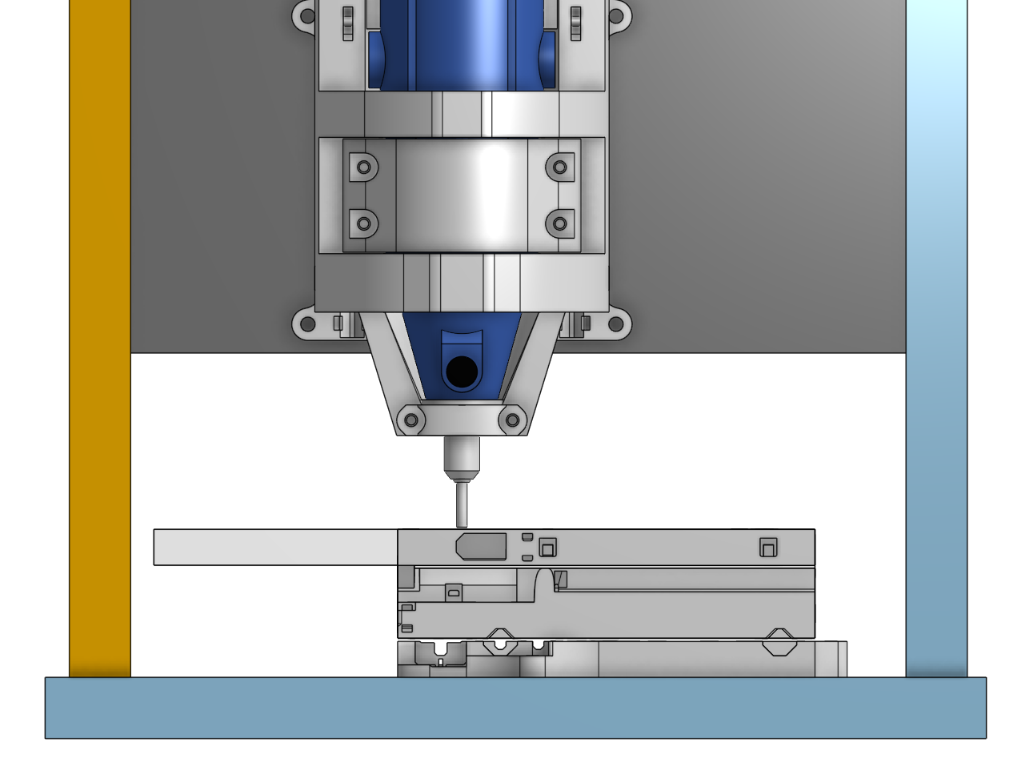
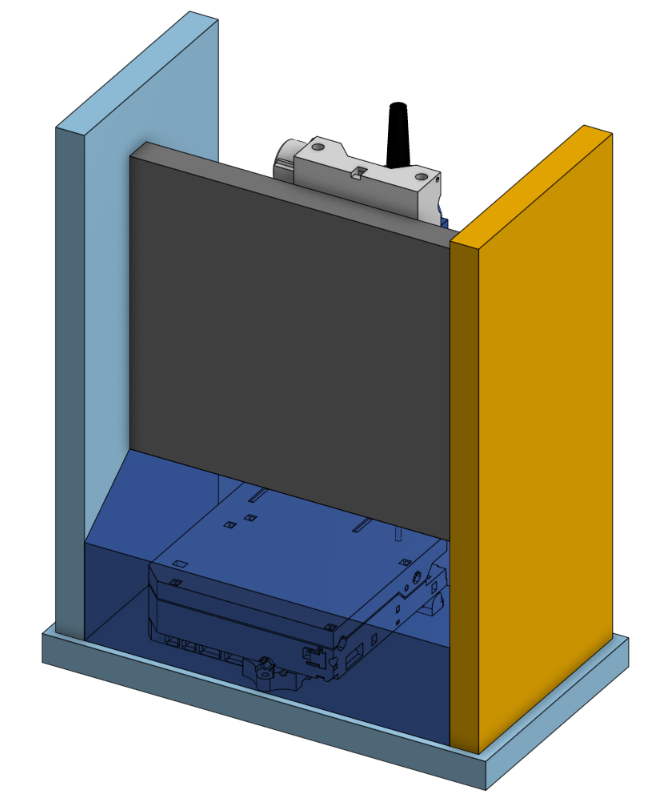
The frame's job is to hold the vertical axis over the horizontal axes. That's the relationship that matters. Here are some dimensions to help set up that relative relationship. The numbers are millimeters, but "looks like this" is close enough.

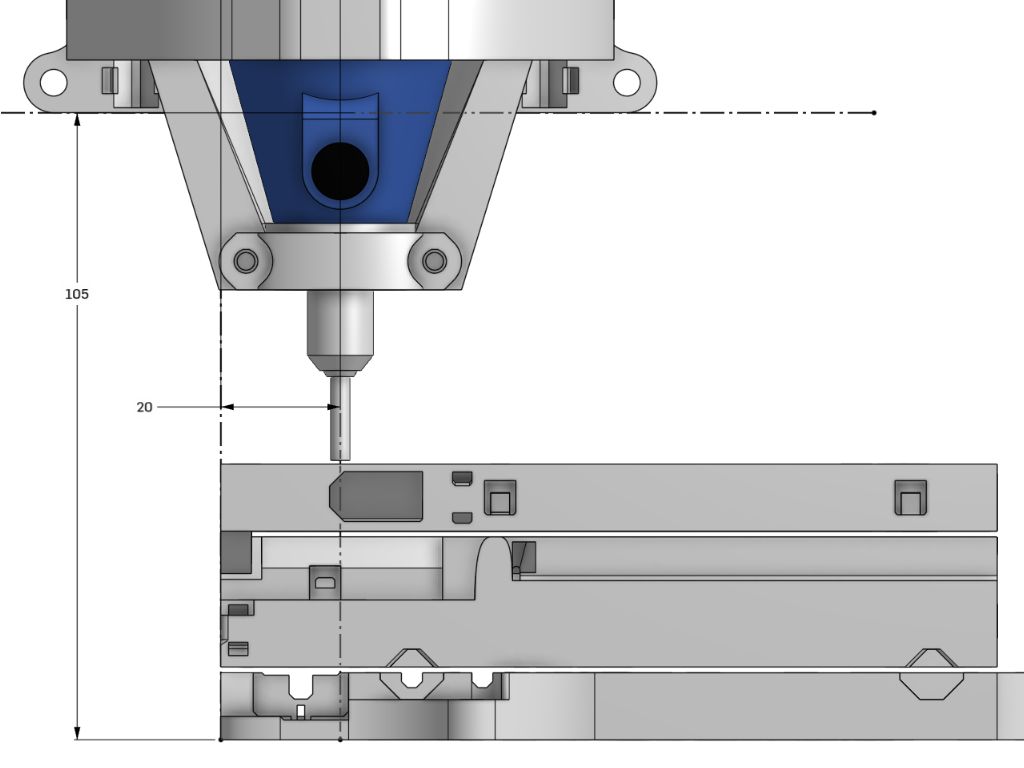
View from front; bottom edge of fixed base of Z axis about 10.5-11 cm above the deck; tool axis about 2 cm in from left edge of XY stack 
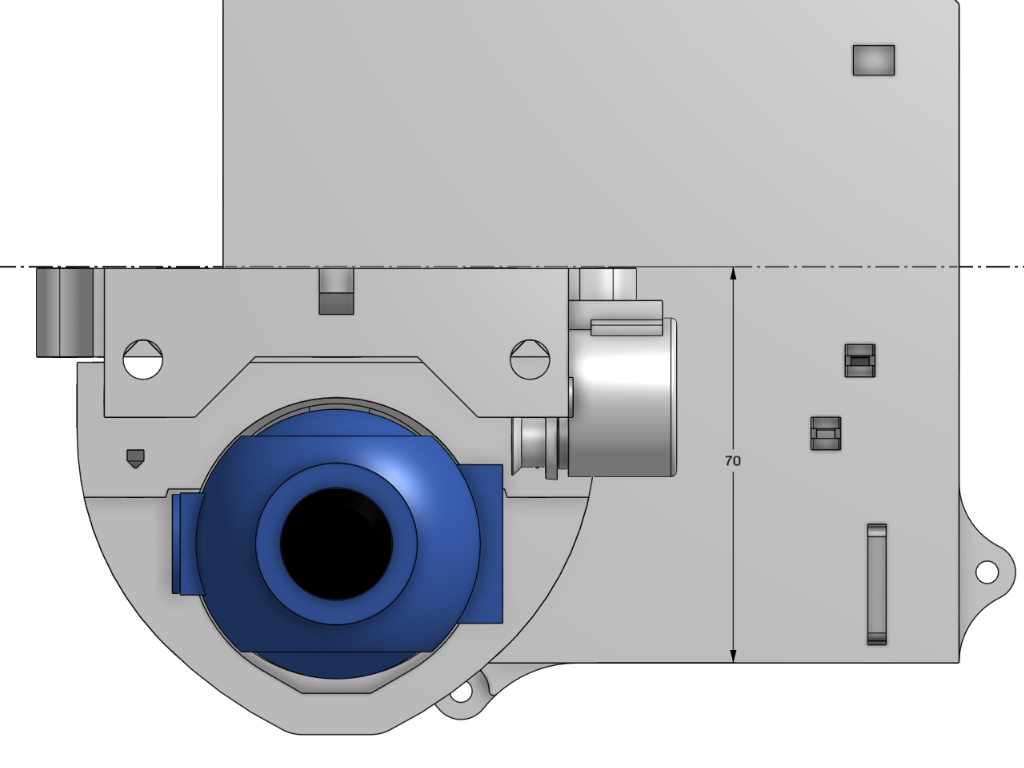
View from above; vertical face for mounting the Z axis about 7cm back from the front edge of the XY stack
Left and right clearances

View from front; leave room on the right side of the XY stack for your vacuum cleaner "crevice tool"; the X axis extends 75 mm to the left, so leave 8 or 9 cm on that side
Just a little bit less simple
Closing off the lower back of the frame will go a long way to making cleanup easier.
A bit of cardboard and tape will do the job:

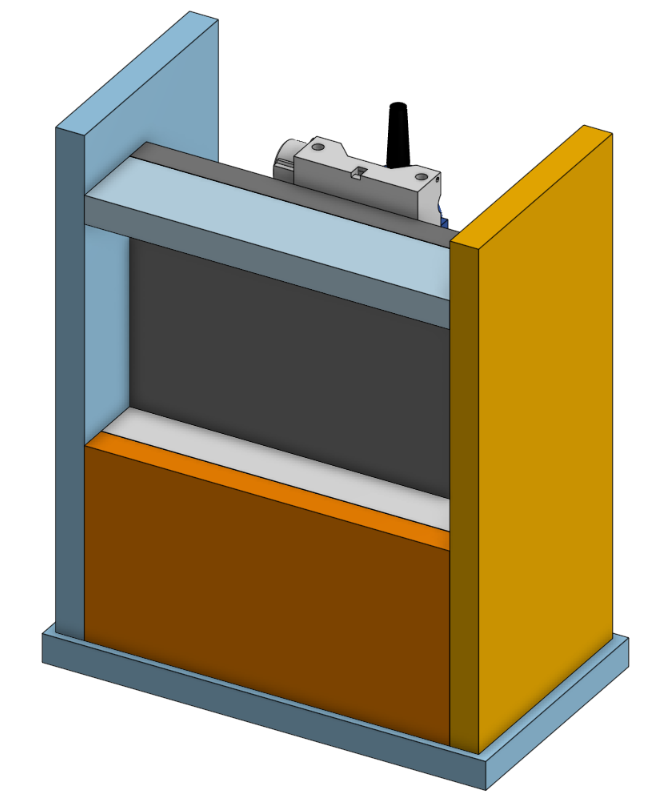
For just a little more effort when cutting parts, a couple more pieces cut to the same width as the vertical transverse piece will both close off the back and also make the frame significantly more stiff. And if you're going that far, a third piece across the top will add another increment of stiffness to the Z axis.

Chunky material like the 3/4" (18mm) slabs illustrated here will probably be plenty stiff enough on their own for a minimal four-piece frame. If your material is thin or otherwise uninspiring, the three extra pieces shown above can very significantly stiffen the frame. If using the narrow horizontal pieces behind the top and bottom edges of the vertical Z axis support, they should be attached along those spanwise edges as well as at their ends.
-
Discord: active and productive!
01/27/2025 at 05:04 • 0 commentsMore log catch-up...
The project subtitle includes "very DIYable". I can say so, but proving so remains for others to do.
While I've been not updating logs here, a couple of builders on Discord have completed their own "Minamil"-like machines up to first cuts. They've hit some major milestones for the project and I'm well late at saying so.
Discorder janvorli has built his machine with a proper spindle:
He started with a Dremel 300 in mind (I.e. in hand) which almost but not quite fit in the Z tool clamp. Then he found a too-good-to-pass deal on the 52mm spindle bundled with power supply etc. So there are a couple more versions of the Z sled to be found in Discord chat history, or for asking:
- slightly modified for compatibility with Dremel 300 in addition to whatever else already fit
- more modified for 52mm spindle only (& clearance for 54mm fan if present)
In the photo above, janvorli has two Z motors rigged. That didn't work. ...I think the 'why' will get its own log entry... What does work for this ~1kg spindle is a single motor and 2:1 purchase. He bored the tie-off bit out the printed part and fitted part of a 3mm smooth metal rod from an old floppy drive. The hoist cord coming down from the motor now turns around that pin with very little friction and runs back up to a screw eye screwed into the fixed base just below the motor/pulley.

At last report on Discord, janvorli had cut a couple of flat spaces:

It may not look like much but the considerable victory shown there is that, after troubleshooting his heavier Z axis and my dual motor fallacy, the two flats are milled to exactly the same depth. Big win.
I think it's important to note that janvorli is the first, that I knew of, to wade into building the 3d printed version of this "Minamil" concept. So he bore the brunt of (not) finding what I hadn't written yet, and challenging the Z axis with a load that I hadn't actually tested for real. I appreciate his help to advance the documentation, and understanding of how the Z axis really works -- and what to try next for that.
Meanwhile, Raf on Discord was building his own "Minamil" when he found that his Dremel 3000 didn't fit into the Z sled. He found a 3D model of the tool that I could use in lieu of the real tool in hand, and we had some back-and-forth about adapting the tool clamp to fit. Almost:

Then a friend of his with relevant CAD skill grafted a suitable clamp onto the base of the Z sled STL to put Raf in business. Raf also shared the new STL back to Discord. A more responsive me would already have all these modified tool clamps uploaded to the HaD project files. So please ask if you have need and don't feel like combing through Discord history. (But hey, join the Discord party anyhow!)

And here's Raf's built machine:

Yeah, the tool body clamp broke. He says it's working ok with just the nose clamp.
He too has both Z motors rigged. If we've understood janvorli's case correctly, that works for Raf, and my earlier trials, because it doesn't really need both motors to lift the spindle, so it's less vulnerable to differences between theory and reality of load sharing as currently implemented. ...more about that in the other log entry that I haven't written yet.
Raf's uploaded filename "minamil_first_try" suggests this is his first result:

Nice! I think that's a pretty big deal, in my view of the project, that someone who's not me has actually in fact worked thru the how-to write-up, such as it is, and put together a replica that, apparently, worked well enough to produce something near to intended results on the first try. Plus adapting the Z sled for a different "spindle" tool along the way.
Bravo Raf!
Both janvorli and Raf have built "corner" frames with the Z axis at 45° to the base. I feel a bit like a bad influence setting that example on my overwrought quest for compactness when a "square" frame (I.e. rectangular, like these examples of the laser cut version) would be the easier, more direct path to a working result. Anyhow, congrats to janvorli and Raf for results achieved!
I'm looking forward to seeing what they do next. How about you?
-
One minute video
01/15/2025 at 22:23 • 0 commentsA while back I made a few videos to show some of what's easier shown than said. Or believed. Since then I've: shed the Z counterweight, shifted from laser cut to 3d print construction, and changed the frame among other less visible changes. But I haven't made any new widget as photogenic as a little gearbox to prompt a new eye candy vid.
So here's one minute of simple but sharp recent work with 3d printed mechanics in the current iteration of fancy package:
I'll probably lift some tight shots from earlier videos eventually, when there's more of more recent content to mix it into. Just replacing wide shots of old stuff with wide shots of new stuff could be expedient, but then "... and here's a different machine that didn't do any of that but could have believemeIpromise" would be awkward. -
FR-2 = "wood" for very fine detail
01/13/2025 at 22:33 • 0 comments...and tough too!

In the previous entry about contacting local scale model builders to ask if they might appreciate an accessible little CNC machine, I mentioned a couple tries at making a "trail board" for a Midwest Model Shipwrights member.
People have been making scaled-down models of inconveniently large things for a long time ... and I've abandoned hope of summarizing that in a sentence. Making detailed wooden models of wooden ships stands a little aside from the model-making mainstream as we approach the 21st mid-century AD, but the venerable practice persists and practitioners gather nearby.
Wood has grain. Scaling down wooden parts has the effect of scaling up the wood's grain. Very fine grain woods mitigate that with good success well established[1]. But trying to capture finer detail at smaller scale eventually turns into trying to carve a tea set from a stack of sewer pipe.
From last time:
- I wrote about FR2 exceeding expectations as a machinable material not entirely completely unrelated to wood but with essentially no grain. "FR2" is an imprecise term for the brown resin-saturated paper board used for the cheapest, simplest circuit boards.[2] Similar material is available by other names. Contrast with FR4 which is glass fiber+epoxy and hostile stuff to work with. I'm thinking this paper+phenolic stuff looks promising for compatibility with wood model construction, but that remains untested by actual model builders -- that I know of. But maybe I'm just the last guy to get the clue. Some "phenolic paper" material is advertised for "enhanced" or "finest" machinability. "FR" = flame retardant.
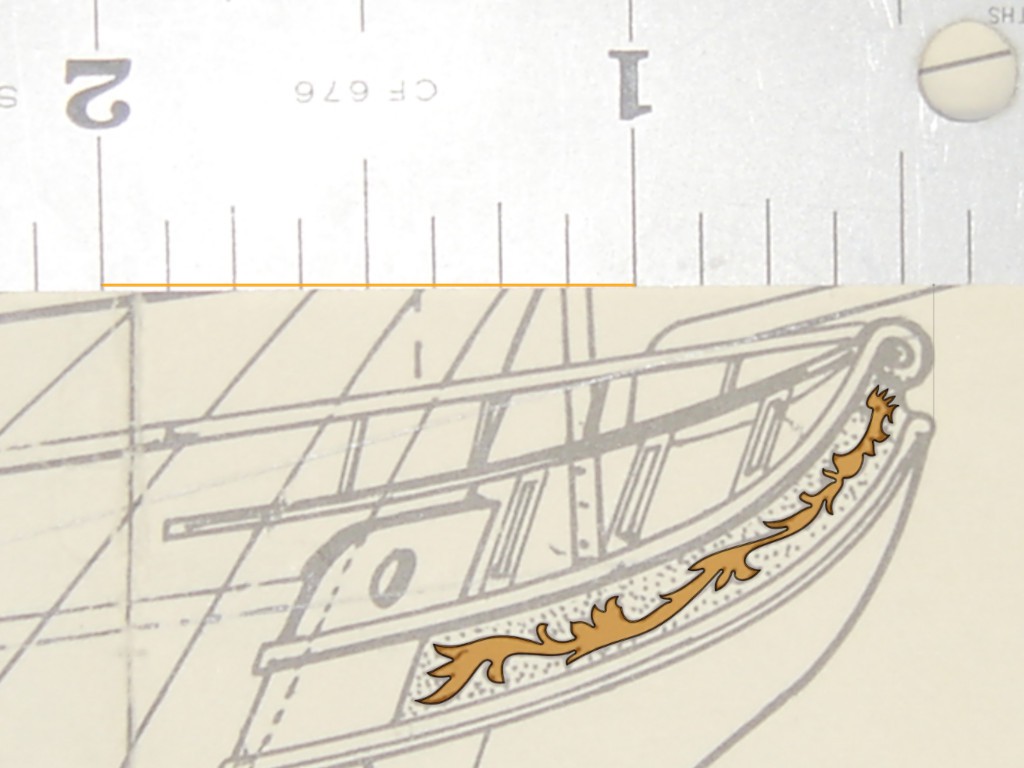
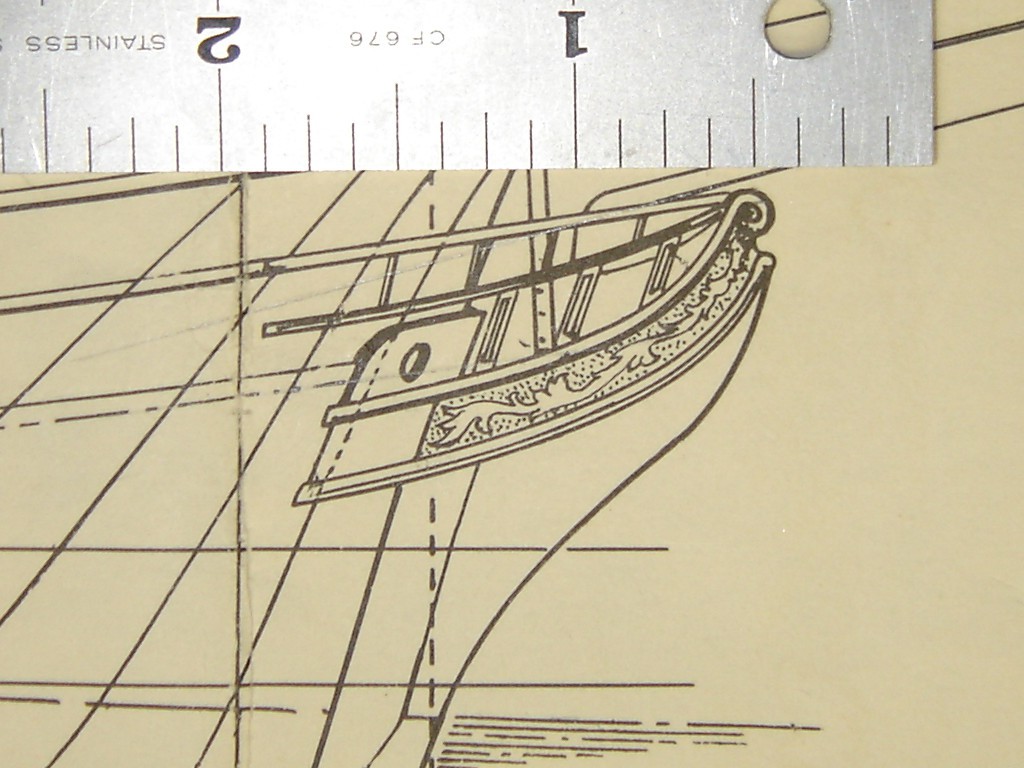
- I had started off in the wrong direction with the first couple of whacks at the "trail board" example. Further information clarifies that what look like scrollwork borders of a flat board appear straight only in profile. The ornamented part is parallel with the mid-plane so it can be taken directly from the drawing. And the builder already has the structure and only needs the decoration.
So, back to the drawing board.

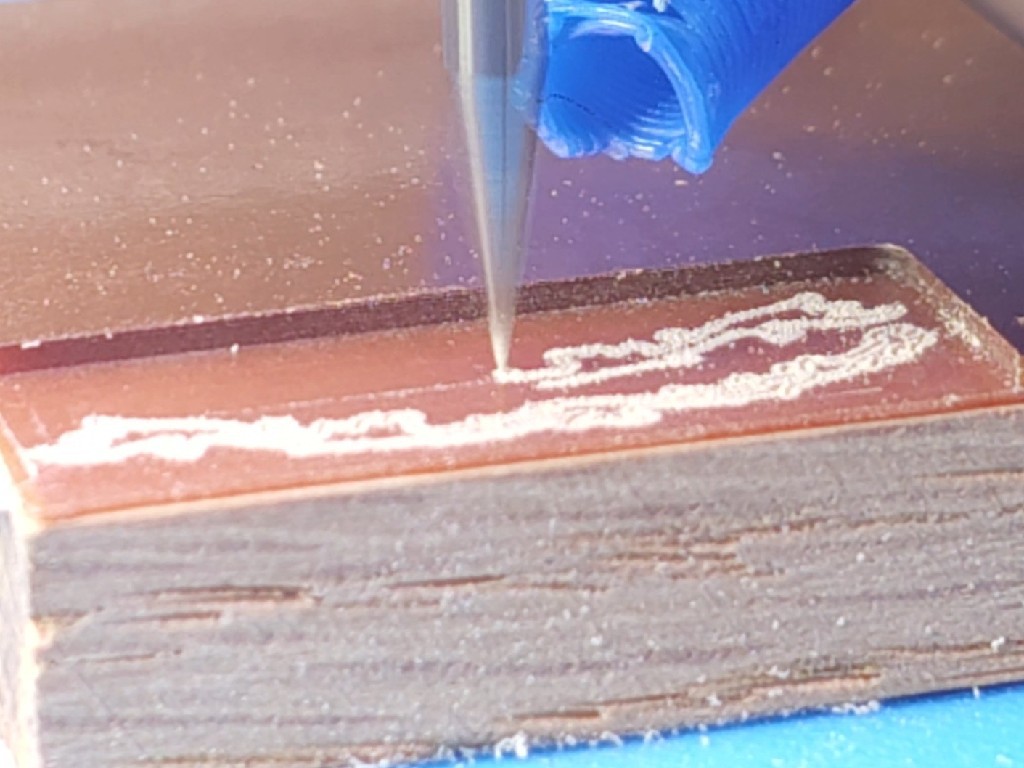
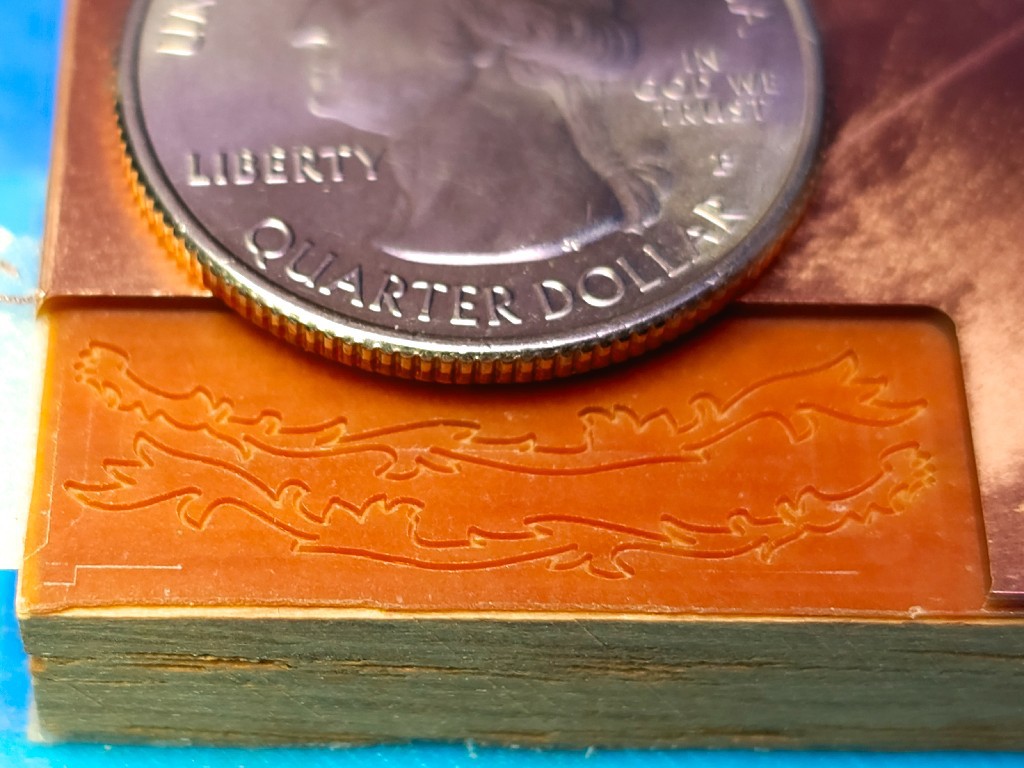
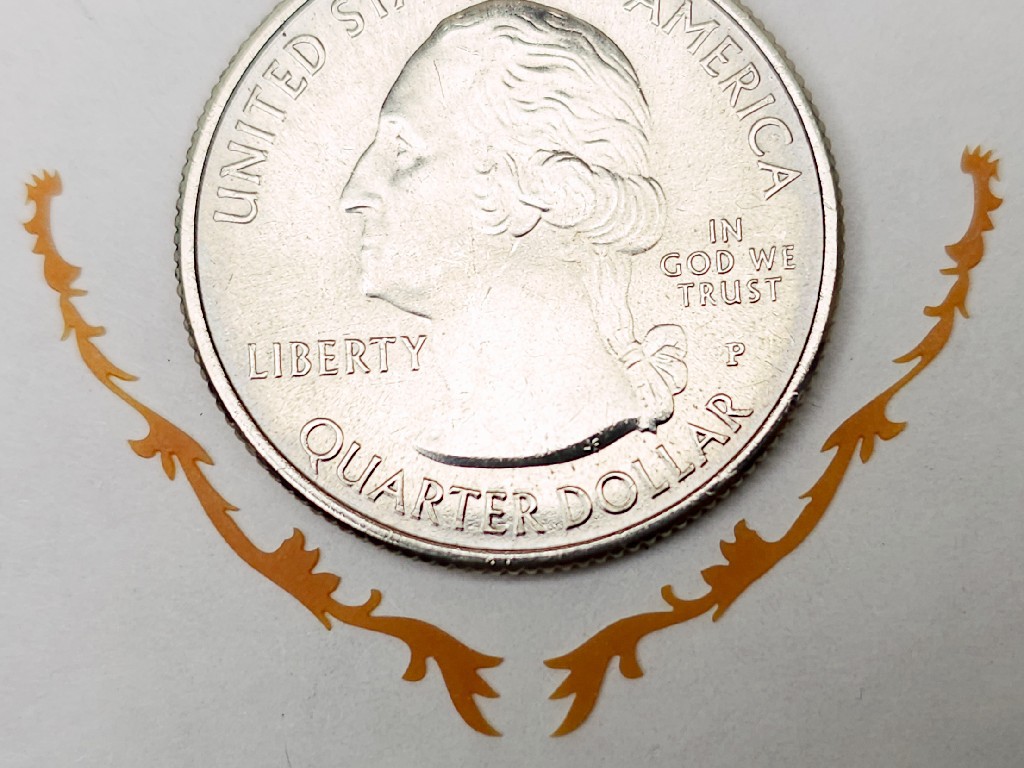
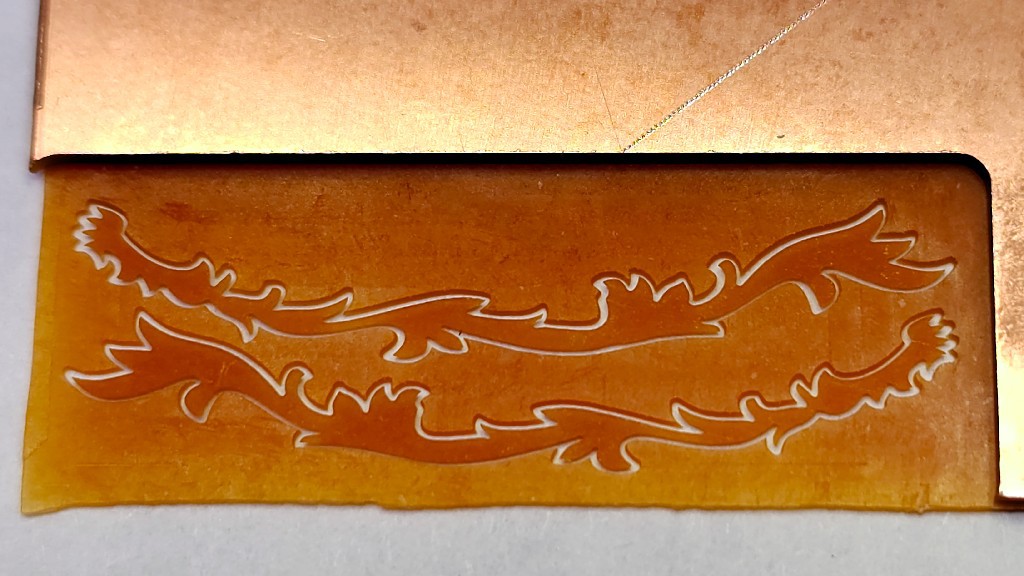
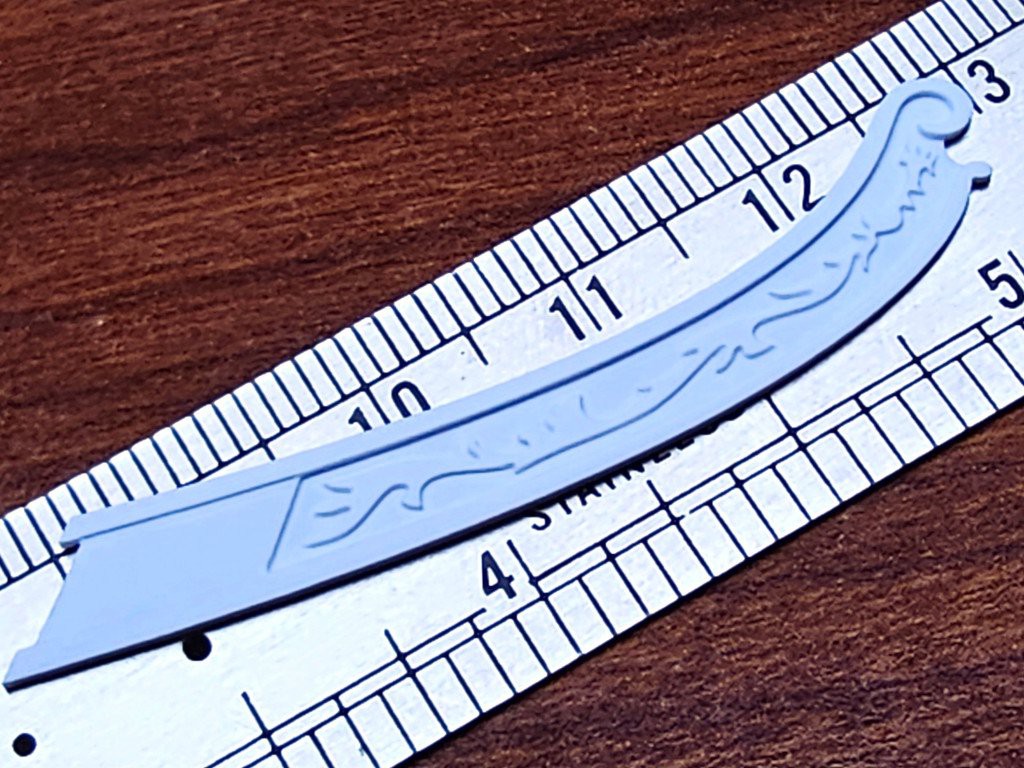
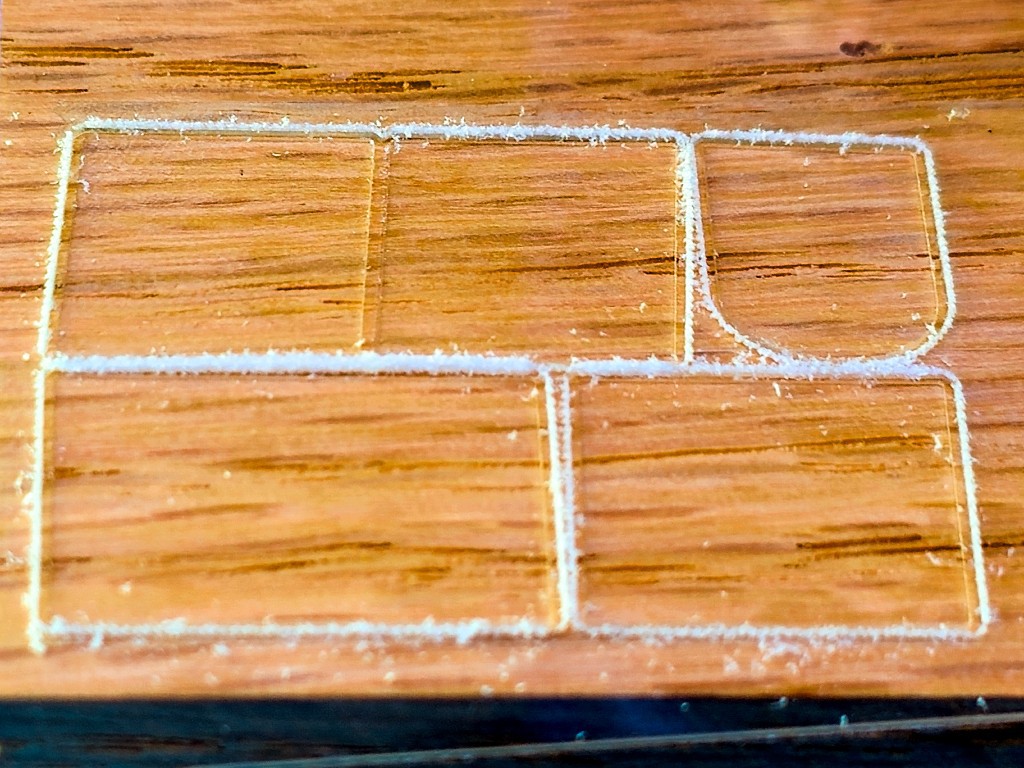
Then milled a patch of FR2 down to 0.3 mm thick (or so I thought, but it came out more like 0.34mm -- dunno why) and from that cut out a mirrored pair of figures using a 20°, 0.1mm Vbit. I didn't feel like testing how deep it could cut without breaking the tip or deflecting when I really wanted the best narrow cut and sharp inside corners, so I ran six passes at very conservative ~0.05mm steps down ("~" because a little more to match four Z motor half-steps). I expected that to cut through or very nearly so. But it didn't. So I ran a few more half-steps down until the bottom of the cut looked different. I was complicating this for myself by trying to cut no deeper than necessary because deeper makes the V cut wider.


When I peeled that up it turned out of that I still hadn't cut through. My current guess is that maybe the glossy surface layer has a different consistency so the top of the bottom skin looks different, but I don't know. In any case, that was initially disappointing. Then I tried sanding the remaining thickness off the uncut side, and that worked quite well.
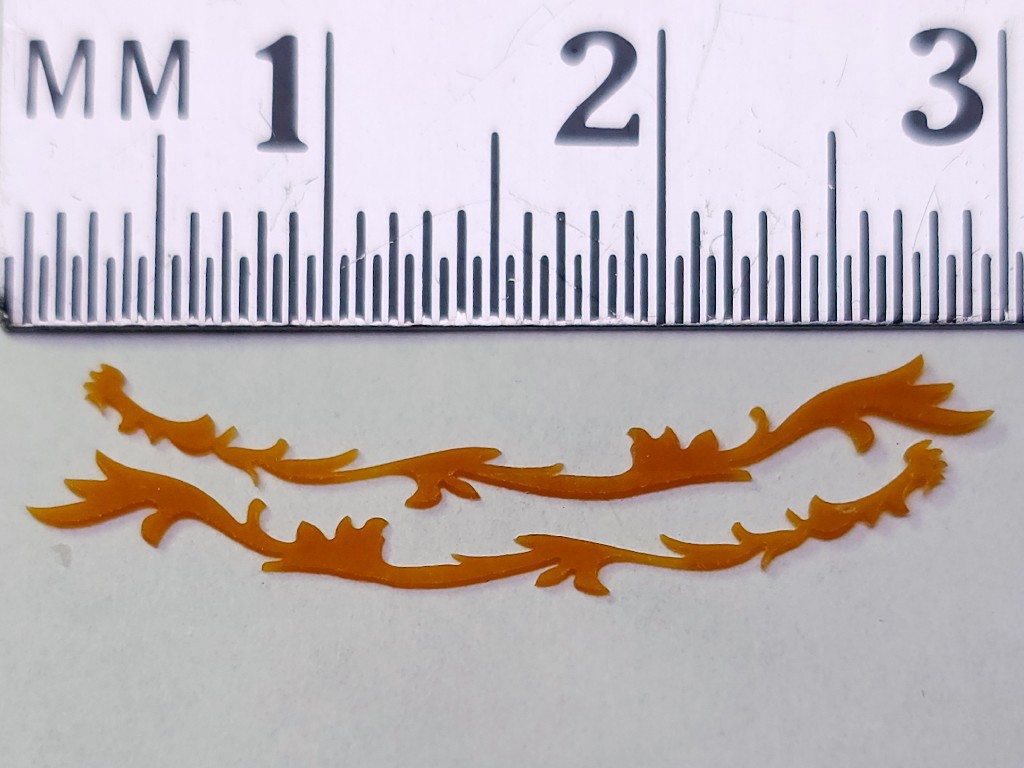
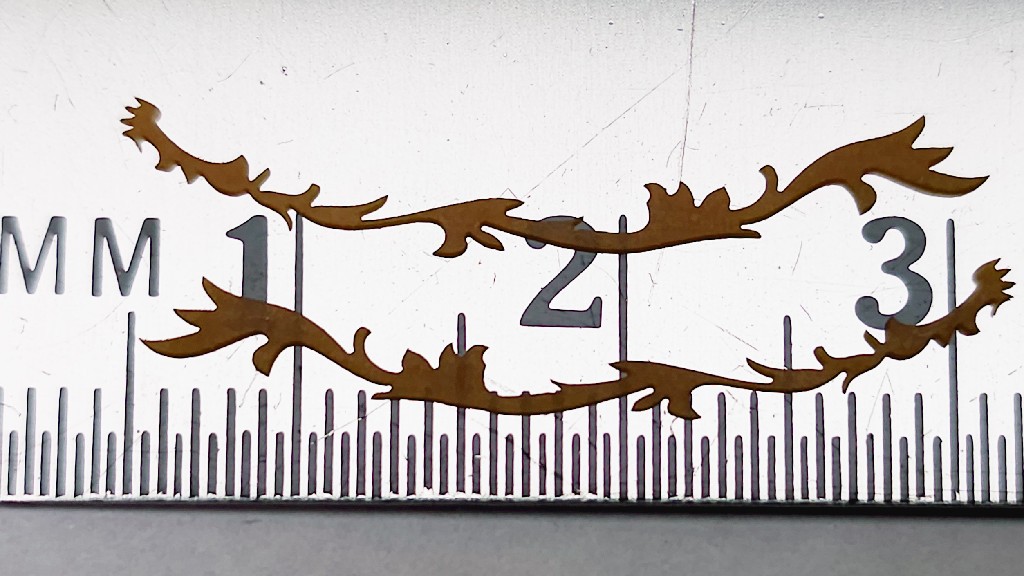
Some beauty shots:


That's a half-millimeter scale. (labeled "MM" in CAPS and numbered by cm. :-/ )
Check out how thin the thin parts are! Earlier I didn't have any great ideas for how to avoid bending that if made from something like brass or styrene, or breaking it if possibly something like that could be cut from boxwood (which I have yet to try). That's where the FR2 works great. Not only is it possible to make those, but also to handle them. They are, of course, fragile. But so far I've been able to handle them "carefully", in the ordinary sense of "careful".
I gather that a chronic challenge / mark of skill among model builders is matching reflected pairs of parts or features like this. To demonstrate the accuracy of match, here are the two parts flipped upside-down and each fit into the hole from which its opposite was cut:

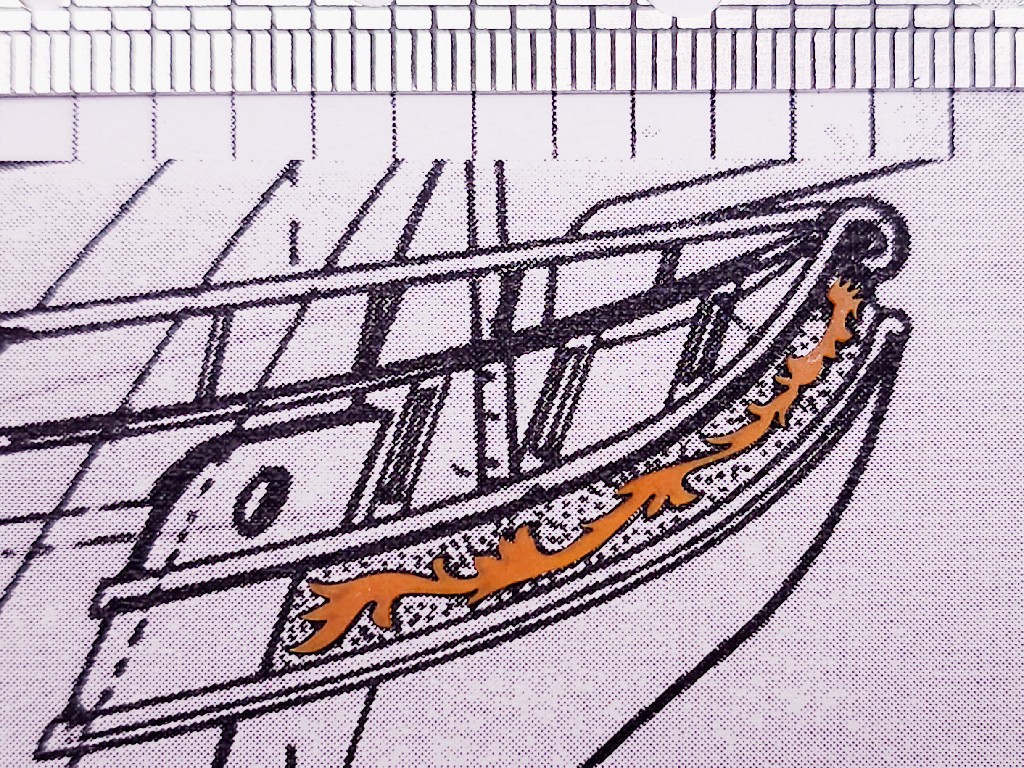
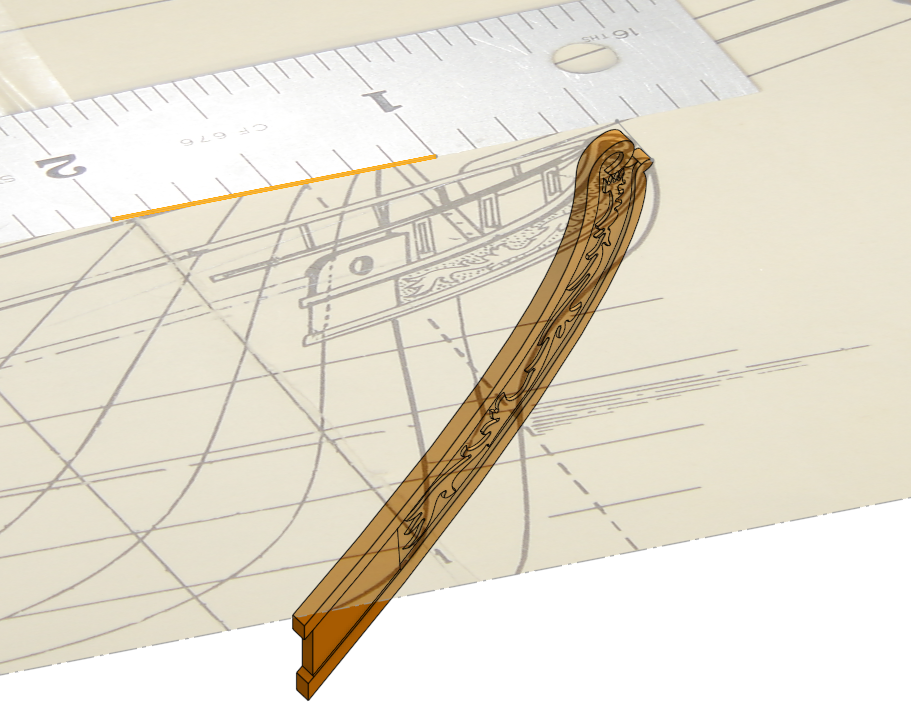
And here's the ̶r̶i̶g̶h̶t̶ ̶s̶i̶d̶e̶ starboard part on a print of the photo of the plan scaled to (nearly) match the printed ruler to a real one:

Now it remains to deliver this back to the builder for a fit check -- both practical and subjective.
A running theme that has kept this project going is exceeding expectations. Again. These two parts are very far beyond anything I had in mind at the start, and still better than I expected even after ratcheting up expectations by lots of steps since then.
=====================8<-----------------------------------------------------------------
[1] Chief among fine grain wood, as far as I know, is the proper species of boxwood grown in favorable conditions. Very much a specialty product and apparently not trivial to "just buy" the good stuff without doing some homework.
I'm sure I'd heard of "boxwood" here and there as a forgettable passing datum. I've never tried to do anything with it (yet -- I've acquired a small sample but haven't had a chance to interact with it). The reason I remember it is because I saw this a few years ago. The link gets some nice pictures but to see the thing you have to go there and make nose-prints on the display case. It's amazing regardless of the material or downer subject. The idea that it was carved in wood is ... cognitively challenging. And a) it's 500 years old, and b) in 500 years it's never been mishandled.
A wider-than-usual digression, but that's what I know about boxwood.
[2] More correctly hyphenated "FR-2". Mostly if anyone says what it is they mention "paper", "phenolic" something, and maybe a random standard related to fire. This was way too hard to find: the real, if nominally obsolete, definition from page 173 of this limited "preview" of NEMA LI 1-1998 (R2011). (<rant>The current version is jealously guarded behind a $551 paywall. What's the deal with secret standards in 2025 when dissemination doesn't require a paper mill?</rant>)
NEMA GRADE FR-2 ... is a laminated material which is constructed from a cellulosic paper combined with a phenolic resin binder. The paper is normally cotton linter or alpha cellulose, but can be manufactured from bleached kraft. The phenolic resin system is flame retardant to a minimum of UL-94 rating of V-1, and is normally plasticized to permit good punching from ambient to slightly elevated temperatures.
Military Specification: MIL-I-24768/25
IEC Specifications: 60893, PF CP 308
Grade FR-2 is used as a flame retardant, room temperature to slightly elevated temperature punching, material for use as mechanical support in electrical applications.[sic] It has good moisture and relatively low dielectric losses under conditions of adverse humidity and temperature.
It looks like the thing that mostly slides under the radar but helps us in this case is "normally plasticized" which I suspect contributes to machinability and toughness. FR-1 definition suggests it's less plasticy at room temperature.
-
Thumbnails are the windows to ... scale modeling
11/25/2024 at 01:06 • 0 commentsLog backlog got big again...
I've been plugging away at making little CNC machines and writing about it. And making little things, few of which have much use apart from tinkering with the thing-making machine. Earlier ̶t̶h̶i̶s̶ last year I randomly discovered that there are several scale modeling clubs around here, including the Midwest Model Shipwrights. Might people who actually make little things have some interest in actually using a little CNC to make actual little things for the thing they do?
Now, these Model Shipwrights are very good at making the things that they already make. And they already make all the things that they need to make model ships. And they know a lot about making model ships. Viz:
org forum journal Nautical Research Guild Model Ship World Nautical Research Journal
ISSN 0738-7245Ships of Scale Ships of Scale The MSB Journal
ISSN 1913-6943There are journals. With ISSNs. Not just one.
So I'm not going to tell these people how to model ships.
...
But I ventured to show up at a meeting with some example widgets and asked if making such things seemed like an interesting capability, and what sorts of ship model things might be interesting to make differently with a different tool.
That went well enough to gain an invitation to return, some examples of things to try, and some material samples.
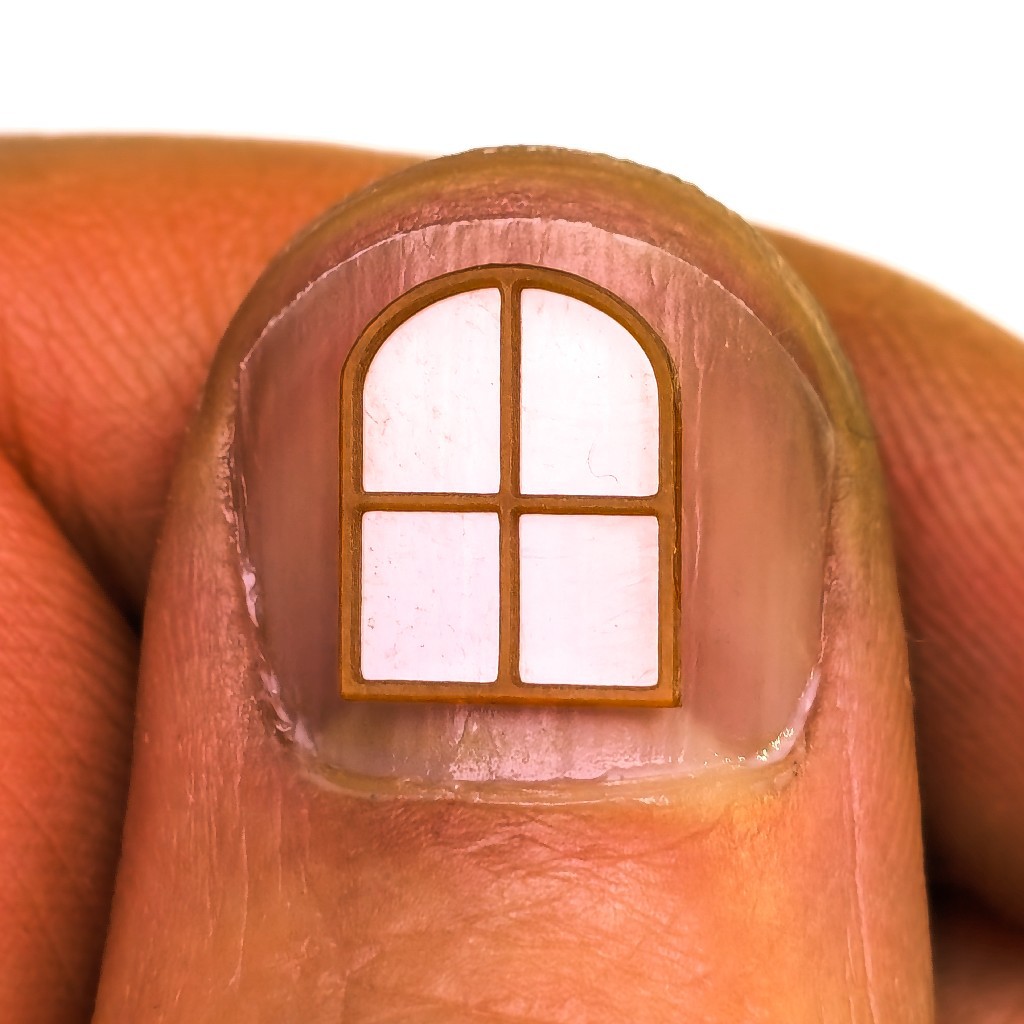
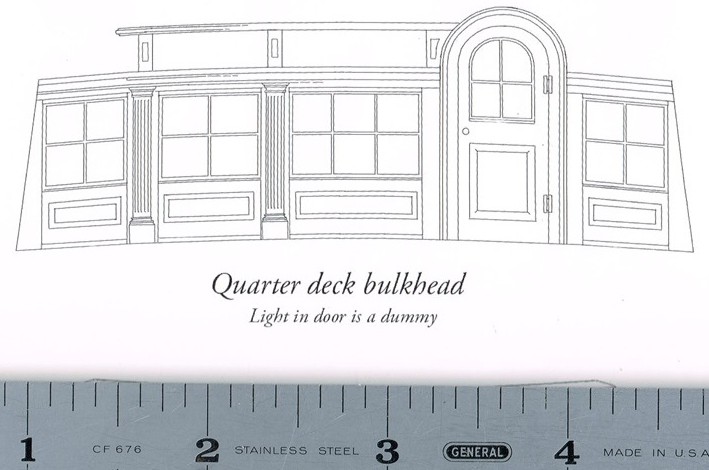
Things to try that might prove interesting included a drawing of window frames, which "usually present a challenge for modelers":

That's where the window in my thumb comes from. We'll get back to that...
This post grew long before it got to the end that I had in mind at the start. It's mostly but not entirely about little windows. If I'm saying this is doable, I probably should show at least one example of process from idea to result. That said, this is more an illustration of how some ideas evolved when the tool at hand was a little CNC mill and not so much a tutorial for CAD or CAM or steps to replicate this result.
Show > Tell: What useful work could a little CNC do for a modeler of ships?
The first example I tackled was this "trail board" -- one of the pair of decorated boards that sometimes dress up the pointy (or blunt*) end of a ship.
The trail board, which I understood to be flat, looks like it runs from the stem back to a point where the hull has some breadth. I guessed that it might be oriented something like the blue and gold trail board on this model:

source: Roland's Ship Building Blog (that part is pewter, and so maybe a candidate for milling instead) Supposing so, then the profile drawing shows a projection of the board leaving two degrees of rotation to determine the correct shape. In between me asking for, and the builder of that model sending another view, he described the boards in a vertical plane. So that's down to one rotation. A first proof of concept demonstrator doesn't have to be actually correct, so I guessed and projected from the drawing to make a solid model. The yellow inch ties model scale to the drawing.

(wrong first guess -- later this will get corrected) While the ornamental figure has a convoluted outline, it appears essentially flat in the drawing. Maybe the prototype was more viney/leafy and maybe a larger scale drawing would show that. For a first whack, it's convenient to believe that it really is supposed to be flat and extrude the traced figure into a "2.5"D solid.
First articles: port & starboard figures cut from 0.001" brass glued to a chip of hardboard.

Sharp inside corners were the main challenge. These parts were received as good enough to validate the idea; next try could be sharper. In part because the underlying surface could be more nearly level -- note left end of the upper part vs right end of the lower part.
aside: At the Shipwrights' meeting where I handed over the brass figures, one of the members gave a presentation on tracing over images with precision (straight lines, round circles, symmetric symmetries, etc.). He was making decals, but it's all the same problem and process as for tracing e.g. a trail board drawing in a CAD sketch. So that group now has a recorded presentation that's right on point for CAD from drawings and other "analog" references. Alternative to cutting just the figure, here's a whole board with the figure & scrolly borders cut from 0.8mm (~0.030") styrene sheet:

Also well received.
Then, in the course of refining guesses down to usefully correct details, we figured out that a) my guesses were pretty far off, and b) in this case only the figure is needed. So that's probably as far as the whole-board example will go in this case.
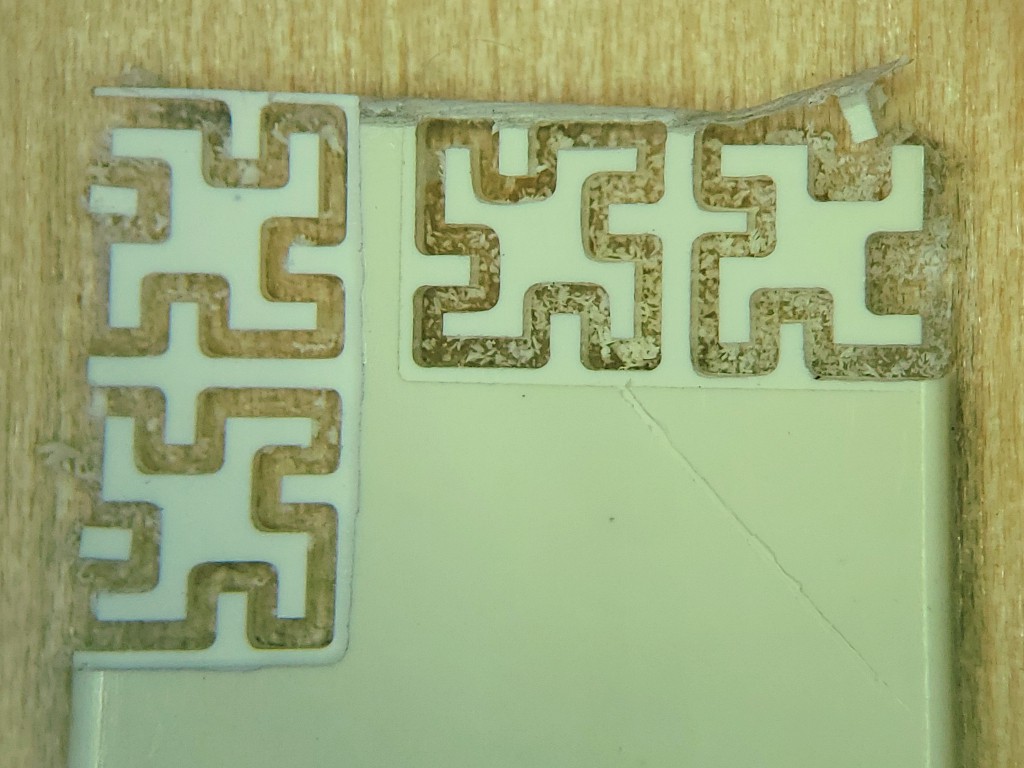
Material samples included a piano key top harvested from a dead piano. For a loose test of machinability I cut a couple of backlash test patterns. Or, in this instance, more of a deflection test.

I should keep better notes on feed/speed/doc/etc -- I think I'll remember but don't. The pair on the left were cut more accurately. The pair on the right were cut more aggressively -- successfully but with more evident tool deflection. If you didn't notice, you might appreciate how that could still be "close enough" for some kinds of work. The ragged edge around the left pair was a fat-fingered step down.
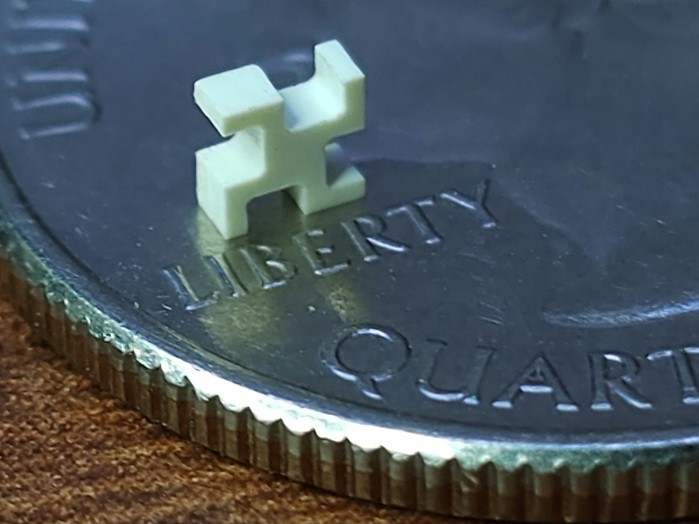
Here's the cutout from the top-right corner by itself:

Yes, I know the traditional piano key top material is ... constrained. See me not typing the word into the searchable www. Anyone building for commission probably can't use it at all, and anyone building for their own enjoyment should probably make sure their next of kin know which models they can gift but not sell. And if you find an old piano carcass, keep it among friends (or find more authoritative guidance).
Back to windows
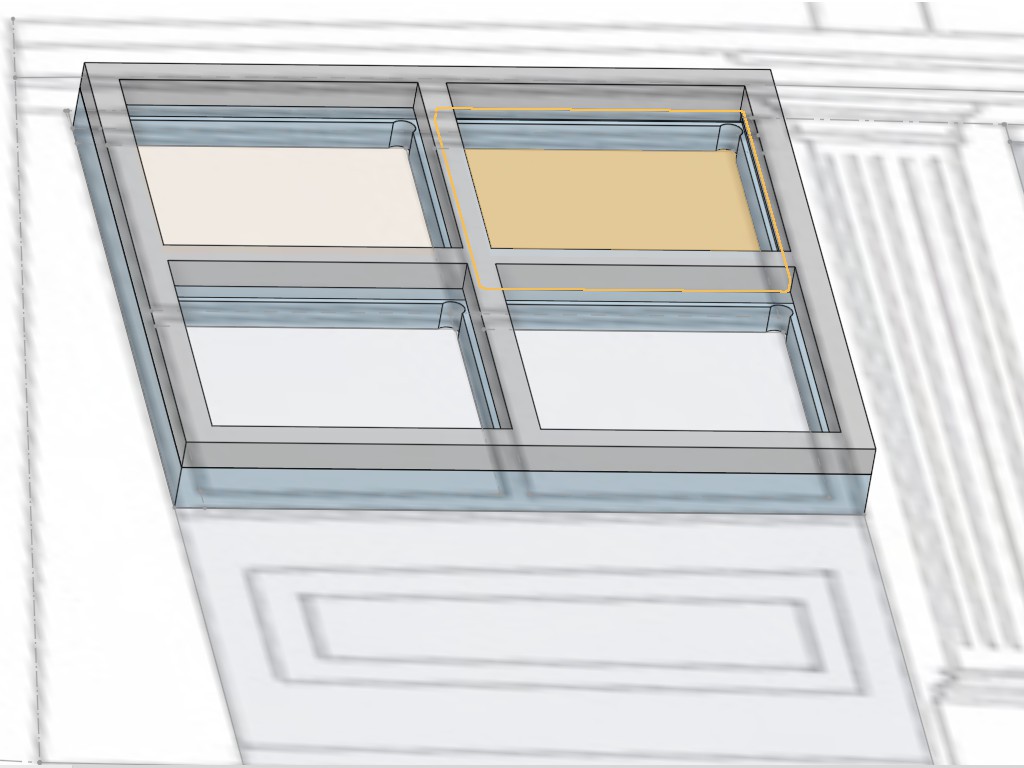
After a little looking at how divided windows are made, I noodled up...
Well, first I had to find a word for the internal dividers between window panes that, being internal divisions and not load-bearing, are not mullions. They're called muntins. I'm pretty sure I'd never heard that before.
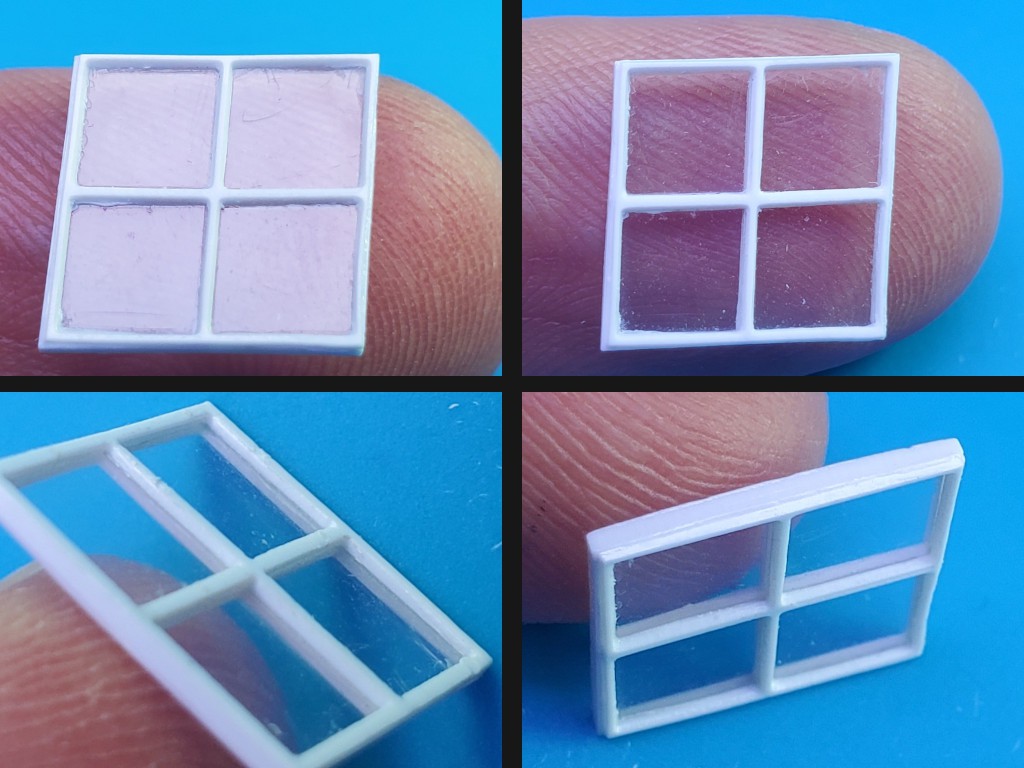
...I noodled up an inner (back) frame with pockets for the "glass" panes and an outer (front) frame to capture the panes in the pockets of the inner frame. For sharp inside corners, I planned to cut the outer frame with a pointy v-bit. The resulting taper would give the outer frame an appearance of thinness and might even look something like glazing putty if painted, so that could be a bonus. For the inner frame I wanted to use a square end mill to cut a clean step in the frame for the "glass" to fit into, but that wouldn't cut the sharpest corners, so that part has "dogbone" clearances for a 0.015" (0.38mm) end mill to overcut the inside corners on a bet that the front frame would hide the overcuts better than it would not hide undercut corners. The recycle bin yielded some flat clear PETE which is fairly stiff with a "glassy" surface. The inner frame pockets are a little deeper than the measured thickness of the PETE.

For a first try, I cut the frame parts from more of the same styrene sheet, cut the "glass" panes from the PETE packaging material, and used thin solvent "glue" for plastic models (mainly styrene) to stick the frame parts together.

top left/right: glint/not; bottom left: inner frame with overcut corners and square profile; bottom right: outer frame with sharper inside corners and tapered profile captures the "glass" The solvent worked well to wick in between and bond the styrene frames without fouling the "glass". If you look close, you can see where some solvent-softened plastic squished a little when I squeezed too hard on one side. I think that would be not too hard to avoid if doing this again.
As a proof-of-concept, that worked well enough to prove the concept. But unpainted styrene wasn't going to fit well in a wooden ship model and I don't know how to paint that (I suppose the edge seam would be well enough hidden to permit painting before assembly -- if paint thickness didn't screw up fit of panes into pane pockets). Also at this scale the styrene frame is soft enough to be very vulnerable to, uh, plastic deformation. Some bending and straightening may have happened. So that was promising but not really satisfactory.
What other material?
Wood would work well with wooden models. But wood doesn't work well for very small features on the scale of the wood grain. Modelers use boxwood for fine stuff, and indeed I've seen some amazingly fine detail in carved boxwood, but I didn't have any and didn't find any nearby source. In any case, it seems like wooden parts would be frighteningly fragile if possible at all.
FR2 material for circuit boards is brown and made of, or at least was originally made of paper saturated with phenolic resin. So it's not entirely completely unlike wood. After wasting away the copper and most of the thickness of some copper-clad FR2 board, down to 0.7mm for the inner frame and 0.4mm for the outer, I gave that a try.

cutting less unlike wood: inner & outer frames cut from FR2 board all the parts 
detail of PETE "glass" pane to fit into pocket in inner frame A frame-shaped pocket cut frame-deep into a bit of basswood served as an alignment jig for assembly. I had cut a similar pocket for the white plastic example above. That worked as far as lining up the parts, but having the parts lined up in a hole didn't help much. This time a deeper relief cut across the jig allowed access to spot glue two sides with the frame laid in the pocket, and to get under the frame to pry it out of the jig. The idea was that securing a spot on each side would hold the assembly together well enough to pop it out of the jig to glue around the rest of the edge.

frames and jig 
frames aligned in jig 
PETE "glass" panes laid into pockets in inner frame This time I used CA glue for the FR2 material. What I have is not water thin, but thin enough to wick enough between the frame edges. A tiny dab on each side. That was enough to secure the assembly so I could pull it out and glue more of the perimeter. It may have been already glued well enough to never come apart -- especially if it would be going straight into its place in the model bulkhead. But I figured this demo piece would get passed around and handled some, and even if a proof-of-concept piece doesn't have to be right it surely helps if its not broken, and I didn't want to bet that the very thin frames were stiff enough to keep the panes in place while the top and bottom were only cantilevered together from the middle, and, and, and the rationalization is strong in this one. Adding glue along the bottom edge and more of the sides went well enough. If you look rilly close at the pic below you can see where a slightly more than ideal amount of glue wicked along the horizontal muntin, but that's not a very eye-catching flaw.
Securing more of the sides left the top arch less cantilevered. I probably could have stopped there without any trouble (especially in retrospect with future knowledge of the material). But nooo... To finish off the arched top of the frame, I stuck the bottom edge back in the jig where it fit closely enough to stand upright. Handy, right? And >this< close to finished.
Yeah, um...
Here's me remembering that capillary flow is all about not needing any help from gravity:

don't dooo thaaaat... So after trying to wick away at least some of much too much glue, I decided to quit before making a worse mess and settle for a mostly successful part with a big (relative to small part) booger on top.

it's a, um, proof of concept -- nevermind the glue blob: FR2 board can be milled with results less unlike wood
Then I got distracted on a side quest that's probably a better fit for a generic "3018"-type CNC for bigger size with less concern for precision. This is already taking far too long to write up so that will be another log another day (month).
Production
The experimental windows and other parts were well received. Concept proven, it was time to make a usable set of windows per the quarter deck bulkhead drawing up the page.
In the first instance, I tried to copy some key reference lines from the drawing as near exactly as possible. Even with a rough raster image of the drawing, you can still get pretty close by zooming in tight and dropping endpoints in the middles of fat fuzzy regions. Straight lines then matched straight lines, so the practical absence of non-rectilinear distortion gave some confidence. The projection looked no worse than pretty close to square.
So I took the drawing straight from the image for the first trial parts. The three parallelogram-like windows actually have a very slight vertical taper. And the two outboard windows are very slightly taller than wide. That makes all of the divided window panes each slightly different, the frames all have a right-side-up orientation and the outboard windows differ ̶ ̶l̶e̶f̶t̶ port/starboard -- but all the differences are too slight to distinguish, but just enough to be not quite right if disregarded. For the four panes of the white prototype window I just made sure to keep them straight. Getting both the frames right side up was a little more tedious. Lots of this-way-or-that-way to see which fit the jig or each other a little better. I wasn't looking forward to managing a dozen almost but not quite identical little bits of "glass".
I don't know whether that un-squareness was real in the drawing or just distortion of the image.
So I cheated. I tweaked all the near-vertical edges to vertical, narrowing the outboard windows by 0.7% at the bottom, the starboard-inboard window by less. Lifting the bottom edges of the four "square" windows by 1.7% to made the outboard windows equilateral -- so those four frames can be inverted or swapped side-to-side. In other words, all the bits that were similar become identical & symmetric. Including all the little divided panes. Maybe that just undoes a slight distortion of the image of the drawing, I don't know. In retrospect, since the scale is at the bottom I probably should have stretched the top instead of narrowing the bottom. In any case, the differences are pretty small. It's not my model so I hope I don't presume too much by calling them insignificant for this purpose.
But even if all the little panes are multiples of just a few sizes, that's still a lot of little parts.
I imagine a common way to do this is to make the divided frame, and maybe put a bit of "glass" behind it. Since this is all about what could a model maker make differently with a different tool, I set out to make a window with the glass "in" the frame. Maybe that will look less like a frame with a bit of "glass" behind. One of a couple of reasons I started with a real "divided light" of separate panes was concern for excessively fragile, and maybe not very flat muntins spanning the opening. Dividing the panes and wicking glue in between the frames would allow the front & back parts to reinforce each other, and to keep the muntins tight to the "glass". For the styrene example, the frames seemed plastic enough that it's not hard to imagine the skinny muntins on either side of a single pane getting deformed out of flat and leaving a visible separation from the pane. The other reason will come up later.
One happy surprise was that the FR2 material proved more than sufficiently tough at this scale. Not fragile at all and quite elastic. Not stretchy elastic, but more springy than bendy or brittle. With durability and flatness pretty well solved, I ventured to try "fake" muntins front and back spanning single panes. And, in a fit of reckless abandon, slimmed the muntins from ~0.46mm (7/8"; 1:48) to ~0.4mm (3/4"; 1:48).
CAM happens here. I used Kiri:Moto (in Onshape) and G-Code2GRBL for everything on this page.
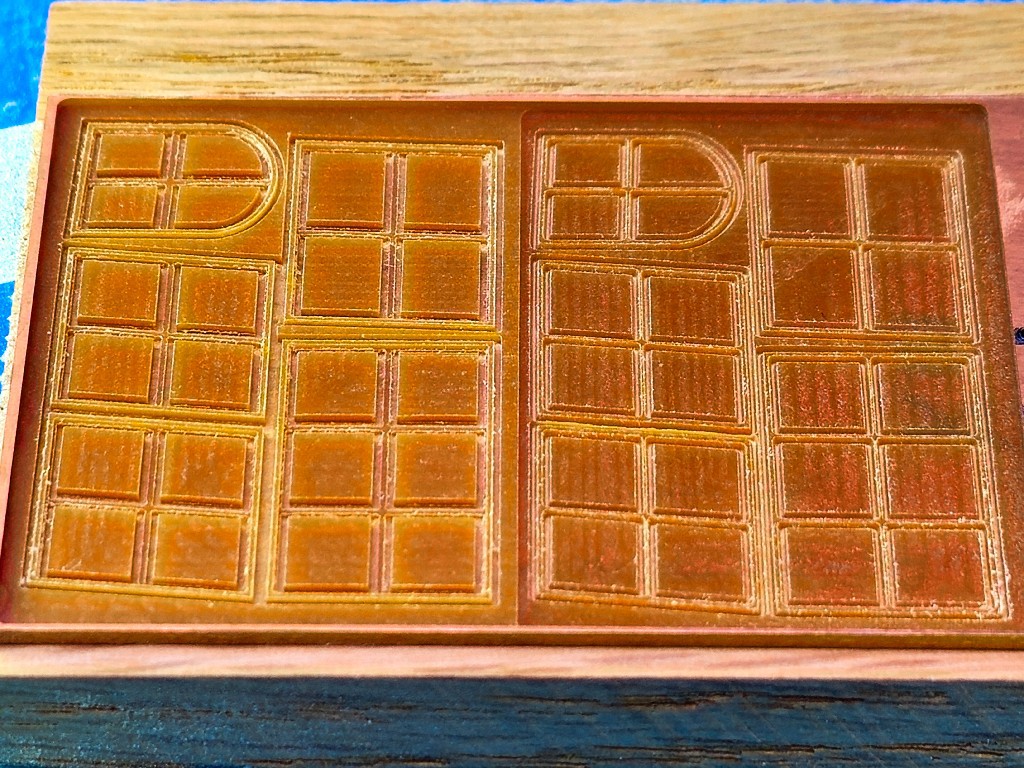
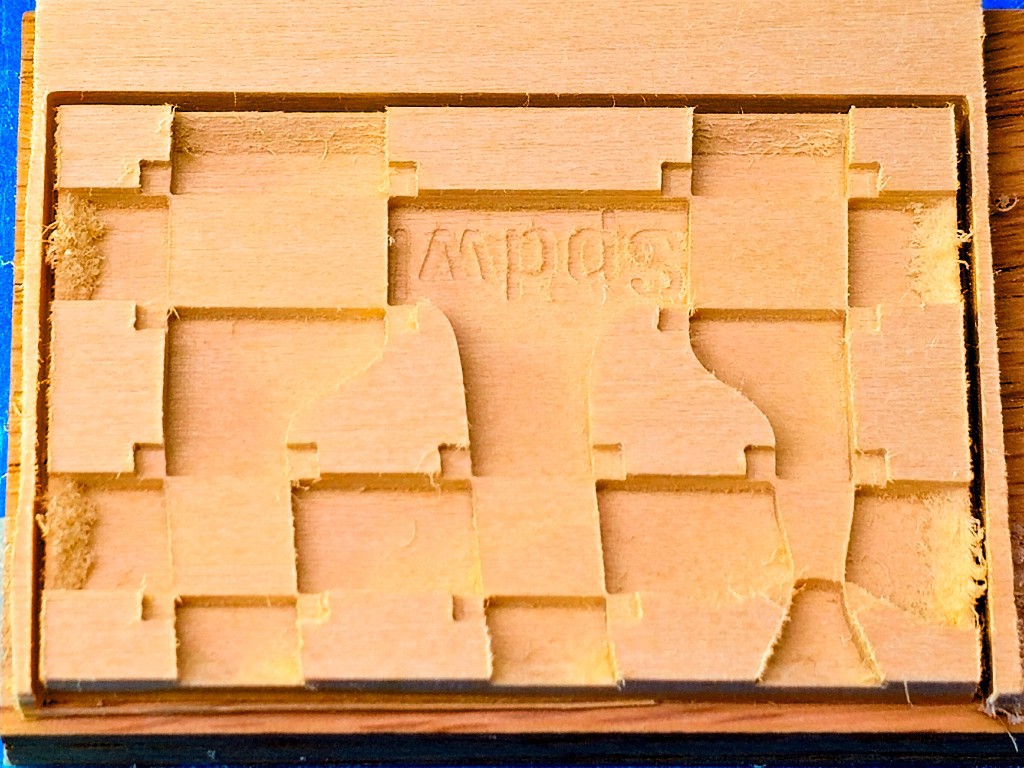
Having gained some confidence in design, material, and process, I felt pretty good about this revision. Here's the whole set cut in one go:

And the PETE "glass":

It must be possible to mill PETE more cleanly than this, but I didn't put much effort into figuring that out. The setup I used pushed material to one side of the cut leaving one clean edge. So these are cut in the direction that put the clean edge on the keeper side of each cut. In the photo above, cleaner edges are most visible in the upper left between the pair of outboard window panes, and also on the right side edges of each part in this view.
After no relief around the first jig, then some relief for the second try, this all-up jig has lots of relief around all sides of each window. It holds just the corners to allow gluing up all sides in the jig -- and horizontal to keep gravity at bay. It also supports the interior of each frame so they can be "squeezed" together without distortion.

The "corncob" mill I used for this, because it's long enough to cut through the 3/16" board, left lots of uncut fibers on the cross-grain slopes. Contrast with the clean-cut steps in the jig photos above. Just a thing to either remember or re-discover.
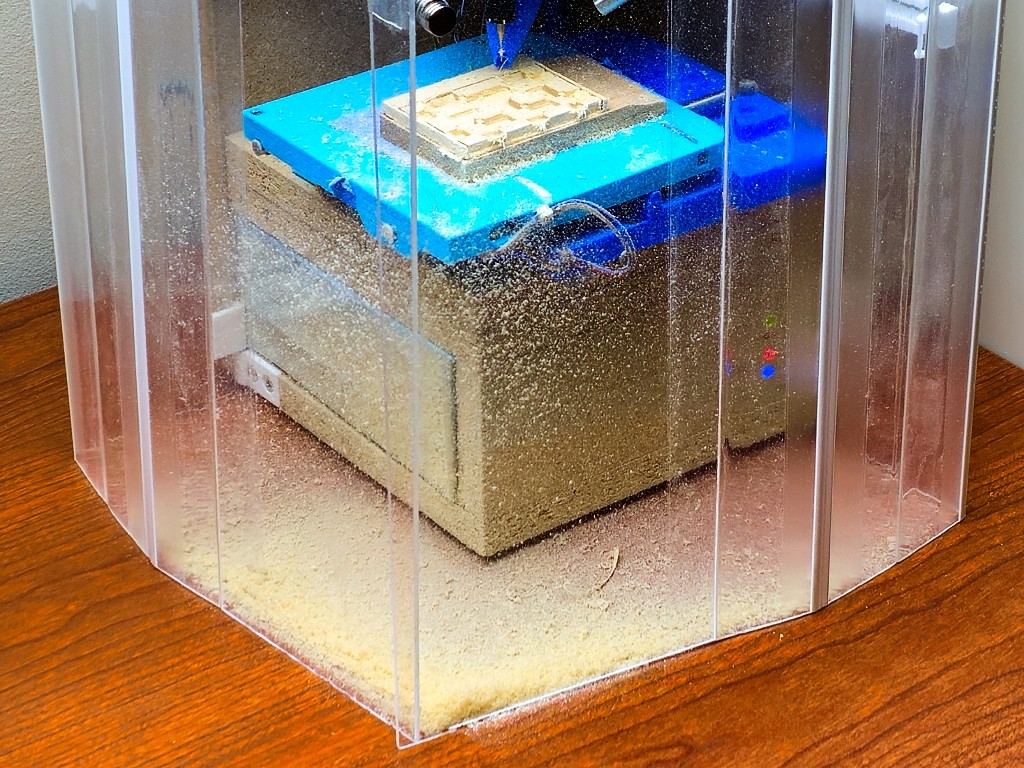
For a little aside here: while this project focuses on the CNC mechanics and not the fancy enclosure, cutting quite a lot of volume (relative to scale) out of that board made for a good illustration of how the enclosure & filtered negative ventilation help to make this a genuinely practical desktop tool:

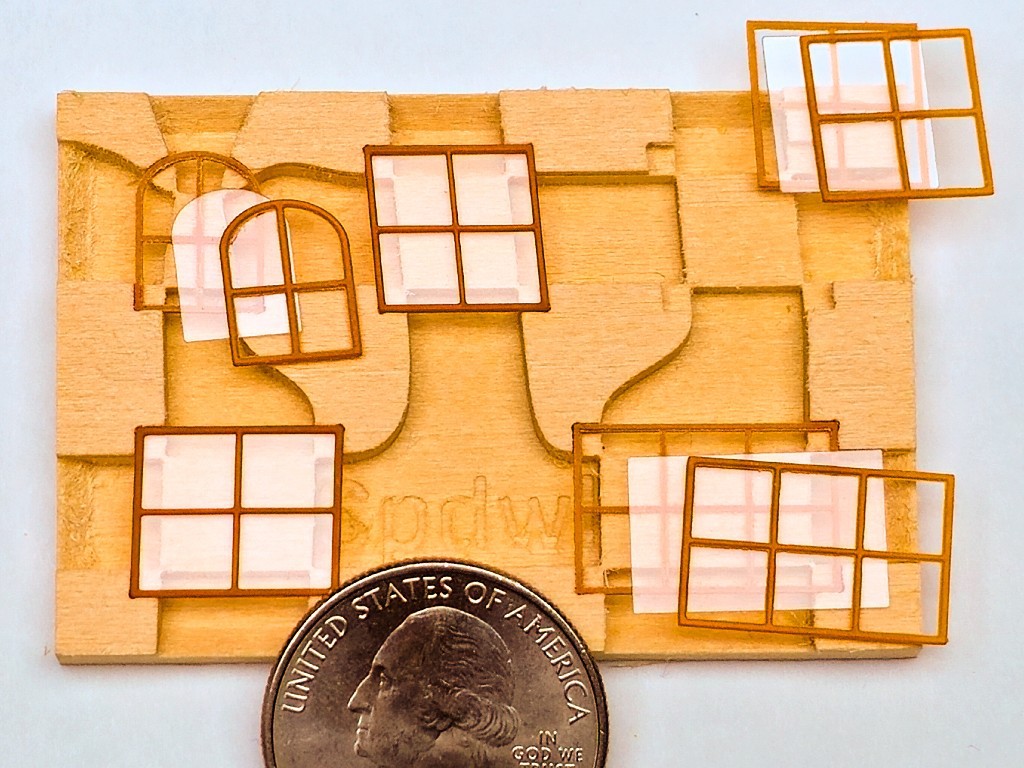
All the parts:

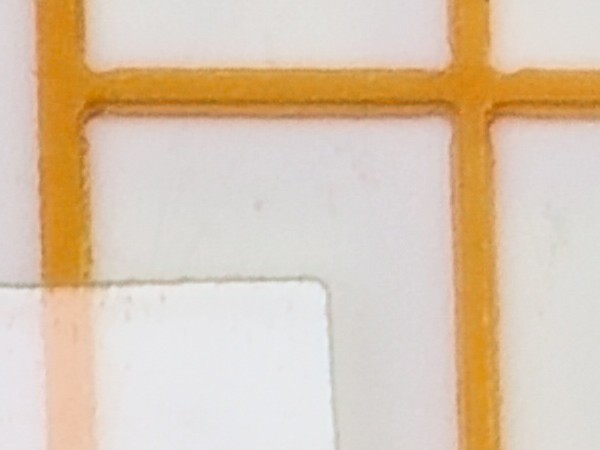
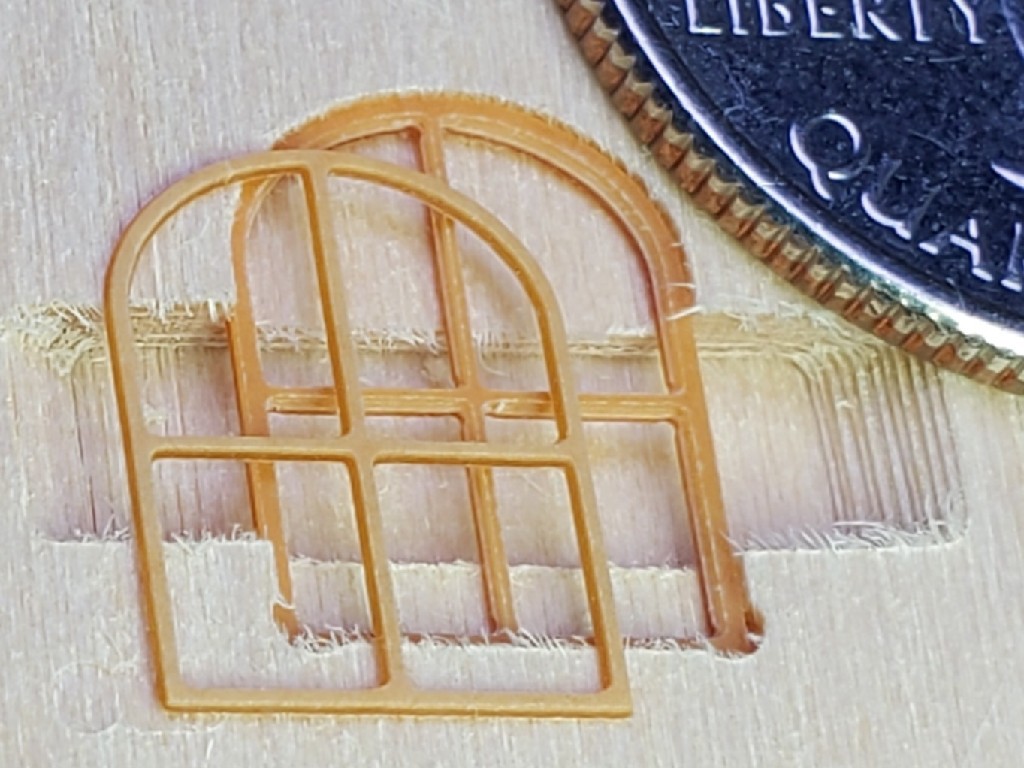
A close look there will reveal that some of the frame parts are more "clean" than others. Bottom-left vs. top-right, for example, and the close-up below:

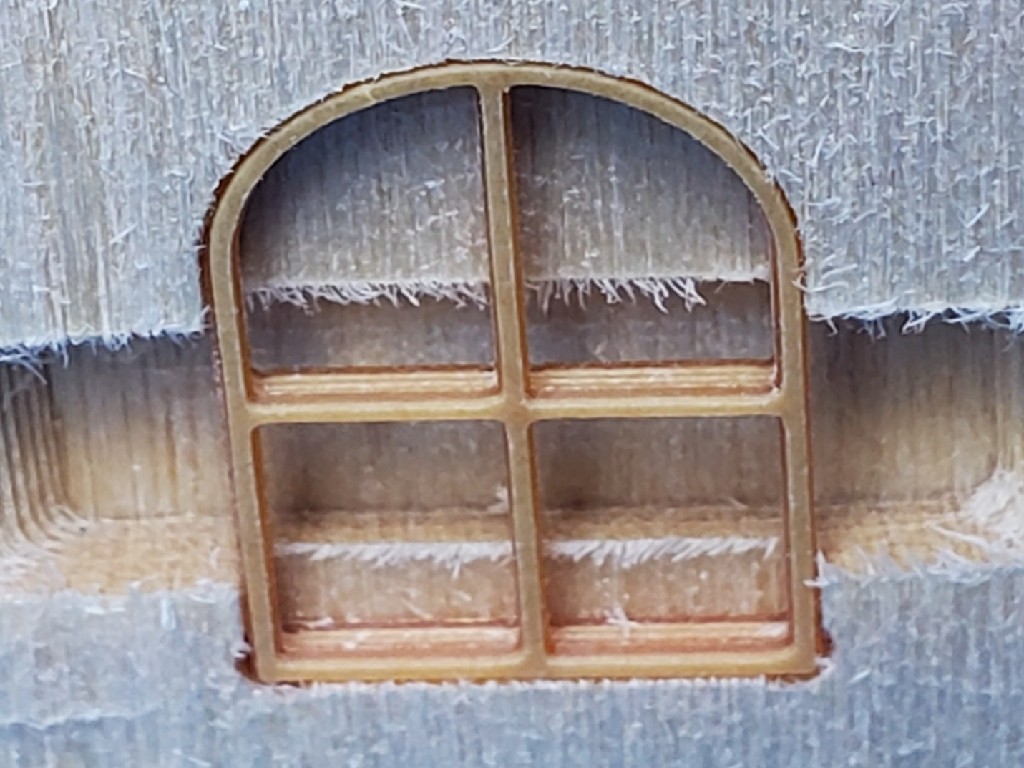
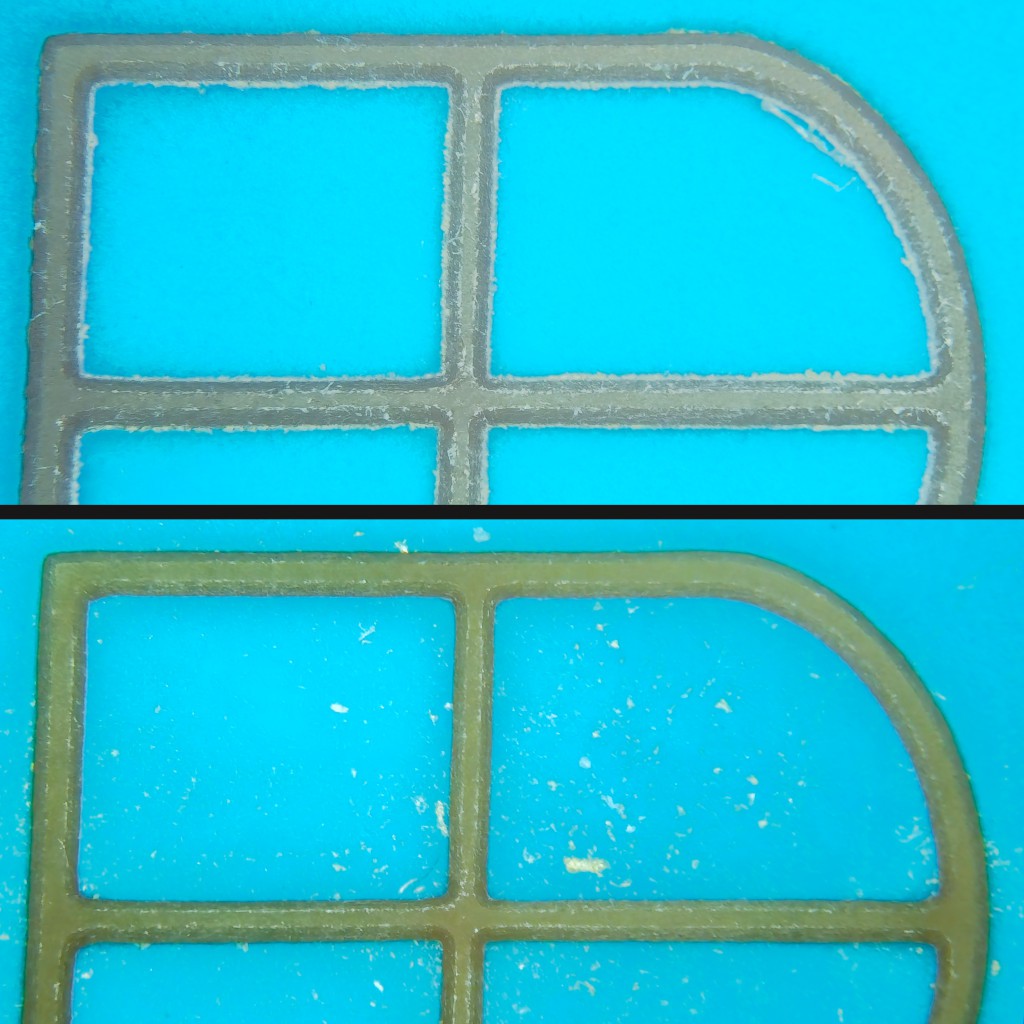
The frames fresh off the mill were a little fuzzy. Especially the front frames because the tip of the V-bit wasn't quite square so it left a little edge similar to mold flash. If I used the same bit again, I could cut a little extra depth through the material to get past the unsquare tip. That would make the frame a little thinner but probably not too much so. The before/after pictures show what came off the machine and then the result after burnishing with the end of a wooden toothpick.
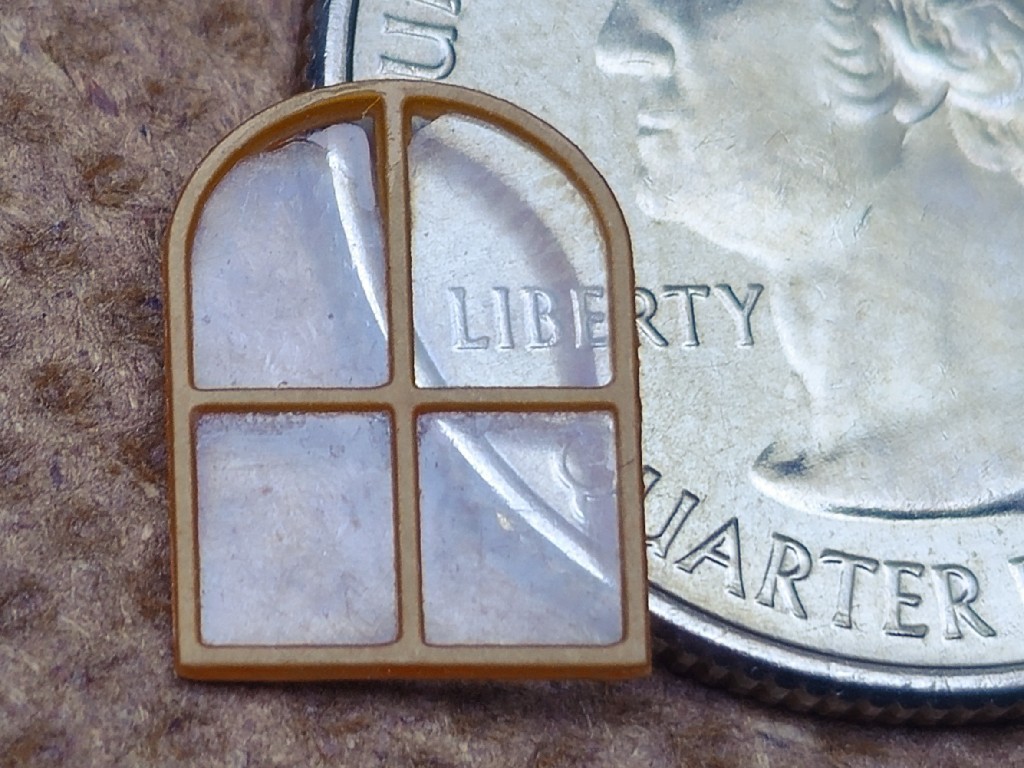
If you didn't immediately notice the difference between "clean" and as-cut parts in the photo with the coin above, then you might see how this post-processing could be optional. I thought it made the parts look better, and this was about figuring out process as I went, so I spent some time with the toothpick and magnification. I figure that's worth showing here for the sake of realistic expectations about part quality and post-processing effort.
Up the page I described one concern that I'd had about trying "fake" muntins spanning a single window pane. Here's the other: would a visible gap between the front and back frames spoil the illusion?
 (that's also an as-cut/un-burnished part)
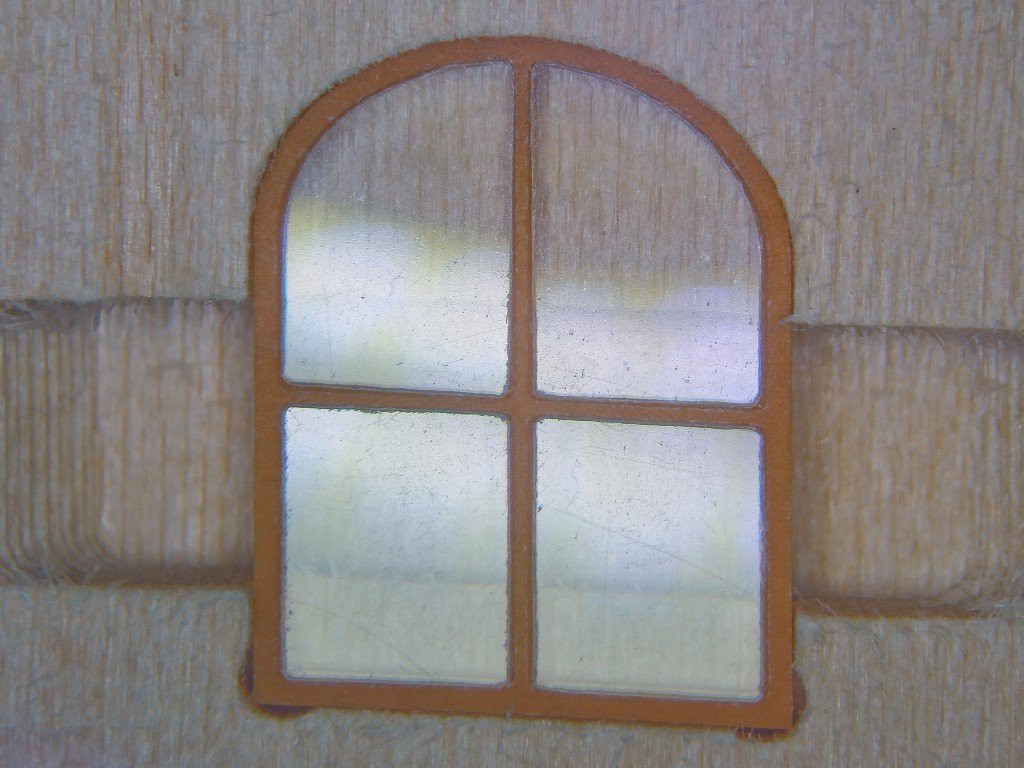
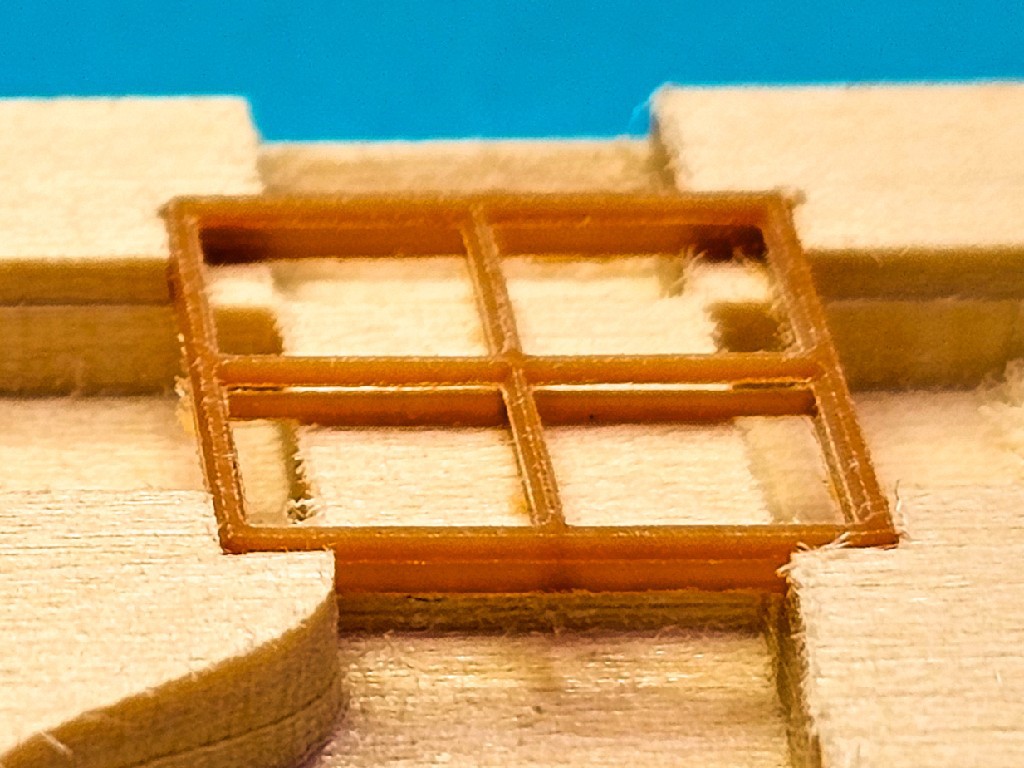
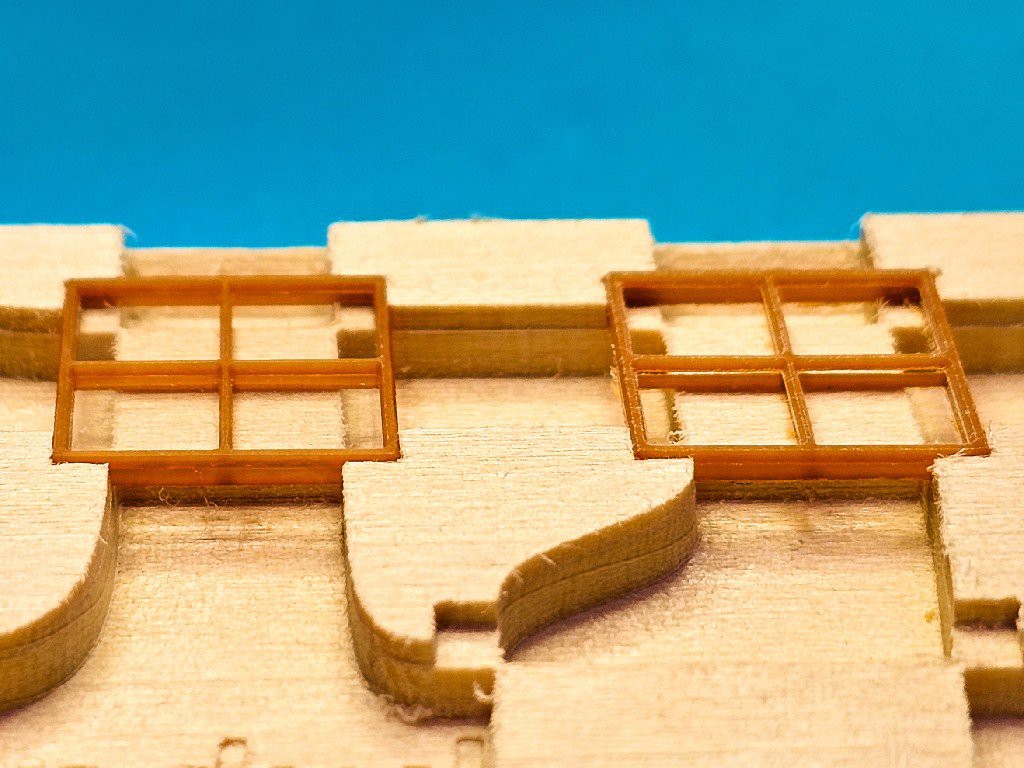
With "glass" in place between the frames, example on the left below, comes another happy surprise: refraction closes the gap.
(besides the closed-up gap on the left, this view also shows a burnished frame on the left vs as-cut on the right)
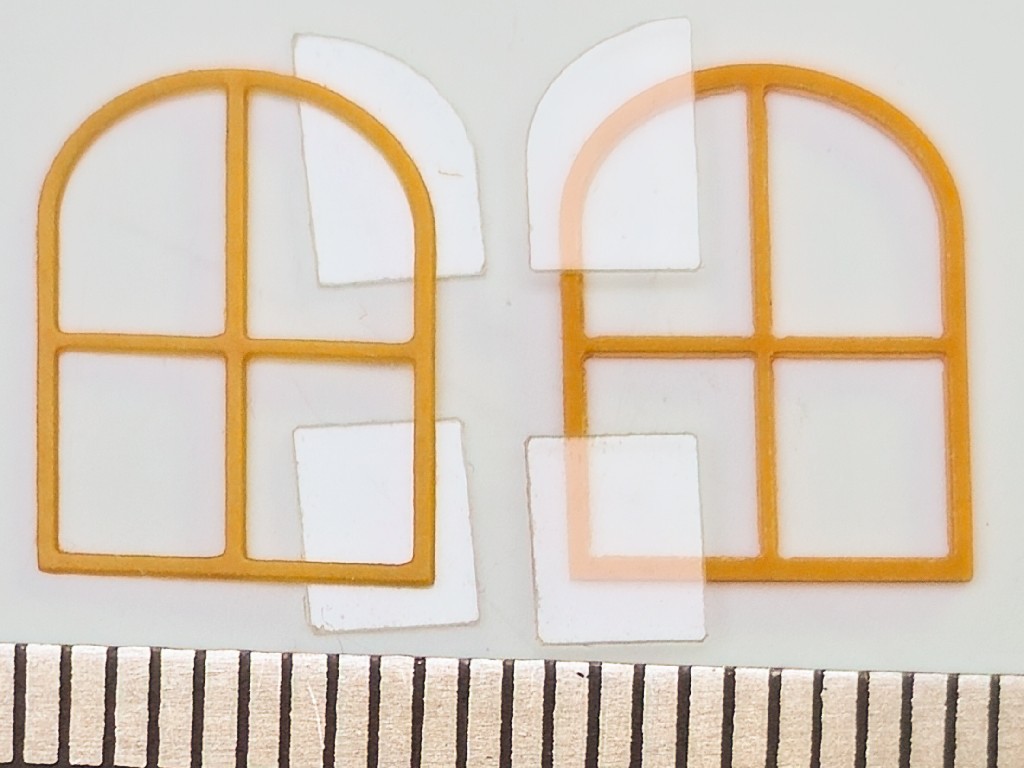
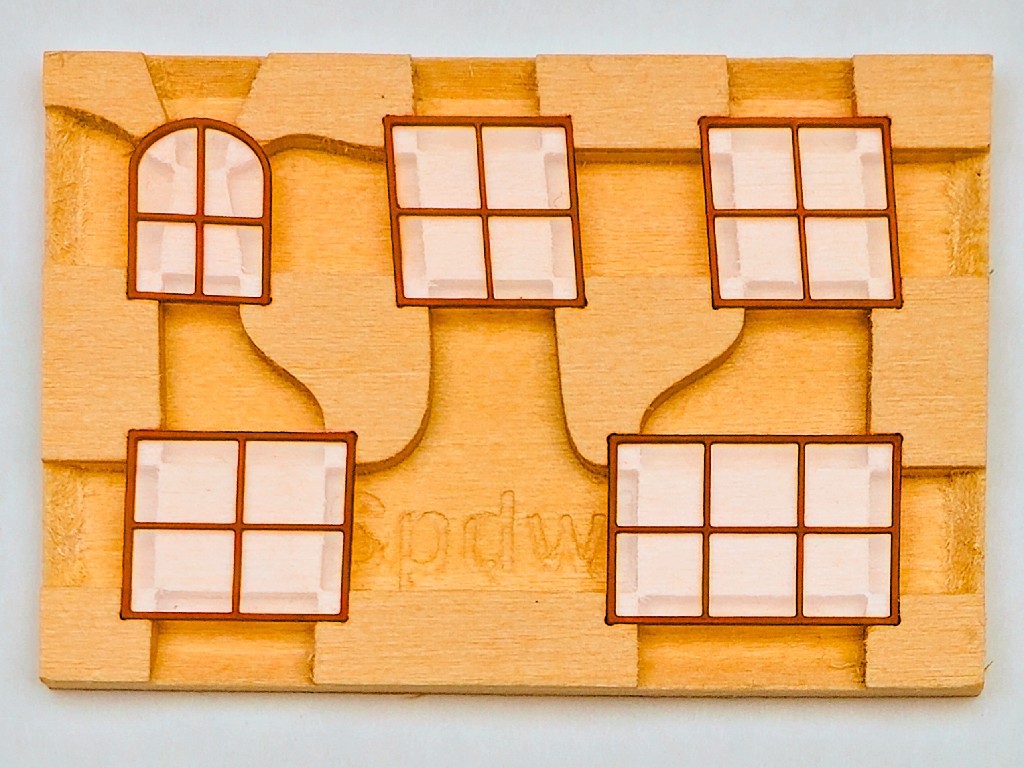
If you've read (or at least scrolled) this far, you get to check out the finished set of five little windows:

(this set has thinner muntins that the first couple of tries -- except that I missed tweaking the arched window which still has "thick" muntins. That kept catching my eye, and it took me a while to figure out that I had in fact missed the change for that window. sorry, Bob!)
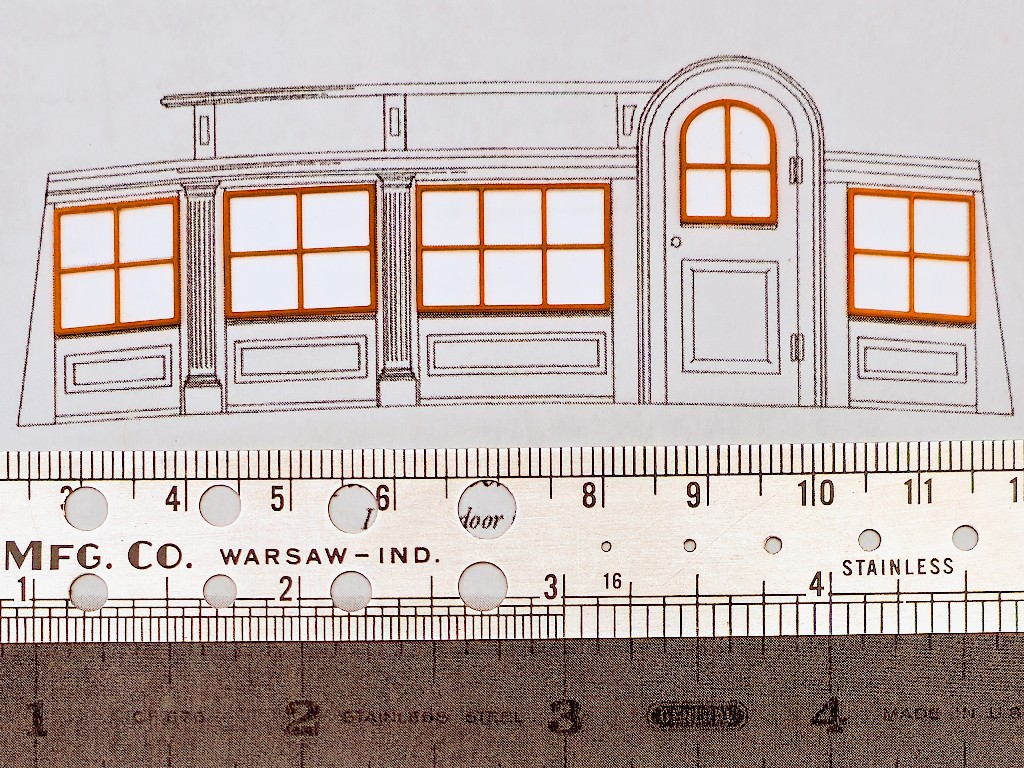
And here's the set layed out on the drawing, with a real ruler over the photographed ruler for scale:

-
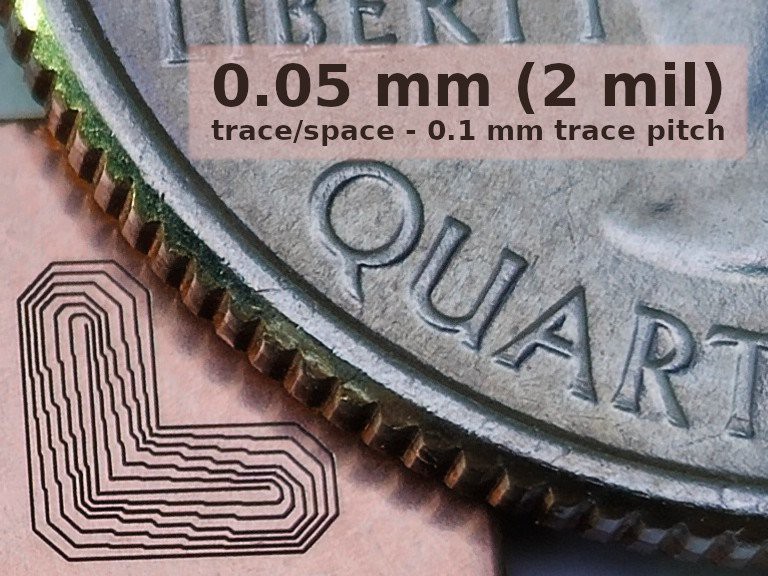
circuit milling: 0.05 mm (2 mil) trace/space
09/13/2024 at 05:10 • 0 commentsLast year 0.2 mm trace pitch seemed pretty tight:
"... just think of the precision required to take off the copper layer and only the copper layer, and leave traces down to 0.2 mm behind." -- HaD Prize 2023 finalist announcement
Here's half that...

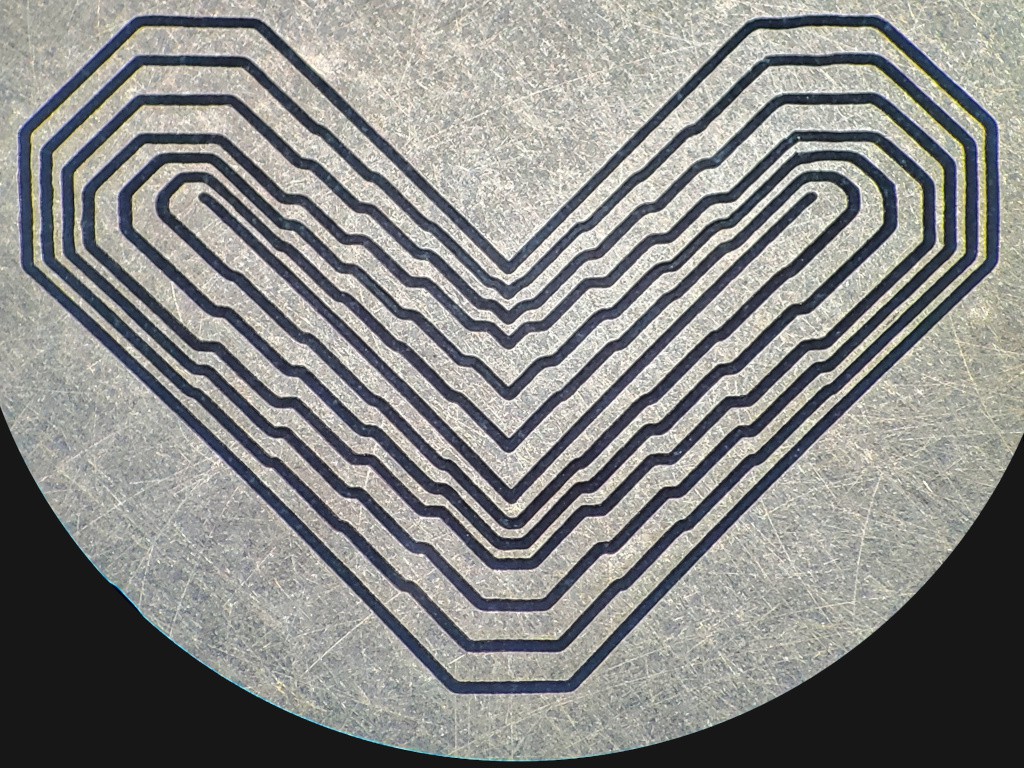
isolated copper traces from 0.2 mm to 0.1 mm center-to-center in 0.025 mm steps
Admittedly more tedious than $pendier option$ with a big friendly START button, but this little machine got the job done.

detail view rotated 135°ccw before writing anything which makes writing hard: X bottom-right to top-left; Y top-right to bottom-left; horizontal/vertical <--> diagonal; I could de-rotate but describing features doesn't actually get much easier unless with a labeled diagram and that's a rabbit hole I'm trying to not go down today... - From counting pixels[1] and a little more math than expected[2], I figure the 0.1 mm center-to-center traces (the skinny ones) are 46% trace and 54% space. So 0.046 mm trace and 0.054 mm space. Not 0.050 but both round to 0.05 so I'll go ahead and plant that flag. In barleycorn units: 1.8 mil trace and 2.1 mil space out of 3.9 mil pitch, and again I'll conveniently round to 2 mil trace/space of 4 mil pitch.
- I have to stop thinking about how to interpret the various irregularities -- maybe that will be another log entry later. For example, the horizontal segments at top-left (which are diagonal) are straight but the similar horizontal (diagonal) segments at top-right are wavy. Both were cut by moving in the same direction at the same rate. The segments on the right were the first in their loops where the bit plunged at their left (in that pic), moved not-so-straight to the right, then continued clockwise. The 2nd and 4th of those (down from top) were approached from about the same direction and have about the same kink. The same segments came out better when cut with ~30 μm (~1 mil) more backlash in Y (found and fixed before cutting the example shown). The "vertical" (diagonal) segments at the left look generally straight but a little more rough than the rest -- those came out worse when cut with a little more backlash in Y. It looks like the cut path deflects a few tenths (of a mil) to the left relative to travel. Etc.
- But mostly: hey look at that! Not "just barely" but actually pretty decent. Another increment of exceeding already much exceeded expectations for this extremely low cost, extremely compact CNC design. !.
did he say "tedious"?
Yeah. It was a development exercise. Lessons learned may help make future work at this scale less tedious, but probably not not tedious.
how
You're already reading this project about how to build a little CNC mill. Elements of coaxing the built thing to carve tiny isolation lines through copper cladding include,
- stable hands-free magnification
- design to X/Y stepper full steps
- repeat to refine
- pointy v-bits
- runout
- density test cuts
- repeat to refine
- level
- level test cuts
- laps
stable hands-free magnification
This time I went straight for the stereo microscope because not needing one wasn't an objective. I've also used my phone on a little tripod for nearly no (incremental) cost, and a USB camera for le$$ than the microscope, either of which might have adequately supported this exercise.
design to X/Y steppers' full steps
The small steps in the least-stepped segments adjacent to straight segments match the 0.025 mm practical limit of horizontal positioning for the motor+screw units used here. (The little jog segment length is step×√2 for diagonals (pic at 45°).) That step-over distance corresponds to one full motor step. I'm running x8 microstepping for best acceleration & speed (another log entry "soon"...) but single microsteps are so uneven that there's no fraction of a 0.025 mm step cycle that's useful for positioning. Designing to a 0.025mm "snap grid" puts each feature at the same phase in the microstep cycle for each motor. I haven't tried to actually synchronize the motor driver step cycle phase(s) because stopping at the same phase of the next/final cycle seems to yield sufficiently consistent steps. (now that I've typed that sentence: maybe cycle phase detectably affects backlash....)
Cutting diagonal traces at 0.1 mm pitch would require stepping over 0.1 mm diagonally or 0.1/√2 = 0.071 mm along X & Y, but that's not a multiple of 0.025 mm. Instead the thinnest diagonal traces in the example are 0.75×√2 = 1.06 mm center-to-center, which isn't far off.
Aside: The next full step thinner would, at this milled path width, leave ~46 - 25 = ~21 μm traces -- narrower than their thickness (in 1oz Cu). I gave that a try with results better than total failure, then decided that I really can stop any time I want to.

0.175 to 0.075 mm trace pitch -- copper traces taller than wide? -- kindasortabutnotreallly
pointy v-bitsI've been using cheap "0.1 mm" v-bits for fine-pitch circuit milling. Random example of the type. Mostly 30° but tried 15° for this. The points of these bits, at least the ones I've collected so far, are pretty random. So "0.1 mm" is more name than dimension. Randomness affords the opportunity to line up a bunch of bits and select the pointy one -- see "stable magnification". That approach got me down to 0.2 mm trace pitch last year and was where I started with this round of trying for smaller. But then I broke the pointy one in the 15° box, which proved helpful because that got me started on re-grinding points for more smallness. "Grind" seems like the wrong word for the lightest possible short drags over a cheap "fine" (not really) diamond hone between checks under magnification.
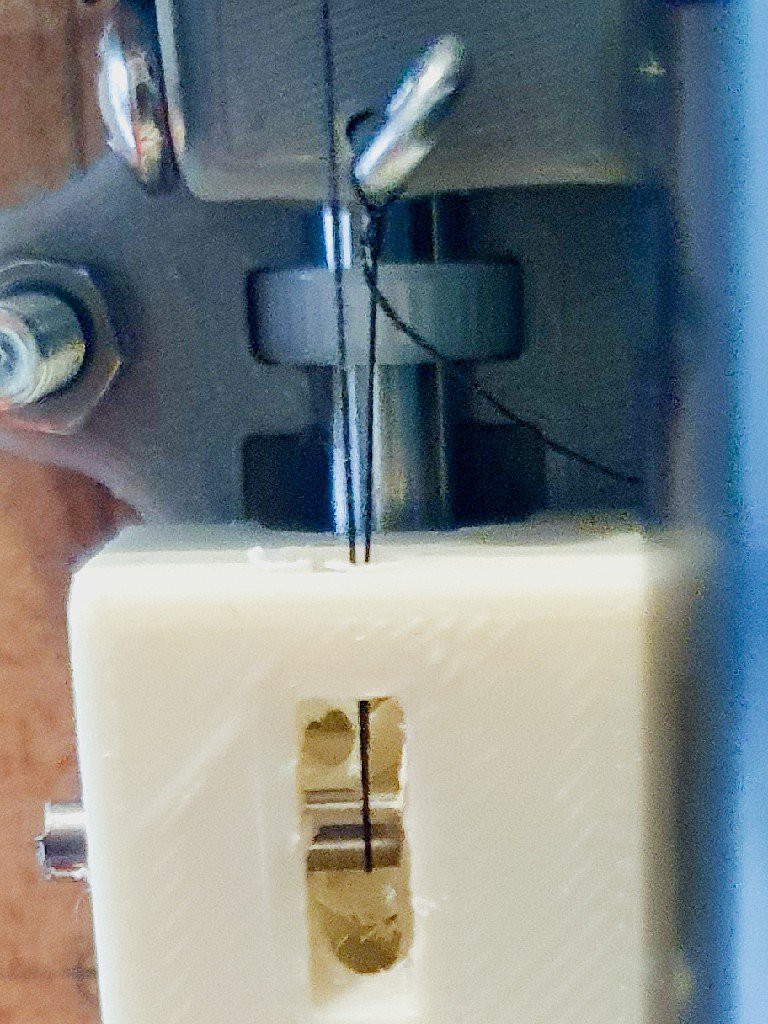
Here's the bit that cut a couple copies of the test pattern shown in the top couple of photos, opposite the tip of a sewing needle that I used for a reference for tweaking runout:

runout
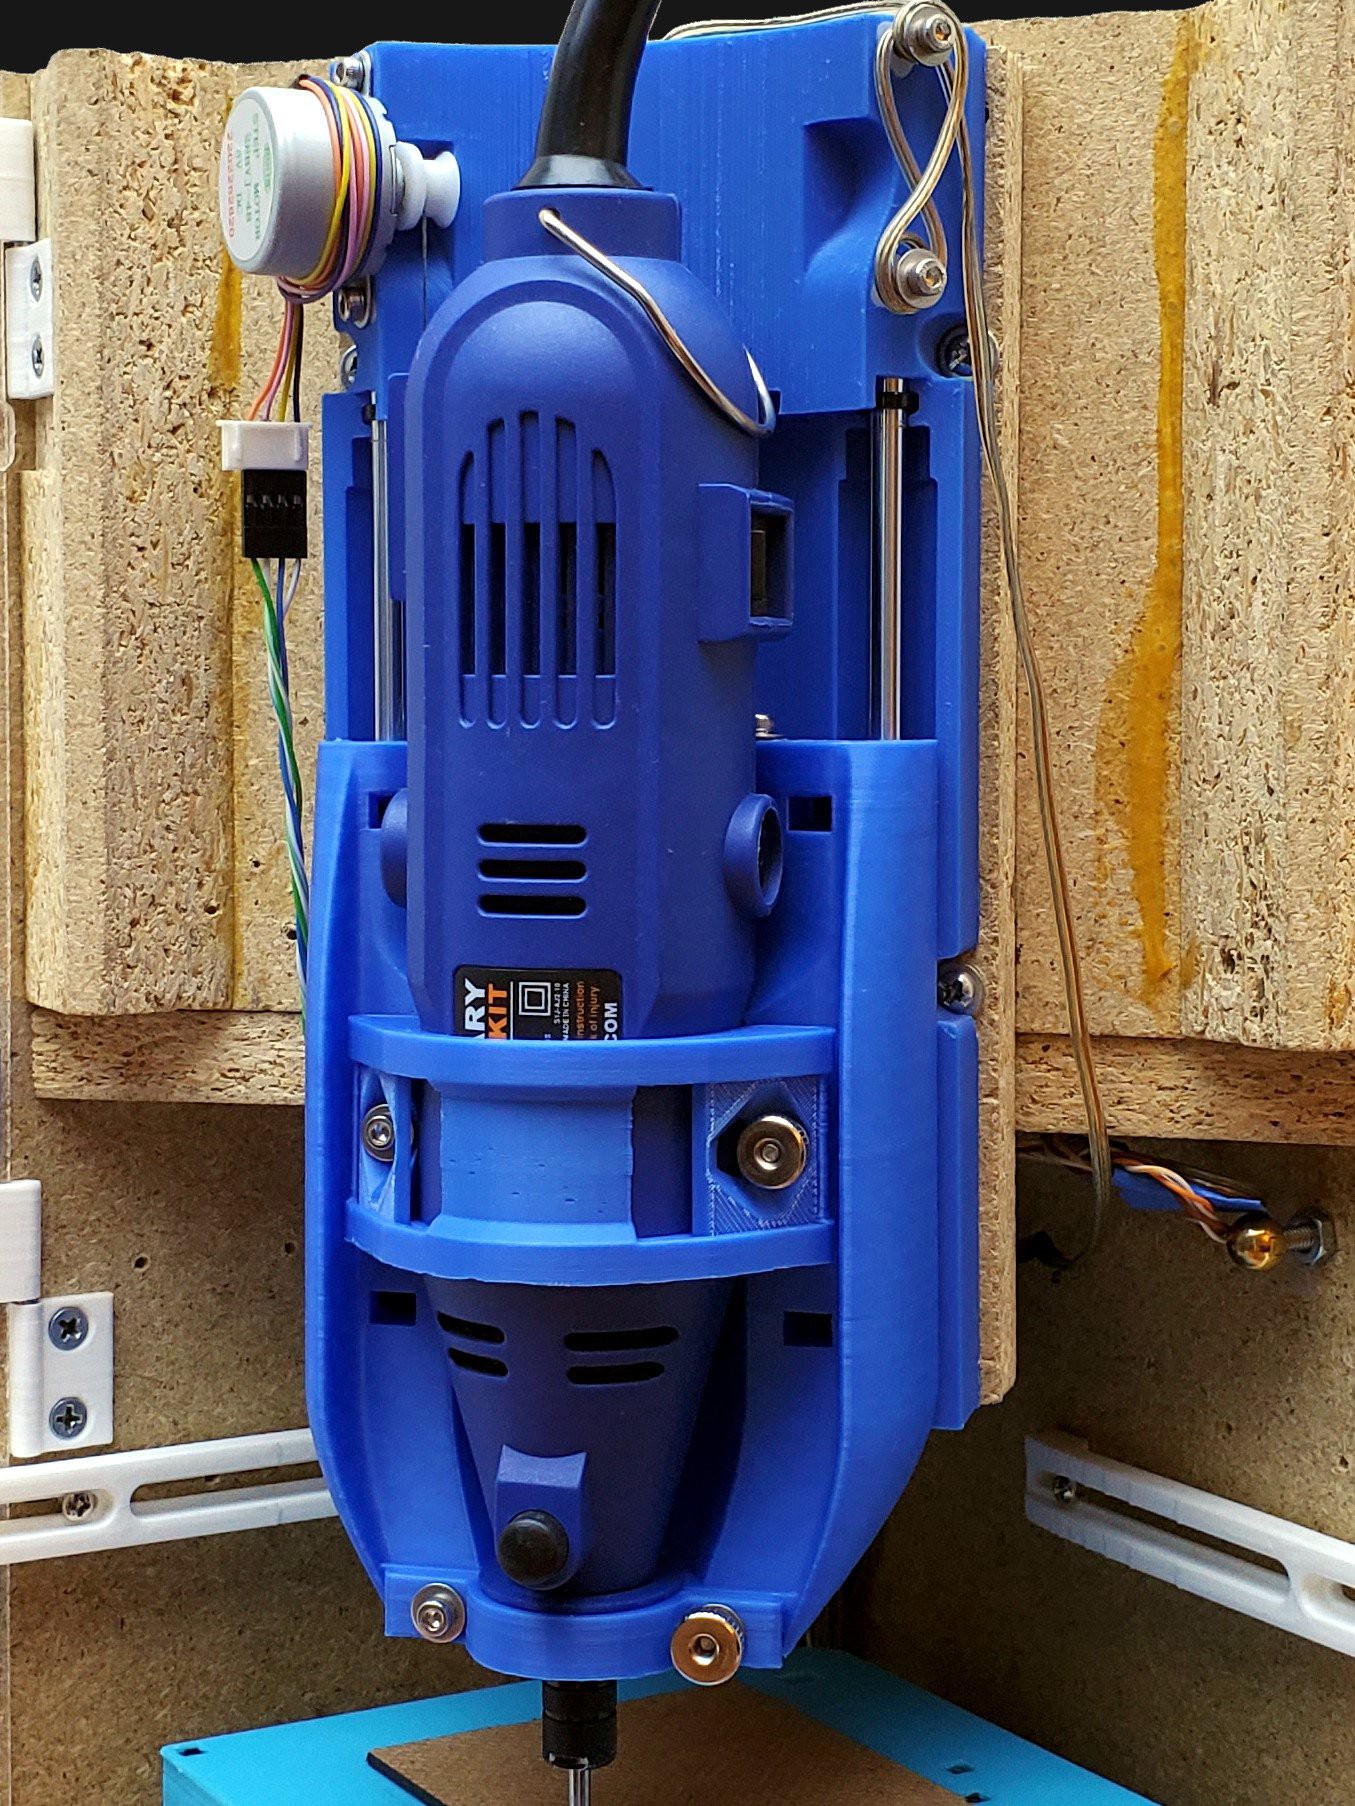
I'm using a cheap generic Dremel-like rotary tool in keeping with the low-cost theme of this project. My "spindle" uses a ball joint for a collet, as do, as far as I know, all similar tools. The, um, versatile collet affords the advantage of requiring deliberate attention to tweak runout. So less runout is a simple matter of more tweaking[*]. Sufficient magnification and a finer center reference help. In this case I used a sewing needle stuck point-up in a lump of "blu tack" and set on the XY table for fine positioning under the rotational axis. The photo above shows that arrangement turned sideways for page layout. While the needle is blunt (relatively) it's also round, so reflected light makes high contrast sharp edges for more precise reference.
I don't know what deviation I was able to see & correct, but it was much smaller than the width of the cut path.
Since the bit axis gets tweaked in any case, it's ok for re-grinding to move the point of the bit.
Maybe another day I'll write another log about better/worse orientation of these half-cone+wing v-bits vs. rotational axis -- or find that someone else already has.
[*] there's always a *
density test cuts
To see if I had a sufficiently pointy bit set up, with sufficiently small & harmlessly oriented runout, to keep some copper between cut lines when cutting deep enough to cut through the copper layer: I cut a lot of parallel 0.5 mm lines 0.1 mm apart. Or 0.075 mm apart before deciding to defer that target.
levelAt this scale, leveling the copper surface is a big deal. Because depth of cut is a big deal. Failure to cut clean through the copper is failure (if the goal is electrical isolation). Cutting any deeper than just-through with a v-bit expands the cut line which doesn't help when aiming for greatest thinness. With a narrow-angle bit the line width is less sensitive to cut depth, but then the more fragile point is more sensitive to cut depth.
While sitting on (double-sided tape on) a spoil board previously milled "level", the copper surface was far enough out of level to cut too deep on one side and/or not deep enough on the other across a ~4mm square area. I figured the small area of the test pattern was probably close enough to flat and, eventually, got it close enough to level by sliding paper shims under corners and sides of the copper-clad board.
I didn't try surface mapping, which might be necessary over a larger area.
Hey y'all, this is going to get more terse 'cause I've got to get this out. Maybe I'll come back and write more later.
level test cutsTo check/evaluate levelness, I set a Z level so that a 0.5mm line would just barely leave a witness mark on the surface outside each corner of the area to be cut. Or indicate which corners were higher or lower.
lapsWhile watching closely with magnification.
If I recall correctly, I ran the pattern seven times:
- level/zero check: just barely polishing a line on the copper surface
- down about half of about 0.026mm (Z steps are uneven: two steps is the practical resolution; one step is more or less than half of that)
- down the other ~half of 0.026mm -- that was really close
- down another half-step: nominally 0.006mm but imprecisely so
- three more times at the same Z level -- the next two times clearly cleaned more copper out of the cut lines and the last time around still cleaned out a little more material and left cleared cuts that I felt ok about.
Notes
[1] Trace/space boundaries are fuzzy in the photo. Which makes pixel counting subject to bias. I tried to drop lines in the middle of the fuzzy regions. I suppose it all gets more fuzzier if you have to account for imperfect boundaries between clear isolation gaps and full thickness current bearing traces -- or net effects of variability.
[2] I expected something easy like average some traces, average some spaces, and divide each average by their sum to get two fractions that sum to 1. That result is close enough and I'd have done well to stop there and not try to check that sum against an average of trace+space intervals. The short version of the long version is that each trace or space between two spaces or/traces is a member of, and different fraction of, two different trace+space intervals.
-
Newer Z is gooder
07/03/2024 at 04:08 • 0 commentsThe first Z axis was ... good enough to not fuss with for a while while fussing with the X+Y axes. The second try (i.e. first attempt to improve) was meh. This one came out better.

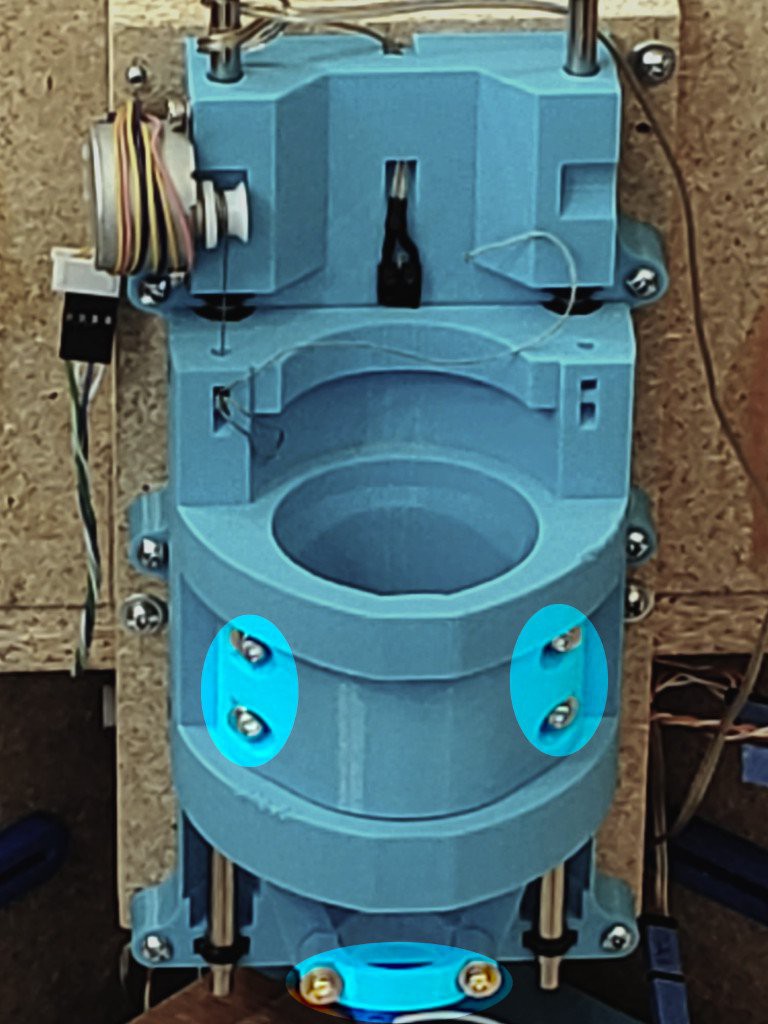
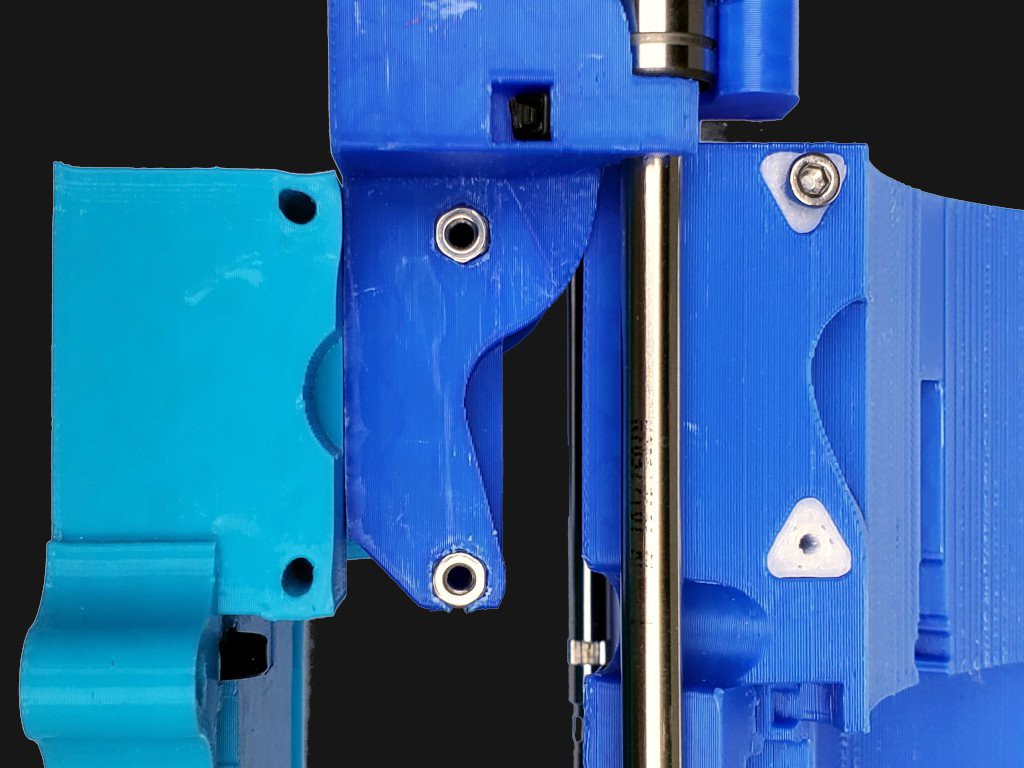
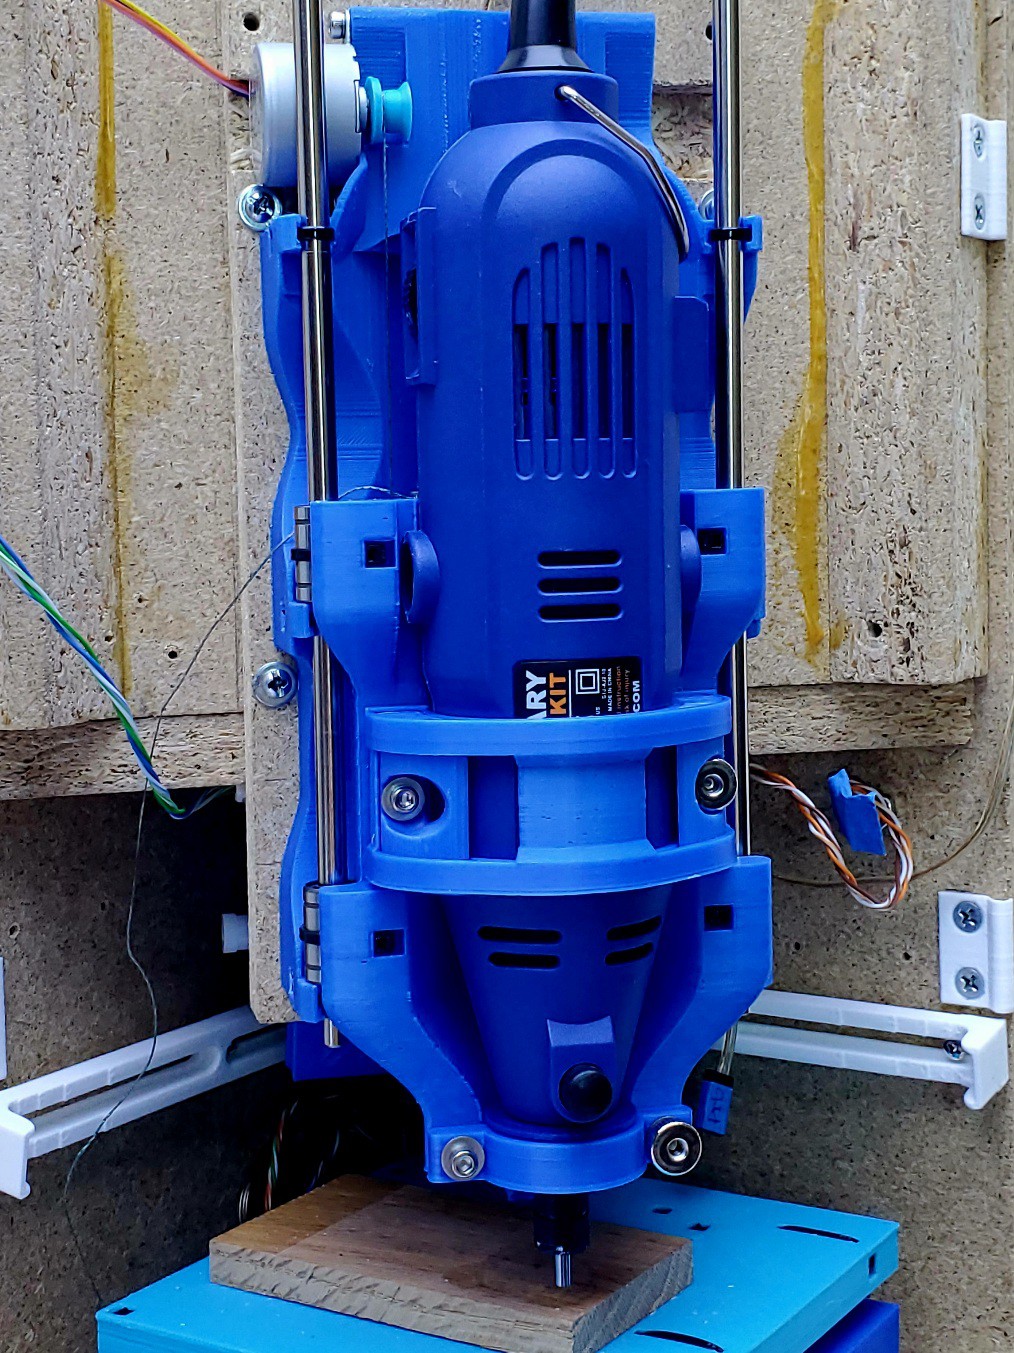
The moving part & clamp changed more than the fixed part. I'll have to decide whether to make the next one slimmer or make the base plate behind it wider.
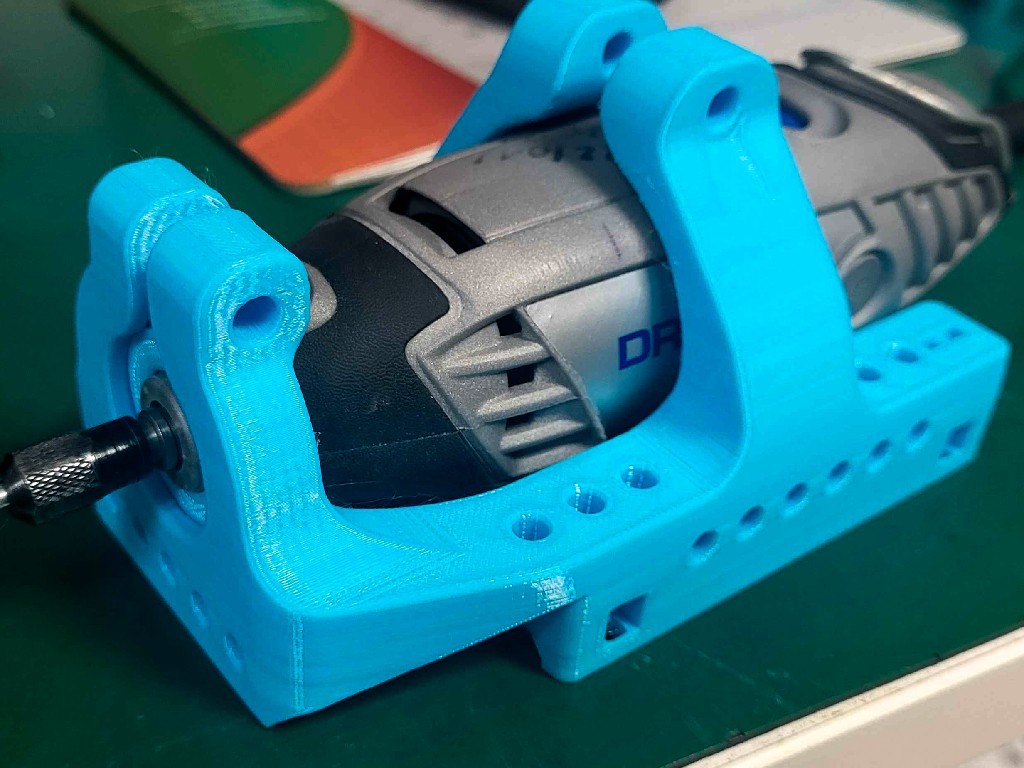
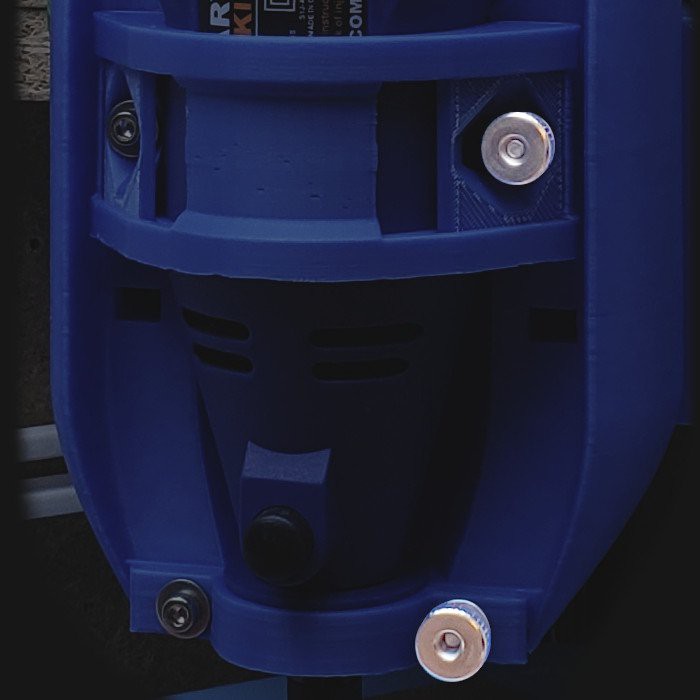
The most visible intent/reality gap with the first 3d printed (vs. 2d laser-cut) Z axis was the fiddly half-dozen M3 socket head screws in the tool clamp.

The clamp screws ran into single-perimeter holes. That "worked" because pull-out strength can be ok. But it didn't really work for the idea in mind because the hole threads were vulnerable to torque-out and wear from frequently turning the loaded screw ̶k̶n̶i̶v̶e̶s̶ threads (call it "slice-out"?). That required attention and a tool to torque up the screws carefully, and to carefully torque all of them instead of just half (one side) to ensure even (i.e. minimum) tension.
Not the quick, casual, routine operation I had in mind.
Reducing that mess to two thumb nuts:
- better reflects the "very inexpensive" idea of making it easy to drop in a daily-driver rotary tool
- improves durability by turning metal nuts on metal screws to secure/release the clamp while the screws in plastic can be driven once and left alone.

A less evident fault with the first printed Z axis was sagging PLA around the warm motor.
left=up; right=down The motor mount screw holes yielded some but didn't fully fail. I don't know if that's because it stopped creeping after I turned down the motor current, if it relaxed to some equilibrium and stopped there, or if it was ten minutes from falling apart.
In any case, it wasn't a big surprise that the PLA softened.
For the first version I opted to just print it and see what happened before getting too wrapped up in trying to anticipate heat effects. It didn't take long to confirm that the pulley(s) couldn't be PLA. PETG is working fine there (white vs. blue in the second pic). The motor attachment to the base part wasn't so obviously bad. It looked fine for a while. Distortion around the screws became evident after a while but wasn't a big deal. The screws continued to hold. It was "ok" to use but definitely needed some help.
I suppose it's possible that with two motors the motor current could be reduced enough to keep the motors cool enough for PLA. I haven't tested that. (A second motor/pulley/cord can be installed for cheap insurance against dropping the big angry part. That's more of a concern in the laser-cut version where the cord/s is/are hidden and run close by sharp edges.)
In the second version I tried embedding hex nuts at the surface -- middle in the pic below. They didn't help pull-out strength which still relied on the screws holding in the plastic part and I doubt they got any less hot than before. The idea was to try spreading the radial load over a larger area of PLA. I think they actually helped more than what I had in mind: by fixing the screws perpendicular to the motor tabs they spread the radial loads much more by requiring the motor to drag the whole screws sideways through the PLA if it was going to go anywhere. They also protected the threads in the PLA hole from stripping by providing a hard stop to torque the screws into. It looks like they worked because there's no indication that they moved. Caveat I didn't run that version very long or in hot weather.
While the nuts seem to have worked well as far as tested, that arrangement had a couple of drawbacks. If a nut were removed, I didn't have any great ideas for how to put it back in the right orientation to match the nut thread to the hole thread. And nuts would add a line to the BoM which I'm trying to keep short.

For this version I'm trying PETG plugs in the PLA part to hold the hot motor mount screws -- right side in the pic above. PETG (or whatever can bear the temperature) is already in play for the pulley(s) so that adds nothing to the shopping list.
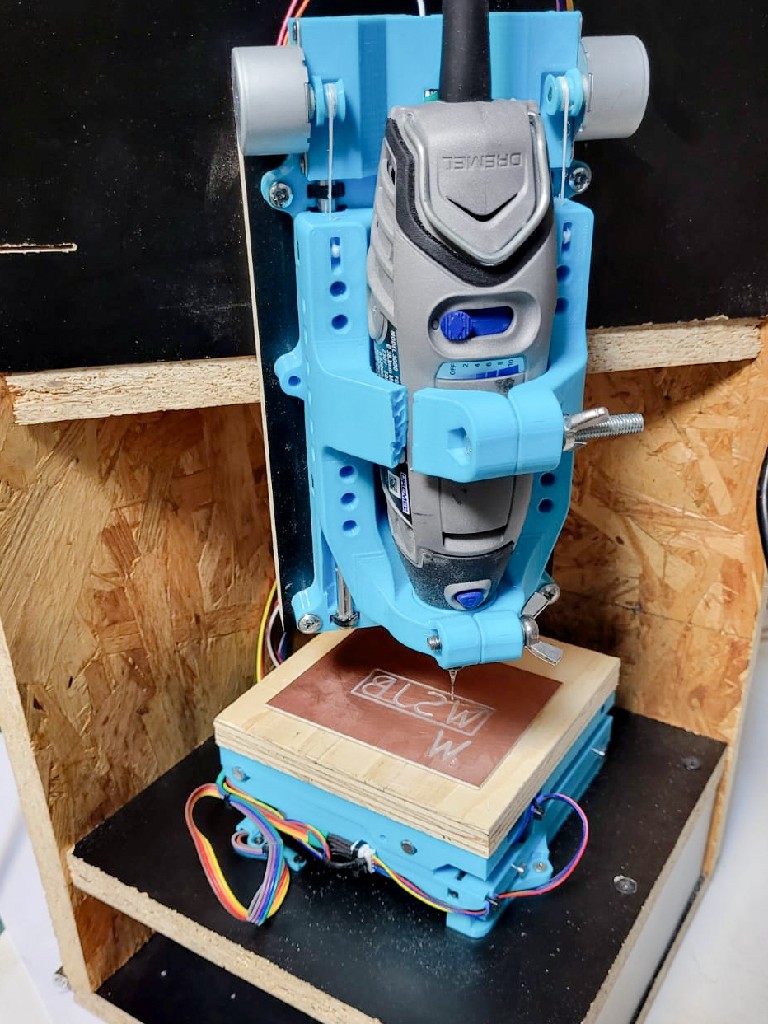
to the cornerBecause I'm also chasing compact packaging, these 3d printed Zs have been designed to fit in a corner.

Part of that idea is that the closed-up box should be durable for casual storage. On one hand, I want to push the "spindle" as close into the corner as possible (i.e. pull the corner as close in to the "spindle" as possible). On the other hand, the transparent panels are less rigid that the hard frame and could get pressed in to some extent while jammed in a closet. The X&Y axes are well protected by the incompressible bottom part of the frame. But the upper parts of the "door" panels have no such support -- so I want to keep some buffer space between the inside of the panels and moving parts of the Z axis. But how much space is adequate "insurance" vs wasted excess?
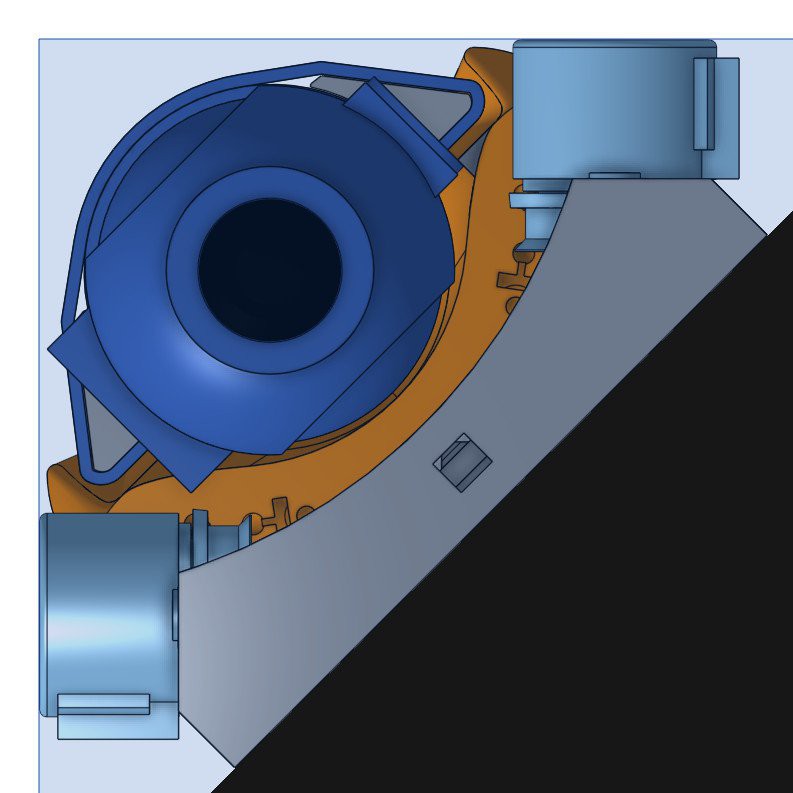
A late idea as I was getting close to done with this revision was to turn the motors parallel to the (imaginary) corner walls. If I ever get around to matching this with an enclosure where it really is right exactly in the corner, the flat backs of the motors (or motor and a printed blank) will provide incompressible strong support at the tops of the less-rigid enclosure panels. That give pretty good protection for soft parts with much less "insurance" space. Optimistically, I think that might work really well.

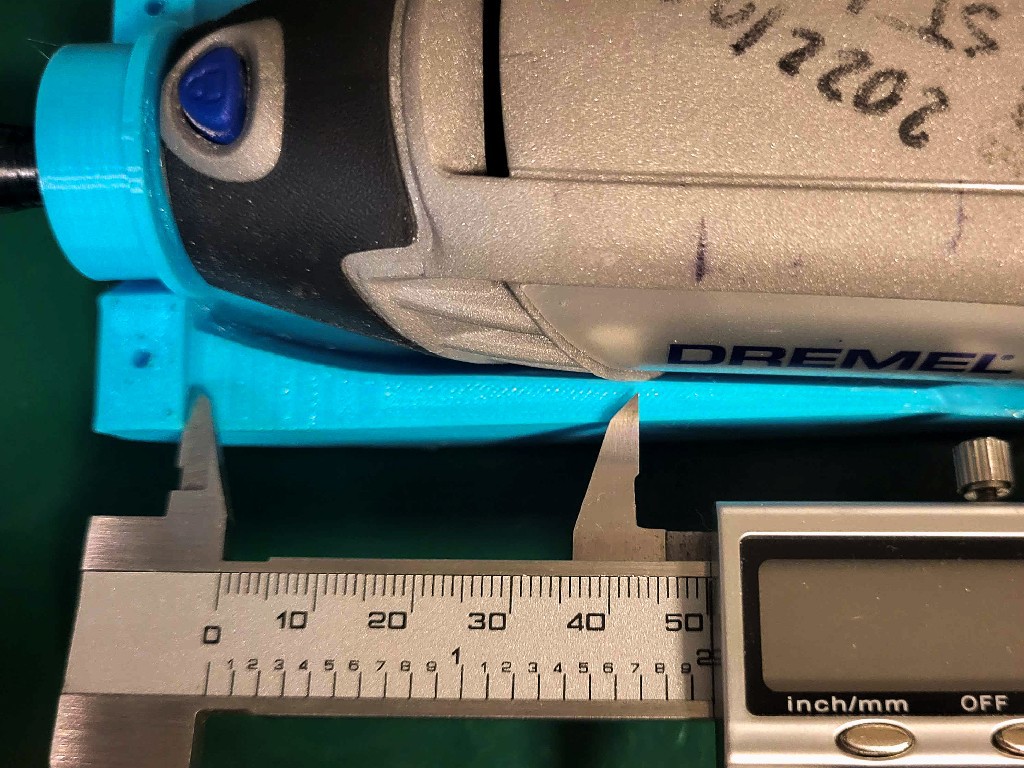
(for my generic dremel-like tool, the corner of the big switch boss limits how close to the corner it can fit -- assuming symmetric Z-axis parts and simple orientation of the tool; that's ok because it's also near exactly the same limit location as for the 56mm fan/flywheel(?) that's apparently universally added to 52mm spindle motors)
-
Meh. New Z is fail.
05/03/2024 at 22:26 • 3 comments
Minamil 3dp: another minimal CNC mill
A very compact, very inexpensive, very DIYable, very precise little CNC mill. This one uses 3d printed parts.
 Paul McClay