-
Deeper Dive: Hardware Feature Sets
10/10/2023 at 13:45 • 0 commentsIn this log I'm going to do deeper dive on the HW feature sets, components selection, interface and why it is there in the first place. You'll see that some of the HW design selection are either nice-to-have or must have. So in case you want to do some customization from the master design files, you can certainly do so with better background understanding. I'll start the explanation from the left hand side of the keyboard interface.
![]()
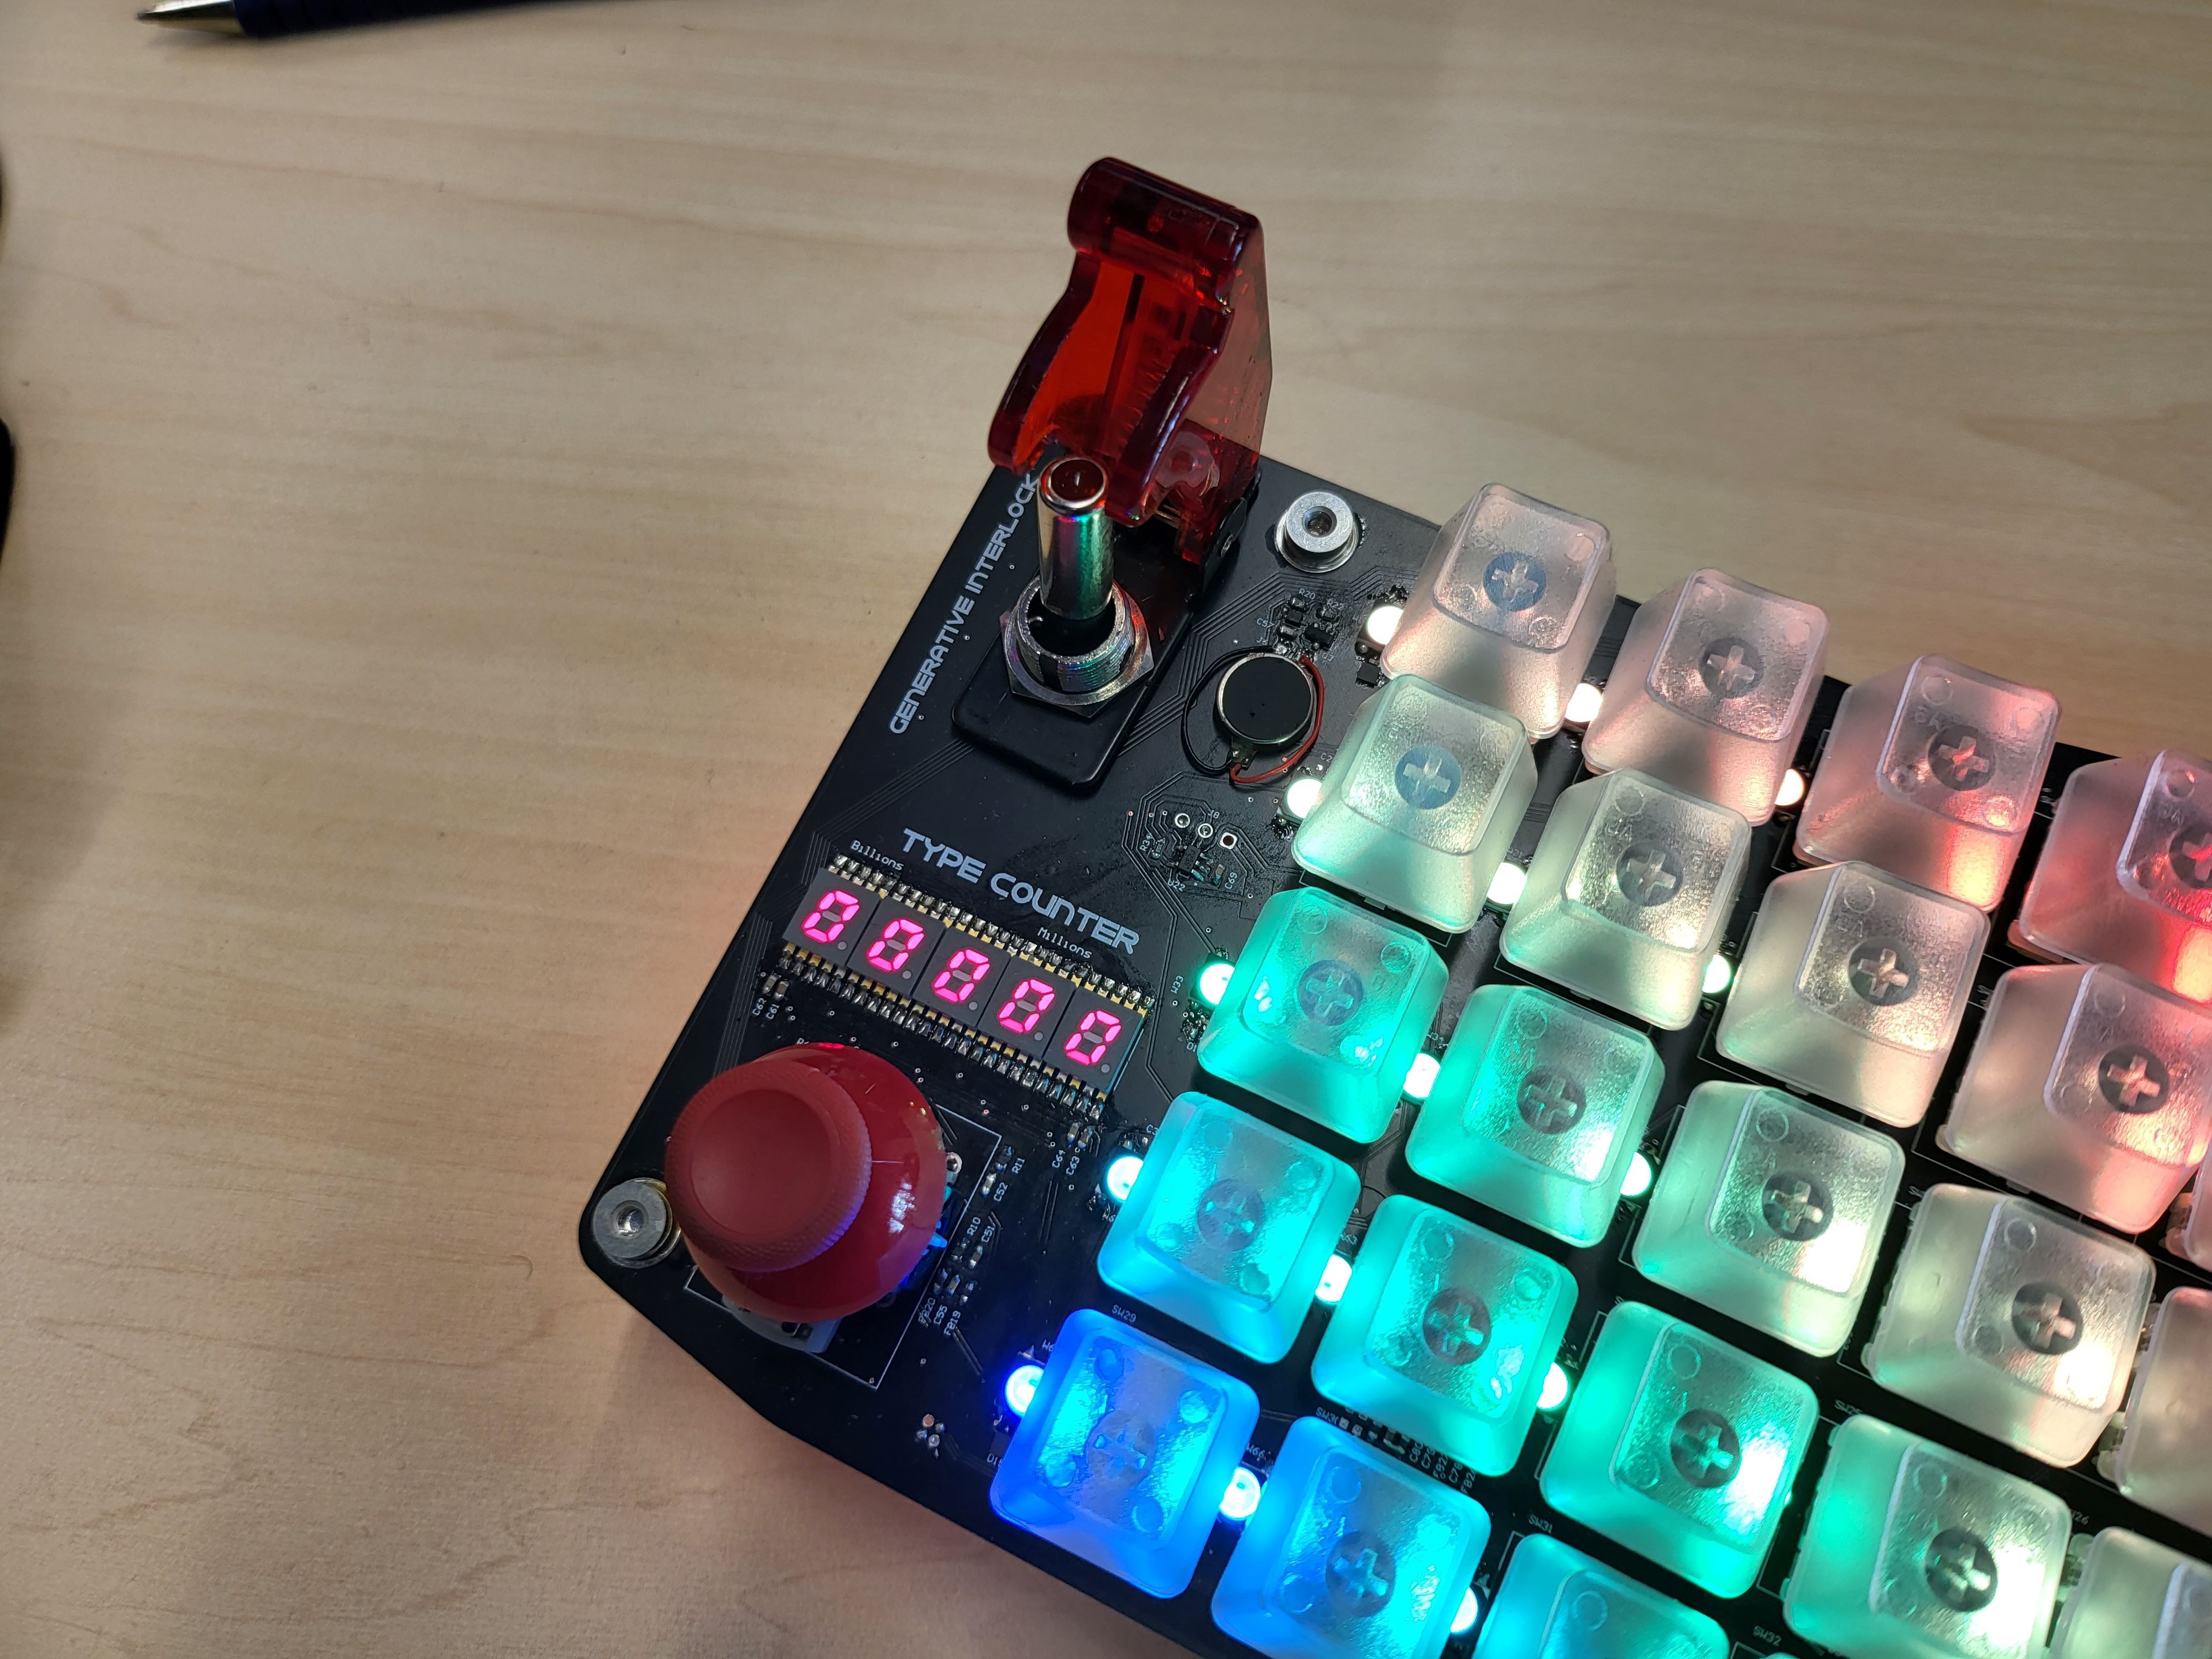
So the left hand side as depicted on the picture above, there are essentially four note-worthy features. Starting on the top left corner, you can see a rocket-switch which you'll often see in fighter jet. I specifically selected that particular one with two steps actuation primarily to signify the importance of us as a human/user to provide a confirmation and agreement on the contents that is generated by a Generative AI model. If you can read on the PCB silkscreen there, I labelled it "Generative Interlock", so as the name implies, it is essentially acting as a physical HW switch/barrier between providing access to the Bluetooth HID controller (ESP32) or not. In the diagram as you've seen, the main processor in the case of Generative kAiboard is an STM32F429, it manages interface directly to the Wiznet W5300 network interface, and it relies on co-processor ESP32 to manage Bluetooth HID command to the user end devices. In summary, in this case when the generative interlock is open, there will be no signal transmitted between the main processor to the co-processor thus preventing unwanted automation to your end-device. Alternatively, when the contents generated by the AI as it is buffered on the 5.5" screen is acceptable for you, the generative interlock can be closed thus enabling the streaming of the generated contents to your end-device.
Furthermore, on the right hand side of the generative interlock, there is a small circular disk which is essentially the left vibration motor. On this version of Generative kAiboard, there are 2 vibration motors placed on each end of the keyboard as you shall see later. The vibration motors are controlled directly by the main co-processor by PWM / GPIO Signals.
Below both of the aforementioned parts, you can see the type counter, to be precise, the first 5 digits of the type counter out of the 10 digits. The first five are located on the right hand side as you shall see. Having 10 digits it then allows you to log how many types the user has click and use the generative kAiboard up to 9.99 Billions. So let see how far that'll go. To me the main reason is simply to keep track and see how many clicks I have registered with the keyboard before something goes wrong. The cherry MX key switches claims guarantee of up to 100 million actuation, so we'll see about that. Also the type counter interfaces via SPI, there is a dedicated shift register underneath each of the 7-segment display. So no need to manage fast refresh rate on the 7-segment display from the main controller, it is latched individually.
At last below the type counter, I placed a 2-axis joystick, with a clickable button built-in. This is essentially an analog joystick you can find in game console controller, either Playstation or Xbox. It requires 2 analog input pins and 1 GPIO to make use of all the features. In the current configuration the joystick is connected directly to the co-processor (ESP32) instead of the main controller. Main reason is that because I expect the usage of this to be mainly for HID related functions, e.g. mouse or play/pause. Of course, via the co-processor you can provide commands / info to the main controller as well.
![]()
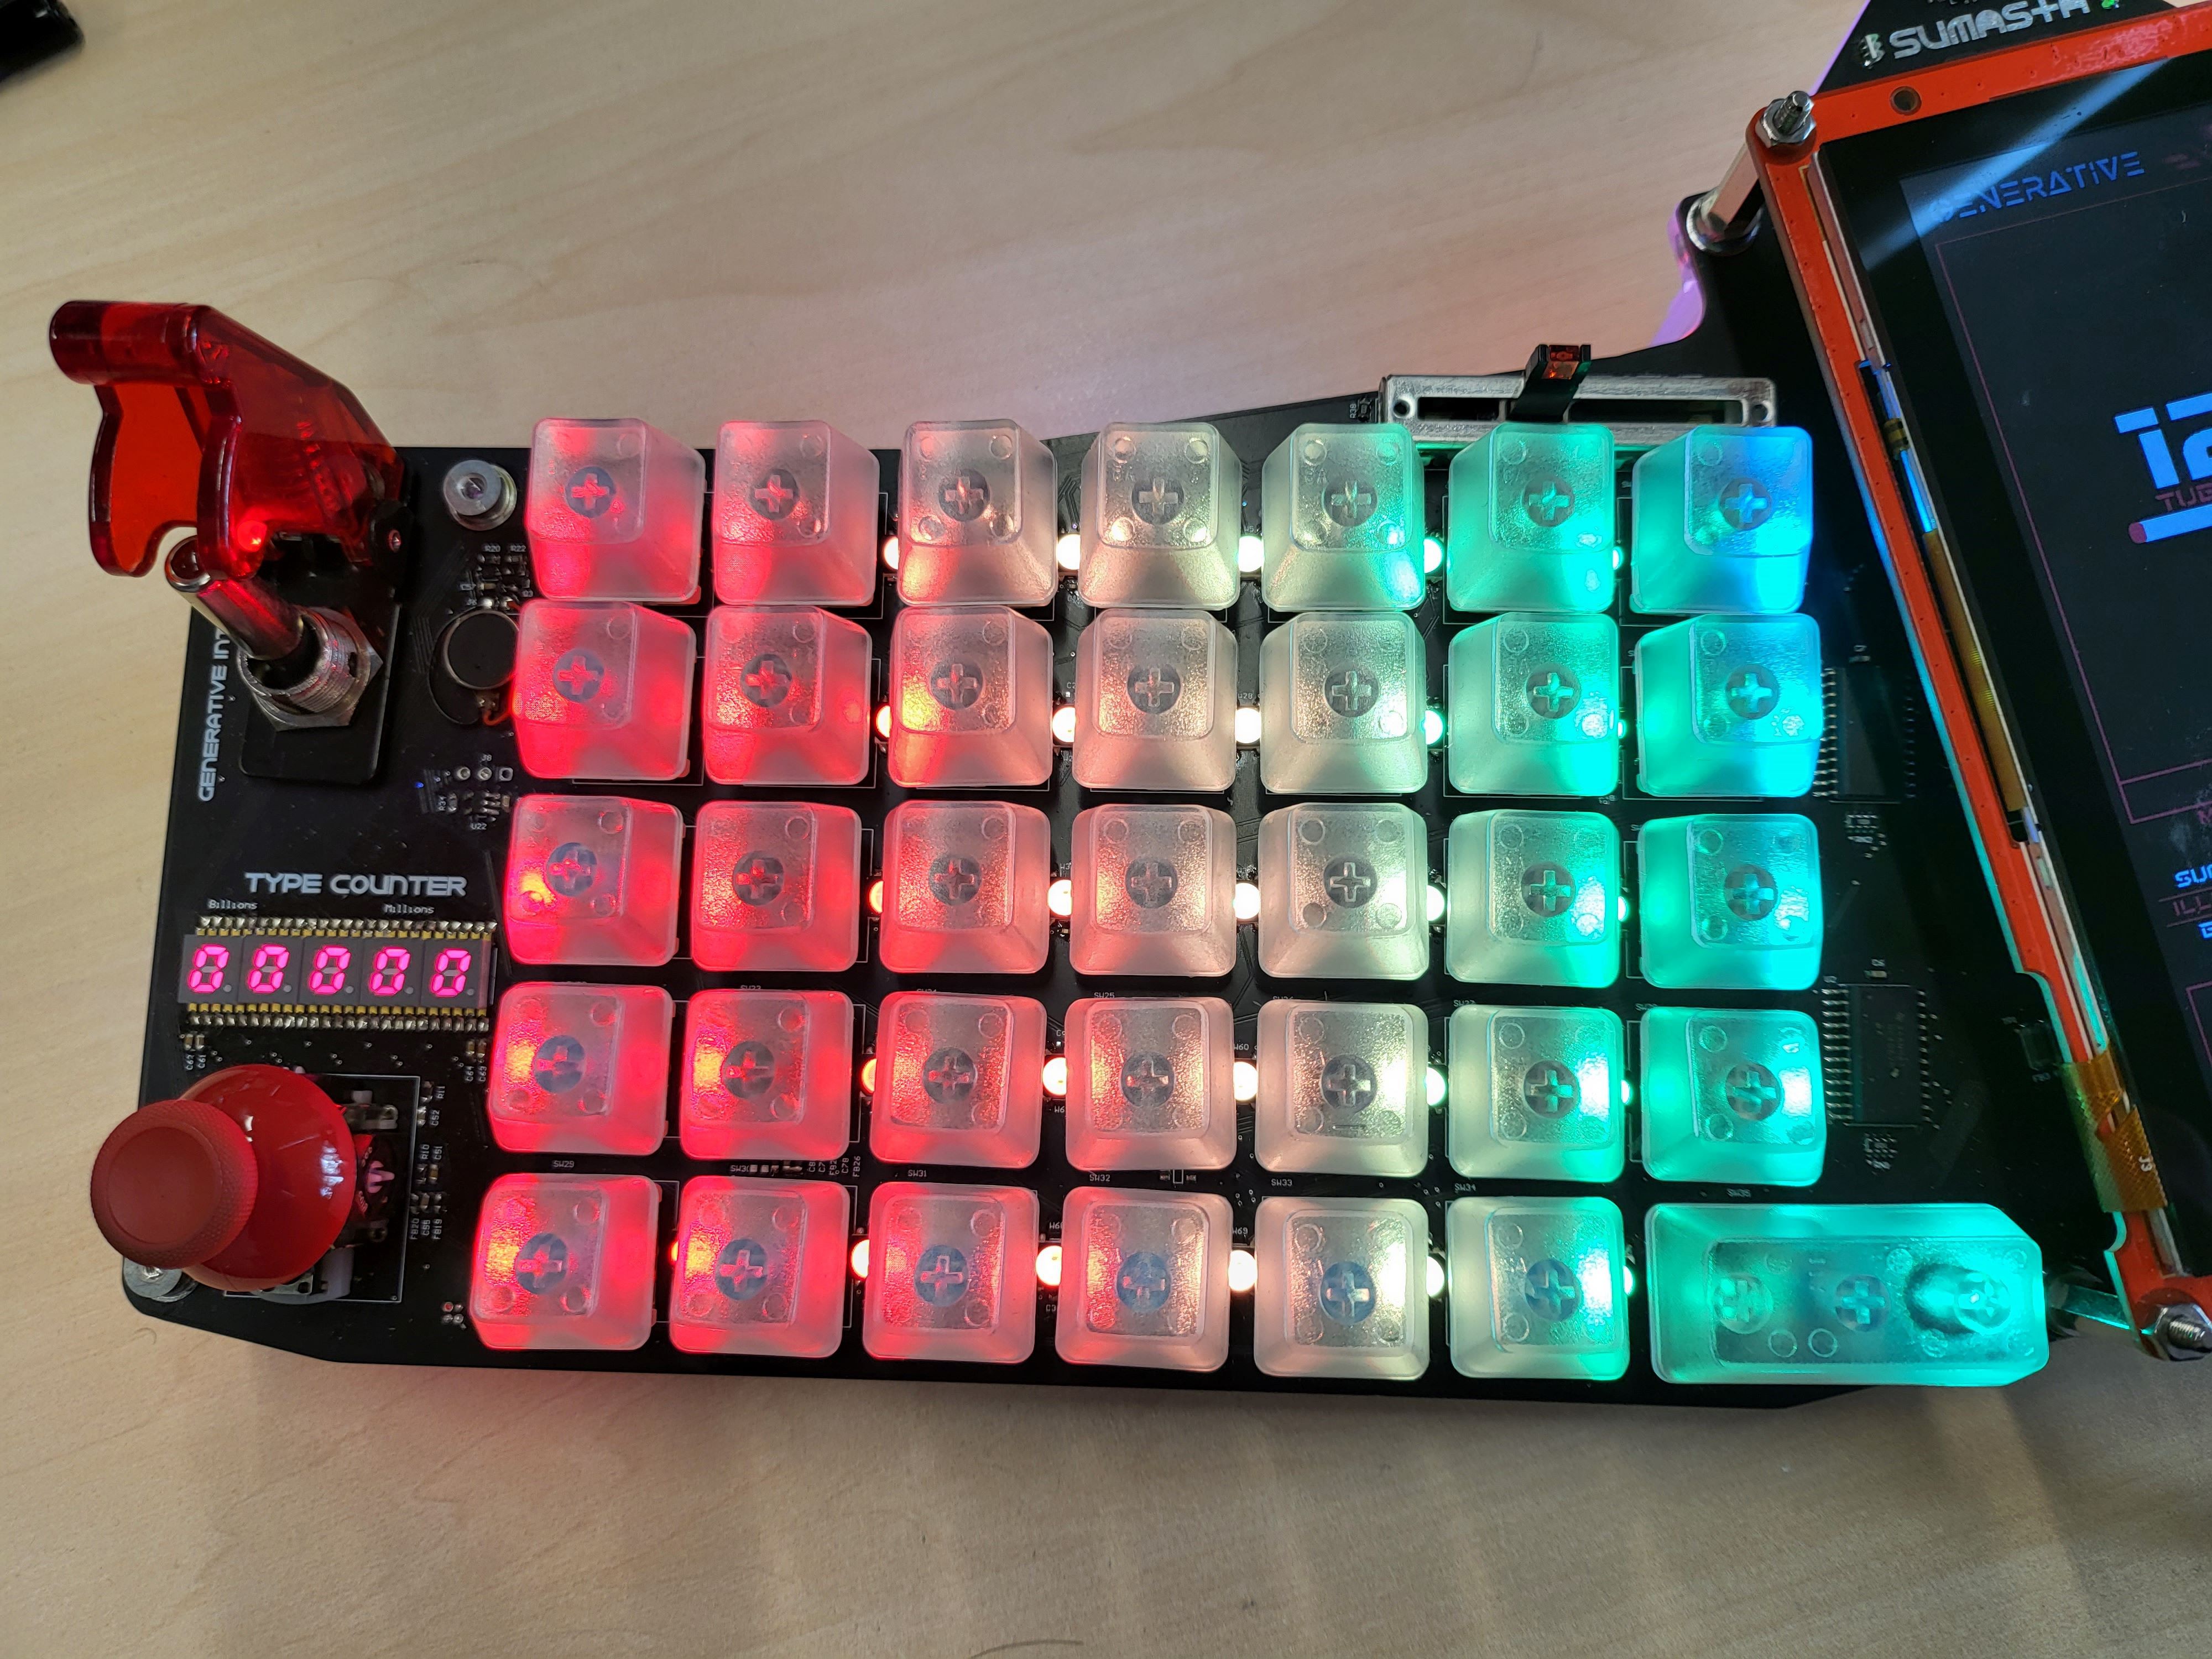
Moving on it's the left-hand-side of the split keyboard. There are 35 keys on each side, with symmetrical design in mind that adds up to 70 keys total. I opted for cherry MX for this for obvious reasons. However this time around I do a hybrid between Cherry MX brown and Blue. The printable characters I mainly prescribe using the Cherry MX brown which is much less noisy but also bit less tactile, while the non-printable characters around the edges of the keyboard I opted to use my favorite, which is the Cherry MX blue. It is good to know also that the key switches on this design is not directly connected to MCU GPIO or charlieplexed etc, but I decided to use multiplexer instead. Primary reason is to have individual single ended connection to the buffer and have less GPIO count use on the main controller side should I decided to opt to use other in the future.
Furthermore, in between the key switches, lays all the 80 x RGB WS2812b LED. The signal is daisy chained from the top left corner down to the bottom right corner of the keyboard. The LED is controlled by the co-processor in this case as well as I don't want to load the main processor with the light animation. Although, if you look at the schematic, there is a parallel bus with buffer connecting the input pins of the first WS2812b and GPIO of co-processor and main-processor. This way if needed, the LED can also be controlled by the main controller STM32.
As the cherry on top, a translucent keycaps are used. These are standard type you can now find and buy cheaply from aliexpress or so. Surely is personal preference, you can also opt to use for other colors / translucent level etc.
![]()
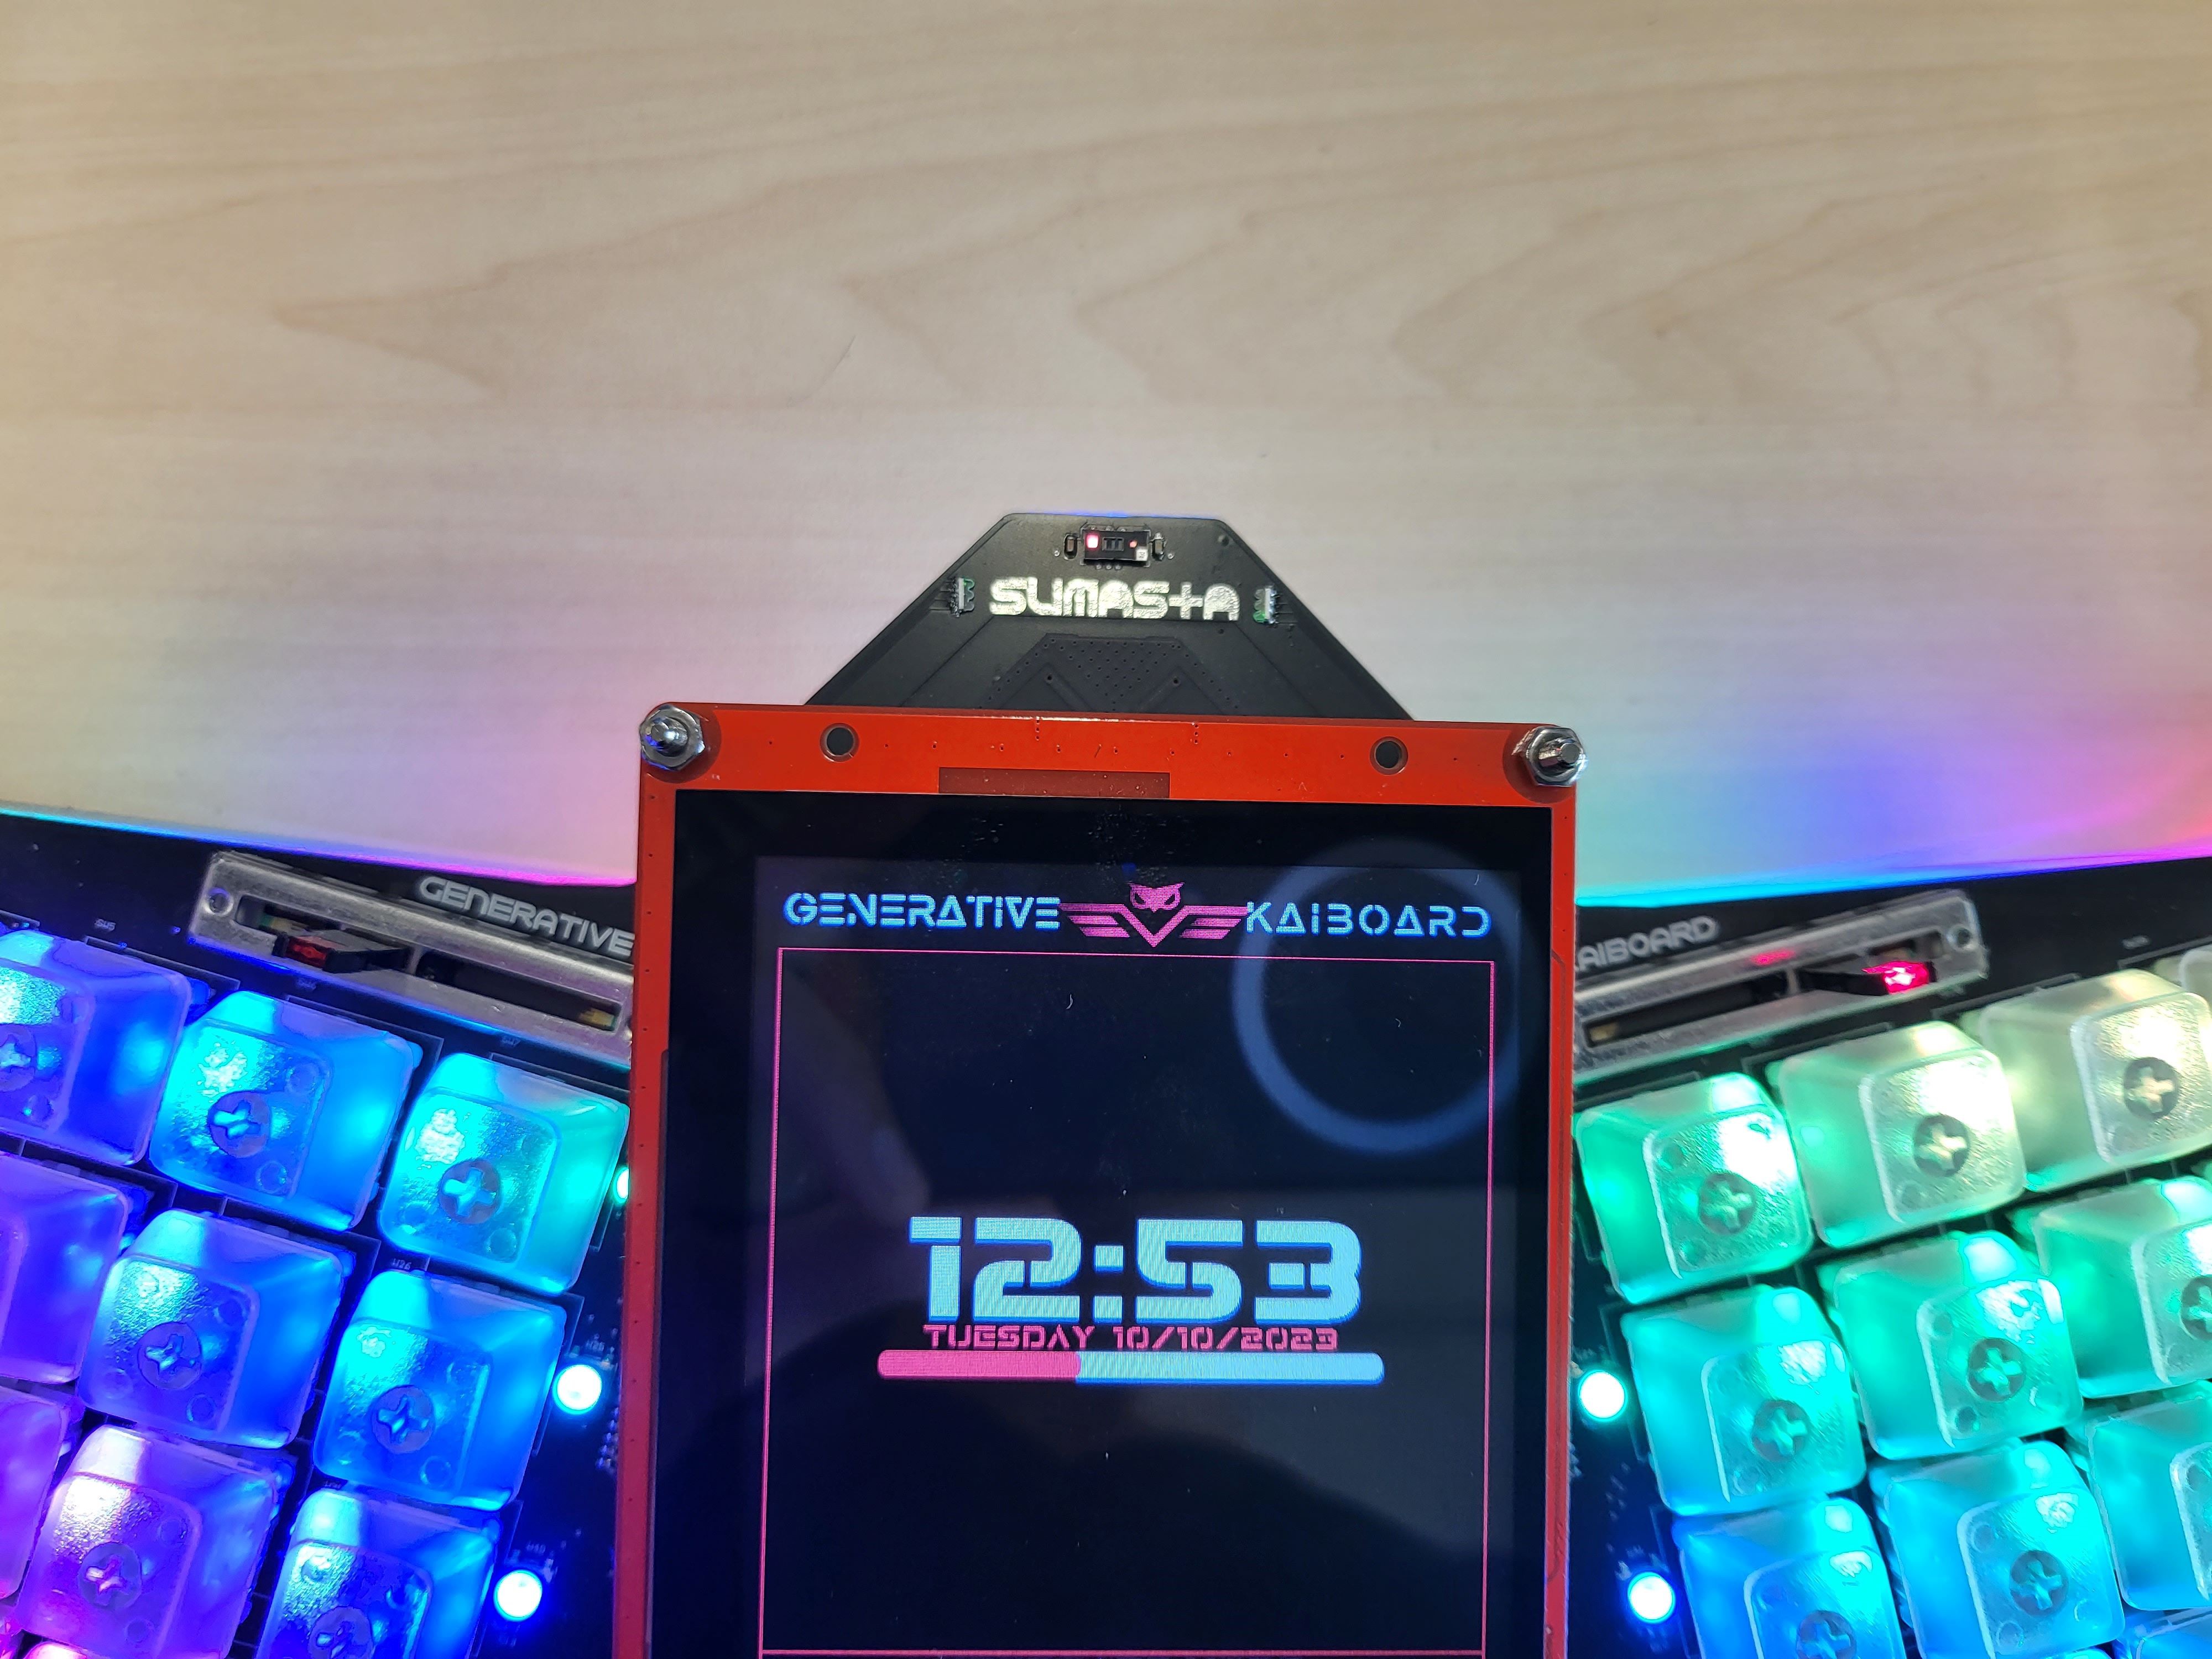
On the top center region, first thing you'll notice is obviously the 5.5" Screen. The screen is a Nextion intelligent series with built-in driver and controller. Micro SD card slot is also provided underneath the display. Furthermore, it has built-in capacitive touch panel allowing you to interact quite nicely with the display. The Nextion display is connected via UART to the main controller, but it is programmed independently via a connector on the top side of the display. Also via a UART connection to the PC. At last, underneath it has also driver for speaker and the speaker connection, allowing you to play audio and video quite easily. It is noteworthy to say that the display is not the cheapest type on the market, but considering the platform and IDE that it offers, it certainly is worth every penny.
Moving on the the sides of the display, on the left and on the right, tilted a bit, you can see 2 slider potentiometer incorporated on the generative kAiboard. These sliders are connected to the co-processor and for the moment, it is programmed to control the primary light intensity as well as the light animation. As the co-processor is managing all the 80 x WS2812b RGB LED, it makes sense to also connect the 2 potentiometer slider to the spare analog pins of the ESP32 co-processor module.
On the very top on of the keyboard, you can see the multizone time-of-flight sensors from ST. It is interfaced via I2C interface and it is intended for people presence detection as well as gesture detection. This particular sensor also is not a standard ToF distance sensor, but this particular one is a 8x8 multizone sensor which can provides you with distance information on 64 different zones at once. Pretty cool right!!?!
![]()
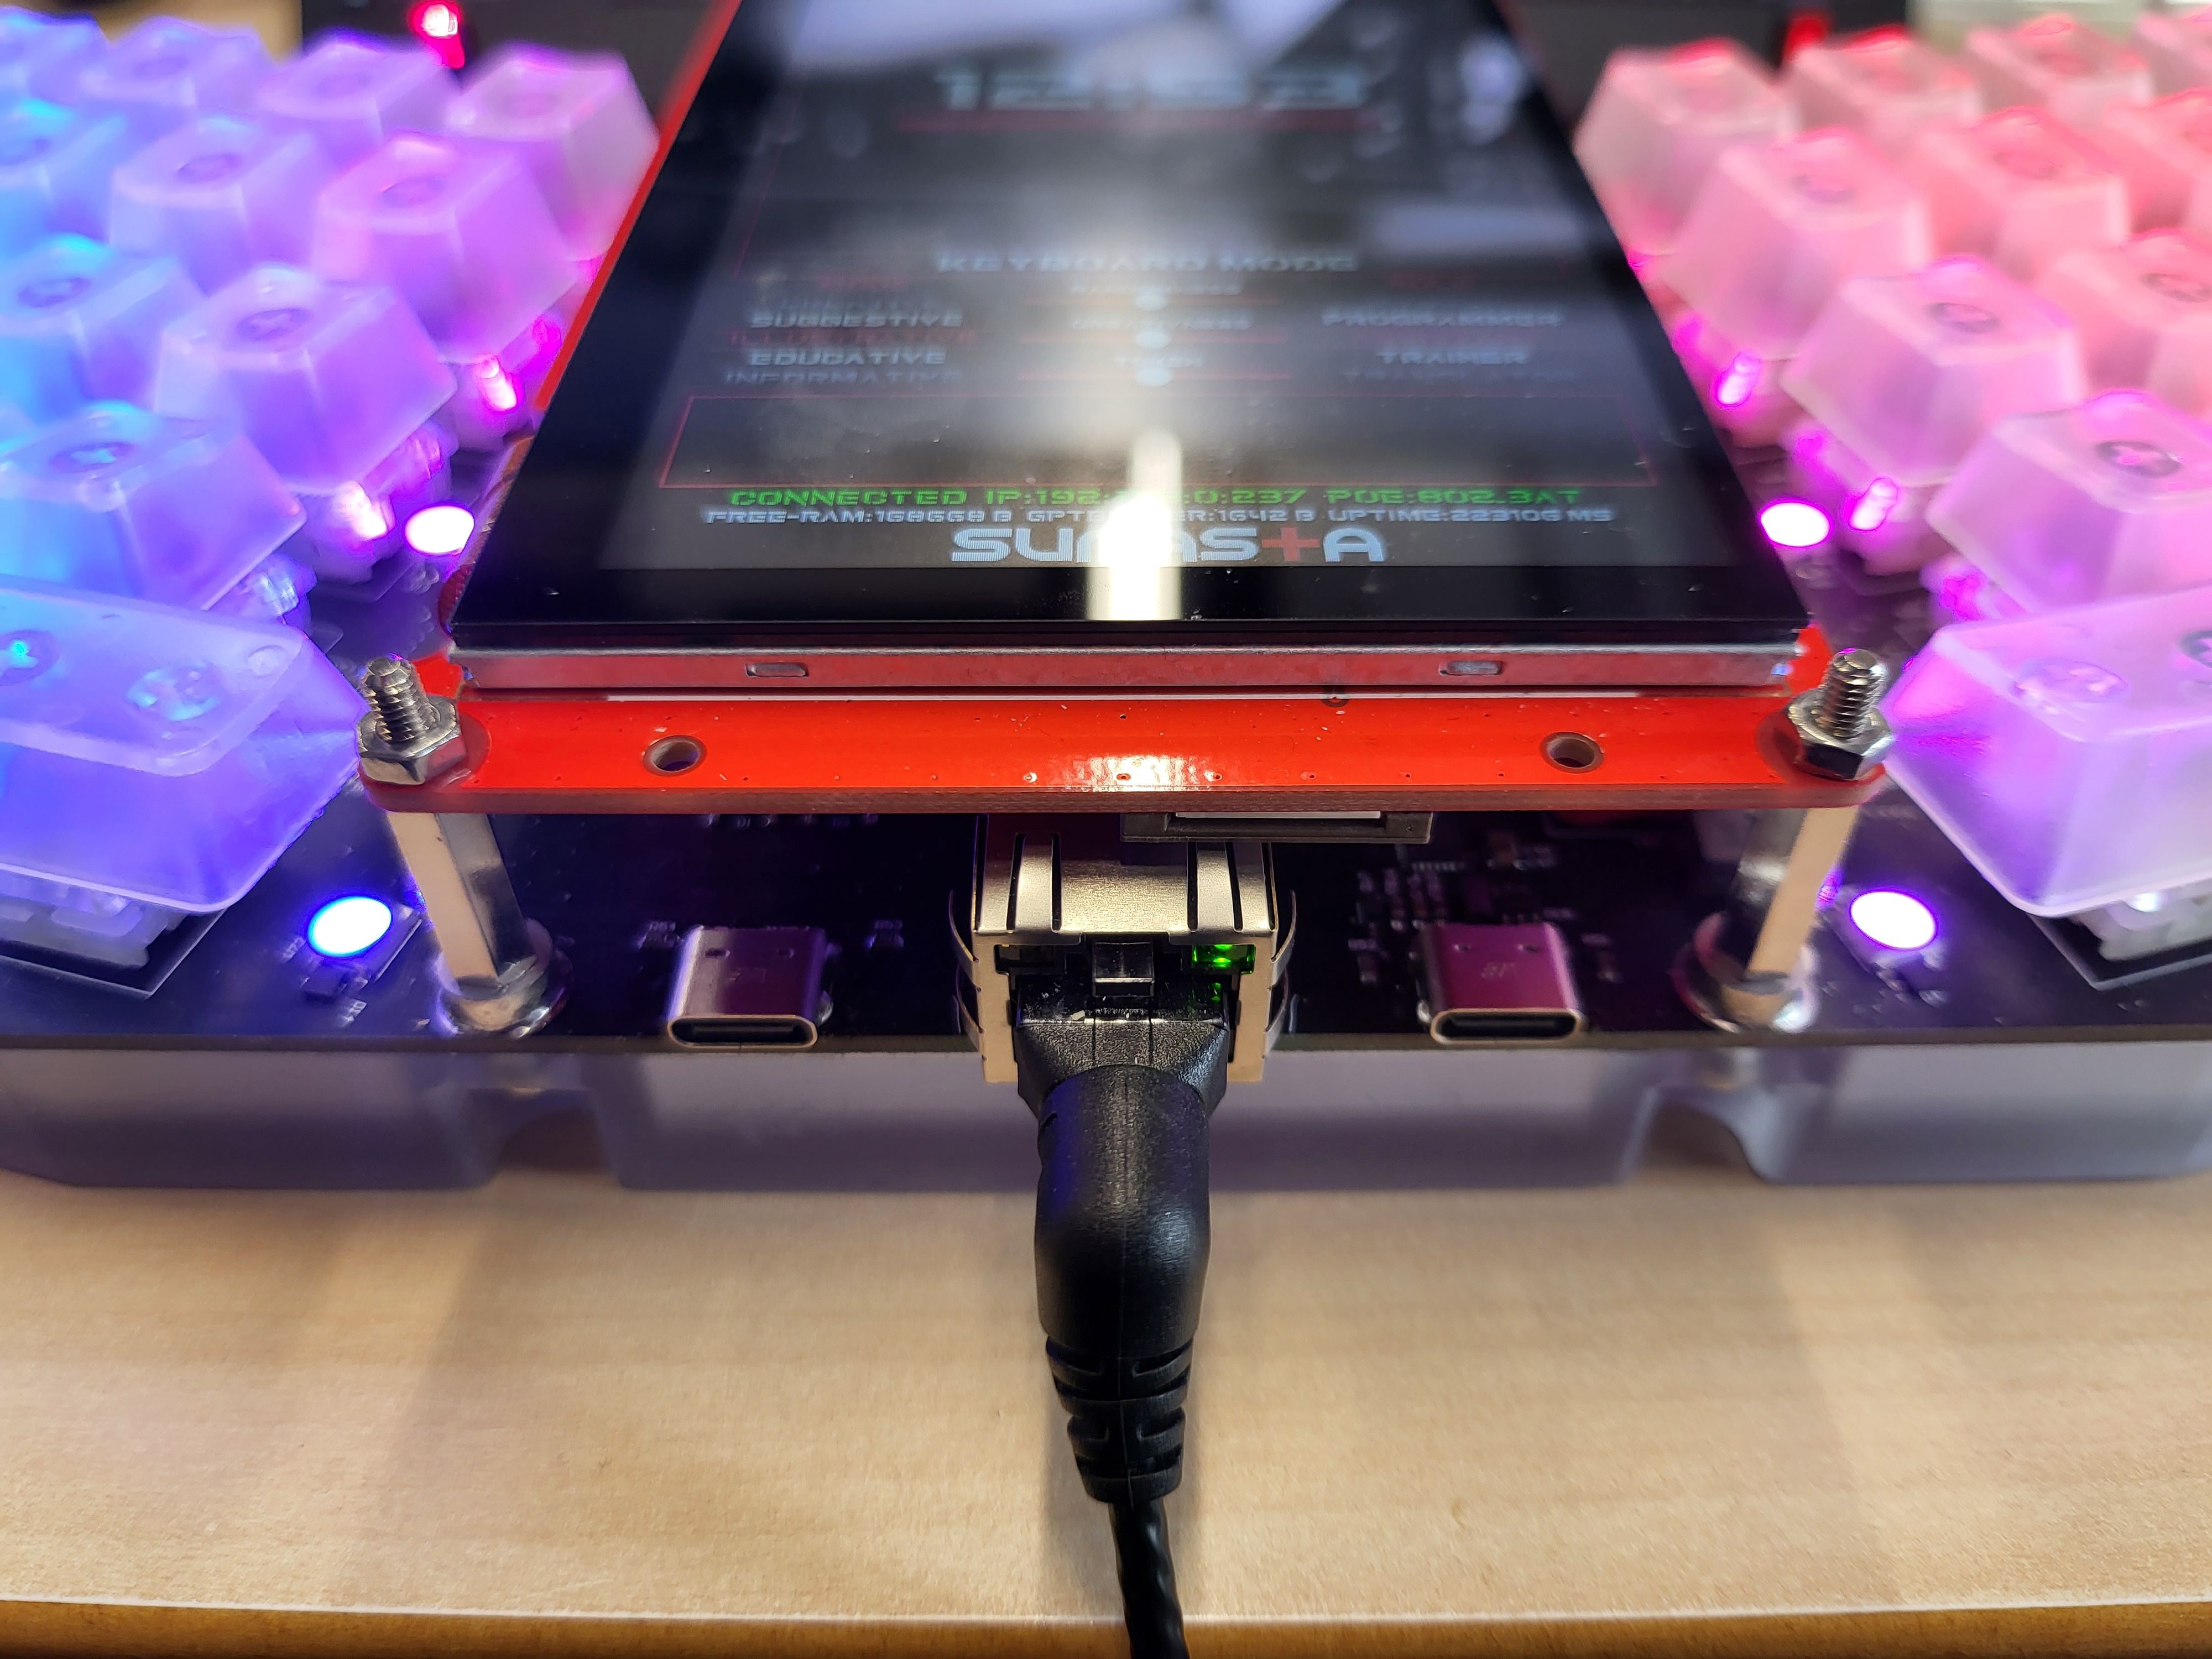
On a bottom middle section as you can see on the picture just above, there are three connectors exposed to the outside world. The first and foremost is the RJ45 Ethernet connector which provides both data/internet and power. I strive for neatness on this build, so I tried to minimized cabling as much as possible. With PoE this is made possible. Moreover, not only a standard PoE, but the Generative kAiboard incorporated PoE+ which is compliant to IEEE802.3AT standard which can accepts power up to ~25W in this particular case. And on the board there are mainly two power rails after the PoE module, and that is 5V and the 3.3V.
On the left side of the RJ45 jack, you have the first USB-C connector which essentially connects to ST-Link inside the Nucleo board. This is pretty much just a connector extension from the ST Nucleo board inside the unit, nothing more and nothing less. As you know, having an exposed programming / debugging connector is really2 important and handy especially for development process.
In addition to that, on the right side of the RJ45 connector, there is another USB C connector which connects to the Silicon Labs USB-to-Serial. It interface to the co-processor ESP32 for programming and serial debugging. I didn't plan it in initially to be honest, but last minute decision of adding this built-in on board is really crucial and safe a lot of hassle for programming and testing.
It is important to note also there is no USB PD built-in on here, so you surely cannot power the whole board via either of the USB-C. It is already on my list for the next HW iteration.
![]()
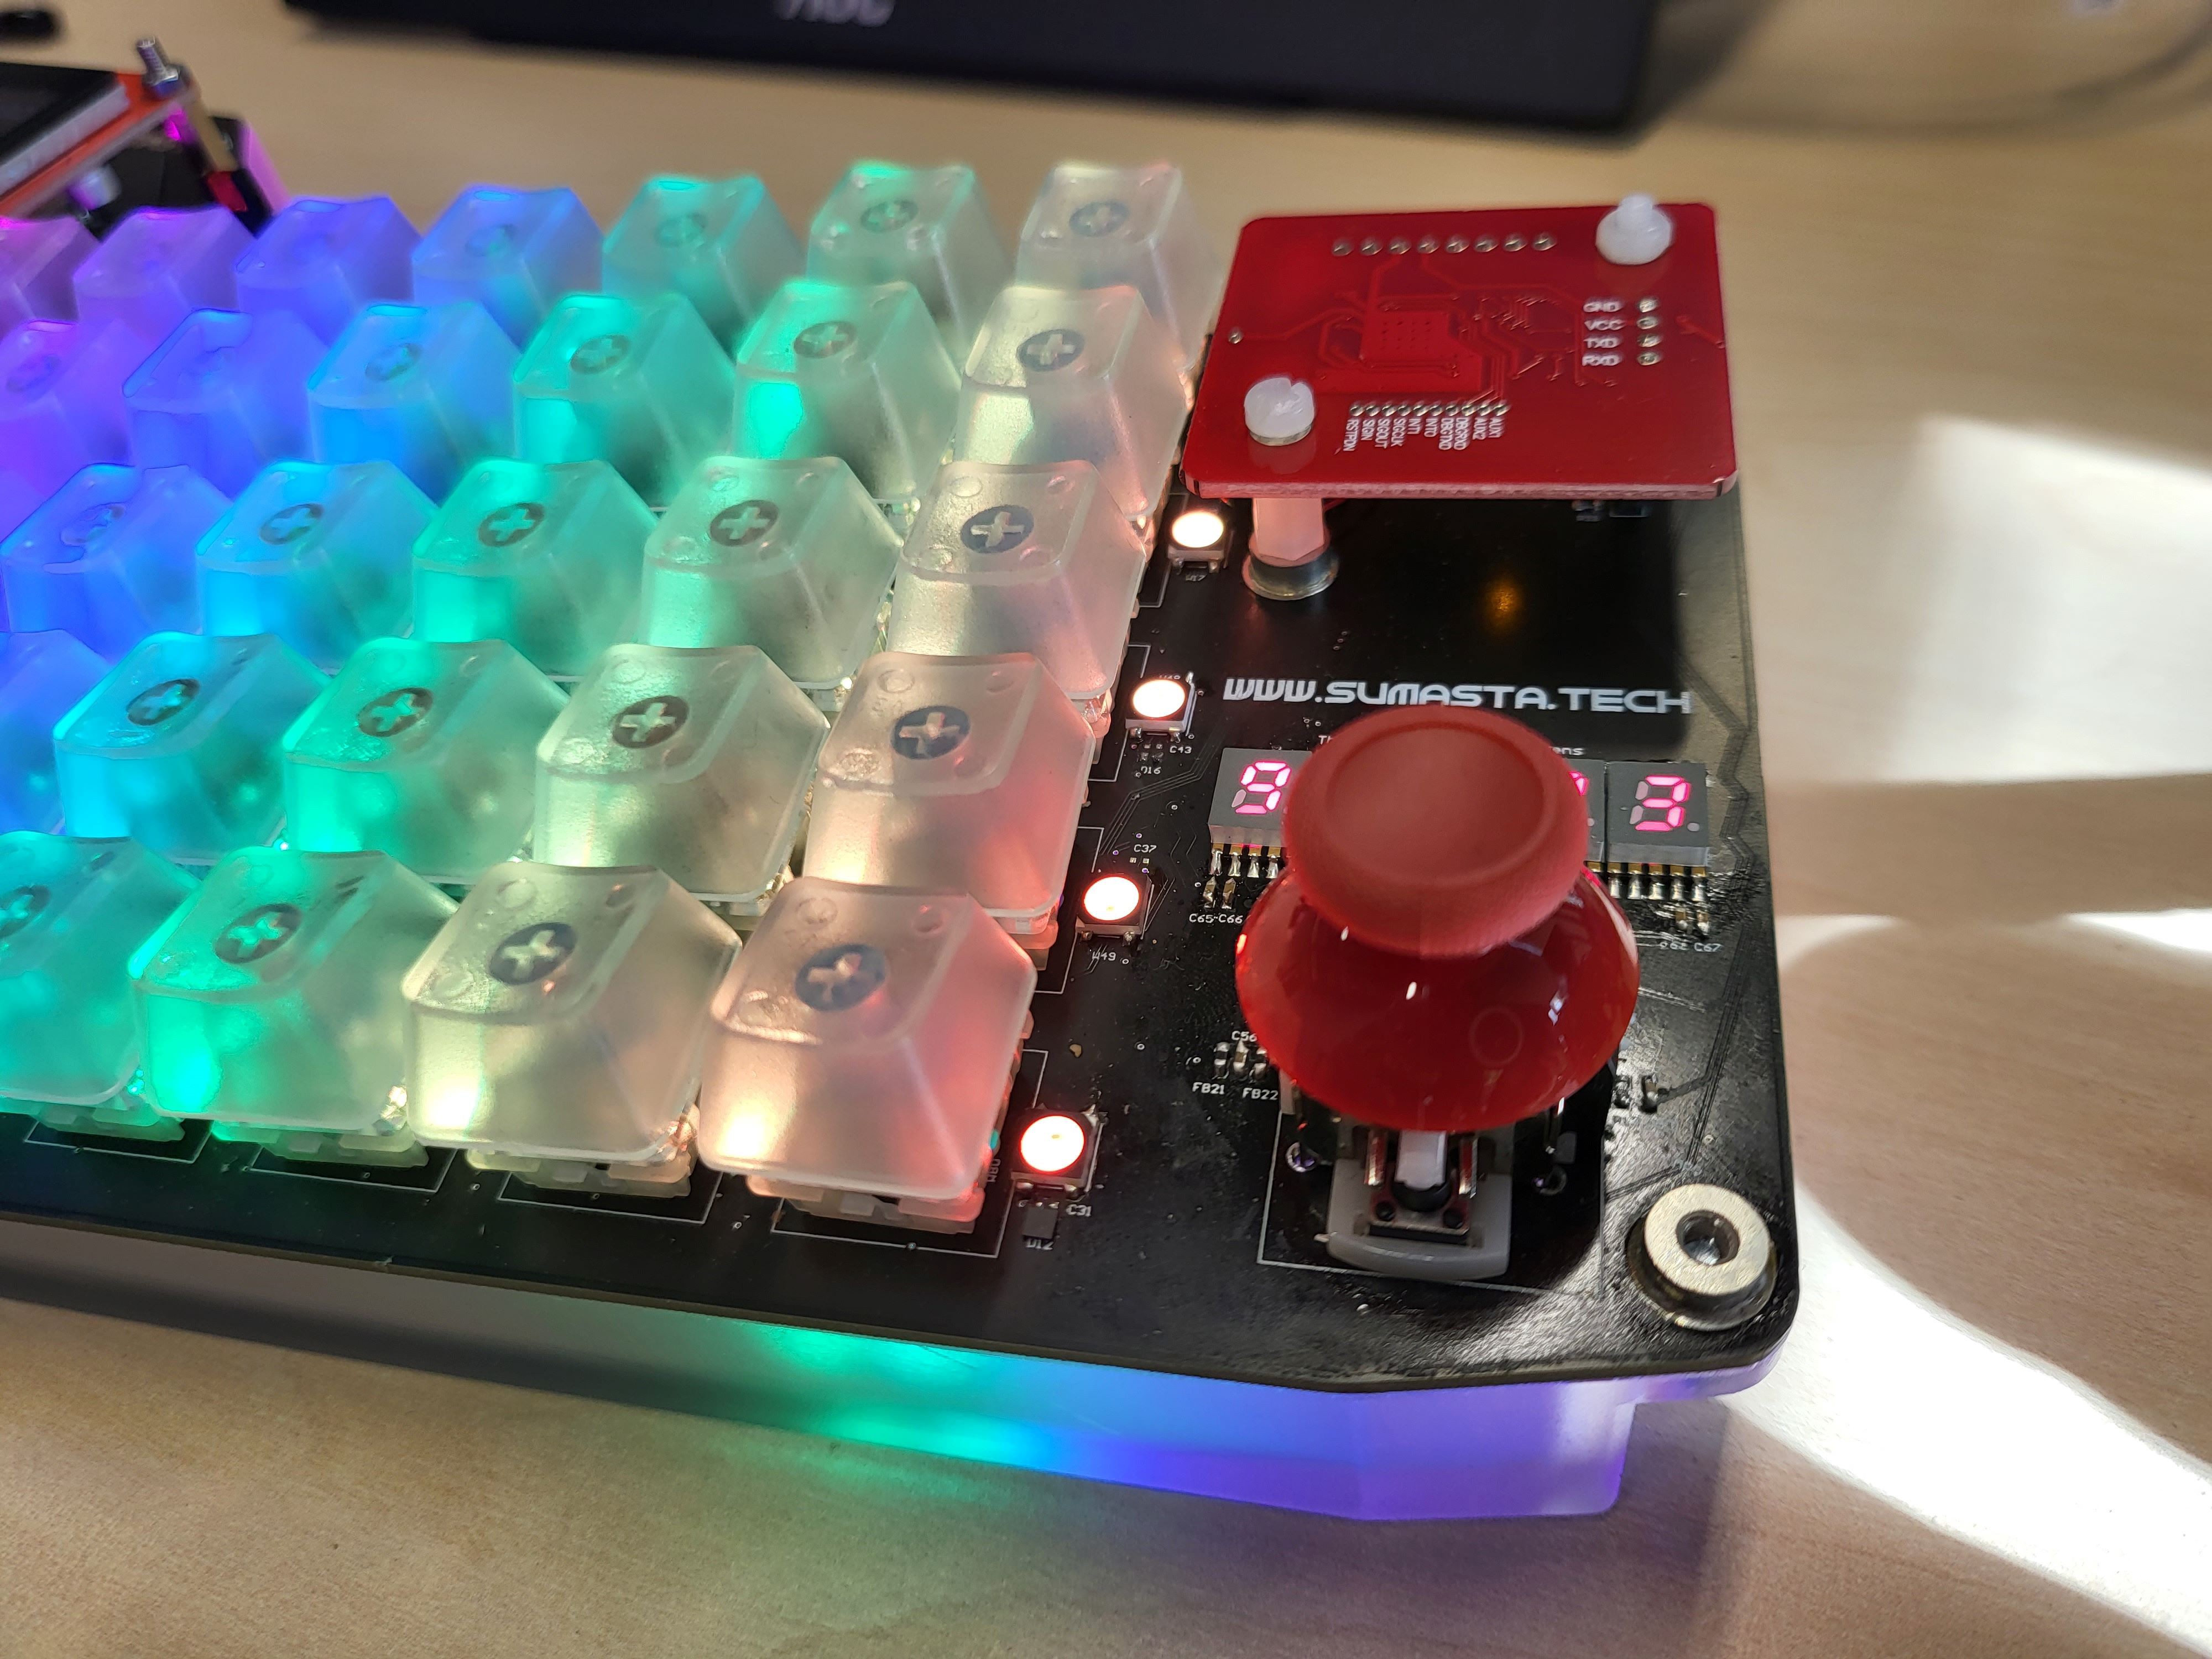
At the very end, on the right hand side of the generative kAiboard you have few more HW features. Quite similar to what we have on the left hand side, there are an additional Joystick and the first 5 digits of the type counter. They are all interfaced the same way and connected to the same controller as the one the left. While the left joystick is used for media control, the right joystick is currently prescribed for keyboard arrow control.
On the top right corner in the meantime, the NFC tag reader is incorporated. It is based on PN532 Chip and currently interfaced via I2C to the main controller. The main function is essentially for authenticating the and unlocking the keyboard etc.
Hidden below the NFC tag, there is an additional vibration motor as well as external EEPROM that is also connected via I2C to the main controller.
Well, I hope that covers all of the HW features of the Generative kAiboard!
-
Generative Mode: Educative
10/10/2023 at 12:16 • 0 commentsOne of the very nice feature of ChatGPT that I discovered recently is their ability to challenge you and ask you some questions. Turns out it is really cool! Of course, the factual information in the GPT LLM model is never 100% accurate, but certainly it gives you some fun and knowledge on certain topics you are interested in. Hence, I named it Educative mode.
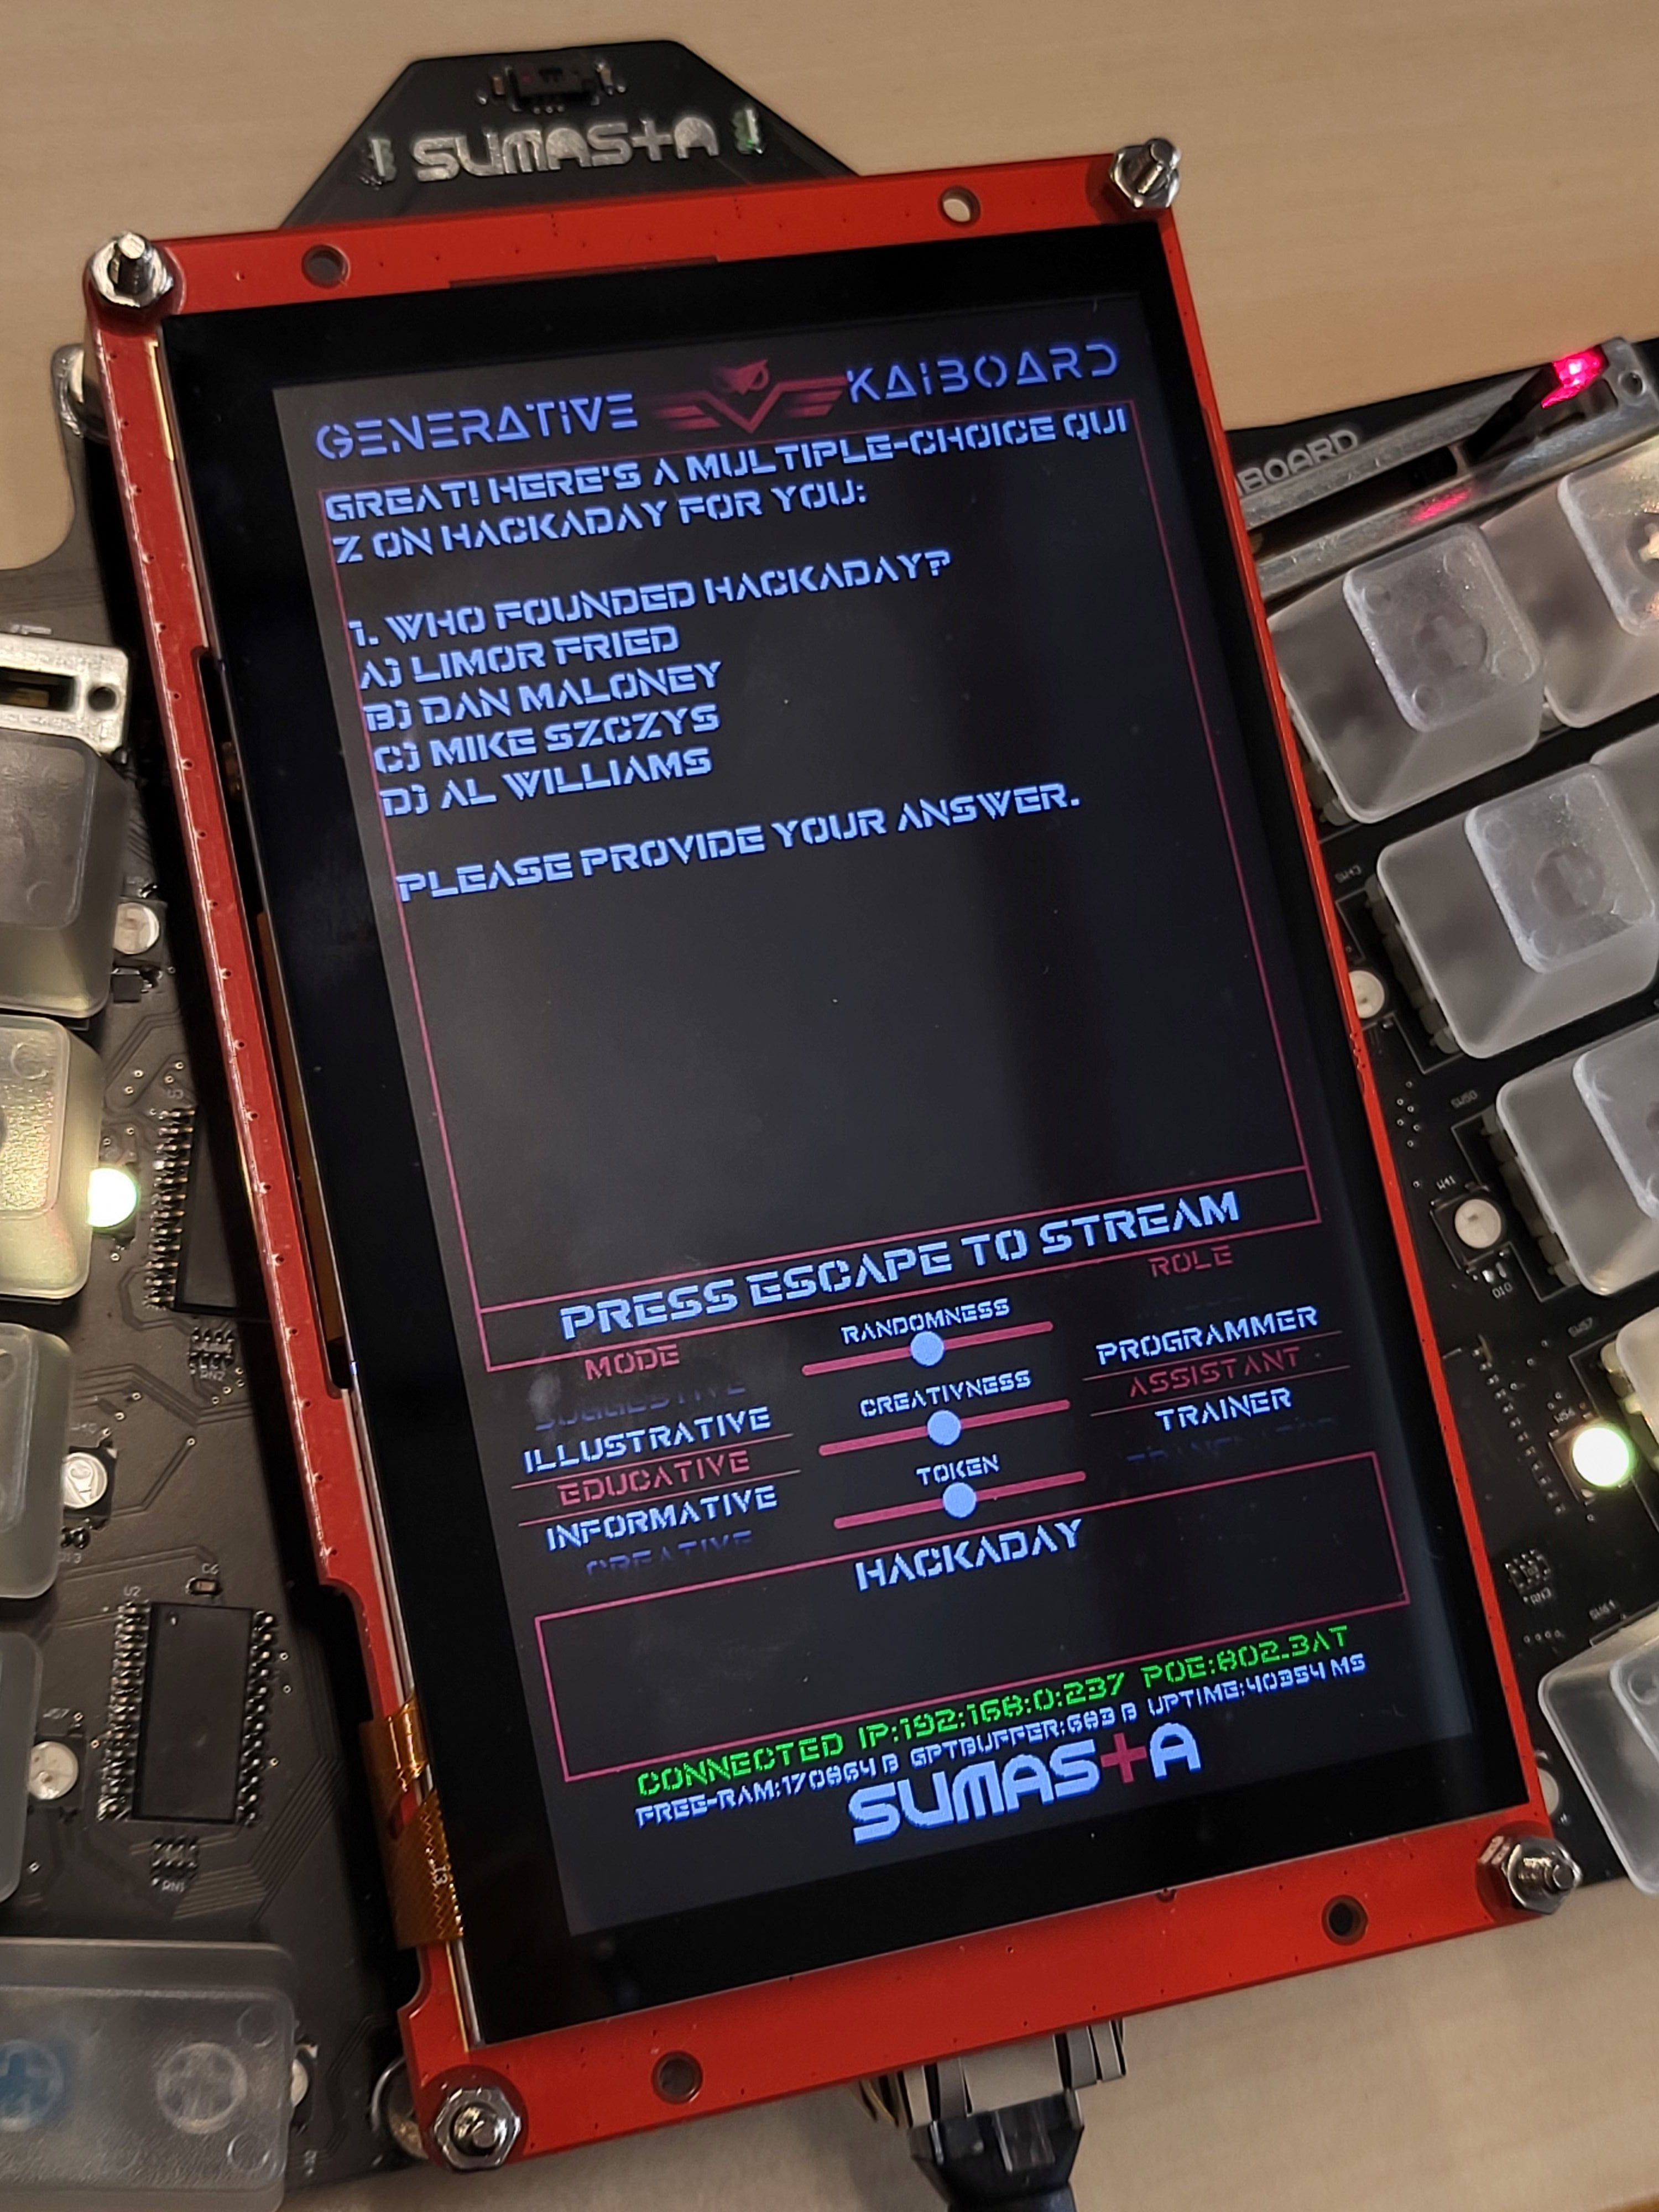
In this mode, what you'll need to input is only the topic of the quiz you are interested in, and the Generative kAiboard will ask you 10 multiple choice questions consecutively. At the end of the the 10th question it will provide you with the grade. It's simple and really fun, at least for me personally, in particular when you are bored and want to test your knowledge on some topics you are familiar with or not.
Example of the screenshot below I asked the Generative kAiboard to generate quiz about Hackaday.
![]()
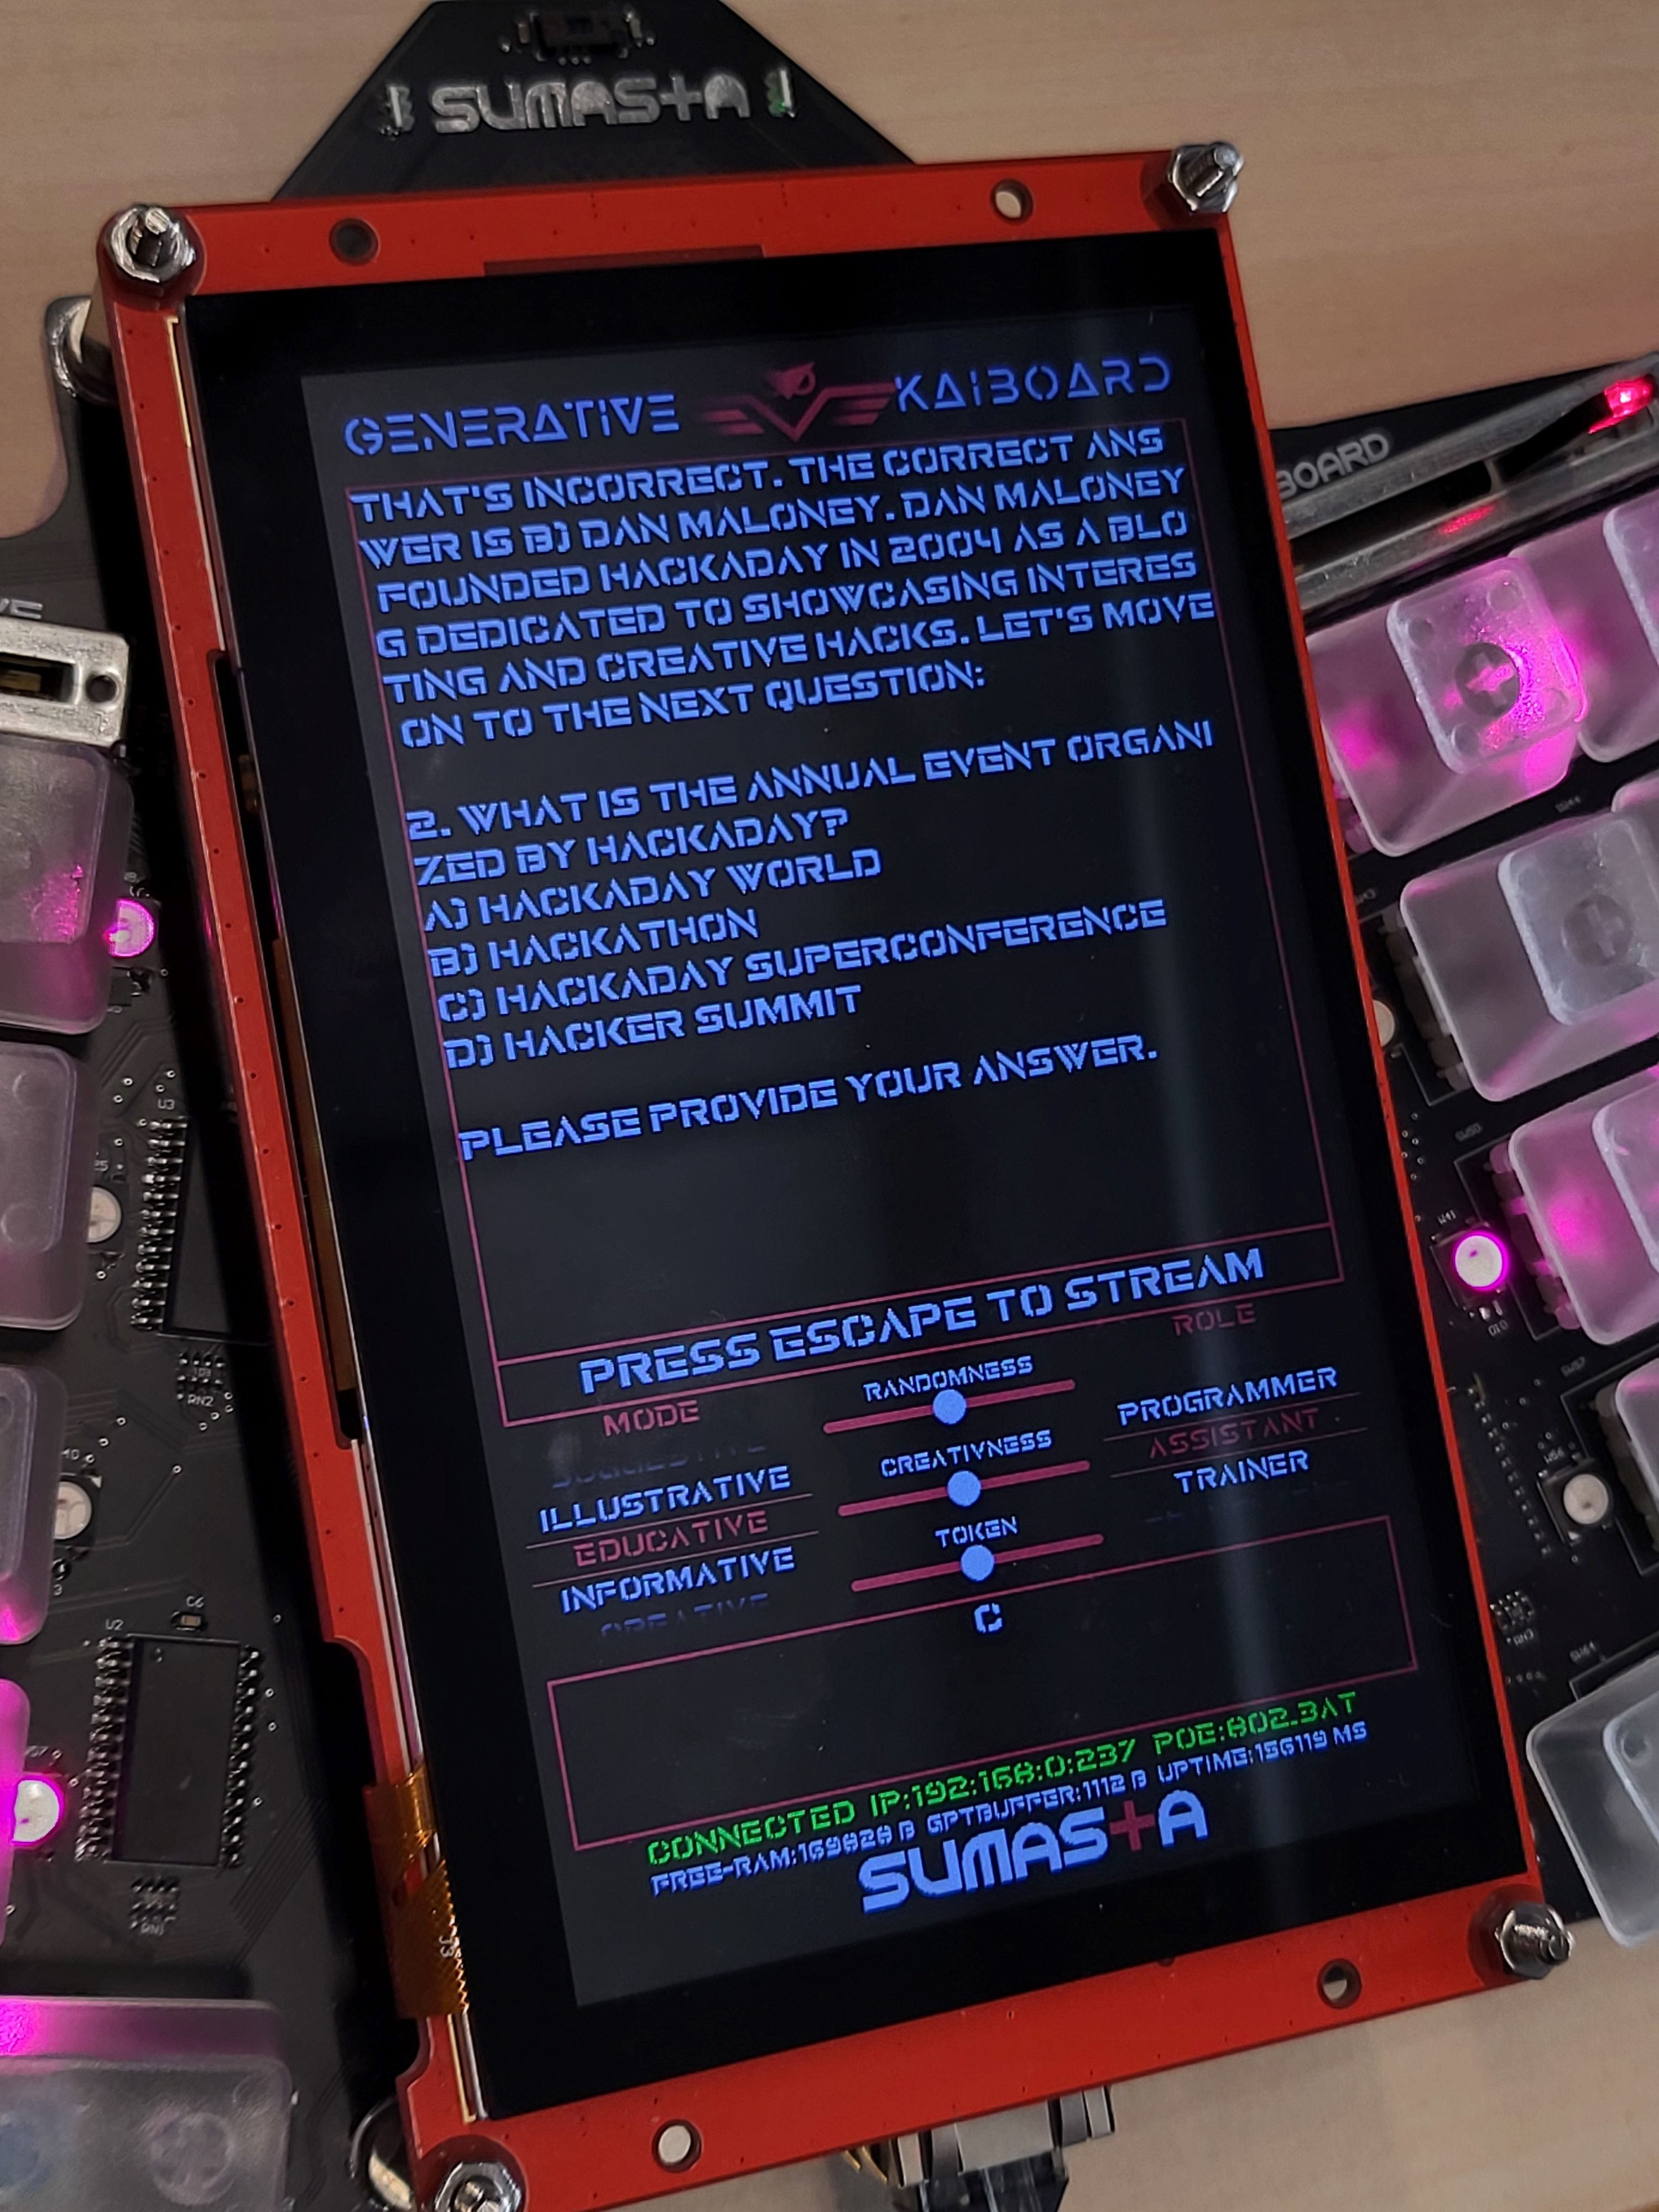
Well well well, according to my / Wikipedia knowledge the founder of Hackaday in 2004 is Phillip Thoron, but somehow he is not listed as an option and ChatGPT thinks Dan Maloney is the correct answer :D
![]()
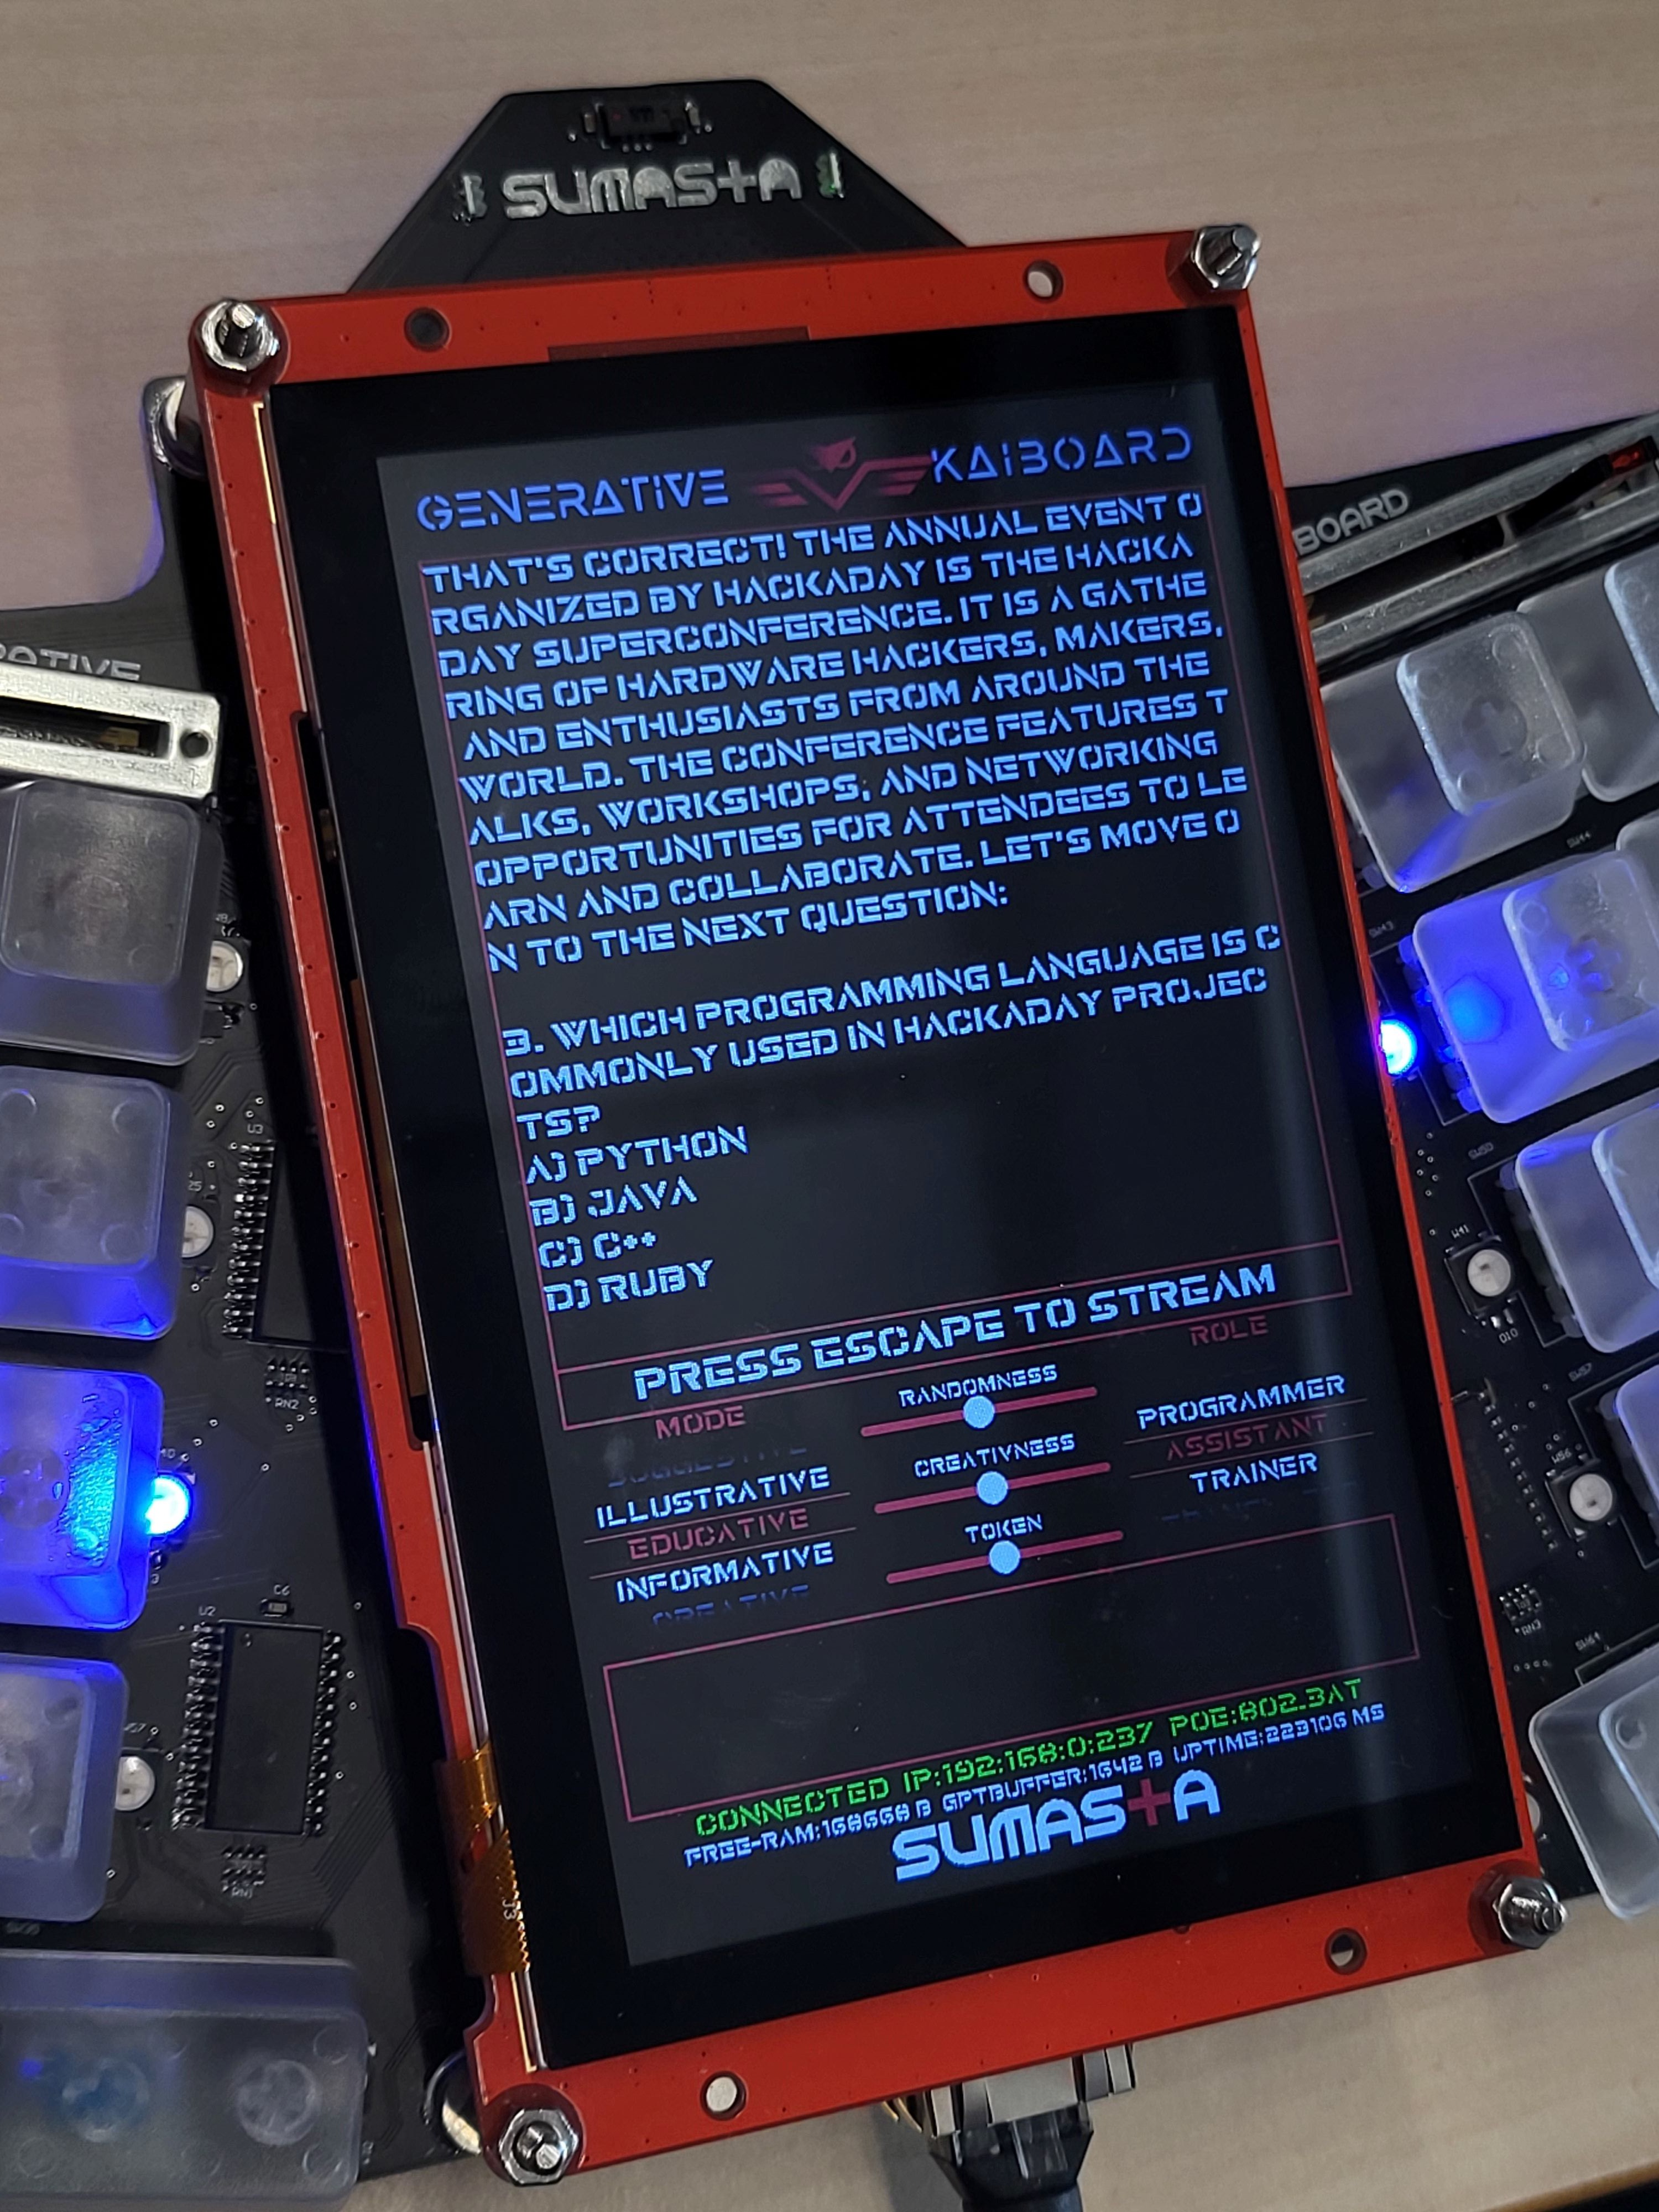
And the response for a correct answer:
![]()
-
Generative Mode: Illustrative
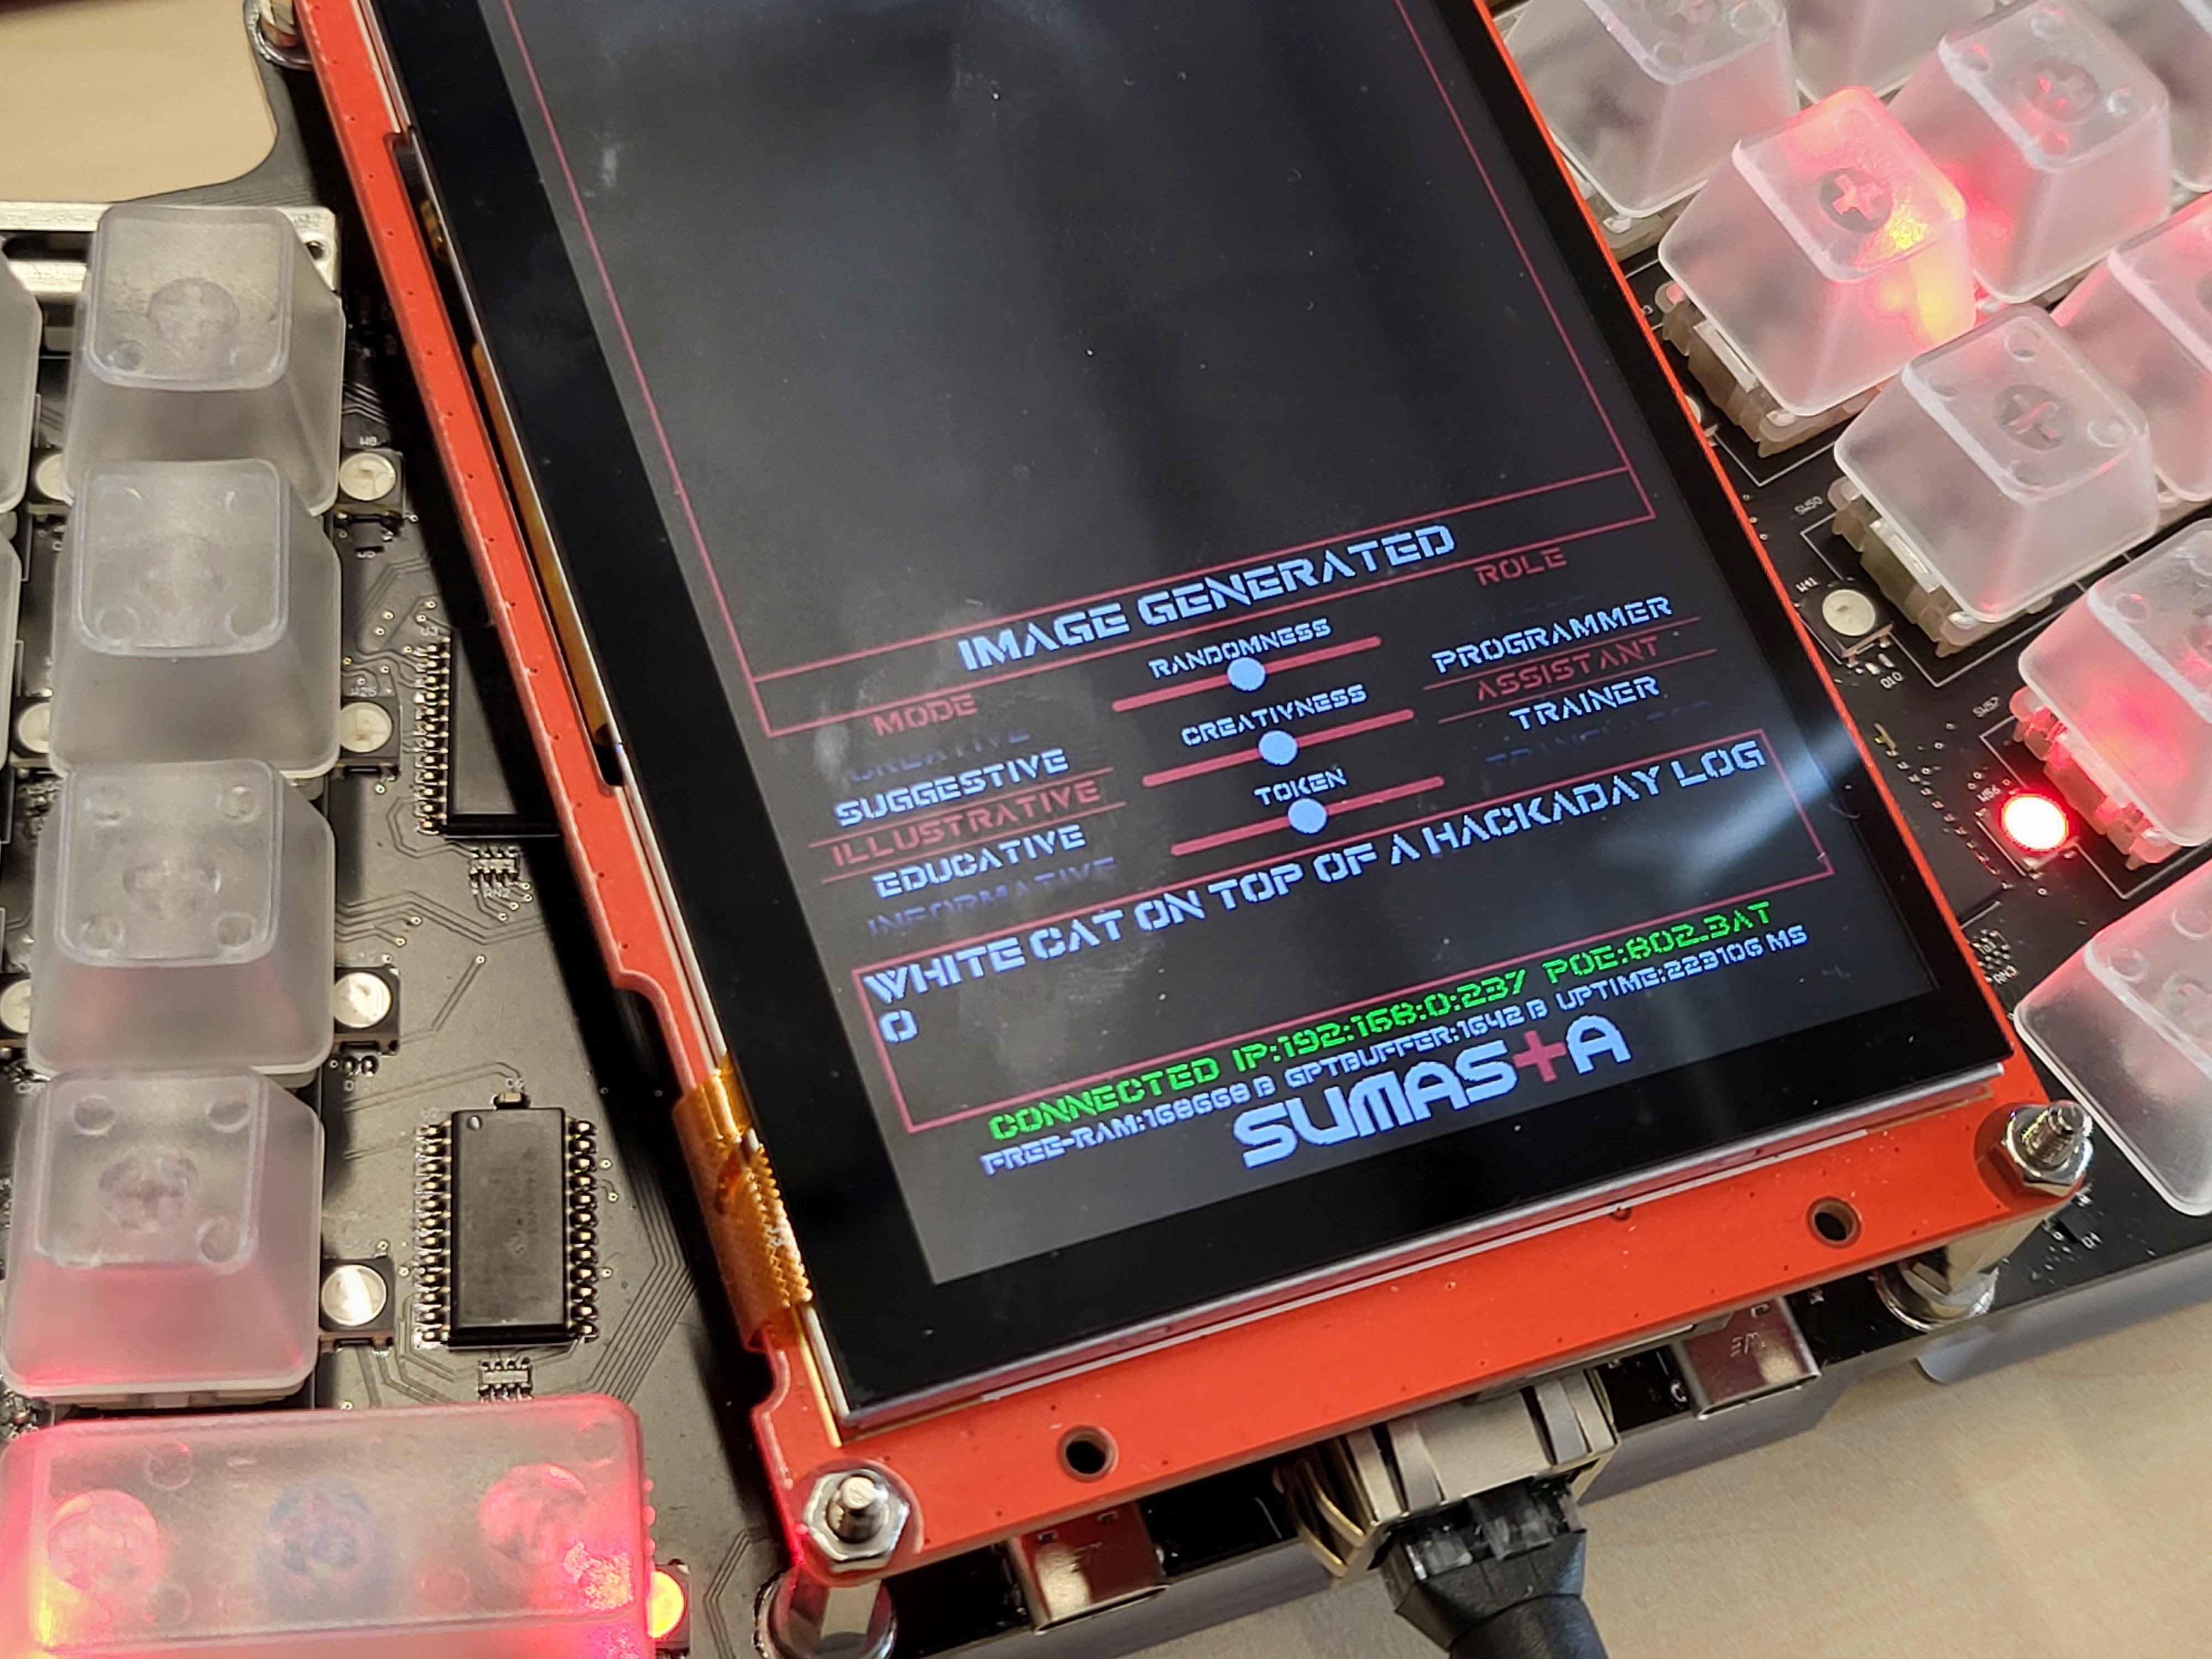
10/10/2023 at 12:06 • 0 commentsThe fourth mode which has recently become my favorite is the illustrative mode. As you might have probably guess, it generates an image instead of texts, and of course it is using image-to-text model (DALL-E) under the hood and not the GPT.
![]()
Quite similar to the informative and creative mode, together with your original prompt, the Generative kAiboard may embeds information about you, real-time information and user statistic to better fine-tune the image generation outcome. My ultimate intention is to of course show it in real time on the 5.5" inch screen, but for now the generated image is displayed automatically on your laptop browser. From that point then you can easily save, edit etc.
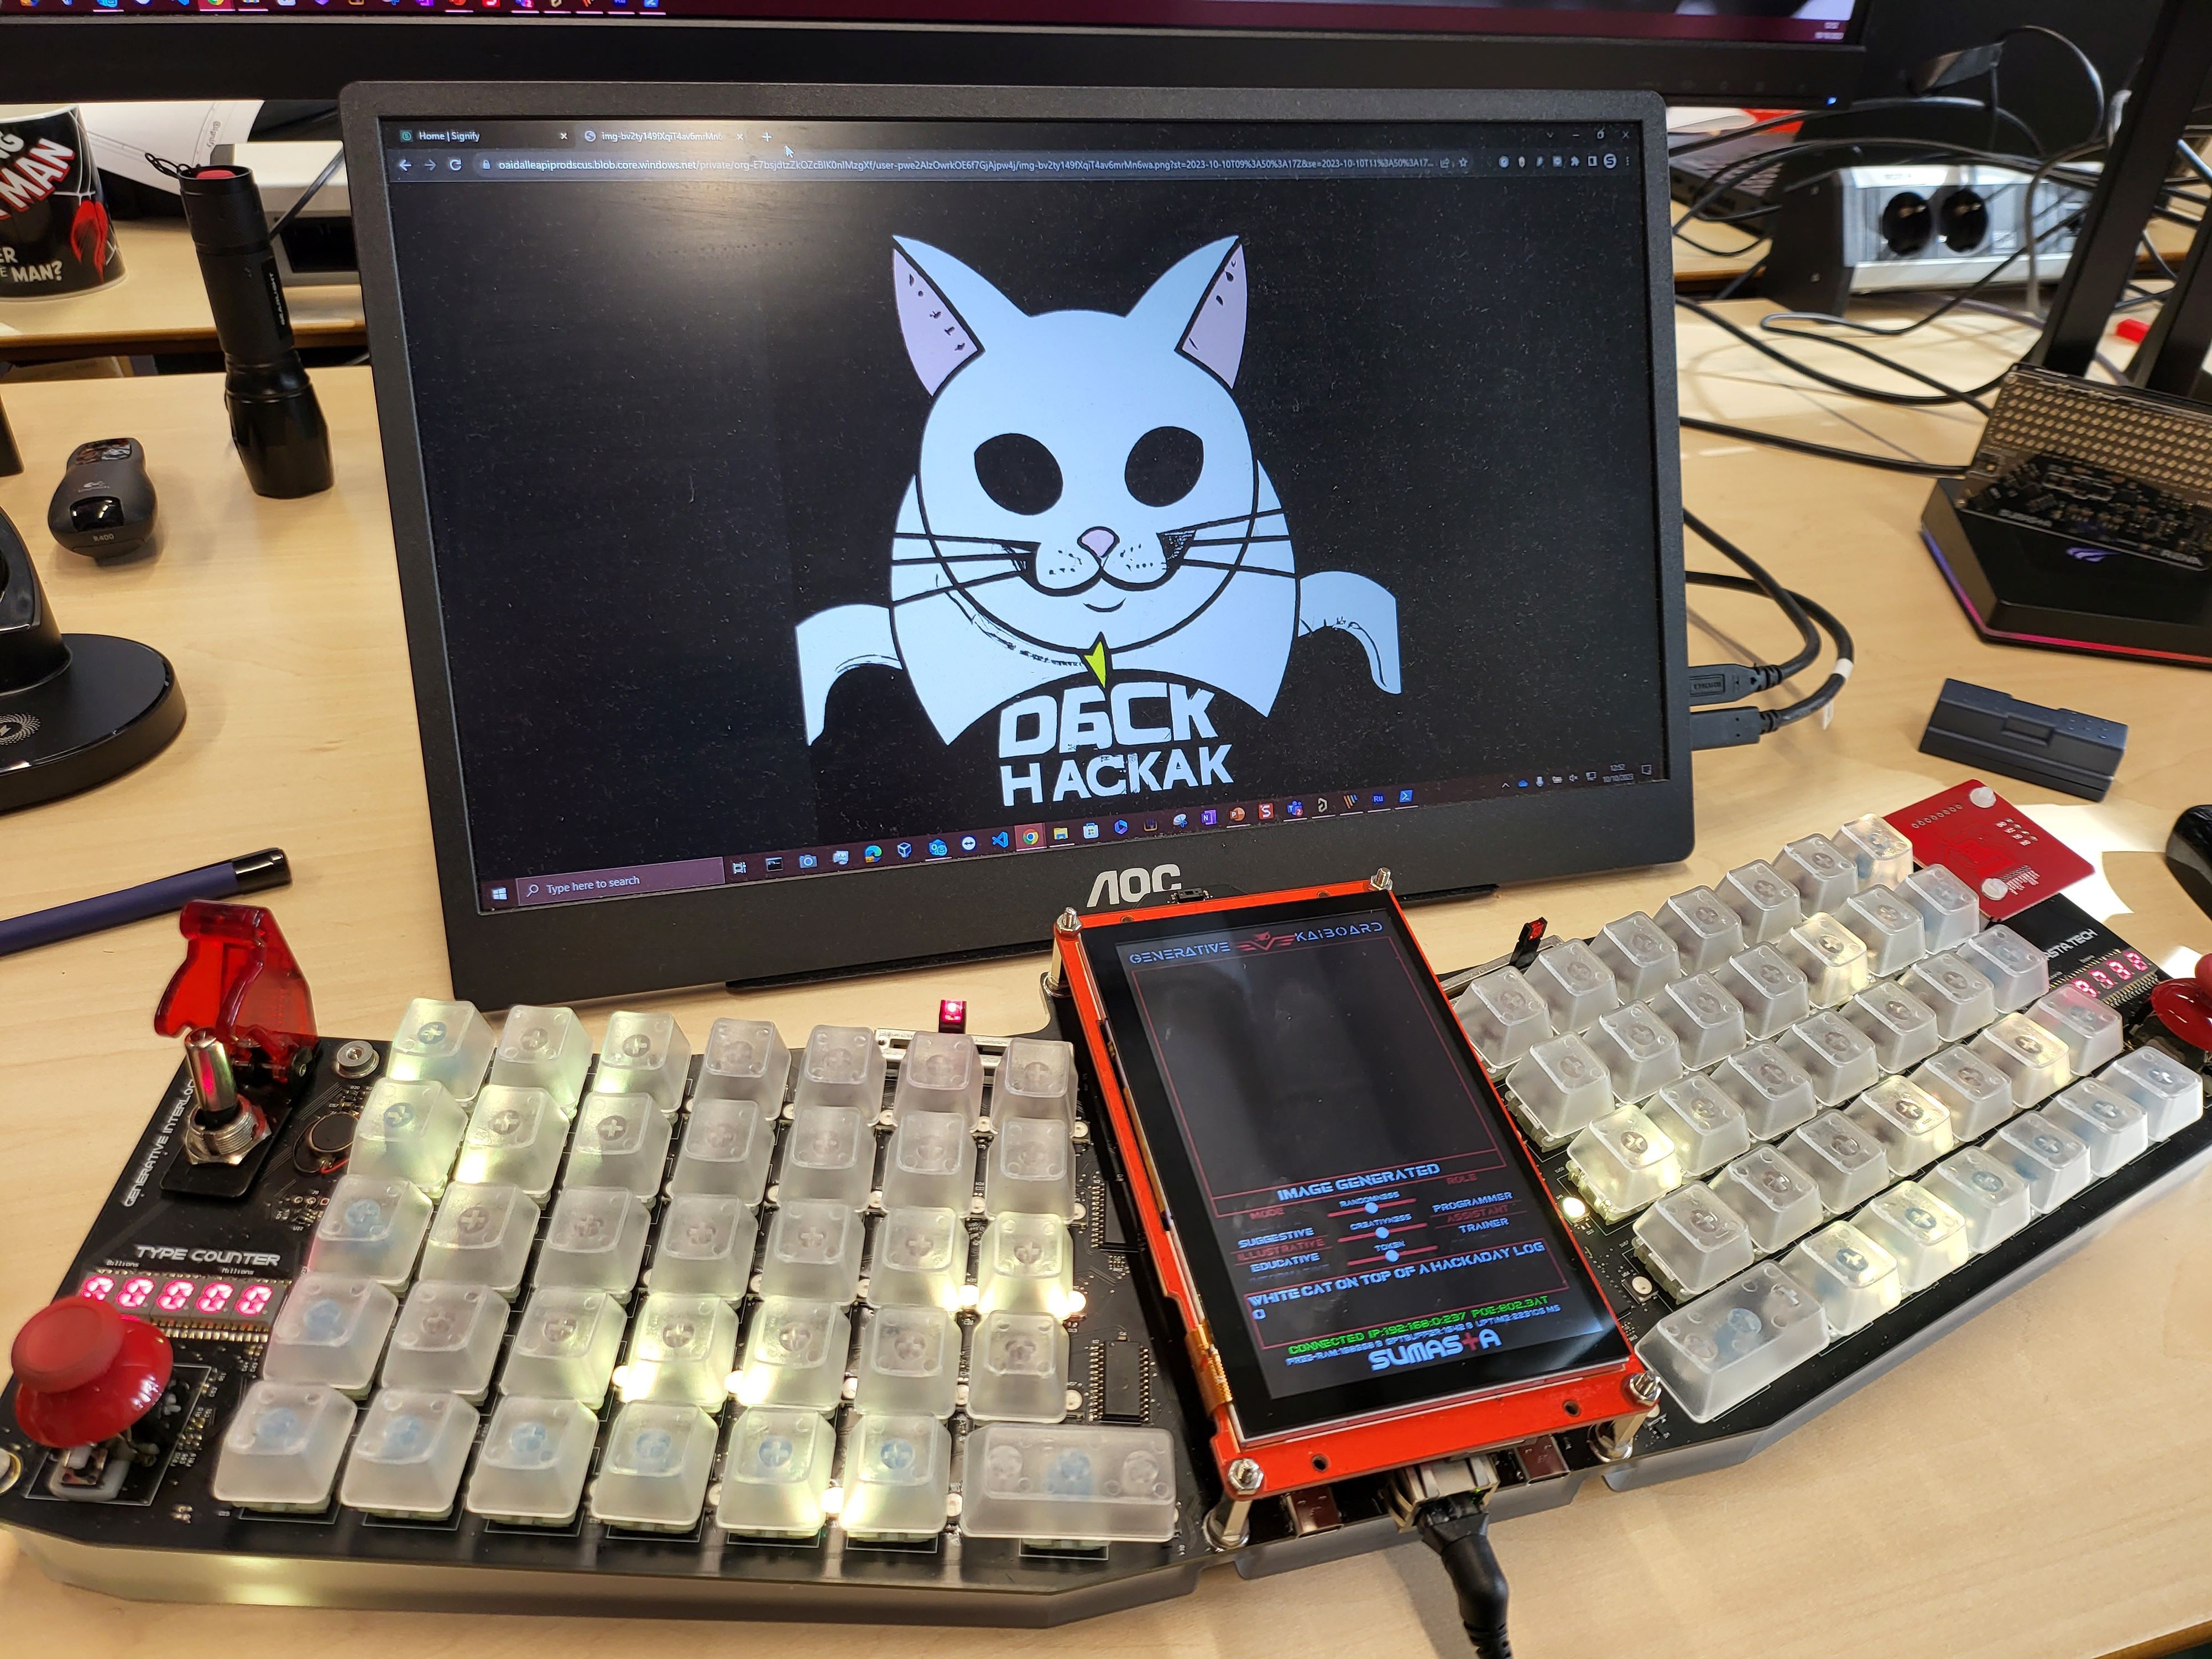
An example as shown in the picture above, I asked Generative kAiboard to make an illustration of a white cat on top of a Hackaday Logo. Well can you guess how it ended up? See below.
![]()
I don't know exactly what is written below the white cat there, looks like a "D6CK HACKAK" :) close enough to my standard. And below is the original image files if you want to safe it
![]()
-
Generative Mode: Suggestive
10/10/2023 at 11:59 • 0 commentsThe third mode I have prescribed on the other hand, it is called suggestive mode. As the name implies, it provides suggestion with the sentences as you type along. In essence it is becoming your companion as you type on your laptop and on the onboard 5.5" screen it directly provides you with some suggestions sentence in close to real time.
You can surely call it hybrid real-time option. So instead of making a complete paragraph first then ask ChatGPT to correct your words, this mode work hand-in-hand which I personally think can be very handy as I can minimize the mount of copy pasting of words etc. Think about it as having a collaborative friends which never runs out of ideas and suggestions.
Here an example below where everything that I type on the PC, gets duplicated on the input text box on the lower part of the screen there. As soon as the sentence is complete, (detected a . and space), a suggestion is then provided automatically on the output text box as shown.
![]()
-
Generative Mode: Creative
10/10/2023 at 11:53 • 0 commentsIn complement to the informative mode, I specifically prescribe creative mode to be different. This is more of a creation mood where you expect the Generative kAiboard to generate some textual contents as much as possible tuned with your style. So this mode is not so much useful for asking simple real-time information, location etc. The contextual information that has been gathered and collected in passive / keyboard mode is tremendously valuable for this creative mode. As it essentially prompting/directing/commanding/nudging the ChatGPT to be creative but at the same time trying to imitate you.
In connection with your original prompt/queries, the Generative kAiboard will embed several contextual wording directives and styling. The most obvious example of that is for instance the word selection, what are the most common words you typically use etc when you typing. Furthermore, that can also be some sort of directives e.g. do not use emojis, or do not use laughing words/sentences etc. The options are limitless here and I have not done exploring.
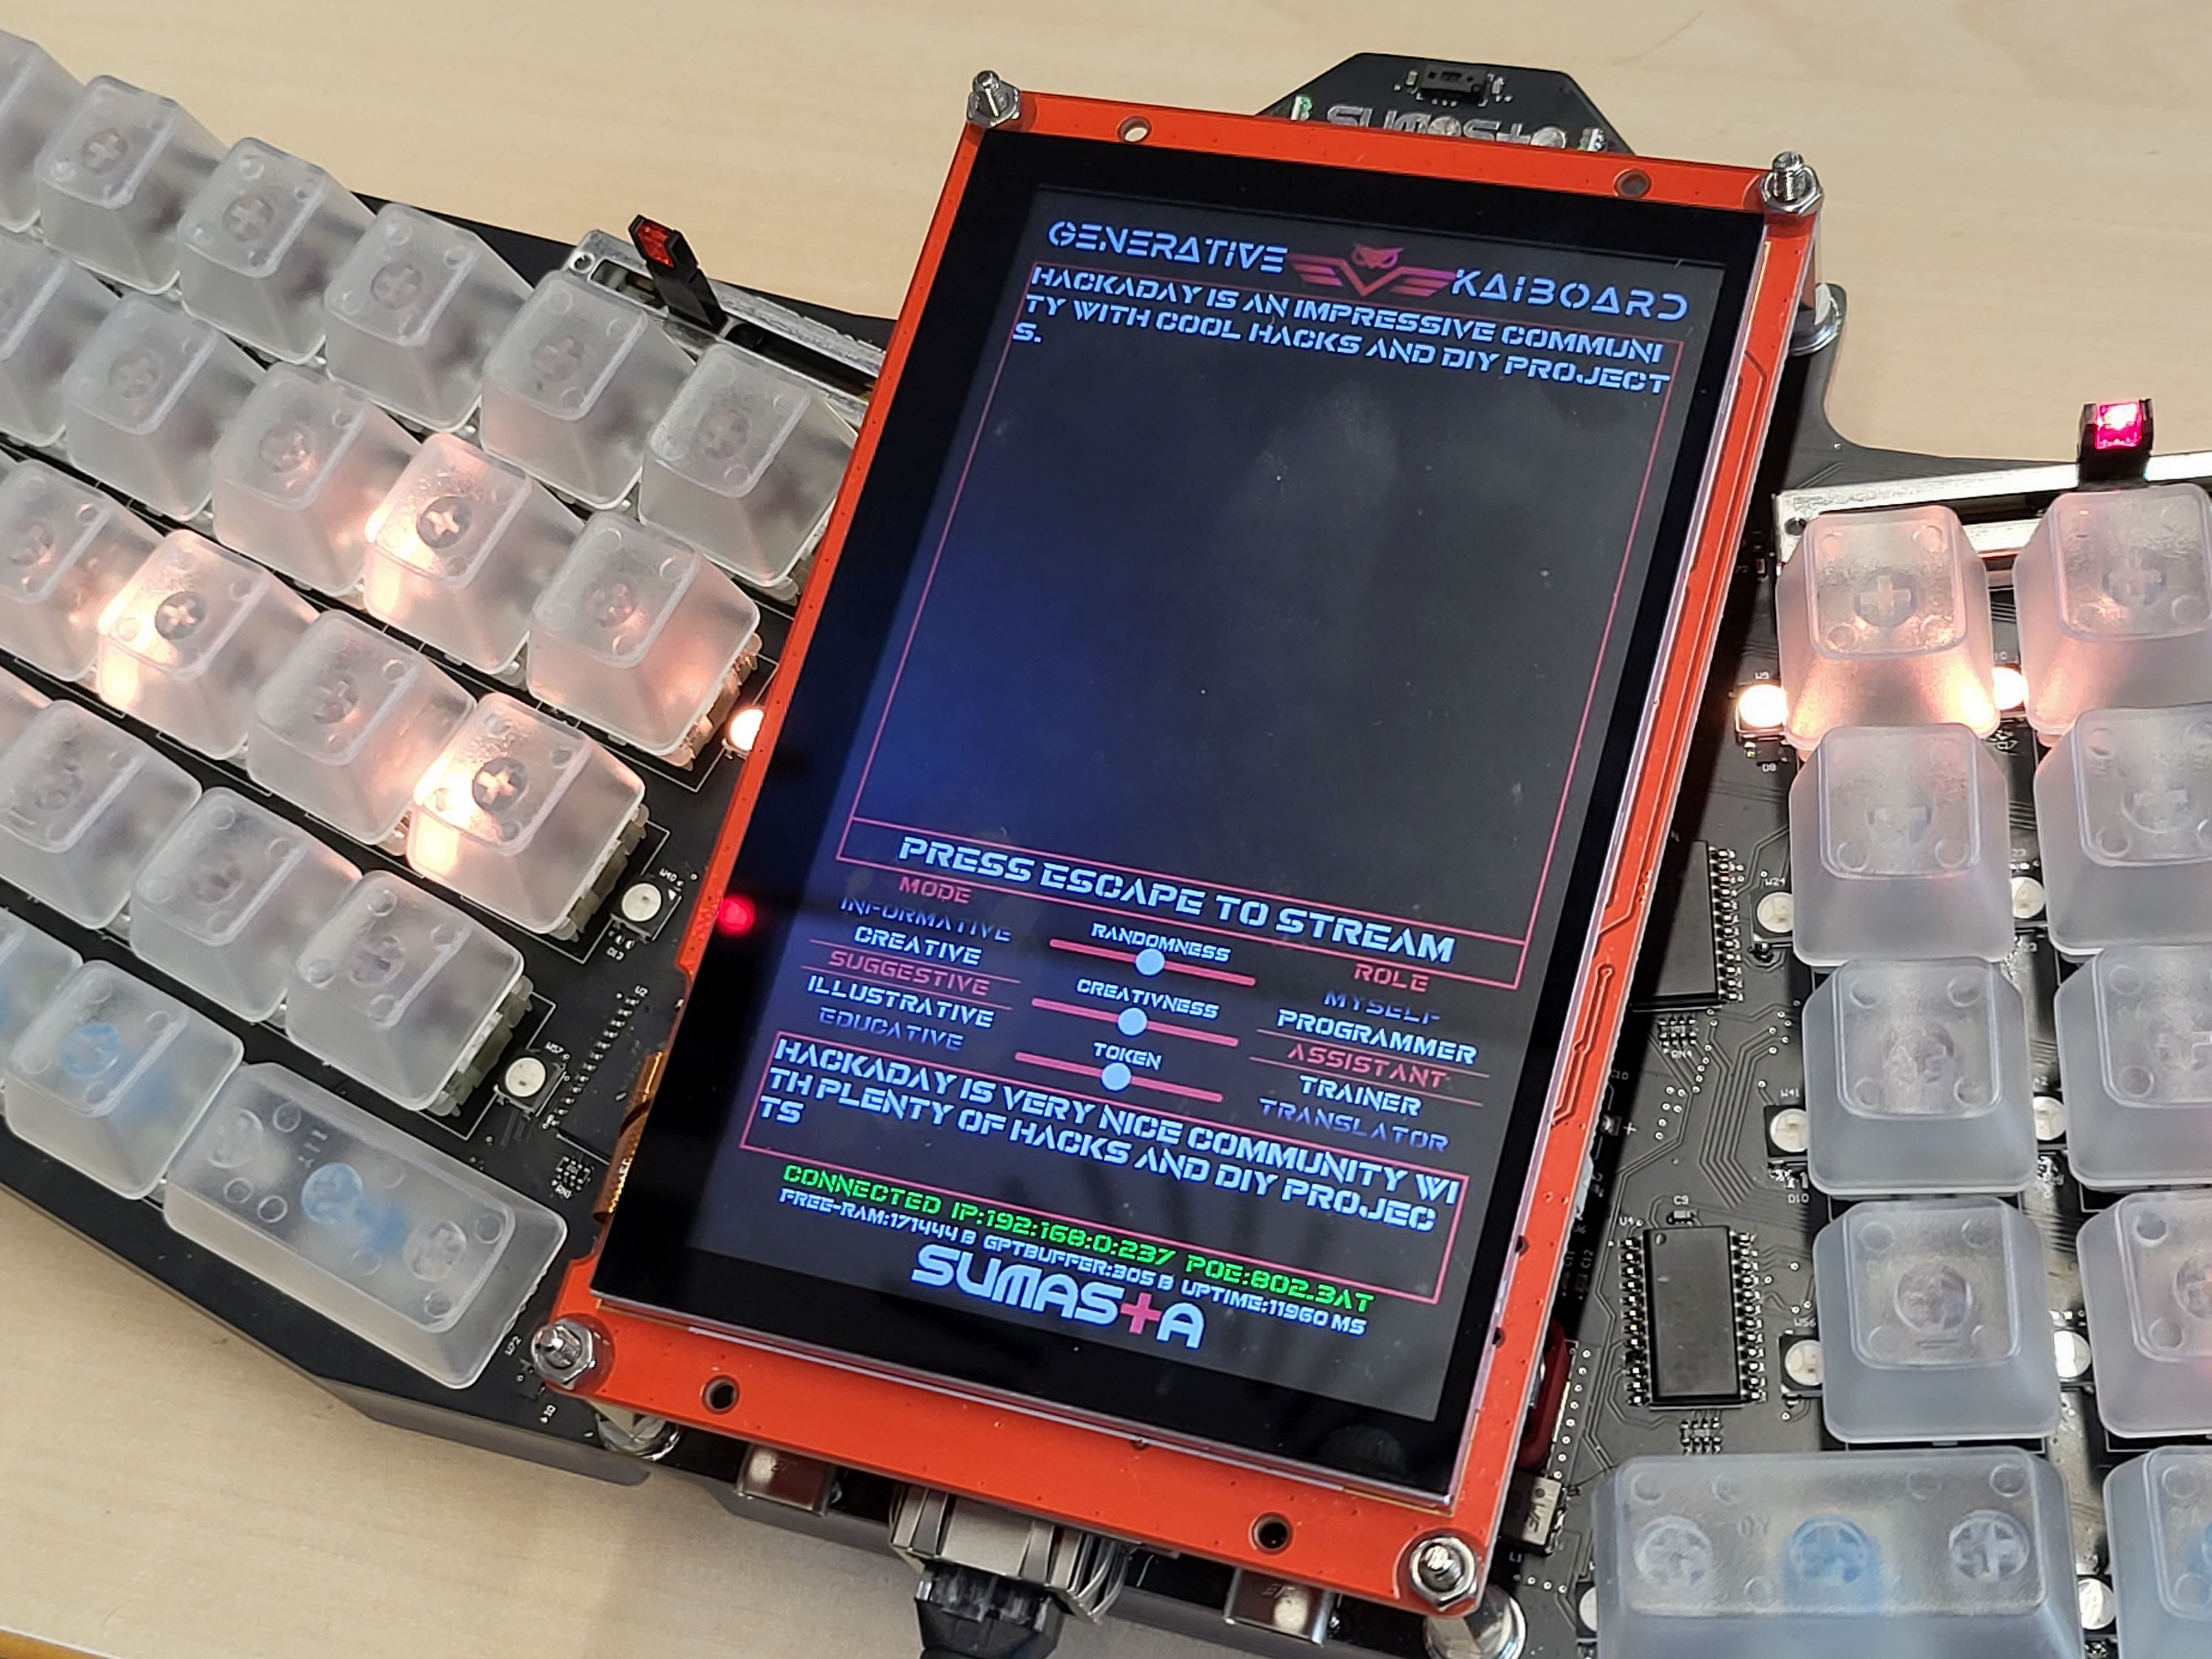
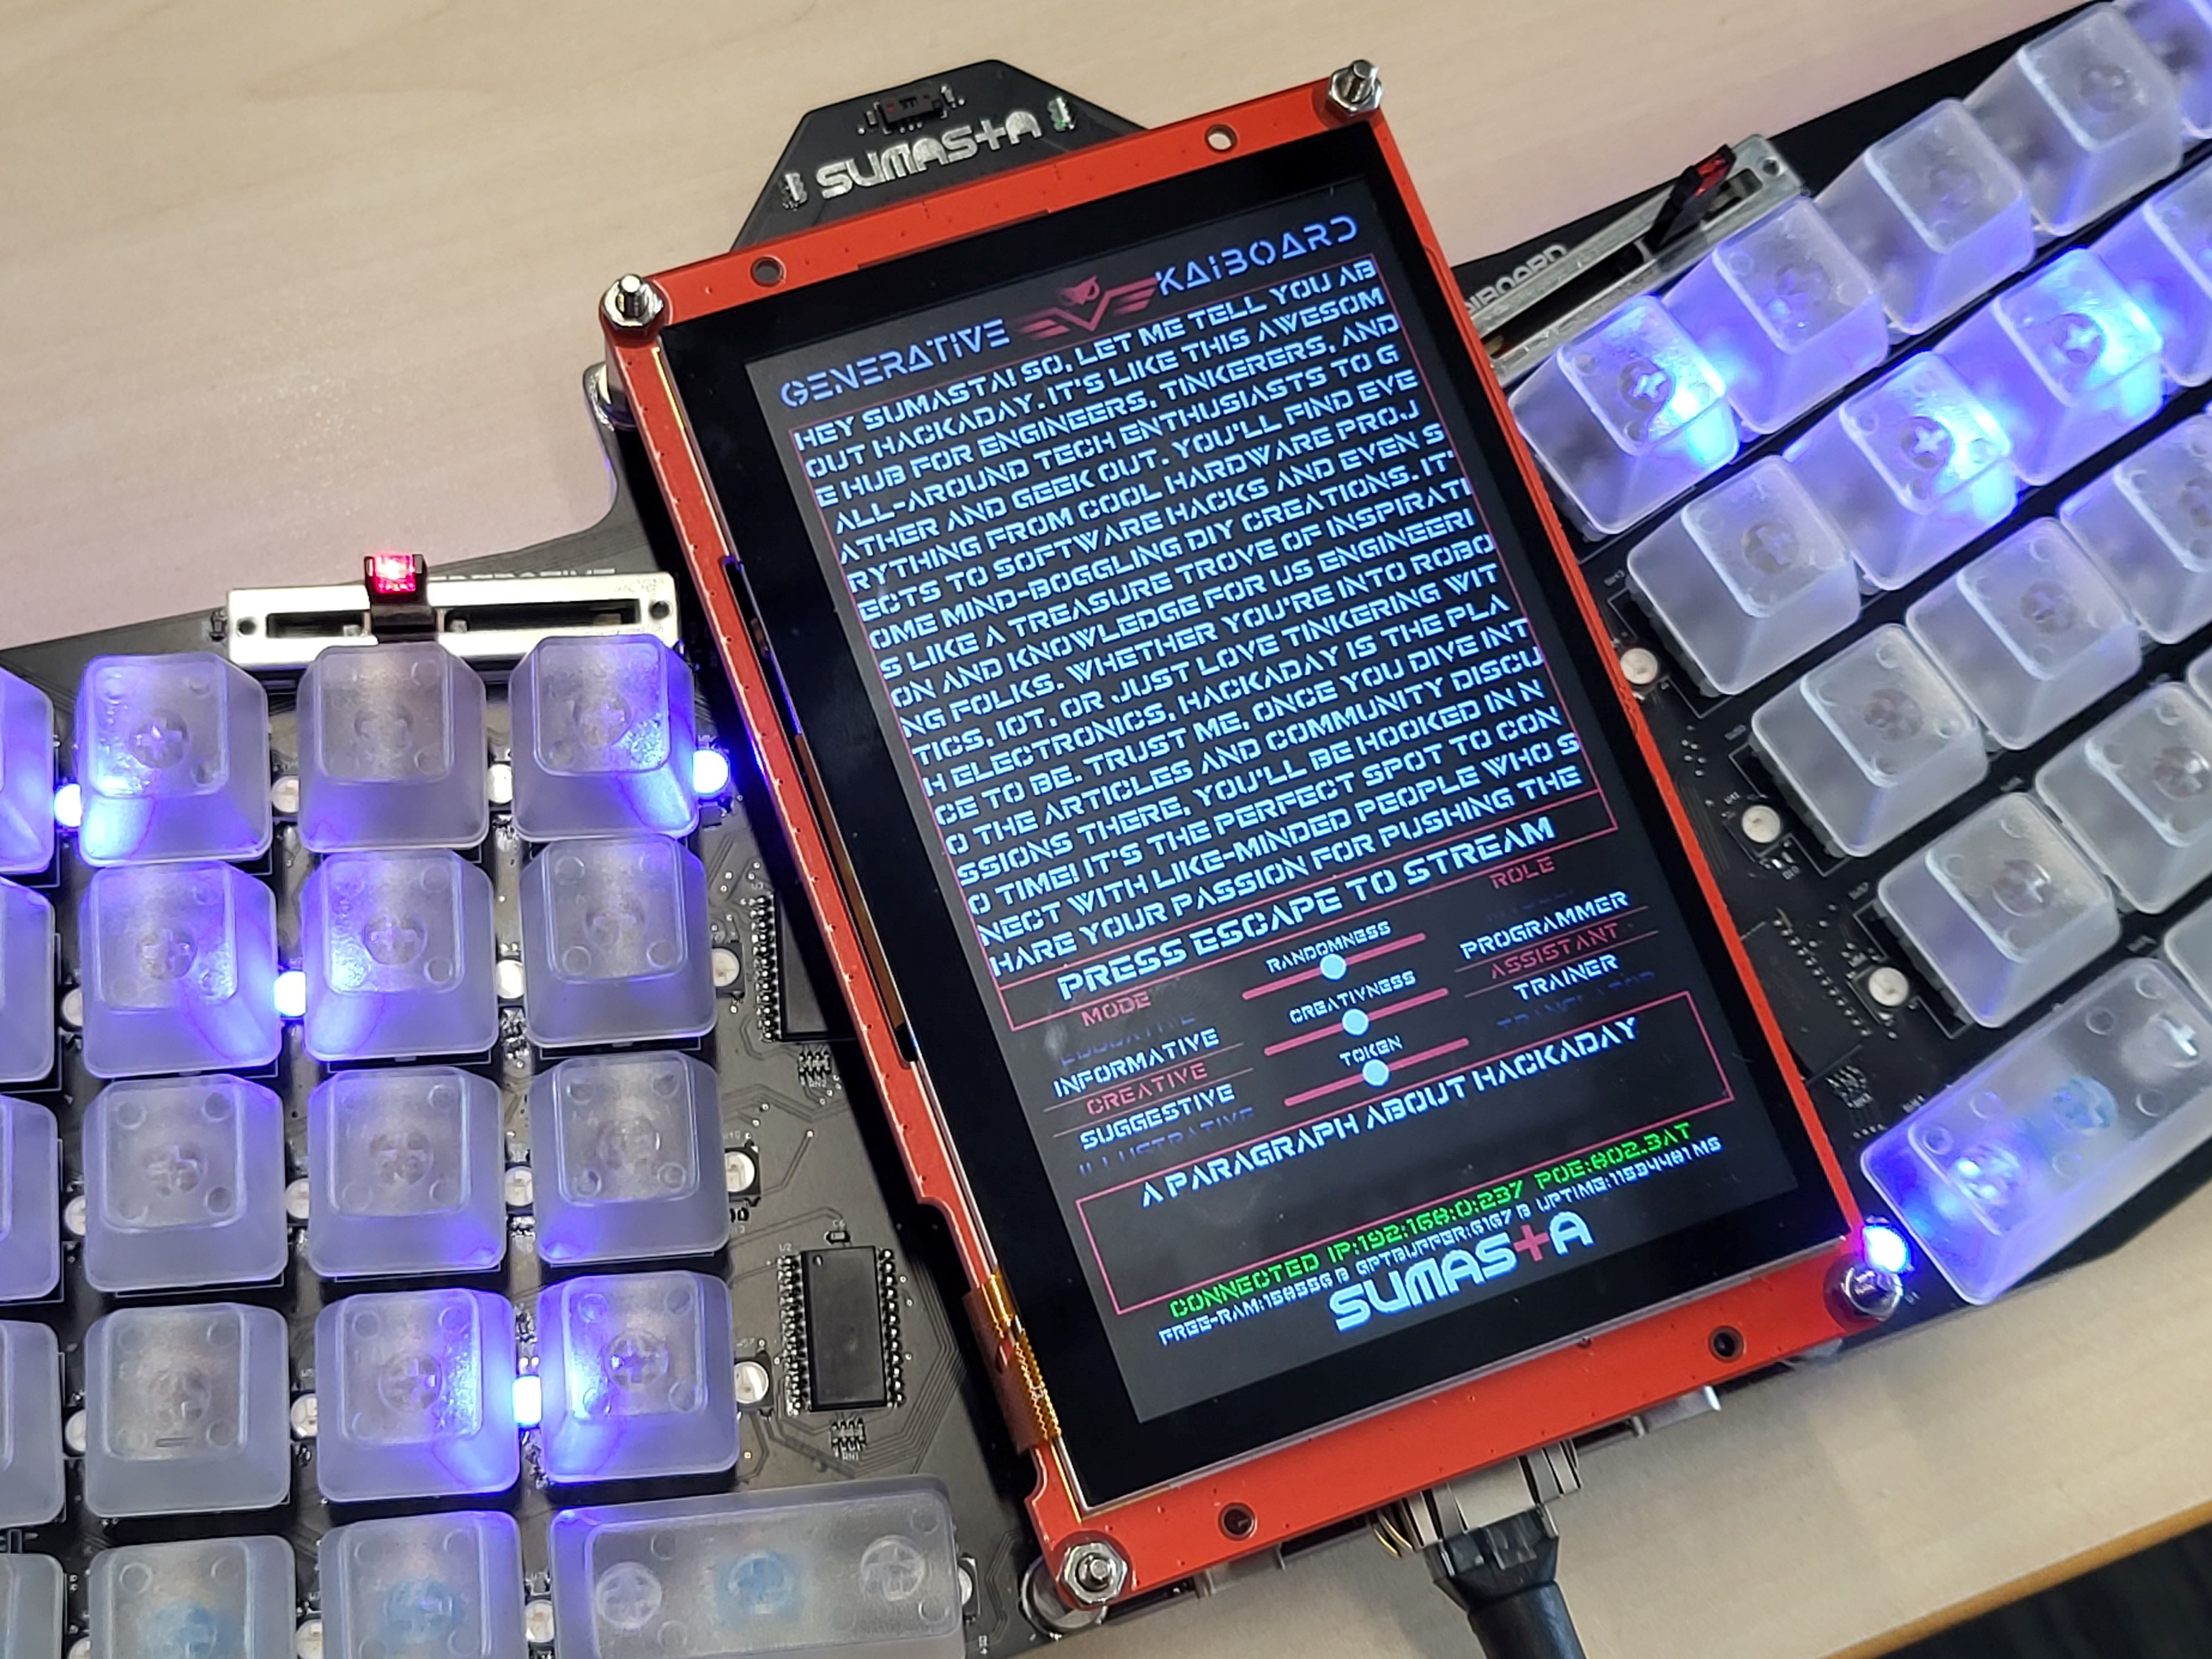
Here's a comparison between asking ChatGPT directly via a web UI, or asking the Generative kAiboard to make a paragraph about Hackaday.
Answers from ChatGPT UI:
![]()
Answers from the Generative kAiboard:
![]()
Now, tell me which one you personally prefer? :)
-
Generative Mode: Informative
10/10/2023 at 11:45 • 0 commentsAlternatively to the passive mode, the Generative mode is where the Generative kAiboard really shines. In this log, I'll detail the first part of it, which is the informative mode.
In this informative mode is essentially the mode where you can ask specific information. For example you want to know specific information about certain engineering definition, or a place or a person, this is the recommended mode to use.
You might then wonder, what is the different between asking some questions from ChatGPT portal directly and via the Generative kAiboard? The primary difference is the real-time and personalized information that is provided seamlessly.
When you ask ChatGPT related to time, distance from your location, your occupations and other personal information for instance, they will not be able to answer. You have to explicitely provide those relevant information before it can provide you with a clear answer.
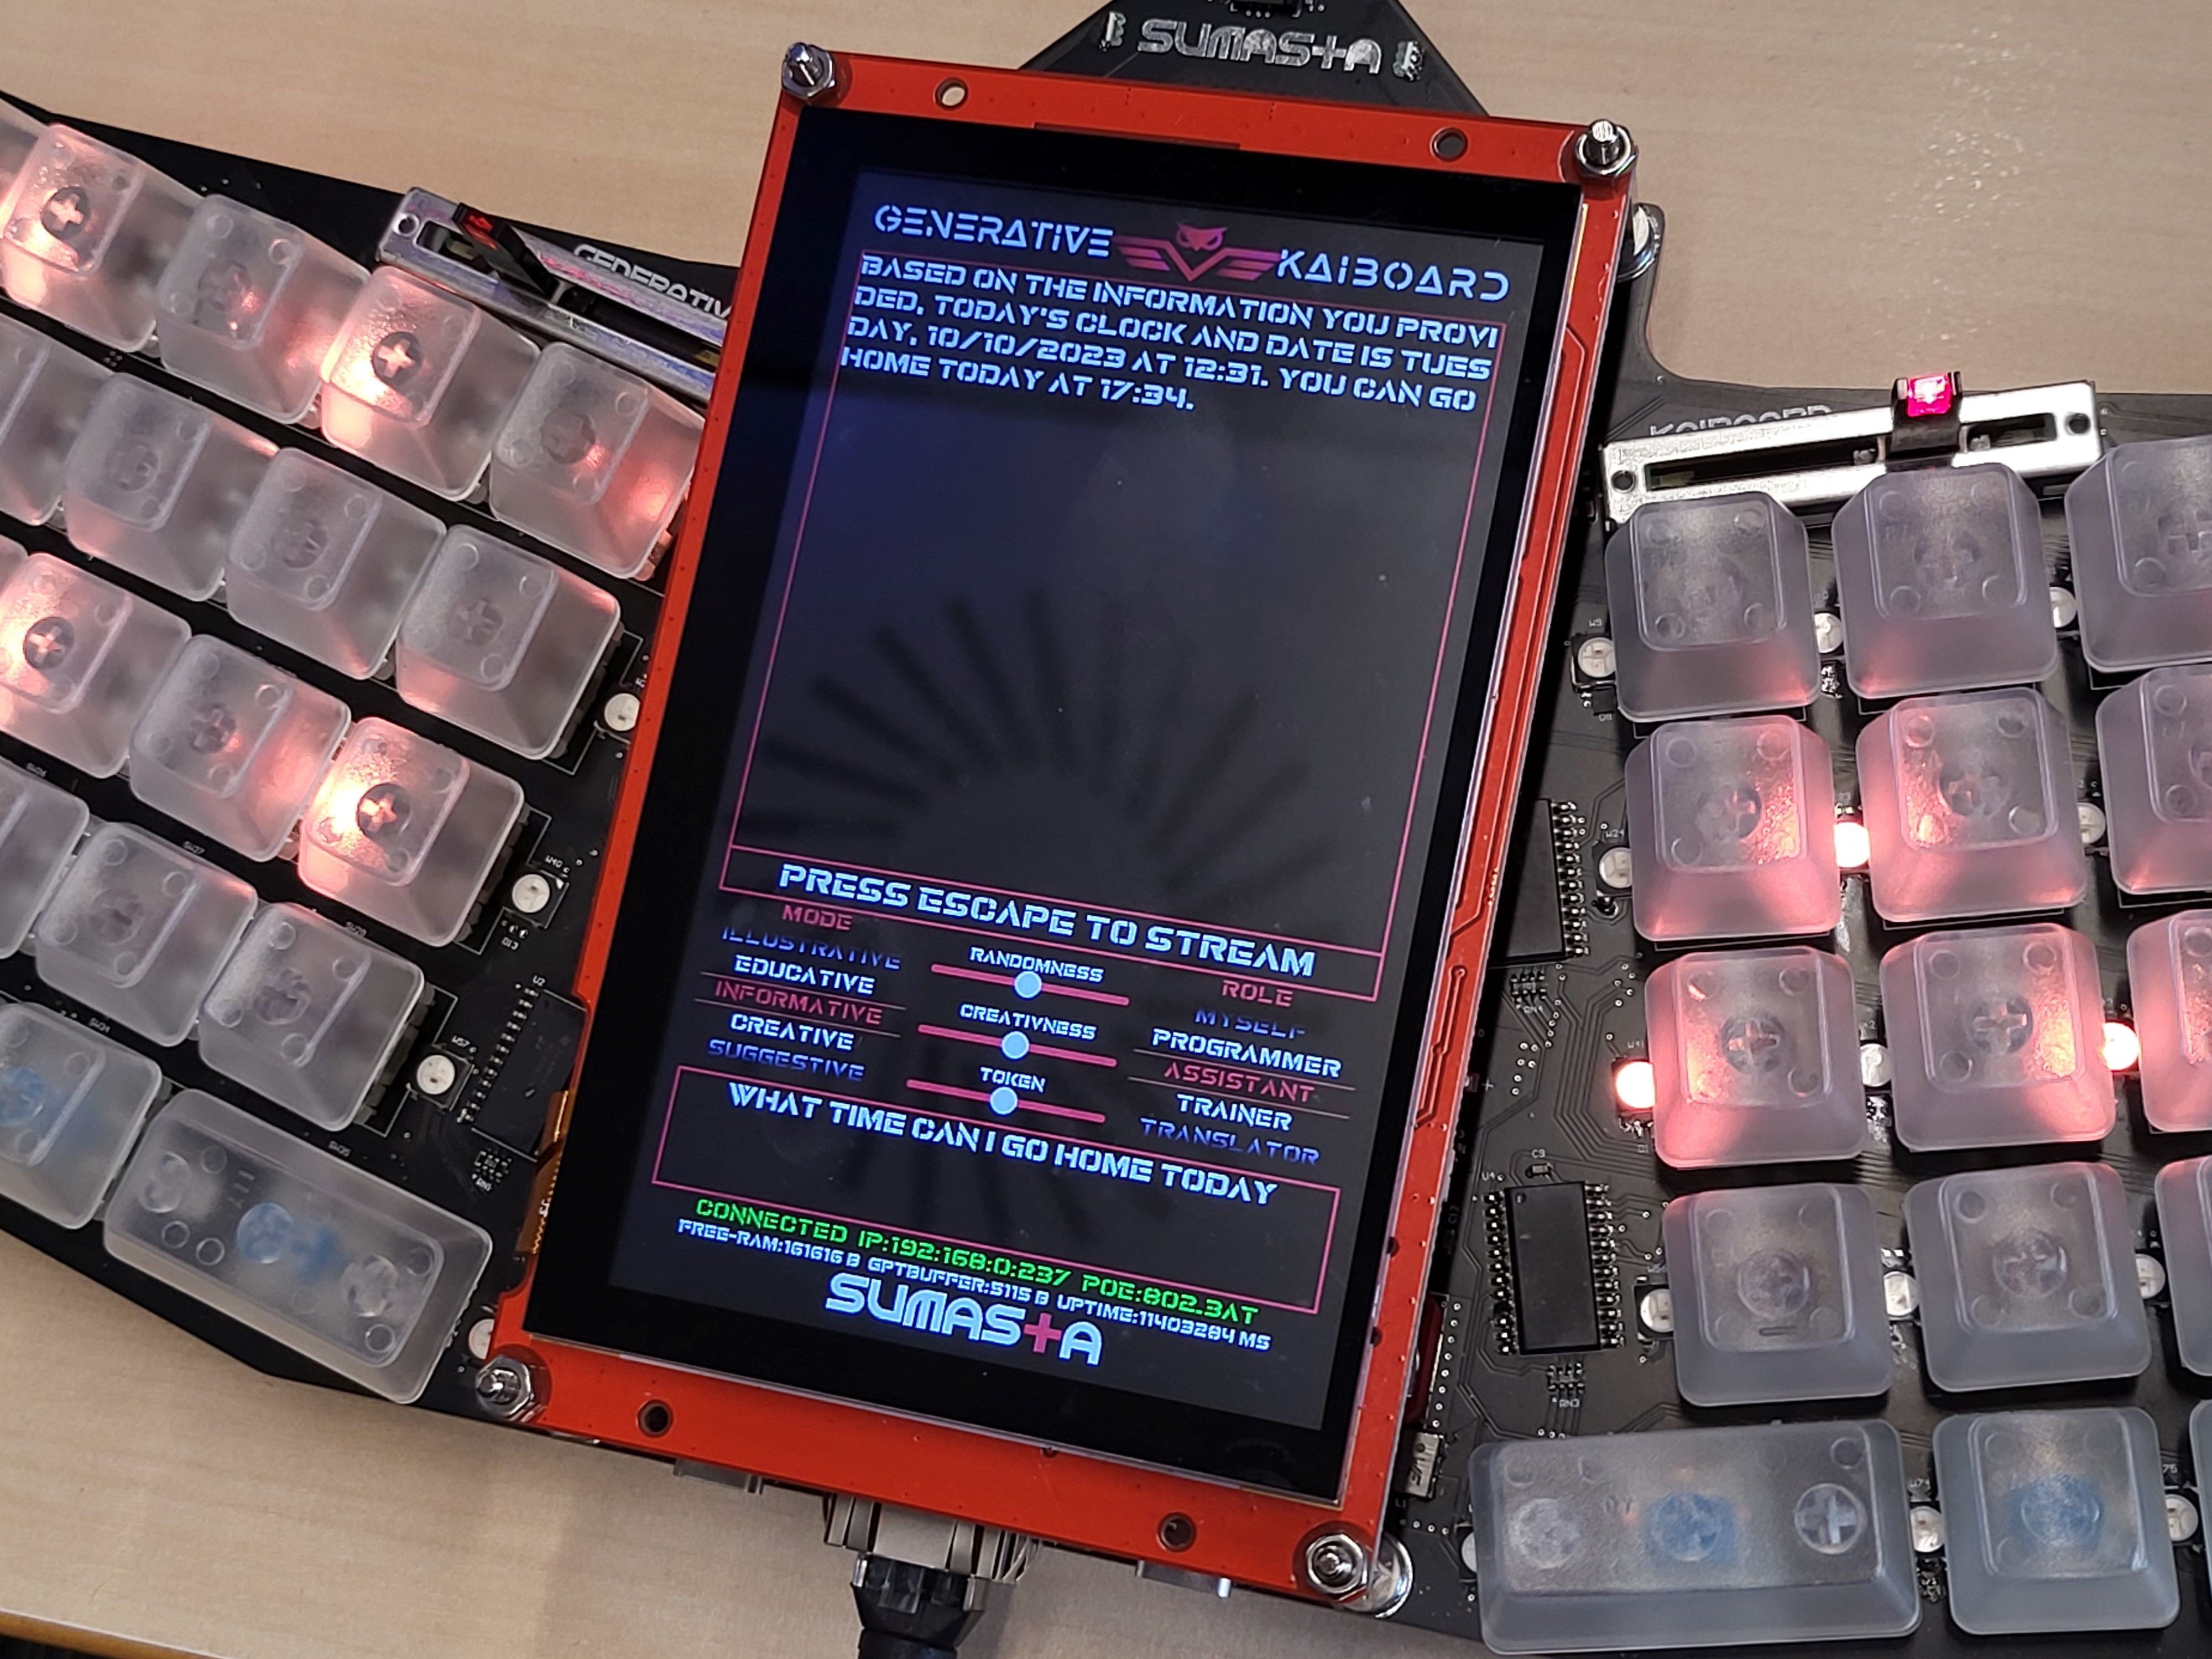
With the Generative kAiboard on the other hand, the query / prompt that you are sending to the ChatGPT server, is filtered locally and appended with relevant contextual information. For example if you ask question such as "when can I go home from work today?", the generative keyboard will provide additional relevant information to the ChatGPT client. In this particular question, the appended prompt will contain the information about the current time and date, your work details (how many hours you work per week), and what is the statistic of your week so far based on your usage of the keyboard daily.
Test Case Example Question: "When can I go home from work today?"
Tested with ChatGPT Web UI:
![]()
Asked via the Generative kAiboard:
![]()
Cool huh?
-
Passive Mode: a Keyboard
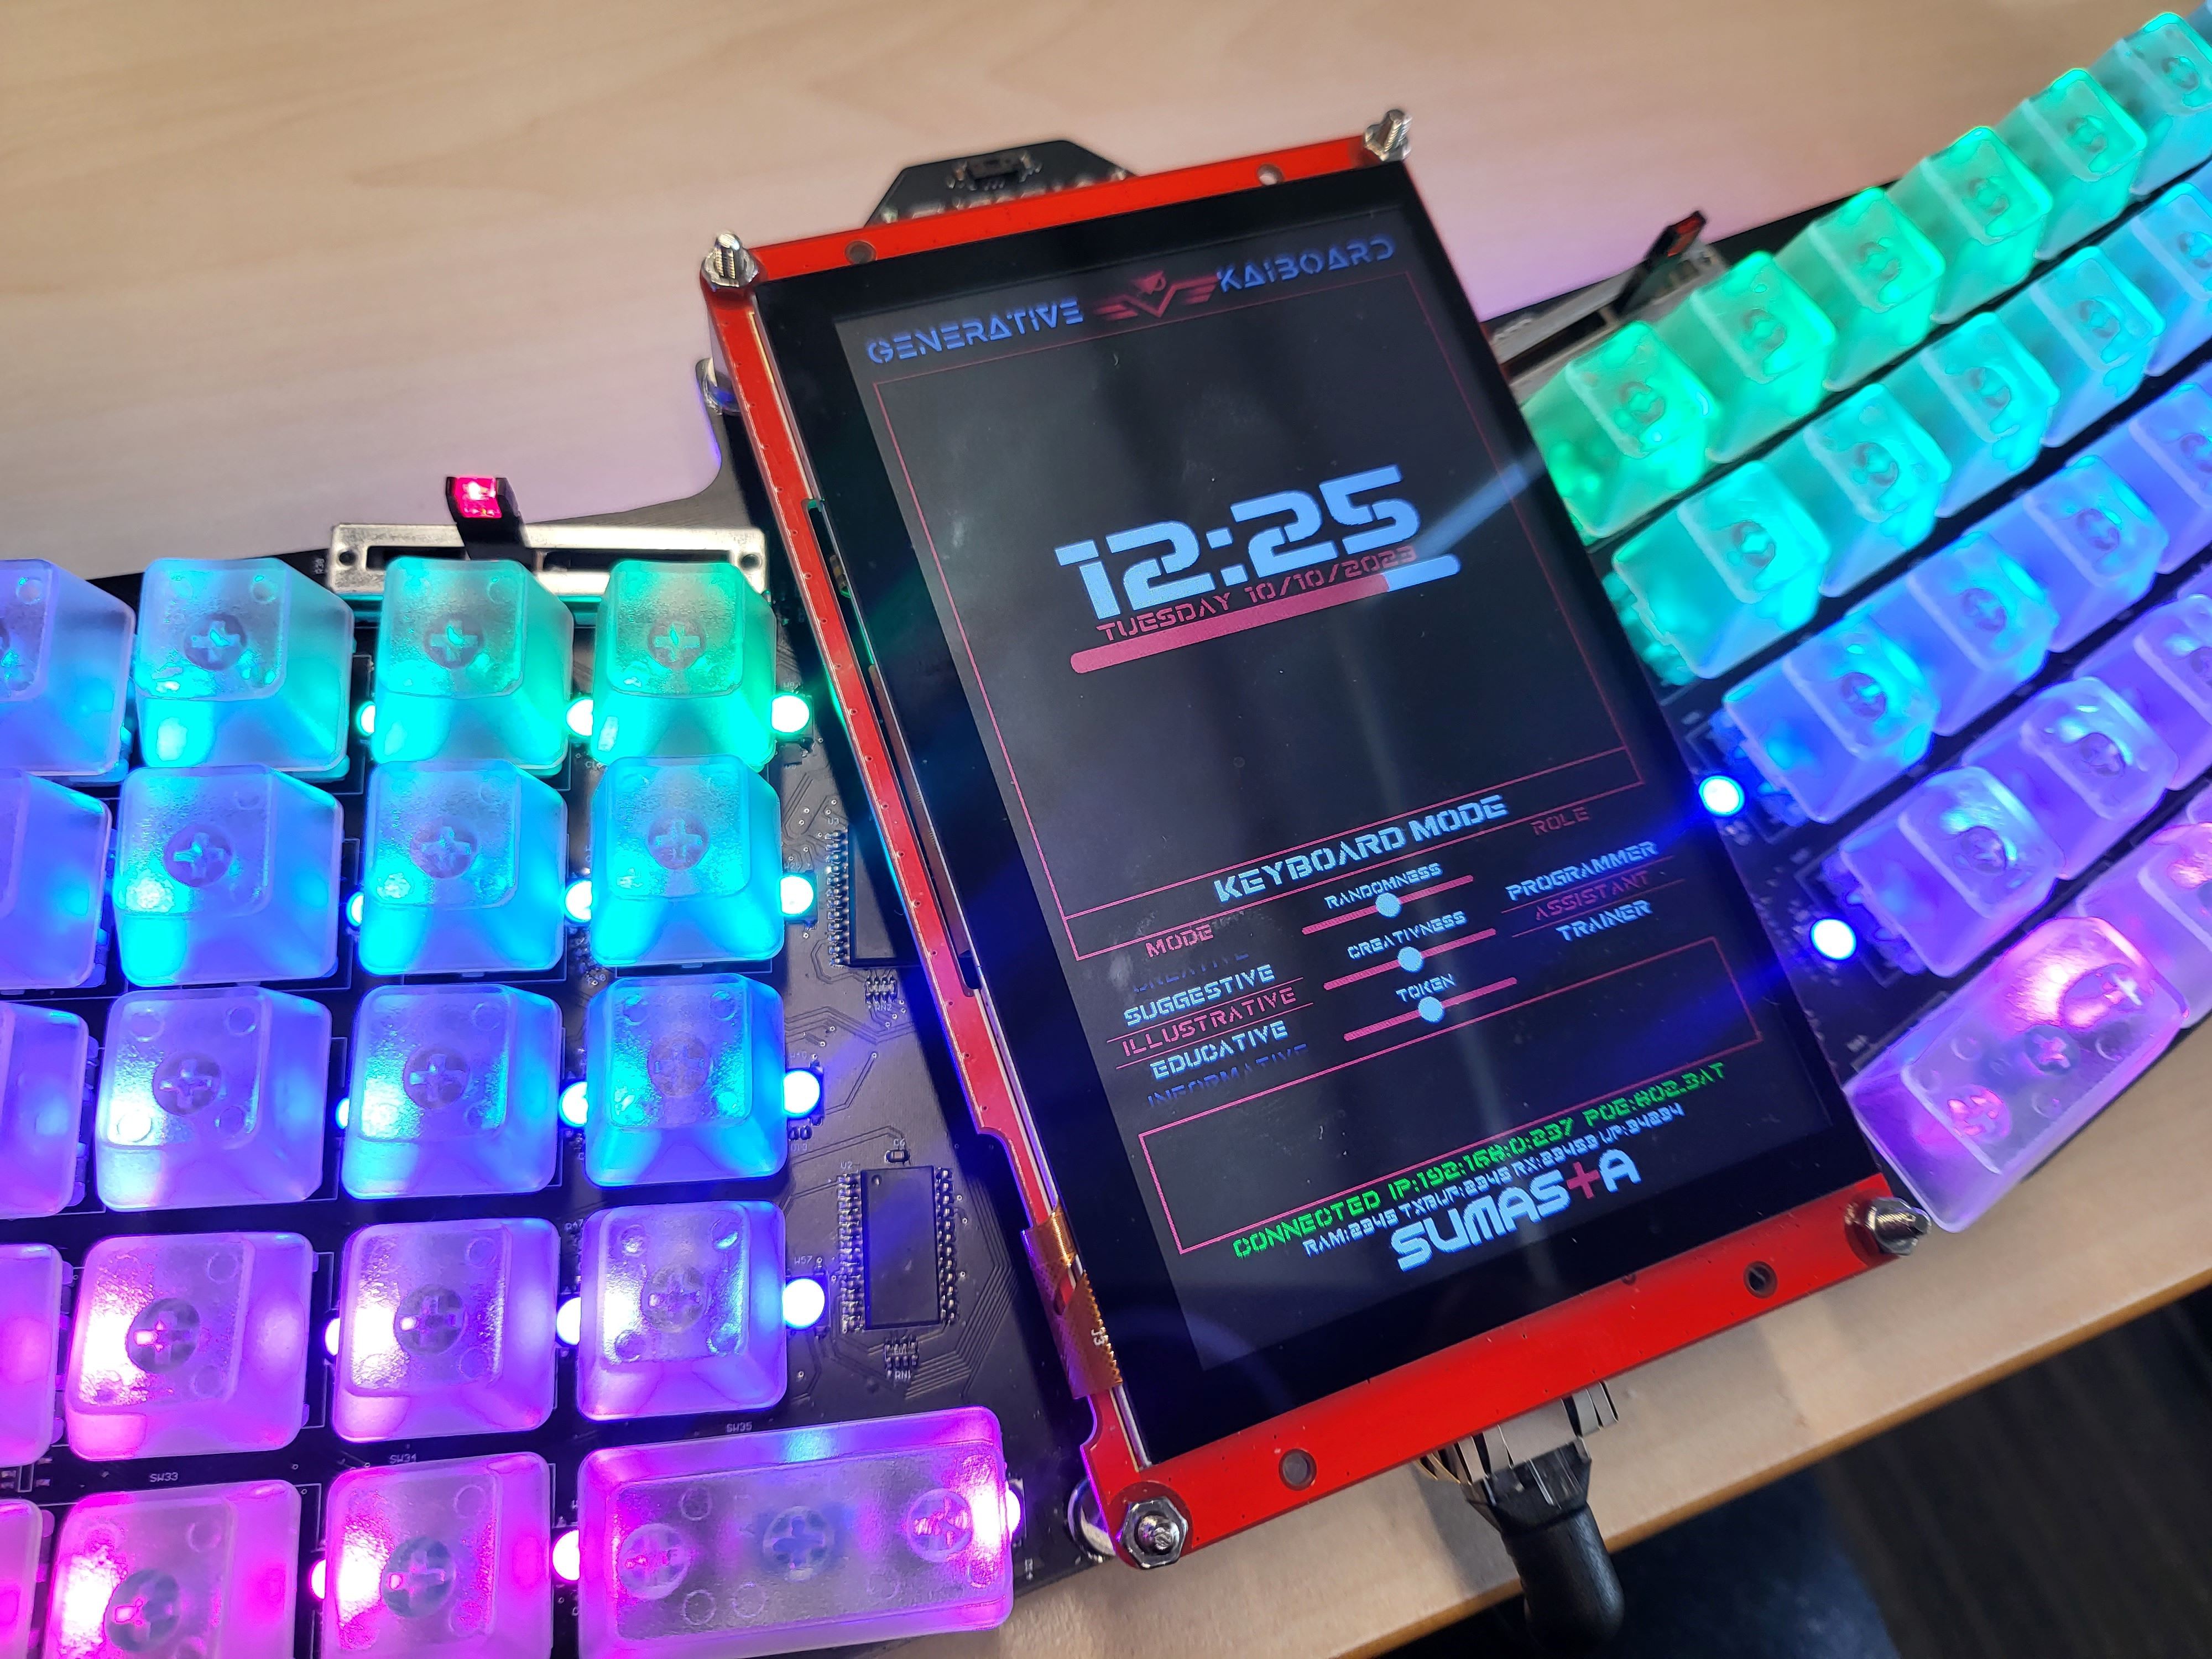
10/10/2023 at 11:37 • 0 commentsThe primary and the foremost important feature being a Generative kAiboard is surely to be a keyboard, a standard input device. Generative kAiboard is no different. Upon powering up it is defaulted to be a keyboard with a split keyboard layout and connected via Bluetooth. Yep Bluetooth, so you can connect it easily not only to your PC but also to your phone or table wirelessly.
![]()
Being in this passive mode, there is nothing particular that you have to do or enable, it works out of the box. Just take care about the key mapping whether it fits your taste or not. Under the hood however, if enabled, while you're typing it records some statistics with regards to the usage of your keyboard, both contextually or not contextually. Contextually means, it records and buffers your words temporarily and report some statistics on the most common words you typically used. When the word buffer is full, the raw message is then send to ChatGPT to request the summary of your words selections and key findings.
This contextual information is then what is provided automatically "behind the screen" when you are asking ChatGPT to generate some contents, primarily in the creative mode.
In parallel to that, some non-contextual information is also reported/logged. Such as your typing speed, keycounts, how often you press backspace, your time usage of when you start and stop during the day etc. This ultimately aimed to provide adaptive information about you via your behaviour in using the keyboard while asking to ChatGPT, in particular in the informative mode.
For example with the information about when you start and stop using the keyboard in the office daily, you can ask chatGPT how many hours left for you to work for this week and under-the-hood the Generative kAiboard will then provide the relevant information. This is just one example, you can surely add your own customization and flavour on top of it of what information you'd like to share or not.
In essence, when you are in passive / keyboard mode, the Generative kAiboard seamlessly collect information about you as a user and it will automatically enhance your prompt when querying to ChatGPT in the generative mode.
-
High Level Architecture Design
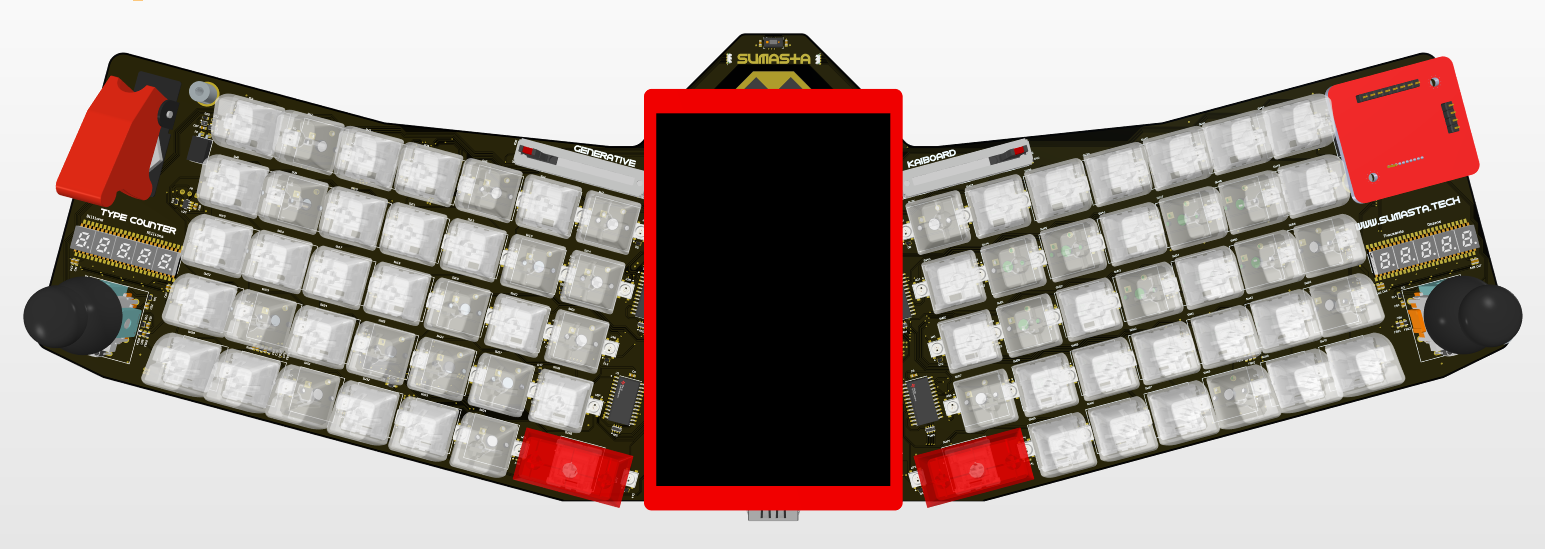
10/09/2023 at 21:40 • 0 commentsAlright, talking about the high-level architectural design the Generative kAiboard's whole vibe is all about keeping things neat and comfy. It's got this cool split keyboard layout that makes the 5-inch screen in the middle the star of the show. The left and right-hand sections are angled just right, at like 15 degrees, so you can type for hours without hurting your wrists.
Oh, and it's cleverly tucked all those extra peripherals around the edges, so you can reach them without messing up the keyboard's sleek look. Plus, they put the PoE (Power-over-Ethernet) thingy right placed in the middle at the bottom. It's genius because it makes all the cables go neatly under your desk, keeping your workspace tidy.
So in essence, the Generative kAiboard is all about that perfect balance of style and function.
![]()
![]()
![]()
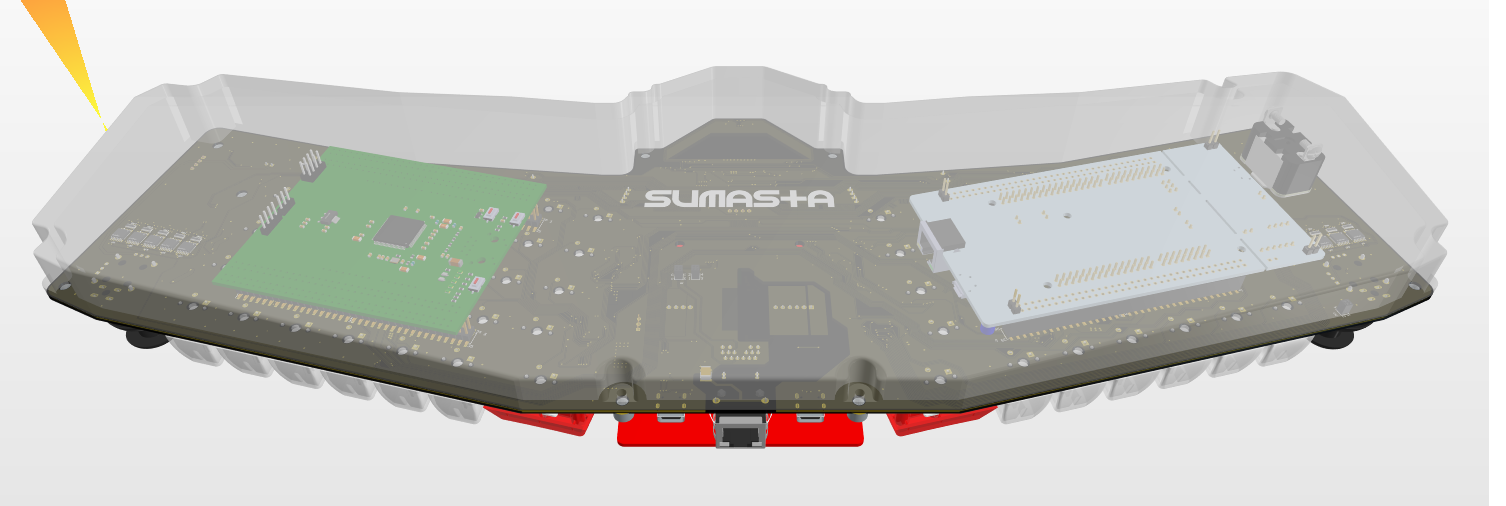
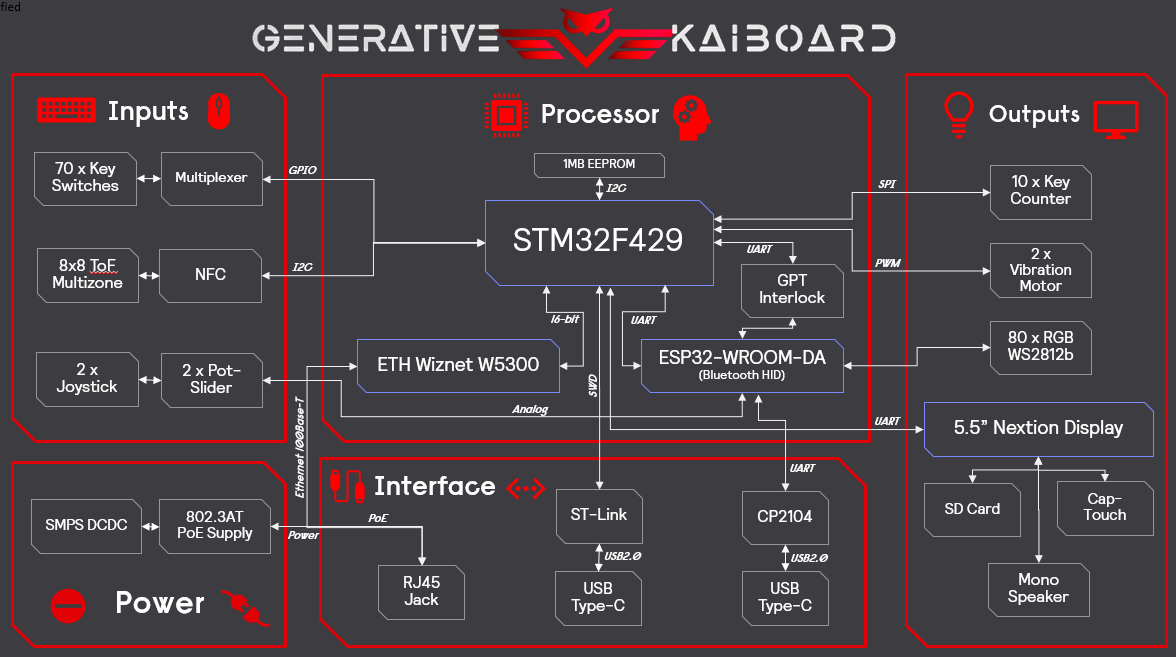
At the hardware level, this system rocks a trio of built-in processors, and each of them plays a role in making the keyboard a jack-of-all-trades. The main star of the show is the STM32F429, which acts as the keyboard's brain, running the whole operation. Then, there's the ESP32 co-processor, working alongside it to make sure you can connect wirelessly through Bluetooth to all sorts of gadgets.
The third processor is all about handling the graphics, making sure everything looks smooth and sharp. And don't forget about the Ethernet controller W5300, it's the networking champ, making sure you stay connected fast and reliably.
In a bit more detail, diagram below depicts the overall building blocks used inside the generative kAiboard.
![]()
-
Enclosure Design
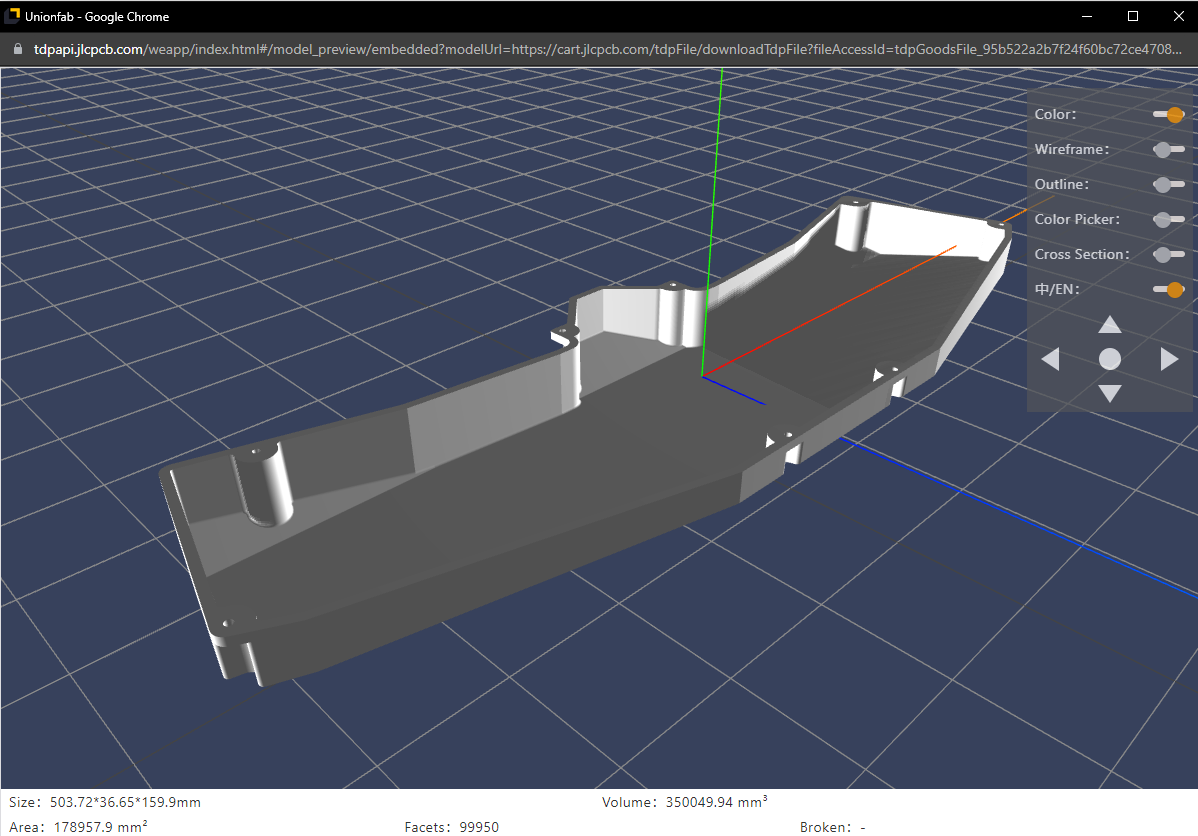
10/09/2023 at 19:50 • 0 commentsSince the start, I've envisioned to have a translucent 3D printed back-housing in a single piece. Mainly for simplicity and the sturdiness of the whole built by providing all the support of the PCB on the top. The translucent requirement on the other hand is for aesthetics, I always like to be able to see, or peek the PCBs inside while also at the same time providing some sort of through-illumination. I've got a help of a colleague to design a straightforward housing and Siemens NX was used. You can find the master file as well as the exported STEP/STL in my GitHub under mechanical folder.
To hold the whole unit together, an SMT spacer was threaded hole from Wurth was used. I placed those SMT spacer around the corner and edges of the board and have the whole of the housing aligned. This way no nuts is required to clamp the housing and PCB together.
The length of the enclosure is slightly more than half a meter, so it was not that easy to print at home or find an affordable printing house. I had to turn to china, in particular JLPCB for their 3D printing service. It was quite affordable and fast, but the shipping cost is almost the same as the part itself. I opted to use SLA resin printing this time in particular the 8001 translucent material. There was a risk of warping due to the size so we had to increase the wall thickness by almost 2 mm, making it also a bit more expensive afterwards.
![]()
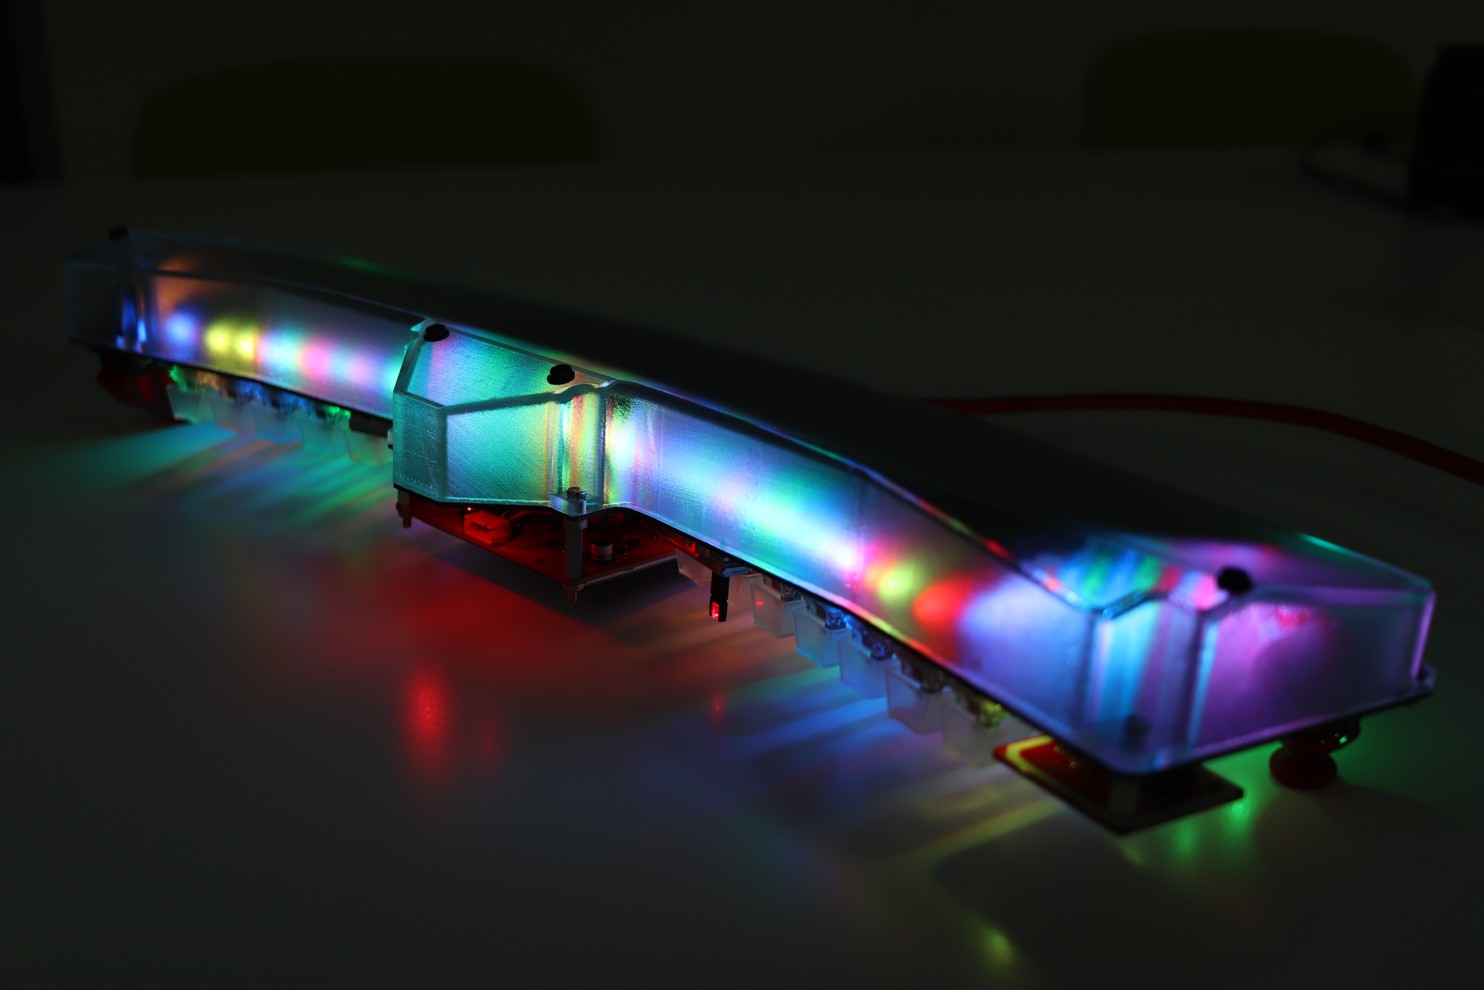
Overall, in the end I'm very happy with the outcome of the 3D printed enclosure. It works great, feels very sturdy and diffuse the light pretty well as well as you can see in the picture below!
![]()
-
The GUI, thanks to Nextion
10/09/2023 at 09:56 • 0 commentsAnother thing you might've notices right away is likely the large 5.5 inch LCD screen with capacitive touch screen in the center of the split keyboard section. This display is placed right at the center of the split keyboard is for nothing but to attract the users attention. The GUI therefore should be made as cool as possible without being too distractive. This time around I'm using the Nextion display, their best version the intelligent series.
Going with this option might cost a bit more, but let me tell you, it's been one of the smartest design choices I've ever made. First off, the software that comes with it, Nextion Editor, is seriously well done. It gives clear instructions and has a user-friendly interface that's pretty awesome. I used it a few years back, and I've got to say, the improvements they've made since then blew me away.
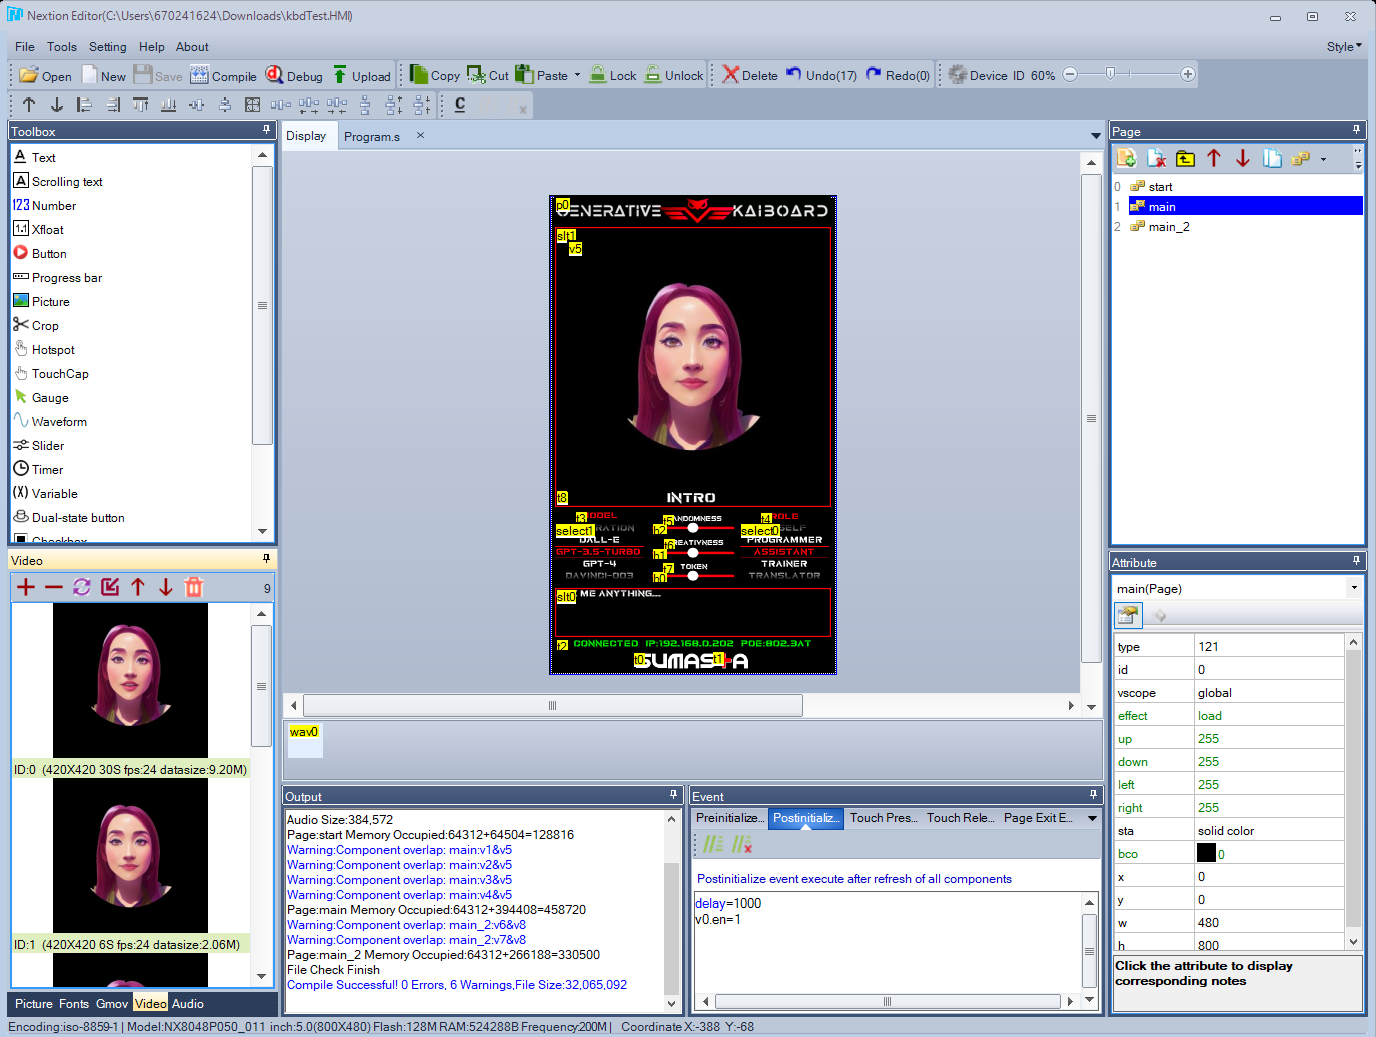
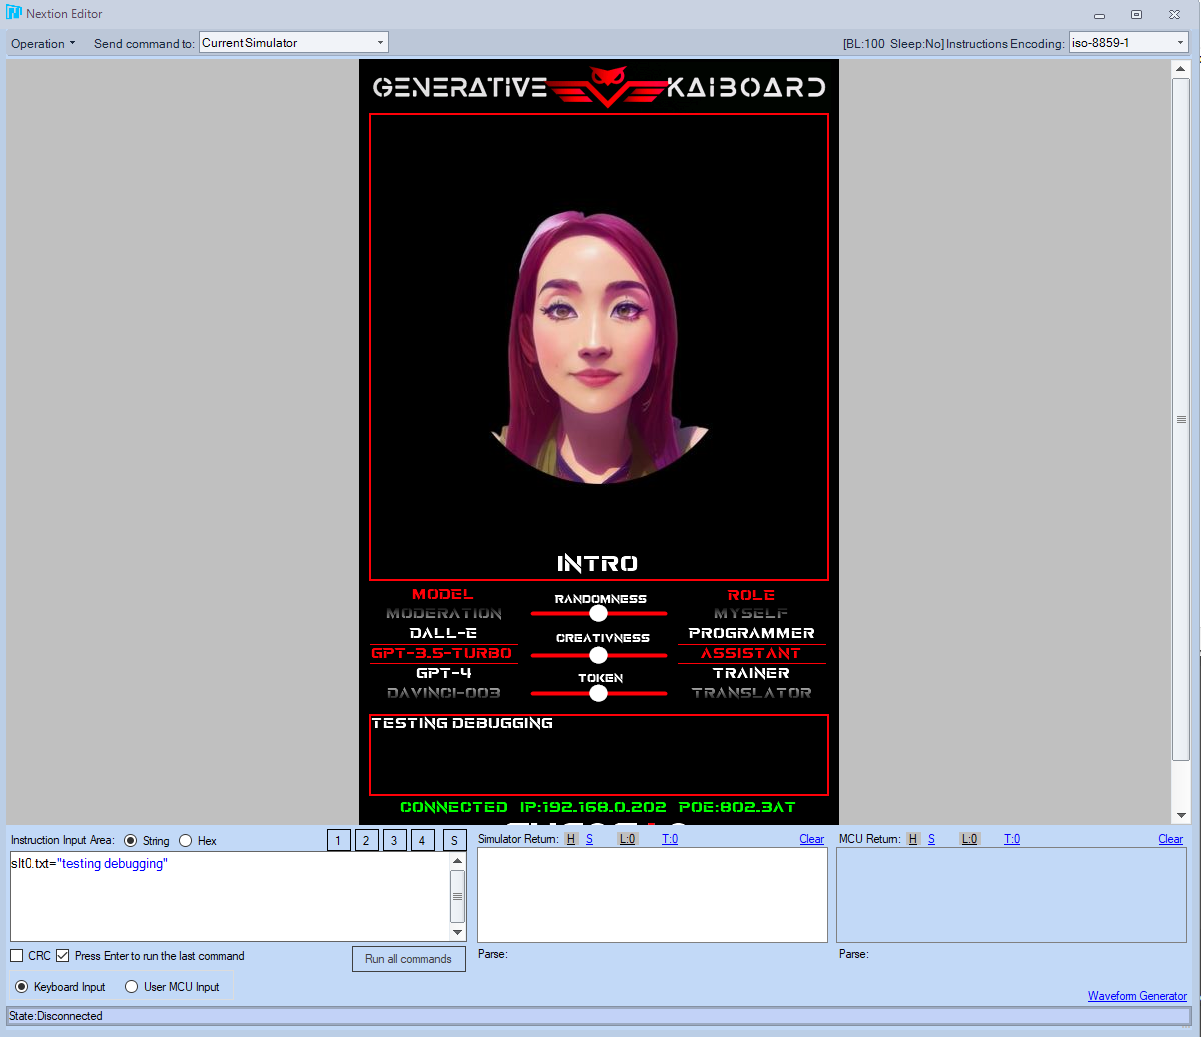
Functionally, it's a game-changer. It takes a load off your resources, so you don't have to worry about separately powering an external display with your main processor. When it comes to putting together the graphical user interface (GUI) and getting everything up and running, it only took me 1-2 days. That's some serious efficiency right there. Below here's the screenshot of the powerful Nextion editor which I really do enjoy. The main important elements only require drag-and-drop, of course a bit of optional coding if you want to do some automation etc. You can embed not only pictures, but also audio, gif and even a video. The programming process is also extremely easy and works flawlessly through standard serial port.
![]()
So in connection with my previous log, once you possess the AI generated video, the subsequent steps become more straightforward. You only need to convert it with their video tool, import it and positioned it. That's it. Well of course, you can set the video behavior as well such as auto-play, volume etc.
What really gets me excited about this is the built-in debugger, which some folks call an emulator. It's a cool feature that lets you do debugging and testing stuff, even if you're working with your external MCU, and you don't even need a physical screen for it. You can simulate screen touch with a mouse click, simulate command all everything within this debugger. How awesome is that?
You can use my .HMI files as a starting point as I uploaded here in Github. Surely first you'll need to download the Nextion editor from their website.
![]()
Generative kAiboard
Beyond Typing: An Adaptive Hardware Prompter for the Age of Generative-AI. Internet-connected. Built-in ChatGPT.
 Pamungkas Sumasta