 Roger
Roger-
21Step 21
Flip over the frame assembly
Verify the notch cut in step 3 is positioned correctly. (rectangle)
Tap M2.5 threads in the plastic as indicated by the four blue circles.
![]()
-
22Step 22
Install LCD driver boards
1 x HDMI to LVDS conversion board to drive LCD panel.
1 x voltage booster to drive fluorescent backlight
1 x button board (not useful for us, but must be attached to driver board. I found this out the hard way and had to buy a replacement driver board.)
8 x 6-32 screws
![]()
-
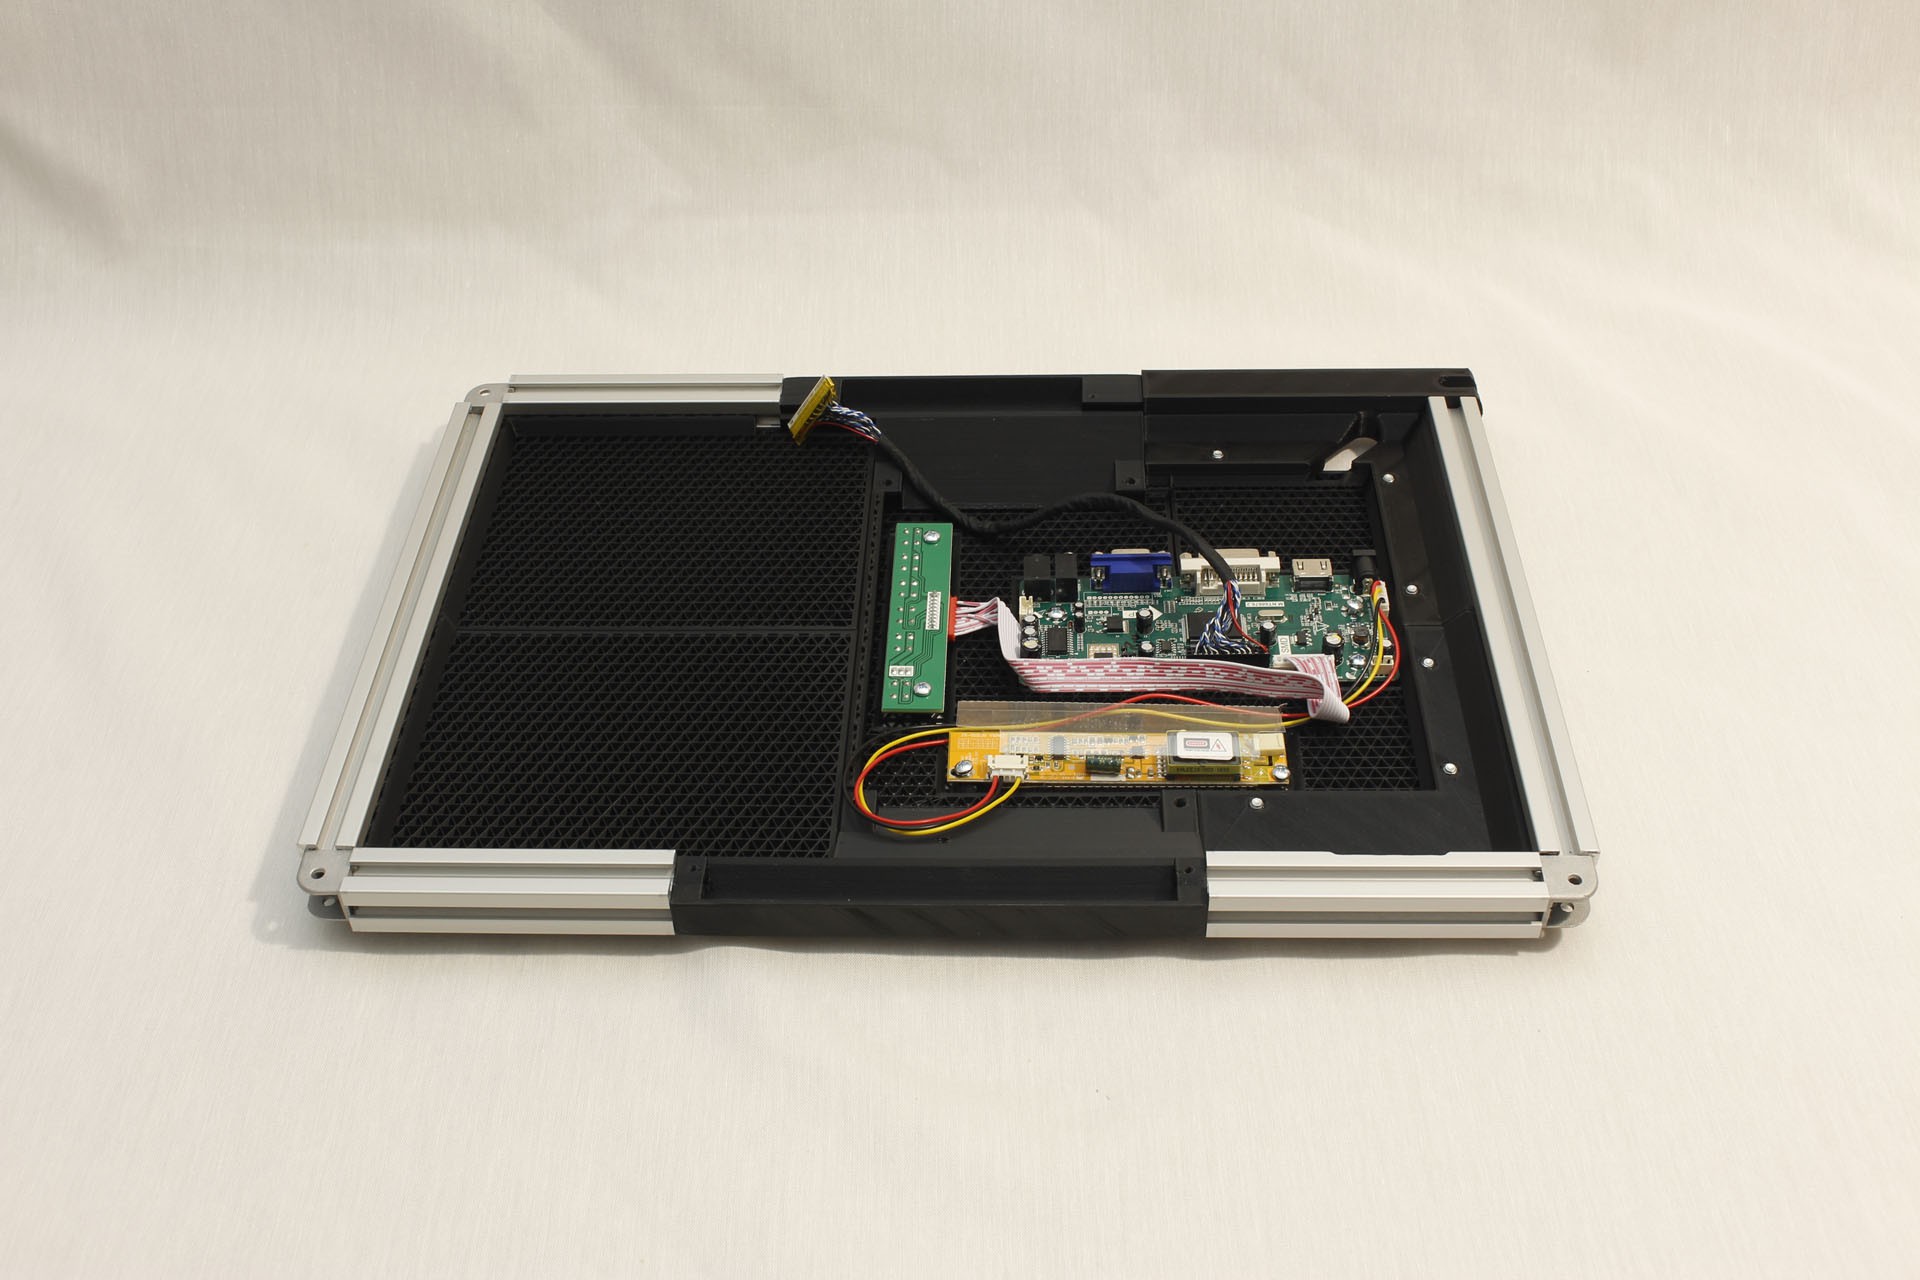
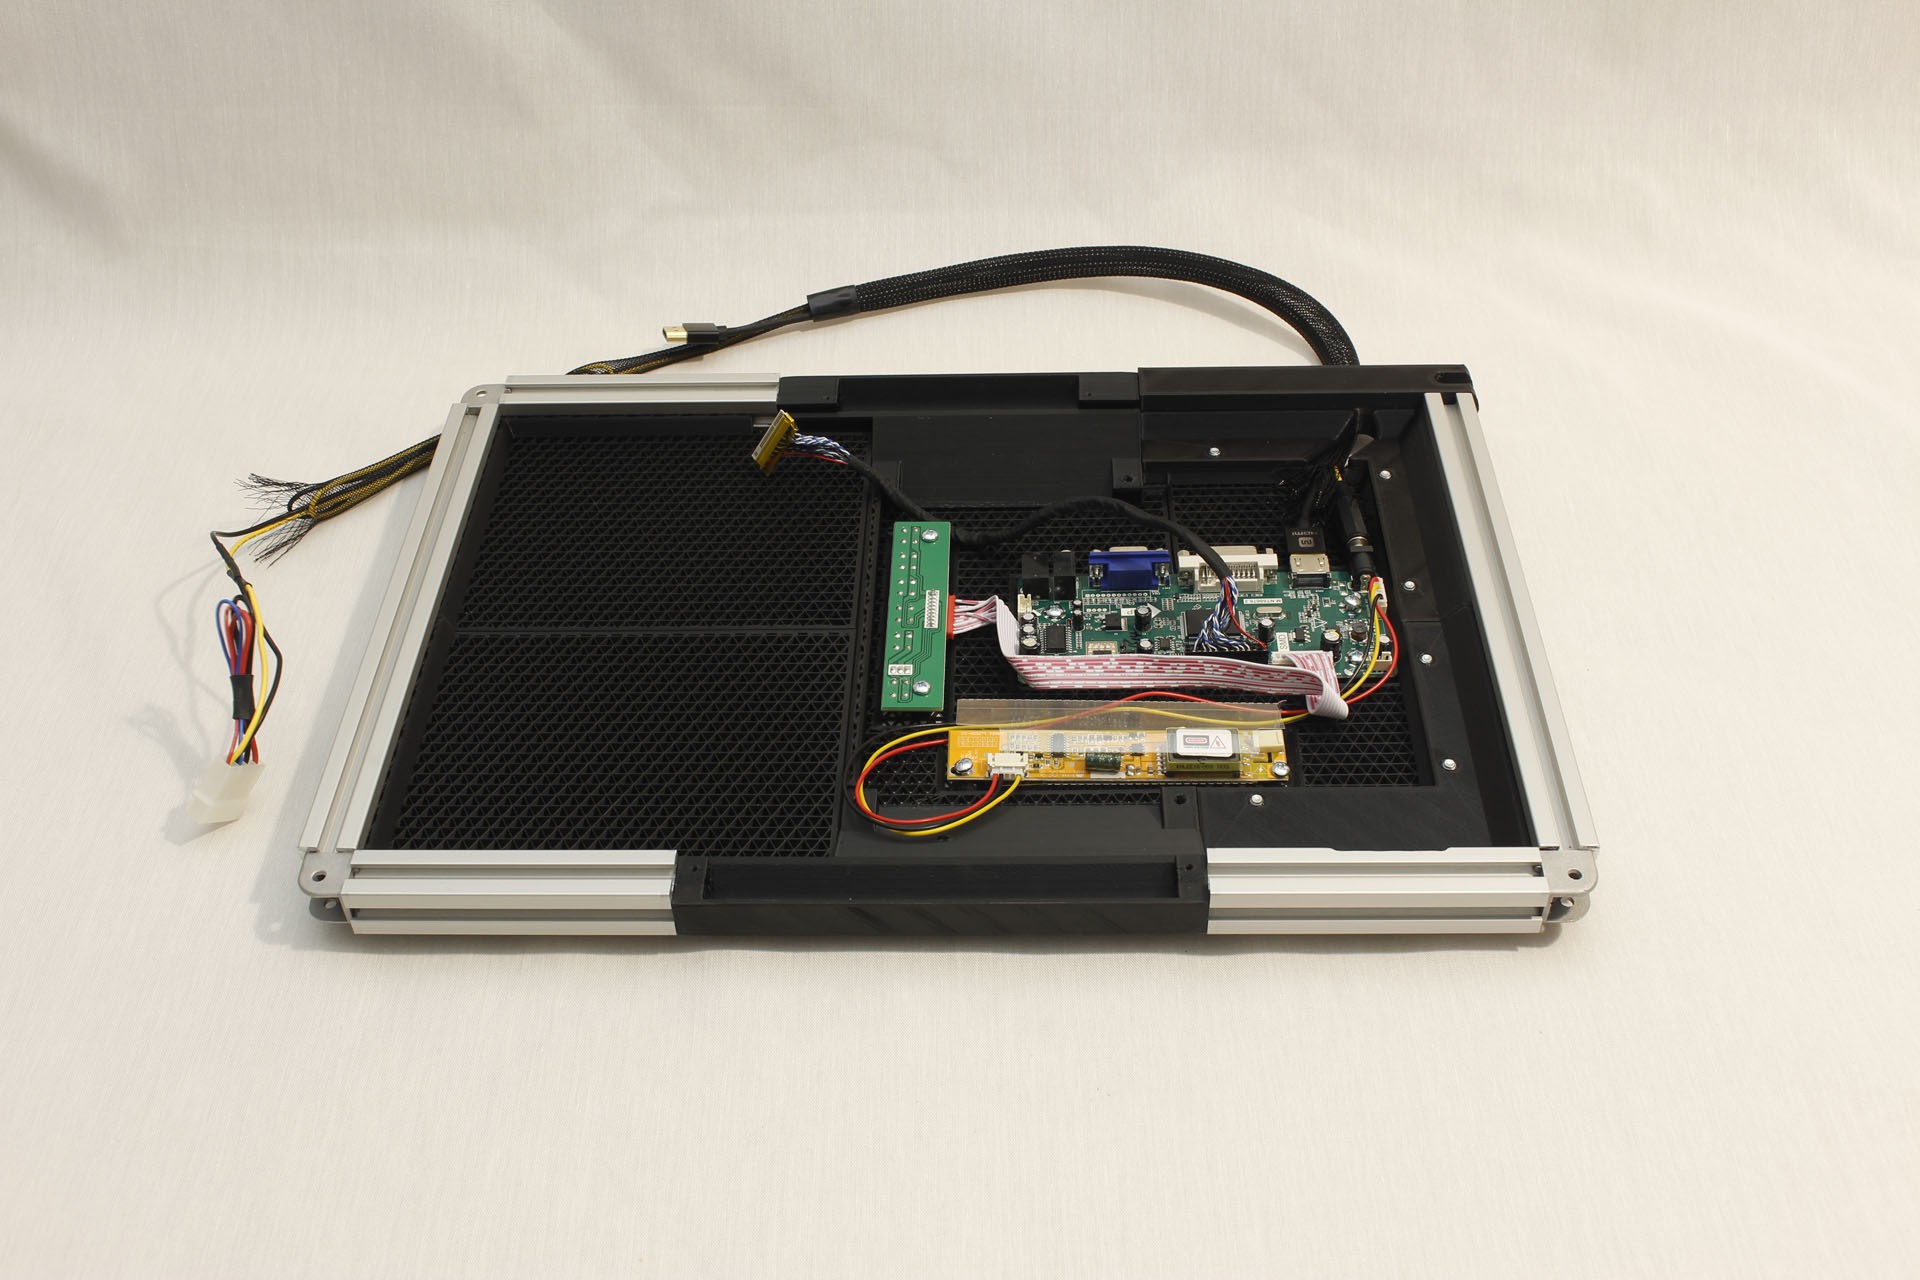
23Step 23
Connect 12V power and HDMI cables to driver board
(Optional) Wrap wire bundle in braided sleeve for neatness.
![]()
-
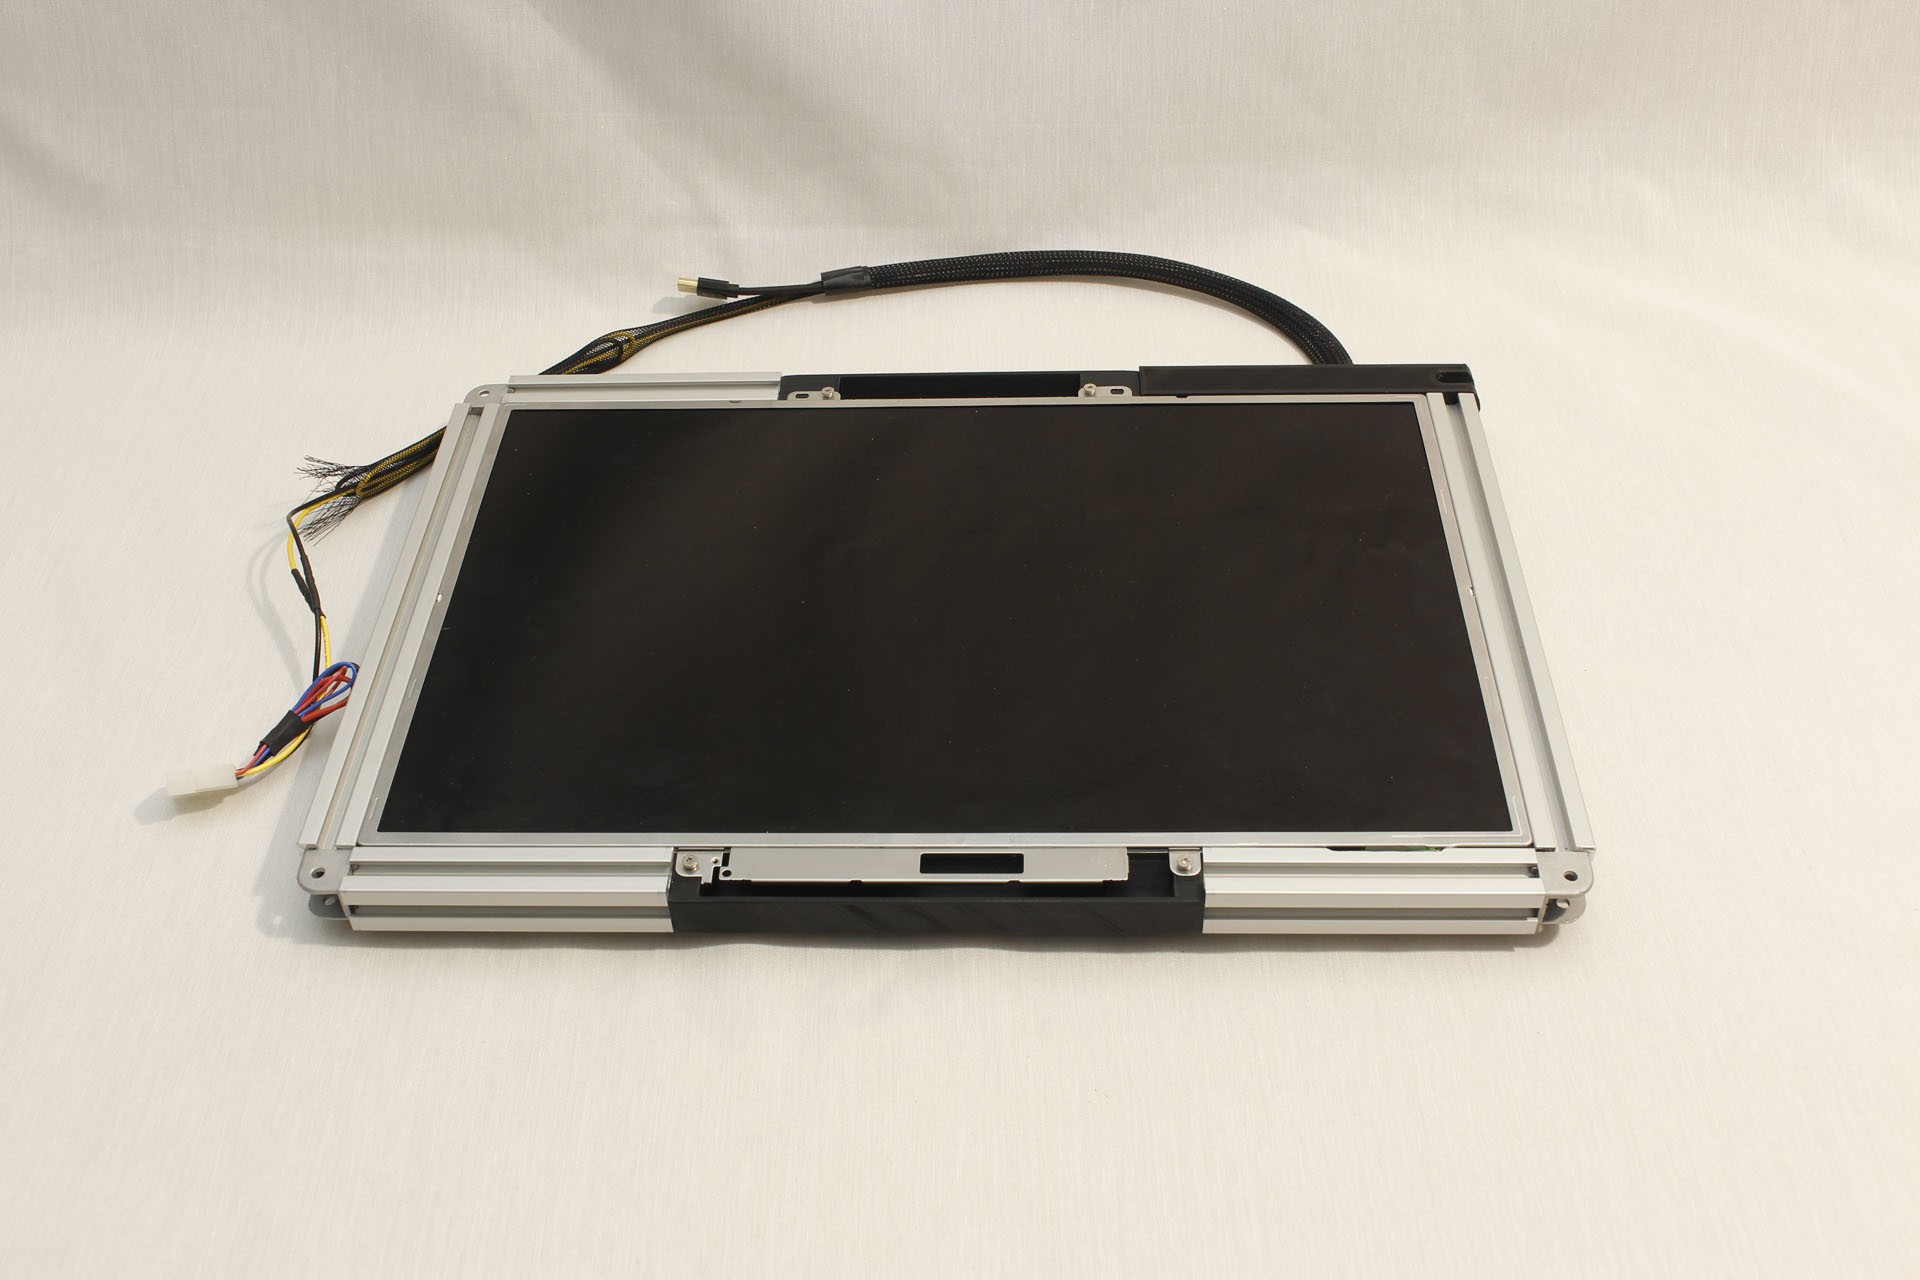
24Step 24
Install screen
1 x LG Philips LP171WU1 as salvaged from Dell Inspiron E1705
4 x M2.5 screws salvaged with the panel
![]()
-
25Step 25
(Optional) Test screen assembly
If you have a functional desktop PC nearby, attach the power and HDMI connectors to the PC and verify screen assembly functions correctly as a monitor.
Set the screen assembly aside for now.
-
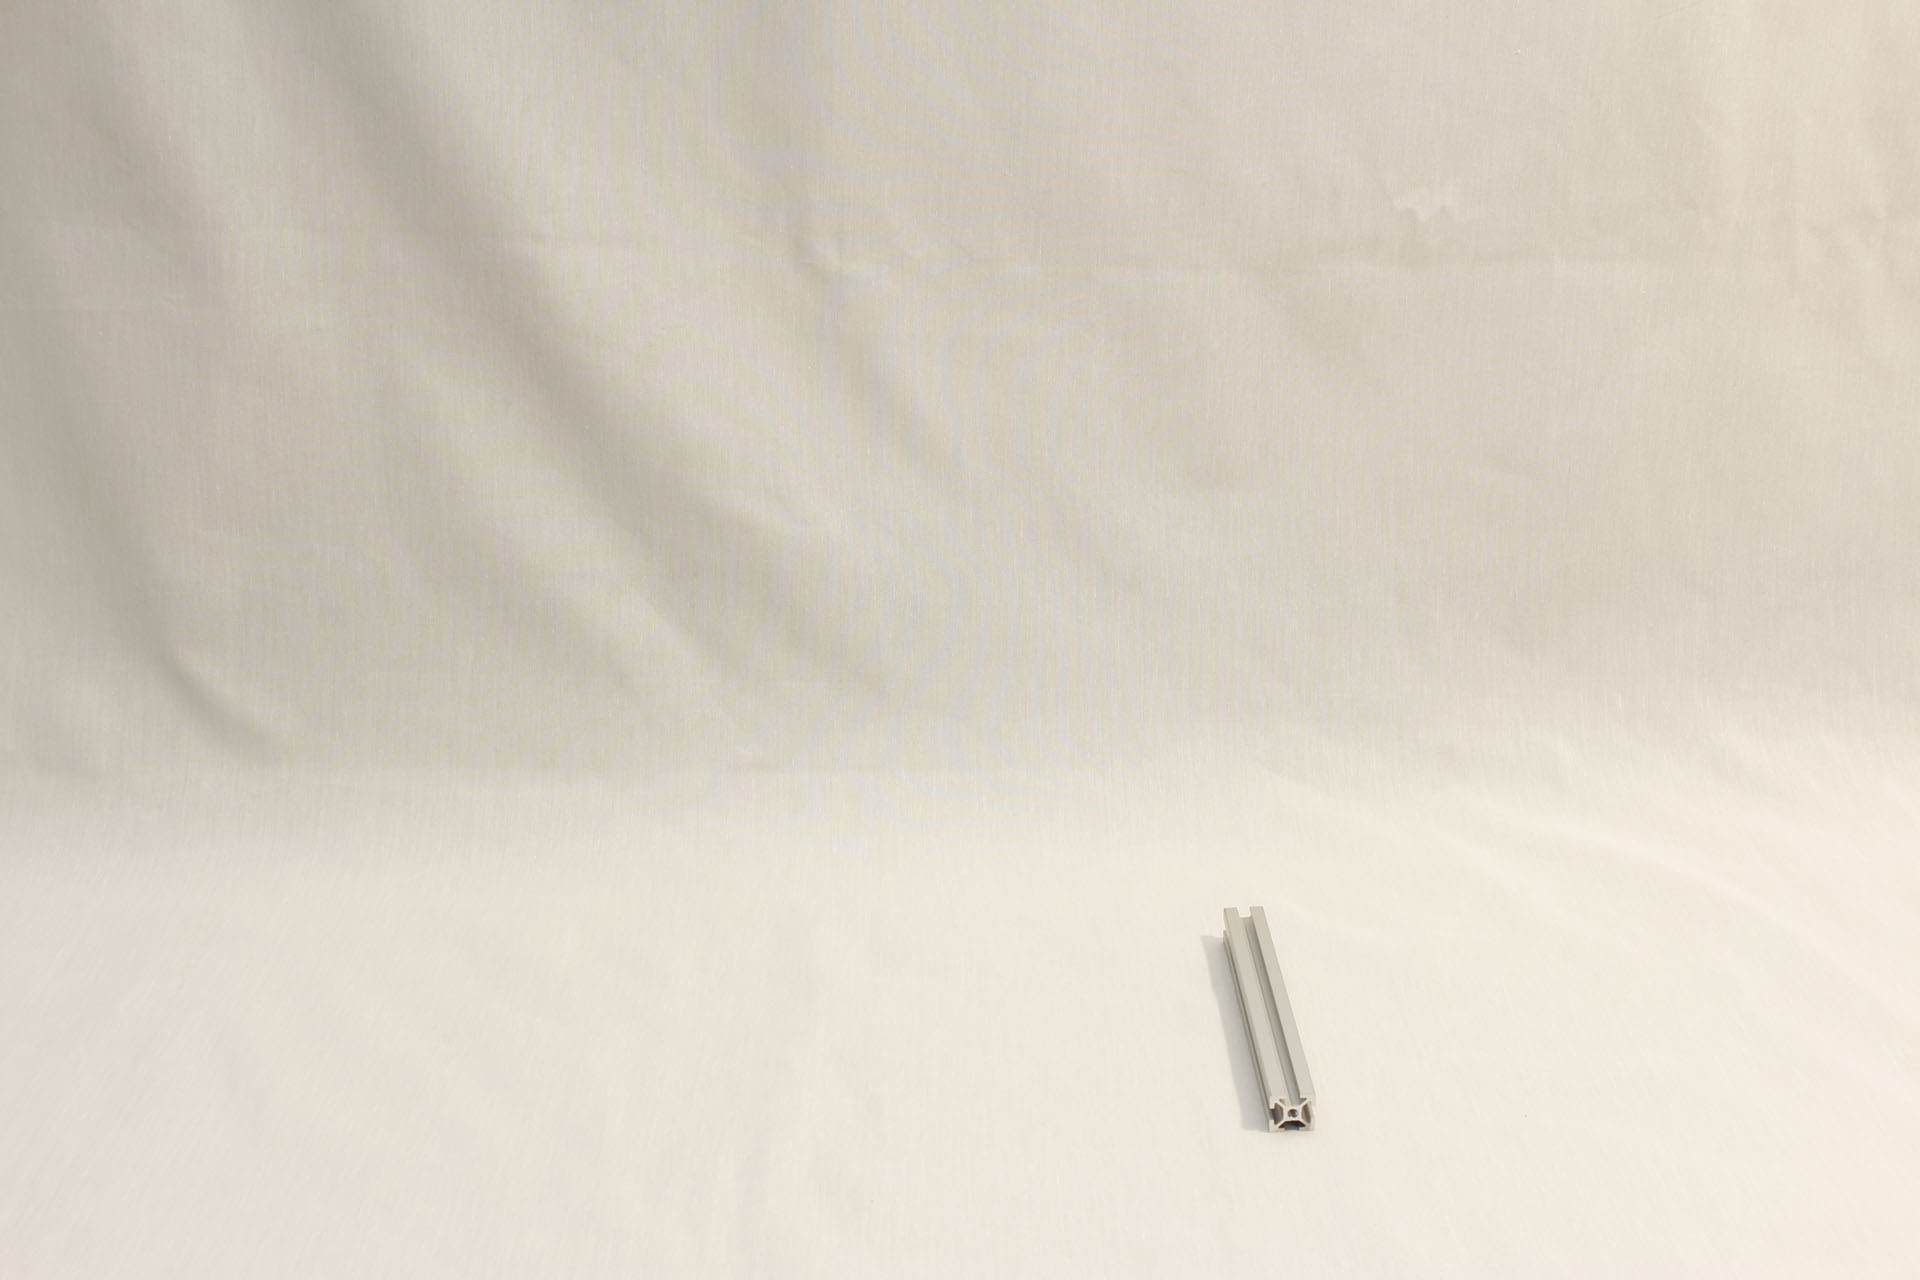
26Step 26
Begin building the main chassis
1 x 155mm Misumi HFS5 extrusion (M5 tapped both ends)
![]()
-
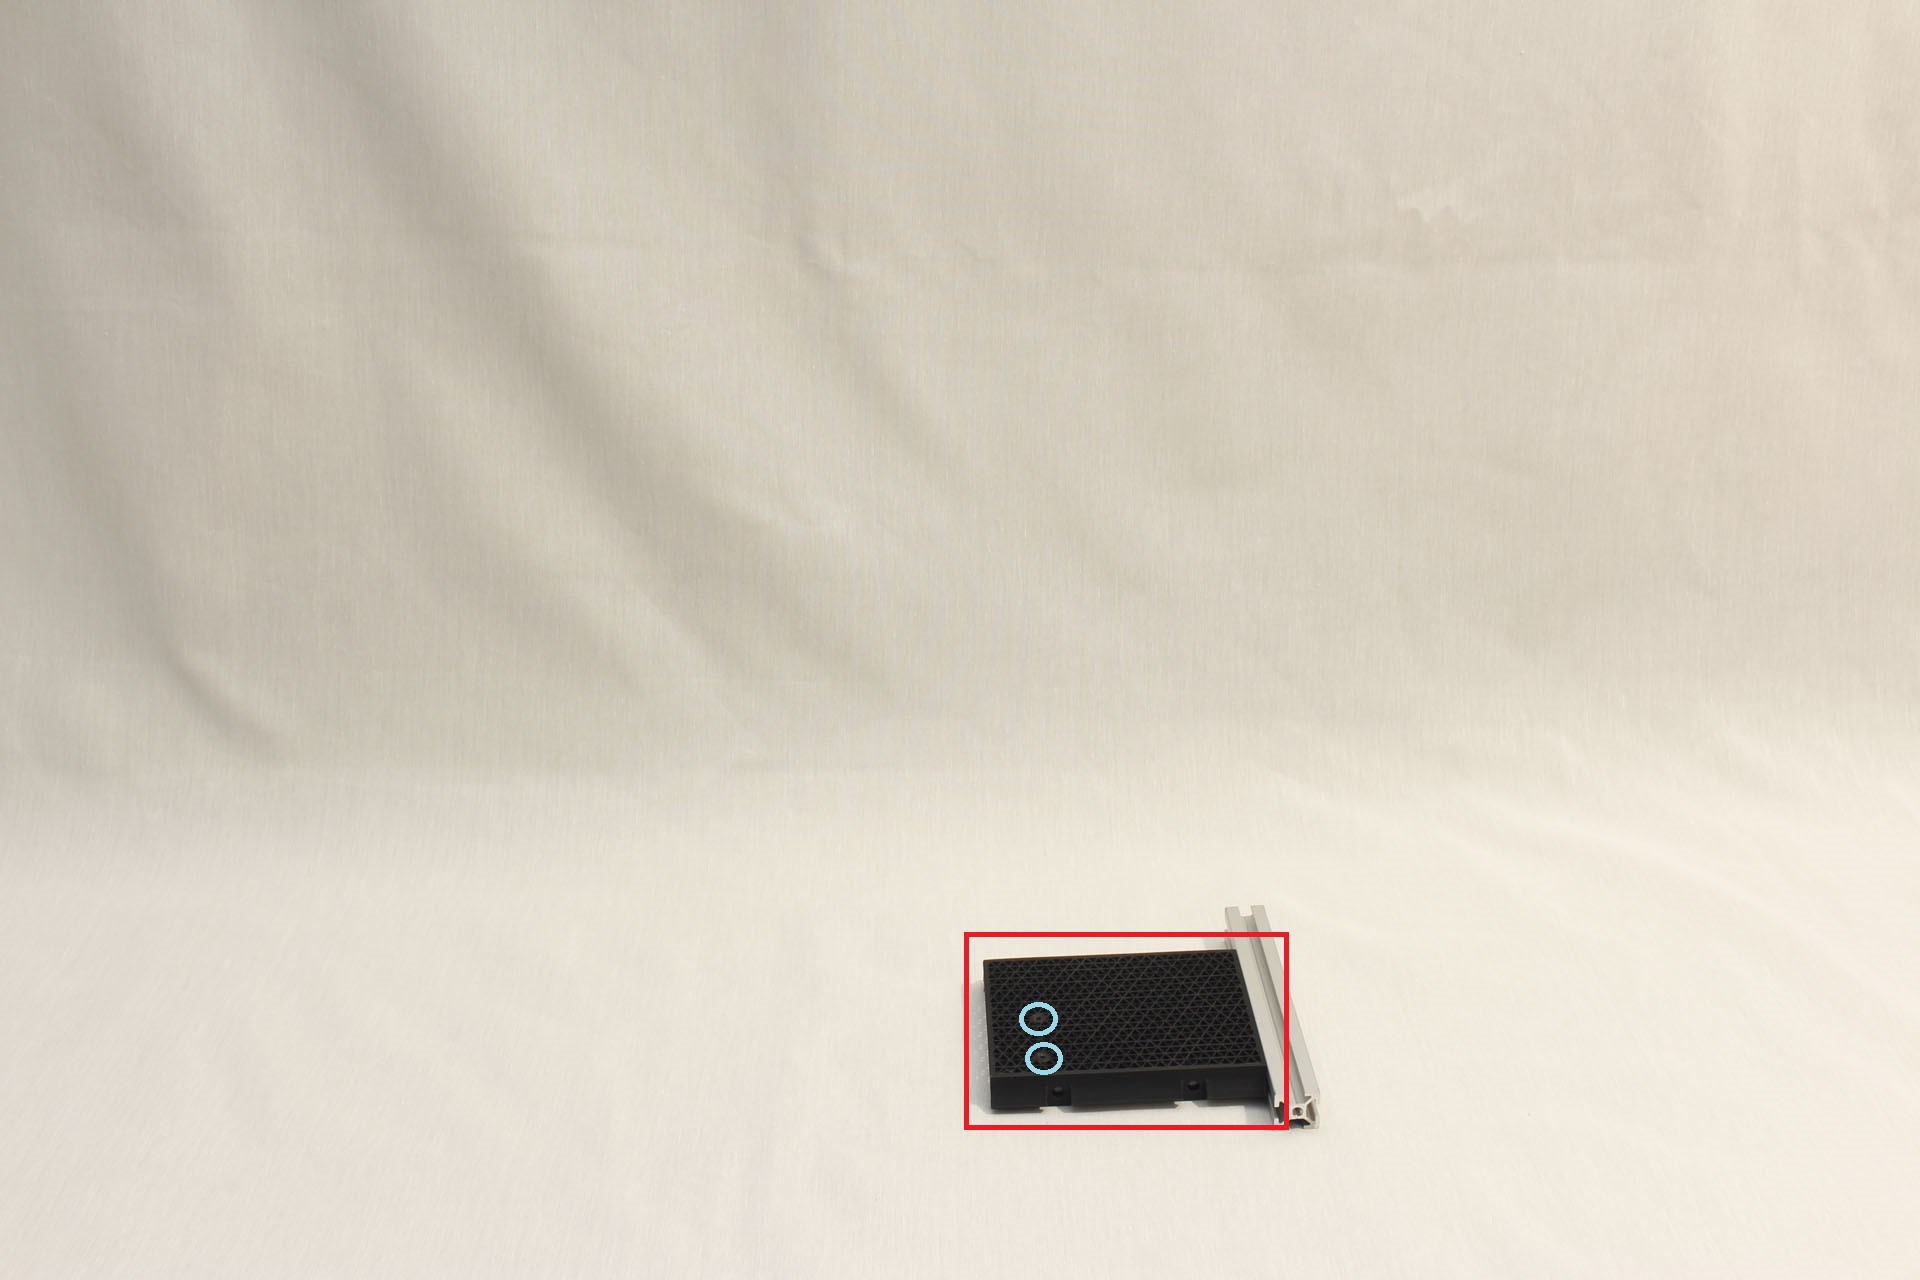
27Step 27
Attach one of two base plates
Fusion 360 object path: "Bottom"/"Bottom Left"
(Yes, the name can be confusing. We're building the chassis with the front facing away from us, while the CAD was designed while looking at the front, so the left/right names are flipped from what we are seeing now.)
Tap 6-32 threads as indicated by two blue circles.
2 x M5 10mm socket head screw
2 x Misumi HNTT5-5 extrusion assembly nut
![]()
-
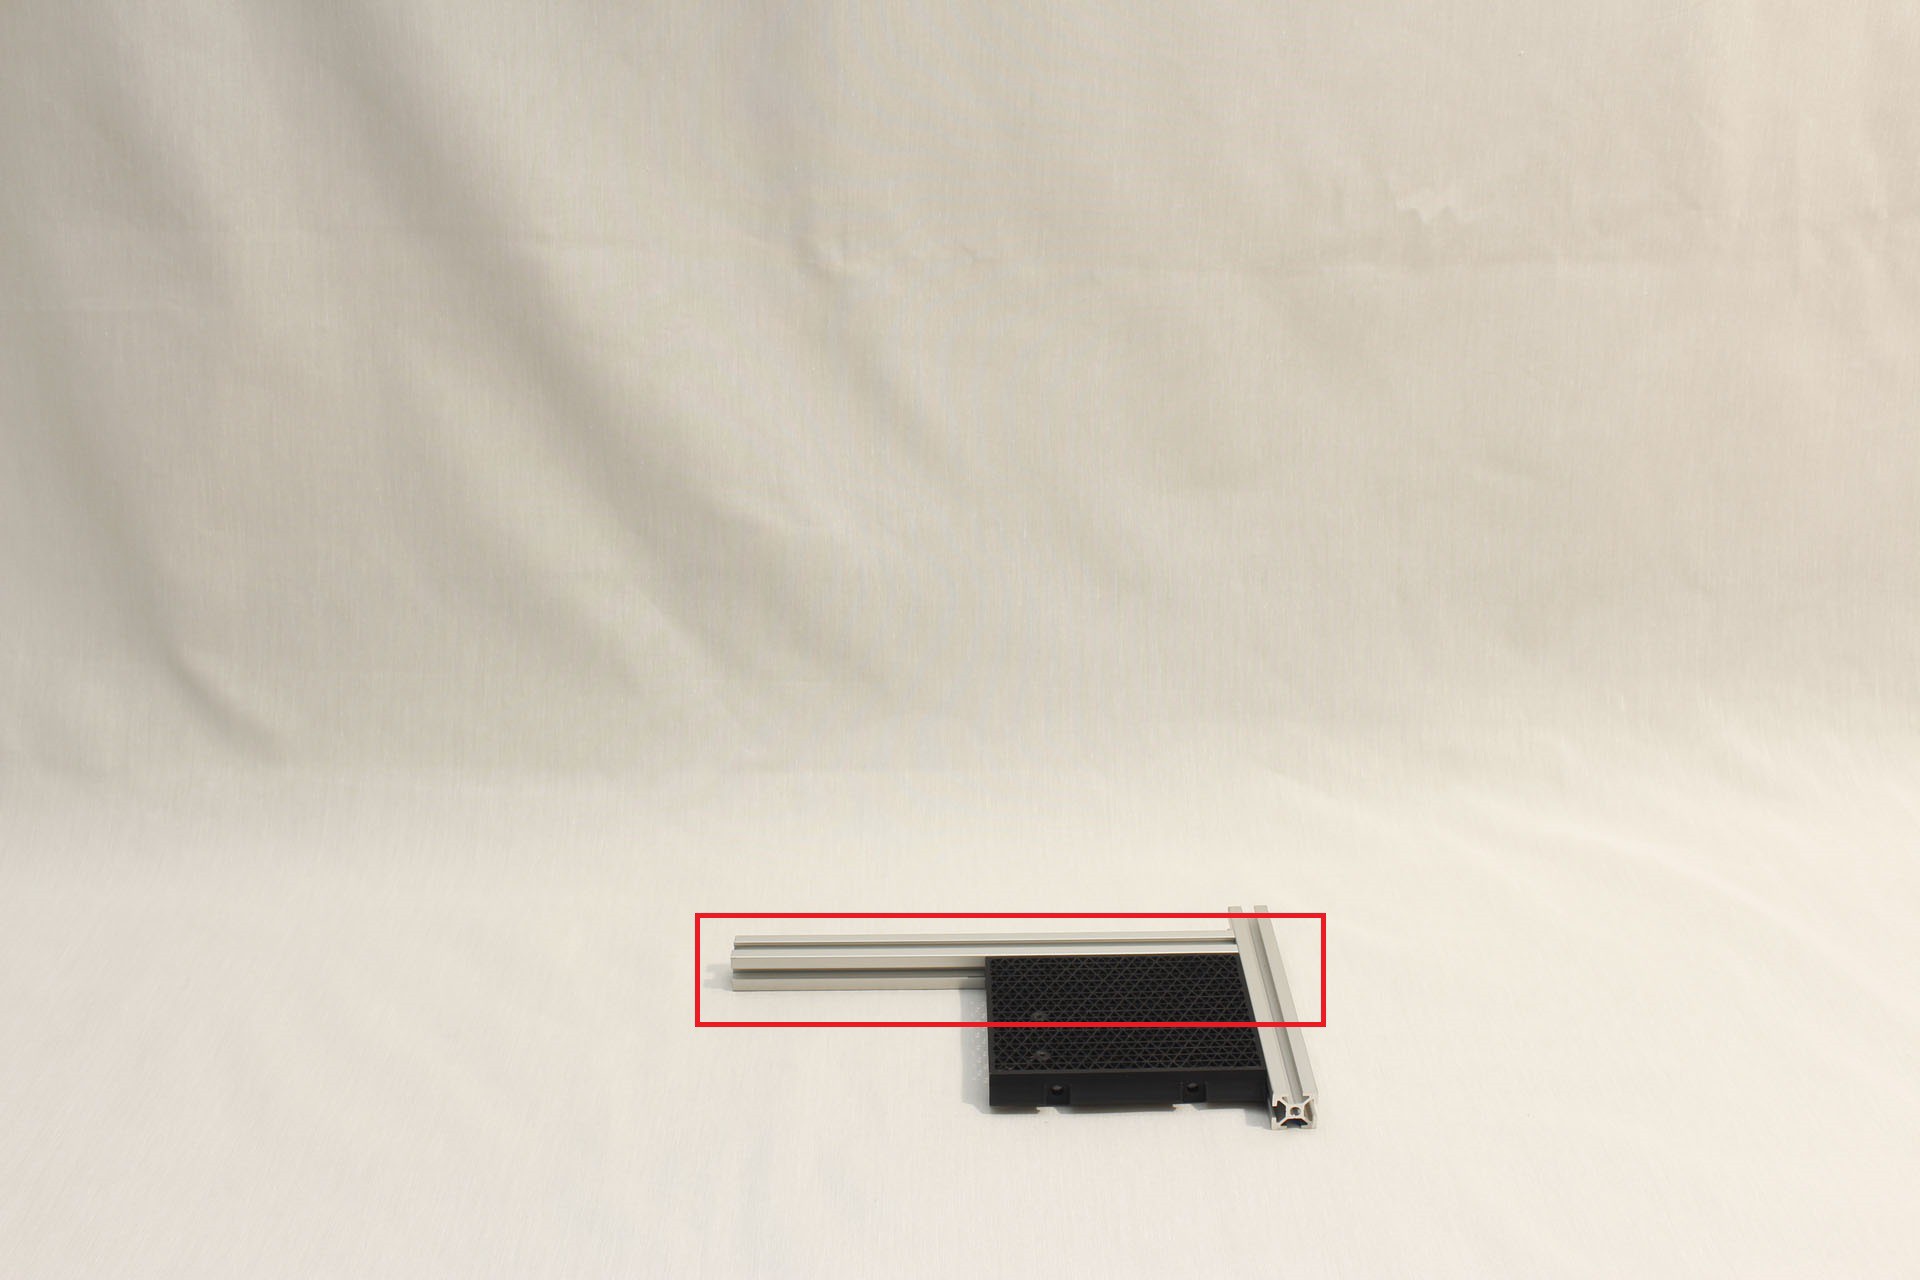
28Step 28
Continue building the chassis base
1 x 245mm Misumi HFS5 extrusion (no tap)
2 x M5 10mm socket head screw
3 x Misumi HNTT5-5 extrusion assembly nut
Two of the nuts are used to attach the base plate to the extrusion. The third nut is added to the opposite rail (facing away from the camera in this picture) for later use.
![]()
-
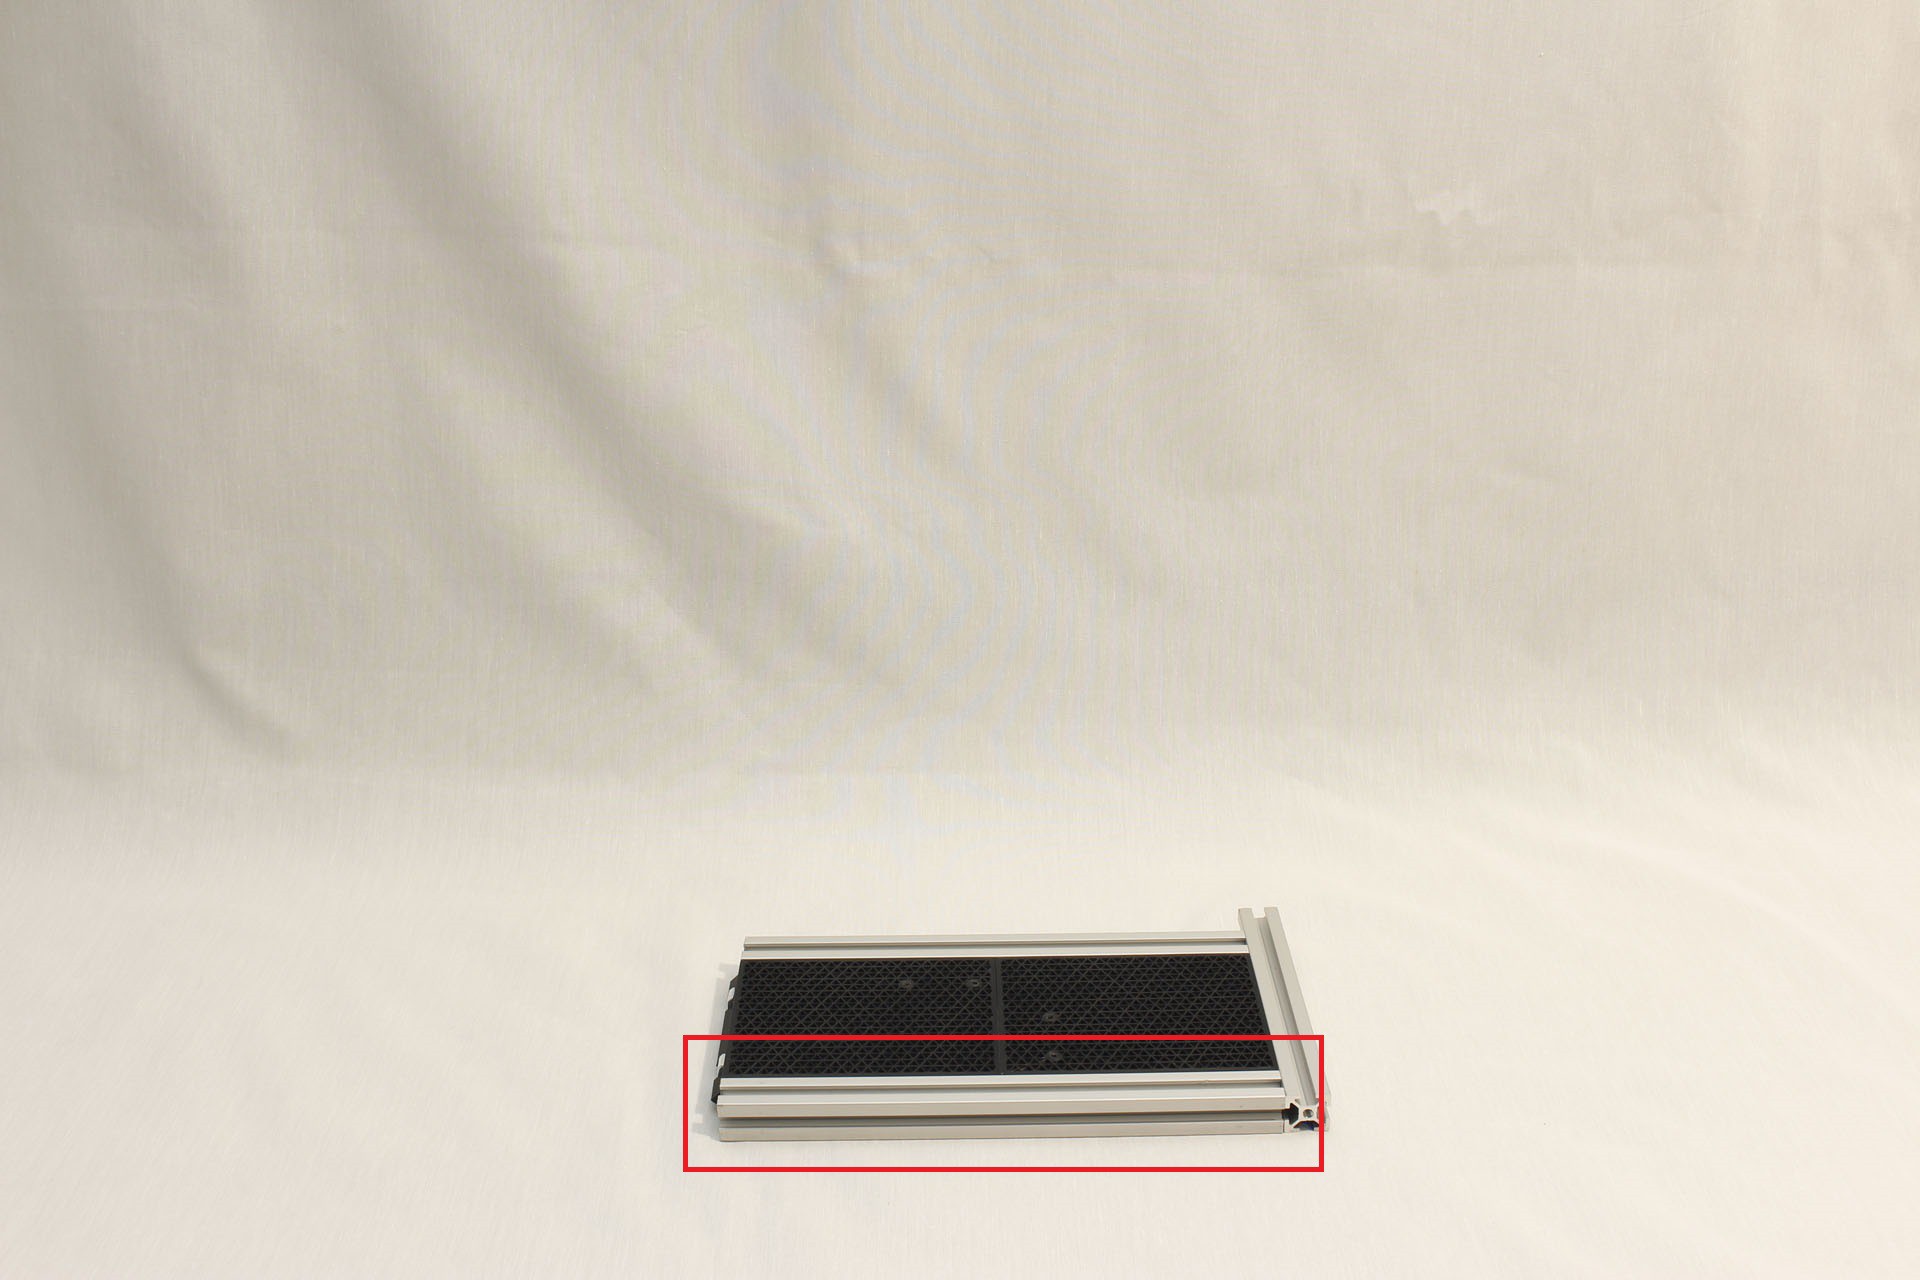
29Step 29
Attach the the other half of the base
Fusion 360 object path: "Bottom"/"Bottom Right"
Tap 6-32 threads as indicated by two blue circles.
2 x M5 10mm socket head screw
2 x Misumi HNTT5-5 extrusion assembly nut
![]()
-
30Step 30
Add extrusion to the chassis base
1 x 245mm Misumi HFS5 extrusion (no tap)
4 x M5 10mm socket head screw
4 x Misumi HNTT5-5 extrusion assembly nut
![]()
Luggable PC
A nominally portable ("luggable") computer chassis for commodity desktop PC components.


Discussions
Become a Hackaday.io Member
Create an account to leave a comment. Already have an account? Log In.