Dominik Kuhn
-
RP2040 MiniPill GPS
01/28/2025 at 15:58 • 0 commentsSHORT UPDATE: After doing some tests with the GPS module on a breadboard, we are designing an extension board. Everything needed for running the module is on the board. Especially the LDO, because of the manufacturer's requirement of a high PSRR.
The manufacturer recommends: "An LDO with a high PSRR should be chosen for good performance. In addition, a TVS diode, and a combination of a 4.7 μF, 100 nF and a 33 pF decoupling capacitor network should be added near the VCC pin. The lowest value capacitor should be the closest to module pins."
![]()
-
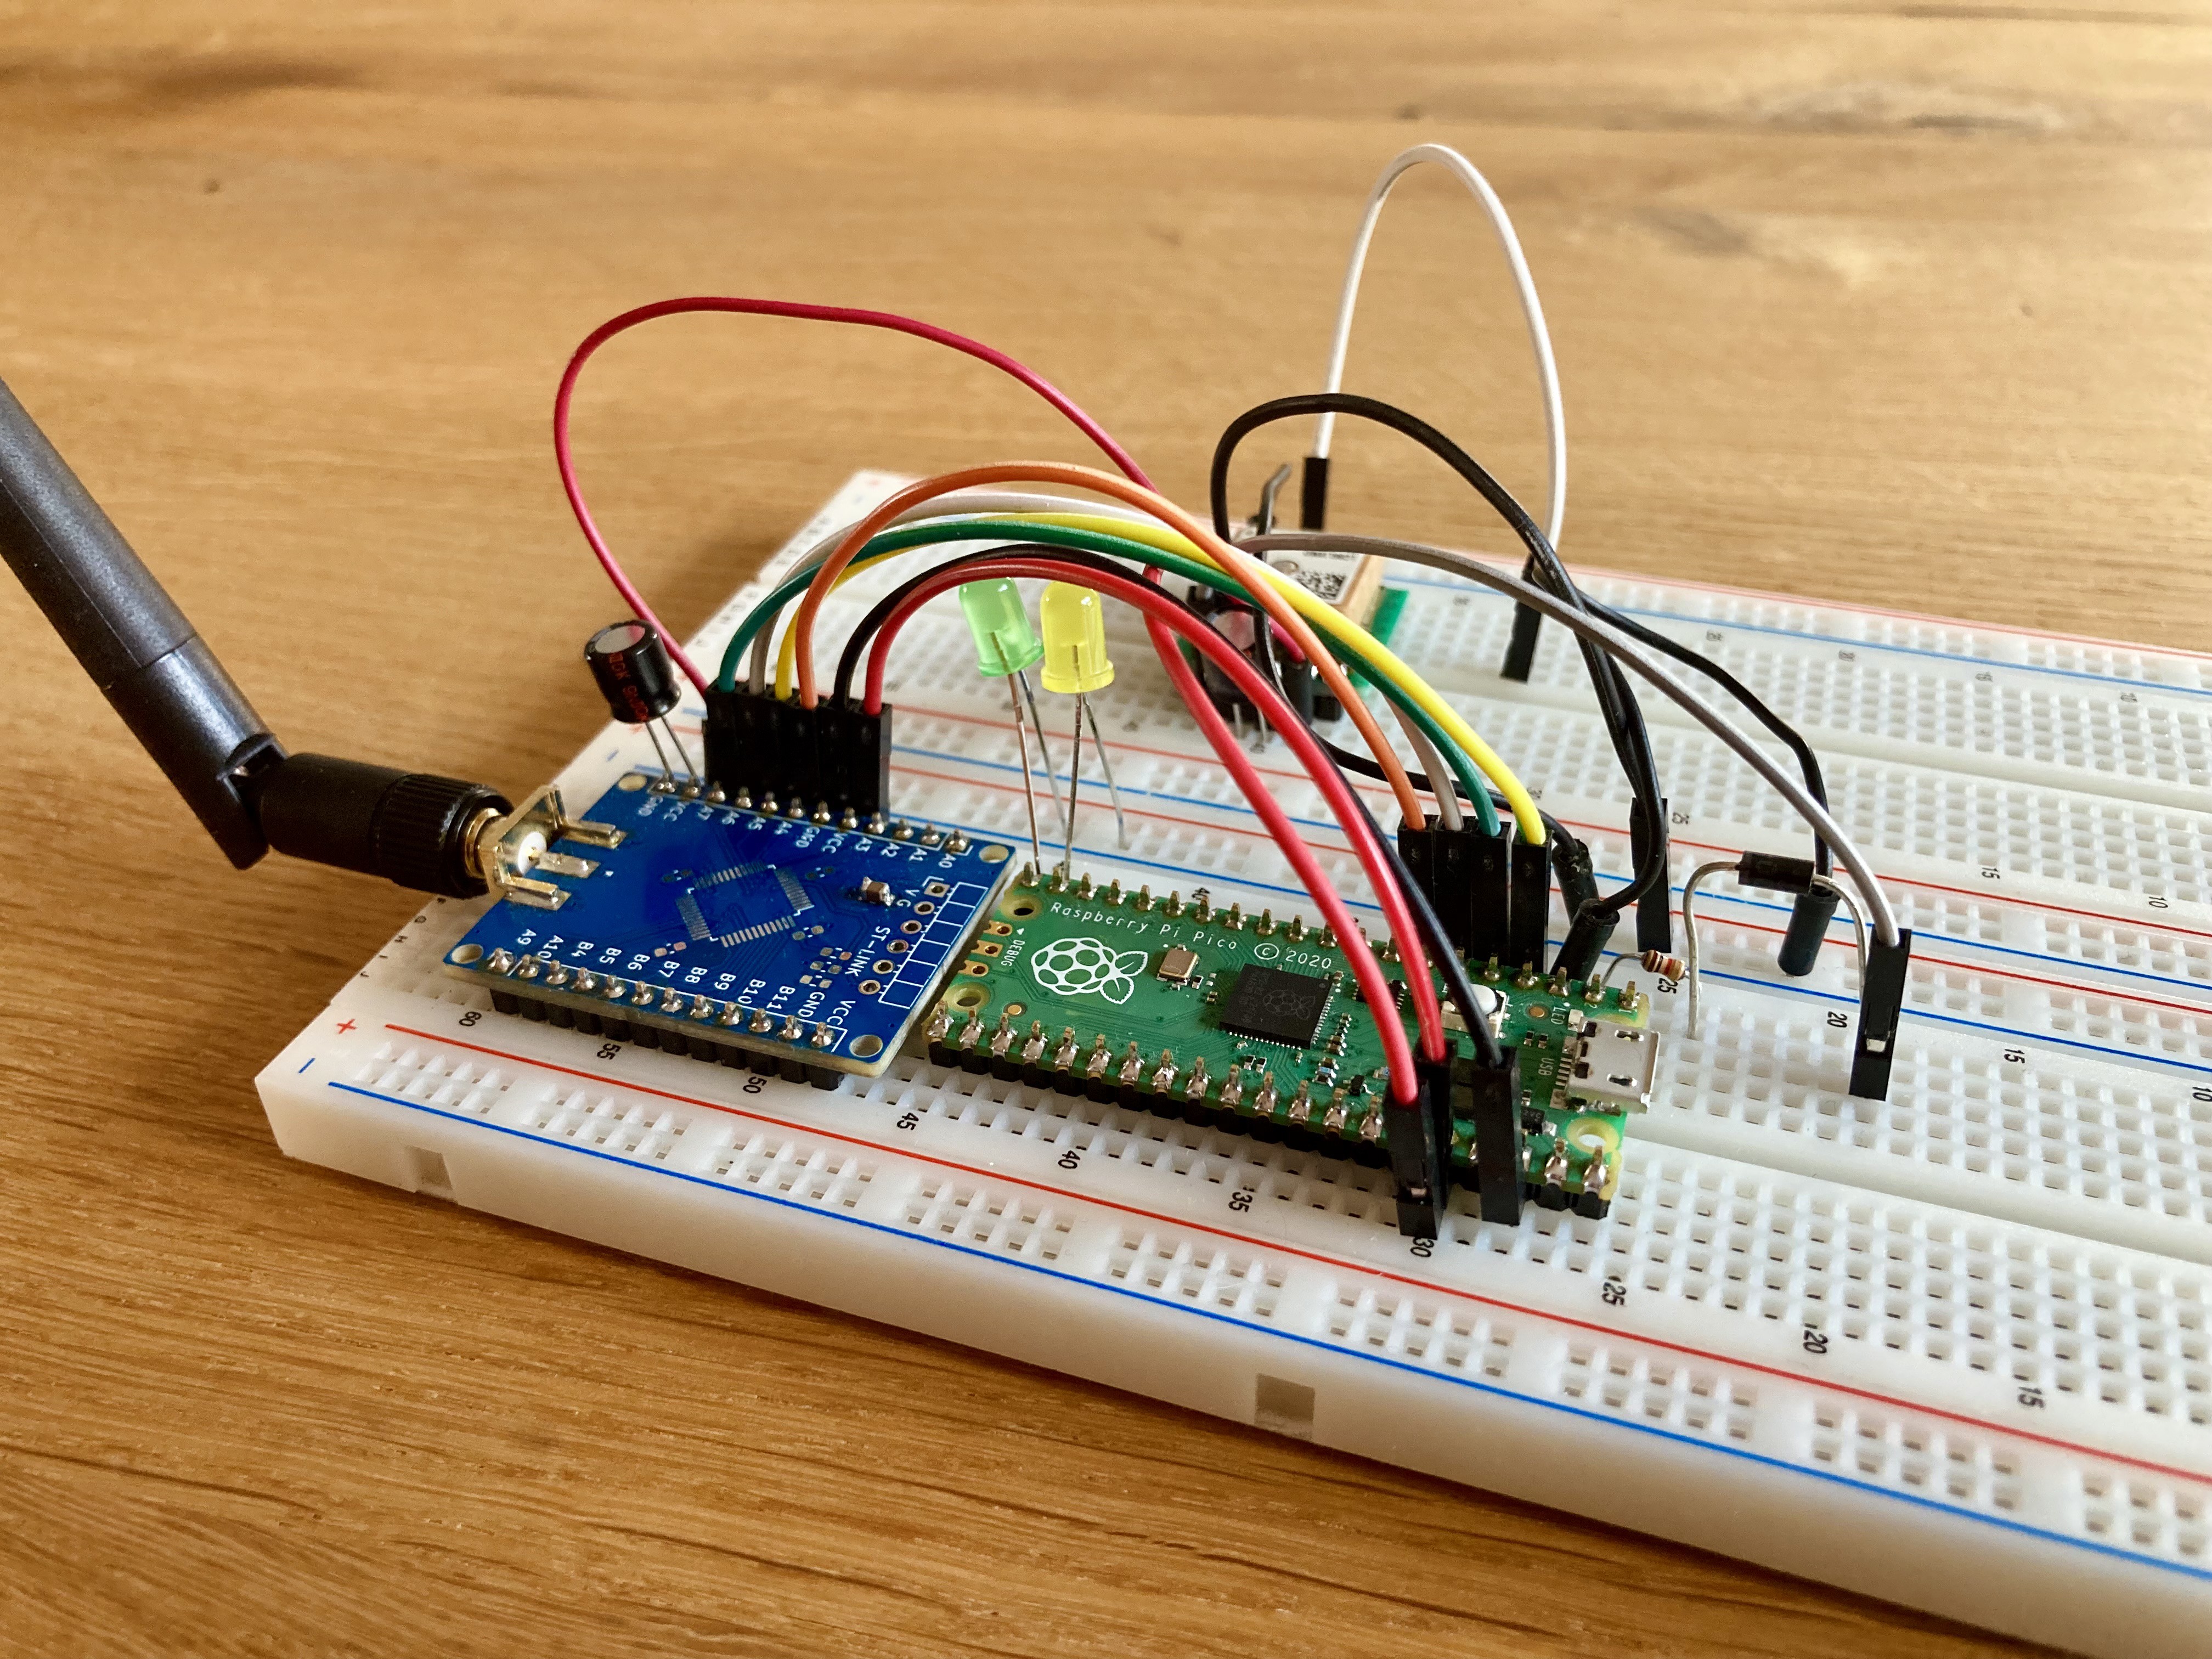
Building a simple GPS Tracker
01/19/2025 at 19:16 • 0 commentsAs you can see in the picture gallery of the project, we would like to add a GPS module to our board. To test the software and the hardware ( schematic), we have built a setup on a breadboard a few days ago. This setup shows us that we can go on with the design of our new board. At the same time, it shows us again in a very impressive way how simple the development of new applications are. Just by copying the code example below (coming soon) we can build a GPS Tracker with our setup. It sends the current position every 5 minutes via TTN (The Things Network) to our application. For this we have inserted a library into our MicroPython port to be able to use many different GPS modules. In this case we have used a Quectel LC86L GNSS module.
![]()
-
Simplifying the development process by activating the USB mass storage functionality in MicroPython
01/11/2025 at 12:38 • 0 commentsWe have activated the USB mass storage function (in the mpconfigureport.h file) for our board in the MicroPython port, so we can copy Python files to the board in the same way as a USB stick.
#define MICROPY_HW_FLASH_STORAGE_BYTES (1024 * 1024)This and the abstraction of the LoRaWAN class (see previous Log) makes development possible without just any IDE. When the RP2040 MiniPill LoRa Board is connected to your PC, tablet or smartphone it will power on and enter the start up process (the boot process).
Your PC should now recognise the RP2040 MiniPill LoRa Board. It depends on the type of PC you have as to what happens next:
- Windows: Your RP2040 MiniPill LoRa Board will appear as a removable USB flash drive. Windows may automatically pop-up a window, or you may need to go there using Explorer.
Windows will also see that the RP2040 MiniPill LoRa has a serial device, and it will try to automatically configure this device. If it does, cancel the process. - Mac: Your RP2040 MiniPill LoRa Board will appear on the desktop as a removable disc. It will probably be called “NONAME”. Click on it to open the RP2040 MiniPill LoRa Board folder.
- Linux: Your RP2040 RP2040 MiniPill LoRa Board will appear as a removable medium. On Ubuntu it will mount automatically and pop-up a window with the RP2040 MiniPill LoRa folder. On other Linux distributions, the RP2040 MiniPill LoRa Board may be mounted automatically, or you may need to do it manually. At a terminal command line, type
lsblkto see a list of connected drives, and thenmount /dev/sdb1(replacesdb1with the appropriate device). You may need to be root to do this.
Okay, so you should now have the RP2040 MiniPill LoRa Board connected as a USB flash drive, and a window (or command line) should be showing the files on the RP2040 MiniPill LoRa drive.
The drive typically contains the following files:
- boot.py – this script is executed when the board boots up. It setsup various configuration options for the board.
- main.py – this is the main script that will contain your Python program.It is executed after boot.py.
- README.txt – this contains some very basic information about gettingstarted with the board.
Notice:
The description above is based on the official documentation of MicroPython, for more details please follow the link. The USB mass storage function also works very well with a tablet or smartphone. We did some tests in the forest and edited parameters in our Python script with an android smartphone without any IDE or so. For workshops, we don't have to install IDEs, libraries, etc. on each participant's device as before. We can start directly with the LoRa(WAN) itself, even in the field. This is great and makes the first steps in development much easier.
- Windows: Your RP2040 MiniPill LoRa Board will appear as a removable USB flash drive. Windows may automatically pop-up a window, or you may need to go there using Explorer.
-
Combine ABP and OTAA mode in one class
09/30/2024 at 13:41 • 0 commentsBy simplifying and extending our LoRaWAN class, we can develop applications with very little effort. Below is a small example in both modes to send a simple string message to The Things Network (TTN):
from machine import Pin, SPI
import machine
import time
from random import randrange

from PyLoRaWAN import PyLoRaWAN, ActivationType


# The Things Network (TTN) device details (available in TTN console)
# TTN device address, 4 Bytes, MSB (REPLACE WITH YOUR OWN!!!)
devaddr = [0x26, 0x00, 0x00, 0x00]
# TTN network session key, 16 Bytes, MSB (REPLACE WITH YOUR OWN!!!)
nwskey = [0xE0, 0x92, 0xEA, 0x35, 0x00, 0x00, 0x00, 0x00, 0x00, 0x00, 0x00, 0x00, 0x00, 0x00, 0x00, 0x00]
# TTN application session key, 16 Bytes, MSB (REPLACE WITH YOUR OWN!!!)
appskey = [0xB2, 0xB5, 0xC8, 0xDF, 0x00, 0x00, 0x00, 0x00, 0x00, 0x00, 0x00, 0x00, 0x00, 0x00, 0x00, 0x00]


deveui = [0x70, 0xB3, 0xD5, 0x00, 0x00, 0x00, 0x00, 0x00]
appeui = [0x45, 0x23, 0x00, 0x00, 0x00, 0x00, 0x00, 0x00]
appkey = [0x44, 0x99, 0xB4, 0xD3, 0x00, 0x00, 0x00, 0x00, 0x00, 0x00, 0x00, 0x00, 0x00, 0x00, 0x00, 0x00]
devnonce = [randrange(256), randrange(256)]


spi = machine.SPI(0,
    baudrate=100000,
    polarity=1,
    phase=1,
    bits=8,
    firstbit=machine.SPI.MSB,
    sck=machine.Pin('GP2'),
    mosi=machine.Pin('GP3'),
    miso=machine.Pin('GP4'))

cs = machine.Pin( 'GP5' ) # , Pin.OUT, value=1)

time.sleep(10)

lorawan = PyLoRaWAN(spi, cs)
lorawan.modem.set_output_power(16)
lorawan.modem.set_spreading_factor(12)

lorawan.join( ActivationType.ABP, auth={'devaddr':devaddr, 'nwskey':nwskey, 'appskey':appskey} )

for i in range(5):
    lorawan.send_test_msg()
    time.sleep(60)

time.sleep(5)

lorawan.join( ActivationType.OTAA, auth={'deveui':deveui, 'appeui':appeui, 'appkey':appkey, 'devnonce':devnonce} )

for i in range(5):
    lorawan.send_test_msg()
    time.sleep(60)
We are still developing and present more details later. Then we will also publish the link to our GitHub repo with the hardware and software for our board.
-
First tests with Micropyton
09/12/2024 at 18:05 • 0 commentsWe added a port to Micropython for this board, so to be able to make the first tests. We wrote several Python modules to send and receive all 4 data message types of the LoRaWAN 1.0.x and 1.1 standards. These message types are used to transport MAC commands and application data. So we were now able to communicate with TTN successfully in ABP and OTAA modes. In addition, we have written an overriding class for low level hardware control of the SX1276 module.
More details later.
-
Rev 1.1 - 2024.09
09/12/2024 at 17:41 • 0 comments- Optimazations:
- Trace width adjusted for a 50 Ohm antenna based on the JLCPCB impedance calculator.
- SMA connection mirrored, to remove a via to the upper side, which possibly made trouble.
- Ground area around the antenna trace in the clearance set to 10 mil as in the JLCPCB impedance calculator.
- Adding a 100nF ceramic capacitor (MLCC) close to the LoRa module.
- Optimazations: