 Blade Master
Here is the latest demo of this board. In this Phase 1 demo, the camera runs person detection fully on-device and directly controls a small robot: when person detected → GO; no person detected → STOP.
No Jetson, no PC, no cloud — just a camera, a neural network, and a control loop forming a compact, self-contained vision module that directly sends GO / STOP signals to a motor controller. The goal of this demo is to validate an end-to-end pipeline on real hardware: camera capture → on-device inference (TPU) → decision logic → motor control.
Rather than building autonomy or navigation, this phase focuses on proving that local vision alone can reliably drive physical actions without external compute or heavyweight setups. Phase 1 is about making the full loop work, stably and visibly, on real hardware.


 Pure Engineering
 anfroholic
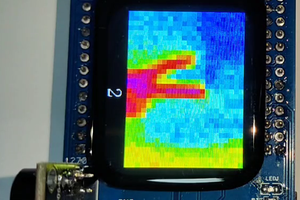
 kingham xu
 Parker