Val
Val-
Part inventory
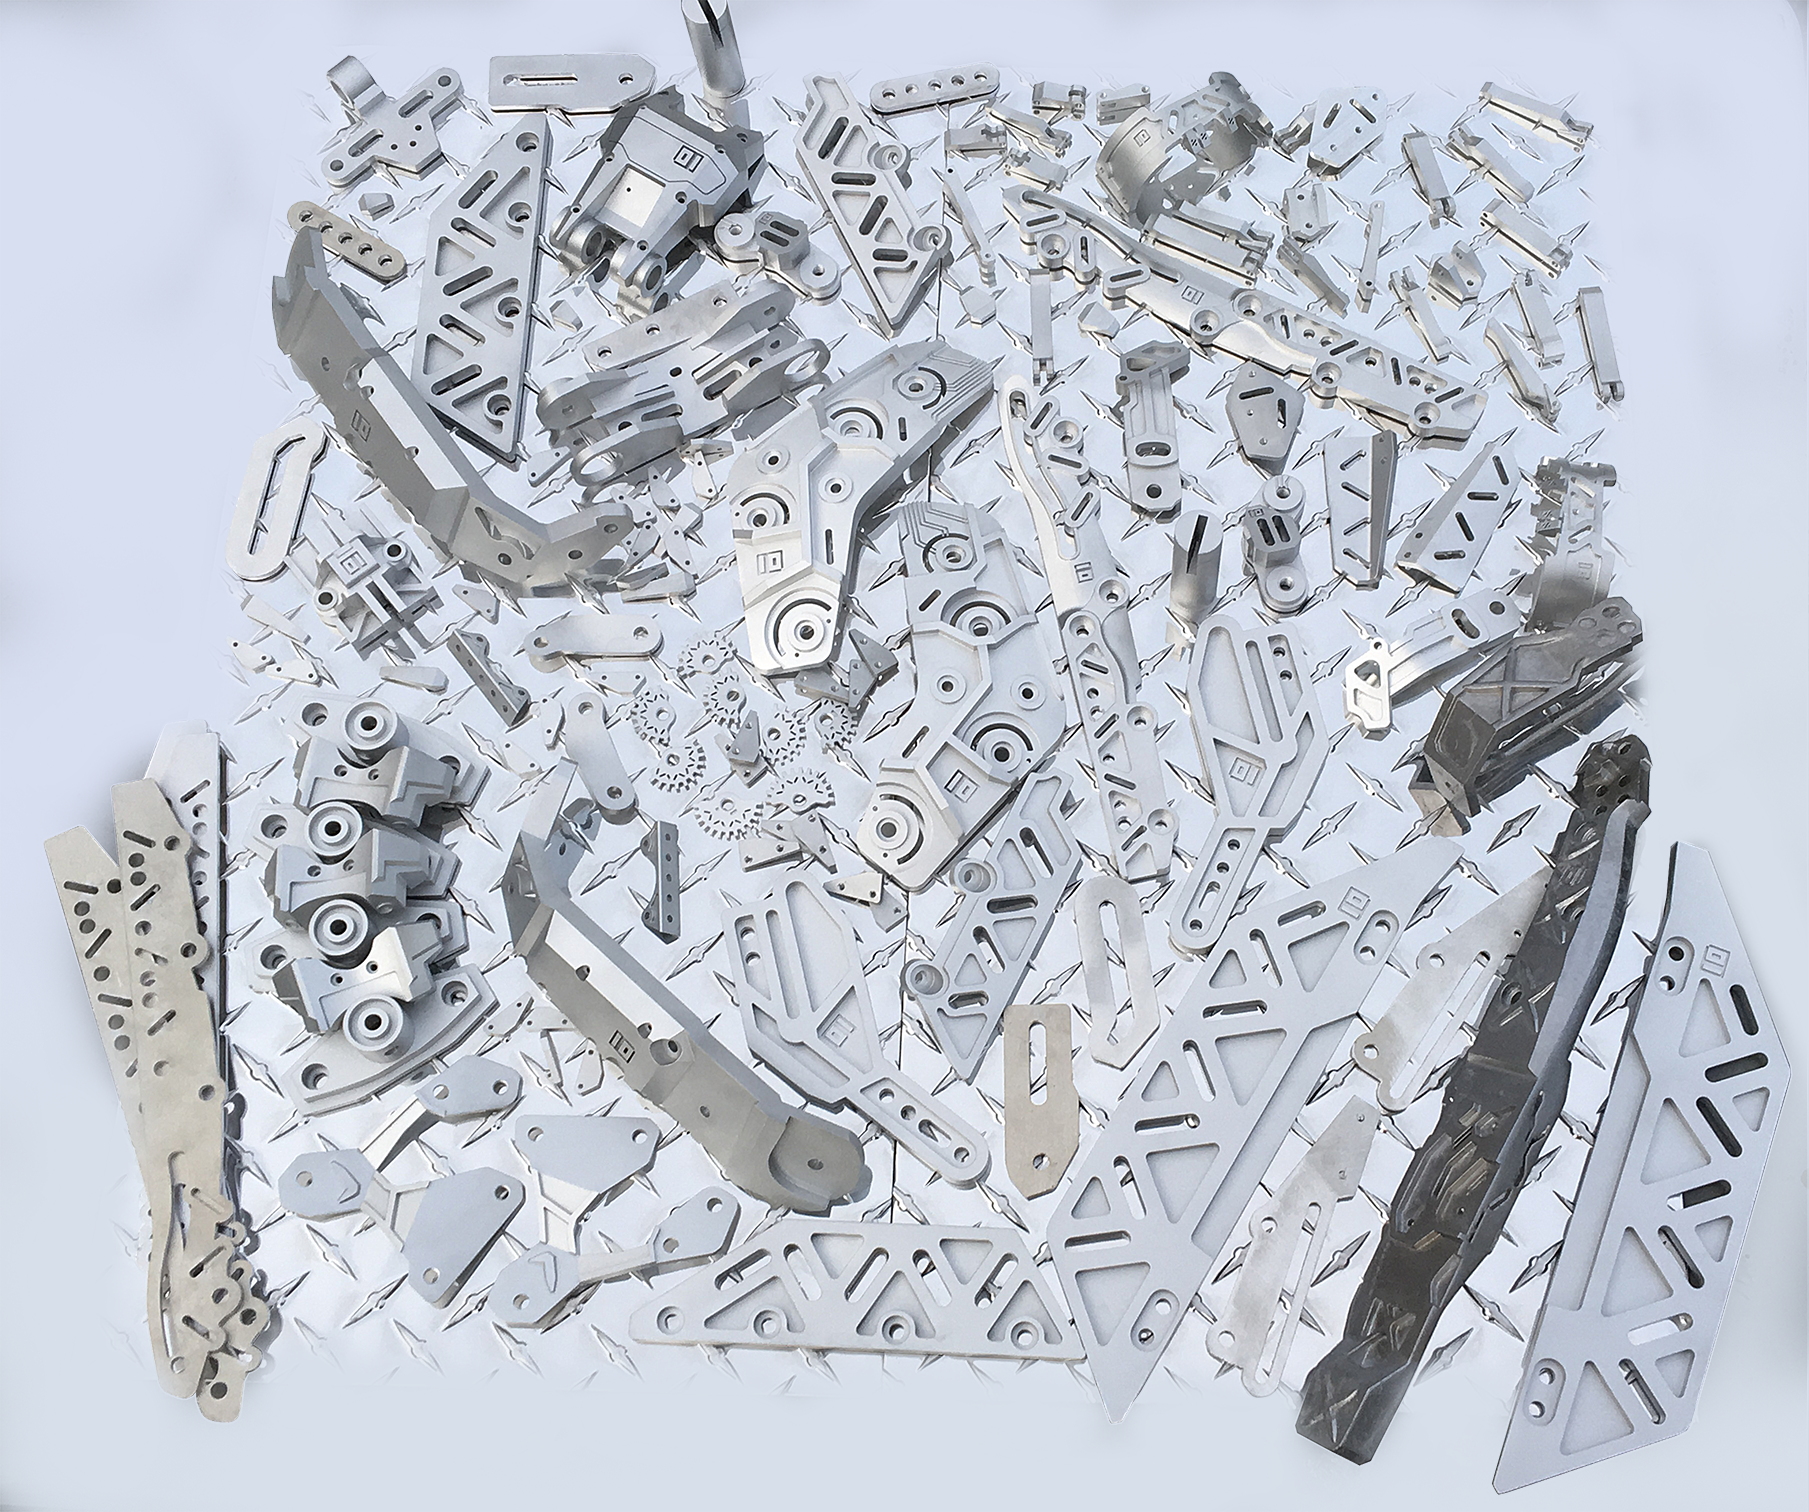
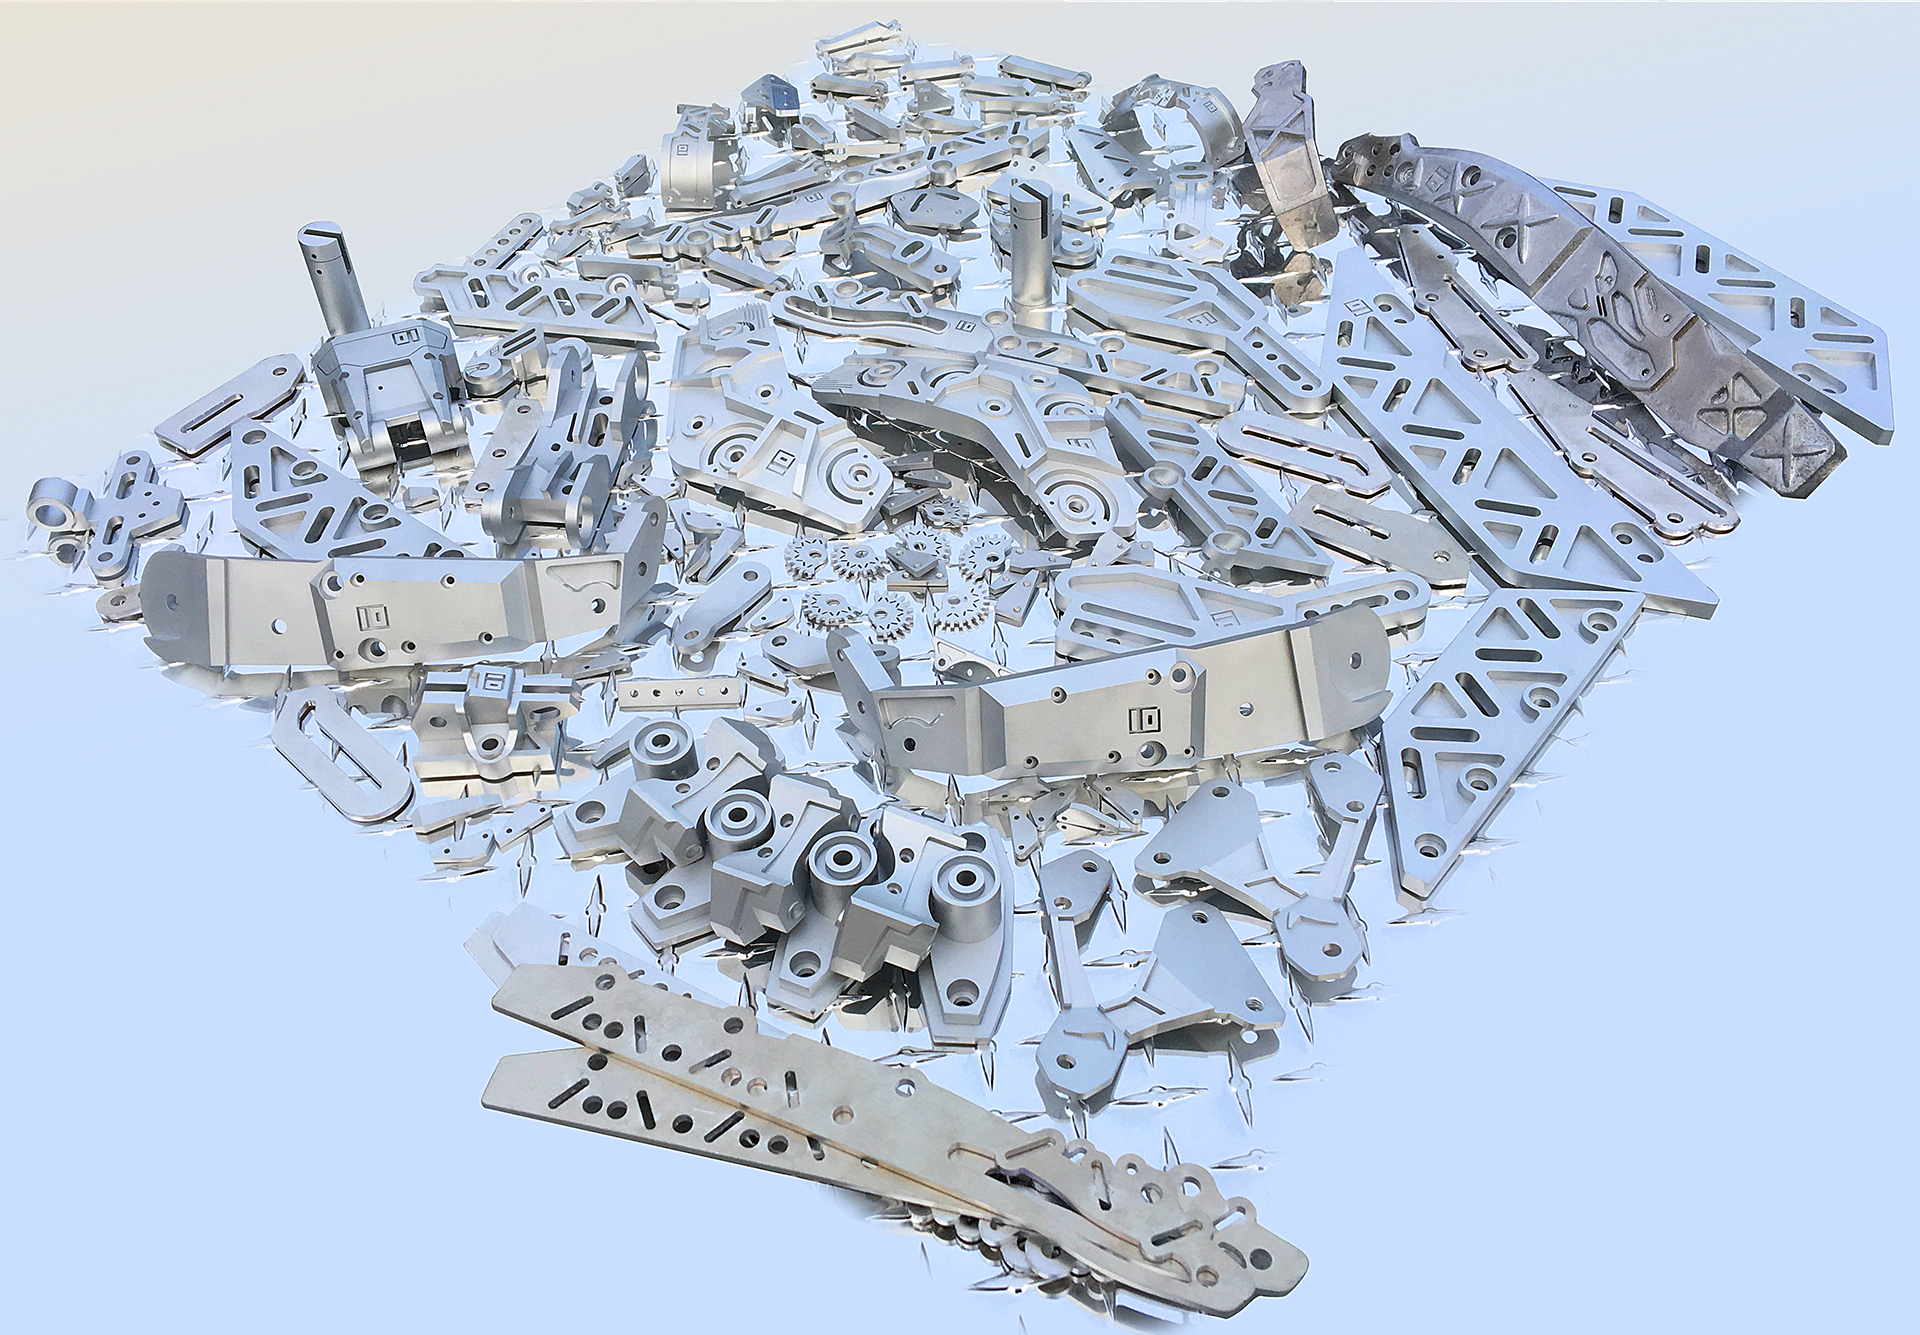
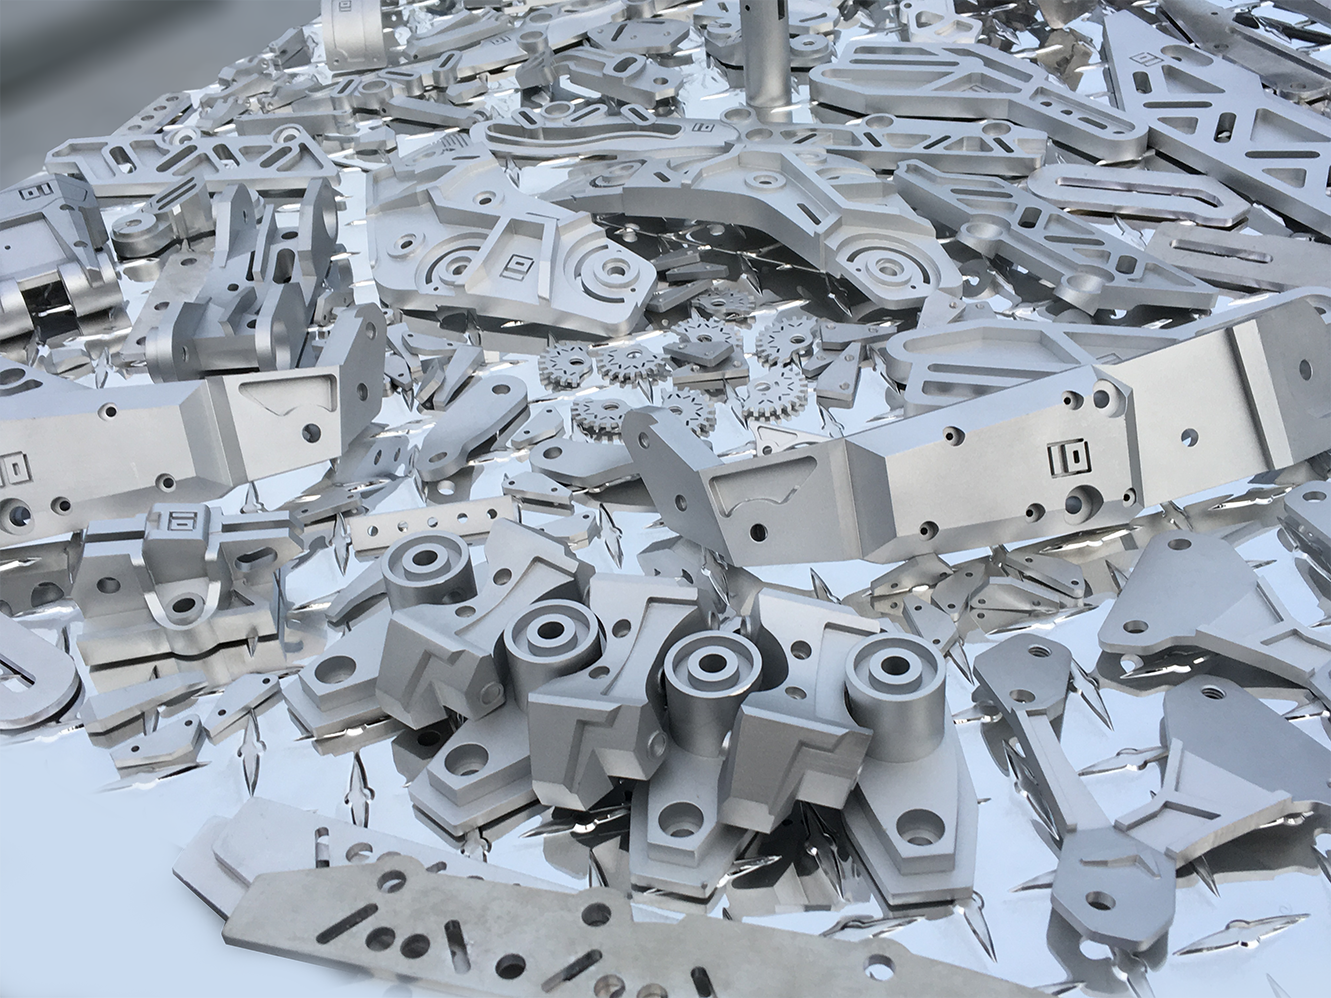
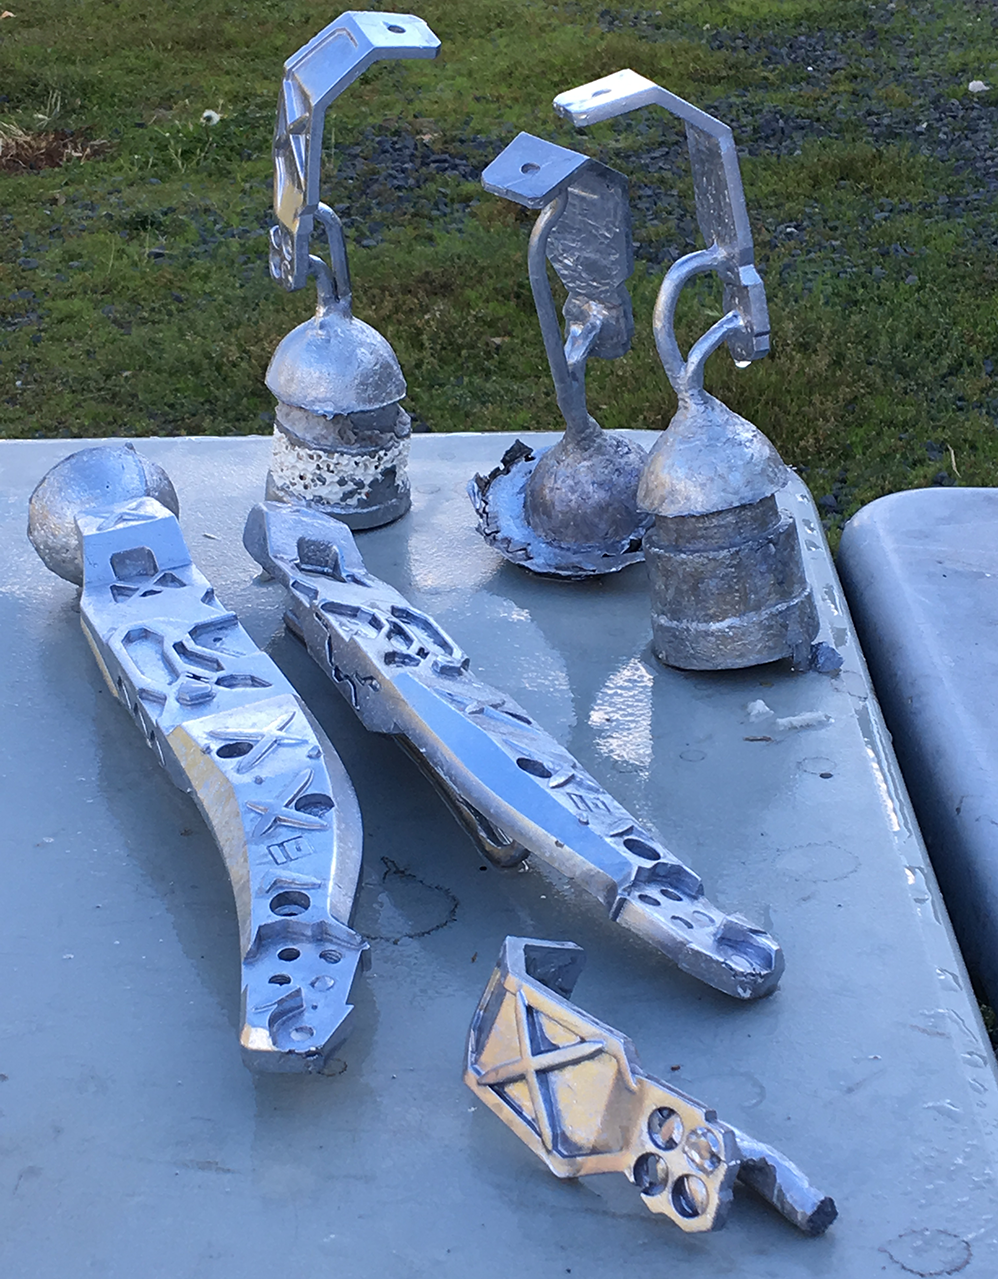
01/29/2018 at 15:26 • 0 commentsI did a detailed inventory this weekend - I am going to cast between 16 and 26 parts (out of 245) and fast-track the rest through CNC. I am glad I built out my foundry infrastructure, but I still want to finish this project in no more than a year. So far I have 3-4 casts ready to cut off the sprues and start polishing.
![]()
![]()
![]()
-
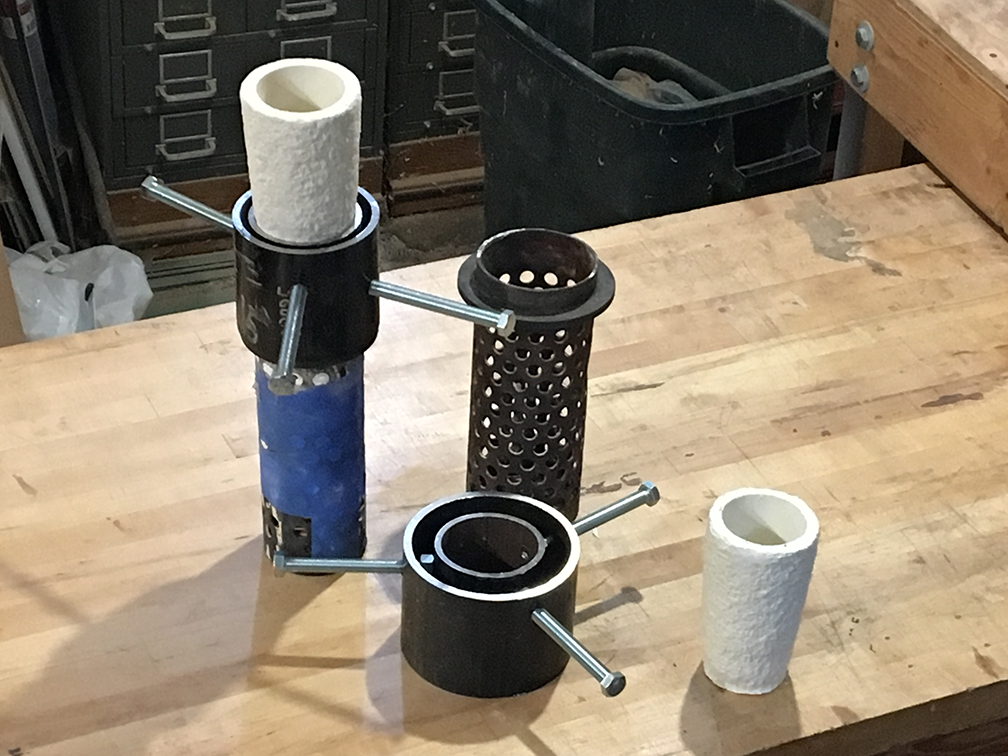
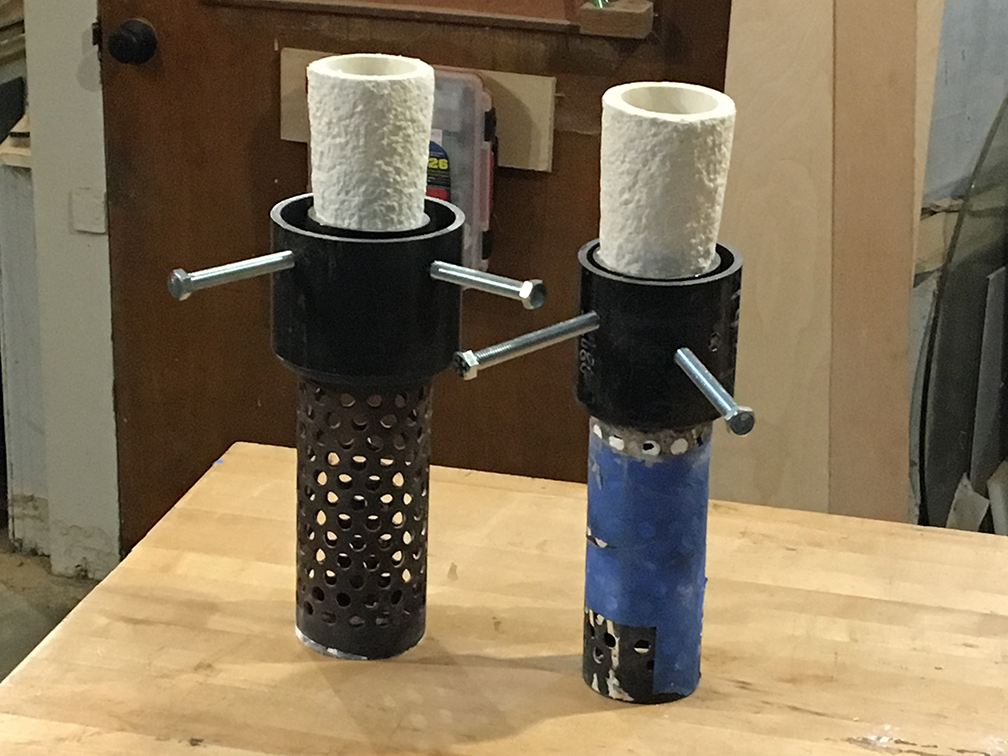
Fixtures again
01/18/2018 at 06:05 • 0 commentsThe last two fixtures got fused together because the metal filled the cavity where pipe diameter didn't quite match the flask. I managed to beat the chunk of metal out of one of the fixtures, but both got destroyed in the process.
Just when I was in talks with a plant that manufactures custom riser/filter combinations from CAD drawings, one of the engineers here at the hackerspace got interested in the problem and helped create a fixture that worked to increase casting quality:
![]()
The new fixture uses a ceramic blanket and more precisely machined & welded pieces (now I know how to weld!)
![]()
![]()
-
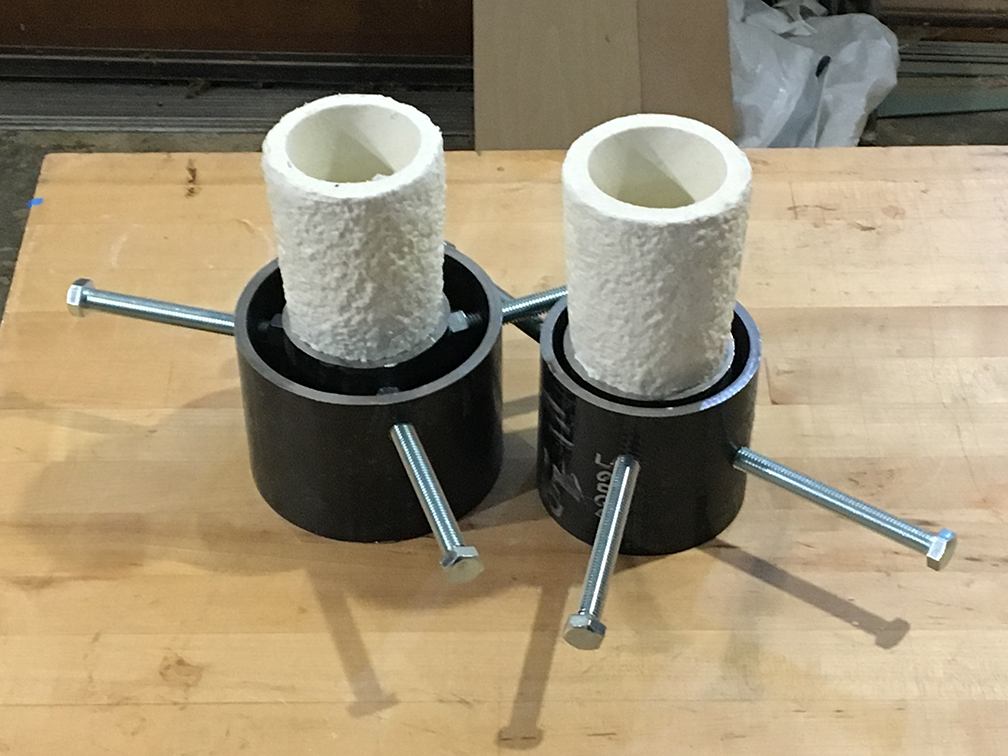
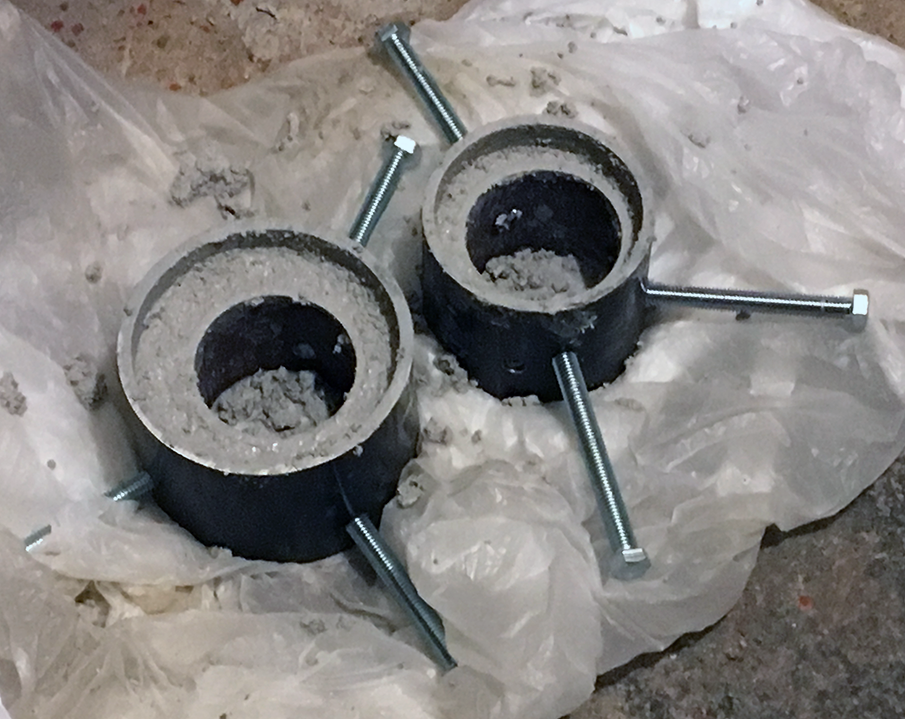
Fixtures completed
12/11/2017 at 00:48 • 0 commentsThis weekend I finally completed fixtures to increase the casting quality. After refractory which cracked and fell apart, clay which exploded in the kiln, CeramaCast which fell apart despite the high price, and finally a cost-inefficient CNC quote, I iterated onto something that works.
![]()
![]()
![]()
![]()
![]()
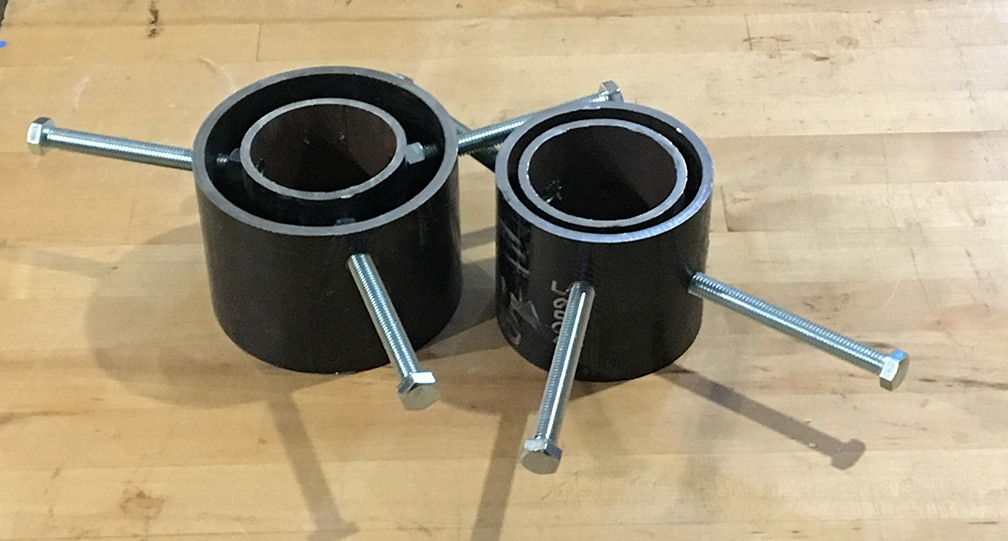
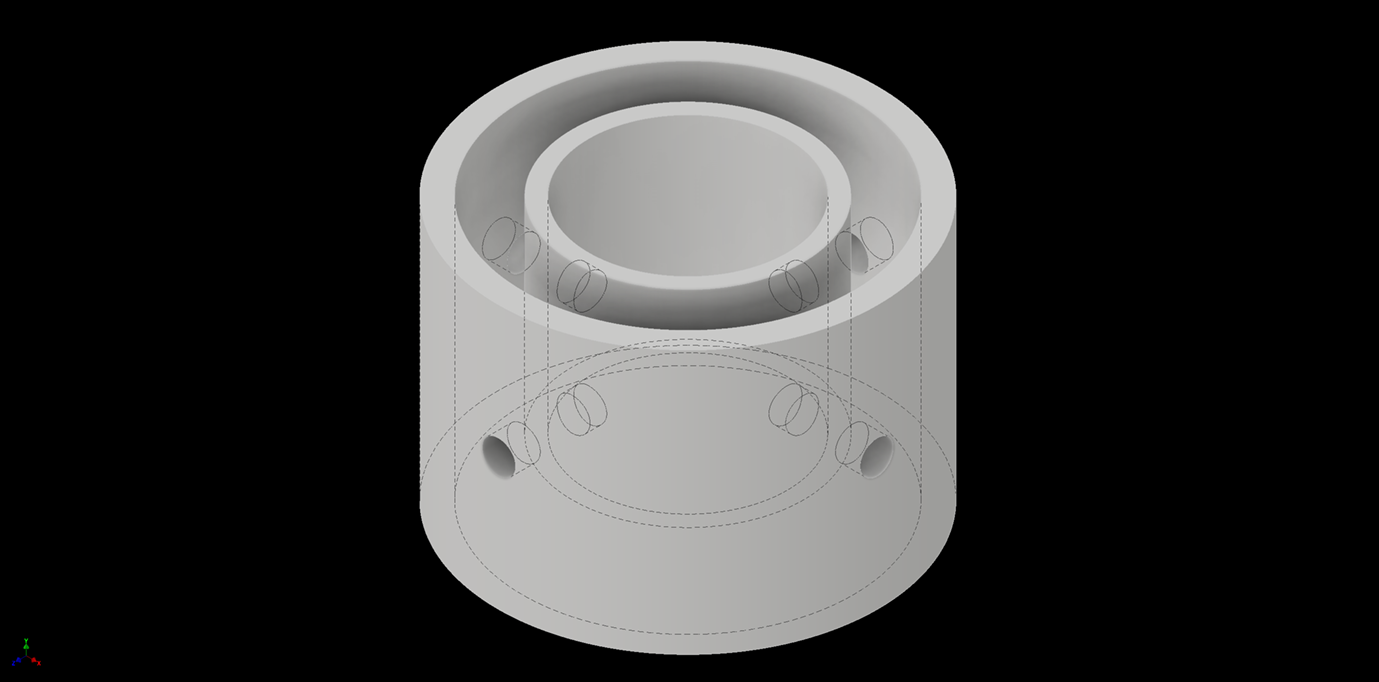
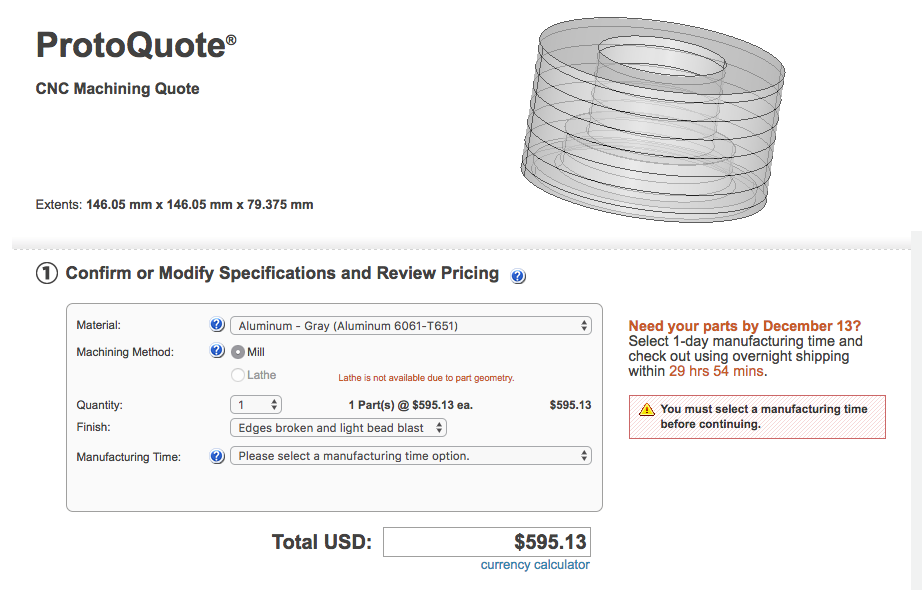
I estimated the CAD model used for the CNC quote with steel pipes of diameters stocked by the nearest steel yard - features like bevels, tapers and 1-piece construction had to be given up but the resulting cost was around $90, down from $900 from the CNC process.
The inner pipe sized to accept the riser is held inside the outer pipe that connects to vacuum flask lip with 1/2" screws. The holes took two weekends to drill and tap, but the result is holding well. The cavity between the pipes is filled with refractory. which no longer needs to hold together by itself.
![]()
The original model quote (it would be two of those):
![]()
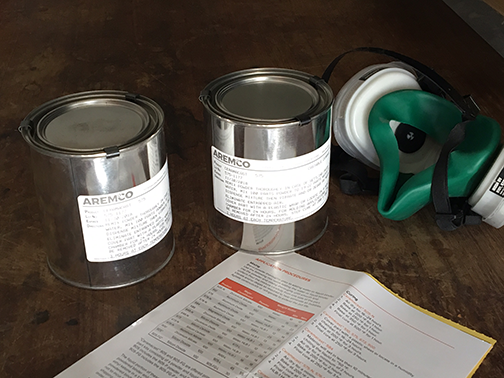
Ceramacast.
![]()
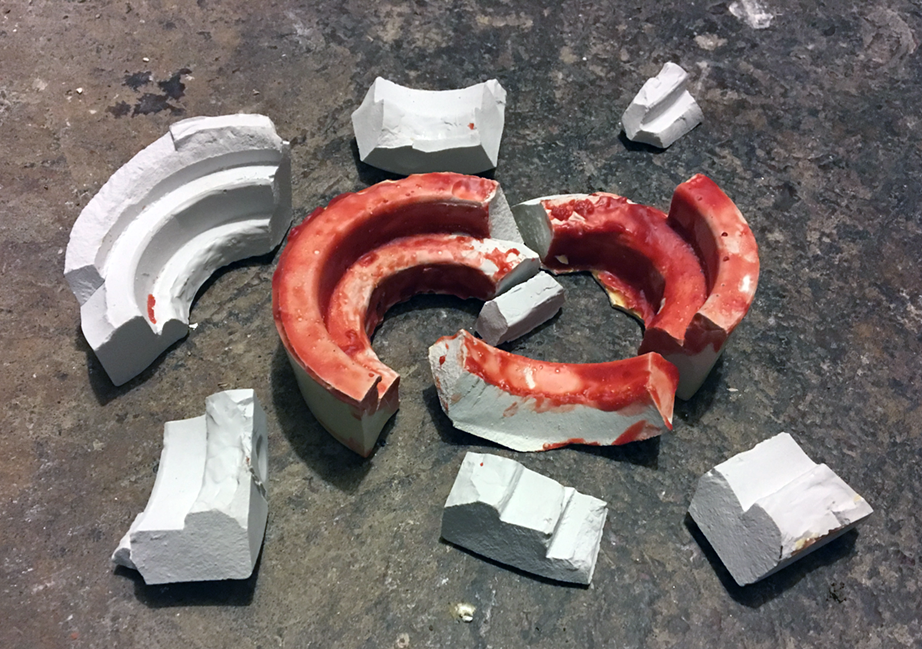
Caramacast after hardening. Those broken pieces are worth $300, pretty unpleasant.
![]()
-
Trying out Ceramacast
11/14/2017 at 05:17 • 0 commentsThe experiment with ceramic fixtures made out of pottery clay failed because the clay shrinks when drying (and especially during firing) - I mounted the clay onto steel flasks to try to imprint the flask surface on the inside which meant the fixtures had no available space to shrink and blew up in the kiln.
![]()
Plan B - I am going to try a quality ceramic casting compound for dense and high-detail casts with 1% shrinkage: Ceramacast. This time I will use wax cores cast from silicone molds to create the inside detail - after hardening, no firing is necessary and the wax core can be steamed out.
-
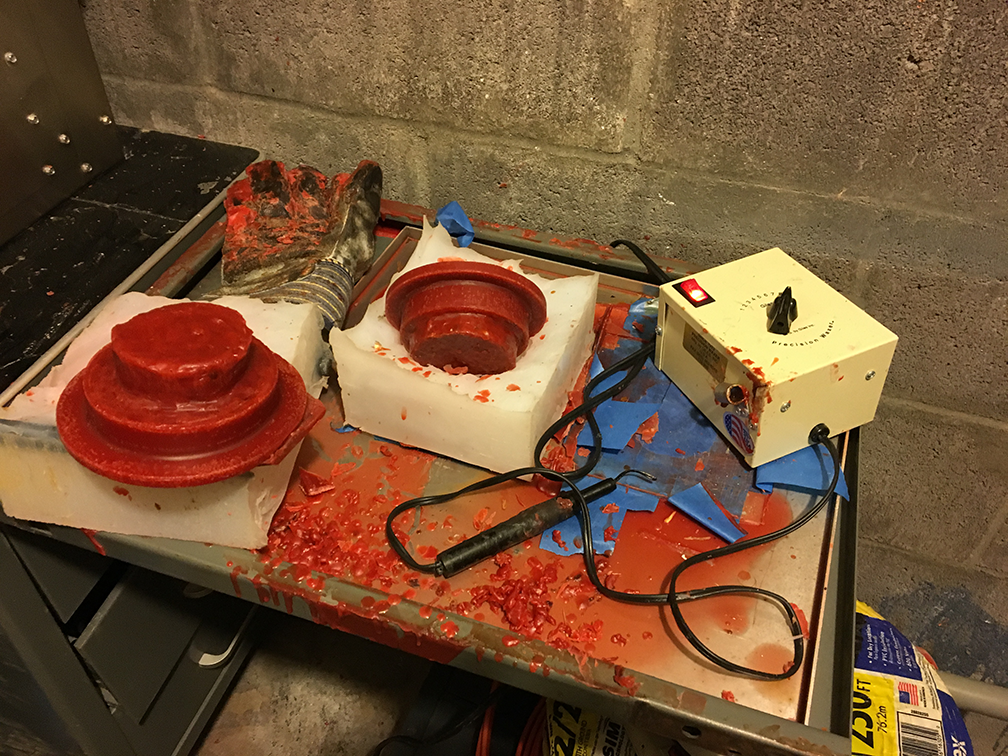
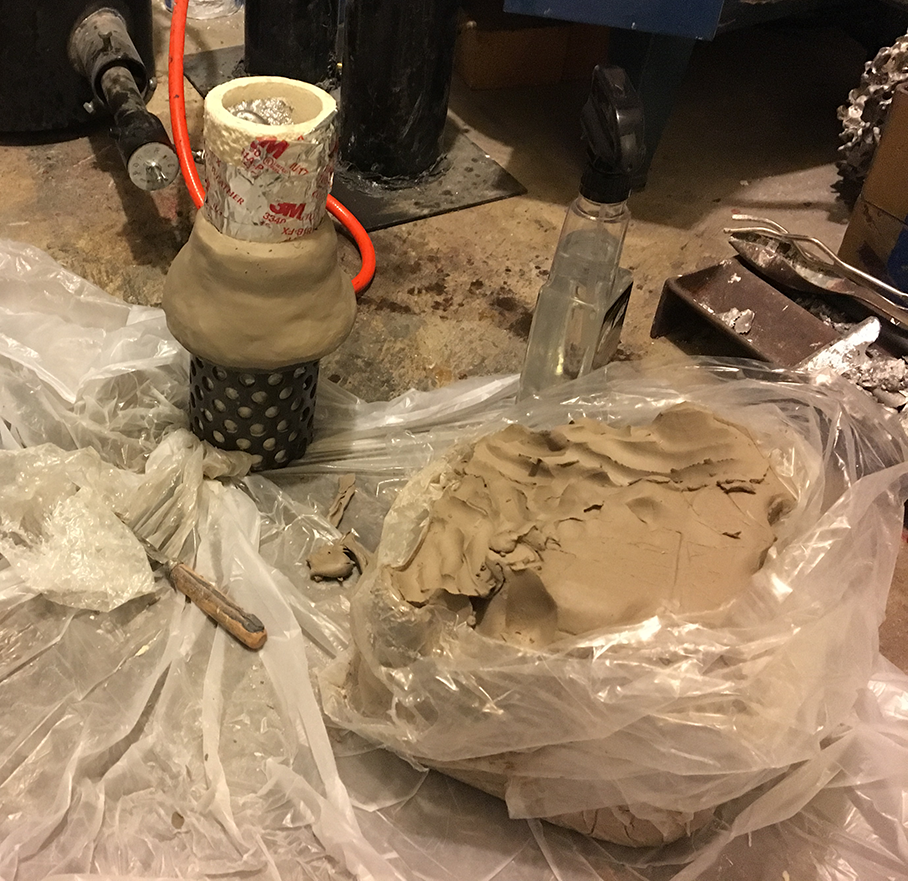
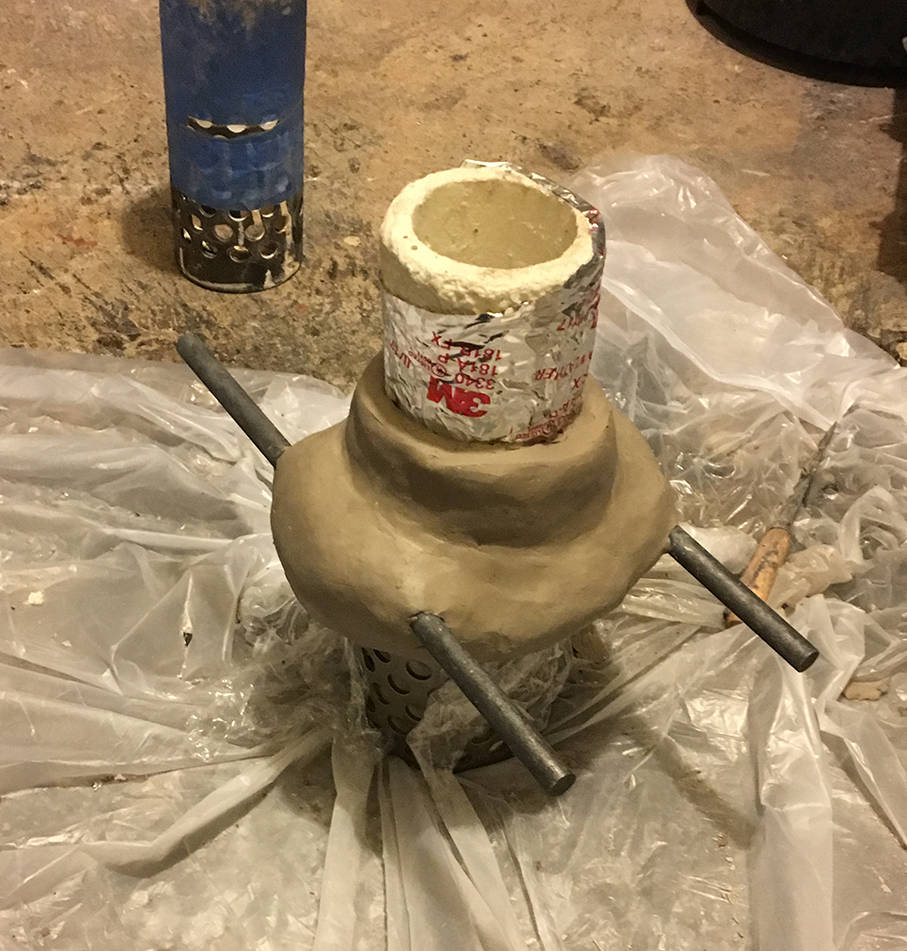
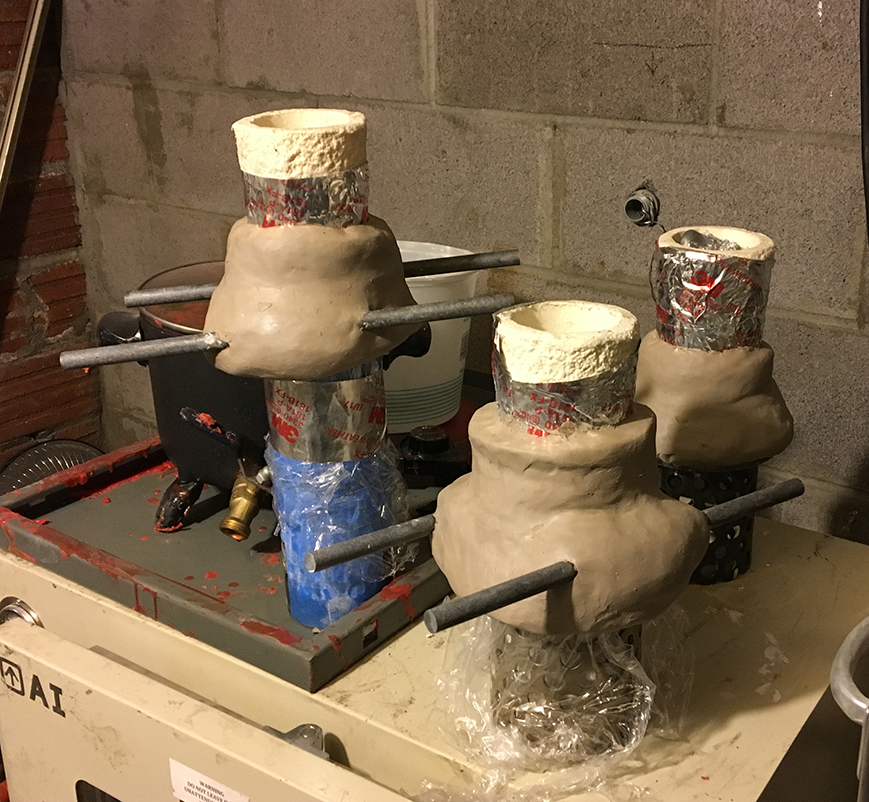
Ceramic fixtures to fight inclusions
10/31/2017 at 02:15 • 0 commentsI found out that the last problem I have with inclusions occurs due to thermal shock weakening the investment (inside the mold) and vacuum then breaking weak pieces off so they end up being embedded in cosmetic surfaces. To shorten the working time I decided to try making ceramic fixtures that have riser & filter pre-inserted. That way I can take 5-6 minutes it takes me to attach riser & filter down to 20 seconds (which is the max time before the thermal shock event).
![]()
![]()
![]()
![]()
The idea is to have the crucible and the vacuum rig already in the kiln room, so all I have to do is take the flask out of the kiln, close the kiln door, place the flask in the vacuum chamber, and attach the fixture. Can this be done in 20 seconds? We'll find out, but first I have to fire the fixtures themselves and glaze them. So, I have some involuntary clay art to do :)
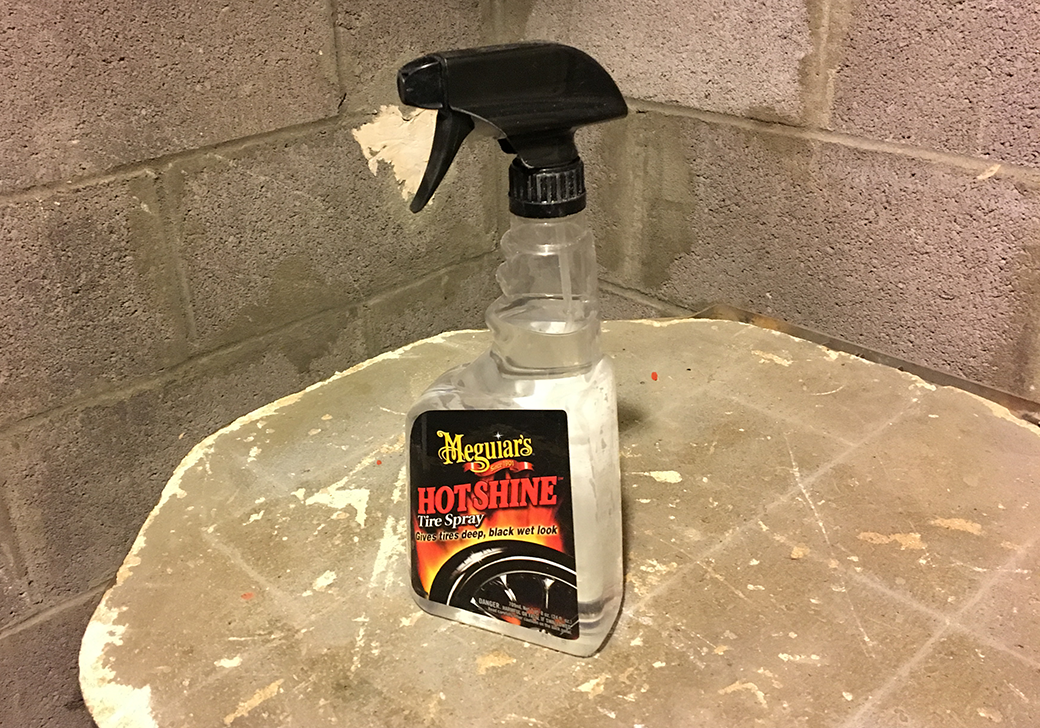
Tire polish pictured here is used as mold release for clay. -
Getting rid of bubbles and inclusions. Automation.
10/09/2017 at 06:37 • 0 commentsTo fight bubbles embedded in the casting I got a spray bottle to apply VacuFilm on the wax models more evenly - this worked and I got a thin mist layer instead of large drops as when using the brush.
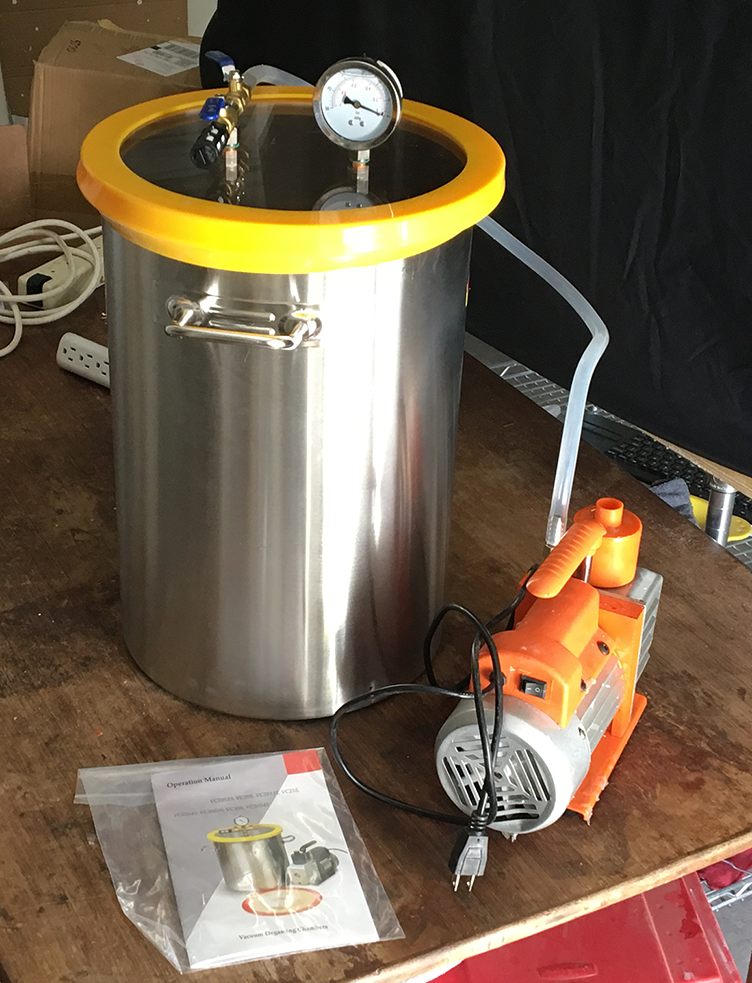
I also got a new large vacuum chamber for degassing before and after investing the wax model. I tried to do that with the vacuum oven for a long time (it was large enough), but after using it for wax, it no longer pulls full vacuum unless it's hot. With the new chamber, time to full vacuum is short enough that I can vacuum twice, all while agitating aggressively with the vibratory tumbler.
![]()
The resulting casts no longer have bubbles stuck inside concave geometry. There are actually a few bubbles on convex geometry (perhaps just a spot I missed with VacuFilm) but those tend to be simple to just grind away.
![]()
![]()
![]()
![]()
![]()
![]()
![]()
![]()
![]()
The last problem are the inclusions - and I noticed that making sprues that are bent several times before reaching their target may be the answer. Kind of like the bent leg of a kitchen sink where all the garbage ends up, they seem to catch inclusions before they get to sensitive geometry. The model that had two of these bends next to each other had the least inclusions of the entire batch (almost perfect).
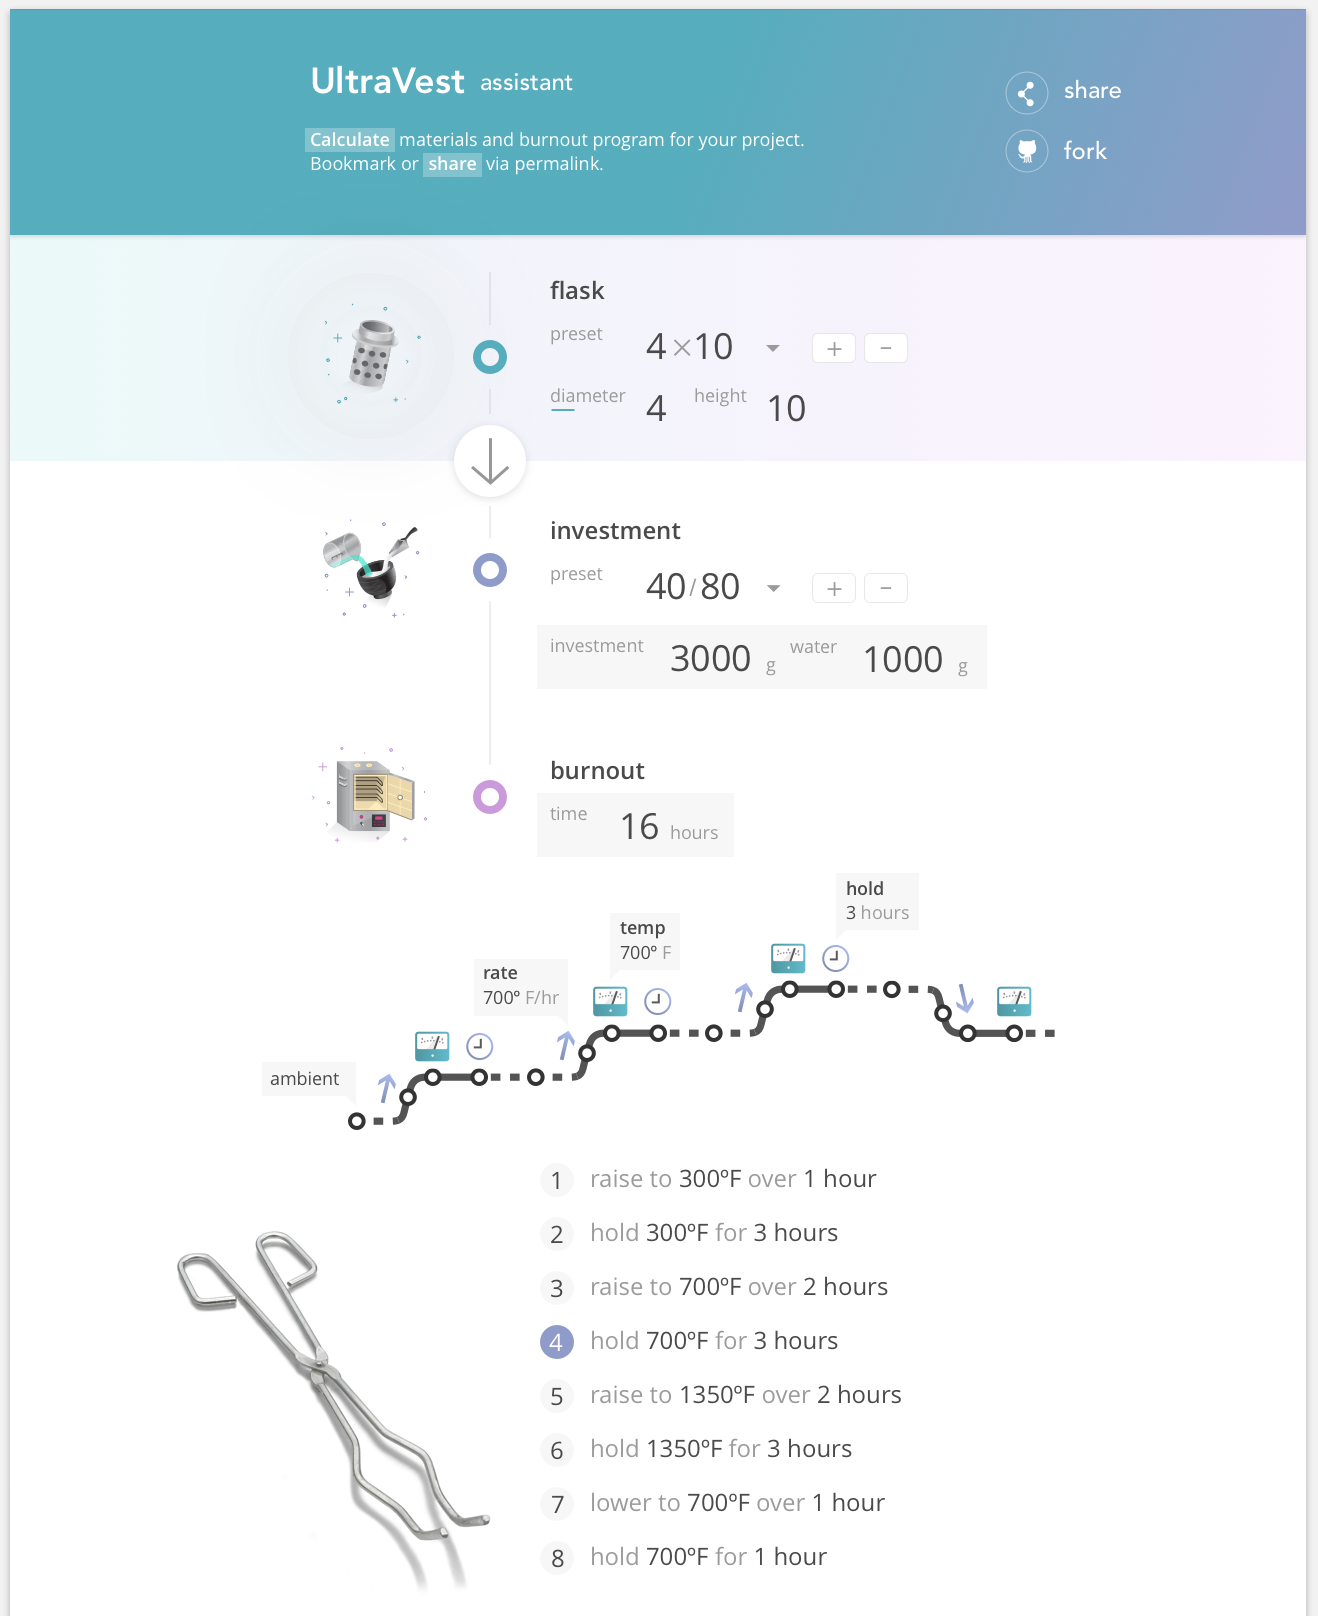
Lastly, I automated the investment/water weight calculation to save myself some time & trouble. I wanted to experiment with Preact and Recompose for a while for building small but potent web apps, and I also wanted to see how simple it would be to build a site that's pre-rendered while being very interactive, and hosted in a static S3 bucket on the Amazon cloud. I published the app and it works amazingly well - now I am taking a UI design class and learning Sketch to design the graphics to go with the functionality
![]()
Of course I will mostly be using it on my phone, so I have the mobile comp as well:
![]()
-
VacuFilm
09/18/2017 at 15:46 • 0 commentsSuccess in metal casting is achieved through ever-tighter process control. This week I spent many hours on chasing the wax models to remove any small concave geometry left from removal of sprues & scaffolding required to cast in silicone. When wax is steamed out in the pressure canner, any small concave negatives become small investment positives. Even though UltraVest is high quality, a few bits of the material hanging on a thin neck will always break off due to gravity, shaking, or by force of metal entering the mold.
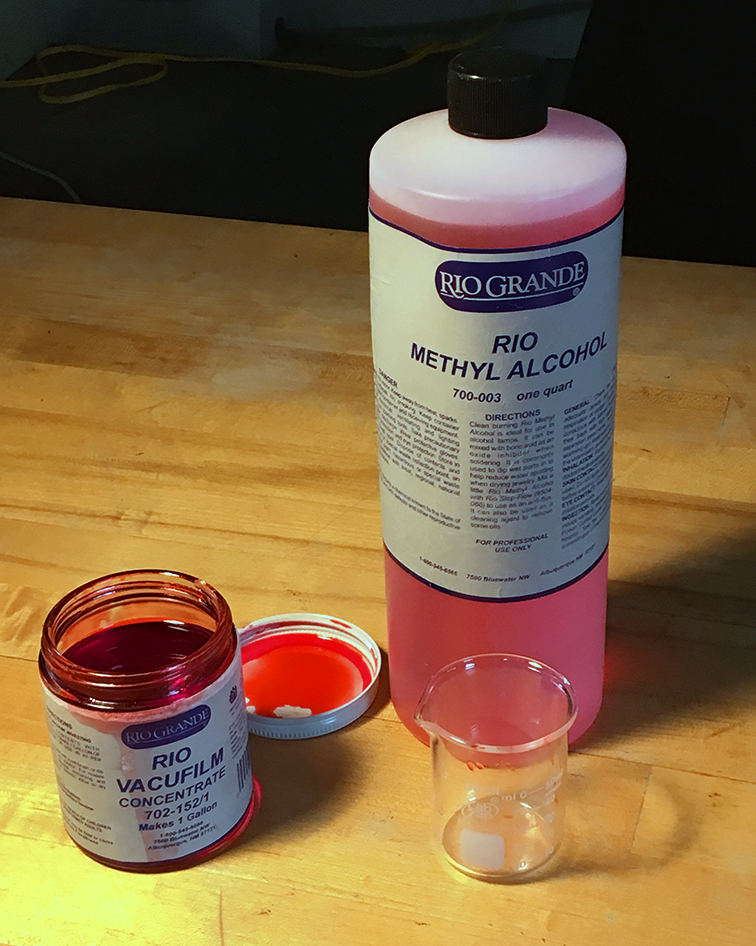
To take care of bubbles getting stuck in concave corners (the ones I have to leave in because they are part of the design) VacuFilm can be mixed with Methyl Alcohol and brushed on, almost like mold release when silicon casting:
![]()
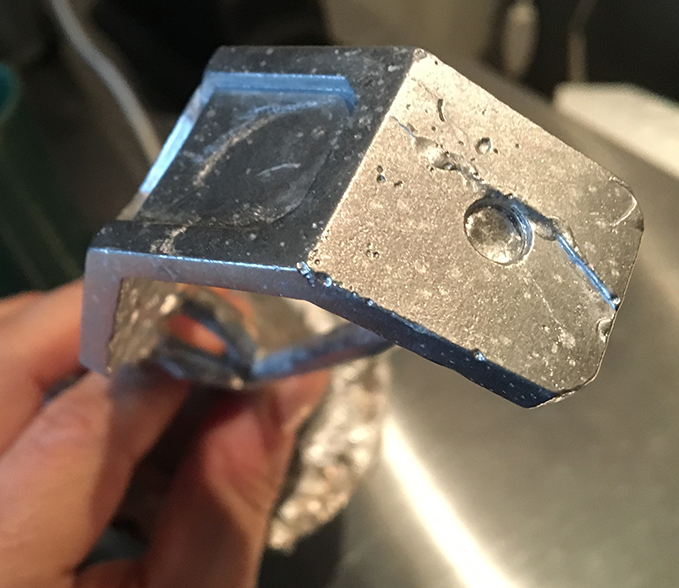
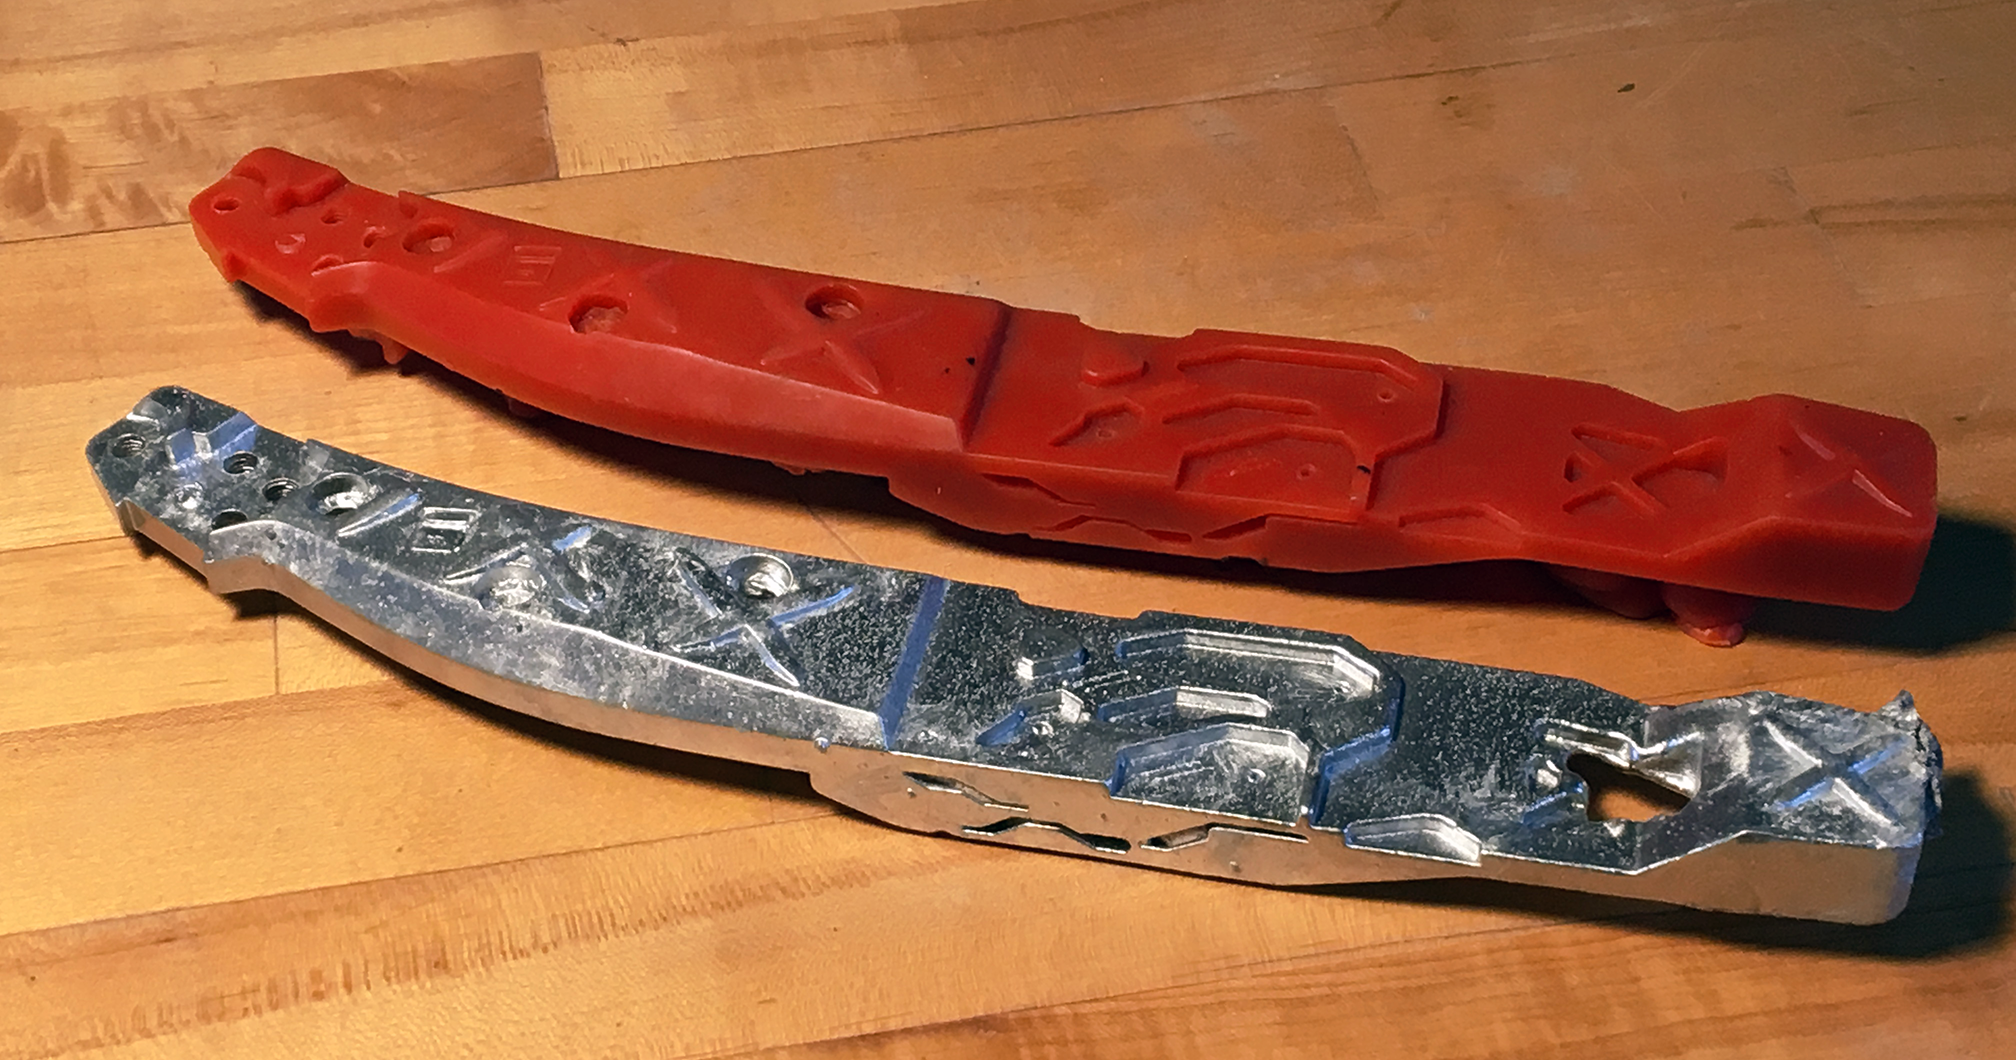
Here's also a botched test cast from this week - still encouraging because almost the entire model came out this time.
![]()
It's interesting to note that the butt of the model (with the square cross) is blurry compared to the rest of the model because it was partially exposed to the surface. That means to achieve good results throughout, the model needs to be as deep inside the mold as possible, with only a thin sprue leading out. Otherwise it must be mixing with hydrogen from the atmosphere and failing to fill.
-
Casting a large part
09/03/2017 at 18:23 • 0 commentsIn this one I get to use my new automatic kiln and extra-tall vacuum flask welded out of two smaller flasks. I made too many mistakes because I haven't done casting for some time while improving my tools, but I am seeing small improvements from process control.
-
Burnout kiln hooked up
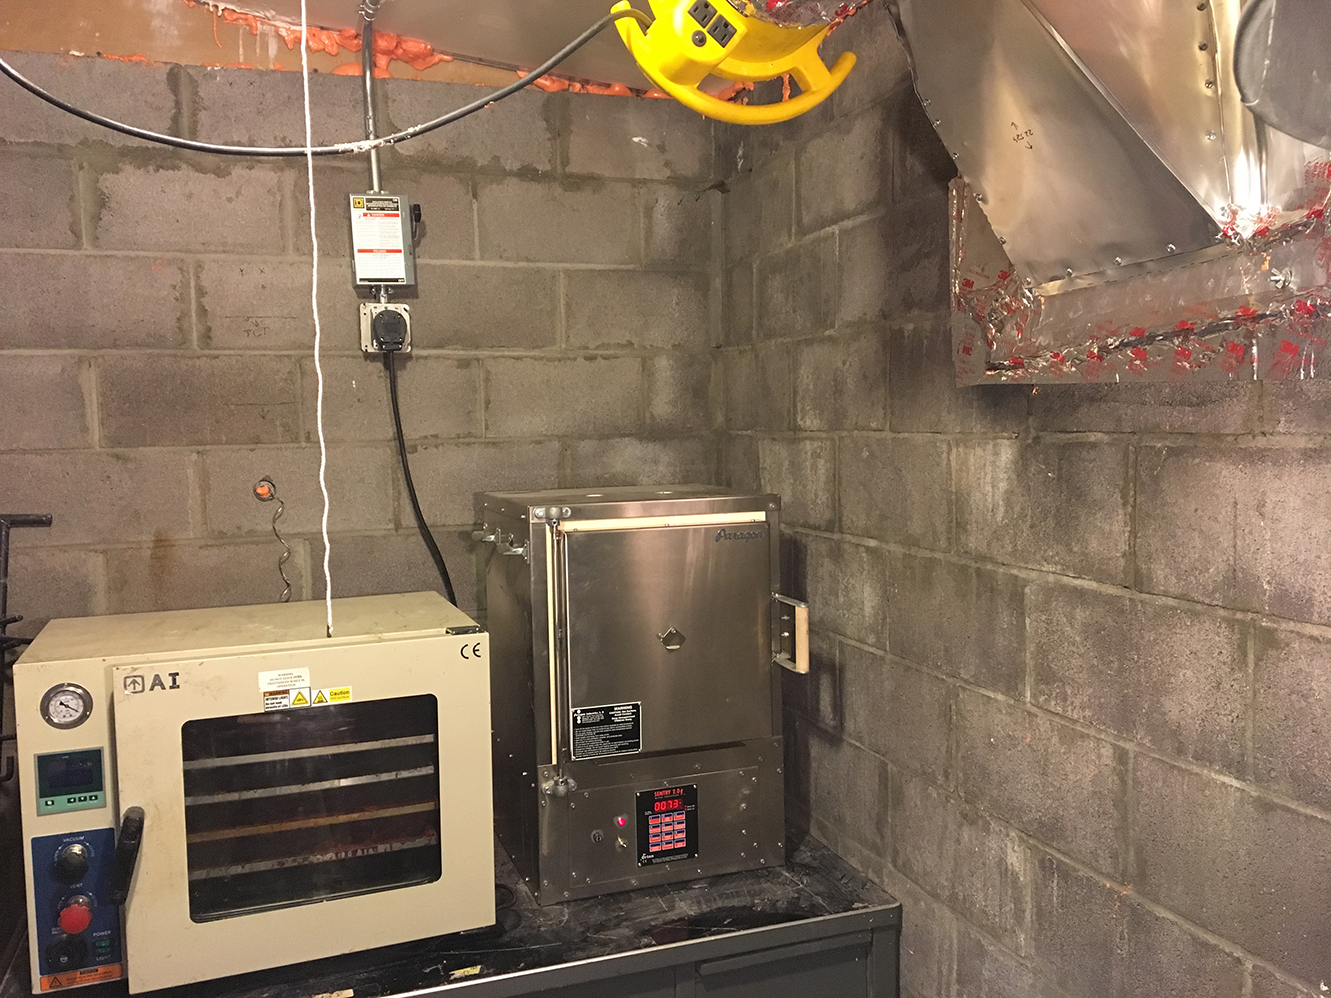
08/17/2017 at 19:43 • 2 comments![]()
The new burnout kiln has finally been hooked up to 30 A / 240 V outlet, which I routed to a fusible safety switch, which then goes across the wall and the ceiling to the breaker box. After so much time spent routing EMT (electrical metallic tubing) conduits, my brain is randomly focusing on them everywhere I go and naming the components. I also had to cut off the kiln's power plug and replace it with another, NEMA 10-50.
The homebrew ventilation visible here was a result of intense labor to make a 3D model of the duct in Inventor, unfold it using sheetmetal functionality, export the sketch to Illustrator, and finally print it at 5% size. I projected the print using a tracer projector and got it to a focus state where 1" on Inventor drawing was equal to 1" on the wall, then traced on sheet metal and cut the patterns out with sheet metal scissors. Common sheet metal screws were used to assemble the final patterns after re-folding them with clamps.
Finally the switch was pulled and nothing exploded. The kiln emitted a long beep and the Sentry controller came online, burning with a demonic red glow. Today I am starting the first over-night (13-hour) burnout.
-
Updating Tools
08/02/2017 at 15:29 • 0 commentsThis week I got the vacuum oven back from service and went to a trucking company warehouse with an axe and a crowbar to retrieve my new burnout kiln (they failed to deliver 3 times). I broke down the box in their parking lot and dragged it into my car, finally making it to the hackerspace to place both on the new fireproof desk that once belonged to National Guard.
![]()
The extra-long flask fits inside the programmable kiln! Now I need to complete a custom VAC duct system and we have to put in a new electrical system for power requirements of the burnout kiln.
Elysium Max Exoskeleton
Exoskeleton suit replica from the movie Elysium in Autodesk Inventor, 3D printed and investment cast out of Aluminum