Close
0%
0%

Vulcan Salute

With this bit of animated art on your wall, it would be illogical if you did not receive extra long life and prosperity.

Similar projects worth following
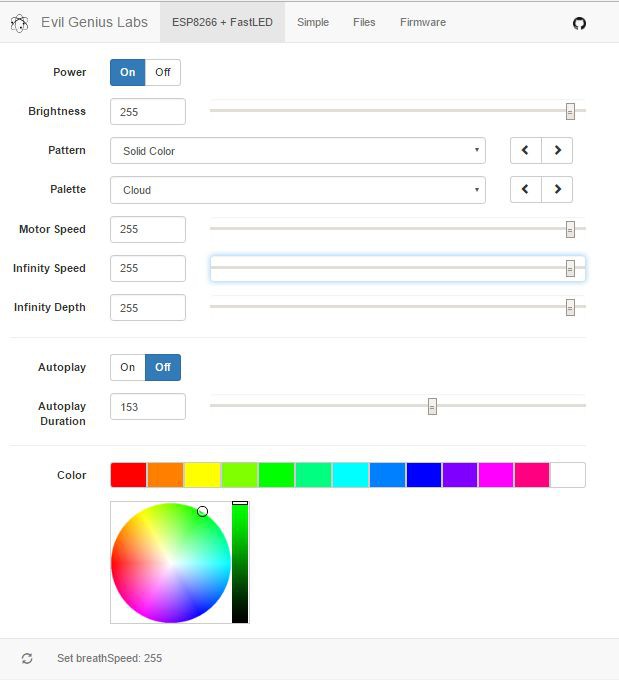
Open a web brower, hit the GO button! With this moving Vulcan Salute, you will instantly notice that you are living a longer and more prosperous life. To make the fingers light up, I started using 8mm PL9823 LEDs, but I wanted the project to be bigger and even more blinky. I scaled up the model and added holes for 60 per meter strips of LEDs. The outline of the hand will feature inward facing single-color LEDs that will show a breathing animation. The half-mirrored surface will enable an infinity effect. Menus and sliders on the web app will let the viewer change LED patterns, change breathe rate of the single-color LEDs, and change the motor speed (salute speed).

I'm learning about creating gears and linkages in this project. If it goes as planned, it will also be my first infinity mirror project. The 3D models are currently being made in TinkerCad, but I would like to learn and use the features available in 123D Design and Fusion 360 as well. The speed of the motor and the LED pattern will be controlled by any device that can connect to the local network and has a web browser. The webserver on the ESP8266 has data stored in SPIFFS flash memory.

Link to Bill of Materials (Google Sheets)

Link to BIG VERSION of 3D Models

Vulcan_Salute.zip

FastLED+ESP8266 webserver plus browser app

x-zip-compressed - 282.82 kB - 03/07/2017 at 11:58

Download

Tiny Pinion.stl

8 tooth pinion gear. I printed in PETG for extra strength, but PLA is probably fine

simplify3d_stl - 239.83 kB - 03/07/2017 at 04:24

Download

Bullgear.stl

Bull gear with Vulcan salute flair

simplify3d_stl - 1.06 MB - 03/07/2017 at 11:59

Download

Hambone Long.stl

Connecting Rod

simplify3d_stl - 97.64 kB - 03/07/2017 at 04:24

Download

Spacer Disc.stl

To add some space between the reflective backing and the moving fingers

simplify3d_stl - 7.89 kB - 03/07/2017 at 04:24

Download

View all 12 files

  • 1 × ESP8266 Microprocessor with WiFi
  • 1 × Geared Motor for toy car / robot With two output shafts (only one used)
  • 16 × PL9823 LEDs Individually addressable LEDs in 8mm package
  • 6 × 3D printed parts 100% fits 8mm LEDs, 62.5% scale fits 5mm LEDs
  • 3 × Filament Rivets made from short pieces of filament. Heat up the end and use a flat piece of metal to mushroom it, completing the rivet.

View all 10 components

  • Web App Running

    terrag03/07/2017 at 12:04 0 comments

    The app works great, I just need to figure out how to make the slider values go from 0-1023 instead of 0-255.

  • ESP8266 repair

    terrag03/07/2017 at 12:03 1 comment

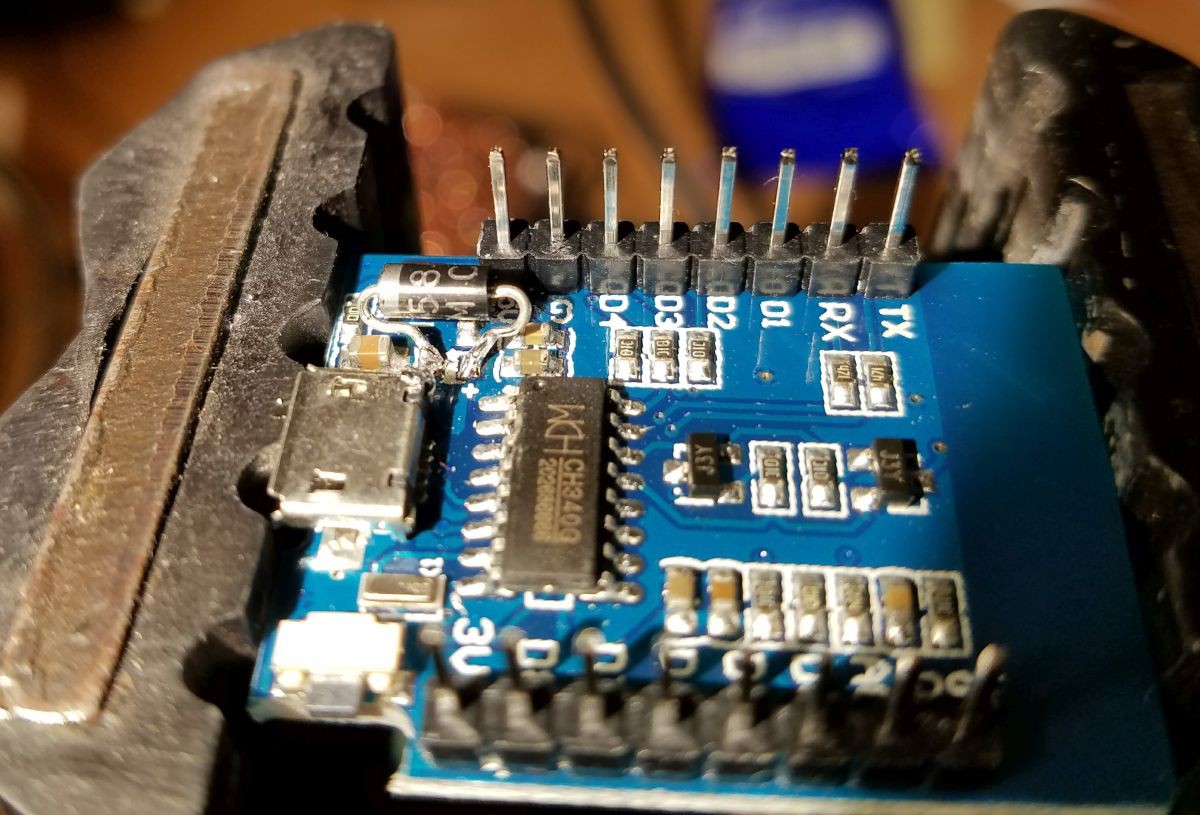
    I must have pushed the Shottky diode of my clone Wemos D1 Mini too hard, it failed last night, so I found a diode in a larger package and soldered it on. It's running the ESP chip, but now I'm having trouble getting it to communicate via USB.

  • ESP8266-FastLED-Webserver app

    terrag03/02/2017 at 20:46 0 comments

    Last night I was able to try out some code on the Vulcan Salute that seems to work. The LEDs, motor, and infinity lights were responding to commands from Jason Coon's Webserver app. I discovered that some of my LEDs are happy with a 3.3V data signal, and some LEDs are not. I got lucky, 2 out of 3 of my strands do not appear to need level conversion, but one does. It appears that the 12V boost converter requires a 5V signal. With a 3.3V signal, I could hear the inductor whining at the right frequency but it was not turning the LEDs off. The H-Bridge Motor controller also needs level conversion from 3.3V to 5V. Tonight I will try a cheap version of one of those level conversion boards based on the BSS138.

  • Finding an alternative to Blynk

    terrag02/28/2017 at 19:05 0 comments

    The contest deadline is only a few days away, so I'm really hoping I can write some software that operates my Vulcan Salute. The ESP8266 will use the FastLED library to drive 26 LEDs, send analogWrite() commands to the motor control board, and on another pin analogWrite() to a 12V boost converter with an enable input. I would like the user to be able to select the pattern and change the PWM going to the motor and the boost converter that controls the strip infinity LEDs.
    At first, I tried using Blynk because it has a nice interface on the phone. My program works with FastLED and with the sliders in the phone app, but when I use the Menu widget to select patterns, it always crashes, with no reset cause listed on the serial monitor. So I looked at +Jason Coon's webserver code that uses JQuery and Bootstrap. Those tools are way over my head, but Jason's is one slick looking app, so I posted a question to the FasteLED users group. Jason responded very quickly with some words of encouragement, so I will try using his webserver code, adding some sliders for more control. I also prepared a bill of materials with purchasing links and added it to the project description.

  • Testing LEDs

    terrag02/20/2017 at 13:16 0 comments

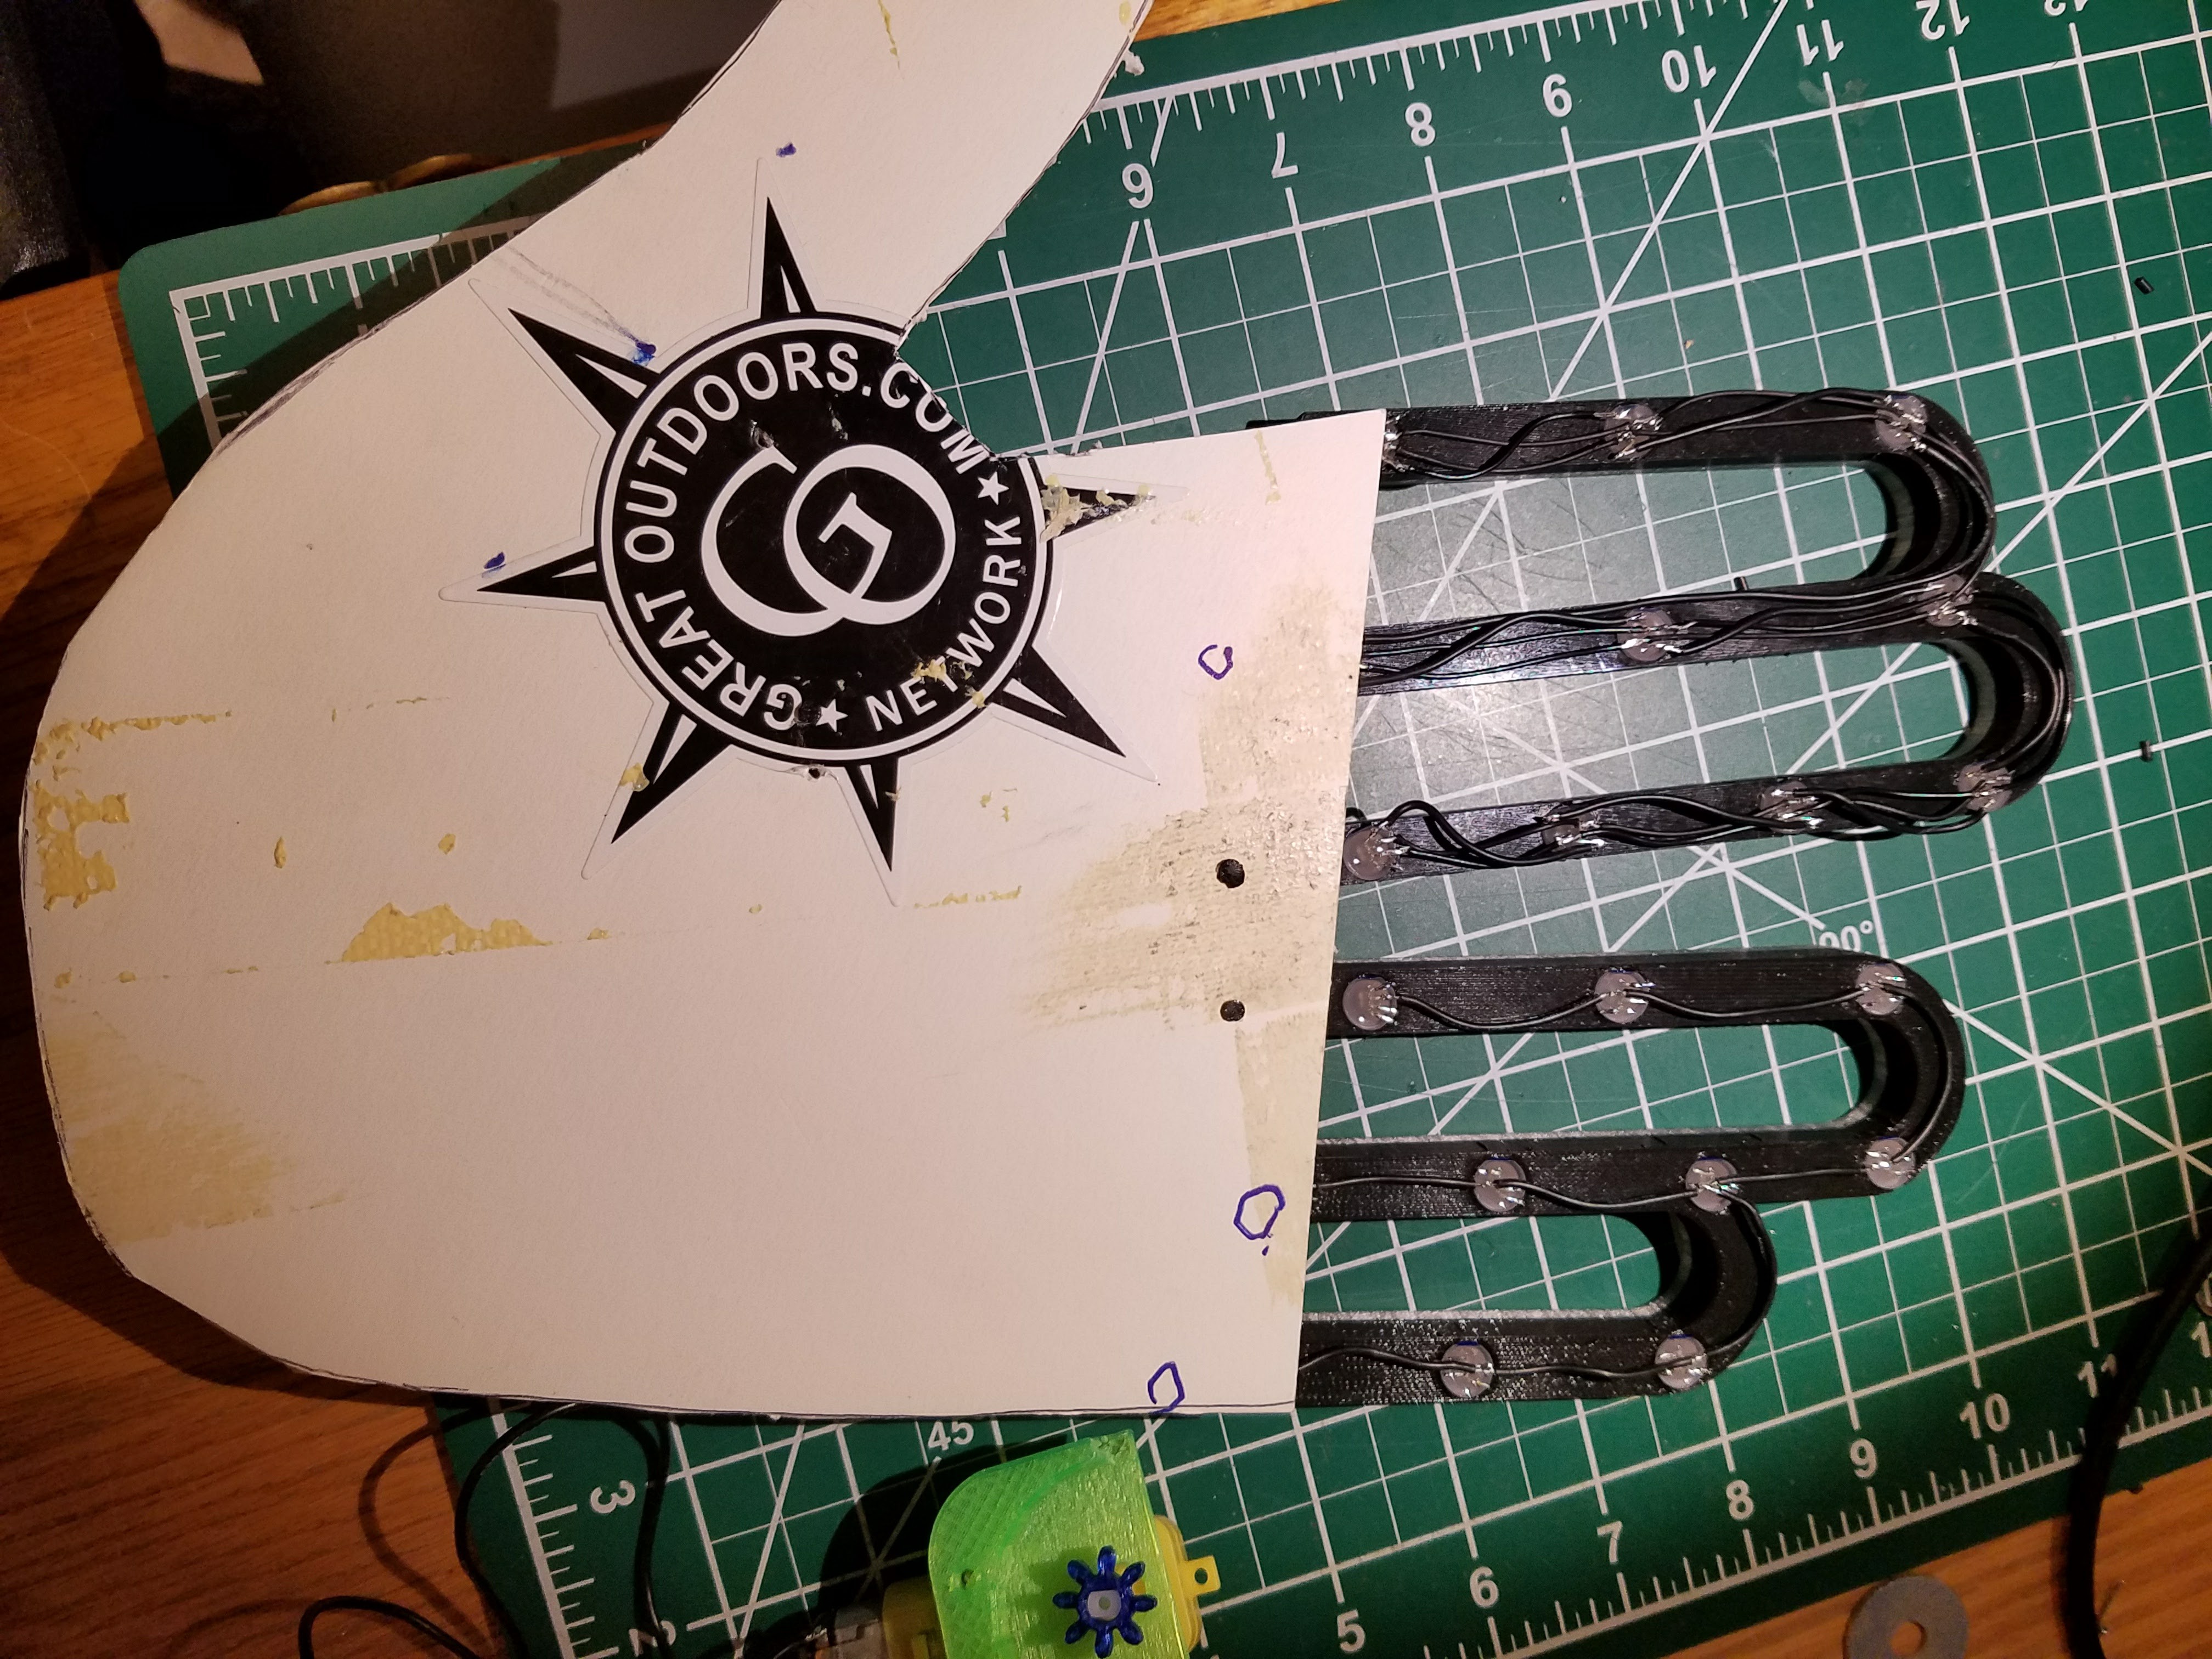
    This weekend I found the perfect plastic material for the perimeter of the hand - a piece of diffuser sheet from an old CRT projection TV. I measured the height of the motor while it was on the motor mount (the tallest item to go in the center of the hand) and I cut a slice of diffuser material 32mm in height. I then proceed to glue it to the acrylic base of the hand and made a notch for the motor wires to exit. Then it was time to put two strips of blue LEDs on the inside of the hand. The blue LEDs are on a strip with a 150 ohm resistor for each group of 3 in series. I tested the brightness on my bench power supply and found that I would like to supply at least 11 volts. I've chosen to use a boost converter to boost 5V to 12V. The converter I have on hand happens to have a chip enable pin available, so I can easily program a PWM breathing effect by using any of the GPIO pins on the ESP8266 and analogWrite commands. I was also able to test the 20 LEDs in the fingers. I have each of the 2 pairs of fingers using the same data wire, so the LED patterns will be mirrored.

  • New Bull Gear, Pinion Gear and Gearbox Holder

    terrag02/15/2017 at 13:57 0 comments

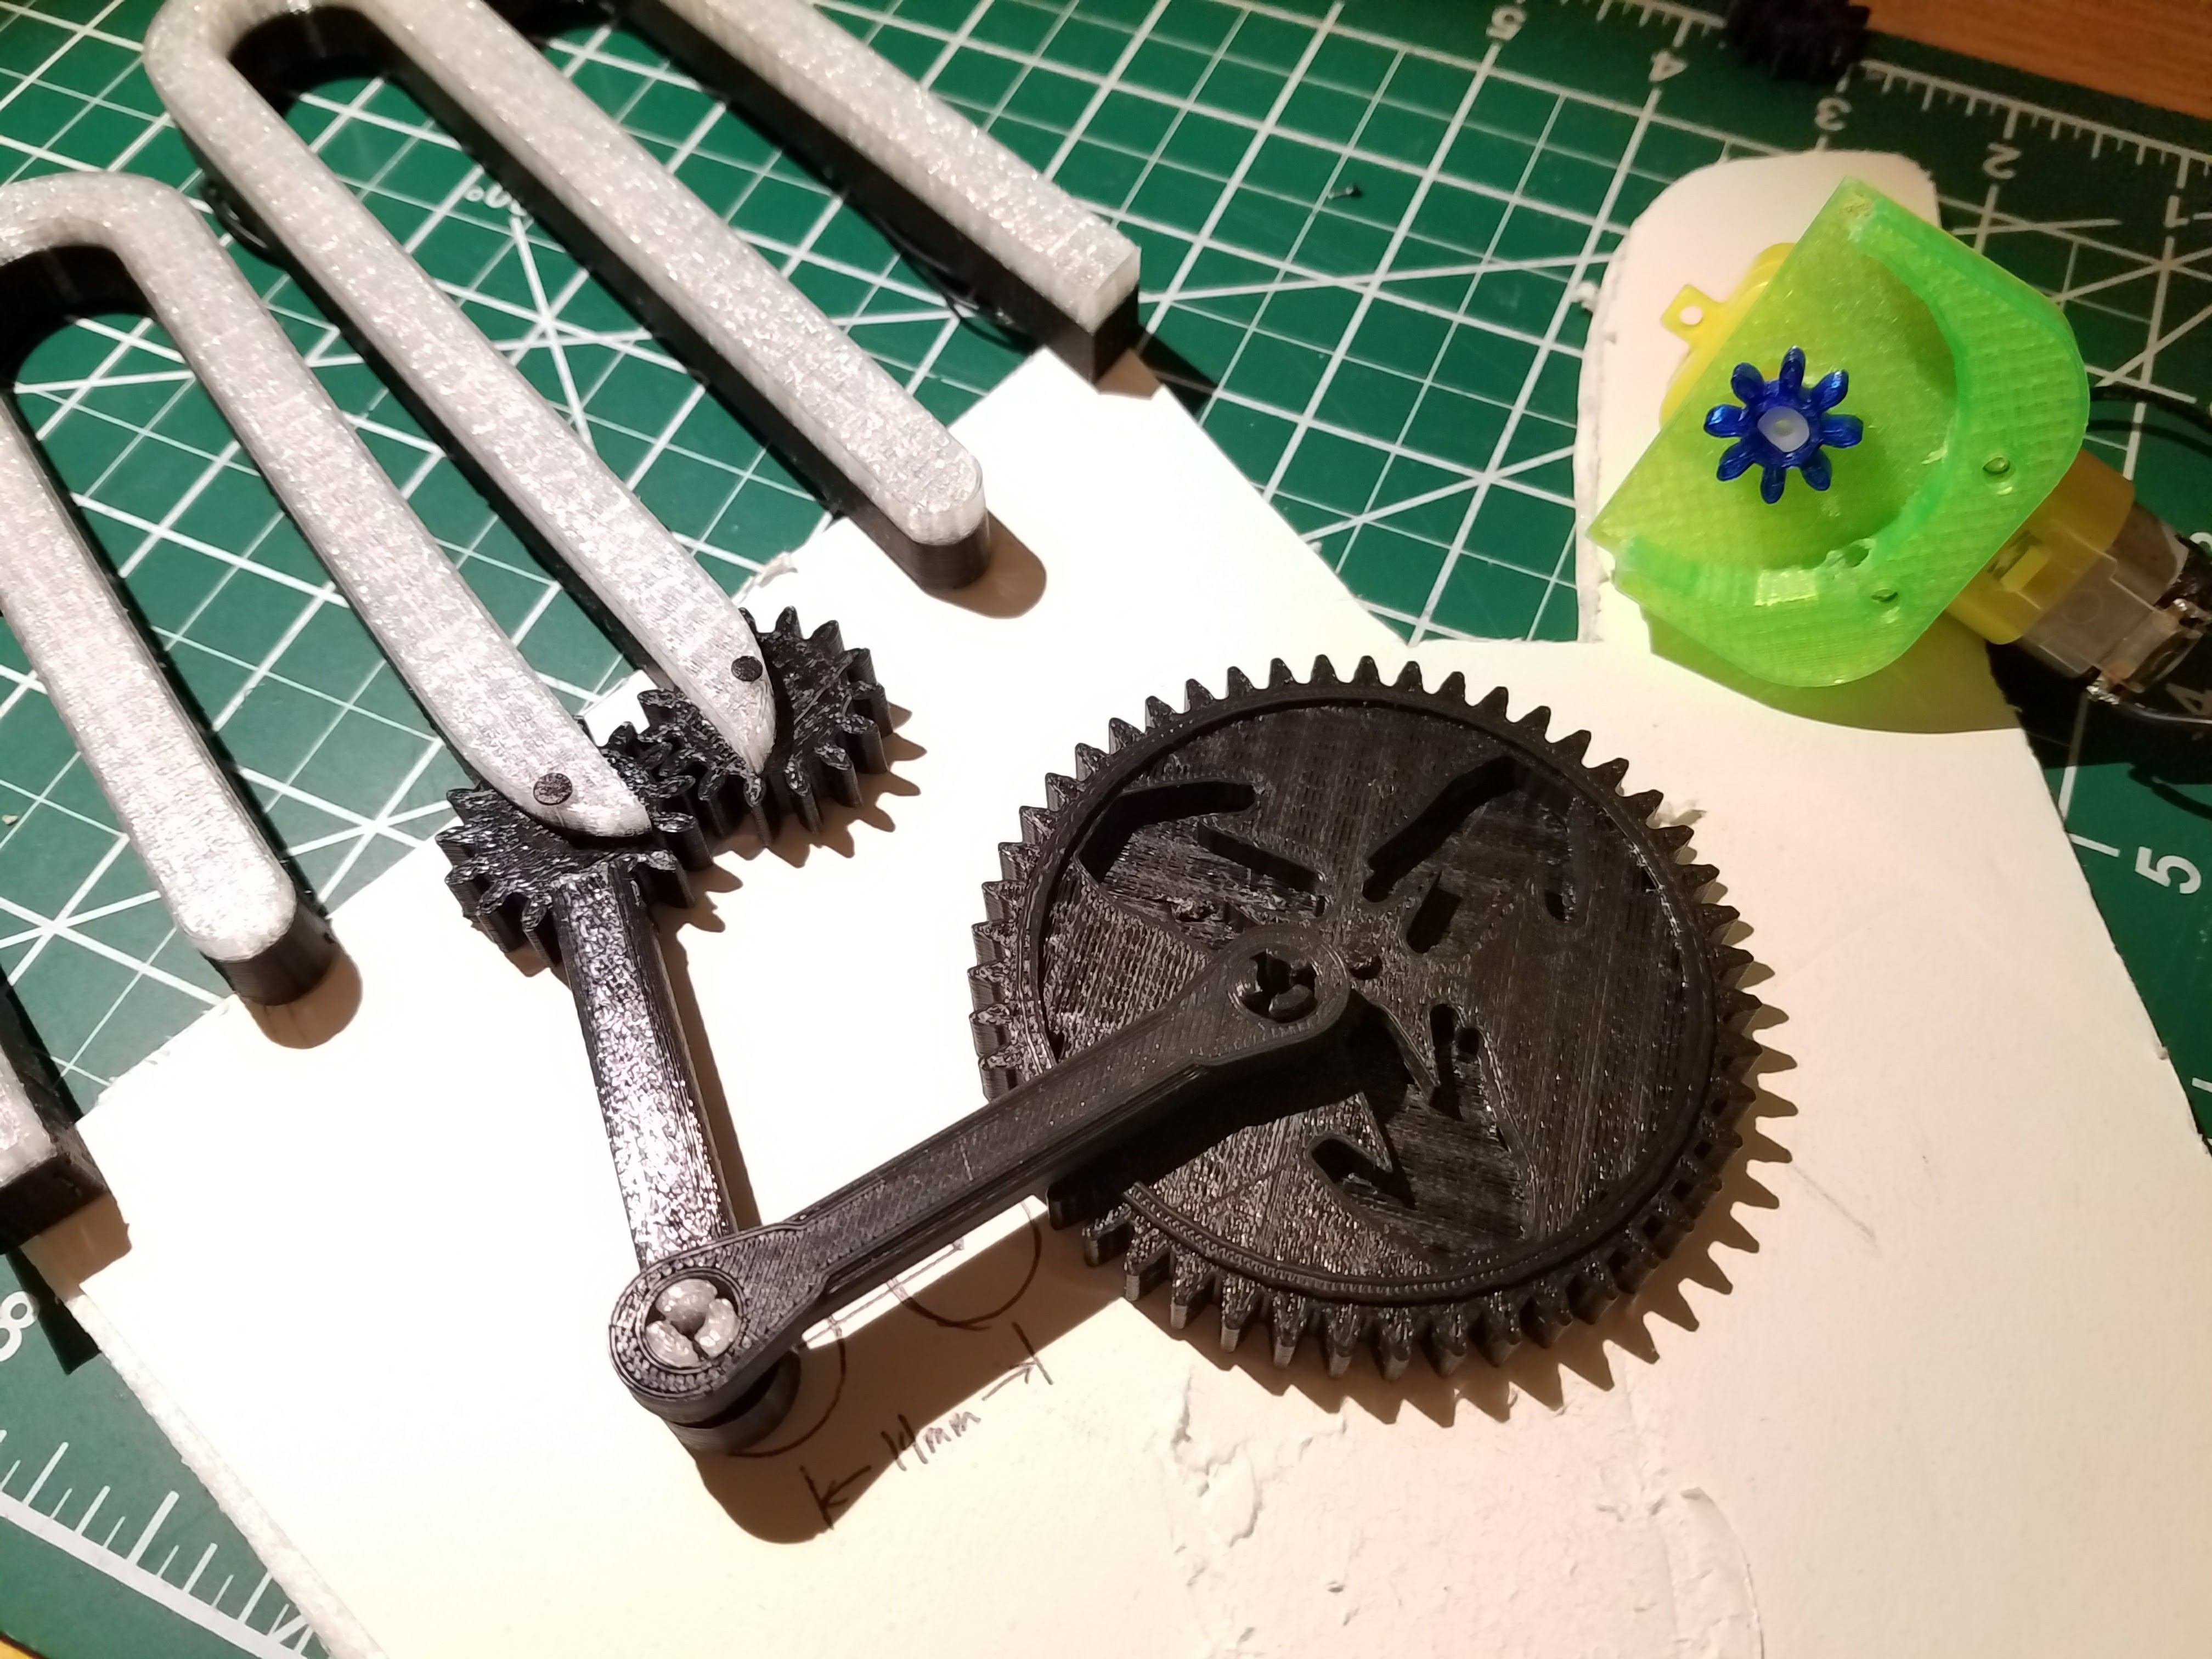
    I printed a new bull gear and a new pinion gear to get a better reduction in speed. I took the opportunity to add some flair by putting three little Vulcan Salute cut-outs in the gear. Since the 8-tooth pinion gear was so small, I decided to print it in PETG which is quite a bit stronger than PLA when printed at the correct temperature. I also had to design a smaller gearbox holder so the larger bull gear would fit.

    Wiring the 20 PL9823 LEDs is a time consuming task. If I make a second Vulcan Salute, I am considering doing a design that uses strips of WS2812s. The wires coming out of the four LEDs closest to the palm of the hand are making contact with the foamboard, so I either need to cut away those sections of the board or add some spacers under the finger gears to make clearance for the LEDs.

  • First test of hand mechanics

    terrag02/13/2017 at 22:41 0 comments

    After the parts were finished printing, I cut a hand outline out of foam board and used plastic rivets to hold the three gears on. I used hot glue to hold the motor mount to the foam board. The motor starts to stall at voltages below 2V, and that is about the speed that I want the Vulcan Salute to run at, so now I am designing a smaller pinion gear and a larger bull gear.

  • TinkerCad models sliced and now printing!

    terrag02/13/2017 at 18:40 0 comments

    I'm printing some guts for the Vulcan Salute. This batch is the motor holder, the connecting rod, and the large gear. I never attempted to print the first version of the design that uses a linear bearing and the rack gear (screenshot pictured in the gallery).

View all 8 project logs

Enjoy this project?

Share

Discussions

Just4Fun wrote 12/08/2017 at 19:03 point

This thing remember me some "installations" I've seen in an art museum at Amsterdam. Really I like it! (and Amsterdam too...)

  Are you sure? yes | no

Similar Projects

Does this project spark your interest?

Become a member to follow this project and never miss any updates