 Florian B.
Do you want to build a Magnetostrictive Position Sensor as described in: https://de.wikipedia.org/wiki/Magnetostriktiver_Wegaufnehmer
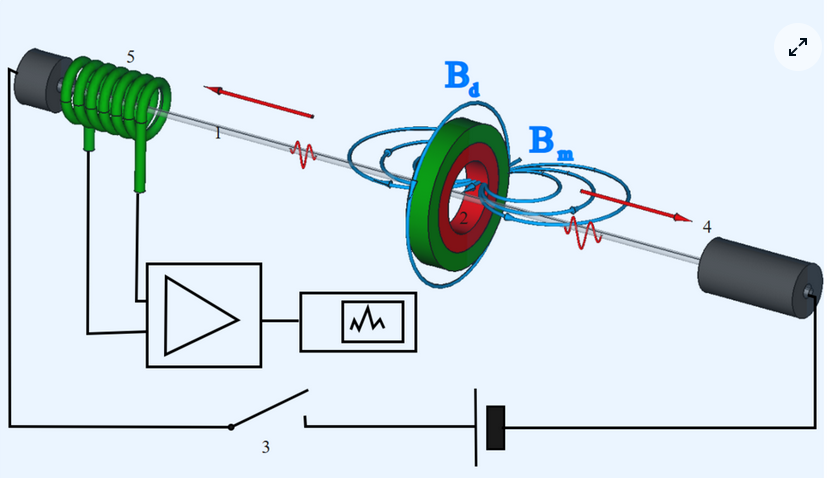
Working principle
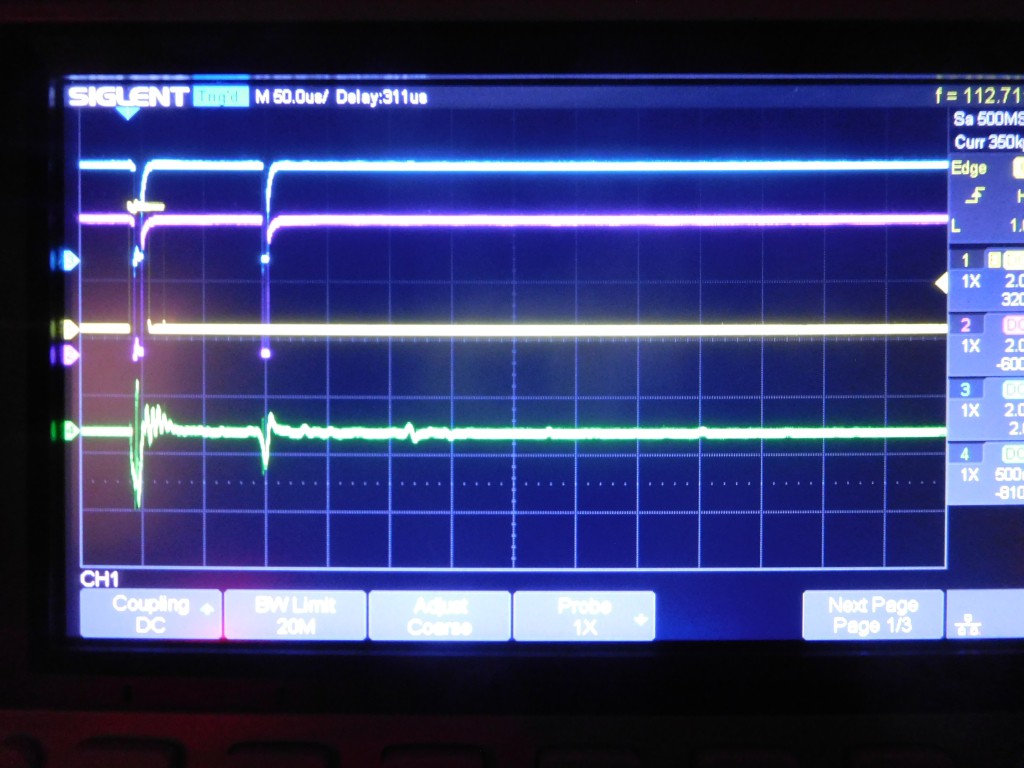
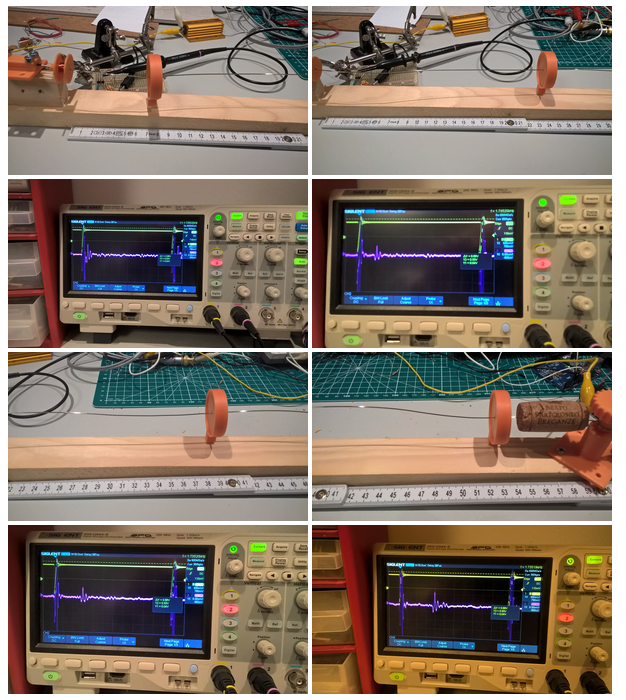
In short: A current pulse will initiate a torsion wave along a magnetostrictive wire at the position of a moving cursor magnet. The travelling torsion wave generates a signal in a receiver coil. From the time between current pulse and the signal pulse the position of the magnet (the distance between receiver coil and magnet) can be determined.
First prototype:
Tubed Magnetostrictive Position Sensor:


Resources
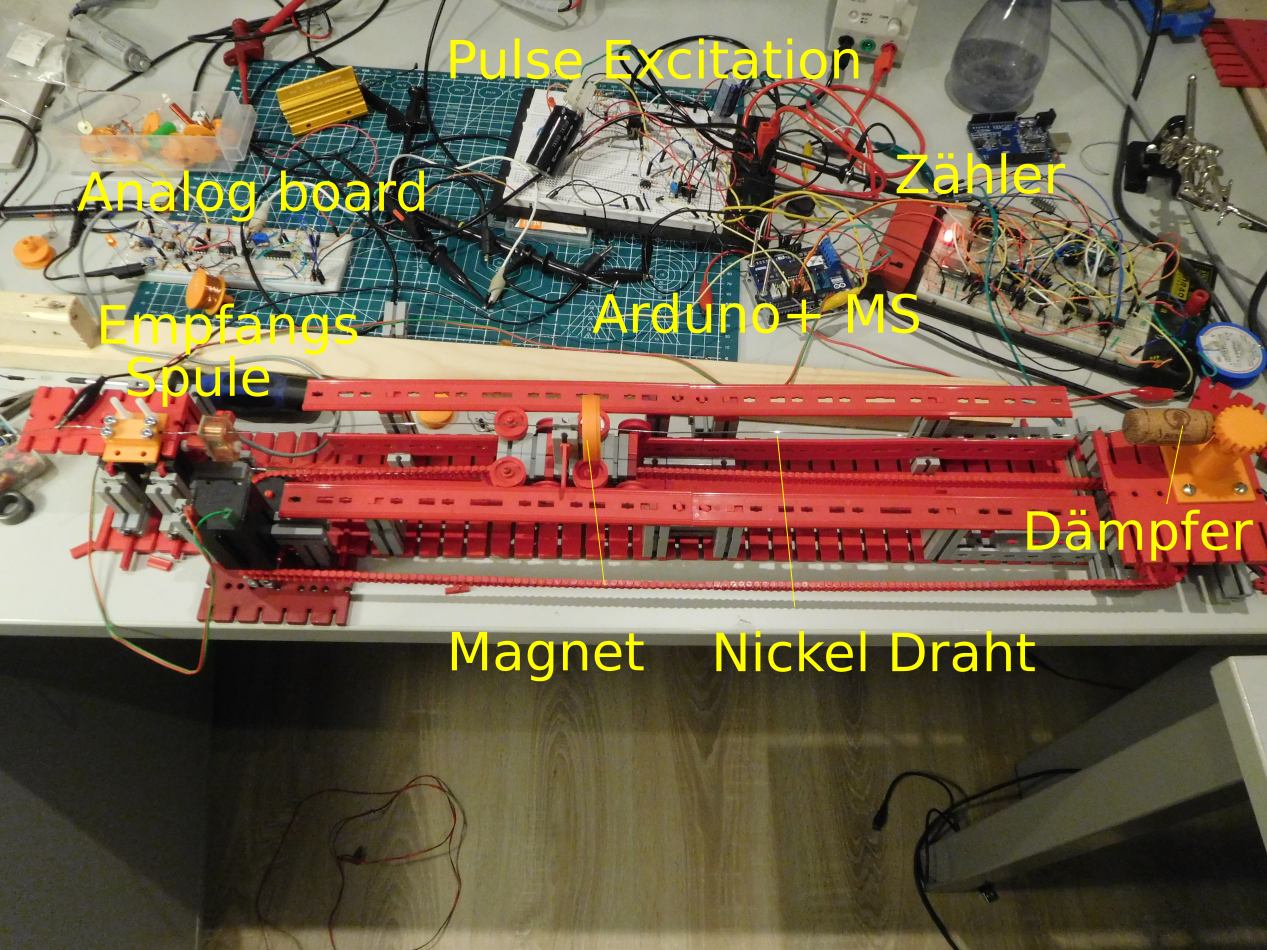
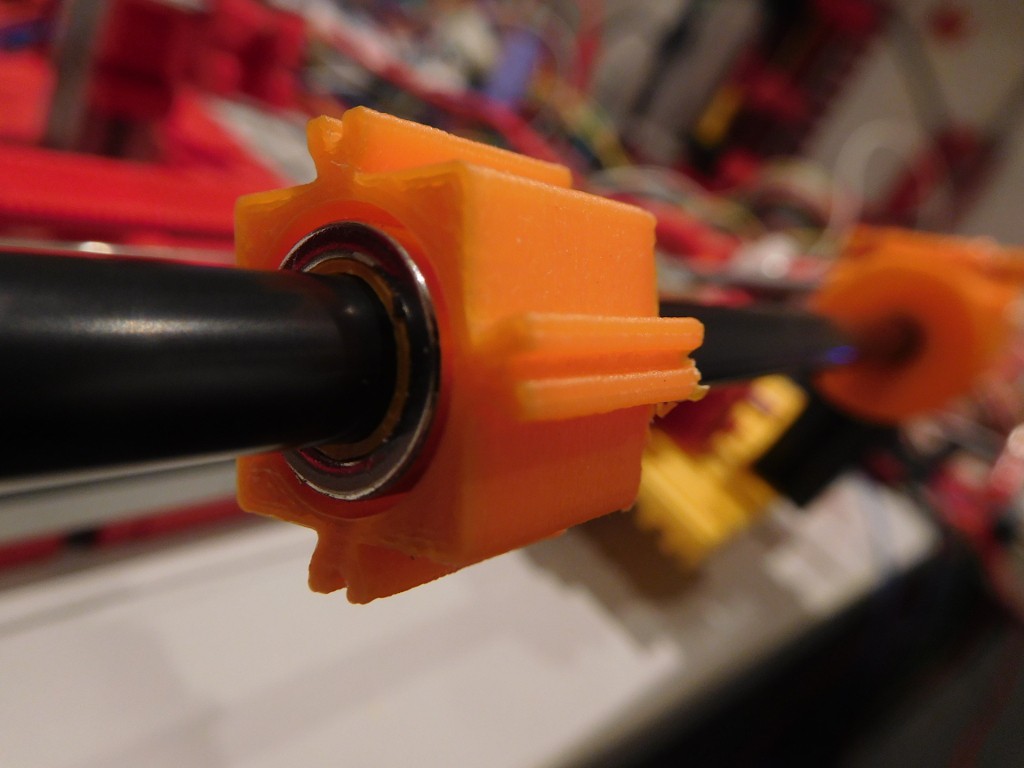
On Thingiverse is a set of parts to build a Magnetostrictive Position Sensor. With this sensor you can measure the position of a magnet sliding along a PVC tube surrounding a magnetostrictive Nickel wire. You can use it to build a linear servo with a DC motor. The sensor is scalable as working range depends on the length.
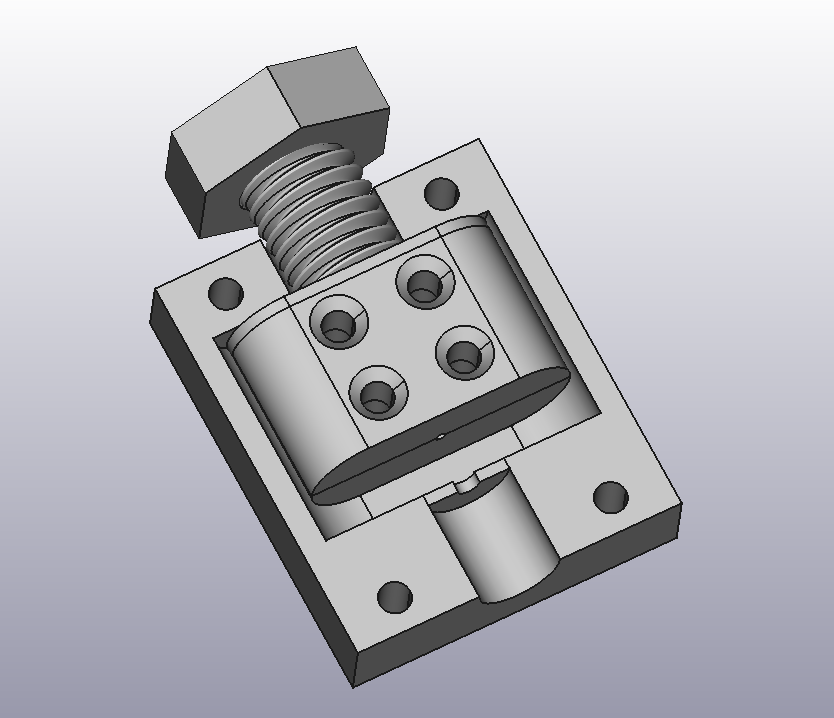
The proposed 3D fittins are compatible with fischertechnik construction system. It consists of following parts:
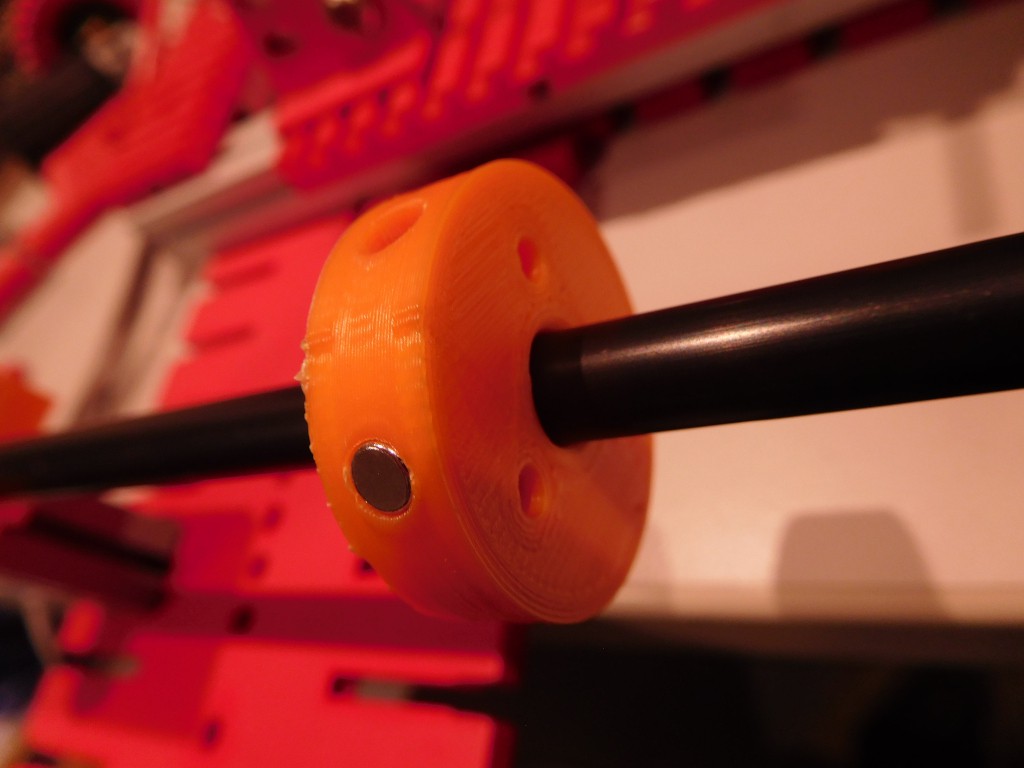
- Magnet Holder for Ring magnet
- End clamps (you need 4 pieces)
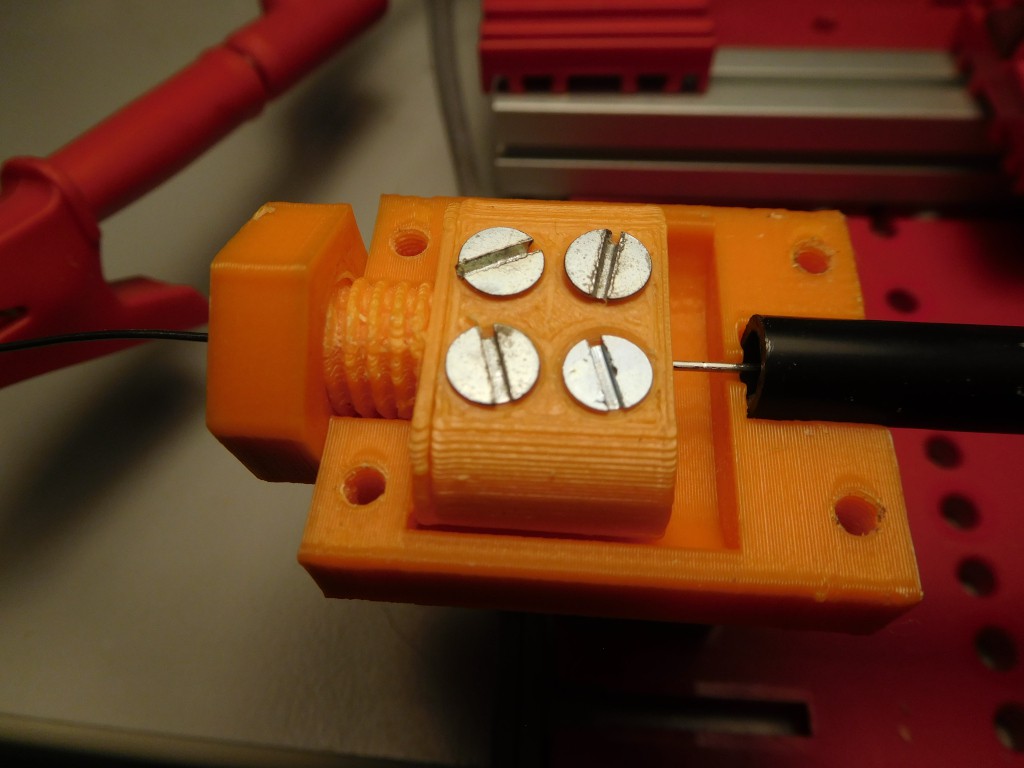
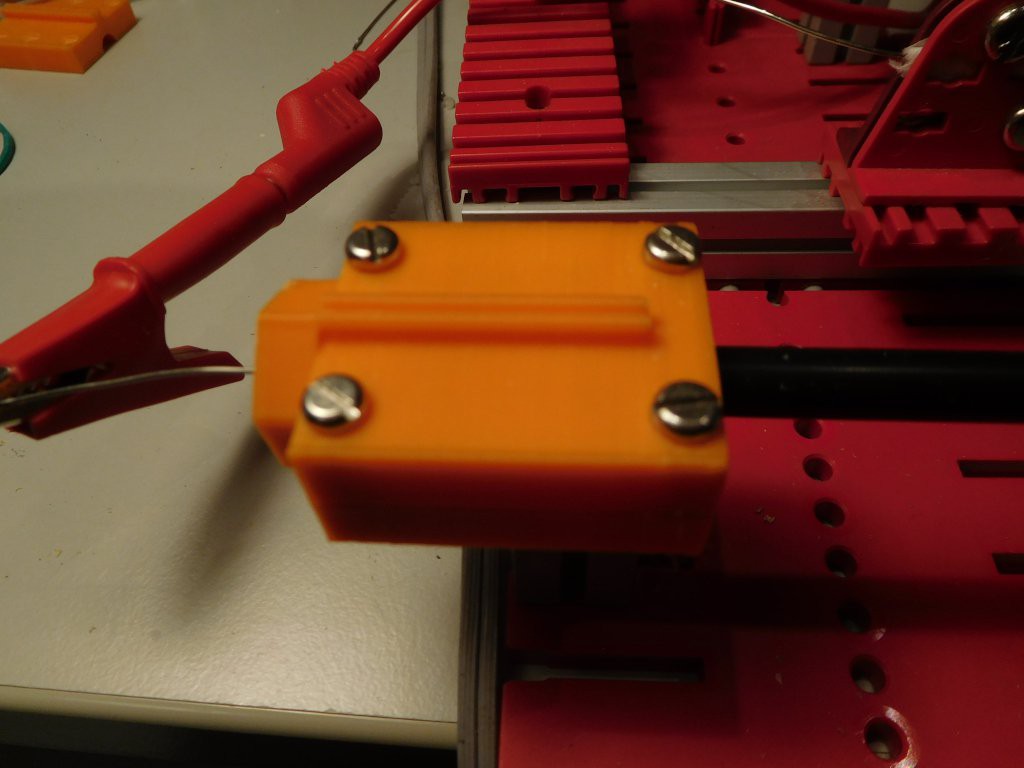
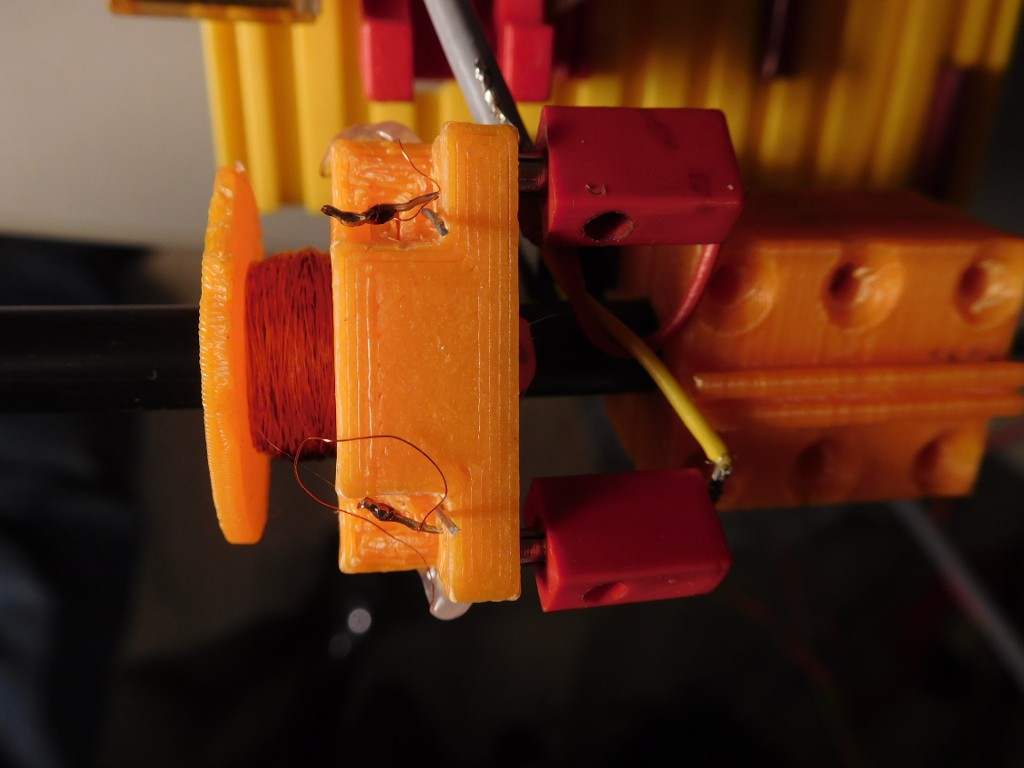
- Coil body
- Connector block for coil
- Wire guide (print it upright with 0.1mm resolution, supports from build plate and large brim)
- Coil holder block for Fsichertechnik (part that can be used to mount coild to the Fischertechnik system if no tube is used)
To build this sensor followng additional parts and components are needed:
- Nickel or NiFe wire (for heating applications) , Diameter: 0.8mm, Length: 60cm (for a 50cm sensor, but longer wires should be possible)
- Nd Ring Magnet: Outer diameter: 12 mm, inner diameter, 8.5 mm, height: 4mm (I used: fix-o-moll Neodym Magnete Ringe 12mm silber )
- PVC housing tube, Outer diameter: 7mm, Inner diameter: 5mm, Length 50cm (You can chose your desired length; It might be possible to use Aluminium tubes)
- 12 x M3-Screws with sink head:, Length 10-15mm
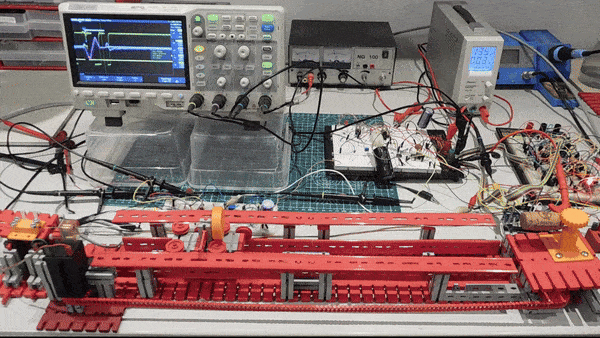
- Power Supply for excitation puilse: 10-20V
- Separate Power Supply for analog electronics: 5-10V (Deriving Voltage from excitation power supply with an additional regulator should be possible)
- Cu-Wire: 0.1-0.3 mm, for 800 Windings
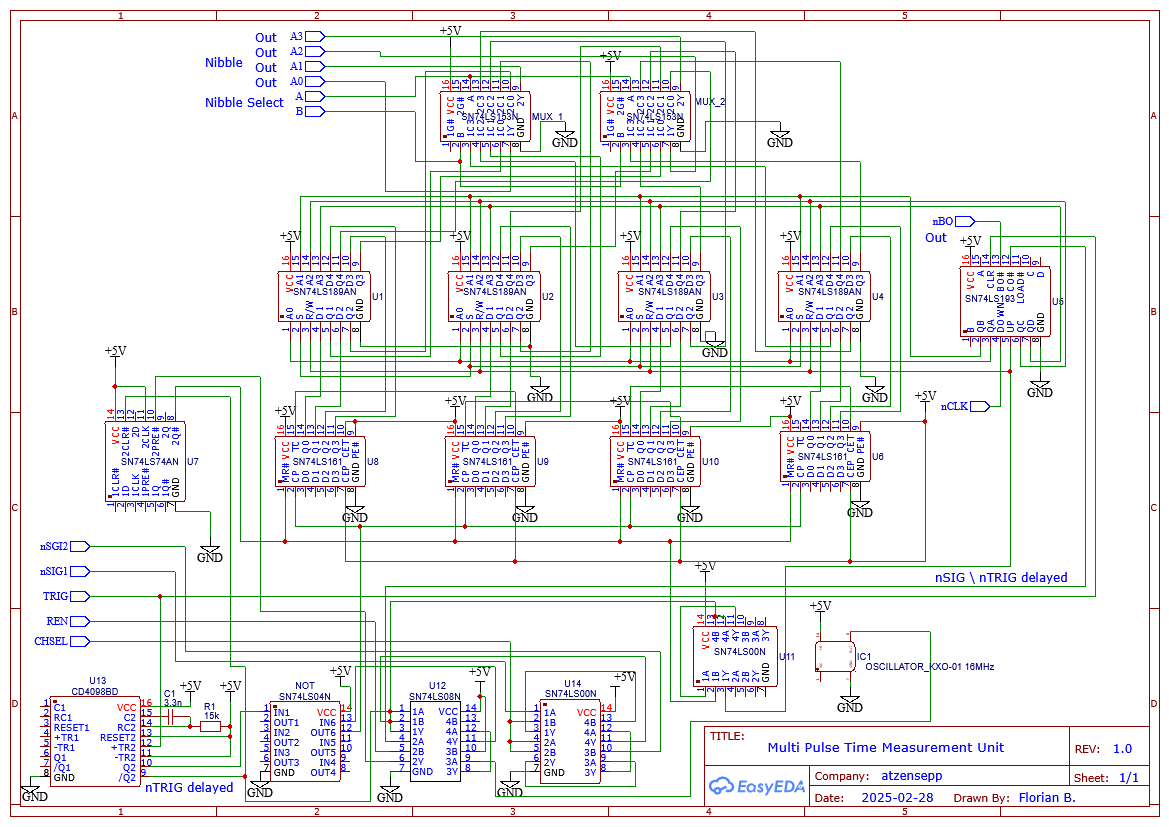
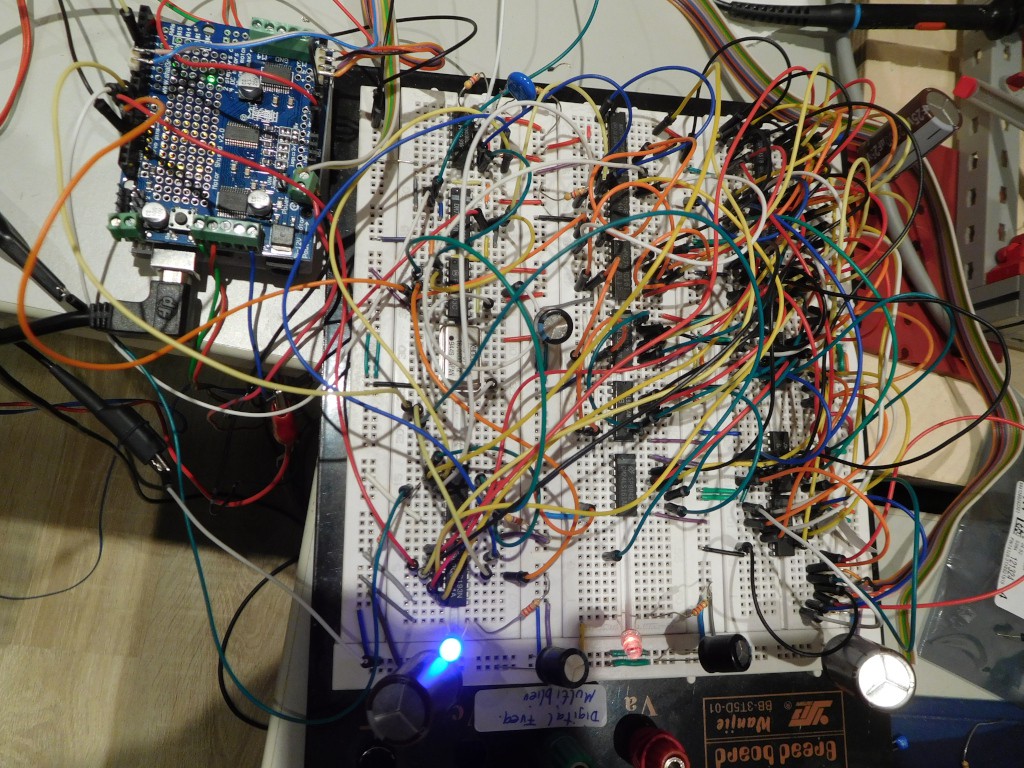
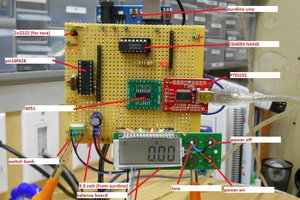
- Exciter-Circuit with a good Power-Mosfet (*)
- Analog Circuit (*)
- Gate Circuit
- Selector-Circuit
- Arduino Uno (*)
- Arduino Software
*: The princible and the sensor electronics is described in ft-pedia 2024/4: https://ftcommunity.de/ftpedia/2024/2024-4/ftpedia-2024-4.pdf
FreeCAD-File to adjust the fittings and an experimental Arduino-Sketch are included
Hints
- Excitation Voltage (good value: 18V)
- Excitation Pulse Duration (too long will cause ringing, too short will give too small signal)
- Capacitive coupling between first and second amplifier stage 175pF followed by 10K to GND
- Permanent Magnetization of the Nickel wire in the neighborhood of the receiver coil can occur and deteriorate signal recovery. Clean by moving a strong magnet along the wire
- Contact of the wire with the tube wall should be avoided. Contacts can damp the signal or create errornious signals
- Wire should be straight without bends and knicks
- Gate circuit: Sufficient delay between excitation pulse and first signal (e.g. 40us)
- LM311 Comparator can generate ringing oscillations. Pull-Up-Resistor must not be too small. 10k or 20k are ok.
- Comparator ringing can be reduced by feeding back output signal to positive input of the comparator. This will create a hysteresis. (I used 65k between Pin 2 and 7)
- Some switching power supplies inject a significant noise floor such that no reliable measurement is possible.
- Some PWM driven Motors can also give rise to false signals. proper shielding helps.


 will.sweatman
 Marcrbarker
this is very cool. What precision and accuracy did you reach if you measured it aldready ?