 GOAT INDUSTRIES
-
Future Improvements
08/30/2017 at 12:59 • 0 commentsIt would be really nice to be able to control this machine with an ordinary wired computer mouse and I believe that this could be done by swapping out the Adruino Mega 2560 for an Arduino Due, which has support for a mouse and keyboard. Some jumpers would need to be changed and it might actually work ok?
-
PCB Faults
04/24/2017 at 12:15 • 0 commentsAlthough the PCB is fully functional, I thought I should make a list of the errors before I forget:
- Rotary potentiometers upside down - cosmetic
- Toggle switches upside down - cosmetic
- Lug mounting hole for slider in wrong place - non-critical
- Board outline doesn't follow USB and power sockets properly - cosmetic
- Schottky diode missing between 12v supply and Arduino Vin, which was supposed to prevent the Arduino trying to accidently run the motors through it's own power supply - non-critical but potentially damage could be done to the ARduino due to user error.
- LED resister incorrectly labelled as 10K and should be 1K - non critical.
-
Controller fully operational
04/22/2017 at 15:14 • 0 commentsWell that was the easiest de-bugging that I've ever done. No more motor vibration by employing mega amounts of oversampling and float to integer conversion in the code and no more hot chips due to motor's power not turning off - again, an easy coding solution was found. My only disappointment is that the project was way too easy and not really much of a challenge, but this does mean it will also be easy to replicate, which is a good thing ..... And, of course, it will be a very useful tool for people with poor eyesight or unsteady hands .... or both.
-
PCBs arrived today
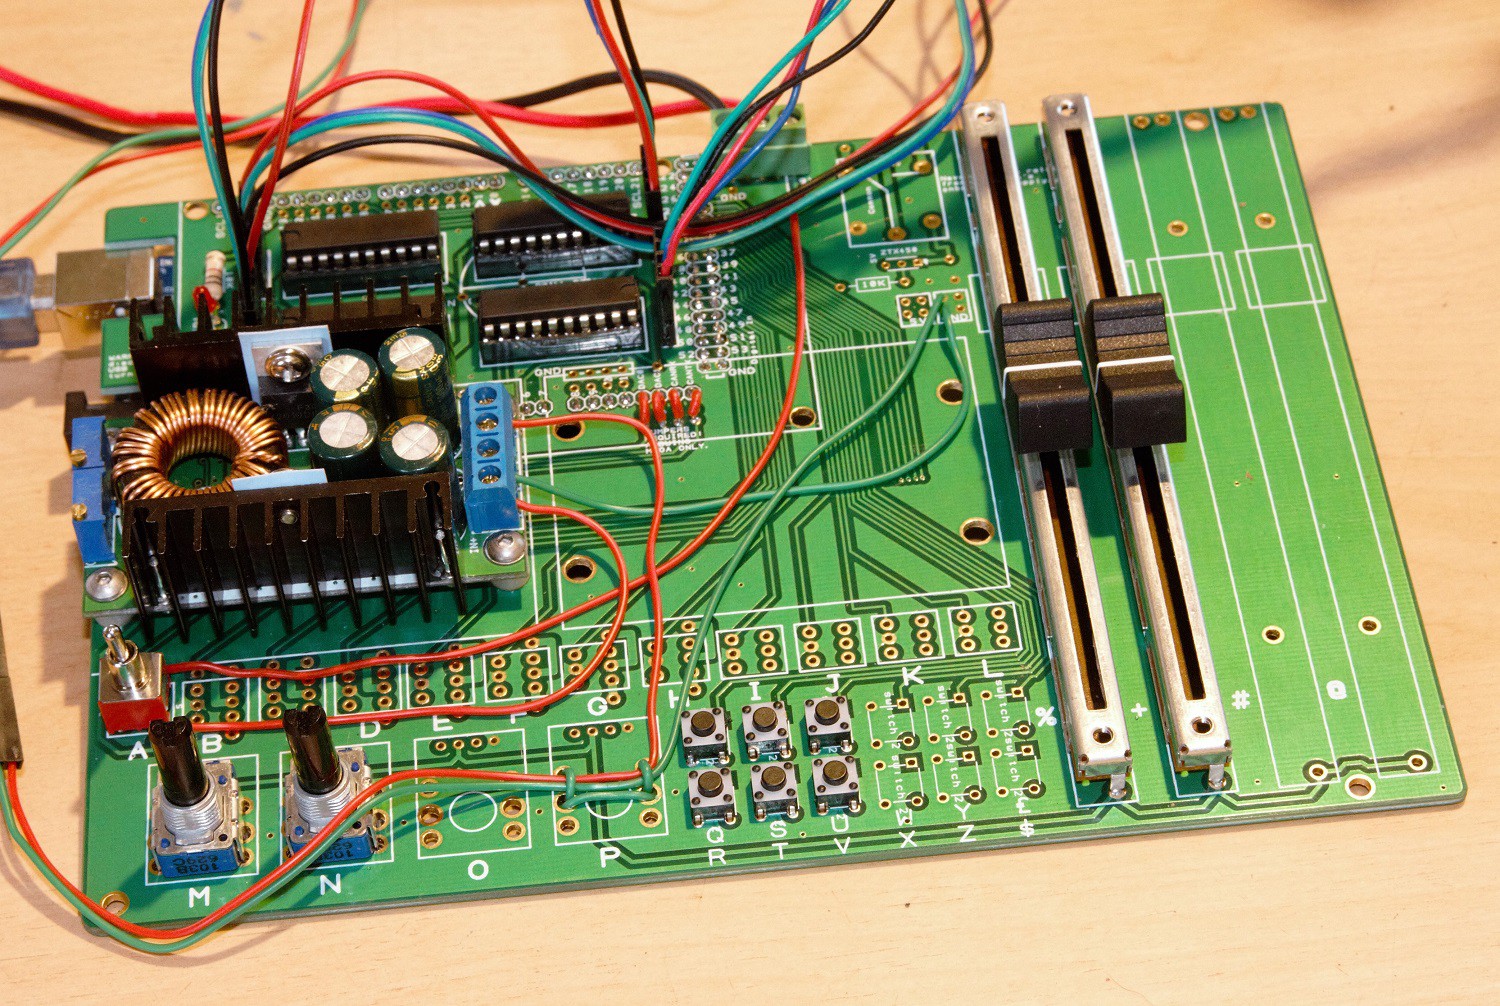
04/20/2017 at 19:05 • 0 comments![]() The PCBs for the controller arrived today so I soldered up some of the components and tested it out. There were a few small non-critical design errors but actually it worked a treat except that I noticed that the current through the L293E's did not drop off when the stepper motor was not being used. The previous breadboard configuration was too chaotic to notice such things and I'm sure there is a simple explanation. Must dig out the L293E datasheet and look for some clues.
The PCBs for the controller arrived today so I soldered up some of the components and tested it out. There were a few small non-critical design errors but actually it worked a treat except that I noticed that the current through the L293E's did not drop off when the stepper motor was not being used. The previous breadboard configuration was too chaotic to notice such things and I'm sure there is a simple explanation. Must dig out the L293E datasheet and look for some clues. -
Vacuum Needle
04/13/2017 at 11:29 • 0 commentsCurrently I am attaching a vacuum needle to the 4th stepper motor and designing the finger operated control board.
![]()
Control panel now has 2x L293E stepper motor controller chips controlling 2 stepper motors. The circuit works but may need snobbery diodes and filter capacitors to operate reliably - the motors vibrate slightly (this was actually solved by oversampling by about x100 in the Arduino code).
The vacuum needle system has been fabricated with two brass fittings made by my own hands on a lathe (see photo). It uses a special air fitting that has a rotating stem on a static banjo: 4MM X 1/8" NPT FEMALE SINGLE BANJO, Kelm One Touch Plastic Push-in Fittings. A standard T fitting would not work as the pipe would get tangled up in the machine as the needle revolves.
The whole machine needs to be extended upwards by about 60mm so some extra lengths of 2020 aluminium profile have been ordered. In the meantime, the control board needs to be hardwired onto proper PCB - Too many diodes and general breadboard frenzy has meant too many chances of shorts/bad connections. No worries though - I have space Hackable Prototyping PCBs just for this kind of situation :)
-
Controller Boards on their way from China
04/11/2017 at 18:43 • 0 commentsMy friends at Sitopway have very graciously accepted my dollars and agreed to send me some circuit boards YAAYYYY!
![]() Apart from the 4 controller chips, the design has an incredibly vast array of knobs, buttons and sliders .... and ..... yes ..... an LED!
Apart from the 4 controller chips, the design has an incredibly vast array of knobs, buttons and sliders .... and ..... yes ..... an LED!![]()
-
4 axis controller PCB
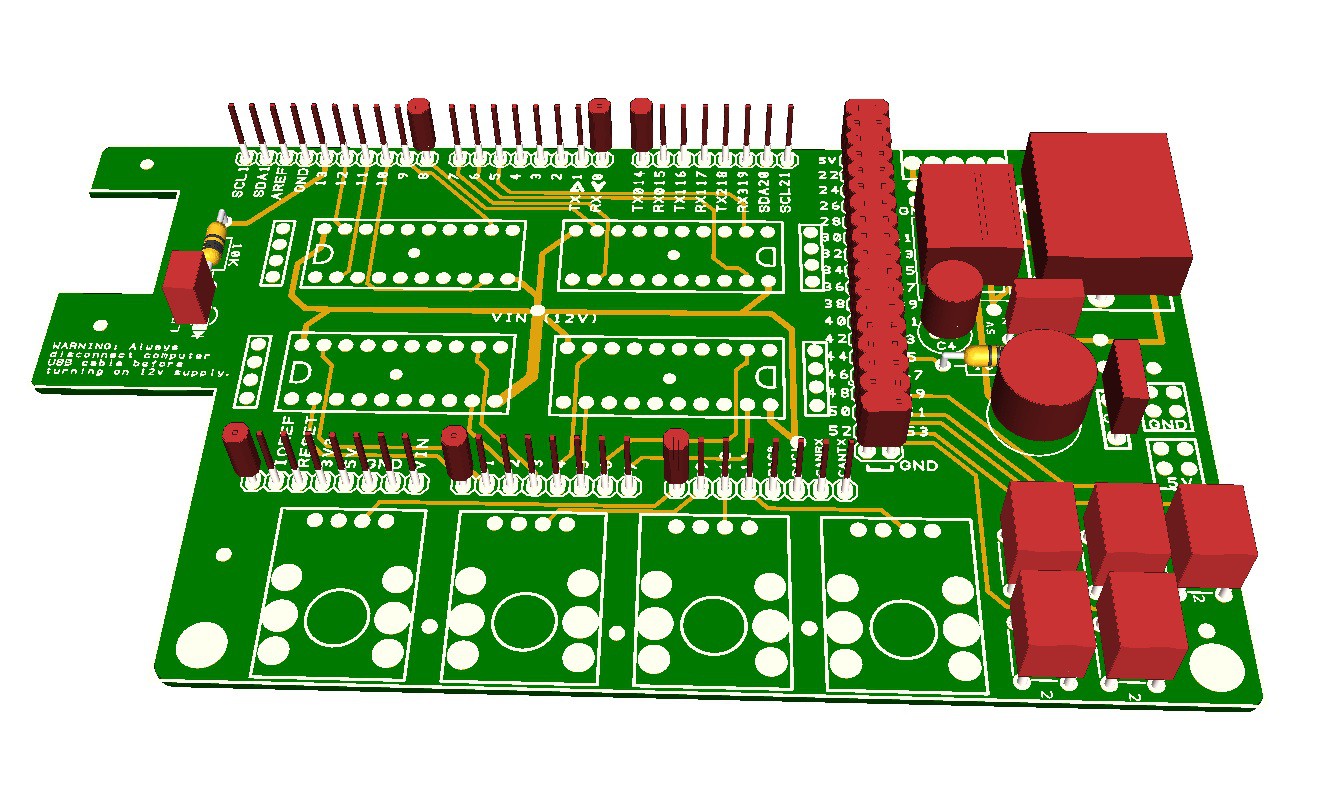
03/19/2017 at 10:33 • 0 commentsThere's going to be a controller board available at some stage if anybody wants one?
![]()
-
Machine is working!
03/17/2017 at 17:25 • 0 commentsThe machine is now working!
Actually, it works really well with really good precision. The video below shows it in action:
-
Control system now working
03/15/2017 at 08:50 • 0 commentsThe machine can now be controlled by fingers!
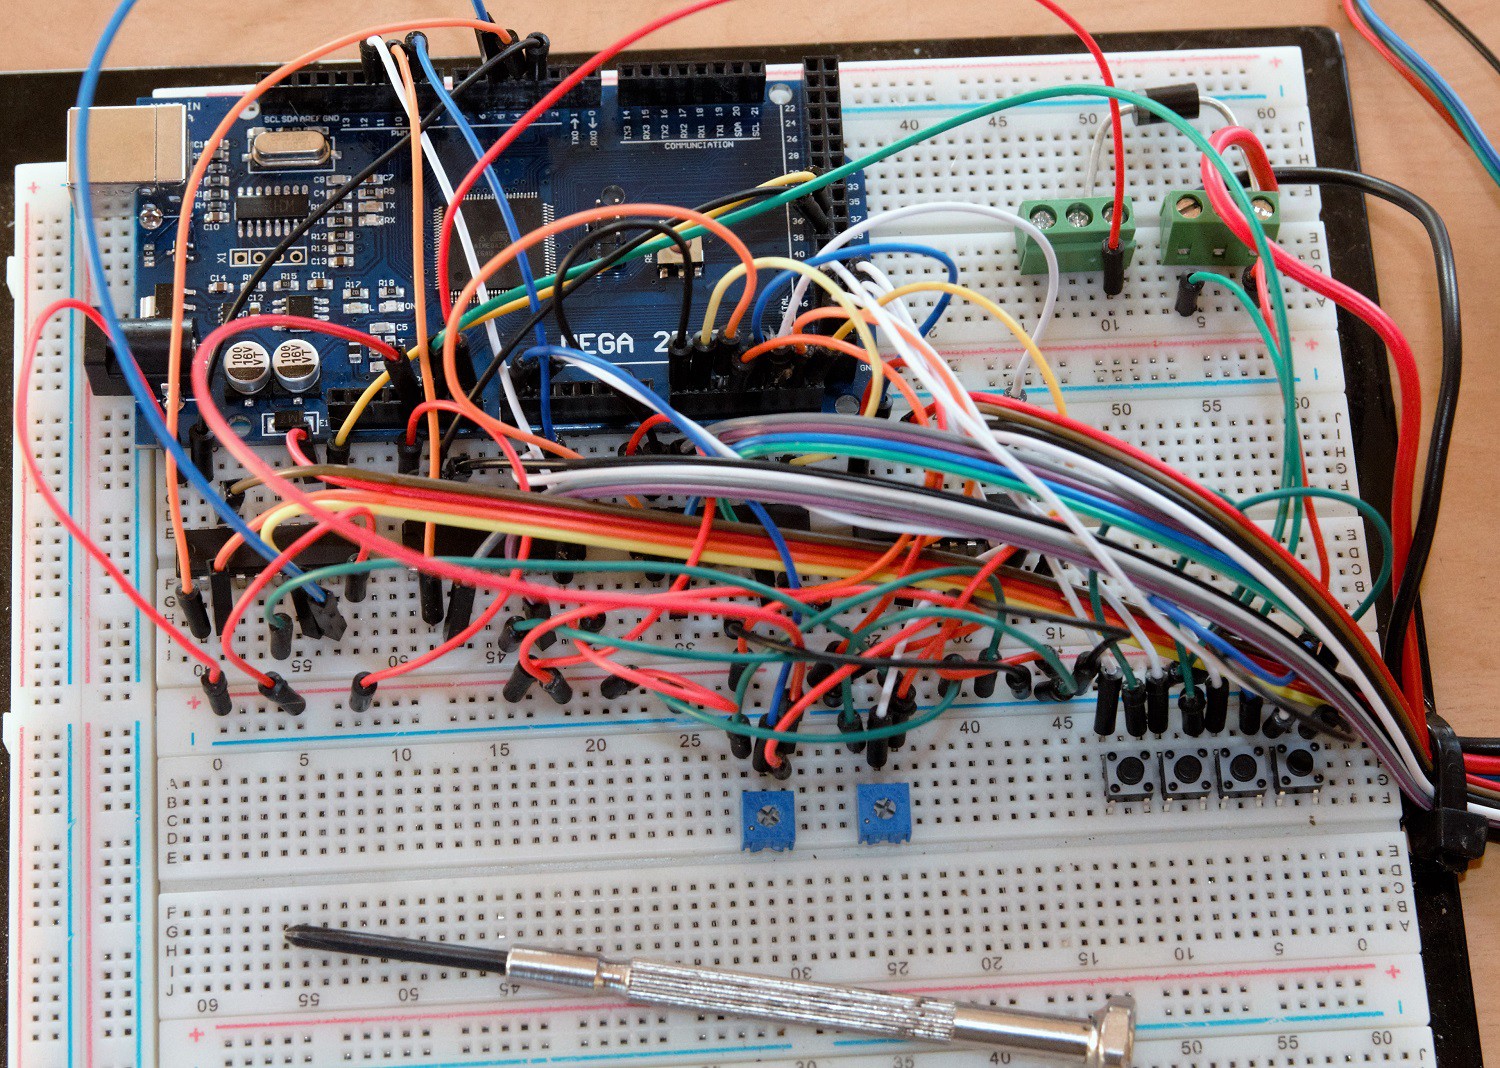
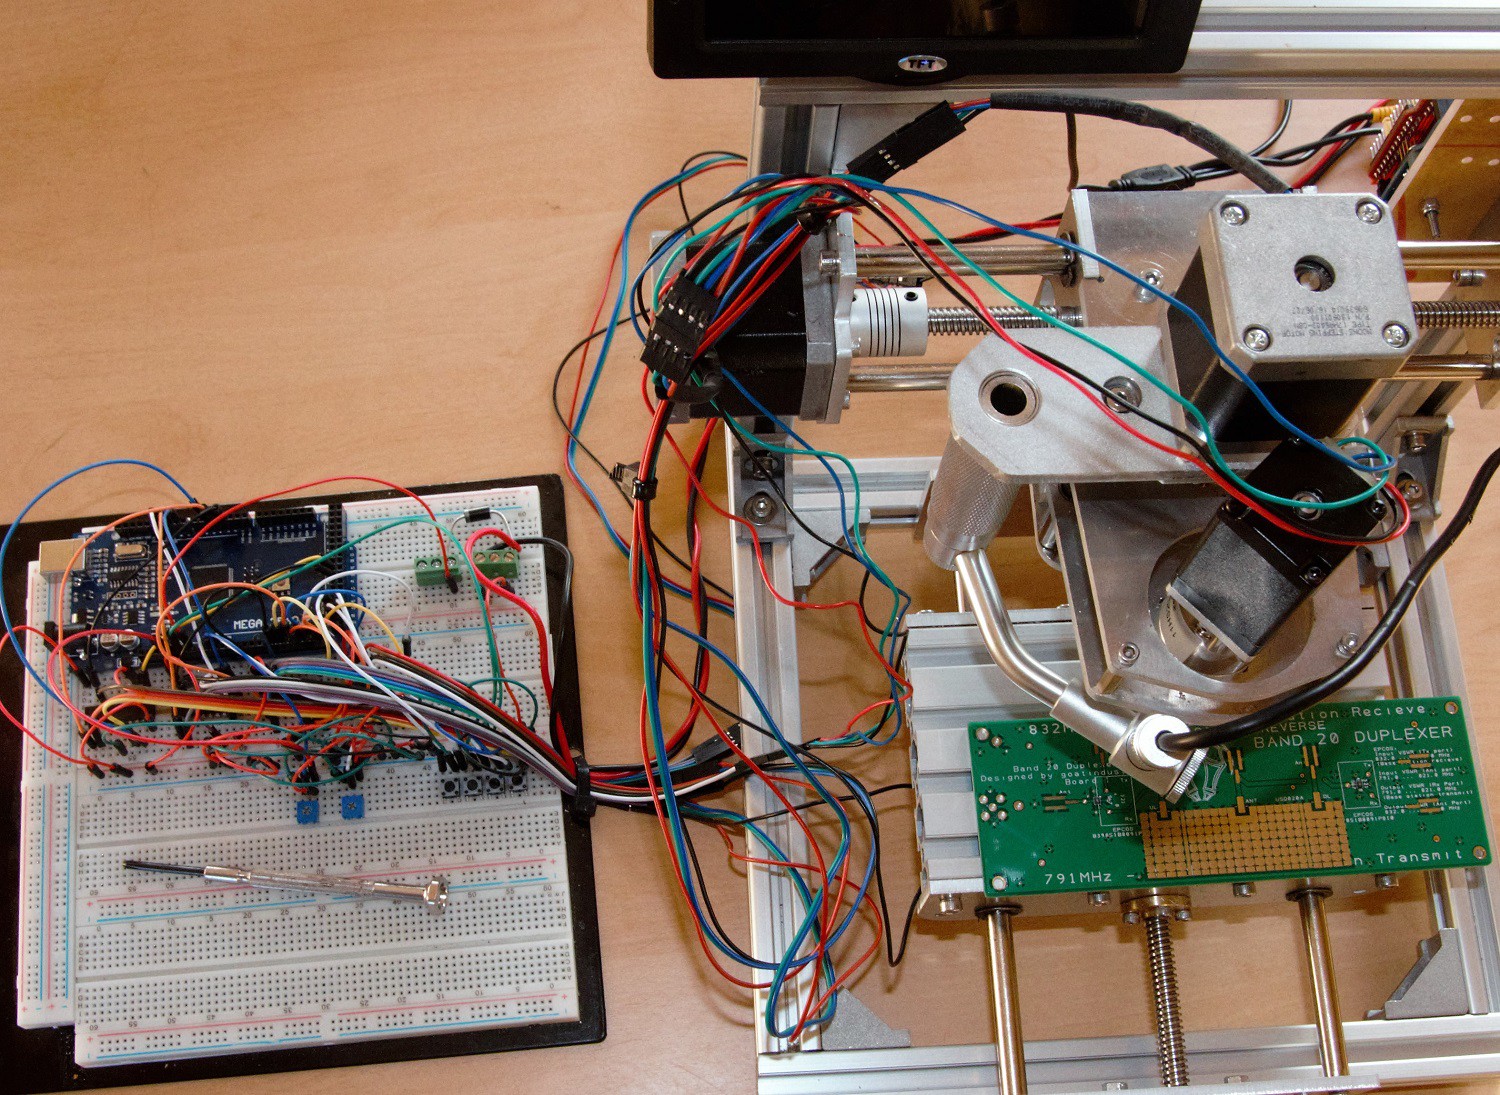
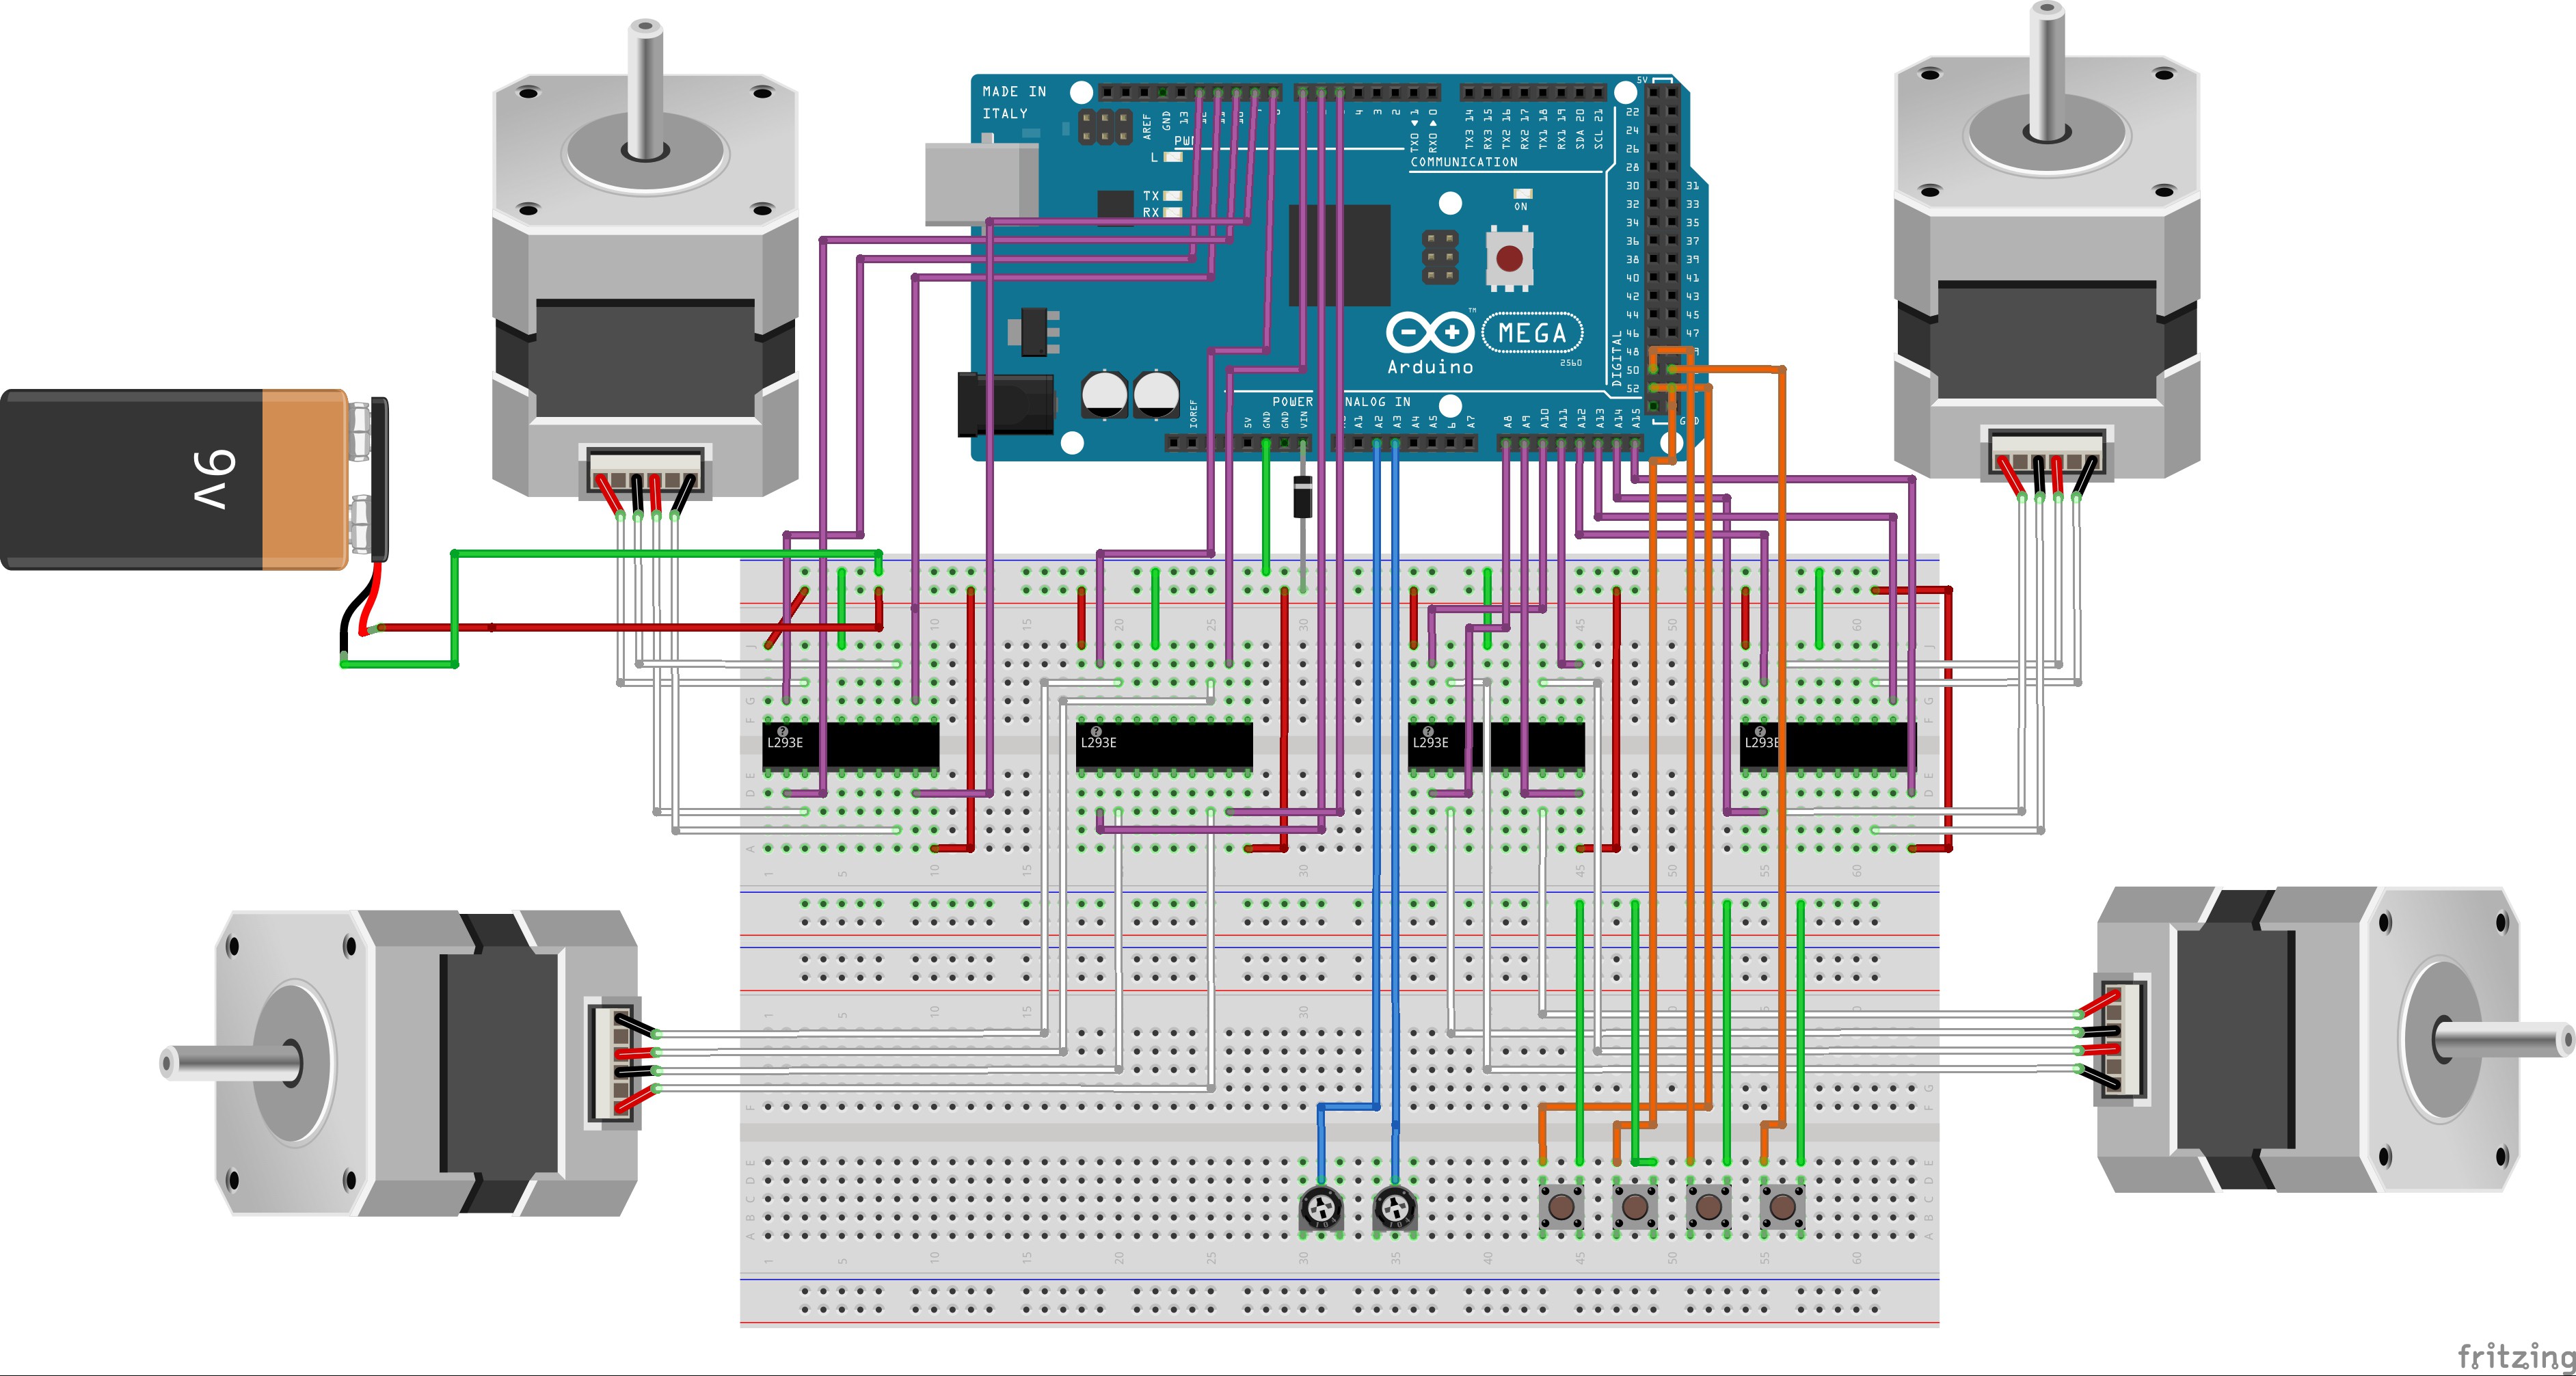
I revamped the breadboard circuit (3rd time) and got all 4 axis's working using an Arduino Mega 2560 and four L293E motor control chips. 8 of the analogue ports had to be used as digital ports, which was fine. The chips themselves are really easy to figure out and the connections are essentially symmetrical in 2 dimensions.
![]()
![]()
![]() The four push buttons, bottom right, allow any particular motor to be turned on whilst the others remain off. The potentiometers allow coarse and fine control.
The four push buttons, bottom right, allow any particular motor to be turned on whilst the others remain off. The potentiometers allow coarse and fine control.Next job - extend the main upright frame upwards by about 50mm to allow the needle to be attached. Then connect the vacuum tube and test it out!
Manual SMT Pick and Place Machine
CNC machine and custom made stepper motor controller to manually pick up SMT components and place them on a PCB with microscopic accuracy.
 The PCBs for the controller arrived today so I soldered up some of the components and tested it out. There were a few small non-critical design errors but actually it worked a treat except that I noticed that the current through the L293E's did not drop off when the stepper motor was not being used. The previous breadboard configuration was too chaotic to notice such things and I'm sure there is a simple explanation. Must dig out the L293E datasheet and look for some clues.
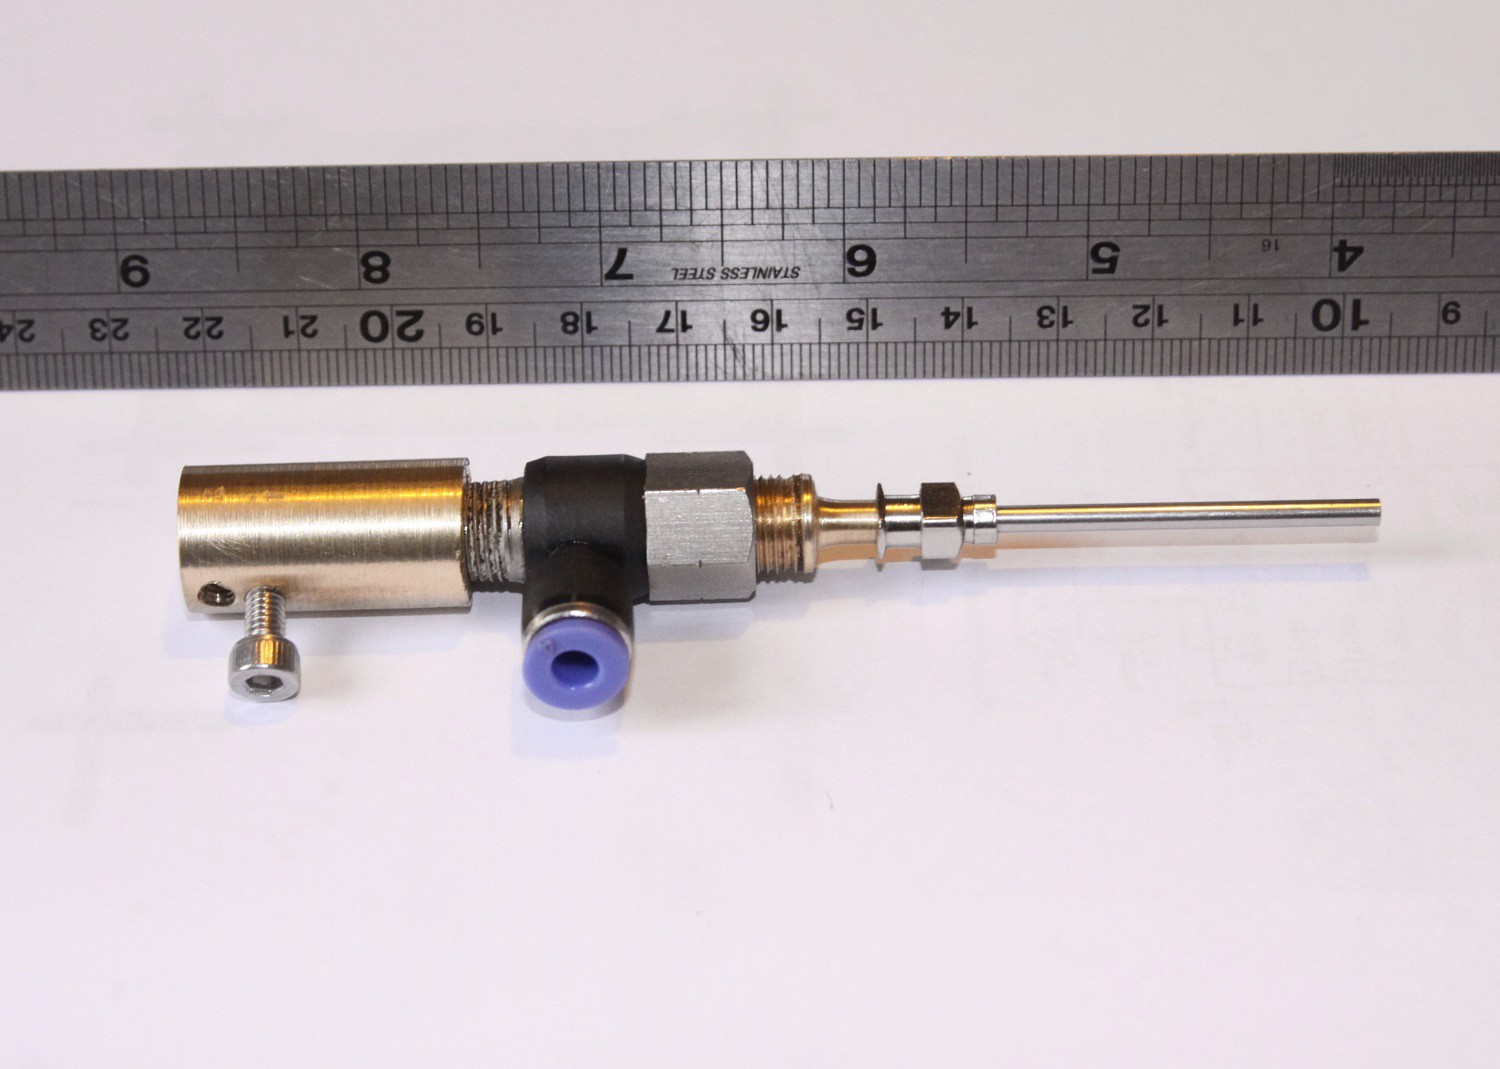
 Apart from the 4 controller chips, the design has an incredibly vast array of knobs, buttons and sliders .... and ..... yes ..... an LED!
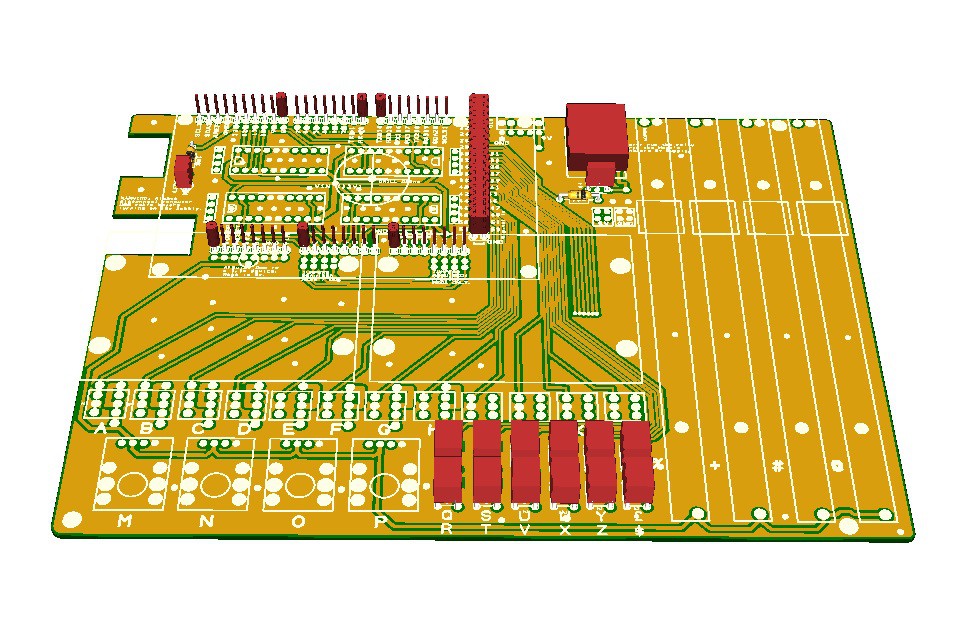
 The four push buttons, bottom right, allow any particular motor to be turned on whilst the others remain off. The potentiometers allow coarse and fine control.