-
1Step 1
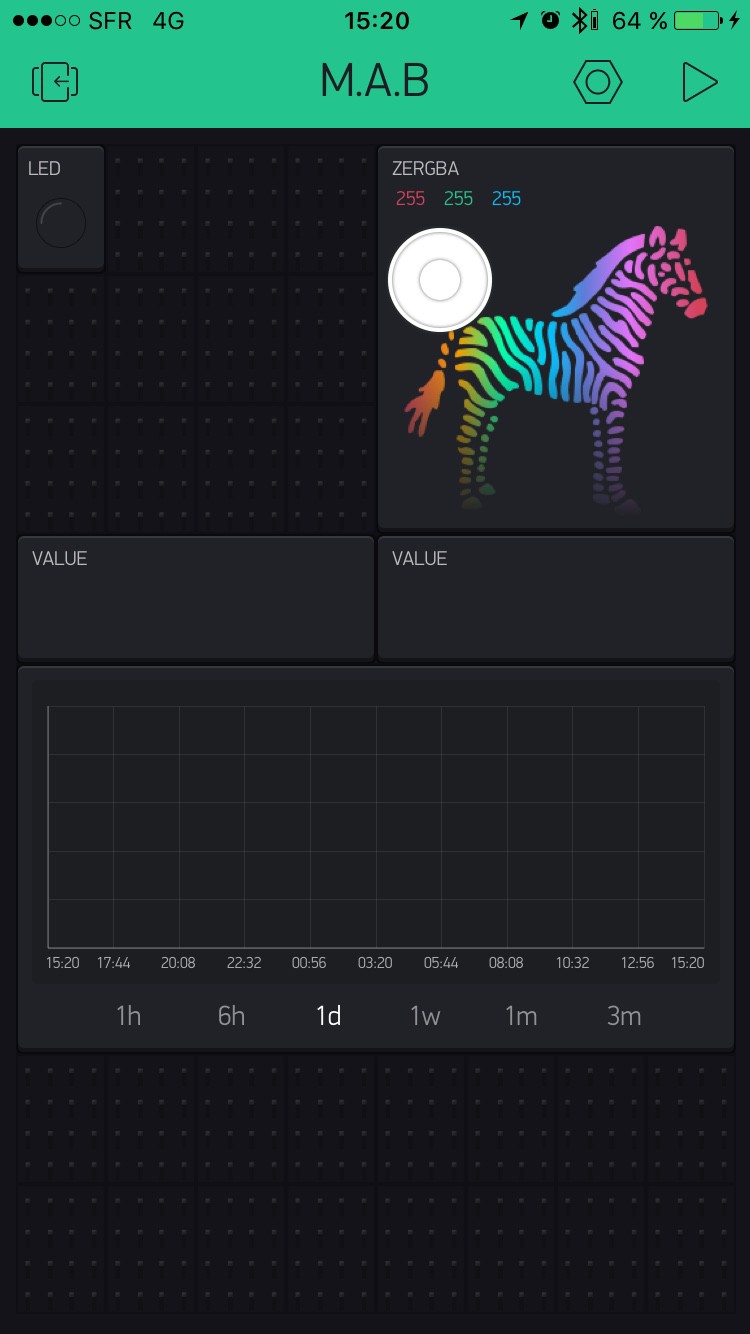
You can download the blynk app on the apple store or on the google store etc...
After you decide to create a new project, they will give you a long list of devices you want your app to be connected to and what type of connections you want. we have chosen the Arduino Nano and a WIFI type of connection.
As for the content of your app, they will offer you a certain amount of content for free. For our app, there were way enough space for what we needed : to blocs to present 2 values (heart beat + breathing)
the "hardest" thing to do is to properly connect each of your values to the pins of your arduino

note : the zebra is a personal touch, had some credits left ;)
-
2Step 2
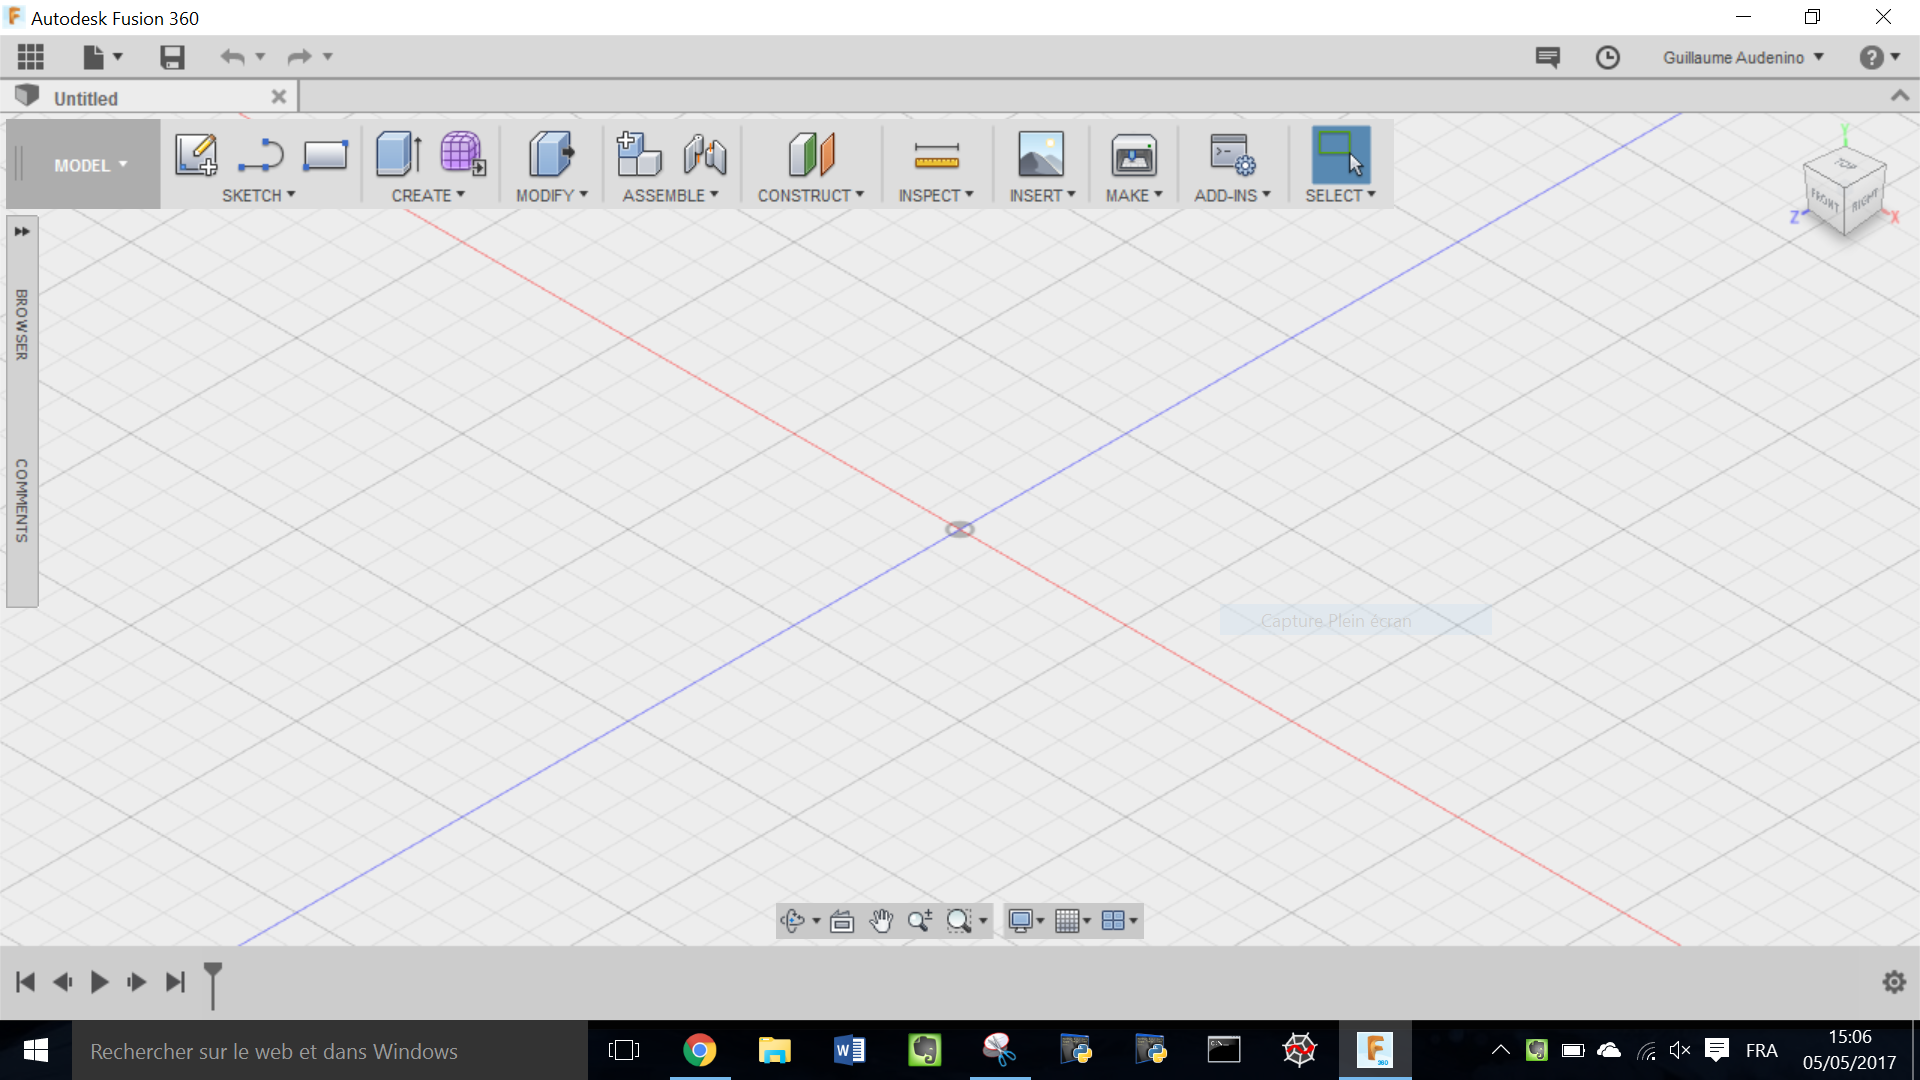
or the "chasis" we will be using the 3D software Fusion 360 https://www.autodesk.com/products/fusion-360/students-teachers-educators (free for students)(You can use another one, as long you don't do any thing to complicated they are pretty similar).
1) Once you download, install and launch de App, You should and on a window that should look like this :
If not , go on the second Top left icon and chose "New design"2)- Onc we are there we can either do a shape and carve it, or the smart way and make a sketch of our project , then we will shape it withthose information we putted down.
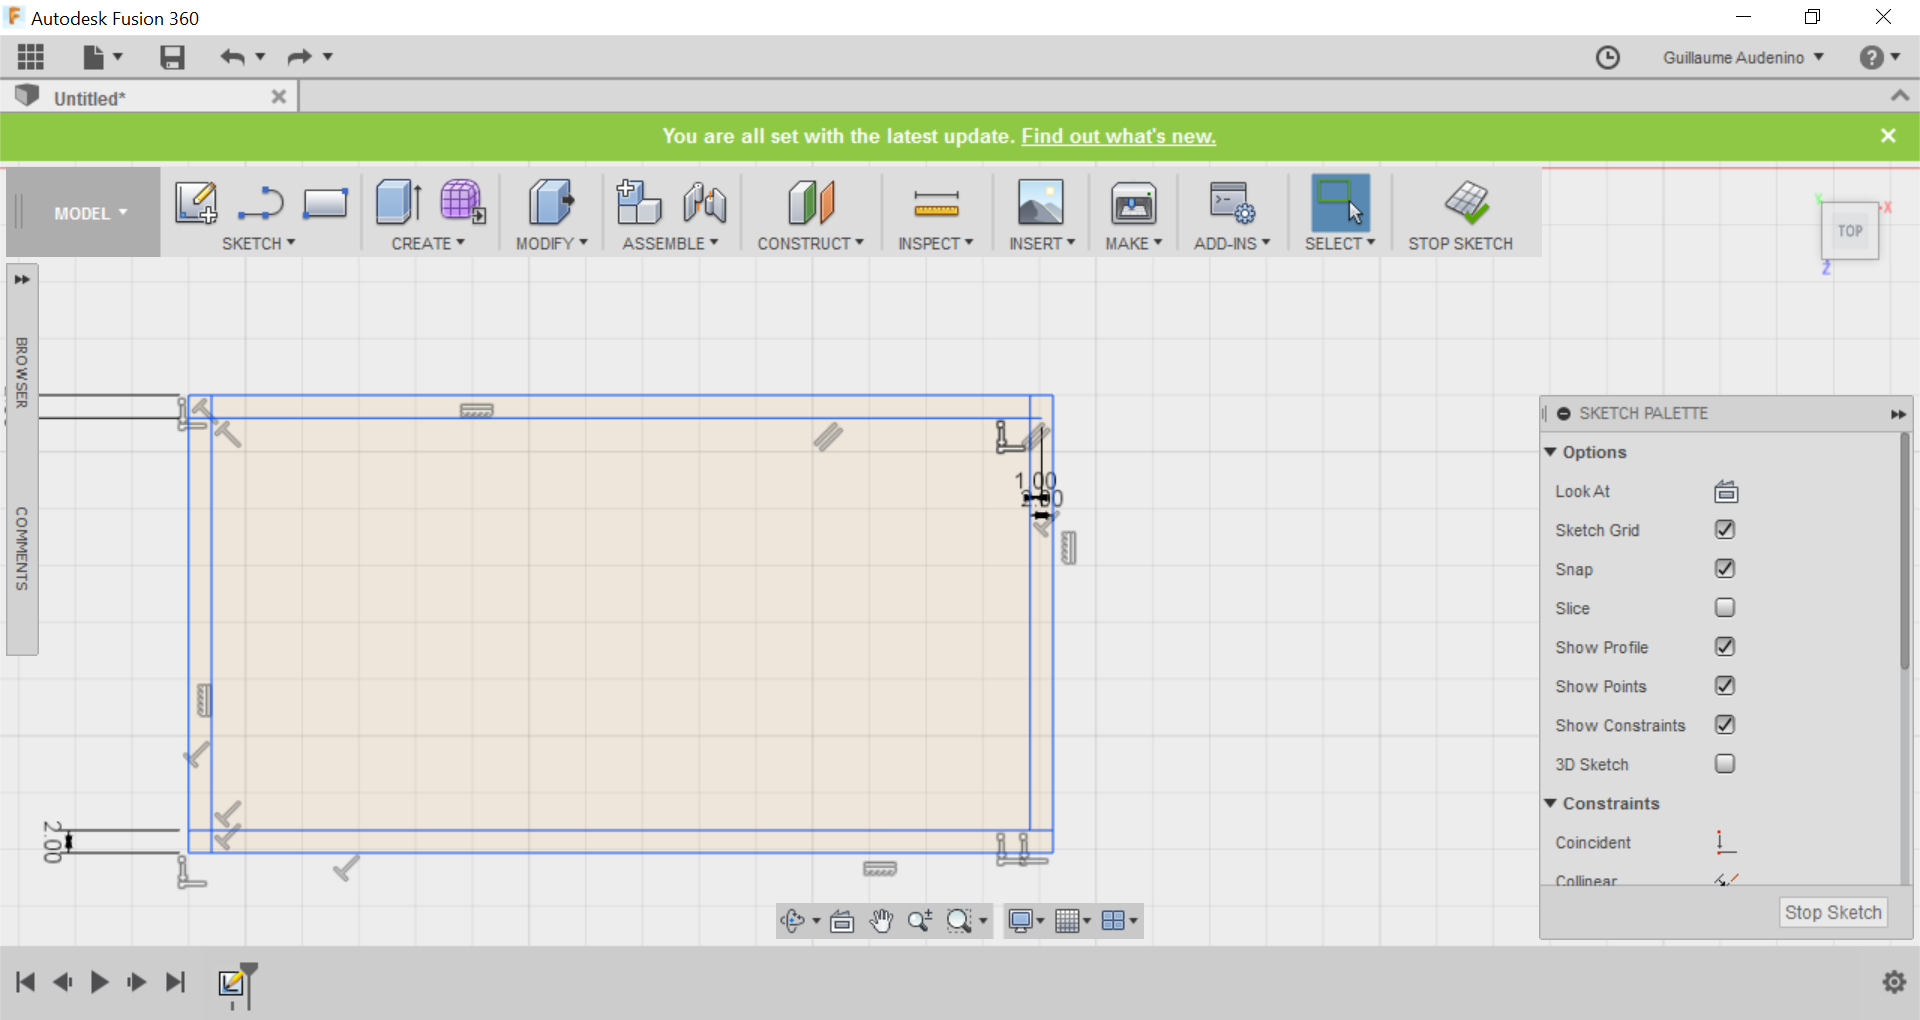
To do so, you need to select the "New Sketch" options. For any of them you need to chose a reference plane (the plane were you will be aking your 2D drawing)
From here you can skip to a later part to "press pull" and give some well diserved 3D to your 2D work
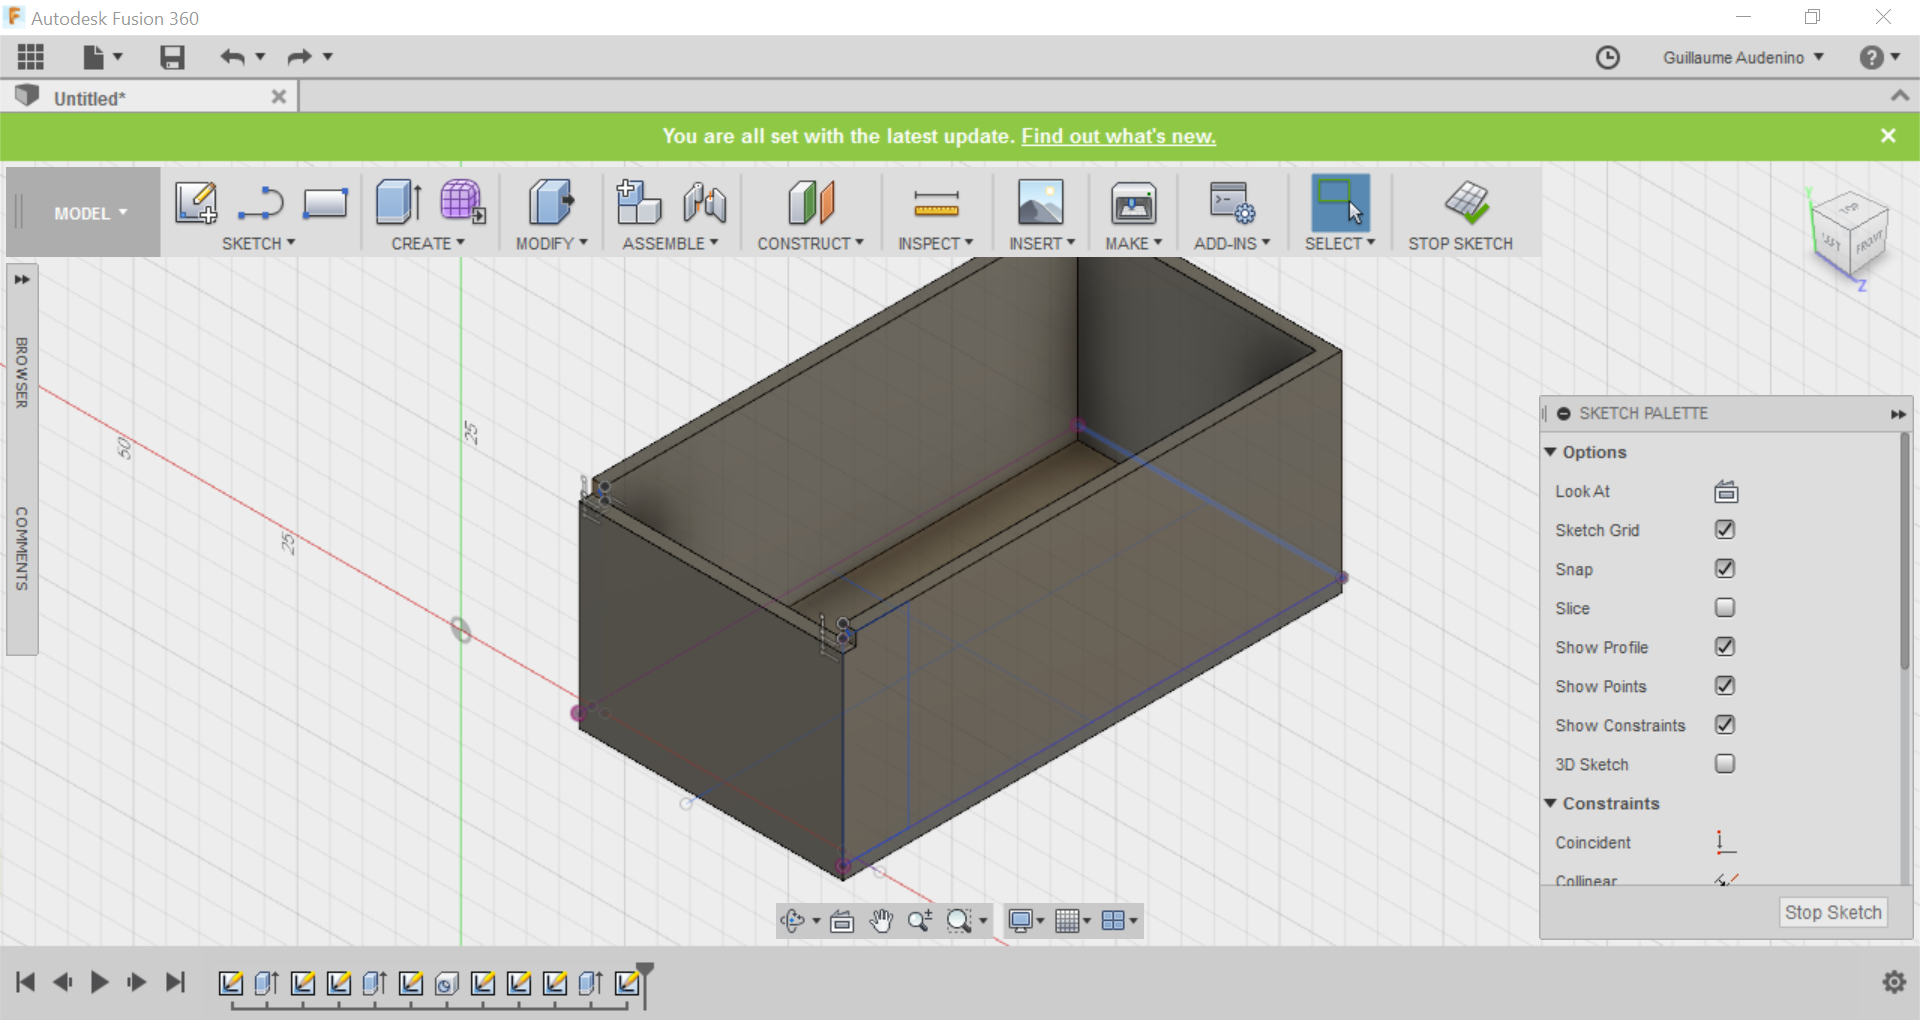
2-1)For a design simple as a box made of rectangle we will use the "2 points rectangle" option to make a rectangle. Note thta you can edit either sides parameters freely. Said box will be a 3.8*7.4*3.4cm rectangle with 2 mm wide walls.
So we should have a rectangular base by now , but now you want to have walls ! To do so, re-use the rectangle option and make "wall" patern on the base
(Make thin rectangles on as long as the sides they are suposed to be)(You can use the "Lines" option to make more effisiant and good looking sides)
By this point your project should look more or less like this.
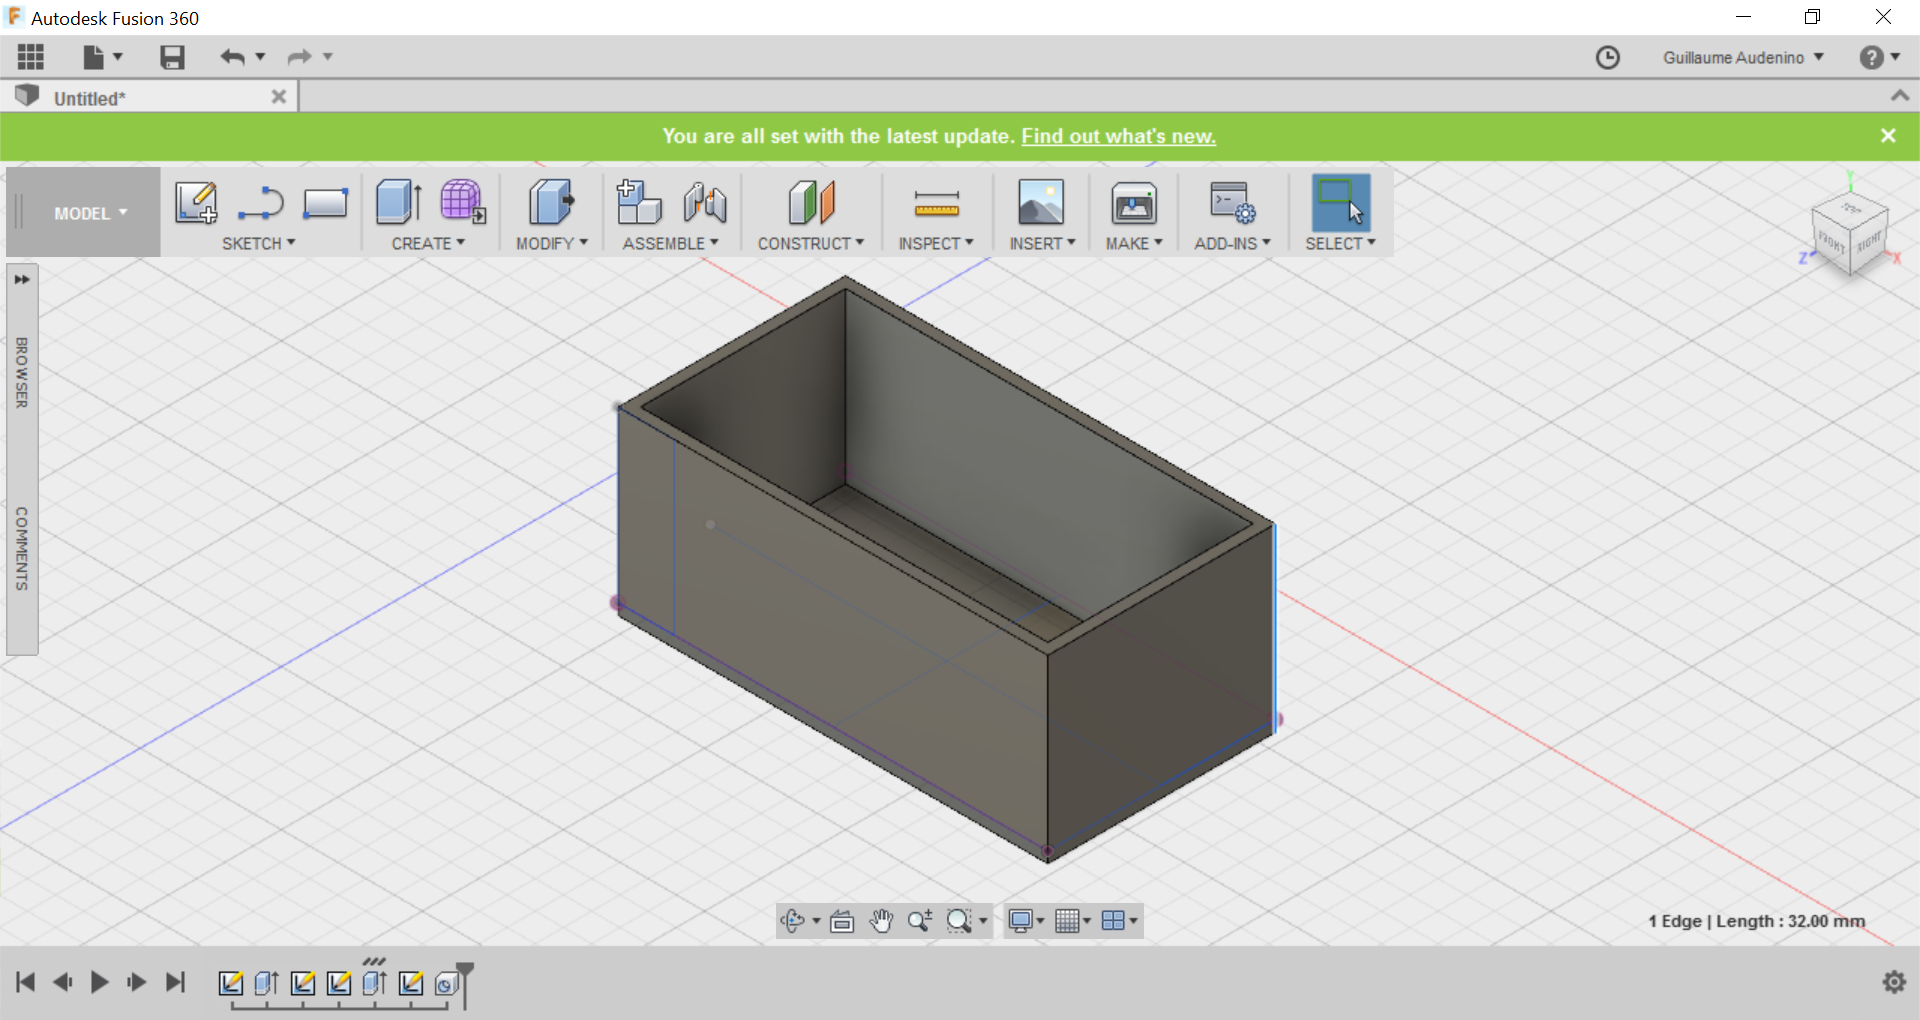
3)Great now we can go on to do 3D stuff !To make this plan go to 3D , use the "Create: Extrude" it will basicaly add depth on the part you want to.
So once you've raised the walls and have a base with a depth of 2mm .
3-1) After this you need to delete 2mm from the top of one of your walls to create the entering side of the top of the box.
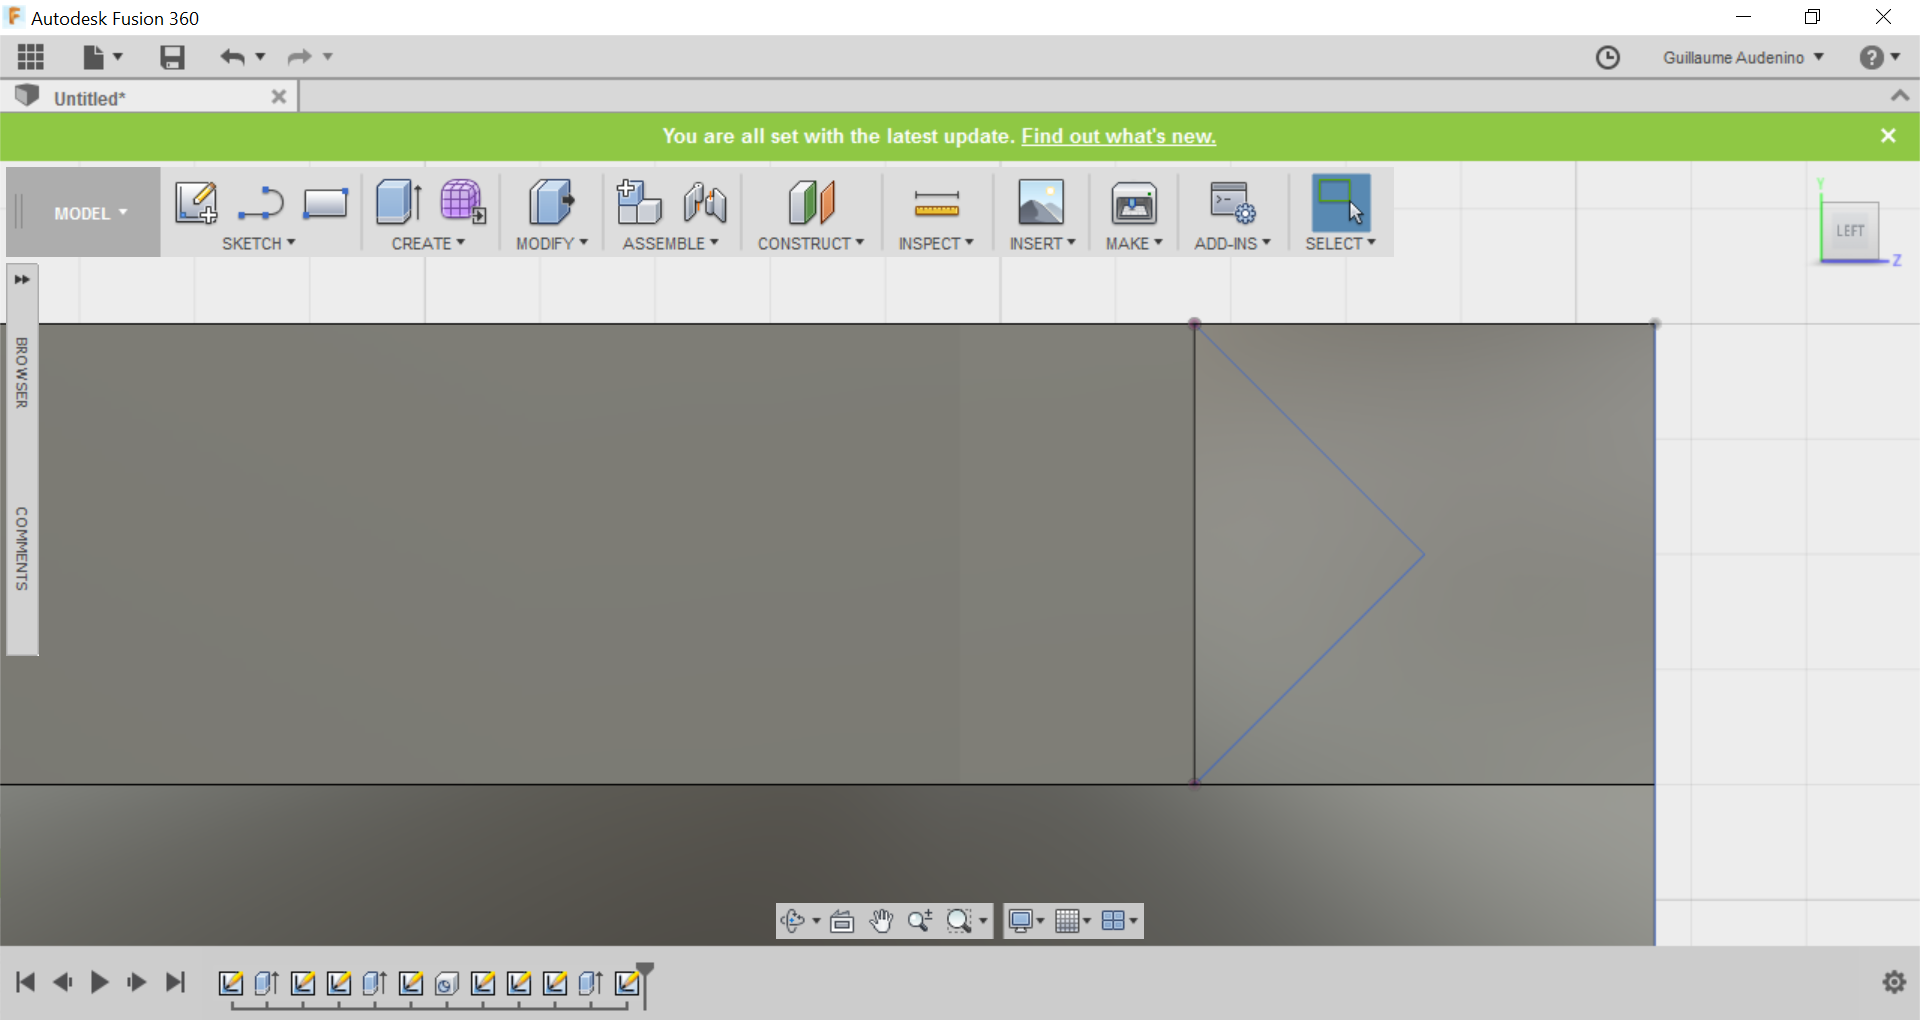
Once done we need to add a slide opening in the 2 other walls, to do so , draw a shape (preferably a isoceles triangles)
Once done , extrude those to the other sid of the walls.
-
3Step 3
FIRST TEST ESP - BLYNK
1) see first instruction to install Blynk
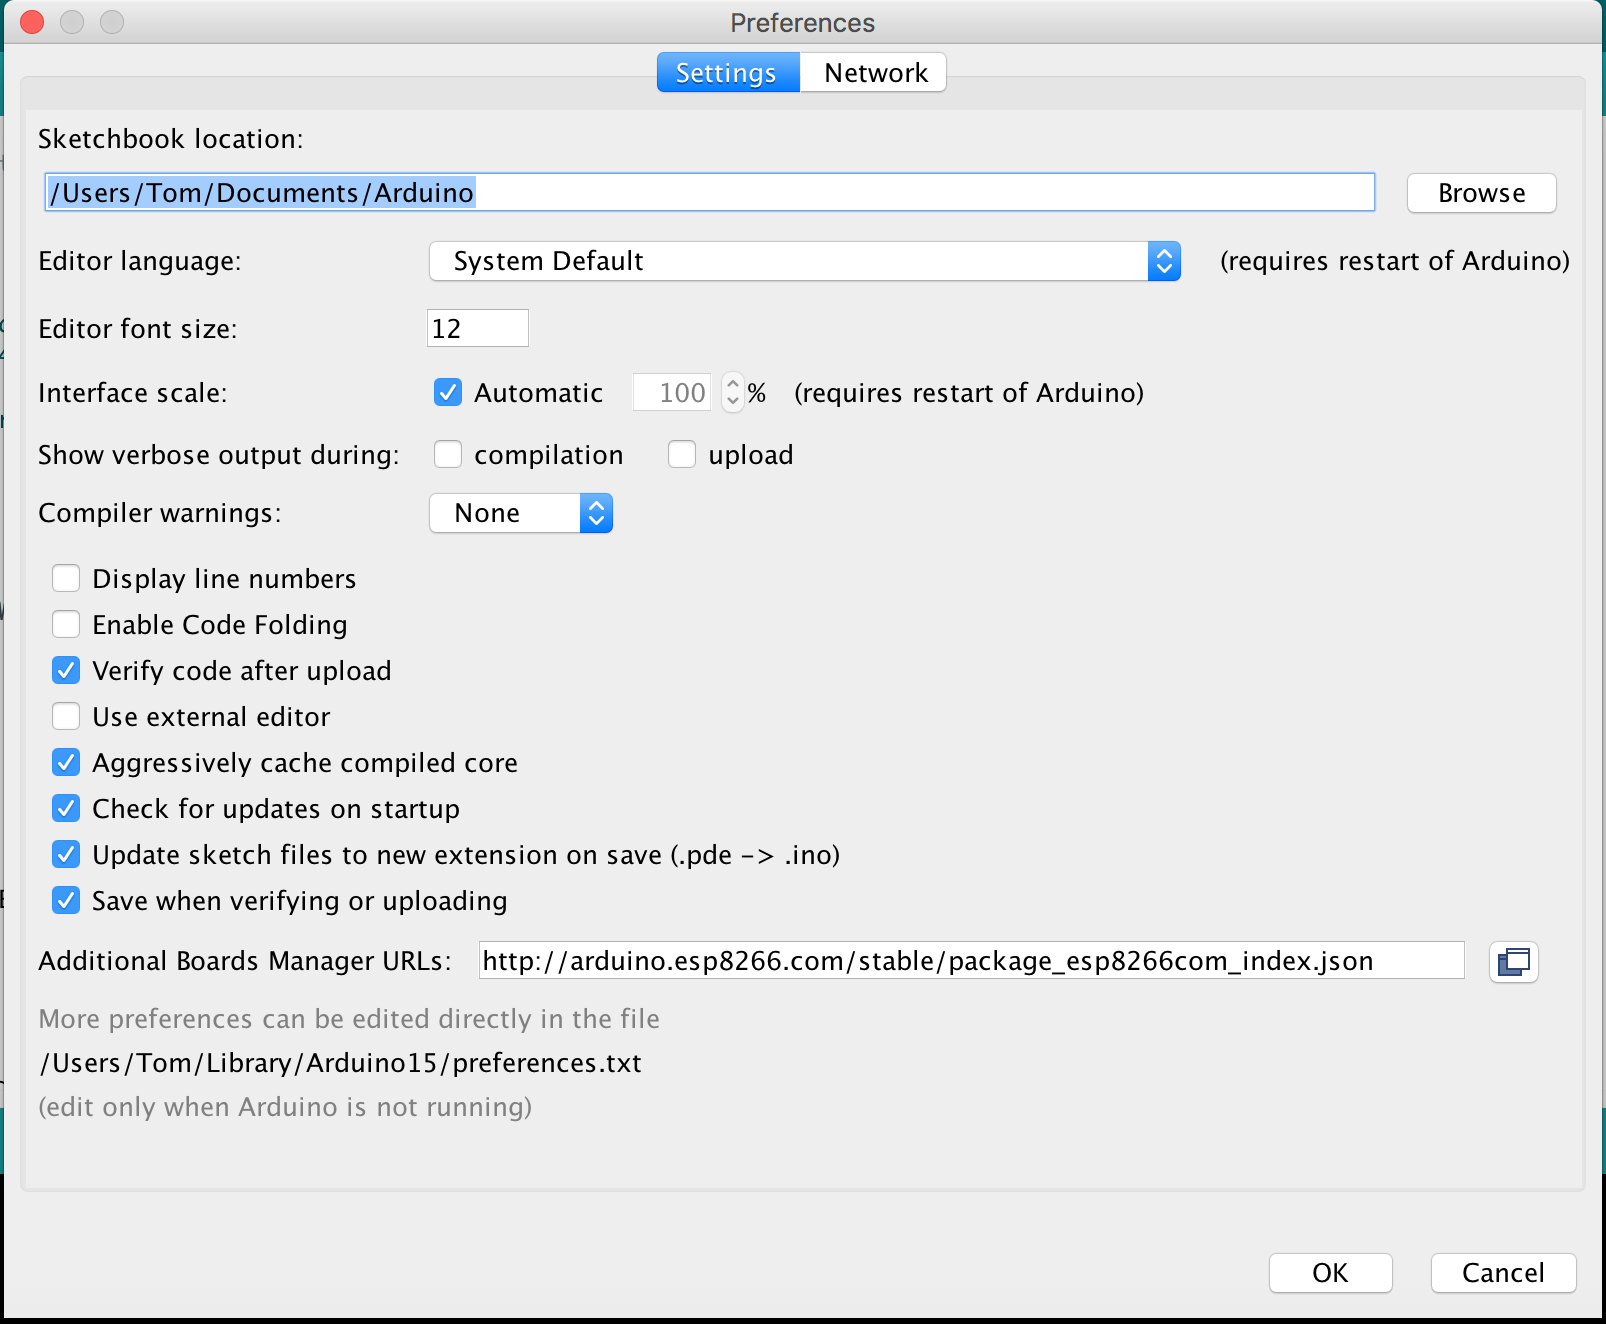
2) install ESP8266 huzzah feather board onto the arduino IDE using the following link :
http://arduino.esp8266.com/stable/package_esp8266com_index.json
3) Go to File > Examples > Blynk > Boards_WIFI > ESP8266_Standalones
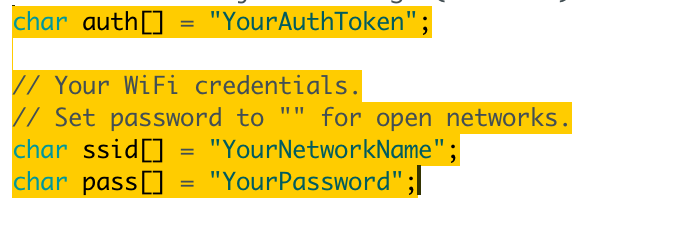
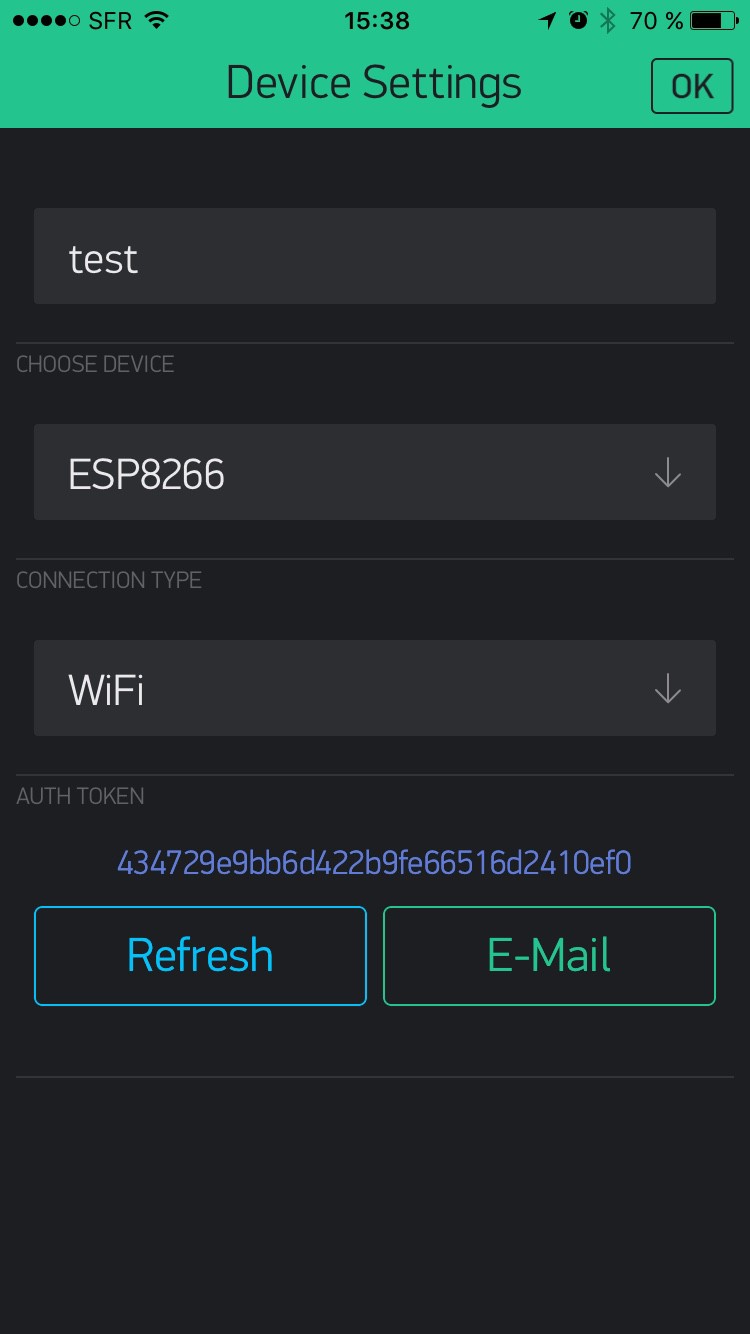
4) then the program will charge all you have to change is the SSID, PASS and the auth token with is the ID of your BLynk Project
5) on your blynk app you will want to set it up as a connected to an ESP8266 via WIFI
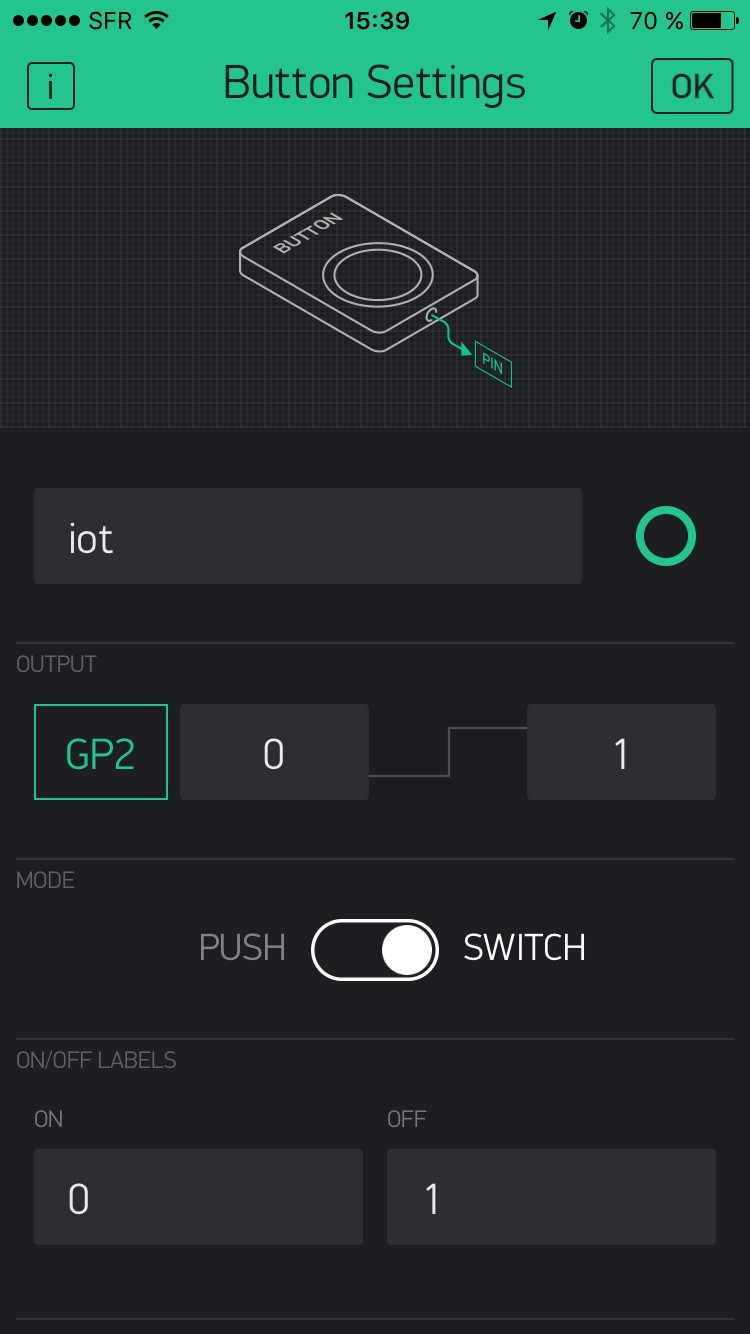
6) put a button and set the output onto GP2 which is connected to the ESP's LED and put "switch"
After everything is done you can put "play" on your Blynk app after you have connected both your ESP and your phone to the same WIFI. When you press on the button the LED of your ESP should turn on the press it again and the ESP's LED turns off.
-
4Step 4
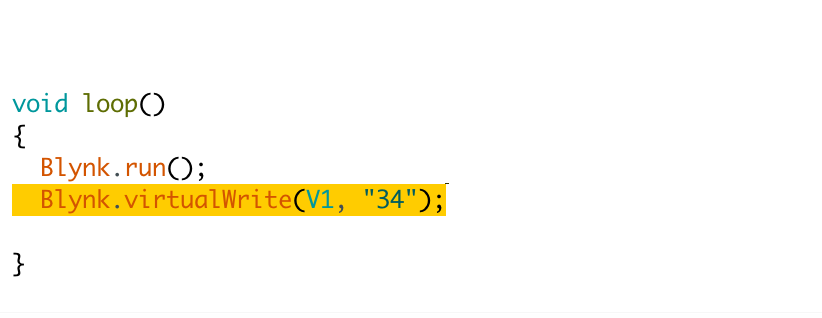
SEND VALUE ESP8266 ==> BLYNK
1)
2)
-
5Step 5
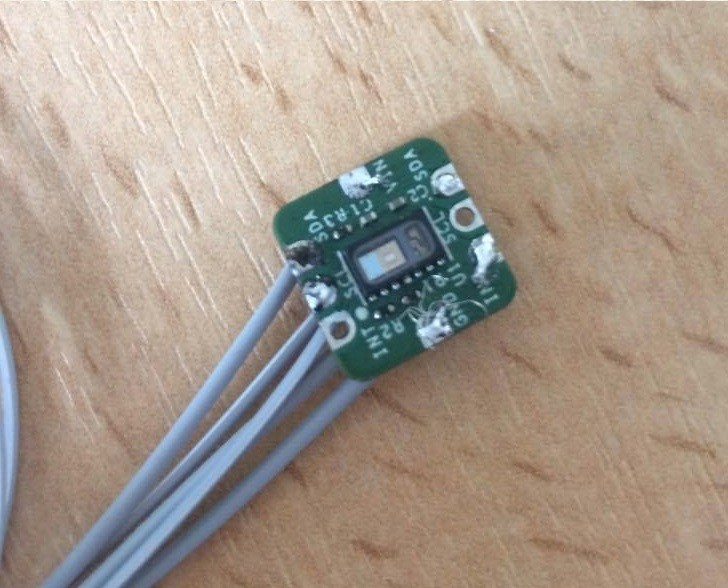
Now we can pass to the SP02 sensor part :
First you have to solder the different ports of the sensor with wires (adapt the wires to the component you will connect your sensor to). Solder ports SDA, SCL, VIN, GND.
Each wire have to be connected to the ESP8266 as the following connections:
SDA = SDA , SCL = SCL , VIN = 3V , GND = GND (These connections come obviously from our arduino code).
-
6Step 6
SELECT THE RIGHT ARDUINO CODE
- Go to the website of your captor
- Check on the difference links given at the end of the page
- Click on one link you think you will find a code (Github would be the best)
- Select the link on hearth rate/SP02
For example you should have a page like this one :
https://github.com/sparkfun/SparkFun_MAX3010x_Sensor_Library/tree/master/examples
-
7Step 7
FINAL STEP : IMPLEMENT TOGETHER YOUR CODES (ESP and Sensor)
You should have a code like this :
/*************************************************************
  Download latest Blynk library here:
    https://github.com/blynkkk/blynk-library/releases/latest

  Blynk is a platform with iOS and Android apps to control
  Arduino, Raspberry Pi and the likes over the Internet.
  You can easily build graphic interfaces for all your
  projects by simply dragging and dropping widgets.

    Downloads, docs, tutorials: http://www.blynk.cc
    Sketch generator:           http://examples.blynk.cc
    Blynk community:            http://community.blynk.cc
    Social networks:            http://www.fb.com/blynkapp
                                http://twitter.com/blynk_app

  Blynk library is licensed under MIT license
  This example code is in public domain.
auth Saif Blynk : 2556aa5013f74f04ae8a47b5485bf74f
auth Tom Blynk : 434729e9bb6d422b9fe66516d2410ef0
 *************************************************************
  This example runs directly on ESP8266 chip.

  Note: This requires ESP8266 support package:
    https://github.com/esp8266/Arduino

  Please be sure to select the right ESP8266 module
  in the Tools -> Board menu!

  Change WiFi ssid, pass, and Blynk auth token to run :)
  Feel free to apply it to any other example. It's simple!
 *************************************************************/

/* Comment this out to disable prints and save space */

#include <Wire.h>
#include "MAX30105.h"

#include "heartRate.h"
#define BLYNK_PRINT Serial

MAX30105 particleSensor;

#include <ESP8266WiFi.h>
#include <BlynkSimpleEsp8266.h>

// You should get Auth Token in the Blynk App.
// Go to the Project Settings (nut icon).
char auth[] = "...";

// Your WiFi credentials.
// Set password to "" for open networks.
char ssid[] = "...";
char pass[] = "...";

const byte RATE_SIZE = 4; //Increase this for more averaging. 4 is good.
byte rates[RATE_SIZE]; //Array of heart rates
byte rateSpot = 0;
long lastBeat = 0; //Time at which the last beat occurred

float beatsPerMinute;

void setup()
{
  // Debug console
  Serial.begin(115200);

  Serial.println("Initializing...");

  // Initialize sensor
  if (!particleSensor.begin(Wire, I2C_SPEED_FAST)) //Use default I2C port, 400kHz speed
  {
    Serial.println("MAX30105 was not found. Please check wiring/power. ");
    while (1);
  }
  Serial.println("Place your index finger on the sensor with steady pressure.");

  particleSensor.setup(); //Configure sensor with default settings
  particleSensor.setPulseAmplitudeRed(0x0A); //Turn Red LED to low to indicate sensor is running
  particleSensor.setPulseAmplitudeGreen(0); //Turn off Green LED

  Blynk.begin(auth, ssid, pass);


}

void loop()
{
  Blynk.run();
  Blynk.virtualWrite(V1,"2018");

  long irValue = particleSensor.getIR();

  if (checkForBeat(irValue) == true)
  {
    //We sensed a beat!
    long delta = millis() - lastBeat;
    lastBeat = millis();

    beatsPerMinute = 60 / (delta / 1000.0);

    if (beatsPerMinute < 255 && beatsPerMinute > 20)
    {
      rates[rateSpot++] = (byte)beatsPerMinute; //Store this reading in the array
      rateSpot %= RATE_SIZE; //Wrap variable


    }
  }

  Serial.print("IR=");
  Serial.print(irValue);
  Serial.print(", BPM=");
  Serial.print(beatsPerMinute);
  Blynk.virtualWrite(V3,irValue);
  Blynk.virtualWrite(V2,beatsPerMinute);


  if (irValue < 50000)
    Serial.print(" No finger?");


  Serial.println();

       }
M.A.B
this project will be used to measure someone's respiratory rhythm via a bracelet installed on your arm.

Discussions
Become a Hackaday.io Member
Create an account to leave a comment. Already have an account? Log In.