0%
0%
ATARI LYNX
An attempt to build a reproduction of this iconic hand-held game system.
 Cees Meijer
Become a Hackaday.io member
Already have an account? Log in.
Just one more thing
To make the experience fit your profile, pick a username and tell us what interests you.
Pick an awesome username
hackaday.io/
Your profile's URL: hackaday.io/username. Max 25 alphanumeric characters.
Pick a few interests
Projects that share your interests
People that share your interests
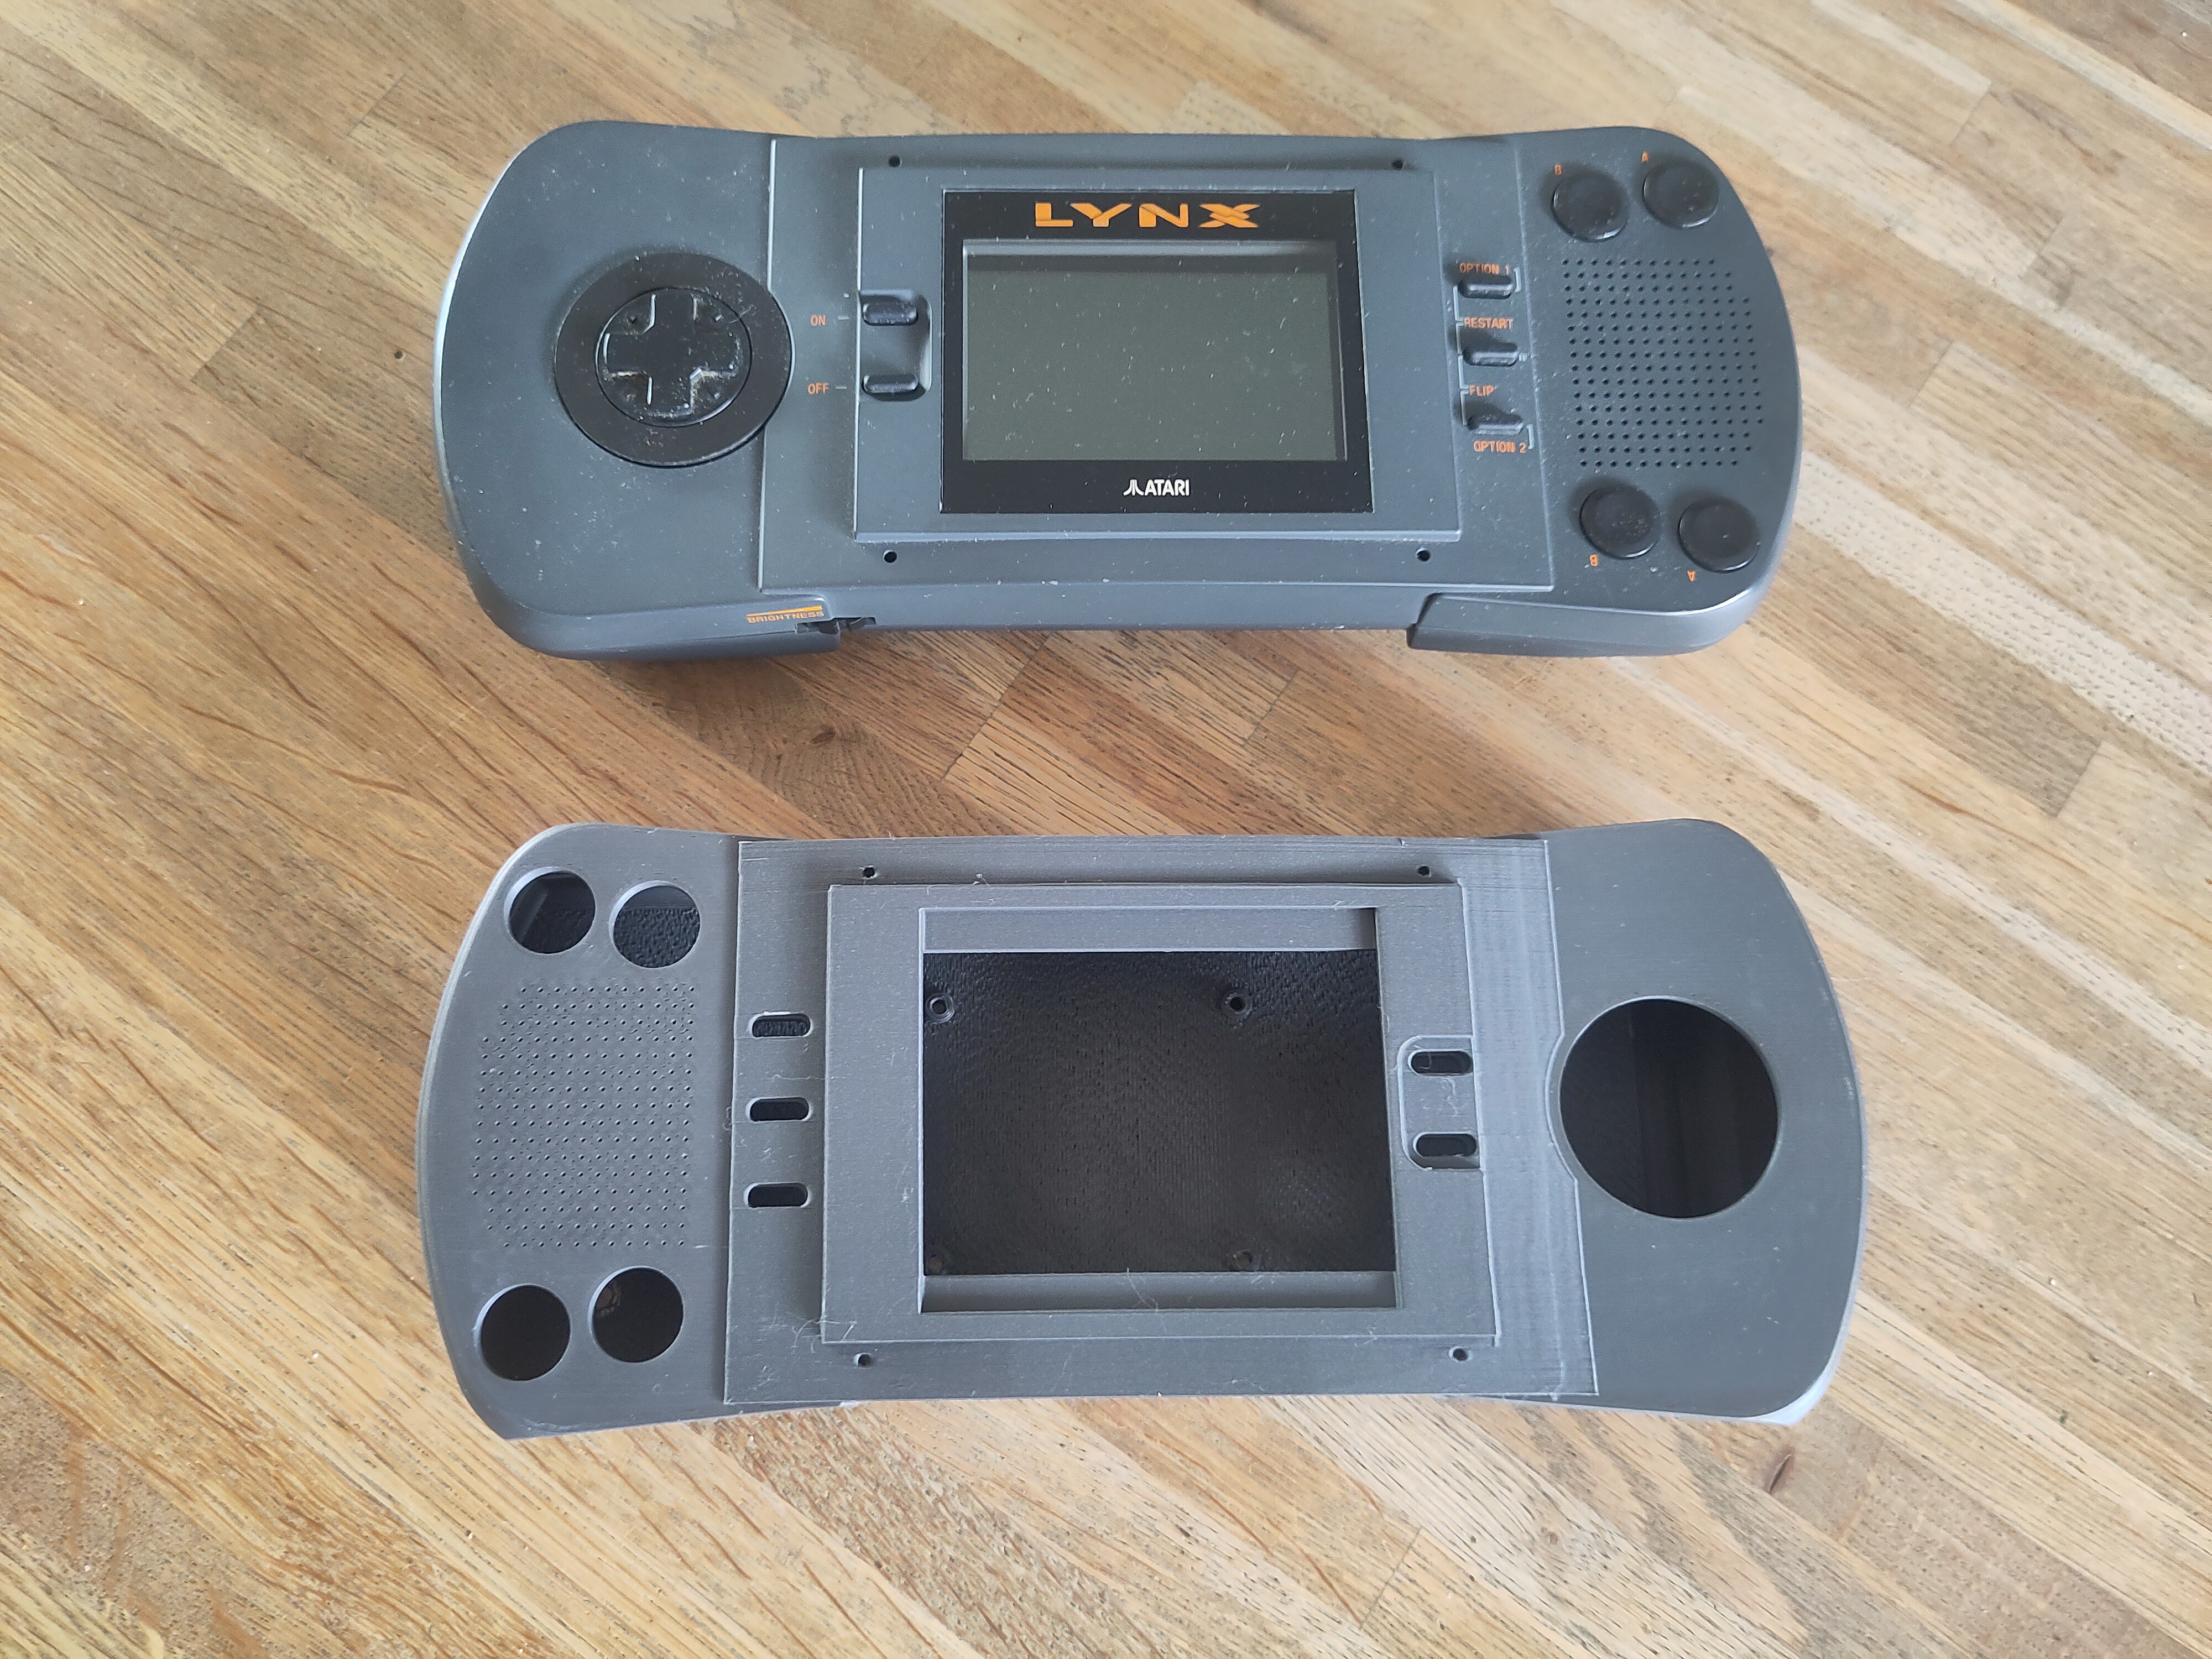
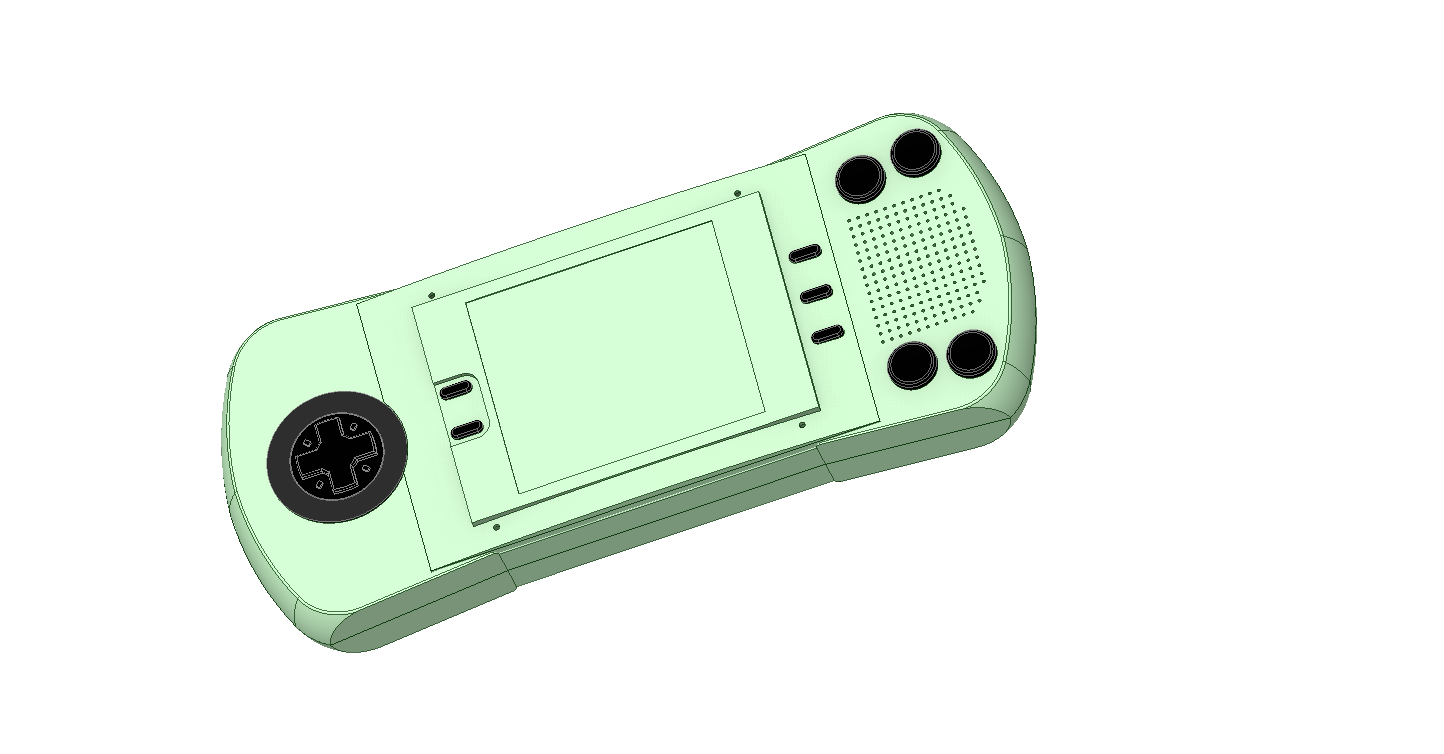
 The screen is in the middle, but the side-sections start at a different distance from the edge of the screen. And once this is corrected, the front indeed looks even more like the original:
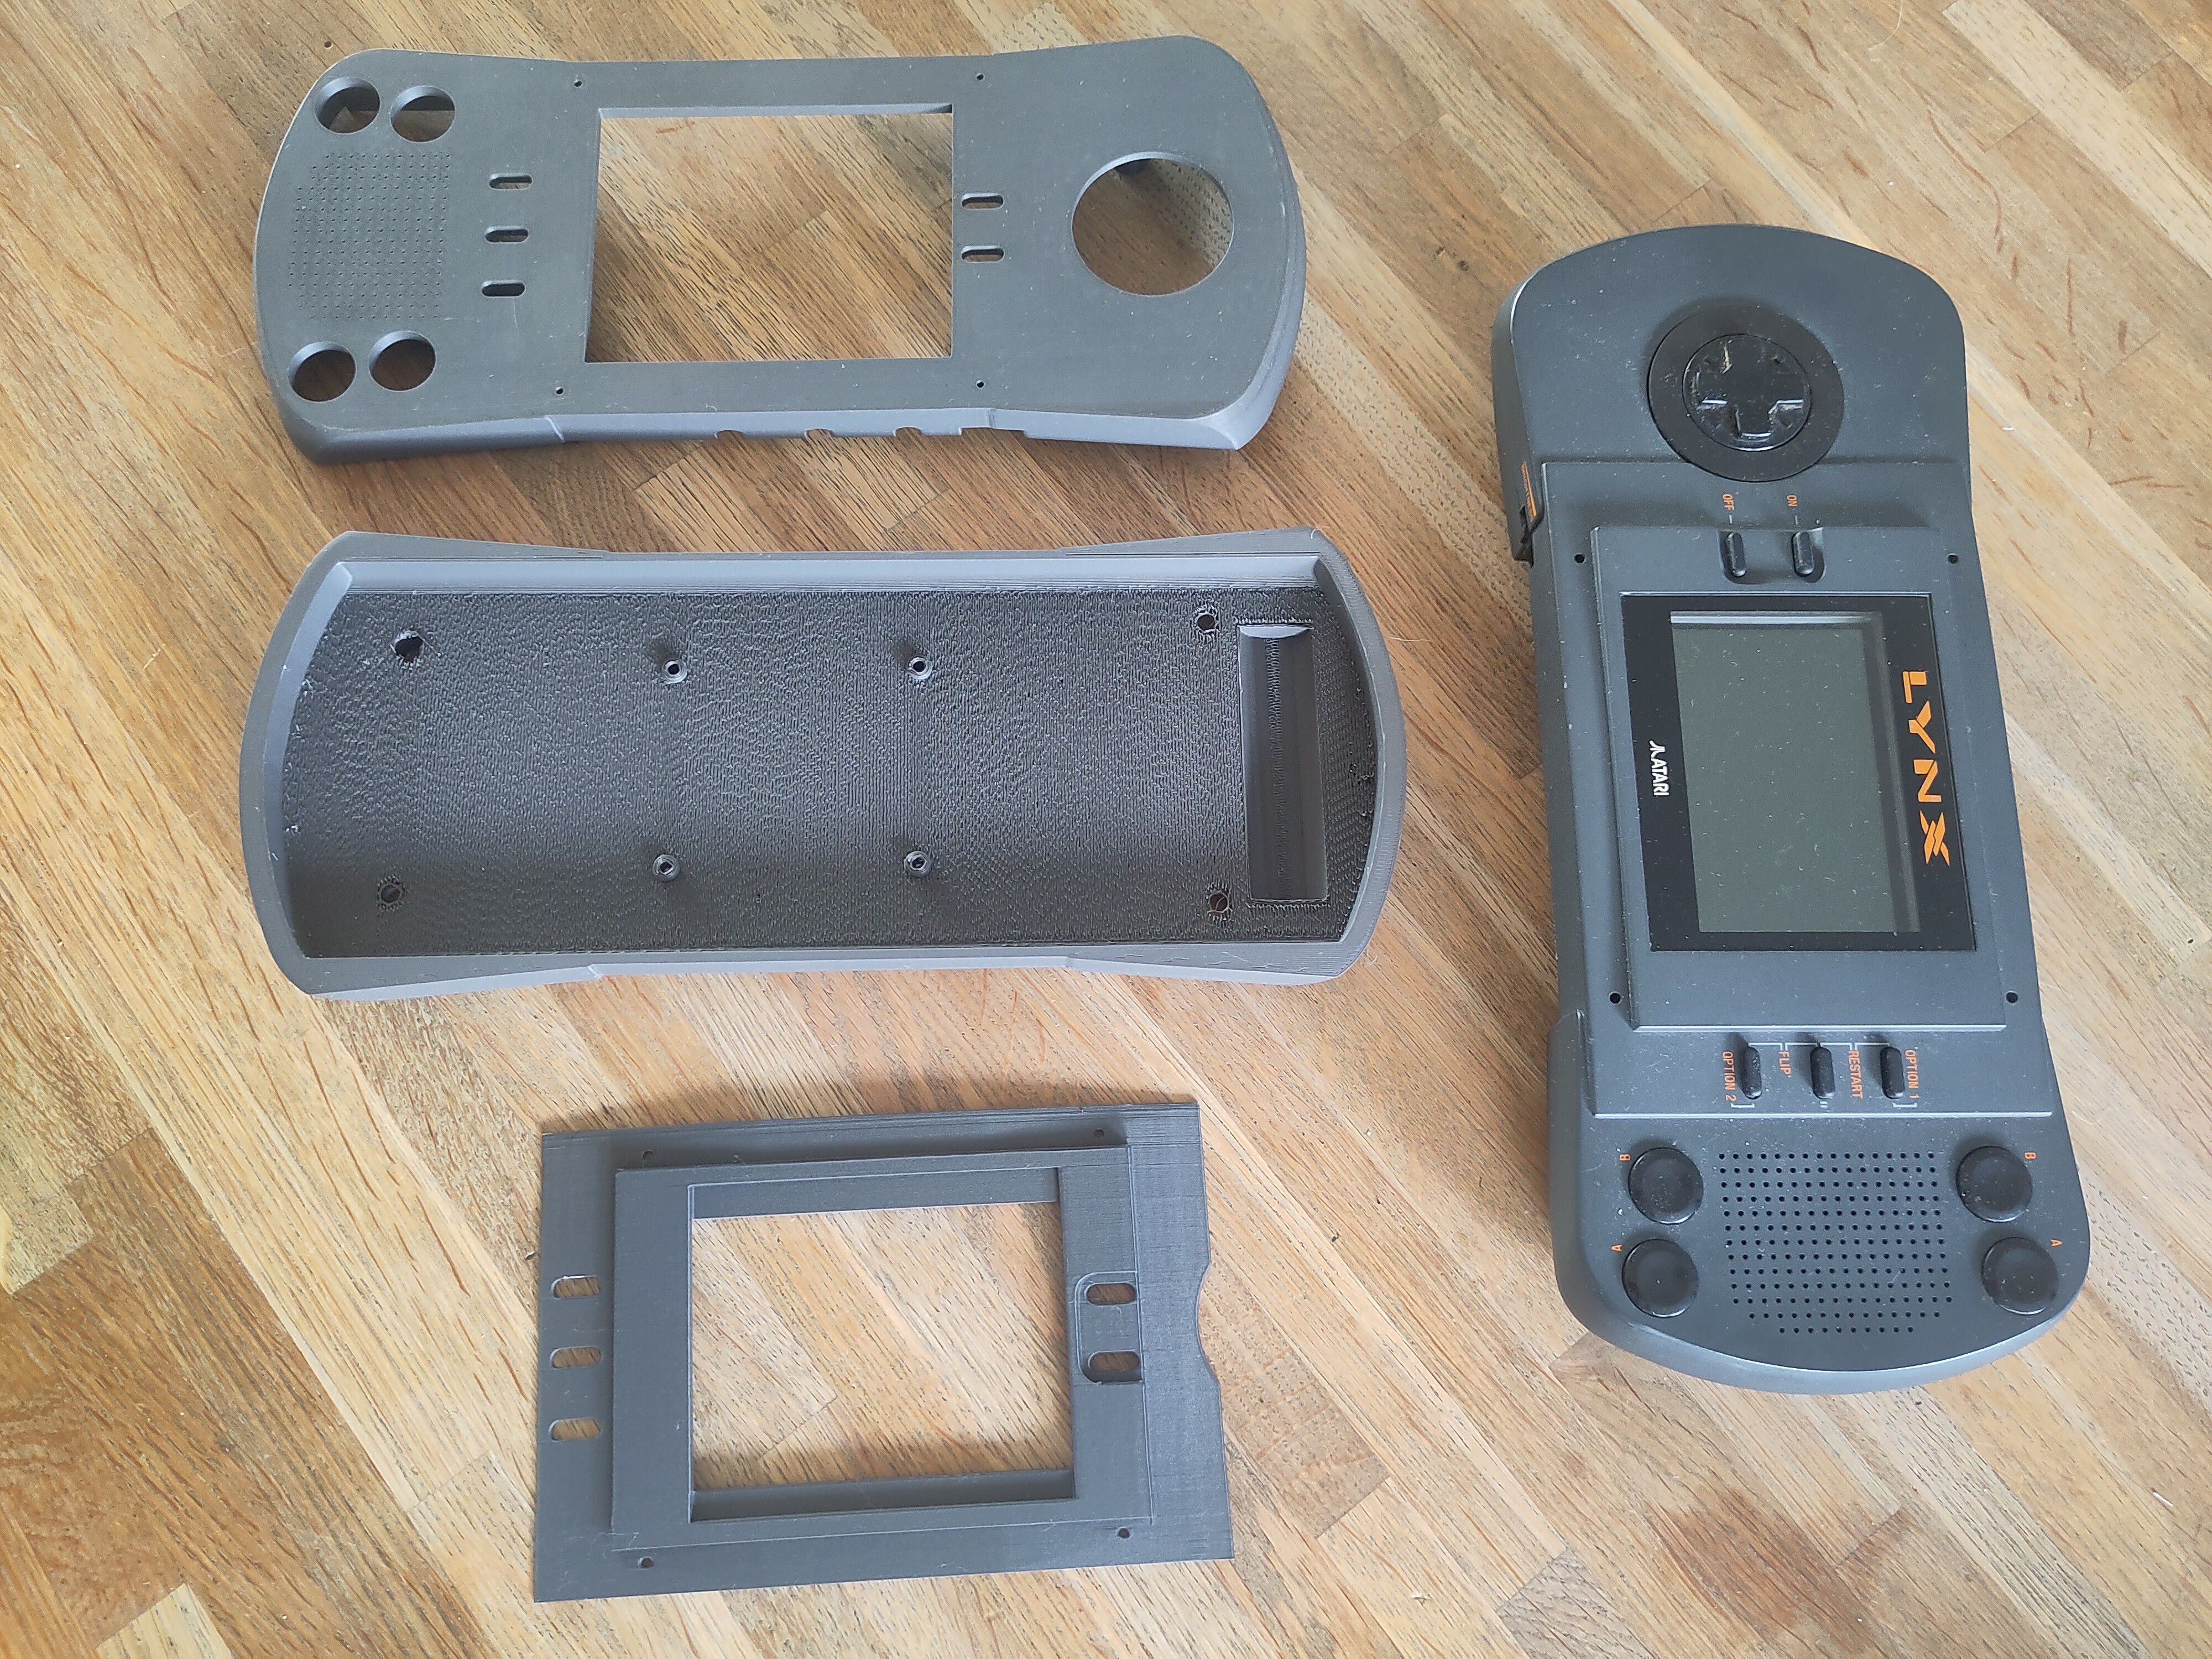
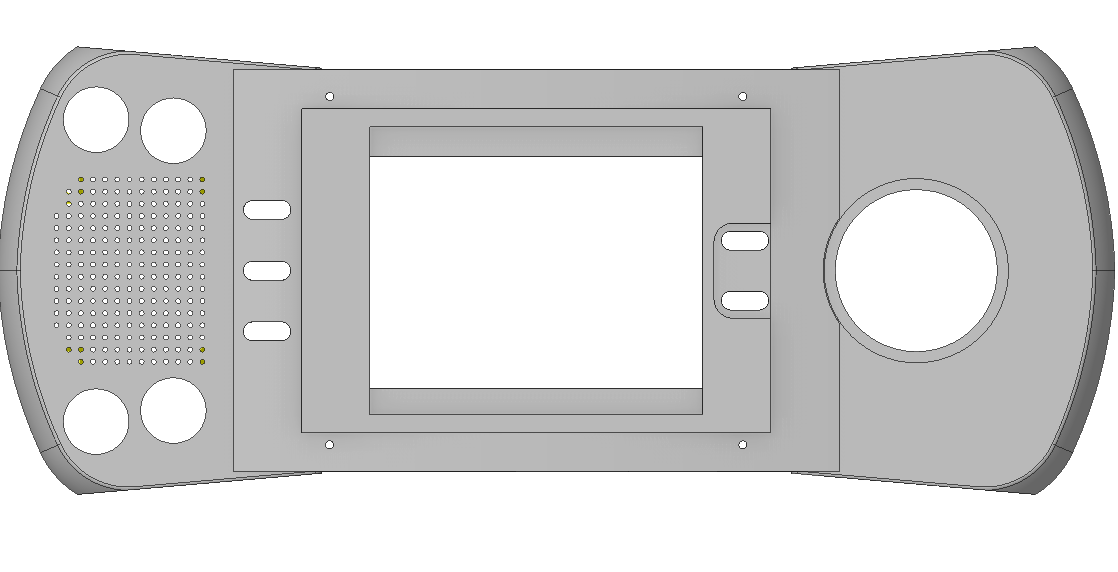 Apart from this there were several small changes that I made to to front, like increasing the hole size for the buttons, so I decided to print it again:
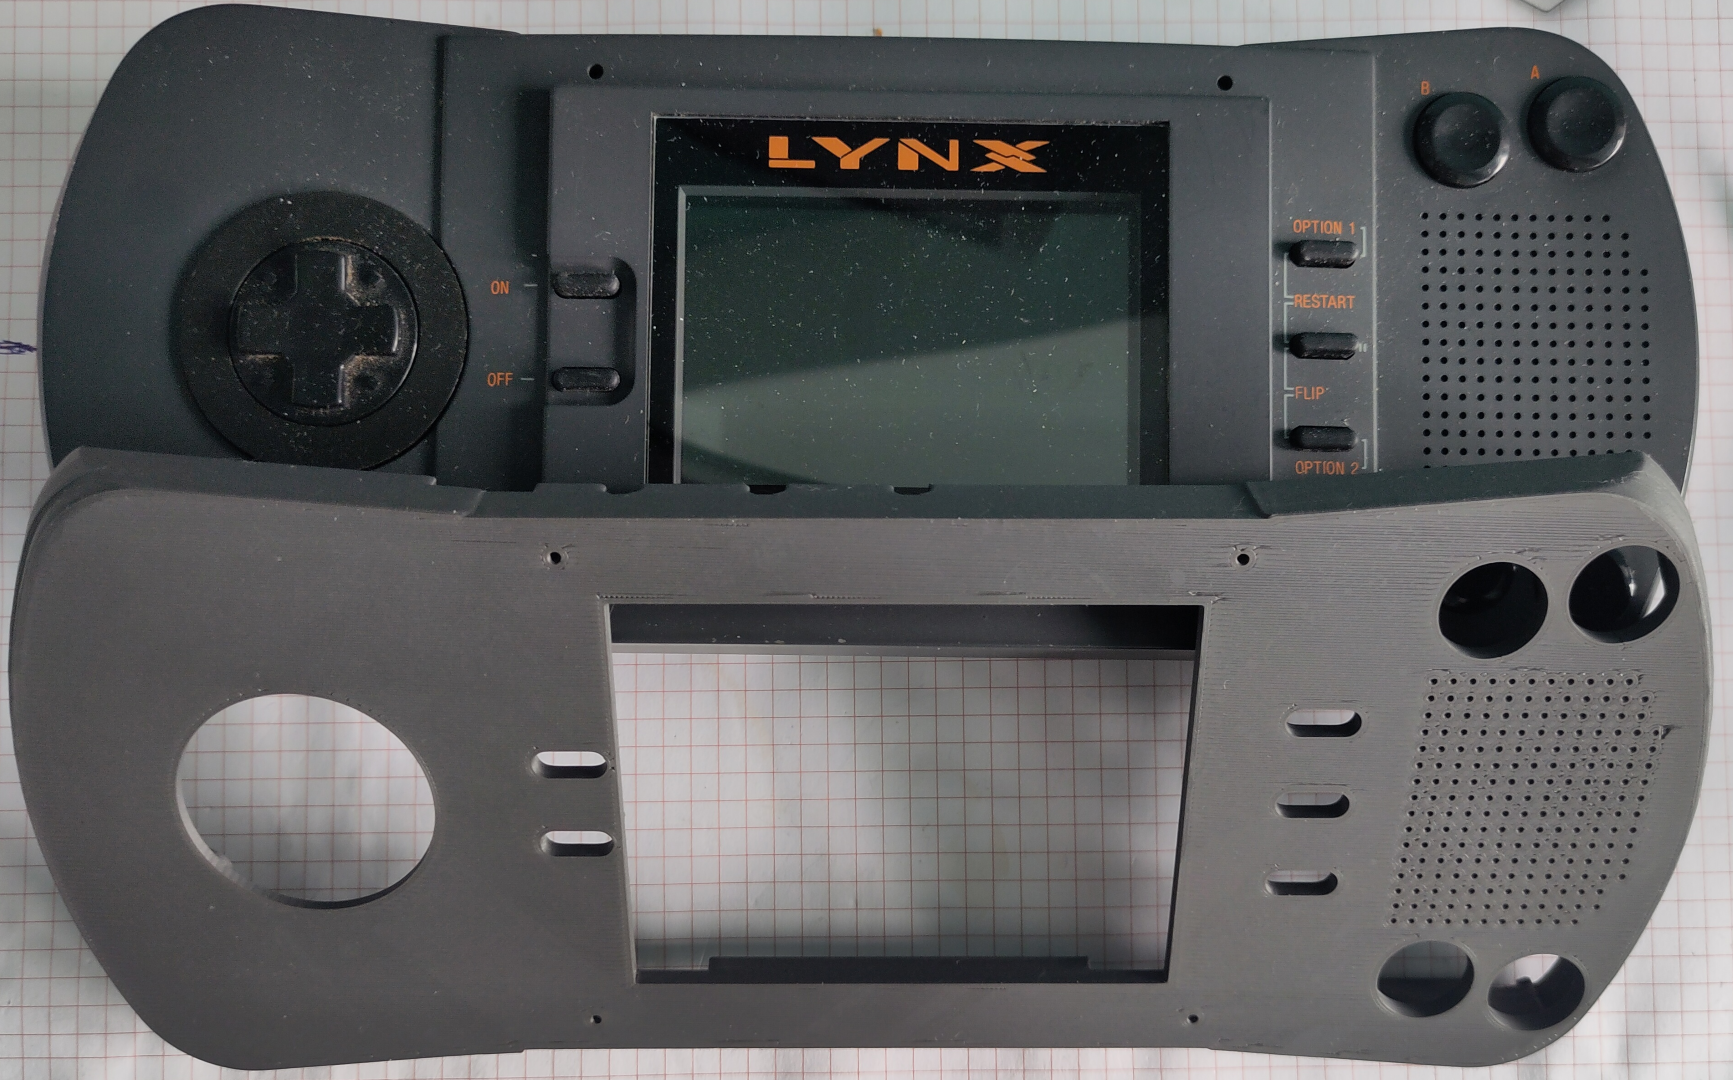 Much better!
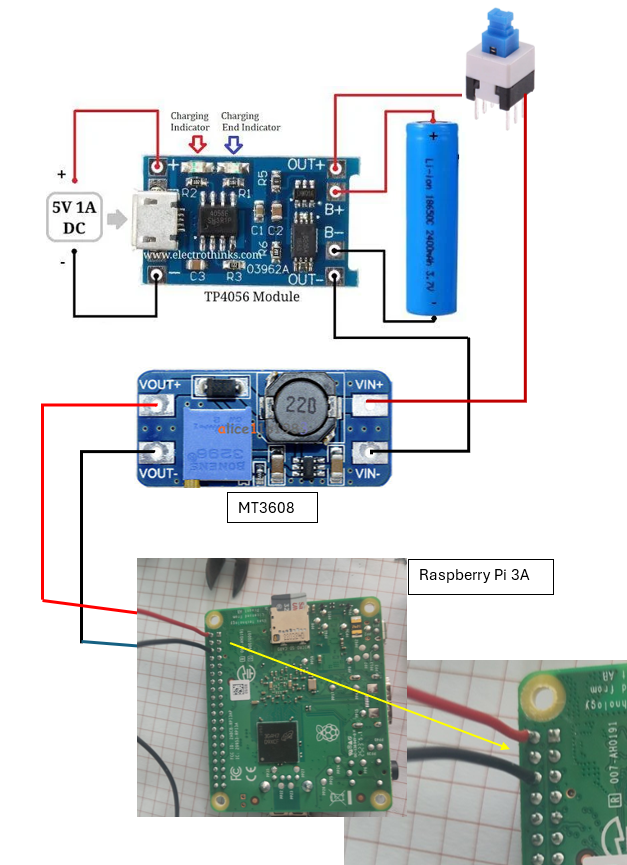
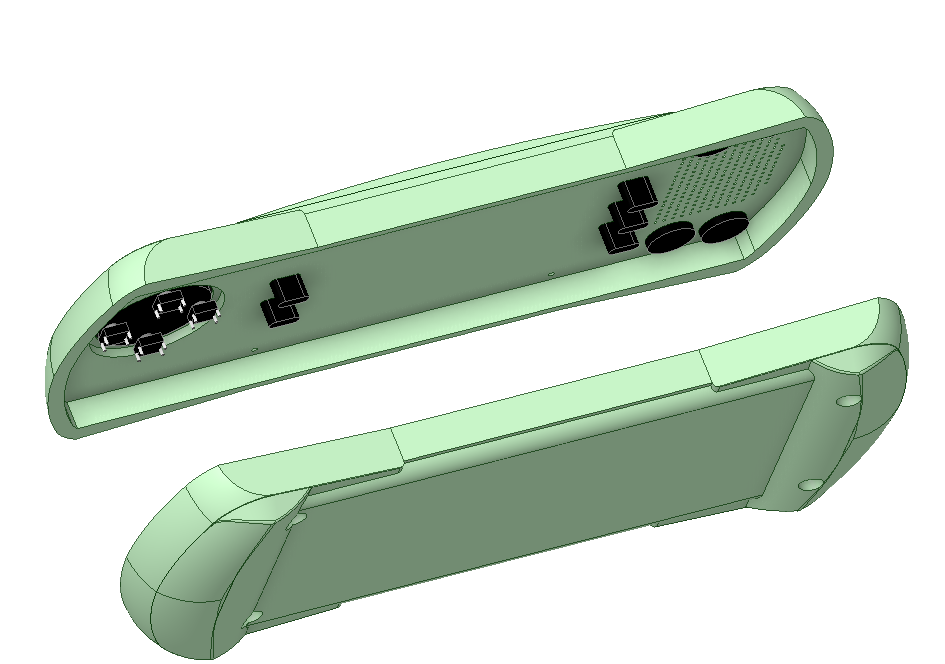
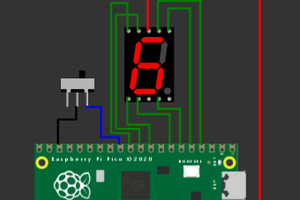
 Soldering the wires directly to the switches, so close to the PLA frame is a challenge. The plastic tends to melt rapidly when a soldering iron approaches. But its possible and little melting it not too bad. For the wiring itself I followed this schematic:
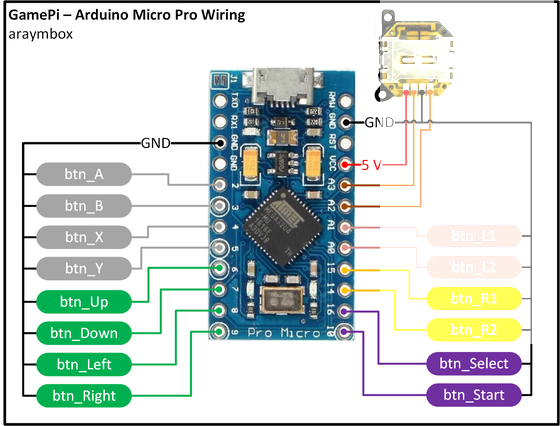


 Open Technology
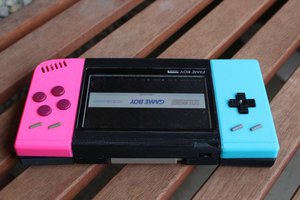
 davedarko
 xli89
xli89
Nice project, and I don't want to detract from the DIY approach! But if you want a nicer screen for your original Lynx there are modern backlit replacements available, e.g https://dragonbox.de/en/upgrade-kits-do-it-yourself/lynx-i-lcd-mod-mcwill-rev-3