 retrobyte
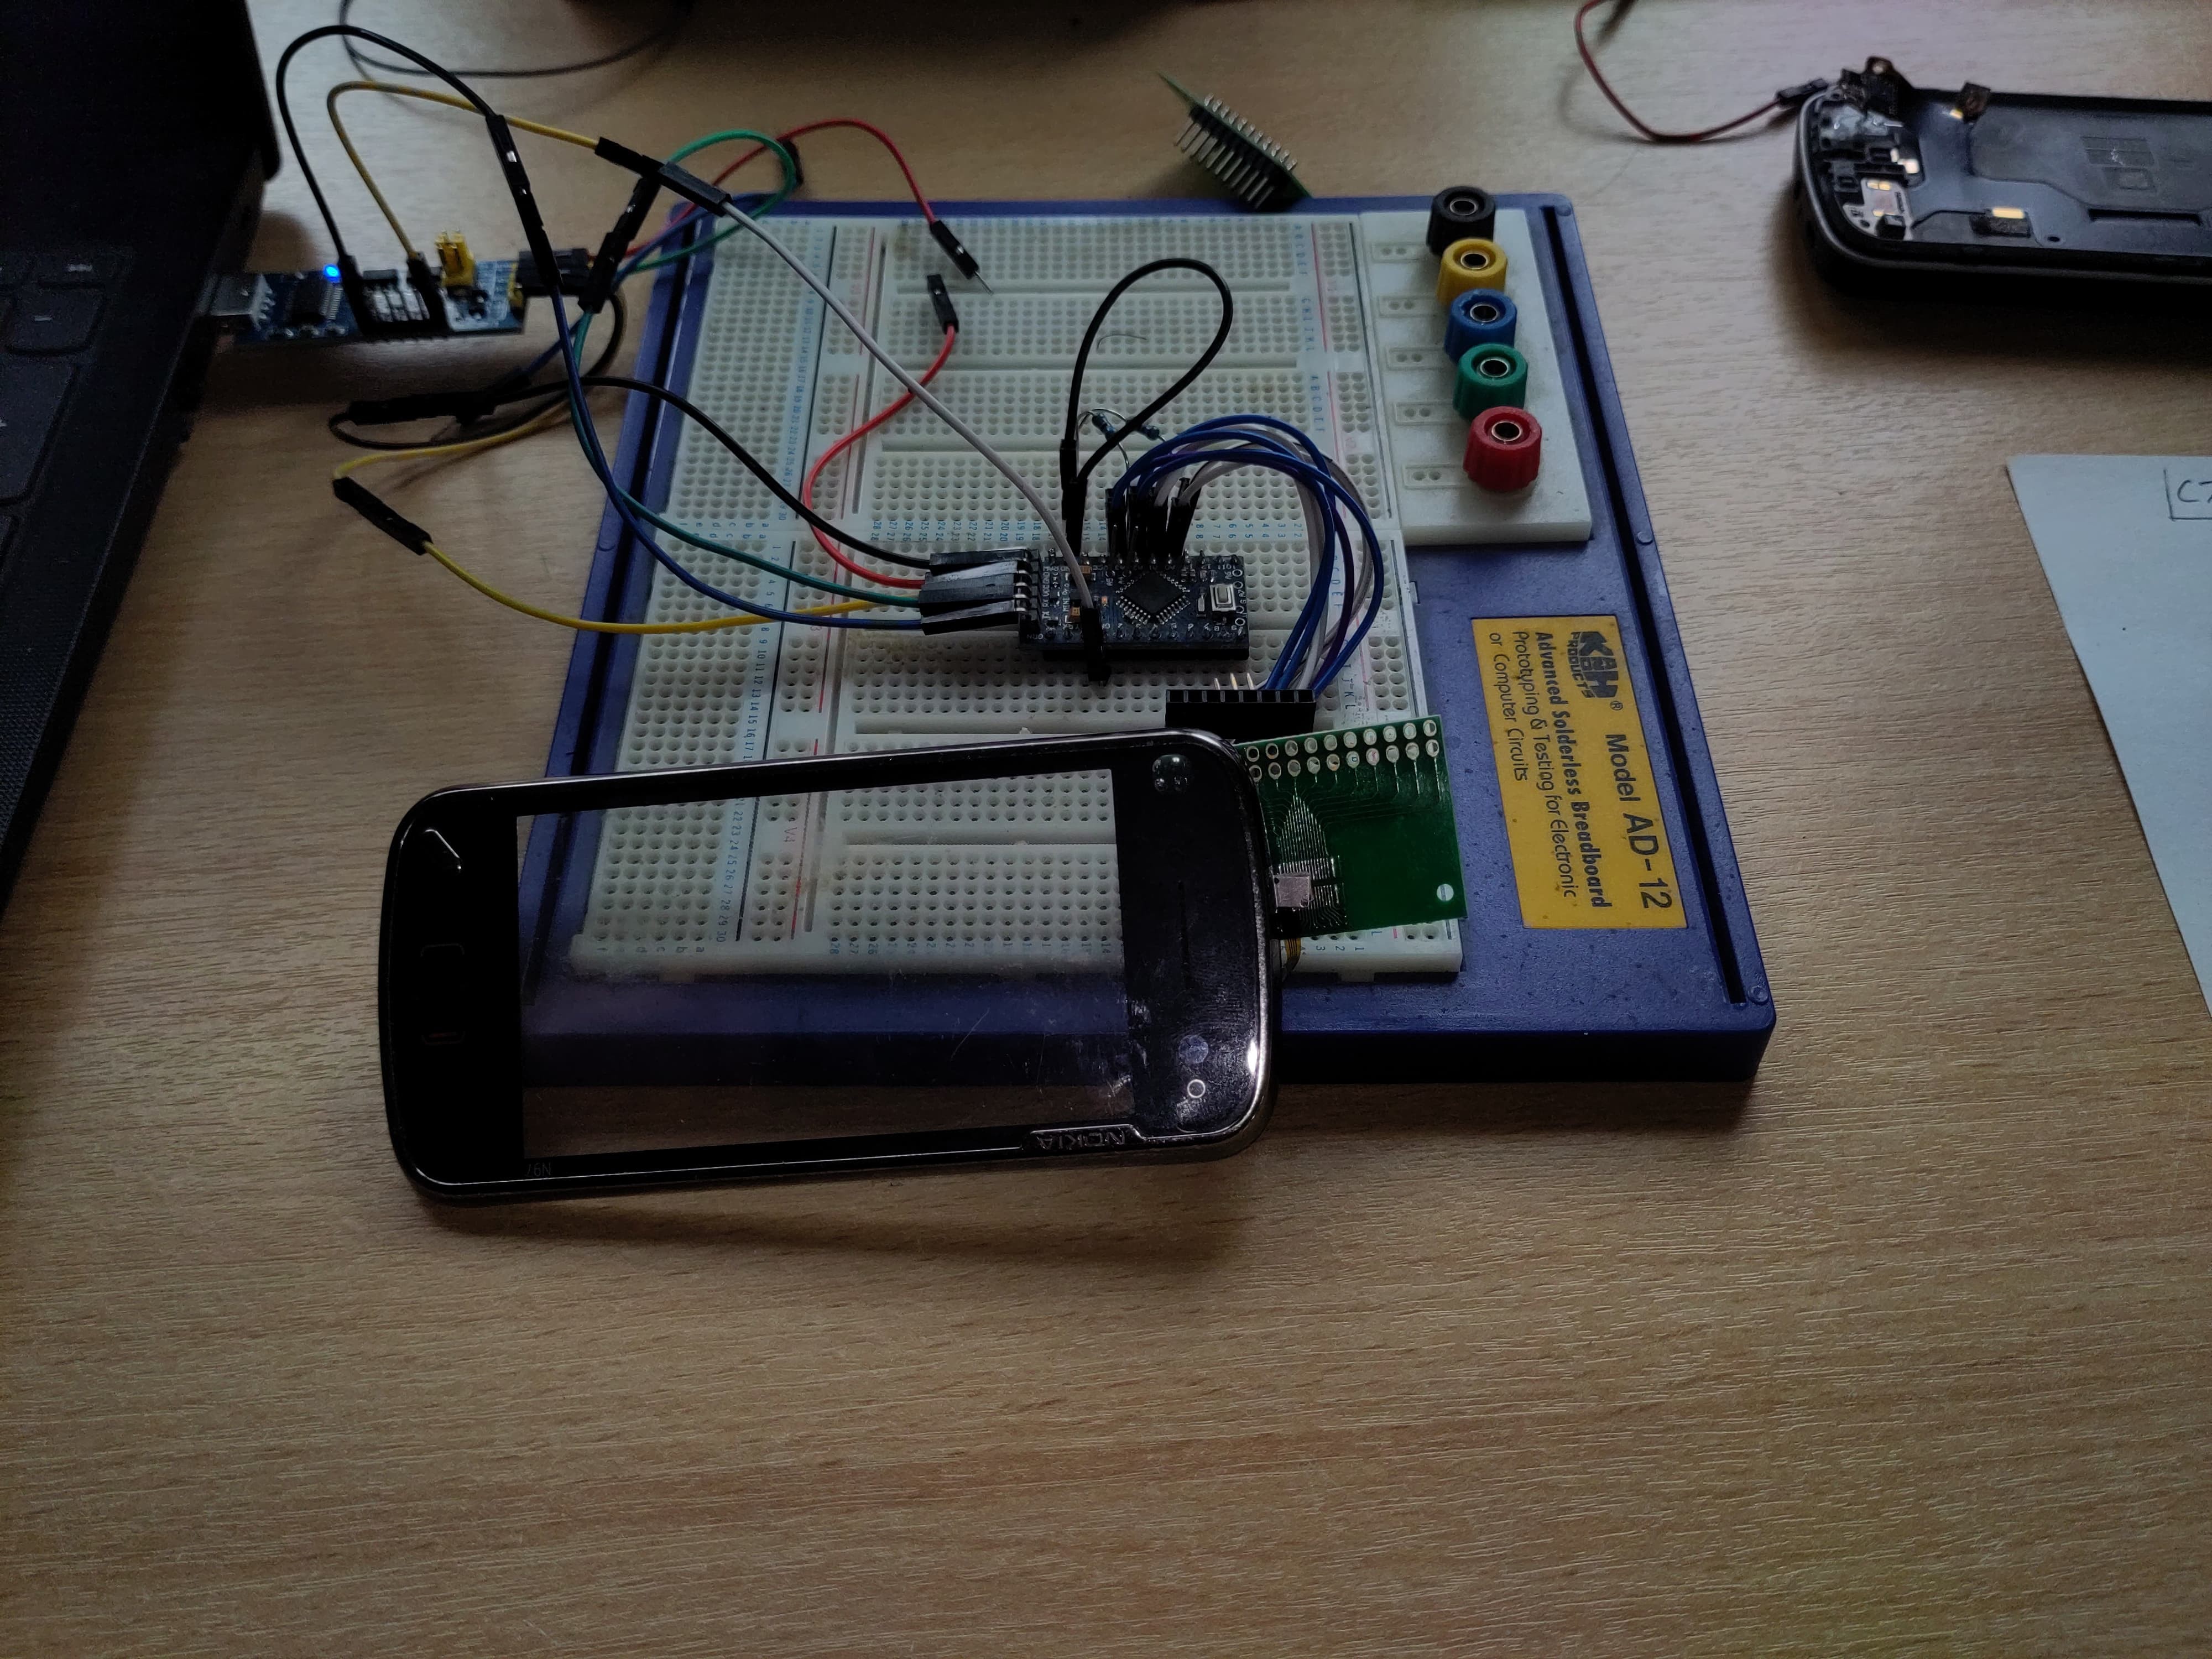
Continuing progress on the Nokia N97 cyberdeck build. This mornings focus was on getting the touchscreen tested and identifying the keyboard connector so I dont have to use salvaged connectors anymore.
🔍 Touchscreen: 4-Wire Resistive Confirmed
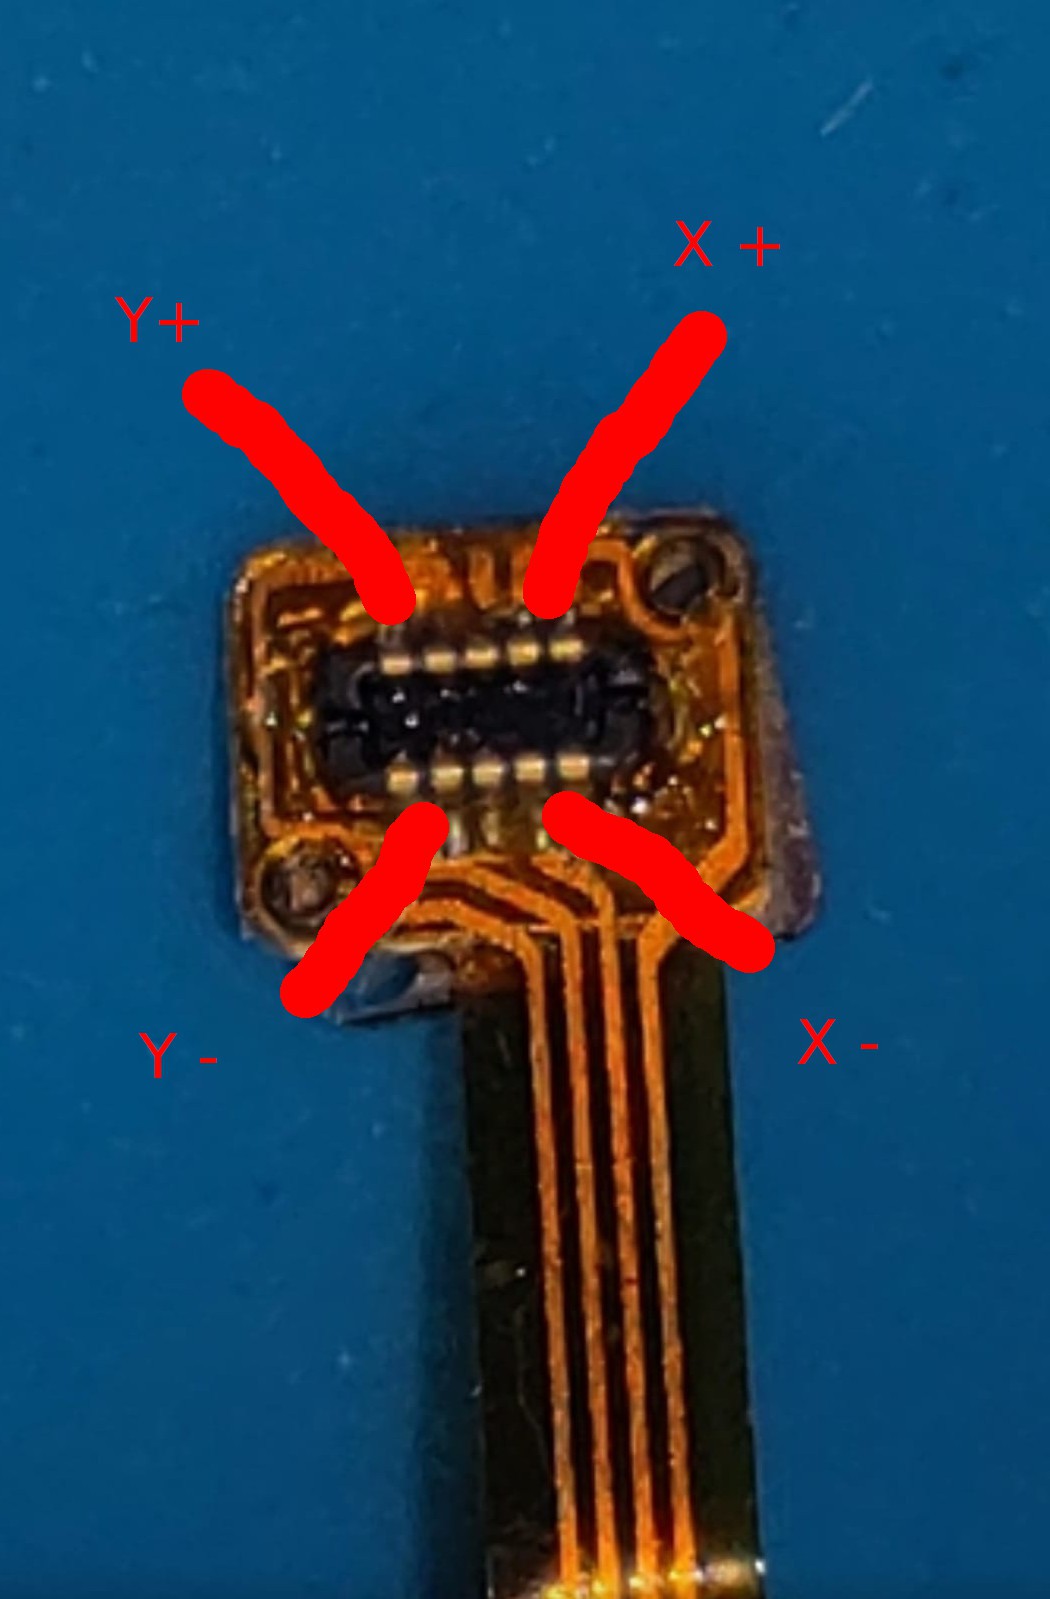
The N97 touchscreen connects via a 4-pin flex cable. After checking Nokia's schematics and doing continuity tests, I confirmed it’s a 4-wire resistive touchscreen — no onboard controller.
Using a multimeter, I measured ~600 Ω across two separate pin pairs, consistent with X+ / X− and Y+ / Y−. That’s a standard configuration for passive resistive panels.
I hooked it up to an Arduino using analog inputs:
-
X+,X−,Y+,Y−each went to analog-capable pins -
Added 10kΩ pull-downs to
X−andY−to ensure a clean 0V reference -
Powered the panel from 3.3 V to match logic levels
Using a simple test sketch, I was able to read stable X/Y positions through analogRead — and the values track consistently across the screen surface when touched. Success!
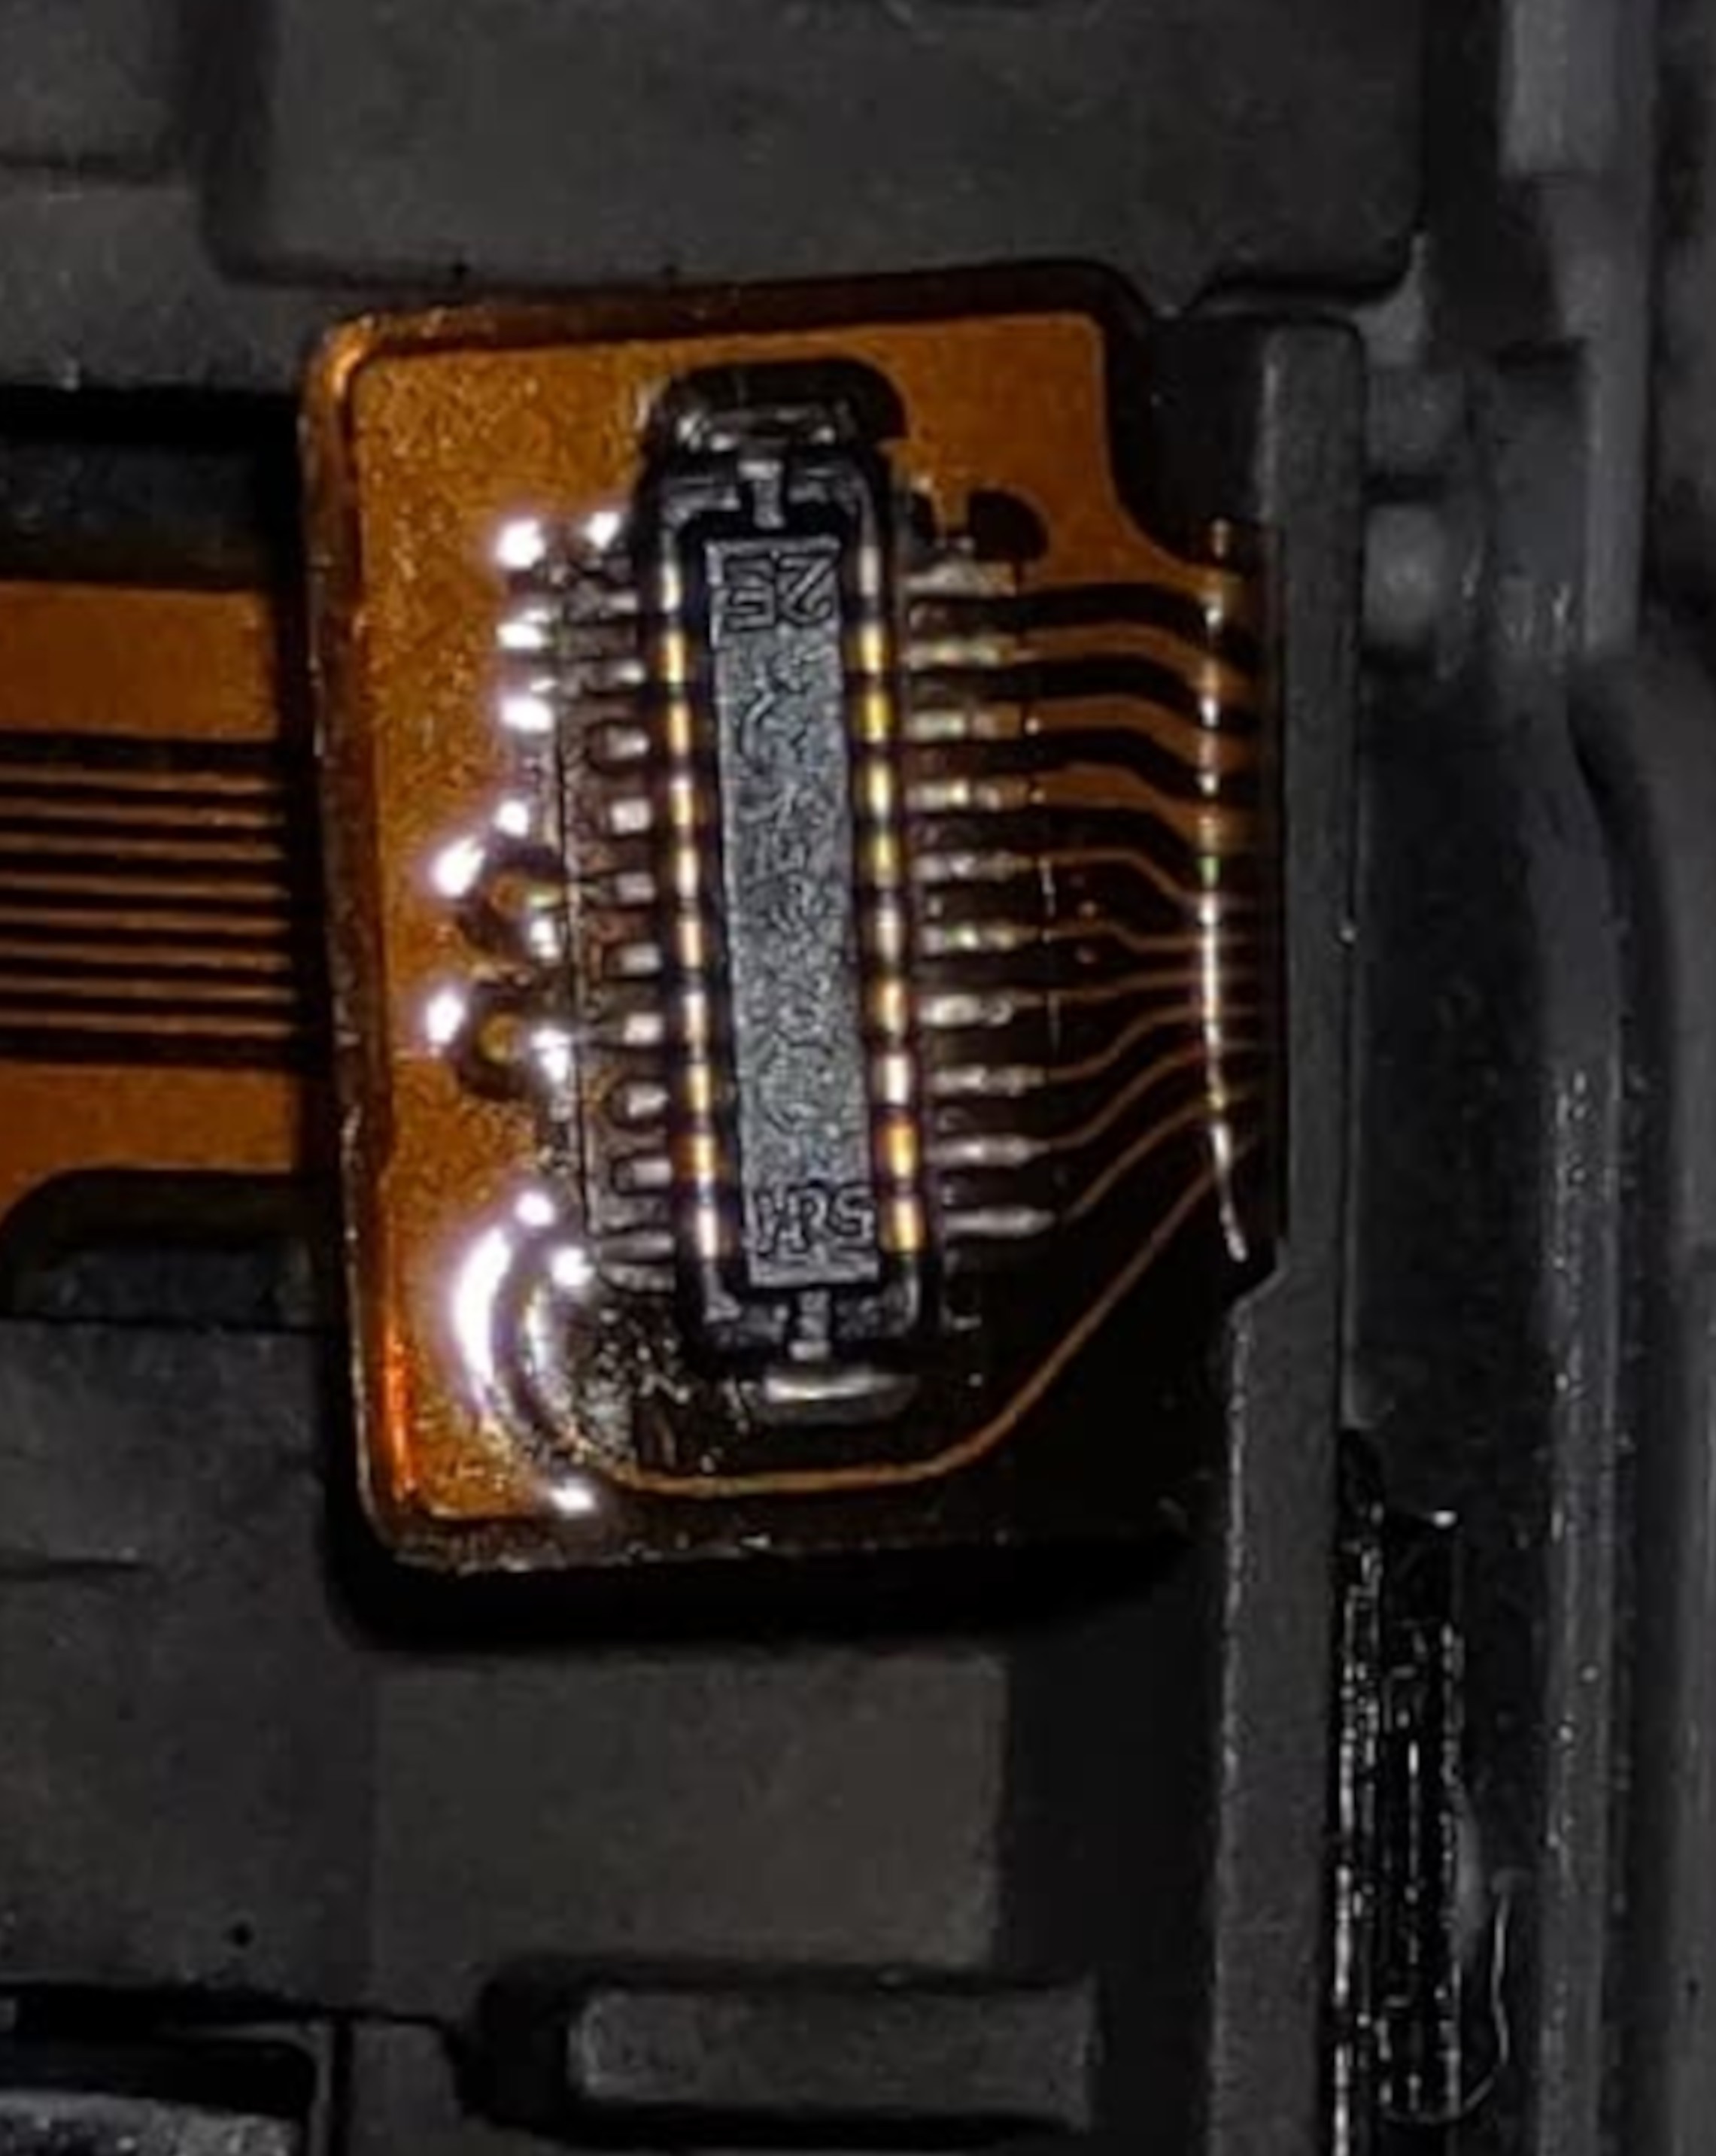
Touch screen flex middle pins are not connected
🧷 Connector Investigation: It’s a Hirose
While examining the keyboard and touch flex connectors, I noticed a small “HRS” logo printed on the keyboard flex. That stands for Hirose Electric, a major connector manufacturer.
After comparing mechanical dimensions and pin counts against their datasheets, I identified a match:
-
Hirose DF37NB-20DS-0.4V(51)
-
20 pins, 0.4 mm pitch, bottom-contact, ultra low profile
This matches the footprint and feel of the original X4401 connector exactly. Which means: I don’t have to rely on salvaged parts. These Hirose connectors are available new and can be cleanly integrated into custom PCBs.
Discussions
Become a Hackaday.io Member
Create an account to leave a comment. Already have an account? Log In.