Close
0%
0%

TRIPPY - a Sawppy Variant

Another implementation of Roger Chen's Servo Actuated Wheels, Printed Interconnect For Extrusion (Sawppy) Rover

Similar projects worth following
I decided to build this rover to give Engineering students at Trinity University in San Antonio a robust platform to develop on top of, and to learn about the world of open source hardware. It's a pretty straightforward remix of Roger Chen's SAWPPY rover, which he's documented here on Hackaday at https://hackaday.io/project/158208-sawppy-the-rover, with a couple of minor changes that I'll cover below.

The name TRIPPY evolved from SAWPPY, and could stand for "Trinity Robotics Instructional Planetary Platform" :)

I made several changes to the original Sawppy.  I use Versions in OnShape, so just navigate to the "Versions and History" tab to see the different varients.

  • Bracket/Coupler for LX-224 servos
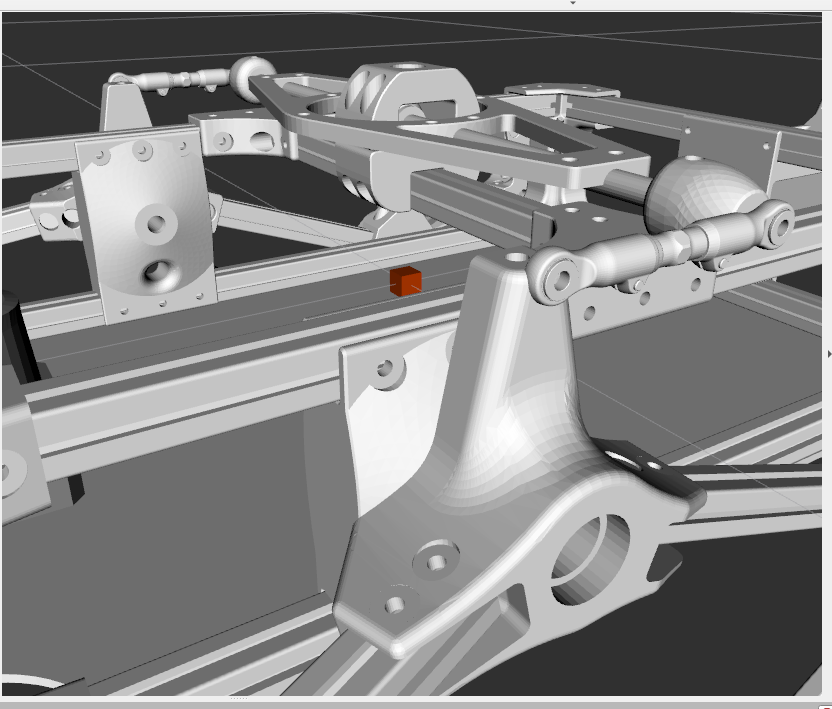
    When I ordered parts, the LX-16A wasn't available, so I grabbed the LX-224.  As shown in this CAD, the dimensions are slightly different.
  • Modification of steering knuckle to accept M3 nuts and M3x16 screws for setscrews instead of threading into heatset inserts
    As was mentioned in the Discussion section of CJ - a sawppy variant right here on Hackaday, some of us have had issues with heat-set inserts pulling out.  As shown in this CAD and the pictures below, I ended up printing a Nut Carriage to get good strength and print resolution in the XY direction, then printing the knuckle in the standard orientation, so that the M3 nut won't spin when tightened against the flat in the 8mm shaft.  Then, I used an M3x16 screw as a setscrew instead of the tiny ones called out in the original.  We'll see how this holds up over time!

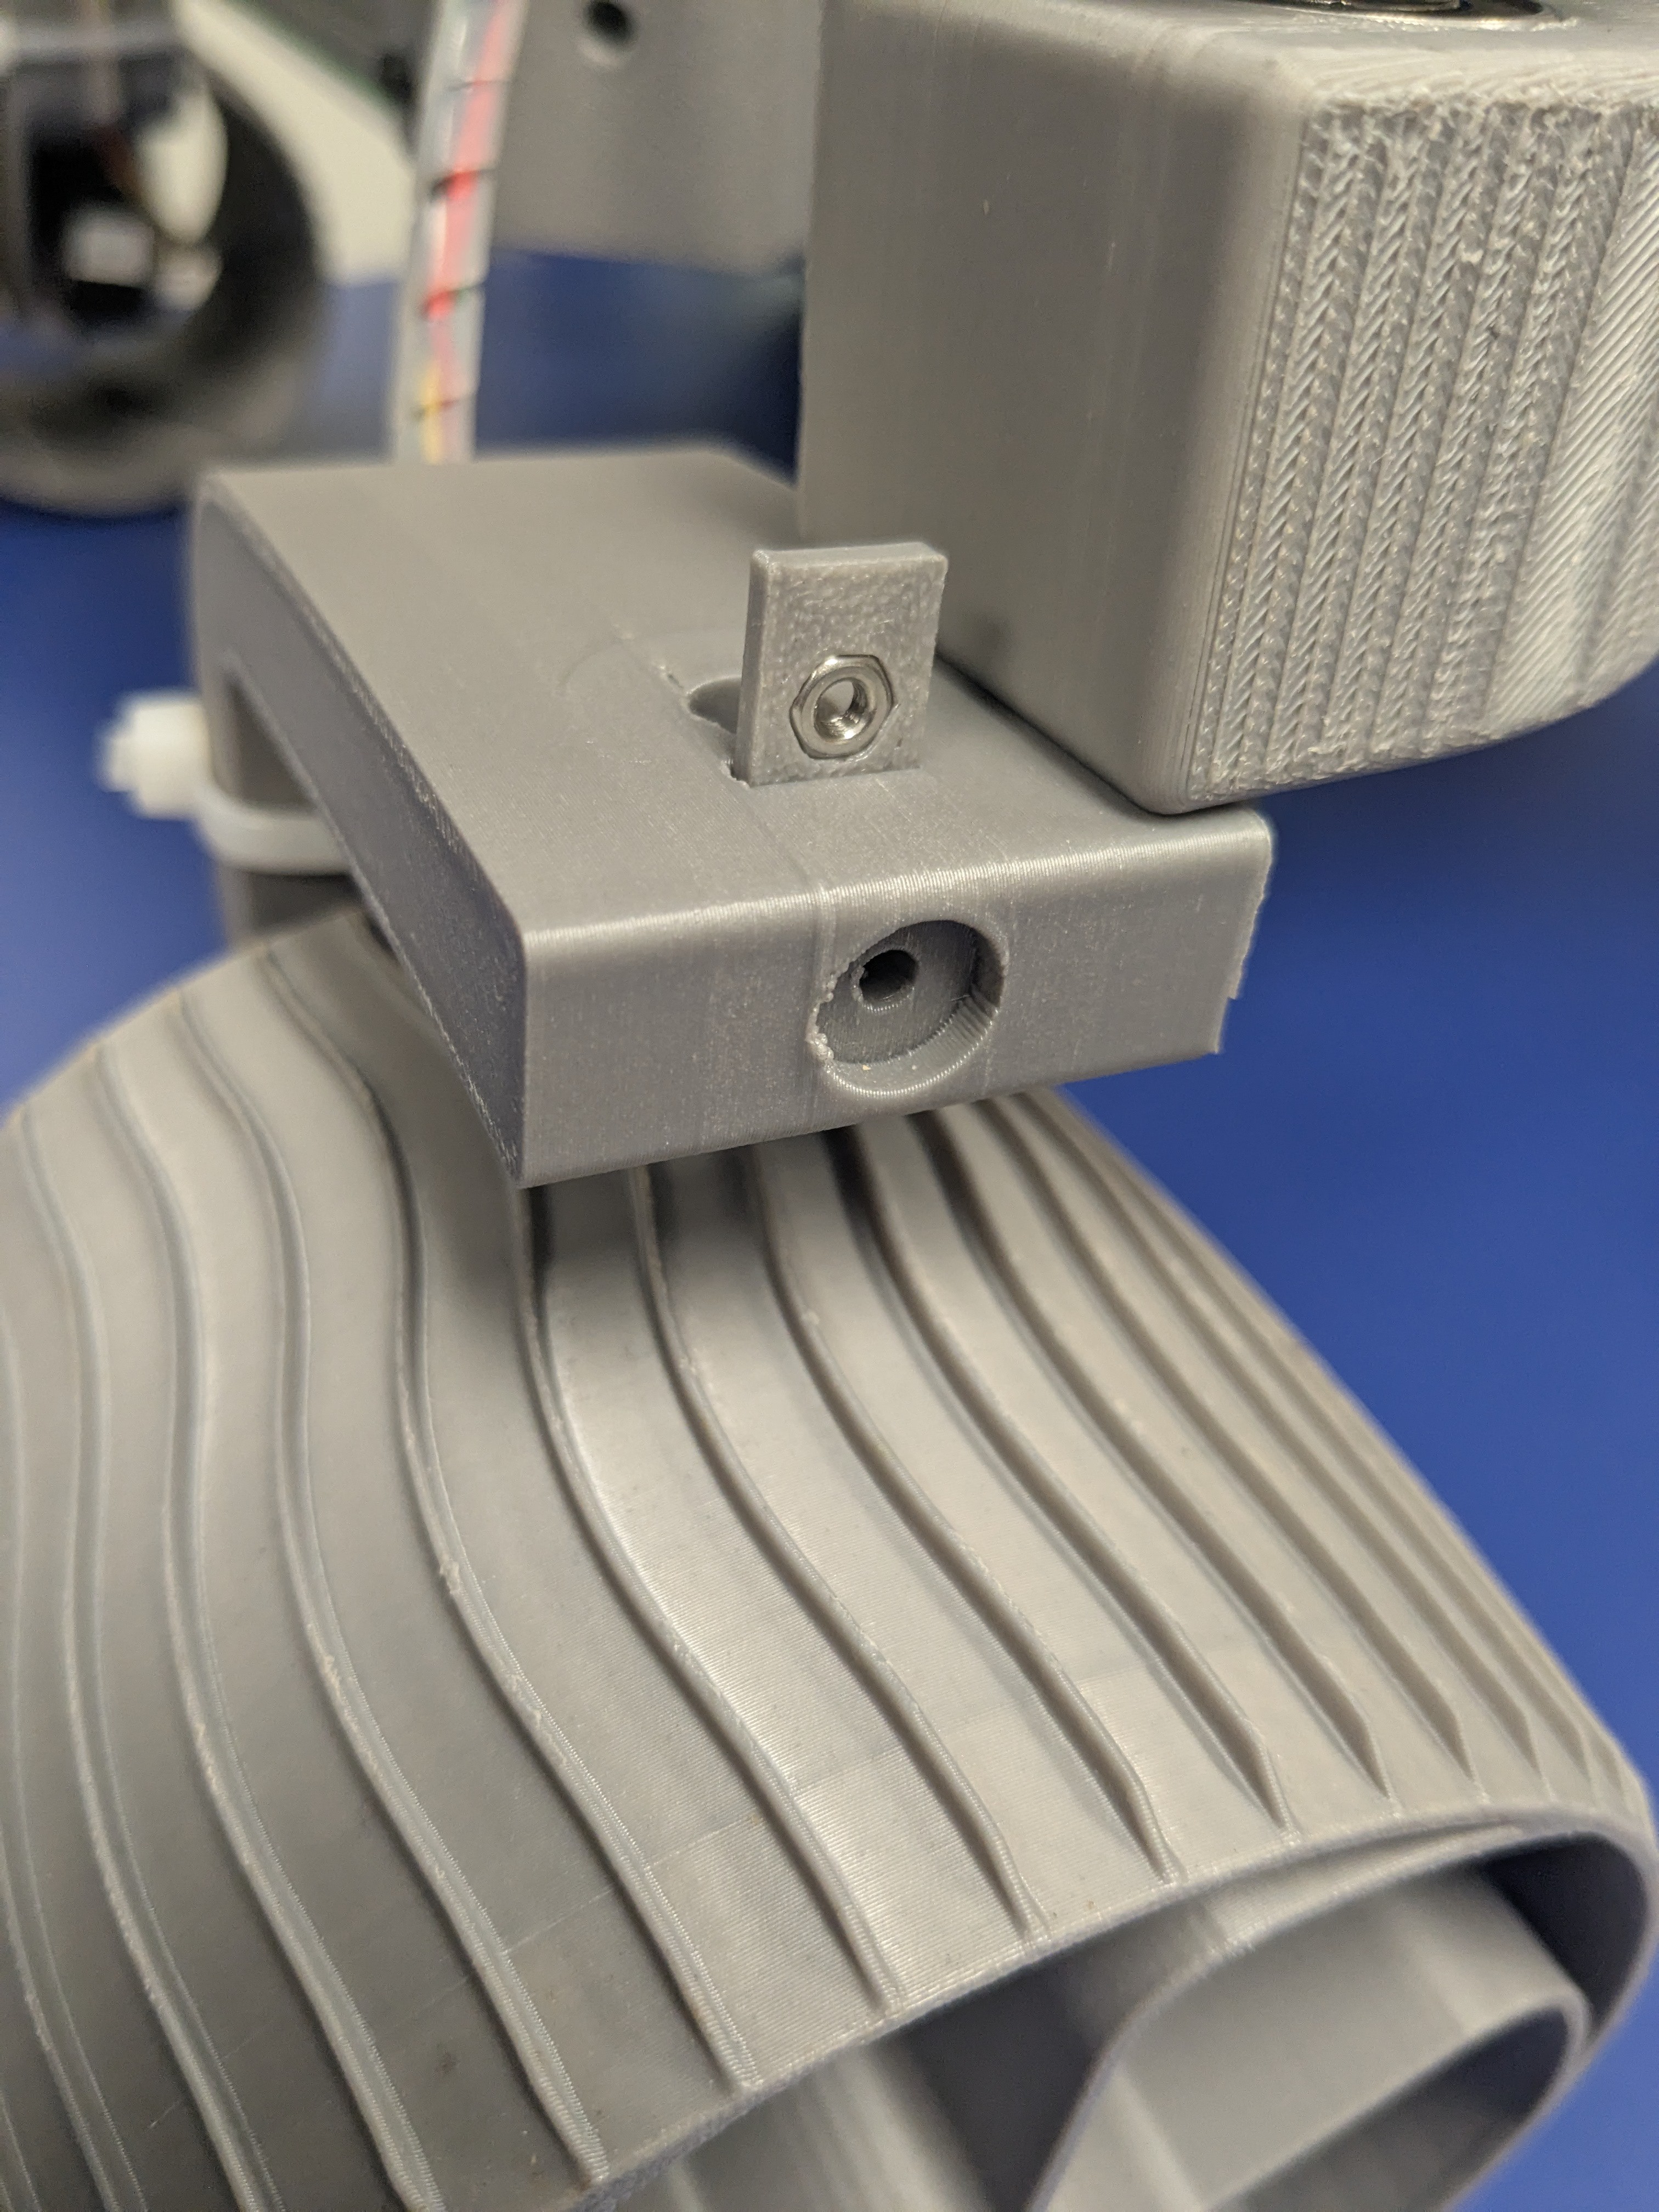
  • Modification of bracket to accept M3 nuts and M3x40 screws to hold bracket instead of threading into the Corners
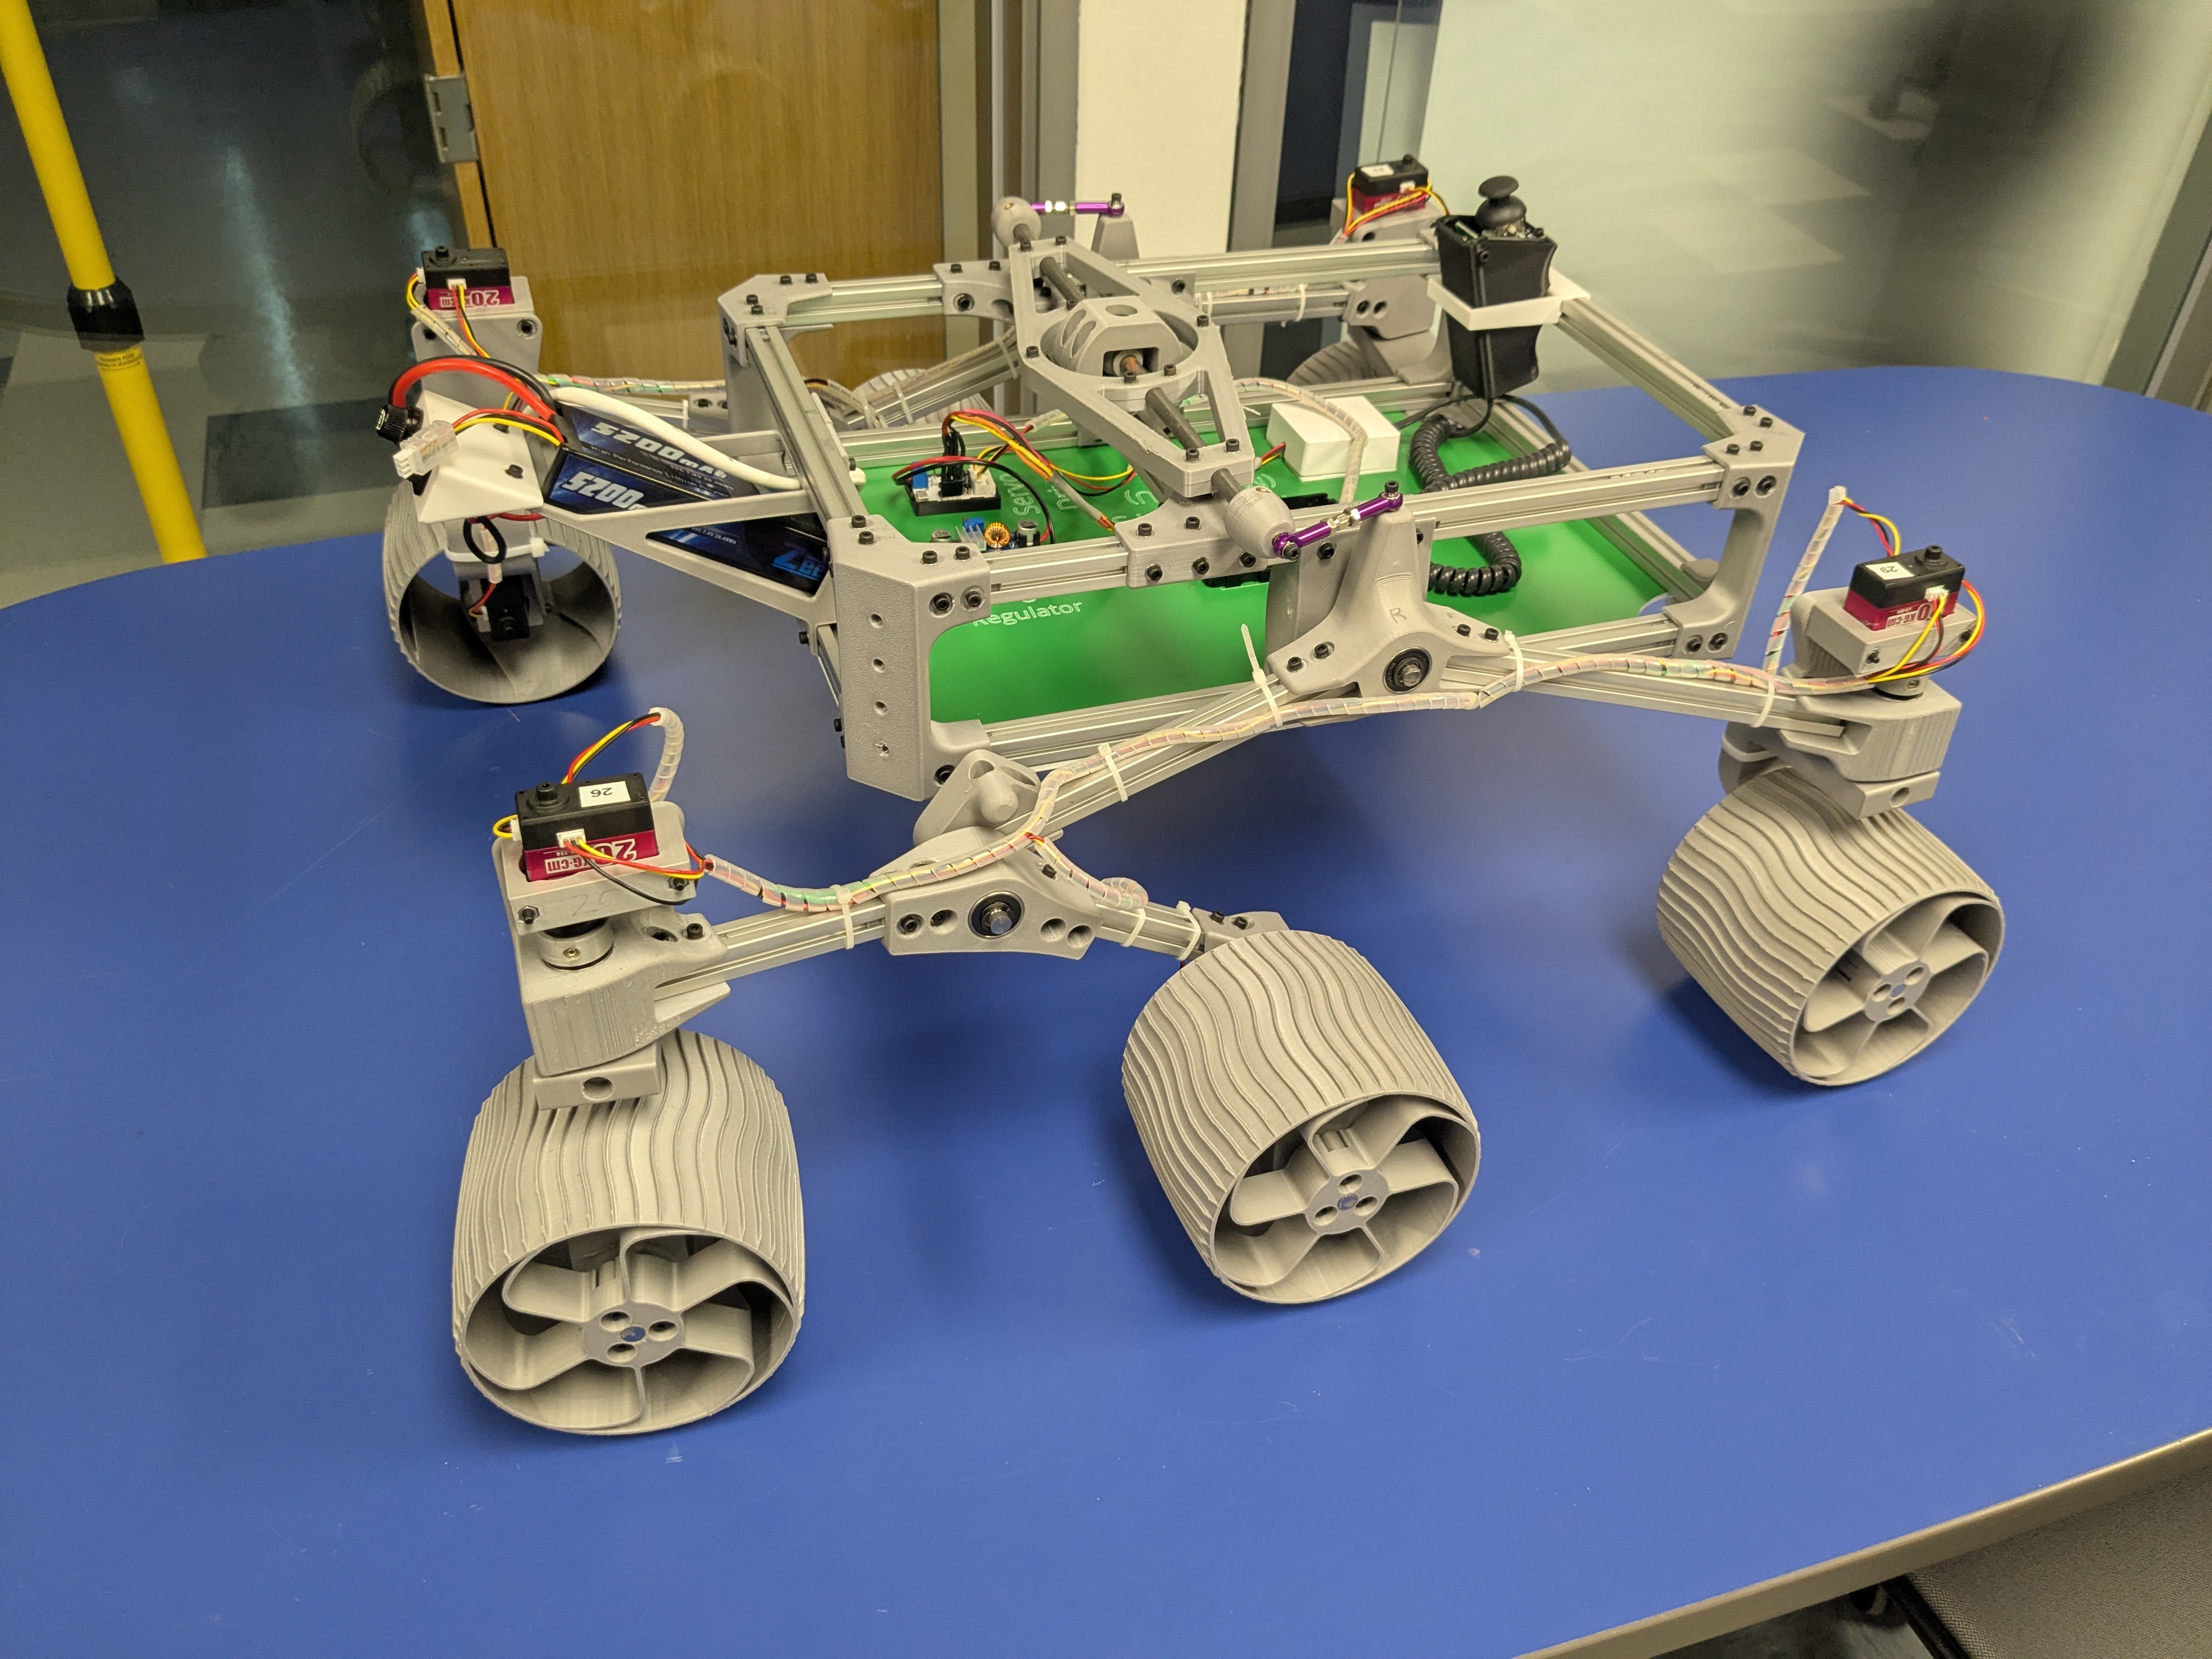
    Similarly, I didn't like the idea of attaching my steering servos with the heat-set inserts, so I added some nut capture into my LX-224 brackets so that I could attach them with M3x40mm screws.  I did have to move the mounting holes on the Fixed and Steering Knuckles out a bit to allow clearance for the screws around the servo body.
  • Additions to the Body panel for laser engraving the electronics layout / laser cutting the mounting holes [probably not terribly useful to anyone but me]
    I wanted outlines and labels on my body panel, so I add them here.

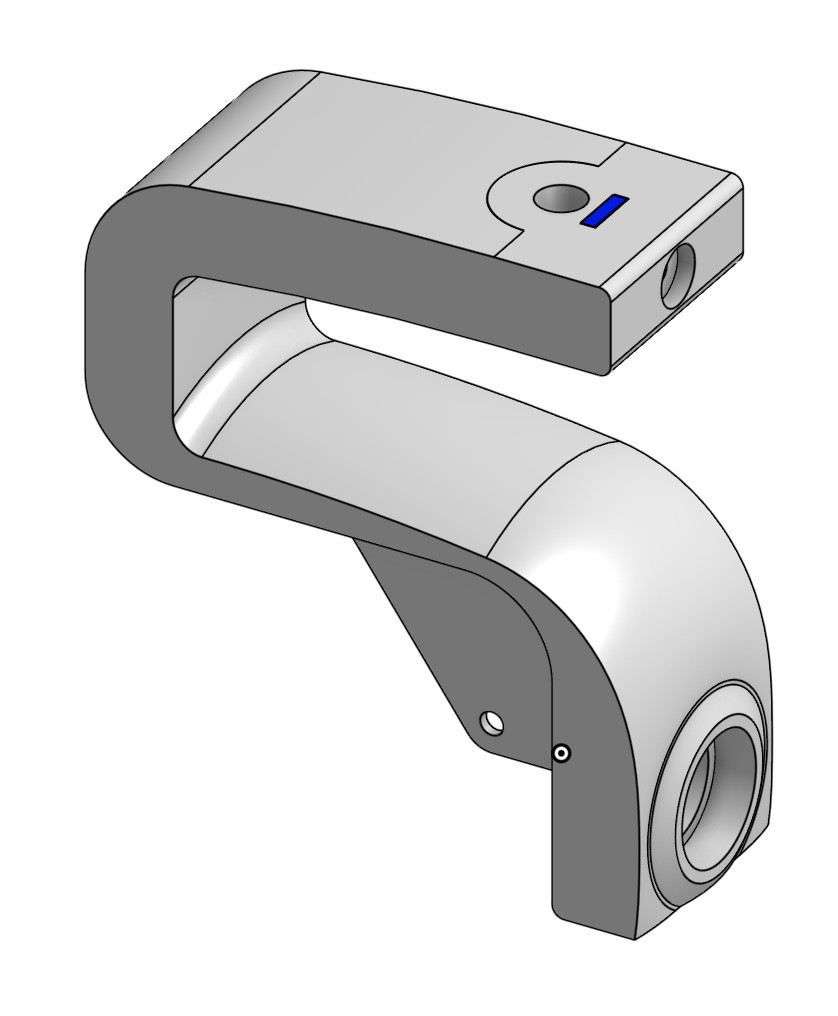
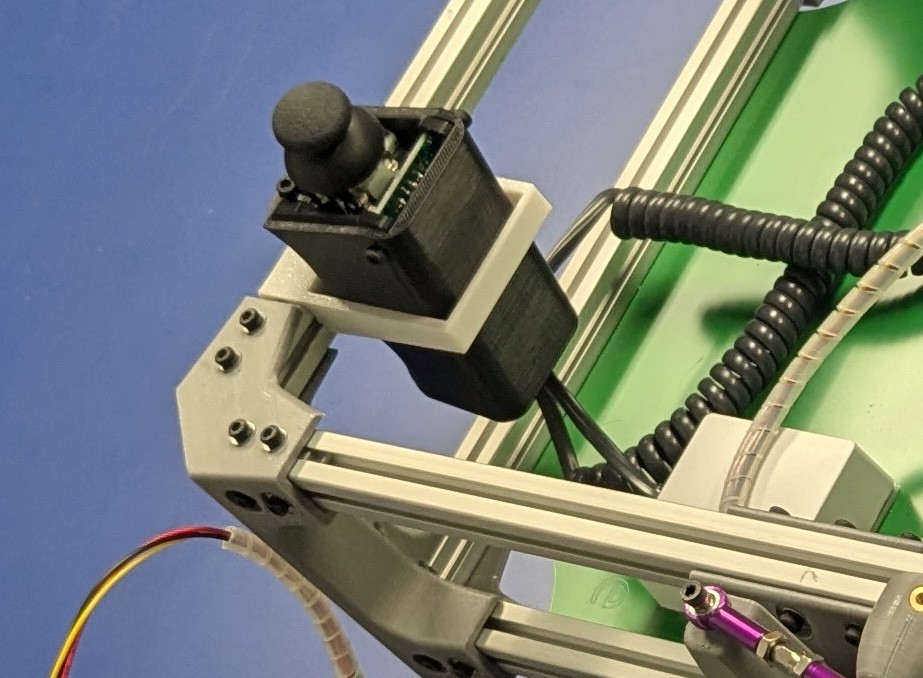
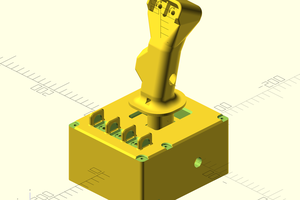
And for the backup controller (as documented here) (CAD - Handheld Arduino Joystick - Copy)

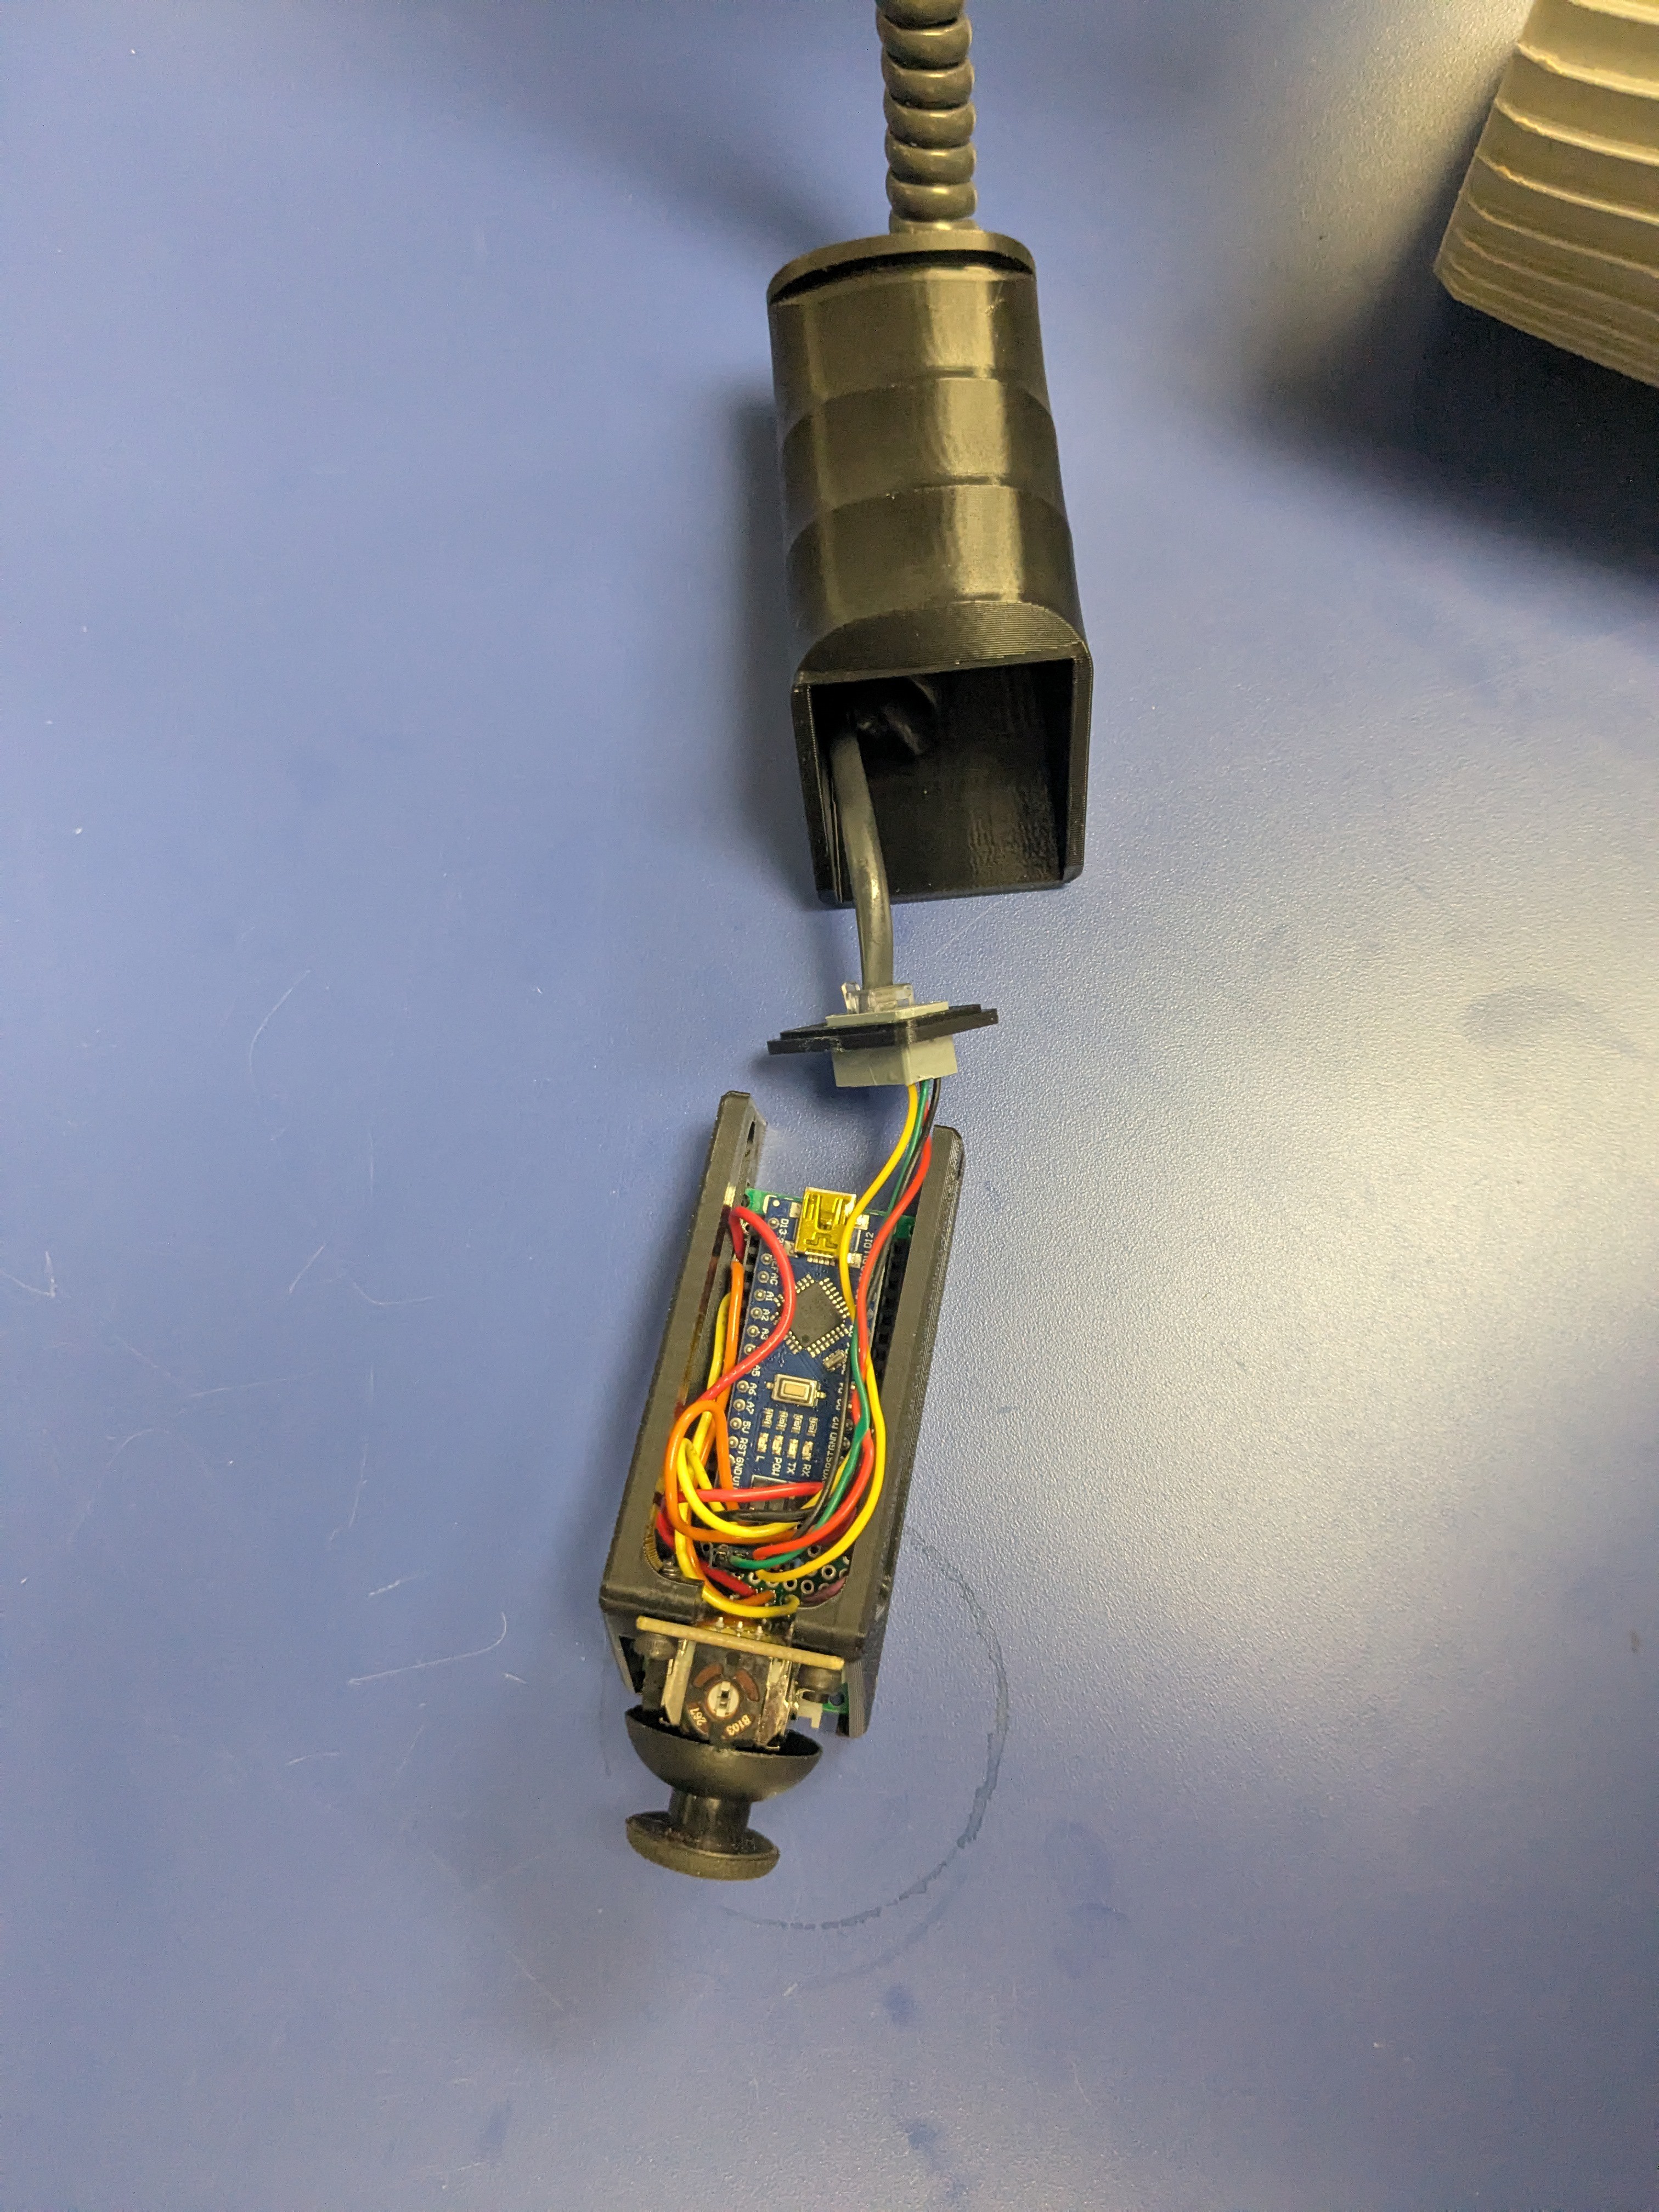
  • Modified the Handheld Arduino Joystick controller to accept an RJ9 so that I can connect my controller to my rover with a standard coiled phone cord.
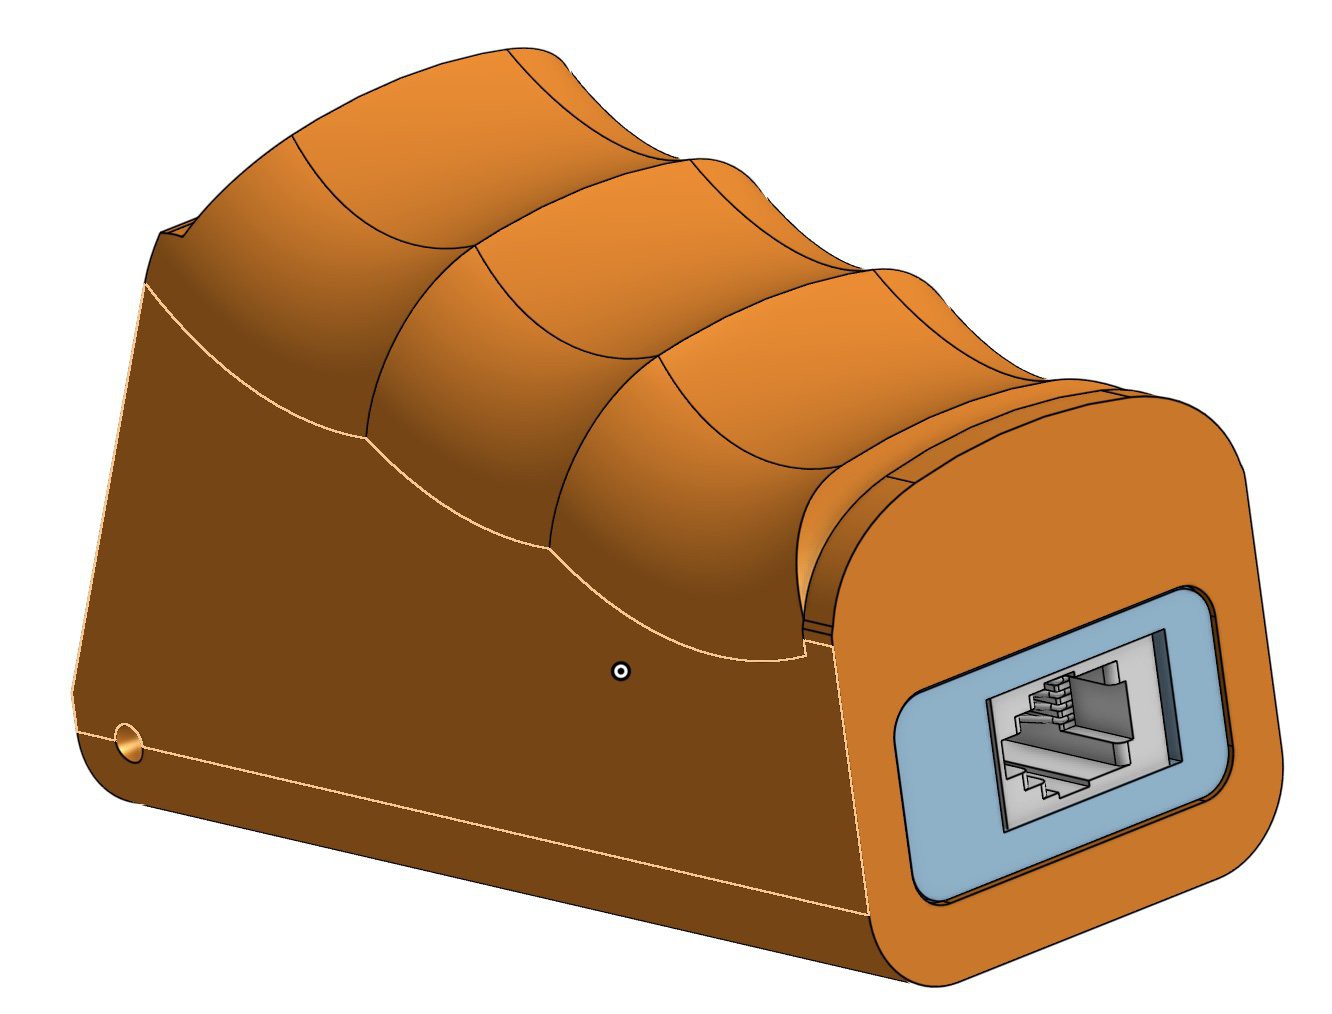
  • Added a "holster" to place the Handheld Arduino Joystick controller in the box when not in use.

Buslinker Carrier.step

A mounting carrier for the BusLinker TTL/USB Debug Board for LewanSoul Serial Bus Servo, which doesn't include mounting holes. Be sure to include insulation or use nylon screws to mount this to your design.

step - 41.44 kB - 07/28/2025 at 19:26

Download

View all 10 components

  • Sawppy on Mars ; VO Working

    knickels10/03/2025 at 21:37 0 comments

    Been learning about (and updating) rgbd_odometry on Sawpyy this week.  I threw out the gazebo classic mars world and just scattered a few rocks around on one of the two patches of mars terrain on https://app.gazebosim.org/fuel/models.  Went down a rabbit hole on optimizing my simul;ation, and rviz2, etc, but it turned out that shapes world just didn't have enough texture to allow VO to run nicely - oh, and the debug image from the rgbd_odometry node doesn't populate no matter what.  Wish I'd known that 6 hours ago :)

  • ros2_rover, jazzy, and harmonic

    knickels09/25/2025 at 22:49 1 comment

    Before trying to get autonomous navigation working on my rover, I decide to simulate it.  Turns out that the recommended version of ros2 for ubuntu 24.04 is ros2 jazzy.  And the recommended version of gazebo for jazzy is called harmonic.  Unfortunately, the gazebo folks are in the middle of a huge API-breaking change (from gazebo classic to ignition, now just back to gazebo - it's a long story https://gazebosim.org/docs/harmonic/migration_from_ignition/.

    Anyway, I went off on a rabbit-trail upgrading the simulation part of Miguel Ángel González Santamarta's ros2_rover from gazebo classic to gazebo harmonic.  So at this point that's the focus of this update.

    I got the robot description to drop into harmonic ok.  Then I added sensors one by one (and almost all of them changed from gazebo classic).  Then I updated the ros2_control control interface.

    So now I have teleop, with sensors, working in Harmonic!  My next rabbit-hole is to update the Nav2 stack, it's got some more significant changes for jazzy.  So I'm off to read about behavior trees and Quality of Service settings. I'll leave you with a really boring simulated teleop loop.

    First, in gazebo harmonic:


    Then, the part of the world piped back to the rover and displayed in rviz2:

  • driving with ROS

    knickels09/25/2025 at 22:25 0 comments

    So the next part of my project was to "download and test out the SAWPPY driving code at https://github.com/mgonzs13/ros2_rover".

    I was excited to find that you can install ubuntu on raspberry pis now, so I put Ubuntu 24.04 and ROS2 Jazzy on my Pi5.  The rover_bringup, rover_sgs, rover_motor_controller, and rover_service work with only a few changes (which reminds me I need to submit a PR for those....).

    So I have a working robot_description, and I can move all the joints around. 

    You may notice if you zoom in on the turnbuckle that it's not attached.  Turns out that closed kinematic loops give Gazebo heartburn, so I left that link out.  For the simulation, I'll fix all the passive joints (the rocker joints and the bogie joints).

    So now I can teleop my rover from another computer using a gamepad.  Not too different from the on-board joystick using an arduino, to the casual observer.  But since it's ROS, that means that as soon as I can get the kinect stream ingested as a costmap, I'll have autonomous navigation!

  • Kinect v1 in ROS2 Jazzy on Raspberry Pi

    knickels07/31/2025 at 18:15 0 comments

    So piping my kinect data to ROS turned out to be somewhat confusing.  I'm using Ubuntu 24.04 and ROS2 Jazzy.

    I saw lots of folks trying to do this, and got a bit frustrated.  Finally, I found a jazzy branch of the kinect_ros2 drivers (be sure to use this fork, the somewhat more canonical repo here doesn't have a jazzy branch.  Following the instructions, there, I downloaded, built, and installed libfreenect, then the ros2 drivers.

    Amazingly, at this point it just worked!  

     ros2 launch kinect_ros2 showimage.launch.py 
     ros2 launch kinect_ros2 pointcloud.launch.py

    In this point cloud, you can see the chair, the door frame, and the walls/ceiling of my small lab pretty well.  Next up will be to download and test out the SAWPPY driving code at https://github.com/mgonzs13/ros2_rover

  • Vision for TRIPPY

    knickels07/31/2025 at 16:08 0 comments

    Now that I've got the basic rover working, the next step is to implement a better controller.  I'm installing Ubuntu 24.04 on a Raspberry 5 so that I can put ROS2 Jazzy on as a Tier 1 system.

    Ubuntu for Raspberry Pi

    I'll likely pick up a RealSense RGBD, as it's more compact, but in the meantime I've got an XBOX360 Kinect laying around, so I connected it: I installed freenect using:

    • sudo apt install freenect

    And tested using freenect.  Bam, we have working RGB-D!

    • freenect-glview

    Then I grabbed a second Voltage Regulator, set to output 12V, running off of two LiPi 7.4V batteries in series. and we should be set for mobile vision suitable for piping to ROS.

  • Hardware Complete

    knickels07/28/2025 at 19:25 0 comments

    I've got the hardware and servos done.  I'm currently documenting the small changes that I made on, here on Hackaday and also on github.  I've implemented the basic rover with the Arduino-nano based Joystick controller.  

    Next up: adding the pi-based controller and ROS2, so that I can drive this thing around within my preferred ecosystem.

View all 6 project logs

Enjoy this project?

Share

Discussions

Bertrand Selva wrote 08/09/2025 at 10:33 point

Nice !

  Are you sure? yes | no

Does this project spark your interest?

Become a member to follow this project and never miss any updates