 mircemk
The other day I received a shipment with a UNIHIKER K10 development board from DFRobot, which I received as a prize. The device is excellently packaged in a branded box, protected from damage during transportation.
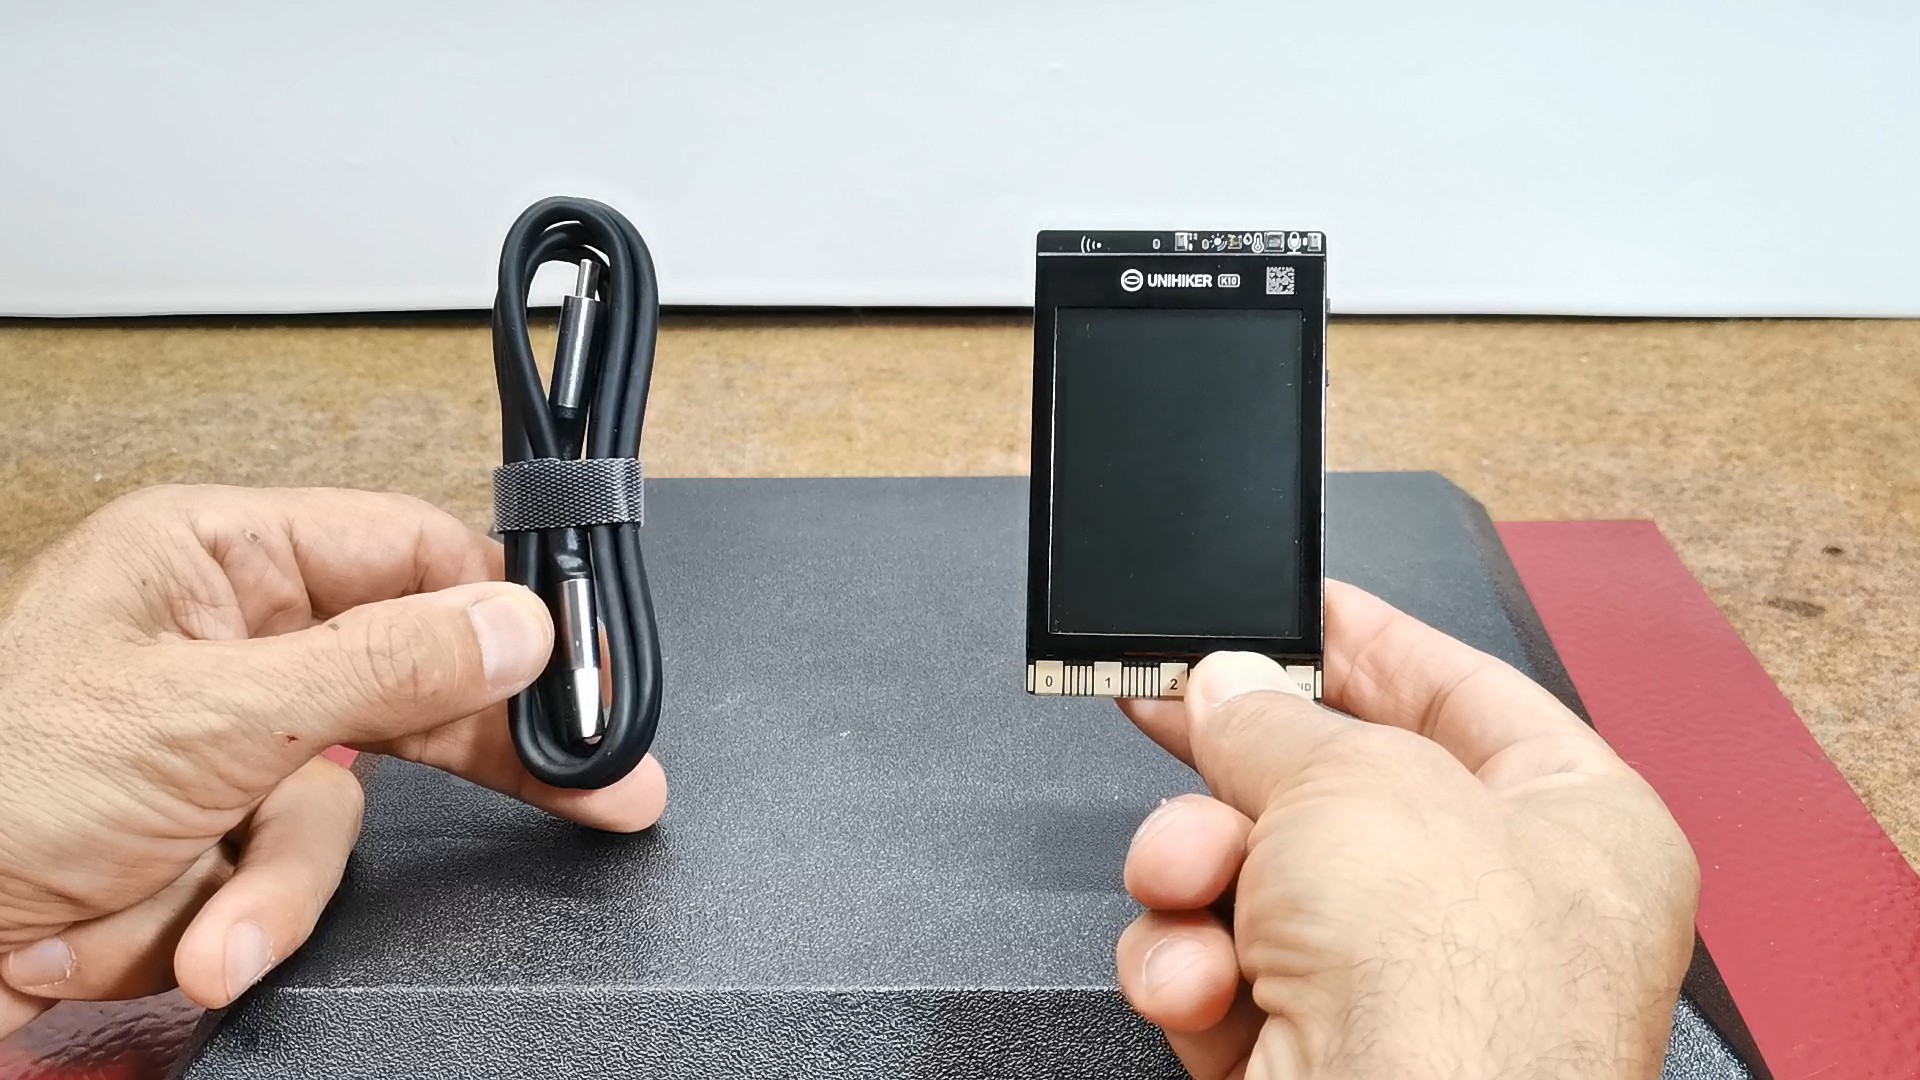
I immediately asked for information because I have no experience with this development board so far. In fact, the device is based on an ESP32-S3 Xtensa LX7 microcontroller and an ILI9341 TFT display with a resolution of 320x240 pixels. The display is protected by a metal frame and right above it are a light sensor, a temperature and humidity sensor, as well as two microphones for noise reduction. There are two buttons on the side and an edge connector at the bottom for connecting additional modules and sensors. On the back there is a camera, three I/O connectors, a micro SD slot, a speaker, three RGB LEDs, an accelerometer, and a battery interface.

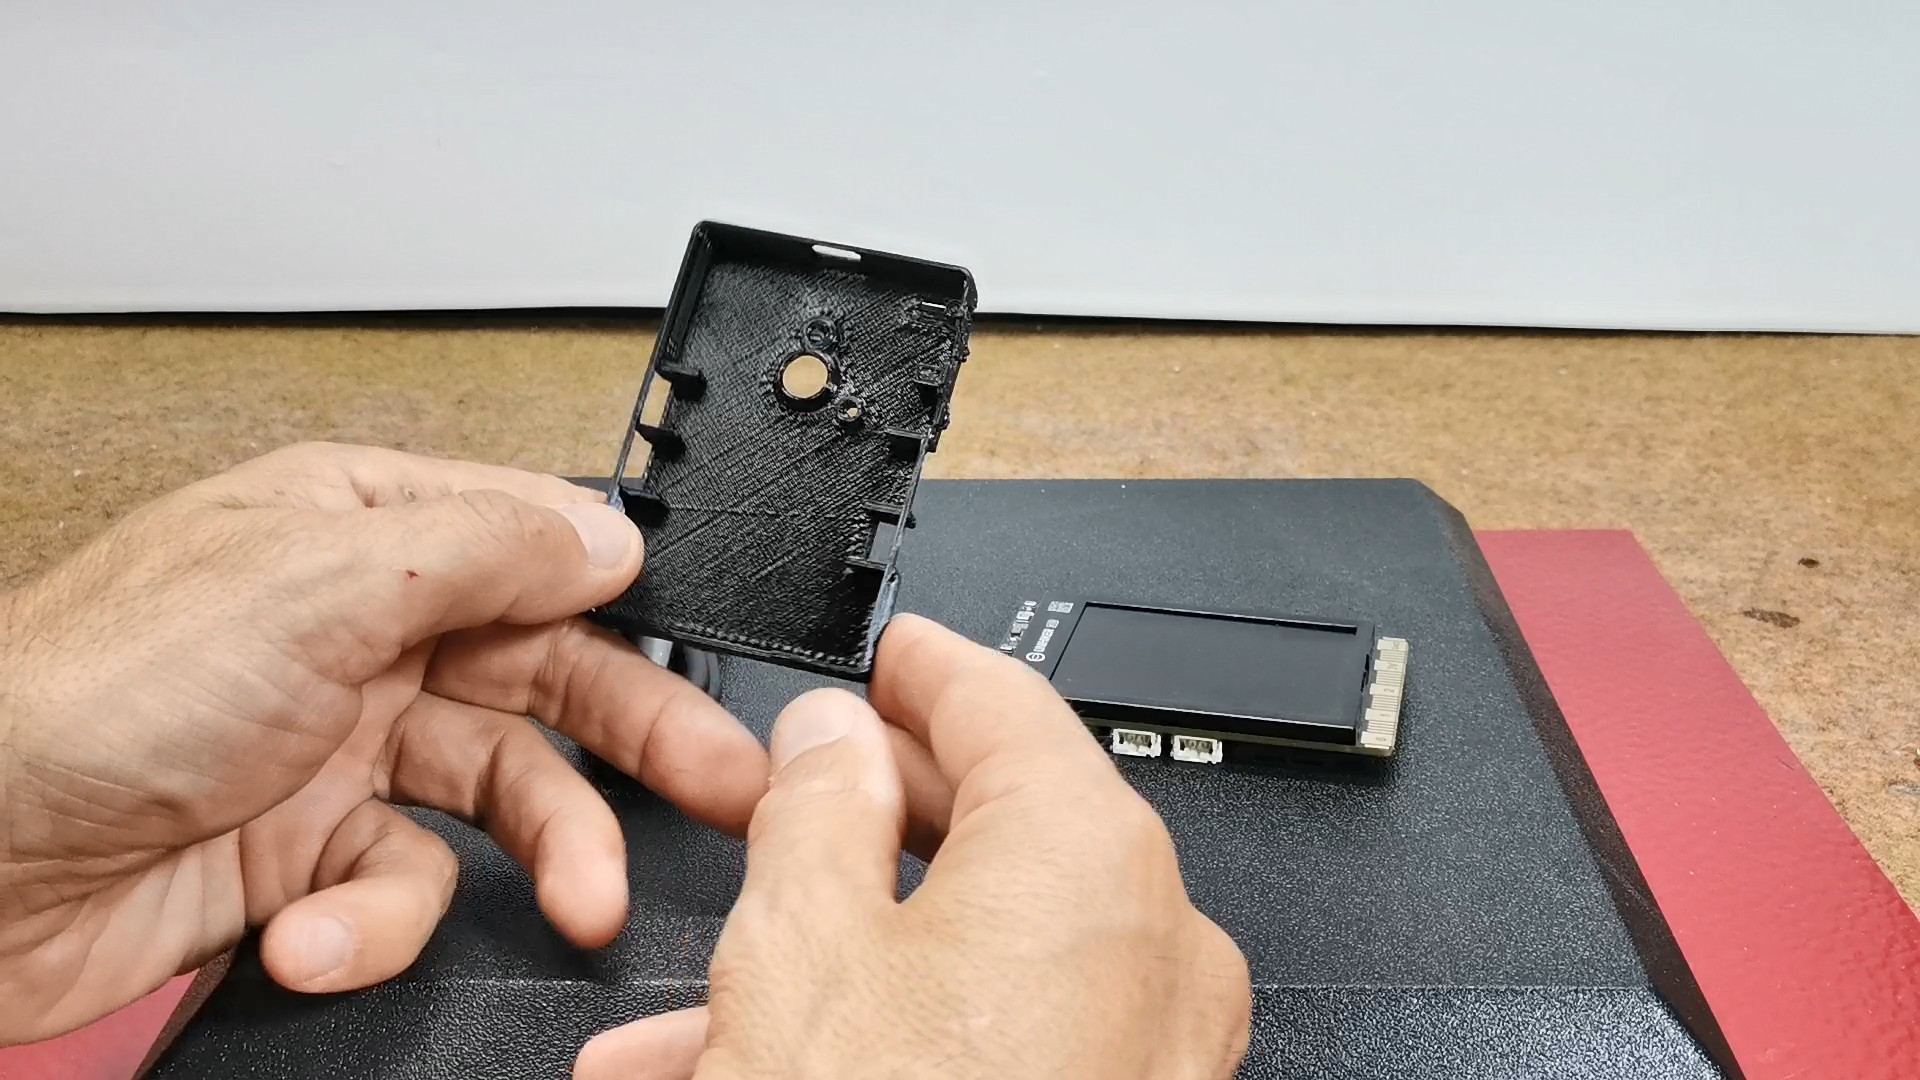
First I made a 3D printed case according to the .stl file provided on the manufacturer's website. The case fits perfectly on the back of the PCB and protects the sensitive components. There are openings for the camera, I/O connectors, USB port, and the buttons are functional.
After successful boot-up, K10 runs the factory built-in programs: Face Detection, voice recognition, Sensor mode and "View Tutorial" mode, which generates the QR code and through your cell phone to view the tutorial of K10. By pressing the B button we move through the menu.
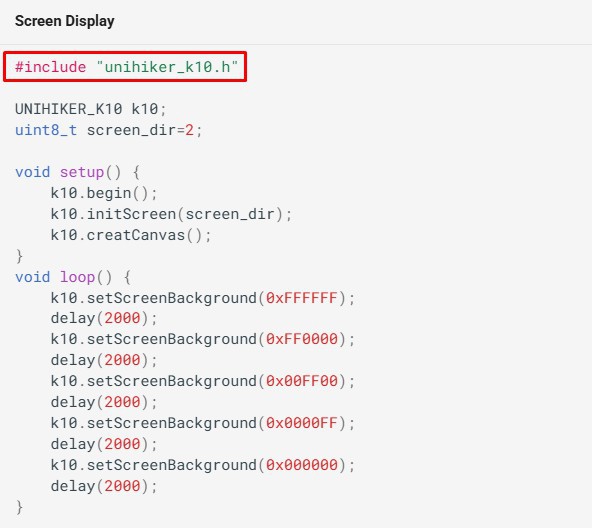
As for software, the supported environments are MindPlus, Arduino IDE, and MicroPython. Basically, the K10 is designed as a device for Exploring: AI (artificial intelligence), IoT, and Python Coding. Even all the support from internet groups and communities relates to these areas. My previous experience has only been with Arduino IDE so I was pleasantly surprised to read that this board supports it. However, I quickly learned that Arduino IDE support is limited to a single library "unihiker_k10.h".
I even contacted the manufacturer regarding support for other standard Arduino libraries, but the answer was that the SDK for Arduino IDE is under development, and is currently recommended to be used only in conjunction with MindPlus.
So I decided to do some research myself and try to install some kind of program using standard libraries. Actually, it's about an ESP32 MCU and an ILI9341 driver based TFT Display, so it seemed logical to me to start with a project that would use some known library, so I chose Bodmer's TFT_eSPI.
First, I downloaded and carefully studied the Unihiker K10 schematic and the way to connect the microcontroller to the Display.
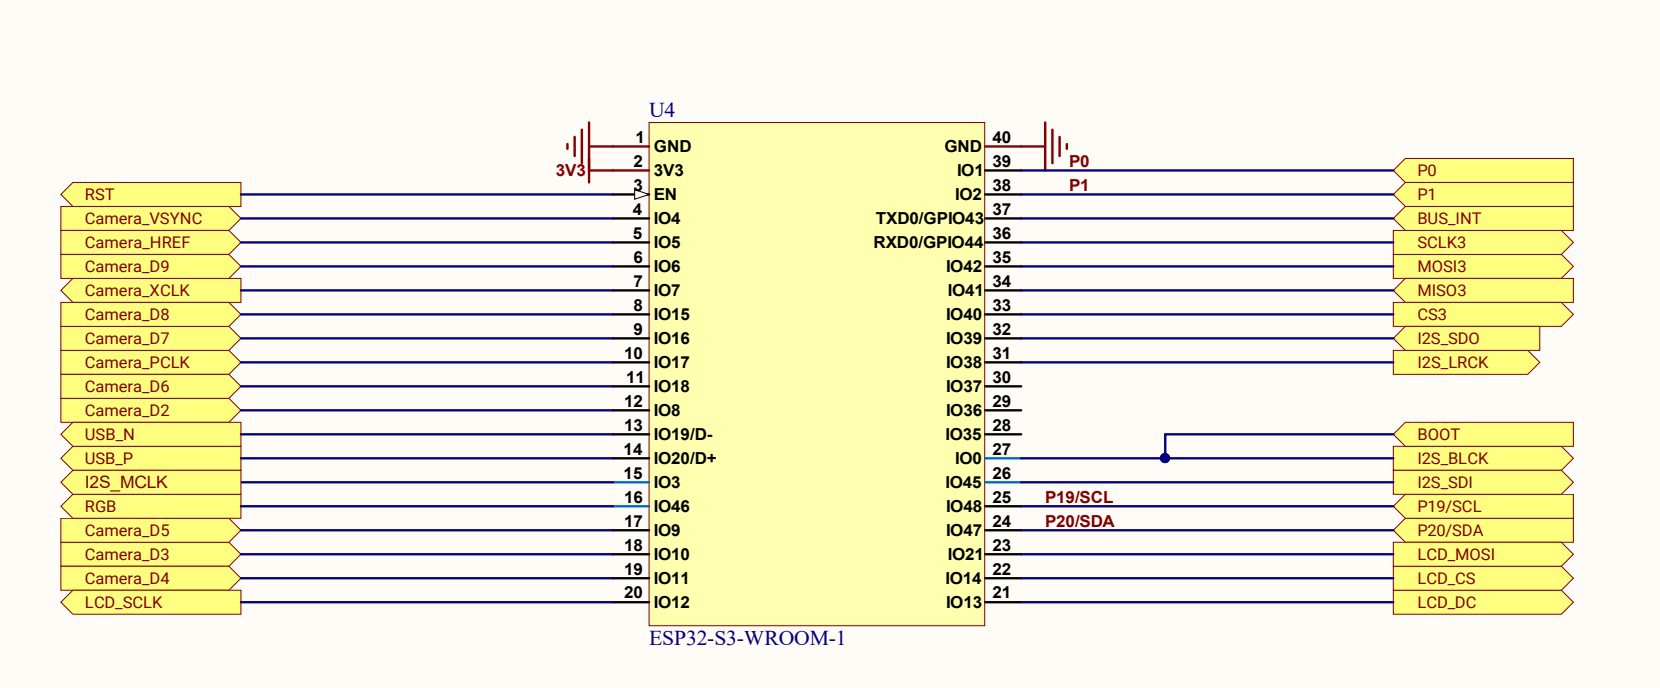
Based on the data from the schematic, I modified User_Setup.h to match the specific connection. Next, I installed support in Arduino IDE for this development board as follows:
We go to File-> Preferences-> Additional boards manager, and enter the given link:
https://downloadcd.dfrobot.com.cn/UNIHIKER/package_unihiker_index.json
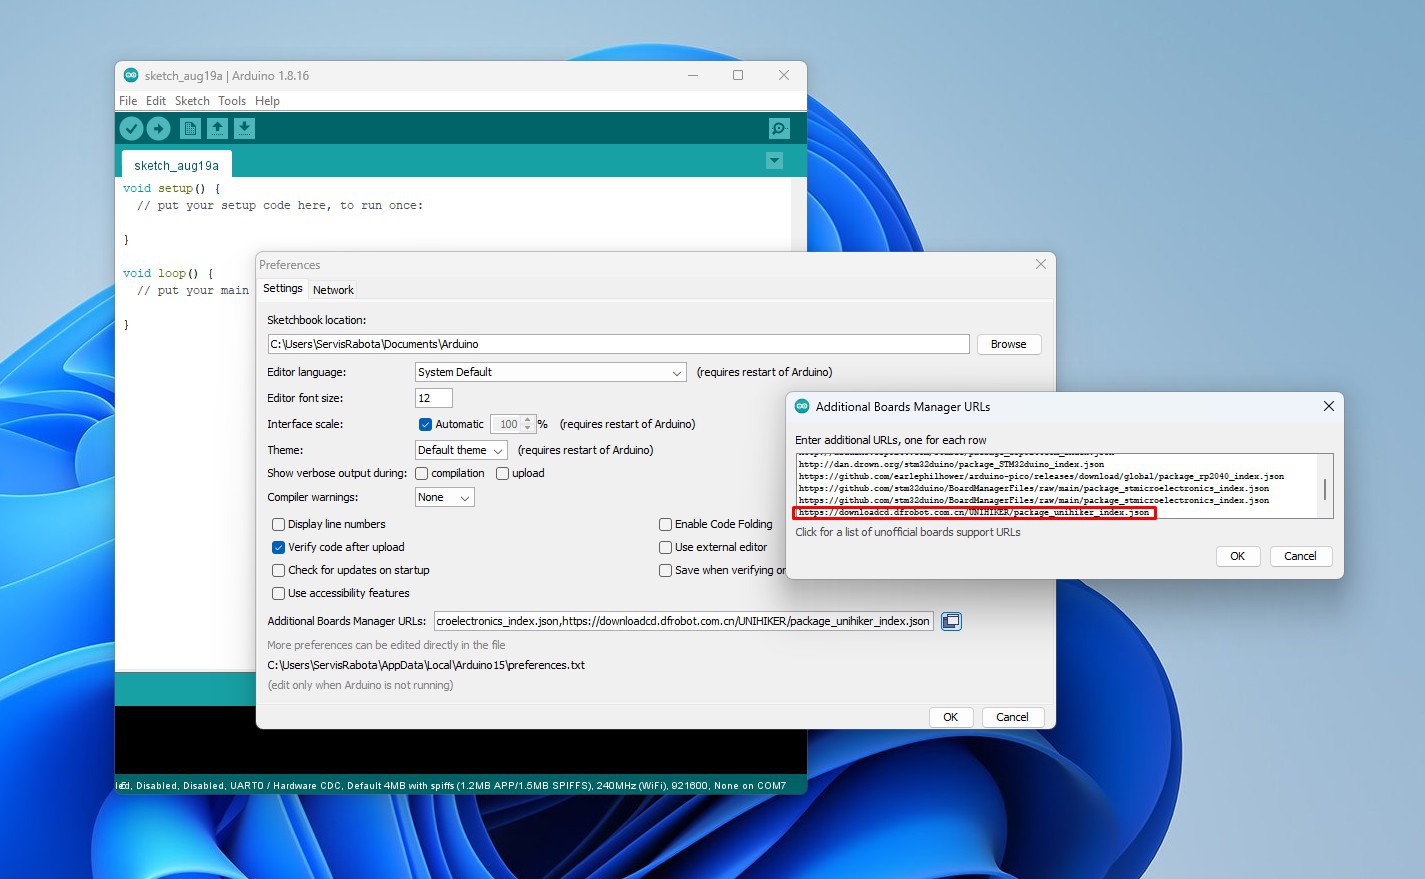
Then in Tools-> Boards Manager we write Unihiker, and we install the support for Unihiker from DFRobot.

Now we go to Tools -> Unihiker -> Unihiker K10.
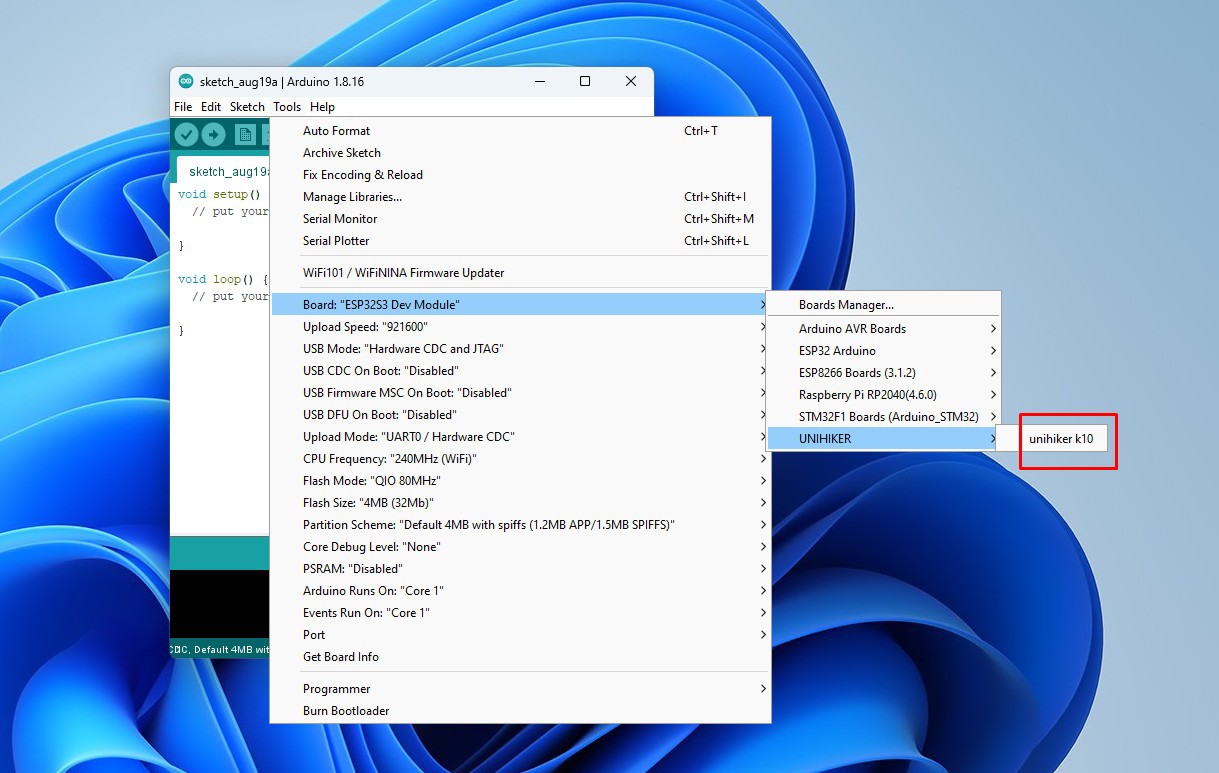
With this, the support for this development board in Arduino IDE is installed.
Now comes the interesting part, which is testing. Of course, to start with, I tried installing one of the examples included in this library, specifically an analog meter. The example installed successfully without errors, but unfortunately after rebooting the display remained black. I went back to the schematic again and discovered that the backlight of the display is controlled by a transistor whose base is connected to a special pin, on the I/O Expansion chip and not directly to the microcontroller, which theoretically means that there is no chance to programmatically turn on the backlight of the display.
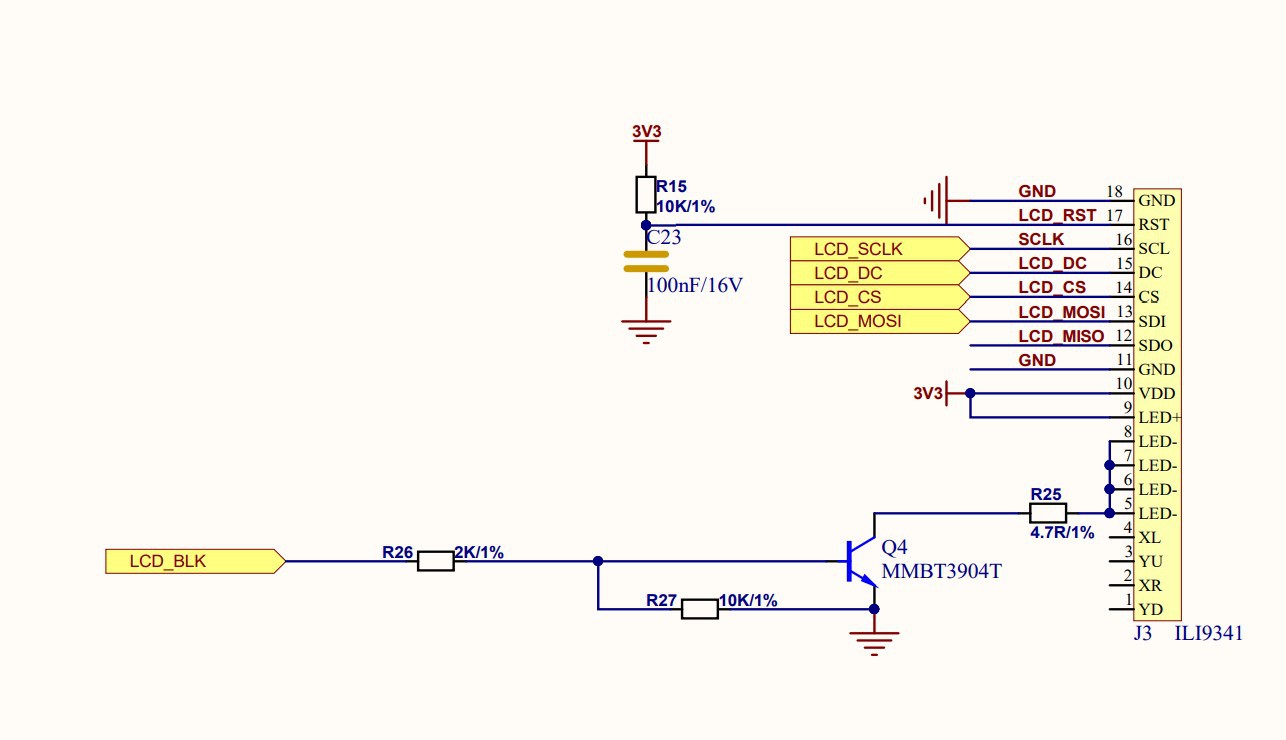
I could probably do it in hardware by directly connecting the ground of the LED pin, but that would be difficult to do and there was also a chance of damaging the board. I came to the solution...
Read more »
 Sergei V. Bogdanov
 Gerson Fernando Budke
 Nik Reitmann
 555Techlab