Close
0%
0%

Hoverlay II

open hardware interactive midair screen

Similar projects worth following
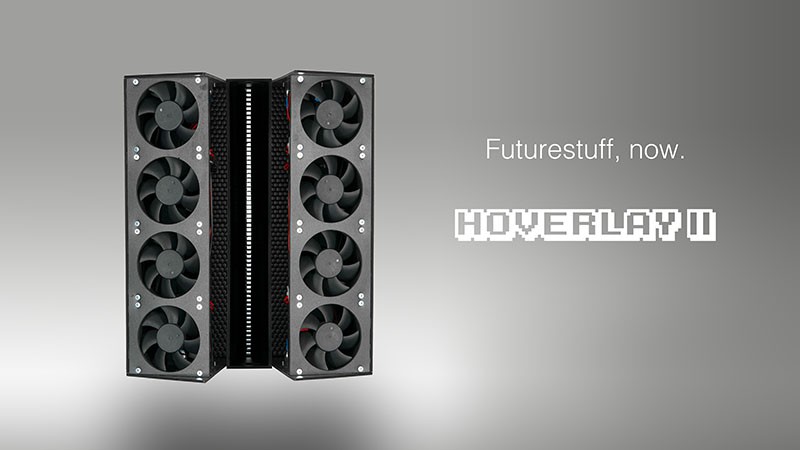
Hoverlay II is a low-cost, interactive, scaleable, open source vapor screen. It allows projection of images, videos and games right into midair and comes with it's own selection of interactive applications.

Short explained, the device creates a thin, stable film of vaporized water, continuously travelling upwards in midair, which then acts as a floating rear projection canvas.

It works great with Microsoft Kinect and we've also successfully tested it as a telepresence display device using Skype.

See the video: http://youtu.be/RzPK1t_XLmU

Even though one Hoverlay II unit is still quite handy (326 mm wide), up to 5 units can be plugged together to form a badass big 1630 mm wide, floating screen of >1 m height. Bigger screens are possible by choosing more high-end components.

Hoverlay II is open hardware licensed under GPL V3.

Introduction

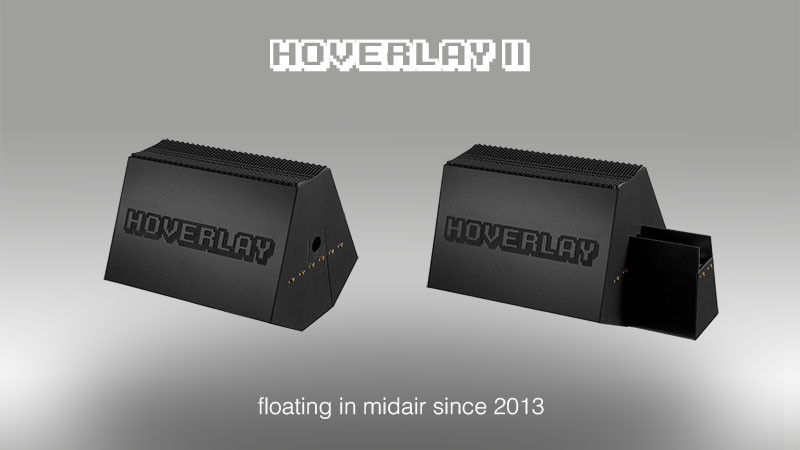
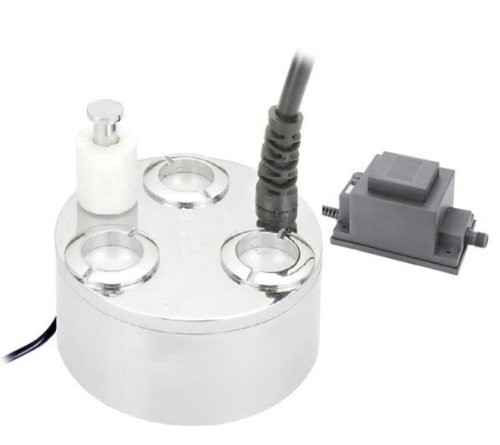
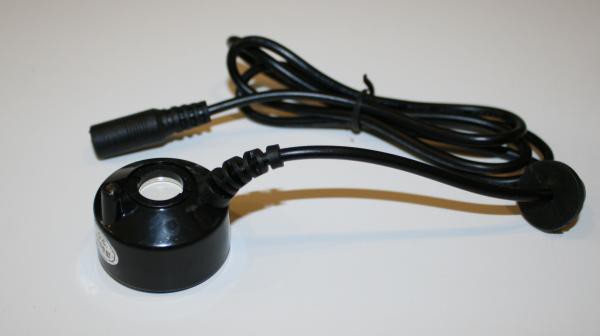
Vaporization is done by off-the-shelf ultrasonic atomizers, either really cheap ones (the black ones in the picture below, 2.50 $ each) or some more rigid ones (the silver one, a Fogstar 300, 290 € each), air is moved by an array of strong and silent pc case fans, laminar flow is formed by 3D printed flow formers. Rear projection works with any kind of video or still image (even dia-) projector.
The housing

The housing is CNC-milled out of black PVC hard foam plates ("Palight", not to be mixed up with PVC soft foam plates) but can be made from pretty much any waterproof material that can be glued or welded, i.e. acrylic.
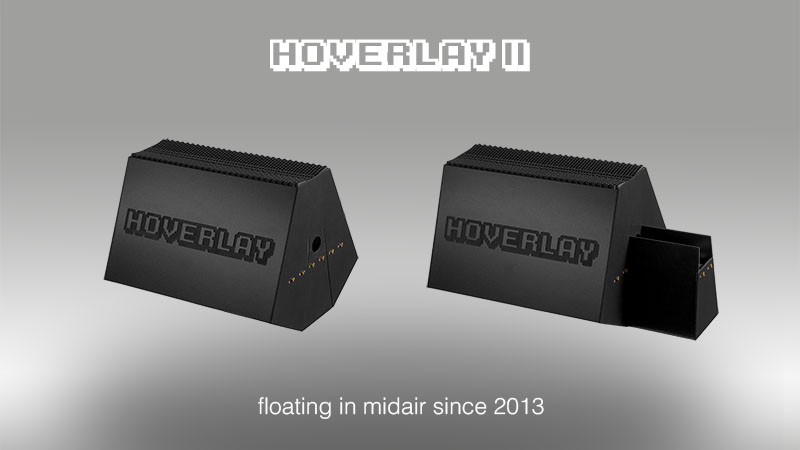
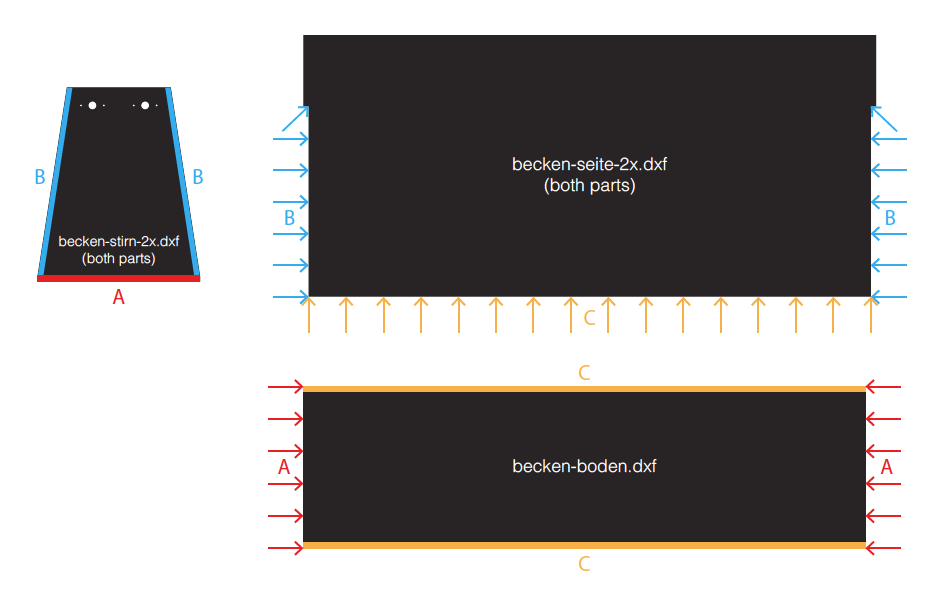
If you choose Palight, you can theoretically build this just with a paper template, patience, a steel ruler, some drill bits and a box cutter. All the DXF files for milling, lasercutting or box cutter samurai are available in the GitHub repo. Never put PVC in a laser cutter though (super carcinogenic). The BOM list in the repo tells you, how often you need to mill or cut a certain file. A single file may contain more than one part.

Operating principle

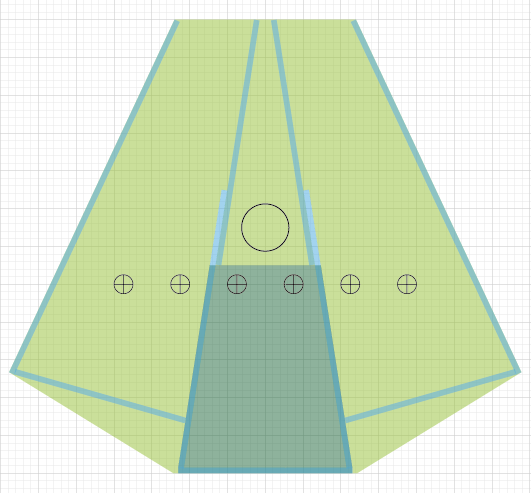
The diagram below shows an axial cross section of a Hoverlay II module, it's probably self explaining:
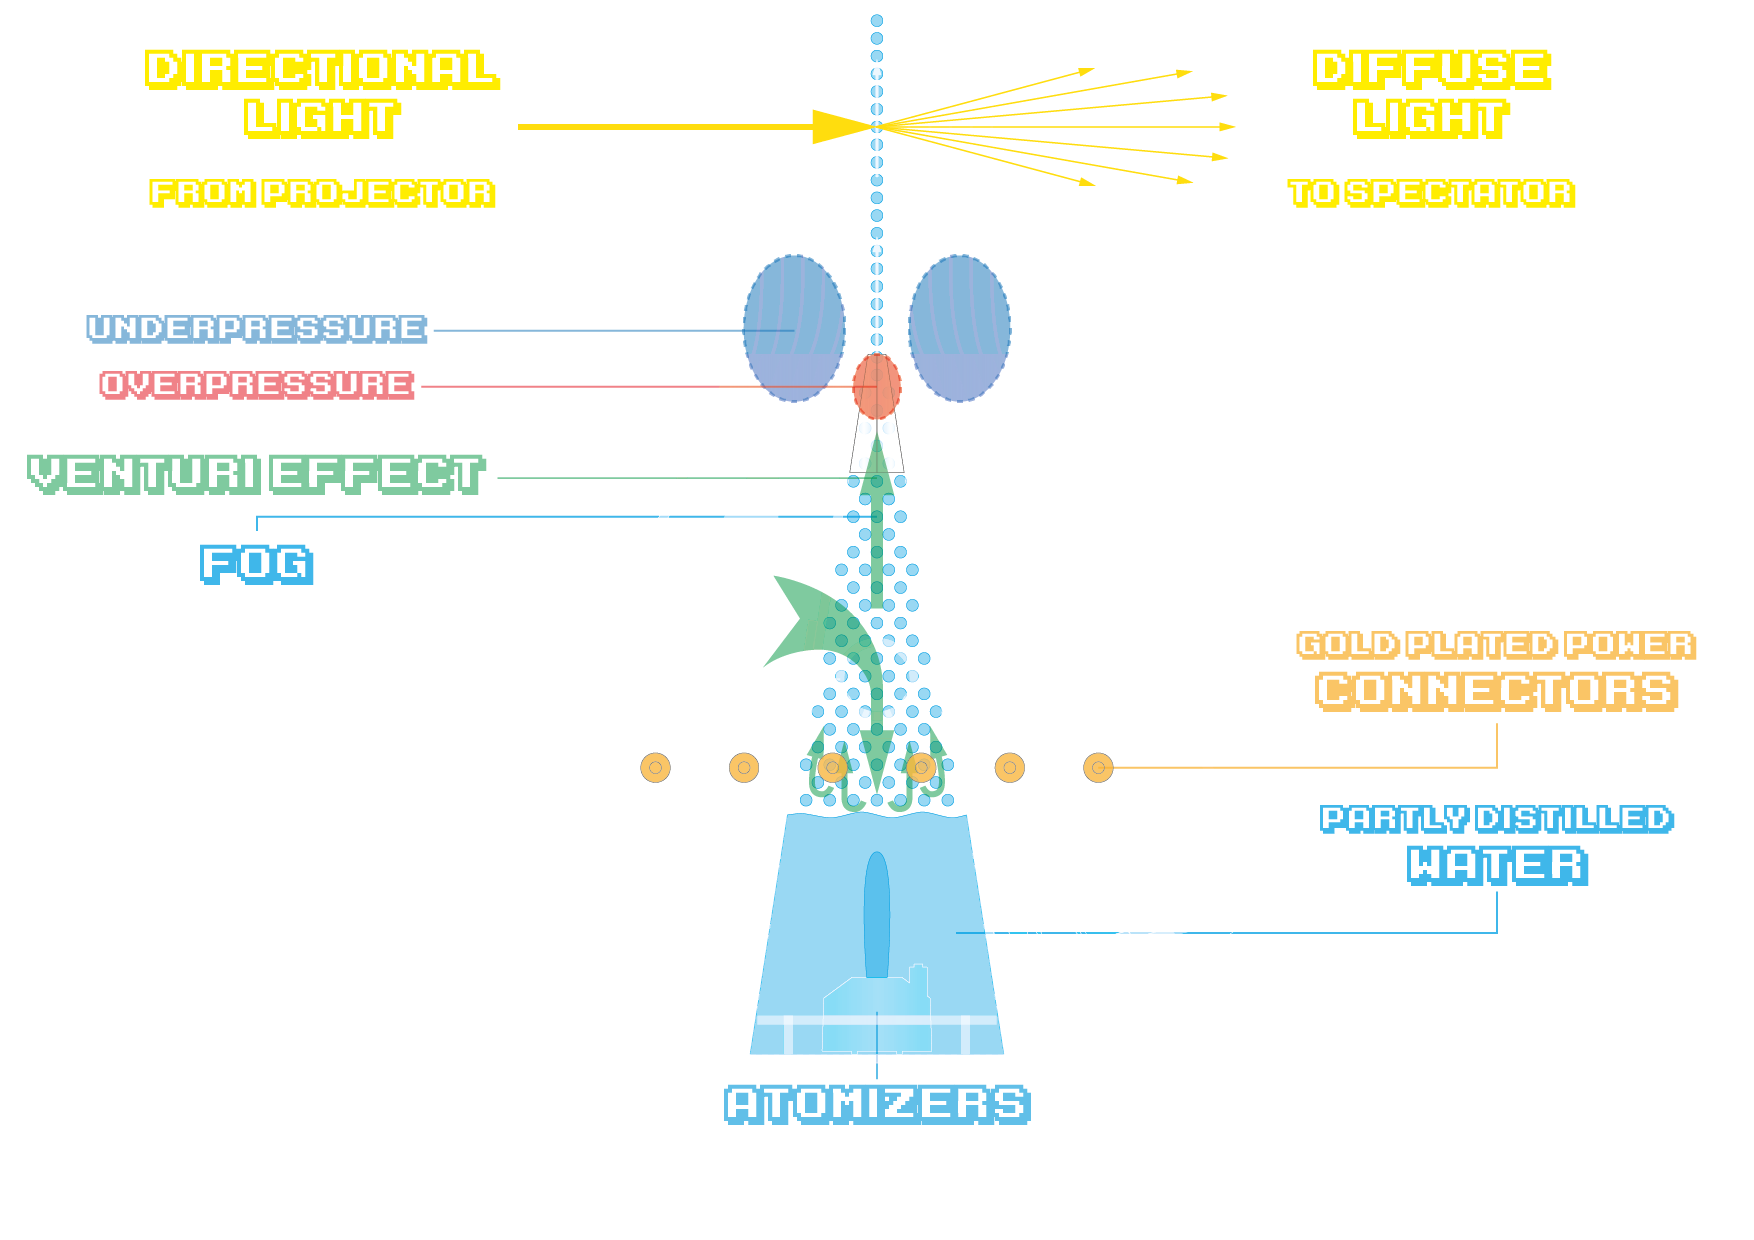
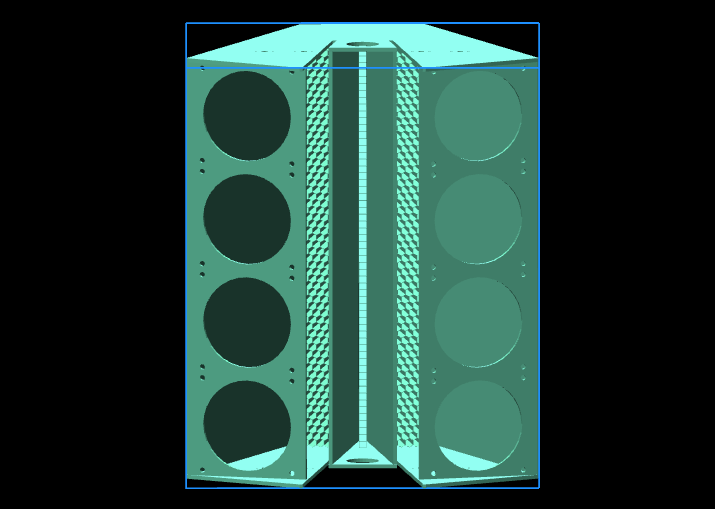
As you can see, there are three channels. The fans suck in air into the left and right channel, which then travels upwards while beeing compressed and accelerated by the convergent channel walls. The air then is pushed through the 3D printed flow formers, which is just many, many small, parallel channels packed into a honeycomb grid. When the air flow exits the flow formers, its mostly laminar, meaning it contains almost no turbulence anymore (such as rotary turbulence from the fans) and can continue travelling upwards almost turbulence-free for quite some distance (> 1 m).

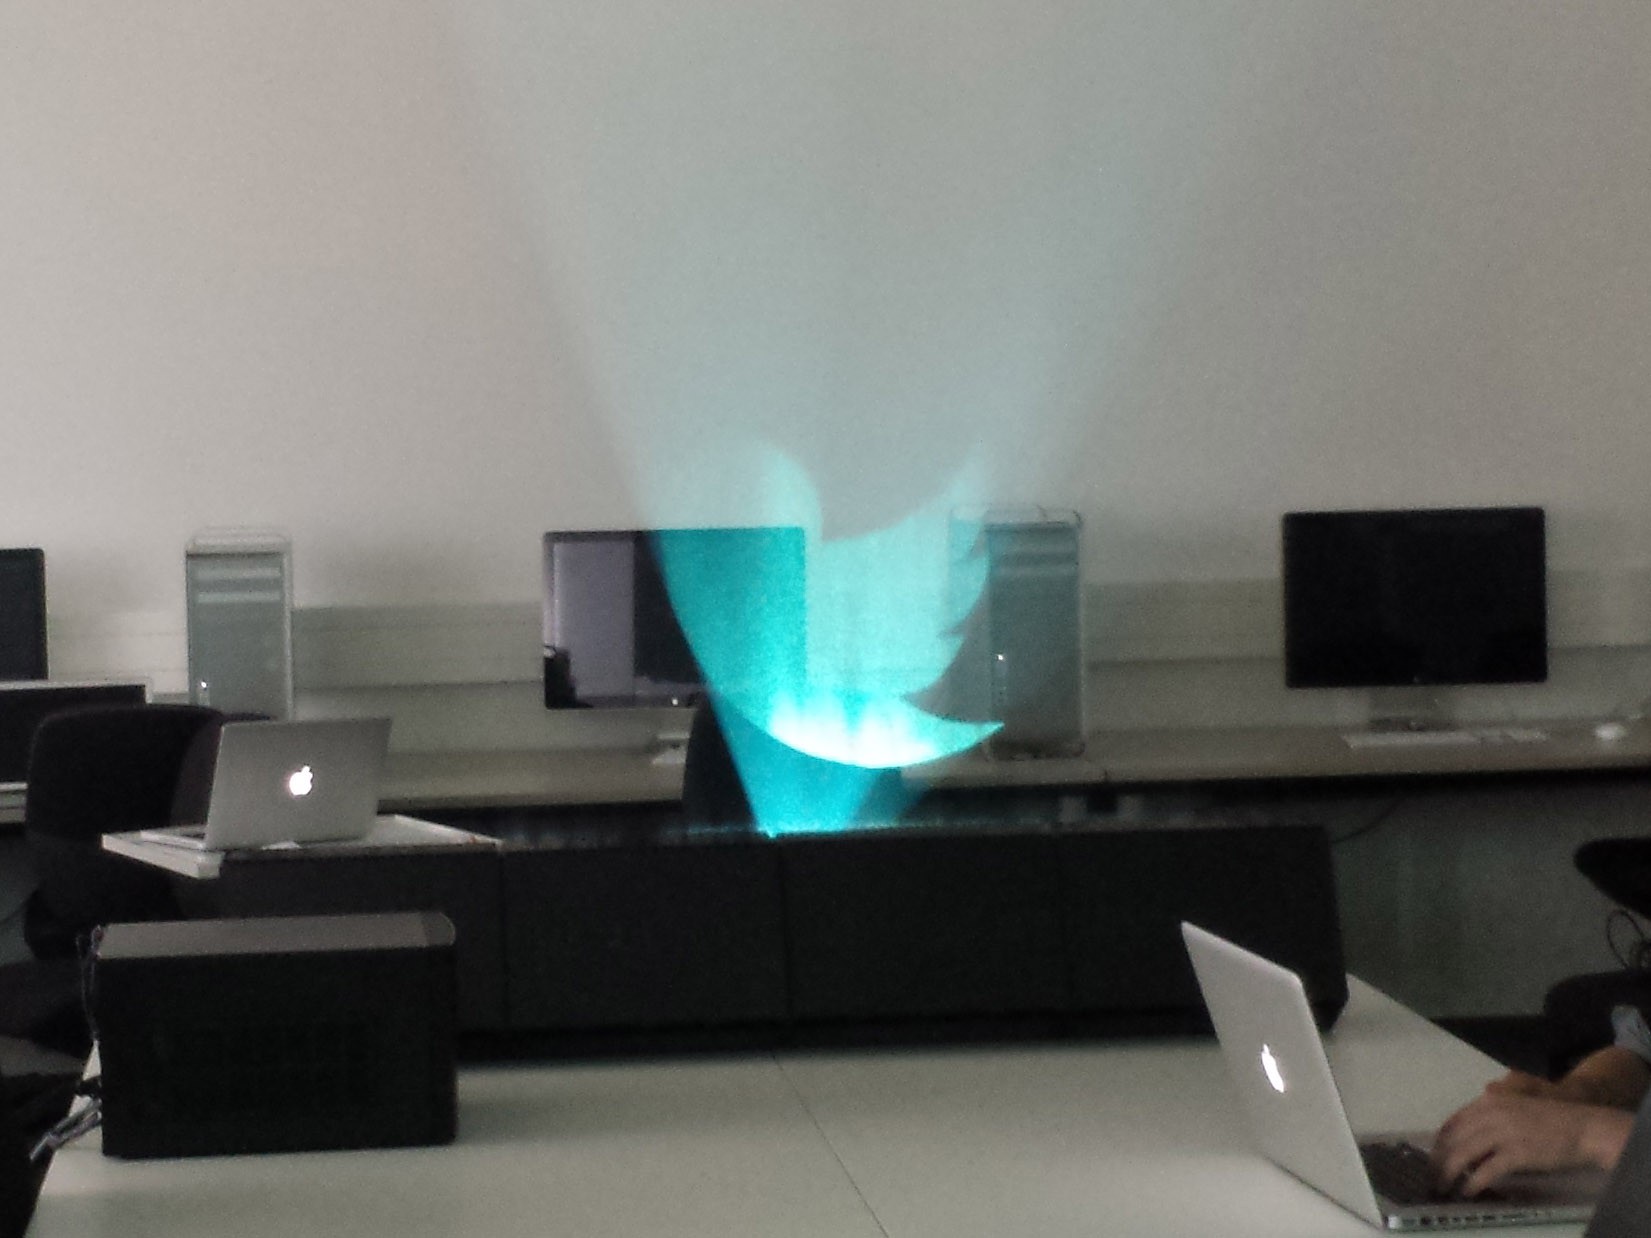
The two fast laminar air flows from the left and right air channel then carry off the fog from the center fog channel, an effect that is known as "Venturi Effect", both accelerating the fog upwards and shaping it into a thin film layer right between them, as you can see in the picture below.
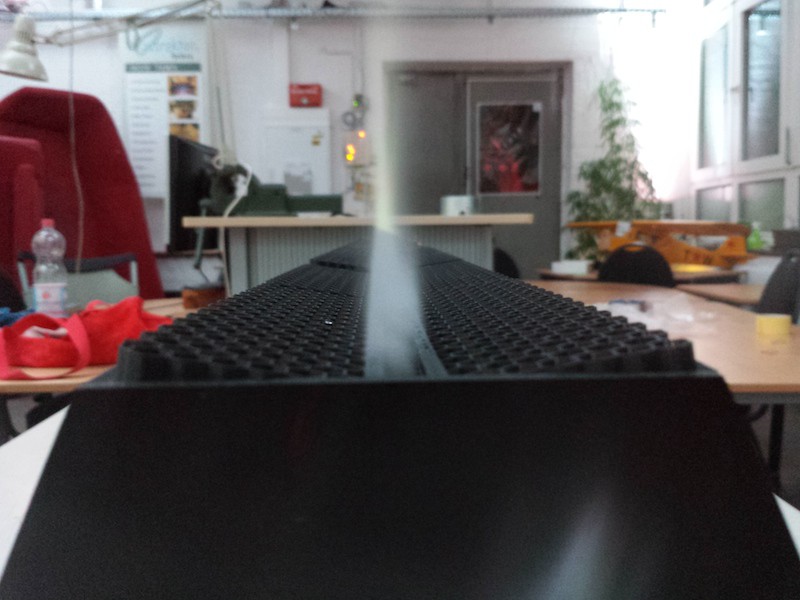
This thin layer of fog has the ability to diffuse incoming directional light (such as light from a projector), which then can be perceived as if it was diffusely emitted by the fog layer itself.
A perforated pressure compensation tube was meant to help delivering fresh air into the fog channel and lifting out the fog homogeneously. A few words about this tube: It's just a perforated (manually, on a drill press) ø 25 mm PVC tube, cut to length of one Hoverlay II module (326mm) that slides in though the corresponding cutouts in the side panels. The pressure compensation tube can be dismissed (the cutouts still have to stay there!) when only using one or two Hoverlay II modules in series. It was meant to help homogenizing the fog density over the full width of larger (3+ modules) installations. However, we found a way better method for that, by using some sort of "brightness booster" in form of two additional fans, blowing air into the pressure compensation holes on both ends of the Hoverlay II array. This both helps homogenizing the fog density over larger screens as well as visibly increasing the fog density (thus brightness). Here you can see the brightness booster in action, it's a true enhancements over all previously posted videos:

I will soon release a nice and tidy, 3D printable "brightness booster" that can be snap-fitted onto the existing pressure compensation tube holes for easy installation. Until then, just ignore the pressure compensation in the BOM, because it just turned out to be a intimidatingly dull solution to the homogeneity problem on larger screens.

Interactivity

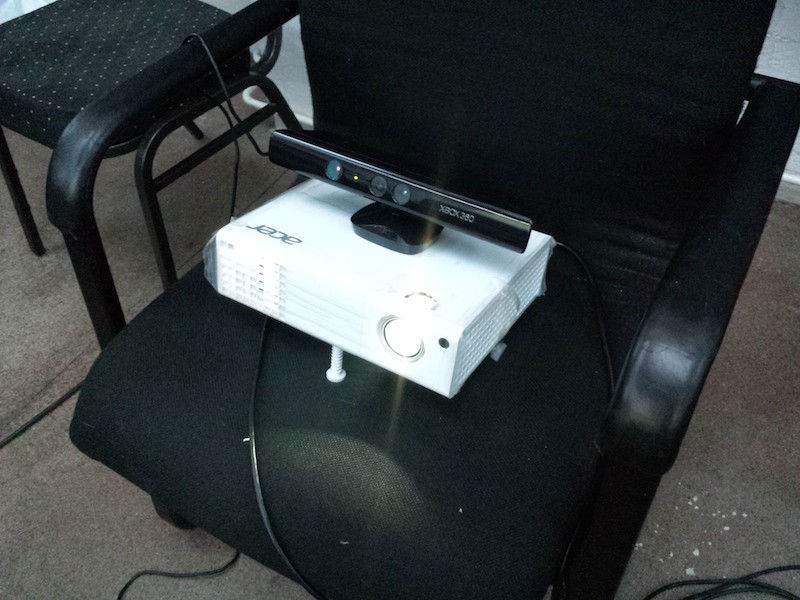
A Microsoft Kinect is sitting right on top of the projector, requiring minimal calibration and mapping. It turns out that the fog layer does not disturb the pattern recognition of the Kinect at all, so it works just fine.
Some more technical details

I spent a lot of time on optimizing the printing process of the flow...

Read more »

  • 1 × AC power supply (fused!) depending on your choice of foggers, 24 V or 36 V AC, about 120 W
  • 1 × DC power supply (fused!) 12V DC min. 200W
  • 8 × PC case fans 12V DC, approx. 40 CFM each
  • 1 × Set of printed parts from the repository
  • 1 × Set of milled parts from the repository PVC hardfoam plates is a good material for building enclosures, easy to cut, easy to glue

View all 20 components

  • Hoverlay @ C31C3

    Moritz Walter12/20/2014 at 17:29 0 comments

    The Hoverlay will be part of the Chaos Communication Congress 2014 (C31C3) from December 27th to 30th, 2014 at the CCH Congress Center Hamburg, Germany, Earth, Milky Way. So if you're in Germany, Hamburg these days, come by for a visit. We'll be glad to see you! And to everybody who cannot come: Merry Christmas and Happy new year!!

    Also, besides that there'll be many other cool projects and an assembly by the Attraktor Makerspace. Don't miss it :)

  • THP Semifinals Video Released

    Moritz Walter09/27/2014 at 00:03 0 comments

    Find out more about the internals and future of the Hoverlay in the THP semifinals video:

  • Full CAD model released

    Moritz Walter09/25/2014 at 15:53 0 comments

    Both Hoverlay I and II were completely layouted in Adobe Illustrator, a surprisingly flat 2D drawing tool I just happen to work with a lot. This is how it looks like, basically:

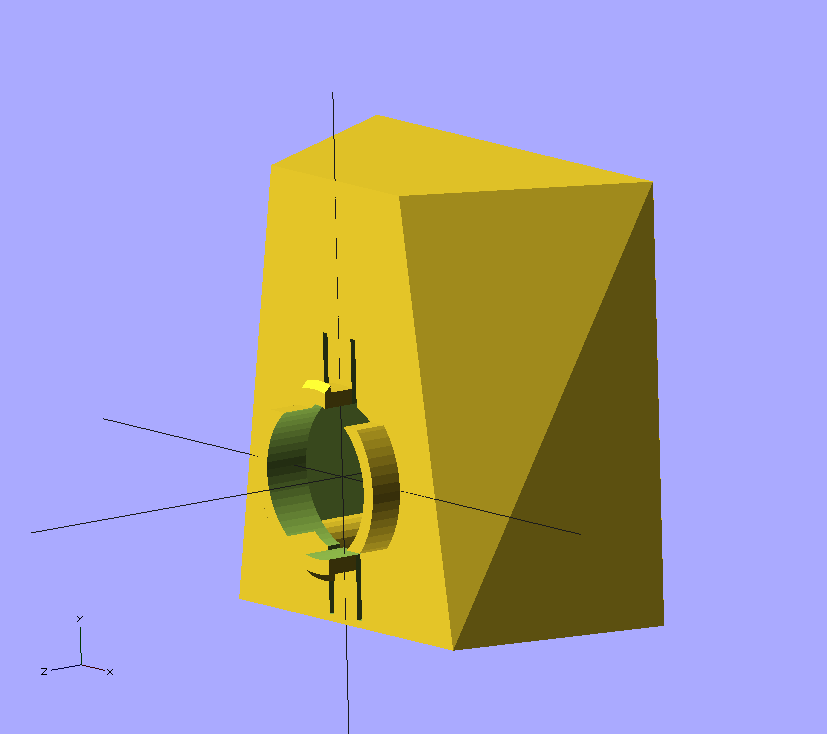
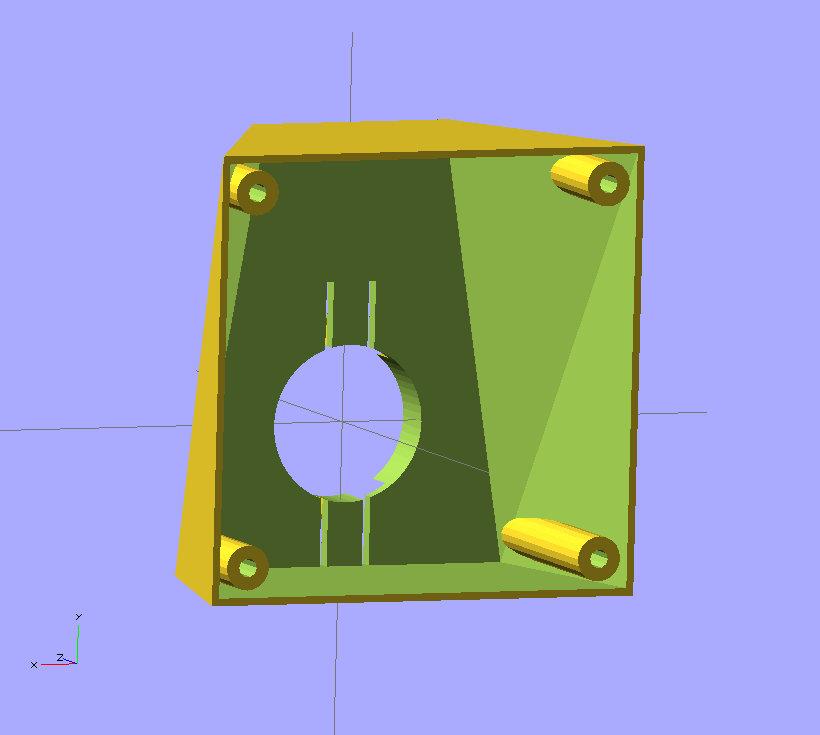
    Making all the parts fit without using 3D CAD required some imagination and a few trigonometric vitamins. Now, since I am getting more and more into OpenSCAD, it's possibilities (like "programming things", yay), and limitations (like no programatical generation of polyhedrons, ouch), I can finally release a full model of the Hoverlay II.

    Mind that this is not meant as a 3D printable version of the Hoverlay II, but it's an important step to get there with a potential Hoverlay III. In order to really get this out there on the printers of the makers, splitting up the Hoverlay module in even smaller segments might be as ineviteable as shinking down the module as a whole.

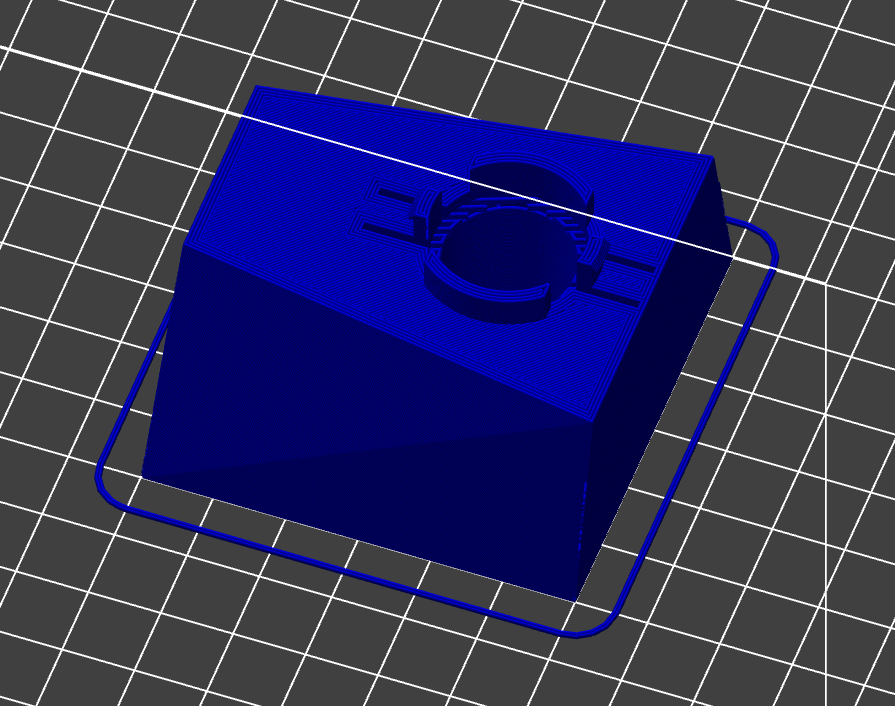
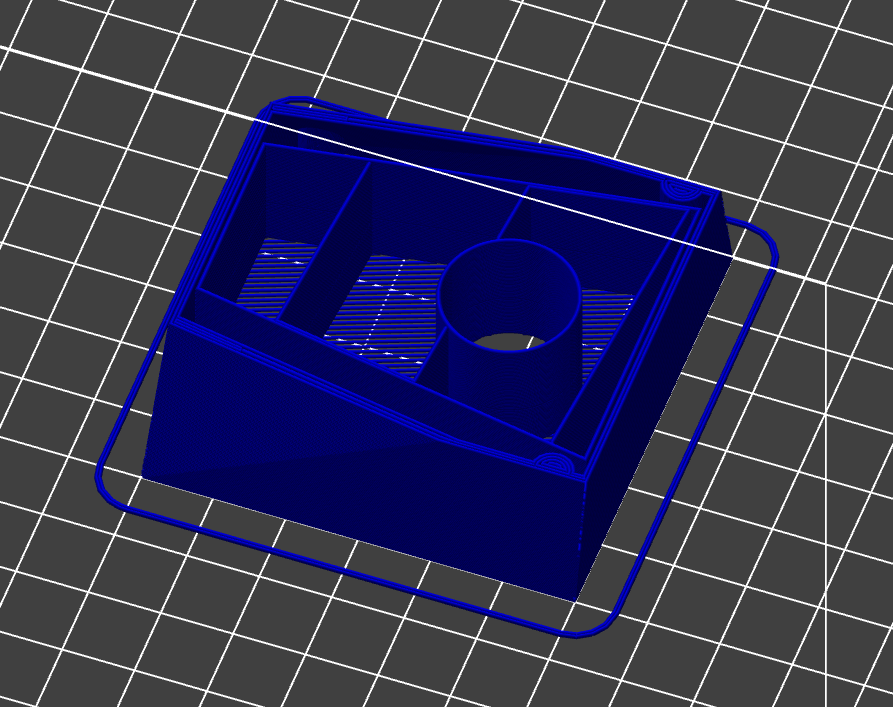
    However, in theory, and if you're crazy enough, this is completely 3D-printable. In the screenshot above from Repetier Host you can see that my build platform is completely covered by the object, which means my Prusa i3 is just too small for that. If you plan to threw this onto your FDM machine, make sure your support material spool is full and your printer has the massive build envelope of at least 326 x 271 x 240 mm. Also make sure you print the housing and the vat separately.

    All the updated files are commited and synced to the GitHub repository by now.

  • Artistic Masterpiece Created

    Moritz Walter09/25/2014 at 00:34 0 comments

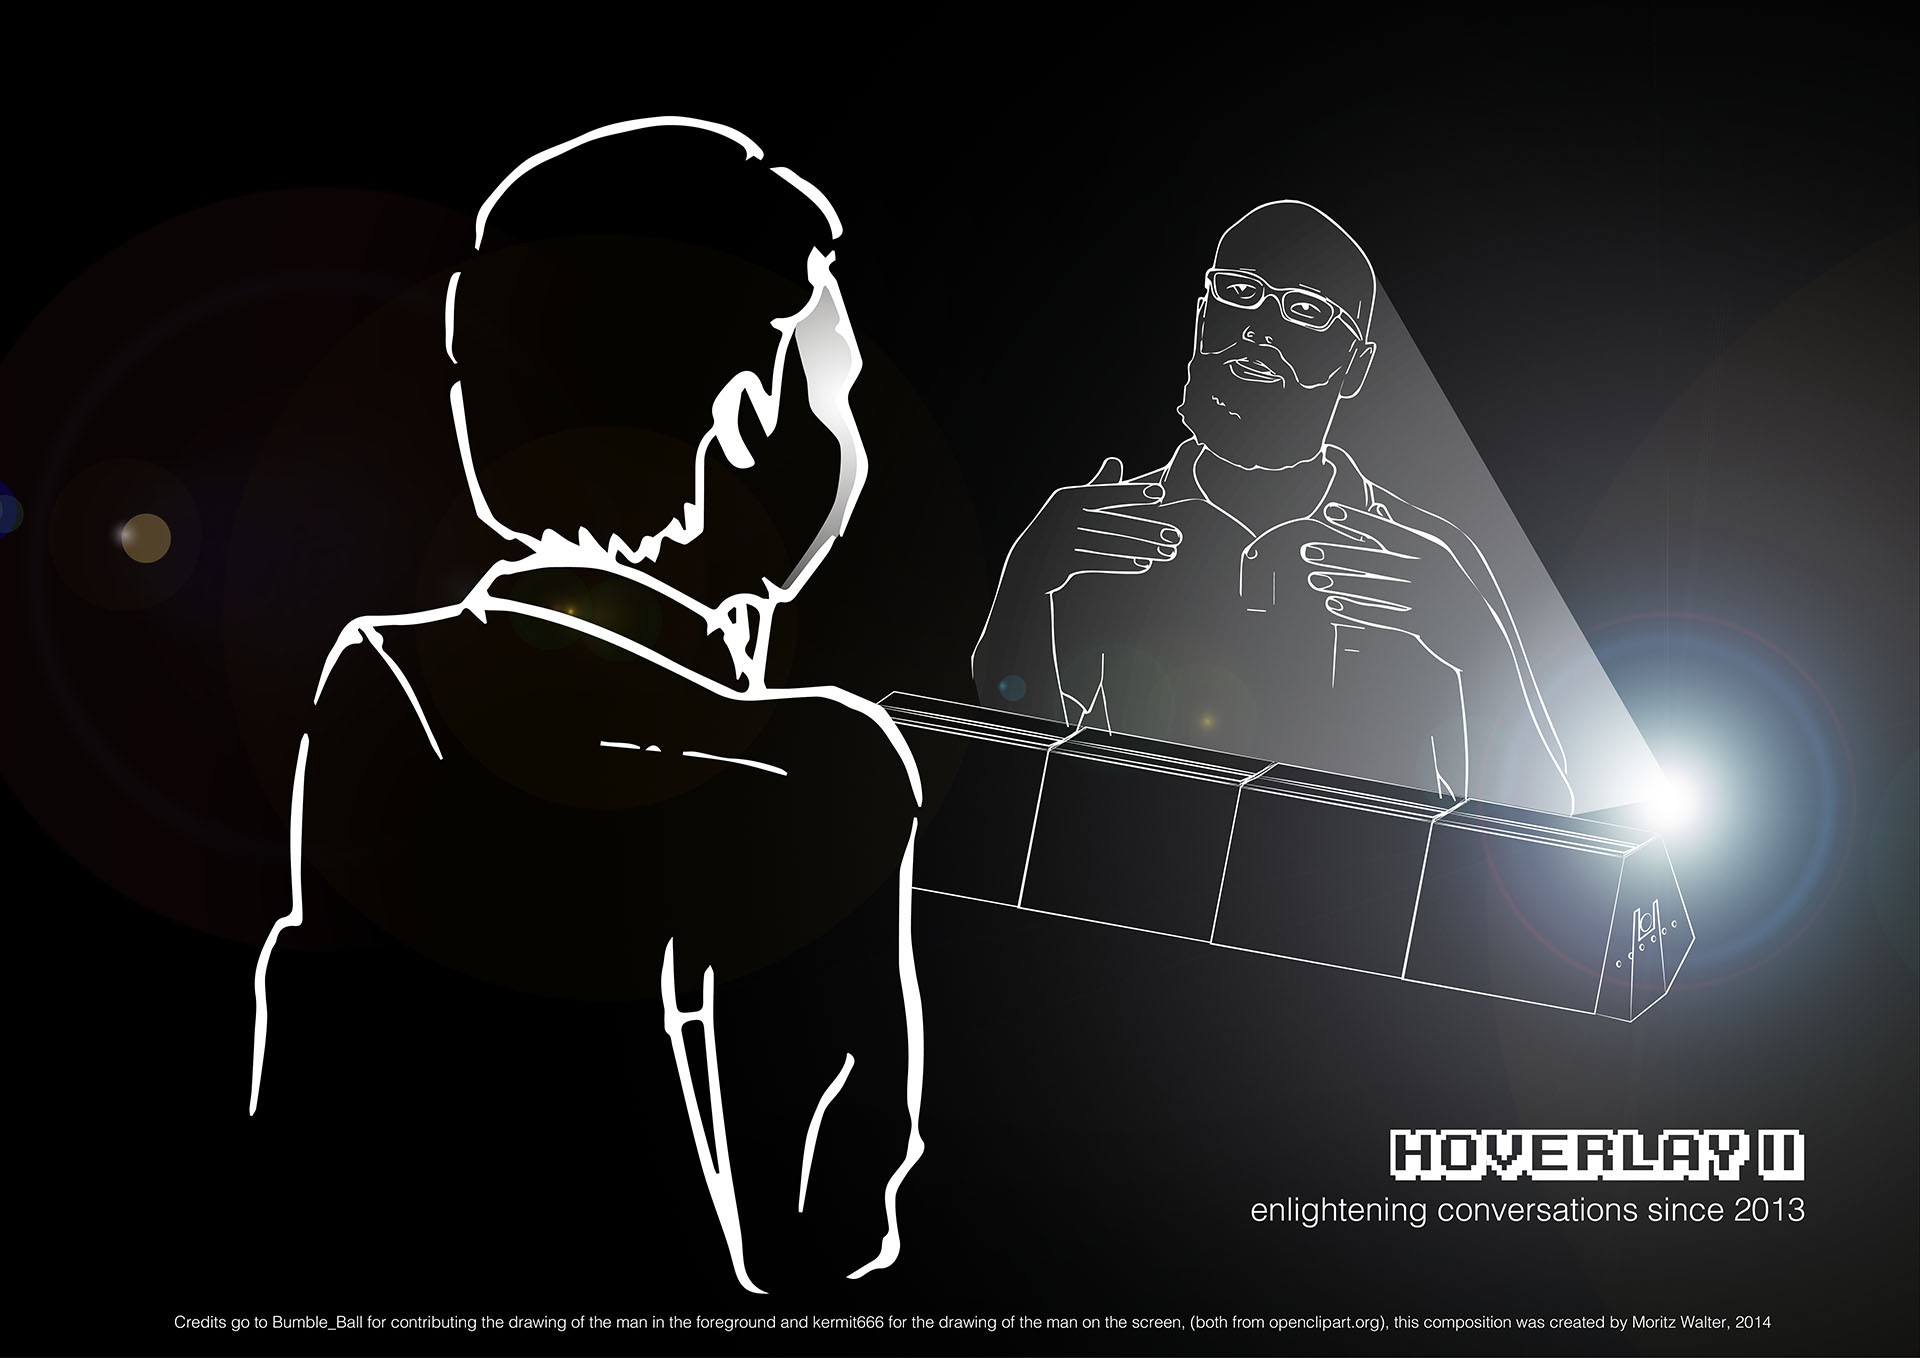
    Last night I felt like showing you guys some of my artistic skills together with some serious photoshopping and really create a true masterpiece. Look at the strokes and the use of color, perfection is a understatement, I am taking your bids now.

    Honestly, of all skills I have "drawing" and "painting" have not yet made it to the top ten. I once built this robot to paint pictures from oil, but that also went weird somehow.. Credits go to Bumble_Ball for helping me out and contributing the drawing of the man in the foreground and kermit666 for the drawing of the man on the screen, this composition as well as the drawing of the Hoverlay itself was created by myself and therefore hopefully complies the requirements of the Hackaday Prize rules.

    More updates will follow tomorrow. The Hoverlay II prototype as well as the CAD data in the repository have gotten some major upgrade that I hopefully can document in detail tomorrow.

  • Preliminary Assembly Instructions released

    Moritz Walter08/27/2014 at 15:49 0 comments

    Building your own Hoverlay II has never been so easy. Just download and follow the brand new Preliminary Assembly Instructions.

    The manual contains everything from the glueing the housing together, assembling the connectors up to a start in wiring it up. You'll still need some basic technical understanding but besides that, its cake!

  • 3D printable brightness booster

    Moritz Walter08/27/2014 at 09:53 0 comments

    Since an improvised cardboard-version of this "brightness booster" showed promising results in this project log (with video), I went into setting up a 3D printable version of the brighntess booster in OpenSCAD. This add-on adresses some homogeneity and brighntess issues I experienced on large installations of 3+ Hoverlay II modules. For smaller installations, it will probably not be necessary at all. It's basically a fan duct that snaps onto the inlets of the pressure compensation tube. The pressure compensation tubes are not necessary when using the brightness booster.

    You'll need two of them for the left and right end of the installation. Each one requires a standard 60 mm fan and two more of the power connectors (male) plus some cables. The OpenSCAD file is configureable and will adapt to 40, 60 and 80 mm fans just by changing the fan_size variable.

    Just add a fan, snap it on and you'll have the brightest Hoverlay you've ever seen.

    It's designed for 3D printing on a FFF machine with a minimum of support structures. The base plate, where the long bridges occur, is a bit thicker to even out the sagging in the bridge. You could also use Slic3r's cut plane option and print the base plate seperately.

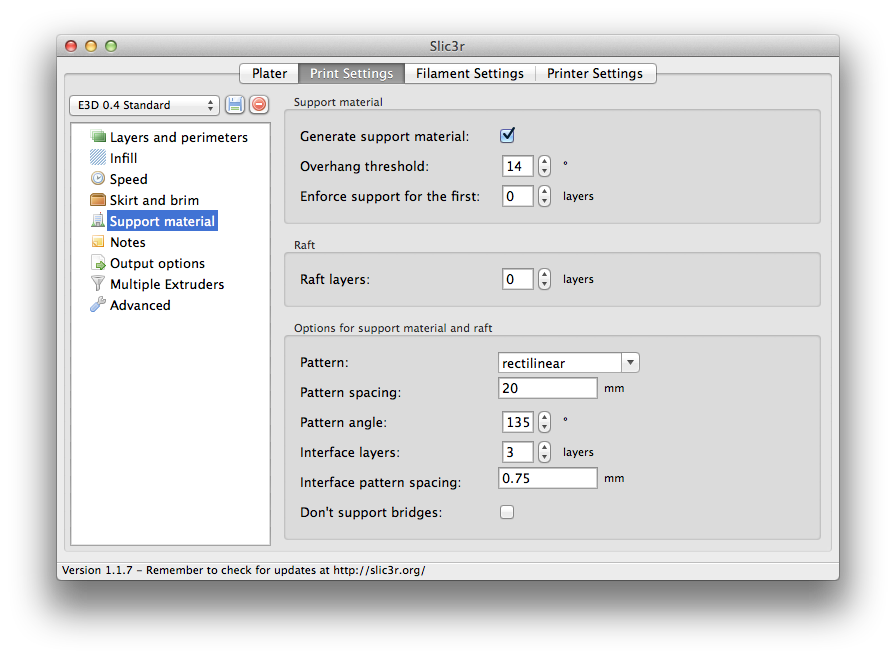
    I've been successfully printing this using a low density support structure with interface layers. You might be also lucky ticking "don't support bridges" in Slic3r. If you run into trouble printing this see my support settings:

    I'll add some photos of the printed installed boosters soon.

  • "Feuertanz" & "Streiflicht"

    Moritz Walter08/19/2014 at 10:15 0 comments

    I've had the luck to get the two truly amazing animation artists and fellow students of mine, David-Kim Hermsdorf and Philipp Kessling, to create this wonderful animation double "Feuertanz" and "Streiflicht" for the Hoverlay II.

    Thank you guys, you did a fantastic job there. I (and probably everybody else close by the live installation) immediately got goose pimples experiencing a deep visual stimulation accompanied by deep frequency quakes.

    To you, who are watching this on your regular, flat, non-hovering screen with laptop speakers, the experience might not be the same, but I hope it gives you an impression of what's happening there ;)

    Short fragments of the footage have also been showed in the Brightness Booster Demo video, I just wanted to get the official permittance to show off the whole thing on Youtube directly from the artists befor upping it completely. I hope you enjoy watching it!

  • Photos & Brightness Booster Enabled

    Moritz Walter08/17/2014 at 14:58 0 comments

    Lots of cool stuff happened recently at the makerspace. For the first, one of our members volunteered to take professional photographs of the Hoverlay II and its internals. After one afternoon of incredibly focussed work on illumination and setup he gave me an USB stick packed with high resolution, high aesthetic quality shots, so I can take that material now and put it into the construction manual, make a nice web page from it and tease you with pictures like the ones below. Thanks, C.!

    Here's an impression of that incredible quality of pictures. Mind that these are photographs, not CGI renders.

    Also, one of the members of our local makerspace, Dirk, added some modifications to the Hoverlay which resulted in a much higher brighness of the Hoverlay screen. Check it out in the video:

    Basically, the modification makes use of the inlets formerly used for the pressure compensation tubes, feeding more air through them into the fog channel with two additional fans. This video shows the first result of this brighntess booster with the same 3000 ANSI lumen projector from the last videos.

  • System Design Document, Credits and Licensing

    Moritz Walter08/16/2014 at 09:04 0 comments

    In order to get a proper System Design Document out I also had to sum up all the used libraries including their license information, open source software and what-so-open-ever else to pay appropriate appreciation to all those great projects out there. Reading this makes me feel like I actually did totally nothing in this project.

    ----------

    Credits and Licensing

    The Hoverlay II hardware, CAD, and all application code is licensed under GPL V3 http://www.gnu.org/licenses/gpl.html

    This project would not have been possible without open source hard- and software. Special thanks the following open source projects, that have been used in making and/or are part of Hoverlay II:

    Hardware Design:

    - OpenScad http://www.openscad.org (GPL V2)

    - Processing http://www.processing.org (GPL V2, LGPL, GPL)

    Manufacturing:

    - RepRap Project http://www.reprap.org (GPL)

    - Repetier http://www.repetier.com (Apache License V2)

    - Slic3r http://www.slic3r.org (Perl Artistic License & AGPLv3)

    - LinuxCNC http://linuxcnc.org (GNU GPL)

    Application Development:

    - Processing http://processing.org (GPL V2, LGPL, GPL)

    - KinectA http://kinecta.mihoo.de (GPL V3)

    - OpenNI https://github.com/OpenNI/OpenNI (Apache License V2)

    - MSAFluid Processing library https://github.com/memo/p5-MSAFluid (MIT License)

    - oscP5 Processing library http://www.sojamo.de/libraries/oscP5/ (GNU LGPL V2.1)

    - Minim Processing library http://code.compartmental.net/tools/minim/ (GNU LGPL)

    - saitoobjloader Processing library https://code.google.com/p/saitoobjloader/ (MIT License)

    - Arduino http://arduino.cc (Creative Commons ShareAlike)

    Also thanks to Christian Knüll for his efforts in making an affordable CAM tool

    available. Check it out at http://estlcam.de (not open source!)

    All layouts have been made with Adobe Illustrator (also not open source!).

    Of course the used Microsoft Kinect is not open hardware. If you want to learn more about how the Microsoft Kinect is licensed, read the manual from page 14 here: http://download.microsoft.com/download/f/6/6/f6636beb-a352-48ee-86a3-abd9c0d4492a/kinectmanual.pdf

    And last but not least, without the support of my local makerspace "Attraktor", not a single prototype would have been realized. If you live in or nearby Hamburg, Germany, you should definitely give us a visit sometime!

  • New Video

    Moritz Walter08/13/2014 at 23:17 0 comments

    Ladies and gentlemen, may I present to you, the Hoverlay II:

    Yesterday night we set up the Hoverlay in our makerspace Attraktor in Hamburg, Germany and explored a bit more of the possibilities of the interactive midair projection.

    All we got was a 3000 ANSI lumen home cinema grade projector, which is visibly less then the 5000 lumens from the projector I had in my university lab. Still, you get a good impression and it was lot's of fun. We tried everything from a skype call, particle effects, 3D viz painting and of course the hackaday skull. I hope you enjoy watching it!

View all 12 project logs

View all instructions

Enjoy this project?

Share

Discussions

Flint1984 wrote 12/06/2021 at 13:13 point

Hi little Question, where can i get the files

  Are you sure? yes | no

[deleted]

[this comment has been deleted]

Moritz Walter wrote 03/26/2016 at 10:22 point

Hi, thanks! Yes, that is exactly the power class that gives good results.

  Are you sure? yes | no

Moritz Walter wrote 03/26/2016 at 13:33 point

@Sergio I don't think 6 l/h is too much, but 3 l/h will certainly suffice. I'm not manufacturing these, but I'm currently willing to sell my ready assembled Hoverlay as a whole, including foggers and power supply, because I'm moving to Canada and transport is tedious.. Just send me a PM me if you're interested!

  Are you sure? yes | no

alexdw1 wrote 02/22/2016 at 10:42 point

Hi,  Great project.  I was wondering the max height you have achieved for projection and noise levels.

I'm looking for something to have in a classical concert hall with just one piano.

Thanks

Alex

  Are you sure? yes | no

Moritz Walter wrote 02/22/2016 at 11:20 point

The useable height is about 1 m with a 7000 ansi lumen event projector.

  Are you sure? yes | no

Analog wrote 09/03/2014 at 20:07 point
While I'd personally like to see the laminar sheet have a smoother flow- the project is still quite well done. I liked version 1 and I'm happy to see you've made some great improvements with version 2. Keep up the great work, I'm looking forward to a version 3 =)

  Are you sure? yes | no

Moritz Walter wrote 09/28/2014 at 14:47 point
Hey! Thanks for the feedback! A smoother fog layer can be achieved, by increasing the width of the flow formers. This will basically increase the width of the buffer air flow, which makes it less prone to turbulences created in the interaction with the ambient air. However, you'd at least need to double it, and doubling that means also doubling the flow rate in general, so you either double the number of fans or you'll need 80mm fans with ~100 CFM which would be very loud and also don't really exist I think.

  Are you sure? yes | no

Jasmine Brackett wrote 08/06/2014 at 20:59 point
Hello iamnotachoice, this looks really impressive. We'd love it if you could add a few more details to your project to give it the best chance of going through to the next round of The Hackaday Prize.

By August 20th you must have the following:
- A video. You've got several, so pick the one (or make a new one) which best describes your project. It should be less than 2 minutes long. Put it on YouTube (or Youku), and make it the only video in the 'External Links' section on your project page.
- At least 4 Project Logs
- A system design document
- Links to code repositories, and remember to mention any licenses or permissions needed for your project. For example, if you are using software libraries you need to document that information.

You should also try to highlight how your project is 'Connected' and 'Open' in the details and video.

There are a couple of tutorial video's with more info here: http://hackaday.com/2014/07/26/4-minutes-to-entry/

Good luck!

  Are you sure? yes | no

Moritz Walter wrote 08/06/2014 at 21:16 point
Thanks for the instructions, a better video and the other stuffs are on the way :)

  Are you sure? yes | no

Jared Sanson wrote 08/05/2014 at 06:39 point
Wow pretty cool!
Do you have problems with things getting damp in your room after running it for a while? I would assume spraying water mist into the air can't be that great for computers in the room!

  Are you sure? yes | no

Moritz Walter wrote 08/05/2014 at 07:57 point
Thanks! This is dry fog, so your hand does not get wet when you touch it. However, it does increase overall humidity in a (fully closed) room with about 250 ml per hour. That seems to be less than if you'd fill the room with transpirating programmers. So far no computers near it have failed, even after 20 hours of continuous operation.

  Are you sure? yes | no

Gabriel wrote 07/23/2014 at 18:33 point
Does the air speed have influence on image quality?

  Are you sure? yes | no

Moritz Walter wrote 07/23/2014 at 22:11 point
I tested different flow rates by pwm'ing the fans down, finding out that a high flow rate of air results in a better image. Though, increasing the flow rate means decreasing the fog density (thus perceived brighness of the image) and needs to be compensated by adding more foggers (increasing fog density again).

  Are you sure? yes | no

Rocket501 wrote 07/22/2014 at 23:25 point
Awesome project! I am interested in making this. How much does it cost? Do you recommend any of the ultrasonic atomizers?

  Are you sure? yes | no

Moritz Walter wrote 07/23/2014 at 18:03 point
Thanks! My recommendation would be: use the strongest and most rugged foggers you can find or afford for this application. I honestly cannot recommend the ones I used, still looking for better ones. Will be glad to see another build, feel free to contact me if something's unclear.

  Are you sure? yes | no

Adam Fabio wrote 07/15/2014 at 05:20 point
Hoverlay is looking better and better every time I see it! Thanks for submitting it to The Hackaday Prize! Your superstring video is just incredible! Don't forget to keep the updates rolling in for the contest - you might just find out how well hoverlay works in space!

  Are you sure? yes | no

Moritz Walter wrote 07/15/2014 at 10:05 point
Thanks a lot! Be assured I keep you guys updated!

  Are you sure? yes | no

anfractuosity wrote 06/01/2014 at 22:16 point
Very cool! I'm curious if you could use multiple projectors somehow to get 3D?

  Are you sure? yes | no

Moritz Walter wrote 06/01/2014 at 22:35 point
There is a nice effect you can get with this by shooting onto the screen with two projectors from back and front. That setup could at least show you an object from --- wait for it :) -- back and front. I also tested shooting in there with two projectors from slightly different angles. That however does not yield good R/L channel separation for the spectator (actually you wouldn't call that "channel separation" anymore), the fog is just too diffusing. Using a regular 3D projector with active shutter glasses gives good results though.

  Are you sure? yes | no

Mike Szczys wrote 03/29/2014 at 18:29 point
Early prototype is fantastic! Can the ultrasonic atomizers be used continuously for long periods of time?

  Are you sure? yes | no

Moritz Walter wrote 06/01/2014 at 22:38 point
Depends on your definition of "long periods of time". It works for many hours (gets warm though). The membrane wears out due to mechanical stress and scale sooner or later, but can be replaced in most foggers.

  Are you sure? yes | no

akohlsmith wrote 03/02/2014 at 22:06 point
Trèz cool. Is the top of the laminar flow distorting due to the ambient air not being still? I don't know enough about laminar flow to know the limitations.

  Are you sure? yes | no

Moritz Walter wrote 03/02/2014 at 23:25 point
Thanks! The quality of the fog wall is best in still air. Though the laminar flow is quite robust against slight ambient air streams, it's steadiness will decrease a little, but it still works good enough for getting a picture.

  Are you sure? yes | no

Similar Projects

Does this project spark your interest?

Become a member to follow this project and never miss any updates