Close
0%
0%

DIMER MKII, Large open robotic arm

An open design robotic arm, made with dc motors, 5 degrees of freedom, can pick up 5 Kg at 1.50 m and with the lowest cost posible

Similar projects worth following
This is the second version of DIMER (https://goo.gl/vvjqlu). This one would be totally replicable, so you can build it in your own home.

I want to build another one but with a few changes: it will be bigger, stronger, more accurate and totally replicable so everyone can build it. I choose dc motor because it's cheaper than servos or steppers with this size and capabilities. I will solve the problem of position with a closed loop system, using optic encoders to know the angles of every part. The structure will be made of aluminium and iron, and all the robot will be covered with 3d prints with good looking. I´ve started the design 2 months ago and I´ve already bought some motors, bearing and aluminium.

I want to control it with a FPGA because I'm learning about it in the engineering and I think that it could be perfect for a high velocity control, but at the beginning I'll start with an Arduino Mega.

I want to do this project because I´ve been studying a lot of robotic arms but I couldn´t find one with enough strength, accuracy and low price, so I´ve decided to build one.

I have experience designing 3d printed gears and I know that it can hold a lot of efforts, so I’m designing all the mechanical structure using aluminium, iron and 3d printings. I´ve studied the mechanical properties of square aluminium profiles and I can use them with having nothing to worry about; aluminium is cheap and it can be found in such a lot of shapes. The main problem was to make a central axis to hold the horizontal efforts of the rotation of the base, but as you can see at one of the logs I solved this problem joining 13 cylindrical profiles. I selected a 16x16mm square profile to make the structure of the arm and forearm. I made some tests and it can hold perfectly the weight without bending.

The accuracy in a 1.50 meters robot arm it's a big problem, as I studied in some subjects like control engineering,I can make a perfect closed loop system with a PID error control. Other way to improve the accuracy is to make the robot arm slower, but if we do that, it will take an eternity to go to the final position, so the accuracy of 0.1mm will lose part of it sense. So I have to look for a mid-solution between accuracy and speed.

I want to control it with an FPGA, I know that it's a very hard work but I started at college with this boards and I think that they are amazing. Additionally, if I can do a good description program it will be faster and better than an Arduino program. It´s true that at the beginning I will start using an Arduino Mega because is easier, but once I finish the hardware I’ll start with the FPGA control.

All the sensors will be optic encoder, because I´ve used potentiometers at the other robot arm and I had some problems like low accuracy reads and difficulties to make a stable voltage level. I’m searching several models, with a variety of resolutions, and the fact is that in some parts is better to pay more and have an absolute encoders rather than having to make a homing every time a switch on the robot.

I'm designing as fast as I can but I have to study and work in other projects. Anyway, I really hope to have it working perfectly at the end of this year.

So I’ll be publishing all the improvement and steps with tons of photos, sketches and videos. If you like this project, please follow me to see all the entire process.

All the 3D files are in autodesk inventor and FreeCad compatible format (.stp)

See you soon!

This is the last goal i achived:

I had to pause this project because of the engineering i'm doing, as soon as possible i'll continue


base joints.ipt

nº12

ipt - 164.00 kB - 05/20/2017 at 16:31

Download

base joints.stp

nº12

stp - 62.18 kB - 05/20/2017 at 16:31

Download

base gear.iam

nº11

iam - 91.50 kB - 04/18/2017 at 22:22

Download

base gear.stp

nº11

stp - 278.21 kB - 04/18/2017 at 22:22

Download

base bearing up.ipt

nº9

ipt - 183.50 kB - 04/18/2017 at 22:22

Download

View all 26 files

View all 7 components

  • Shoulder movement

    Antonio Regueira03/21/2017 at 12:43 0 comments

    I select dc motor beacuse are cheap and i can control it well with a closed loop control sistem, with optical encoders.

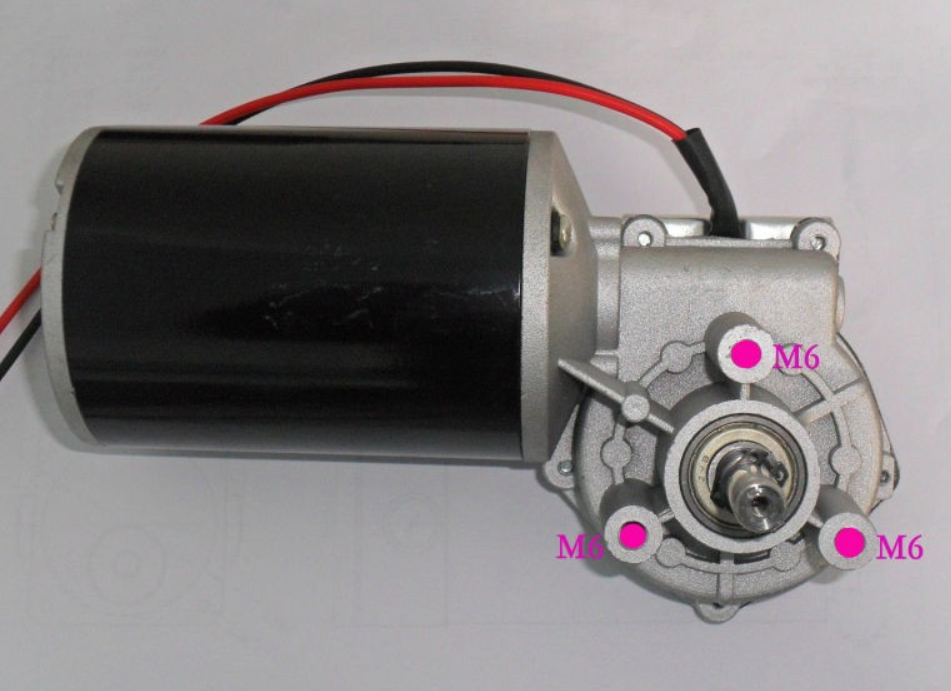
    I look for a lot of motors and finally find this one:

    https://es.aliexpress.com/item/stock-24-V-120W-worm-wheel-geared-motors-DC-gear-motor-with-a-free-Reversing-switch/32691489956.html?spm=2114.17010208.99999999.315.ROIJCF

    This a 24 V DC motor 40 RPM and 120 W, with a nominal torque of 25 N*m, i built a gear reducer to 4 RPM, as i saw in mechanical engineering books the torque is proportional to velocity, so 40/4=10 and 10*25=250 N*m. 1 Kg*m is equal to 9.8N*m so 250/9.8=25.5Kg*m. This is a lot of torque!

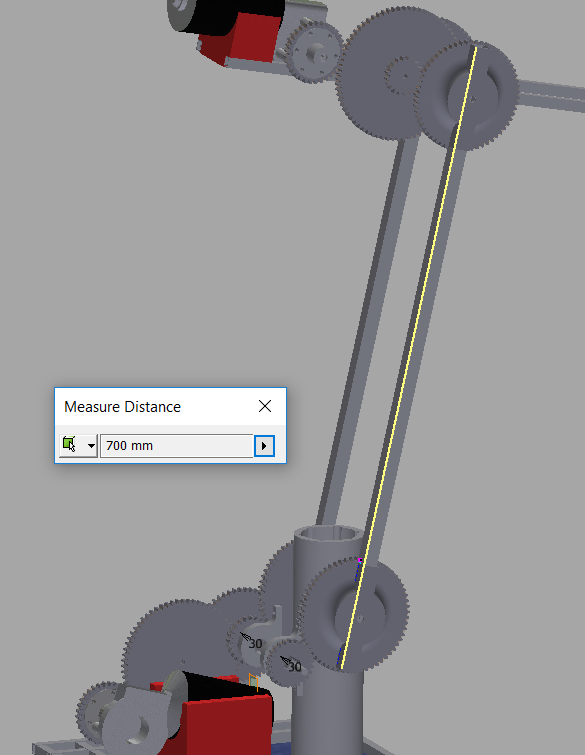
    The part form the shoulder to the elbow is 70 cm.


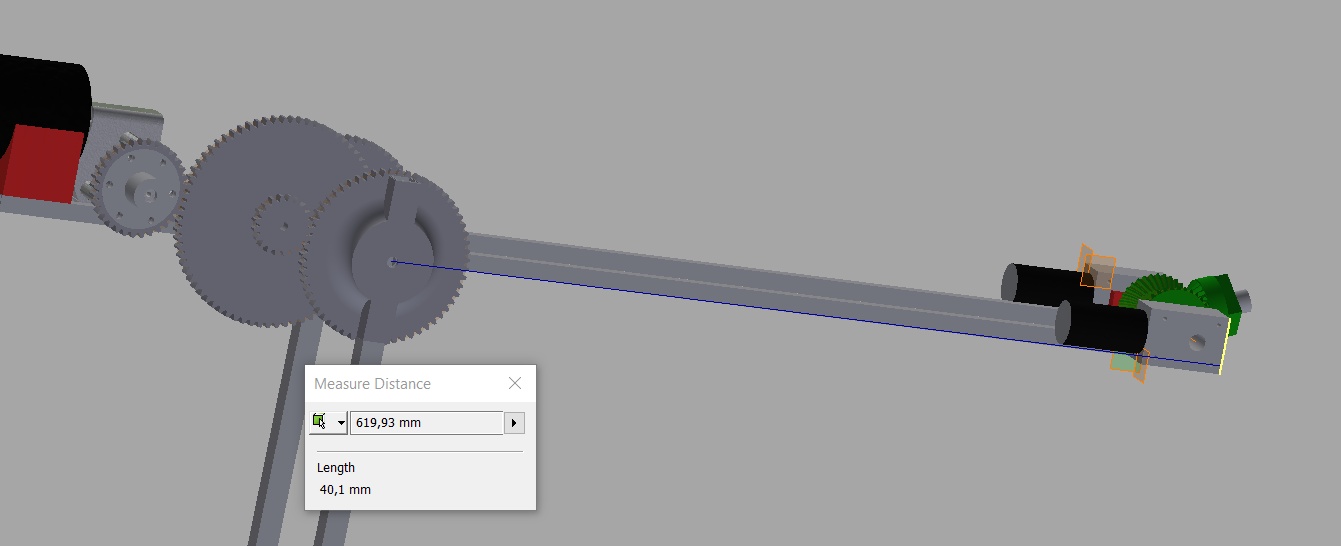
    This other part is about 62 cm plus the gripper(i didn't design it yet but more or less it will have about 20 cm).

    So i have 70+62+20=152cm. This is the maximus action radio of my robot arm.

    Then, if i have 25.5 Kg*m/1.5m=17Kg, i have to subtract the weight of the elbow motor and the wrist but i think i can pick up 5 Kg at the max lenght posible.

  • Horizontal movement

    Antonio Regueira03/21/2017 at 12:08 0 comments

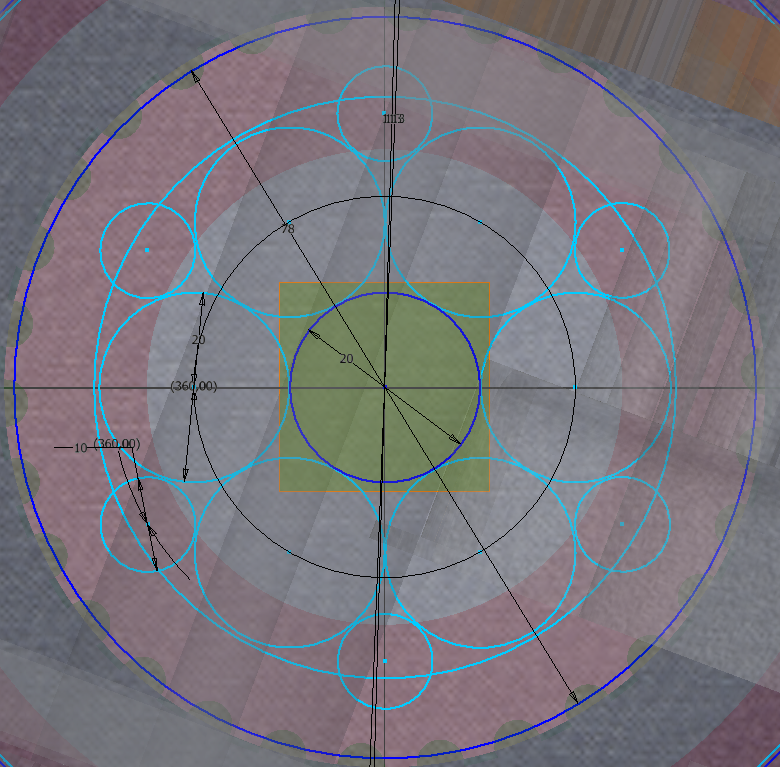
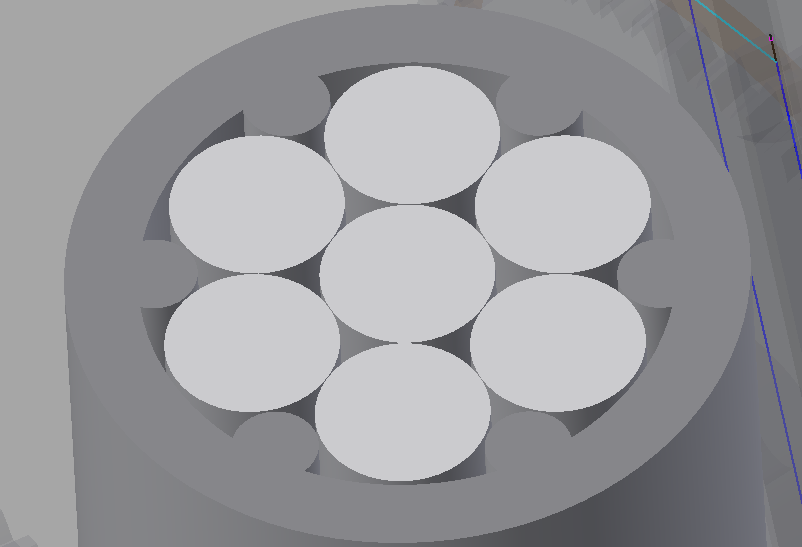
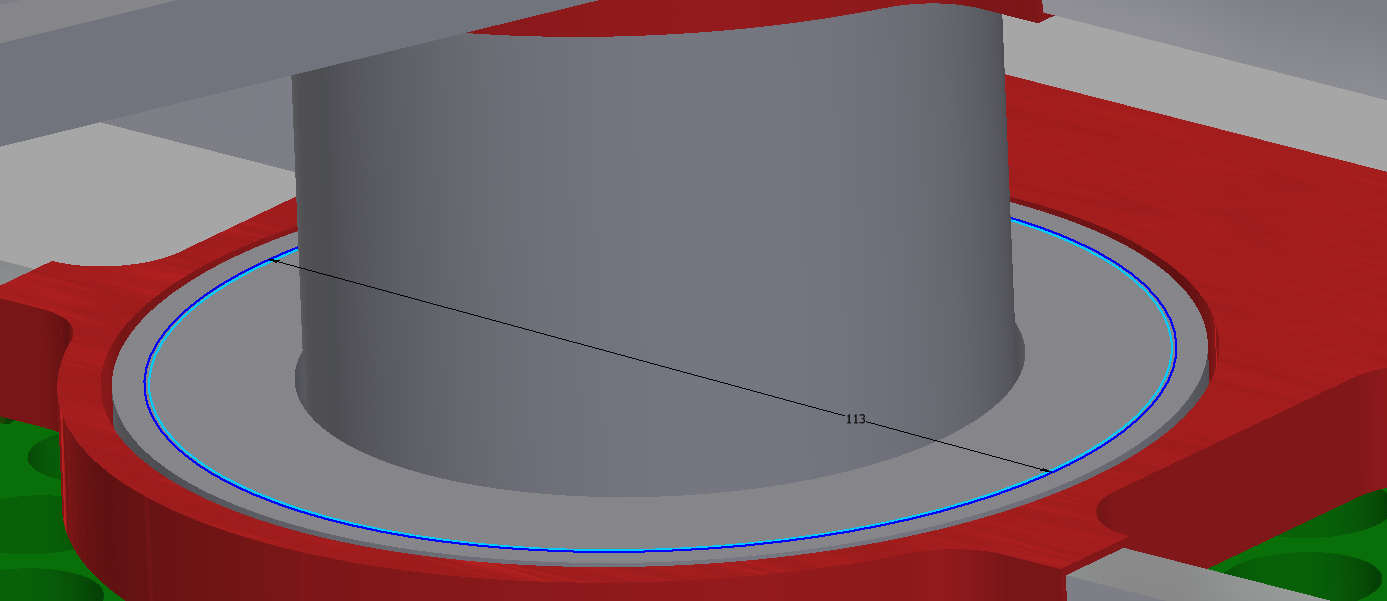
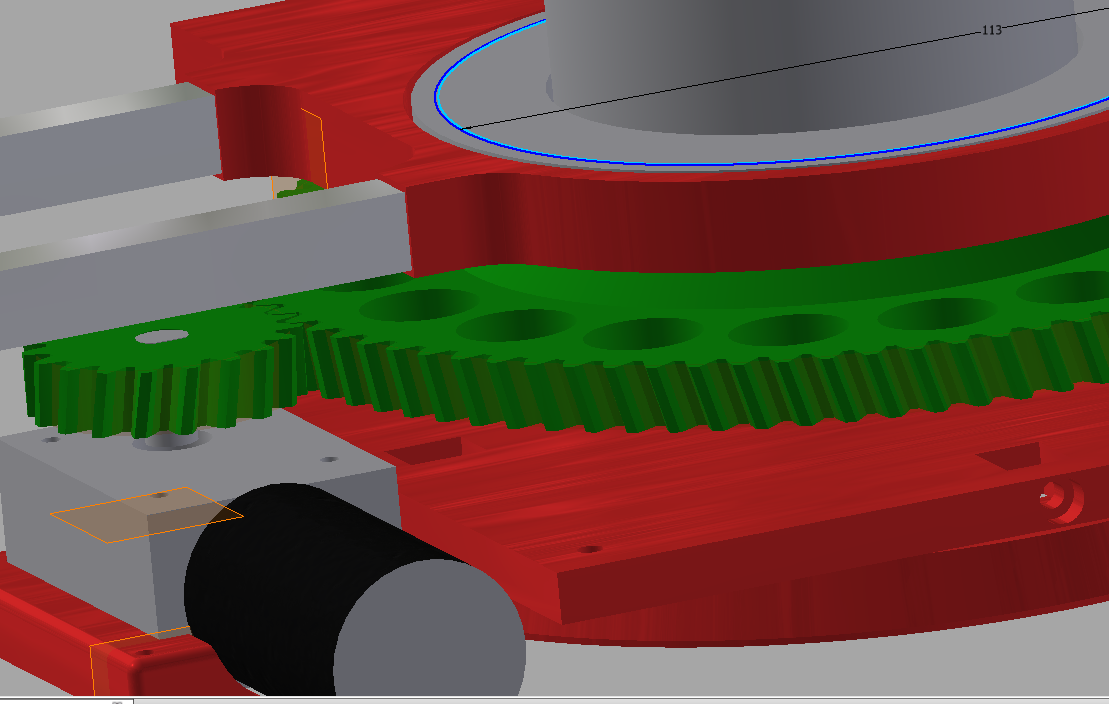
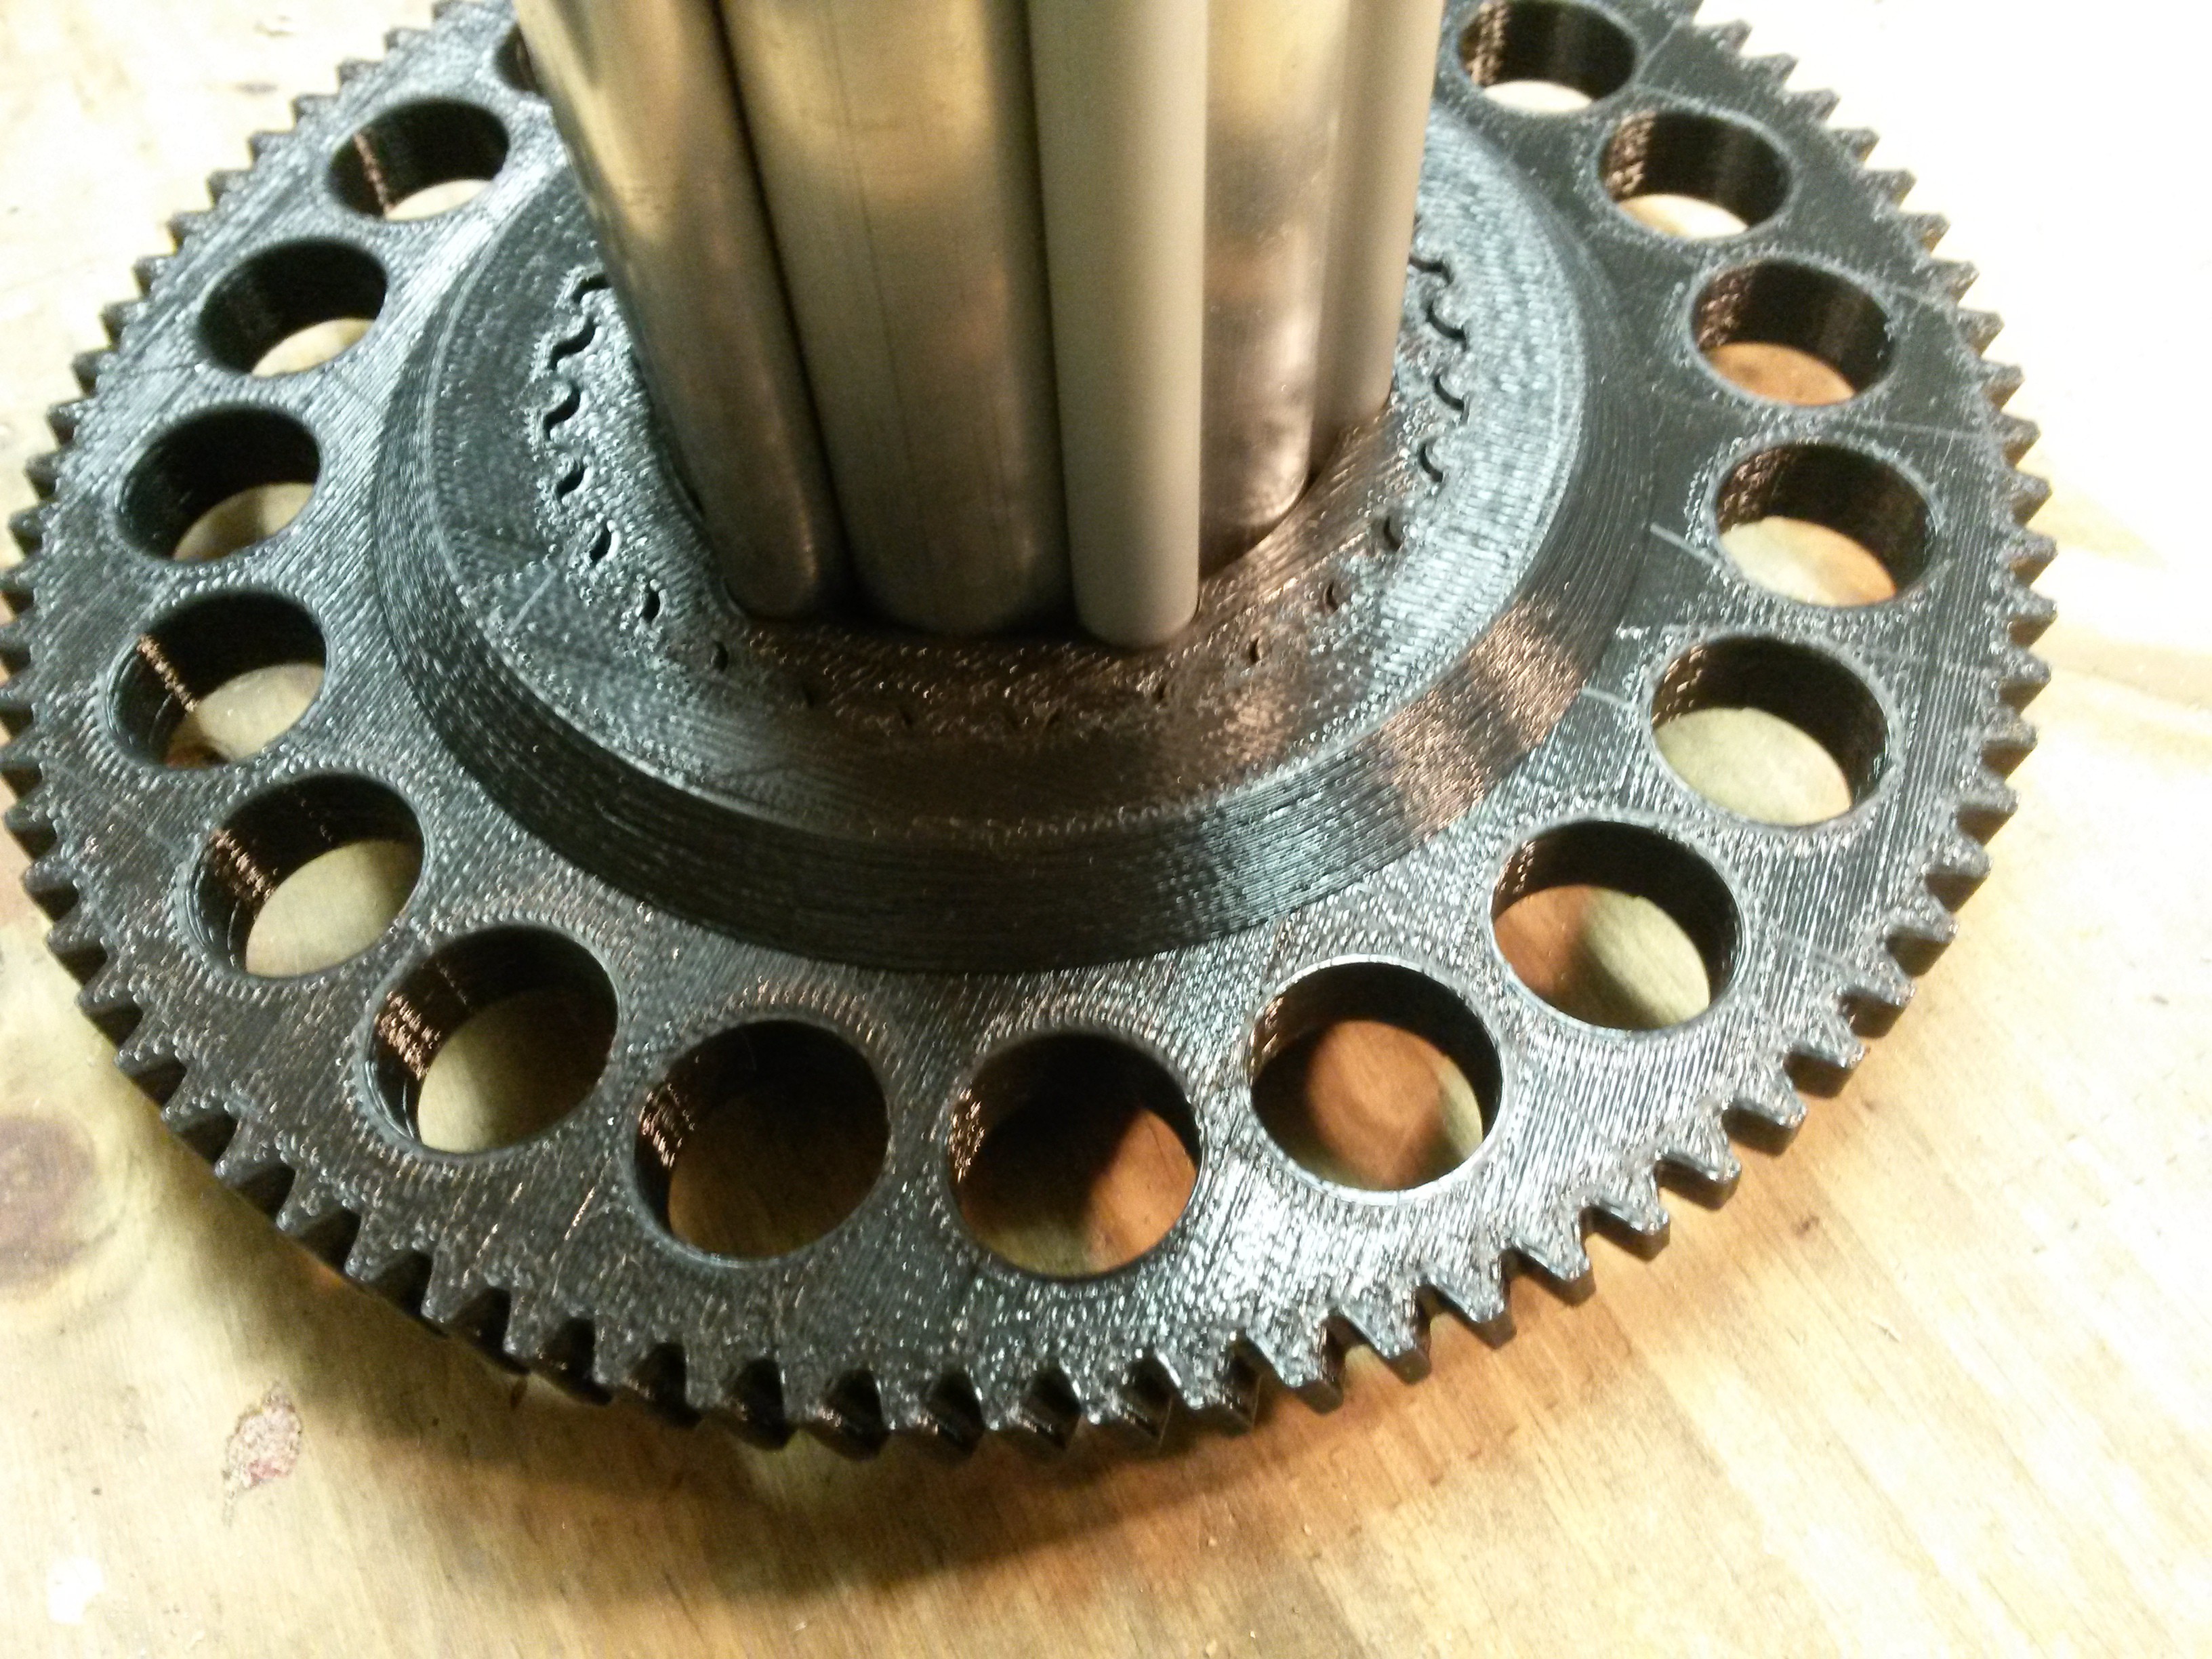
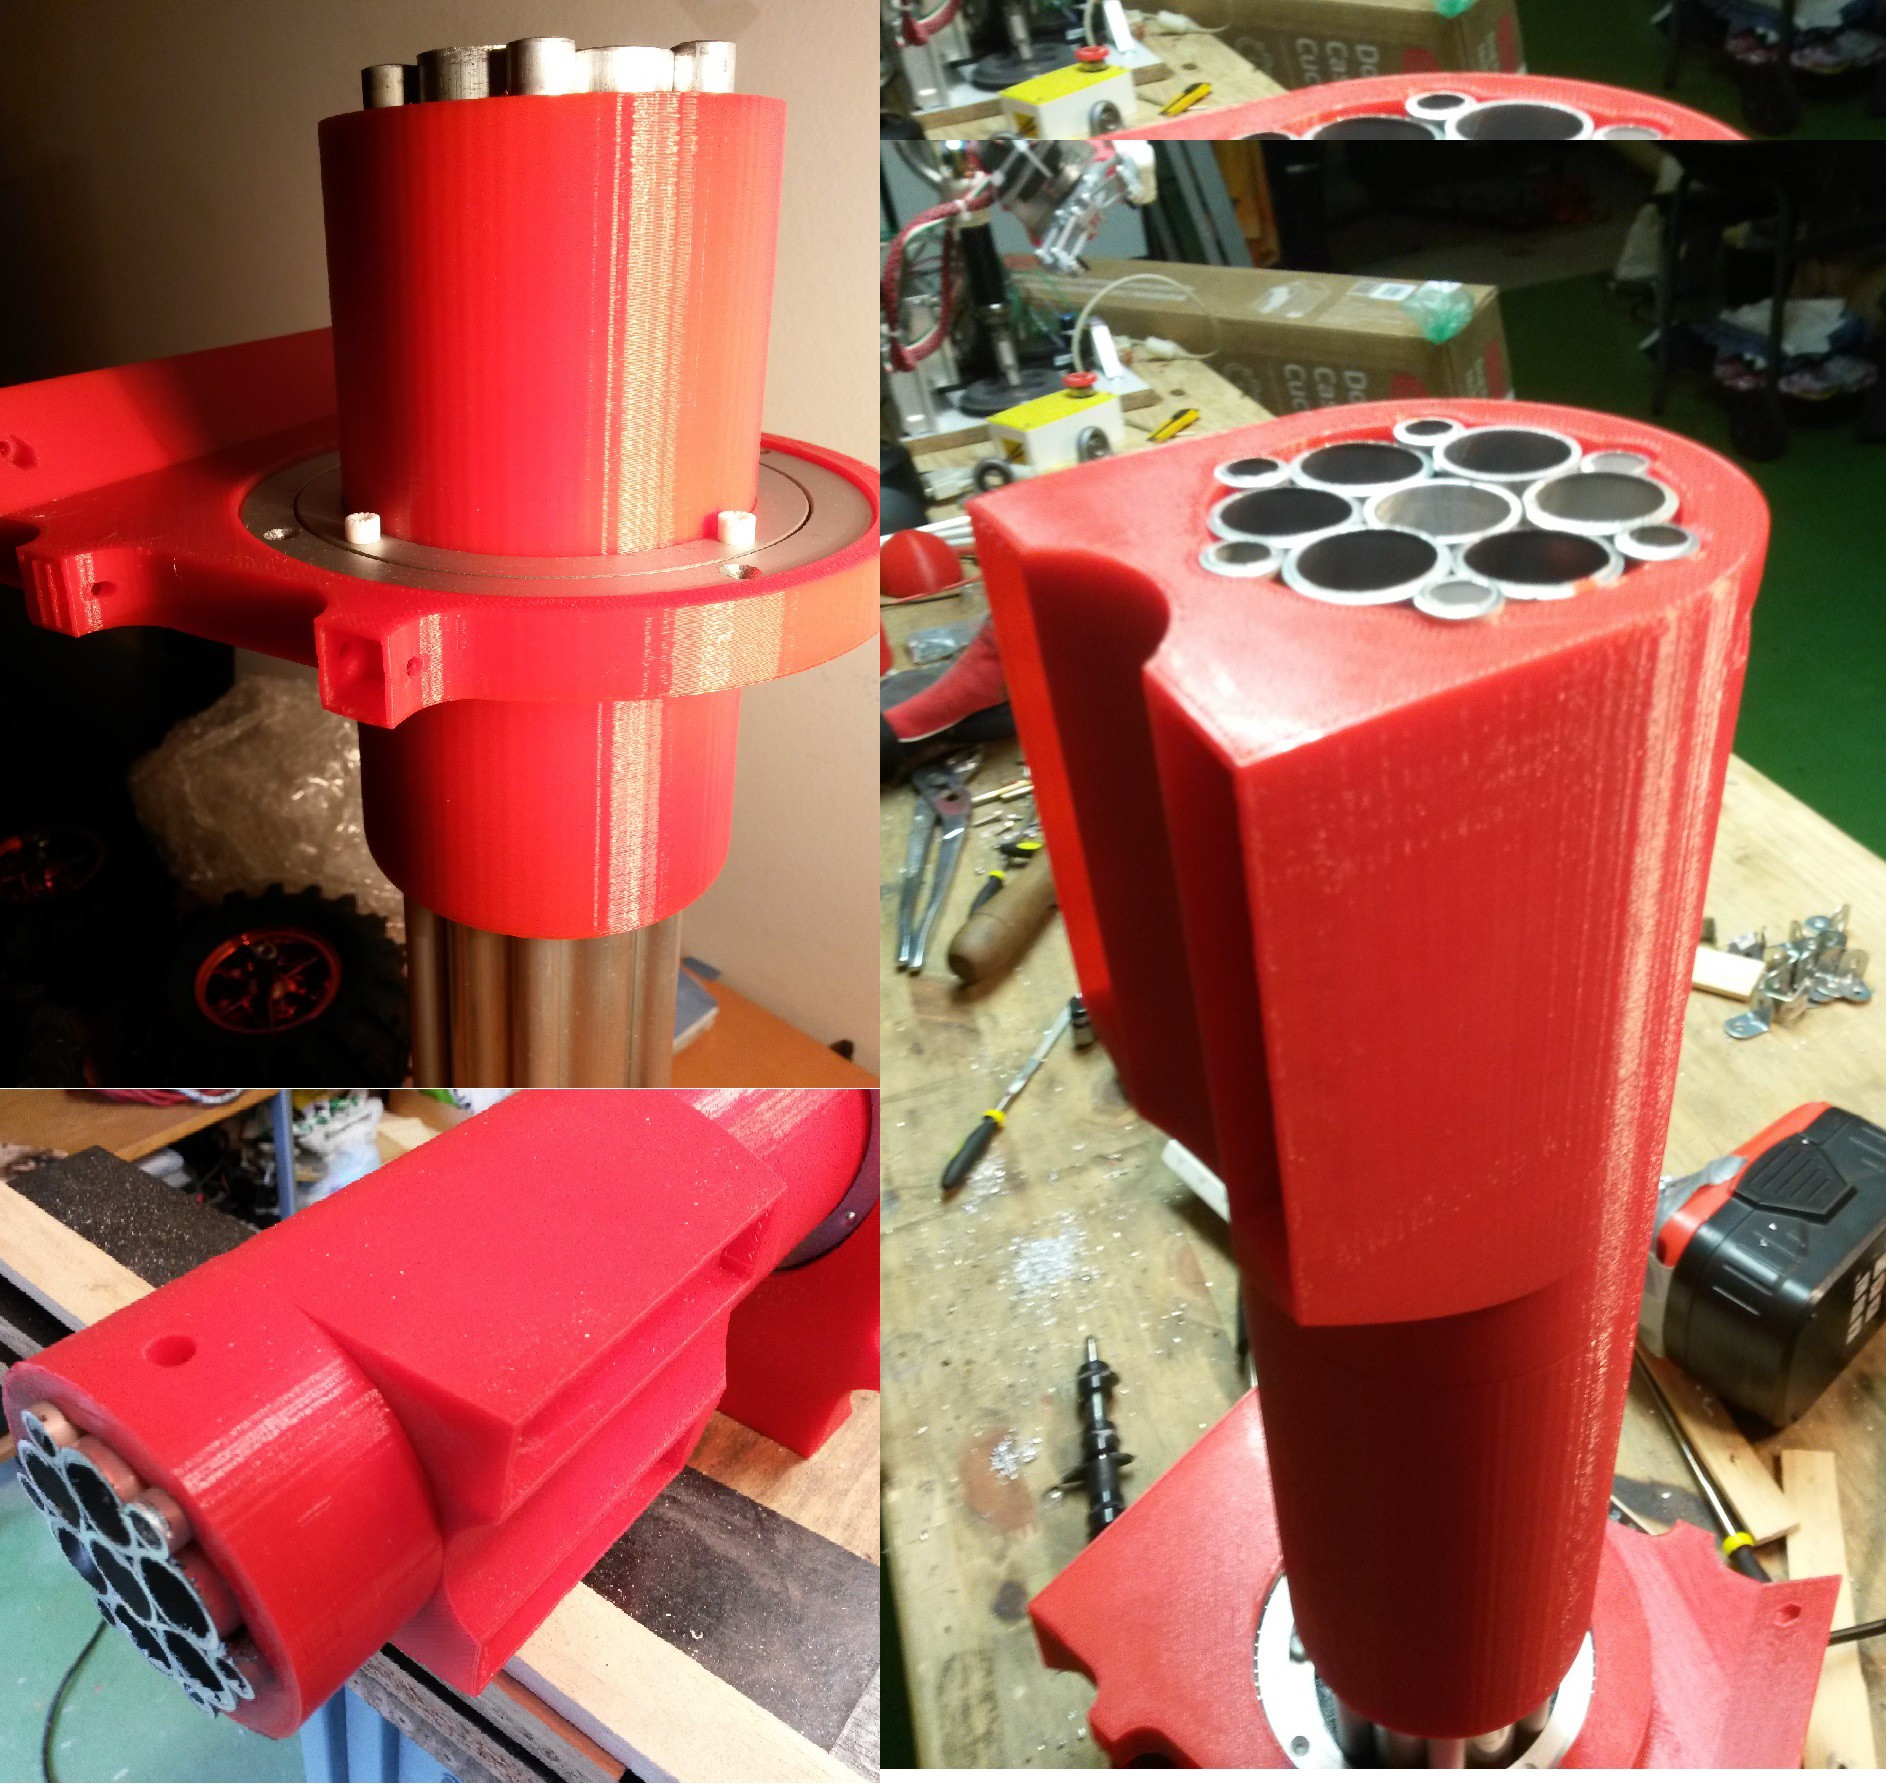
    The structure will be mostly in aluminium, with square profiles, i studied the capabilities of this kind of structure and it can work fine. i solve the problem with the horizontal movement with a set of cilindrical aluminium profiles, exactly with 7 of 20 mm of diameter and 6 of 10 mm, i choosed this solution because it is cheaper than a large cilindrical profile and has much more strenght, this set will be joined with 3d printed part and holded by 3 bearings, 2 lazy susan with an 80mm diameter and 1 to support the vertical force, in those 3 images you can see the system.

    The first one, is a 2d sketch, the possition of the profiles. The blue circle marks the limit of the 3d cover.

    The second one, you can see the cover, with 7 circular profiles of 20 mm and 6 of 10 mm, all the profiles will be empty so i will pass alt he cables to the rest of the arm by the central one.

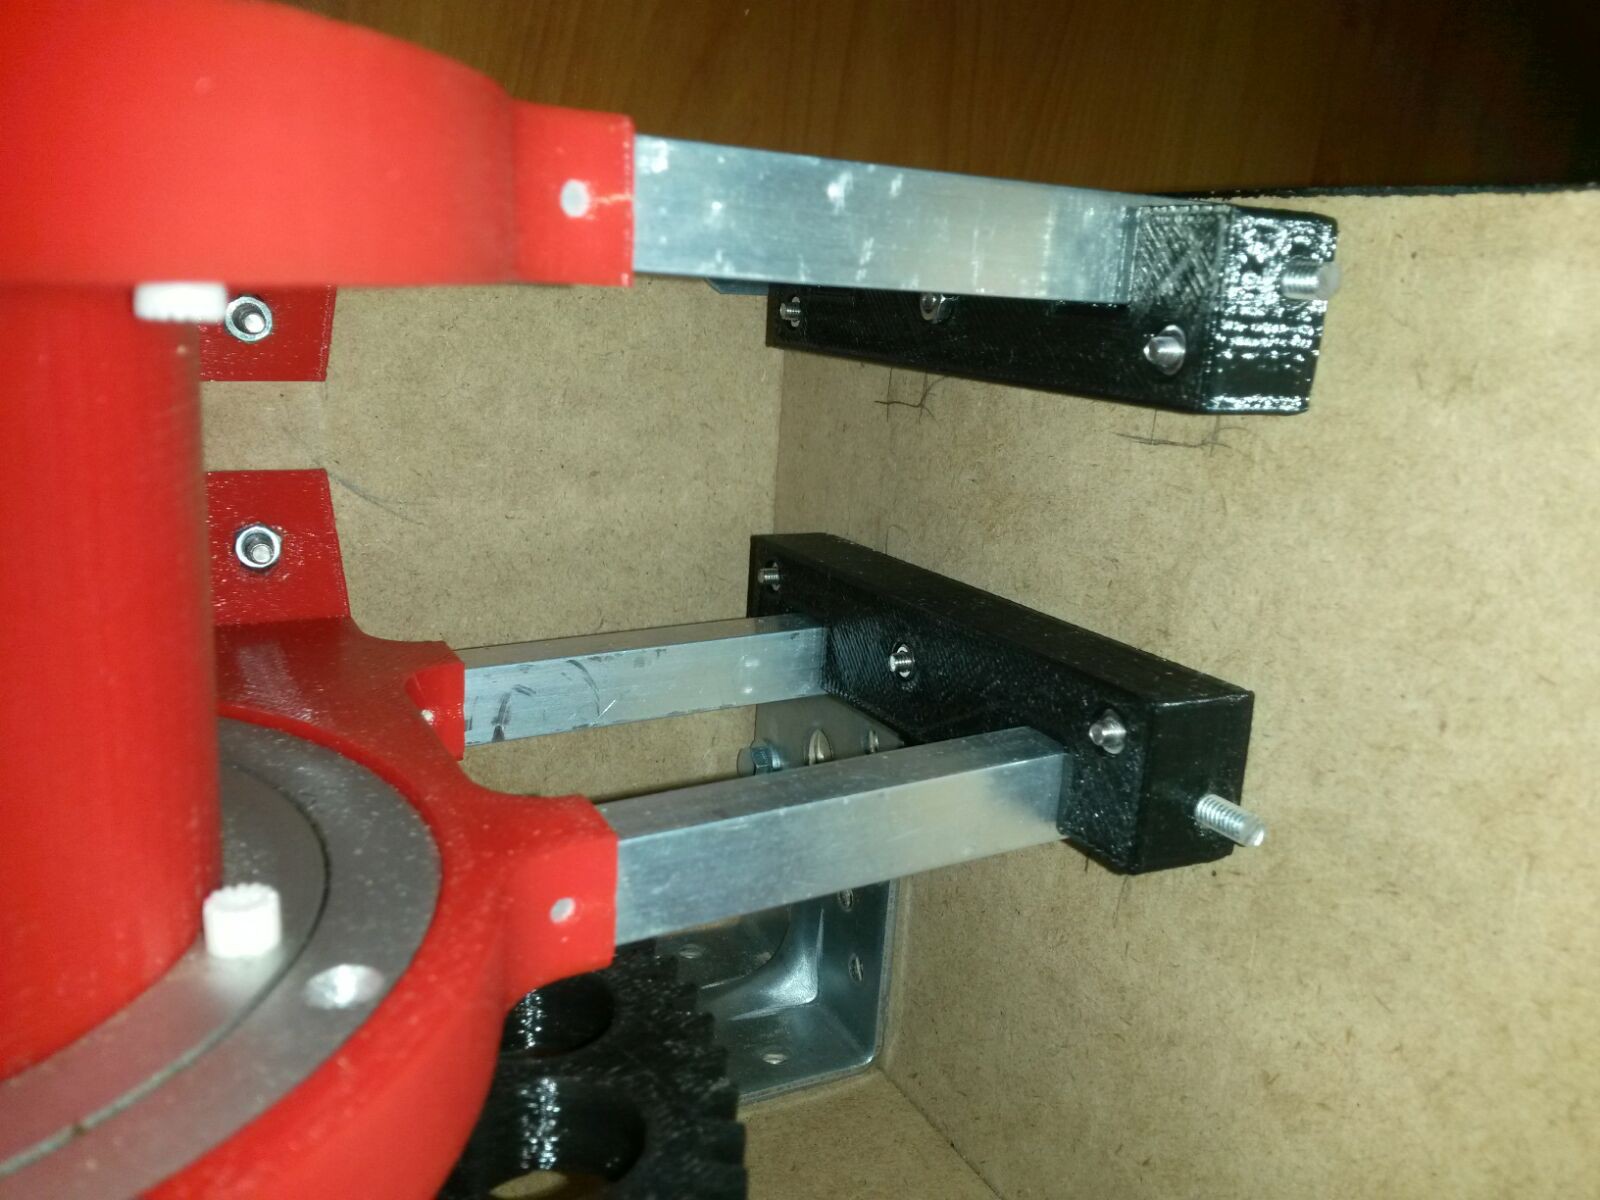
    In this image you can see the central column with a bearing, i choose a lazy susan with 80 mm of diameter, and it will be holded to the structure by a 3d piece(the red one) and some square profiles of 16 mm.

    This is the motor of the horizontal movement, with 3d printed gears, under the central column there is an encoder so i can know the position.

View all 2 project logs

  • 1
    Step 1

    Central axis:

    Items needed:

    1 - Cilindrical aluminium pipe // 20 mm diameter // lenght: 35 cm // Units: 7

    2 - Cilindrical aluminium pipe // 10 mm diameter // lenght: 35 cm // Units: 6

    3 - Printed parts // numbers : 1 and 2 (Central base gear and base hold)

    Instructions:

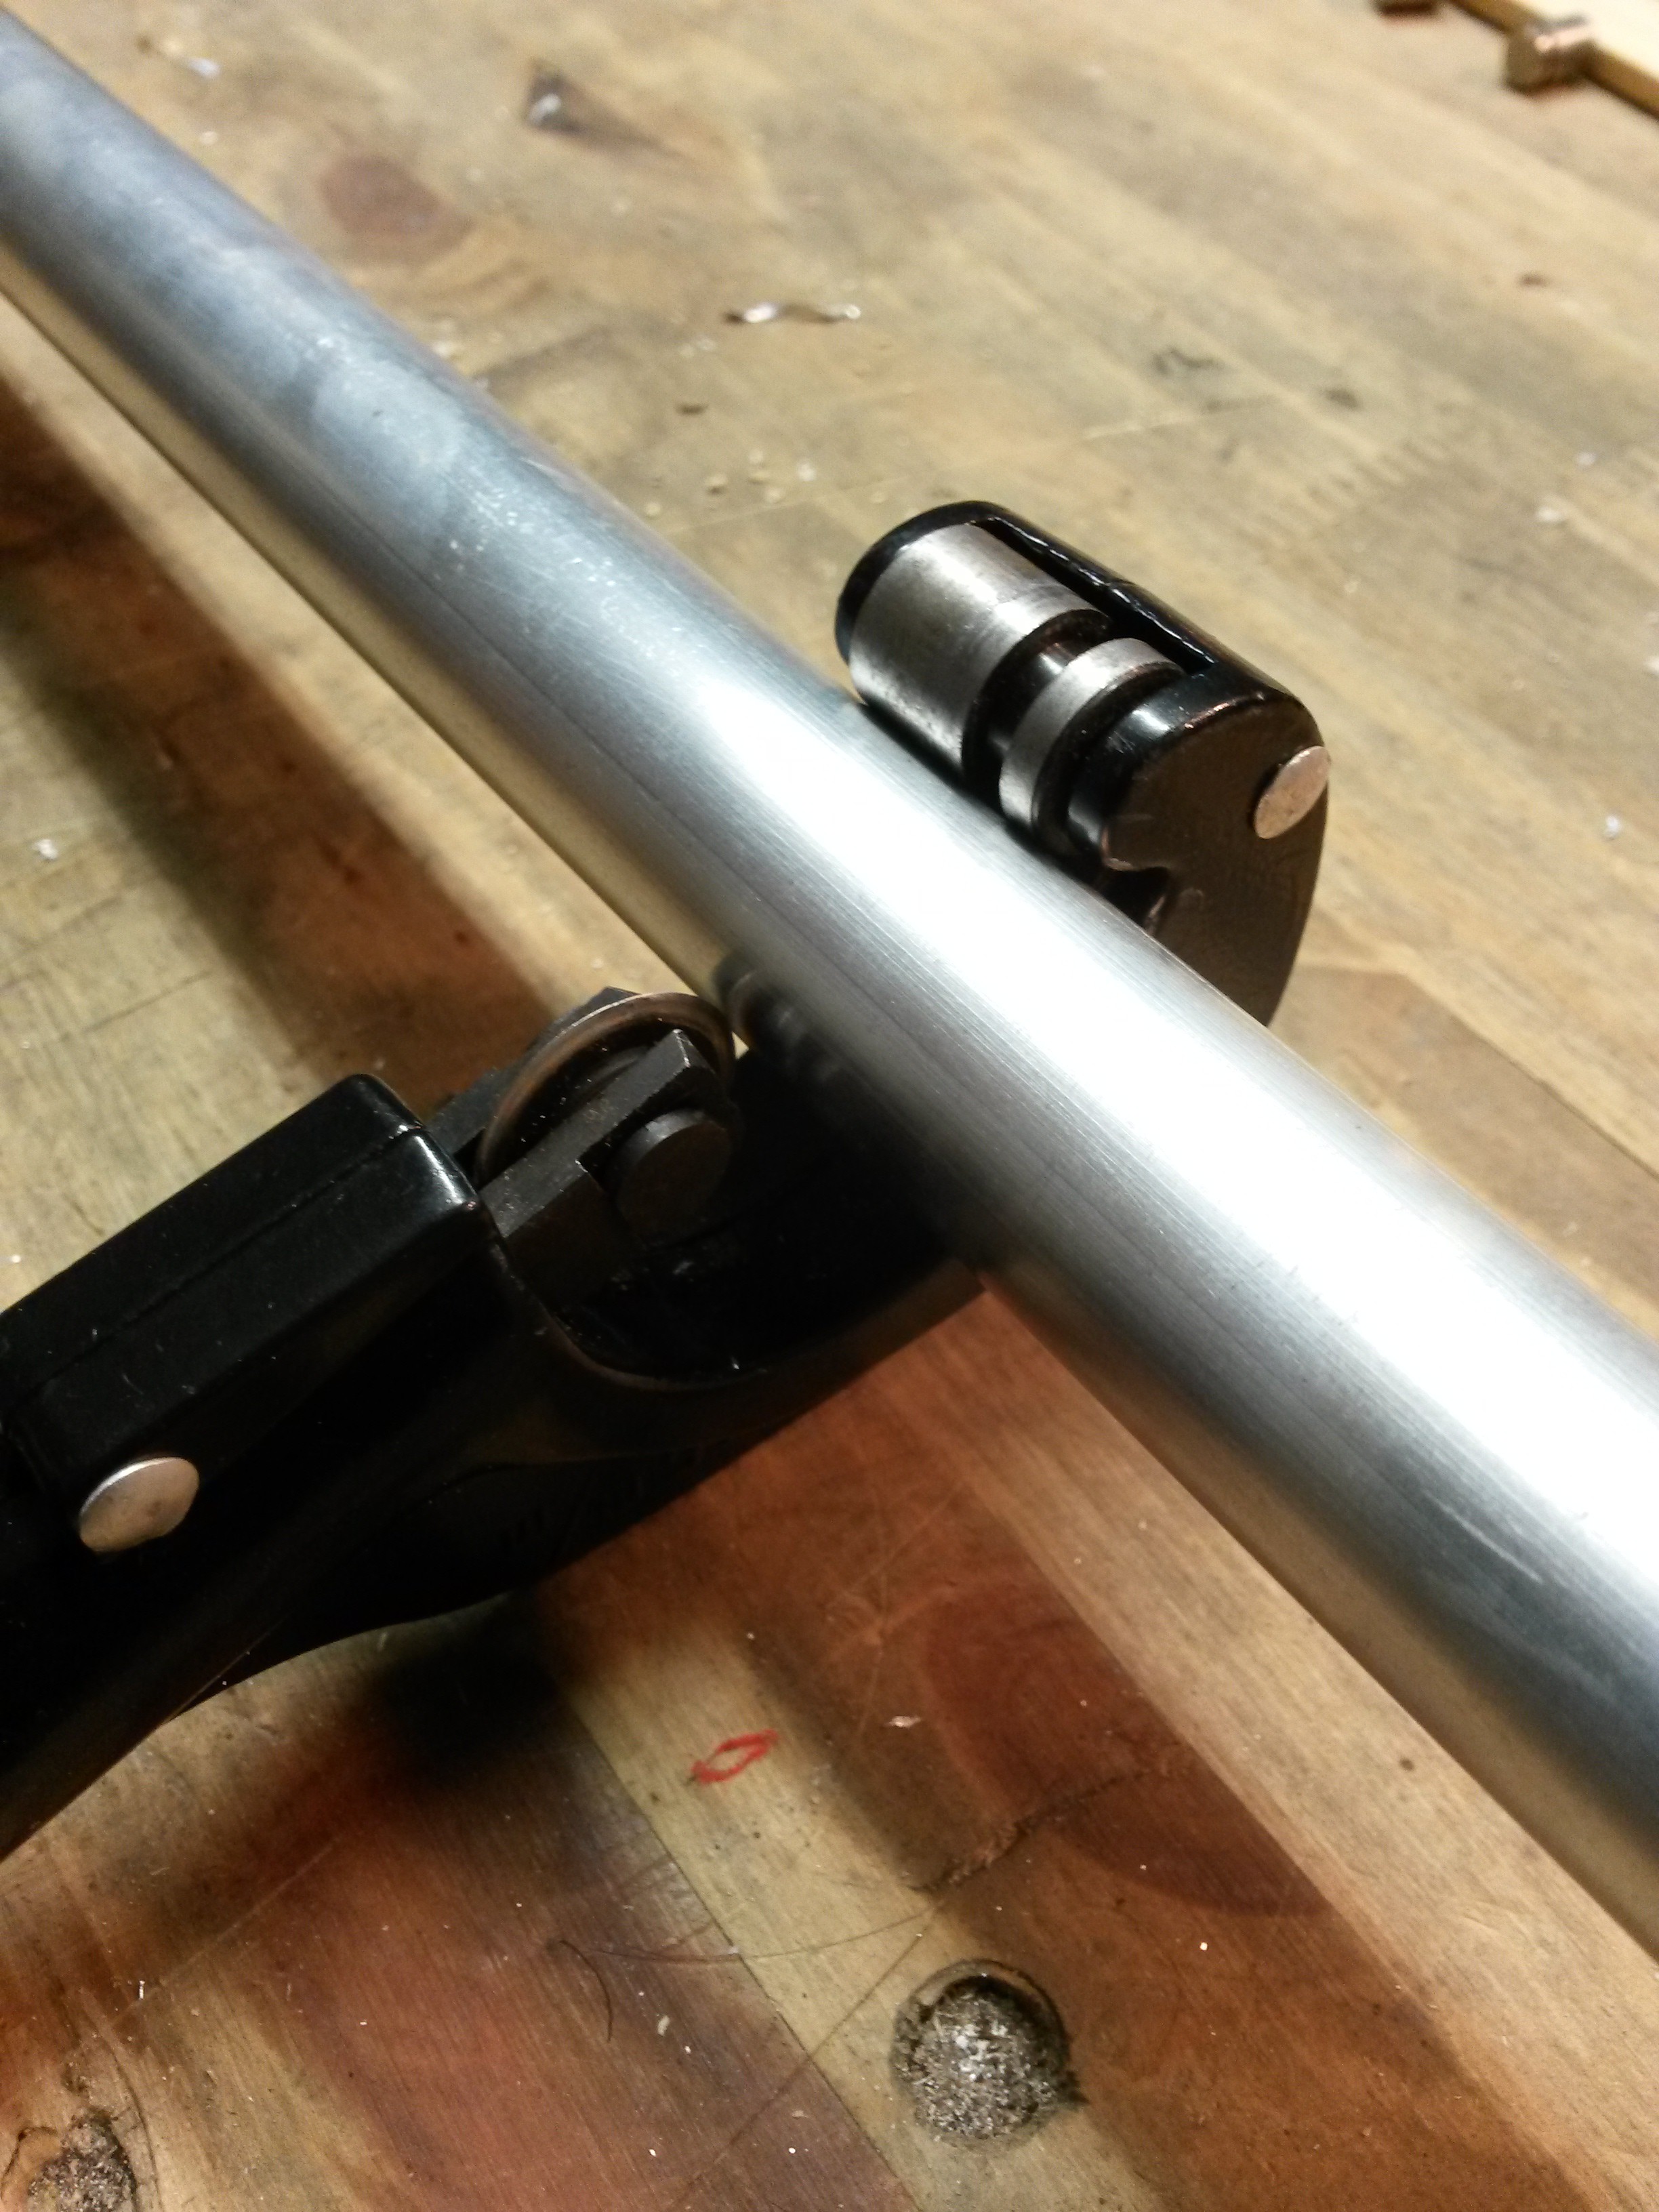
    -First you have to cut the pipes to 40 cm, i used a pipecutter like this one:

    pipecutter

    When you have all the pipes, put all together inside the 3D base hold, i put two screw with a few glue to make the joint stronger.

    Joint the central base gear and the hold base just pushing

  • 2
    Step 2

    3D printed cover and holders of central axis

    Items needed:

    1 - Printed parts // numbers : 3,4,5,6 and 7 (covers and holders of central axis).

    2 - Rubber Head Hammer.

    Instructions: (important: must put the lazy susan bearings with covers into the axis before other 3D parts)

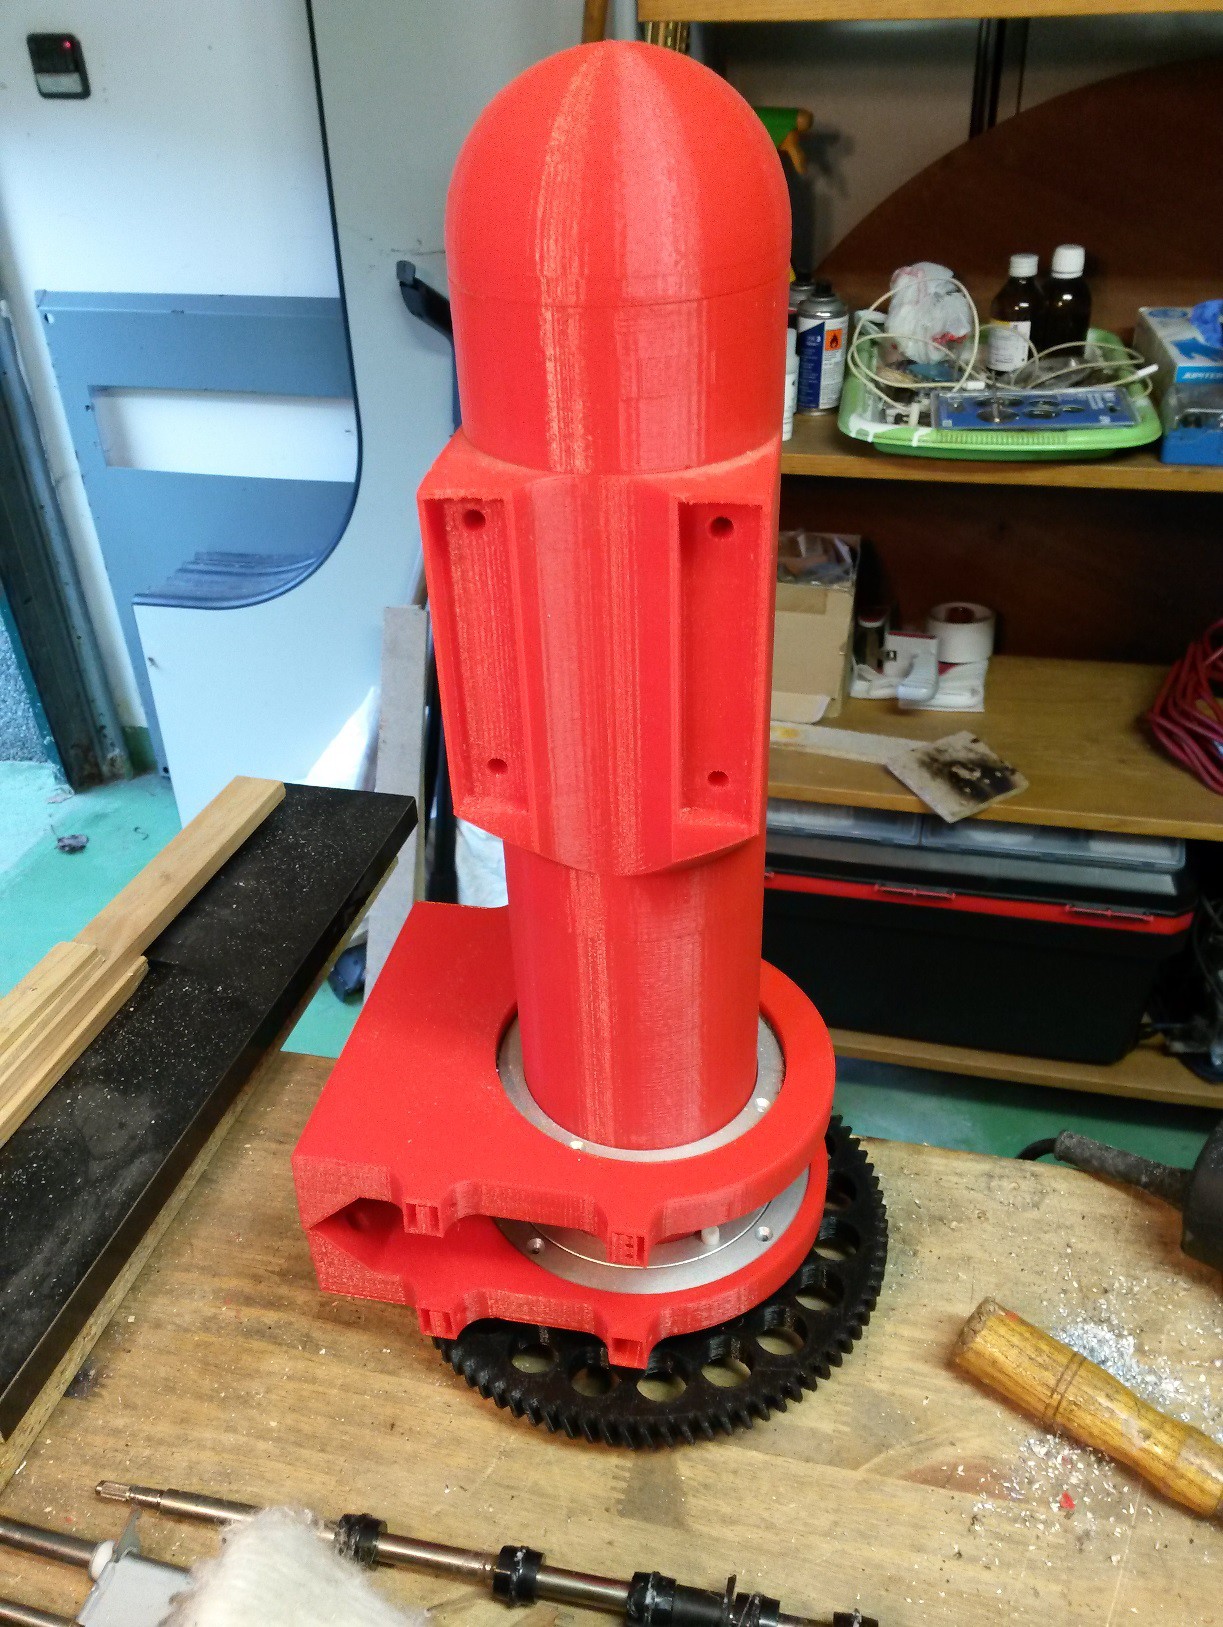
    First put lazy susan bearings in their position ( on 3D nº7), then introduce the following 3D parts around the central axis in this order, nº3, lazy susan, nº5 and nº6 like the following images.

    See that i put the lazy susan one opposite to the other, because i want one bearing in the highest possible position in the base box.

    I used a rubber head hammer to put this 3D parts, you must have caution in order to not break any part, it's a bit dificult to insert the 3D parts, but i made this because it helps to distribute the forces supported by the axis.

    So you must have this:


  • 3
    Step 3

    Base

    Items needed:

    1 - Printed parts // numbers : 8, 9, 10, 11 and 12 (base bearing up and low, motor base holder, base gear, and base joints).

    2 - m3 x 10mm and nuts, units: 4

    3 - m4 x 30mm and nuts, units: 8

    4- m5 x 12mm and nuts, units: 16

    5- wood screws, units: 8

    6- corner braces for wood screws, units: 4

    7- corner braces for m5 screws, units: 4

    8- vertical force bearing(on components)

    9- 12x10 mm aluminum frame

    10- m3 x 25 and nuts, units: 12

    11- m4 x 115 mm threaded rod, units: 4

    Instructions:

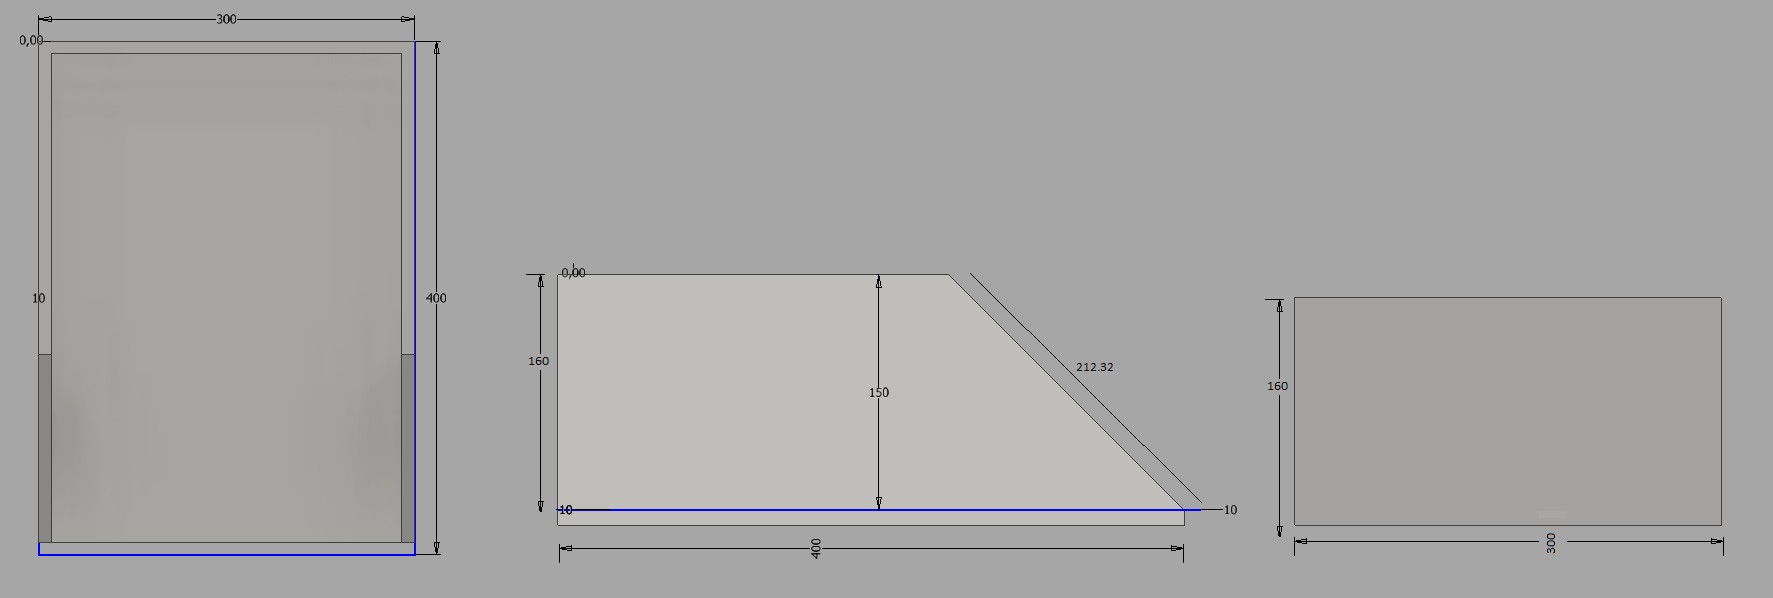
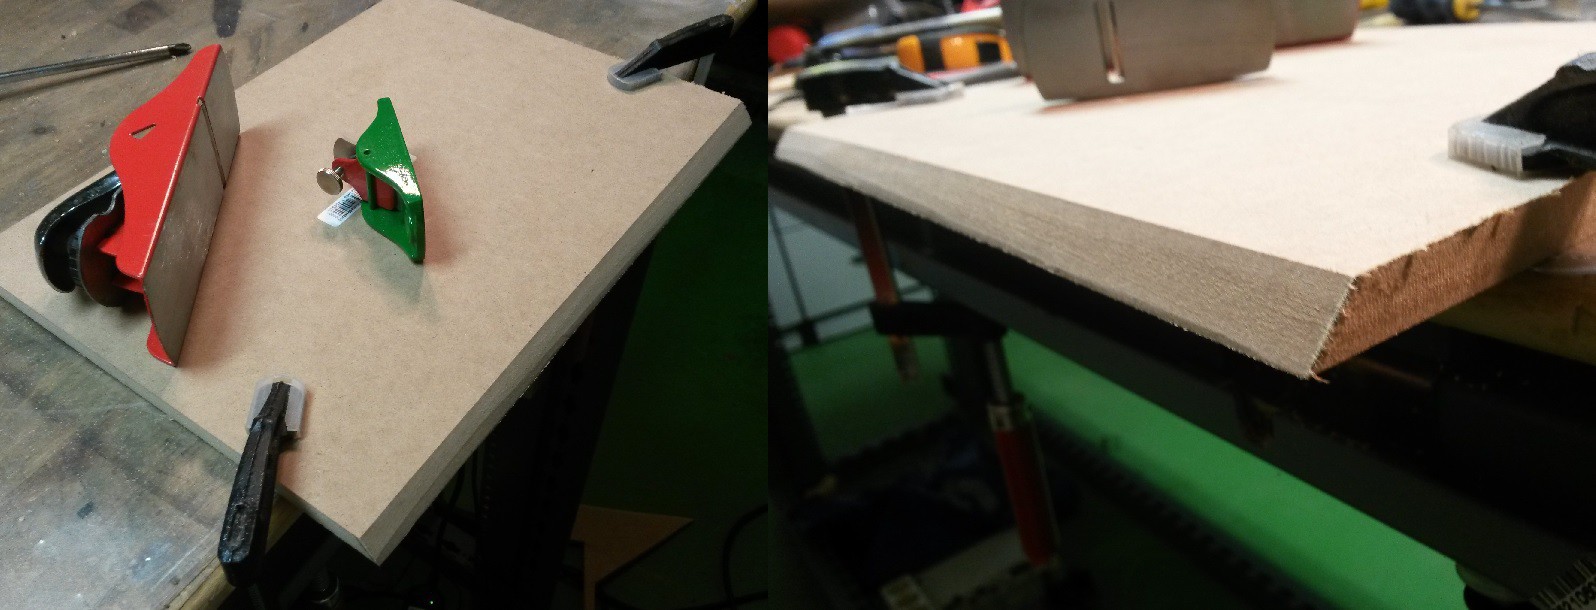
    First you must cut the wood with the following dimensions:

    I use mdf panel to build this 'box' i selected the 10mm width one, i think it can be hard enough to hold the robotic arm, because I'll go around it with aluminum, but this is the second part of the base.

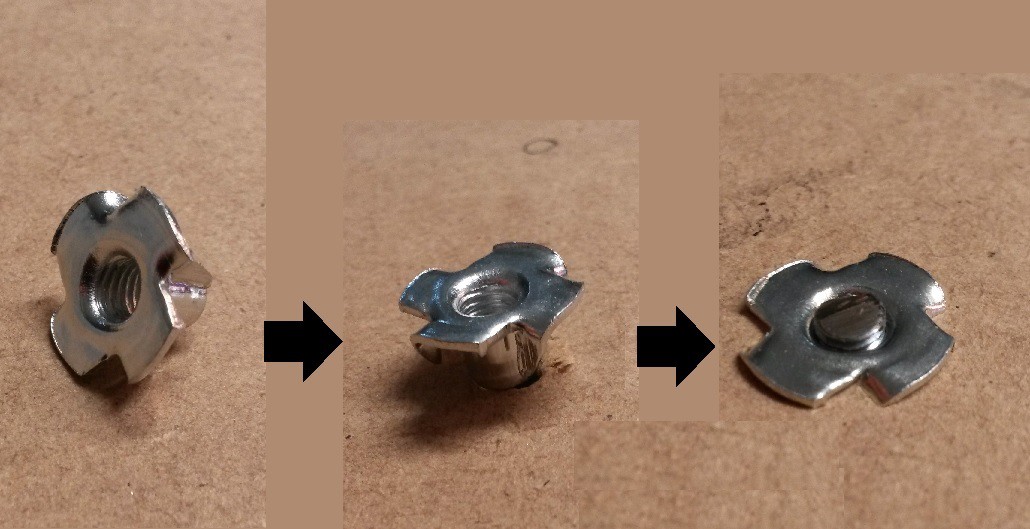
    I did the angle handmade, but with a cnc it will be more accuracy. I selected this kind of nuts for the lower part of the base, it is simple to use and seems to have very good result, i put the link where y bought them on components needed. You need 8xm5 and 8xm4.

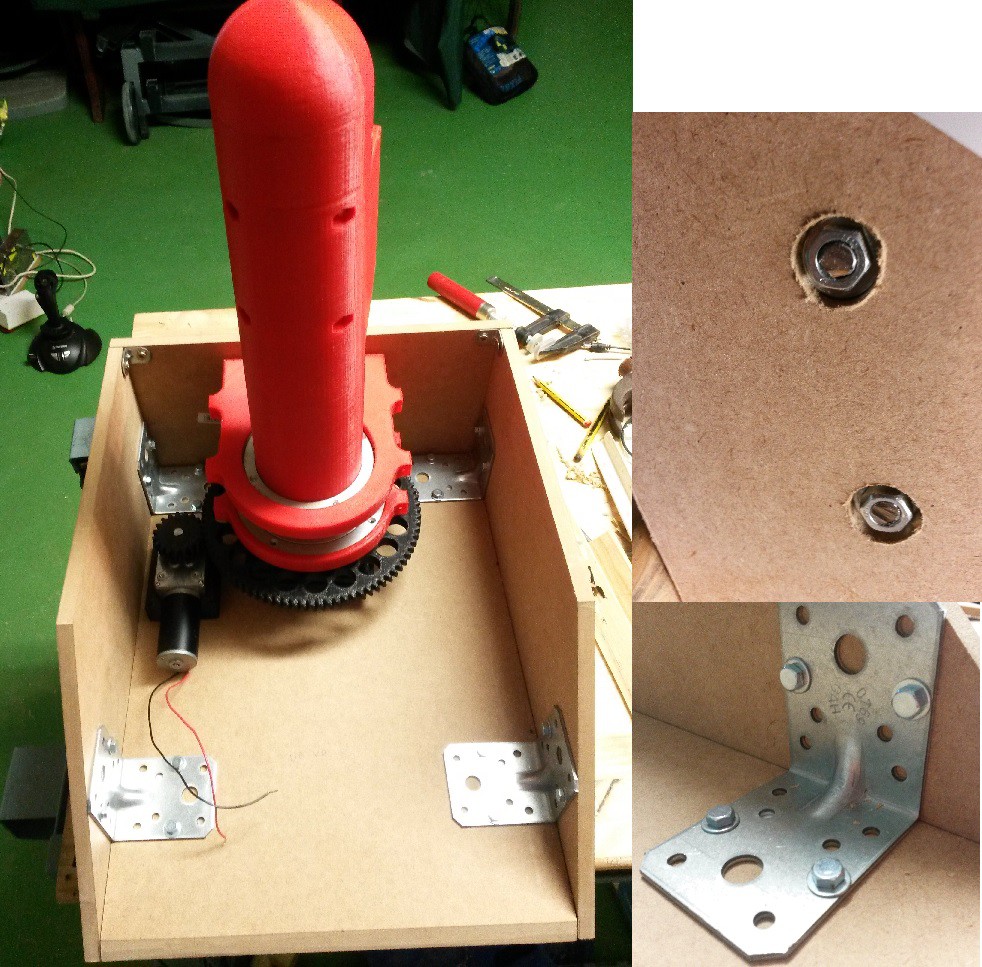
    Finally I put the corner braces at the best position, it depends on wich corner you used, but think about of putting the dc source, arduino, motor drives and some extra space to future aplications and select corners with the idea of be hard enought to support all the forces of the robot arm.

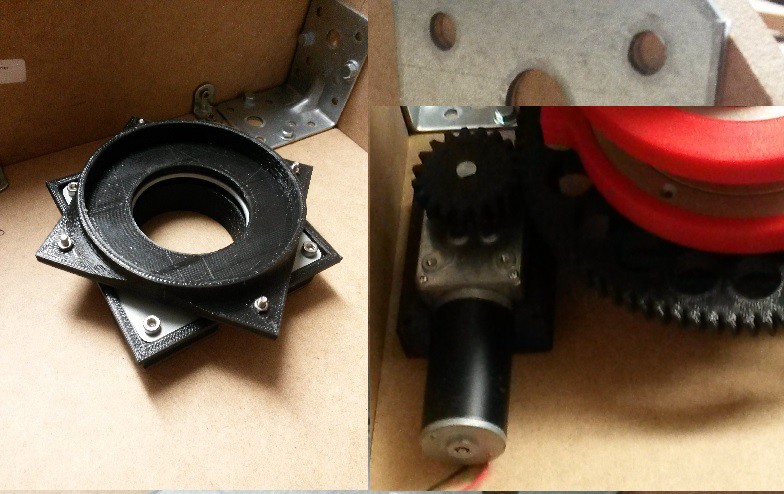
    Now that the base is finished you can screw the motor and the bearing like the following pictures:

    Next you have to cut some 12x10 aluminum frames to hold the lazy susan bearing to the bases's walls, it must be around 85mm each one(8units) but it depends of the positions of the arm(i put it in the middle).

    Then you must use the base joints(nº 12), put the joint into his positions and make the holes into the wood. I make the holes to be used with M3 screws and a M4 threaded rod.

    So you must have something like this:

    Now to finish the base, we only need an aluminum platten to make the walls stronger, as fast as i can y upload the last part of the base.

    See you soon!

View all 3 instructions

Enjoy this project?

Share

Discussions

Similar Projects

Does this project spark your interest?

Become a member to follow this project and never miss any updates