 Doruk Kumkumoğlu
-
11Modify The Ribbon Cable
![]()
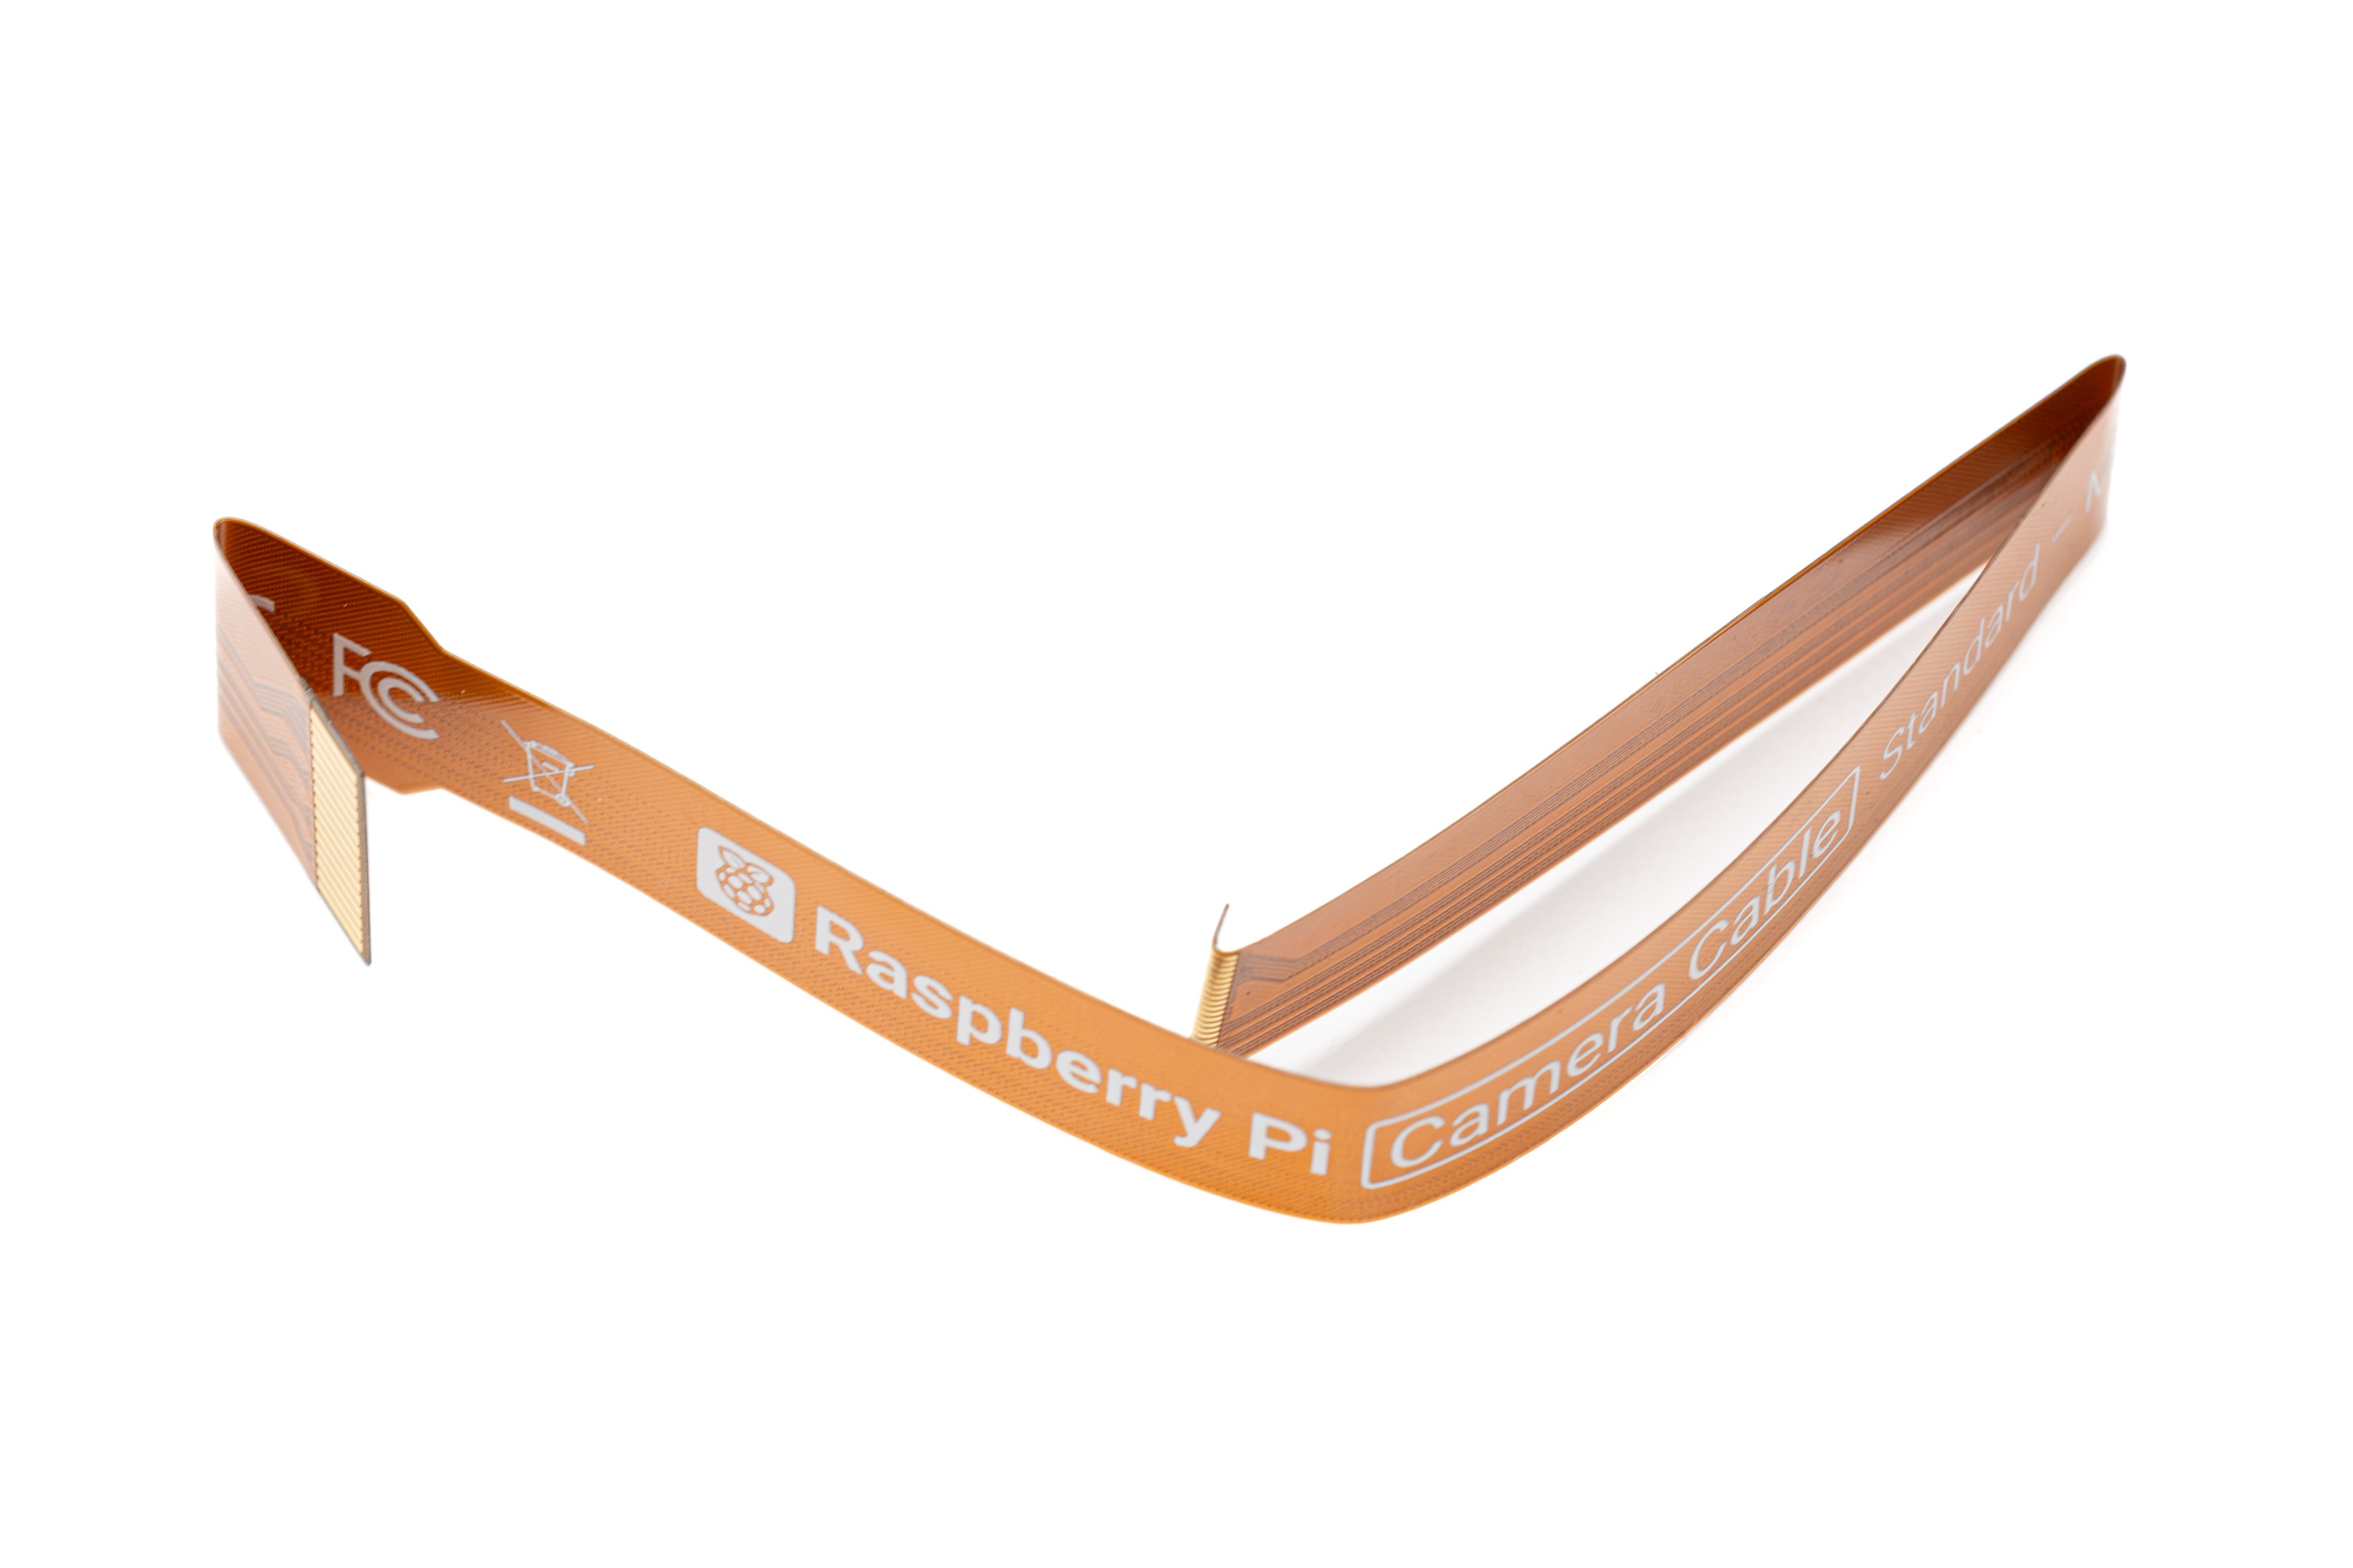
The Raspberry Pi connection end (narrow end) of the camera adapter ribbon cable has a plastic part that needs to be modified.
Very carefully push a sharp blade under this plastic part, little by little, cut the adhesive holding the plastic part to the ribbon cable. Be careful not to scrape into the ribbon cable. When you reach the half point, cut off the peeled off portion as shown in the photo. Keep the cut off part. This modification allows the end of the ribbon cable to be folded closer to the Raspberry Pi camera port.
-
12Fold The Ribbon Cable
![]()
Fold the camera adapter ribbon cable 4 times exactly as shown in the photo.
Fold once and let go, don't fold back and forth on the same spot, this will break the cable.
Don't fold the cable completely flat, this will also break the cable. There should be a small curvature on the folds as shown in the photo.
-
13Connect The Ribbon Cable
![]()
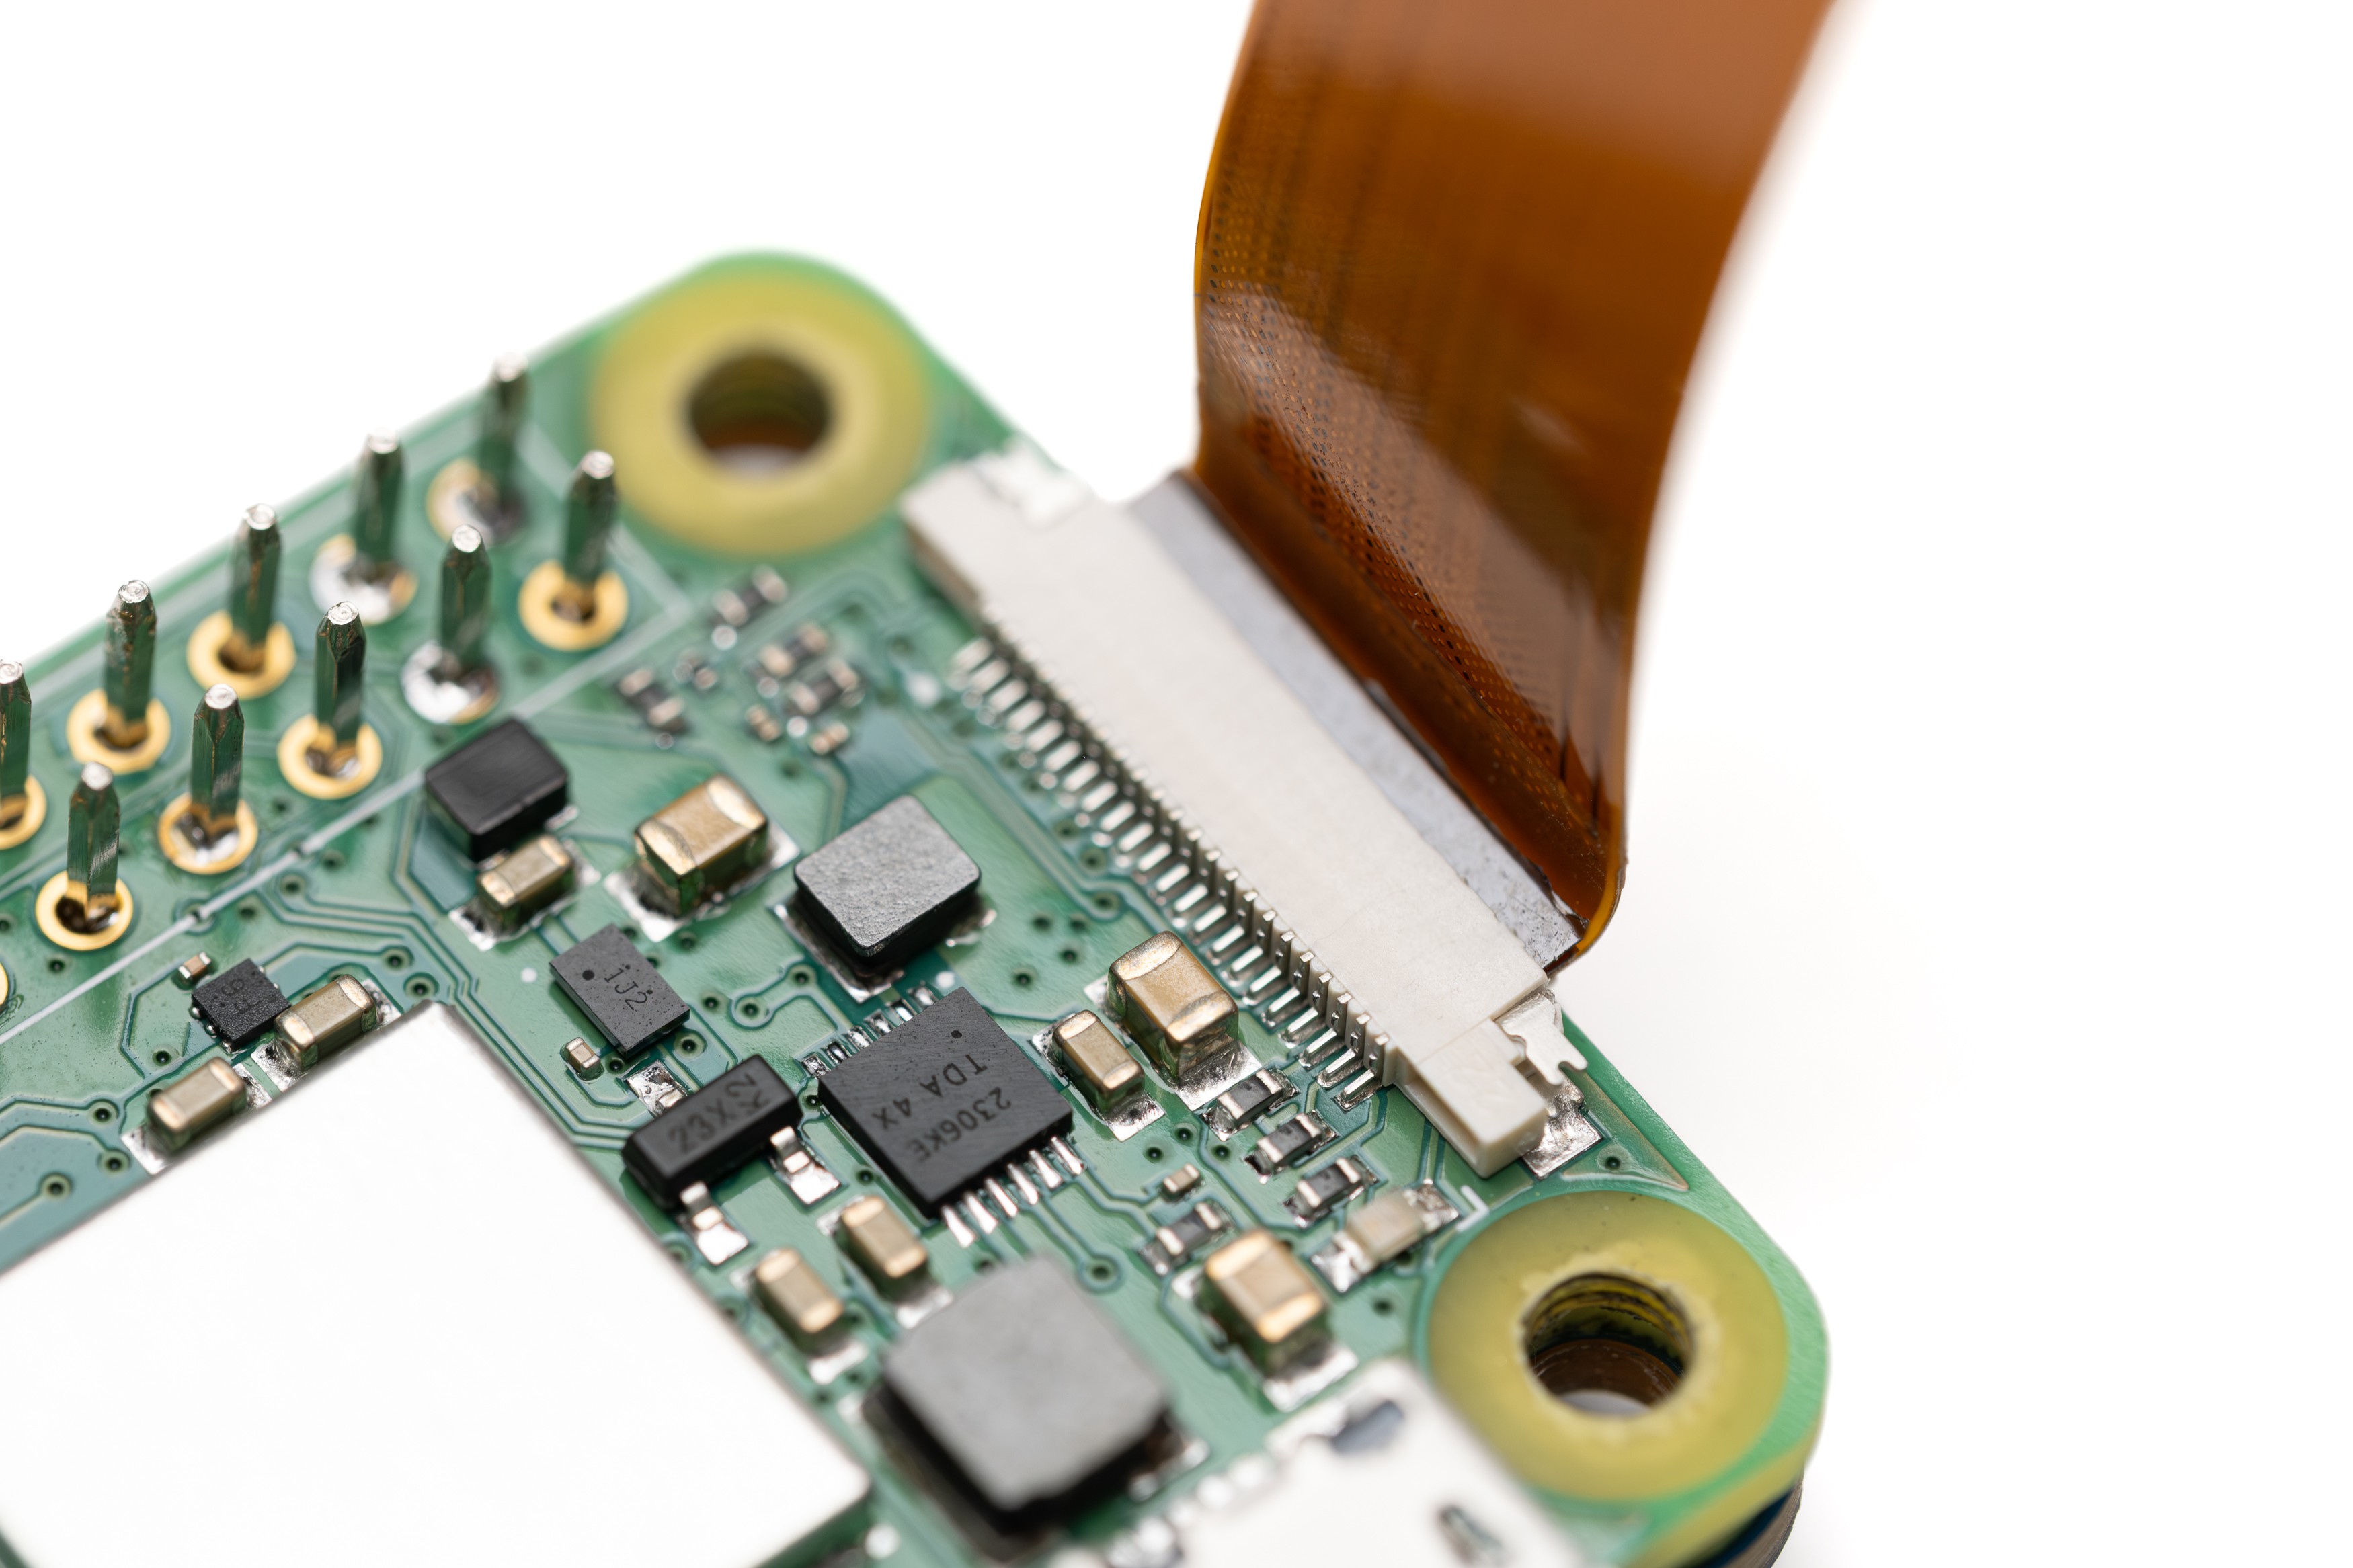
Remove the black camera port clip from the Pi. This clip will not be used again.
Push the modified and bent end of the camera ribbon cable in the camera port. To make it stay there without the clip, use the previously cut off plastic part and jam it inside the port as shown in the photo.
-
14Ribbon Cable Placement
![]()
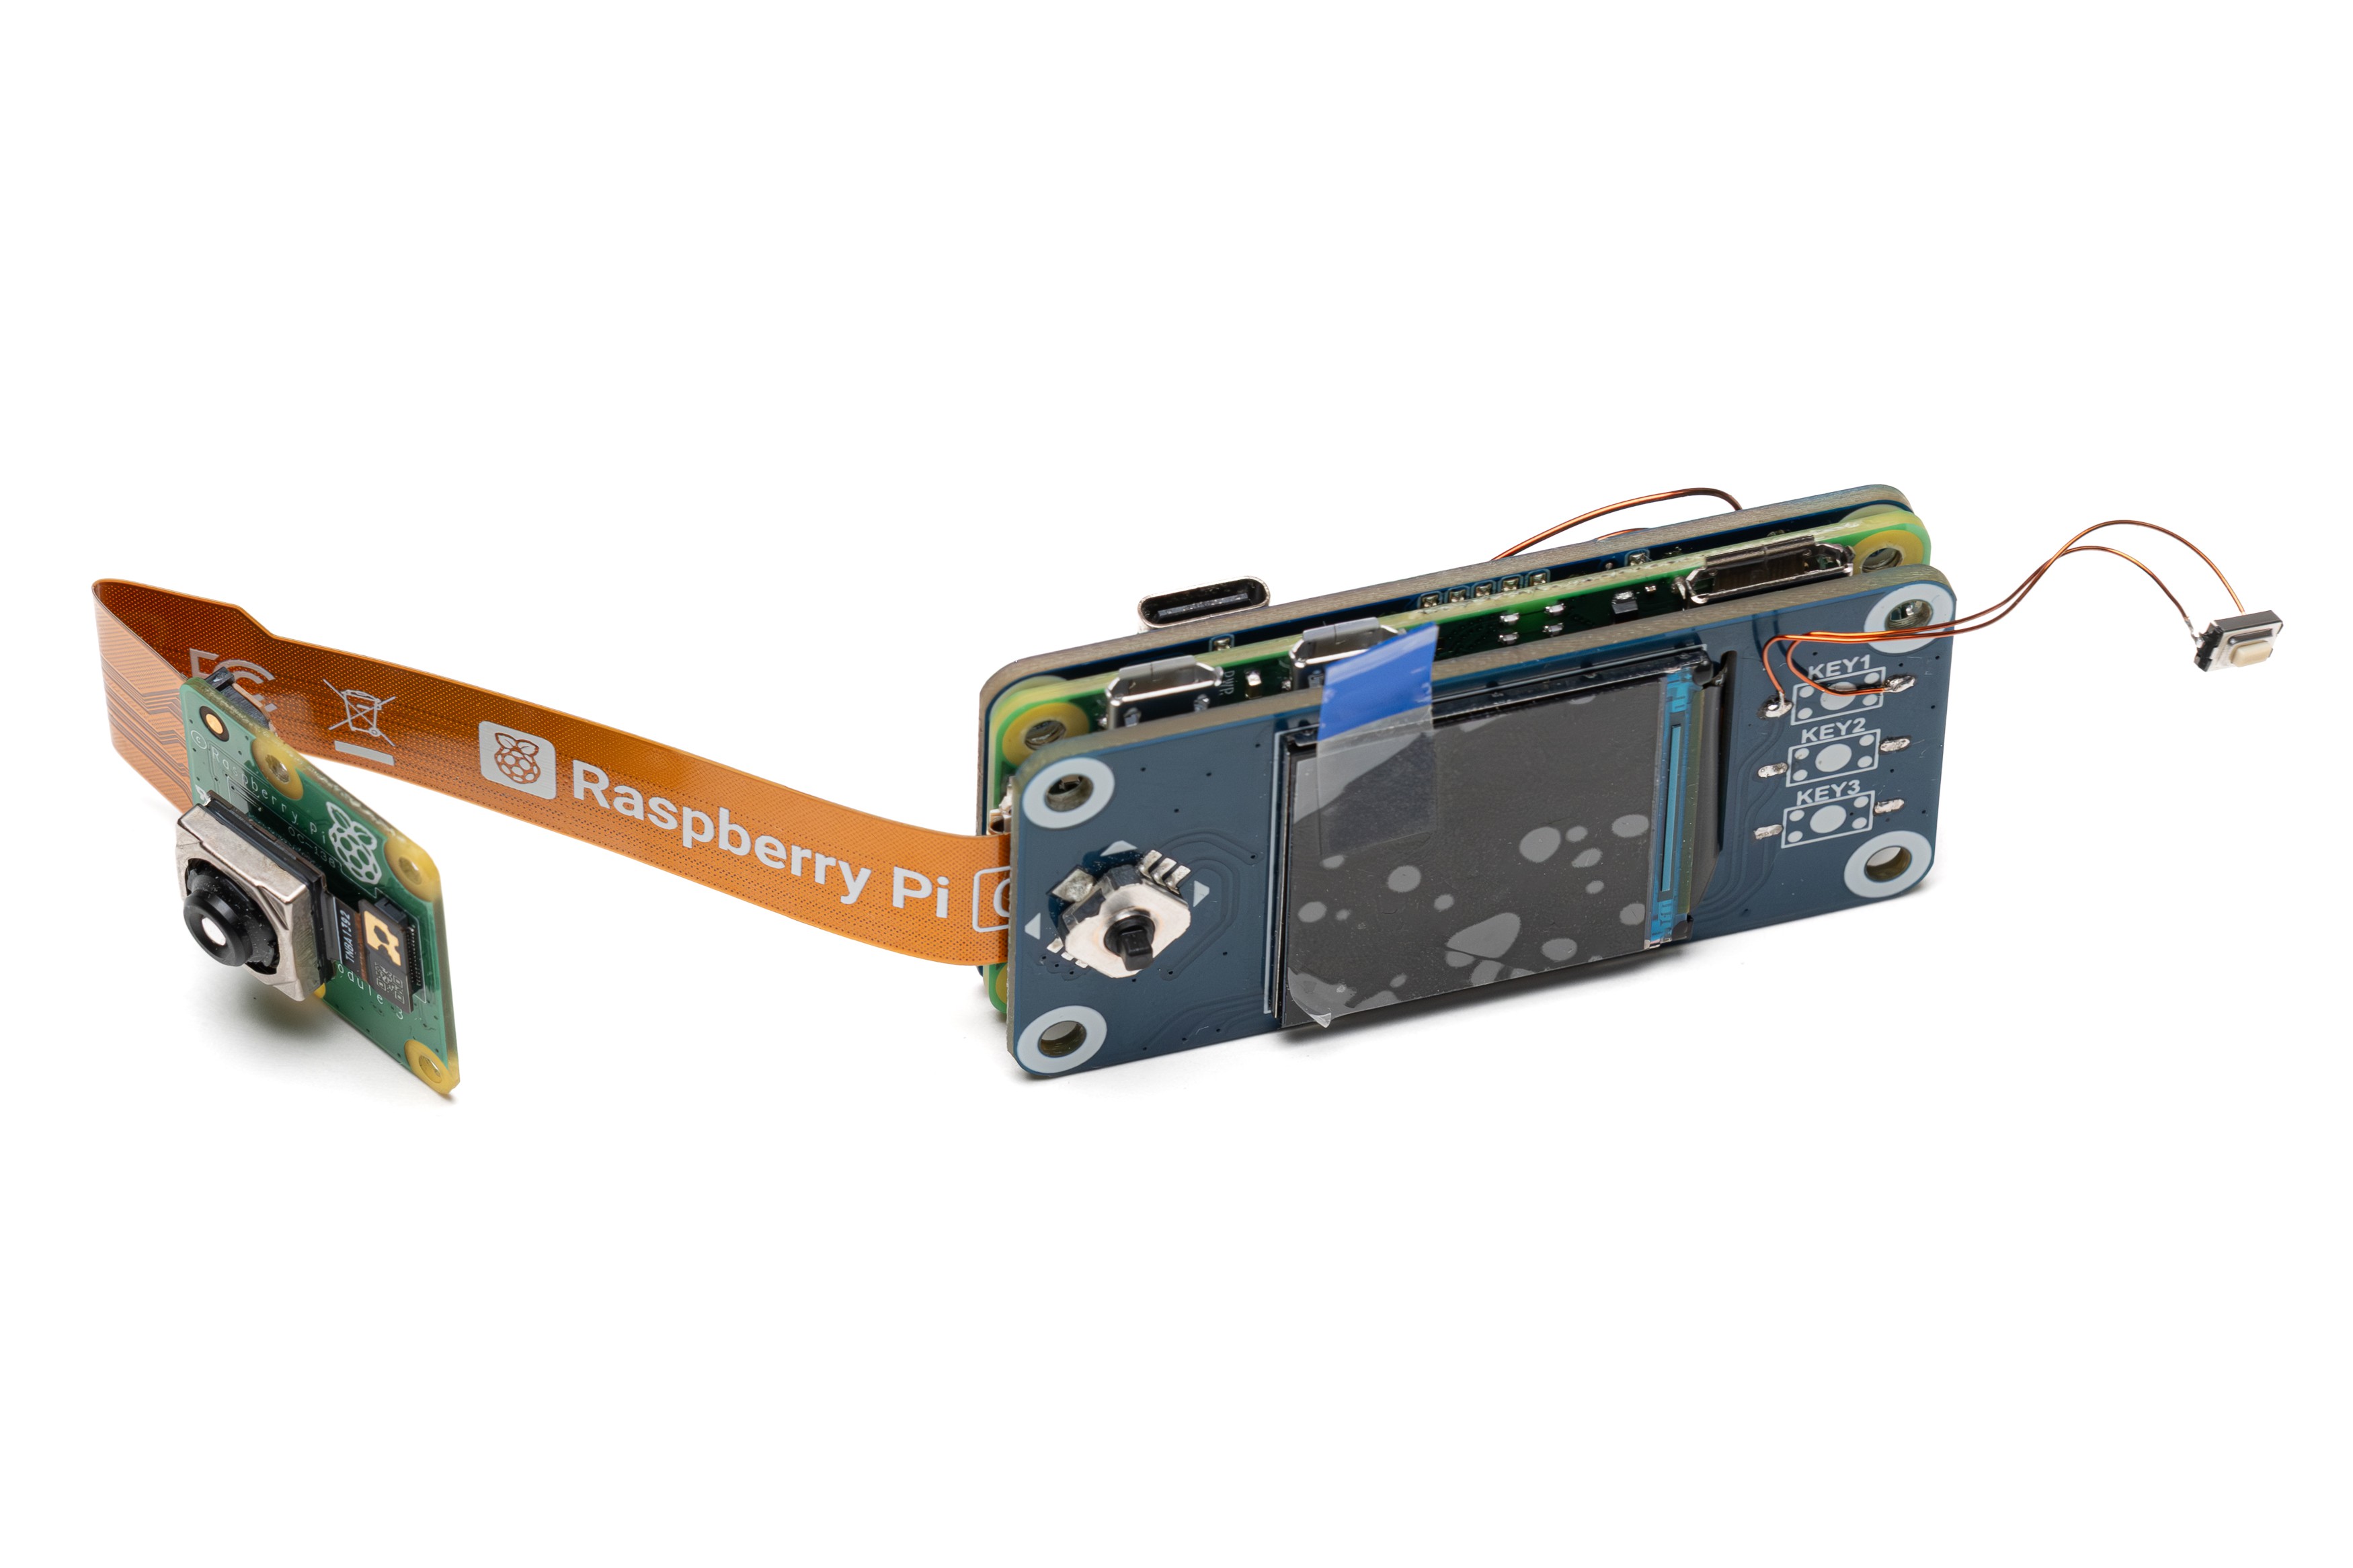
After connecting the camera ribbon cable to the Pi, connect the LCD HAT, leaving most of the cable folded inbetween the Raspberry Pi and the LCD HAT.
The remaining cable outside should look exactly like in the photo.
The camera is connected for demonstration, you don't need to connect it at this stage.
-
15Modify The Camera Module
![]()
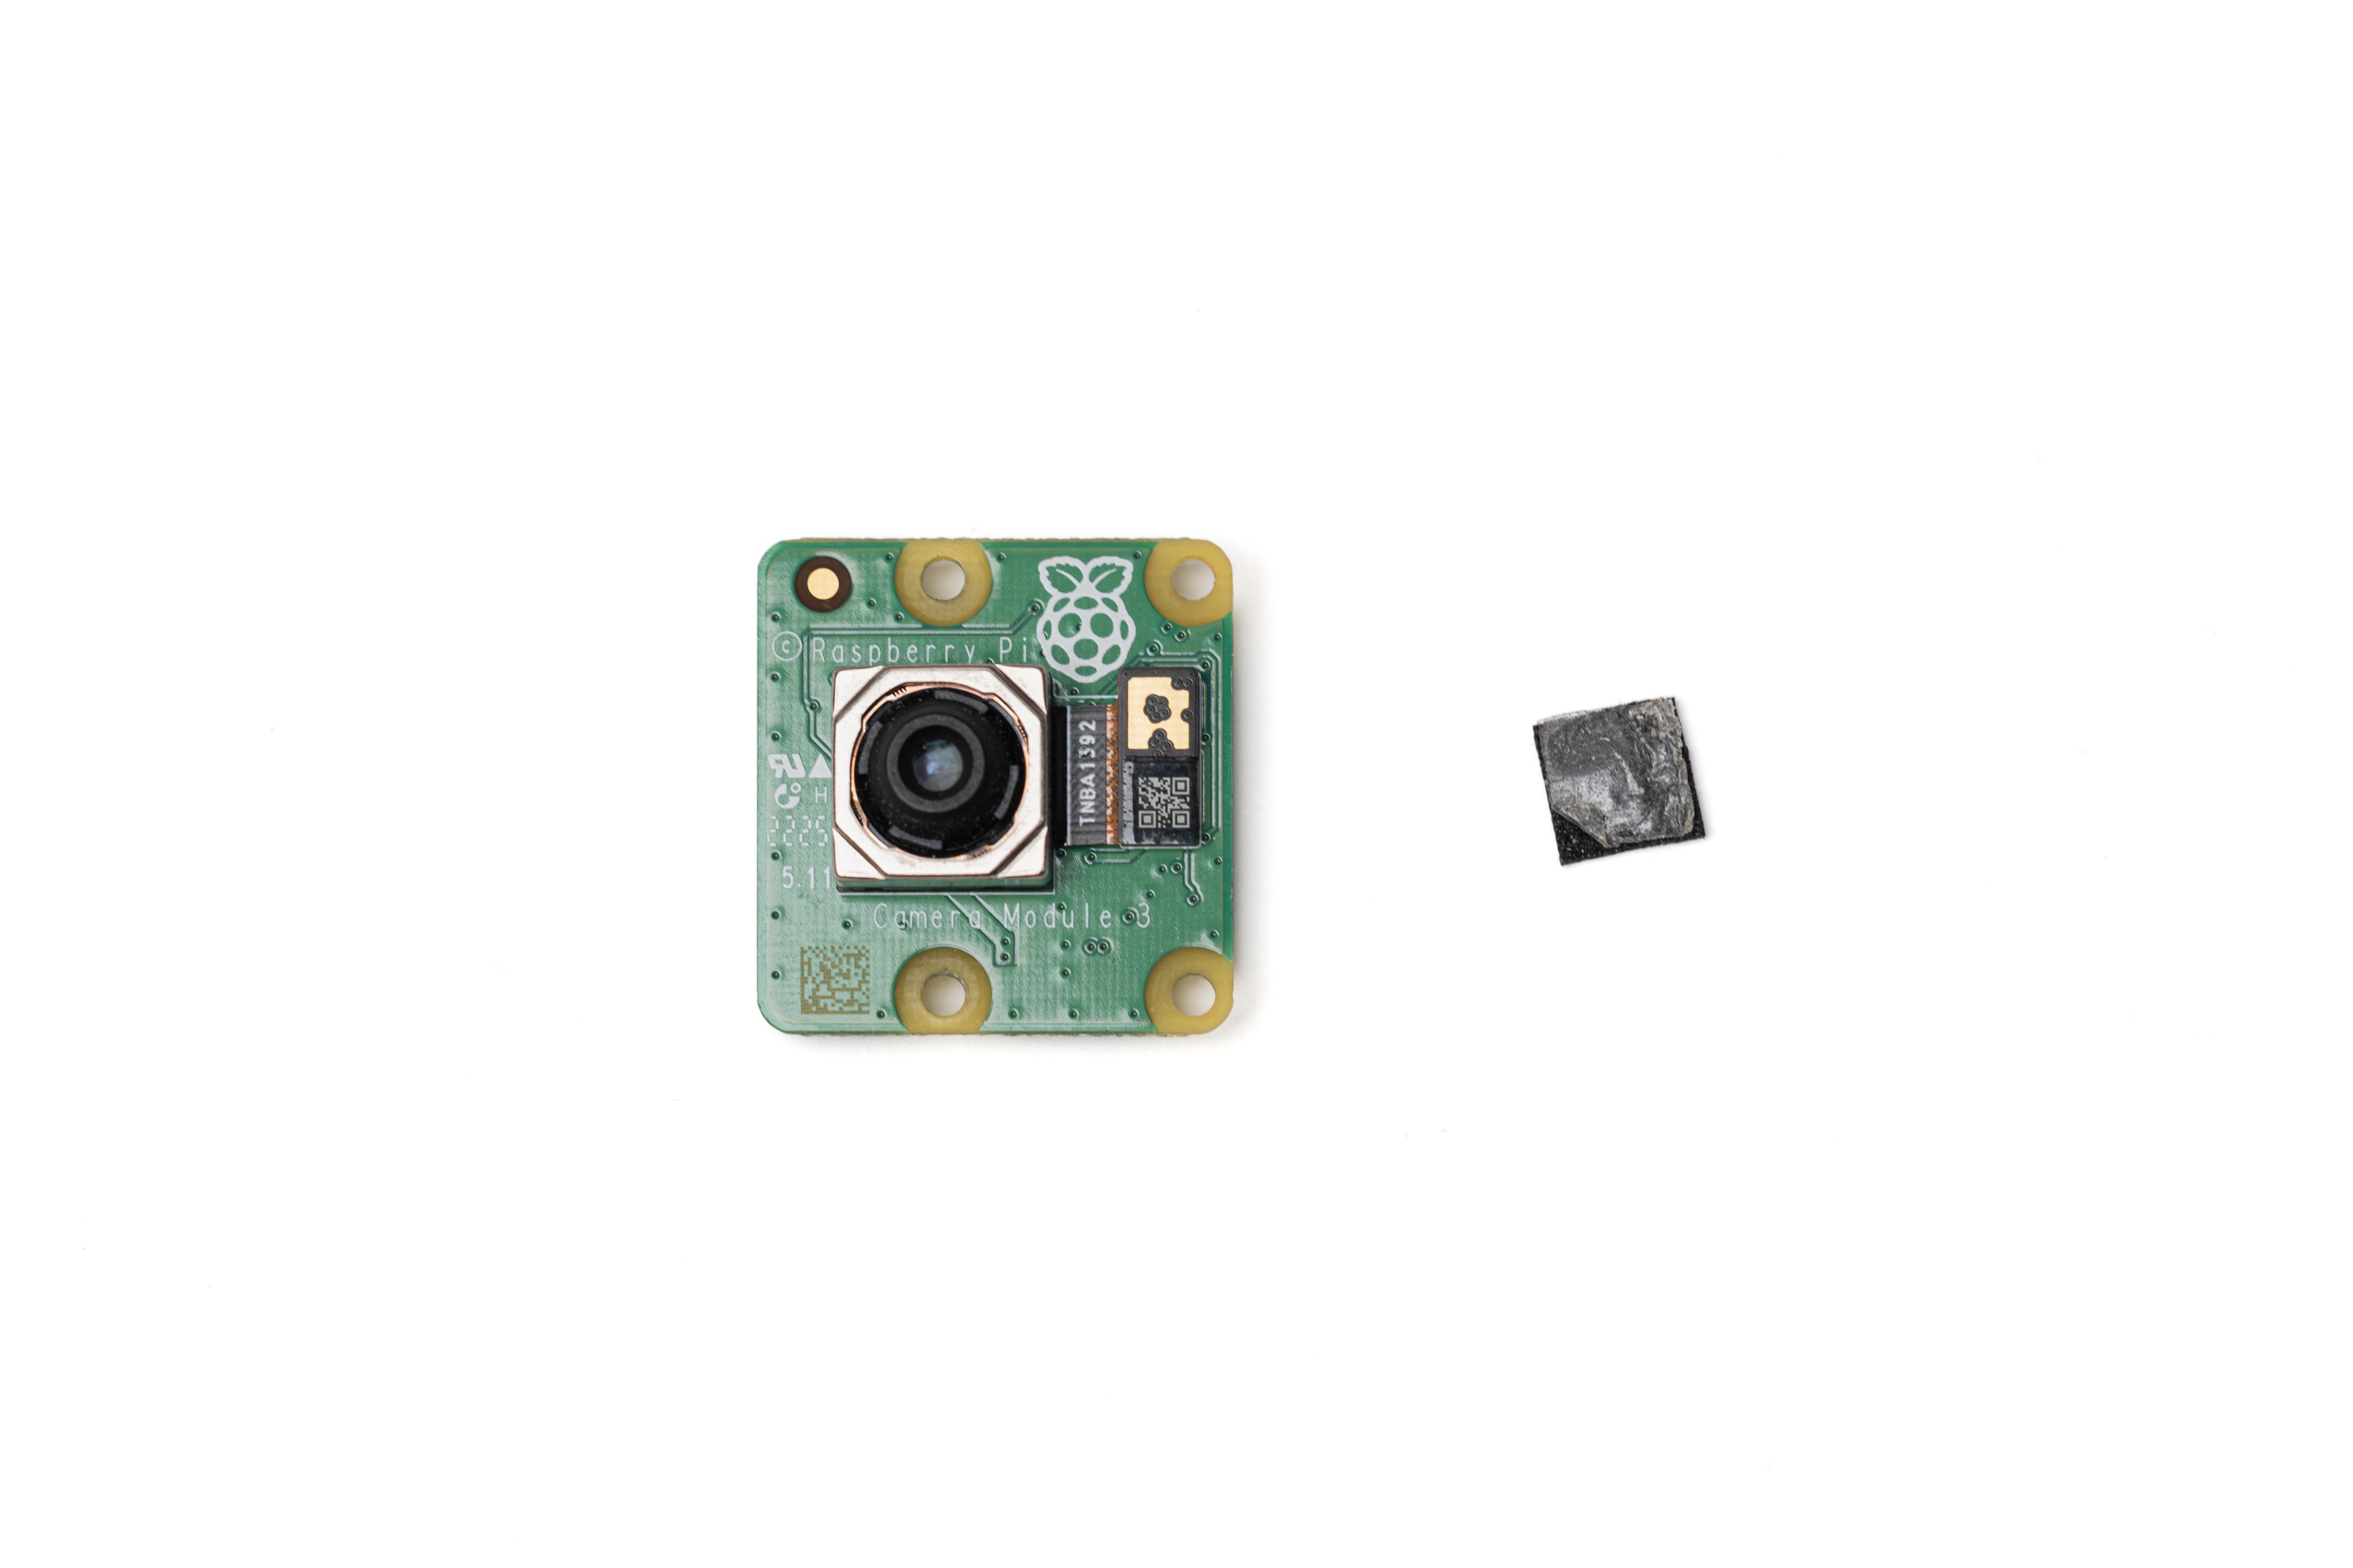
Carefully remove the camera from the camera board by first disconnecting it from its connector and then peeling it off the foam underneath.
Completely remove the foam from the board/camera. A piece of double sided tape should remain on the board. If it's gone, apply it yourself. Connect the camera back to the board and stick it to the tape.
Removal of the foam allows the camera section of the device to be slightly thinner.
-
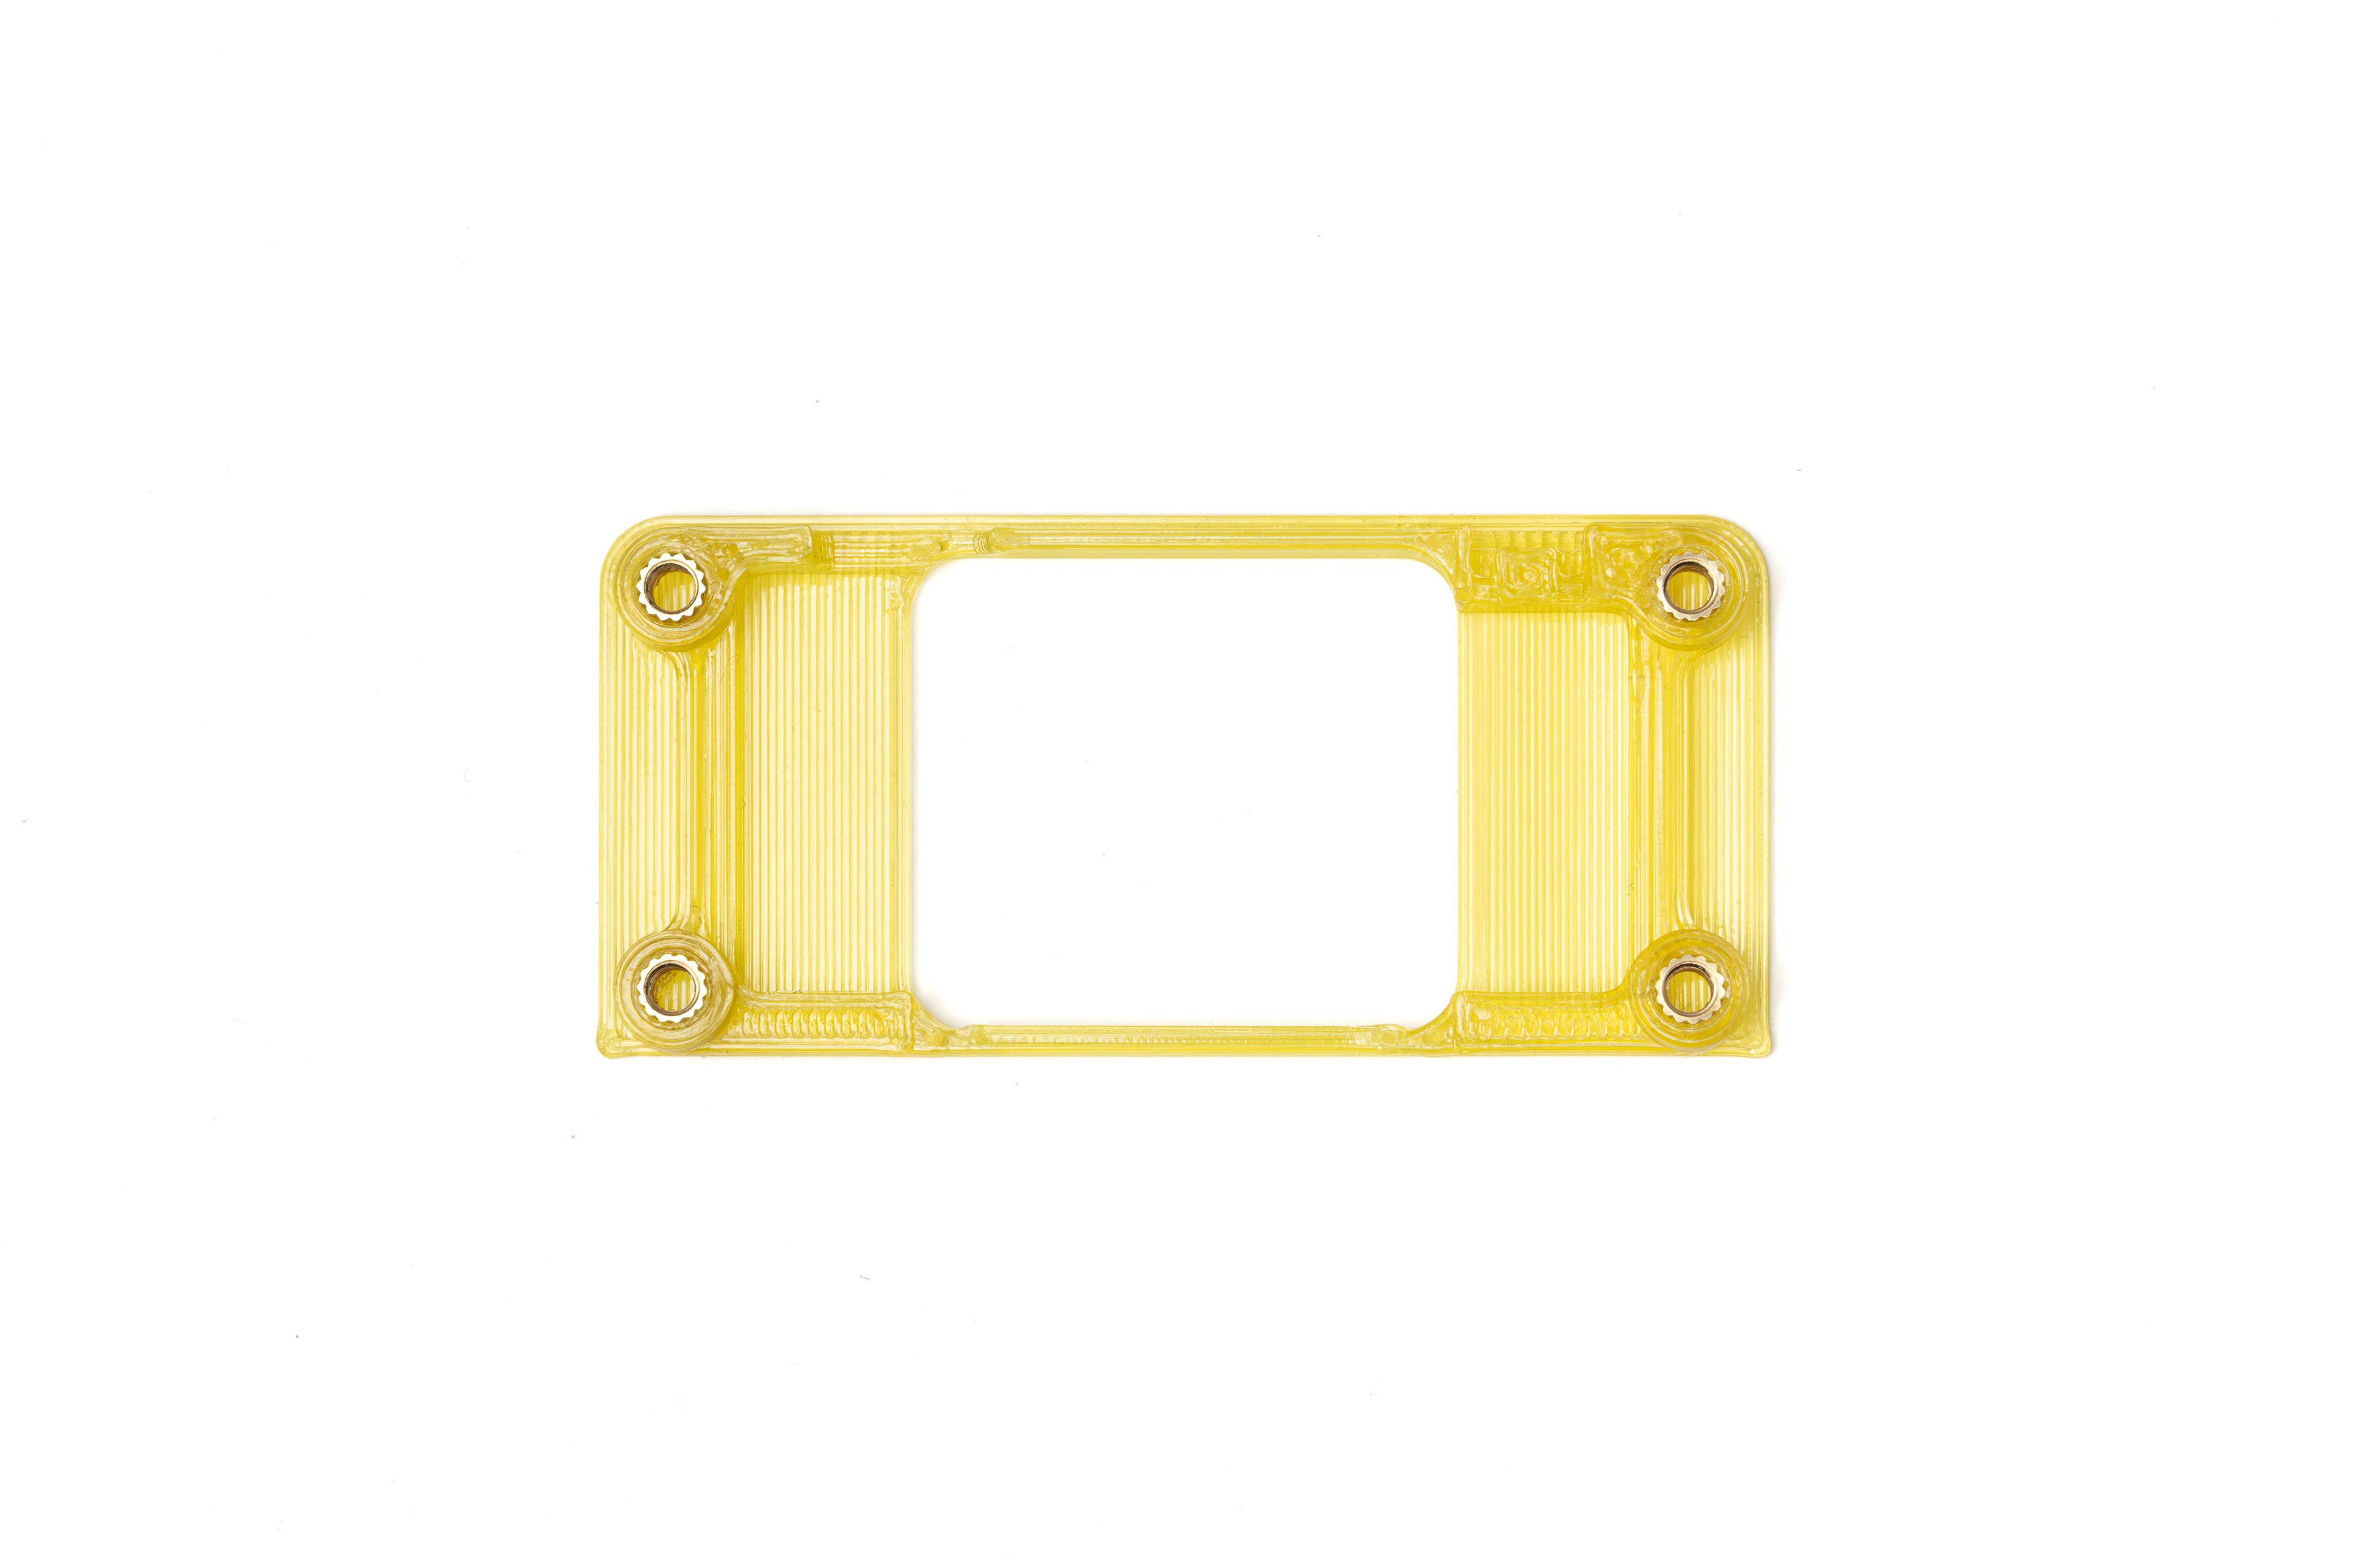
16Install Heat Set Inserts
![]()
Using a soldering iron and heat set insert tip, install 4 M3x4mmx4mm brass heat set inserts in the holes on the 3D printed back cover piece.
Make sure the inserts are flush to the 3D printed surface, don't push them all the way in.
-
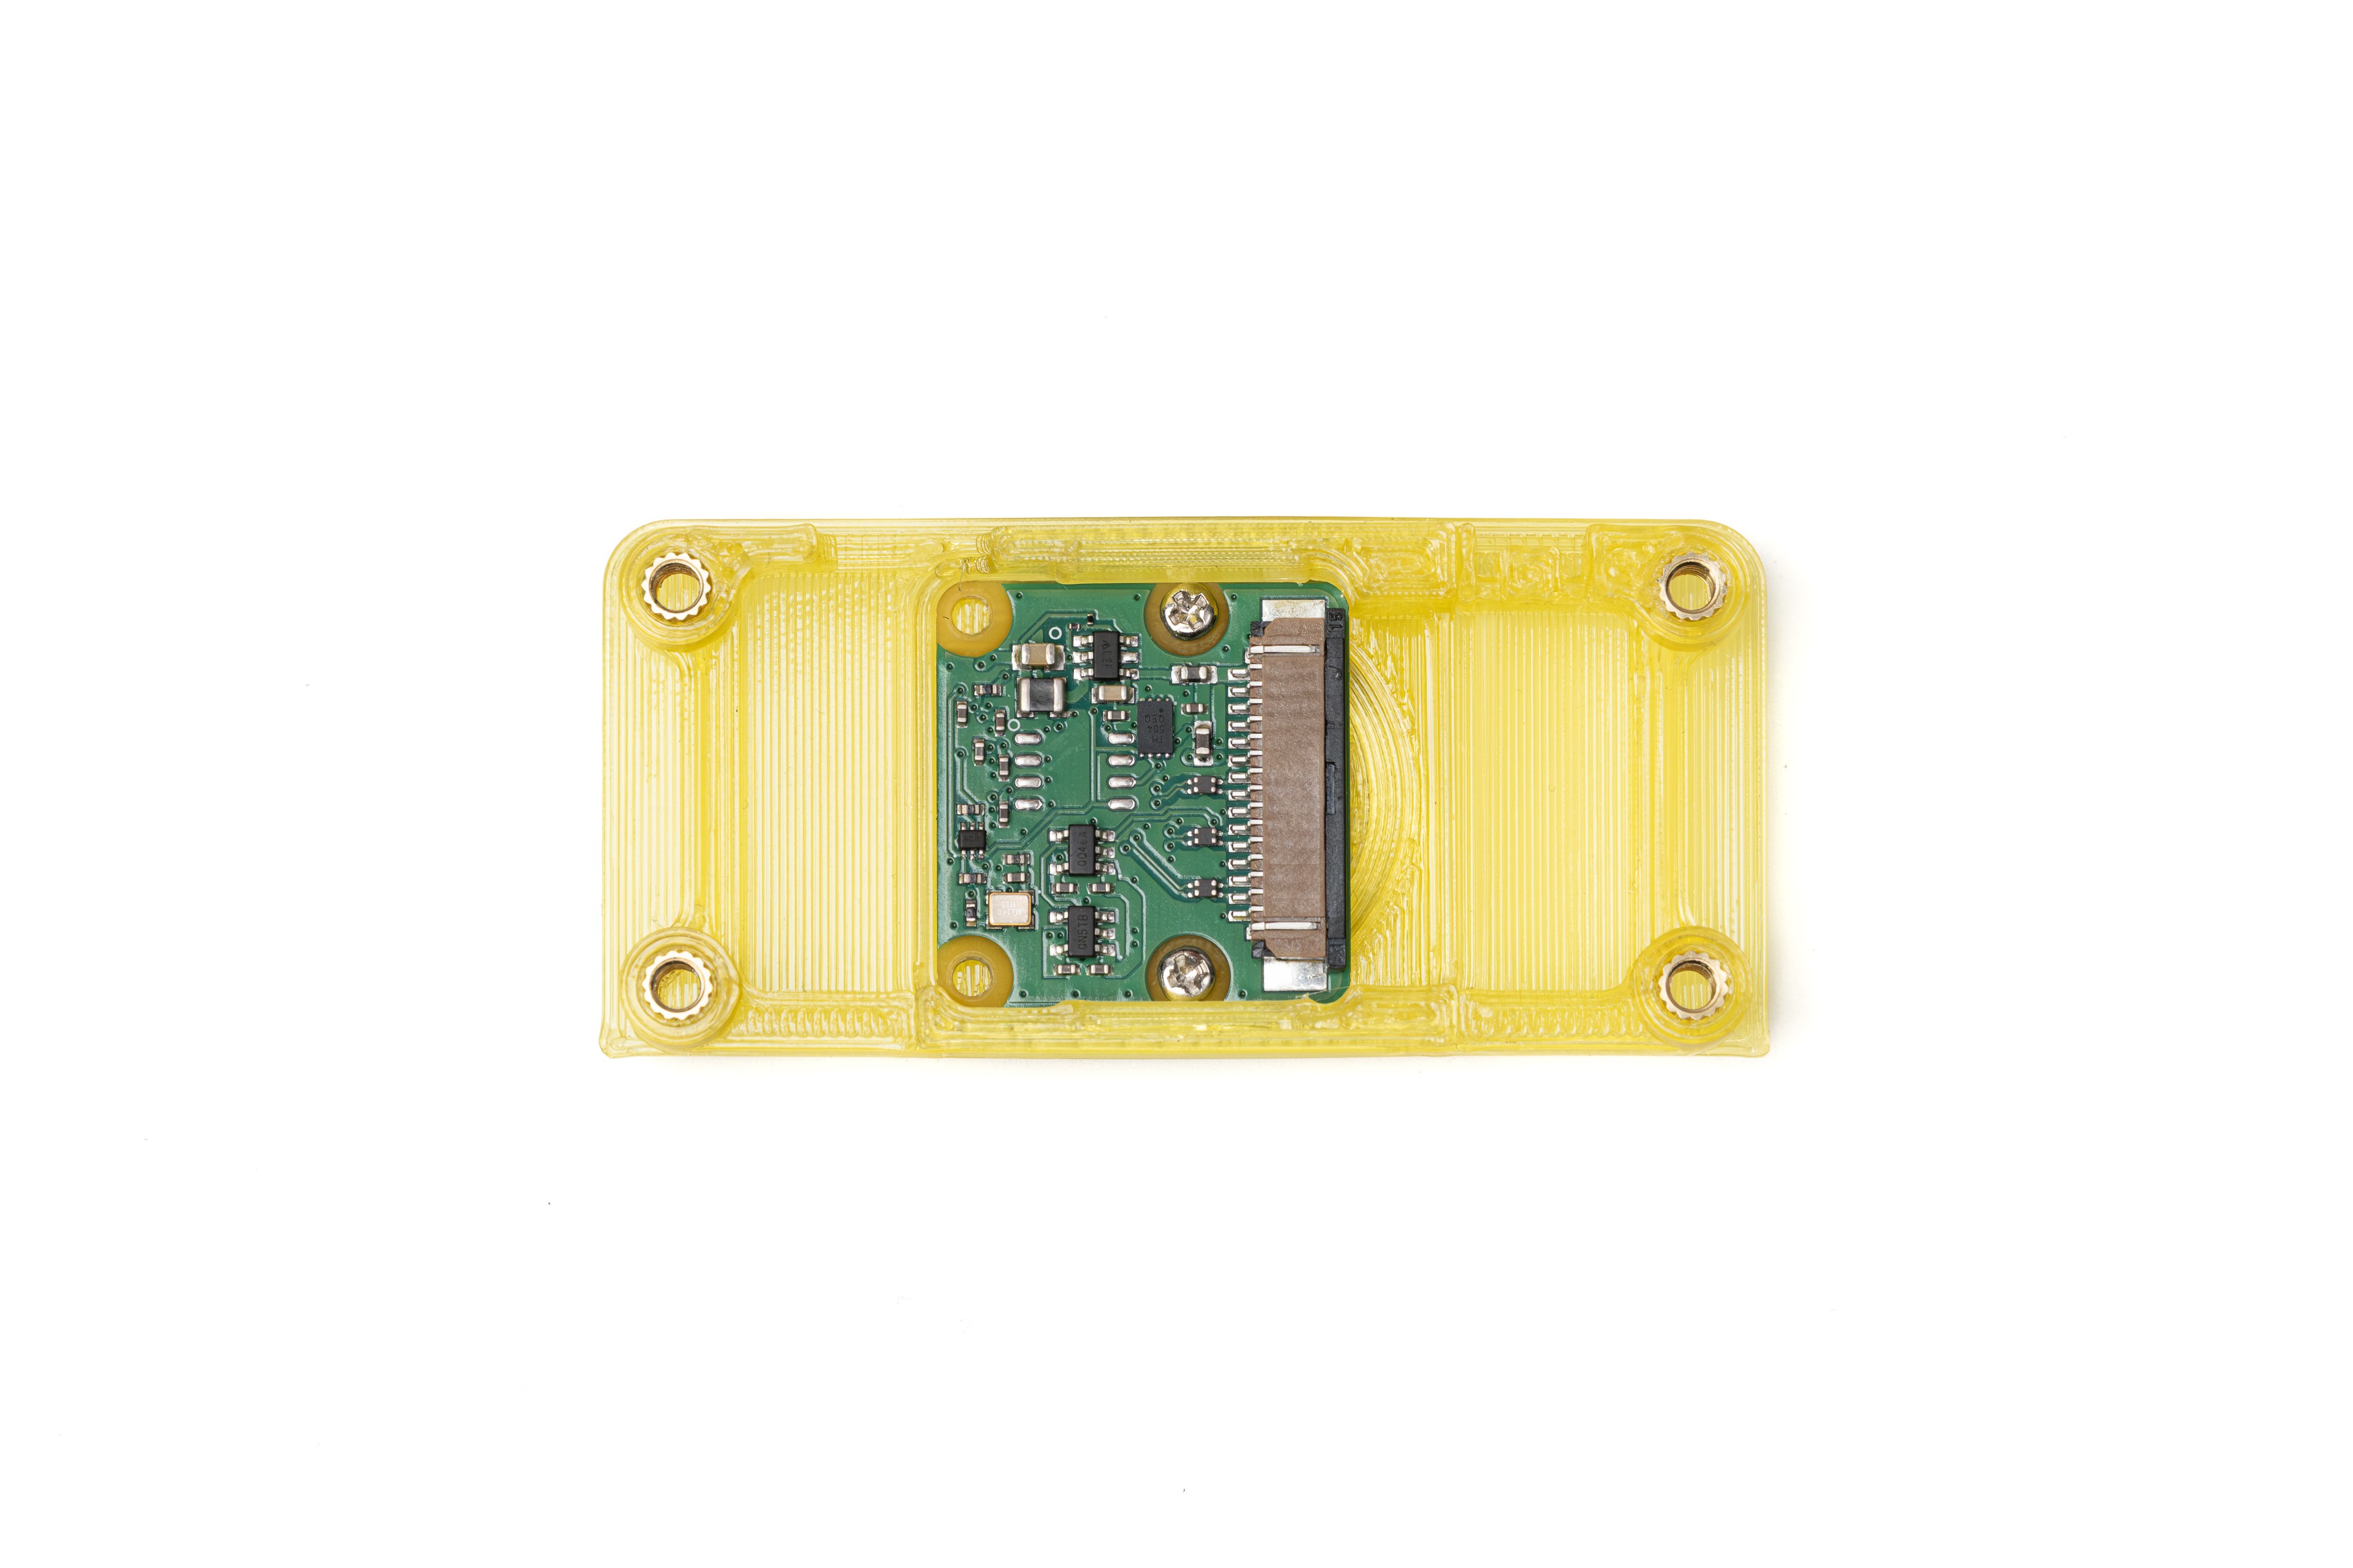
17Assemble the Back Cover
![]()
Using 2 M2x6mm screws that come with the LCD HAT, screw the camera module to the 3D printed camera circle part. Make sure the screws are in all the way. Then, snap this assembly to the 3D-printed camera cover piece.
Finally, snap the assembly made up of the camera circle, camera cover and the camera module into the 3D printed back cover piece that has the inserts installed in the previous step.
The back cover assembly should look like the photo.
-
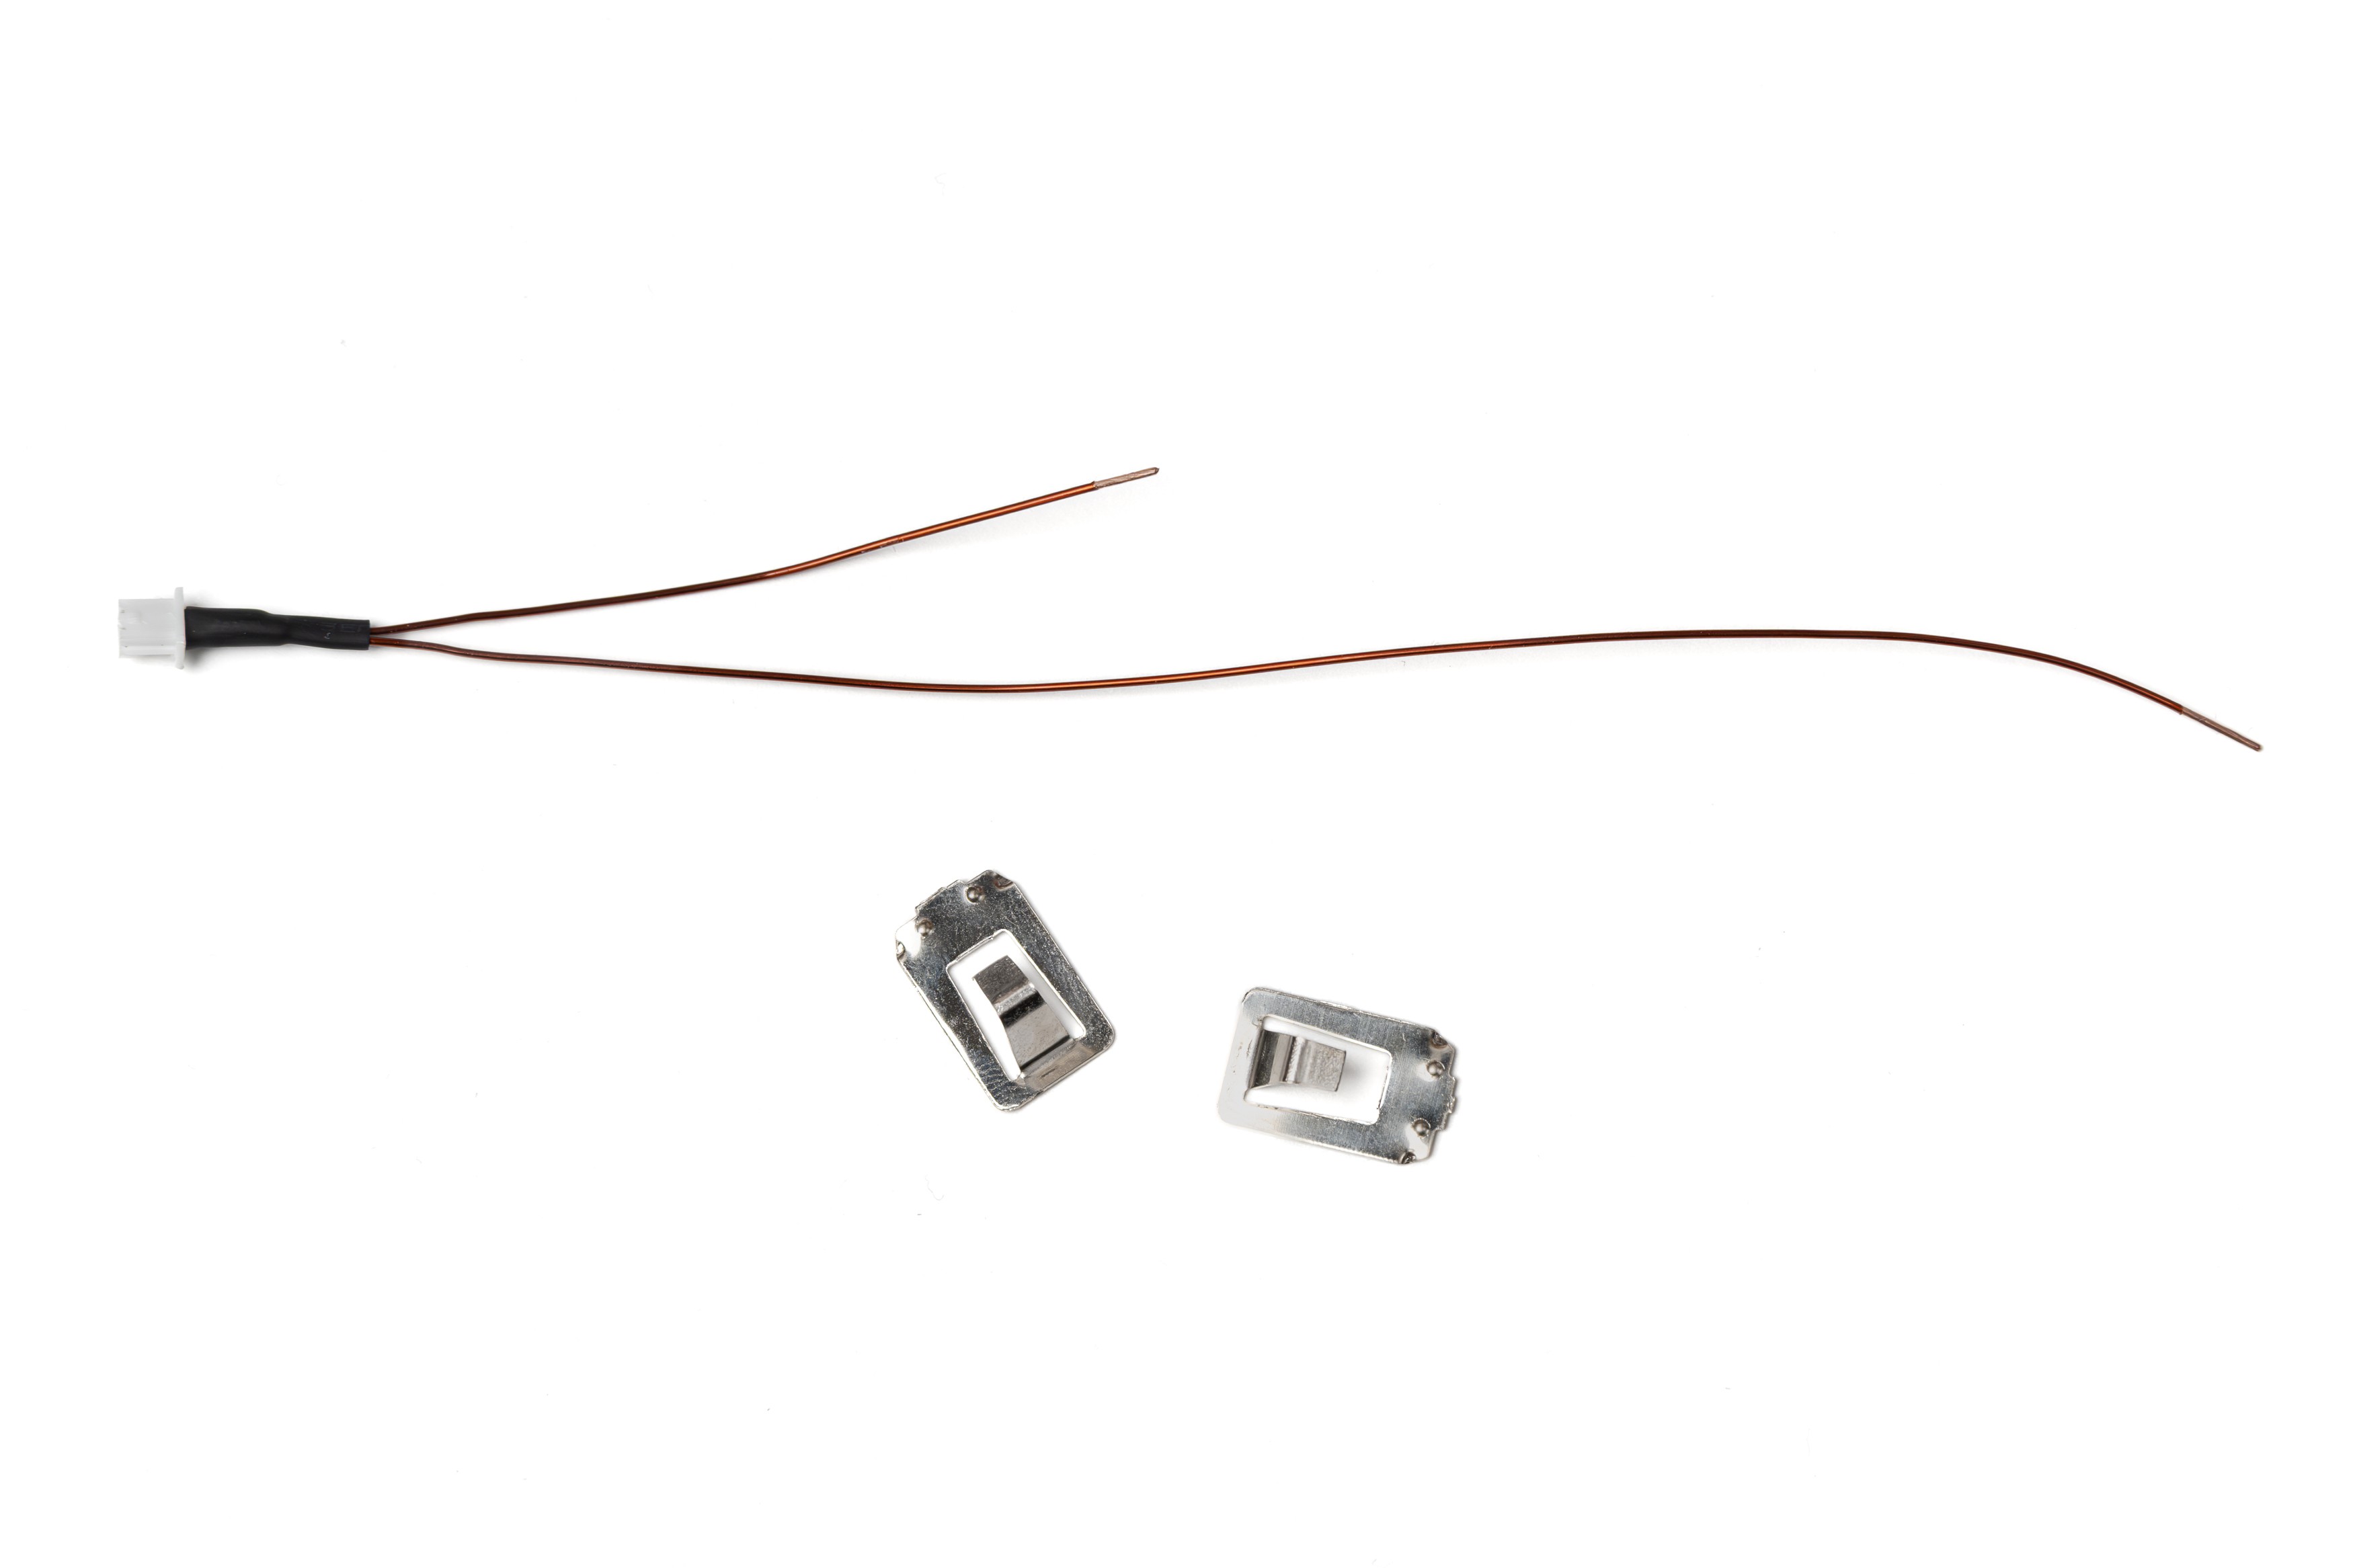
18Prepare The Battery Contacts
![]()
The power cable will be connected to the battery contacts previously removed from the Battery HAT. If you're using a connector like in the photo, make sure to solder the cable to the contacts after you push the cable through the main 3D printed enclosure.
At this stage, prepare the contacts by sanding the ends and applying flux so the solder can stick to them.
In the photo, the pins are removed from the contacts, but keeping them is a better option. You can fold the pins after installing them in the enclosure and lock them in place.
-
19Solder The Cable To Contacts
![]()
Push the female power cable through the openings in the 3D printed enclosure. Solder the ends to the battery contacts as shown in the photo.
After soldering, seat the contacts into the enclosure. Push the contacts into their place as far as they can go. If you kept the contact pins on, fold those in towards the case from the other side.
-
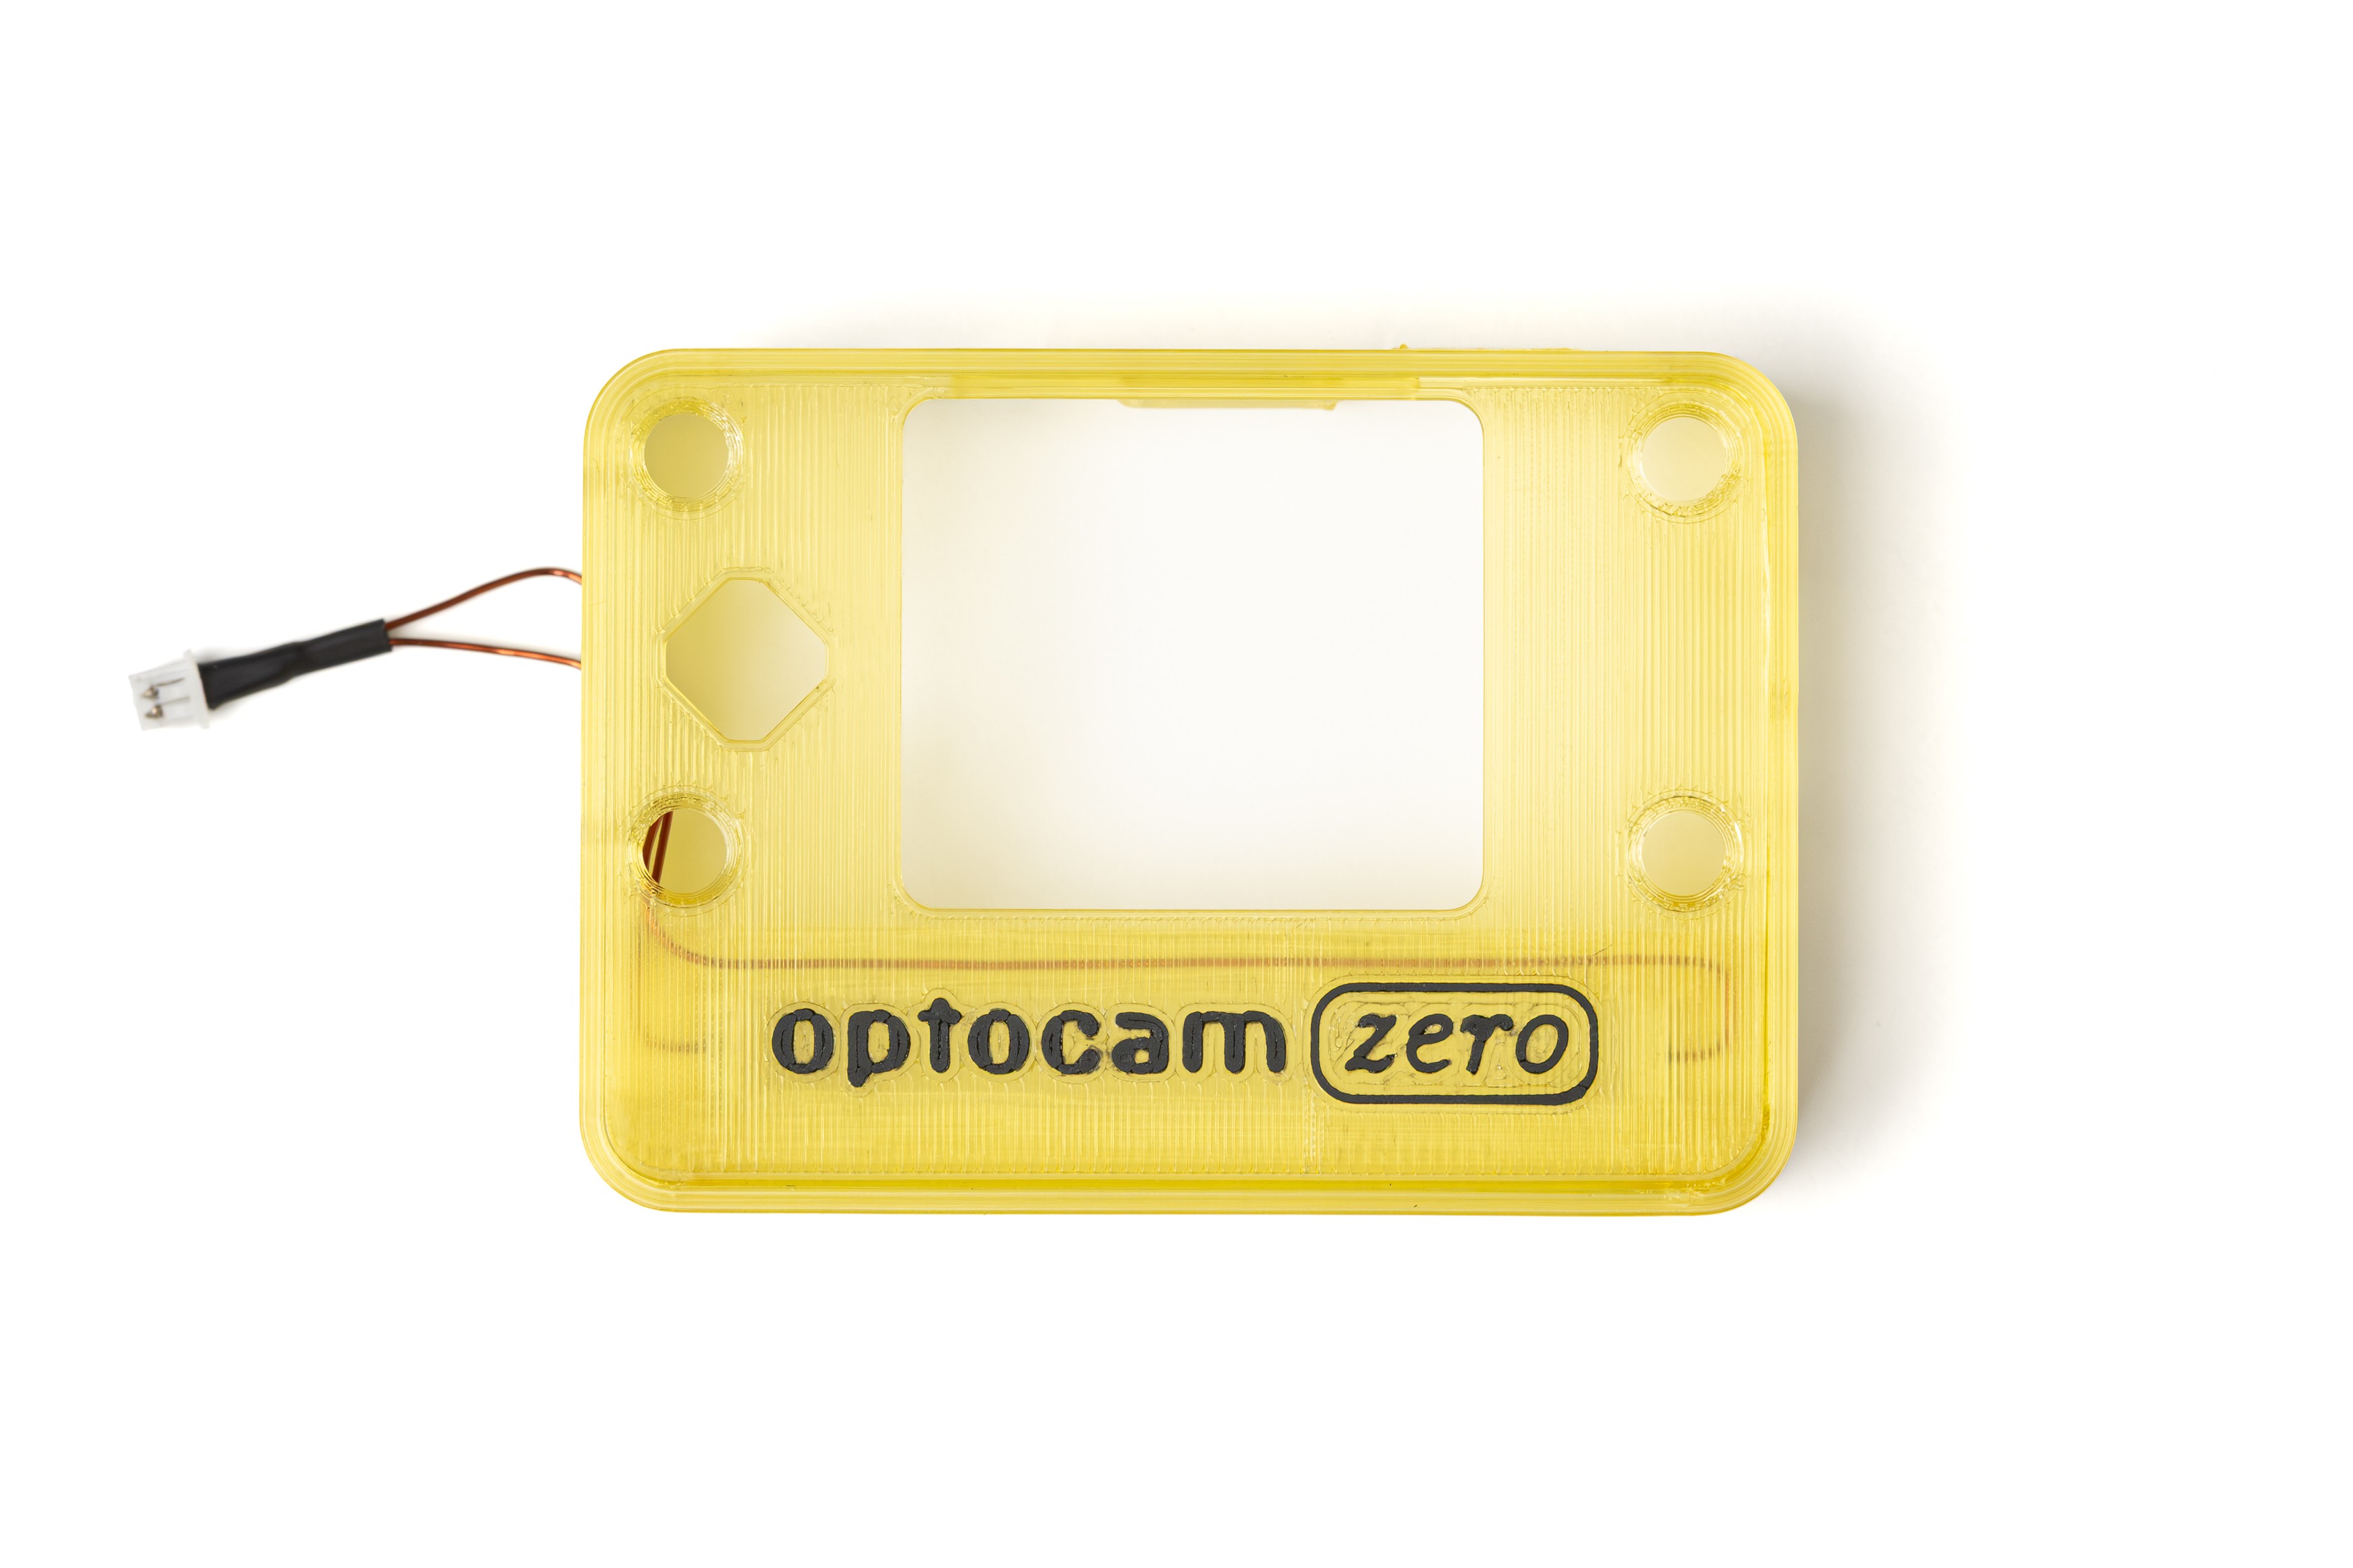
20Install The Front Cover
![]()
Route the power cable as shown in the photo. Fit the cable coming from the positive terminal in the cable channel designed into the enclosure.
Install the 3D printed front panel part. The front panel utilizes friction fit, so it may require some force to push it in to get it seated flush to the body.
Optocam Zero
Optocam Zero is a Raspberry Pi Zero based compact digital camera made using off the shelf components.


Discussions
Become a Hackaday.io Member
Create an account to leave a comment. Already have an account? Log In.