Close
0%
0%

Scottina

A pocket-sized front panel for the diagnostic tools you already use

Similar projects worth following
0 followers
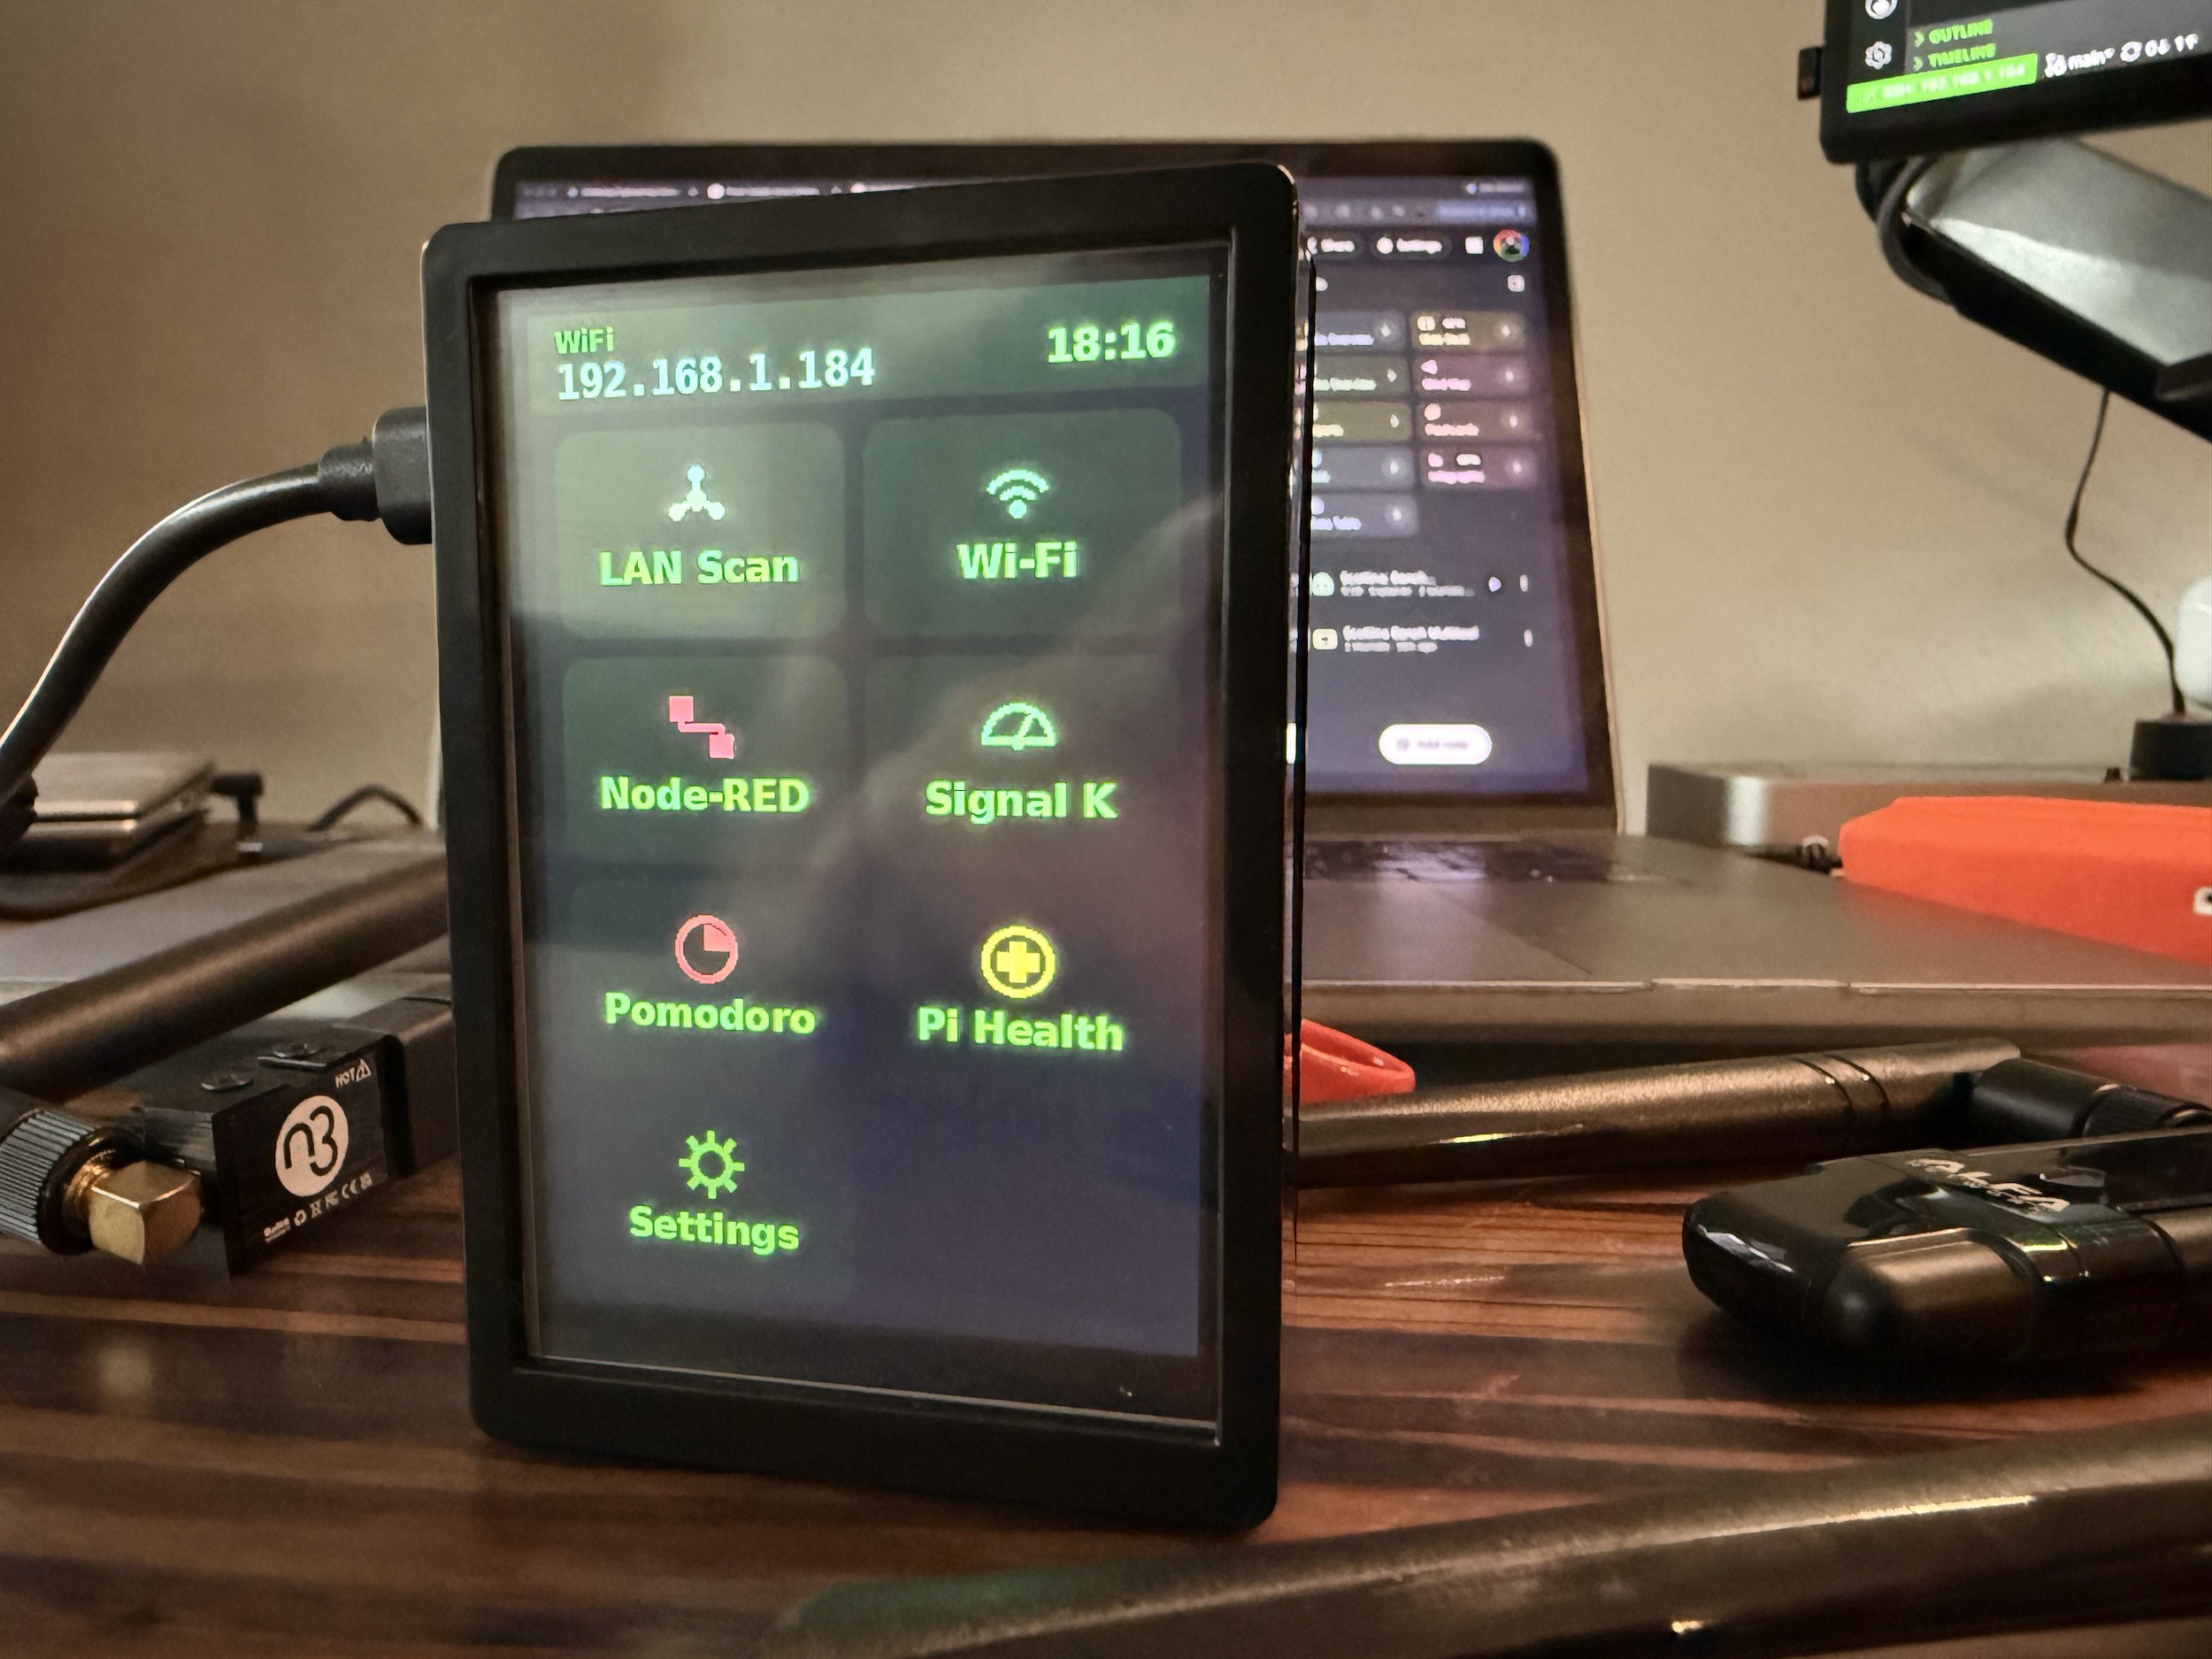
A pocket-sized touchscreen front panel for the bench diagnostic tools you already use — a Pi 5 + 3.5" screen that boots straight to a tap-driven tile grid, strips each tool down to the two controls and two numbers you actually watch, and skips the other 90%. Diagnostics only — not a Flipper, not a Marauder, not a wardriving toy.

The gap I'm closing

Bench diagnostics live at two extremes. Either you're squinting at a terminal over SSH on a headless box, or you're hauling a laptop to the bench to open a full-size GUI. Headless is too little. The full interface is far too much.

Here's what I kept noticing: for any single diagnostic question, I'm pressing about two buttons of that tool and watching about two numbers come back. The other 90% of the interface is just in the way. I don't need the ribbon menus, the config panels, the twelve tabs. I need to plug a thing in, glance at a 3.5" screen, and get my answer.

Scottina is that middle ground. It doesn't invent new tools — it gives the ones you already trust a front panel sized to the one question you're asking.
What it is

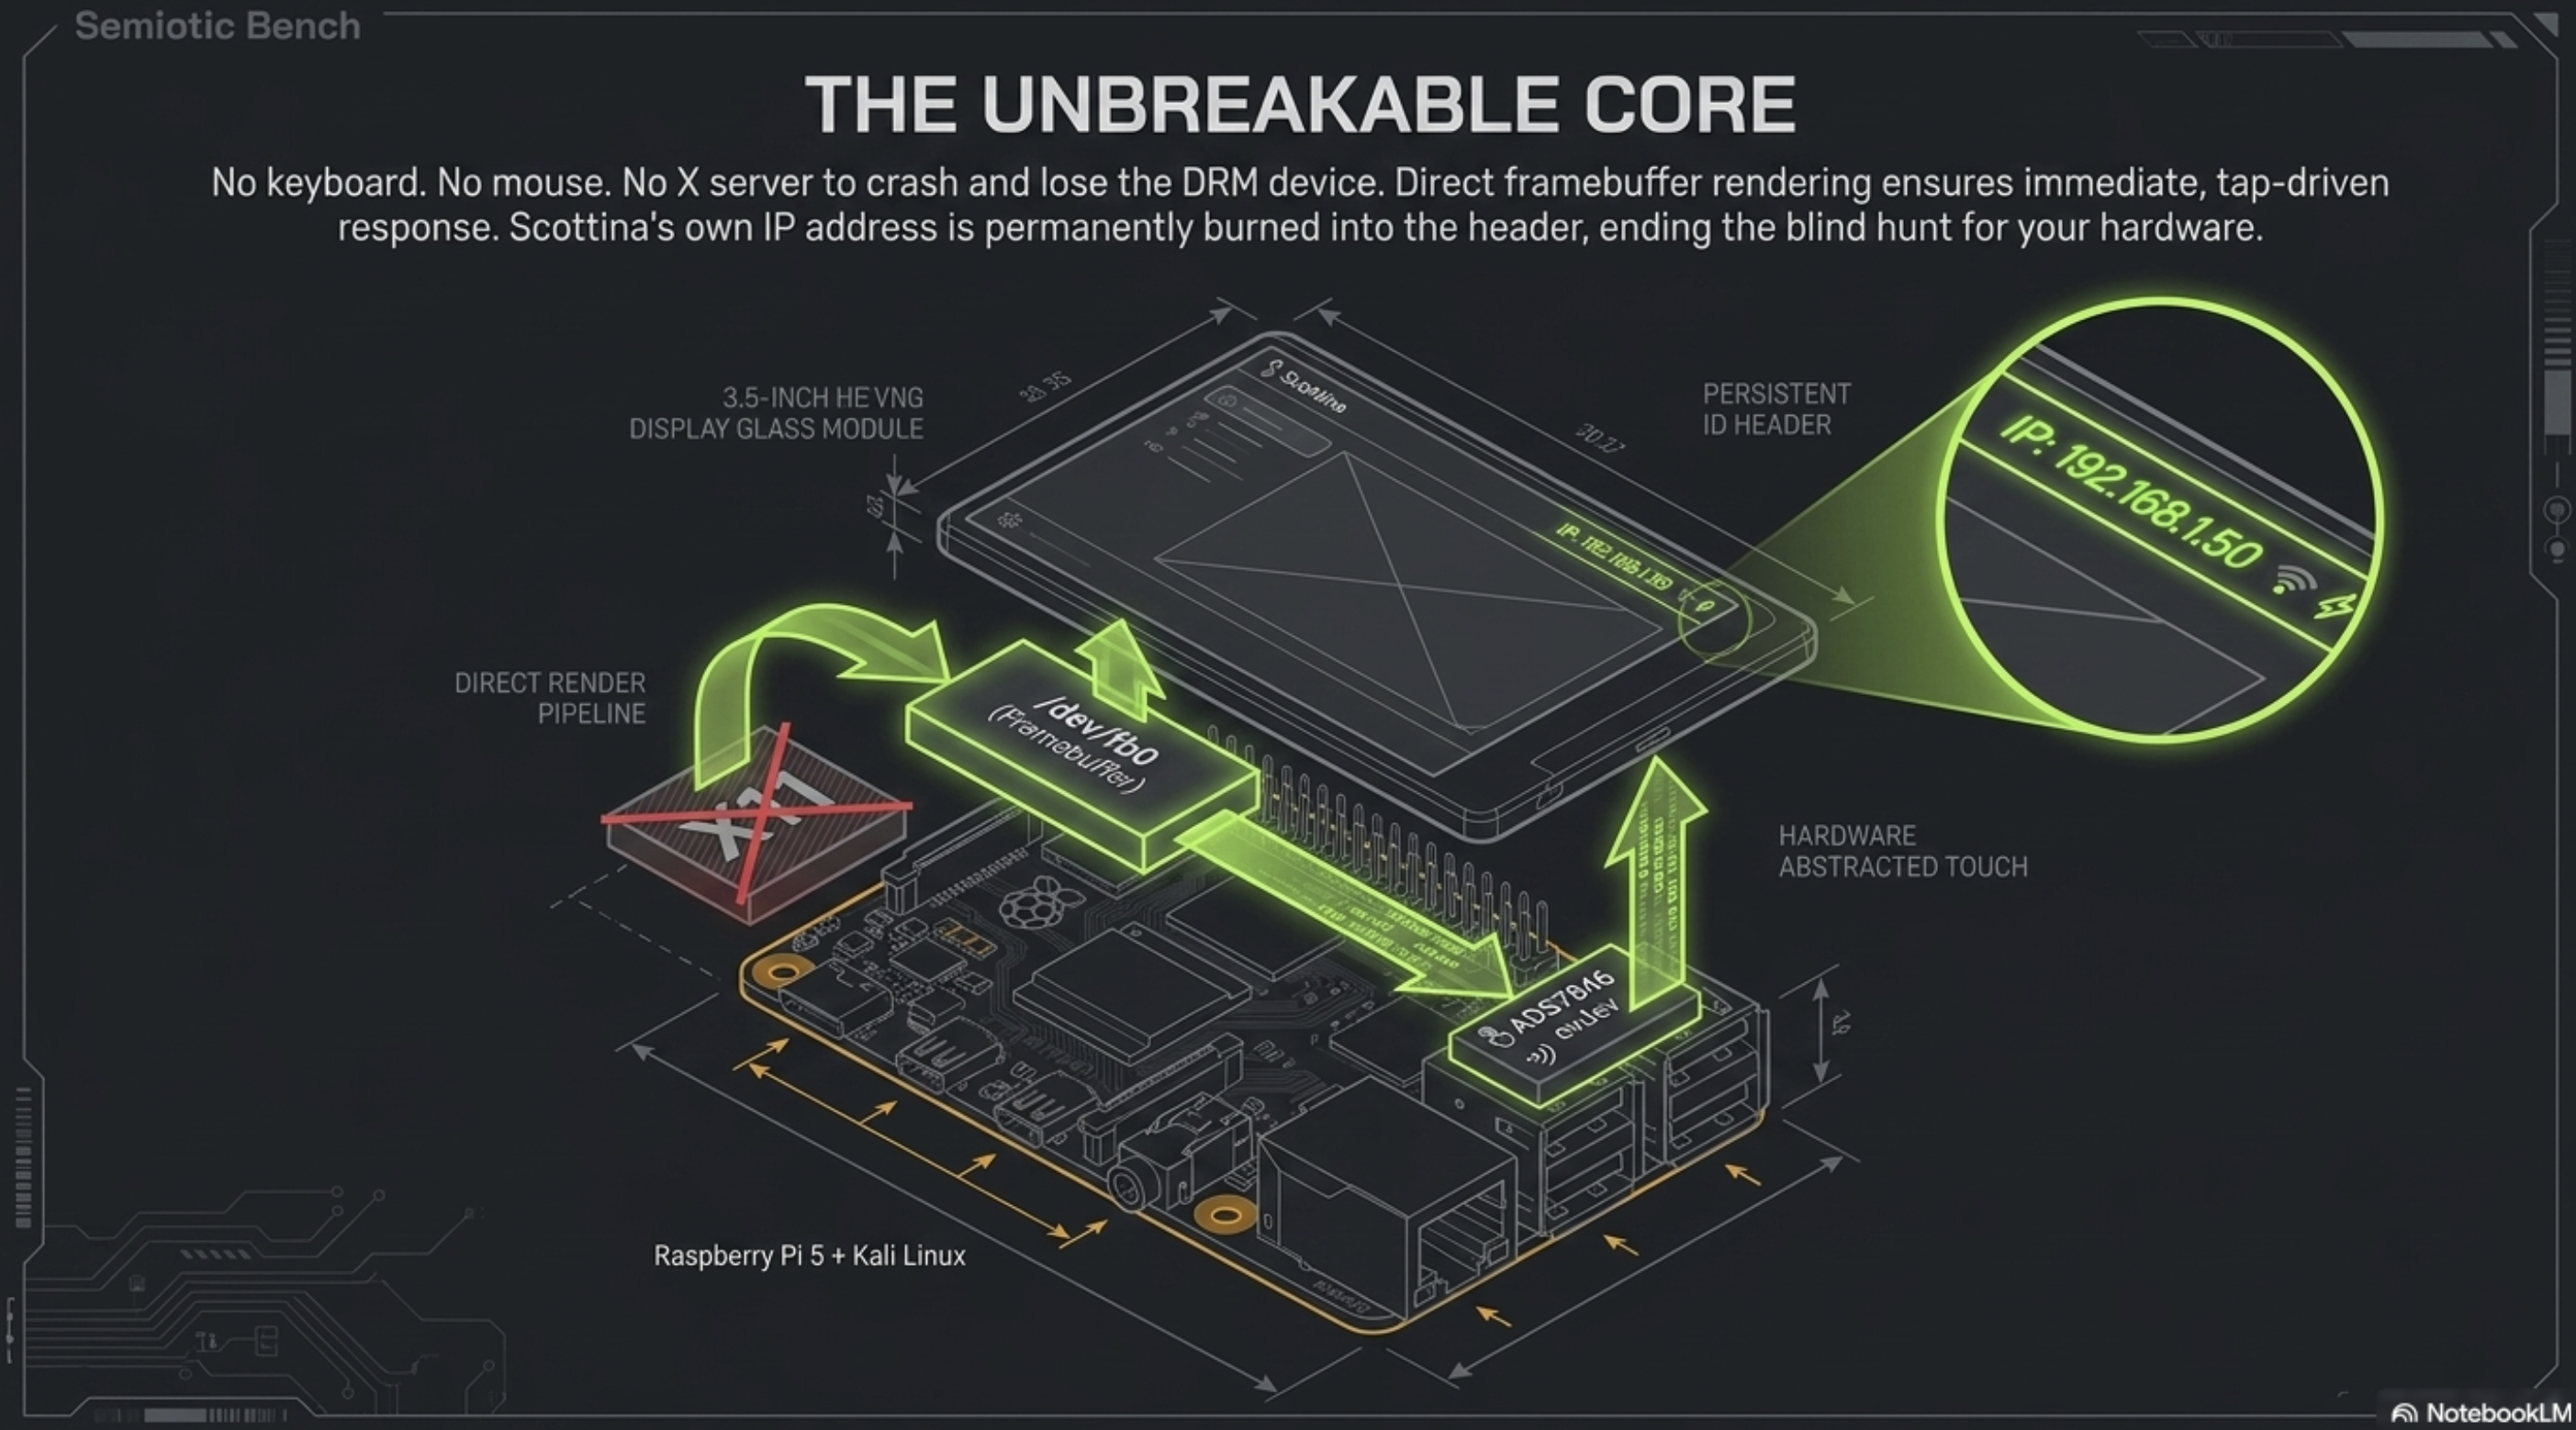
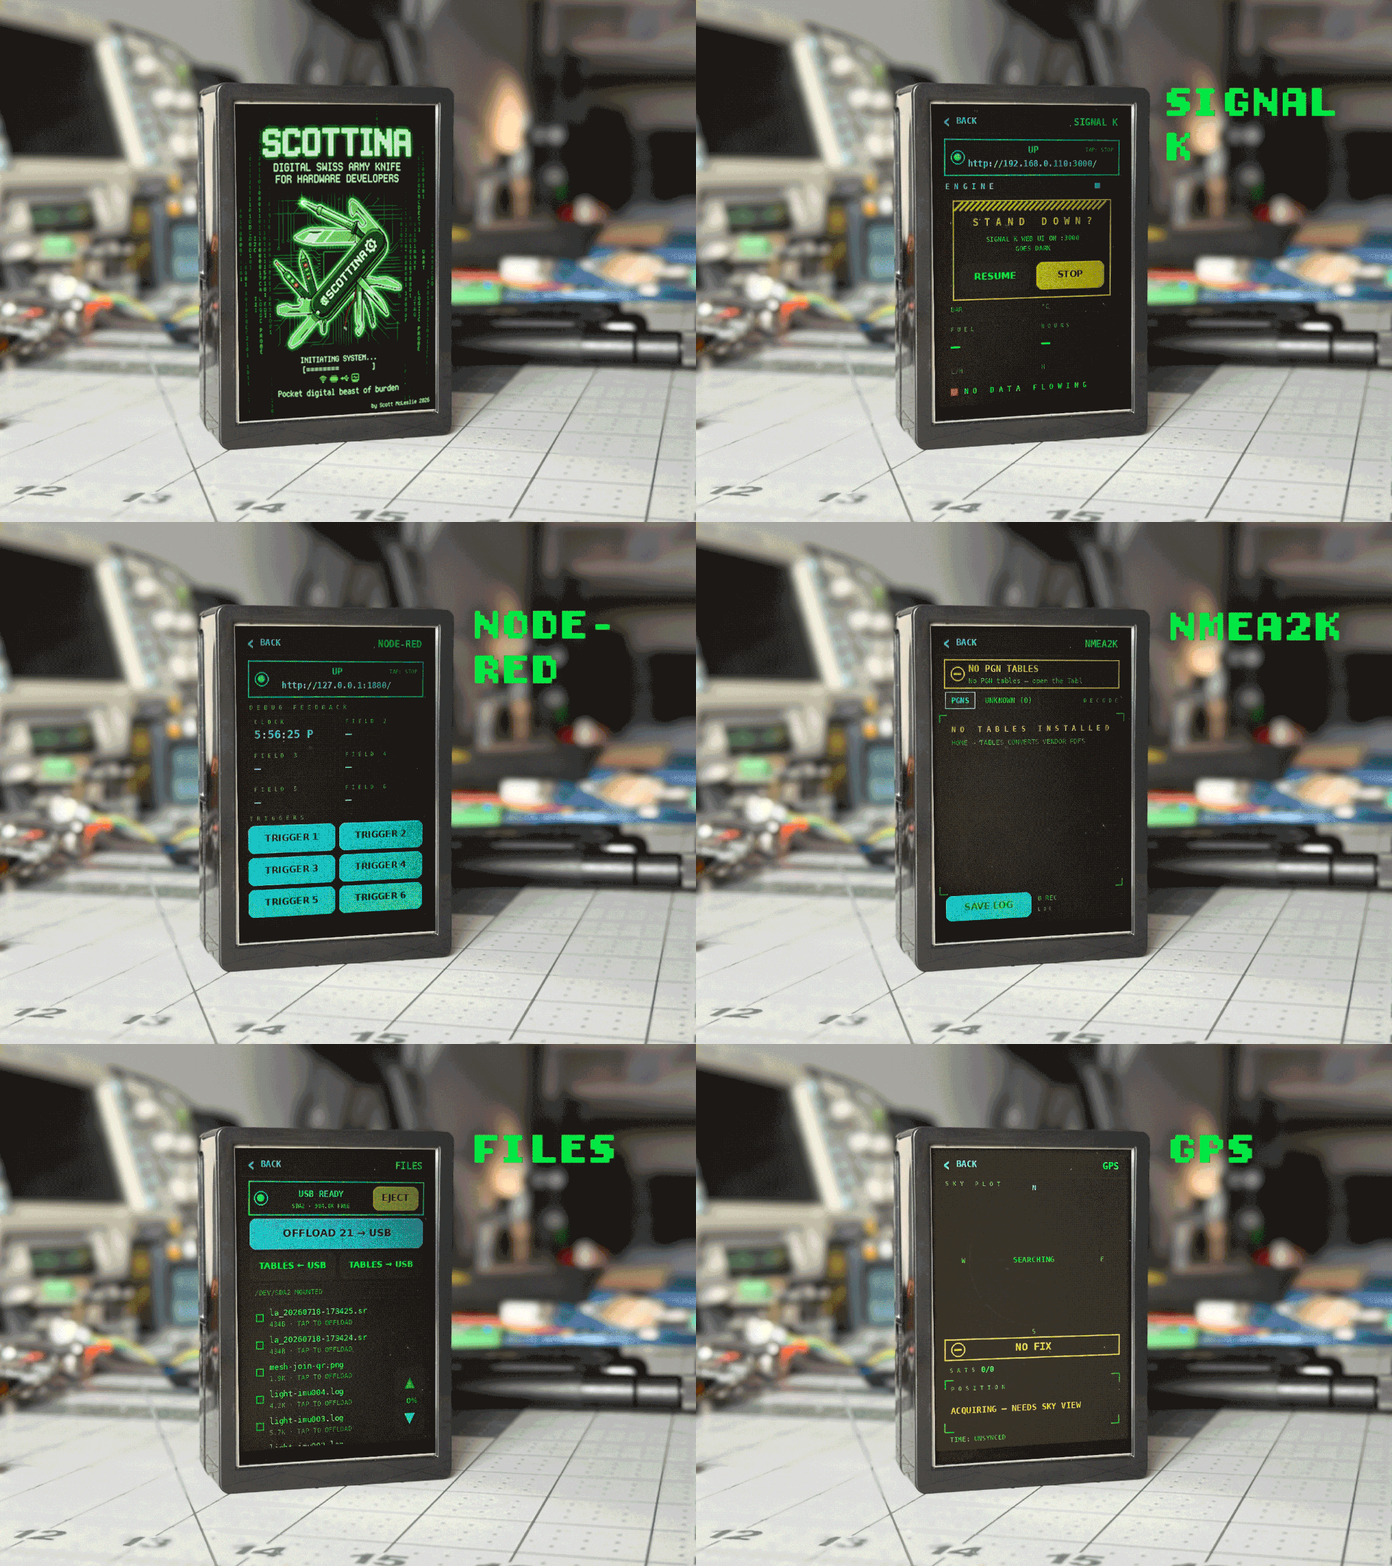
A Raspberry Pi 5 running Kali, driving a 3.5" ILI9486 SPI touchscreen with resistive touch. It boots straight to a tap-driven tile grid — no keyboard, no mouse, no desktop, no X server. It renders directly to the framebuffer and reads touch from evdev, so there is no display server that can lose the panel.

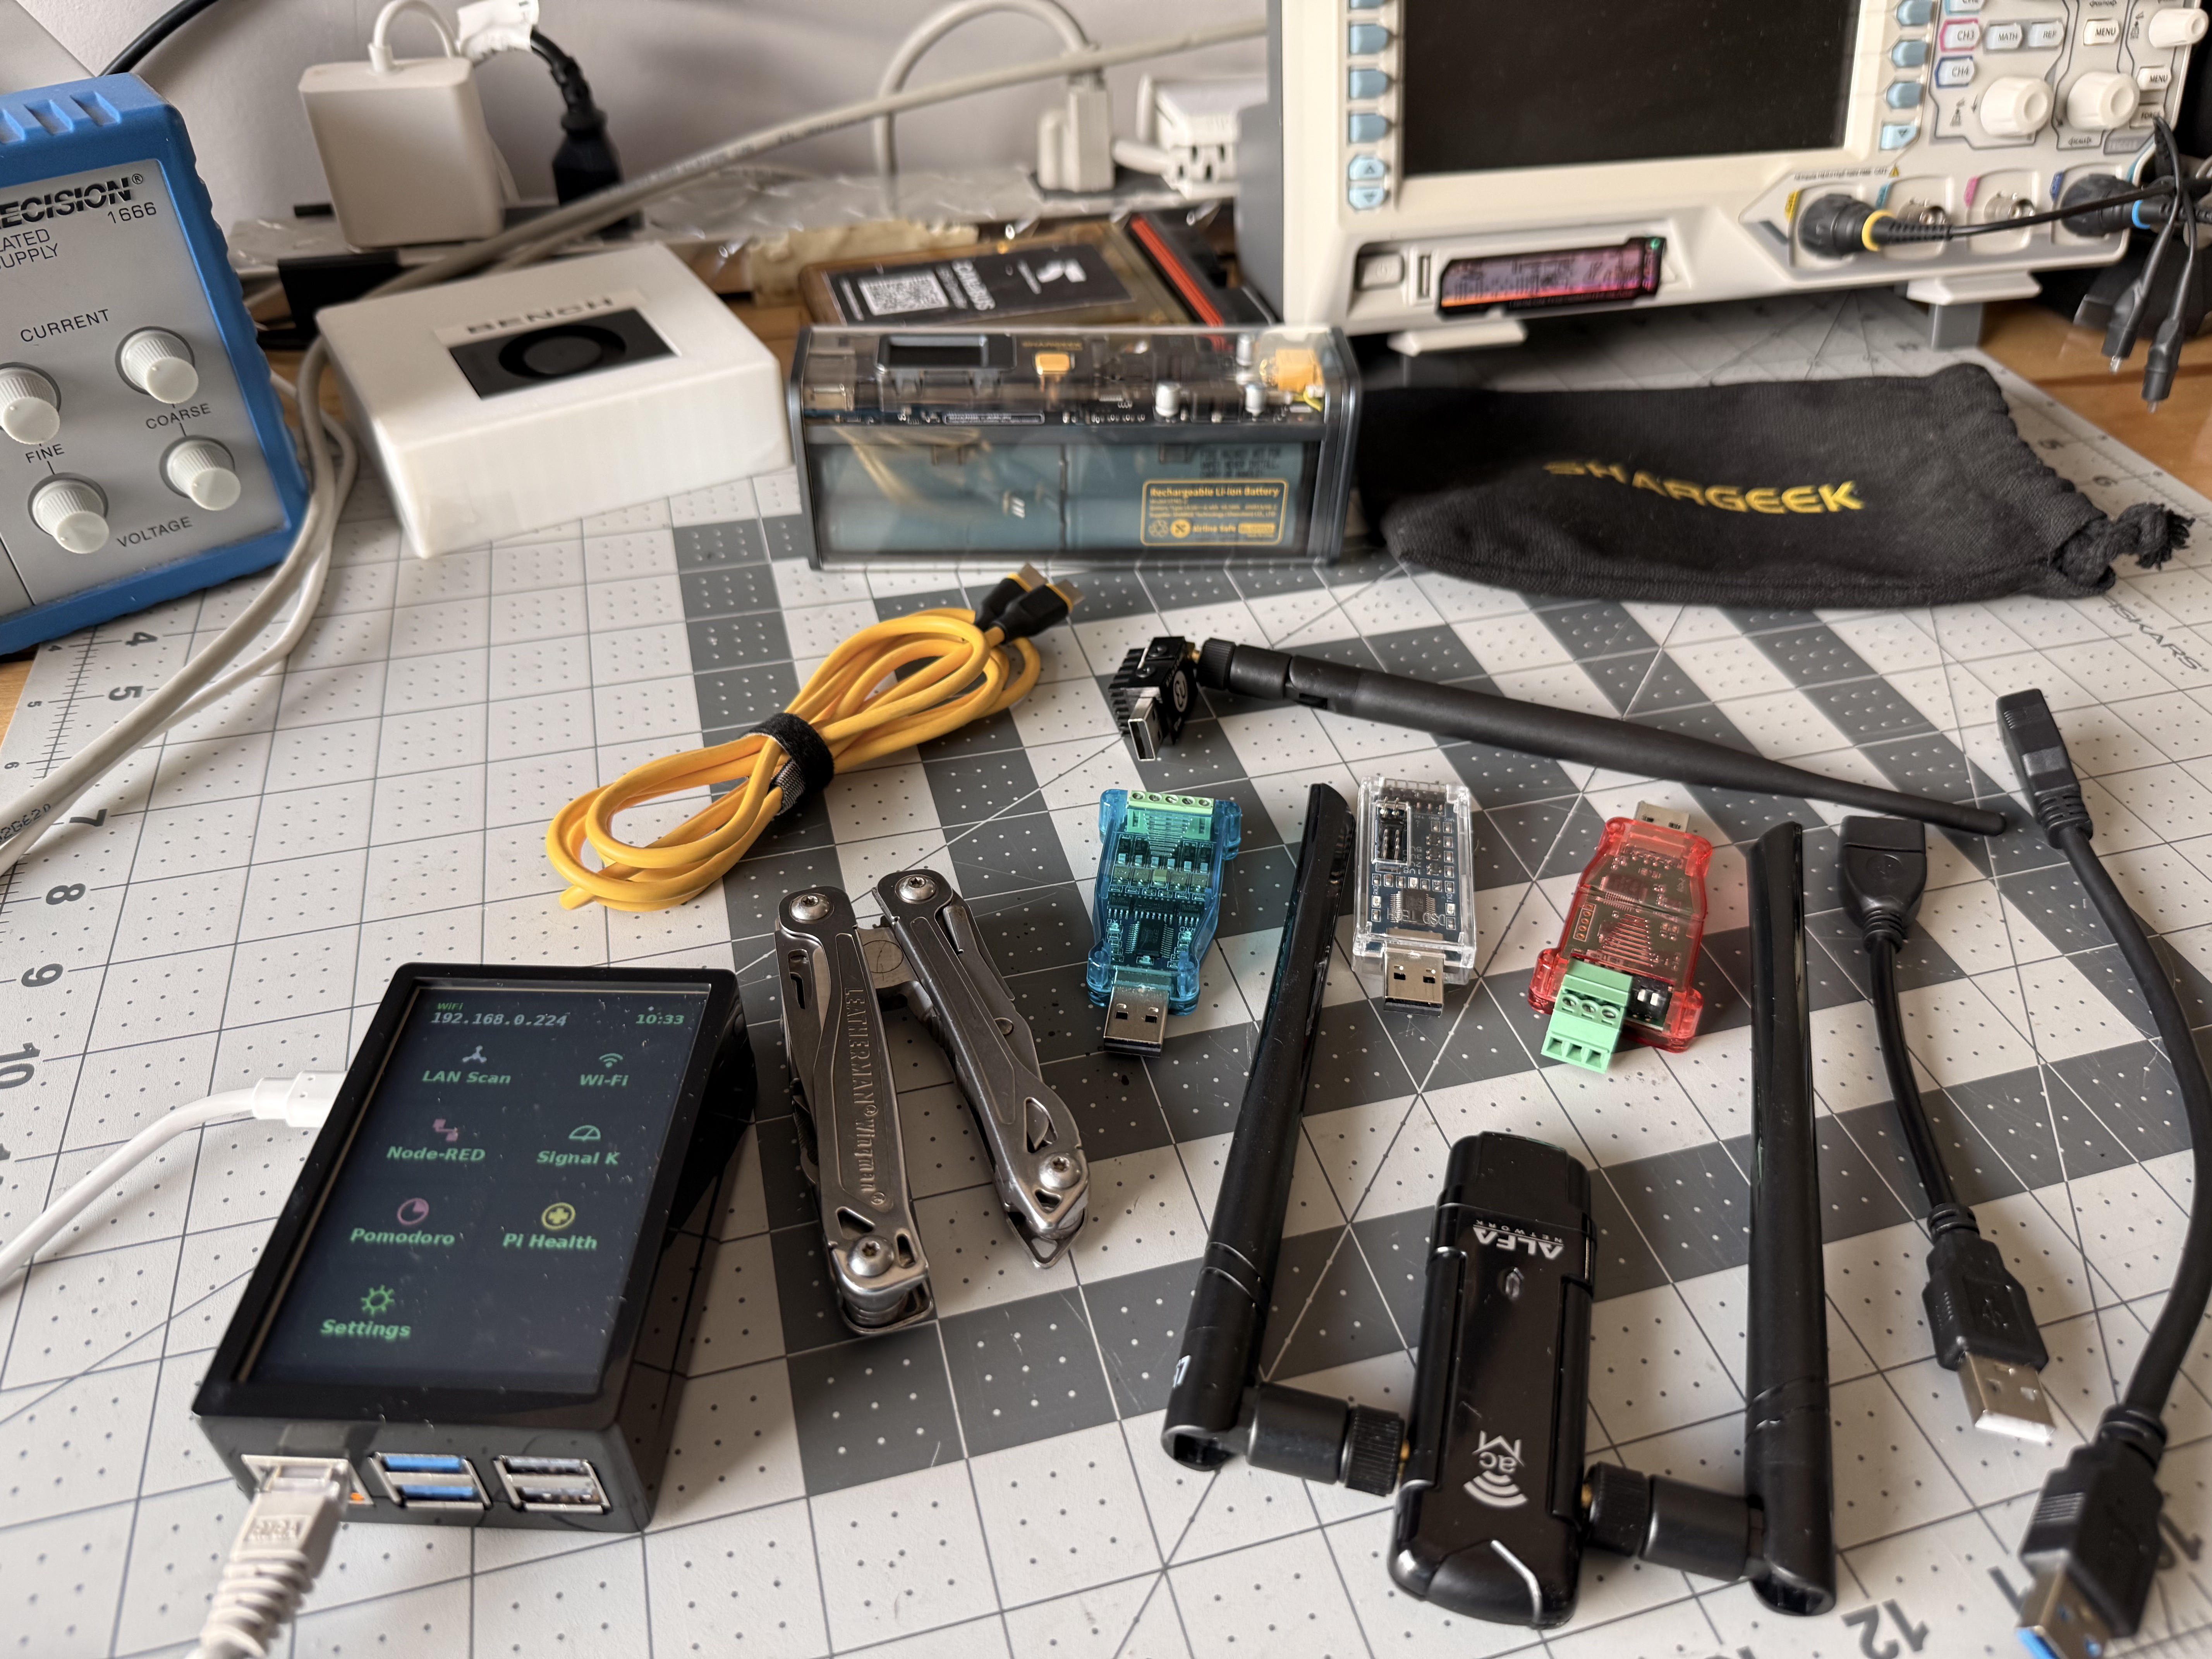
Plug in a USB device and its tile appears on the home grid. Unplug it and the tile goes away. Each device screen is cut down to the functions you actually reach for.

What it is not

It is not a Flipper Zero, not a Marauder deployment, not a wardriving toy. It shares some radios and some Kali tools with those, but the scope is strictly diagnostics — no offensive or attack tooling. That boundary is enforced in code, not convention: the UI is physically incapable of expressing an offensive operation.

One deliberate exception: CAN bus has normal TX/RX, because heartbeats and replies are how you diagnose a bus at all. A listen-only CAN tool can't tell you whether the node is deaf or just quiet.

What this feels like in day-to-day work

  • Pulling a Pi off the rack without the usual dance. No hooking up a monitor and keyboard just to join Wi-Fi. No hunting for Ethernet. No arp-scanning into a forest of identical "Raspberry Pi Foundation" MACs and SSHing in blind. Scottina joins networks headless from the touchscreen, and the moment it's up, the IP is right there in the header.
  • Guessing the CAN bitrate so you don't have to. Plug in a USB-CAN transceiver and it autodetects the device and sweeps bitrates listen-only, keeping whatever rate actually yields frames. With your DBC tables preloaded, you get decoded, normalized messages. No laptop, no full CAN suite.
  • New-board bring-up before you write a line of driver code. Tap the I2C scanner, confirm the sensor is really acking at the address you expect. "Is it my wiring or my code?" answered in five seconds.

Two small touches I'm weirdly proud of

Scottina's own IP is always in the header. When you need to reach it from a phone or laptop, you're never hunting.

Every web-app screen shows the exact URL:port. These bigger tools ship their own browser UIs. Scottina launches the app, probes the port until it actually answers — the tile only goes green when the thing is really serving, not merely spawned — then shows you what to type. No guessing which port Node-RED landed on today.

Where it is now

v1.0 is running on my bench daily. Network, radio, bus, GPS, and web-app tooling all front-ended as tiles. GPS is integrated and outdoor-validated — gpsd and chrony for a disciplined clock, plus a phosphor-CRT sky plot because I couldn't resist.

Build logs will walk through the design decisions, the things that fought back, and the parts I got wrong the first time.

And Scottina Prime isn't the only board on this bench. More on that later.

  • 1 × Raspberry Pi 5 Runs Kali. The whole panel is a Python app rendering to the framebuffer — the Pi 5's headroom is what makes SDR decode and live CAN counters feel instant instead of laggy.
  • 1 × 3.5" ILI9486 SPI touchscreen, 480×320, ADS7846 resistive touch The panel Scottina is built around. Driven by the piscreen DRM overlay, rendered straight to /dev/fb0, touch read from evdev. No X server anywhere in the stack.
  • 1 × Cheapo Pi Case off Amazon This one comes with a screen already: https://amzn.to/3R4uJzr
  • 1 × microSD card, 32GB+ Kali install. A10/U3-class or better — the panel is I/O-sensitive at boot.
  • 1 × USB-C power supply, 27W PD Pi 5 wants the official 5V/5A brick. Underpowering a Pi 5 with dongles attached produces the worst class of bug: intermittent and blamed on your code.

View all 9 components

  • Who said I need all these buttons in my face?

    Scottsky28 minutes ago 0 comments

    Starting the logs where the project started: with the thing that annoyed me enough to build hardware.

    The problem, stated plainly

    Every diagnostic session I run lands in one of two bad places.

    Place one: SSH into a headless box and squint at a terminal. Fine if you already know the exact command and the exact flag. Miserable when you're standing at a bench with one hand on a probe.

    Place two: carry a laptop to the bench, open the full GUI, and navigate a tool built for someone doing everything, when you are doing one thing.

    The observation that turned into a project: for any single diagnostic question, I use roughly two controls and watch roughly two numbers. Consistently. Across CAN, I2C, serial, Wi-Fi, SDR. The tools aren't wrong — they're general-purpose, and general-purpose means the 90% you're not using is between you and the 10% you are.

    Read more »

View project log

  • 1
    Step 1 — Gather the hardware

    Full list with notes is in the Components section. The minimum to get a working panel: Pi 5, the 3.5" ILI9486 screen, a 27W USB-C supply, an active cooler, and a decent microSD. The ALFA, CAN dongle, and SDR are all optional — their tiles simply don't appear until they're plugged in.

    Do not skimp on the power supply. An underpowered Pi 5 with dongles attached produces intermittent faults you will spend a day blaming on software.

  • 2
    Step 2 — Flash Kali and get in over SSH

    Write the Kali Raspberry Pi image to the microSD, enable SSH, and boot the Pi with a network cable and no screen attached. Everything from here is done over SSH — the panel isn't alive yet.

    Update before you touch anything else:

    sudo apt update && sudo apt full-upgrade -y
  • 3
    Step 3 — Bring up the panel

    This is the step that eats afternoons, so it's deliberately minimal. Two lines in /boot/firmware/config.txt:

    dtparam=spi=on
    dtoverlay=piscreen,drm,rotate=90

    Reboot. That's the entire display configuration.

    rotate is the only display setting that requires a reboot — pick 90 or 270 depending on which way up your case holds the panel. Touch orientation is handled in software, so you never come back to this file to fix taps landing in the wrong place.

    Verify the framebuffer exists:

    ls -l /dev/fb0
    cat /sys/class/graphics/fb0/name

    You should see the ILI9486 DRM framebuffer. If /dev/fb0 is missing, stop here — nothing downstream will work.

View all 10 instructions

Enjoy this project?

Share

Discussions

Does this project spark your interest?

Become a member to follow this project and never miss any updates